(Part 3) Best power transmission products according to redditors
We found 657 Reddit comments discussing the best power transmission products. We ranked the 364 resulting products by number of redditors who mentioned them. Here are the products ranked 41-60. You can also go back to the previous section.


Honestly I should just buy a 20 pack of these and then print a frame that holds them all in a circle so the hose can have a perfectly smooth track to go through
These?
I bought everything at Home Depot just walking through. Plus the pillow block bearing off Amazon so from memory
2 Pieces- UCP204-12, 3/4 inch Pillow Block Bearing Solid Base,Self-Alignment, Brand NEW https://www.amazon.com/dp/B01IWGLAM0/ref=cm_sw_r_cp_api_H-rRAbGRZKA17
2-8 foot 2x4’s cut in half so 4 4’ pieces
2- 2’x4’ 3/4inch plywood
Couple 2x4 scrap’s to mount the bearings too (about 6”)
Piping is all 3/4 inch, 24”, 2-10”, 2 T joints
1 10 inch solid lag screw
And some JB Weld to secure the lag inside the top T joint.
I will give you my background before my opinions. As everyone has different goals, opinions, and experiences.
I got my printer near the end March of this year. I have something like 2500m of filament run though it, and no idea how much print time.
When I received my printer, my test prints failed and I was pissed. But this community helped improve my Cura settings and started producing usable parts. I then went nuts and printed out a BUNCH of mods. This is by far my most favorite thing. There's always something I can print to improve the quality of the prints.
THe down side is I went too far and got to a point where I couldn't produce anything of quality. So, 2 weeks of tweeking and researching later I'm printing in PETG with beautiful quality and very minimal visible layers.
My most recent project in PETG:
http://i.imgur.com/sVf7S2D.jpg?1
So, now to answer your question...
> How do you like your Maker Select?
I love it. It allowed me to buy a cheaper printer (One of the cheapest at the time @ $350) that produced amazing results. It also has upgrades you can purchase or print to improve the quality, so investing smaller amounts over time to make it better and better. I highly recommend it to anyone who is starting because it does require tweaking which forces you to learn and understand how exactly 3d printers work. A major plus was that this community has a lot of Maker Select users for support, which was a MAJOR plus for me.
As of today, I've purchased the following upgrades:
So, in the last ~3 months I've spent an additional $264... Oh god, don't tell my wife! All are totally not necessary, mind you. The only thing I'd 100% recommend you do are print out the following to mods:
DiiiCooler along with buying the 50mm blower fan. There are cheaper options out there, I just wanted it faster so I bought it through Amazon to get free 2 day shipping.
z-Brace - This is key, and will run you maybe $15 worst case scenario to get enough M4 screws and the threaded rods.
Edit: Forgot a couple more things I bought.
That's another $59, so $323... I have a problem. again, 95% of this is NOT NECESSARY. I'm just addicted to modding.
3D Printer Linear Ball Roller Bearing Slide Block Comgrow https://www.amazon.com/dp/B0728J3J9K/ref=cm_sw_r_cp_api_fMhMBbRK4R04A
But before you buy try again with what you have, only slightly hand tighten all the bearing blocks and then while sliding it back and forth, slowly tighten them to make sure it still slides beautifully
I don't know if it's the correct name, but it's a conveyor roller. Usually go on "conveyor" lines so boxes and things can roll along it in more than one direction.
https://www.amazon.com/48x32mm-Flange-Conveyor-Bearings-Transfer/dp/B00XP5H5S2
The website says the new model uses hydraulics, actually it looks like a gas ram, like you'd find holding up a car hood or a hatchback.
An electric-powered linear actuator could work, but they get expensive for the long ones.
You would need quite a large stepper if you try and direct drive the panel. Can you use some timing belt attached at a distance from the hinge? This will give you mechanical advantage, but the panel will not move as quickly.
Yeah, but people use a lot of different materials to do so. One of the best or most popular ones I think is Sorbothane. You can get individual sheets of it on Amazon. You just have to cut it to fit the shape of your case.
The part that I don't understand is the gas spring. Are you envisioning a manual lock that will lock the bed at the top and bottom, and the gas shocks are intended to make it easier to manually raise and lower?
My thought would be similar to what /u/TW_2 suggested. If it were me, I would be looking at linear actuators. The longest ones I found in a quick google search have an 18" stroke length so I'm not sure if that gives you enough travel.
EDIT: I found this actuator with a stroke length of 30". This actuator will move 225lb, so if you're using four of them they should be enough to carry a bed and a few people.
I didn't take pictures of the old pulley before I threw it away. It was really mangled. Do you want the new set up? it looks just like any pictures I have seen of what a stock pulley "should" look.
below is a link to the pulley I bought from amazon. it came with new grub screws and everything.
https://www.amazon.com/gp/product/B0714QYPGV/ref=oh_aui_detailpage_o04_s00?ie=UTF8&psc=1
​
​
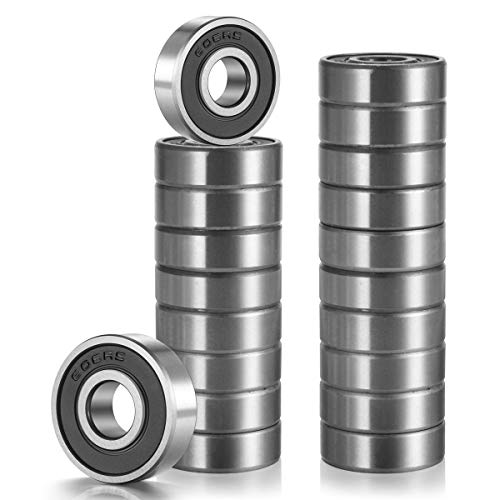
Yeah, regular 608s. https://www.amazon.com/gp/product/B07C6FL8TW/ref=ppx_yo_dt_b_search_asin_title?ie=UTF8&psc=1
Here you go! This looks to be very close.
https://www.amazon.com/uxcell-Plastic-Furniture-Bracket-Fastener/dp/B015GOO98I
Mesh bed leveling map and wave springs.
https://plugins.octoprint.org/plugins/bedlevelvisualizer/
https://www.amazon.com/gp/product/B07B45Y37D/ref=oh_aui_detailpage_o02_s00?ie=UTF8&psc=1
https://github.com/PrusaOwners/prusaowners/wiki/Bed_Leveling_with_Wave_Springs
Edit: Forgot the last link.
Anything similar to this should work: https://www.amazon.com/dp/B07JJLZTLV
https://www.amazon.com/dp/B01GTGOD6U/ref=cm_sw_r_cp_apip_JsdjWqVv87ACN
The PSU case needs some love, too. It's like Creality shopped around for the loudest fans it could find, and that's what shipped with the Ender. Anyway, these two things make the PSU much better: https://www.thingiverse.com/thing:3384875 WellFan Noctua 60x25 remix https://www.thingiverse.com/thing:2967389 WellFan PSU case mod and for fun https://www.thingiverse.com/thing:2987473 cause, well, just cause (60mm fan guard) oh, and the fan: https://www.amazon.ca/gp/product/B009NQMESS/ref=ppx_yo_dt_b_asin_title_o07__o00_s00?ie=UTF8&psc=1
Heyyyyy, you've added a buck converter and have 12v now, time to change the main board fan! It's a noisy bugger too! It ends up being the same fan as what comes on the factory hotend cooler. Annoyinggggggggggg. Like a mosquito in my ear!!! https://www.amazon.ca/gp/product/B009NQLT0M/ref=ppx_yo_dt_b_asin_title_o07__o00_s00?ie=UTF8&psc=1 Noctua 40x10mm fans are bolt in replacements for both of those, if you don't want to change the hotend cooler. I could have used a 40x10 on the Hero Me cooler I used - but the 40x20 looks cooler.
This is the LED strip lighting I used, it was expensive though, and I'm sure you could find much less expensive alternatives. https://www.rpelectronics.com/55-7160w-0-led-strip-outdoor-ip65-white-1m.html (white and red! z-rail and top rail!)
I printed a handle, and really like it, but it won't work without some love. Instead of modifying the 3d model I'm probably just gonna heatgun it into the shape I need it to be. Currently, it hits the Y-axis rail. It's here, if you wanna take a stab at it: https://www.thingiverse.com/thing:3313306
The Z-axis stepper is by far the loudest - I'm going to try to see if I can make a damper work, like this: https://www.amazon.ca/gp/product/B07CL356J5/ref=ox_sc_act_title_3?smid=A28ZWXW3ZSVNZU&psc=1 ** disclaimer note: I haven't done this yet. I haven't received the dampers.
I printed a zillion links from this thing: https://www.thingiverse.com/thing:2920060 but didn't like the result after putting it all together. It motivated me to try and do something for cable management, though. I DID end up using a bunch of the start and end mounts, though, and cut off the link nubs. They worked super great for cable management.
I'm still not 100% happy with the cabling - I'm ordering these: https://www.amazon.ca/gp/product/B074GZFYM1/ref=ox_sc_act_title_2?smid=A23BY812APN9IU&psc=1 and will be trimming/cutting/hiding/wrapping them so it looks nicer. Don't get me wrong, it works fine the way it is, but I don't like that flat ribbon cable stuff. It's too... ugly. It's either these cables or I'm going to build my own, which I like doing anyway. This will be soon. I don't think it'll look much different, but I think individually wrapped cables running to the stepper motors would look cooler. More space-ship-ie.
There's probably more. For this list, there's another list like it of failed/ugly/discarded parts - it took some trial and error for sure. It's worth it though. I've actually printed more stuff for my printer than I have for projects I'm working on. 3d printing is so funny that way!
If you have questions, I'm happy to help :) I have pictures of all this if you need them. I haven't figured out imgur, but will add photos to this album as time goes on: https://photos.app.goo.gl/AEXNqvTXE5ZZhnhi8.
-Tunder
PS. Man this is a really big post. I didn't realize I did so many things. Rabbit hole, this thing is.
Wave springs. It took a looooooong time to get there. For the most part, when leveling the bed the springs are fully compressed, or at least mine are in some spots.
It was mostly just hours of leveling and adjusting the screws.
The wave springs I used are on amazon:
https://www.amazon.com/dp/B07B45Y37D/ref=cm_sw_r_cp_api_tI1ZBb01JCM42
They’re a little larger than the bushings on the OD, but they fit nicely. They are also a pain the ass to install.
Worst case is you have a bad bearing, replacements are super cheap. Super worst case is you have a bad bearing and it begins to wear the linear rods. But, they are hardened rods, so I'd say this is pretty unlikely. I'm guessing the seal must be bad on one of them.
If you're feeling up to it, you can order some LM8UU linear bearings (8mm inside diameter, 15 mm outside diameter, 24 mm length), disassemble the X-axis and replace them. This can be done without completely disassembling the extruder if you're careful, just be very careful with the heater cartridge wires, as they are very susceptible to strain and will break easily right at the cartridge if you bend them around much.
https://www.amazon.com/dp/B07D8RDV1L/ref=cm_sw_r_fm_apa_i_c5JUCbEXF4066
Keep in mind, I can only say they helped some. I think it's still possible to do better.
I can move it myself and I am in no way in the running for a strong man competition. While a tad heavy, it's more awkward getting it through doors and around corners.
Parts List:
Yoga balls:
https://www.amazon.com/gp/product/B01LQ4PXFA/ref=oh_aui_detailpage_o04_s00?ie=UTF8&psc=1
pillow bearings:
https://www.amazon.com/gp/product/B01IWGLAM0/ref=oh_aui_detailpage_o05_s00?ie=UTF8&psc=1
3/4 inch steek rod:
https://www.amazon.com/gp/product/B0069AB2NO/ref=oh_aui_detailpage_o06_s01?ie=UTF8&psc=1
Rail Clamping Guides:
https://www.amazon.com/gp/product/B07426SVYM/ref=oh_aui_detailpage_o03_s00?ie=UTF8&psc=1
Straps to anchor the trainer: (Way to long) https://www.amazon.com/gp/product/B004PL4H0O/ref=oh_aui_detailpage_o00_s00?ie=UTF8&psc=1
At the risk of being overly instructive from an amateur, some misc. parts I have on the bench.
Metric bolts with nylon inserts. Vibration resistant bolts that don't need lock washers.
Metric collection of flat and split washers.
Heat shrink tubing to insulate connections.
3m IDC 314 connectors. Great for splices and easy to use.
These Seems I can never find small enough clamps.
I bought 20 of these. They show up all the time when looking at projects.
Metric set screw collection. Needed one when I was trying to change out an extruder block.
Last, but not least, these.
Feel free to ignore, but these are random things that I've suddenly found the need for in the last couple of months. Pretty much starting from scratch, so I need everything.
I've used a mixture of Silverstone silencing foam, and 0.125" Sorbothane (https://www.amazon.co.uk/gp/product/B019GBKKPS/ref=ppx_yo_dt_b_search_asin_title?ie=UTF8&psc=1) to fill mine, works very well.
You can even stick the sorbo to the underside of the plate in various places, in between the PCB and plate, to dampen and noise travelling though it.
the ultimate solution is to upgrade to linear railings like these
​
Here's a video of mine in action
I got mine from here:
https://www.amazon.co.uk/gp/product/B00QZ7YGFW
We took a ton of inspiration from Cybots and made what worked for us this year. Here is a video that we used a reference.
https://www.youtube.com/watch?v=JkeNEMUYbiA&t=49s
As for sourcing parts we tend to use google a ton. It's still one of the best ways to find things. In the case of the carbon fiber rod sourcing, we found a linear bearing that we and started there.
The linear bearing that was used originally came from servo city.
https://www.servocity.com/8mm-linear-ball-bearings
After realizing that we needed a lot of bearing we decided to try and find a cheaper source and we ended up purchasing them from amazon.
https://www.amazon.com/gp/product/B01LXX22B0/ref=oh_aui_detailpage_o00_s01?ie=UTF8&psc=1
After having the bearing picked out we wanted to source the Carbon fiber rods these where the rods that we purchased first.
https://hobbyking.com/en_us/carbon-fiber-tube-hollow-8x750mm.html
Those rods would be great for hobby use but they had a seem all the way down the rod and didn't slide nice in the bearings.
At that point we figured out that we would have to purchase something with more precision so we googled 8mm carbon fiber tubes and found one that fit what we were looking based on the failed last purchase. and ended up buying rods from here.
https://dragonplate.com/DragonPlate-Carbon-Tube-315OD-x-239ID-x-24
I guess the basic gist of what we do for sourcing is little more than guess and check. We are a very fortunate team that we can afford to make a mistake or two every year when purchasing and it won't hurt our build.
If I was to do part sourcing on a budget I would figure out what is the most critical part that you need and purchase 1 or 2 of that item and inspect it and learn what you can from it before you make a bunch purchase.
Figured I'd share the flanged bearing setup I'm running on my marcmt88 mounts.
http://www.electric-skateboard.builders/t/custom-made-cnc-motor-mounts-available-for-sale/32342
Parts list (For one idler, in order of layout):
Note: I'm running Abec11 107mm wheels, I did have to create a bevel with a rasp on the inside of the wheel to clear the flange.
dont think you really need ceramics but amazon sells them too. https://www.amazon.com/gp/product/B0197SR8R8/ref=oh_aui_detailpage_o07_s00?ie=UTF8&psc=1
https://amzn.com/B00OZJMX1Q
linear rails can be had reasonably enough. They offer superior accuracy and stability, and if installed properly, last a long long time.
Amazon has a new brand that hasn't got many reviews yet but man that price. been watching them to see how it plays out.
He sent me the source via PM, they are on Amazon UK. You can of course order them from IGUS directly as well.
Hi using the following setup:
So my question is:
Thanks!
Not to detract from the point of this post, but I thought I'd share:
I bought this for 3 dollars: https://www.hobbypartz.com/exi-630.html
And these for 7: https://www.amazon.com/dp/B07JJLZTLV/ref=cm_sw_r_cp_apa_i_CqQXCbQ5WXDKM
25pcs 2.5mm Si3N4 Silicon Nitride Ceramic Bearing Balls G5 https://www.amazon.com/dp/B07D8RDV1L/ref=cm_sw_r_cp_apa_i_TNCRDbXRC6FQ6
I cut the gear off mine with a Dremel and then added this to the rod coming out of the motor. [Link] ( https://www.amazon.com/dp/B0714QYPGV?ref=ppx_pop_mob_ap_share)
3d printer linear ball rollers work well. Decently cheap too.
​
https://www.amazon.com/Printer-Linear-Roller-Bearing-Comgrow/dp/B0728J3J9K
Watch the extruder gear. If the sound is when it turns backwards, that's the retraction sound. Install a NEMA 17 stepper motor sound damper on the extruder motor. Might as well do the x,y at the same time. Only do z motors of you do a lot of z hopping on retraction
(5pack) NEMA 17 Steel & Rubber Stepper Motor Vibration Damper for CNC 3D Printer https://www.amazon.ca/dp/B07CL356J5/ref=cm_sw_r_cp_apa_i_zehZCbXWMFNAY
Looks like these:
http://www.amazon.com/Emax-MT2213-935KV-Brushless-Copter/dp/B00XY6T1W0/
A center bearing design will be more difficult than a perimeter bearing design. Wood as a rolling surface will create problems as the wood grains crush, creating little ripples for the bearings to roll over. If you can get a metal plate, say 3/16" thick, then you can bolt flange roller bearings like this: https://www.amazon.com/48x32mm-Flange-Conveyor-Bearings-Transfer/dp/B00XP5H5S2 to the bottom of a plywood disc, and have them roll on the metal plate. This will reduce the rolling friction significantly, thus reducing the power needed in how you rotate it.
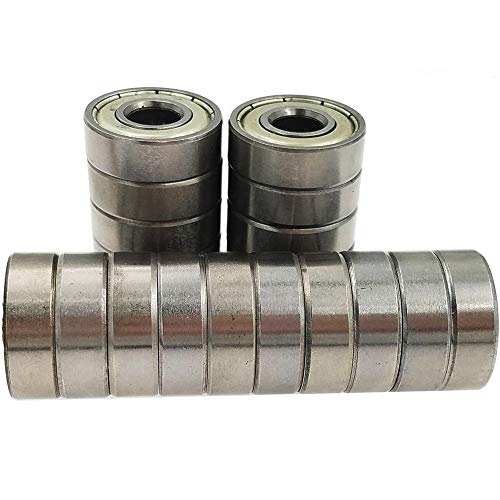
https://www.amazon.com/Skateboard-Bearings-Sackorange-Shielded-Miniature/dp/B07216D1SZ/ref=sr_1_5?keywords=bearings&qid=1549756573&s=gateway&sr=8-5