Best bar clamps according to redditors
We found 143 Reddit comments discussing the best bar clamps. We ranked the 68 resulting products by number of redditors who mentioned them. Here are the top 20.
We found 143 Reddit comments discussing the best bar clamps. We ranked the 68 resulting products by number of redditors who mentioned them. Here are the top 20.


He answered the more reasonable and economical solution to your question. The other answer is, yes, you can find a product like that but it's $270 with poor reviews. You could buy 5 of these corded drills for less than the price of the adaptor. You could also buy 5 double packs of batteries for less money.
You have no reason to be rude to someone answering your question when they present the best option to your problem. (Particularly when your question can be answered by five minutes online searching.)
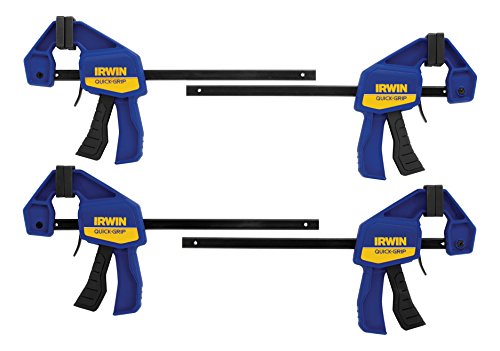
You can get a bar clamp that has reversible ends.
Something like this:
https://www.amazon.ca/IRWIN-QUICK-GRIP-One-Handed-Mini-Clamp/dp/B001DSY4QO/ref=asc_df_B001DSY4QO/?tag=googlemobshop-20&linkCode=df0&hvadid=292999463894&hvpos=1o1&hvnetw=g&hvrand=899368437878054851&hvpone=&hvptwo=&hvqmt=&hvdev=m&hvdvcmdl=&hvlocint=&hvlocphy=9001623&hvtargid=pla-437236176675&psc=1
Cool stuff!
Here's one thing- when stacking them improves the sound, I'm wondering if that's just due to having more resonant coupled mass. Try not stacking them but instead put something heavy and rigid (old HDDs, cordless drill battery, a brick, etc) on top of the drives. See if you get a similar effect. Also try putting something heavy on top of the stack...
By resonant coupled mass I mean material that gets the vibrations of the drive transferred to it, and thus helps with putting those vibrations into the air. Thus bolting the drives down to the board will help a lot. But let's come back to that.
-----
To build your box, you really only need a couple of tools and parts, which I'll link you to now.
Cordless Drill
Cheap Drill Bits
Circular Saw (a jigsaw is also OK)
Set of 4 clamps
Carpenter's Square
Angle Brackets
Wood Screws (probably want some 1/2 inch screws too for the brackets)
A piece of 1x2 wood moulding or similar
A piece of quality 1/2" plywood or MDF
Feel free to substitute whatever's on offer at your local big box home improvement store, it's the concepts that matter not the specific models of things. With that stuff you can build almost anything, your little box will be a snap.
The key with all that- use two of the clamps to clamp the board you're cutting down to the table. Then use the other two clamps to clamp a 2-4' piece of moulding down to the board. The moulding then serves two purposes: Along with the square and a pencil, it lets you draw a very straight and very long line along where you want to cut, and then when you move the molding back a bit (by the exact distance between the edge of the saw's skid plate and the sawblade), it forms a guide for the edge of the circular saw skid plate to slide against, giving you a perfectly straight cut even from a handheld saw.
Note: always cut with the saw facing away from you or your body, and keep your fingers away from the path of the blade! Let the tool do the cutting, don't force it. When you drill a hole for a screw, pick the drill bit that's as wide as the screw shaft (not the screw teeth).
I suggest using more angle brackets to rigidly mount the floppy drives to the casing itself. Obviously brackets that have the hole in a place which holds the drive flush against the casing are preferred. Angle brackets come in all different sizes, and you can always just drill another hole through the bracket if you need to. A larger angle bracket could hold both the upper and lower drive. Or for a stack of two drives, mount one to the inside of the main casing, and the other to the outside of the HDD casing.
-----
Now back on audio. A box like you designed might really help, especially if the back is closed as you're creating a cavity which focuses all the sound forward.
However you should also get a better microphone. If as you say it sounds great in person, well, that isn't being captured well on your video. The video is seriously lacking in bass- floppys make a great raspy bass and that doesn't come over well in the video. :(
I suggest an external mic, something which will stay right next to the drives and enclosure. There are also portable audio recording gadgets which have a good mic built in, I'm thinking something like this.
(Random sidenote- that's why the clapper slate exists, seeing the clap on film and hearing it on a separately-recorded audio track is used to sync up the video with the audio...)
For reference, consider how What is Love has really strong bass, but has a good quality mic right there.
Also production wise- what that guy sometimes does is first record half the drives with the mic right next to them, then record the other half of the drives with the mic right next to them, then sync the recordings and make the two (mono) recordings into the L and R of a stereo track and lay it over the video of the drives moving which is recorded without any microphone...
Hope that helps!
$45 on Amazon, definitely worth it.
https://www.amazon.com/dp/B00068P48O/ref=cm_sw_r_cp_apa_i_RQFxCbAMKZEKR
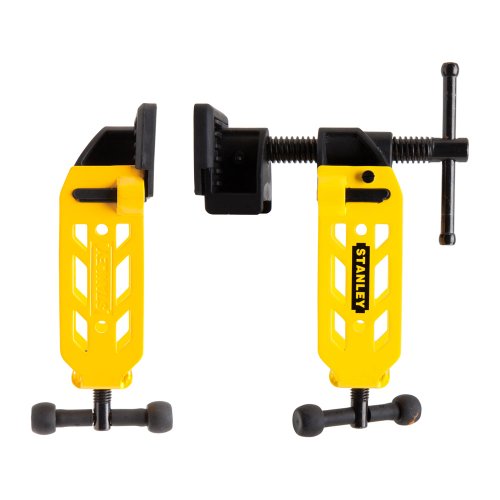
If you don't have a workbench you can bolt the workstation down on, I would advise getting some of these clamps (not these exact ones, but this style) to keep the base from moving around. You can put them on the backside and it usually won't interfere with the project.
They give you 400lbs of clamping force unbolted, or 850lbs bolted to a 2x4. Flip them around to give yourself a spreader. Any size 2x4 will work. And when you are done just take them off and put the wood back on the pile and hang the clamps back up.
http://www.amazon.com/dp/B00DYMYV2E/ref=cm_sw_su_dp
It really depends on what you want to start building? Any ideas of what your first 5 projects are? For woodworking, I'd get the following.
a) Circular saw. It will make fast work of cutting sheet goods, it's possible to rip boards with decent accuracy, and you can cross cut as well. Super versatile because you can make several jigs and use different blades for hardwoods, plywoods, and even tile. For light, occasional work, you won't notice a difference between a $50 Skil model and a $120 DeWALT model. Just don't drop it.
b) Jig saw. You can also cut plywood and hardwoods with a jig saw, but the results will not be as good. The benefit of a jig saw is that you can make circular (or any shape really) cuts. You can make a low more artsy stuff with a jig saw.
http://www.amazon.com/PORTER-CABLE-PCCK602L2-Lithium-Tool-Combo/dp/B00CM7Z2KW/
I'd suggest a a drill and impact driver set. You can get away with just a drill and use it to drive screws as well. However, with the combo sets, I was able to pick up an impact driver and a flashlight with a carrying case that uses the same batteries for about $20 more than just a drill and 2 batteries alone. The impact driver will allow you to drive 3-1/2" screws into studs like butter.
http://www.amazon.com/Kreg-R3-Pocket-Hole-System/dp/B000J43A7W
This bad boy has made furniture makers out of many that wouldn't be able to in the past. You'll need a good clamp to use with it. Just search YouTube for videos about building stuff. Ana White uses pocket holes on every thing and she makes decent stuff.
"A woodworker never has enough clamps." Everyone knows this.
http://www.amazon.com/Jorgensen-3724-HD-24-Inch-Heavy-Duty-Steel/dp/B00005R1HY
http://www.amazon.com/Irwin-Quick-Grip-Clamp-Set/dp/B00A9KMARW/
I have 6 of the 24" clamps, 8 of the Irwin Quick Grip clamps, and a handful of spring clamps. I've been able to build just about anything with that many clamps... but I've wanted more. If you use the pocket hole system, you'll want to clamp pieces together before you drive the screws.
I went to a Habitat for Humanity ReStore and picked up an old particle board desk that is about 300 lbs for $20. That's what I use. Otherwise, you can build one from 2x4s with the tools above and build your skills.
Squares, Drill bits, Driver bits....
I usually pick up something new for every project I start.
That's about $500 worth of tools and is the barest of bare bones I'd suggest someone to start with if they want to build bookshelves etc. The most important thing you can have is knowledge and YouTube/Reddit is the best place to get it if you don't have a woodworker to physically teach you.
Try these. I love them and I never have to worry about clamp length again. They are the Stanley 2 x 4 "C" clamps.
http://www.amazon.com/gp/aw/d/B00DYMYV2E?pc_redir=1409143379&robot_redir=1
http://imgur.com/a/NXrN7
Osir 1.5" inch straightener plates + control temp gutted and taped onto the straightener. The plates are melted into the pads for my clamp (they're the alternate wide ones instead of the regular pads like you see on everyone elses) and the circuit for the temp control I just taped back onto the edge of the clamp. I also carefully broke off just the plastic cover for the temp circuit so that way I could use the buttons. just used a bunch of electrical tape.
I'd give a full tutorial but I dont really have the money to go buy a bunch of stuff and then wait for it to ship again and all that. Theres a couple good tutorials out there on how to build one, just search "HMK Rosin Press" on google and youll eventually find something.
heres a link to the straightener (which I'd highly recommend despite what tutorials recommend, this has very accurate temp control settings) https://www.amazon.com/gp/product/B010BBKVYC/ref=oh_aui_detailpage_o00_s00?ie=UTF8&psc=1
and the clamp
https://www.amazon.com/dp/B001VND4X0/ref=sxr_srecs_prc_1?pf_rd_m=ATVPDKIKX0DER&pf_rd_p=3149131442&pd_rd_wg=2ZL39&pf_rd_r=KQK24Z3MEA5MMH5SKTBX&pf_rd_s=desktop-rhs-carousels&pf_rd_t=301&pd_rd_i=B001VND4X0&pd_rd_w=pUJ8E&pf_rd_i=irwin+quick+grip&pd_rd_r=45HF5M4XK41W0KVHQSA0&ie=UTF8&qid=1503036389&sr=1
Woodworker here. It's no problem at all to repair that break and end up with a neck that's more solid than before.
You can take it to a luthier and it'll be an easy job for them, or it's a pretty easy DIY job too.
Here's what I'd do: get a bottle of CA glue (super/krazy glue), a needle-tip glue injector, a clamp (a quick clamp would be fine, or any solid clamp with padded clamping surfaces to avoid marring the neck), a wiping cloth, and acetone (paint thinner or nail polish remover).
Gently force the break open slightly, and inject CA into several locations throughout the break. (The ideal would be to get a coat of glue across the entire surface, but that's not practical in this case.) You want to work quickly, as CA has a short working time, but don't rush. Once the glue is in place, immediately apply the clamp. I'd locate it directly on the first fret so it's central on the break. If using a quick clamp, get it as tight as it goes. A screw-based clamp should only be tightened to finger tightness, as those can apply much more force than a quick clamp and you don't need a lot of clamping force in this situation. If there's any glue squeeze-out, clean it up immediately with the cloth dampened with acetone. CA glue cures very quickly, so you can remove the clamp after only 5 minutes or so. Just to be safe, I'd let it sit for a day before restringing it.
The last thing to do to make it as good as new is to repair the finish. It looks like this neck has an oiled finish, so that makes things super easy. Feel across the entire joint. If you can feel the break at all, take a piece of 220 grit sandpaper and gently sand the joint, going with the grain. It shouldn't take much effort to get it smooth. Finally, get some tung oil (make sure it's 100% tung oil, not "tung oil finish"), apply a small amount to a clean rag, and wipe a thin coat across the repaired area. Let it sit for a few hours, gently sand with fine grit sandpaper (absolutely no more coarse than 220), and repeat. I'd repeat this process for three or four coats. If you notice a different coloration on the repaired area and want to keep it even, then oil the entire neck. (Precautions for working with tung oil: work in a ventilated area, and dispose of your oily rags properly. Either burn them, or lay them out in a ventilated area (preferably outdoors) until they become hard and brittle, at which point the oil is cured and the rags can be thrown out. If thrown in the trash or balled up before the oil is cured, they can actually spontaneously ignite.)
Here ya go.
Two clamps from a hardware store should be about $4 -- total. Cheapie metal clamps are about $2 a pop. If you have 8$, you could even get two of these ones from Amazon
If you really can't afford clamps, simple warping on a backstrap loom requires 2 pegs. Have a chair with two arms? That just became your warping board. Have two pencils? Use those to preserve your cross. It's a short warp, sure, because it's the span of your chair arms, but it's a warp. Or use two chairs side by side -- the arms that are closest together are for your cross, and the arms farthest apart just hold your yarn. Stick pencils to preserve the cross right before you remove the yarn from the chairs. Have a walkway railing? Same thing - use the railing arms as your end pegs and use your dowels/pencils/tree twigs to keep your cross. You don't need a lot of tension on the warp, you just need to make sure it's even. Heck, if it was warmer out, you could probably even stick two spikes in the ground (metal spikes, wooden dowels, tree sticks even) the distance you want your warp to be and create your warp on that (again, using pencils/dowels/twigs for your cross)
We've been weaving for thousands of years. You don't need fancy equipment to create a warp - especially for a backstrap loom. Get creative, go slowly, BREATHE, and you'll get there. :)
Clamps, give that man some nice K body clamps. http://www.amazon.com/Denali-30-Piece-Bar-Clamp-Assortment/dp/B000NDMO94/ref=sr_1_3?ie=UTF8&qid=1415313885&sr=8-3&keywords=denali+clamps I have these denali clamps and they work great for the price.
If the bandsaw runs, it should still be useful. You can purchase a new blade if there's an issue with the existing one. The chisels will be fine, but you'll have to learn how to sharpen them. Sharpening systems can be expensive, though.
Otherwise it depends a little on what you want to build.
If I were starting out on a significant budget, I think I'd go with a skil saw, triangle square, tape measure, and drill/driver set. And I'd be thrilled to have a bandsaw & chisels. If you can, buy a good skil saw. Don't too much worry about the quality of the rest.
Those will all be very useful later, too, of course. Might build some sawhorses first and go from there.
A skil saw is really useful for breaking down pallets, as well, in case you plan on making use of them as a source of lumber while you're starting out.
If you want a more specific list, I own these products:
https://www.amazon.com/Stanley-33-312-Powerlock-Tape-Rule/dp/B00002X2GN/ref=sr_1_5?ie=UTF8&qid=1497387060&sr=8-5&keywords=stanley+tape+measure
You don't need a 25' tape and a 12' tape is easier to use.
https://www.amazon.com/5280-01-15-Amp-4-Inch-Circular-Single/dp/B01BD81BLO/ref=sr_1_3?ie=UTF8&qid=1497387078&sr=8-3&keywords=skil+saw
That skil saw isn't the best in the world, but it'll get you pretty far.
https://www.amazon.com/Swanson-S0101-7-inch-Square-Layout/dp/B00002255O/ref=sr_1_1?ie=UTF8&qid=1497387123&sr=8-1&keywords=triangle+square
Just a cheap, basic square.
You'll also want some clamps, no doubt. On a tight budget I'd get some walmart cheapies. They're not great, but they get the job done, and clamps are crazy expensive. You want them to be basically like this:
https://www.amazon.com/IRWINQUICK-GRIPOne-Handed-Mini-Bar-Clamp-1964742/dp/B00002244S/ref=sr_1_1?ie=UTF8&qid=1497387348&sr=8-1&keywords=woodworking+clamps+hand
But larger (12-36"). And walmart brand is cheaper, I think they're about $3 for a 12" clamp.
Good luck! Ask questions!
If your goals are to do fine woodworking, like interior furniture (that isn't "rustic")...or if your budget is much larger, then you'll be looking at an entirely different set of tools.
Table saw, planer, orbital sander, bandsaw (if yours is no good), bench grinder, miter saw, jointer, in order of importance (to me!). And lots and lots of hand tools. Marking gauge, marking knife, awl, variety of drill bits, counter sinks.
Belt sander, disc sander, jigsaw, router. Router can be way up there in importance if you make good use of it--very versatile tool. I just don't use it a ton personally, and bits can be very expensive.
Both are correct. F clamps would be a more specific name for them. Irwin uses the term bar clamp to describe their quick grips I've also heard of sash clamps and pipe clamps being included in the term bar clamp.
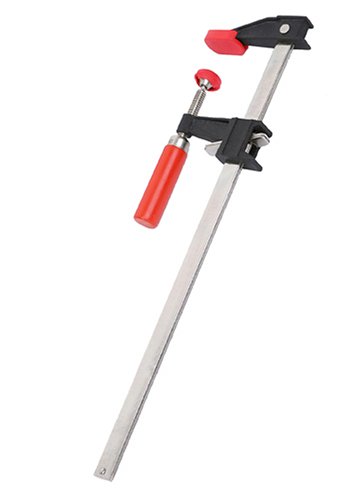
It's actually about the same price for me. Pony clamp 13.97 + 10 ft of pipe 13.26 = 27.23 before tax. Stanley 2x4 clamp is $30 on amazon.
You can also use a pistol grip clamp/spreader. Works like a charm and a lot less likely to break.
Plus you can use it as a clamp as well.
So, I don't know if they'll become available again but I bought these for something like $50:
http://www.amazon.com/Denali-30-Piece-Bar-Clamp-Assortment/dp/B000NDMO94/ref=sr_1_cc_2?s=aps&ie=UTF8&qid=1418708154&sr=1-2-catcorr&keywords=denali+30+piece+bar+clamp
and I actually find myself using them more than I do my quick clamps.
I figured out how to change the tires pretty easily. You can take the tube out with the tire lever; this is the easy part.
To put the tire back on, first put the valve through the hole. Then, use the clamps and the tire iron (or possibly start with the tire levers) to do the rest. Clamp it as far as you can on each side (1/3rd to 1/2th the tire clamped in place) and keep moving the tire into position with two tools very close to each other starting close to the clamps. When you make some progress, put a new clamp into position. I had to use the tire irons for the last part as it's extremely tight. **You won't be able to go straight for putting the rest of the tire on, you have to do it bit by bit from the clamps.
Pedro's Tire lever - https://www.amazon.com/Pedros-6400051-Tire-Lever/dp/B001SN8IW0
Clamps - https://www.amazon.com/gp/product/B001DSY4QO
Tire iron - https://www.amazon.com/gp/product/B01FVGSO0A
I don't think people realize how expensive it is for a company to build speakers. The general consensus is that there is a 1000% markup, meaning a $1000 pair of speakers only are $100 in parts. The company has to spend money to design and research the speakers. All of that is done in a building that they pay for. Next, they've got to build the speakers. Someone personally has to screw in each driver and apply every vinyl finish. They have to pay people to do that stuff. Next, they get shipped to a distributor. Speakers are big and heavy, so that isn't cheap. The distributor takes a cut of the money. They then send the speakers to a dealer. Once again, shipping costs. The dealer also needs some money, so they raise the price to make some money.
I'll throw out an example. The Buchardt S400 is a good one. It is made out of parts that anyone can buy. They use this $20 tweeter with a waveguilde attached, this $34 passive radiator, and this $71 woofer. So, they come out to about $125 per speaker, and $250 for the pair. They most likely get bulk discounts, but we can ignore that. Anyways, you get about $250 worth of parts in $1800 speakers.
Anyways, besides what comes when you order stuff, you've got to get some other parts.
You'll need a pair of binding posts for every pair of speakers you make. I use these ones, but really any of them should work.
You'll need polyfill to fill the speakers.
Screws to screw in the drivers.
Speaker wire, for inside of the speakers as well as to wire it all up when you're done. Since you're spending this much on the setup, banana plugs to plug in the wires might make you feel better. You won't need them, but it is definitely much easier to use them.
Alright, so that is really all of the stuff that you'll need inside the speakers. Now we can talk about the building stuff.
Clamps. You'll be gluing the speakers together, and need to hold them in place while the glue dries. Speaking of, wood glue.
You'll need a soldering iron for soldering everything together inside. That one comes with solder as well, as far as I can tell.
However, you want to finish the speakers would be last. Spray paint, vinyl wrap, whatever you want really. You could even get paint and a roller and paint them like that. You'll most likely want to sand and prime them first.
I think that's everything. Anyways, that Buchardt example is one of many examples. These Von Schweikerts are $35k and only have like $5k in parts, or something like that. I looked them all up once but I don't remember. Anyways, this is all to say, a pair of $400 speakers like the Monitor Audios don't have $400 in parts. It's much less than that.
Remington wet2straight on low setting. If you use a heat gun, it should show around 200-250. I use this one and it works well. Costs about twenty bucks.
If you want to go the extra mile, and honestly get 5-10% more yield, get a 600lb irwin clamp for another twenty bucks.
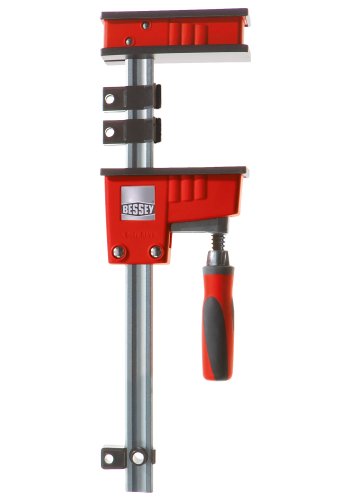
These are solid: https://www.amazon.com/Bessey-KR3-550-50-Inch-Parallel-2-Pack/dp/B001HSO6TU/ref=sr_1_50?s=hi&ie=UTF8&qid=1519866448&sr=1-50&keywords=bar+clamps
You've probably heard the first law of clamps is that you can never have too many clamps.
The corollary to that is you can never have too many bar clamps of exactly the same model and dimensions because it is a massive pain to try to get panels aligned for glue-up when you you have two or more different sizes of clamps sitting at different heights from the workbench.
For light duty, I love these: https://www.amazon.com/IRWINQUICK-GRIPOne-Handed-Mini-Clamp-Pack-1964745/dp/B001NP9S7M/ref=sr_1_4?s=hi&ie=UTF8&qid=1519866799&sr=1-4&keywords=irwin+quick+grip. Super fast and easy to apply even one-handed.
I made the mistake of buying a lot of this style clamp when I was starting out: https://www.amazon.com/Bessey-GSCC2-524-2-5-Inch-24-Inch-Economy/dp/B000FA0BMC/ref=sr_1_4?s=hi&ie=UTF8&qid=1519866845&sr=1-4&keywords=bar+clamp
When you use them to span more than a couple of feet, they bow and that throws the jaws out of square with the work-piece. I eventually just threw them away.
Oh - I have never used these, but I've fiddled with them at the store and they seem solid and a bit better than pipe clamps: http://www.rockler.com/surefoot-aluminum-bar-clamps
I use one of these with a rubber shaft grip.
https://smile.amazon.com/IRWINQUICK-GRIPOne-Handed-Mini-Bar-Clamp-1964742/dp/B00002244S/ref=sr_1_4?ie=UTF8&qid=1492043839&sr=8-4&keywords=quick+grip+6%22
More uses than just golf clubs.
If you're going to set up a little operation gripping clubs for cash, the vice you posted would be a good addition. Otherwise you'll end up using it once a year for new grips.
I would never cut those tabs off.
I used a little clamp to squeeze the sides of the mags a little bit. One of these:
https://www.amazon.com/dp/B00004TRCD/ref=cm_sw_r_cp_api_rTz5ybQB30JWH
if you don't already have these, or some channel lock pliers, try squeezing really hard on the sides of the mag with your hand
I believe he/she is referring to the F-Style clamp, which is the only prime-deal for that amount I could find.
https://www.amazon.com/Bessey-GSCC2-524-2-5-Inch-24-Inch-Economy/dp/B000FA0BMC/ref=sr_1_4?ie=UTF8&qid=1480108710&sr=8-4&keywords=bessey+clamp
to expand on this.
you'll want to buy a cheap powered router, a straight bit, a couple of clamps and HEARING and EYE PROTECTION.
i can't stress those last two enough.
once you've done that,
i recommend practicing on a bit of extra wood. get the idea down and then do it on your final piece.
I use a https://www.amazon.com/IRWINQUICK-GRIPOne-Handed-Mini-Bar-Clamp-1964742/dp/B00002244S/ref=sr_1_6?crid=29OSKUC6N2YQ3&keywords=irwin%2Bquick%2Bgrip%2Bclamp%2B6%2Binch&qid=1559108566&s=gateway&sprefix=irwin%2Bquick%2Bgrip%2Bclamp%2B*%22%2Caps%2C210&sr=8-6&th=1 It provides perfect variability :)
The entire project can be done with these tools:
Total =$52
https://www.amazon.com/TEKTON-39180-1-5-Inch-Ratchet-Spreader/dp/B000NY4UDQ/ref=sr_1_7?s=hi&ie=UTF8&qid=1497567741&sr=1-7&keywords=c+clamp
something like this
I really like these small Bessy Clamps. I bought a few as add on items and I use them all the time now.
Best way to rig any DSLR/DSLM camera is to start off with a good cage. This will give you mounting options, and you can start building up as needs arise (sort of like buying a small house and adding extensions when your family grows).
I am a really big fan of smallrig products, and I'd recommend on getting this one.
I use two vice grips like these for easy removal of even the most stuck devices and lock rings: http://www.amazon.com/Quick-Grip-546-Mini-Bar-Clamp/dp/B00002244S/ref=sr_1_1?s=industrial&ie=UTF8&qid=1398807092&sr=1-1&keywords=irwin+quick+grip+clamp
Saw the 24 inch low price while picking up a couple of the Bessey 4 inch for $4.99 https://www.amazon.com/gp/aw/d/B00004TRCD/ref=mp_s_a_1_3?ie=UTF8&qid=1486668466&sr=1-3&pi=AC_SX236_SY340_QL65&dpPl=1&dpID=41iER89TJwL&ref=plSrch
http://www.amazon.com/Quick-Grip-546-Mini-Bar-Clamp/dp/B00002244S/ref=pd_sim_hi_4?ie=UTF8&refRID=0S4R920E0M6Z81B471N4
cant tell you how handy that thing has been for ecig related uses! no scratches on any of my mods or atties to date.
"making dabs" lol
Sorry - I always just get a kick out of that usage.
You definitely don't need a press - a hair straightener can work great, but like other people said, if the bud is too dry it won't work.
We use this clamp: https://www.amazon.com/IRWIN-QUICK-GRIP-1964758-One-Handed-Clamp/dp/B001DSY4QO/ref=sr_1_3?keywords=clamp&qid=1564765600&s=gateway&sr=8-3
In fact, if you're not going to make lots and lots of rosin, don't even invest in a press. This method will work well and get you a decent yield.
Seen here? The blue ones appear to be Irwin quick-grip clamps, while the red ones are probably Bessey K body clamps.
Come on man, this shit isn't exactly hard to figure out.
My opinion:
Any links to tools are for tools that I have and like. Some people may know of better brands or may have had experiences that are dissimilar to mine.
In regards to wood, you can definitely find slabs big enough, but slabs are expensive and are usually used for tabletops, not for this type of application. When I need larger pieces, I will edge glue boards together (check out this guy who does it for a workbench top). I did this to make a one inch thick tabletop that was roughly 4' X 7'. If you are going to do this I would suggest getting a jointer as well. This will make sure you have perfectly perpendicular sides to lumber you are likely going to buy rough cut. When doing this for furniture as you would be doing if you decide to go this route, you should be very conscientious of the wood you are buying because you will want the grain to line up and for a person casually looking to not be able to discern where the seam(s) are.
DISCLAIMER: I have only been wood working as a hobby for a couple of years and have only a few projects under my belt. I am by no means an expert in anything woodworking and do it for fun. I likely do many things wrong/unorthodox.
The cheap way to go about this, since I'll bet your pickets are cupped along the width -- cup side towards the fence rail, screw it down to push the cup out. Letting the fasteners do all of the flattening work is what most people, especially contractors, do in situations like that.
The easiest jig to make for this is a piece of flat material and a pair of hold down clamps. This style is cheap, but works. This style is more effective, but expensive. The idea being to do something like this, but I would have your clamps on the side instead of the ends since that board probably has a lot of weird twists and warp in it.
I'd opt for the first option, though -- they're going to get sprung out of line with each other again sooner or later, and you're probably better off not exposing new material if you can.
Sorry for the long delay!
​
Most truck-peeps would use this clamp to secure structures to the truck bed (the same area where camper shells scure down).
​
I was ballin' on a budget, so I actually just took some small F-clamps I had to fasten the cuppy to the truck bed.
​
Lemme know if this helps, can draw a picture if you need!
I bought these from a suggestion here and they have been great so far. They are not great quality but it is a lot of clamps for a good price and they are better than the HF ones (I own a few of those as well)
Yes, you're on the right track. I bolted one of these ,which used to be $10 cheaper, to a 2 by 6 with some rubber on bottom. I just clamp it to a sturdy table with some of these.
Works great and even held up on removing a REALLY tough barrel nut.
Edit: bonus is you can drill a hole part way through in the wood for driving out pins.
Take a look at how wooden model airplanes are built. They have scale plans that you can lay the parts out on and you can use T-headed push pins to hold them in place while the glue dries. Techniques here might be useful:
http://www.pldaniels.com/flying/balsa/balsa-pinning-methods.html
I have some little tiny bar clamps (like this: http://www.amazon.com/Irwin-Tools-5464-One-Handed-6-Inch/dp/B001DSY4QO ) that might help, too, although the ratchet action on them is quite strong and it would be easy to crush whatever you're working on.
Have you looked at any of the Channellock sets
https://www.amazon.com/dp/B00L07E6XO/
or Irwin sets
https://www.amazon.com/Tools-VISE-GRIP-4-Piece-Traditional-2078707/dp/B076C4BQ9C/?th=1
I bought 12 of the 3/4 clamps for $8 each including prime shipping.So all 12 for under $100. I swear Amazon knows what I have searched for, but really would have bought more had I realized it was such a screaming deal!
Home Depot looks like the best current deal, I could use more!
No sooner am I looking and the 24" Bessey economy bar clamp shows up at $8.72. link
Home Depot shows it at $12.97
Hmm, so tempting
> These are solid: https://www.amazon.com/Bessey-KR3-550-50-Inch-Parallel-2-Pack/dp/B001HSO6TU/ref=sr_1_50?s=hi&ie=UTF8&qid=1519866448&sr=1-50&keywords=bar+clamps
$130!?!!
I'll stick with my $20 pipe clamps.
How about you mount the wheel to a piece of wood using screws, but give yourself enough room each side to use some nice, cheap, woodworking clamps to secure the whole assembly to your desk?
https://www.amazon.com/gp/aw/d/B00TKIUL84/ref=mp_s_a_1_1?ie=UTF8&qid=1491866136&sr=8-1&pi=AC_SX236_SY340_FMwebp_QL65&keywords=clamp+sets+for+woodworking&dpPl=1&dpID=41GO%2BbfhSGL&ref=plSrch
Hold down clamp aren't available at Lowes as far as I know. Your best bet is either a local Rockler store which is the manufacture of that one that you linked to or Amazon.
Direct link here:
Rockler Deluxe Hold Down Clamp https://www.amazon.com/dp/B002MMMSTU/ref=cm_sw_r_other_awd_R27Jwb6GCXTVV
Incra version:
INCRA Build-It Hold Down Clamp https://www.amazon.com/dp/B000W07PEM/ref=cm_sw_r_other_awd_t37Jwb4V8DJX3
The t track you'll need:
Shop Fox D2725 36-Inch T-Slot Track https://www.amazon.com/dp/B0000DD1O9/ref=cm_sw_r_other_awd_v47JwbX3GA2F9
You're right. So Greenlee produces 18v 3A adapter for cordless tool. This model looks like Makita battery for $289. Not good enough, powerwise. But if say Makita mass produces it, it can be $150 and more powerful say 30A. At that price point, I would buy it
Edit: wouldn't use the adapter for drill because battery is sufficient. But a grinder, sander, miter saw are much more versatile if you have both cordless and corded options for the same tools. Los Gatos Power is now defunct but they used to make sufficient AC adaptors for $250.
Hey man! I would advise you to do some research into Rosin and avoid using solvents to make your extracts.
You can make rosin, which is a solventless and dabbable extract, with just some parchment, and a hair straightener.
Check out /r/rosin
To make Cannabis Rosin
I start by pucking ~2g of cured nugs with a small pollen press
then take one half foot of Oil Slick Wrap foil backed parchment paper and put the puck in the center of that.
after prepping the nug in the parchment i squish it in a hair straightener that is unplugged with an irwin quick clamp
after that is squished to it's limit i plug in the hair straighener and put my ear up to the area where the nug is and wait for a sizzle. as soon as i hear the sizzle i unplug the straightener and undo the clamp..
Then you've got rosin!!!
20% off promo code: REDDIT
for products on the Oil Slick Big Cartel!
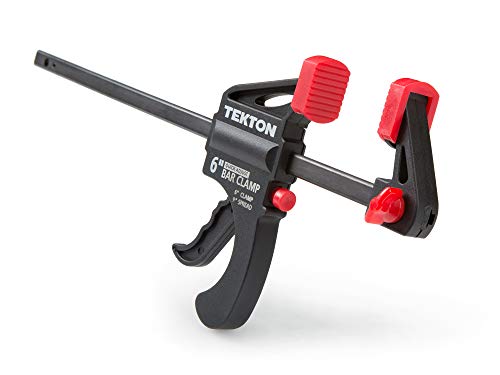
They make clamps that are reversible so they can also be spreaders, like this Tekton one. Probably not exactly what you're looking for, but its something close.
Thanks for the reply, I ended up going with this guy, Ill definitely consider mounting to a wood block
Get yourself some of THESE That what i use. I heat up the worker wheels just a little bit with a hair dry then press them on with these. I put a plastic bottle cap on top the the fly wheel. On the motor side I use a small screwdriver handle that fits between the motor terminals. works great and give you a lot of control to center them.
Eh... it really depends on the size of what you're doing, but a perfectly even 14.7psi (at sea level, less at elevation) is actually really good compared to most clamps.
At the 1x1 size, yes it's only 14.7psi, but for the initial pressing of full 9x12 sheets that's 108 square inches, multiplied by 14.7psi to get 1,587lbs of force, perfectly evenly distributed.
These Revo K-body clamps are often considered some of the best in the business. They're capable of 1500lbs of force, which is great, but now you have to distribute that perfectly over the total area, which is where things get tricky.
The beauty of vacuum is how well it scales while retaining perfectly even force, which is really what you're after for if you're looking to get a lamination just right.
Source: built longboard skateboards for years, nothing beats vacuum. I've tried clamps, clamping jigs, weight, etc. but vacuum was a game changer.
The G7 is an upgrade for sure. The T2i does 1080 video (what Canon calls 1080-might be upscaled for all I know), and you're looking at 4K video on the Panasonic that you can do a lot more with. It'll be a lot clearer and easier to work with, especially if you punch in in post.
As far as getting a C100 mk II, I would definitely take that over the Panasonic since it's a true cinema camera, but that's an added price. With that said, there's a few things you can do to make that Panasonic a lot more usable.
I would be going for the G7 if I were you. It is a huge step up from the T2i.
Clamp
Yeah, it worked well enough to do four or five simple case bindings. Then I bought a couple of these ratchet clamps at Walmart to press books between a board (you could use a sturdy clipboard for starters) and my desk. It doesn't have to be super heavy, so don't worry about not having equipment to start.
Yeah, I'm trying to save money on it too. What padlock brand/model are you disassembling? Field stripping this Kwikset is the first thing I did when I got it. Very nice to gain that familiarity with the workings before attacking it.
I went about making the picks by printing a Romstar template, matching scale to the ruler in inches on the print-out. Cut out the desired tools and glued them each to a ~5" long section of feeler stock (1/2" wide x 0.02" thick, meant for testing tolerances in machine shops and production lines. 0.02-0.025" is supposed to be the thickness for North American keyways.)
After glue drying, I clamped the feeler stock in a horizontal position in this small vice, and then used EZ Lock Metal Cut-off wheels @~30k RPM to generate a rough shape (Cat#EZ456, should be able to find for $2 per wheel or less, or even cheaper off-brand products). The slower you go and the less you remove at a time, the longer your wheel will last and the less likely you are to overheat the steel (which can cause weaknesses). I used long, light strokes down the whole 5" of feeler for every pass, removing sub-millimeter quantities each time.
I left about 0.5mm of the white paper surrounding the printed tool template, so that I could more cautiously produce the final tool shape with an aluminum oxide grinding wheel (Dremel 952,932,etc). I clamped the Dremel 4300 down to the counter with the bit hanging over the sink, and then hand-held the tool while using the length of the grinding wheel to remove some of the mountains and valley produced by the very thin metal cutting wheel. Holding the pick while leaving the Dremel clamped made it easy to affect how much metal was being removed with small changes in force applied. I used the corners of the grinding wheel to remove away the final material around the snake/hook/half-diamond business end. The same wheel was then used to remove rough spots and round out the edges.
Finishing used some 240 grit sand paper and then a felt buffing wheel with abrasive compound. All these Dremel items came in this Dremel 4300 kit I was gifted a while back. I have a feeling a bench grinder will do a much faster, cleaner job -- but we've all got to start somewhere! :-D
Edit: I'm in the same situation with the recording. Still have to get my white belt yet though! :-D I'll have to figure out a good spot for my phone, or maybe use my webcam. I agree on the cam, never hurts to have a cheap Logitech cam around.
> Harbor Freight,
50 miles away. I could pay $6 shipping I guess.
$6 for a 24" clamp. Are these things any good?
The next closest I can find on Amazon is $10
https://www.amazon.com/Bessey-GSCC2-524-2-5-Inch-24-Inch-Economy/dp/B000FA0BMC/ref=sr_1_33?ie=UTF8&qid=1483331055&sr=8-33&keywords=bar+clamp+24%22
EDIT:
Also found these on ebay for $6.50 each.
http://www.ebay.com/itm/Lot-of-4-24-Inch-BAR-CLAMPS-Heavy-Duty-Woodworking-Wood-Carpenter-Tools-/311765298530?hash=item4896a8ed62:g:YGkAAOSwuTxV7dtW
This is probably a little late, but maybe it will help someone else so I will throw in my two cents. When I first started building my tool collection I bought (2) of the Harbor Freight bar clamps you referenced above and (2) of these from Harbor Freight http://www.harborfreight.com/12-in-ratchet-bar-clampspreader-68975.html#.Ux35gfldV8E
They work ok, and are a good value for ~$3. The only thing I would suggest is take some super glue and glue on the plastic caps because after awhile they stretch and fall off constantly
Later on I needed more clamps for a large project, and I went to Home Depot and bought some Irwin clamps that were on sale. They work much better one handed and seem to clamp more evenly than the HF ones. Looking back I wouldn't of bought the Harbor Freight ones, and would of bought all Irwins. The reason being the Irwins will probably outlive me if I take care of them, and as per the rule with all Harbor Freight tools their clamps will eventually break.
Anyone looking to buy clamps the Special Value pack of Irwin clamps at Home Depot is (6) Irwin clamps for $20. I know a lot of stores no longer have them in stock, but you can check yours. Link - http://www.homedepot.com/p/Atlas-Homewares-Mini-Micro-Clamp-Set-6-Piece-1888814/204359098#
P.S. - That same pack on Amazon is $55 - http://www.amazon.com/Irwin-Quick-Grip-Clamp-Set/dp/B00A9KMARW/ref=sr_1_1?ie=UTF8&qid=1394473856&sr=8-1&keywords=irwin+clamp
Yes, I was just thinking that... bend the legs out of the way. The craft press he uses in his photos, this one is pretty cheap on Amazon.
Edit: Here's the one I bought: Quick-Grip 546 Mini Bar Clamp by Quick-Grip
Me too... Except, this pack of clamps is $40 on Amazon! Some small seller, I am sure... Probably bought them from HD for $15, and is not making a good margin!
Bessey Clutch Clamp Set (6-piece) GSCC6PK (6 In.) https://www.amazon.com/dp/B012YGW44M/ref=cm_sw_r_cp_api_0EzsxbVRDSFFX
Then maybe you are right. Could be sunlight heated it up.
​
I would imagine you can glue it back down again. Use some bar clamps to hold it tight: https://www.amazon.com/IRWIN-QUICK-GRIP-1964758-One-Handed-Clamp/dp/B001DSY4QO/ . Just put cloth in between the clamps and the veneer surface so you don't scratch it. Probably find some DIY information online about what kind of glue to use with veneer.
I will say that he's going to be limited with that workspace, but he can get by with some basic stuff. I also have extremely limited space. I have an outdoor shop space, but since it's not insulated and has no power, I'm very limited in what I can do.
However, here's a good list of things to get.
Keep in mind that father's day is coming up soon, and tools like these are popular things to be put on sale. Keep your eyes open :)
I’m in US so names of things might be different:
X-acto: Getting the nicer knife (with a cushioned grip) and a couple different styles of blades is so helpful!
I found that having The Chopper a miter box, and this thing kept my cuts square.
Now I have a mini miter saw and it’s pretty awesome but pricey.
A self healing cutting mat that you use only for cutting (don’t get glue etc on it).
Sandpaper to clean up messy cuts.
Glue: tacky for most things - let it set up a little on a scrap piece before applying, things won’t move around as much. cyanoacrolyte (non gap filling is better) and an accelerator are godsends when you can’t hold pieces together to dry.
mini clamps or mini clips and a square that you can clamp to (you can make this out of foam board and line it with parchment paper to keep glue from sticking) so you don’t have to hold it while it dries. The gentle painters tape also helps.
Wash your hands constantly! Have a ‘clean area’ for cutting and assembly and a ‘dirty area’ for glue ups.
Edited to add that I wouldn’t buy a styrofoam cutter off the bat, most schools have them and they’re just for concept massing models. Check YouTube for videos, the guys that make scenery for model trains etc are amazing.
https://www.amazon.com/IRWINQUICK-GRIPOne-Handed-Bar-Clamp-Heavy-Duty-1964712/dp/B001V61452/ref=sr_1_4?keywords=irwin+600&qid=1567012980&s=gateway&sr=8-4
One of these, I dont see how you could apply 850 lbs of pressure by hand. This clamp applies 600lbs.
How about this:
http://www.amazon.com/Bessey-GSCC2-524-2-5-Inch-24-Inch-Economy/dp/B000FA0BMC/ref=pd_sim_sbs_hi_4?ie=UTF8&refRID=113DXKNK8KG8X3D7E4CA
Miter Box (Find one that allows you to cut the 30 degree angle pictured in the guide)
Sanding Block
Clamp
Hammer
Boom! Now get to it!
Thanks for that, I didn't know they did that!
I wonder why it's so expensive and delivers only 3.3 amps of current? I can spend $30 in parts and deliver 5-7 times more current. The amazon page has some negatives reviews. It seems this one can only work with a small selection of tools.
I meant one like this. I get my types of clamps confused at times.
It's $20 on Amazon but any hardware store has it marked up a lot more.
I do a combination of hand and random orbit sanding when I need to sand. I try to get surfaces as smooth as I can with a smoothing plane and card scrapers so I don't have to sand much, but sometimes it's unavoidable.
As for bar clamps, I got this set from Amazon for $120 a couple years ago. I've supplemented those with others from Harbor Freight.
http://smile.amazon.com/Denali-30-Piece-Bar-Clamp-Assortment/dp/B000NDMO94/ref=sr_1_cc_2?s=aps&ie=UTF8&qid=1419722120&sr=1-2-catcorr
As for decent lumber, check your local Craigslist or equivalent for sawmills and lumberyards in your area. Don't buy from the BORG or Rockler/Woodcraft as they'll assrape you without lube. I've had good luck with auctions and yard sales too.
On the two occasions I've used stain, I used General Finishes oil based. Seemed to work well. I try to use woods that are the color I want to begin with. The most I usually do is use something like linseed or tung oil that darkens the wood a bit.
Hand vise: IRWINQUICK-GRIPOne-Handed Bar Clamp, Heavy-Duty, 6", 1964711 https://www.amazon.com/dp/B001VND4X0/ref=cm_sw_r_cp_apap_SKWbD2mBTHRZ9
Steel plates: Round Hot Rolled Steel Plate 1/4" x 4" Diameter Circle (Pack of 2!) https://www.amazon.com/dp/B00YWBU1P2/ref=cm_sw_r_cp_apa_Mdufzb3Q4YDXK
Epoxy: J-B Weld 8297 HighHeat 550 Degree Epoxy Putty Stick - 2 oz. https://www.amazon.com/dp/B007PP26RI/ref=cm_sw_r_cp_apa_ieufzbQD017AS
And turns out my stove is way easier to heat up the steel plates. But if you're interested in a heat gun I bought this one: Genesis GHG1500A Dual Temperature Heat Gun Kit, Grey https://www.amazon.com/dp/B00EU2T8GG/ref=cm_sw_r_cp_apa_pfufzbAPGCZ11
Sorry about the formatting, I'm on mobile
For this job, or one very like it specifically, a couple of those one handed speed clamps would work really well, too. In this case, you'd clamp the handle/knob first, east to west, and then the rim, east to west. It's different than with the tape, because the forces applied go different directions; pressing on the tape is a vertical downward force, and the clamps provide an inward lateral force. (the elastic force of the slightly stretched tape is inward and lateral, but is also marginal; enough to slowly squeeze the excess glue out, but not enough to hinge-spring the two halves apart)
I used this system - http://smile.amazon.com/Kreg-R3-Pocket-Hole-System/dp/B000J43A7W/ref=lp_552488_1_2?s=power-hand-tools&ie=UTF8&qid=1422105125&sr=1-2.
I really liked it as it also allows you to set your depth and distance and just go - all of my pocket holes were made in one sitting. I used it with an Irwin 6" Clamp (http://smile.amazon.com/IRWIN-Tools-QUICK-GRIP-6-inch-546ZR/dp/B00002244S/ref=pd_sim_hi_1?ie=UTF8&refRID=0BGS8N79X833JZTM4W81)
I just finished a rear tire change myself for the first time. A few things that helped me that I picked up from various youtube videos:
I used quick-grip clamps to compress the tire and keep it in the wheel on the opposite side I'm working on. I placed 2 clamps aligned with the spokes on either side of the valve, and worked on the other side so I don't accidentally damage the valve with my efforts. I have clamps like these:
https://www.amazon.com/IRWIN-QUICK-GRIP-1964758-One-Handed-Clamp/dp/B001DSY4QO
I lubed the tire bead edge and wheel rim with WD-40. It still took a lot of force to get the final section of bead over the rim, but the lube really helped. My first attempts at taking off the tire ended up with my old set of plastic levers snapping. Had to make a trip to the local bike store to get a new set of nylon tire levers with steel core. The ones I found were made by Specialized. They did a great job (tires were still stubborn but came off and on).
I use clamps like these when gluing stuff together on ukuleles.
The same clamps are running for $41 on Amazon: Bessey Clutch Clamp Set (6-piece) GSCC6PK (6 In.) https://www.amazon.com/dp/B012YGW44M/ref=cm_sw_r_cp_awd_2r1Fwb16JPXGT
And then when that still doesn't work and you're done fucking around, use a pair of these:
http://www.amazon.com/Irwin-Quick-Grip-Clamp-Set/dp/B00A9KMARW
Make sure they're the kind with rubber pads, of course.