Best automotive primers according to redditors
We found 74 Reddit comments discussing the best automotive primers. We ranked the 20 resulting products by number of redditors who mentioned them. Here are the top 20.
We found 74 Reddit comments discussing the best automotive primers. We ranked the 20 resulting products by number of redditors who mentioned them. Here are the top 20.


He's using high heat BBQ grill paint already.
The highest commercial heat resistant paint will be exhaust ceramic coating paint.
VHT SP102 FlameProof Coating Flat Black Paint Can - 11 oz.
https://www.amazon.com/dp/B000CPJLGM/ref=cm_sw_r_cp_apa_6OqrxbC9N3WY3
here is the adhesion promoter that i was recommended
https://www.amazon.com/Dupli-Color-CP199-Adhesion-Promoter-Primer/dp/B0007UAXJQ/ref=sr_1_1?ie=UTF8&qid=1474655912&sr=8-1&keywords=adhesion+promoter
and also if you can find the "Krylon Fusion" spray can in the color you are looking for, it is supposed to be the best for plastics
You think something like this would work similarly even though it isn’t necessarily “commercial grade”?
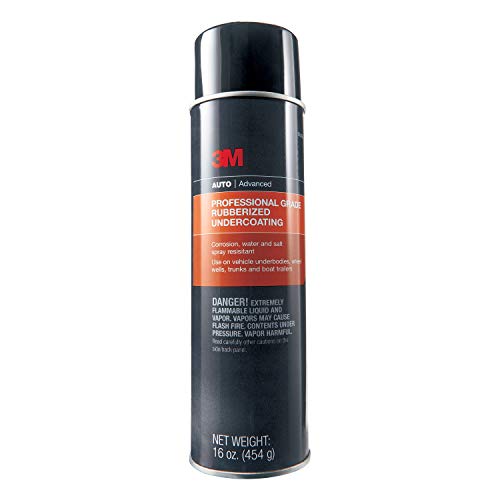
3M 03584 Professional Grade Rubberized Undercoating - 16 oz. https://www.amazon.com/dp/B002H9CMCQ/ref=cm_sw_r_cp_api_i_3A3kDbRDC6GX3
VHT is popular for heat/flame resistant paint.
I think proper cure procedure is idle 20 min then cool 20 min, idle 30 min then cool 30 min, then run it normally for 30 min or so (ride it around). You can also bake it in the oven to cure it if the muffler on the bike won't get hot enough.
Some people have very good results with this paint. I think it's very sensitive to prep and application. Have to lightly scuff or sand the surface. Then thoroughly clean with isopropyl alcohol or something to get all the dirt and grime off. Start off with a couple of light coats then start spraying heavier and heavier.
I have not tried this myself but I did order it last week. I removed the mufflers on my bike and I plan on painting the underpipe section.
probably something like this: https://www.amazon.com/VHT-SP102-FlameProof-Coating-Black/dp/B000CPJLGM
You have to first use an ahesion promoter. Also available on Amazon or at any auto parts store. It's a critical step when painting plastic of any kind. Adhesion promoter followed by primer followed by paint.
The paint you want to use will determine the primer you use. If you're going with a brush-on exterior latex or oil base, use the Zinnser. If you plan on a spray paint (my preferred way to do shutters), go with the 2x (Krylon also makes a good plastic primer), your color coat, then a clear for UV resistance and durability.
For the plastic, clean clean clean.
For surface prep, Don't laugh, but I whip blasted them with the sandblaster. Yes it leaves it rough and ugly. Your spraying on bedliner, no one will ever know.
Edit in, Clean it after you sand blast it. or thoroughly scuff it with 80-120 grit sand paper.
Upol Adhesion promoter
Then their acid 8 Primer.
Last Raptor bed Liner
I did the valance, fender flairs in tintatable white on my 03 Sierra. I also did the plastic pieces for the rear bumper and the plastic bed rail piece in black . Even after a year of stepping on the bumper constantly it's held up well.
This.
I recommend VHT paint. I painted my car's turbo manifold, turbine housing and downpipe with the shit and after about 20k miles it still looks good.
https://www.amazon.com/3M-03584-Professional-Rubberized-Undercoating/dp/B002H9CMCQ
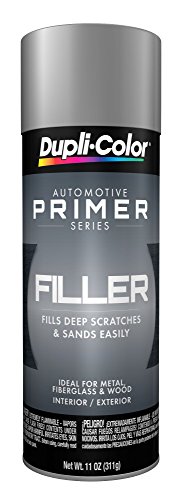
Spray the print with a filler primer, sand it, rinse and repeat until the surface is to your liking. Then do a coat of matte primer (Make sure you test the two primers to make sure there won’t be a reaction). Then just acrylic paint.
Do you have a picture of the damage? Depending how deep it is you’re gonna want to start with 80 or 150 grit. Sand it down as much as you can to level out that scratch. It’s best to use an actual palm sander when doing this otherwise you’re going to be sanding for a while. You must keep the sander moving in an area larger than the scratch....think shaving a layer all around so it’s even and will make your feathering easier. Don’t use traditional bondo, they make plastic filler (https://www.autobodytoolmart.com/evercoat-poly-flex-flexible-polyester-glazing-putty-411-p-15571.aspx?gclid=EAIaIQobChMImYjOtbKS3gIVS0wNCh0_6gLVEAQYASABEgJsm_D_BwE) which has flex in it made for plastic body parts. I use that at work but it’s expensive...you can find a cheaper one. The traditional “bondo” is meant for metal panels and it will crack on a plastic bumper. I put that on before I feather out because you’re gonna want sand that down with 150 also. After you got it nice and level go to 240 and then 320 grit sand paper. Then you may prime it. I usually go 3-4 coats of primer. Sand that down with 600. Ideally you don’t want to just paint right over the primer. I use sealer that is meant for plastic parts but if it’s a DIY at home you can probably get away with not doing that if you wanna save some bucks by using this https://www.amazon.com/SEM-39133-Flexible-Primer-Surfacer/dp/B000HAXLZO So then yes base coat then clear coat. Take your time if you have any questions just ask.
I used 80 grit sandpaper paper and an orbital sander over the whole thing. You definitely aren't trying to break through the paint just scuff/etch the paint.
If you break through the paint use #8 https://www.amazon.com/U-POL-ACID-PRIMER-M-I-R-COMPLIANT/dp/B003ZWDZ9I/ref=mp_s_a_1_28?keywords=raptor+bed+liner&qid=1550451327&s=gateway&sr=8-28
This is in a nutshell what I did. Seemed to work out for me. I would have loved to have been more detailed but I'm doing this all from my phone on vacation.
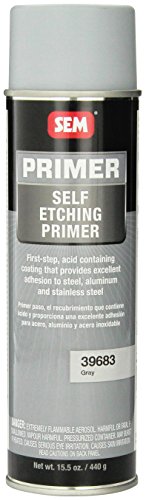
You need to degloss it, or etch it, if you want any kind of paint to adhere:
https://www.amazon.com/SEM-39683-Grey-Etching-Primer/dp/B000GTIRAU
Sand blast it, or sand the hell out of it to take the gloss off. If it stays shiny, the paint will not be able to grip on to it.
In your other post, its hard to tell for sure but the factory paint looks to be in tact. If you have them plastic wheel well liners are the first and most effective line of defense to stop rocks from ruining your paint.
I wouldn't sand off the factory paint just so I could apply POR15. Also I don't think you can get the paint out of the nooks and crannies without a sandblaster. POR15 says right on their website you CAN apply it over existing paint, but you don't get the anti-rust benefits unless its applied over bare metal. If you are going to this much trouble, you really should wipe it down with a degreaser / alcohol / acetone.
Regarding spray on undercoatings I have used the 3M Rubberized Undercoating (link) and its easy to use, but its only been a few years for me so I can't say how well it will hold up. IF you are currently rust free, you can just spray that over what you have now and skip the POR15.
To add to the iron powder idea, there are actually metalized paints that are basically iron powder in an acrylic binder that you can brush onto parts and then weather with actual rusting solutions. Might consider spraying the piece first with a clear adhesion promoter. One thing to be aware of is that the rust can continue for aaaages, so once you've got it it to a point where you're happy with the look you may want to put some kind of sealer over the thing to lock it in.
https://www.amazon.com/Dupli-Color-DAP1689-General-Purpose-Sandable/dp/B002984MTG?th=1
You'll notice the single can is 13 bucks, but a case of six comes out to a little under six bucks. If you go to an auto parts store instead of ordering online, you'll pay much closer to the bulk price than you will ordering a single can online.
This is the brand I like to use. It goes on very light and doesn't clog up detail. Make sure you shake the can a lot and test it on a sprue before you do it on the model.
https://www.amazon.com/gp/product/B002984MTG/ref=oh_aui_detailpage_o00_s00?ie=UTF8&psc=1
I read an article on this once but cant find it now....
First of all, try to read up on review and find out what acutally works. Don't just buy paint that is marketed as working on hi temp parts. Get the highest temperature rating possible (I found this, and this clear coat. If you really want to go whole hog, you can get primer. Probably not necessary though.
Anyway prepping properly IS SUPER IMPORTANT! Make sure you sand off any rust, and clean with a good degreaser (I like dawn dishsoap, but hey to each their own). If you really want to go all out, sand the entire thing. This is just good paint prep in general though.
When painting, apply multiple coats as thinly as possible (don't let it gob up.) I would do like 4 coats of base, plus 2-3 of clear coat. Make sure and wait a good amount of time for it to dry between coats.
After you are done painting and have the exhaust installed back on (at least a full day after painting), warm it up slowly. So start and run the bike for like a minute, then shut it off for 5. Do this several times, then start increasing the run time. This allow the paint to temper without as much initial stress. After that just ride it, it will bake fully over the next week or so.
If you don't really care about looks or longevity, just get BBQ/grill paint, mask off the areas around the exhaust, and spray that sucker without even taking it off. Should last you at least a year.
I haven't done this yet, but I plan to in the next few months.
Took me forever to figure this out. It’s not easy finding parts for the little three inch pipe. I ended up using the transition plate listed below with high temp insulation between it and the roof. Then on the roof I installed one of these high temp silicon rain guards. Also, if you are looking for a chimney cap Home Depot sells a cheap one that was recommended to us by cubic mini. We painted the stove pipe and chimney cap black using high temp paint.
176203 3" Ceiling Support/ Firestop-... https://www.amazon.com/dp/B002NHWAQK?ref=yo_pop_ma_swf
Insulation, Wool, 0 to 1200 Degrees F https://www.amazon.com/dp/B01LZI4T1U?ref=yo_pop_ma_swf
3 Silicone Hi-Temp Pipe Flashing... https://www.amazon.com/dp/B0792PT94W?ref=yo_pop_ma_swf
https://www.homedepot.com/p/100396919
VHT SP102 FlameProof Coating Flat... https://www.amazon.com/dp/B000CPJLGM?ref=yo_pop_ma_swf
Never used that website but seems expensive.
Amazon has this kit which seems nice because it includes clear coat. Just make sure you get the correct color. Even a color match will have a variation in the color. Be prepared, you will see the fix.
Then you just need a primer Try not to sand to metal.
Self etching primer is a good way to go if you’re working with a metal surface. Also, use a light colored primer if you’re trying to transition from black to white. Using a darker gray or black primer will only cause you to apply more coats of white paint.
dietec on YouTube does some pretty intricate case mods and paints almost all of them. You’ll see he does a lot of prep for paint which is very important as well.
Here’s a link for some primer. (Use a mask or work in a well ventilated area, this stuff is toxic as hell)
I was looking into the below or Lizardskin. Still researching
https://www.amazon.com/3M-03584-Professional-Rubberized-Undercoating/dp/B002H9CMCQ/ref=pd_aw_sbs_263_of_52?_encoding=UTF8&pd_rd_i=B002H9CMCQ&pd_rd_r=8a0e974f-7b76-11e9-a109-d74889de0019&pd_rd_w=D7Sh5&pd_rd_wg=bgxcW&pf_rd_p=aae79475-6dc9-4a12-80e8-27b63108fa72&pf_rd_r=HMA88PJR3ZVQRV2BP8BJ&psc=1&refRID=YY0M3KK2AQ07G26WAKGR
I honestly have no clue about this. I'm just using google. Something like this is what I'm thinking https://www.amazon.com/VHT-SP102-FlameProof-Coating-Black/dp/B000CPJLGM
Here is my finish process. 1) basic sanding for raft and or support scarring, 2) prime with Duplo Color Thick Primer (Amazon link below but you should be able to find it in any autopart store), 2.5) Sometimes I use a latex guesso but it requires 2 coats 24 hrs apart but smells a lot better and easy clean up and works well in winter when you can't spray, 3) Detailed sanding and filling with Squadron Green Putty (Bondo putty works fine too), 4) Regular Duplo Color primer, 5) Final detail painting with Tamiya acrylics. Make sure you don't use any lacquer based paint after otherwise you will basically ruin your model. Acrylics and lacquer paints cannot be intermingled
https://www.amazon.com/Dupli-Color-DAP1700-Filler-Primer-fl/dp/B00R244LN4
If you cannot find it in a local store, you can order it online:
https://www.amazon.com/gp/product/B000B6DG7C/
SEM Black Self Etching Primer. One of the best primers for painting metal. Three light coats and it turns out great!
This is a good body filler that you can get at walmart in the automotive section.
And this is a good filler primer, also from walmart.
I used this for rust conversion:
Rustoleum automotive rust reformer. https://www.amazon.com/gp/aw/d/B003HG48AC/ref=pd_aw_sim_60_3?ie=UTF8&psc=1&refRID=AT7Q8GF6HPCHYDYGCC9M&dpPl=1&dpID=41Dob2efETL
And this for the under body coating:
3M pro undercoat
https://www.amazon.com/gp/aw/d/B002H9CMCQ/ref=pd_aw_sim_60_3?ie=UTF8&psc=1&refRID=MGW2KRC0CD2B6XH89VXB&dpPl=1&dpID=61ypq2wgP3L
I used spray for both for getting into tight spaces. If I could do it again, I might line-x or monstaliner the underside for toughness though that coating was pretty tough it feels like it would scrape off on stuff but I sold my old 4runner before I could test that out.
I sanded until my thumb bled.
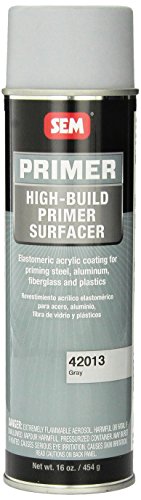
Then I hit it with high fill primer:
https://www.amazon.com/gp/product/B000PKX16A/ref=oh_aui_detailpage_o03_s00?ie=UTF8&psc=1
Then I sanded that down smooth through the thumb pain.
Then I hit it with the texture spray linked above.
Then I gave it a couple of coats of "Trim Black":
https://www.amazon.com/gp/product/B000EM019O/ref=oh_aui_detailpage_o03_s00?ie=UTF8&psc=1
The texture spray really hides a lot of the imperfections
if you're doing your rims, i suggest ceramic "header" paint from the auto parts store. I painted my truck rims matte black 10 years ago, the paint still hasn't chipped off. http://www.amazon.com/VHT-SP102-FlameProof-Coating-Black/dp/B000CPJLGM
My go to primer. Stick with the sandable cause thats the flattest one.
Header paint is probably your best solution out of a rattle can.
High temperature powder coats may be an option,
Ceramic coatings work, but they're pricey
Regardless of what you do, I'd fire it before cooking with it to drive off any chemicals.
I've went through a few different ones and I like this stuff the best. Goes on thin but not too thin. I used to prime in black, but when you paint a bunch of minis red, orange, or yellow on black primer you'll never want to see it again. Been sticking to white ever since.
https://www.amazon.com/gp/product/B002984MTG/ref=ppx_yo_dt_b_search_asin_title?ie=UTF8&psc=1
Just a plastic primer, try this one maybe: http://www.amazon.com/PlastiKote-469-Plastic-Primer-Enamel/dp/B0007OWD0Y/
I've used both this and this. I prefer the DupliColor because the Rustoleum has a stronger smell. You also need to be careful with the Rustoleum. Whenever I start a new can, it tends to spit blobs of gunk for the first few seconds.
3M Rubberized undercoat would be ideal for your purpose.
That doesn't look too bad. But if you're not going to fix the issue (cut out those metal sections and replace them), since that's in the wheel well area which gets sprayed with water, sand from the road, etc.., I'd apply some undercoating on it to minimize the effects of road spray. 3M has a pretty good rubberized undercoating which I've used a few times (try not to touch it and wear some gloves) : https://www.amazon.com/gp/product/B002H9CMCQ/ref=oh_aui_search_detailpage?ie=UTF8&psc=1
I guess the only issue is that it won't match the silver / gray of the vehicle.
I used SEM Trim Black with great results. I used an adhesion promoter first. 1+ year on the flare looks the same as the day I painted it.
The problem with bed liner is that it's textured - and you have to strip/sand it all of if you end up not liking the textured look. But it's great if you like the look!
like this? https://www.amazon.com/Dupli-Color-DAP1689-General-Purpose-Sandable/dp/B002984MTG/ref=sr_1_11?ie=UTF8&qid=1541838023&sr=8-11&keywords=auto+filler+primer
http://www.amazon.com/Dupli-Color-FP101-General-Purpose-Sandable/dp/B000B6DG7C
Spray, sand, paint.
Example results (not mine): http://forum.typeamachines.com/viewtopic.php?f=8&t=195
The same thought occurred to me. I wonder if something like this would work.
I always use an adhesion promoter for plastic parts like bumpers and trim. Something like this https://www.amazon.com/Dupli-Color-CP199-Adhesion-Promoter-Primer/dp/B0007UAXJQ
Sand it down, looks like rust to me though... If it's just surface rust use a coarse grit and clean it up. Rust-kon is also an alternative. If you get to the bare metal check for any low spots and apply body filler as needed. Afterwards you have to spot [prime] (http://www.amazon.com/U-POL-HIGH-HVLP-PRIMER-Aerosol/dp/B003ZWJE16) it. Then you can either try to blend the paint with the factory original, this would include feather sanding the surrounding paint and then going back in and painting 2" around that spot. Once it's dried you can wet sand and buff. Unless you want to paint the entire fender you have to burn the paint when buffing to match your original paint. OR just go in with some rattle can paint and ghetto rig it after spraying the primer.
To get paint to stick you have to give it a clean surface to stick to. Otherwise it won't be any better than trying to paint dirt on the ground and expecting it to stay. Even brand new guns are usually dirty from the factory they're made in. To clean the gun simply disassemble it and clean each piece with either soap and water or even running alcohol. Also while doing this you can decide what parts you want to paint and what ones to keep unpainted since you want to go for an accented look. It'll make it look a lot more like a finished product than if you were to spray the whole gun assembled.
After cleaning, I would suggest using an adhesion promoter before applying any color. I did this on a springer shotgun about five years ago and it barely has any scratches or chipped paint on it and I have solely used it in CQB until it finally broke this year. Follow the instructions (multiple light coats) and it will help a lot. Same goes for the primary paint itself. Multiple light coats of the color will stick and look better than a couple heavier coats.
Why not one of these? https://smile.amazon.com/3M-03584-Professional-Rubberized-Undercoating/dp/B002H9CMCQ
https://www.amazon.com/3M-03584-Professional-Rubberized-Undercoating/dp/B002H9CMCQ/ref=sr_1_3?ie=UTF8&qid=1493246997&sr=8-3&keywords=rubberized+paint
Smth like this one, can't remember the exact name but should work. Be sure to scrap the remainings of the old rubber texture and give it some sanding ! Good Luck !
Probably some sort of high temp header paint or something similar.
Like this stuff
https://www.amazon.com/VHT-SP106-FlameProof-Coating-Silver/dp/B000CPIMUS
https://www.amazon.com/3M-SandBlaster-Between-Sandpaper-400-Grit/dp/B000H5VTO4
https://www.amazon.com/SEM-42013-Grey-Build-Primer/dp/B000PKX16A
I believe those help keep the chair stable. Lightly sand the feet. Clean with alcohol and let dry. Spray with https://www.amazon.com/Dupli-Color-CP199-Adhesion-Promoter-Primer/dp/B0007UAXJQ
Let it dry then paint.
http://www.amazon.com/3M-03584-Professional-Rubberized-Undercoating/dp/B002H9CMCQ/ref=sr_1_5?ie=UTF8&qid=1449073326&sr=8-5&keywords=truck+bed+coating
something like this?
Dupli-Color FP101 Gray General... https://www.amazon.com/dp/B000B6DG7C?ref=ppx_pop_mob_ap_share
This worked very well.
By "red lacquer primer" do you mean the colour red? (Sorry if that's a stupid question)
Will this do the trick?
Is this the same stuff? I'm leery of the 'fills light scratches' tag line.
https://www.amazon.com/Dupli-Color-EDAP16897-6-PK-Sandable-Primer/dp/B002984MTG?th=1
No, it’s this:
https://www.amazon.com/Dupli-Color-EDAP16987-General-Purpose-Sandable/dp/B001DKR55O?keywords=dupli-color+hot+rod+sandable+primer&qid=1537220603&sr=8-1-fkmr0&ref=mp_s_a_1_fkmr0_1
Apparently Duplicolor refers to it as “hot rod” primer.
I'm a big boy now
Congrats! It's exciting when they first start going on their own!!!
would love to have this if I win it's in my manly wishlist.
VHT SP115 FlameProof Coating Satin Clear Paint Can - 11 oz. https://www.amazon.ca/dp/B000CPJLGW/ref=cm_sw_r_cp_apa_i_5QsRDb69PXSFK
awesome information, thanks!
is it this product: http://www.amazon.com/Dupli-Color-FP101-General-Purpose-Sandable/dp/B000B6DG7C/ref=sr_1_1?s=automotive&ie=UTF8&qid=1334844429&sr=1-1
thanks for brainstorming this. may try this if no better option;
http://www.amazon.com//dp/B002H9CMCQ
making a fitted cover over this is not an option - too much work.