(Part 2) Best body repair tools according to redditors
We found 718 Reddit comments discussing the best body repair tools. We ranked the 288 resulting products by number of redditors who mentioned them. Here are the products ranked 21-40. You can also go back to the previous section.


![AUTOSCRUB 6" Fine Grade Foam Pad for DA Polisher [AS-006]](https://m.media-amazon.com/images/I/516TK80JM0L.jpg)


Repairing that damage will require specialized tools if that plane is to be made skyworthy again. I wouldn't go at it with anything less than one of these:
https://www.amazon.com/Pops-dent-Dent-Repair-Popper/dp/B0015D88U0
You'll need to buy a sprayer designed to foam such as this one:
iK FOAM 1.5 PUMP SPRAYER | 35 oz | Professional Auto Detailing; Dry / Wet Foam Spray https://www.amazon.com/dp/B01BLGDAVW/ref=cm_sw_r_cp_apa_ALTZAb8QBYC3N
This should do the trick.
Sorry this kinda became a small essay, I hope it's not too verbose but there's a lot of ground to cover if you're just starting out.
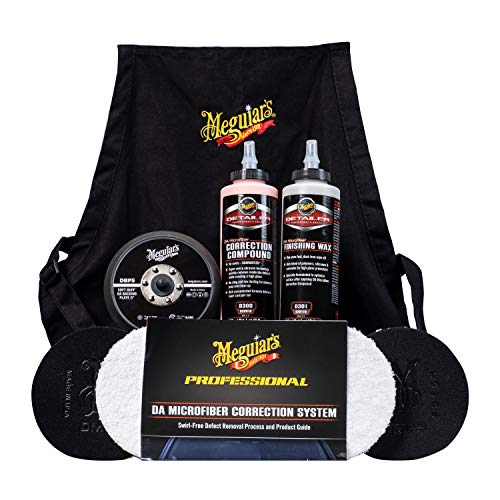
I got kinda shafted started out since I had a pretty damn oxidized, single-stage red Miata as well as a pretty-ok silver 2015 Subaru, so I kinda had to build two kits at a time since I didn't want to cross-contaminate my systems. I ended up getting a bunch of orange and white Lake Country CCS foam pads along with playing around with some Meguiars foam cutting pads for the Miata and the 5" Meguiars Microfiber Correction Kit for the Subaru and anything else that's clear coated.
I'm using the same Harbor Freight DA, but with the 5" backing plate that comes with the Meguiars kit. If you don't get the Meguiars kit, at the very least you need to order a new backing plate for Harbor Freight DA because the one that comes with it is well-known for being really shitty. I prefer using a 5" system as it fits a better into tighter spots and gives you noticeably more correction power over a 6" at very little perceived loss of coverage efficiency because of the smaller size.
Of note: I've only had poor experiences with microfiber pads on single-stage since they seem to clog up so fast, but they've been great on clear coat. Most people won't face this issue, but I figured I'd put it out there.
Pair whatever kit you build/get with the 36-pack of microfibers from Costco and you'll be in business in no time.
I did pick up a 6.5" Lake Country CCS red wax/sealant pad since I like to apply Collinite 845 to everything I care about. I intentionally picked an oversized pad for my backing plate because I'm only using my DA at the minimum speed possible (like 1.5 on the HF DA) to spread a thin layer of wax efficiently. If you crank up the speed by accident or out of curiosity, yes, the 6.5" pad does tend to get totally out of control in a hurry, so don't do that haha.
Don't forget your pad brush, or if you have an air compressor, you can use that to blow out your pads (Youtube it). Some method of cleaning pads is absolutely mandatory and for some reason, this is often overlooked or skipped by many people starting out.
Whatever you get, I like to have at least 2 cutting pads on hand and I'll make a conscious effort to switch halfway through the car, usually hood/driver's side for one and trunk/roof/passenger side for the other. I usually can get through a car with just one polishing pad but it's reassuring to have a backup on hand in case the pad explodes or I'm an idiot and set it down on the ground or something. I'm also kinda anal about cross-contamination of LSPs, so I now have a dedicated Lake Country red CCS pad for each LSP I use.
Finally, I know you're looking for advice on pads, but I ended up getting a bottle of the Meguiars DA Microfiber Polish since I prefer to lay down my own LSPs and the lifespan of the DA Finishing Wax was iffy, especially compared to the Powerlock+ and Collinite 845 combo that I use on cars I actually care about. The DA Finishing Wax is now reserved for my detailing side-hustle (which is currently helping fund putting a turbo in my Miata), since it saves quite a bit of time over separate polishing and waxing.
How To: 2 Step Polish - Ammo Review on the bottom - forgot to add that to the title! Sorry guys
Here is a video showing some before/after polishing action:
https://www.youtube.com/watch?v=vBdT_v60QXk&feature=youtu.be
This guide may be a bit sparse and even less pictures than I would have liked, but I was fighting for sunlight and doing my best to get as much done as I could.
Porter Cable 6 inch DA Polisher
Meguiar's Microfiber Cutting Pads 5.5 inch
Meguiar's Microfiber Cutting Pad 3.5 inch
Uber Blue 5.5 inch finishing pad
Flex Light
Ammo Paint Restoration Regimen
IPA Mixing Guide: http://www.autogeekonline.net/forum/hot-topics-frequently-asked-questions/31183-how-mix-ipa-inspecting-correction-results.html
Ammo Paint Restoration Regimen Review:
Leveling Fluid
Color: Coconut creamy whitish...you get it. Look at the picture
Smell: Oranges! Yes, oranges. Never smelled a polish before that didn't smell like chemicals
Cutting power: My car is in pretty good shape, so it had no problem taking out love marks and random light scratches. I will have to update this on a more neglected paint job. However, I found that I did NOT have to go back over and areas. Lucky me. 9/10.
Dusting: Hardly any. I am very very very happy about this.
Oil Residue: Again, hardly any. It was also very easy to remove. I found myself not needing IPA, instead a light spray of ONR QD took it right off.
Amount used: after priming the pad fully, I found that I could get away with doing a whole panel with that primed pad and by only adding a few extra dots after. 9/10 (basically saying not much was used)
Overall: 9/10 - easy to use, smells great, doesn't dust, great cutting power. Sounds like something I'd want in a polish!
Jeweler's Polish
Color: Light blue
Smell: Green apple. Awesome!
Finishing power: 9/10. Took away micro marring no problem
Dusting: none
Oil residue: hardly any. hnnnnggg
Amount used: comparable to the Leveling Fluid. Very little was needed after the initial prime - and unexpected glob that came flying out of the bottle >:0
Overall: 9/10 - same as above. smells great, easy to use, user friendly. Thank you Larry!
Overall Regimen observations: Love it!!! They were so easy to use and had no learning curve on them whatsoever. The smells were awesome, the fact that there is next to no dusting is just amazing, the little polish residue. Cons? I can't find any. They are reasonably priced I think, especially coming from Ammo. I could easily see Larry bumping the price up if they catch on. 9/10 would buy again
Go to Amazon and order this (I like Meg's products),
This should run you about $345 for everything and have you setup to take care of your car for a long time. You can find a 20% discount code online for harbor freight to bring the price down $55 for the DA. Go to home depot and buy a couple buckets and you will be good to go.
Edit: To add, I went to Lowes and bought a cheap inline sprayer for my hose and it works fine for foaming up the vehicle, plus it only costs $5.
Edit2: If you are going to downvote me please post why you don't like my recommendation.
SV is the lowest trim of the 2014-2015 Mazda 3s https://www.cars.com/research/mazda-mazda3-2015/trims/
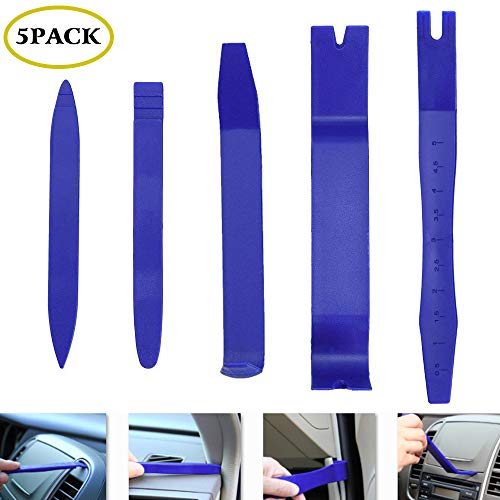
For OP, can't say for certain about the fog lights (or anything else really), but it's super easy to remove the covers and check to see if the fog light wiring is there - either something like a panel pry tool or a screwdriver with electrical tape wrapped around to prevent scratching.
> First, how do I patch holes in the plastic
You really can't unless you want to repaint the entire SNES case. You'd need to use Bondo, fill it, sand it, prime, then paint ... or spend $6 on a new shell and be done with it.
>how do I smooth out the edges of the holes I cut.
Use a fine grit file. You gotta remember that filing eats away at material too. Make your initial cut smaller than you need, then file it to the proper size.
Yup, it's this one. It's pretty straight forward; use lots of lubrication, light pressure and keep the speed at one or two. On particularly contaminated cars it's worth it to wipe it down every now and again and re-lubricate, since it pulls the dirt into whatever medium you're using to lubricate. That's one reason I really like ONR with it; you can see the dirt particles being suspended in the ONR droplets.
https://www.amazon.com/gp/product/B076ZJMHB1/ref=oh_aui_detailpage_o00_s00?ie=UTF8&psc=1
Like I said be super careful with it, you can easily burn the paint. I had no prior knowledge about this stuff til the other day after watching a few Youtube vids
Honestly, I don't think there is a huge difference between them. I would worry more about having the proper tool kit to be able to install them properly. You can either assemble this yourself or try to get a kit with everything needed. Here's what I bought but you can just go by Amazon reviews.
You can always try car scratch remover but the severity of the scratch is going to depend on how repairable this is. https://www.amazon.com/GP21005-Windshield-Polishing-Removes-Surface/dp/B001RAQGXC
Wrong one. You want the "Foam" one: iK FOAM 1.5 PUMP SPRAYER | 35 oz
https://www.amazon.com/iK-SPRAYER-Professional-Detailing-Spray/dp/B01BLGDAVW/ref=sr_1_2?keywords=iK+Foam+1.5&qid=1550003703&s=gateway&sr=8-2
The other is just a sprayer.
You should easily be able to find a 2-quart hand pump sprayer: Amazon link to a $9 cheapie, but I wonder if it will foam properly. If not there are more expensive versions that specifically mention foam, like this $33 one from The Rag Company
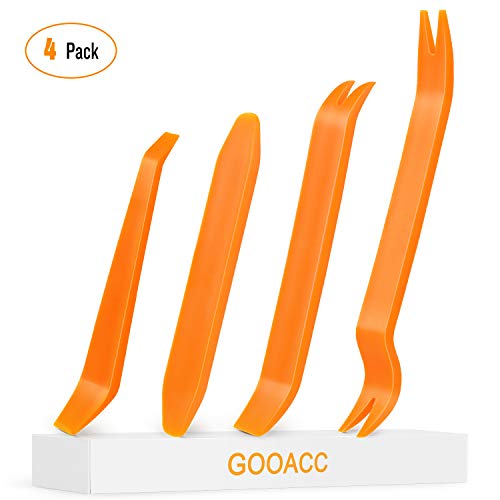
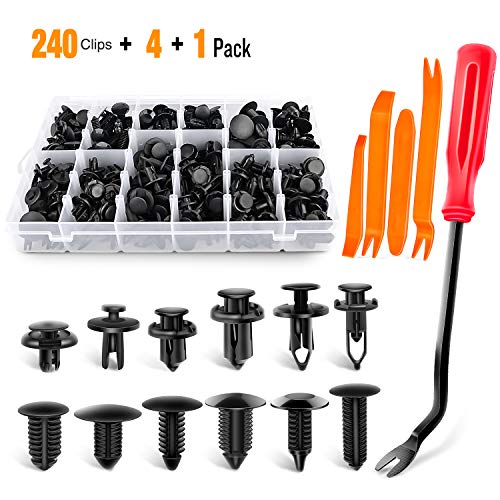
Retainer clips
GOOACC 240PCS Bumper Retainer... https://www.amazon.com/dp/B07L6FJGR4?ref=ppx_pop_mob_ap_share
I bought these but seems they’re out of stock from amazon since I paid $3.77 for it at the time.
I just use bondo. this stuff
http://car-part.com/
You just have to find a junkyard that's willing to sell you one.
Basically you need the following:
APIM
GPS Antenna (Amazon - https://www.amazon.com/gp/product/B07R6NL5G6/ref=ppx_yo_dt_b_asin_image_o02_s00?ie=UTF8&psc=1)
USB Port Replacement (https://www.amazon.com/gp/product/B07HC84V8D/ref=ppx_yo_dt_b_asin_image_o02_s00?ie=UTF8&psc=1)
The USB Port isn't REALLY necessary for Android Auto, but it's cheap and easy to change, the 2016 doesn't actually need an adapter like the older fusions, it's just drop in and the new ports also enable CarPlay. if you decide to keep the old one, it will throw an error on the screen every time it starts but will still work with Android Auto.
Pry Tools - https://www.amazon.com/gp/product/B00D7XNQHG/ref=ppx_yo_dt_b_asin_image_o03_s00?ie=UTF8&psc=1
A 7mm Socket Wrench
A ForScan Compatible ODB2 Programmer: https://www.amazon.com/gp/product/B07PHNX57D/ref=ppx_yo_dt_b_asin_image_o04_s00?ie=UTF8&psc=1
And you'll have to reprogram the Car Computer. You can google that and there's a dude out there that will give you a ready made programming file for $50.
The APIM you can find by looking for a model number xxxx-14G370-xxx
There are also 14G371 Modules, and I believe those are the Navigation enabled ones but I'm not 100% sure. I don't particularly care since I just use Android Auto anyway and that just uses the Phone GPS.
Once you have all the parts it's honestly not too hard of a swap. I was scared of doing it but I think it was definetly worth it. the Sync 3 system is SOOOO much better than Sync 2 just because the way it interacts with the phone is excellent.
Also one thing I DID notice is that while all Fusions from 2017 onwards have Sync 3, it looks like the 2017 APIMs (and 2018 too maybe) are stuck on Sync 3 version 3.0 where as the newest one is 3.2 or so. It doesn't matter for Android auto strictly since that's updated on the Phone, but if Ford does decide to add features, we likely won't get them. Not without an APIM swap, and there are some reported issues with swapping newer APIMs.
Care about your leather the proper way.
There quite a few youtube tutorials about that.
You will need to gather a kit of 3-4 different chemicals (cleaner, softener, cream, wax), two brushes (soft and hard) and some sponges. Then clean your leather every or every other month. Make sure to give enough time between every stage of the cleaning (i.e. apply cleaning solution, buff in, wait 15 mins, buff out).
Should take about 45 minutes once you get a hold of it. You can do like 3 pairs in these 45 mins.
Or take to shoe repair store and and ask 'em to do a deep cleaning on 'em.
Here is the kit I bought on Amazon for this purpose (hope it is OK to post product links here - I get no kickback from these):
https://smile.amazon.com/gp/product/B00NVK34T0/ref=ppx_yo_dt_b_asin_title_o00_s00?ie=UTF8&psc=1
https://smile.amazon.com/gp/product/B002A92UZC/ref=ppx_od_dt_b_asin_title_s00?ie=UTF8&psc=1
https://smile.amazon.com/gp/product/B002J8379C/ref=ppx_od_dt_b_asin_title_s00?ie=UTF8&psc=1
https://smile.amazon.com/gp/product/B00ZGQ4HKW/ref=ppx_od_dt_b_asin_title_s00?ie=UTF8&psc=1
https://smile.amazon.com/gp/product/B00KGG7QQY/ref=ppx_od_dt_b_asin_title_s00?ie=UTF8&psc=1
https://smile.amazon.com/gp/product/B00J7RL0ZQ/ref=ppx_yo_dt_b_asin_title_o08_s00?ie=UTF8&psc=1
https://smile.amazon.com/gp/product/B07CSVPP23/ref=ppx_yo_dt_b_asin_title_o08_s00?ie=UTF8&psc=1
https://smile.amazon.com/gp/product/B07CSYPC3X/ref=ppx_yo_dt_b_asin_title_o08_s00?ie=UTF8&psc=1
https://smile.amazon.com/gp/product/B00MS1IDIA/ref=ppx_yo_dt_b_asin_title_o08_s00?ie=UTF8&psc=1
I used the meguair's foam applicator thing and applied by hand.
These... https://www.amazon.com/dp/B002J8379C/ref=cm_sw_r_cp_apa_i_SS3SCbNBFXZTR
I just got this guy and he's workin' great!
​
https://www.amazon.com/ShineMaster-Maxshine-Blue-Action-Polisher/dp/B07MZMWTKX/ref=sr_1_fkmrnull_1?crid=1MQL54Z54NDP3&keywords=shinemaster+m8s&qid=1554496608&s=gateway&sprefix=shinemaster+%2Caps%2C170&sr=8-1-fkmrnull
https://www.amazon.com/Glass-Polishing-Types-Windshield-Scratches/dp/B001RAQGXC
Not OP, but Bondo is pretty common. However, you should wear gloves and a respirator when working with it.
I personally prefer wood filler. It's cheaper, and safe to work with your hands.
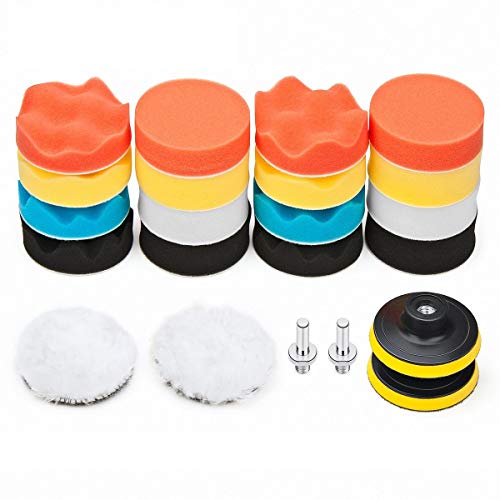
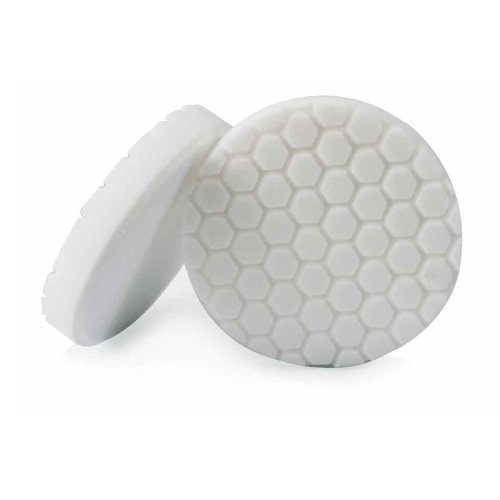
You can look into these pads instead:
Chemical Guys BUFX_102HEX5 - Hex-Logic Medium-Heavy Cutting Pad, Orange
Chemical Guys BUFX_106HEX5 - Hex-Logic Finishing Pad, Black
Chemical Guys BUFX_104HEX5 - Hex-Logic Light-Medium Polishing Pad, White
Colors are not the same across brands, but these Hex-Logic are the same.
Multiple pads are used when your pad gets full of product or too dirty. You can clean them, but this slows you down and sometimes I feel safer using a newer (fully cleaned) pad. I often use 2 pads for compounding and 2 pads for polishing.
I have had the 9500ix for 4+ years now and it's been working pretty well. It's saved me from at least 4-5 tickets. As /u/13489194 stated below though, there are newer models out there that work better and are worth a few extra bucks. What I've noticed in the past few years is a very annoying increase in false positives with all the new cars that have side radar blind spot detection.
I mounted mine up on the top of the windshield a few inches below the headliner and to the right of the rearview mirror. It doesn't obstruct my view, and only prevents the passenger sunshade from fully opening a bit.
What you want to do is get a hardwire cable, a tap-a-fuse, and a trim tool and just gently pull on the trim and use the plastic trim tool (aka bone tool) to push the wire in behind the trim, down the A-pillar, and then into the fuse box. Not sure about the S6, but on my A5, it made it easier getting it down the A pillar to remove the "Airbag" plastic cover piece that covers up a Torx screw, and slightly unscrew the cover over the pillar so you can more easily fish it in.
Hardwire that bad boy into a fuse that is only on when the car's ignition is on, such as the Homelink Garage door opening or something. I dunno about the S6, but on my A5 there are fuse panels on both the passenger and driver's side. I put mine on the driver's side so that I can mount the little mute button assembly w/ the included velcro right below the headlight switch assembly. I can easily and quickly mute it as well as see the flashing light while driving.
Some stuff I'd recommend:
Escort Max 360 Detector
Hardwire adapter unit (no need for the bluetooth one as the Max has bluetooth built into it now)
Tape a fuse
Trim tools to fish the wire in
Other common tools you'll need would be a screwdriver, Wire Crimper/Stripper, and a socket to punch down the ground connection in the fuse panel.
Also, you'll want to be running the Waze application when driving as it will notify you of police locations reported by users. That's saved me a lot, especially when they aren't using radar or are using laser.
Alright i didn't really take any good photos of my work flow so ill do my best to put it in writing for you.
So Before I assembled any of the pieces they all got sanded in 120, 320, and 400 grit sandpaper. Then I joined all the blade pieces together with 3DGloop and filled as many of the joint cracks I could with Acryl Spot Putty. Then it was another pass with 320, and 400 Grit paper before the Blade got a coat with Filler Primer as for the handle I did the same sanding process for what I could but using a little 3DGloop and its included brush you can use it in light amounts as smoothing agent as well which helps a ton for the hard to reach areas on the handle. Then I joined all the parts together with 3DGloop, and applied more spot putty and sanded again. I gave the whole thing a few more coats of filler primer before going for color. I started color with gold hit those 3 spots, and after they dried I masked them off and hit the handle with purple. Once that dried i masked the handle and hit the blade with silver. For the "Dirt" in the cracks and recesses and the handle trim I used brown and light blue acrylic paint. I also used a little bit of Rub N Buff to give the blade a bit more of a shine. Once i did all that I shot it with come clear coat to lock it all in. Wow that was mouthful hopefully that helps you.
This: http://www.amazon.com/BMW-82-11-149-389/dp/B000PA00XM
Hook your iphone/ipod into the aux input.
You might need these: http://www.amazon.com/Leegoal-Panel-Dashboard-Dismantle-Installer/dp/B00D7XNQHG/ref=sr_1_3?s=automotive&ie=UTF8&qid=1452048112&sr=1-3&keywords=panel+removal+tool
And watch this for how to install it: https://www.youtube.com/watch?v=0qmXdnFdjwk
I found this job to be pretty easy. I installed in the back of pocket below the radio. I can tuck the wire away that way.
Everyone is right about the maintenance. Stay on top of it or it will get out of control.
I carry a Cruz Tools mid-sized kit (5 hex, two wrenches, a sparkplug wrench thing, a screwdriver with Philips and straight bits, zip ties, etc), an electric air compressor, and a tire plug kit. These all fit under my seat. I also have a good tire pressure guage, a flashlight, extra fuses, and a mini Leatherman in my fairing pockets.
After the low - side on a ride I was leading (not me) and given I ride in remote areas often (e.g. Gifford Pinchot National Forest), I'm adding a pretty hefty first aid kit this weekend, along with taking a wilderness first responder course very soon.
Yes, I'm over cautious. I would point out that every bit of my kit was used during last summer's riding, except for the plug kit, mostly in the service of others. I also prefer long touring in twistes to short rides.
EDIT: added links
probably a mopar specific fastener. But I'm sure you could replace with one of these
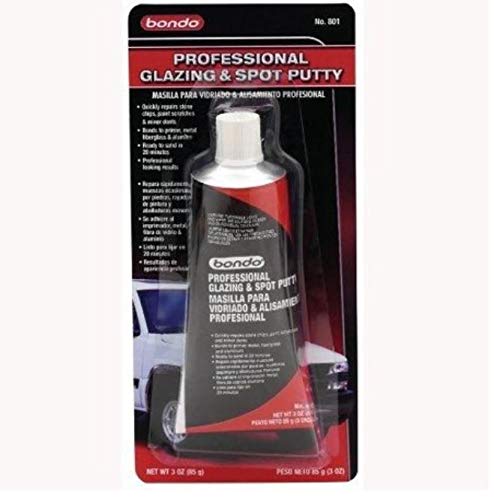
Get yourself some glazing and spot putty to fill any small to medium glue lines. A tube of the stuff will last a good long while, it’s cheap and fills small imperfections quickly, sands really easily and you can find it just about anywhere. I typically get mine from Walmart in the auto section near the bondo or at just about any auto parts store for around $10 US.
https://www.amazon.com/Bondo-801-Professional-Glazing-Putty/dp/B004BYKICG/ref=mp_s_a_1_3?keywords=glazing+putty&qid=1573106939&sprefix=glaz&sr=8-3
When I sand prints I start with an 80 grit, then a filler primer, then sand with a 120 to smooth it all out. Then a couple coats of a regular sandable primer, sand 240 grit, then base coat and final colors.
any big gaps from where things are glued together I use this stuff https://www.amazon.com/3M-05096-Acryl-Green-Spot-Putty/dp/B004BZOTQQ
you may need the iron remover eventually but you can wait to buy it until you actually need it.
FCC and Microfiber cutting pads
yeah, compare 10 gallons at $19 vs 10 gallons of invisible glass or whatever which is almost $200.
they are more expensive but you will have a better surface for waxing when you don't have a soap that has wax in it.
d101 may not be strong enough to get the wheels totally clean, that's where d143 will come in. d101 will be good on plastics though.
cleaner for the plastics would be d101. leather you could do leatheriques pristine clean for cleaning and the rejuvinator for protecting. they're expensive though, you might look into optimum leather conditioner or adams
I would buy this,
http://www.amazon.com/Slime-COMP03-12-Volt-Inflator-Gauge/dp/B000ET9SAU/ref=sr_1_12?s=automotive&ie=UTF8&qid=1448980138&sr=1-12&keywords=slime+air+pump
and
http://www.amazon.com/Slime-2040-A-Tire-Plug-Kit/dp/B000ET9SAA/ref=sr_1_5?s=automotive&ie=UTF8&qid=1448980761&sr=1-5&keywords=tire+plug+kit
In the plug kit your really buying those T handles, there nice and wont try to fold into your hand or away from it while you plug the tire. You can buy I think it's 40 plugs stand alone at walmart for around 5 bucks if you find yourself plugging tires that much.
Then buy a metal jar of rubber cement because that little tube is going to work once and get rock hard.
http://www.amazon.com/Slime-1050-Rubber-Cement-oz/dp/B003V9UU66/ref=sr_1_5?ie=UTF8&qid=1448981382&sr=8-5&keywords=rubber+cement
Any will do that's just what I found on amazon.
That's the same air pump I own except I dont think mine says 300 PSI on the side, I would be extremely surprised if it could actually reach 300 psi but I can tell you for a fact it'll air a tire up in a less than 10 minutes.
http://www.amazon.com/Battery-Cigarette-Lighter-Lengthened-Extension/dp/B00JOY6U7U
This may be worth while as well incase your cigarette lighter doesnt work or blows a fuse you could just clip directly to your car battery.
As far as a phone charger I just mean use a phone charger that plugs in your cigarette lighter, I dont trust those little power bricks. Even if your car battery is "Dead" as in it wont turn your engine over and clicks, it's probably still got more than enough juice to charge your phone and make a call for help.
I would splurge for these nice jumper cables
http://www.amazon.com/Cartman-Booster-Cable-Gauge-Listed/dp/B00VHE76GE/ref=lp_15719941_1_1?s=automotive&ie=UTF8&qid=1448981135&sr=1-1
That comes up to 132 dollars in my amazon cart, I think that puts you much better off than the alternative you were looking at at a reasonable price.
I lived on a dirt road for years, Holes in my tires were Common and I don't think I ever broke out my spare.
Eh, actually that's not that deep, but it is where I thought it would be. The poppers work on a flat surface here's one of the kits. You're headed to a body shop. Sorry, man/ma'am.
Or just live with it. That's not something I would change, but then I live in a congested urban area where everyone parks on the street and every car has dings much worse than that.
I've started using this spot putty instead of wood filler. It's a lot easier to spread thin and get into small gaps.
I actually use a nanoskin autoscrub for almost the entire car except for some tight spots. i can clay the whole car in less than an hour. you just have to rinse it often so you don't mar the paint with contaminants. i rinse it every panel or two.
https://www.amazon.com/gp/product/B0090IRKUG/ref=oh_aui_search_detailpage?ie=UTF8&psc=1
Check the door cards. Popits have a known problem of clattering if they move freely. I used to use Door Strip Caulk.
I posted this years ago, but it applies to all vehicles. https://www.reddit.com/r/MINI/comments/1m2i2d/fix_that_annoying_door_rattle_with_just_a_panel/
As far as I can tell, that should work. Here's a polishing pad I found for you.
http://www.amazon.com/Chemical-Guys-BUFX_104HEX5-Hex-Logic-Light-Medium/dp/B0041MVQ4M/ref=pd_sim_auto_3?ie=UTF8&refRID=0CANS5K5E2Z6T3P56XXN
I would buy this DA:
http://www.amazon.com/PORTER-CABLE-7424XP-6-Inch-Variable-Speed-Polisher/dp/B002654I46/ref=sr_1_1?ie=UTF8&qid=1407291588&sr=8-1&keywords=porter+cable+7424+xp
This backing plate:
http://www.amazon.com/Astro-Pneumatic-4607-Velcro-Backing/dp/B003CH3Z8W/ref=pd_bxgy_hi_img_y
3 of these:
http://www.amazon.com/Chemical-Guys-BUFX_102HEX5-Hex-Logic-Medium-Heavy/dp/B0040MI9H0/ref=pd_sim_hi_6?ie=UTF8&refRID=0NJJRSFYV45X3EWAS3NA
2 of these:
http://www.amazon.com/Chemical-Guys-BUFX_104HEX5-Hex-Logic-Light-Medium/dp/B0041MVQ4M/ref=pd_sim_auto_1?ie=UTF8&refRID=11TRQVZC789CNJ8EXED1
1 of these:
http://www.amazon.com/Chemical-Guys-BUFX_106HEX5-Hex-Logic-Finishing/dp/B0042TTIYO/ref=pd_sim_auto_2?ie=UTF8&refRID=08HEKJEWM7H5NRFGAQNH
Pretty sure they are all compatible with the backing plate.
I would apply a small drop of oil to the clamp before you use it. If it happens again, you can try filling in the groove with a metal epoxy like this.
I'm no u/thebearjew333, just some passerby. Hey, you could maybe cut up some thin tin or aluminum sheet and J B Weld putty together the petals.
ok, 2 other options -
Something like this, but obviously find one the right size for the hole you're going to drill.
https://www.amazon.com/Premium-Sealing-Closed-Rubber-Grommets/dp/B074WNWMD5
And/or:
https://www.amazon.com/3M-08578-Black-Strip-Calk/dp/B000PEZ1L4
I've used both methods before with good results for almost the same application as what you're doing.
Use this type of JB Weld, 5 bucks and your troubles are over
Remove the bolt, clean the area, set the jb weld, leave it for 1 hour, drill and tap. Grind off external excess. Done
Unfortunately, I don't. I was in the same boat as you last year and hunted around and eventually just decided to live with the dent.
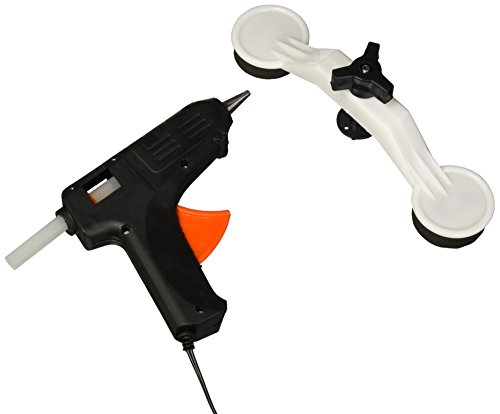
That said, Amazon has these suction based dent fixers for $10-ish. They may work for some but not all dents. That may be worth a try.
[edit]
here's one example : http://www.amazon.com/Vacuum-Suction-Handle-Dent-Puller/dp/B003NU0EM8/
WILL REMOVE UNSIGHTLY PUSSY DINGS OR YOUR MONEY BACK!!!
This stuff is unbelievable. So effortless to put on by hand. After a good wash, it took maybe 40 minutes to do the car with moderate detailing experience. It leave a jaw dropping shine and you'll use maybe 1/8 of a bottle on a single coat of a mid sized sedan.
Currently $18.92 at Amazon with free shipping. Plus a 4 pack of applicator pads for 8 and some change and a 24 pack of microfiber towels for $10.
$35 bucks for a shiny car for 3+ years. You just can't beat it.
M105
M205
Polisher: http://www.harborfreight.com/6-in-57-amp-heavy-duty-dual-action-variable-speed-polisher-69924.html
Pads: http://www.amazon.com/gp/product/B009902YHO?keywords=white%20cutting%20pad&qid=1452705830&ref_=sr_1_1&sr=8-1
(Used this for both the compound and the polish, as I don't yet have the orange foam pad. Maybe that's the problem lol?)
When you say spot putty, do you mean this ?
This
If you're looking for a budget polisher you could try one of these
ShineMaster Maxshine M8S Blue Dual Action/DA Polisher: 900W, Orbit Diameter Size: 8mm https://www.amazon.com/dp/B07MZMWTKX/ref=cm_sw_r_cp_api_i_Xj2WCbJ8KK4R3
Having some success with this. I used the included pad and a battery powered drill (only thing I had) per the instructions and it has drastically reduced the swirls.
I also tried Griot's garage 3 inch glass pads with the polish from the kit and although the Griot's pads are coarser than the ones with the kit, they seem to work well when used with a random orbital polisher.
Griot's 6 inch glass pads are softer than the 3 inch ones and seem to work well also. There are still some small scratches, but the swirls can no longer be seen from a distance which was my biggest concern. Now I need to find a way to buy more of the polish itself since I have everything else. I might try ceriglass instead and will be sure to share the results.
MAINTENANCE WASH QUESTION
I just completed my fall detail, spending 12 hours total power washing, compounding, polishing, glazing, sealing, waxing, and detailing every nook and cranny.
I had a good run of 2 weeks without rain. Every 2-3 days I would use quick detailer to keep things looking good as new. Sadly it will be raining all week, so I will need to do a wash after things clear up. I have a couple questions:
Thanks!
Is it a big shallow dent like "I hit it with my knee." or a small sharp dent like "I hit it with a pot handle."? For big area dents use a suction puller, an auto parts store will probably loan you one. For sharp dents try a heat gun and can of air duster.
you can actually put velcro tape on it and then you can use any pad. i polished a car with one of those and some chemical guys pads and it worked fine.
https://www.amazon.com/gp/product/B00006IC2T/ref=oh_aui_detailpage_o03_s00?ie=UTF8&psc=1
https://www.amazon.com/gp/product/B009902YHO/ref=oh_aui_detailpage_o02_s00?ie=UTF8&th=1
Here's a handy chart for aggresiveness of polish/compounds: Autopia Care Care Chart
You could try meguiars microfiber cutting pads if you still need a stronger cut. Remember that you want to use the least aggressive method first. No reason to take extra clear if you don't need to.
Looks awesome man! As a note for the next one you can use bondo or a similar filler to get those seams smooth. I like this one: https://www.amazon.com/3M-05096-Acryl-Green-Spot-Putty/dp/B004BZOTQQ/ref=sr_1_1?ie=UTF8&qid=1485847259&sr=8-1&keywords=acryl+green
P.S. Not an affiliate link, just trying to spread the good workd of acryl-green....smells better than bondo and isn't soylent green
Sure thing! It wasn't too difficult, just took some learning. I did a lot of watching tutorials on YouTube and mistakes were made. So first, the items I bought were viynl wrap and chrome edge trim. You don't have to do glossy black and silver chrome, but that's what I chose. A wood grain would look nice if you have a tan interior.
Vinyl: https://www.amazon.com/gp/aw/d/B007EEU58W/ref=ya_aw_od_pi?ie=UTF8&psc=1
Chrome trim: https://www.amazon.com/gp/aw/d/B0194BMZEY/ref=ya_aw_od_pi?ie=UTF8&psc=1
Also helpful! Trim pry tools: https://www.amazon.com/gp/aw/d/B00D7XNQHG/ref=ya_aw_od_pi?ie=UTF8&psc=1
First, take a look on YouTube for videos on removing the radio, because that will tell you how to remove all the trim pieces. Make sure to be VERY careful, the plastic clips can break easily. For the side trim pieces, also look on YouTube or the internet on how to remove those. They'll do a much better job at explaining than I will!
Applying a wrap is fairly easy, it just takes patience and a little bit of skill. I recommend doing easy pieces first before more complex pieces like the vents and top center console panel (which was super hard!). Look on YouTube for tutorials on how to wrap, there are some great videos out there explaining the process. You'll need a heat gun or hair dryer if you want to really do a solid job, as well as a razor. For the vents, I trimmed around the small indent by the opening and carefully cut around the indentation by the wheel that opens and closes them. It's very tricky to do but if you're careful it will look pretty nice.
The Chrome edge trim is pretty easy to do, just shove it into any gaps that you want to line with trim. If you're careful with how much you use, that one pack should cover most of the car. Try not to go too excessive or it will look silly. Some panels will be really hard to force the trim into, so I recommend some sort of smooth tool like the butt of a screwdriver to press it into place.
All in all it took me about 2 days to do all the work, and I had to purchase a new piece of trim from a junkyard because I was careless. Don't rush it, take your time, and make sure you educate yourself as much as you can (YouTube videos/guides)
If you have any questions, let me know! Also, send me a picture of your car if you end up doing it, I'd love to see how it turns out!
I started with Hex Logic pads but honestly didn't find them that effective or that durrable. These days I use Meg's MF pads for compounding and Meg's Soft Buff for polishing. They are much easier to work with and give me a better result. As far as polishes go, you can't really go wrong with M105/M205 combo or if you want an AIO HD Speed is pretty good as well.
I like my PEI shiny so the bottom of prints have a more glass-like appearance. After a couple of years on this .06 in thick PEI bed, I had made a few gouges and scratches on the bed that were affecting my print quality. A quick go over with drill mounted polishing sponges and Novus plastic polishing compound really shines the surface right back up.
This stuff works great on your worn car headlights too!
The Maxshine M8S is also a solid entry level polisher, and you get color options https://www.amazon.com/dp/B07MZMWTKX/
Glad to hear I'm not the only one with this issue. Did you ever come to know what it is or what exactly causes it? Does it continue to happen after initially cutting or polishing? Because for me, that was the first time the paint ever got a half decent polish AFAIK. How much of a difference is there with the D151 as a "reconditioning creme" and a standalone polish?
You're right on that about how others treat their cars, but I never have and never will resort to that kind of barbarism on any cars under my watch haha.
I quickly gave up on the HF pads too. I got a CG cutting pad, polishing pad and a manual finishing pad yesterday, but didn't have a chance to use them today. Is it worth upgrading the backing plate too? I haven't given that a second thought since it doesn't sound like it'd make a difference like a pad would. Also going to be getting a clay and lube set tomorrow.
Link for a dent removal product on Amazon
Strip Caulk could be another option.
https://www.amazon.com/3M-08578-Black-Strip-Calk/dp/B000PEZ1L4
I'm restoring a car that used something like it for oem tail light gaskets. Still pliable after more than 50 years.
I just shoved one of these in there, been fine ever since
https://smile.amazon.com/GOOACC-Retainer-Plastic-Fasteners-Chrysler/dp/B07L6FJGR4/ref=sr_1_3?keywords=plastic+rivet&qid=1566440542&s=gateway&sr=8-3
Not at all, you do want to get a trim removal tool for the headliner portion. It's not required, but does make it much easier.
Something like this: https://www.amazon.com/GLISTON-Removal-Panel-Vehicle-Installer/dp/B07JVP1MRS/ref=sr_1_5?keywords=trim+panel+tool&qid=1568436223&s=automotive&sr=1-5
Sand it out, repaint it, bolt it down with some strip caulk (like this https://www.amazon.com/dp/B000PEZ1L4/ref=cm_sw_r_cp_apa_i_NH6ZCbHMZQ2RG ) to seal around the holes and keep leaks from happening
I use this one because it records forwards and backwards. They’re super easy to install if you’re just plugging into the 12V outlet. I mounted it on the passenger side of the rear view mirror, so it’s hidden from my view. The cord is fully tucked away under the ceiling, run down the door under the weather stripping, looped under the glove box, and finally plugged in. Completely invisible except at the outlet. Do yourself a favor and get a nice plastic tool like the second link.
https://www.amazon.com/gp/aw/d/B0742J69SQ?psc=1&ref=ppx_pop_mob_b_asin_title
https://www.amazon.com/GOOACC-Dashboard-Dismantle-Installer-Tool-4PCS/dp/B00D7XNQHG/ref=mp_s_a_1_4?keywords=car+pry+tool&qid=1565954709&s=gateway&sprefix=car+pry&sr=8-4
https://www.amazon.com/iK-SPRAYER-Professional-Detailing-Spray/dp/B01BLGDAVW/ref=sr_1_1?s=automotive&ie=UTF8&qid=1523078705&sr=1-1&keywords=ik+foam
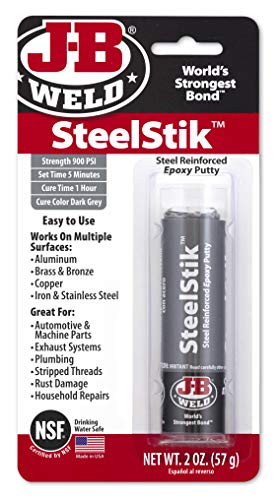
JB Weld or equivalent 'paste' type epoxy.
Clean all the metal really well and follow up with a wipe-down of rubbing alcohol. Mix up the 2-part epoxy and use it like modeling clay to surround and cement together the parts you don't want moving.
This stuff is pretty permanent though. The legs will likely never move again.
https://www.amazon.com/J-B-Weld-8267-SteelStik-Reinforced/dp/B00RN7CT2U/ref=sr_1_1?ie=UTF8&qid=1510517068&sr=8-1&keywords=steelstik
https://www.amazon.com/GOOACC-Retainer-Plastic-Fasteners-Chrysler/dp/B07L6FJGR4
Yeah along the floor and interior panels. Get those plastic pry tools to help you get it behind the panel:
https://www.amazon.com/GLISTON-Removal-Panel-Vehicle-Installer/dp/B07JVP1MRS/
I had a similar problem and this saved the day for me: http://www.amazon.com/Pops-dent-Dent-Repair-Popper/dp/B0015D88U0
It is cheap and easy to try, so you don't have much to loose.
http://www.amazon.com/Vacuum-Suction-Handle-Dent-Puller/dp/B003NU0EM8/ref=lp_15707121_sp-atf_title_1_2/179-9948535-7894465?s=automotive&ie=UTF8&qid=1394216981&sr=1-2
ALBUM (also at end of post)
I recently purchased a Rupes LHR15 MkII bundle from Detailers Domain during their Father's Day sale and I've been afraid to use it. But I didn't want my ~$400 purchase just sitting there... so I went and bought a Hex Logic Waxing Pad and the Nanoskin Autoscrub for DAs. Yesterday, I did a wash, clay and wax on my personal car and today I did the same for my girlfriend's car. I haven't started polishing yet because I'm still hesitant and have some questions. I've watched Junkman's video series on polishing and I've read the written guide here in the Wiki, but they don't go over specifics (e.g. how do you polish the A pillars, around badges, lower front bumpers [i.e. around and inside the Miata's 'smile']).
I messed up on my own car because the clear coat is failing and I underestimated the Nanoskin. I've clayed with regular clay and the small nanoskin sponge and nothing happened to my car. However, when I went over the same area with the Rupes w/ Nanoskin, it went dark grey. At first, I thought it was just super dirty but I stopped. After inspecting.. it looks like I may have ripped off loose clear coat haha.... I wish I had someone that I can talk to in person and ask questions on the fly as I work.
 
What surprised me the most was how loud the vibration sound is and it makes me question whether it is normal. Using the Nanoskin, it almost sounds like a deep vibrating sound and sometimes a slapping sound. Is that normal? I have watched youtube videos and it's hard to distinguish if the sound I hear is the same in the video.
 
Also, do you guys clean your backing plates? The Rupes manual says that the machine is lubricated enough for lifetime use, but the backing plate has turned black/dirty from the shroud. If I clean this backing plate, would I need more lubricant? Should I do the washer mod to this LHR15 MkII?
 
Do you guys have any recommendations for which pads to use with the Rupes? I read some posts saying that the Rupes is too aggressive for the Hex Logic pads, but I decided to try it out anyway. Those posts were right, at least in my experience. I've only used the waxing pad twice and it's starting to rip (please see the album at the end of the post). I was thinking of going for Lake Country Pads
 
I recently watched AMMO's video on how to wash pads, and I've applied that to my own waxing pad and Nanoskin pad (water in sink + hand scrub, put back on DA and spin at highest speed to get water out, rub against hand + towel while running it on polisher). How do you guys wash your pads?
 
Here's an album of everything mentioned above.
Yeah, that would work to get some stuff out, but to shine them, albeit temporarily, spend the $12 and get this:
https://smile.amazon.com/3M-39008-Headlight-Restoration-System/dp/B001AIZ5HY/ref=sr_1_4
If you have an electric drill, this is more fun and you can do more parts of your car:
https://smile.amazon.com/Foam-Drill-Polishing-Inch-Buffing/dp/B076ZJMHB1/ref=sr_1_23
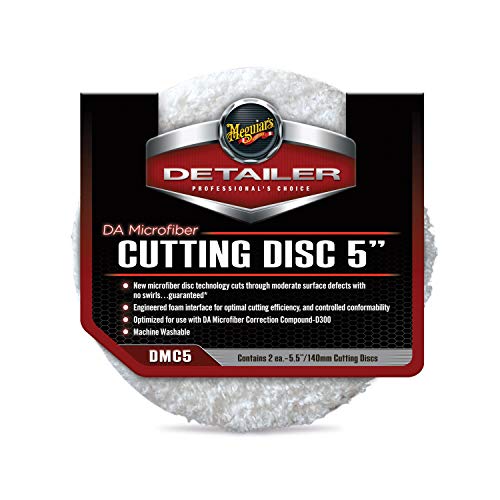
Going to order this pack of 2 - Meguiar's DMC5 DA 5" Microfiber Cutting Disc, 2 Pack https://www.amazon.com/dp/B004VG0N38/ref=cm_sw_r_cp_api_i_y58ODb2PE5GR4
These will cut more and be more effective than my current Uro-Fiber pad? Since the clear is hard should I be finishing and polishing using the Uro Fiber or a softer white foam? I ruined my Orange pad with the wrong brush/cleaning too aggressively.
You can pick up a Dual-Action polisher from Harbor Freight for about $50 with a internet coupon, and this Meguiar's kit comes with all the pads and compounds you need to do a full compound, polish, and wax. It is very newbie-friendly, and there is plenty of youtube videos and podcasts full of advice on how to use it from the actual engineers that developed it. Seriously, if you can't get all the swirls out with this system, it's because wetsanding first is probably needed.
http://www.amazon.com/Meguiars-DMCKIT5-Microfiber-Correction-System/dp/B00CJ69F2W
Don't use M101/M105 or anything that aggressive unless you're sure you know what you're doing.
Meg's Microfiber Correction Kit is good. Consider ScratchX for minor correction, and Ultimate Compound for a more effective single stage correction. UC can also be used as a glass polish. M101/M105 will require a second stage of correction/polish like M205 after it.
https://www.amazon.com/Bondo-801-Professional-Glazing-Putty/dp/B004BYKICG/ref=mp_s_a_1_6?adgrpid=56307205656&gclid=EAIaIQobChMIm9za99m54wIV8R6tBh03EQUVEAAYASAAEgIhgPD_BwE&hvadid=274667213166&hvdev=m&hvlocphy=1024543&hvnetw=g&hvpos=1t1&hvqmt=e&hvrand=14879666796726518634&hvtargid=kwd-302421650345&hydadcr=25631_9900539&keywords=3m+bondo&qid=1563289163&s=gateway&sr=8-6
Assuming you've got a glass tank and the scratches are light enough that you can't catch your fingernail on them, I just went through the same thing. I successfully reduced the appearance of my scratched tank using a cordless drill and a automotive glass repair kit (cerium oxide) - $25 on Amazon. I need to sit down and share the post, but I basically did what Joey does in the second half of Vid 1. I cleaned thoroughly with vinegar first, spent about 5 mins buffing each section, and rinsed clean with vinegar again. It's hard work holding the drill steady to apply even pressure, but I found the result to be worth it. I'll post my pics tomorrow if I can find time.
Vid 1.
Vid 2.
Vid 3.
Don't use autozone towels, the last ones I bought from there were 100% polyesther and can't absorb anything. I have a pile of these useless towels now and they're going to the garbage.
All links provided are Amazon.com links:
Get a towel that's 80% polyesther, 20% polyamide. It will absorb better. Meguiar's Supreme Shine towels. Get a bunch of them. Also a Water Magnet Towel for drying. When drying, you should get the microfiber / water magnet drying towel damp first, it will absorb more water much more easily.
Cheapest and quickest way to remove swirls, my recommendation is Meguiar's Ultimate Compound and some Gold Class wax. This kit has everything you need for $25 including the microfiber towels and foam pads: http://www.amazon.com/Meguiars-G3300-Brilliant-Solutions-Restoration/dp/B004EB12FS
Expensive but quickest and most effective way, get Meguiar's DA microfiber correction kit http://www.amazon.com/Meguiars-DMCKIT5-Microfiber-Correction-System/dp/B00CJ69F2W and buy the porter cable polisher. Also I recommend getting the Meguiar's car correction kit I linked above with this. You'll get excellent results.
Separate all your towels. Use dring towels only for drying, wax towels only for waxing, polishing towels only for polishing, and Glass towels (rainX) only for glass.
I use these when applying the M105:
Chemical Guys BUFX_102_HEX5 Hex-Logic Medium-Heavy Cutting Pad, Orange (5.5 Inch) https://www.amazon.com/dp/B0040MI9H0/ref=cm_sw_r_cp_apap_JnEUTcXh1t2xd
Then I switch to these to apply the M205:
Chemical Guys BUFX_104_HEX5 Hex-Logic Light-Medium Polishing Pad, White (5.5 Inch) https://www.amazon.com/dp/B0041MVQ4M/ref=cm_sw_r_cp_apap_3CuEdXSpOPLHj
To be honest, I can't tell much of a difference before and after using the M205. I can definitely see improvement after using the M105 but yeah, last week I did my front driver's side fender and it took me five hours. Sad face.
Sometimes I think I should have bought a flex as I understand they work faster. I went with the PC because I understood it to be extremely safe. Being my first time and all, I wanted to be safe rather than burn my paint. But yeah, five hours/panel is ridiculous.
They already have that. You're too late haha Nanoskin (AS-006) AutoScrub 6" Fine Grade Foam Pad for DA Polisher https://www.amazon.com/dp/B0090IRKUG/ref=cm_sw_r_cp_apa_W0axxb0ATKDTW
Hope this helps! This isn't an exhaustive list of the best professional products but some of the best top rated affordable and highly rated by forums and high subscriber YouTubers. I'll try to answer questions as they come. Thanks for all tye comments and positive/critical feedback. Promise is all helps in the end!
Wash/Decontamination
Wheels/Tires
Compounding/Polishing
Finshing Wax/Protectant/Plastic & Trim Restorer
Interior/Glass Cleaners
Convertible Fabric Top Cleaner/Protectant/Sealer
Microfiber Cloths/Car Drying Microfiber Cloths/Buffing Microfibers/Brushes/Etc.
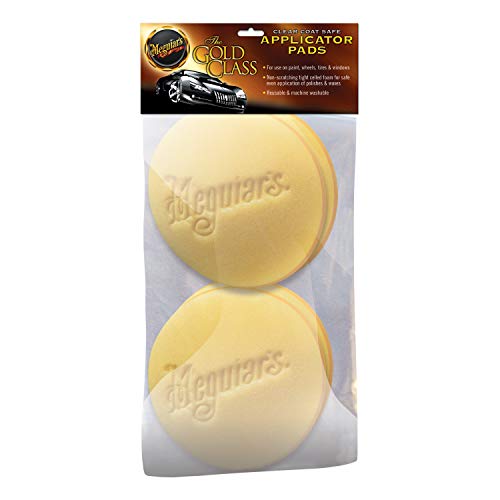
I hope I'm not late, I agree with code-sloth but I would add these http://www.amazon.com/Meguiars-W0004-Foam-Applicator-pack/dp/B002J8379C/ref=redir_mobile_desktop?ie=UTF8&keywords=meguiars&pi=AC_SX236_SY340_FMwebp_QL65&qid=1450380856&ref_=sr_ph_1&sr=sr-1 instead of using the microfiber towels because I would find a little hard to get the collinite off the applicator pads, I can only imagine the microfiber towels and the smell of the collinite doesn't go away either; you should use them to remove the collinite.
Epoxy Putty like this stuff:
https://www.amazon.com/J-B-Weld-8267-SteelStik-Reinforced/dp/B00RN7CT2U/ref=sr_1_3?crid=199IQ14EQEDAE&keywords=jbweld+metal&qid=1563404542&s=gateway&sprefix=JBweld%2Caps%2C133&sr=8-3