Best body repair upholstery & trim tools according to redditors
We found 138 Reddit comments discussing the best body repair upholstery & trim tools. We ranked the 40 resulting products by number of redditors who mentioned them. Here are the top 20.
We found 138 Reddit comments discussing the best body repair upholstery & trim tools. We ranked the 40 resulting products by number of redditors who mentioned them. Here are the top 20.
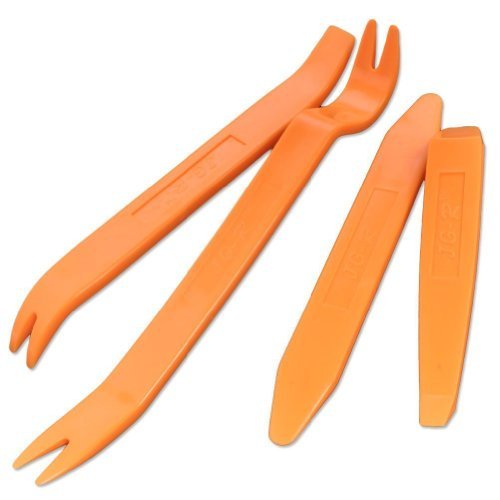
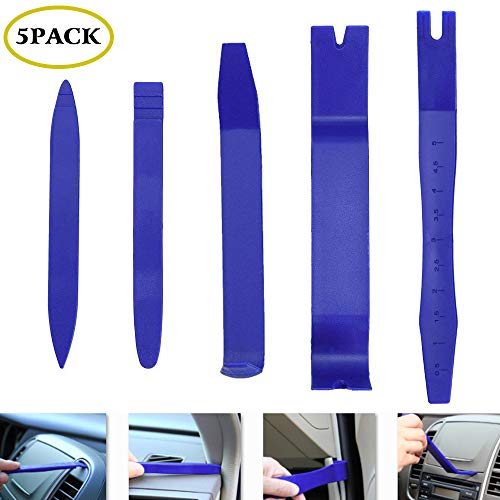
![Tresalto Auto Trim Removal Tool Set [Non Marring and No Scratch] Auto Trim Kit for Easy Removal of Car Door Panels, Fasteners, Molding, Dashboards and Wheel Hubs, 5 PCS](https://m.media-amazon.com/images/I/51jtkhWw09L.jpg)


I installed the parts myself over the weekend and it took me around 2.5 hrs. Grab a set of trim removal tools (around 10USD) , follow the service manuals closely and it's really not that hard.
You can get the parts today from Med Center Mazda on Ebay for $166.94USD - 15% off = $144.50USD (with coupon PICKFAST on EBay App ONLY), shipping free anywhere in the US.
https://www.ebay.com/itm/Mazda-Apple-CarPlay-and-Android-Auto-Retrofit-Kit-00008FZ34/192679403436?epid=11023459215&hash=item2cdc965fac:g:Qb4AAOSwz6pbtnlR:rk:1:pf:0
https://www.amazon.com/Tresalto-Auto-Trim-Removal-Tool/dp/B01L8GHB7O/ref=pd_lpo_vtph_263_bs_img_1?_encoding=UTF8&psc=1&refRID=PSYC82VRJR5KKEY3Z4EH
https://pages.ebay.com/promo/2018/1121/70319.html?_trkparms=%26clkid%3D8318549494442163000
From one Subaru owner to another. Hope this helps.
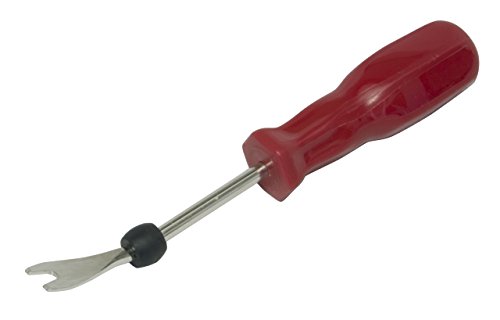
Lisle 35260 Plastic Fastener Remover https://www.amazon.com/dp/B0002SRCMO/ref=cm_sw_r_other_apa_6WpMyb4EWP6PR
Clipsandfasteners Inc 15 Subaru Bumper Engine Cover Fender And Grille Clips https://www.amazon.com/dp/B00588T81Q/ref=cm_sw_r_other_apa_IYpMybKHCF30R
Yesterday I took some time and blacked out the chrome on my headlights and installed Diode Dynamics Switchback C-Lights on my 2015 Premium. I think it turned out pretty well, as you can see from the before / after photos above.
It was pretty warm out and - while I left the headlights in the sun for a while before opening them - I didn't bake them and thought they came apart fairly (10 minutes / side) easily. Overall, the job took about 5 hours and I'd rate it a 6/10 for difficulty.
Total cost came out to be about $155, Rallysport Direct had a 10% sale so I got the boards and retro-rubber for $150, and got a $5 can of matte black Krylon paint + primer at Lowes. I also purchased some Frog Tape but didn't end up using it.
Some thoughts...
I'm not a huge fan of the turn signal connectors on the LED boards. I would have preferred the wires to be about 12" longer, and I ended up stripping a section of my (blue) turn signal wire, soldering, and then taping them (would prefer heat shrink tubing, but it worked) instead of using the vampire taps.
I also didn't use the (i think) T-10 connector. I couldn't find anywhere in the headlights that I liked to mount the drivers, and there wasn't a good place to run the wires out, so instead I removed the socket from the light, cut / stripped / soldered the white and black wires to the driver to the red and black C-light wires. Then, I used VHB tape to stick the driver boxes to the back of the headlights, and sealed the holes with some extra retro-rubber.
I should have bought the DRL harness, because even though I disconnected my DRL resistor I couldn't confidently find the place to connect it to the new C-boards for DRLs. I'm not sure if I got a different / newer model of C lights than most sites describe, because the red wire went from the driver board to the LED board. I may buy that and connect it in the future.
It was a bit tricky putting the C-light diffuser back in over the LED boards. The little clips wanted to scratch the newly painted surface, and the LED boards didn't fit as nicely as I thought they would. I eventually got them together, but I had to take them apart and touch up once.
Fingers crossed on fogging. If I do get fogging, I have a few silica gel packets that I'm going to stuff in there for a day or two to see if that knocks down the moisture.
The stock silicon sealant is pretty gross, but cleans up easier than I expected. Regular soap washes it off, but Goo-Gone might not be a bad idea.
Pulling the bumper was pretty easy. About a dozen clips / screws, and it popped right off without too much trouble. I put a mover's blanked down (which really wasn't necessary - you aren't going to mess anything up on the bottom of the bumper) and had enough play that I didn't bother disconnecting the fog lights and turn signals.
Either have a helper, or something reflective enough that you can see the lights sitting in the car. You'll want to test all the light settings, turn signals / hazards, and test with the handbrake on and off.
I did everything myself and didn't feel like a helper would have made things any easier.
Having a set of body panel tools and spudger kit is invaluable, both for this job and in general. Just spend the $20, it'll pay for itself.
I did scare myself taking apart the headlights - I hadn't removed the stock bulbs in my c-lights, and one of them broke on me. Fortunately it didn't damage anything. Make sure you remove those c-light bulbs first if you want to avoid a sphincter tightening surprise.
If I were to do it again, I would probably get some frosting paint and paint the c-light diffusers. It looks good, but I think I would prefer the full C-light diffuser to appear a bit whiter and even out the light from the LED boards. If I end up taking them apart again I will probably do this.
I didn't replace my halogen bulbs - the extra $100 or so it would cost to switch to LEDs wasn't in my budget. I'll probably do that not too far down the line, but for now it looks fine with the orange halogens. Since I disconnected the high beam DRL resistor, it'll only matter at night anyways. I thought about doing an HID retrofit, but again - budget.
I didn't replace the amber side-marker covers with tinted ones. They darken up a bit when you paint the chrome under them, but I wouldn't mind having them a shade or two darker.
It looks pretty good, a very worthwhile mod for one person to do in 5 hours for ~$150.
​
​
Hey guys I ordered them online from a parts place in Texas. Link here:
https://www.nissaninfinitiparts.com
I did both sides in the front. $58 each. I think about $13 to ship. The guys were really friendly and helpful, called me after I placed the order to confirm the parts and they showed up on time. The parts and shipping were cheaper getting them from Texas than getting them here in Chicago.
I also used these tools:
https://www.amazon.com/gp/aw/d/B00HNMLQAG/ref=ya_aw_od_pi?ie=UTF8&psc=1
Plenty of videos on popping the old ones out on YouTube. Took about 10 minutes.
No kit.
Wrap
Tools
And a heat gun I already had. The only issue I'm having is that there's air slowly forming in the corners like where the vents are, if I had to do it again id probably put some glue on those spots.
You should definitely invest in a door puller/clip puller and buy extra clips. I used a screwdriver the first time and it sucked so much this time around I spent 5 bucks at Walmart and picked up a door puller and it made life so much easier. You just work the head of the clip lose enough to fit the puller and it pops right out. Sadly I
don't have tips for the headlight tabs since I broke most of them off. Here's one similar to mine.
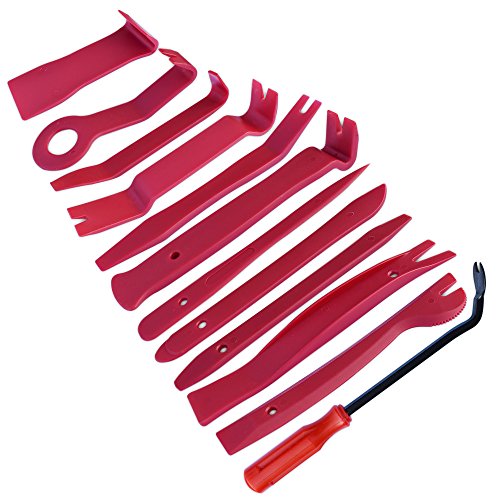
Tresalto Auto Trim Removal Tool Kit, Set of 5 Pcs https://www.amazon.com/dp/B01L8GHB7O/ref=cm_sw_r_cp_api_i_HoxDDbF7E3FPH
As others have said don't mess with A/C. It's one for the professionals really.
I've recnetly started servicing/repairing my car (also a Civic - but an 04 plate). No experience. Just YouTube!
It hasn't taken much in tools. Some have just made life easier too (I bought a trolley jack for £50 for example - could have used the emergency one that came with the car). Axle stands are about £15. You can get cheaper but I wouldn't scrimp on safety. Mind you I made wheel chocks out of some fence posts I had and they work great.
So far I've done
I'd happily change brake discs and pads if they needed doing. Air filter was new, but could have just popped one in when I did the throttle body. Pollen filters are easy too. Would be a bit more nervous about changing the brake fluid though.
​
Main dealer service (just an inspection, oil and filter change and topping off washer liquid) is now £170 with a major service at a whopping £275 just for adding filters and brake fluid. You can get much cheaper at independents, but still save a packet doing it yourself.
I've paid for all the tools in year one in labour costs. An oil filter and oil change next year would only cost me about £30.
Just make sure you keep records of everything you've done.
If you want to spend a bit more on Honda parts these guys have been good
Just realized how vague my reply was.
Weather mats - I was able to get "free" Honda ones from the dealer with my vehicle purchase. They're nice and fit well. I've heard great things about weather tech too. And don't forget one for the trunk too. Mine earned it's keep the first time a milk jug leaked. Super easy cleanup compared to carpet cleaning.
Interior leds - I used these plus this trim removal kit. Trim kit is a nice to have, you probably have something around the house to improvise with. For the actual install hit up you tube for "tenth gen Civic interior lights". It's a very easy job.
Also this was my first time having a car with a nice key fob so I got some of these to keep it from getting beat up. With auto lock, unlock, and push button start, it only leaves my pocket when I'm home anyway.
SV is the lowest trim of the 2014-2015 Mazda 3s https://www.cars.com/research/mazda-mazda3-2015/trims/
For OP, can't say for certain about the fog lights (or anything else really), but it's super easy to remove the covers and check to see if the fog light wiring is there - either something like a panel pry tool or a screwdriver with electrical tape wrapped around to prevent scratching.
I went OEM because some of the aftermarket installs can have weird gremlins. The downside is that it’s limited to the range of your existing keyfobs. That and the fact that if you have the limited with the smart key the car shuts off when you open the door. I totally get why it works that way, it’s a feature not a bug and it’s not big deal, but some people are annoyed by that.
https://www.amazon.com/gp/aw/d/B00OBVU92I/ref=ya_aw_oh_bia_dp?ie=UTF8&psc=1
I know that fits the 2014-2017 models, there is a similar part number (search PT398-891X0) for earlier 5th gen models.
I had to do some googling and digging in the 4Runner forums to find the install documentation, but I think it was this thread. The instructions covered everything, it was really very straightforward and was 100% plug and play. I have a limited and factory security so I didn’t have to install the hood switch, but that doesn’t look too hard either. If those aren’t the correct instructions let me know and I’ll dig it off of my hard drive.
You’ll want to get some plastic panel popping tools off of amazon, I got these. Other than that you’ll just need some common hand tools for the bolts, a screw or two, and cutting the tails off of the zip ties you install. Oh, they recommend a torque wrench for the knee airbag you have to take out (it’s less scary than it sounds, I promise). I had a cheap harbor freight one and it worked fine, but I don’t think it would be the end of the world if you just tightened them with your socket wrench by feel to what they were when you removed it, they don’t seem like they would be mission critical for the airbag to still work, they just hold it in place.
To get it to work with your keys, they have to be programmed. While there are apparently ECU programming tools one can buy, they seemed sketch and getting the techstream software to work was a fucking nightmare (I had to run a VM with Windows XP, and that’s before the driver nightmares) so I recommend just taking all the keys into a Toyota dealer, mine programmed them for the remote start for ~$60. It might even be cheaper if you time it with a maintenance visit. In the end my dealer wanted $750 to install the factory remote start but buying it myself and only paying them for the keys I spent half of that and 90 minutes of my time.
Oh, and the little barrel shaped plastic screw-head cover on the passenger kickplate in the bottom right of the passenger floorboard waaaay up in the back? It unscrews, it doesn’t pull off. Remember that, it took me like 10 minutes to figure that out. That was probably the toughest part other than getting the wiring harness actually plugged in, it was a tight fucking fit with all the wires.
It's car specific, but they generally have a few trim pieces that need to be removed, and then a couple screws. After that you just have to pop the clips that hold the panel in place around the outer perimeter. I'm sure you can find a video or tutorial on your specific car. That's what I did, just hit up YouTube.
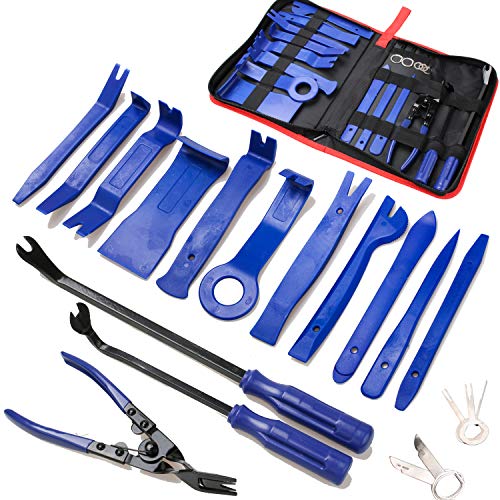
For tools, you'll need panel removal tools, like these. You can also grab these for helping with popping those clips. It's not necessary though. The first time I did it I just used a flat head screwdriver and torque xD Definitely not the easiest though.
Subwoofer, Amp, 8 gauge cable kit, trim removal set, Fuse taps, and T-Taps
As for a guide, I just used other guides online and pieced them together. Really should have made a well-documented one when I did it, but I installed mine 6 months ago. Already forgot certain things. Just remember to look up the speaker wire colors for the back speakers before you tap into them and know that putting the power cord through your firewall from your battery is going to be a total bitch :)
Also just to clarify, the fuse taps are for the remote wire going into the amp. I tapped the sunroof fuse as it shuts on/off with the ignition (I don't have a sunroof, but it shouldn't matter if you do or not). Also also, that black cable going into my amp on the left side is a bass knob that came with the amp. That's wired all the way up into my glove box, so it can be adjusted easily if it becomes too much. The wires with kit and everything are long enough that you shouldn't need anything else, and everything tucks away in the door seem guides so nothing is showing at all.
Found it on amazon. Searched for trim removal tools. It was like 22.99, came in two or three different colors
https://www.amazon.com/dp/B07HRNKY8P/ref=cm_sw_r_cp_awdb_t1_mbOtDbNYA5BKD
Retainer clips
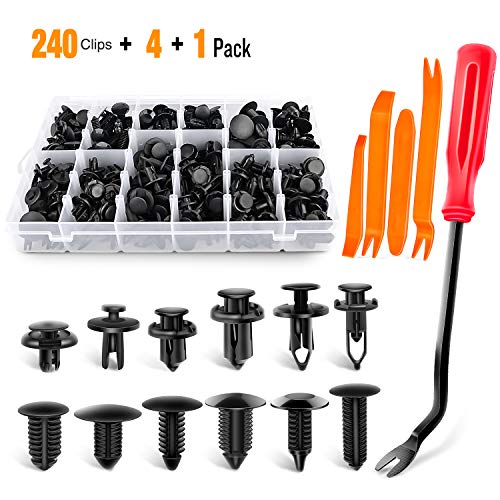
GOOACC 240PCS Bumper Retainer... https://www.amazon.com/dp/B07L6FJGR4?ref=ppx_pop_mob_ap_share
I apologize in advance for this long post. None of these are "must gets", but they are what I got for my 2016 Premium forester. I'm posting this for my own future reference as well as to help some people who are wondering what accessories might be good for their new forester. I highly recommend ordering from Jackie from Annapolis Subaru @ 443-837-1422 as she can get you some good prices on the subaru accessories as well as WeatherTech products! I saved on WeatherTech shipping costs (~$20) by ordering through Jackie and the warranty is the same as if I had bought them through their website.
Please note that some of these accessory links are for my specific car year, model and configuration. I have a 2016 Premium forester without eyesight (affects the Covercraft/heatshield sunshade - they also have eyesight compatible sunshades!).
Also, I personally didn't get my windows tinted, but I think that is something that you should seriously consider doing :)
Speaker kit
Tweeter kit
WeatherTech DigitalFit floorliner (1st & 2nd row)
WeatherTech cargo/trunk liner (without bumper protector)
Weather Tech TechCare floorliner and floormat Cleaner/Protector Kit
Gorilla mud flaps
Covercraft's UVS100 sunscreen - use promo code FREESHIP
Exterior Auto Dimming Mirror w/ Approach Lighting
Luggage Compartment Cover (manual rear gate)
Rear bumper cover
Auto-Dimming Mirror with Compass and HomeLink
Rear Seat Back Protector
Two Home Depot 5 gallon homer bucket
Heatshield sunshade (driver/passenger, second row, rear windshield, sunroof) - note that their website only shows only one side window (driver/passenger), you need to call in to ask them to add the second row side window ones - on my invoice it says part #1425S-A and #1425S-B
Antigravity Batteries AG-XP-10 Multi-Function Power Supply and Jump Starter (check eBay to see if priced cheaper)
Viair 77P Portable Compressor Kit (check eBay to see if priced cheaper)
Amazon stuff:
EZ Pass Holder for VA Flex
Aux cable
Stickershield (parking stickers, etc)
Dropstop seat gap filler (driver/passenger side)
Door panel removal kit (for speaker kit install)
Two grit guards
Microfiber Drying towel
Microfiber cloths (3 pack)
Car wash shampoo
Wheel brush
Resqme (window breaker/seatbelt cutter)
Wheel cleaner
Microfiber wash mitt
Reindeer costume for Christmas
Headrest coat hanger
Road reflective triangles
Duct tape
Odor eliminator
Tire air pressure gauge
OBDII Scanner (Bluetooth)
First aid kit
i replaced both of mine on my 05. they're like $40 shipped on ebay and amazon. you need to buy a pry kit like this to pop it off and then it slides right in.
https://www.amazon.com/KINGLAKE-Panel-Removal-Radio-Installer/dp/B00HNMLQAG/ref=sr_1_4?keywords=pry+kit&qid=1549632120&sr=8-4
https://www.youtube.com/watch?v=r5_-pebbIwk
Just did this over the weekend. As the others have stated, if you're not forceful, you shouldn't be breaking any clips. I could probably tear the dash apart again in about 15-20 mins if I had to do it again.
I do highly recommend purchasing a plastic auto trim remover kit. They made popping the panels and clips ALOT easier. I purchased this one: https://www.amazon.com/Tresalto-Auto-Trim-Removal-Tool/dp/B01L8GHB7O/ref=sr_1_4?ie=UTF8&qid=1539017376&sr=8-4&keywords=auto+trim+removal
The trim remover comes in handy when you're trying to pop the clips to loosen the old AUX hub unit. You can find details instructions on how to remove the TRIM panel in the TRIM PDFs here: https://my.hidrive.com/share/hsodpqja.l#$/Mazda_Firmware/1%20CarPlay-AndroidAuto%20INSTALL
​
IMO, I was more nervous about the software update than the physical labor of running the cables. I spent more time doing the software update because I needed a FAT32 formatted USB stick. That was a challenge since most of my memory sticks are 64gb+ and can only be formatted in exFAT/NTFS on Windows 10. Partitioning the 64gb drives to <32GB didn't really help me either, so I had to go purchase a <32GB usb stick and formatted to FAT32. Other than that, I was nervous about the installation failing, but it was also pretty straight forward. You need to complete the update ahead of the physical installation, so I'd recommend just getting that out of your way first.
I'm glad I did the installation myself, I don't know how neat the dealers would be in terms of dampening and tidying up the new cables.
When I removed mine I used of these plastic trim tools.
Shouldn't be too hard. Be sure to acquire new fasteners for the door panel before you take it apart and get yourself a panel tool like this to make it easier on yourself: http://www.amazon.com/Lisle-35260-Plastic-Fastener-Remover/dp/B0002SRCMO/
When taking the panel off the door take your time and make sure you disconnect wiring harness in there as you go so you don't accidentally overextend any of them. Once that's off it is usually a couple nuts/screws to remove the mirror. Then install the new one by putting the nuts/screws back on. Put new door panel fasteners on your door panel. Connect wires back up and press it back on. Be careful around the door locks if you have the pin type that pops up and down as the linkage can become bent; on some cars you can remove the pin by unscrewing it before you start but for other styles you can't remove it because it's square.
This guy is perfect for your setup. Gets you the 100w for your speakers and a respectable 350w for your sub.
Make sure you set your gains correctly. I'd leave some headroom on the speakers (target 90w) to avoid clipping.
This amp has fuses on it but you still need to fuse the power wire. Don't skimp on wiring!
This is a simple, clean, respectable little setup. I like it.
Oh yeah one last thing! I'd highly, highly suggest putting these on the shopping list if you don't have anything.
No one should have to go through that much trouble running wires.... There are cheap products out there that make all of this very... VERY... easy.
Long Guide https://www.amazon.com/Electrical-Threader-Cable-Running-Pulling/dp/B00NQ0N5D0
Short and Stiff guide https://www.amazon.com/gp/product/B002LE8CQM
Body tools: (I credit this as one of my best purchases ever) https://www.amazon.com/gp/product/B00HNMLQAG/
I used Goo Gone because it's gentle and I didn't want to risk stripping the clear coat or anything. Soaked it real good, waited 30 seconds or so and used one of THESE with a flat tip as a scraper. There were some very fine scratches afterwards. I could only see them with a flashlight and they came out easily with maguiers scratchx 2.0.
Since yours is newer the adhesive will probably come off easier than mine did.
I bought mine off of Amazon.
Some conservative criticism
Proper panel removal tools will make life a lot easier and can prevent possible damage.
That ground looked questionable. Hard to tell if any cleaning of the paint/primer over that stud was done prior to install. But the rear package tray isn't a terribly substantial part of the car to being with. You want to ground to clean bare metal that is a substantial structure in the car. With the battery having been that close the factory ground point should have been readily available. The negative terminal on the battery would have been acceptable too.
The routing of the bass knob cable was just lazy. It takes very little time and effort to remove the rear seat bottom and route the wire that way with the factory runs.
Other that that, not to bad.
From what I can see you're going to want to get a tool like this https://www.amazon.com/Lisle-Drake-Off-Road-Tools/dp/B0002SRCMO/ref=sr_1_1?ie=UTF8&amp;qid=1518368702&amp;sr=8-1&amp;keywords=clip+tool
at least if you plan on doing this a lot. Otherwise, a flat had screwdriver should be able to pry up the center section and then pull them out.
Taking the door apart with the right tools, usually panel or trim removal tools (this is what I got) can be less difficult than you might think.
I replaced mine last week on my 2011 Speed and it was a learning experience. And yes the new part cured the false alarm issue. Here's a video on how to remove the door panel but not the actuator. Thanks to Ally at Everything DIY:
https://www.youtube.com/watch?v=C9wlWCF3LrA
I didn't read the service manual beforehand but I wish that I had. If you have questions feel free to ask.
Edit: Take lots of pics as you disassemble the inner door panel. Ally's video does a great job documenting the outer door panel.
Edit 2: A set of door panel removal tools are nice to have in your tool arsenal. I bought a set at Harbor Freight but these are very similar:
https://www.amazon.com/Tresalto-Auto-Trim-Removal-Tool/dp/B01L8GHB7O/ref=pd_cp_263_1?pd_rd_w=szsGV&amp;pf_rd_p=ef4dc990-a9ca-4945-ae0b-f8d549198ed6&amp;pf_rd_r=KTHPKPSDHKF8K2Z5E9V0&amp;pd_rd_r=6d79417f-a761-11e9-ba93-c31e6dacbe46&amp;pd_rd_wg=8imSE&amp;pd_rd_i=B01L8GHB7O&amp;psc=1&amp;refRID=KTHPKPSDHKF8K2Z5E9V0
A hook and pick set is a must have as well:
https://www.amazon.com/GreatNeck-621-Piece-Hook-Carde/dp/B000CMDQ4S/ref=sr_1_25?crid=26BXJMU79EZG9&amp;keywords=hook+and+pick+set&amp;qid=1563237505&amp;s=automotive&amp;sprefix=hook+and+%2Cautomotive%2C191&amp;sr=1-25
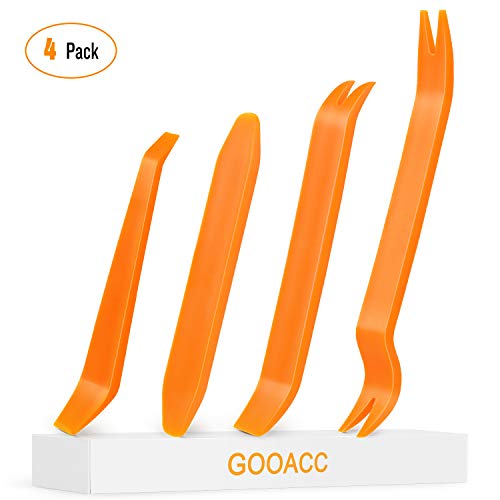
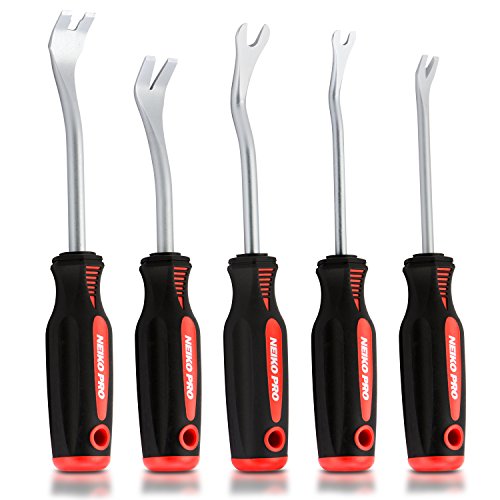
Something like Neiko 20596B Auto Trim Panel Removal Tool Set with Soft Grip (5-Piece) https://www.amazon.ca/dp/B004LE66RM/ref=cm_sw_r_cp_api_i_8iKxDbG8K4JZ4
They have cheap plastic ones but they’re cheap for a reason. These will do for an amateur and needs something decent.
Pry tool or Spudger tool.
https://www.amazon.com/Non-Mar-Spudger-Electronic-Wholesale-Quantity/dp/B015JKXLVK/ref=sr_1_33?keywords=plastic+pry+tool&qid=1566093172&s=gateway&sr=8-33
https://www.amazon.com/MICTUNING-Removal-Fastener-Removers-Strong/dp/B01KXN7LE6/ref=sr_1_5?keywords=plastic+pry+tool&qid=1566093172&s=gateway&sr=8-5
Yes, get a kit from Amazon (KINGLAKE Auto Door Clip Panel Trim Removal Tool Kits for Car Dash Radio Audio Installer Pry Tool 4Pcs https://www.amazon.com/dp/B00HNMLQAG?ref=yo_pop_ma_swf) or wrap a flat head screw driver with electrical tape. Start from the front clip on the left and work you way towards the back. The right side also has a front clip near the windshield and you have to work your way from back to front.
Also- get 3M clear auto tape to put under the mount feet(3M Clear Scotchgard Paint Protector Vinyl Wrap .5" Wide Tape Roll (.5" x 48") https://www.amazon.com/dp/B072KF647X?ref=yo_pop_ma_swf) to prevent scratching the paint.
I want to say I used a 3/8”bit to drill through the roof gutters. Bought new bits so they were very sharp.
I literally installed this on my 2019 4 days ago. Took about 20 minutes. Invest in a proper trim removal tool kit so you dont mess anything up
https://www.amazon.com/dp/B01L8GHB7O/ref=cm_sw_r_other_apa_i_wjVDDbG0Z2MHG
The key to pulling the door panel is to use the right tool.
You just slide it under the panel and slide it left or right to find the fastener. Then use it as a lever to pop the fastener loose. Works like a charm.
You can find it at any auto parts store for less than $10. A million uses beyond pulling door panels too.
I too have a 2015 RT Plus Shaker. And back in January I did the swap.
Here's the best price you'll find: https://www.stevewhiteparts.com/exterior-15-18-dodge-challenger-392-6.4l-front-lip-lower-chin-spoiler-mopar-factory-oem-1517lipspoiler?parent=1021
You'll find lower prices on other sites, but then their shipping is outrageous. That site has the lowest price when shipping is figured in.
and here's some other things you will need to get the job done
S&G Tool Aid 19400 Rivet Tool for Plastic Rivet https://www.amazon.com/dp/B007QV2E50?ref=yo_pop_ma_swf You will need at least 35 of these rivets. Just get the 100 piece package as you will waste some of them. They're cheap enough anyway.
PartsSquare 100pcs Fender Liner Fastener Rivet Push Clips Retainer for Chrysler Dodge Jeep https://www.amazon.com/dp/B01B2RC6WY/ref=cm_sw_r_cp_apa_TssiAbG4Q20VM
You may need some of these as well. It's not a bad idea to use them inside the wheel well so that future removals are much easier.
GOOACC Nylon Bumper Fastener Rivet Clips Automotive Furniture Assembly Expansion Screws Kit Auto Body Clips 8mm - 40PCS https://www.amazon.com/dp/B008427D88/ref=cm_sw_r_cp_apap_aldZPoDPnRuY6
You will also need some trim removal tools if you don't have them already. https://www.amazon.com/dp/B01L8GHB7O?ref=yo_pop_ma_swf
You will also need a deep 10mm socket like this and a long extension for the nuts inside the wheel wells. TEKTON 14191 3/8-Inch Drive by 10 mm Deep Socket, Cr-V, 6-Point https://www.amazon.com/dp/B000NY6RBY/ref=cm_sw_r_cp_apa_jCsiAb5EZJ4V3
here's Mopar's instruction for removing the front fascia: https://www.dropbox.com/s/lxe8evqu87l517u/Front%20fascia%20removal.pdf?dl=0 It's much easier to put on the new lip with the fascia off. And I'll warn you that getting the old lip off is a bitch.
The entire job will take about 5-6 hours if you're doing it by yourself. Can cut that time in half if you have someone helping you
https://imgur.com/a/uITIE46
https://imgur.com/a/uTlyeCv
Sure. You're going to be running a power wire from the radar, across the top of your windshield, under the top part of your A-pillar, into the rubber trim, down to the side access, and into the fuse box. You're going to put an add-a-circuit in to put two fuses in one slot and share a fuse that turns on when the car is in accessory mode so the radar is only on when the car is on. These are the steps I took:
Step 1:
Mount the radar where you want it to be. I have mine above my mirror so it doesn't obstruct my windshield view at all and isn't visible from outside the car.
Step 2:
Plug the power wire into the radar.
Step 3:
Feel the top of the windshield where the headliner meets it. There's a roughly 1/4" gap there. Tuck the power wire into this gap, working your way towards the driver's side door. The red line is the path your wire will be taking.
Step 4:
When you get to the edge of the windshield, use one of the trim tools to gently pry the A-pillar cover just enough to allow you to tuck the wire into it. Get the wire flat and then push the cover back into place.
Step 5:
Tuck the wire in between the rubber trim on the door, working towards the dash.
Step 6:
Use the trim tool to pry off the side cover. It has 3 clips and should come out fairly easily.
Step 7:
Remove dash drawer by opening it and then squeezing the sides towards the back.
Step 8:
Pull out a fuse, put it in your add-a-circuit, then put the add-a-circuit plug where you pulled the fuse from. The red arrow points to the fuse I chose.
Step 9:
Turn on the car and verify that the radar powers up and down with the car.
Step 10:
Velcro strap the excess power wire and tuck it out of the way.
Step 11:
Replace the drawer and side panel
Stuff to buy:
Power wire:
https://www.amazon.com/Escort-Direct-Power-Radar-Detectors/dp/B0003NN83U/ref=sr_1_2?ie=UTF8&amp;qid=1497974491&amp;sr=8-2&amp;keywords=9500ix+hardwire
Add a circuit:
https://www.amazon.com/Radar-Mount-Detector-Fusebox-Circuit/dp/B00UB9W92C/ref=pd_sim_107_2?_encoding=UTF8&amp;pd_rd_i=B00UB9W92C&amp;pd_rd_r=0K76S4T52SJB4ACR9V8M&amp;pd_rd_w=AupqD&amp;pd_rd_wg=ZwoBH&amp;psc=1&amp;refRID=0K76S4T52SJB4ACR9V8M
Fuse puller:
https://www.amazon.com/RoadPro-RPFP2-Fuse-Puller-Pack/dp/B00CSBUFOU/ref=sr_1_5?ie=UTF8&amp;qid=1497975152&amp;sr=8-5&amp;keywords=fuse+puller
Trim tools:
https://www.amazon.com/gp/product/B00HNMLQAG/ref=oh_aui_search_detailpage?ie=UTF8&amp;psc=1
one of these.
Yes, and easy enough to do yourself. It helps to have a trim tool to help pull panels and tuck wires in.
It did. I had an issue where it wasn’t opening all the way after install but support was very responsive via WeChat. They sent me a software update file to load onto a micro SD and pop it in the control box and that fixed it in literally 5 seconds.
Regarding the physical installation, make sure you have everything you need if you’ve never done anything like this before. Get a set of trim removal tools and a fish tape to fish wire through. There’s cheap options on Amazon, you don’t need anything elaborate. You’ll need a metric socket set and a T45 Torx bit. My kit was missing one of the small T tap connectors so I ordered these T1 connectors which I ended up replacing the other two from the kit because I like these ones better.
I’m still not 100% sure how you’re supposed to get that wiring up through the rubber tube in the trunk. Mine got stuck half way and I had to make a cut to free it and wrap it back up in electrical tape. Taking the connectors off the end would be my best guess if I were going to try it again.
It’s quite the project, and you may find yourself launching tools across the garage at a couple points, but in the end it’s very cool. It really should’ve been included in the premium build of the car IMO, especially after you see how simple it would’ve been as a factory option.
Here’s a few pics
I found some plastic pry tools on Amazon that say they are for removing trim and panels in car interiors. Is that what you’re referring to? like this?
You got to use like this-
Auto Trim Panel Upholstery Removal Tool Set, 5 Piece- https://www.amazon.com/dp/B004LE66RM/
You can also find them in auto parts stores
If you like to work in your car, get these tools, they are inexpensive and useful for removing door panels, interior/exterior trims, bumper clips and more without scratching or marrring anything.
If you follow the instructions in the initial post (which indicates for each part where to apply pressure and in which sequence) and get a trim kit (ex: Tresalto Auto Trim Removal Tool Kit, Set of 5 Pcs https://www.amazon.com/dp/B01L8GHB7O/ref=cm_sw_r_cp_api_i_nspyCbJVYTMH4), you will not break anything.
Headlights (you only need one pair. the cutoff is outstanding)
Map lights, license plate lights, running tail lights, and side marker lights
Reverse lights
Front turn signals (accessible from under the vehicle - pin remover and 10mm socket needed)
Rear turn signals (requires tail light disassembly)
Turn signal resistors (required to prevent hyperflashing; soldering is recommended)
Brake lights (requires tail light disassembly)
Daytime-running lights (pliers needed)
Trunk light and dome light
Get a piece of plastic (or a knife, with caution), stick it in a crevice, and just pry it off carefully. They pop off easily. These things are pretty useful.
This has always helped me out.
Lisle 35260 Plastic Fastener Remover
https://www.amazon.com/dp/B0002SRCMO/ref=cm_sw_r_sms_awd_RlSQwbH88JRR5
This: http://www.amazon.com/BMW-82-11-149-389/dp/B000PA00XM
Hook your iphone/ipod into the aux input.
You might need these: http://www.amazon.com/Leegoal-Panel-Dashboard-Dismantle-Installer/dp/B00D7XNQHG/ref=sr_1_3?s=automotive&amp;ie=UTF8&amp;qid=1452048112&amp;sr=1-3&amp;keywords=panel+removal+tool
And watch this for how to install it: https://www.youtube.com/watch?v=0qmXdnFdjwk
I found this job to be pretty easy. I installed in the back of pocket below the radio. I can tuck the wire away that way.
Everyone is right about the maintenance. Stay on top of it or it will get out of control.
I have had the 9500ix for 4+ years now and it's been working pretty well. It's saved me from at least 4-5 tickets. As /u/13489194 stated below though, there are newer models out there that work better and are worth a few extra bucks. What I've noticed in the past few years is a very annoying increase in false positives with all the new cars that have side radar blind spot detection.
I mounted mine up on the top of the windshield a few inches below the headliner and to the right of the rearview mirror. It doesn't obstruct my view, and only prevents the passenger sunshade from fully opening a bit.
What you want to do is get a hardwire cable, a tap-a-fuse, and a trim tool and just gently pull on the trim and use the plastic trim tool (aka bone tool) to push the wire in behind the trim, down the A-pillar, and then into the fuse box. Not sure about the S6, but on my A5, it made it easier getting it down the A pillar to remove the "Airbag" plastic cover piece that covers up a Torx screw, and slightly unscrew the cover over the pillar so you can more easily fish it in.
Hardwire that bad boy into a fuse that is only on when the car's ignition is on, such as the Homelink Garage door opening or something. I dunno about the S6, but on my A5 there are fuse panels on both the passenger and driver's side. I put mine on the driver's side so that I can mount the little mute button assembly w/ the included velcro right below the headlight switch assembly. I can easily and quickly mute it as well as see the flashing light while driving.
Some stuff I'd recommend:
Escort Max 360 Detector
Hardwire adapter unit (no need for the bluetooth one as the Max has bluetooth built into it now)
Tape a fuse
Trim tools to fish the wire in
Other common tools you'll need would be a screwdriver, Wire Crimper/Stripper, and a socket to punch down the ground connection in the fuse panel.
Also, you'll want to be running the Waze application when driving as it will notify you of police locations reported by users. That's saved me a lot, especially when they aren't using radar or are using laser.
Those clips look similar to the ones that hold the door panels down. They were also super flush. I was able to get them off by using a flat head screw driver to lift them just enough to slide in a trim tool under the flathead, remove the flathead, and pry the clip with the tool. The tool I used came in a set. You could also probably get them at an auto parts store. I bought mine online.
Tresalto Auto Trim Removal Tool Kit, Set of 5 Pcs https://www.amazon.com/dp/B01L8GHB7O/ref=cm_sw_r_cp_api_i_XWD4Db6B3XYBG
Location: NC, USA
Device: Nexus 6P 64GB (White)
Approved: 9/27
Ordered: 9/27
Ships: 9/28
Shipped: 10/3
ETA: 9/29-10/2
New ETA: 10/5
Replacement: Pixel XL (128 GB, Very Silver)
Process: Google Support
Warranty: Out of warranty, within Nexus Protect (have replaced phone once over a year ago under NP)
Status: Shipped! (10/3)
Battery drain for me. I was going to replace it under under NP (would've been second replacement), but found this thread first. They first said "well your phone is out of warranty but fortunately is still covered by Nexus Protect" but I told them the phone had to only barely be out of warranty and I wasn't go to pay the $70 for a known problem other people were getting free replacements for (I didn't mention the Pixel). They were very nice and gave me the "one-time exception" for a 128GB Silver Pixel XL which the representative said was the only color left and 'looked very nice'. Obviously pleased with how it turned out - credit to Google for really going above and beyond to make this right in the end, even though there's a lot of headache in-between for many.
Only worry is that they'll be upset with the scratches my screen has (small, made by sand) or say something like "there's nothing wrong with your phone" if maybe the 4th factory reset before I send it in fixes it. That remains to be seen.
Note: To anyone with a bend in the casing around buttons, just buy something like this and press it back in. If you are really worried it'll scuff (didn't for me) just use a paper towel barrier. These are also super handy to just have anyways. I had a bend near the lock button and another one near the volume button. Obviously I wouldn't bother if it is going back to Google though.
Rivets - Ginsco 102pcs 6.3mm 8mm 9mm 10mm Nylon Bumper Push Fasteners Rivet Clips Expansion Screws Replacement Kit https://www.amazon.com/dp/B076BMVZ8R/ref=cm_sw_r_cp_tai_aEMXCb5GHH8S3
Trim removal tools (good to have) - KINGLAKE 4Pcs Auto Door Clip Panel Trim Removal Tool Kits for Car Dash Radio Audio Installer Pry Tool https://www.amazon.com/dp/B00HNMLQAG/ref=cm_sw_r_cp_tai_LEMXCbFPMGXH9
As for the rivets I ended up replacing the “permanent” ones with the skinniest ones in the linked set. In the future I can reuse these if I want to.
Here's a decent video on removing the front bumper - https://www.youtube.com/watch?v=pUNlKmHgp9k
I watched and read as much as I could before diving into this. Let me tell you: it's fairly common sense once you do it. You almost could just go figure it out. I think I could have the bumper off in 15 minutes now that I've done it. Here's the main thing to know: once all fasteners are removed unclip the sides of the bumper outwards, the top upwards, and lastly the whole assembly forwards.
I saw the backs of the mesh grills and filed away the idea to change them some time later.
I have replaced two regulators in my WJ and can tell you this tip. when you buy the parts for the regulator also buy all of the clips that hold your door panel on and the tools to do it right too.
Here is a removal toolset that I wish I had when I did this work
Here are two tutorials that walks you through the process
Good
Better
Here is a listing on Ebay for the clips themselves
It's a very straightforward process, you'll be in and out in a couple of hours if you take your time and sort all of your parts like me, or less than an hour - with practice like CDN_Conductor says.
Come check out /r/grandcherokee in addition to this sub if you have additional questions specific to the WJ, like /r/cartalk we are a community of enthusiasts CRAZY about cars, only focused on the Grand Choerokee.
I swapped the factory JBL radio/cassette/CD changer for this Sony double DIN unit which is less than $250. https://www.crutchfield.com/p_158XAV1000/Sony-XAV-AX1000.html?skipvs=T
This is a basic CarPlay unit with no CD drive, no standalone navigation (but you get navigation in Carplay mode), it has Sirius XM support but not built in (has a socket on the back to plug-in the extra Sirius doodad).
Works fine for me. I think any double-DIN Carplay radio would work fine though.
I like this one because it has USB, volume knob and aux on the front and it's good value.
You can pay more and get fancier ones from various makers with features like DVD/CD drive, standalone navigation, wireless Carplay, HD radio.
I used 2 Axxess boxes recommended by the Crutchfield website to connect to the JBL factory amp and the steering wheel controls. I'm not sure retaining factory amp was worthwhile, and you may not have one. It would have worked fine with radio's built-in amp I think. Keeping the steering wheel volume buttons is nice. There is also an adaptor box that does both JBL interface and wheel controls from another maker.
I got a Metra dash kit which slots it in the dash perfectly.
I installed the radio's supplied Sony microphone instead of the Toyota one for Bluetooth calls.
I added a Pioneer backup camera :
https://www.crutchfield.com/p_130NDBC8/Pioneer-ND-BC8.html
The 2005 has a factory spot for a camera (because that was a Japanese option in 2005), so I put it there.
Initially I bought the head unit from Best Buy which meant they did free installation, but their installation was so bad that I do not recommend it. After one trip back to fix things they broke I realized that every time they fixed something they broke something else, so I finished the job myself.
Things Best Buy screwed up:
They installed the Sony mic nicely at windscreen top left, ran the cable to the radio, but forgot to plug it into the back of the radio. Doh! I had to take the whole dashboard apart to fix this.
They instlalled backup camera fixed to nothing, just hanging by cable pointing in roughly the right direction (I dremeled a groove for the camera cable in the original Toyota mounting plate which they had removed, glued plate back into place, attached camera to it properly).
They didn't reconnect the dashboard dimmer switch so dash lights could not be dimmed. I took the lower left dash apart and plugged it in.
They cracked two dash vent pieces. They paid for and replaced one but I later noticed they'd cracked the other and replaced it myself. This all required used parts from EBay.
They lost half the special flanged nuts that hold the hatchback handle piece on, which I noticed when it started to fall off (I got more from Toyota dealer for like $2 a nut. That's a lot for a few nuts but cheap for a repair.).
They lost various other dashboard nuts and bolts that I haven't replaced yet but dashboard is currently holding together.
&#x200B;
So in short, hire a competent radio installer or do it yourself carefully. Free installation isn't free, it turns out.
If you do any work yourself you will need a car trim removal kit like this one:https://www.amazon.com/gp/product/B01L8GHB7O/ref=ppx_yo_dt_b_search_asin_image?ie=UTF8&psc=1. It has various tools to take dash panels off without damaging them. I found YouTube videos to help me take the dash apart and properly remount the camera.
&#x200B;
It was a pain but the end result works great. The Sony's Bluetooth is much better than the factory BT for phone calls. Now there's music streaming over Bluetooth too. Radio works fine. Backup camera is great, comes up on radio screen when you engage reverse. In Carplay mode (with iPhone plugged into USB) it does great navigation via choice of map apps, Podcast app works fine, Siri will read text messages to me, great music support.
http://car-part.com/
You just have to find a junkyard that's willing to sell you one.
Basically you need the following:
APIM
GPS Antenna (Amazon - https://www.amazon.com/gp/product/B07R6NL5G6/ref=ppx_yo_dt_b_asin_image_o02_s00?ie=UTF8&amp;psc=1)
USB Port Replacement (https://www.amazon.com/gp/product/B07HC84V8D/ref=ppx_yo_dt_b_asin_image_o02_s00?ie=UTF8&amp;psc=1)
The USB Port isn't REALLY necessary for Android Auto, but it's cheap and easy to change, the 2016 doesn't actually need an adapter like the older fusions, it's just drop in and the new ports also enable CarPlay. if you decide to keep the old one, it will throw an error on the screen every time it starts but will still work with Android Auto.
Pry Tools - https://www.amazon.com/gp/product/B00D7XNQHG/ref=ppx_yo_dt_b_asin_image_o03_s00?ie=UTF8&amp;psc=1
A 7mm Socket Wrench
A ForScan Compatible ODB2 Programmer: https://www.amazon.com/gp/product/B07PHNX57D/ref=ppx_yo_dt_b_asin_image_o04_s00?ie=UTF8&amp;psc=1
And you'll have to reprogram the Car Computer. You can google that and there's a dude out there that will give you a ready made programming file for $50.
The APIM you can find by looking for a model number xxxx-14G370-xxx
There are also 14G371 Modules, and I believe those are the Navigation enabled ones but I'm not 100% sure. I don't particularly care since I just use Android Auto anyway and that just uses the Phone GPS.
Once you have all the parts it's honestly not too hard of a swap. I was scared of doing it but I think it was definetly worth it. the Sync 3 system is SOOOO much better than Sync 2 just because the way it interacts with the phone is excellent.
Also one thing I DID notice is that while all Fusions from 2017 onwards have Sync 3, it looks like the 2017 APIMs (and 2018 too maybe) are stuck on Sync 3 version 3.0 where as the newest one is 3.2 or so. It doesn't matter for Android auto strictly since that's updated on the Phone, but if Ford does decide to add features, we likely won't get them. Not without an APIM swap, and there are some reported issues with swapping newer APIMs.
https://www.amazon.com/gp/product/B06XF1F3CS/ref=oh_aui_detailpage_o01_s00?ie=UTF8&psc=1
&#x200B;
I bought this set, however the only two tools I used were the blue ones. I figured it was like an extra dollar from whatever else and you get a few more tools in case you ever need them.
&#x200B;
A hell of a lot more, believe me. Switching the screens out is really easy with a couple of inexpensive tools.
https://www.amazon.com/gp/product/B06XF1F3CS/ref=ppx_yo_dt_b_search_asin_title?ie=UTF8&amp;psc=1
https://www.amazon.com/gp/product/B00B0Q5M7Y/ref=ppx_yo_dt_b_search_asin_title?ie=UTF8&amp;psc=1
The procedure is pretty straight-forward as well:
https://mazda3revolution.com/forums/2014-2018-mazda-3-skyactiv-audio-electronics/216745-any-tweak-disable-touch-screen-all-togather-2014-mazda-3-a.html#post2408051
Links to everything I used for my installation:
https://www.amazon.com/gp/product/B01G8HUTCW/ref=ppx_yo_dt_b_asin_title_o00__o00_s00?ie=UTF8&amp;psc=1
https://www.amazon.com/gp/product/B00HNMLQAG/ref=ppx_yo_dt_b_asin_title_o01__o00_s00?ie=UTF8&amp;psc=1
https://www.amazon.com/gp/product/B076F1WXRC/ref=ppx_yo_dt_b_asin_title_o01__o00_s00?ie=UTF8&amp;psc=1
I ran the control wire (just 4-wire phone cord with RJ11 connectors) back to the trunk of the vehicle when I ran my 4-gauge amp wire (this video helped a lot). I used trim removal tools to pull all the panels for that initial run.
For the control knob, I first removed the side panel to the left of the headlight switch that's only visible when the driver's door is open, then opened and dropped the small storage box above the driver's knee area by pinching the sides and pulling down. Once those are open you can route the wire up under the steering column and over to the gas pedal. I then followed the install manual for the Apex garage door button which were great. Just one note - when you get the shift boot off, all you need to do is push up from the underside of the buttons to dislodge them - don't try to remove the whole piece around the shifter, as it appears to be bolted somewhere to the rest of the console, contrary to their instructions. Here are pics of the final installand customization of the button module to accommodate the ACR1 control knob.
I used something like this http://www.amazon.com/gp/product/B00HNMLQAG
An old credit card will probably work fine... I'd cut it to make it narrower.
I bought a cheap automotive pry tool set from Amazon for a couple of bucks. These are the ones I purchased: https://www.amazon.com/gp/product/B00HNMLQAG/ref=oh_aui_detailpage_o00_s01?ie=UTF8&amp;psc=1
To take the driver's side panel off, I shimmied one pry tool at each end of the panel that runs perpendicular to the door, and they popped out. After that, you need to pull the window switches out. I couldn't get the clips with my fingers, so I popped them out with a pry tool.
The passenger is a little easier IMO. You need to pry out the aluminum finisher on the door handle first, then there's two 10mm bolts that you need to unbolt, then the door handle will come out. After that, you should be able to get the passenger switch cover by hand. The clips to get the switches out are the same.
After I dipped mine and put them back in the car, I found a good tutorial on it (figures, lol) by someone on Youtube named AnthonyJ350. I painted mine a fair bit differently, but dissablemly is mostly the same.
https://www.youtube.com/watch?v=6vopxhHPTGA
He also has a lot of other tutorials for our cars, so he might have a video on the center console. I've put in and taken out an aftermarket head unit in mine so I've done it, but I can't remember exactly what's in there.
found it. thank you!
I just shoved one of these in there, been fine ever since
https://smile.amazon.com/GOOACC-Retainer-Plastic-Fasteners-Chrysler/dp/B07L6FJGR4/ref=sr_1_3?keywords=plastic+rivet&amp;qid=1566440542&amp;s=gateway&amp;sr=8-3
It looks like the new one you linked to purports to be a direct swap-in replacement for the stock unit.
However, they also say to send them a picture of your existing unit so they can confirm compatibility; so maybe do that.
Edit: with Amazon's return policies being so good, you could also just give it a shot.
Edit 2: I just realized you might have been asking about the actual install process. It shouldn't be too bad. Here's a video I found detailing the process: https://www.youtube.com/watch?v=M-UEH_RkRTA
You'll want to get a set of trim removal tools like this: https://www.amazon.ca/Tresalto-Auto-Trim-Removal-Tool/dp/B01L8GHB7O/ref=sr_1_5?crid=2A3H5I2OJVFU6&keywords=trim+removal+tool&qid=1565547229&s=gateway&sprefix=trim+remo%2Caps%2C165&sr=8-5
The only tool you should need aside from that is a #2 Philips (maybe JIS? but Philips should work) screwdriver.
I use this one because it records forwards and backwards. They’re super easy to install if you’re just plugging into the 12V outlet. I mounted it on the passenger side of the rear view mirror, so it’s hidden from my view. The cord is fully tucked away under the ceiling, run down the door under the weather stripping, looped under the glove box, and finally plugged in. Completely invisible except at the outlet. Do yourself a favor and get a nice plastic tool like the second link.
https://www.amazon.com/gp/aw/d/B0742J69SQ?psc=1&amp;ref=ppx_pop_mob_b_asin_title
https://www.amazon.com/GOOACC-Dashboard-Dismantle-Installer-Tool-4PCS/dp/B00D7XNQHG/ref=mp_s_a_1_4?keywords=car+pry+tool&amp;qid=1565954709&amp;s=gateway&amp;sprefix=car+pry&amp;sr=8-4
Dude, it is not hard to take off the plastic.
Get a trim puller and a set of trim tools ...
eg
https://www.amazon.com/KINGLAKE-Panel-Removal-Radio-Installer/dp/B00HNMLQAG/
https://www.amazon.com/Ninth-City-Steel-Upholstery-Removal-Pliers/dp/B01LZQM1BB/
A set of trim removal tools make removing the gauge cluster so much easier. I've removed the gauge shroud a few times on my '92 and those flexible pry tools helped avoid cracking it.
I need to replace my speedometer cable too. The first time I did an LED swap in the gauge cluster I damaged the flexible circuit board and killed my idiot lights and tach. When I do the speedo cable, I'll remove the cluster just to avoid damaging this one's board.
Awesome, good luck with it and feel free to PM me if you have any questions. If you buy from Crutchfield then I believe they'll send you a PDF with instructions on removing door panels, head unit, etc. I have one for the OB which should be the same as your Legacy and would be happy to email it or Dropbox it to you if you're not going with Crutchfield.
Definitely have some trim removal tools before you get started. You can get them for a few dollars on Amazon or Harbor Freight. Makes removing panels easier without scratching or creasing them like you might with a screwdriver.
Yeah along the floor and interior panels. Get those plastic pry tools to help you get it behind the panel:
https://www.amazon.com/GLISTON-Removal-Panel-Vehicle-Installer/dp/B07JVP1MRS/
https://www.amazon.com/GOOACC-Retainer-Plastic-Fasteners-Chrysler/dp/B07L6FJGR4
Not at all, you do want to get a trim removal tool for the headliner portion. It's not required, but does make it much easier.
Something like this: https://www.amazon.com/GLISTON-Removal-Panel-Vehicle-Installer/dp/B07JVP1MRS/ref=sr_1_5?keywords=trim+panel+tool&qid=1568436223&s=automotive&sr=1-5
‘Kick plate’ or ‘sill trim’.
It’s usually just held down with some clips and comes off fairly easily with a small, thin plastic pry bar or trim removal pliers . Just be sure to find the clips before you lift it up and position your tool as close as possible to the clip.
It looks like you’ll also have to remove the rubber seal before the sill trim.
Dent puller.
I’m not sure if that’s what they’re called exactly, but they’ll pull up on Amazon if you search for it by that term.
There’s also dent pullers that you can find that look like this one. I’ve seen them in the automotive section at Walmart.
Edit: I wouldn’t recommend the exact one from the second link (due to the low rating), but that’s how the one at Walmart looks.
You should be able to pop the panel off with a panel popper tool. Car stereo shops do it all the time.
I did it the hard way. It really wasn't that hard. You will need a set of trim removal tools like these: https://www.amazon.com/dp/B00HNMLQAG
and a drill bit and I think that was it. I don't even remember a screwdriver but you might have needed one. I followed a youtube video. I did it on a blazing hot day and get it done in 20 minutes. I remember my sweat dripping onto the rear cover thingy and evaporating as I looked down... I recommend doing it on a cool day because you will be under a big window :)
I bought a Lisle tool that helps a ton with lifting them.
https://www.amazon.com/Lisle-35260-Plastic-Fastener-Remover/dp/B0002SRCMO
It's glorious. I have used it a bunch of times now on several cars.
Something like this works most of the time:
https://www.amazon.co.uk/Trident-T661300-Trim-Clip-Tool/dp/B07FD17M6P
For some that are really flush with the surface they're mounted on, you might want to work around the edge with a thin flat blade driver or a pick.
Yes. That'll give you a working system that'll be an upgrade and it'll allow you to further upgrade later with sound deadening and/or a subwoofer and/or an amp for the front speakers or whatever else you might want to do. (Of course, future upgrades are optional - you might enjoy this upgrade enough as it is.)
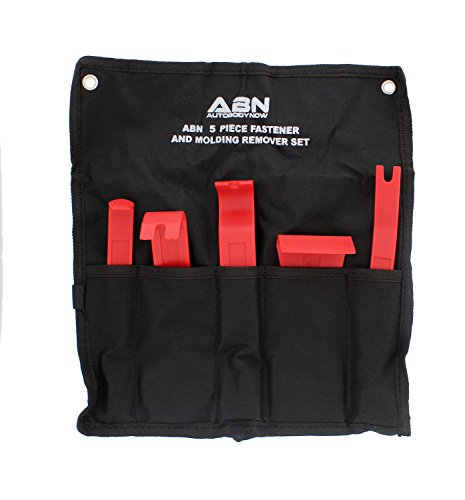
If you can afford a little extra, also buy these or any similar product from whatever brand: http://www.amazon.com/ABN-Premium-Auto-Trim-Removal/dp/B00KCXMCTM/ref=sr_1_8?ie=UTF8&amp;qid=1459284544&amp;sr=8-8&amp;keywords=trim+tool+set
Those tools will help you not break plastic clips or trim pieces inside the car when you take stuff apart. I highly recommend them. I've been doing car audio installs for a while and I have a pretty good idea of how to remove trim panels properly... and I still wouldn't want to do it without tools similar to those.
Bought this one:
Anyyion Auto Panels Trim Removal Tool for Door Panel Removal Tools 8PCS(Red) https://www.amazon.com/dp/B06XF1F3CS/ref=cm_sw_r_cp_api_6iG6BbXWCZRED
Seems like there are a bunch of similar ones on amazon. Any with decent reviews seem like they will do fine.
Never mind. Found it:
MICTUNING 13 Pcs Auto Trim Removal Tool Set with Fastener Removers Strong Nylon Door Panel Tool Kit https://www.amazon.com/dp/B01KXN7LE6/ref=cm_sw_r_cp_api_i_QofvCbV38SMD1
I got this tool
https://www.amazon.com/Lisle-35260-Plastic-Fastener-Remover/dp/B0002SRCMO/ref=pd_bxgy_263_2?_encoding=UTF8&pd_rd_i=B0002SRCMO&pd_rd_r=81107e06-b9de-11e8-87eb-1be919d0e38f&pd_rd_w=vEvK5&pd_rd_wg=wuK8R&pf_rd_i=desktop-dp-sims&pf_rd_m=ATVPDKIKX0DER&pf_rd_p=3f9889ac-6c45-46e8-b515-3af650557207&pf_rd_r=W8JF6K0MS0R6C9Y470QQ&pf_rd_s=desktop-dp-sims&pf_rd_t=40701&psc=1&refRID=W8JF6K0MS0R6C9Y470QQ
Do you use this to pry the whole thing or just the center piece. I can't reach underneath the center piece to pry it out...
I instated mine myself with this and powered it from the OBD by hotwiring with this. Never did it before. Just shove the wires into the gaps.
They're really easy, just look up how your door panel comes apart so you don't have to pull on things and guess.
Buy this tool, or one like it. It makes the job really easy:
https://www.amazon.com/Lisle-35260-Plastic-Fastener-Remover/dp/B0002SRCMO/ref=sr_1_41?keywords=door+panel+clip+tool&qid=1556081230&s=gateway&sr=8-41
If you don't have one of the kits to pull stuff apart I highly recommend one. It made my life a lot easier when I was working on some Tuesday. This is the one I have: Tresalto Auto Trim Removal Tool Kit, Set of 5 Pcs https://smile.amazon.com/dp/B01L8GHB7O/ref=cm_sw_r_cp_apa_i_0DpQDbP1B7G8X
Here is the link!
VLand
The music in the video is my favourite part.
If you’re using this video to install the vland tails, know that you don’t have to go to the lengths of removing the hatch light or upper- quarter panels all the way off. You can very easily pry the trim all around he hatch opening, just enough to fish the sequential twindicator cable through with a stiff wire such as a coat hanger or a grabber tool.
Also if you don’t already own one, pick up a trim removal kit on amazon from $7-$50 depending on brand and quality I did mine with an $16 one, super handy.
Good luck!
amazon trim kit
https://www.amazon.com/KINGLAKE-Panel-Removal-Radio-Installer/dp/B00HNMLQAG/ref=sr_1_3?ie=UTF8&amp;qid=1520380837&amp;sr=8-3&amp;keywords=panel+remover+tool
And personally I would try to do steering wheel controls, I doubt its $$$ just the labor of finding the right module and wiring it up.
Most of it is held together by a combination of plastic moldings and retainer clips/pins. Get something like this:
https://www.amazon.com/GLK-Panel-Install-Removal-Installer/dp/B07C1857QC/ref=asc_df_B07C1857QC/?tag=hyprod-20&amp;linkCode=df0&amp;hvadid=312174136943&amp;hvpos=1o6&amp;hvnetw=g&amp;hvrand=2468939912497145328&amp;hvpone=&amp;hvptwo=&amp;hvqmt=&amp;hvdev=m&amp;hvdvcmdl=&amp;hvlocint=&amp;hvlocphy=9019562&amp;hvtargid=pla-633452732397&amp;psc=1&amp;tag=&amp;ref=&amp;adgrpid=63790029762&amp;hvpone=&amp;hvptwo=&amp;hvadid=312174136943&amp;hvpos=1o6&amp;hvnetw=g&amp;hvrand=2468939912497145328&amp;hvqmt=&amp;hvdev=m&amp;hvdvcmdl=&amp;hvlocint=&amp;hvlocphy=9019562&amp;hvtargid=pla-633452732397
Open up the trunk, fold down your rear seats, and get to work. It will be out in no time flat.
those crimpers work but they are actually for non insulated only and tend to punch through insulation, doesn't look like there is an insulated hole on them. For quick work use my trusty old klein but I also have a ratcheting crimper with a few different die sets, the insulated die is a double crimp and works fantastic. This works almost as well for a lot less $$$(I bought the cheap one when I thought I loaned my palidin then realized it was in another toolbox). I'm usually too lazy to solder stuff under the dash(proof of laziness), but anything outside of the cabin I solder and use glue lined heatshrink to make sure the union is not compromised. When I do use butt splices or crimp caps, I make sure to use the right crimper.
I also consider my test light as a must have, computer AND airbag safe. It make signal chasing much easier using the piercing probe and the headlight is handy. Keep the bandaids handy using it though, I've tested the voltage in my fingers quite a few times.
While the plastic trim tools come in handy, I find something like this very handy when you need a bit more nut behind the prying, although I haven't't used the window crank clip remover in a LONG time lol.
Car interior panel tools, like this: https://www.amazon.com/KINGLAKE-Panel-Removal-Radio-Installer/dp/B00HNMLQAGBrain fart. I meant one of these: https://www.amazon.com/Jakemy-Professional-Opening-Electronics-JM-OP06/dp/B00ZWEAOSW/
I've also used plastic bicycle tire levers with some success, it'll depend how flush the knob is with the panel.
Just installed mine yesterday and here's some tips:
Pay attention to the 2 different sized plugs when removing the bumper cover so you try putting right plug in the right hole.
Pay attention to which piece goes over/under when looking at the wheel well area so you are confident how to put the cover back on. I say this because I had one part going UNDER another and it made snapping the bumper cover back on difficult. One clip was not snapping back in until I realized I had the cover going under another piece when it should have been OVER top.
I bought some cheap auto trim piece kit that helps pulling plugs out and also plastic tools that help pop clips without scratching the paint. Here's the link to what I bought: Tresalto Auto Trim Removal Tool Kit, Set of 5 Pcs https://www.amazon.com/dp/B01L8GHB7O/ref=cm_sw_r_cp_apa_i_kpJaBb0EEWNQ9
I've done it with a few monitors, pretty easy and I thought it was worth it. Granted, these were on the cheaper side (~$200ish), not sure how I'd feel doing this on an ASUS ROG or ACER Predator :)
Check youtube to see if you can find someone doing it with your model or manufacturer to help give an idea of where the connections are on the frame. I have a set of automotive tools used to remove interior trim (like this) and that worked great for getting under the plastic without fear of breaking anything.
I used Gorilla Tape to hold the back components to the display and then black duct tape around the edges to cover up the metal.
I play racing games mostly, so having a 10-12mm gap kinda took away from that experience. Now it's down to about 5mm with the way I have my sides overlapping my center panel. So for me, worth it.
One thing to watch for after removing the plastic cover and expose the metal in the back. When you set up your side panels, it's easy to scratch the panel of the center monitor if you're trying to get them overlap and close together. So just be careful there.
Best of luck!
Sure thing! It wasn't too difficult, just took some learning. I did a lot of watching tutorials on YouTube and mistakes were made. So first, the items I bought were viynl wrap and chrome edge trim. You don't have to do glossy black and silver chrome, but that's what I chose. A wood grain would look nice if you have a tan interior.
Vinyl: https://www.amazon.com/gp/aw/d/B007EEU58W/ref=ya_aw_od_pi?ie=UTF8&amp;psc=1
Chrome trim: https://www.amazon.com/gp/aw/d/B0194BMZEY/ref=ya_aw_od_pi?ie=UTF8&amp;psc=1
Also helpful! Trim pry tools: https://www.amazon.com/gp/aw/d/B00D7XNQHG/ref=ya_aw_od_pi?ie=UTF8&amp;psc=1
First, take a look on YouTube for videos on removing the radio, because that will tell you how to remove all the trim pieces. Make sure to be VERY careful, the plastic clips can break easily. For the side trim pieces, also look on YouTube or the internet on how to remove those. They'll do a much better job at explaining than I will!
Applying a wrap is fairly easy, it just takes patience and a little bit of skill. I recommend doing easy pieces first before more complex pieces like the vents and top center console panel (which was super hard!). Look on YouTube for tutorials on how to wrap, there are some great videos out there explaining the process. You'll need a heat gun or hair dryer if you want to really do a solid job, as well as a razor. For the vents, I trimmed around the small indent by the opening and carefully cut around the indentation by the wheel that opens and closes them. It's very tricky to do but if you're careful it will look pretty nice.
The Chrome edge trim is pretty easy to do, just shove it into any gaps that you want to line with trim. If you're careful with how much you use, that one pack should cover most of the car. Try not to go too excessive or it will look silly. Some panels will be really hard to force the trim into, so I recommend some sort of smooth tool like the butt of a screwdriver to press it into place.
All in all it took me about 2 days to do all the work, and I had to purchase a new piece of trim from a junkyard because I was careless. Don't rush it, take your time, and make sure you educate yourself as much as you can (YouTube videos/guides)
If you have any questions, let me know! Also, send me a picture of your car if you end up doing it, I'd love to see how it turns out!
I don't believe you can downgrade the firmware. Installing the version 70 first is a requirement for the "official" android auto. I paid $162 for the USB cables and dock ( https://www.amazon.com/gp/product/B07KRPSRKH ), and $10 for the trim kit ( https://www.amazon.com/gp/product/B01L8GHB7O )
I found the instructions to follow here: https://forum.miata.net/vb/showthread.php?t=679114
There's a link to an 'hdrive' site, find the NA firmware, put them on a USB key (16gb or smaller) and follow the instructions to the letter. It's easy.
Then find the folder for the videos of the cable install, find the closest match to yours. Also easy.
Firmware took an hour (mostly sitting and waiting). Cables took an hour in my 2018 CX-5.
Both were easy as far as anything technical I've ever done. Very easy. Just take your time, follow each step carefully.
No contex. Self install, pretty normal post in the sub reddit.
Tresalto Auto Trim Removal Tool Kit, Set of 5 Pcs https://www.amazon.com/dp/B01L8GHB7O/ref=cm_sw_r_cp_api_j0A9BbCR2Y5GC
Your just a moron bud, this is pretty BASIC knowledge