Best center punches according to redditors
We found 70 Reddit comments discussing the best center punches. We ranked the 21 resulting products by number of redditors who mentioned them. Here are the top 20.
We found 70 Reddit comments discussing the best center punches. We ranked the 21 resulting products by number of redditors who mentioned them. Here are the top 20.


the porcelain is much harder than the glass. Once tempered glass takes more than around 15000 psi it shatters. The porcelain does that in an incredibly small area. It does not work on regular glass or laminated glass (front windshield)
edit:adding this is what he should have used. Also cars with power windows should have these in case you drive into the water.
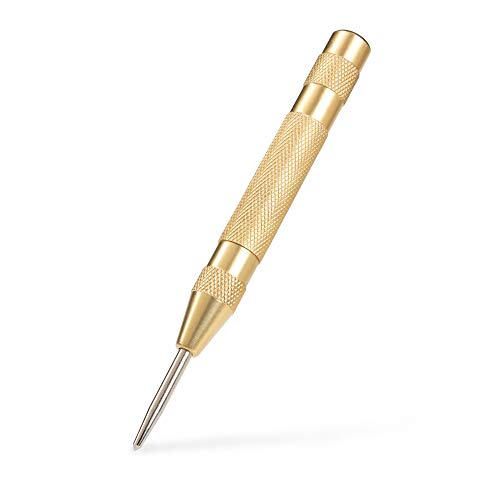
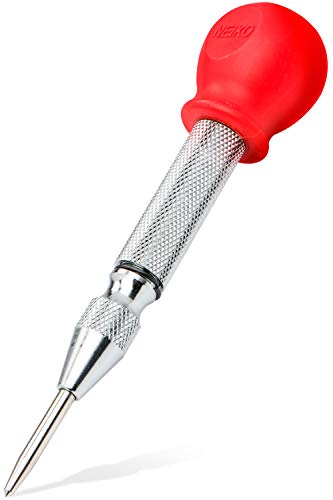
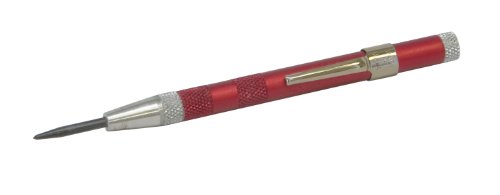
Spring loaded center punch.
Just a heads up: You can buy a window punch for like $10 and it takes up very little room in your glove box. Its a useful tool for emergencies including situations like this
Get a center punch. Old EMS trick of the trade. You don't have to worry about having room to wind up or possibly fighting gravity if you're the one in the car, and if you're not, you don't have to use it in the center of the windshield (i.e. not right in someone's face).
Automatic (spring loaded) center punches break windows with little to no effort. I think it's been discussed on here before that some police/fire opt for these.
It's an automatic centering nail set.
https://www.amazon.com/Stanley-58-011-Self-Centering-Setter/dp/B00009OYGT
Nope. /u/wlxd left his referral URL in there, and I'm betting that's it. Here's a clean version of the link which should work and not get caught by automod.
I would add to get a center punch to help get your drilling centered on the bolt. Like this
This might be excessive, but I wanted to be thorough so you can see what all is out there. I am having trouble thinking of anything that the following tools can't do, in terms of AR building and maintenance. This is basically my setup at home, though some.of the brands and whatnot are different.
I am operating under the assumption that you already have some basic hand tools in addition to the torque wrench.
The only things you absolutely need are roll pin punches and an armorer's wrench and some basic hand tools like Allen wrenches, screwdrivers, needlenose pliers and so on. The rest just expedite the process and help solve weird issues that may come up.
Wheeler Engineering Roll Pin Starter Punch Set https://www.amazon.com/dp/B01B3NWBVI/ref=cm_sw_r_cp_apa_QJZDAb1ZFBQ80
Wheeler Roll Pin Punch Set https://www.amazon.com/dp/B00EE6GHVW/ref=cm_sw_r_cp_apa_4JZDAbV5YGA8M
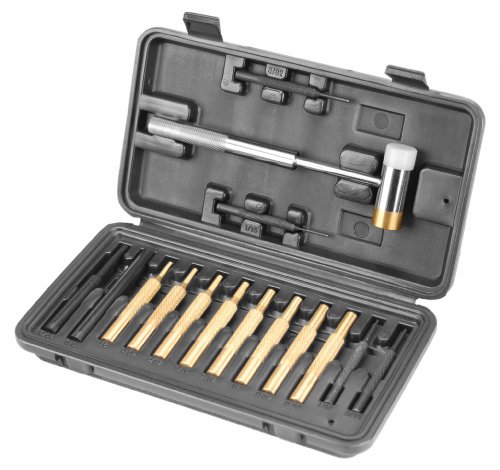
Wheeler Hammer and Punch Set In Plastic Case https://www.amazon.com/dp/B004SY07HU/ref=cm_sw_r_cp_apa_FNZDAb1Y74EF0
Geissele Automatics 10-169 AR15/M4 Reaction Rod https://www.amazon.com/dp/B01EY6WFAI/ref=cm_sw_r_cp_apa_hOZDAbD3JHBAE
Aeroshell 33ms / MIL-G-21164D / MIL-SPEC Barrel Nut Thread Grease + 1/2oz can https://www.amazon.com/dp/B01BJ3HE0K/ref=cm_sw_r_cp_apa_4OZDAbQGRYJJ2
TEKTON Long Arm Ball End Hex Key Wrench Set, Inch/Metric, 26-Piece | 25282 https://www.amazon.com/dp/B00I5THF4W/ref=cm_sw_r_cp_apa_PPZDAbQ05H680
TEKTON Long Arm Star Key Wrench Set, T10-T50, 9-Piece | 25291 https://www.amazon.com/dp/B00I5THF9M/ref=cm_sw_r_cp_apa_cQZDAbRX59VNW
IRWIN Tools Multi-Purpose Bench Vise, 5-Inch (4935505) https://www.amazon.com/dp/B009TOCZEC/ref=cm_sw_r_cp_apa_1QZDAbT8R47J0
Yost UP-360 Universal 6 Inch Prism Style Jaw Cover https://www.amazon.com/dp/B01EVQH42U/ref=cm_sw_r_cp_apa_aRZDAbRHAV73E
Real Avid Gun Tool Pro - for Modern Sporting Rifles https://www.amazon.com/dp/B00IMHX5KA/ref=cm_sw_r_cp_apa_bUZDAbEB87JFB
Wheeler Firearms Accurizing Torque Wrench https://www.amazon.com/dp/B0012AXR4S/ref=cm_sw_r_cp_apa_xWZDAb1SRYD6D
Wheeler Professional Gunsmithing Screwdriver Set (43-Piece) https://www.amazon.com/dp/B00HTN4EWG/ref=cm_sw_r_cp_apa_HXZDAbQX5BEWF
TacWater USA AR15/M4/M16 Tools Multi-Purpose Tool Set (W) https://www.amazon.com/dp/B079H5WWZ3/ref=cm_sw_r_cp_apa_GYZDAbRGY3CNH
Takedown Pivot PIN Tool set 223 556 6.8 SPC 300 AAC https://www.amazon.com/dp/B017OUSJFQ/ref=cm_sw_r_cp_apa_V.ZDAbSHZPEG5
Magpul Bev Block https://www.midwayusa.com/product/1015877615/magpul-bev-block-ar-15-action-block
Most likely, the interlocking surface between the clamp and the actual seatpost has been damaged by the seatpost working loose. One way to keep it from slipping is to mar both surfaces with something like a spring punch and maybe some friction paste, then tighten the hell out of it. If that doesn't work, you probably just need a new seatpost.
That photo is wrong. This is the correct picture of that item.
https://www.amazon.com/Empire-Level-27203-Pocket-Center/dp/B0015YPHX0/ref=cm_cr_arp_d_product_top?ie=UTF8
auto centre punch
https://www.amazon.com/TEKTON-6580-Automatic-Center-Punch/dp/B0037UUO60
just fyi, all those window break tools are grabage, if you want to ensure you break the window quick and easy, get one of these.
Source: My 50 year old uncle who has been in the auto glass business since he was 17, he bought everyone in the family one of these for christmas, years ago.
https://www.youtube.com/watch?v=l6C5Ytc5Soc
https://www.youtube.com/watch?v=1yHlI_8TGA4
https://smile.amazon.com/TEKTON-6580-Automatic-Center-Punch/dp/B0037UUO60/
Go get a center hole punch and use it on the frame. If it tings, its just surface rust. If it dents in or punches through, there is deep rust.
Don't buy a truck with deep rust in the frame. Anywhere in the frame. I live in salty areas too and rust happens. But rust still is a safety issue and if it wasn't washed and taken care of, the frame is mechanically compromised and shouldn't be purchased.
Now surface rust, even quite a bit of it, is to be expected. It can look rusty all over and still be ok. Phosphorus conversion coatings (what the frame goes through at the factory) work that way. Most of the body can also have rust and be fixed. Rocker panels, cab corners, over wheel wells, etc. And you can lose quite a bit of those body areas and be fine.
But deep rust anywhere in the frame and it's done.
Had a post like this awhile ago with more insight for those who care...
I guess I can repost my own post:
I do this kind of thing as a part time job for CDOT (Colorado Dept of Transportation) when I want extra money to buy something stupid, so I have some good insight as to what gets people stuck.
--------------------------------------------------------------------------------
>An extra belt and a breaker bar big enough to move the tensioner.
I mean, I don't carry an extra belt, but I'm pretty good about checking wear on it every few weeks or so. However, a breaker bar is definitely definite definitely recommended. It's most useful for wheel lugs, but it'll work on a belt tensioner too.
>Spare hose clamp for if you blow a radiator hose off/ intake hose/ turbo hose/ whatever. They cost like nothing (literal cents), but when you need it you need it. You ain't going anywhere with no air intake/ turbo intake/ coolant hose.
>Bottle jack? instead of the stock scissor jack?
No you don't need a full size floor jack.
If you have a regular passenger car (like a 4 door car) the scissor jack will work fine. They are kind of tedious to jack up and down but it's for an emergency, not everyday use. The bottle jack is a good idea for large SUV, Trucks, and RVs. Make sure you have a base or something on it if you have any sort of lift. Also remember that you will have to jack up much further to install the inflated tire than you had to for the flat one.
Only other advice I have here is actually pull that jack out and figure out how to use it. They all gotta be different and some are like oragami in how this click into that, which slides onto that... Reading the user manual and deciphering the IKEA-esque pictures on the side of the road just adds frustration and stress to the already crappy situation.
>Fix-a-flat kit
Meh. A spare tire is the better option. Make sure you check it's inflated at least every couple months. It's very very common that people have a spare, but that its flat. It does you no good as a spare if it's flat. A tire plug kit a definitely a good thing though. If you do HAVE to use the fix a flat, prepare to have a tire shop guy charge you twice when they find it all over the wheel. It's a nightmare to clean off, and as others have said will ruin you TPMS sensor. Depending on the make/model of your car this could be another $35 to $100 you have to spend, in addition to a new tire.
>Lights! and flares
(Ignore the guy in the comments that said lights are only emergency vehicles. He has no idea what he's talking about)
For an emergency kit, flares are better since they don't require batteries (that you will forget to change/ charge). However, lots of road flares last 30 - 60 minutes. It should take you 20 to change a flat. Be careful with the flares as many types drip as they burn. Don't light yourself or the side of the road on fire. I know you're thinking "well duh" but it happens every year in CO where I live. Someone lights the brush on fire near the highway cause they put flares out and got to fixing their car and not paying attention.
That said, you can get LED road flares that are bright and really good at attracting attention. Look up the laws in your area. Some places restrict the color you can use. Amber (orange) is usually a pretty safe color to choose. If you can get on that has more than one color, it's better. Monochromatic light doesn't give people good depth perception. Avoid as much as possible bright white strobes facing rearward. All you're going to do is blind the people you are trying not to get hit by.
> Screwdriver set with misc bits
Like others have said, this won't be super useful for your car, but for various other tasks it can be a huge time/ money/ aggravation saver to just have basic tools for random things. Ever tried to get a hose clamp off with just your fingers? You just have to remember to put those tools back in the kit. You don't need Snap Off for this as they likely won't get used that much. Don't get the cheapest ones at Harbor Freight either. Get the " pittburgh professional" ones.
> Socket set?
You can get the set if you want to, but at a minimum get the socket that fits your lugs. Get the drive size that fits the breaker bar you got from above (likely 1/2"). When I do this for work I had a cordless impact driver which was awesome, but a breaker bar doesn't require you to remember to charge batteries, and I haven't found anyone that just wasn't strong enough to use one. A breaker bar is like $15. Cordless impact driver powerful enough is like $250+.
>Glass Breaker/ Hammer
Honestly, you'd be better off with a spring loaded center punch. You have to have room to swing the hammer, and some people (elderly, children) just don't have the strength to hit the window hard enough. With the center punch, you just touch it to the glass and push until it clicks. Many cops and firefighters use these as a means to get you out. If you go this route, have a seat belt cutter, pocket knife, something...
>Fire Extinguisher
It's better if you mount this somewhere where it wont get buried. My favorite place is honestly the trunk lid or right in front of the taillight area in a car, under one of the seats for a SUV or truck (if you can easily flip it up). Imagine yourself suddenly panicking and thinking holy goddamn s**t my car is on fire, and scrambling to get to your extinguisher. Put it somewhere you can scramble to easy. If it takes longer than 10 seconds, its not accessible enough.
> A little portable air compressor
can really help if you get a flat and have a flat spare. Not necessary but sure is nice. You can use it for other things too (blowing up sports balls air mattresses etc...). They usually take FOREVER to fill a tire, but if you're stuck anyway...
>Roll of duct tape (because obviously).
I've used it to tape up bumpers after an accident so they can at least get off the road, to secure wiring, to a whole number of other things.
>Spare fluids.
Maybe. Gallon of coolant or distilled water at least. quart of oil, etc... This also depends on where you normally drive. If you never leave the city and a parts store is usually a couple blocks away then you don't have to bother. If you live outside the city and it would take you the entire afternoon to walk the next 15 miles to the store...well, plan accordingly.
> Tire pressure gauge.
To check main and spare tires. Don't trust the ones on the gas station pump (they get slammed around and scraped on the ground). I've seen them as inaccurate as 15 - 20 p.s.i. off.
> Jumper cables.
Better yet, your own jump pack.. Jumper cables are only useful if someone else is there to rescue you.
> A tow strap
is kinda nice, but if you're stuck and there's nobody else around it won't help you (unless you have a winch/ come-along). Nothing wrong with having one handy in case someone comes along though.
> Tire chains.
Don't know where you live but in CO there is actually a new (ish) chain law for passenger vehicles. When it's in effect you are supposed to have chains (or alternative traction device) in place. It's not just for truckers anymore. I take them out in the summer.
> A shaker siphon
Makes transferring fuel way way way way way less infuriating than dealing with the stupid friggin gas cans you have to buy nowadays. All the silly safeties and valves, it's like playing goddamn BopIt. They also work for coolant and washer fluid too, not that you would be dumping gallons of washer fluid... How to use it I don't carry a fuel container in my truck with me, but FYI it's illegal (in the US at least) to transport fuel in anything other than an approved fuel container. I doubt you'll get in trouble, just something to consider.
Best tool for smashing windows is spring loaded center punch. However, I suspect that office tower windows might be laminated glass, so although you might be able to break it, you might not be able to get the broken glass out of the window.
30 bucks on amazon, and you can bitch to them and get a new set when you inevitably bend a punch or mar the nylon strike surface.
https://amazon.com/dp/B004SY07HU/ref=cm_sw_r_cp_apa_i_PZmwCb9WVZQ28
Same with the roll pin punch set. I've bent my smallest roll pin punch (gas block) a few times and the manufacturer just sent me a new one. I think it was less than $10.
IMO, the few bucks you're saving isn't worth buying used tools that you literally beat on with no warranty.
Also u need a price for WTB, please modify your post :)
Tempered glass, is pretty hard to break. You need a hardened glass breaker, or a really significant blow to break out a car window. Most of those cheapy fake glass breakers you see on knives and stuff, aren't actually hardened at all, and thus you rely entirely on your strength (and the small surface area of the strike face) to break the glass.
The easiest and cheapest approach is to keep an automatic center punch in your car. They're a couple bucks and you'll be able to break out in an emergency with minimal effort. The minimal effort part is something to keep in mind because you're probably going to be injured after a car crash, so you might not be up to the task of ape-smashing your way out of your car.
http://www.amazon.com/TEKTON-6580-Automatic-Center-Punch/dp/B0037UUO60/ref=sr_1_3?ie=UTF8&qid=1457017401&sr=8-3&keywords=automatic+center+punch
How about something smaller then like a spring loaded center punch.
Center to center caliper adapters
Automatic center punch
Caliper depth gauge attachment Mitotoyo link
^ make a similar one but with a hole for a dial indicator. ULTRA OMEGA useful for making comparative measurements on the surface grinder without taking parts out to measure. This design from brown&sharpe is probably better.
12" long parallel. For parallel sake. (I use it for tramming in a bridgeport head)
Custom gauge block/stick, for setting tool offsets instead of using paper.
Tool grinding fixture for frequent tools. I honestly don't know the details of such a thing but my professor gushed during class about it. Probably something like this that rides on a grinder toolpost sled.
Heh yeah. Get something like this, maybe not as cheap, it makes drilling metal much easier and more precise.
Thank you! This is the first I've ever heard of an automatic center punch. Just ordered (this one) from amazon.
You're not supposed to use one roll pin to punch out the other pin. You're supposed to use a punch, one of these:
https://www.amazon.com/Mayhew-Pro-25017-Pilot-Punch/dp/B008M22FII
I'm actually trying to visualize what you were doing, because you would have needed to remove the old retaining pin in the first place to remove the firing pin. After that, you would use the punch linked above to start and drive in the new hardened pin. You can use roll-pin holders to start if you have them laying around.
EDIT: As an additional tip, you can drop the hammer to hold the firing pin in place to aid in lining up the gap in the firing pin and the hole in which you drive the retaining pin.
You could use a spring loaded center punch like this one to push the pin out:
https://www.amazon.com/gp/aw/d/B0037UUO60/
Once the head is out enough that you can get a flat screen driver our, just slowly pry the pin the rest of the way out.
This one here
(Make sure to use Amazon Smile and donate to your favorite charity. More than a few pro-2A ones to choose from.)
Nice, looks great! And enjoyed reading. How does that pothead & pot combo workout, thought they looked nice but never used one.
The holes being slightly off center - are you center punching and then drilling first with a small (1/16" or so) bit, then larger diameter after that. Should help some if you aren't.
Awesome auto punch if you can bare the price... https://www.amazon.com/Starrett-18A-Automatic-Center-Adjustable/dp/B0006J4Q64
Can get a cheap one from Harborfreight that will do the job for a while, but they have a soft tip https://www.harborfreight.com/spring-loaded-center-punch-621.html
I have these:
https://www.amazon.com/Wheeler-89-Piece-Deluxe-Gunsmithing-Screwdriver/dp/B001C63M7O/ref=sr_1_4?ie=UTF8&qid=1525651391&sr=8-4&keywords=wheeler+gunsmith+tools
and
https://www.amazon.com/Wheeler-Hammer-Punch-Plastic-Case/dp/B004SY07HU/ref=sr_1_5?ie=UTF8&qid=1525651391&sr=8-5&keywords=wheeler+gunsmith+tools
When it comes to getting screw bits (if you're piecing together a set) it's important to make sure you get hollow grind bits as not to damage the screw heads.
It's snapped off at the bottom of that hole? Nothing you can do is guaranteed to work.
My favorite way is to use a center punch and a left handed drill bit.
https://www.amazon.com/gp/aw/d/B0037UUO60/
https://www.amazon.com/gp/aw/d/B003XF3QYQ/
Push the center punch directly into the broken screw until it clicks. It's important to get as close to the middle of the screw as you can.
Next drill into the screw with the left hand bit (spinning the correct direction) until you go all the way through or the remains of the screw come out.
Since it's plastic, never use that screw hole again.
I found your charging handle for almost $10 cheaper. You could cut the cost of the charging handle significantly by getting a one-handed one. I used the exact same lower build kit for my first AR. The lower build kit does not come with any tools. You're going to need some tools, such as a Castle Nut Wrench and a punch set
This is kind of optional, but you're going to need a spacer if you want to use iron sights (or else the iron sights will be blocked by the red dot sight. The spacer also helps a great deal is making it more comfortable, so your head isn't awkwardly tilted, obviously this will depend on your eye height.
Don't get discouraged if this seems confusing, if all else fails, watch an ar15 building tutorial and everything will be much clearer. Here's another tutorial. Good luck.
no problem man.
Any basic knife will do
flashlight: https://www.amazon.com/Tactical-Flashlight-EdisonBright-Lithium-Batteries/dp/B00DR9GWX0/ref=sr_1_2?ie=UTF8&qid=1503516912&sr=8-2-spons&keywords=fenix+flashlight&psc=1
Screwdrivers:https://www.amazon.com/StarTech-com-Precision-Screwdriver-Computer-CTK100P/dp/B0001NYK16/ref=sr_1_1?s=electronics&ie=UTF8&qid=1503517004&sr=1-1&keywords=micro+screwdriver+set
Tweezers:https://www.amazon.com/gp/product/B06XXXQHS8/ref=oh_aui_detailpage_o00_s00?ie=UTF8&psc=1
Solder Iron:https://www.amazon.com/gp/product/B000BRC2XU/ref=oh_aui_detailpage_o00_s01?ie=UTF8&psc=1
Solder Sucker:https://www.amazon.com/gp/product/B005GIPKOW/ref=oh_aui_detailpage_o02_s00?ie=UTF8&psc=1
Solder Station:https://www.amazon.com/gp/product/B00LXL6AHM/ref=oh_aui_detailpage_o00_s00?ie=UTF8&psc=1
Solder Iron Tip Cleaner:https://www.amazon.com/gp/product/B00PQ32EPA/ref=oh_aui_detailpage_o01_s00?ie=UTF8&psc=1
Spring Punch:https://www.amazon.com/dp/B0037UUO60/ref=twister_B01IRD4F34?_encoding=UTF8&psc=1
Wire cutters:https://www.amazon.com/Hakko-TR-20-M-D-Flush-cut-Construction-Dissipative/dp/B00FZPM2AQ/ref=sr_1_15?s=industrial&ie=UTF8&qid=1503517519&sr=1-15&keywords=soft+wire+cutter
Here's a few really good gifts that I got recently:
Highly recommended:
Other really good ideas:
they have small punch tools https://www.amazon.com/dp/B005JGL4XM
So you have heard good things about their guns?
About drilling the vent. This isn't a big deal at all but one thing you MUST do is use a center punch before drilling so that your bit won't wander. I find that even if I'm using a drill press a nice dimple makes it so much easier. I use this one.
https://www.amazon.com/General-Tools-89-Stainless-Adjustable/dp/B003Y3BU86/ref=sr_1_2_sspa?ie=UTF8&qid=1506537660&sr=8-2-spons&keywords=automatic+center+punch&psc=1
It's not too expensive and works well. Of course is you have the bank buy a nice starret. I love their tools and have a few micrometers made by them.
Buy a set of left handed drill bits and an automatic center punch.
Make a center guide hole to keep your bit in the middle, then just start with a small bit and go up sizes. Since the drill bits are left handed, your drill spins counter clock wise, so you have a good chance that the bit will catch and back the bolt out. If it doesn't, you at least made a hole for something like a bolt extractor set.
But by drilling the center out, you're releasing the tension on the threads, so as you go up in sizes on the left handed bits, you should have a good chance of unscrewing this.
You could also prep this thing by putting a few drops of penetrating oil and leaving it overnight to get into the threads.
I can't seem to find a full set of Irwin's carbide bits, they only seem to have packs of the same size, but a multi size pack exists so look around for that. It goes up in sizes from like 5/16" to like a quarter inch. You should get a few of the small bits as they are easy to break.
For my first few lowers I used this combo of things I grabbed from amazon...
I also used a pair of pliers and masking tape.. I built 4 lowers with that setup.. the pivot pin/roll pin install tool wasn't "needed" but it did make it so I didn't have to worry about the spring/detent flying across the room.
I have since grabbed a vice block for upper and lower but I didn't need it for the lower.. Upper work you do need the vice block.. I also grabbed a much better set of punches as I bent a few of those punches from that wheeler kit on my first time trying to swap a FSB to low pro gas block.
https://www.amazon.com/d/Center-Punches/Automatic-Center-Punch-Adjustable-Tension/B07BJMYRFQ
These work better because you don’t have to swing them.
Also pick up a center punch. Just put the point on the center of your hole and push - it's spring loaded and makes a neat little indentation. Just center punch all your hole centers and grab your drill. This is also a couple bucks at harbor freight.
Fuck it lets order everything off amazon if possible.
punches $10 you might use two of them
hammer $6 and this is over kill you need it to set like 3 roll pins. One in the trigger guard, bolt release, and forward assist
Masking tape Like a dollar at walmart only need a little while installing pins.
Grease same stuff from ebay little cheaper. Will likely only need a 5ml container but two are only $5
Magpul Bev block. Different site but free shipping and a quick google search will show you who to contact for usually a %10 off
Torque wrench and vise you are on your own but someone you know should have them and you can usually get away without a torque wrench depending on what handguard you choose.
Machinist here, That's an automatic center punch. They work great for shattering window glass! LPT, turn your face away and wear some hand protection...
I just built exactly what you're describing. I can share some of my experiences.
I'm super happy with the results of my build. The process is fraught with a lot of cursing and you're probably going to lose a couple of the tiny parts (like detent pins and tension springs) but the end result will be totally worth it. You'll be intimately familiar with the insides of your AR-15 and share a sentimental connection with your firearm thanks to its DIY nature. Enjoy!
For sure, just take your time and you'll eventually develop a method for assembly of each part.
The hardest by far is installing the mag catch roll pin. Using a lot of electrical tape and a ChannelLock Tongue and Groove pliers, you can usually press it in carefully.
https://www.homedepot.com/p/Channellock-12-in-Tongue-and-Groove-Pliers-440/100002119
I recently bought a set of roll pin punches and along with a small hammer, has made starting and finishing that part much easier.
https://www.midwayusa.com/product/1019303727/ar-stoner-ar-15-roll-pin-punch-set-7-piece-steel
https://www.amazon.com/Wheeler-Hammer-Punch-Plastic-Case/dp/B004SY07HU/ref=sr_1_10?ie=UTF8&qid=1538439501&sr=8-10&keywords=gunsmith+hammer+set
Simpler than that. I used an automatic pin punch (in fact I'm pretty sure it's this onehere) and a pair of pliers. Came right out with no trouble.
You can also use a thin chisel or screwdriver and a hammer if you've got a steady hand. Basically, the pin has a grooved section; that's the end that needs to come out first. Hit the pin until you can grab the grooved end with some pliers and it should slip right out. Most short pins like this usually don't give you much trouble, but some are REALLY stubborn, so be careful.
Automatic Center Punch - 5 inch Brass Spring Loaded Center Hole Punch with Adjusta... https://www.amazon.com/dp/B07BJMYRFQ/ref=cm_sw_r_sms_c_api_i_8JwIDbWYQXA9E
I use the Wheeler Set. I would also suggest the Starter Punch from CGW for the more stubborn pins. If you don't have a bench block I would get one of those too. A universal bench block will work fine but I would get the CZ Bench Block to make things a bit easier.
For polishing, some 600 grit, 1000 grit and 2000 grit sandpaper and some diamond stones from brownells would work just fine. Just follow the guides carefully and don't take too much metal off of the crucial areas.
Came out good. I see someone recommended a center punch, if you are going to buy these tools, don't skimp. These are machinist tools and they should be the right material and hardness or they will dull easily and ruin your work. If you buy an "automatic" center punch, buy this one. Cheaper ones quickly stop working consistently. You can also just get one nice, hardened ordinary one and use a hammer each time.
The most important thing is to back up the sheet metal. Use spray adhesive to stick a block of wood to the back of the metal temporarily for all your center punching and drilling ops. Also, using a center drill instead of a small "jobber bit" will create more accurate holes. The shorter flute length and sturdier shank increases accuracy and reduces walking on the surface.
For lower assembly, all you really need is a a rubber mallet and possibly a willing helper. As far as anything else, you'll want:
Armorer's Wrench, mostly for the castle nut
Punch pin set for driving pins in.
You'll also probably need an Allen wrench or slotted screwdriver to put the grip in.
For the upper, you'll need some C-clamps and a vise block, as well as some decent moly grease and a torque wrench.
Literally the only things I've had to spend on are the armorer's wrench and the vise block. Everything else is stuff you should have lying around the house.
Would a simple set like this suffice for the extractor? https://www.amazon.com/Stanley-16-226-Piece-Punch-Kit/dp/B000NIBFSK/ref=sr_1_1?ie=UTF8&qid=1468090941&sr=8-1&keywords=Punch+set
These will break about every kind of non-reinforced glass there is, no swinging, just put the tip on the glass and push. These things are too cheap not to be in the console of every vehicle I have. Get a little seatbelt/strap cutter and you've provided two vital tools for emergency egress for <$20.
Full kit is about $150 and if you take it to a gunsmith they'll probably charge you about a hundred bucks.
You can save money if you do the work yourself. Buy an [Apex Armorer's Block] (https://www.amazon.com/dp/B00K5ULZ9U/ref=cm_sw_r_cp_apa_LcuRzb3Y9Z9K6) and a [punch kit] (https://www.amazon.com/dp/B004SY07HU/ref=cm_sw_r_cp_apa_XduRzbYY6Z749), then YouTube.
Adding onto what others have said. (Just a disclaimer I've only built 5 ARs so far so I dont know if some of the cheapo stuff is as durable as the fancy stuff that others are recommending.)
I really like this armourer's wrench since the 1/2" drive is so close to the castle and barrel nut adapter. Makes getting the correct torque easier IMO. Usually you only need the castle nut and flash hider adapters for AR builds since most aftermarket handgaurds come with proprietary barrel nut wrenches.
A decent set of roll pin punches will help you install both the upper and lower. I like this cause it also comes with a nylon (i think its nylon) end to keep from messing up your upper/lower finish.
Also, this is worth its weight in gold. It helps you install things like the roll pin that goes in the gas tube, bolt catch, trigger gaurd, and forward assist without the need of those fancy $50 tools.
And lastly I would definitely get a magpul Bev block and a bench vise. I got a cheapo one from amazon and its worked fine.
A spring loaded center punch works very well. http://www.amazon.com/TEKTON-6580-Automatic-Center-Punch/dp/B0037UUO60/ref=sr_1_1?ie=UTF8&amp;qid=1404833845&amp;sr=8-1&amp;keywords=spring+loaded+punch
The key to breaking tempered safety glass is to apply the force over a small area.
Yes! I like to use a spring loaded automatic center punch to make the first mark, then if it's not quite big enough to capture the drill bit, follow up with a manual center punch hit with a ball peen (or pein) hammer. Usually, if you are careful, you can drill close enough to the center that the remaining shell is thin enough to be picked out or chased out with a tap. Extractors have their place but you really have to be careful not to break one off in the offending bolt.
You don't even need something that beefy to break car windows. They make keychain sized car rescue tools and a center punch will also do the job.
Just speaking as someone who has a legitimate use for them, anyway.
Looks like a variation of a auto center punch. Like this one. Fantastic tool for precise drill holes.
General Tools 70079 Utility Automatic Center Punch https://www.amazon.com/dp/B000KKT998/ref=cm_sw_r_cp_apa_cOiYzb26V46XD
Top - utility knife with hook-shaped utility blade
Middle - Punches
Bottom - reminds me of a carpet glue trowel but unsure.
Was this family member a carpet installer?
just get an automatic center punch
https://www.amazon.com/TEKTON-6580-Automatic-Center-Punch/dp/B0037UUO60
http://www.amazon.com/SE-Center-Punch-Automatic-Brass/dp/B003DW8OCI
$6.30 on amazon. Place the punch about 1/2mm from the edge of the faceplate and punch at the stake position on the castle nut. Actuate punch 5-6 times.
Done.
A center punch as a pilot hole/guide doesn't work?
https://www.amazon.com/Starrett-18A-Automatic-Center-Adjustable/dp/B0006J4Q64
This is the one I got.
Neiko 02638A 5" Automatic Center Hole Punch | Adjustable Impact https://www.amazon.com/dp/B008DXYOLC/ref=cm_sw_r_cp_api_iweUAbPE045DC
It gets the job done for most pins in figures.
Here are some commonly used and often overlooked tools that I use every day and have multiples of in case one goes missing
Spring Punch:
https://smile.amazon.com/Starrett-18AA-Automatic-Adjustable-Diameter/dp/B0006J4Q5U/ref=sr_1_11?ie=UTF8&amp;qid=1503860094&amp;sr=8-11&amp;keywords=spring+punch
Picks/Scribes:
https://smile.amazon.com/General-Tools-80-Fixed-Scriber/dp/B00004T7RW/ref=sr_1_2?s=industrial&amp;ie=UTF8&amp;qid=1503860130&amp;sr=1-2&amp;keywords=pick+scribe
small flashlight:
https://smile.amazon.com/gp/product/B008X2QMKY/ref=oh_aui_detailpage_o00_s00?ie=UTF8&amp;psc=1
Edge Technology Speedy tool height setter: (This thing is badass and super quick for manual lathe setup)
http://www.edgetechnologyproducts.com/speedy-lathe-gage/
this is a punch starter kit. I don't believe these are meant to punch out pins. You may be thinking of a punch set such as this Stanley set for $10 + free ship. I also just ordered this set.
Check your local sporting goods store or a smaller hardware store, like Harbor Freight. I know my local Academy sports sells some beginner's gunsmithing tool sets. I bought a Wheeler set (similar to this one), either from PSA or Amazon. comes with several punches, including brass ones, and a little brass/nylon hammer.
First I center punch the rivets on the bottom with one of these-
Bastex Steel Automatic Center Punch For Stable Hole Drill Indentation. with Adjustable Tension, Push-to-strike Function. https://www.amazon.com/dp/B072HSWV3B/ref=cm_sw_r_cp_api_i_6smvCb6ZKRCC8
Then I will use a 1/4” drill bit to take the head of the rivets off so the body and base can be separated. Just be slow and careful at this point so you don’t damage the base. Sometimes you may need to use a smaller bit on this part so just check and see what works best for the application.
Then I drill down about 3/16” into the rivet with one of these drills and then tap the hole with the tap-
Du-Bro 360 2-56 Tap And Drill Set https://www.amazon.com/dp/B0006O4GYG/ref=cm_sw_r_cp_api_i_KrmvCbDECZ061
Then I install one of these to make sure it fits correctly and holds everything together properly after all the work is done. You could also do a 2-56x3/16” screw if you want one a little bit longer-
2-56 x 1/8" Button Head Socket Cap Screws, Allen Socket Drive, Stainless Steel 18-8, Full Thread, Bright Finish, Machine Thread, Quantity 100 By Fastenere https://www.amazon.com/dp/B00YSS9CYA/ref=cm_sw_r_cp_api_i_ormvCbP5S7Q34
I think that’s about it. Send me a DM if you have any other questions.
You can buy these things called hole punches for getting started with a pilot hole exactly where you want it, then you want to use a step drill bit to the appropriate size. Make sure the bits are rated for the material you're working on, likely steel.
Center punch ?