Best resistors according to redditors
We found 197 Reddit comments discussing the best resistors. We ranked the 116 resulting products by number of redditors who mentioned them. Here are the top 20.
We found 197 Reddit comments discussing the best resistors. We ranked the 116 resulting products by number of redditors who mentioned them. Here are the top 20.


Resistors are REALLY inexpensive. Throw them away and order new ones.
https://www.amazon.com/Ictouch-300value-2800pcs-Resistor-KIT0148/dp/B01NCKQCYU/ref=sr_1_fkmr0_1?keywords=Ictouch+300value+2800pcs+1%2F4W%2C+1%2F2W%2C+1W%2C+2W%2C+3W+Carbon+Metal+Film+Resistor+%2B%2F-1%25+Box+Kit+KIT0148&qid=1569975286&s=gateway&sr=8-1-fkmr0
$38.37 (considering you have a soldering iron) and don't mind doing some coding, I'd estimate it would take 20 minutes at most if your not putting much detail into it.
Library: https://www.arduino.cc/reference/en/language/functions/usb/keyboard/
Here's a Youtube video as well, https://www.youtube.com/watch?v=SHIcliL4O14
Buy this and then Buy this other thing and you'll never need Radio Shack ever again.
These are parts I use consistently in my labs
Capacitor kit
Resistor kit
Jumper wires
Bread board(s)
Larger breadboard. Recommended for larger projects but I haven’t used it too much. Best for large IC circuits
Multimeter. This has all the right features
Other things that can be useful:
•Wire strippers
•Pliers
•Electrical Tape
•Tackle Box or tool bag (to carry everything)
•Flat jumper wires
As you get into classes you’ll need specific parts (transistors, logic gates etc) but this should get you started. I use the things I linked in every lab weekly.
Feel free to message me with any questions.
Joe Knows Electronics is your friend. 800-some piece resistor kits, each group individually bagged and tagged, comes in a nice compact cardboard box, and it's cheap as hell. I've been using their stuff for a while now, and it's good quality stuff.
Has he applied for any jobs yet? I was given one of those leather pads with paper inside and a holder for resumes (something like this) except it was from my undergrad university with their emblem. Definitely gives you some confidence for interviews and recruiting sessions. Also you can get him some nice resume paper to go with it. That lasted me for years.
I also enjoyed having one or two of these demotivational posters in my room. Depends on his humor and if he has barren walls like I did.
If you know more details about which raspberry pi he has, you could get some shield extensions. These are boards that expand its capabilities. There are also newer boards with better specs. Also with two boards you can of course make them talk to each other ;)
Depends on his area of interest and your budget, but you could get him some kind of [introductory FPGA kit] (http://store.digilentinc.com/fpga-programmable-logic/) or DE0-Nano.
Tools... so many tools he might be interested in. USB logic analyzers are so cheap these days and go well with hobby boards. Again not sure your budget, so you can go all sorts of ranges here (Open Workbench Logic Sniffer or scanaplus or Saleae Logic 8 or a china clone of Saleae Logic 8). Saleae or the knockoff I think are the better options for the software compatibility. He may be in need of a soldering iron or a multimeter.
Something else unique, you could get him a "gift card" (they don't really sell them) or an IOU to a PCB printing service. Ask him to design his own board and you'll pay $X of the service. You'll want to make sure he knows the price structure on the website because they charge per square inch and it depends on his design how many layers he may need. He makes the schematic and they will print some circuit boards for him. They won't mount the parts, just do the schematic and he would have to hand solder the components.
If he likes old videogames you could get him some old school USB controllers and tell him to install lakka on his rasberry pi, or just get him a new Raspberry Pi3 to dedicate it as an old-school console emulator. It is quite impressive how many consoles they have emulated.
And back to more tools... more micro screwdriver bits than you would actually need. You can get him a starter pack of resistors, capacitors, and other assorted electronics sparkfun. There are also so many buttons, switches, LED screen displays, etc. that he probably wouldn't want to buy on his own. Maybe you could get a container with an assortment of circuit components (resistors, capacitors, transistors, and other sensors). Careful! This can add up real quick. All types of sensors exist... ultrasonic rangefinder, stress, photocell, temperature, etc. etc. endless!.
Welcome! The brains of the operation is a Raspberry Pi. Connected to the Raspberry Pi are a bevy of sensors: Moisture, Temp/Humidity, Sunlight
They get checked every 10 mins and stored in a postgres db on AWS
You need a potentiometer.
You need 1k ohm resistance and a linear taper (some will be listed as audio taper and won’t work well).
Hook your dimmer leads up to the center and a side pin on the pot and you’re done.
You don't need to do any soldering if you get the right parts. Get these leads to connect to the header on the rpi board. Then get these connectors and you’ll need a 4.7k ohm resistor. I’d suggest buying a combo pack of resistors and save the other resistors for future projects.
Pull two of the F/F leads off from the rest and cut them in half; you’ll use 3 of the 4 resulting pieces. Connect one of the leads to the Vcc lead on the thermometer probe (usually red) and one end of a 4.7k ohm resistor. The connector/splice is a T so you’ll use all 3 connections. Then connect another of the half leads to the Data lead from the probe (could be yellow or white or almost any other color) and the other end of the resistor. You’ll have something that looks like an H with the two leads with the resistor across the middle. The third lead from the probe will be the ground lead which will probably be black. This lead will be straight through just joining the
resistorprobe lead to the lead with the gpio header female to connect to the rpi board. The end result should be 3 wires terminated with the female header connector and the resistor between Vcc/Power and Data lines. Now you are ready to connect to the rpi board. Make sure it’s powered down and locate pins 1, 7, and 9. Look here for a diagram. Pin 1 is the pin closest to the SD card. Pins 1,7, and 9 will be the first, fourth, and fifth pins respectively on the inside row counting from the “back” (side where the sd card is) of the board. Pin 1 (first inside pin) will go to the Power/Vcc lead, Pin 7 (fourth inside pin) goes to the Data lead, and Pin 9 (fifth inside pin) goes to the GND/ground pin.That’s it for the physical connection. Now boot it up and see if it’s already working:
cat /sys/bus/w1/devices/28-*/w1_slave
If you see something like the following, it’s working:
XX XX XX XX XX XX XX : crc=51 YES
XX XX XX XX XX XX XX t=23500
The second line t=NNNNN is the temperature in Celsius out to three decimal places so 23500 is 23.500 C.
If you get a “No such file or directory” error then do the following and reboot:
sudo sed -i.bak '$adtoverlay=w1-gpio' /boot/config.txt
EDIT: found a mistake in the ground lead connection instructions
Honestly you can get a bunch of the individual stuff separately on amazon. Here are some recommendations I have:
Get a volt meter that can measure ohms and current (mA):
https://www.amazon.com/gp/product/B00KHP6EIK/
Red/Green/Blue LEDs:
https://www.amazon.com/gp/product/B0059H5Z5O/
https://www.amazon.com/gp/product/B004UMA60S/
https://www.amazon.com/gp/product/B0059H5Z5O/
Breadboards:
https://www.amazon.com/gp/product/B01258UZMC/
Jumper wires:
https://www.amazon.com/gp/product/B00ZWEFWO8/
pir (motion) sensors:
https://www.amazon.com/gp/product/B017HP88VI/
transistors:
https://www.amazon.com/gp/product/B00R1M3DA4
resistors:
https://www.amazon.com/gp/product/B0185FGTSS/
https://www.amazon.com/gp/product/B0185FGN98/
The multimeter is great, you can make sure you wont fry your GPIO outputs. Try not to pull over 16mA of current per pin to avoid damage. Use a 1k or 330 ohm resister accordingly. You can also do a lot of cool stuff with a transistors and LEDs.
I've been documenting a lot of the electronics stuff I've been teaching myself; About six months ago I was where you were, setting out trying to learn how to use all these components. Feel free to reach out if you have any questions. I'd recommend going to the oldest post on my blog and reading in order if you want some ideas: https://supertechnologyknowledgequest.blogspot.com
PM me with any questions, I'd be happy to point you in the right direction for anything you are trying to do for which I can help! Best of luck!
edit: the multimeter is no longer on amazon, just find one that lets you read resistance AND current (milliamps).
I've used assortment packs like this before:
Joe Knows Electronics 1/4W 86 Value 860 Piece Resistor Kit
by Joe Knows Electronics
Link: http://amzn.com/B003UC4FSS
Also search for Elenco
Breadboards are for mocking up circuits.
https://www.adafruit.com/product/64?gclid=CjwKCAiA5qTfBRAoEiwAwQy-6Vh20yG6Pu3X7QUsvZ3IUAR2MR5EhKdlEPpA5rnXI_-nlAqat56QShoCZx8QAvD_BwE
Resistors are just components but you use them all the time so it's good to have a supply of them.
Top-cofrLD 1/4w Resistors Pack 164 values x 10pcs = 1640pcs 0-22M Metal Film Full range resistors Assortment Kits https://www.amazon.com/dp/B00WE1FQ8Y/ref=cm_sw_r_cp_apa_D6t6BbSSEQQKV
Wouldn't something like this work
https://www.amazon.com/gp/aw/d/B009KAEP7A/ref=pd_aw_fbt_121_img_2/163-7575233-3411138?ie=UTF8&psc=1&refRID=E5DJJXXPZKDYCS0FNTZR
He said his were 6Ω speakers. He was thinking of getting 2Ω resistors.
I'm a little out of the loop, but I thought 2Ω speakers were more prominent in car audio.
Anyway, assuming a 24V audio signal;
8Ω speakers = 3A draw = 72W per speaker max
6Ω speakers = 4A draw = 96W per speaker max
He's running at around 130% of max rated output on that channel, before we even get to adding in the center and the satellites.
That's all just napkin math, so it's not precise.
-----
OP, you only got so many choices here:
I actually didn't tally up the cost as that wasn't really of a concern to me, but I'll try my best to provide links to the things I bought for this. Feel free to add it up for me!
I also bought various tools, like crimpers, Dremel kit, drill, etc, but I don't consider those to be project-specific as I'll have them for the foreseeable future. Let me know if there's anything you see that you think I missed!
> Unfortunately the biggest issue is the Bose sound system runs on a 2ohm Independence for their speakers making an aftermarket upgrade next to impossible.
no so! My Infiniti is all Bose and is the same way. If the stereo doesn't see a 2ohm load when I start the car, it errors out. Just wire in a 2 ohm resistor before your line output converter, then the amp will always see a 2ohm load regardless.
I used this:
https://www.amazon.com/Chassis-Mounted-Aluminum-Wirewound-Resistor/dp/B008MLKDN8/ref=sr_1_6?ie=UTF8&qid=1503073409&sr=8-6&keywords=2ohm+resistor
and the the usual hi/lo line output converter. In my case I ran it to a Zapco monoblock and a JL sub, but you can use whatever.
Here's the explanation from AudioControl
http://www.audiocontrol.com/knowledge-base/everything-hooked-powered-music-playing-no-audio/
Now if you are trying to run component speakers, just get the 4 ohm speaker, and wire in a 4 ohm resistor in parallel. Some companies even do it on the speaker itself, so you just take a 4 ohm resistor, and connect the positive to positive, negative to negative, on the speaker terminals, then connect your wire as usual. The resistors are like 25 cents, and the amp will see a 2ohm load and you c an use whatever speakers you want.
10 cents for a resistor?!
more like 50x for 10 cents.
https://www.amazon.com/MCIGICM-Resistor-Assorted-1ohm-10M-36valuesX20pcs/dp/B06XCNK5XX?ref_=fsclp_pl_dp_1
thats something close for a penny each. what does the electronics giant Sony pay?
Note for the future: Please shorten your shopping links (or use reddit's feature to hide them like this). You can trim about two thirds of the URL:
https://www.amazon.com/Ictouch-300value-2800pcs-Resistor-KIT0148/dp/B01NCKQCYU
u/midwayfair mostly beat me to it.
You can get an assortment of topmany film box caps that will cover most of your foreseeable future needs for $15 from Smallbear.
You can also get an assortment of electrolytic caps from smallbear for $10.
[You can get a huge set of metal resistors with almost every value you'll ever need here for $10, marked with their value which is nice for initial sorting.]
(https://www.amazon.com/dp/B01J5M2G9Q?psc=1)
Wiring in parallel or series you can get to almost any value you'll need with those three purchases for $35. Not bad, right?
As for transistors/diodes/IC's, that's much more dependent on what you're building. A good rule of thumb there is every time you need 1, order 5. You'll have a nice selection (and empty wallet) in no time. Most would agree that Smallbear is the place to source those kind of "specialty" parts to make sure you get high quality/official/tested stuff. Mammoth is my personal second favorite. Tayda would be third, great prices but I've gotten some weird less-than-official looking stuff from them that doesn't always sound the same as their Smallbear counterpart.
BTW. You can buy some prototyping board (like this) and some through-hole resistor (like this) to practice your soldering, as soldering diodes and switches are pretty much the same technique, and they are super cheap. ;)
The dimensions of the box are 17in x 7.5in
The switch, potentiometer, and display was all one piece which was sourced from amazon. It’s in a previous post of mine on this page.
I had to use a different potentiometer than the one from the kit. The top plywood for the box was too thick for the knob to reach so swapped it out for these (https://www.amazon.com/Uxcell-a15011600ux0213-Linear-Rotary-Potentiometer/dp/B0171M5SRE)
The fans were two of these (https://www.amazon.com/ARCTIC-F12-Standard-Configuration-possible/dp/B002KTVFTE)
The magnets were bought off eBay. (Rare earth magnets, neodymium)
Washers for spacing the magnet from the fan were already owned.
Used clear epoxy for any gluing that was needed.
12v dc power plug, which was an old cell phone charger. I split the power supply to both PWM speed controllers.
That’s it for parts!
Hi! I built a Beavis Board about six weeks ago. Not terribly difficult to make at all. I purchased these on amazon from Joe knows...
Resistors
Capacitors
Transistors
The problem I have is that some of transistors aren't right for the layouts, the capacitors aren't film, and I couldn't find an assorted IC box.
If I had to do it all over again I would catalog all the parts needed for every project on the projects guide or see of there was a list of items the Beavis Board came with and take that to Tayda or Mammoth. It's a lot of work but will be better in the long run.
I'm definitely interested if anyone else has purchased assorted boxes and how that worked out.
Yes those will work fine, but you can use a much cheaper tool for the screwdriver, they make little plastic ones called tweakers designed just for rotating small pots.
Something similar to this:
https://www.amazon.com/Potentiometer-Tools-Hardware-ADJUST-piece/dp/B00DWI1LUA/ref=sr_1_fkmr0_3?ie=UTF8&qid=1494247175&sr=8-3-fkmr0&keywords=plastic+potentiometer+screwdriver
I'd remove that stupid metal clip on it before use, but anything similar to that will be perfect.
It depends on the component. Resistors and caps usually either work or not, and even really cheap sets tend to be within rated tolerances. I just buy the cheapest sets of those that have the values I want.
Transistors and ICs will depend on what you're getting. Common and still produced values are cheap and easy to get. Again, just buy whatever's cheap and gets you what you need. Watch out for fakes or seconds when buying out-of-production parts like 308s or 3007s. Best to get those from reputable places (smallbear, Mammoth, etc), because they're expensive and it's easy to get burned. I'd really look at the values you're getting when ordering ICs and possibly transistors in bulk. Those parts are usually really specific to a build and buying a lot of values might leave you with a bunch of unused parts.
The Joe Knows sets are good, if a little expensive. They tend to be well sorted, which is nice, but not something I'm willing to pay more for. Like this set of resistors is going to be just as good and is significantly cheaper than the equivalent Joe Knows set. There's certainly nothing wrong with the Joe Knows stuff though - if it has the values you need at the right price, go for it.
You can also score some great bulk deals on ebay and alibaba, but you'll be stuck waiting for overseas shipping a lot of the time. I'd go Amazon for an initial order and then shop around when you refill.
I can't speak to if it would work but amazon has them
https://www.amazon.com/gp/aw/d/B016NXK6QK/ref=mp_s_a_1_3?ie=UTF8&qid=1526339191&sr=8-3&pi=AC_SX236_SY340_FMwebp_QL65&keywords=resistor&dpPl=1&dpID=412RenH-PlL&ref=plSrch
You have to solder a resistor to the R14 jumper on the back of the pcb. I used a 100 ohm size 0603 resistor from this pack and these leds from Adafruit.
Picture of the jumpers
I did it.My transformer is shared with my upstairs neighbors so I had to reroute the wiring. It was actually very straightforward. This is the exact one I bought.
https://www.amazon.com/dp/B06XQWJ4JP/ref=cm_sw_r_sms_c_api_i_hgFXCbM0CQPC4
In the past I've used a large box type thing to control the heat output of my 1500w element. It got VERY VERY hot, and burnt out, because apparently i should have put a giant heatsink on the back (Why would it NOT come with one?)
Anyway....looking up motor controllers again, I see nothing but these guys. Rated at 2kw should be good for a 1500w element, but I'm not sure if PWM is a good thing, compared to plain old analog tuning. I guess it depends on the pulse width, right? 10hz compared to 0.1hz might be fine.
Edit: this is what I had which apparently is a FAN controller, and obviously analog (rheostat)
I’m not sure I’d call it bulk but here’s what I ordered: ELEGOO 17 Values 1% Resistor Kit... https://www.amazon.com/dp/B072BL2VX1?ref=ppx_pop_mob_ap_share
They come pre organized into little packets in a clear box. Super handy and takes up less space than if I put them in the drawers.
Hope this helps.
https://www.amazon.com/gp/aw/d/B0185FGN98/ref=mp_s_a_1_1?ie=UTF8&qid=1500397995&sr=8-1&pi=AC_SX236_SY340_QL65&keywords=330%2Bohm%2Bresistor&dpPl=1&dpID=41zlzAaQE-L&ref=plSrch&th=1&psc=1
anything anti static should be good
https://www.amazon.com/Potentiometer-Tools-Hardware-ADJUST-piece/dp/B00DWI1LUA/
https://www.amazon.com/VISHAY-SPECTROL-008T000-ADJUSTMENT-TRIMMERS/dp/B00HKJ90V4/
https://www.amazon.com/Aven-13016-Piece-Anti-Static-Alignment/dp/B001Q4YGQS/
If you do not have doorbell chimes, you must use a resistor to simulate the wiring that would be in the mechanical chime. And you'd need a resistor on one of the wires for each doorbell. Also, running two of them off a tiny 10VA transformer probably won't work very well. It may, but you may have problems with slow/no charging also. But the resistor not being there will prevent it from charging entirely. Also, don't press the button or it could fry the other Ring since they're both attached without the resistors.
https://www.amazon.com/Cutequeen-Aluminum-Wirewound-Chassis-Resistor/dp/B06XQWJ4JP/
That's a 2-pack of compatible resistors. Since you're operating two in parallel off one transformer, you'll want to picture the wire nuts as your connection to the transformer, as it relates to the image on Ring's site. So the resistor will go on the red wire between the wire nut and the station wire, not between the wire nut and the transformer.
Sure. Does yours have a 2 pin or a 3 pin plug?
Something like this should work fine.
Photo of the label on the tray would help.
It is a good idea to do that with resistors. Here isa nice super cheap pack that will have most of the values you'll ever need for pedal building. They are perfectly fine resistors that will fit any builds of yours. I measured several ones and they were OK.
I would not recommend it for capacitors though because this kind of packs are usually (really) low quality parts. Can be nice for prototyping though.
This.. I have really been enjoying look mum's cem 3340 tutorial:
https://www.lookmumnocomputer.com/cem-3340-diy-simple/
I would strongly suggest getting a resistor and capacitor kit off ebay or amazon.. They're like 15$-20$ each. That will get you a few of a huge range of resistors and caps:
https://www.amazon.com/Top-cofrLD-Resistors-1640pcs-resistors-Assortment/dp/B00WE1FQ8Y/ref=sr_1_14?s=industrial&ie=UTF8&qid=1541720878&sr=1-14&keywords=resistor+book
https://www.amazon.com/Joe-Knows-Electronics-Value-Capacitor/dp/B007SVHFXO/ref=sr_1_5?s=industrial&ie=UTF8&qid=1541720924&sr=1-5&keywords=capacitor+kit&dpID=41%252BFAHpNRVL&preST=_SX342_QL70_&dpSrc=srch
The worst part of these projects is waiting for parts. So Building up a little surplus of this kind of stuff will make your wait time much lower..
That sounds about right. Even if it ends up not working out I would recommend you try anyway because your next project could be a success.
This will most likely also require soldering experience. I suggest you get a pack of crappy plated perf boards and a big pack of resistors and just spend an hour or two doing nothing but soldering.
The physical assembly steps could be interesting to live stream, but be careful because a lot of people will start making suggestions that may or may not be good that you would be better off ignoring.
I do stuff like this professionally, so if you have questions that aren't getting answered (or don't want to post something publicly) feel free to PM me.
Edit: Plated perf board that will work: https://www.amazon.com/dp/B072Z7Y19F
Resistor pack: https://www.amazon.com/dp/B07L851T3V
Feel free to hit me up with questions. I have always wanted to design a sex toy, so I learned a lot of relevant skills, but unfortunately I have a job that uses all of those skills now and I am too busy to work on my passion projects.
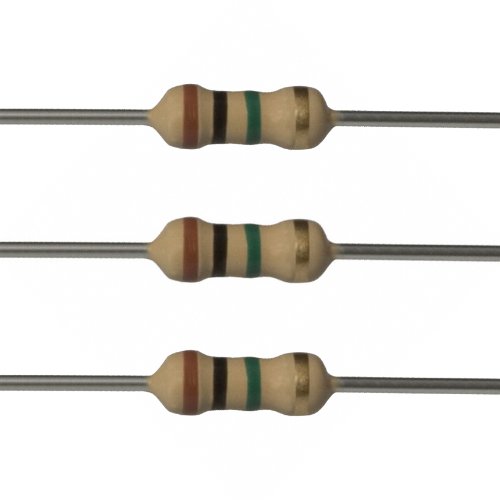
I just realized the resistors I'm using are "metal film". I'm using these.
Here is a link to the manual.
I connected the resisters across the BNC connector using this
I appreciate your help.
I'm a big fan of this kit, mostly because the resistors already come in individually labeled bags, but its a bit more expensive. Amazon
> What I was shooting at was more of the specifics, e.g. variety vs 330 and 10k resistors only. Think of it like the emergency kit of arduino :P
No. You WANT a veriaty kit like this if you already don't have one: http://www.amazon.com/gp/product/B003UC4FSS/ when it comes to common parts like resistors, caps, diodes,etc. After getting that, get a bulk order of common ones like say 100,220,1K,22K,etc resistors.
Most boards I've come across really don't appreciate and are sensitive to anything above 27-28 VAC.
Edit:
Nice kit I bought on Amazon for similar situations.
Elegoo 17 Values 1% Resistor Kit Assortment, 0 Ohm-1M Ohm (Pack of 525) https://www.amazon.com/dp/B072BL2VX1/ref=cm_sw_r_cp_apa_i_q2k.AbW3C1F4A
I ordered this pack last night.
okay everything works now! well X and Y are working like they should be. I just have to connect the Z and solder the resistor. I have never soldered a resistor so is there a certain orientation I should be doing it? I bought this resistor: https://www.amazon.com/gp/product/B0185FHALI/ref=oh_aui_detailpage_o03_s00?ie=UTF8&psc=1
I am red-green colorblind so I may say the colors wrong so from left to right I see brown-black-green-gold. Should brown side or gold side be facing towards the wire from the Z-probe or does it not matter?
For the organization reason I just got this. Chocked full of values I'll probably never need, but now I have them and at least a way to keep them all organized!
You should have a wire wound resistor inline to protect the transformer from frying. Or wire the power kit inline in bypass mode to provide a self resetting fuse. Obviously something is shorting out the transformer. Pushing the button will do that and with no load, could damage the internals of the pro as well.
Cutequeen 2PCS 50W Watt 25 Ohm Resistor Aluminum Case Wirewound Chassis Mounted (Pack of 2) https://smile.amazon.com/dp/B06XQWJ4JP/ref=cm_sw_r_cp_apa_i_sEXEDbTXRHQBD
https://www.amazon.com/VISHAY-SPECTROL-008T000-ADJUSTMENT-TRIMMERS/dp/B00HKJ90V4/
(not clear if that's the right size for your use, or not.)
You want a 'poteniometer screwdriver' or 'tweaker'
These should be it, right?
https://www.amazon.com/E-Projects-100EP5141M00-Ohm-Resistors-Pack/dp/B0185FHALI/ref=sr_1_1?ie=UTF8&qid=1466351570&sr=8-1&keywords=1+mohm+resistor
So a router speed controller would not work?
What about a device like this?
https://www.amazon.com/TruePower-Electronic-Stepless-Controller-Brush-type/dp/B009KAEP7A
Thank you for submitting to /r/SmallYTChannel. You have spent 3λ to submit here, making your current balance 2λ.
/u/PurelyStats, please comment
!givelambdato the most helpful advice you are given. Youwill be rewarded 1λ if you do so. For more information, read the FAQ.
Video data:
Field|Data
:-|:-
Title|Recreating the 40-Yard Dash Speed Test with a Raspberry Pi and Phototransistors
Thumbnail|Link
Views|111
Length|05:31
Likes/Dislikes|8/0
Comments|0
Description|In this video, we show how we created the NFL's 40-yard dash speed test that is used by scouts to evaluate the speed of potential American football prospects. To recreate the test, we used a Raspberry Pi, phototransistors, laser diodes, resistors, a analog-to-digital converter, and a simple Python stopwatch program. Using these materials, we created two laser tripwires separated by 40 yards. One tripwire starts the stopwatch, and the other stops the stopwatch. ⤶⤶For more information on the code and our wiring setup, visit our github repository: https://github.com/chris-gong/forty-yard-dash-rpi⤶⤶Thanks again to our friends for helping us out: Alex, Taylor, Ethan, Zach, and Grant⤶⤶Join our discord: https://discord.gg/2xbR5qT⤶Support us on patreon: https://www.patreon.com/flopperam⤶⤶Social media links:⤶Twitter: https://twitter.com/Flopperam⤶Instagram: https://www.instagram.com/flopperam/⤶Facebook: https://www.facebook.com/flopperam⤶Alex's Twitter: https://twitter.com/uhFakie⤶⤶Materials Used:⤶Raspberry Pi: https://www.amazon.com/ELEMENT-Element14-Raspberry-Pi-Motherboard/dp/B07BDR5PDW/ref=sr_1_4?keywords=raspberry+pi&qid=1565404835&s=gateway&sr=8-4⤶Phototransistors: https://www.amazon.com/HiLetgo-Phototransistor-Photosensitive-Sensitive-Sensors/dp/B00M1PMHO4/ref=sr_1_2?keywords=phototransistor&qid=1565404855&s=gateway&sr=8-2⤶Laser diodes: https://www.amazon.com/HiLetgo-10pcs-650nm-Diode-Laser/dp/B071FT9HSV/ref=sr_1_3?keywords=laser+diode&qid=1565404876&s=gateway&sr=8-3⤶Breadboards: https://www.amazon.com/Breadboards-Solderless-Breadboard-Distribution-Connecting/dp/B07DL13RZH/ref=sr_1_3?keywords=breadboard&qid=1565404905&s=gateway&sr=8-3⤶Battery holders: https://www.amazon.com/LAMPVPATH-Battery-Holder-Bundle-Single/dp/B07BNMKNQX/ref=sr_1_5?keywords=battery+holder&qid=1565405063&s=gateway&sr=8-5⤶Analog-to-Digital converter: https://www.amazon.com/HiLetgo-Converter-Programmable-Amplifier-Development/dp/B01DLHKMO2/ref=sr_1_3?keywords=raspberry+pi+adc&qid=1565405226&s=gateway&sr=8-3⤶Breadboard wires: https://www.amazon.com/EDGELEC-Breadboard-Optional-Assorted-Multicolored/dp/B07GD2BWPY/ref=sr_1_3?keywords=breadboard+wires&qid=1565404930&s=gateway&sr=8-3⤶10k ohm resistors: https://www.amazon.com/Projects-100EP51210K0-10k-Resistors-Pack/dp/B0185FIOTA/ref=sr_1_3?keywords=10k+ohm+resistors&qid=1565404944&s=gateway&sr=8-3⤶⤶Music Creds⤶Song: Royalty Free Music | Victory - Hip Hop Beat | No Copyright Instrumental⤶Video Link: https://www.youtube.com/watch?v=4D-LoMTbvx4⤶Music & Arrangement: Marjan Gjorgjievski⤶Mix & Mastering: Marjan Gjorgjievski⤶⤶Song: Lakey Inspired - Blossom⤶Video Link: https://www.youtube.com/watch?v=B7ArnZl_zBU⤶Follow the artist, Lakey Inspired:⤶https://www.facebook.com/LAKEYINSPIRED⤶https://soundcloud.com/lakeyinspired⤶http://instagram.com/lakeyinspired⤶⤶#nfl #40yarddash #raspberrypi
Channel Data:
Field|Data
:-|:-
Name|Flopperam
Thumbnail|Link
Subscribers|577
Videos|31
Views|54011
^/u/SmallYTChannelBot ^made ^by ^/u/jwnskanzkwk. ^PM ^for ^bug ^reports. ^For ^more ^information, ^read ^the ^FAQ.
How wide is your maple? Something to consider: I have a 12" 5hp Belsaw planer at my shop in Hagerstown, I'd be willing to give you access to for lumber trade. Also, I noticed you need a motor for your lathe, I have 4 electric motors that I don't use, I think most have pulleys. I purchased this a while ago as a speed controller, it works great.
Those slabs sound amazing. How did you get those milled?
>How wide is your maple? Something to consider: I have a 12" 5hp Belsaw planer at my shop in Hagerstown, I'd be willing to give you access to for lumber trade. Also, I noticed you need a motor for your lathe, I have 4 electric motors that I don't use, I think most have pulleys. I purchased this a while ago as a speed controller, it works great.
>Those slabs sound amazing. How did you get those milled?
I also have a 12" planer. Some of the board are over 18 or 20. I think I'll be ripping most of them down anyways. Thanks for the offer on the motor, I recently picked up 2. I just need to get a belt that fits now.
The slabs I had done by 2griffins. They had an Alaskan chainsaw mill. That was really cool to watch. If you ever want to come see some of it, let me know.
Still can online, even cheaper. Pack of 1120 resistors, in 56 different values, costs 11 dollars. Less than 1 cent a piece
off the top of my head around 120-150 but thats assuming you buy everything online with free shipping and assuming you have access to alot of tools.
Pi Zero https://www.adafruit.com/product/2885 $5.00
LCD https://www.amazon.com/BW-3-5-Inch-Monitor-Automobile/dp/B0045IIZKU/ $15.50
USB Sound Card https://www.amazon.com/Sabrent-External-Adapter-Windows-AU-MMSA/dp/B00IRVQ0F8/ $6
USB HUB https://www.amazon.com/Adapter-Converter-Android-Samsung-Transformer/dp/B00OZDUTMM $6
Volume Potentiometer https://www.amazon.com/16x2mm-Double-Taper-Duplex-Potentiometer/dp/B00O9Y6Z70 $6
Mono 2.5w amp https://www.adafruit.com/products/2130 $3
ABXY PCB http://store.kitsch-bent.com/product/common-ground-dmg-button-pcb-a-b-x-y-version $11.75
Power Boost 1000C https://www.adafruit.com/products/2465 $20
Female micro usb https://www.adafruit.com/products/1829 $1
female usb socket https://www.amazon.com/uxcell-Female-Degree-Socket-Connector/dp/B00FH85SGG Free or $6
Stereo Jack https://www.amazon.com/uxcell-Plastic-Stereo-Socket-Connector/dp/B00GLQAF7A $6
Slide switch https://www.amazon.com/uxcell-SS12F32-G7-Position-Switch-Solder/dp/B007QAJWYW $6
Membrane set http://store.kitsch-bent.com/product/silicone-buttons $2.75
Extra button set http://store.kitsch-bent.com/product/custom-buttons $2
28mm Speaker https://www.amazon.com/Metal-Inside-Magnet-Player-Speaker/dp/B00O9YG9GM $6.50
two single button pcb http://store.kitsch-bent.com/product/easy_buttons $4.30
2300mah Battery http://www.microcenter.com/product/458057/2,300_mAh_Li-Po_Battery_and_Charger $15.00
I bought most of the kits from Small Bear Electronics (the exception was the resistor kits). They are one of the only sources I've found for capacitor kits, transistors, op amps, pots, etc and they have some great stuff available.
Link to kits here
Spent about $100 but it took a lot less time than ordering all the items separately on Mouser.
I also bought a resistor kit from Joe Knows Electronics on Amazon.
Link to resistor kit here
I would also recommend buying a component tester, it's one of the best purchases I've made. It makes it feasible to pull all the components off of your breadboard and sort them quickly so you can reuse them. Also very handy in double checking a component value when you're building a pedal without looking at the color coding, etc.
Link to component tester
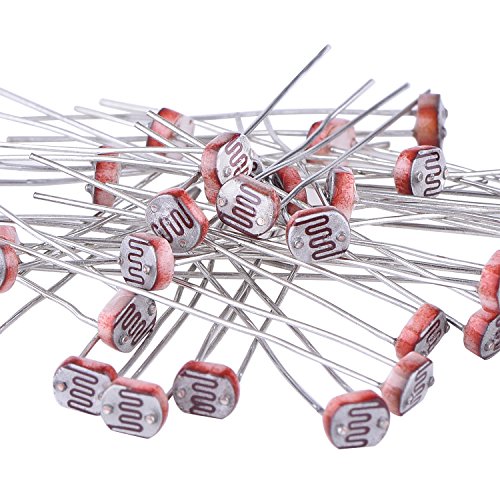
Thanks for the info! Just to make sure, do these work? https://www.amazon.com/eBoot-Photoresistor-Sensitive-Resistor-Dependent/dp/B01N7V536K/ref=mp_s_a_1_5?keywords=light+sensors+arduino&qid=1562689767&s=gateway&sprefix=light+sensors+&sr=8-5
Something like this. Even though this is overkill for a one off solution. 5% resistors would be fine too.
Elegoo 17 Values 1% Resistor Kit Assortment, 0 Ohm-1M Ohm (Pack of 525) https://www.amazon.com/dp/B072BL2VX1/ref=cm_sw_r_cp_apa_yAK0AbPG0JMZD
whoops! thanks! just canceled. i thought i was making things easier! i found two resistor sets that ranged from 0-10M:
Pixnor
Cutequeen
The Cutequeen certainly looks like a better value but I don't think I need that many resistors, so I went with the Pixnor set. For capacitors I think these should fit the bill:
Capacitor set
I read a bit about the different kinds of caps and decided that I didn't want to deal with electrolytic caps since I'm just starting out and don't want to have to worry about polarity.
Hopefully I picked the right components this time! Thanks again for the help!
Find yourself an old fan motor or an old plug in drill and hook it up with something like this http://www.amazon.com/TruePower-Electronic-Stepless-Controller-Brush-type/dp/B009KAEP7A
Here’s a listing of all the included material
eBoot 30 Pieces Photoresistor Photo Light Sensitive Resistor Light Dependent Resistor 5 mm GM5539 5539 https://www.amazon.com/dp/B01N7V536K/ref=cm_sw_r_cp_api_i_-wV6CbC6051BJ
Beadalon Artistic Wire 30-Gauge Bare Copper Wire, 30-Yards https://www.amazon.com/dp/B0048927RI/ref=cm_sw_r_cp_api_i_vEV6CbC9KF2ZQ
MCIGICM 200pcs 2n3904 npn Transistor, 2n3904 Bipolar (BJT) Transistors NPN 40V 200mA 300MHz 625mW TO-92-3 https://www.amazon.com/dp/B06XRBLKDR/ref=cm_sw_r_cp_api_i_UEV6Cb66Z0SC2
3mm Diffused LED Diode Assortment Kit - Pack of Assorted Color LEDs and Resistors (1000 pcs) - Red, Green, Yellow, Blue and White Light Emiting Diode Indicator Lights from Plusivo https://www.amazon.com/dp/B07GBFJ823/ref=cm_sw_r_cp_api_i_dFV6CbWBSS5AD
Good idea! For anyone who wants to have a set of organized resistors I would recommend this kit. Only $18 in Amazon.
http://www.amazon.com/Joe-Knows-Electronics-Value-Resistor/dp/B003UC4FSS
I've had good luck with a router speed controller. You can find them at most hardware stores for very little money.
Do you work with small electronic devices, or ones that need adjustment? This looks like a potentiometer adjustment tool.
I am using this one: https://www.amazon.com/dp/B00O9Y6Z70/ref=cm_sw_r_cp_apa_xFcSAbSZCMY49
100-200 Ohms seems about right. But I recommend buying a resistor kit like this instead of the individual values, makes you more flexible for future projects. And it's even cheaper than the 2 single value stips you listed.
>First off, the burden of proof is on you.
LoL, no, you're the one trying to disprove me.
>Don't tell me too google it, I went to school for it.
Good for you, so did I, you clearly need a refresher. Or simply more time working with the real thing rather than staring at formulas in a book. You clearly understand each part, each textbook equation... but you fail to understand how it all works together in a real, live DC circuit.
>Blah blah formulas and shit
Ok, that's nice and pretty on paper. Now go take a load simulating resistor and some 32AWG or so wire... cut to various length, one inch, one foot, one yard, 3 yards, etc. Hook them up to a bench power supply or just a car battery and let me know which one gets hotter.
Protip: When you get decent technical training, they don't just throw this stuff at you in formulas in a book, they also make you do it yourself by hand and show you, in a safe environment, what kind of fuck ups are dangerous. I've seen what happens when you run small wires further than you should. I've seen what happens when you drop a wrench on a 12V battery with enough amperage to melt it. I've seen why airbags are kinda terrifying.
This is how I know for a fact that this is correct and am not paying attention to your prattling on about formulas you know how to use but do not understand. I have done that experiment, the little 1 inch wires doesn't give a shit and stay cool, the 1 foot wires get a little warm but no big deal, the 1 yard wire is very hot to the touch and the longest one acts like a fusible link, burns out.
https://www.amazon.com/Joe-Knows-Electronics-Value-Resistor/dp/B003UC4FSS/ref=mp_s_a_1_2_sspa?keywords=resistor+assortment+kit&qid=1573074991&sprefix=resistor&sr=8-2-spons&psc=1&spLa=ZW5jcnlwdGVkUXVhbGlmaWVyPUEyWE1WMVFCTEZKTjJZJmVuY3J5cHRlZElkPUEwNTk4MjU1MTlSRUhHTFdDWDZUMyZlbmNyeXB0ZWRBZElkPUEwMjY5NzI5Mk1BM0tKRFhPNzlMTCZ3aWRnZXROYW1lPXNwX3Bob25lX3NlYXJjaF9hdGYmYWN0aW9uPWNsaWNrUmVkaXJlY3QmZG9Ob3RMb2dDbGljaz10cnVl
I trust you are capable of typing the word "breadboard" into Amazon's search bar yourself.