(Part 3) Best tape, adhesives & fasteners according to redditors
We found 1,290 Reddit comments discussing the best tape, adhesives & fasteners. We ranked the 493 resulting products by number of redditors who mentioned them. Here are the products ranked 41-60. You can also go back to the previous section.


Glue. Yes, there is clothes glue. Well, tape actually: Hollywood Fashion Secrets Medical Quality Double-Stick Apparel Tape, 3 tins x 36 strips Value Pack https://www.amazon.com/dp/B00AR4BLWA/ref=cm_sw_r_cp_api_6DPCAbWDY3BHR
This might work. But IDK how easily you could remove it in the future
I guess I'm not enough of a DIY person...
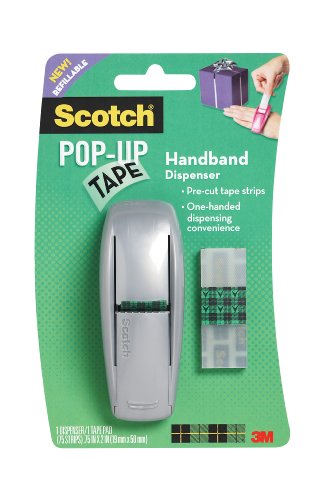
http://www.amazon.com/Scotch-Handband-Dispenser-Inches-96-G/dp/B000XSPEPA
http://www.amazon.com/MoMA-X-Shaped-Rubber-Assorted-Colors/dp/B003335MZ4
That's why everyone should own one of these.
https://www.amazon.com/MoMA-X-Shaped-Rubber-Assorted-Colors/dp/B003335MZ4
It was super simple! I bought these magnet sticker sheets from Amazon — one of the reviewers said they used them for a magnetic palette and that the hold was strong enough: https://smile.amazon.com/gp/product/B00B2SE5KA/
Then I emptied out an old pencil case, and cut the magnet to be the right size. Pressed it into the bottom, and voila!
I've always used the Hollywood Fashion Tape or, because sometimes I just really need it to hold, duct tape or skin-safe sports tape. Duct tape isn't exactly skin safe for long wear, but it gets the job done.
I used something similar to this:
https://www.amazon.com/dp/B078SVG2CC/ref=cm_sw_r_cp_apa_i_uRWvDbFCCXECM
The magnets are 1/2 inch wide and I needed 1/4 inch so I cut it lengthwise whenever I needed it. Hope that helps!
They'll mail them to you for free, but that won't happen in two days.
Amazon sells them:
https://www.amazon.com/Replacement-Holder-Mounting-3M-Fasteners/dp/B007BH5848/ref=sr_1_4?ie=UTF8&qid=1473861514&sr=8-4&keywords=Ez+pass+Velcro
Seriously, bathing in DEET before going to bed? I gotta know, are y'all taking the piss here or do Irish people literally not know about window screens?
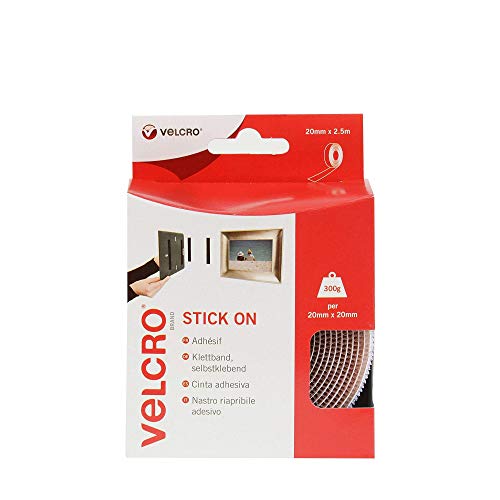
Edit: if you do buy that particular screen, get some proper Velcro tape as well, because the stuff that comes with it is shit.
Yeah!
For those interested, I found these awhile back when I had a similar idea:
Chalk
Dry Erase
This Scotch Handband dispenser is amazing for wrapping gifts, but it's such a pain that it needs special (somewhat expensive) refills.
Sure, but this would probably be easier to use.
I used this, two strips on each about 2 inches long. Holding well so far! I used pretty much the entire roll for all of these.
Amazon has them available, I use these:
https://www.amazon.com/gp/product/B00B2SE5KA/
60mm thickness is the key, and can cut it using a standard hobby knife.
I have dual sticks, not have a HOTAS, but I think my setup is still relevant.
I've been toying with the idea of making fold-away holders for my sticks that attach to my chair but it's probably a pipe-dream. I use my computer and desk mainly for work... so any solution has to be removable or tucked away for non-playtime. But until then... this is how I do it:
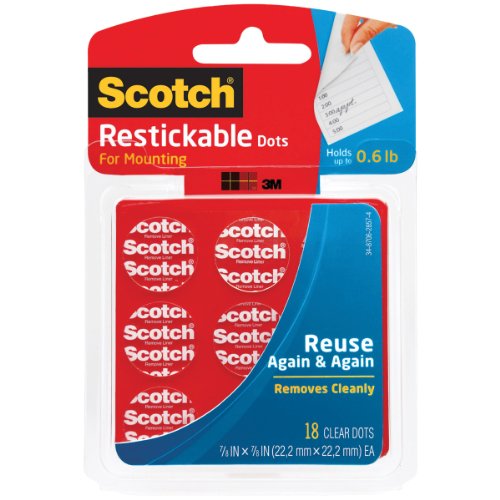
A year or so ago, someone on this sub suggested Scotch Restickable Dots. I attach 3-4 to the base of each stick and plant them firmly on the mouse pad. I also have many under the mouse pad to keep it secured to the desk top.
Works well for me. I simply pick up the sticks and put them off to the side when I'm done. I remove the Dots from the bases and put them on top of the bases to keep them from sticking to the desk elsewhere. I also cover my sticks when not in use (I have cats)... so the Dots remain fairly clean.
Oh, and the Dots are washable... so you can "refresh" them if they loose their stickiness.
Could get those small binder clips and clip the towel in that and use the silver part to hold onto a tack.
3M Mounting Squares They do wonders
I'm pretty sure you'd be better off making your own; you can buy the bands for dirt cheap.
http://www.amazon.com/Latex-free-Silicone-Refill-Bands-1800pcs/dp/B00F3TKLRA/ref=sr_1_1?ie=UTF8&qid=1407017421&sr=8-1&keywords=loom+bands
I'm glad that you like my design though! :)
There are a few "rifle" and pistol styles made by companies, but in all honestly they are far too small and silly looking for a man to carry around. They don't really have the shape and look of a flintlock or matchlock/wheel-lock firearm. I have made most of mine by hand. For a long rifle, I used a 2x12 and cut it to the shape I wanted (looked online to find a pattern that I liked then glued a plastic clothespin at the back of the barrel location. You'll have to order some larger heavy duty rubber bands or make your own with surgical tubing.
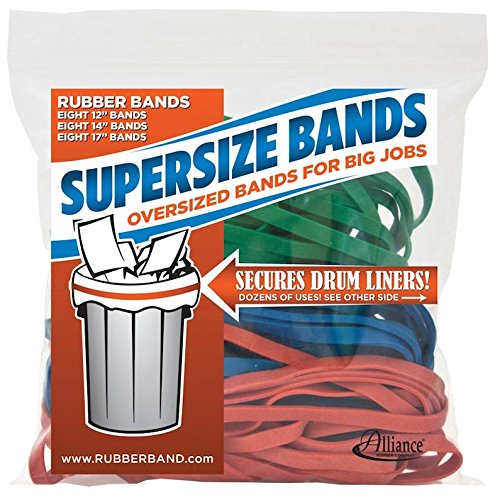
Here is a link for the type of bands I use for my musket.
http://www.amazon.com/Alliance-SuperSize-Resealable-Containing-Inches/dp/B0017D16PW/ref=sr_1_3?s=office-products&ie=UTF8&qid=1418397209&sr=1-3&keywords=rubber+bands+12
I'll post a picture of some pistols i'm working on later.
You can either pay this person £20 for 10 rubber bands, some image files, and some printed stuff, or buy 1800 rubber bands for $3.85.
Seems a pretty clear-cut choice for anybody capable to living without adult supervision.
I used VELCRO Brand. They also do heavy duty, but I haven't tried that since this one works well for me.
Sounds like there could be some RF interference.
Try this USB hub and put the hub closer to where your controller will be, and then plug the MS dongle into that.
I have one on my desk with my Logitech keyboard and mouse dongles and it's worked great.
(Note it's USB2 on purpose, USB3 has been known to cause interference with wireless devices)
https://www.amazon.com/gp/product/B07B4YBR3Z/ref=ppx_yo_dt_b_search_asin_title?ie=UTF8&psc=1
Secondary tip:
If you put that USB hub on your desk and want it to stay put, these are great temporary fasteners:
https://www.amazon.com/gp/product/B007Y17T70/ref=ppx_yo_dt_b_search_asin_title?ie=UTF8&psc=1
Maybe use adhesive magnetic tape? The reviews say that the hold generally sucks, but that doesn't matter if you're using rare earth magnets on the headphones rather than just a plate of non-magnetic steel.
https://www.amazon.com/gp/product/B00B2SE5KA/ref=oh_aui_detailpage_o00_s01?ie=UTF8&psc=1
Its a metal door :)
http://i.imgur.com/812ZmTg.jpg
I usually turn everything i make into a magnet with those sheets, they work really well, but they do tend to fall off when the perler warps a bit, so i use glue to make sure they stay on.
Scotch Pop-Up Tape Handband Dispenser, 3/4 x 2 Inches, 75 Strips/Pad, 1 Pad/Pack - Colors May Vary (96-G) https://www.amazon.com/dp/B000XSPEPA/ref=cm_sw_r_cp_api_i_LMf0DbJMN2HYV
> Glue on a magnet
That's what I was thinking. Look at this and see if it might work. Should be easy to remove when you leave.
For the most part, it's just this: http://www.amazon.com/GOLDSTAR-GS60S-P-TAGGING-GUN-STANDARD/dp/B000Q83MLU
It come with the T-tags and you just tag them back on when you're done. Make sure that the item is returnable before you walk out with it and it's helpful to note where the original tag was. Even if the T-tag doesn't look exactly like the one from the store, I've never had them question me.
I always return items in perfect condition with no smells, stains, or whatever. So, you have to be careful not to get sloppy drunk. It's great for job interviews, when you can't afford a new business outfit. Or for weddings when you aren't part of the bridal party.
Sure, it doesn't need to be a specific tape, but I would use a velcro style like: https://www.amazon.com/Pass-I-Pass-SunPass-Adhesive-Strips/dp/B007BH5848/
I wouldn't use a foam tape as I would be concerned it would not stand up to the heat on the back of the television over time.
3M itself just referring to the adhesion brand - but there are other options out there.
>I can imagine you doing that XD (having a sticky note on my hammer)
I always laugh at myself when I do, but it works! : )
>I don't keep sticky notes at home.
We were talking about adhesives. This is a fun one. It makes any paper into a sticky note. : )
>I'll figure out the sandwich thing. It's in my enormous list of food bookmarks XD
Perfect!!
After years of tape, I changed to putty. But then I found this:
https://www.amazon.com/Scotch-Restickable-8-inch-18-Dots-R105/dp/B007Y17T70/ref=sr_1_4?ie=UTF8&qid=1519050026&sr=8-4&keywords=3m+sticky+dots
I've had the same set of stickies on my markers for over 6 weeks. They are totally washable ( when you're washing your hands), add just a drop of soap and rub them. You can feel the grime coming off of them. Then, I just let them dry for about 10 minutes. I keep them on a piece of film/plastic in my pocket. Life changing. They are very thin, so I doubled them on my marker to make it easier to use.
ok I just googled "ipass velco", and got this
three doll hairs, free shipping(though its not prime so no 2day) a the nearest toll plaza to me is $0.55 plus gas brings it up to maybe a buck fiddy, two bucks at most. so yeah, it would be cheaper to just go to the toll plaza =D
I plan on storing my seeds for years. Here's how I do it:
This method takes care of the 3 things that lower seed viability--humidity, oxidation (with the oxygen absorbers and vacuum seal), and temperature. I also plan on saving herb for the long haul like this, but with 62% Boveda packs instead of the CaCl2.
I use this kind of bag instead of the floss away ones. I get them from craft stores. They have a write on strip and a hole punched in the top. I write the floss number on the bag, pop the floss in and hang it on a 3 inch binder ring. I keep them in numerical order rather than colour families as I mostly use patterns. If you design your own, I would think that arrangement by colour would make more sense.
I have about 75 bags on a ring. When one starts to get full I split it and start a new ring so I have one ring with floss numbers 0-100 (I don’t have every floss colour...yet) and another with 101-200 etc.
Works for me. I hang them on a hanger in the closet when I’m not using them. When I have an active project, I take the colours I’m using and put their bags on another ring so I have an “active” ring.
Sonya (my niece's name is Sonja hehe), your Momma wouldn't tell you this but...learn how to rock red lipstick when you get older :-D
my sonja is obsessed with these
One these work?
1
2
3
use a tagging gun tool to hold the sandwich together because it's faster and easier than safety pins.
http://www.amazon.com/ExecuSystems-GS60S-P-TAGGING-GUN-STANDARD/dp/B000Q83MLU
Honestly, get a couple of big rubber bands like these and you'll probably be fine. What's the manufacturer and model of the shaker, maybe you can find something from there?
I wonder if two strips of magnetic tape in the top hem would work for the opening. It's pretty flexible, but would stiffen up a bit when stuck together, and is probably easy to roll up. I have some at work. Might try it out tomorrow.
As far as sewing skill, it's just practice. Set up the next few inches of what you're about to sew, and feed it through smoothly at a constant speed. Use something as a visual guide, either the edge of the foot, or a mark on the machine, or a piece of masking tape with a measured line drawn for your seam allowance.
If you just want sewing practice without wasting a bunch of expensive fabric, you could probably use cheap blue tarps from the hardware store. If you don't want to be wasteful, make some reusable grocery bags or something? That's an easy project to practice design, construction, top stitching, rolled hems, and handles. (Tip: Make a U-Panel style bag with a single front/bottom/back panel, and two side panels.)
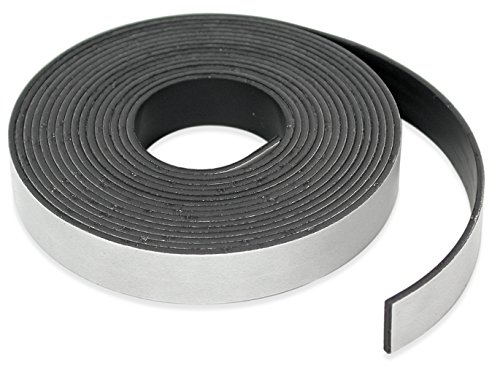
I got it on Amazon.com, as a roll of magnetic tape. I had to cut it up into appropriate length pieces, then lay it out flat and put some heavy books on it to get it to stop trying to roll back up. And then it still tried to, so I keep the sheets stored face-down when I'm not using them, and that's gotten it to flatten out better.
Here's the link to the specific magnetic tape I bought:
https://www.amazon.com/gp/product/B005HYDC68
Here's a quick tutorial! Do give me a shout if you need clarification of any parts of it!
To make a cover for your cth480 you'll need to find a glass supplier that can cut you a sheet of 2mm glass sheet to 123x205mm.
The prices, quality and precision of the cutting can vary a lot between suppliers and you may need to search around for one that doesn't have a minimum order size.
If you search google maps for glass suppliers, you should be able to find a fair few local suppliers close to where you live!
.
When you get the glass cut, the edges will be very sharp, so you'll need to smooth over everything to make it safe/comfortable to use.
I've experimented with different ways of doing this, but on a small scale, the most effective method I've found has been to use some fabric backed wet/dry sandpaper in the 300-350grit range stuck with double sided tape to a hard smooth surface such as a granite chopping board, or a hard kitchen work surface.
Ideally you'd want some sort of diamond abrasive, but they're more expensive, and harder to get hold of. Sandpaper will work fine for a one off though, but you may want at least one or two spare sheets, as the hard glass sheet will wear down the sandpaper very quickly!
Also, be sure to have something soft to put the sheet down on when you're working so that you don't inadvertently scratch the surface by putting it down on a piece of grit from the grinding process.
.
When it comes to sanding, first off wet the sand paper, this helps the sand paper cut more smoothly as well as keeping the glass dust down. You want to avoid breathing any of the dust if possible!
Hold the glass sheet at around 45 degrees to the sand paper and, applying light pressure, make circular motions to grind the edge down. Your first aim should be to dull all of the sharp edges of the sheet left over from the cutting! This should only take a few strokes over the paper to do!
Decide which side of the sheet you want to be the top. This side will need to be beveled so that it's comfortable to use! Depending how much beveling you want, you can remove as much or as little of the edge as you want.
You can also round off the edges and corners of the cover. I'd recommend doing so if you can work out how to, but I'm not sure how to describe the process without making a video about it.
Once you're done with the grinding you'll want to clean off the cover the same way you'd clean normal glassware!
.
If you want to have the low friction surface finish, then you'll need to get hold of some silicone spray lubricant, you can spray it on the surface and then buff it on with a glasses cloth or some kitchen towel.
The main advantage of the surface finish is that it gets rid of the 'break in' period for the cover. The clean glass cover can start off a bit sticky and takes a little while to become nice and smooth without the silicone finish. You could alternatively rub some candle wax over the surface as a substitute for the spray though.
.
As for attaching the cover to the tablet, so long as the cover doesn't slide around on the tablet it's fine, you could use glue, double sided tape, or any other method you want to stop it moving around.
You could even use something like this on the corners of the cover if you wanted it to be easily removable!
.
hopefully you'll understand some of what I've said in the wall of text that this has become, but do feel free to ask me about any parts of it if you need some clarification or more info!
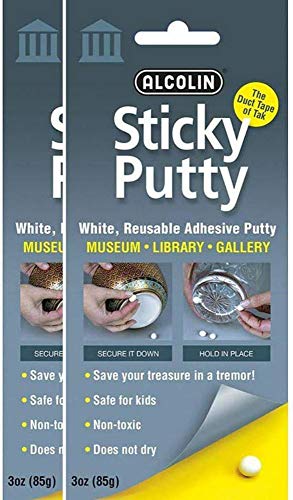
This is what I do. I have a lot of Harry Potter keychain figures because the scale works better (Dobby, Nifflers, Picket, etc) and museum putty keeps the wobblier ones standing. Marvel key chains are especially difficult because of the bobble head. My classic Ant-Man pop stands up on his own but The Wasp has tiny little needle legs and a GIANT HEAD so I ended up super-gluing her to an extra stand.
something like this if you want to go with a hidden closing.
That looks great. One thing I use on mine is a piece of stick on magentic strip along the edge of the top tier. I can tie a dozen flies, and cement all the heads at once. Plus, it keeps them from getting knocked around.
I stick them to the wall at light-switch level using these Scotch removable mounting squares. Come off nicely without damaging the paint. https://www.amazon.com/gp/product/B00099E8DM/ref=ppx_yo_dt_b_search_asin_title?ie=UTF8&psc=1
Always on a wall that the sun doesn't shine on and some of mine are Ecobee sensors so in a location where the motion sensor will be effective.
It's really easy and inexpensive to make them. Check this out. Instead of sewing them, I used 3M Weatherstrip Adhesive and magnetic strips.
I use this stuff and it holds up just fine. No damage on anything I stick it to.
I like to use the rubber x bands made by Moma. Cheap and they do the job nicely.
http://www.amazon.com/gp/aw/d/B003335MZ4/ref=mp_s_a_1_1?qid=1395659035&sr=8-1
I don't fully understand the problem. So apologies if these are out of left field, but magnets can work -- many contact chargers use them -- if the device has them embedded. Otherwise something like this mounting tape, cut appropriately, can hold just about anything while allowing for it to be removed.
https://www.amazon.com/gp/product/B0017D16PW/ref=ppx_yo_dt_b_asin_title_o03_s01?ie=UTF8&psc=1
Better cheaper option. Also multiple sizes so you can use thicker filters which work better.
Interesting. I use 1 or 2 of the sizes in this https://smile.amazon.com/Alliance-SuperSize-Resealable-Containing-Inches/dp/B0017D16PW/ref=pd_sim_229_2?_encoding=UTF8&psc=1&refRID=VSAZB9ZP7PJZK8C0BS5F (on mobile) and they don't warp or stress my box lids. 5 inches doesn't warp the larger boxes?
I second this. Make sure your skin is dry when you put it on and it'll stay all day: https://www.amazon.com/gp/product/B00AR4BLWA/ref=oh_aui_detailpage_o05_s00?ie=UTF8&th=1
As an alternative, there's also fashion tape like this that will hold up socks, though you'd probably have to use several per leg
Copied from another of my posts on the subject:
This style of strap-on works well. If you're wanting to use toys with a small base and a large knot (Razor, Fenrir, Tucker, etc), then this style of metal o-ring should do the trick since you won't have to try to slip the ring over either the base or the knot.
TNTOR 2500 mAh Portable Power Bank-Thinnest & Smallest & Lightest Power Card, Built-in with Micro USB Cable, Wallet & Pocket Sized Powercore, External Battery Charger| Ultra slim Power Bank for Android & iPhone https://www.amazon.co.uk/dp/B075455DRN/ref=cm_sw_r_em_apa_ZdO1BbM393S4V
Bluetooth 4.1 Transmitter / Receiver, TaoTronics 2-in-1 Wireless 3.5mm Adapter (aptX Low Latency, 2 Devices Simultaneously, for TV / Home Sound System) https://www.amazon.co.uk/dp/B016UF7J5C/ref=cm_sw_r_em_apa_8eO1BbPG75B2R
VELCRO Brand - Stick On Hook and Loop Fasteners | Perfect for Home or Office | 20mm x 2.5m Tape | White https://www.amazon.co.uk/dp/B0013DO888/ref=cm_sw_r_cp_apa_IfO1Bb7HDF505
Enjoy!
The best solution you can get for printing PETG without any warping is a glass bed with PVA glue. I would highly recommend getting a borosilicate (Pyrex) glass plate. Borosilicate glass has a VERY low coefficient for thermal expansion so it extremely resistant to thermal shock and the breakage that comes with it. I had the piece of glass for my CR-10 cut to size at a local glass shop as glass beds were not offered anywhere for the CR-10 at the time. However now you can go on Amazon and pay a very reasonable price for a nice glass bed. Such as this which is less than half the price that I had to pay about two years ago. Ooof!
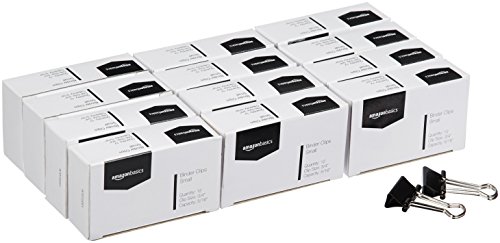
Take your glass sheet and attach it directly on top of the metal heated bed that the CR-10 has with binder clips. It is a very simple but extremely effective way to keep the glass tightly attached without issue while also allowing a quick and simple process for removing prints and swapping print surfaces.
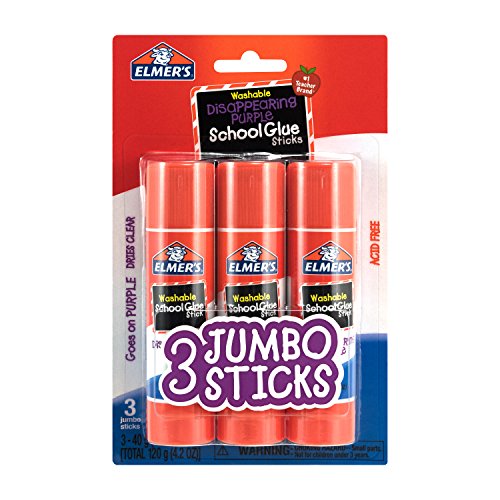
Then, it is time for the star of the show, the PVA glue! Now, before you get intimidated by the exotic sounding glue (like I did when I first heard about having to use it), just know that it is literally just Elmer's Disappearing Purple Gluestick. This is seriously one of the BEST tools for anyone who prints somewhat exotic or finicky materials. Uncap the glue and evenly coat the glass with a light coating and you are ready to go. When I say light, I mean just one pass over each spot, do not do more than one coat, that one coat is plenty! The best part is that it is disappearing, so when you apply the glue and it still has a bit of moisture, it is a dark purple, however once it sits for about 30 seconds on a bed that is heating up it loses its color and becomes more translucent so you can see exactly what parts of the bed are coated well and which parts you may need to touch up. When the glue has lost its color and the glass looks like it is a bit hazy or foggy then you are ready to print!
PETG can be a bit tricky to print if you are coming from PLA but it is very rewarding once you dial it in.
I would suggest that you either use a low fan setting of 25% or less (except when bridging which should be 100%) or do not use the fan at all (again unless bridging). PETG is a material that wants to stay hot and slowly cool on its own. It does not like to be hit with a fan instantly after being laid down like PLA. PETG actually fuses itself together at the layers which makes it have extremely strong layer adhesion, whereas a properly formed PETG print cannot be separated at the layer lines because of this fusing effect. (This is why you NEVER print PETG directly onto PEI as it can fuse with the PEI and tear the PEI off of the bed.)
​
I would also suggest that you run a hotter bed temperature. I personally print PETG with a bed temp between 85 and 100, depending on the brand of PETG I am using.
There is one VERY important end of print step to safely and successfully print PETG. When the print is finished, DO NOT let the bed cool to ambient temperature while the print is still attached! You MUST set your end of G Code to reduce the bed temperature to about 60% of the temperature it was while printing. This is a very important step so that your piece does not break your glass bed! This is especially important as the printed pieces get larger and have a larger contact surface with the bed. If you allow the print and glass bed to cool to ambient on their own then you are dramatically increasing the chance that the print will cool too rapidly and shrink while still attached to the glass and end up breaking the glass.
This may seem like a lot of things to do to print PETG but when you see the final result and how strong and beautiful PETG can be printed it is all well worth the effort.
​
One final tip about PETG is that it is very hygroscopic (not as bad as Nylon but still noticeable and much worse than PLA) and needs to be taken care of for it to print well. PETG needs to be stored in airtight bags with desiccant packs while it is being stored. PETG should never be left out in the open air for longer than it needs to be. If the roll is not currently supplying a print then it MUST be stored properly. If you allow your PETG to sit out and absorb the water from the air, it will print very poorly and never give good results. If you are printing PETG and can hear a crackling or hissing sound at the nozzle, then your PETG is too wet and needs to be fixed! The crackling and hissing sound that can be heard is the water that has been absorbed by the PETG being instantly boiled and turned to steam when it hits the hotend. This is most noticeable with Nylon but poorly kept PETG will also exhibit this same behavior.
​
If you have any questions or need me to clarify something please ask and I will gladly do my best to help! PETG is well worth the hassle and learning curve as the results that can be achieved with it are truly amazing.
Its an "x-shaped" rubberband that we have lying around where I work. It looks like Amazon carries something similar.
I use these on a few games...others I just use velcro dots between the lid and bottom on two sides.
I went through this issue myself, and I found a pretty good solution, I think. It'll take some time to setup correctly and you'll need to do some math, but it works.
Get these: http://www.amazon.com/Removable-Mounting-Squares-squares-108/dp/B00099E8DM
When you put them on your wall, push one side down for about 30 seconds against the wall, then put a corner of the sound proofing squares and press that into the pad for about another 30 seconds. I'd recommend using 1 square for each corner. They stay in place, and come off the wall without any marks.
I also disagree, I print ABS all the time with a bed temp of 80C. I recommend [Elmers Glue stick] (http://www.amazon.com/Elmers-Jumbo-Glue-Stick-Pack/dp/B00MZ5Q5QG?ie=UTF8&psc=1&redirect=true&ref_=oh_aui_search_detailpage) to coat the bed as it's warming up. Let each layer dry prior to the next, but you'll want a couple layers before the print starts.
I get mine on ebay from the seller city-green. They ship from NJ, and I always get them a couple days later (granted I am in PA). You get 150 for 9.99.
ETA: I keep my sticks on 3 inch binder rings, organized by brand and color.
Any craft store (Michael's, JoAnn, the dreaded Hobby Lobby, and probably even Lowe's or Home Depot for some things) will do as well as Amazon if you can wait a few days for shipping.
I've not made keyrings yet but for magnets you'll probably want some kind of magnetic tape like this:
http://www.amazon.com/Magnum-Magnetics-Corp-Adhesive-Magnetic/dp/B00114LU8K/ref=pd_sbs_indust_3?ie=UTF8&refRID=0F9T34N0C12XGK1T5QZ6
Or a magnetic sheet like this:
http://www.amazon.com/Flexible-Magnet-Adhesive-Length-rolled/dp/B005HY990G/ref=sr_1_1?s=arts-crafts&ie=UTF8&qid=1404232861&sr=1-1&keywords=magnet+sheet
The adhesives on those are usually kinda crappy so I'd suggest maybe pulling the tape off and adding your own adhesive of choice.
Also the flexible magnets tend not to be super strong so you might need to use a bit more than you would think.
As stated in my other post, I've had this thing running for over a month at 75c with no loss of cohesion
I'll have to do some checking if I ever go above that I'm sure, but for PLA and PETG it's been perfect
Looks like, to have a higher Curie temperature, you'd want to use thicker 60mil sheets
You can get them for 7 cents/unit or less if you buy in bulk.
Museum putty. It's removable but will act like a glue.
Sticky Putty- Reusable Museum & Gallery Quality Adhesive Putty, The "Duck Tape of Tak"- 2 Pack https://www.amazon.com/dp/B01GEGXP0K/ref=cm_sw_r_cp_apa_i_kRLGDbXKN012R
Yes. It is tape that acts like a dry erase whiteboard. There is also chalkboard tape.
http://www.amazon.com/Scotch-Erase-White-1-88-Inch-5-Yard/dp/B00NBL3YR6
http://www.amazon.com/Scotch-Chalkboard-Black-1-88-Inch-5-Yard/dp/B00NBL3UVG
+1 Purple glue stick and a proper bed level.
Elmer's Glue Stick (E579), Disappearing Purple, 3 Sticks https://www.amazon.com/dp/B00MZ5Q5QG/ref=cm_sw_r_cp_api_3wDYBb443TTSR
I did something similar for Mines of Phandelver and bought a butt-load of small binder clips on amazon. Mine aren't as nice as yours but the clips work perfectly!
i wasn't too worried about getting the glue off the back of the pots because i intended to glue magnets to the back anyway. there's all sorts of stuff you can use other than z palettes, have fun with it.
eta: this is what i used https://www.amazon.com/dp/B005HYDC68/ref=cm_sw_r_cp_api_YxcXzbYWBGWEK
There's removable/restickable glue sticks similar to what is on Post-It's.
I used to wrap gifts for a children's charity (all the stuff you donate in the stores, volunteers like me sorted and wrapped for 30 hours).
This item was vital when wrapping many items in a short time. I did learn that it's not advisable to save tape from year to year; then it's just more trouble than it's worth.
http://www.amazon.com/Scotch-Handband-Dispenser-Inches-96-G/dp/B000XSPEPA
How much clearance do you need?
You can use magnetic tape to secure the glass panel to the case. The tape I linked is 2mm thick so you can get additional 4mm by using this tape on the glass and the case. It likely wouldn't be as secure as the original mounting mechanism. but it should be fine if you are not moving the case around.
If you mean "plastic fasteners" they are attached to clothing or fabric using a price tag gun.
Like this.
Indeed.
I get binder rings and make a little book, similar to this one.
Do you need it to be "permanent" as in survives shop use or "permanent" as in unable to be removed by a conniving employee?
If #2 then engraving is your best option. If #1 then I'd think about something that can identify the sets, but can also be changed by you as sets and tools get rearranged (if necessary).
It seems that if set 1 is missing a tool and set 2 has a tool that is missing its ID, then it's pretty easy to put 2 and 2 together. In other words, the IDs don't need to be permanent, they just need to be consistent.
The sell small silicone rubber bands in tons of colors. You could put some around every tool handle and then tell people that it's there responsibility to keep their set together and make sure that every tool in the set is identified. The silicone should be okay with most acids etc. And if, say, you need to downsize from 5 sets to 4 you can cut off the bands and reorganize.
That being said, a really conniving employee could buy their own bands and use them to steal other sets' tools.
There are loads of ways, but I settled with some of this velcro tape. Honestly, I imagine removing the TAPE will damage the wallpaper once it's been on for a while, but I can remove the tiles and reattach them without any harm.
I have heard of people gluing the foam to sheets of plywood and hanging those on hooks, but that seemed like a little too much work for me.
Yeah, I was going to go with putty and cardstock, but I'm just trying to think if there was some other kind of paper that would be easier to stick on. I actually just found this restickable glue stick that apparently has an adhesive similar to Post-it notes, so I may look into that! Have to see how long the adhesive lasts tho
What are you using to level the bed? Also where are you leveling it to? (above the bed screws are the right spot) I use a piece of receipt paper folded in half to level it.
It may be worth using a bed level gcode to assist with the human error or placement problems)
Also the stock springs may be bad these should help with the frequent bed leveling.
A glass bed may also help with adhesion with these
I've thought of simply getting some of these and making a display on a blank wall in my room by my pipe supplies. Just stick em to the wall.