(Part 3) Best hobby building tools & hardware according to redditors
We found 1,658 Reddit comments discussing the best hobby building tools & hardware. We ranked the 466 resulting products by number of redditors who mentioned them. Here are the products ranked 41-60. You can also go back to the previous section.


55. Testor Model Master 8876C Clear Parts Cement and Window Maker, 1/2 fl. Oz.
5 mentions

Testors8876C


Depending on your budget, either Windsor & Newton series 7:
http://www.dickblick.com/items/05887-1000/ and http://www.dickblick.com/items/05887-1001/
Those are what I use and love... there are better brands out there, but on that site, I feel that's a good brand for the cost.
But basically any brush that is Kolinsky Sable is superior. If you are looking for other things for him in the same vein, there are some awesome stands:
https://www.amazon.com/Vallejo-Front-Module-Paint-Stand/dp/B01720DWKU/ref=sr_1_1?ie=UTF8&qid=1478108624&sr=8-1&keywords=vallejo+paint+stand
Those are for Vallejo brand paints though. And brush soap/cleaner is always nice.
Good luck!
First comment:
Please upvote this by default so it stays towards the top. I'm still learning how2reddit
So I am NOT an artistic person so this is especially anxious for me. But, I needed something to keep my hands busy that wasn't masturbating, so here we are.
I have probably over studied techniques and materials, and I want this post to be a "documentary" if you will. Where someone who has no business painting is going to be doing just that.
So, I'll be documenting my pitfalls and approaches to everything here. With all of you lovely people, it'll also hopefully be a central location for someone like me or just wants to get into 40k can refer to.
Disclaimer: I'll be at work until 5pm EST. But my job is pretty cushy so I'll be adding planning details throughout the day
Tools and Such
Well, I probably overspent here. Only because I'm lazy and didn't want to make the drive to harbor freights. But then again, paying the premium to help support my local game shop is going to give me some karma in the long run. Here's the list of things that I ended up picking up:
Theory is Great and All (11.13.19)
So here are my updates from actually painting.
Life Sucks and I haven't gotten much done (11/15/19)
So I was only able to apply a second coat of to what I've already done. But honestly, not too shabby! Apparently I didn't water down the paint too much.
https://imgur.com/gallery/lA9LV1N
Also, I recently switched to a different cell phone carrier, and got a $200 prepaid card.... So I'm getting these.
https://www.amazon.com/gp/product/B004INERK4/ref=ox_sc_act_title_1?smid=A3TMLEXVMVIW94&psc=1
https://www.amazon.com/gp/product/B002JLVM5U/ref=ox_sc_act_title_3?smid=A1Y3PCPH3CY53X&psc=1
There's a blog that I found (will have to find it again later) that recommended these.
I used this for Glue https://www.amazon.co.uk/Gorilla-Glue-4200101-Epoxy-Syringe/dp/B01MQMM3X1 and this for the filler https://www.amazon.co.uk/Vallejo-20-ml-Plastic-Putty/dp/B000TSBJEO
Nope I use this
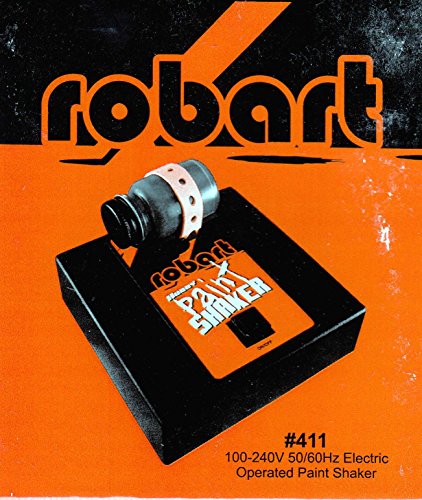
https://www.amazon.com/Robart-Manufacturing-Paint-Shaker-Powered/dp/B0006O7M9W?ie=UTF8&*Version*=1&*entries*=0
I have not had any luck with green stuff so far, but I am loving plastic putty. I think it is easier to use for basic stuff like this, but I say this as a novice.
Vallejo Plastic Putty, 20ml https://www.amazon.com/dp/B000TSBJEO/ref=cm_sw_r_cp_tai_9bfJDbBRE0B47
>tamiya primer, not sold in jars.
yes it is.
https://www.amazon.com/Tamiya-Liquid-Surface-Primer-40ml/dp/B000R9N5W4/ref=asc_df_B000R9N5W4/?tag=hyprod-20&linkCode=df0&hvadid=312073751953&hvpos=1o5&hvnetw=g&hvrand=1866742580981046888&hvpone=&hvptwo=&hvqmt=&hvdev=c&hvdvcmdl=&hvlocint=&hvlocphy=9032490&hvtargid=pla-441314617408&psc=1&tag=&ref=&adgrpid=67622841052&hvpone=&hvptwo=&hvadid=312073751953&hvpos=1o5&hvnetw=g&hvrand=1866742580981046888&hvqmt=&hvdev=c&hvdvcmdl=&hvlocint=&hvlocphy=9032490&hvtargid=pla-441314617408
$96 off of amazon, damn!
http://www.amazon.com/God-Hand-Spn-120-Ultimate-Nipper/dp/B008S51O22
Edit:
Found one for $63:
http://www.amazon.com/gp/aw/d/B00T5IH8PI/ref=pd_aw_sbs_121_1?ie=UTF8&dpID=31t3uFq%2BGUL&dpSrc=sims&preST=_AC_UL100_SR100%2C76_&refRID=0GB0006NT5E1CQ6CRS69
It's made by Tamiya. It should be available at your local hobby store, but it is also, of course, available on Amazon.
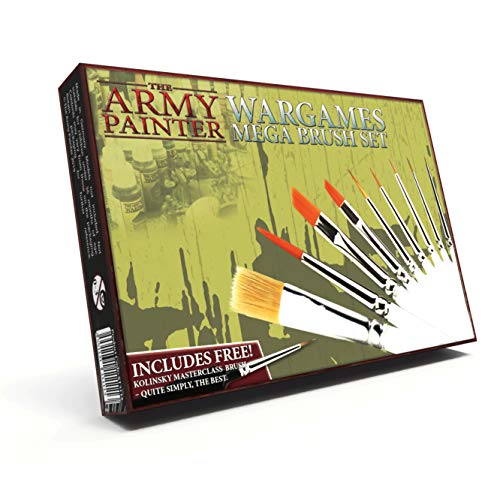
10 Miniature Paint Brushes with FREE Masterclass Kolinsky Sable Hair Brush - Durable Miniatures Paint Brush Set, Wargamer Brushes with Comfortable Grip - Wargames Mega Brush Set by The Army Painter https://www.amazon.com/dp/B00HC8H4EI/ref=cm_sw_r_cp_api_gx-1Ab7S8ZM2F
Highly recommend this set over the stuff at hobby lobby I’ve bought several brushes from hobby lobby and have liked none of as much as the brushes from this set
Vallejo makes plain acrylic medium, glaze medium, and even a metallic medium (so you can create metallic paints in any color you want).
actually looks like the Vallejo brand shelves... https://www.amazon.com/Vallejo-Front-Module-Paint-Stand/dp/B01720DWKU/ref=sr_1_11?keywords=hobbyzone&qid=1569856052&s=gateway&sr=8-11
Drill probably isn't your best bet. I would recommend a pin vise, they aren't very expensive and super useful for detail work.
I bought this assortment of magnets which comes in different sizes. A lot of people take a small hand drill like this and will drill a small hole which they fill with green stuff and stick the magnet to so it rests a bit more flush. I haven't finished putting my mortarch together yet so I can't say for sure the best size of magnet to use, but I would imagine the smaller size would work fine.
Magnetizing really helps with almost any model. I'm working on magnetizing Hexwraiths/Black Knights so I can switch between the two when I want to play ghosts or skeletons. My wife has the Daughters of Khaine Bloodwrack Shrine/Cauldron of Blood and she's magnetizing that so she can have the Shrine, Hag Queen on Cauldron, standalone Hag Queen, standalone Medusa, and Standalone Avatar of Khaine. Just tons of different combinations for her. But I would recommend looking up videos on how to magnetize models and see what you can do.
Gorruck 34L GR2 Coyote Tan - a good bag, heavy, uncomfortable, probably give it to my grandchildren in like 50 years
Flip Flops - generic things
Bigblue 28W solar charger - very good, can charge my battery up during the day if i leave it in the sun which I've never really done honestly
Jakemy hardware tools - seamed useful? i've never needed this
Army glove shells - i thought i used these a lot and were indistructable but now that i think of it, i don't use them that often and are probably pretty cheaply made.
Sharpie, pen, all weather notebook - probably should switch over to a fisher space pen...
Straws - these are probably already broken.
Whistle - really really really loud
Fire-striker, matches, lighter - i'm not sure i have enough ways to start a fire
Fresnel lens - ok, now i have enough
LED flashlight - i used to go running in the middle of the night with this flashlight, its tiny
LED flashlight - this isn't the one i have but looks kinda similar? i don't remember where i got mine
Earbuds - generic cheap earbuds
Leatherman Surge - given to me by my wife for passing the bar. thanks wife!
First Aide kit - i put mine together from stuff i've stolen from friends houses whenever i go over and use the bathroom
playing cards - these look very similar to the ones i have, they are plastic so they won't get rained on
glasses/ sunglasses - i have really bad vision
personal hygiene kit - aahhhh dry shaving
Sawyer Mini / syringe, collapsible canteen (dirty), heavy duty straw - i've never used this
collapsible canteen (clean) - i've never used this either
sewing kit - i've used this a lot
ID tags - i guess if i get blown up they'll know my blood type?
garbage bag - for when my pockets are full
elastic bands - i use these when packing to keep rolled socks and things from falling apart
Salt - i have nooooo idea why i have this
cooking grate - i'm not going to hold meat over a fire with a stick like some sort of caveman
heavy duty ziplock bag - in case my mapcase breaks and other reasons
rip-patch - leftover from when i needed a pack because i bought a crummy cheap inflatable sleeping pad.
Army Fleece Beanie - i always keep this at the top of my pack
4 Bungie Cords - not the one i use but similar. to make a field-expedient shelter
Trowel - for disposal of biological wastes
Lensatic compass - because GPS should only be a backup
Pocketboy 130 folding saw - i have a bigger one for yardwork, this small one is really great
Tent stakes - for tent staking
Ravpower 26800 Battery - use this all the time can fast chage my stuff
Battery Battery holder, cables, wall charger - all fits togehter like glove!
Army Poncho - wear it, make a tent out of it etc
Microfiber towel - not the one i use but similar. i mainly use this for when the kids accidentally fall in a lake like they tend to do for some reason
Down Jacket - cheap chinese knockoff... i feel bad for not buying american
Wet weather top - not sure this is worth the space/weight
Wet Weather bottom - not sure if this is worth the weight/space
Silkweights - PJs! and warmth
Jungle Blanket - this is a lot better than the army's woobie. lighter and warmer
Gransfors Bruks Wildlife Hatchet - again, gift from wife. she wanted me to chop things and be more manly, generally. now i come home with parts of wildlife for her to cook
Map of New England - or, how i stopped worrying and love dismounted land navigation
PT belt - keeps me safe in all situations
Compression straps - i don't like lashing things to the outside but i guess i can if i wanted to
Fork and Spoon - stole these from the kitchen. i'll probably be replacing this soon with something titanium.
​
EDIT: i just priced it out: $1,585.08 total
The things I'm saving for aren't as exciting and glamorous as most things people here are saving for, but as someone who has been gifted often, I decided yesterday to take down all of my wish lists and make a new one containing only items I will eventually be purchasing for myself. I tried to include little frivolity and I will remove items from the list as I purchase them. This way I feel like at least I'm moving towards a goal. (My indie cosmetics line.)
The main thing on the list is this little paint shaker which would be used to mix my hand made nail polishes.
The white lion was actually incredibly easy, and took like 2 hours excluding priming and waiting for paint to dry.
I primed him black, then painted his body Monster Brown, and the mane Oak Brown
I then gave the entire model a hefty wash of Agrax Earthshade
After that, I drew in some very rough, non-blended shadows and highlights around the ribs and larger muscles, I think I used the Oak brown and Ushabti Bone
After that I took a large flat brush, and Aggressively drybrushed the entire thing with some more thinned Ushabti bone. Be sure to make sure your brush isn't too wet, or you will lose all that detail you built up. Thinning it allows it to be even more transparent when it goes on, and the highlights and shadows still show through your drybrushing.
For the eyes I just painted the sockets a very bright white, then threw down some red ink once it dried. The blood effects are some thin coats of Dried Blood followed by a smaller coat of Fresh Blood.
I use a Badger Patriot 105 along with a Super Fine Conversion Kit. I use a Badger Aspire TC910 compressor, but I also used a variant of this little mini air compressor for about a year which worked great.
For paints I used Citadel; what you see here is Incubi Darkness, followed by Kabalite Green and then Sybarite Green. I did a final brush edge highlight with Gauss Blaster Green. I get these at my FLGS.
I recently got the the Vallejo GameAir set for my birthday, and the paint is great. I didn't use it here though, this is all Citadel paint.
As for technique, I based the whole model black (with the riders separate) and then applied a fairly broad highlight of Incubi Darkness on the higher (where the light hitting the model was more prevalent) spots, then moved the brush a bit closer to catch the inner parts with Kabalite Green, then a bit closer using the same technique with Sybarite green. As for the edges I just purposefully over-sprayed so only half the paint hit the model, giving it a sharp edge.
The GameAir set from Vallejo comes with a color conversion chart but doesnt cover most of the "Dark Eldar" colors, only the basics. You can thin down Citadel paints with water, but the pigment in them is thicker than actual air brush paint, so your brush will clog, and paint drying on the air brush needle is a real annoyance. Other than that, I'd recommend watching a few videos on airbrushing 101, this effect was really not hard to apply at all once you get a gist for trigger control and aiming.
Other than that, the Wyches were painted following pretty much every Dark Eldar armor/flesh painting video you can find, haha.
Only things I'd add would be plumbers tape (your compressor of hose might have a leaky seal - it's common) and Tamiya's spray stand (very useful for supporting sections of larger kits and turning them).
http://www.amazon.com/dp/B00080DIWE/ref=cm_sw_r_tw_awdm_Kk6oxb0KT3EX6
What are you planning to use the brushes for? Because those are pretty bad brushes! But then if it's just for mixing paint, they'll be fine.
When I bought my airbrush paint, I also bought a string of lava beads:
http://www.amazon.com/dp/B00J9F7DFM/ref=cm_sw_r_tw_awdo_Sp6oxb0D2P5FA
Just drop one or two into your paint bottles and shake. They're cheap and non-metallic so they don't rust in water based paints.
I found this one, close to my price range. Anybody have any experience with Paasche?
https://www.amazon.ca/Paasche-TG-100D-Gravity-Airbrush-Compressor/dp/B002N0QA8Q/ref=pd_sim_sbs_79_1?ie=UTF8&dpID=51NlBWUlHML&dpSrc=sims&preST=_AC_UL160_SR160%2C160_&refRID=85TZ19DGQ4H3S88Q2DBQ
https://www.amazon.com/Citadel-Paint-Shade-Agrax-Earthshade/dp/B0189BKI7G
https://www.youtube.com/watch?v=tUQsiv41Enw
If you don't want nubmarks, but you're too poor to buy Gundam Planet Nippers or Godhands, remember to cut as far away from the part as possible. The gates on the runners are there for a reason, use them. This stresses the plastic less and leaves less stress marks & holes in the plastic when you cut. Then shave the gate of with a hobby knife.
I'll recommend the HG Origin Char's Zaku II if you don't mind buying another one. It's an updated version of the Char's Zaku II Commander type, with more details, much better articulation, and overall better build quality.
It's Tamiya's painting stand Amazon link
I bought a master brand airbrush kit off amazon this Christmas and along with what i found here. Here are my thoughts:
What i don't like about the Ninja:
The spirit jet is very similar to the compressor I have but mine was significantly cheaper. If you look on Amazon there are tons of this exact compressor that companies have just stuck their sticker on.
Iwata Paasche Master
Personally, I would get one of the no-name brands with a tank for less than what you would pay for the name brand ones. Then use the money you saved to get a decent brush or the accessories you need. The ones that come with the Master kits isn't terrible if you are new but once you use a higher quality brush you'll see the difference.
A few things are going sideways here.
​
First of all, you don't need every paint. You just don't. Even if you want all the colors, there are other paint companies, I'll link a few. Everyone has their own opinons, of course, on the quality of the various paints. These still range from 1-200 dollars for the paints, but still, a far cry less then you must be paying GW.
​
https://www.amazon.com/Miniature-Painting-Bonus-Wargamer-Regiment/dp/B01MTXRUUT?ref_=bl_dp_s_web_7513501011
​
https://www.amazon.com/Reaper-Master-Bones-Paint-Complete/dp/B01NAEA1YC/ref=sr_1_5?ie=UTF8&qid=1540331060&sr=8-5&keywords=reaper+paint+set&dpID=51wdGAzIDyL&preST=_SX300_QL70_&dpSrc=srch
​
https://www.amazon.com/Vallejo-Game-Color-Basic-Paint/dp/B009LH0YTA/ref=sr_1_8?ie=UTF8&qid=1540331110&sr=8-8&keywords=reaper+paint+set
​
In addition, you can get all the brushes you'll need, in good quality, here
https://www.amazon.com/dp/B00HC8H4EI/ref=sxts_kp_tr_2?pf_rd_m=ATVPDKIKX0DER&pf_rd_p=8778bc68-27e7-403f-8460-de48b6e788fb&pd_rd_wg=hHPTk&pf_rd_r=0GT4KSMPYRA7JT2FMDYE&pf_rd_s=desktop-sx-top-slot&pf_rd_t=301&pd_rd_i=B00HC8H4EI&pd_rd_w=fbRI0&pf_rd_i=army+painter+brush+set&pd_rd_r=52c35bd8-add2-476d-9143-b6dcc068755e&ie=UTF8&qid=1540331250&sr=2
​
If you go for the Army Painter large Paint set, the Army Painter Brush Set, and get Dark Imperium for around 135.00 on Ebay or Amazon, you are looking at 270.00. You can find pretty much every tool that Citadel sells much cheaper elsewhere in the off brand. I don't even use a scraper for example, I use files and cheap craft knife.
Been painting a few years and lurking here forever, here's my advice:
> Mixing Brush: I am told that you should not mix paint with your primary brushes. Where can I buy a cheap brush for mixing, and anything special I need?
If I'm already using a "larger" brush (1 or higher) I'll mix with my good brushes and just be mindful of how far up the ferrule I am or use the back of the brush. If I'm using a detail brush I'll use a super cheap synthetic 2 or 3. Look on amazon or at a local art chain (Michaels) for cheap student grade packs of round brushes. You'll end up using these for terrain, PVA glue, and all sorts of other things.
> More Brushes: My kit came with a 2 flat and 0 round. What other brushes will I need, and what in your opinion is a good brand to buy? Any set that covers all the basics? Although I am new to painting, I'd like something that will last me and be quality. They sell SoHo brushes in my local store, which look like they are great quality. Any users here?
This topic can get pretty involved. Brushes have a lifespan so if you're new to the hobby I wouldn't recommend dropping money on higher end Kolinsky brushes like W&N Series 7 or daVinci Maestro. For a new painter I recommend Winsor & Newton's University series and Army Painter's Wargamer brushes. The W&N University brushes are higher than average student quality acrylic brushes that can be abused. They're great for basecoating with thicker mixes. The Wargamer brushes are a cheap intro into real sable hair so you can get started at layering with thinned paints.
> Primers: This is a big ? for me --- Spray primers, basic black white and grey? Which ones, what brand, etc... Really unsure what is recommended here, as in a store there are so many, but hoping /r/minipainting can help as we are all painting the same stuff. Would love some specific product recommendations here.
For the most part, you have three options: spray cans, brush-on, and airbrush. I can't really recommend spray primers - they require ventilation, have trouble with humidity, and can only be sprayed at one consistency. Many of the hobby spray cans advertised for basing your minis aren't actual primers. Brush-on primers are the most economical but run the risk of losing detail on the mini if applied heavily. Airbrushing is my preferred method using either Mr. Hobby's Mr. Surfacer 1500 thinned with Mr. Color Leveling Thinner for highly detailed minis, or Vallejo Primer for tabletop quality minis. Vallejo Primer's are acrylic and polyurethane so they're more protective but can sometimes take away detail.
> Finish: I saw a few videos where they spray some 'protective' finish on a product, I believe there are matte finishes as well as gloss finishes? Can I get any 'matte/gloss finish' product, or are there certain ones for miniatures?
Same three options as priming. If your minis are going to be handled often, I recommend a glossy coat then a matte coat. Glossy varnishes are stronger than matte varnishes, so this combo will give you the most protection. You are more likely to lose some detail this way. If your minis are for display only you can skip the varnish and just be careful. Dried acrylics are basically thin plastic so they have some durability on their own. Brand-wise I airbrush using Liquitex Professional gloss and matte varnishes, thinned with Vallejo airbrush thinner and a drop or two of Vallejo flow-improver. Vallejo varnishes are also good but Liquitex offers the best bang for your buck.
> Mini Holders: I found this product which looks amazing, but is not available until late 2017 since the Kickstarter has ended. Are there any similar products that someone could recommend, or should I just go with something very simple? Would love to hear some ideas.
I use an old Citadel paint pot and white poster tack to stick to the bottom of the base. If you want to paint individual parts, heat the tip of a needle/pin with a lighter, press it gently into the glue joint of the mini (the hole will be hidden later), then press the other side of the needle into a wine cork or similar.
> Brush Care: I got a "masters" paste from a store that I was told to rinse and swirl my brushes in after painting. Any other tips or is this okay?
Master's is the best option, just make sure you follow the directions and use warm water for best results. You can also get a small bottle of W&N Brusher Cleaner and Restorer to have on reserve if you accidentally let paint dry on one of your better brushes. If it's a cheap or synthetic brush you can clean it with original Windex (WITHOUT Ammonia-D) or Vallejo airbrush cleaner, followed by a wash with Master's.
> Carving/Scraping tools: I know some minis need to be cut from a sheet and some have mold lines that need to be cleaned. How is this done and what tools are needed?
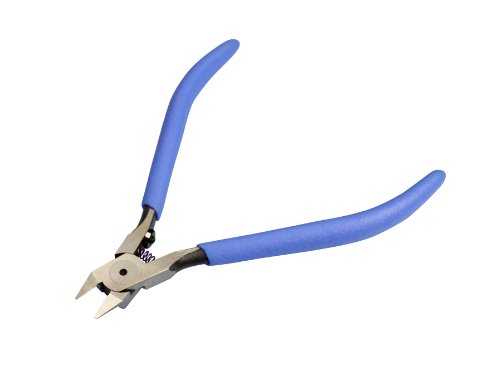
Get a decent pair of sprue cutters - I recommend these. You should be able to find these for $10 at a local hobby store. For plastic minis you should be fine with just an X-acto or similar knife for getting rid of mold lines - just run the blade mostly perpendicular to the line and "shave" it gently.
> Storage Box: For all the little things that come along with painting, what do you use/recommend to store everything in?
A coffee mug works fine as a brush holder. You can try a hardware store for all sorts of containers if you're traveling with paints. Otherwise desk space and some imagination (spice racks) or money (official paint stand) are all you need.
> Paint Agitators: I was told to get some steel balls and put them in every paint bottle I have. It's okay to leave them in there. Would these work, or any concerns?
Please do not use steel ball bearings. You can attempt to buy "marine grade" ball bearings but unless it's reputable and expensive they are still likely going to rust and ruin your paint. I use hematite beads for necklaces for my paints. 4mm for dropper bottles and 6mm for pots. You can get them cheaper at Michaels w/ a coupon and they're inert so they won't stain your paints.
> Flow Improver: Thoughts? I was told to mix this into my washes. How much should I add, one drop? Is this product okay, or is this only for airbrushing?
Flow improver is generally used for airbrushing to extend the drying time and prevent clogs. Fluid retarder in the form of actual art supply from W&N or Liquitex, Vallejo's Glaze Medium, or Games Workshop's Lahmian Medium are what you're looking for. These can all be used to turn a normal paint into a wash (heavy dilution), or can be used to extend drying time for wet blending (light dilution). I can't give you exact ratios as each paint company, each color, and the age of your paints will dictate that. Trial and error is the only method here.
One thing that hasn't been mentioned yet is a wet palette. It will save you a lot of headache when learning to wet blend and will let you save mixed paints for many days. You can get one for cheap and use either the papers that come with it or kitchen parchment paper. Both will yield different results so play around with both. Be sure to use distilled water or you're likely to get some funk from mold after a couple days.
Keep one of these in your wallet: fresnel lens. Light, cheap, hard to break. I knew my Army training and Stoner science would intersect one day.
3-Pack Credit Card Size Pocket Fresnel Lens - Magnifier Lenses for Fire Starting https://www.amazon.com/dp/B00NWMUK0I/ref=cm_sw_r_cp_apa_vFCMzbQSW6EVQ
> wool socks
Is this in addition to the 2 pairs of socks mentioned in your "transportation" section?
> Sleep/Shelter (light tarp, 2 x 50 feet of 550 Titan survivor cord, emergency Mylar blanket, portable hammock? wool blanket? woobie? bivvy bag?)
You said "4-season." Have you tested any of this in the extremes of the seasons? Especially winter?
> Illumination (LED flashlight, headlamp, spare batteries)
Enough spare batteries? Rechargeable batteries? Way to recharge said rechargeable batteries?
> Combustion (waterproof matches in waterproof container, 5 Bic lighters, Fresnel lens, Magnesium block? Ferro rod? Survivorsteel? travel lantern? 12-hour candles?)
More ways to start a fire is always good. I see no tinder, though. Having some on hand in case you can't gather any (none around, or it's all wet) is handy, and it won't take up much space. Something like Wetfire or even cotton soaked in petroleum jelly (you can store this in a ziploc or cut straws to an inch and a half or 2 inches stuff it down in there, pinch the ends with pliers and melt them with a lighter). Maybe even just carry a tiny jar of Vaseline and some cotton swabs to make a cotton tinder stick on the spot.
> Hydration (filled 40oz stainless steel water bottle, Sawyer Mini water filter)
Consider a few collapsible water bottles. No need to keep them full. If you either know you're going to go a long stretch between water sources or you're going to wander into an area where you're not sure about the water (quality or availability), you can fill them up.
> Protection (two high-capacity 9mm handguns… make and model? How much ammunition for 2 weeks?)
"How much ammo?" depends on how much you actually need to use them. Hopefully, you'd use them zero, which means that you need zero ammo. Worst case that you live through is lucking your way through daily extended gun fights. The truth would likely be somewhere in the middle.
Let's consider weight for a moment
Most handguns sold as new in the US come with 2 magazines. Standard magazine capacity for a Glock 17 or M&P9 is 17 rounds. Glock 19 and M&P9c carry 15 rounds in their standard capacity magazines. So, 2 full mags with the gun is 34 rounds for the full sized guns or 30 rounds in the compact guns. That's about a pound of ammunition in 2 magazines (rounding because I'm lazy). If you've got 2 guns that each came with 2 magazines, you have 2 pounds of ammunition between the two guns, plus the weight of the guns and the magazines themselves.
The Glock 17 has a 4.5" barrel and weighs 24.87 ounces (1.55 pounds) with an empty magazine.
The M&P9 has a 4.25" barrel and weighs 24.7 ounces (1.54 pounds) with an empty magazine.
So, for each gun with 2 full magazines, you're talking about roughly 3.5 pounds of weight, so 7 pounds if you're carrying 2 guns. The compact versions of the guns (G19 and M&P9c) aren't much lighter, so not worth factoring the difference.
Most handgun ammo comes in 50 round boxes (some of the higher end defensive ammo comes in 20 or 25 round boxes). That 50 round box weighs between 1.4 and 1.6 pounds (depending on the weight of the actual projectile used).
1 box of ammo will give you 2 loaded magazines and 16 rounds left loose (for the full sized guns, 20 rounds for the compact guns). Might as well pop for a third magazine to stuff at least most of the ammo in. And you're adding another half pound to your load for each gun you do this for.
So, 8 pounds for 2 guns, 6 loaded magazines, and 100 rounds of ammunition. How much more weight do you want to carry?
Also, please define "high-capacity."
Make and model is debatable. Lots of folks will say "Glock" without a second thought. They're reliable, no doubt, but they don't naturally point straight for a lot of people. If you're going to practice plenty, that's not a problem. If you're not, it might be. I prefer the M&P over the Glock. It naturally points straight for me.
Honestly, this is a big can of worms with no single "correct" answer, and it actually brings more questions than answers. Things like:
And many more questions, really. It deserves its own post.
> Medical Supplementation
You asked about antibiotics. Do you know how to determine what antibiotic to use? How much of it to use? Are you allergic to any antibiotics? Allergy to the penicillin family is fairly common, for example.
Seriously consider consulting your physician about this. Tell him/her you're planning an extended camping trip and you're worried about possible infection if you get a serious cut while out. Ask about a prescription for a prophylactic course of antibiotics for such an event. They might do it, they might not. If they do, fill the scrip and make note of what it is and the dosage amount and instructions and use that as a launching point for future research.
> toilet paper coins
That looks like a bad implementation of a good idea. Carry some actual TP (same type you're used to at home, pull the cardboard tube out of the middle to help it squish flatter) and/or some wet wipes. If you don't mind the bulk and the weight, go to the baby section of Wal-Mart and grab some Parent's Choice brand baby wipes. They're not flushable, definitely not septic safe, and I have no idea how biodegradable they are, but they're surprisingly tough, and reasonably cheap. I don't recall what a pack of 80 costs off the top of my head, but a case of 1200 costs $20. If you don't want to brave the baby section, grab some Charmin wipes (which are flushable if that matters to you) from the regular TP area of Wal-Mart. Avoid the Cottonelle wipes. Their structural integrity leaves much to be desired.
Also, a way to wipe your ass isn't a "creature comfort." Personal hygiene is a necessity that becomes doubly important when SHTF.
> -folding solar panel?
If you have the space (volume and weight) and have batteries to charge (like for your lights), sure, go for it.
This is starting to get long (does Reddit have a character limit?), so I'll try to breeze through a few other things:
If we get the "WW3/national SHTF/anarchy scenario," that .22 will be good to hunt with, but crap to fight with. In that scenario, a proper AR-15 in 5.56x45 NATO would be preferable, but I wouldn't want to hump 250 miles with it in the open if I didn't have to. Consider a Pistol Caliber Carbine (PCC) that takes the same magazines as your handguns (Kel-Tec has a few options, Ruger's PC9 is promising, too). It's not as good as a proper rifle, but it will extend the useful range of the handgun ammunition and magazines you're already toting. It will also add 4-6 pounds to your load, but a decent AR will ad 6 to 8 before you factor the extra magazines and ammo.
NVG are bulky and expensive. Unless you plan to move and/or fight a lot at night, I'd skip them.
The use case you make for a gas mask can be handled by a bandana or shemagh, either of which is lighter, more compact, and have other uses. If you're expecting actual gas, grab the gas mask, otherwise it's unnecessary weight.
A lightweight vest is going to stop handgun rounds but probably not rifle rounds. It's also probably going to be hot. This one's up to you. Helmet is also a personal choice. I expect it would get more actual use saving you from tree branches and falls than gun shots, but not sure if you want the extra weight, bulk, and potential heat build-up.
I'm using these Xurons for thicker sprue connections and then following up with the usual God Hand work, or if the connectors are small enough, just going straight in with the God Hand. If necessary I'll do further trimming with an Xacto blade afterward.
Those Xurons are actually pretty good on their own, but the God Hand is smaller and thus easier to use for work in confined spaces.
Though you could just use a blade and sandpaper if you have some practice at it. Some people even use nail clippers.
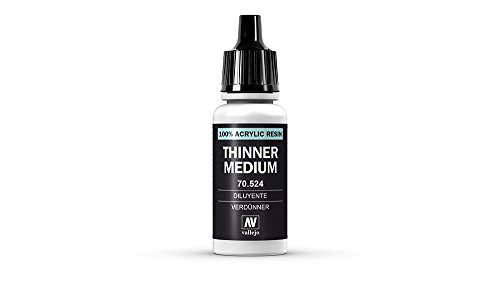
For the Model Color, use the Thinner Medium. You just need 1 or 2 drops of this thinner for a drop of Model Color. Too much will make your paint have a watery/runny consistency.
On the other hand, use the Airbrush Thinner for the Model Air. It works best with a Retarder Medium. Vallejo's air brush thinner is quite tricky to use though. You have to get the right paint to thinner ratio that will work best with your air brush. Try out different combinations on an old kit or a plastic sheet before painting your models.
EDIT: There's also an air brush flow improver from Vallejo.
The Robart Paint Shaker ~$40
http://www.amazon.com/Robart-Manufacturing-Paint-Shaker-Powered/dp/B0006O7M9W
Badger Paint Mixer ~$10
http://www.amazon.com/Badger-Air-Brush-Co-121-Paint/dp/B000BROV02
Go to an art store or hobby store and get CA glue from there. It usually comes in large enough containers that it won't dry out like it does in little dumb tubes or whatever.
I couldn't find anything on HLJ, but here's Amazon:
http://www.amazon.com/Pacer-Technology-Zap-Zap--Adhesives/dp/B00SXJJ2QI/
> I bought some liquid GS but it was already solid
i'm so sorry -_-
i use this specific GS product and its great
i use these sculpting tools and they're great
Love your colour scheme! I think your pooched on the windshield. Next time use clear glue for windows https://www.amazon.com/Testor-Model-Master-Cement-Window/dp/B0006NDZDU
Make sure to post more army pics, would love to see an army painted in this colour scheme.
That is the Tamiya paint stand.
https://www.amazon.ca/Tamiya-300074522-Model-Stand/dp/B00080DIWE/ref=mp_s_a_1_2?keywords=tamiya+paint+stand&qid=1568823849&s=gateway&sprefix=Tamiya+pai&sr=8-2
I’ve tried metal screen patches and two different fiberglass screens. Fiberglass is the way to go for sure. I got lucky and found a few sheets of fiberglass screen at a hobby shop that specializes in scale models like trains and architectural models.
As far as cutting/gluing/positioning, I use some cheap calipers to get a rough measurement of the screen dimensions and just keep dry-fitting and moving the screen around with the tip of my knife or a toothpick or something until I’m happy with it. The calipers also come in real handy when cutting plasticard for vehicle armor, or really any plasticard work. Personally, I like to put the screen on the inside, so it involves drilling out the peened post ends as mentioned. When it comes time to glue, I use Zap-A-Gap super glue and these precision tips to set one corner of the screen, then once it’s mostly cured, slowly work around the edge of the screen, gluing and tamping it down and waiting for a section to have some good adhesion before moving to the next section of the screen. It takes a while but the methodical nature helps preserve my sanity when messing with the mesh.
Iwata and Badger are generally considered high quality air brushes. I have an Iwata Eclipse so will speak to what I know of it.
You probably want to get an airbrush that is gravity fed. It has a bowl in the top that you pour the paint into. You can do a little mixing in the airbrush that way, to get the color and consistency you need conveniently.
Don't skimp on the compressor. There are 2 kinds: Constant flow or chambered. One just pumps air in constantly and stays on. The other fills a chamber then shuts off and you use the chambered air to spray. If you go with a constant flow airbrush, get a long hose to mitigate the pulsing of the compressor. Shoot, get a long hose anyway because it's great to have. If you can afford it, this is top of the line: https://www.amazon.com/Iwata-Medea-Studio-Double-Piston-Compressor/dp/B000TLSYB2/ref=sr_1_7?s=toys-and-games&ie=UTF8&qid=1536160547&sr=1-7&keywords=airbrush+compressor
Get one of these, they're awesome, you'll see why: https://www.amazon.com/Iwata-Medea-Universal-Spray-Out-Pot/dp/B01DYN6ESG/ref=sr_1_cc_1?s=aps&ie=UTF8&qid=1536160284&sr=1-1-catcorr&keywords=iwata+pot
Buy a mask. Don't airbrush indoors without one. You will inhale particles that you can't see and it will definitely cause issues with your lungs. Don't airbrush indoors without a booth or some way to suck up particulate from overspray. I use a home made rig that is a box fan with an air filter. It works like a charm but if you've got the cash, buy a manufactured one.
Pro tip: If you have a Hobby Lobby or Michaels near you they tend to have weekly 40% off one item coupons. They also tend to carry some mid range airbrush compressors and high end airbrushes. Check out what they have and if you like their stuff get that sweet 40% off these 2 big ticket items (you'll have to do 2 visits to the store to get the discount twice).
That's all I got.
The small file would probably be good. You could also use a drill bit by hand with a pin vise like this. It might even be worth trying something like a paperclip to start with.
https://www.amazon.com/Vallejo-Game-Air-Paint-Case/dp/B00QD77SYA/ref=sr_1_4?ie=UTF8&qid=1487693685&sr=8-4&keywords=vallejo+air
https://www.amazon.com/Basic-Colors-Acrylic-Airbrush-Vallejo/dp/B00MZ9VERW/ref=sr_1_3?ie=UTF8&qid=1487693685&sr=8-3&keywords=vallejo+air
Tamyia makes a good primer in rattlecan and handbrush; while you're there, pick up some ultra thin cement - it's awesome for seam fusing.
Thanks for the information! I never considered that the Iwata Ninja will pulse air as there is no collection tank.
​
I thought of getting this cleaning kit and this cleaning solution.
I use gw paints, mainly because I just always have, and I'm used to them, but if you wanna use some better quality, most people recommend vallejo or army painter. You can get a pretty good start with a variety of colors for army painter on Amazon for a pretty good price.
https://www.amazon.ca/dp/B01MTXRUUT/ref=cm_sw_r_cp_apa_B706BbA6TT14G
And I know you didn't, but I use their brushes, this set is a good starting point.
https://www.amazon.ca/dp/B00HC8H4EI/ref=cm_sw_r_cp_apa_F806BbW819S9Q
The blood should be much darker than it is. That bright red color makes it look like it's supposed to be red paint. The blood on the base isn't too bad, but again should not be so bright. You can use a darker red color for the blood, and make it look wet by coating it with an acrylic gloss (like Future floor polish, or a clear gloss, or even something like Testors Clear Parts Cement and Window Maker.
>1: You say you use Vallejo paints, what is the reason for using that brand, Cost? Quality?
Boils down to really just two things.... the model air/game air paints are pre-thinned for airbrushing which is super handy, especially when starting out, and two, dropper bottles are infinitely better for airbrush work than those stupid-ass paint pots GW makes. I have LOTS of GW paints as they are amazing paints. (expensive, but amazing) Typically i brush paint with GW and airbrush with Vallejo.
>2: For some reason, that airbrush costs nearly 60 pounds :D (i live in the UK, if you hadnt guessed!) if i were to get that specific airbrush, what else would i need to make it work, you mention an Air Compressor (brand? type?) and a Water Trap (whats the purpose of that - as i say, bit of a noob here!), what else, some sort of Hose to connect the compressor to the brush i assume? any cleaning supplies? which specific paints do you use?
WTF?! That airbrush is 60 fuckin pounds in the UK. Shit. At any rate, ANY TANK compressor will work. A tank compressor compresses air into a giant tank that is THEN let out of the tank through the brush, which allows for smooth flow. If it were an air compressor without a tank then it would "putt, putt, putt air out." which is deadly for airbrush work. You want smooth constant air flow.
Airbrush to Compressor Hose
Water trap for air compressors Note: these aren't 100% necessary for a larger tank air compressor as the large tank somewhat does exactly what this little guy does. These are usually only necessary for a compressor that isn't a tank fed. Moisture through condensed air is a real problem and if it gets into your paint, it'll fuck up your smoothness of airbrushing.
My exact compressor, which can be used for LOTS of things, not just airbrushing. Note: the only downside to these types of compressor is how goddamned loud they are. Pretty much HAVE to be used outdoors.
I connect the airbrush to the hose i linked earlier. I connect that hose to the water trap i linked earlier. I connect the water trap to a standard thick cheap air compressor hose. I connect the cheap air compressor hose to the air compressor.
I assure you it's FAR less complicated than it seems. That masters brush i linked you earlier comes with a 'quick release' that is STUPID handy. It connects to the airbrush hose (the blue-ish one linked) really quickly.
I use pretty much exclusively Vallejo Air paints.
Model Air Standard Colors
Model Air Range
Game Air Range
Only difference between game and model air ranges is the color vibrance and ability to be touched repeatedly and not wear off. (should not be a problem at all if you varnish your models though). Game air colors are generally formulated to mimic the GW range as well.
The only difference between Game and Model vs Game Air/Model Air is that the Air versions of them are pre-thinned and ready to shoot through an airbrush straight outta the bottle. You can buy almost any of those colors individually from amazon.
Also, Airbrush Guru is THE best resource I've seen on the subject. TON of helpful tips and tricks. Great in-depth reviews of noob friendly airbrushes and how to clean them. Most of the things I've linked you to buy can be used for things OTHER than airbrushing. The reasons for that are they are cheap. Good airbrushes run for hundreds of dollars. Shitty ones that still work awesome are priced accordingly. Start small, then dive in from there.
Lastly but not in the very least... safety is king. DO NOT AIRBRUSH IN A CLOSED ROOM WITH NO VENTILATION.
Airbrushing acrylics is the safest of the paints to shoot through, but even they can get in your lungs and over time cause problems. If you are going to try to airbrush indoors make sure you setup a proper ventilation system or have in place a spray booth. Something like this would be fine.
P.S. This is incredibly handy as well, like, more handy than anything I've shown you so far. It is obviously NOT necessary, but once you start airbrushing I would guarantee you that it'll be the next thing you buy. Helps when you need to sit the airbrush down but you still have paint in the cup. Enjoy! Again, go to that website, The Airbrush Guru for the best information. It's fantastic, seriously.
https://www.amazon.com/Vallejo-Thinner-Medium-17-ml/dp/B000KYLBZE/ref=sr_1_3?ie=UTF8&qid=1520543248&sr=8-3&keywords=vallejo+medium
This glue
Here's a big fat messy shopping list I made for someone a while ago. You might find it useful too.
http://www.amazon.com/Quickshade-Ink-Warpaints-Army-Painter/dp/B00HC8D80W
Amazon.com: Quickshade Ink Set Warpaints Army Painter
http://www.amazon.com/Pacer-Technology-Zap-Zap-Adhesives/dp/B00SXJJ2QI
Amazon.com: Pacer Technology (Zap) Pacer Technology (Zap) Zap-A-Gap Adhesives, 1 oz
http://www.amazon.com/General-Pencil-Company-Masters-Preserver/dp/B0009RRT9Y
Amazon.com : General Pencil Company The Masters Brush Cleaner & Preserver 2.5 0z. : Brush Soap
http://www.amazon.com/Army-Painter-Wargame-Starter-Paint/dp/B01BJ55UDQ
Buy Army Painter Wargame Starter Paint Set - PLUS Promo Undead figure
http://www.amazon.com/280715-American-Accents-Primer-12-Ounce/dp/B00KZ6LLZW?
Buy Rust Oleum 280715 American Accents Ultra Cover 2X Spray Paint, White Primer, 12-Ounce
http://www.amazon.com/TEKTON-6655-Needle-File-10-Piece/dp/B000NPUKYS?
TEKTON 6655 Needle File Set, 10-Piece
http://www.amazon.com/Xacto-X3311-Precision-Knife-Blades/dp/B0000DD1N4?
Buy Xacto X3311 N0. 1 Precision Knife With 5 No. 11 Blades
http://www.amazon.com/Most-Wanted-Wargamer-Set/dp/B007H4YR8S
Amazon.com: 1 X Most Wanted Wargamer Brush Set
http://www.amazon.com/Xuron-170-II-Micro-Shear-Flush-Cutter/dp/B000IBSFAI
Xuron 170-II Micro-Shear Flush Cutter: Wire Cutters
http://www.amazon.com/Milliput-Standard-2-Part-Hardening-Yellow/dp/B011BO9R5W
Amazon.com: 2 X Milliput Standard 2-Part Self Hardening Putty, Yellow/Grey
Edit: Of, and I used this guide for making my Thinner. http://www.reapermini.com/Thecraft/15 But I'm going to experiment more, because this is not perfect.
here is my set up. nothing to complain about. and the badger 105 is a great starter. its use of good machining means it only has one o-ring and its dead simple to clean.
https://www.amazon.com/Badger-Air-Brush-Patriot-Gravity-Airbrush/dp/B002W84GTO
https://www.amazon.com/Master-Airbrush-Fitting-Conversion-Adapter/dp/B0038NJYHG/ref=pd_lpo_vtph_201_lp_t_3?_encoding=UTF8&psc=1&refRID=9CTBV4FN6C10RQSFJXPG
https://www.amazon.com/AIRBRUSH-COMPRESSOR-Airbrush-Published-Exclusively/dp/B001738DXU/ref=sr_1_4?s=arts-crafts&ie=UTF8&qid=1505354405&sr=1-4&keywords=master+airbrush+1%2F6
then you will need cleaning supplies such as
https://www.amazon.com/Naturebelle-Airbrush-Cleaning-Holder-Nozzle/dp/B01D41W04U/ref=pd_sim_201_12?_encoding=UTF8&psc=1&refRID=3SG1JR28SAK6TVWHEZ03
https://www.amazon.com/Iwata-Medea-Airbrush-Cleaner-16-Oz/dp/B003TJA0SQ/ref=sr_1_1?s=arts-crafts&ie=UTF8&qid=1505354507&sr=1-1&keywords=iwata%2Bairbrush%2Bcleaner&th=1
I'm pretty happy with the quality of everything and it makes painting a base coat of pure white or yellow super simple. also makes painting a color shift or pattern very easy. if you have the cash i would highly recommend it
here are some of my projects i have completed with it
https://imgur.com/a/N4mhr
Try Vallejo plastic putty https://www.amazon.com/Vallejo-VJ70401-Plastic-Putty-20ml/dp/B000TSBJEO.
It's water soluble in the initial stage, so you can wipe the excess away with a wet cotton swab.
Most of the time, the mating surface shouldn't be completely flush anyway. If two plates were welded or riveted together, they obviously won't be completely flush. Basically, don't be a perfectionist.
The putty is for filling small visible gaps. However, if you find numerous gaps in the finished model, you should probably consider buying a different brand...
Same goes for the injection pin marks. Good companies will design the model so that these marks are either facing inward or being covered up by other parts. You shouldn't need to fill more than a couple of these marks in a model. Otherwise, you should consider buying other brands.
"Green stuff" is what miniature modelers use to fill gaps. Don't use the "Liquid Green Stuff" from GW, it's mediocre at its job at best and useful only for the most minute of gaps.
Look for this stuff:
https://www.amazon.com/GF9-Educational-Products-Hobby-sculpting/dp/B0028BZQIK
Wood Fill will not leave a smooth surface at the level of detail you want; it will appear 'chunky' as it dries. Green Stuff remains smooth.
Ouch, I would recommend using nippers that are designed for modelling like [Tamiya's sharp pointed nippers] (https://www.amazon.com/Tamiya-Sharp-Pointed-Side-Cutter/dp/B000J47Z4G/ref=sr_1_2?ie=UTF8&qid=1525891853) or God hand nippers if you have the cash. Standard side cutters tend to pinch and tear instead of cutting and with the brittle nature of resin they can take chunks out like that. I also recommend cutting 1-2mm away from the model itself and then sanding down the left over nubs after full curing.
https://www.amazon.com/gp/product/B01DYN6ESG/ref=od_aui_detailpages01?ie=UTF8&psc=1
Like that?
I was in the same boat as you. This is all the stuff I bought: https://www.amazon.com/gp/product/B0067BAYNO/ref=oh_aui_detailpage_o04_s00?ie=UTF8&psc=1, https://www.amazon.com/gp/product/B001738DXU/ref=oh_aui_detailpage_o04_s00?ie=UTF8&psc=1, https://www.amazon.com/gp/product/B00KS1II96/ref=oh_aui_detailpage_o04_s00?ie=UTF8&psc=1, https://www.amazon.com/gp/product/B003TJA0SQ/ref=oh_aui_detailpage_o04_s00?ie=UTF8&psc=1,https://www.amazon.com/gp/product/B004BN5RUU/ref=oh_aui_detailpage_o03_s00?ie=UTF8&psc=1 .
I also bought an assortment of paints I thought I'd need. I went with the Vallejo Game Air line. If you look around, you'll see the stuff I bought recommended by many people for novice airbrushers.
Also, when I bought all that stuff, I signed up for the Amazon Prime credit card as well, so I ended up getting like $120 off that order. It worked out pretty well.
So Ive used Green Stuff, Liquid Green Stuff, and now Vallejho's Plastic Putty, and by far my favorite to use is the Plastic Putty. Green stuff you have to kinda work with a little to get it to behave, but the Plastic Putty gets right in that crack thanks to the needle tip squeeze tube it comes in, and it seals really good too!
https://www.amazon.com/gp/product/B000TSBJEO/ref=oh_aui_detailpage_o09_s00?ie=UTF8&psc=1
https://www.amazon.com/God-Hand-Spn-120-Ultimate-Nipper/dp/B008S51O22
This this makes Gunpla lots more fun because nub marks suck.
Guison Rebake's giant butt shield is actually a pair of giant nippers.
Thank you for the quick reply. I'll just go ahead and get a mix of that, do you think something like Bluecell Alligator clips would be more than enough? Or would those bite too hard on the plastic?
Something like this? Liquid Surface White Primer 40ml Bottle Tamiya https://www.amazon.com/dp/B000R9N5W4/ref=cm_sw_r_cp_apa_6hNFybH2V8941
Tamiya Painting Stand
That’ll help a lot. Or a old lazy Susan you don’t care about.
I use this there may or not be a better alternative though.
I am looking at this one right now, since from what I have read Paasche is a better brand than masters.
https://www.amazon.com/Paasche-TG-100D-Gravity-Airbrush-Compressor/dp/B002N0QA8Q/ref=sr_1_cc_2?s=aps&ie=UTF8&qid=1511535675&sr=1-2-catcorr&keywords=Paasche+D500SR
Thanks!
It's... An overly complicated process. I started painting this army in 2008, and at the time it included a lot of dry brushing. There were no good yellow sprays, and foundation paints were kinda shitty too.
If I were to start nowadays, I'd keep it MUCH simpler though, but I do love the warm yellow. All in all, I'm glad I've been forced down this path for relative consistency though.
After A LOT of trial and error, the method I'm using right now is this:
^ I managed to find a consignment store online that had a fresh-from-GW six-pack of sealed from the factory Golden Yellow circa 2008. I've been using ball bearings, Lahmian Medium, and a Robart paint shaker to keep them usable.
If you choose to copy my method... Emperor be with you.
Neither. It's this: https://www.amazon.com/Vallejo-Thinner-Medium-17-ml/dp/B000KYLBZE
(Sorry for not formatting a hyperlink, sending from my mobile, don't know how)
I agree. The ribbon doesn't last long at all. I buy the Gale Force Nine stuff. Comes in separate tubes so curing hasn't started yet and there is no waste.
You can find some here.
I have this and it has served me well. I also have just bought some drill bits of larger sizes. They don't fit in the vice but they're big enough that I can just hold them.
If you're getting into custom work, I highly recommend magnets for days. Small neodymium ones (~3mm), buy a few hundred in bulk for cheap, some super glue, and a drill bit with the same diameter to make "sockets" to put the magnets in. Then put magnets in everything!
Depending on how many models you're looking to work on, this drill was cheap and effective for me. I only needed to pin one model though, so the drilling wasn't too tedious. Doing it by hand 30 times might get annoying, though the drill might work quickly on plastic (I was using it on a metal model)
Hobbico Pin Vise 1/16" Collet with 6 Bits https://www.amazon.com/dp/B000X4OIWY/ref=cm_sw_r_cp_api_DyBnxbE8WJMM1
Also a paint shaker is a good investment. It is expensive though
I use these for topcoating,
https://www.amazon.com/Bluecell-Alligator-Stick-Airbrush-Hobby/dp/B007ZYX1GO/ref=pd_sim_21_29?ie=UTF8&psc=1&refRID=TYRGEP0MWPTD0JZGKCKR
just clip one end to the part(arm, head, leg) and stick the other end in styrofoam or cardboard.
Keep the spray about a foot or so away and just wave it back and forth
I'm pretty sure there is some stuff you could use to make a clear visor. I've never used it, but seen some clear stuff that was used for making windows on car models, etc.
Found it! Full disclosure: I have no clue how, or if this works....
Testor Model Master 8876C Clear Parts Cement and Window Maker, 1/2 fl. Oz. https://www.amazon.com/dp/B0006NDZDU/ref=cm_sw_r_cp_apa_i_6fEqDbKXRM8KQ
yea yours is totally more killer at paint shaking and probably last another 20-30 years! I expect this one to explode on me :D. I was going to get this https://www.amazon.com/Robart-ROB411-Paint-Shaker-Powered/dp/B0006O7M9W/ref=sr_1_2?ie=UTF8&qid=1483397723&sr=8-2&keywords=paint+shaker but it doesn't ship to NZ
Is the model air set this same one on amazon for $140 or is there a different one?
https://www.amazon.com/Vallejo-Game-Air-Paint-Case/dp/B00QD77SYA/ref=asc_df_B00QD77SYA/?tag=hyprod-20&linkCode=df0&hvadid=312184153387&hvpos=1o1&hvnetw=g&hvrand=12570395582216074422&hvpone=&hvptwo=&hvqmt=&hvdev=c&hvdvcmdl=&hvlocint=&hvlocphy=9012118&hvtargid=pla-437215944143&psc=1
3-Pack Credit Card Size Pocket Fresnel Lens - Magnifier Lenses for Fire Starting https://www.amazon.com/dp/B00NWMUK0I/ref=cm_sw_r_cp_apa_mm4.ybTZ614H8
Nice. Now just hit them with some wash and they will instantly look 10x better.
Brown Big Skinny bifold with 50-100 in cash, driver's license, credit card, voter card, insurance card, fishing license, AAA card, emergency contacts, a family photo, a small amount of duct tape, and a fresnel lens. All packed up it's still pretty thin.
It is this one. It is nice, it has that stand and then a flat turntable in the set.
Those sets actually look really awesome and right in the price range I was willing to spend. Might grab both! Thanks for the recommendation.
For brushes I saw army painter has this set it looks like it has the brushes you recommend and then some. Have you found the bristles of these brushes stay together well? I know on small brushes you will always have some minor separation because of their size.
Also what do you use to clean your brushes? I figured id pick some of this Master Brush Cleaner while i'm at it.
I bought this kit and I've been having decent luck with it. You might also want to pick up a spray booth and a spray-out pot like this.
I went with the kit because I live in a tiny apartment, so a big and/or loud compressor wouldn't work. You might be able to save some dollars going for something bigger with a tank on it. My understanding is that the brush is much better than no-name cheap airbrushes, but not quite as nice as some of the higher end Iwatas.
This is enough airbrush to learn on and paint basecoats, shading, and block-in colors for miniatures and smaller models, but it doesn't have enough power to be very versatile outside of that range (you're not going to be painting a van with it, and freehanding fine lines/details won't be the best).
Keep the joining you have but I would still recommend using a glue to keep the parts from slipping and chipping paint. You can also use 'Green Stuff' to fill out those gaps and sand down to a smooth edge. Paint over it and it should look all one piece. I do agree the interlocking pieces will help hold it together under the rough environment of people playing with the sword.
Skip the super glue for anything clear. I use this for all my clear parts and I'd bet it'd work well for you:
http://www.amazon.com/Model-Master-Cement-Window-Testors/dp/B0006NDZDU/ref=sr_1_3?ie=UTF8&qid=1421258081&sr=8-3&keywords=testors+clear
Nice!
Just make sure to also eventually buy something that can maintain those pots. Either a commercial or home-made shaker or rotator or oscillator. An oscillating multi-tool with sander plate, you could glue some pots to to shake them...?
For cheap go for this but I've heard mixed reports on its longevity.
Cheers on having all the paints ever!
That will work. I don't use a ultrasonic bath for mine.
I use this for my cleaner Iwata-Medea Airbrush Cleaner 32 oz https://www.amazon.com/dp/B003TJA0SQ/ref=cm_sw_r_cp_apa_i_.EDNDbVCPWR7D
This is a good set of videos on airbrush
https://youtu.be/bwLYShS6SIg
So far I have found this online:
https://www.amazon.com/Hobby-Starter-Mega-Brush-Set/dp/B00HC8H4EI/ref=sr_1_4?s=toys-and-games&srs=7513501011&ie=UTF8&qid=1482729498&sr=1-4
If so, I can get these now in the process now and get Tamiya Plastic Cement 20ml. Just need to get clippers next, I don't think there is much a difference along with a hobby knife to shave down plastic layout.
I'd have to say the aligator clip sticks, because they don't seem like much at first but they save your life when spray painting any sort of parts, you prop them up on a piece of foam or cardboard to dry.
Also the LUM-168 Camel because I always thought it looked ugly as sin but I've come to like it Lol. It's a very detailed model
I actually don't play 40k (well to be fair I just got back into the hobby, and I'm pretty much exclusively playing fantasy) but I think my strategy works for 40k as well. I've put magnets on the bases of all of my models using green stuff (epoxy). I then put tin sheets on the bottom of my movement trays, but instead of this step you could just get a metal box or put a piece of metal on the bottom of your current box. The magnets are strong enough to hold the models even when upside down (or even if they aren't the plastic models). It's especially great for fantasy where everything is ranked up in a unit, so moving the unit means none of the models will fall off/out.
I've been struggling with realistic looking bone myself, but I think I nailed it on my latest attempt, the chimney stacks on my Carnifex's back came out pretty good:
Carnifex 1
Carnifex 2
I did this by layering up to bleach bone starting with a dark brown using really thin coats. But that's for painting a flat surface.
Nid-flesh is all about washes, so I'd probably start with one shade darker than bleached bone, wash brown, then 2 thin layers of bleached bone on top. I find it helps a lot to thin with an actual thinning agent instead of just water. The one I currently use is a P3 brand that I picked up at my FLGS, but essentially you'd want something like this:
http://www.amazon.com/Thinner-Vallejo-Acrylic-Paint-Bottles/dp/B000KYLBZE
Small magnets are cheap. I used to buy them in bulk when I was deep into tabletop gaming. We used to drill small holes in our models and glue the magnets into the recesses so we could quick swap bases and weapons. You can buy a bag of those little things for less than $5, and the hobby drill should run about the same. With those and some glue, you're looking at ~$12 total investment, and then 2 minutes per part you want to magnetize.
EDIT: Links to parts for anyone interested. You can find them cheaper if you shop a bit, but these should serve as quick references.
Hobby drill:
http://www.amazon.com/Hobbico-Pin-Vise-Collet-Bits/dp/B000X4OIWY/ref=sr_1_2?ie=UTF8&qid=1451271476&sr=8-2&keywords=hobby+drill
1/16" rare earth magnets
http://www.homedepot.com/p/Magcraft-Rare-Earth-1-16-in-x-1-32-in-Disc-Magnet-200-Pack-NSN0591/204721289
You can usually score these cheaper at your local hobby shop or tabeltop gaming store.
If you are on a tighter budget, I can recommend this Paasche airbrush kit that comes with a compressor, 3 needle sizes, a hose, and cleaning tools. I found it to be a really great value. And the reviews speak for themselves.
Thank you so much!
do you use this?
I got them off Amazon, here's a link. Vallejo Front Module Paint Stand https://www.amazon.com/dp/B01720DWKU/ref=cm_sw_r_cp_apap_9ap5BKo3mYbKf
This is a rough step by step guide: Nub removal
If you don't mind spending, for step 2, you can get a Godhand cutter to get as close a clean cut as possible. This will bypass the xacto-removal which I personally dislike since I tend to overgouge/cut myself.
After which, use a 800-grit sandpaper and every few one-direction pass, check to see if the surface is smooth. Then use a 1000-grit and sand it slightly in circular motion
It will appear whitish but since you're already doing the whole basic process, you can proceed with topcoat, which will diminish the white marks and the end result should look almost nubless.
Of course, that's without the painting process.
Make sure you buy a hose if you buy a compressor without one (eg. if you buy used).
You will want to buy a respirator.
You can also jump-start his accessories list by including some cleaning supplies (spray-out pot, airbrush cleaner), as well as some paints/primer/topcoat (tamiya, mr color, vallejo, alclad ii, etc.).
I believe this can all be done with a budget of 300$ (assuming US). At this point, he could start spraying that day if he wanted.
EDIT: I use this Master Airbrush Compressor and the Iwata HP-CS airbrush. I've been happy with them so far, but I do wish I spent a little more on a compressor with a tank (as /u/7x13 recommends).
If you use Zap a Gap or similar they have a removable tip. It seems to stay very clog free with minimal buildup on the tip. Maybe the plastic they use has something to do with it, but my bottle seems fairly clean. That and I like the Loctite control type glues which have the squeeze sides. They tend to let me keep the tip clean as no glue seems to leak out unless I squeeze them. They also have great formulas imo. Gel or liquid depending on your needs.
Hmm, my recommendations are still all video games and gunpla.
Including a $52usd pair of model nippers which anyone would kill anyone who used them as wire cutters.
Thanks for all the help. I picked up what I think were some pretty decent snippers from the local hobby shop, but maybe I should look into some other options. They could be flatter and sharper and they tend to leave behind enough of a nub to be annoying. Thanks!
edit: I think I found what you're talking about. $60, is that right? Seems... like a lot? https://www.amazon.com/God-Hand-Ultimate-Plastic-GH-SPN-120/dp/B01MUGEO9X/ref=dp_ob_title_toy?dpID=41fKOYeoe4L&preST=_SY300_QL70_&dpSrc=detail
Oh ok. Then would a tamiya liquid surface primer work as well? I was thinking of this originally: https://www.amazon.com/gp/aw/d/B000R9N5W4/ref=mp_s_a_1_fkmr1_1?qid=1466351155&sr=8-1-fkmr1&pi=AC_SX236_SY340_QL65
Got some of this and was able to spray paint the Model Master Deep Sea Blue over it successfully. This stuff really smells, however, so I ordered some of this hoping it will be a little nicer to work with.
If you think that's expensive...
I think most people would use something like Vallejo Plastic Putty:
https://www.amazon.co.uk/gp/product/B000TSBJEO
these are what i got u can also use a little bit of blue-tac on the end of a bbq skewer, thats what i did. hardware stores also sell alligator clips but i dont think you will find 25 of them for lower then 7-8 bucks unless there is a surplus/craft store near you
https://www.amazon.com/gp/product/B002N0QA8Q/
With spare parts, needles, etc.
These can be bought on amazon us
I tried amazon.de but I know only a few words in german and alligator clips were not there.
They're just shishkabob skewers with alligator clips on them, would cost about 5$ to make 30.