(Part 2) Best hobby building tools & hardware according to redditors
We found 1,658 Reddit comments discussing the best hobby building tools & hardware. We ranked the 466 resulting products by number of redditors who mentioned them. Here are the products ranked 21-40. You can also go back to the previous section.


![Tamiya Weathering Master 6-Sets(A,B,C,D,E,F) [Japan Import]](https://m.media-amazon.com/images/I/51zT9nc-esL.jpg)
![TAMIYA Panel Line Accent Color 3-colors(Black,Brown,Gray) Set [Japan Import]](https://m.media-amazon.com/images/I/41lZ2OHt32L.jpg)


A few particular items of interest from Amazon :
A few items & vendors from Etsy :
Whatever the question is use Vallejo putty to fill the gaps in, you can use green stuff or liquid green stuff but I don't think it holds much to the vallejo brand.
What you're noticing is oxidation from the ambient air. It may give it a bit more sheen, but you could use a clear flat spray lacquer such as this to minimize the erosion over time.
As far as bringing it back - You could tumble polish the brass, but that would more or less restore it to it's unfired state, not fired. As such, leaving it as is would be my recommendation.
First comment:
Please upvote this by default so it stays towards the top. I'm still learning how2reddit
So I am NOT an artistic person so this is especially anxious for me. But, I needed something to keep my hands busy that wasn't masturbating, so here we are.
I have probably over studied techniques and materials, and I want this post to be a "documentary" if you will. Where someone who has no business painting is going to be doing just that.
So, I'll be documenting my pitfalls and approaches to everything here. With all of you lovely people, it'll also hopefully be a central location for someone like me or just wants to get into 40k can refer to.
Disclaimer: I'll be at work until 5pm EST. But my job is pretty cushy so I'll be adding planning details throughout the day
Tools and Such
Well, I probably overspent here. Only because I'm lazy and didn't want to make the drive to harbor freights. But then again, paying the premium to help support my local game shop is going to give me some karma in the long run. Here's the list of things that I ended up picking up:
Theory is Great and All (11.13.19)
So here are my updates from actually painting.
Life Sucks and I haven't gotten much done (11/15/19)
So I was only able to apply a second coat of to what I've already done. But honestly, not too shabby! Apparently I didn't water down the paint too much.
https://imgur.com/gallery/lA9LV1N
Also, I recently switched to a different cell phone carrier, and got a $200 prepaid card.... So I'm getting these.
https://www.amazon.com/gp/product/B004INERK4/ref=ox_sc_act_title_1?smid=A3TMLEXVMVIW94&psc=1
https://www.amazon.com/gp/product/B002JLVM5U/ref=ox_sc_act_title_3?smid=A1Y3PCPH3CY53X&psc=1
There's a blog that I found (will have to find it again later) that recommended these.
From someone who has never put together a miniature model before KDM, it wasn't that bad actually. Some models are a pain in the ass due to how small the pieces are, and fitting into your fingers.
Most of the models are pretty straightforward. You can use vibrant lantern (http://vibrantlantern.com/) to find how to put together any models that the official KDM website doesn't have.
The armor kits take a little bit more in figuring out how they are supposed to go. Armor kits can make up to 4 survivors, and you can mix and match gear so it's really up to you how to decide to build them.
Also, if you aren't painting them, the stuff below is all you'll need:
Pacer Technology (Zap) Brush on Zap a Gap Adhesives, 1/4 oz
https://www.amazon.com/gp/product/B00GB0SE60/ref=ppx_yo_dt_b_asin_title_o08_s00?ie=UTF8&psc=1
Pacer Technology (Zap) Zap-A-Gap Adhesives, 1/2 oz
https://www.amazon.com/gp/product/B00SXJJ2OU/ref=ppx_yo_dt_b_asin_title_o07_s00?ie=UTF8&psc=1
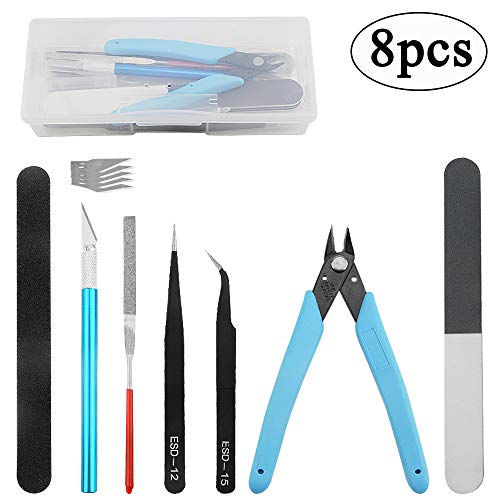
Professional 8 PCS Gundam Model Tools Kit
https://www.amazon.com/gp/product/B01GH6B3Z6/ref=ppx_yo_dt_b_asin_title_o06_s00?ie=UTF8&psc=1
Alvin Deluxe Professional Self-Healing Cutting Mat
https://www.amazon.com/gp/product/B0015AOIYI/ref=ppx_yo_dt_b_asin_title_o06_s00?ie=UTF8&psc=1
It's just cheap alligator clips on bamboo skewers. You can buy 25 pre-made for like $5. https://www.amazon.com/dp/B00CWRCO6M/ref=cm_sw_r_cp_apa_8ffRzbMP2AFNG
Like any hobby the initial cost to start will always be high. You may be tempted to buy cheaper tools but whats the point if you plan on building Gunpla for a while and will end up replacing them. If you only want to build 1-2 kits then you can get away with 2 dollar clippers and a box cutter but it won't give you good results.
Despite the cost these are still the tools I recommend that EVERY Gunpla owner who doesn't plan on painting their kits purchase
A) Tamiya 74035 Sharp pointed side cutters, worth every penny
B) Xuron 410 Side Cutters, very durable at an affordable cost
C) X-Acto X3000, Comfort rubber grip, comes with 2 blades
D) 3 Fine tipped Gundam Markers, Black, Grey and Brown
E) Krylon Acrylic Flat Coat, large can for only $5-6
And that's it.
2)Use the Tamiya cutters to cut the remaining nub, with practice you can get it practically flush to the part.
3)Clean up the nub with a hobby knife. You don't need sandpaper or a file if you did the steps above correctly and the flat coat will mask any scratches.
4)Use the Gundam markers for lining
6)Finally finish with a top coat
Total cost with amazon prime is $65. Yes the Initial cost is high but the tools above will last you for 20+ kits (you will need to buy more blades and flat coat). If you really can't afford that you can save up for the Tamiya sharp pointed side cutters and use the Xurons in the mean time (you will have more work to do).
So $38-65 initial investment to me is really not that expensive
Thanks! Honestly I just kind of winged it. The parts that are rusty were done with the Sophisticated Finishes rust set. It's a 2 step process. You paint the area you want rusted with an iron solution, then paint it with a bluish watery substance that actually rusts it.
Everything else was done with these. Most of what you see is the orange rust. The seats have the gray, which I think does a good job replicating aged vinyl. All off the engine parts are covered in the oil stain, along with the inside of the windows.
And, of course, a good old brown/black wash on everything.
I would honestly buy them separately. A helping hands like this one, and a lamp like this.
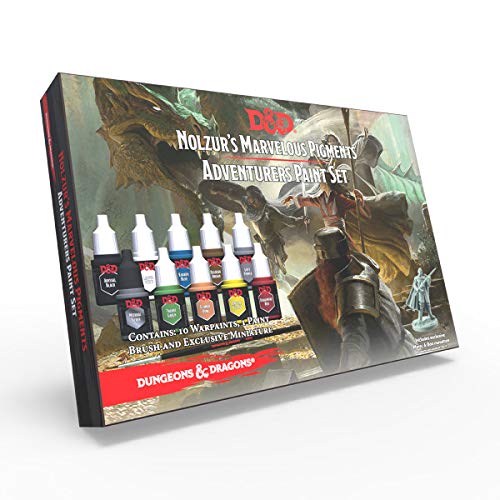
The model is of Minsc and Boo, and it comes with the Nolzur's Marvelous Pigments Adventurer's Set. It's like a D&D/Army Painter colab for newbies (like me!).
The model is pretty cool tho.
Damn, that cloak is pretty. Very nice paint my friend. Only critiscm is fill that gap.. it's hardly noticeable but once you see it you can't un-see it. :)
I use this stuff for quick patches.
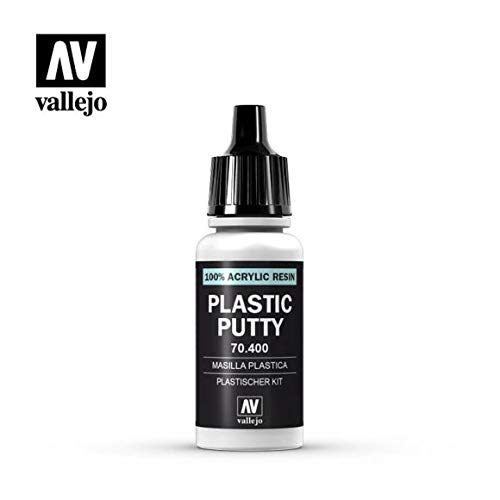
Vallejo Plastic Putty, 17ml https://www.amazon.com/dp/B000PHCNLC/ref=cm_sw_r_cp_apa_vHTTBbFM6FE8R
Thank you! I love sharing how I did things! The cast was OK (no bubbles, the claws were a little jagged). It's a breeze to assemble (no pinning required), but there were some noticeable gaps after assembly. These were easily-filled with Vallejo plastic putty, which I find easier than liquid green stuff:
Vallejo Plastic Putty, 17ml https://www.amazon.com/dp/B000PHCNLC/ref=cm_sw_r_cp_taa_qfQNDbCZP4KHB
For Contrast Paints, I found these tables really helpful: http://imgur.com/gallery/mb5jHNg
I undercoated the model with Wraithbone Spray. The green scales were done with Militarum Green, the bottom half of the model and any bone bits were painted with Skeleton Horde. I went back over the bone areas and applied Snakebite Leather in the recesses to help them stand out. The tongue and gums were done with Volupus Pink. The blue areas were done with Akhelian Green! The base was done with Basilicanum Grey and Gor-Grunta Fur. I went back over the metal bits with watered-down Skrag Brown in the recesses to simulate corrosion.
One of my best friends;
http://www.amazon.com/Tamiya-87012-Plastic-Cement-20/dp/B002CDPZDK
Good luck.
Welcome to the hobby, friend! Here's a few useful tidbits of info for you.
None of the Gundam kits from the last 20 or so years need glue. That's a standard feature across pretty much every Gundam model kit. So in that regard, feel free to pick any design you like. Not all kits are created equally, but a quick search across this subreddit will help you figure out if the kit you're looking at happens to be hot garbage (and there are a few that are).
To more directly answer your question, the starter set uses an older model of the classic RX-78-02 Gundam. The Revive version is a much, much better model. You can find it here on Amazon.
A panel lining pen (or pens) are not required, but certainly make for a better final product. They're pretty cheap on their own, and generally you'll want at least grey and black, and possibly also brown. Alternatively, you can get a pack of all 3. You'll also want so basic q-tips/cotton swabs to clean up your panel looking.
You're also going to need some nippers. Nippers come in a range of types, qualities, and styles. The best nippers are single sided (that is, one side is a blade and the other is flat). These, the infamous Godhands are hands down the best nippers on the market. They're expensive as shit, but worth every penny. If you're on a medium budget, Tamiya's nippers are the next best option. There are cheaper nippers out there, but they're gonna come with significantly inferior results. That said, a lot of that can be addressed with...
A good hobby knife. You'll be just fine with a simple, cheap X-Acto knife, but there is (in my opinion) a better option. My personal favorite, the Tamiya Design Knife. It's got a slightly smaller blade, which will let you get into tighter spaces with it. It also comes with a metric crapton of replacement blades. You'll want to replace the blade every couple kits, but there's a bunch of them in there. There same container that holds the replacement blades even has a second chamber to dispose of your old blades into.
Finally, you may want some fine pointed (possibly angled) tweezers for decal application. Finger oils can screw up the adhesive on the stickers. You can pass on this starting off most likely, but you'll want to get some eventually.
TL;DR, the starter pack isn't the best option. If you're after the granddaddy Gundam, get the Revive. Otherwise, pick your favorite design. The newer the kit, the better, generally speaking. Look at the copyright date on the box cover to see. Bottom left corner.
You're going to need nippers, which can get pricey, but the cost is worth it. Start with a mediocre pair, and upgrade to the Godhands once you're committed to the hobby. You'll need a knife, too. You can cheap out on this one, but there are better options IMO.
Optionally, get tweezers, panel lining pens, and cotton swabs.
Edit: other good starter kits
HG Barbatos is a great kit. The build process for IBO models is a bit different than other gunpla, though, as they have a quasi-inner frame.
HG 00 Gundam is another great starter. It's also the first kit I ever panel lined, and it was a great starter for that.
If you're wanting a Zaku, the HG The Origin Zaku II Type C is probably the best Zaku kit released to date in 1/144 scale.
Finally, I'd feel bad for not suggesting my all time favorite HG build. It was just a fun, fun kit to make and to pose. The HG 1.5 Gundam. It's got some really cool gimmicks and, unique colors, and an awesome design.
I use this thing
http://www.amazon.com/dp/B00AQAANDS
I started recently and did a lot of research.
I like Vallejo paints. Something like a set from Amazon is $40 and you get 16 colors. Depending on your paint color needs you can get game colors or a normal set.
Game Color Intro Set (16) https://smile.amazon.com/dp/B000PHCTRK/ref=cm_sw_r_cp_apa_i_k97VCbDME38CK
Vallejo Basic USA Colors Paint Set, 17ml https://smile.amazon.com/dp/B009162PWU/ref=cm_sw_r_cp_apa_i_I-7VCbD1ETA5H
That is unless you're painting terrain. Use craft store paint on terrain. You can paint with craft store paints if your on a real tight budget. But I think it's significantly more challenging.
Also I recommend getting a nul shade from citidel. Don't get any of their paint pots, they are a pain.
I got this set and found it very handy to have all s
The washes I could want. Used some odd colors on my dragon and fire fox.
Games Workshop Citadel Shade Paint Set https://smile.amazon.com/dp/B00KOD3FM8/ref=cm_sw_r_cp_apa_i_lc8VCbEMS1X69
Hope that helps!
Below are links to everything on Amazon:
Crazy Ants Reel Rolling Tool Bag Pouch Professional Electricians Organizer https://www.amazon.com/dp/B00O0FN832/ref=cm_sw_r_cp_api_OtgGzb838Y9H5
BXQINLENX 8 PCS Gundam Modeler Basic Tools Craft Set For Car Model Assemble Building(A) https://www.amazon.com/dp/B01GH6B3Z6/ref=cm_sw_r_cp_api_grgGzbFBB475F
Stanley 84-096 5-Inch Needle Nose Plier https://www.amazon.com/dp/B0001IW50Y/ref=cm_sw_r_cp_api_gtgGzb2XFXKT9
StarTech.com 7-Piece Precision Screwdriver Computer Tool Kit (CTK100P) https://www.amazon.com/dp/B0001NYK16/ref=cm_sw_r_cp_api_0ugGzbMGHA2NQ
Dynamite 5 pc Metric Nut Driver Assortment https://www.amazon.com/dp/B000BQ4XPQ/ref=cm_sw_r_cp_api_rvgGzb3V9N7CK
NEEWER® Titanium Nitride TiNi Hex Driver Wrench 4 Piece Set 1.5mm/2mm/2.5mm/3.0mm https://www.amazon.com/dp/B00CP2GGBI/ref=cm_sw_r_cp_api_7WgGzb3WEWHC0
Bondhus 12592 GorillaGrip Hex Tip Fold Up Tool with ProGuard Finish, 7 Piece https://www.amazon.com/dp/B00269YAIQ/ref=cm_sw_r_cp_api_zXgGzbJZRSBR6
There are also a few assorted items in there as well, standard scissors, small little brush(for getting dirt out of the quad in a crash), extra 12v power chord for my balance charger, small wrench(for propeller nuts), a couple extra small screw drivers. In the pouches: micro fiber cloth for fpv camera lens, zip ties and Velcro tape.
Good luck!
I've done business with Plaza Japan in the past, they have a good selection and low prices; you'll pay for shipping so best or order more than just one product to take advantage of that.
​
Amazon isn't bad, just check the prices compared to other stores. I've gotten great deals, and I've seen items posted at silly prices too. If you got prime then shipping is covered, although keep in mind that lots of the low price ship kits are shipped from Japan so the free shipping takes a while. Also read the reviews, I've had a couple of sellers not ship but Amazon had my back every time.
​
As for tips for a beginner, get the right tools right off the bat, this tool kit is a good start, I like these brushes (although you might want to get an additional bigger one as well), and I use this brush cleaner. Get a paint pallet for mixing, remember some paints like Tamiya need thinner while ones like AK don't. For more on brushes watch this quick video. You'll likely want some modeling masking tape. If you'll be doing something with lots of decals like a Carrier get some Microset & Microsol plus decal/hobby scissors. You'll need some kind of filler putty, I like miliput. Later on you'll want to mess with things like washes (vallejo makes a great out of the bottle wash) simple washes can make you stuff suddenly look pro because of what it does to small details, if you're going to be doing ships with specific paint schemes look in to the AK sets they'll be 5-6 colors all as part of a theme (like Royal Navy ships).
​
Most importantly you should start with something cheap. Your first few models will be learning experiences, so play around with those cheap $10 IJN destroyer kits till you get comfortable, use it to test painting techniques, then build that $50 HMS Ark Royal kit.
I'm by no means an expert but so far I've been using Tamiya Extra Thin Cement and As a starter kit for tools I've used: https://www.amazon.com/dp/B01GH6B3Z6/ref=sr_ph_1?ie=UTF8&qid=1493146419
Its only 16 bucks for the kit.
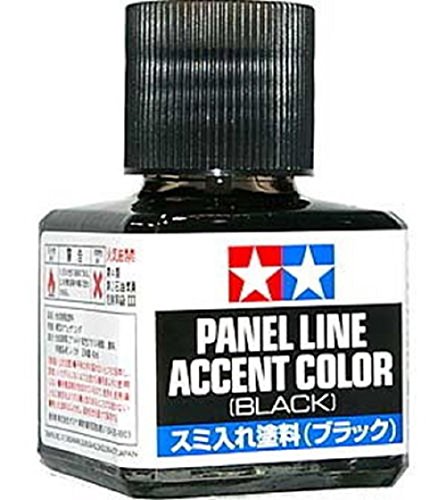
There's this stuff called Tamiya panel line accent color that's great for this. It naturally flows into casting lines. It's also less dark even in black and also pretty forgiving. If it goes wrong you can wipe it away.
The other option is the super fine Gundam markers. You can use them to draw in the lines but unlike the stuff above they're really unforgiving. If you go outside the lines you can't really correct it.
TAMIYA 87131 Panel Line Accent Color Black For Plastic Model Kit https://www.amazon.com/dp/B01HDJ7BR0/ref=cm_sw_r_cp_api_i_HAokDb9EX3F7Z
I would not recommend brushing this stuff on. Glosses are really hard to brush on and still get a good result. If you have an airbrush, go for this stuff.
But if you don't, then I recommend picking up some of the Tamiya's glosses in the spray canisters like this
The side skirts are easy enough to pop back on for this guy. I feel like the Zeta being a grenade circlejerk is pretty overblown. Sure, it's more fragile than other gunpla, but it isn't going to permanently break by touching it.
As for the decals, I suggest these tweezers. They work incredibly well, especially for the tiny RG decals.
If you get it nice and hot you should be able to dig it out with some angled tweezers.
Bought mine off Amazon here. It dries hard and is pretty adherent, and doesn't run when you're positioning the mod. There may be better options, but it's worked well for me.
It takes a lot of time. You need the right tools. Id' have an exacto knife, some clippers, some files, a good glue, and probably some gap filler. Oh, and a cutting board to work off of.
I linked some examples to give you an idea, you can feel free to find a particular product that works for you, although I do really like the Tamiya glue. There are a lot of little pieces so some people might like some tweezers as well. I use cupcake wrappers to help keep the pieces in one place as I'm assembling and keep them from getting lost. I'd recommend not working over carpet as a dropped piece might get lost forever in there.
As others have said, Vibrant Lantern has some great build guides, which are probably required for more complex models like the Phoenix.
Otherwise, don't let the amount of sprues overwhelm you. Pick a miniature to assemble and finish it before moving on to the next one. Most of them are fairly straightforward. I would really recommend you take your time in assembly, as getting the edges filed and gaps filled will pay off in the long run - nothing worse than a well painted model with gaps and mold lines showing. There are plenty of videos out there on how to do this if you aren't sure or just want some additional instruction.
Start with the White Lion and starting survivors. The Screaming Antelope and Butcher will be the next ones to tackle. All of these are fairly easy to assemble.
So this guy was the subject of lots of experimentation.
Overall, super fun, solid build. I learned a lot working on this one.
Patience and practice. Scribe the back of plastic spoons for practice, or any other round plastic objects.
But I do recommend using proper modeling scribing tape like this one instead of Dymo tape. Dymo tape works fine for flat surfaces, but this scribing tape is a lot more flexible and will conform to curved surfaces better. They last quite a while depending on how much you scribe. I bought a roll last year and still haven't run out after 3 MG builds I scribed heavily.
Secondly, if you're using this Tamiya scriber, you might want to change it to something like the Tamiya engraver or something similar. They're much easier to control over a tool like the Tamiya scriber and you can change the blades to suit the thickness you want or need for your kit. Mr. Hobby makes a similar tool that's a bit cheaper I think, and obviously there are BMC chisels which are the top of the line. But there are cheap alternatives out there.
Honestly though, when it comes to precision tools like scribers it might be best to go out and buy the highest quality scribers/chisels you can afford. Buying lower quality tools can actually get you bad panel lines.
Get some big bottles of Vallejo black and white. Done for years of perfect brush or airbrush priming.
https://www.amazon.com/Vallejo-Black-Primer-Acrylic-Polyurethane/dp/B004BN5RUU
https://www.amazon.com/dp/B004BMZVMK/ref=psdc_2236131011_t1_B004BN5RUU
I've seen people selling them at hobby stores, but I just make my own.
For example, you can get a premade set on Amazon for pretty cheap
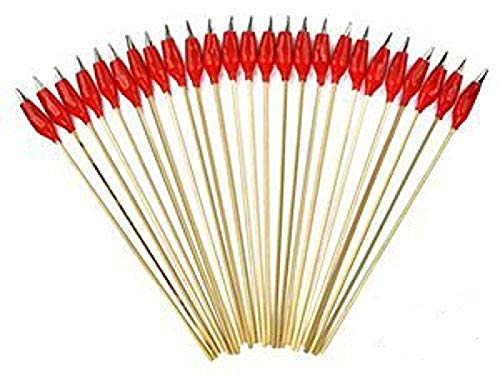
But that's not how I do it. I went to Wal-Mart and bought a styrofoam block, a package a bamboo skewers (from the grilling section) and a couple packs of alligator clips (from the electronics section). The clips fit perfectly on the end of the skewers, and you just stab them into the styrofoam to dry/cure.
Not worries, just sharing my experience and offering some advice ;)
That back of 200 clips is only $14 which comes out to $0.07 a piece for very high quality clips. Paired with 4mm skewers and they offer a far superior tool.
I do like these little tiny ones for the smaller parts though. I picked up this set for $0.11 a piece and while the red insulation is useless, they're good clips for small parts as long as you secure them with some other adhesive.
Assuming you will start with panel lining on bare plastic first.
----
Here comes the controversial part, people say that the Acent will eat through your plastic and make it brittle - which is not wrong but not always right. Yes, it will ruin the plastics if you shower them in the accent and enamel. All you need is a little touch and the ink runs. To clean up, damp a cotton swap with enamel thinner and rub right off. Very easy. Very little headache.
----
There are other self-thin solutions that some people use, but I find the options above the be the most efficient ones.
Oh haha nope... tbh I lost his hammer launcher thing in a pile of parts somewhere.
Ol’ Ironhide has...
New weapons
New gap fillers
New stompy boots
Whole lot of this... ... and some of this
I should also mention nuln oil, also called "liquid talent," though I've never tried it myself.
Citadel makes a good producut. This is what I use for my Gunpla and bases for mini's.
https://www.amazon.com/Citadel-Paint-Shade-Nuln-Oil/dp/B0189BIERC
But really, just run a search for "black wash acrylic paint".
Gundams are all snap-together models, so no glue/paint is explicitly required. The instructions are all in the form of pictures, so you should be able to understand them just by looking at them and matching the parts on the plastic runners and piecing the parts together.
You'll want a hobby knife and a pair of sprue cutters to free the parts from their runners; Something like This should be fine for a beginner. You just use the cutters to cut the parts off where they attach to the runners and then sand or file down the excess.
There is another sub called /r/Gunpla which is dedicated specifically to Gundam models, and they might be able to help out more.
I recommend any of these 2 alternatives, very cheap and you will enjoy the quick and effective results:
Gundam marker:
Gundam Marker
Accent Color
The 3-pack of markers for bold lines:
https://www.amazon.com/GSI-Creos-Gundam-Marker-Value/dp/B00HY93GHY/ref=sxts_sxwds-bia?crid=3GTR0RXGUXX4H&keywords=gundam+marker+set&pd_rd_i=B00HY93GHY&pd_rd_r=3b3b062e-d90d-495a-8e52-176ed31b8ba1&pd_rd_w=RRUZa&pd_rd_wg=sdCxW&pf_rd_p=a5491838-6a74-484e-8787-eb44c8f3b7ff&pf_rd_r=9A24ZX8C18EJZBXABCXP&psc=1&qid=1571687311&sprefix=gundam+marker%2Caps%2C152
Tamiya ink works differently, it will spread down the lines: (Comes in a variety of colors)
https://www.amazon.com/TAMIYA-87131-Panel-Accent-Plastic/dp/B01HDJ7BR0/ref=sr_1_1?keywords=tamiya+ink&qid=1571687349&s=toys-and-games&sr=1-1
​
And I like to use this for fine details, it is thinner than the Gundam markers:
https://www.amazon.com/gp/product/B002UCSNQY/ref=ppx_yo_dt_b_search_asin_title?ie=UTF8&psc=1
​
These I use for cleaning, the middle grit will take off ink, then the fine will buff the marks:
https://www.amazon.com/gp/product/B00R34AE66/ref=ppx_yo_dt_b_search_asin_title?ie=UTF8&psc=1
​
Hope this is helpful, good luck!
IIRCC, Tamiya has only a glossy clear spray. The only ones I know are these:
I've used Tamiya rattle cans in the past, and they are pretty fool-proof. And the Testors products are used by a lot of people, so I doubt they're much harder to use.
getting a lot of mixed answers about this, but if I'm not painting my kit and want to panel line, should I bother with a clear coat beforehand? I'm planning on using a fine tip Gundam Marker and some Tamiya panel line accent color (this one). from what I've read, I don't need to bother with a base clear coat if I'm not painting.
and if I do need a base clear coat, is this the right one?
No problem.
A minor note re. the gloss coat: I might be a little wary of old Citadel paints; I've heard their shelf lives are not the longest. I would go with a rattle can of Tamiya clear gloss to start with; one can ought to cover at least one or two HG-sized gunpla, if used sparingly.
These do a great job. Obviously you wouldn't want to carry them with you, but you also probably wouldn't wear them in public.
https://www.amazon.com/Tamiya-74003-Angled-Tweezers-Mk803/dp/B000BN9IF4
Personally, for a standard round wire, Temco sells 316L Stainless Steel for mega-cheap. Like $6.64 for 100'. It is the exact same wire that any "vape" company will sell at a huge markup. Stainless works in wattage or Temperature Control, and is my personal favorite.
As for coil wrapping, I prefer these UD Coil Jig sets. I have 2 so for dual coils, I have 2 of each size diameter. I prefer these because the diameter tools remove to help you position your coils after being installed. These require hand-wrapping, but make installation a bit easier. This is personal opinion, of course.
For the Limitless, when I use round wire, I prefer 22g 316L. It is VERY easy to wrap as the wire is large enough to get the wraps near-perfect right off the start; but not so thick that it hurts to wrap it. I usually do 8 wraps around a 3.0mm diameter. This gives you so much surface area that the flavor is really just top-notch. The 3.0mm diameter gets the perfect amount of cotton to keep the wicks the perfect thickness. I run the wicks down to the tip of the glass, and fluff the ends profusely.
If you do end up ordering wire from Temco, 24g 316L SS is also good to keep on-hand. With their prices, you can get 200' of wire for a mere $13. A spool of 15' 316L from UD or somewhere else will easily run you $7-$10 or so. Again, can't recommend Temco wire enough! Haha.
As far as tools, I would HIGHLY recommend a 521 Tab. Geekvape or Coil Master both make a similar tab which runs on a single 18650 battery. Allows you to build, test your resistance, and then pulse your coil(s) for cleanup all from the same surface. Worst case scenario, you always have a backup device by placing an atty of the tab! Not recommended though! Haha.
Angled Tweezers are also HIGHLY recommended for wicking RDTA's. Tweezers, I like pointed tips to fluff cotton. Wire cutters are a dime a dozen, just don't go too cheap as the 22g is somewhat thick, and if you get into more exotic coils, you want to make sure it cuts perfectly 1st try, every time.
Thank you!! I got Tamiya weathering kits off Amazon. They're like little makeup applicators, they make a bunch of different ones and they come with 3 colors per pack. Then I hit it with a coat of Tamiya Flat Clear to lock it all in and make it look more realistic.
https://www.amazon.com/Tamiya-87085-Weathering-Master-Set/dp/B000FODYHW/ref=sr_1_2?keywords=tamiya+weathering&qid=1570843885&sr=8-2
I just used the Tamiya weathering master C kit (link). It was actually fairly easy to apply with the little sponge brush thing -- I'd just rub it in the silver pigment and then brush it over corners. I think it turned out pretty well for a first attempt :)
I've been using Vallejo Putty. Works well for me. Mostly filling small gaps in figures with it currently.
I use Perfect Plastic Putty or Vallejo Putty
Both are water based and can be cleaned up using a damp (not wet) cotton bud before they dry fully. Once dry they have to be sanded like any filler.
I also use a medium viscosity super glue mixed 1:1 with baby powder (you can also use baking powder) for bigger fills and gaps where I know I need to sand as it doesn’t shrink and will polish smooth.
Get some plastic filler like this: https://smile.amazon.com/Vallejo-VJ70400-Plastic-Putty-17ml/dp/B000PHCNLC
I can recommend Tamiya, Vallejo and Mr. Surfacer. Check your local hobby store, they probably have these in stock if you don't want to wait for shipping. Model builders have been using fillers like this for ages and they work extremely well with plastics.
Technique wise, use the filler to close the gaps and lines then sand. Take your time with the sanding. You can wetsand if you want to (I personally prefer this). Once things are looking good, follow up with some some filler primer spray and then sand one more time with high grit/fine sand paper. For sanding, some sanding needles like this: https://www.amazon.com/Alpha-Abrasives-Plastic-Sanding-Needles/dp/B01LEC98AU help a TON for fine detail work.
You can also get some needle files, but I find these harder to use and less forgiving of mistakes when working with plastics.
PS: Checkout /r/modelmakers and http://cs.finescale.com/f/. You can learn a ton about techniques that can apply to finishing up 3D printed models.
To add to the good info above: for KDM miniatures you are pretty much guaranteed to need to use putty/epoxy for the gaps on them if you want them to look good painted. Most of the big monsters will have some very noticeable gaps when put together, and it is fairly common on some of the armor kit survivors too (especially the unarmored kit mentioned above - serious issues with "ken doll" arm sockets).
For larger gaps, I prefer milliput superfine white. It is firm enough you can shape it (add water to help change consistency if needed).
https://www.amazon.com/Milliput-Superfine-2-Part-Hardening-Putty/dp/B002CNEWAM
For smaller hairline graps, I really like Vallejo Plastic Putty. It doesn't require pre mixing and is easier to work with if you just need to get it into a tiny gap. Usually apply it then wipe off with wet cloth.
https://www.amazon.com/gp/product/B000PHCNLC
https://www.amazon.com/Spray-Lacquer-TS-80-Flat-Clear/dp/B000ZVO3YS
If you're painting a model kit, try your best to acquire paints and topcoats specifically for plastic/plastic models. If you're in the US, Testors, Tamiya, and even Krylon can work as good flat coats and each brand has a respective gloss and semigloss spray.
Quick question, as a complete noobie to Gunpla, I was wondering if these would be the appropriate sprays to use for top coating, both for the gloss, so I could pannel line, and then do the decaling and weathering and obviously then the matte coat.
So would these work for the gloss and matte coats, or are there better options out there. Obviously price isnt to much of an option, as long as its the best bang for the buck.
The first one I've found is the gloss its by Mr.Hobby, called Mr.Super Clear Gloss and the second one was the matte final coat by Tamyia Color called Tamiya Color TS80 Flat Clear
If you already have the hose that comes with those China airbrushes (1/8 size). You will need this adapter to be able to fit your badger appropriately to the hose you already have.
A more convenient and practical solution though is to get a Iwata QD set
and then just get a Badger QD adapter. The reason being that 1/8th fittings are more commonly used by more airbrushes (Iwata, Chinese made, GREX, Harder&SteenBeck, Mr.Hobby, Tamiya) than Badger's fittings. Sticking with 1/8th gives you more options and it is better that your Badger adapt to the 1/8th fittings rather than the other way around where you have your China and other airbrushes adapt to Badger's fittings.
Also, for these QD and coupler attachments. I advice you buy the real branded ones from Iwata and Badger. Do not settle for those unknown China branded ones as they leak air horribly.
I have an Iwata Revolution CR, that same compressor just a different name, and a quick connect from TCP Global from one of their airbrushes (which I would not recommend by the way).
Not sure if it's available on amazon UK but here is a quick disconnect it has a 1/8 inch connector which is the same as that compressor.
Though I'm not sure by what they mean with an adapter plug. Power plug maybe since UK is on 240V?
Edit: Words
You're going to find that you can either get some decent gear upfront for a realistic price, or you can go cheap and have to replace poorly performing gear almost immediately, which is the expensive way to go. These items below come in within your listed budget and will give you good service for years.
Get a compressor with a tank. Those cheap air compressors may save you thirty dollars upfront, but you're really going to regret having that on-demand-only air pressure bobbing up and down and screwing up your air flow. This Master TC-20T is a good buy. Get the TC-40T for twenty dollars more if you're going to want to do other types of spray paint art in the future. This one has more endurance before heating up. I own one of these and they are quality gear at a good price.
Get a decent starter air brush. This Iwata Neo Dual Action is good for a starter and yet isn't too expensive so if you screw it up you won't break the bank. At the same time, the machining of the parts is much, much better than those cheap Master sets which really aren't good at all. Granted, you may get lucky and get a good-yet-cheap Master air brush, but more likely than not, you'll spend most of your time trying to get the thing to give you a spray without splatter.
Get a quick release coupling set for the airbrush. Having to use a wrench to attach the air brush gets old really, really fast -- like immediately -- and the ten or so bucks makes it a great deal. Iwata-Medea Quick Disconnect Set
Thank you for the help, I'd also like a QD mount. Here are things ive found. Which one/combination of these things should I get?
https://www.amazon.com/Badger-Air-Brush-Co-51-042-Coupler/dp/B003EGZB2Y/ref=sr_1_4?ie=UTF8&qid=1549178476&sr=8-4&keywords=badger+quick+disconnect
https://www.amazon.com/Master-Airbrush-Fitting-Conversion-Adapter-x/dp/B0038NJYHG#customerReviews
https://www.amazon.com/Iwata-Medea-I-160-3-Disconnect/dp/B001P5S5CO/ref=sr_1_13?ie=UTF8&qid=1549178637&sr=8-13&keywords=airbrush+quick+disconnect
https://www.amazon.com/Master-Airbrush-Release-Disconnect-Connections/dp/B001MKGOUM/ref=sr_1_5?ie=UTF8&qid=1549178655&sr=8-5&keywords=badger+quick+disconnect
Yup, it's called a quick disconnect https://www.amazon.com/Iwata-Medea-I-160-3-Disconnect/dp/B001P5S5CO/ref=sr_1_27?ie=UTF8&qid=1481391638&sr=8-27&keywords=airbrush+quick+disconnect+iwata
Just a forwarning they are a bit louder than the air compressors that are specifically built for airbrushes but I just keep mine in a different room with a long hose. You will also need a coupler along with the hose. Here's the links to AZ where I got my hose/coupler: https://www.amazon.com/gp/product/B000BQO8W4 and https://www.amazon.com/gp/product/B001P5S5CO
Liquid cement for models tamiya a little goes a long way. And some fine grit sand paper or sticks. The liquid cement melts the plastic together forming a permanent bond or seal then you just sand it smooth with sand paper. It's super easy. Sand paper you can get online or at a hardware store.
Here's a video that might help. There's literally hundreds of videos on the subject. So if you don't like this one just look up seam line removal.
Also remember, practice makes perfect. The more you do it the easier and better you'll get. Don't be afraid to try and experiment.
Have not built that one (its on my list); however, I have used this modeler glue. Its cheap, very good at its job, and its on prime.
http://www.amazon.com/gp/product/B002CDPZDK/ref=oh_aui_detailpage_o04_s00?ie=UTF8&psc=1
Spray primer is great for priming lots of minis really quickly, so you are doing it right! For small touch-ups, people usually use brush on primer, or sometimes airbrush primers.
I use the Vallejo black primer, which also comes in smaller sizes as well as other colors. It works both with a brush or an airbrush. You just need to put a drop of two of the primer on a paint palette, and then use a brush to apply it on a specific spot. There's a whole bunch of videos on Youtube of people using brush on primers if you want to take a look.
Do keep in mind that if you ever decide to remove supports or mold lines that you missed and didn't notice until after painting (I've done that several times before), the paint will also scraped off and may leave a small sort of "paint crater" if the layer of paint was a bit thick. You'd just need to fill it back in with some equally thick paint to smooth it back out afterwards.
Prime Vallejo Surface Primer Black
Airbrush Rhinox Hide from below at an angle
Airbrush Mournfang Brown
Zenithal Vallejo Gunmetal Premium making sure you leave the browns in the shaded areas.
I will be changing to Vallejo completely because GW paints are a pain in the arse to get into an airbrush.
Don't use the primers that come from a hardware store, they are much stronger and meant for things like wood and other furniture and house painting, they might destroy your miniatures.
Primers can be spray or paint-on, and they are somewhat different than regular paints. Not sure on the exact details of what makes them different, I just know that the primers stick a hell of a lot better to bare plastic than regular paints. So you should use primer on bare plastic (or metal, or resin) before applying regular paint.
GW does not have any paint-on primers, and while you can technically use Chaos Black paint as a primer (probably due to the pigment content), it is not actually a primer and you are probably better off using actual primer (not to mention you will end up spending a fortune on Chaos Black paint pots if you prime everything with it). GW sells spray primer in a can in both black and white, there are also a number of other companies that sell spray primer for miniatures (Vallejo, Army Painter, P3), some of which sell it in more than just black and white. If you want paint-on primer, I recommend Vallejo Surface Primer, which comes in bottles up to 200 mL, the one that I linked is in black, but they also come in a variety of other colors.
Also about primer, you don't even need it an spray cans you can buy a 200ml bottle of it for like 16 USD on amazon. That should last you a long freaking time and is more than thin enough that you can apply the primer directly to the model(as long as you don't way overdue it)
Here is a link to what I have: http://www.amazon.com/Vallejo-Game-Colors-Bottle-Acrylicos/dp/B004BMZVMK/ref=sr_1_2?ie=UTF8&qid=1452099033&sr=8-2&keywords=vallejo+paint+primer.
The other benefit of not using spray is it can allow you to practice brush control, try painting fine detail areas with the primer and seeing how (within the lines you will stay) since it is rather watery it can help with this. Also don't be discouraged by your fist attempts, I'm also just starting out as well and the painting of it is definitely a learning process.
I think it's cool you want to pick up a hobby your father had. It will be a nice reminder every time you pick up the gun.
I use this 100% for miniatures, and it works great!!
​
Alright, here is the list I bought. It's a bit more than you want to spend, but this will ensure you can get going right away, and not be frustrated. I did a fair amount of research on different forums, sites, and youtube videos. If you want to know why I chose something, feel free to ask. I was going to bold the ones that you absolutely need, but I would say everything in the first set are a must.
​
​
​
​
For the compressor, I keep mine at about 18-20 while doing miniatures and it's perfect.
I do 1 drop Improver, 5 drops thinner, and 6 drops primer and have perfect flow.
​
Feel free to ask any questions! Good luck!
Hvstle
I use gundam panel lining pens, like these: https://www.amazon.com/dp/B00HY8JI7C/ref=twister_B01N8TDZIM?_encoding=UTF8&psc=1 - black
https://www.amazon.com/GSI-Creos-Point-Gundam-Marker/dp/B006B3YYZM/ref=pd_bxgy_21_img_2?_encoding=UTF8&pd_rd_i=B006B3YYZM&pd_rd_r=WF27RX3KPCKMWVEPFH2E&pd_rd_w=5XjyC&pd_rd_wg=XTRl0&psc=1&refRID=WF27RX3KPCKMWVEPFH2E - grey
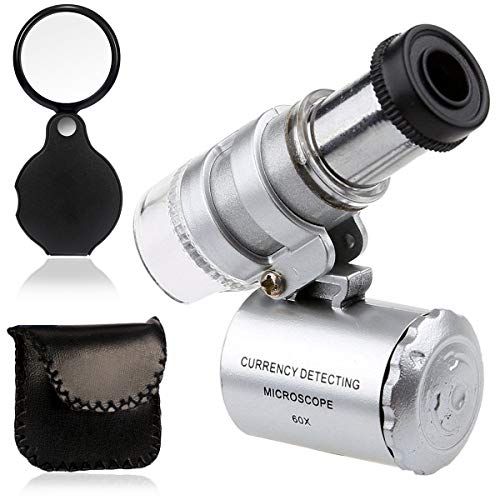
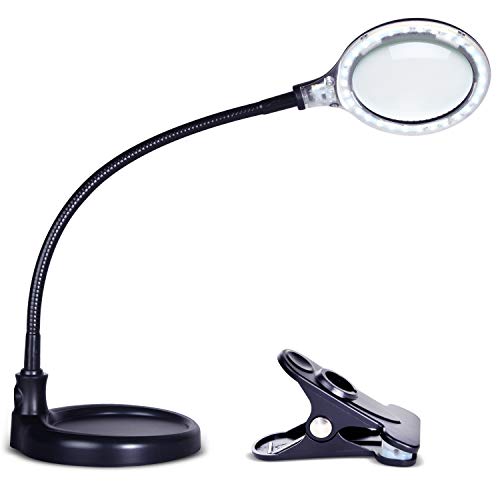
My favorite magnifiers as someone who does bench work, beading, wire wrap, stonework:
http://www.amazon.com/SE-1013FL-Helping-Magnifier-Light/dp/B000Z7GGJC/ref=sr_1_6?ie=UTF8&qid=1405451223&sr=8-6&keywords=helping+hands
http://www.amazon.com/Microscope-Jeweler-Currency-Magnifier-Adjustable/dp/B00AQAANDS/ref=sr_1_9?ie=UTF8&qid=1405451254&sr=8-9&keywords=jewelers+loupe
(this thing is so much fun, and I keep one on me when running around goodwills)
http://www.amazon.com/Housweety-Professional-Jewelers-Lighted-Magnifier/dp/B005VIG6TA/ref=sr_1_1?ie=UTF8&qid=1405451281&sr=8-1&keywords=jewelers+magnifier
None of these are expensive and all are very useful.
In my experience those two finger turning adjustable types are garbage. They never last for very long and are dificult to manage.
I purchased these two years ago and it's all I've eve used.
[1] (https://www.amazon.com/KINGMAS-Pocket-Microscope-Jeweler-Magnifier/dp/B00AQAANDS/ref=pd_sim_200_2?_encoding=UTF8&psc=1&refRID=KEDEDRG711YM9A2DM25Y) 60x LED and adjustable. Is great for looking at trichomes.
2 40x fixed. Is great for everything else when you don't need to get as up close and personal.
Well, if you're thinking about doing it get some mylar paper from goulet and go slow and use super cheap nibs. You will break your first 4-16 nibs.
I personally like to do it on my dremel at low speeds using a finer grit spinny thing :) The way you do it is keep a vision of what the nib should look like at a very detailed level and just go slow and light with the grinding and check it with a loupe often. I use a 60x loupe (this one, it's amazing) and check the shape of the nib OFTEN. After every few seconds of work I'll check it till it's in the shape I want, then I'll take some fine files and smooth it out a bit with different sticks between 3200 and 12000 grit. I'll usually move up from 3200 and just keep going until I'm on the 12000 grit stick. I usually have the nib I'm working on in the pen by the stick tuning part but I do take out the nib when I'm using the dremel.
Now that I've gotten pretty proficient at it, it usually only takes about 5 minutes to do a nib unless it's below a F, in which case it'll take up to 10 since you really have to go slow with those because you want to keep as much material on the nib as possible, but just shape it into a finer point where the paper touches it.
I recently started to gather a startup airbrush supplies and tools.
I purchase some alligator clips from amazon (https://www.amazon.com/dp/B00CWRCO6M/ref=sr_ph_1?ie=UTF8&qid=1484095804&sr=sr-1&keywords=alligator+clips)
while waiting for my other supplies to arrive i realize i didn't have any styofoam laying around to use as a base given that most stuff is packed using inflated air bags now. while i was watching some airbrush guide on youtube it gave me idea
I started typing and this ended up being really long, hopefully it helps. I might have gone overboard, so if you need / want a TL;DR or more info on anything just say the word and I'll do what I can :)
My personal preference is to add details and touch-ups to my figures. I've done a few full repaints, and I'm working on my first airbrushed figure, but I really like adding in details where the factory didn't :)
---
Paints:
I've had good results using alcohol based acrylics like Tamiya, Model Master, or Testors Acrylics (I think Enamels are Testors' main line, so make sure to check what type it is). Alcohol-based acrylics thin and clean up nicely with 91% isopropyl alcohol, I usually pick it up from whatever pharmacy is nearby (don't get the 70%, it doesn't work at all).
Citadel and Vallejo make nice water-based acrylic paints in additional colors, you'll definitely need a primer if you're working with Vallejo (I've only used a couple of Citadel paints, so I can't really speak to them).
You'll want to stay far away from acrylic craft paint, I've tried it in the past and it doesn't come out well at all (I just use some empty glass or plastic jars from stuff like sour cream or salsa since they're not too big).
Some folks like enamel paints, and there might be another kind of model paint, but the chemicals in those paints and their thinner tends to be quite strong so I avoid them. I used un-thinned enamels when I first started painting, and when I tried to use the thinner it ended up melting my paint tray and making a mess, so I'm not too keen to give them another try.
---
Tools are going to differ a bit depending on how you want to paint (hand painting vs airbrushing or spray painting).
---
Hand Painting:
You'll need paints, some soft bristle brushes (I have a set like these), something to stir your paint (I use a Badger Paint Mixer and love it to bits), thinner (depending on your type of paint), a mixing tray, some pipettes for measuring paint and thinner, something to hold your parts while painting (I like these Aligator Clips), something to stick the clips into (I use a styrofoam block wrapped in plastic from a craft store, but I've seen folks use taped together cardboard like from Amazon boxes or the cheap foam coolers), some fine grit sand paper or nail buffing blocks to help rough up the surface slightly to help the paint stick, and something for topcoat (I absolutely love Pledge Multisurface Floor Care, aka Future Floor Wax, it's a clear acrylic wax that dries to a semi-gloss to gloss shine, it brushes on nice and self-levels for a smooth finish, and one bottle will last a REALLY long time; I got a bottle a few years ago and I've used it on a LOT of gundams and TFs and the bottle is still half full). You may also want some smaller containers or jars to hold your thinner, brush cleaner (alcohol or water), and topcoat if you're using Pledge just so you don't need to keep the big bottle out on your workspace.
---
Airbrushing:
You'll need an airbrush and compressor, and then a lot of the same supplies as above. You'll also want some small-ish jars to store your thinned paint so you can re-use your leftover paint instead of having to toss it, and some painter's tape to mask off parts you don't want to paint and to keep your paint lines clean.
You can airbrush inside the house, but you'll want to do it in a well ventilated area if you don't have a spray booth (box with a fan and air filter to help move the fumes out the window and help keep the paint from spraying everywhere). I'm still learning to paint with my airbrush, so I don't have too many tips here.
---
Spray painting:
You'll need your choice of spray paints, alligator clips, fine sand paper, and some painter's tape to mask off areas so it doesn't get everywhere. I definitely wouldn't advise using spray paints indoors, the fumes tend to be really strong. I haven't really used spray paints in a long time, so I'm not a lot of help here either.
---
Markers:
Some folks might recommend sharpies or paint pens / markers, but I've never had good luck with them.
I do highly recommend using a Micron, Graphix, or Prismacolor marker / pen for highlighting panel lines in .005 thickness for most figures. The .01 and even .05 markers can work well too, but they might be too thick for some figures, so a couple different thicknesses can't hurt (I've got a pencil case full of lining markers from those brands). Don't use sharpies for panel lines, unless things have changed, even the thinnest ones tend to dry a purpley-blue instead of black, and the lines are still really thick compared to the Micron.
---
Painting Tips:
I wouldn't recommend spraying them while they're still on the runners. When you remove them, you'll have to sand down the nubs and paint over that area. Would work better if you got some of these and a small block of styrofoam to stand them up in. Then you can remove pieces, sand the nubs, and paint the whole piece at once.
I use Testors brand paint for most of my car models, haven't done much gunpla for a while, but I'm getting back to that and am going to try out my Testors spray cans on one.
What I like to do is as I build the Model, i do not fully assemble but test fit to get a feel for what is covered/not covered as well as if I need to fill any gaps. From there, I put the parts on some clip sticks to prime and spray. I use a piece of styrofoam to hold all the clips while I'm painting. Once the colors are all where I want them to be, then I assemble it all and do touch ups where needed.
As for general airbrushing, I practiced on ping pong balls before I tried painting models. It's something somewhat challenging to practice getting even costs on a uneven surface as well as a good way to learn control for your brush. Along with that, I also sprayed on paper just to experiment with spray patterns at different angles and pressures.
Here's a link to those clip sticks I was talking about. Good luck on your next build!
http://www.amazon.com/Bluecell-Alligator-Stick-Airbrush-Hobby/dp/B00CWRCO6M
My issue is I am not comfortable with the hobby knife, I feel like I have to put to much pressure into removing the nub even with a fresh blade. I will do the alligator trick, would these clips be to large for the method you suggest, some parts seem to small with those clips. Also I make my own sanding sticks but I do have a few sheets of sandpaper left so I will start cutting strips for other kits. Would you recommend I go higher than 2,000? I go 1,000 < 1,500 < 2,000 < Nail Buffer Block < Nail Polish and Shine. But I still see some marks after all this which makes me think I need a higher grit or maybe a fresh stick.
>black is fine I use citadels shade "nuln oil" this can make any paint job look 2x better
Can a black wash be used on any color? How do you use a black wash on a light-colored figure?
I see that the Citadel Shade Nuln Oil is $8.60, but I could get a batch of 8 Citadel washes for $34.50. Would you recommend the batch of washes, or is the black all I need for a beginner.
I also have the Army Painter Strong Tone Quick Shade that I have been using, but it is a pretty dirty shader, only good for all my zombies I think.
Yeah. Here's an Amazon link to the basic games workshop set.
Amazon
Essentially the paint is super watery and will suck itself down into the crevices of a model. It's nicknamed liquid talent because it just instantly and drastically improves your model.
I've used shades on a 0.1mm layer height print before. It's usually fine, any bigger layer height and it starts getting wonky because if the nature of 3d printing. It makes rings around the model. It looks like you should be fine though.
I have been looking into panel lining lately as I want to move from strait assembly into lining and matte coating.
The general thought seems to be that if you are working with unpainted plastic you can just panel line on the plastic as it is already relatively smooth and gloss.
The reason for gloss coating before panel lining a painted kit is two fold.
First it protects your paint job you just finished.
Then possibly more importantly, thinned washes don't flow over matte finish paints well, so if you are lining with a thin wash you're going to go nowhere very slowly.
.
.
A Matte look is achieved by having a rougher surface, all those tiny little scratches/particles absorb the light causing it to look matte.
A Gloss look is achieved by having a smoother surface with much finer scratches creating the mirror like effect by reflecting it away from the surface rather then into the crevices of the surface.
Think of it like pouring muddy water on a piece of glass vs lets say cement.
It will flow right down the glass and wipe off easily but it will get stuck on the ridges and even after you wipe it clean there will still be mud stuck in the little grooves where you don't want it.
That is a very simple way of explaining it, might not be the best either.
Still, it should demonstrate well enough.
.
.
For panel lining you can do either acrylic or enamel.
It is suggested to not use lacquer for panel lining as it will not work well on top of anything except lacquer and can eat into plastic causing it to break if you use to much, it does however make a fantastic primer because of its strength.
Enamel paints can do this as well but not unless you use way to much.
The general rule of thumb for mixing paint types is this.
Lacquer can paint over other Lacquer paints but will eat into enamel and acrylic paints.
Enamel can paint over Lacquer and other Enamels just fine but can cause problems with some acrylics so you should test the combination before hand.
Acrylics can paint over anything.
https://www.amazon.com/TAMIYA-Panel-Accent-Color-3-colors/dp/B00M58FWVC
I settled on these myself, as it is already thinned to the correct amount for panel lining and comes with a small brush attached to the lid.
It's an enamel so if I want to weather over it with acrylics it will not be cleaned away with acrylic thinner.
The only downside is that being an enamel it can cause your plastic to break if you go heavy with it.
You should get one of Tamiya's weathering kits. This list all of the sets but you can buy each one individualy based on what kind of weathering you want.
In terms of how to paint them, I would do Mephiston Red → Evil Sunz Scarlet → Wild Rider Red with Carroburg Crimson shade for the armor and then do a standard Citadel gold progression for the trim. After that I would recommend using weathering powders and standard "chipped" armor techniques. Good luck!!
I purchased this set a while ago: https://www.amazon.com/gp/product/B00M66FM86/ref=oh_aui_detailpage_o00_s00?ie=UTF8&amp;psc=1
I've been very happy with them and the results I get from them. It's also a nice selection of colors/tones, though of course you can just buy one of the cases instead of this entire set to save money.
https://www.amazon.com/dp/B0189BIERC?ref=yo_pop_ma_swf
The gold standard.
Citadel Paint, Shade: Nuln Oil https://www.amazon.com/dp/B0189BIERC/ref=cm_sw_r_cp_api_i_5IbHDbN67N50H
I also have a wide selection of Army Painter washes that came with the complete set of paints.
Just use sparingly and have a dry brush handy to soak up any excess. You can always layer up!
That thing needs a wash to darken it up and increase the grit.
&#x200B;
https://www.amazon.com/Citadel-Paint-Shade-Nuln-Oil/dp/B0189BIERC
Actually i was just looking at kits and saw this kit can you tell me the quality of one vs the other?
I got this kit https://www.amazon.com/dp/B01GH6B3Z6/ref=cm_sw_r_cp_apa_eRFNzb7YRA72P
Hahaha. No problem
(Hobby Link Japan Marker Black)
https://hlj.com/gundam-marker-black-fine-tip-for-panel-lines-gnzgm01
(Hobby Link Japan marker Grey)
https://hlj.com/gundam-marker-gray-fine-tip-for-panel-lines-gnzgm02
(Amazon set of 3) https://www.amazon.com/GSI-Creos-Gundam-Marker-Value/dp/B00HY93GHY/ref=mp_s_a_1_2?keywords=panel+line&amp;qid=1569935250&amp;sr=8-2
(Amazon Tamiya Panel Wash Black)
https://www.amazon.com/TAMIYA-87131-Panel-Accent-Plastic/dp/B01HDJ7BR0/ref=mp_s_a_1_4?keywords=panel+line&amp;qid=1569935250&amp;sr=8-4
(Amazon Tamiya Panel Wash Grey)
https://www.amazon.com/Panel-Line-Accent-Color-Light/dp/B07CMSBDCB/ref=mp_s_a_1_8?keywords=panel+line&amp;qid=1569935250&amp;sr=8-8
I put links from Hobby link Japan because thats what people here recommend using, bit I also put Amazon because it might be easier for you. Unfortunately I couldn't find the wash on Hobby link. Happy Building 😁
I think so? Here:
https://www.amazon.com/TAMIYA-87131-Panel-Accent-Plastic/dp/B01HDJ7BR0
I use this, the base could use a little more weight, but all in all it is great.
Brightech LightView Pro Flex 2 in 1: Magnifying Glass LED Lamp - Lighted Magnifier with Stand & Clamp - for Desk, Sewing, Table - Bright Light for Rea https://www.amazon.com/dp/B01K10XA1O/ref=cm_sw_r_cp_apap_hJbqsNahY9meL
Got it on Amazon https://www.amazon.com/dp/B018MRI1F8/ref=cm_sw_r_cp_api_i_0mIYCb2A9PYTP
Got the lighted magnifier there too. It can be free standing or clamp on. The ones locally available look like junk. https://www.amazon.com/dp/B01K10XA1O/ref=cm_sw_r_cp_api_i_TpIYCbFB0MCVR
I got this and it’s perfect. https://www.amazon.com/dp/B01K10XA1O/ref=cm_sw_r_cp_api_pazQBbKS6AWWN
I use the Lightview Flex.
It's not the cheapest in the world but it is very bright and you have the magnifier if you need it. The flexibility of the gooseneck is great and the desk clamp is quite strong. The weighted base has good heft and doesn't move on the desk.
The downside is that the gooseneck isn't extremely long, so that could be an issue for you. I have no problems due to how I brace my elbows on my desk.
I'll chime in for a recommendation for this lamp I purchased recently.
Also/additionally, try picking up a cheap pair of low-strength readers. At least in the US, they're available at most drugstores. Even a 1.00 or a 1.25 can make a big difference in discerning tiny dates on coins.
I got the paint set on amazon for 25-30 ish USD. It’s army paint brand, which I think is the same brand as the upcoming legion paints.
https://www.amazon.com/Army-Painter-Dungeons-Official-Adventurers/dp/B07DWMTNDJ/ref=mp_s_a_1_4?keywords=miniature+painting+kit&amp;qid=1562575883&amp;s=gateway&amp;sprefix=miniature&amp;sr=8-4
Here you go!
Hey there! I got into painting based on the board games I was picking up that came with plastic miniatures. This was a good starting place as the figures aren't super detailed and adding any paint to them seemed to make them better than standard board game pieces.
If the art side if things is more of the draw then I would suggest checking out a starter kit. There are a few "starter kits" out there that are good because they give you the basic necessities to jump into painting without spending tons of money.
I saw a couple good looking kits on Amazon. Here is a DND specific one:
The Army Painter Dungeons and Dragons Official Paint Line Adventurer's Paint Set https://www.amazon.com/dp/B07DWMTNDJ/ref=cm_sw_r_cp_apa_i_-QBDDbAFWJSHE
Or here is a generic fantasy one:
Reaper Miniatures 08906 Learn To Paint Bones Kit https://www.amazon.com/dp/B00NTMC49G/ref=cm_sw_r_cp_apa_i_z1BDDbC1DSWE1
I think I'd recommend the second one as it comes with a couple different figures and seems like it's ready to go right out of the box.
One cool thing about painting miniatures is that it is as complicated or as simple as you'd like. There are some great tutorial videos on YouTube to teach the basics. I learned from Sorastros painting tutorials. He does a good job of showing you the basics to get a decent looking figure and then gives you extra steps if you are extremely detailed or want to go to the next level.
As others have mentioned you can get sets of figures to paint from reapers miniatures website. Or if there is a board game out there with a theme your son likes, it may be a good place to start as most games come with 15-30 miniatures with different sizes. Including bigger monsters which can be really fun to paint. Plus you then have a fun game in which to use your art project.
Mice and mystics is a fun family cooperative game with tiny anthropomorphic mice fighting fantasy battles similar to the redwall books. I painted the figures from those and had a great time with the painting and the game.
Some other good ones are Descent 2nd edition and Starwars Imperial assault. Both come with great miniatures but are a little complex on rules and need one player to be the big bad overlord playing against the heroes.
There is also a series of dungeons and dragons board games that are cooperative and come with lots of miniatures. The quality of these isn't very high but those were my first figures.
If you want to go "whole hog" you could purchase one of the "Warhammer age of sigmar" starter boxes. These miniatures are extremely detailed and actually require you to assemble them from several pieces. They don't come with paint inused but there are entire paint kits to go along with them. Some folks really enjoy putting the GW models together, then priming and painting them. These aren't cheap so it might be best to start elsewhere but you get a lot of figures in the box. I will warn you the theme is fairly dark. Lots of blood and skulls.
Best of luck and I hope you guys enjoy!
If you're looking to get started in painting for D&D, get the offical D&D paint sets from Army Painter. They come with brushes, and each set also comes with a mini.
Basic colors and a Minsc mini
Second set, more colors and an owlbear mini
&#x200B;
And the number one piece of advice for new painters is thin your paints. Always thin your paints and keep them thin.
Ok. Gonna throw out a couple of suggestions to get you started.
First get a starter paint set.
You can get them from the local hobby shops
A few of them come with the basic supplies you need to get started.
The following ones come with a small set of paints, a brush and a miniature to paint. Often they also come with step by step instructions or online videos to watch
Dungeons and Dragons Official Paint Line Adventurer's Paint Set https://www.amazon.com/dp/B07DWMTNDJ/ref=cm_sw_r_cp_api_i_kTC0Db25P03XH
Dungeons and Dragons Official Paint Line Monsters Paint Set https://www.amazon.com/dp/B07DWL5JZZ/ref=cm_sw_r_cp_api_i_VVC0Db4FCQTAM
Reaper Miniatures 08906 Learn To Paint Bones Kit https://www.amazon.com/dp/B00NTMC49G/ref=cm_sw_r_cp_api_i_vWC0DbVBYBCNP
Reaper Miniatures Master Series Paints #09970 Starter Set for Mini Figures https://www.amazon.com/dp/B07664WJ3H/ref=cm_sw_r_cp_api_i_RXC0DbPXRB07Z
The Army Painter Kings of War Undead Miniatures Paint Set - Highly Pigmented Acrylic Model Paint Set - 10 Miniature Paints in 18ml Dropper Bottles https://www.amazon.com/dp/B01MRYAY5R/ref=cm_sw_r_cp_api_i_FYC0Db3QD8HJT
The above links are only there to show you what to look for.
Citadel also has a great range of paints but they are generally more expensive and don’t come with brushes or models to paint
Please. Buy local and support our FLGS (Friendly Local Game Stores) They are the reason why so many people are into these hobby’s.
Take a little while and find a couple of Nolzurs or Reaper miniatures you like to paint. They are inexpensive and will be great pieces to start with.
However if your gonna look online Miniature Market currently is having their Black Friday sale
https://www.miniaturemarket.com/searchresults?q=black+friday+sale#/?_=1&amp;sort.ga_unique_purchases=desc&amp;page=1&amp;filter.product_tag=Black%20Friday&amp;filter.manufacturer=Army%20Painter
What ever route you’re choose let us know what you did and show us your completed work. There are a lot of super helpful people here
Hey, I’m also pretty new to the hobby. I picked up one of these https://www.amazon.com/gp/aw/d/B07DWMTNDJ/ref=sspa_mw_detail_0?ie=UTF8&amp;psc=1&amp;smid=AU2FNATHSFHNB. And I have been pretty happy with it. For some reason my local hobby shop had it a little cheaper than amazon so if you have a store around you that might sell this stuff I would check it out. It comes with a decent selection of good paint, #1 brush and a miniature for you to get started.
https://www.amazon.co.uk/Tamiya-100ml-Spray-TS-13-Clear/dp/B000BMV0II/ref=mp_s_a_1_7?ie=UTF8&amp;qid=1535820164&amp;sr=8-7&amp;pi=AC_SX236_SY340_QL65&amp;keywords=tamiya+spray+paints+clear&amp;dpPl=1&amp;dpID=41B-CLEhV3L&amp;ref=plSrch
Tamiya equivalent?
I personally recommend Tamiya's clear coats, as they spray thin and cure fast.
I haven't used it myself so I can't recommend on experience, but Mr. Hobby is another well-liked brand for clear coats.
Amazon if I'm not in Pasadena or Baldwin Park: https://www.amazon.com/Tamiya-TS-13-Clear-Spray-Lacquer/dp/B000BMV0II/ref=sr_1_1?ie=UTF8&amp;qid=1502141914&amp;sr=8-1&amp;keywords=Tamiya+TS-13
Tony's Hobbies if I'm in Baldwin Park: https://www.yelp.com/biz/tonys-hobbies-and-toys-baldwin-park
Custom RC if I'm in Pasadena:
https://www.yelp.com/biz/custom-rc-hobby-pasadena?osq=Hobby+Shops
Just look for stores that sell trains, RC or planes, and chances are that they stock 'em :)
I use Tamiya TS-13 spray cans. Had some very good results over time. 1 coat is ok, 2-3 thin, light coats are ideal.
Future/Pledge Floor Shine Stuff Whatever It's Called Now works fine too, I'm just a snob with materials.
I just used a pair of angled tweezers, these to be specific.
Hello, I'm just starting with Gunpla and I need some tweezers to apply the stickers to my kits, would this tweezers be good for RG models?
https://www.amazon.com/Tamiya-300074003-Angled-Tweezers/dp/B000BN9IF4/ref=mp_s_a_1_4
The “Eyelure” brand fake lashes come with a super tiny eyelash glue with a tiny wand in it and I always sneak that little bottle in with me for raves just in case they do lift up. So far thats never happened yet but the main lash glue I use is a black glue from the brand “Kiss” and it’s called Lash Couture lash adhesive and I swear it is the stickiest lash glue I’ve ever had and has never lifted.
Also, when I apply my lashes I wait for the glue to become tacky and then I put them on like normal and pinch the lashes at the strip to my lids with tweezers similar to these to secure them: https://www.amazon.com/Tamiya-300074003-Angled-Tweezers/dp/B000BN9IF4
Lash extensions would def be easier and less maintenance though! Good luck with your lashes!!
These are pretty nifty for it :)
Hey everyone!
I'm as new as it gets. So, I made a shopping list after doing some research on everything that I think I need to start. I'll place the links to all the items in the lines below. Everything is on Amazon because... well why not?
Gundam
Glue
Marker
Tweezers
Knife
Cutters
Mat
More Markers!
*Krylon Matte Finish
Am I missing anything?
That's nice. Didn't even know this existed. How much? Do you know what scale it is or how tall?
I just bought the Bandai 1/48 scale model kit and will be putting it together this weekend. I want to apply something like the Tamiya 87085 weathering set but I havent done my research yet to know what type of paint it even is or how to properly seal it.
I'm curious about this 1/50 from Sega also.
Yeah.
Basecoat with a dark gray, highlighed with two lighter shades of gray and then a black wash. Re-highlight with watered down paint.
Weathered with this. Added some oxide technical paints.
Blues are just started with dark colors and brought lighter and lighter with a light white blue mix for the middle.
I used a small piece of sponge to add the greens and ochre colors. Finally I painted small black cracks and highlighted some edges with white-grey mixture.
Dry brushing techniques, graphite pencils, powdered makeup with earth tones, Weathering kits, salting and/or hairspray chipping, deforming/bending parts by means of heat....
There's lots of ways you can weather a build. Just keep in mind that in many cases, less is more.
For paint chipping, get some Ak Interactive Ak00089 - Heavy Effects Acrylic Fluid https://www.amazon.com/dp/B00AMB67W2/ref=cm_sw_r_cp_apa_i_CvyWCb0482YV8
For rust, get a Tamiya 87085 Weathering Master C Set https://www.amazon.com/dp/B000FODYHW/ref=cm_sw_r_cp_apa_i_qxyWCbTWEVTXK
Super glue works well, but some minis have a very limited surface area or a weirdly shaped joint that limits just how much glue you can get in there. I will often build up joints using this:
https://www.reapermini.com/FigureFinder#detail/02901
In this specific mini's case:
https://smile.amazon.com/gp/product/B000PHCNLC/ref=oh_aui_detailpage_o03_s00?ie=UTF8&amp;psc=1
I wanted the shield to be vertical instead of horizontal because it kept falling off when I put it into my mini-holder. So, I actually attached the bottom of the shield tip to the base, juuuuust a bit to further add to the strength of the bond. Sometimes these attachments are difficult, so using a combination of glue as well as putty can greatly help.
tamiya ts 80
&#x200B;
https://www.amazon.com/Tamiya-TS-80-Clear-Spray-100ml/dp/B000ZVO3YS/ref=sr_1_1?keywords=tamiya+top+coat&qid=1568355627&s=gateway&sr=8-1
&#x200B;
is that a good alternate top coat? mr top coat is nowhere in stock... and apparently the super clear is lacquer based and no good over decals and panel liners? so that leaves me the taimya one? is that ok to use?
So I'm looking into my first project that's more than a straight build. Specifically I'm thinking of a recolor of a Kyrios from orange to green (college/workplace colors, and fortunately white is our secondary).
The right order is Primer, paint, panel line, topcoat right? And then just topcoat for the pieces I don't recolor?
Also on topcoating, do you spray that on each external piece individually, or on the whole unit assembled?
Lastly, if I get into weathering effects, that's after painting and before topcoat right?
My batch of cheap Leos finally came in, so I have a few grunt units to mess with.
You're probably looking for PS-55 or TS-80 from Tamiya as well. I personally never used these but I asked a mate I know and he said they're great
I'm planning on top coating some HGs. I'm also using gundam markers for small details and the pour type markers for panel lines. Which top coat would be better: tamiya, mr. hobby top coat, mr. premium top coat spray, or mr. super clear, or maybe anyone have other recommendations?
unfortunately i live in somewhat of a countryside and need everything shipped...
https://www.amazon.ca/Testors-Spray-Lacquer-Clear-Coat/dp/B009FF6DN4/ref=sr_1_1?ie=UTF8&amp;qid=1525997806&amp;sr=8-1&amp;keywords=testor%27s+dullcote+spray
this looks a lot more reasonable but I've seen some people saying it melts your gunpla or something...? have you had any experience with this one?
edit:
nevermind, this looks like a very good alternative
https://www.amazon.ca/85080-Spray-TS80-Clear-100ml/dp/B000ZVO3YS/ref=sr_1_1?ie=UTF8&amp;qid=1525998118&amp;sr=8-1&amp;keywords=tamiya+flat+clear
I panel lined first, then used this https://www.amazon.com/gp/aw/d/B000ZVO3YS/ref=mp_s_a_1_1?ie=UTF8&amp;qid=1483678708&amp;sr=8-1&amp;pi=AC_SX236_SY340_QL65&amp;keywords=tamiya+top+coat&amp;dpPl=1&amp;dpID=4176x2Qtl1L&amp;ref=plSrch.
https://www.amazon.co.uk/d/Outlet/Tamiya-Acrylic-Colour-Clear-Mat-TS-80/B000ZVO3YS/ref=sr_1_2?ie=UTF8&amp;qid=1494607362&amp;sr=8-2&amp;keywords=tamiya+clear+spray
This one seems to be Mat?
For airbrushes, I'm personally a fan of the Neo by Iwata, especially their gravity feed (cup) model. The brush is well built, fairly easy to take apart and clean, and has very few issues with most paints and other products you may put through it.
I picked mine up on sale for around $50, and if you have a Michael's or Hobby Lobby nearby, you may be able to pick it for less with one of their one-item coupons they release occasionally. It's also nice if you have a hobby store near by as you can drop in a pick up replacement needles or nibs if you accidentally drop it >.>; . Needles and nibs typically cost in the 10-15 dollar range for replacements, so not too terrible.
For compressors, a simple compressor with a tank will work wonderfully, so long as it has a proper pressure regulator and water trap. I have this compressor and it works well, after I got the correct airbrush hose to attach to the NEO.
There are a couple extra tools that can help with airbrushing as well, but most can be picked up at a later point. Something I would recommend that you get with the initial purchase is a spray booth. This allows you a place to spray into and capture many of the errant particles of paint from your airbrush. Combined with a proper respirator mask, it will ensure that you don't breath in any of the particulate from airbrushing, and hopefully don't have airbrush paints drying on items they weren't directly sprayed on. I would say of the two, the mask is the most important to have.
A quick-disconnect is useful for cleaning and swapping airbrushes, but isn't really necessary at first. A cleaning pot is also useful as it gives you a dedicated space to spray out leftover paint and cleaing fluid, and should stay fairly contained.
I would also look at purchasing a ultrasonic cleaner further on, as it is amazingly helpful for cleaning the airbrush when paint has leaked into the body, or spilled into places it shouldn't be.
Other's can probably offer advice as well, but that's what I currently use. Hope this helps!
Thanks! The Tamiya brand one actually isn't too pricey so, I'll go with that.
Just to make sure: Is this it?
Tamiya Cement is still my favorite.
Late comment but Yo I'm from Brissy & I can let you know what I did
I was in the Kickstarter and while I waited for the game to finally ship I spent ages devouring information from Gambler's Chest and Add-Ons tabs here.
For sleeves, I originally went for the official KD sleeves which were good, but availability for them had pretty much been once-off, so once the expansions came I was shit outta luck. I then went for Swan Sleeves, which are $3.95 USD per 100 Premium (pretty good price for really good quality, albeit shipping is a bit hefty and will change depending on number of packs ordered). 57x90mm sleeves are a perfect fit, but if out of stock then the 60x90mm are also a good fit. I just had a look, and both are currently out of stock, but just keep them in mind, 'cause AFAIK no one else stocks premium 57x90mm and they (imo) are undoubtedly the best fit for the cards.
As someone who's never sleeved before, it takes waay longer than you think it will, haha.
For gear cards, I personally went with the binder option; it's really convenient to be able to organise them like this. This was just using a 3-ring binder from Officeworks and a couple of these coin pages from Amazon.
For the making of the miniatures, while you can make do with a kitchen knife and some nail clippers for removing pieces from sprues, you'll make your life a lot easier investing in an X-acto knife and sprue cutters. By FAR the cheapest knife is from Bunnings, and at $2.50 it is of fantastic quality and comes with 3 extra blades. Sprue cutters you'll have to look around; best I could find was a cheap pair from Amazon that are fine. Finally, plastic cement is an absolute Must imo. Can't recommend it enough - instead of acting like an adhesive like superglue, it essentially melts the parts together and creates a very strong bond. Tamiya is pretty good and works great, but feel free to have a read around forums; people will have preferences for various brands, regular, thin, extra thin, etc. The making of miniatures is daunting at first, but it's not as hard as you might think (although you're like to make a mistake or two at first, but dw about it lol) and resources from https://build.kingdomdeath.com/, vibrantlantern.com/ and forum threads on https://boardgamegeek.com/boardgame/55690/kingdom-death-monster should see you through most of them :)
That's pretty much it. The storing or shelving of miniatures is up to you, as is whether or not a box insert is necessary.
Hope at least a couple of the things I said were useful. Have fun!
I looking for a light weight headset that is the price range from 20-60 dollars. I also wear glasses so it has to be able to work with that.
&#x200B;
Right now my current painting equipement:
&#x200B;
Is there anything else I should buy?
Not sure where your are looking to find them 'too expensive'.
Pin Vise
Tamiya Basic File Set
Tamiya Plastic Scriber II
Those are cheap and or par the course for finding them elsewhere. I don't think going with used tools is a good idea when you can get them new for very reasonable prices on amazon.
I got this guy: http://www.amazon.co.uk/Plastic-Scriber-II-Tools-Tamiya/dp/B002KKBVTC/ref=sr_1_1?ie=UTF8&amp;qid=1398719674&amp;sr=8-1&amp;keywords=tamiya+scriber+ii
I scribed the first couple of pieces today, definitely a skill to be learned! But I'll keep the WIPs coming! :D
I just searched on youtube for guides on eliminating seam lines, not sure who exactly but all the big youtube personalities pretty much have tutorials I believe.
Hey guys! Just found this sub, but I've been wanting to get into this hobby for a while. Planning on going with this one to get my feet wet.
Before I buy it, I'm also planning on getting these markers and these wash's (both from the wiki). Can someone show me to a video tutorial that explains exactly how to use them please? I've got no idea what the wash's are for...
I might also pick up this scriber to try and do some battle damage, but I can't find any tutorials on that? I'd also need some paint...
Is there anything else that I'm missing? I've already got decent angle cutters and an Xacto knife.
Thanks!
U. Just found the tutorials link that covers lining, but I could still use some info on adding battle damage!
Tools like this or this are used for scribing custom panel lines. Just sand the lines after scribing to flatten the raised plastic that resulted from the scribing.
If you check out the Repository of useful links and threads on the sidebar, you'll find almost all the answers to questions you'll have.
EDIT: There's also this Big List of Gunpla Tutorials & Resources with tutorials to everything. It used to be in the repository, I think, but may have been removed. Anyway, good thing I bookmarked it before. Enjoy!
You can get a scriber to make panel lines. It takes patience and a steady hand, but very doable. People use label tape to help provide solid lines to follow.
It is hardly difficult, it simply takes planning and a careful hand. (do not use a hobby knife!!!) I'm all for doing whatever works for you but a hobby knife would be a no go, it will deform the plastic and not actually remove it. A chisel is the way to go. If you are serious about it, I love BMC chisels.
http://www.1999.co.jp/eng/list/2119/0/1?word=bmc
Otherwise, Samuel decal posted some pictures of alternative chisels recently that are cheaper.
https://www.facebook.com/media/set/?set=a.10153623678411897.1073741978.382602901896&amp;type=3
and
https://www.facebook.com/media/set/?set=a.10153623672411897.1073741977.382602901896&amp;type=3
I have not tried either but they look to be good quality.
The next step down would be a Tamiya scriber for straight lines
http://www.amazon.com/Tamiya-74091-Plastic-Scriber-II/dp/B002KKBVTC/ref=sr_1_1?ie=UTF8&amp;qid=1451349163&amp;sr=8-1&amp;keywords=tamiya+scriber
and a Trumpeter scriber for tight corners
http://www.amazon.com/Trumpeter-Panel-Line-Engraver-Tool/dp/B001JJT9DU/ref=sr_1_1?ie=UTF8&amp;qid=1451349199&amp;sr=8-1&amp;keywords=trumpeter+scriber
These two are a super cheap way to go, not cheap as in bad but you certainly get what you pay for in control and uniformity.
As far as stencils go, I either make my own from acetate or just draw my design directly on to the model and use Dymo tape as a straight edge.
You can use the back of your razor blade but you'll have to be careful not to go out of the line.
I think most people use something like the following link to scribe lines. The principle is the same regardless of rather it's new lines or bringing out buried ones. This is is essentially just an angled razor. There are also picks that look like what a dentist would use that you can scrape the lines with.
https://www.amazon.com/dp/B002KKBVTC/ref=cm_sw_r_cp_awd_nOozwb7DT24F1
Here you go! :) Check this out on AMZN:
http://amzn.com/B002KKBVTC
I've only ever really used brush on primer, and it works out fine for me. I use Vallejo Surface Primer Grey, as well as Black (these can be mixed for darker shades too) you can get them in a selection of colours up to 200ml in size.
Works with my GM02.
https://www.amazon.com/GSI-Creos-Point-Gundam-Marker/dp/B006B3YYZM/ref=sr_1_2?ie=UTF8&amp;qid=1518123632&amp;sr=8-2&amp;keywords=Gm02+gundam+marker
Are you talking about this?
GM01 Black Fine Line https://www.amazon.co.uk/dp/B00HY8JI7C/ref=cm_sw_r_cp_api_eExyybGVJ187W
Gundam Marker GM02 Gray Fine Tip GUNPLA https://www.amazon.co.uk/dp/B006B3YYZM/ref=cm_sw_r_cp_api_RHxyybAA0VTDA
Grey on white and light colours black on darker colours
Great job. Really, it looks awesome. I would agree with Rouge-Y though, note necessarily thinner panel lines, but lighter. What you have there would be great for darker plastic. I would recommend the gray panel line marker or a mechanical pencil for white and yellow pieces.
The gray panel line marker is my bread and butter:
http://www.amazon.com/GSI-Creos-Point-Gundam-Marker/dp/B006B3YYZM/ref=sr_1_5?ie=UTF8&amp;qid=1453841124&amp;sr=8-5&amp;keywords=panel+line
I’m a tricomb guy, grab a cheep scope off of amazon, https://www.amazon.ca/KINGMAS-Microscope-Jewelry-Magnifier-Jeweler/dp/B00AQAANDS/ref=mp_s_a_1_5?keywords=mini+microscope&amp;qid=1567317008&amp;s=gateway&amp;sprefix=mini+micr&amp;sr=8-5 Or search mini microscope and pick one
This one is 12$ Canadian and works perfect for this, the tricombs will start clear and then start to get cloudy and then start to turn Amber. I usually check the middle of the main cola on the plant and chop when it’s approx 60/40 Amber to cloudy. it’s a personal preference thing as the high changes depending on ratio. You should be able to find some you tube videos fairly easily that’ll help. The scope is also a must for identifying some pests as well.
Great looking plant, good luck!
I seem to have linked the wrong scope, you should get at least a x45 sorry about that
This is slightly different from what you have above, but if you're using a cell phone and you want to get macro shots, give one of these a try. You can just hold it up to the back of your cell phone camera lens, and then directly over the coin. It's great for getting macro shots of specific parts of a coin.
This is another popular option: https://www.amazon.com/KINGMAS-Pocket-Microscope-Jeweler-Magnifier/dp/B00AQAANDS/ref=pd_sim_201_4?_encoding=UTF8&amp;pd_rd_i=B00AQAANDS&amp;pd_rd_r=T85T5H6TCG8FQT8Q80XR&amp;pd_rd_w=mh4B9&amp;pd_rd_wg=9WA7H&amp;psc=1&amp;refRID=T85T5H6TCG8FQT8Q80XR
Multiple vendors sell that same one for multiple price points.
After the thread here: https://www.reddit.com/r/MTGLegacy/comments/6k77zx/buying_duals_is_terrifying/ I figured I'd try to disprove the rumor that the text is the biggest give-away (hint: it's not), and bring some degree of confidence to those who do want to buy duals (hint: just buy a $5 loupe!)
&nbsp;
Here's the loupe I use: https://www.amazon.com/KINGMAS-Pocket-Microscope-Jeweler-Magnifier/dp/B00AQAANDS/ref=sr_1_11?ie=UTF8&amp;qid=1498759657&amp;sr=8-11&amp;keywords=jewelers+loupe
A pocket microscope. Might get it tomorrow when I get paid and take pictures on my phone using it. :o
I bought a cheap loupe to inspect the tip... https://www.amazon.ca/KINGMAS-Microscope-Jewelry-Magnifier-Jeweler/dp/B00AQAANDS
So far, I'm on the original 0.4mm nozzle, and I only change them to switch sizes... 0.8 for big "structural" work, and 0.2 for 1:100 scale minis.
I've run roughly 10kg through the 0.4 nozzle, including several spools of "silk" and thermo-chromatic.
The most important things are a tank and the ability to fill the tank to a PSI above a minimum of 80 or so. A tank makes it so the compressor doesn't have to run constantly, and creates a buffer so the air pulses of the compressor aren't transmitted to the brush where they can cause dotted rather than smooth lines. You want the compressor to be able to put out a higher PSI because you want the tank to hold enough so you can spray for longer at pressures of 60 PSI or below for longer intervals before the compressor has to refill the tank.
For model painting, most of your spraying will be best done at 20-30 PSI. Higher PSIs like 60 tend to be either for cleaning, or stuff like textile paints (i.e. T-shirt artists). The little "fishtank" compressors like the Ninja Jet can only deliver a max PSI of around 15 or so, which is on the very bottom edge of what most brushes can work with. PSIs of 15 and below are mainly used for tiny close-in detail work with highly thinned paint, and going that low works better with brushes that are designed specifically for detail, rather than "jack of all trades" workhorses.
Different brushes require different CFM (cubic feet per minute- a measurement of air volume rather than pressure), and little "fishtank" compressors are bare minimum here as well, so there will be many brushes where they'll make the brush spray poorly because they physically can't provide enough air to keep up at any pressure. A good target CFM rating for a tankless compressor is 1.5.
A tanked compressor can technically get away with less CFM, since it's not supplying the brush directly, but unless you want to have to stop painting whenever the compressor has to top up the tank, you want the compressor to have enough CFM to supply the brush WHILE also filling the tank, which means check your brush manual/documentation for its CFM, and look for a compressor that is specced over that by at least 1/2. The higher the CFM, the faster the tank will fill. Unfortunately I could not find specs for the Patriot that list CFM, but 1.5 is probably still a good start for a tanked compressor.
"Master" and other such Chinese import brand compressors are popular because people think they're cheap, but for very little extra a brand like California Air Tools will get you better QC, support, reliability, and specs. Chinese airbrushes are comparatively cheap, but the compressors aren't really, so there's not much reason to get the Chinese ones IMO.
Avoid regular hardware-style compressors unless you're painting in a very noise-tolerant environment, as even the "quiet" ones are LOUD AF. Seriously: when the descriptions/reviews say "super quiet" they mean by construction site standards, not household appliance standards.
As to fittings: if you live in a particularly dry climate (like Arizona, say), you can get away with not using a moisture trap, but even there it's good practice to have one just in case. If your climate is any more variable or humid than that, you will want a moisture trap. You can just get one from the local hardware store though: it doesn't have to be a special type. Always place the trap last in the air supply/fitting chain before the airbrush hose, so: compressor-> tank-> regulator-> moisture trap-> airbrush hose-> airbrush. Or if using a bench block as described below: compressor-> tank-> regulator-> connecting hose-> bench block regulator-> moisture trap-> airbrush hose-> airbrush.
In the US, compressors usually have 1/4 NPT fittings. In Metric countries, 1/4 BSP. These fittings are cross-compatible enough that you can use them together with teflon tape.
For hobby and fine art airbrushing, I HIGHLY recommend a lightweight hose like this over braided hoses. Braided hoses are for industrial-type settings like auto painting shops, where hoses need to be extra hard wearing.
BTW, when painting, loop the hose once around your forearm so if you accidentally drop the brush, the hose acts as a lanyard preventing the brush from hitting the floor. I feel like I'm constantly hearing horror stories about people damaging their brush by dropping it when preventing this is so easy.
A tanked compressor with come with a regulator. These are perfectly usable, but imprecise. It's not strictly necessary, but I do highly recommend using the built-in regulator as a step-down regulator, and getting a 0-30 or 0-60 PSI regulator to chain after it. I use one of these on my setup, and it makes adjusting airflow much better.
If you plan on locating your compressor directly on or under your "workbench" surface, that's all you need. If the compressor is going to be outside immediate/easy reach, it can be good to mount your regulator and moisture trap on a separate "bench block" so you can put it on/under your bench within easy reach. This is what I had to do with my setup (I mounted the regulator and moisture trap on a scavenged heavy steel bookend). In that case, you'll want/need a hose like this to go between the compressor and the regulator/filter block.
There are "extras" you can get like a quick-connectors and MAC valves, but I don't personally recommend them. If you're only using the compressor for your airbrush, you don't need quick connectors on the compressor side of the hose, and IMO quick connectors on the brush side don't actually save you time/energy as it only takes 2 seconds to unscrew a brush from the hose. If your regulator is in easy reach, a MAC valve similarly does not save you any time/effort. Both of these also add lots of bulk to the brush stem, which is undesirable if your instinct is to hold/use the brush like a pen instead of a gun. There are mini-filters that go between the hose and the brush, but I generally don't recommend them for the same reason: too much added bulk on the brush stem: it's better to to add to your main filters if you need better filter performance.
I don't have a Badger Patriot, but my understanding is that it's a good brush. I have two Badger SOTAR models, and if they're any indicator, I'd expect spray performance to be comparable to IWATA, but fit & finish to be more raw and "industrial" outside of the nozzle and needle, so a little fussier to keep clean. It should be much better and more reliable than a 20$ "Master" or "Point Zero" or whatnot.
The threads in the head assembly can be a little "gritty" on Badger brushes OOB. If that's the case, I recommend lapping them with something like Flitz to ensure a good seal. Basically just put a tiny dab of compound on the male threads, then screw them in and out about 20 times to polish off the burrs that are causing the gritty/sticky feeling. Make sure to clean the residue off thoroughly before spraying again.
For maintenance, get a roll of lint-free shop paper towels, a couple packs of interdental brushes from the local dollar store, a box of q-tips, and a box of round wood toothpicks. Use paper towels and q-tips wetted with solvent/thinner to clean the cup and needle, the interdental brushes to clean the passageways/tubes in the body, and use a wood toothpick whittled to a needle taper and soaked in thinner to clean the inside of the nozzle (don't use metal tools to clean the nozzle, as they might scratch it or flare the tip). Occasionally you'll need to inspect the needle tip or nozzle for gunk or damage, so you'll want a high-X pocket magnifier similar to this. Also a stick of wax-based lip balm to help the threads in the head assembly maintain a good air seal (apply a tiny amount to the male threads before reassembly after cleaning).
Get or make a spray-out pot. They're easy to DIY out of a margarine tub or soda/juice bottle, so although nice, it's not strictly necessary to buy one.
Get or make an airbrush stand/holder. This is not for storing the brush, but rather for having a way to set the brush down while in-in use without spilling the paint cup. Again: these are easy to DIY, so you don't have to splash cash on one unless you really feel like it.
Hope that helps!
A handheld for checking trichomes, I like these little cheapies: https://smile.amazon.com/gp/product/B00AQAANDS/ref=ppx_yo_dt_b_search_asin_title?ie=UTF8&amp;psc=1
But checking for broad and russet mites, the USB plug-in is the way to go.
Google isnt hard to use, people are lazy.
Here you go.
https://www.amazon.com/Bluecell-Alligator-Stick-Airbrush-Hobby/dp/B00CWRCO6M
http://www.amazon.com/Bluecell-Alligator-Stick-Airbrush-Hobby/dp/B00CWRCO6M/ref=sr_1_2?ie=UTF8&amp;qid=1417441276&amp;sr=8-2
I bought these and they are pretty decent
Correct!
Bluecell 50 pcs Alligator Clip Stick for Airbrush Hobby Model Parts by Generic
https://www.amazon.com/dp/B00CWRCO6M/ref=cm_sw_r_cp_apip_GgJ5aIplWSoA2
So this:
https://smile.amazon.com/Citadel-Shade-Paint-Games-Workshop/dp/B00KOD3FM8/ref=sr_1_4?ie=UTF8&amp;qid=1519681521&amp;sr=8-4&amp;keywords=paint+wash
or this?:
https://smile.amazon.com/Nontoxic-Miniature-Washes-Dropper-Bottles/dp/B0714QL55V/ref=sr_1_1_sspa?ie=UTF8&amp;qid=1519681988&amp;sr=8-1-spons&amp;keywords=army+painter+wash&amp;psc=1
For primer is there a benefit to using paint on, vs spray? I think the bases will be separate from my pieces. So I would think a spray can of like, white, grey, and black would be my best bet?
This set of shaders right here is the most important thing you can buy. If you don't want to invest that much you can just buy Nuln Oil and Agrax Earthshade individually and be fine.
If you already have acrylic paints you can just use what you have - just make sure to thin them until they are almost as thin as milk. Thick paint will cover up detail.
You will also want Krylon Matte finish or Testor's Dullcote matte finish to seal the mini.
I recommend watching Sorastro's painting guides, his Zombicide series starts from the most basic techniques.
I like these. http://www.amazon.com/Games-Workshop-Citadel-Shade-Paint/dp/B00KOD3FM8 but always with the knowledge that I can make my own with about a 1:8 ratio of any paints that I have. Use the color wheel as your guide. Cool colors recede while warm colors pop out. Try experimenting with different colors and see what effects you get, and what makes you happy. On faces I use a bit of blue in the shadows to help them recess, while using red in other places to help it come out.
Also, I typically repeat 3 and 4 multiple times.
Shade set
Having little pots of most is fine --- I mostly use nuln and agrax.
Yeah... mini paint is expensive... but it's also generally worth it. I'd recommend picking up one of the variety packs (I got a lot of mileage out of the Vallejo Basic USA Colors Kit, although the yellow and the orange weren't strong enough in my opinion). While the paints are certainly expensive, they last quite a long time. I've painted over a hundred minis (and a fair amount of terrain) and I still have at least half of every bottle. After I bought the basic set, I then bought a few individual bottles for colors that I felt were lacking. I specifically got a new orange, a new yellow, a couple of greys and a couple of additional browns. That set of colors has worked really well for me!
Something else to consider is washes. A friend got me a Games Workshop set for my birthday and it's been really nice. Once again, it's got a steep upfront cost, but the supplies will last a good long time.
i put a small amount of gold from Game color polished gold on a paper plate. Take an eye dropper and get some water and add 1-2 water drops on top. take a brush and mix together and whip the excess off on the paper plate while twisting to get a point(ish) on the brush. Then apply to model.
I'm still working on this model in several places. I got tired when i got to the current point last night. still need to go over the cape and some details again for additional layers.
paints i'm using
Shade paints (citadel)
and a few random citadel base and layer paints, 2 reds and 2 flesh tones.
all advice welcome. I still don't like the lack of smoothness i see in some spots on my models.
Ooooh thanks! I'll have to watch that video! I just ordered the Citadel set as well. I'll do a couple of side-by-sides and post the results. Hopefully this weekend, since I'm still waiting for them to come in the mail.
Thanks for giving me the motivation!
Canadian here also.
I bought mine from Amazon.com Panel Line Accent Color 3 Pack
Only took about 6 business days to deliver to my door, and the paint well within date. Though packaging was a little questionable, with the 3-pack glass bottles being shipped in just a single layer bubble wrap envelope. @.@
I also checked my local hobby store (Hobby Wholesale) and they actually started stocking it when when I went there a few days ago, but they sell it individually ($9 each)
http://www.amazon.com/TAMIYA-Panel-Accent-Color-3-colors/dp/B00M58FWVC/ref=sr_1_1?ie=UTF8&amp;qid=1459450686&amp;sr=8-1&amp;keywords=tamiya+wash
I would use a brown or sepia panel wash on the Trans-Am.
It's what we use at my house, it's subtle but still defines everything really well
link
watch this
get this
I prefer Tamiya panel wash to markers. you can get a much cleaner line.
http://amzn.com/B00M58FWVC
The caution it that if you are not painting your kit, gloss coat and THEN panel line with this stuff (clean up with a drop of lighter fluid on a q-tip), because the solvent in the wash can eat away at the bare plastic and make it brittle.
so Gloss> panel line/decal> Top coat of your choice.
Thanks. The blue on the main body is the colored plastic. All of the other solid colors are decals. Beyond that I used an enamel wash to bring out the details and panel lines. I used the wash and these Tamiya weathering colors to weather it.
http://www.amazon.com/TAMIYA-Weathering-Master-6-Sets-Japan/dp/B00M66FM86/ref=sr_1_1?ie=UTF8&amp;qid=1465253151&amp;sr=8-1&amp;keywords=tamiya+weathering
What is the best set of things to start out with weathering? For instance, is this a good set? https://www.amazon.com/dp/B00M66FM86/_encoding=UTF8?coliid=I1XI8QH3DQRFDA&amp;colid=3BT0B9K6OKTMQ
What are good brushes or other items I would need to weather my sets? Thanks a lot!
I also bought Tamiya weathering material. I'm really excited!
Try to get some of those https://www.amazon.com/dp/B07H5SB4HB to fix the miniature on a champagne cork. Works perfect. Then use some grounding like https://www.amazon.com/dp/B07T2H1SBR.
Then paint the miniature and finish with some Nuln Oil like https://www.amazon.com/dp/B0189BIERC
That should help. Have fun!
I got back into painting after about a 25 year hiatus, and got the following:
this primer,
https://www.amazon.com/gp/product/B002BWORRW/ref=ppx_yo_dt_b_asin_title_o08_s00?ie=UTF8&psc=1
this paint kit
https://www.amazon.com/gp/product/B07DWMTNDJ/ref=ppx_yo_dt_b_asin_title_o01_s00?ie=UTF8&psc=1
And this wash:
https://www.amazon.com/gp/product/B0189BIERC/ref=ppx_yo_dt_b_asin_title_o00_s00?ie=UTF8&psc=1
Really happy with all these products.
how do yall feel about beginner kits such as https://www.amazon.com/BXQINLENX-Gundam-Modeler-Assemble-Building/dp/B01GH6B3Z6/ref=pd_sbs_21_2?_encoding=UTF8&amp;pd_rd_i=B01GH6B3Z6&amp;pd_rd_r=2KSC5ZDH88QYZT19QKQY&amp;pd_rd_w=Y7aiQ&amp;pd_rd_wg=Pjz33&amp;psc=1&amp;refRID=2KSC5ZDH88QYZT19QKQY
also how big is the difference when panel lining red pieces with black or gray markers, those seem to be the easiest to get a hold of?
Hi folks,
Does anyone know what the finishing sticks are from the Amazon Gunpla Tool Kits?
https://www.amazon.com/BXQINLENX-Gundam-Modeler-Assemble-Building/dp/B01GH6B3Z6?ref_=bl_dp_s_web_16153897011
I bought this kit a little while ago, and while the rest of the tools aren't that great, I actually really, really like that combo finishing stick, but it has worn out after 2-3 kits.
Anyone know where I can get JUST that stick?
I just got this stuff for my brother:
tools
glue
mold line scraper
I'd suggest getting some well reviewed mini brushes from Amazon as well. Make sure you clean them. Enjoy!
Hey man! I used Tamiya X 20! Here's the link
TAMIYA 87131 Panel Line Accent Color Black For Plastic Model Kit https://www.amazon.com/dp/B01HDJ7BR0/ref=cm_sw_r_cp_apa_x6H0Bb17EBM7K
not sure if there are special considerations for a zaku, but a huge step up from markers are these tamiya panel line accent colors. These look like other paint bottles, but actually they're much easier to use. They come with a sort of brush tip on the other side of the lid, and all you need to do is just to 'touch' the wet tip into a panel line, and the paint will just 'fill' the gaps in the panel through gravity. Look up videos if you're not familiar with panel washing.
You can see it comes in a variety of different colours, you should get 2 different ones and see which one works better, but 1 of them should be the black as it works quite well on most panel lines
I'd opt for a freestanding magnifying glass or combo helping hand over one of those
I bought this LED lamp with a magnifying glass back in January and, up until last week, it’s been my only source of light besides whatever is overhead in the room.
Brightech LightView Pro Flex... https://www.amazon.com/dp/B01K10XA1O?ref=yo_pop_ma_swf
This lamp is great. However, I found that because it was so bright, it was basically the only source of light my res could see on the model and it cast pretty harsh shadows, making it difficult to really paint well and straining my eyes.
So I purchased this lamp last week as a “fill” light:
RMJ Dimmable LED Desk Lamp... https://www.amazon.com/dp/B0714KST8G?ref=yo_pop_ma_swf
And it’s been such a wonderful addition. The “study” setting is perfect daylight hue and it fills my workspace with enough light so that I’m not straining my eyes and have relatively even lighting over my models while I paint.
Hope that helps.
It was another amazon find for me: https://www.amazon.com/dp/B01K10XA1O/ref=cm_sw_r_cp_apap_Fh9FMsyEilKRq Its not too bad. I dont really use the magnifying glass though
After I did a decent bit of research a few months back I ended up getting this one and enjoy it quite a bit.
i want to start painting the pilot figures. i'm thinking of buying a magnifying glass desk lamp. do you guys use such things? is it worth it? if so, any recommendations?
from my cursory research, seem this one may be decent value for relatively cheap price point.
https://www.amazon.com/gp/product/B01K10XA1O?pf_rd_p=183f5289-9dc0-416f-942e-e8f213ef368b&amp;pf_rd_r=4WEDB459278EGVMBZEX9
Looks pretty good! This gives me hope, that I can do something similar. I have this startet-painting set, but did not find the courage to give it a try yet.
This is kind of unrelated to the game, but if I decided to paint the miniatures, is this a good starter kit?
https://www.amazon.com/Army-Painter-Dungeons-Official-Adventurers/dp/B07DWMTNDJ/ref=sr_1_2_sspa?keywords=miniature+paint+set&amp;qid=1571930710&amp;sr=8-2-spons&amp;psc=1&amp;smid=AU2FNATHSFHNB&amp;spLa=ZW5jcnlwdGVkUXVhbGlmaWVyPUExWThVTTVKTTBZQjRVJmVuY3J5cHRlZElkPUEwODQ0NzgzM05MUjJKRjZGTVEzMyZlbmNyeXB0ZWRBZElkPUEwMjYzNzQxM0wxUEU0TEVFQkhVSSZ3aWRnZXROYW1lPXNwX2F0ZiZhY3Rpb249Y2xpY2tSZWRpcmVjdCZkb05vdExvZ0NsaWNrPXRydWU=