(Part 3) Best household paint & primers according to redditors
We found 1,160 Reddit comments discussing the best household paint & primers. We ranked the 437 resulting products by number of redditors who mentioned them. Here are the products ranked 41-60. You can also go back to the previous section.
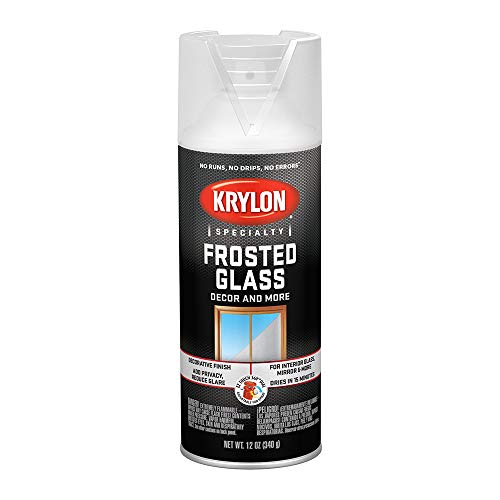


You can buy a spray that will make the glass hazy (like a bathroom window). It's removable.
But yeah, your landlord sounds like a piece of work. Have you asked him directly how he expects you have privacy and avoid being a target for break-in?
just spray paint them
Acryllic paint used. Acryllic colors work best on fabric. This converse sneaker uses canvas fabric.
Steps for the artists over here :D
*Shoes must be brand new or crisp clean before painting*
[Step 2 is required if your base color of shoe is non white. If it's complete white then you can start painting directly. ]
4)Paint the leaked edges, borders or mistakes you made while painting by covering them with black acryllic paint again. (black used here since the color of sneaker is black so it hides after drying)
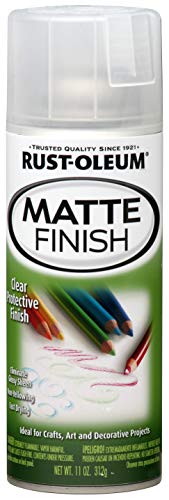
5)Once you're happy with the paint, coat it with a sealent spray 2-3 times to prevent the paint form getting exposed to dirt and stuff. Make sure the sealent has matte finish or you shoes will turn out glossy lol. I used this spray sealent
EDIT : Added instruction for white sneakers @ step 2
EDIT : Added sealent spray link.
 
Noveske
Lower
Upper
 
Colt
xpost from /r/ar15
Edit: updated links
After the last basecoat, I used a lacquer stick. You rub it on like a crayon, let it set for 5 mins, then gently wipe away the excess with a paper towel.
And when wiping off the excess, wipe across the line marks, horizontally. Like the length on the piece. If you follow the direction of the marks, you'll wipe out all the lacquer.
Let it sit for a bit then hit the spots where it didn't fill in or got wiped out. Repeat as needed.
Wait a couple days then clear coat.
Lacquer-Stik Paintstick, White https://www.amazon.com/dp/B002BY8HKS/ref=cm_sw_r_cp_apa_i_34AsDbSZRHBRG
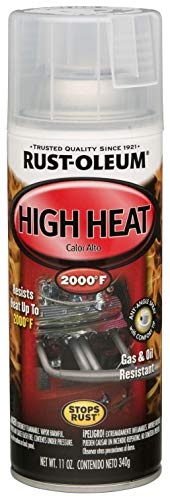
Most likely high heat spray. Used it when I constructed a mini blacksmith forge. It Comes in a Rustoelum can.
here
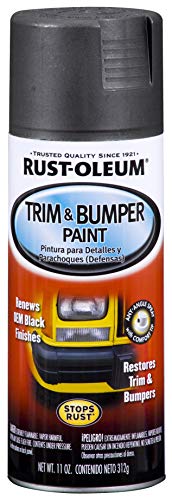
This is how it looks currently. Just replaced the head gasket, rockers, water pump, etc and all that good stuff. I'm gonna paint the trim, bumpers, flares, grill and head light housing, and the thing with the light in it that is over the license plate. I'm also going to remove all the badges and replace them with black ones, including the front "Jeep" badge. However, they don't make a Sport badge like the one I want so it's going to have to be a vinyl decal.
My plan is to take all the trim off, remove reside with goo gone or simple green, sand then clean everything, let it dry and mask it all off with blue tape and brown paper or plastic sheets and go to town on it with a few cans of this. I'll remove the grill and headlight covers and do them separate. As for the red stripe, I'll tape it off and do it with blood red Montana Black spray paint.
Few questions for you guys that did similar jobs already:
Next upgrades;
Thanks for reading!
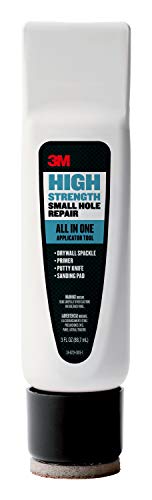
This costs $7 with free 2-day shipping. I consider it a mandatory item to have when moving out.
https://www.amazon.com/3M-Patch-Plus-Primer-fl/dp/B00UY39TZ0/
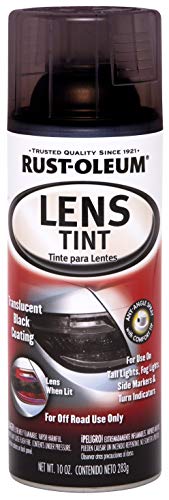
http://www.amazon.com/Rust-Oleum-Automotive-253256-10-Ounce-Translucent/dp/B0070S7ZXA/ref=sr_1_2?ie=UTF8&qid=1414042988&sr=8-2&keywords=headlight+tint+spray
Silver or Black, you can try to find other colors.
Degrease with mineral spirits first. Use very light coats, stuff likes to run.
Note that headlights are plastic, so i have no idea if this stuff will stick to glass.
For those interested I loosely followed this guide. Getting the rubber coating off was a total bitch but the end result was worth it! Since all I had available was glossy paint I opted for a matte clear to achieve the look I was after. The pain used was Rustoleum 2X Gloss Grape and Rustoleum Matte Clear Coat. I'm happy to answer any other questions about the process as well!
I seal my acrylic alters with two coats of this to prevent flaking or scratching. It does the trick.
If there is any increase in thickness, it's entirely undetectable.
Also, it gives the finished product a more even appearance. Transitions from non-painted to painted surfaces on the card are less noticeable when the light hits the card from an angle that might cause a glare. I think that's largely due to the matte finish of the spray.
Hope that helps.
Perhaps a pattern in frosted glass? You can make a stick-on masking stencil (Modello will make you a custom one for the dimensions of your window) and then use a frosting spray to add the pattern. You can also use removable frosting-look decals. Use a pattern that you like or go crazy, frost the entire thing except "portholes" where you want to be able to look out.
If you are feeling architectural you can add window lattice. Painted garden trellises might even do the trick if you want to save money. How much space/land do you have outside the windows? You can mount the lattice immediately outside, or place them as a wall a few feet in front of the window if you have space. You should be able to see out, but it will be hard for others to see in.
You are correct to paint the surfaces. I recommend a product like this.
The humidifiers you have chosen are too small. Get two, one for each side of your home. And get bigger ones. Maybe like this one.
I would also take pictures of the water condensing on the walls. Document everything you are having to do including the money you are having to spend to make your home "livable" and protect the property of the the landlord. Stay in communication with the landlord and ask if you can deduct some or all of these expenses from the rent since you are helping to prevent mold damage to the property. Mold is dangerous and it is nothing to mess around with. I don't know what the laws are where you live, but the landlord should be inclined to help with this problem.
If the problem persists or the landlord is not responsive it might be a good idea to find another place to live when your lease is finished.
Unfortunately, I think you got a primer that does not bond to plastic, as I am not seeing it on the link you linked, however I am absolutely no expert.
As for the rust-oleum I use and see recommended, it is this type Rust Oleum 280704 American Accents Ultra Cover 2X Spray Paint, Gray Primer, 12-Ounce https://www.amazon.com/dp/B00KZ6M3CW/ref=cm_sw_r_fm_apa_6-3YBbWEXF5MQ
Which does bind to plastics and says so on the can. You can get it in white, black, gray, etc.
I believe there are high temp clear enamels that may work for your use
Edit: rustoleum has a clear coat engine enamel good for up to 2,000 degrees F. here's a link
Give me a minute, I can link you to a comment I found explaining it in depth
EDIT: I'm just gonna paste it here. For reference, I,believe priming is coating it in a thin layer of paint to act as a base. Use black primer for darker results and white for lighter. Credit to u/pyrese
I love painting the hero forge minis; sounds like you did yours in the new high detail plastic.
I've done a few of those recently and once you get them primed, it's not much different than painting die cast minis.
Thank you! Most credit goes the florist on the centerpieces- I just added the candles, table runners, and table numbers.
The gold spray paint I used was this Rustoleum. I used it on sooo many things; the candlesticks, the table numbers, cake stands & toppers, etc. I think I went through like 4 cans lol. Conveniently, I came across this blog post where someone craftier than I had already done a detailed gold spray paint comparison and I just chose the one I thought would be best and stuck with it.
I love painting the hero forge minis; sounds like you did yours in the new high detail plastic.
I've done a few of those recently and once you get them primed, it's not much different than painting die cast minis.
https://www.amazon.com/Rust-Oleum-Automotive-251574-11-Ounce-Bumper/dp/B005H5P5C6
has the jeep xj on the logo. I used it and loved the results, and it sticks. tried heat gun, this is easier and im more confident with it.
I used this because it was cheap and I didn't want to run down to Lowe's.
One can should be enough, that board is 42.75" long and 10" deep (I think) and I still had some left over in the bottle after three coats.
Its actually under an inch (just measured). There really isnt much depth as all. Would one of those 4-in-1 filler/spatula/sanders work with this you think? Since it's not that deep?
Try this: https://www.amazon.com/Rust-Oleum-1910830-Metallic-Spray-11-Ounce/dp/B000QD3GPW
Quick question, as a complete noobie to Gunpla, I was wondering if these would be the appropriate sprays to use for top coating, both for the gloss, so I could pannel line, and then do the decaling and weathering and obviously then the matte coat.
So would these work for the gloss and matte coats, or are there better options out there. Obviously price isnt to much of an option, as long as its the best bang for the buck.
The first one I've found is the gloss its by Mr.Hobby, called Mr.Super Clear Gloss and the second one was the matte final coat by Tamyia Color called Tamiya Color TS80 Flat Clear
If the metal is rusted through, then it's probably not worth it. But, if the metal is still good underneath I would say to go for it!
Making a really hot fire inside the grill works phenomenally well. After that, I used a sander to get all the rust off I could.
You want to make sure the surface is clean before you paint, and it is helpful to use a primer. For the paint I used a high temperature spray paint designed for the purpose. The surface needs to be clean before you apply it, and you can't apply the paint anywhere that touches open flame.
> Natures miracle then Paint over with kilz to trap odors
Should I just dump something like this in a bucket with a couple gallons of water and spread it around the floor?:
https://www.amazon.com/Natures-Miracle-Remover-24-Ounce-P-5553/dp/B001LUO1K8/
Or should I use a wet vac with something else?
For the Kilz, does this work?:
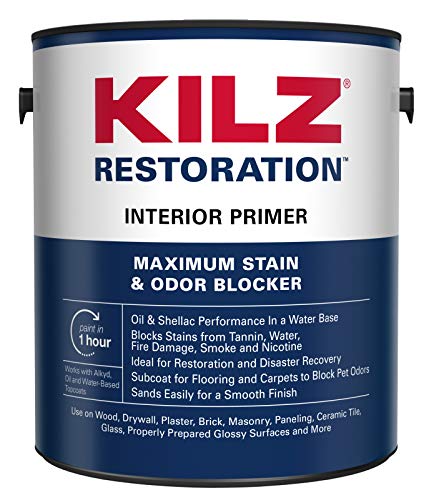
https://www.amazon.com/KILZ-Maximum-Blocking-Interior-1-gallon/dp/B007XH9PKO/
Isn't there a risk of this pealing up underneath in the future? We may use wider planks, which would require glue. Not sure how well that would bond with the paint being on top.
Could you try spraying the bottle with a clear coat after you've drawn the ink? Something like this
Here are the specific products I used:
Masonite, Chalk Markers, and Chalkboard Paint. I also used a slightly different color set of sidewalk chalk like this that I bought at a drugstore. If I had it to do again, I might spend some time looking for a thinner Masonite board.
ETA: I realize my bar for "sustainable" is likely lower than some, but I live in the DC area, so my main concern was reusability. It's also worth noting that Masonite board was designed as a way to reuse wood wasted at factories back in the day (although Masonite the company doesn't make masonite the material anymore, so I have no idea how the material is sourced now.)
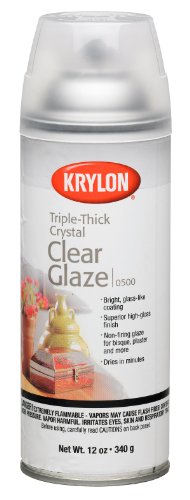
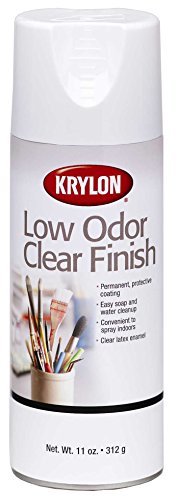
https://www.amazon.com/gp/aw/d/B001144TJC/ref=mp_s_a_1_2?ie=UTF8&qid=1502415650&sr=8-2&pi=AC_SX236_SY340_FMwebp_QL65&keywords=krylon+crystal+clear&dpPl=1&dpID=41MGd%2BvBXVL&ref=plSrch
If the odour is trapped in the walls I know that certain paints have been developed to "lock" the nicotine and smoke smell away.
I know my parents have bought this stuff after my grandmother died and they had to renovate her apartment so it could be sold/leased.
I did find some links. A professional painter explains what he does to salvage rooms that have been heavily smoked in.
https://www.duluxtradepaintexpert.co.uk/editorial/nicotine-nightmare
He talks about a primer that blocks the nicotine. I found something that sounds right on amazon for reference: https://www.amazon.com/Maximum-Blocking-Interior-Primer-1-gallon/dp/B007XH9PKO/ref=sr_1_2?ie=UTF8&qid=1503859515&sr=8-2&keywords=Primer+Sealer+Nicotine
I always used Lacquer-stiks, it's literally what they're designed for.
http://www.amazon.com/Laco-Markal-Lacquer-Stik-Paintstick-White/dp/B002BY8HKS/ref=sr_1_1?ie=UTF8&qid=1457470941&sr=8-1&keywords=lacquer+sticks+guns
I bought one and I've only used half an inch of it to do several guns.
On the 'you can paint these' route - it looks like they used something similar to this paint: http://www.amazon.com/Rust-Oleum-1910830-Metallic-Spray-11-Ounce/dp/B000QD3GPW/ref=sr_1_1?s=hi&ie=UTF8&qid=1453220885&sr=1-1&keywords=gold+spray+paint
Rust-Oleum Brand?
This is what I've been using recently. (I get it for like $10 a can from Walmart)
http://www.amazon.ca/Krylon-Clear-Finish-Aerosol-11-Ounce/dp/B001HWCLK2
As for how it looks, my Duel & Buster were sprayed with it so you can check them out below
http://imgur.com/a/HmPeu
I would use a primer. It will give something for the paint to really bind to because metal is non-porous. Make sure you get a metal primer.
Rust-Oleum Automotive Rust Primer: https://www.amazon.com/Rust-Oleum-249331-Automotive-12-Ounce-Primer/dp/B003CT4AO8/ref=sr_1_2?s=hi&ie=UTF8&qid=1479909567&sr=1-2&keywords=metal+primer
I prefer using Rustoleum brand. They have automotive enamel paints and they look great. I just used this:
https://www.amazon.com/dp/B001UE7MW4/ref=twister_B002LSIFOC?_encoding=UTF8&psc=1
On my lug nuts and they look great. A good gloss finish too. There are many paints you can use, just stay away from arts and crafts-y paints and make sure its good for metal use. As long as you use several even, thin coats of paint on top of primer, you should be in good shape!
Also, I would recommend repainting the whole wiper blade. It will look spotty if you don't plus its small enough that it should not take much more time to do. Happy Detailing!
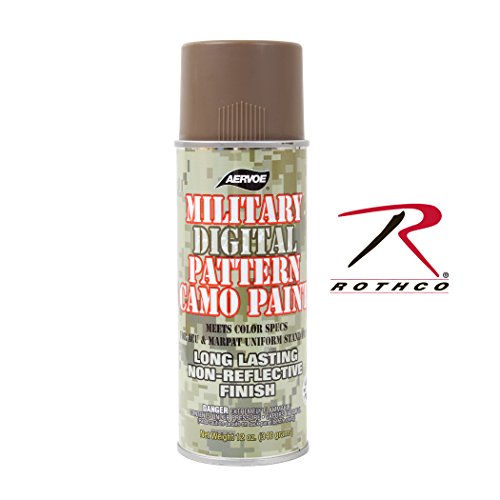
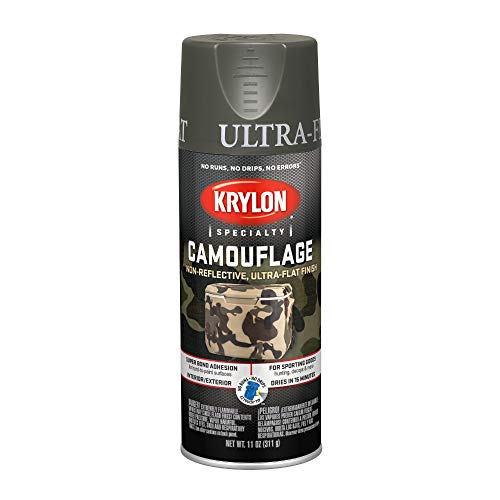
Coyote Brown 12 Oz. Spray Paint https://www.amazon.com/dp/B00EPH4SMU?ref=yo_pop_ma_swf
In my house we ripped up carpet in the basement that the previous owners cats peed on and the only thing we found that got rid of the smell was we painted the concrete floor with kilz odor blocker and it worked like magic.
KILZ Restoration Maximum Stain and Odor Blocking Interior Latex Primer/Sealer, White, 1-gallon https://www.amazon.com/dp/B007XH9PKO/ref=cm_sw_r_cp_apa_i_-.EADb070PHDM
Also in a basement I'd recommend luxury vinyl plank instead of laminate because of it being waterproof and you won't ever have to worry about any smells from moisture.
For building gunpla or models in general (including resin cast kits) people use stuff like this: https://www.amazon.com/Mr-Super-Clear-Gloss-Spray/dp/B000W2YLGA/ref=sr_1_4?ie=UTF8&qid=1523076243&sr=8-4&keywords=mr+clear+spray
I did this: https://www.amazon.com/Krylon-K04293000-Camouflage-Technology-11-Ounce/dp/B00176UX26
Result: https://i.imgur.com/wJ87qsr.jpg
Yep, this.
Here's my QFR that I painted. It has a fair few process pictures.
A vinyl film is going to cut a lot of light output, even if it is clear. Vinyl is not a great/good/decent choice for a lens cover.
You could try to apply an actual optical filter meant to shade a theater lamp, such as this: http://us.rosco.com/en/products/catalog/roscolux
I think that the daffodil is closest to selective yellow. The other benefit to using these, is that theyll withstand the heat, and also be optically clear.
The spray paint is also optically clear. It fairly UV resistant, but should be topcoated with this ( https://www.amazon.com/dp/B006ZLQ0JI/?tag=2402507-20 ) to increase the UV and chip resistance. I've had good success with 1 light base coat and two medium-heavy coats of the yellow duplicolor, topped with one medium-heavy coat of that clear. Make sure to clean the glass lens very well, with a paint thinner cleaning. The cleaner the lens, the better the paint sticks.
As far as upgrades go, Im sure the morimotos are an upgrade from a beat up oem headlight, but, despite their popularity, they arent great lamps. Good on you, sticking with 4500k burners, as they are the most efficient. Lightsource does matter, regarding the tint, as HID burners and LED chips produce a much greater quantity of blue light than their halogen counterparts. Good vehicle lighting is generally not inexpensive, though there are some exceptions.
Legally, in the US, you can run 4 forward facing illumination lamps. So 2 low beams and 2 fogs, or 2 highbeams and 2 driving lamps. But not highbeam and fogs, or lowbeam and driving.
This stuff is basically XTC 3D in a can:
https://www.amazon.com/Krylon-I00500A00-12-Ounce-Triple-Aerosol/dp/B001144TJC
I used a spray lacquer - satin finish. This is the one.
after removing the case I gave it about 8 light coats of this with about a half hour between coats, then after a few days I gave it a few coats of this. just make sure its clean before you do start and wait a couple days after you finish before you put it back on
You dont necessarily need to use Mr. Top Coat or Testors. I used a Rustoleum Matte clear and it came out just fine for me...my only gripe wasn't with the matte coat but me going to heavy with the Future clear and trying to correct it.
i took the rim off of a 10 gallon tank i got from the dollar per gallon sale at petco. here is the picture. i used about 4 coats of this for the background and it worked flawlessly!
make sure to wear gloves and use some tools to help break the silicone bond
https://www.amazon.com/Rust-Oleum-Automotive-260771-11-Ounce-Degrees/dp/B006ZLQ0JI/ref=pd_sim_263_4/135-8501305-4659463?_encoding=UTF8&pd_rd_i=B006ZLQ0JI&pd_rd_r=28ef0185-63c5-11e9-aa29-13293a7f6817&pd_rd_w=XYxwZ&pd_rd_wg=jVOlQ&pf_rd_p=90485860-83e9-4fd9-b838-b28a9b7fda30&pf_rd_r=W988KFWPM2M5WCE4J3PE&psc=1&refRID=W988KFWPM2M5WCE4J3PE
Actually, Frosting Spray works just fine. Making a paper mask and sandblasting is another option.
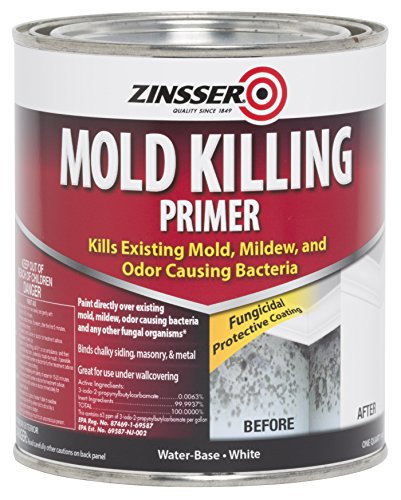
Kilz is good, we used Zinsser:
http://www.amazon.com/Rust-Oleum-276087-Killing-Primer-Quart/dp/B00K7FEQPI/ref=sr_1_1?ie=UTF8&qid=1463426777&sr=8-1&keywords=zinsser+mold+killing+primer
Lacquer-Stiks
http://www.amazon.com/Markal-Lacquer-Stik-Paintstick-White/dp/B002BY8HKS/ref=pd_bxgy_hi_img_c
I would spray the affected area with something like this. Lightly. Then wait many hours until it's absolutely dry. Then sand that with 3 or 400 grit sandpaper, not overly hard, wipe very clean with a dry cloth, then spray it again. And then perhaps again. Also comes in matte.
Thanks, the paint I was referencing is RustOleum's here...seems ok for high heat, but perhaps you're right when it comes in contact with a flame.
Perhaps a shield of some kind is in order?
Here is a link to the original submission
http://www.reddit.com/r/GunPorn/comments/2dibda/noveske_spr_and_colt_6020_carbine_builds_xpost/
Here is a comment by the original submitter
 
Noveske
Lower
Upper
 
Colt
xpost from /r/ar15
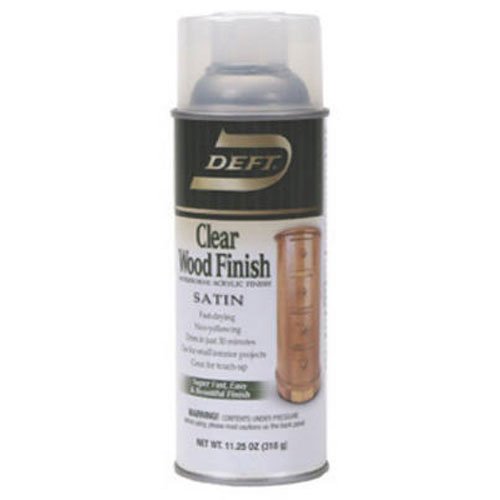
There's this stuff called Spray Deft, you can get it at pretty much any hardware store. It's a clear wood finish, but you would spray it on the helmet so you wouldn't have to touch the autographs at all, just a few light coats of it and you should be good. I'll try to find a link to it here in a sec.
Edit: Here's a link to buy it on Amazon: http://www.amazon.com/gp/aw/d/B0016KXBU4?pc_redir=1405491571&robot_redir=1
Paint the concrete with a mold killing additive, then use your tile:
https://www.amazon.com/Rust-Oleum-276087-Killing-Primer-Quart/dp/B00K7FEQPI
Cheap and easy waterproofing.
I need this jelly roll pan and this chalkboard spray paint, because I'm making a magnetic chalkboard! It's going to hang in my room, and residents will be able to play with my magnetic poetry while we talk about their problems or whatever. :)
to infinity and beyond
https://smile.amazon.com/gp/product/B006ZLQ0JI/ref=oh_aui_detailpage_o04_s00?ie=UTF8&psc=1
I was thinking about doing the same thing to my gun. By any chance do you remember whether you used this or ......this?
Lacquer-Stik Paintstick, White https://www.amazon.com/dp/B002BY8HKS?ref=ppx_pop_mob_ap_share
Just need to use this lacquer stik and fill in wherever you want to, then use NON ACETONE nail polish remover to remove the excess. Then SEXINESS!
It's this
Wash everything down with soapy water first (even if it's new and doesn't look dirty). I'd replace the adhesion promoter with a good plastic compatible primer, I've had a few issues with Krylon primers and plastic, but this stuff worked great for me. Also, make sure you know what grits to reach for during the sanding process. You'll want to sand the primer at about 400-600, base coat 800-1000, clear coat 1000-2500. With dry times, make sure you know the paint's recoat window. Also, before sanding, make sure the paint is hard or it will gum up the sand paper and tear it off the surface you're painting.
Also, after clear coat you'll want to sand again, you will need some rubbing compound and polish for this step as well since sandpaper is too coarse to get the shine back.
No, that's usually enamel based (and hard to work with)
Something like this
https://www.amazon.com/280704-American-Accents-Primer-12-Ounce/dp/B00KZ6M3CW/ref=mp_s_a_1_1?ie=UTF8&qid=1540593013&sr=8-1&pi=AC_SX236_SY340_FMwebp_QL65&keywords=rustoleum%2Bprimer&dpPl=1&dpID=41h8AzYPgPL&ref=plSrch&th=1&psc=1
Just normal household spray paint, and I like priming in my base color, or the lighter of two if doing 2 tone light/dark schemes
Thanks for the info. So this should work fine
https://www.amazon.com/280715-American-Accents-Primer-12-Ounce/dp/B00KZ6M3CW/ref=sr_1_1?ie=UTF8&qid=1487963991&sr=8-1&keywords=primer%2Bspray%2Bpaint&th=1
Agreed, bleach is a great way to attack mold. Once you have done this, let the wood dry really well before doing anything with it. Alternatively, you could try using some mold killing primer: https://www.amazon.com/Rust-Oleum-276087-Killing-Primer-Quart/dp/B00K7FEQPI
You can also purchase a spray can or window filmer, like this. It comes off with acetone, not water, so you should be able to wipe it down while adding privacy.
Otherwise velcro seems to meet your requirements; stick one side to the molding, the other to your plexiglass. probably add a handle or two to make removing it easier. Can also cut holes in the plexiglass for finger holes and/or ventilation.
https://www.amazon.com/Rust-Oleum-Automotive-251574-11-Ounce-Bumper/dp/B005H5P5C6
Yes.
So Axon, just to be sure. I want to paint a certain part a flat Matte color. So I'll use a Flat/Matte Coat. If I paint other parts gloss/metallic I'll coat it with a gloss coat, correct?
Would this be a good brand for a flat/matte coat? https://www.amazon.com/Mr-Super-Clear-Flat-Spray/dp/B000W30PIW/ref=sr_1_2?ie=UTF8&qid=1495418826&sr=8-2&keywords=gundam+matte+spray
And this for a gloss/metallic? https://www.amazon.com/Mr-Super-Clear-Gloss-Spray/dp/B000W2YLGA/ref=sr_1_3?ie=UTF8&qid=1495418918&sr=8-3&keywords=to+coat+gloss+gundam
I apologize for all the questions and ignorance. I'm about to paint for my first time on an RG Aile Strike. :)
You can use tint spray on your front indicators, they also sell pre-smoked ones with LEDS. Motodynamic makes a really nice smoked LED tail light for your bike. Check out the video at the bottom of the page.
Sometimes.
3M also has a solution for that lol
https://www.amazon.com/3M-Patch-Plus-Primer-fl/dp/B00UY39TZ0/ref=sr_1_4?keywords=wall+filler&qid=1568684115&sr=8-4
Another idea instead of black and white paint is chalkboard paint too.
going by what this product page says their clear coat is acrylic based, meaning that in theory putting enamel based products over it should eat it away and ruin your paintjob. However, not all acrylic products are chemically the same. for example Pledge floor care is an acrylic varnish and when applied via aribrush or brush over gunpla it acts as a good gloss coat for the enamel wash.
Your best bet is to go with a lacquer based gloss coat to put your panel line wash over. don't worry as these won't affect your paint underneath as long as your paint has cured. brands that are at the top of my head are tamiya and mr. super clear.
Does anyone know if this would be a good finish to go over the paint?
http://www.amazon.com/Krylon-11-Ounce-Clear-Finish-Aerosol/dp/B001HWCLK2/ref=sr_1_1?ie=UTF8&qid=1422148850&sr=8-1&keywords=krylon+clear+matte
Rust-Oleum 253256 Specialty Lens Tint Spray Paint, 10 Oz Aerosol, 8-10 Sq-Ft/Can, Translucent, 10-Ounce, Black https://www.amazon.com/dp/B0070S7ZXA/ref=cm_sw_r_other_apa_i_a3YEDbC70PTZR
I haven't tried it yet, but the artist who I've been following most closely as I learn about sculpting uses Krylon matte finish spray (this one I believe: https://www.amazon.com/dp/B001HWCLK2/ref=twister_B004JLA2OU?_encoding=UTF8&psc=1), and her stuff doesn't seem to be shiny. Her name is EmilySculpts if you want to check her out.
Yeah, I've heard rustoleom works, though I personally use This Stuf, Really works, trust me.
They sell satin nitro. http://www.amazon.com/Deft-037125017132-Interior-Lacquer-12-25-Ounce/dp/B0016KXBU4
http://www.amazon.com/Rust-Oleum-Automotive-253256-10-Ounce-Translucent/dp/B0070S7ZXA theres the link to it on amazon.
looked into this and buying replacements is stupid expensive. if you want the OEM molding look, you have to remove it, paint it and put it back on with double sided tape. this is the trim paint to use, even has an XJ on the can.
Rust-Oleum Automotive 251574 11-Ounce Trim and Bumper Spray, Matte Black https://www.amazon.com/dp/B005H5P5C6/ref=cm_sw_r_cp_api_mhSPzb1NAMDJG
This is on my to-do list as well, I personally like the look of the 97+ molding when it's not faded grey. it's also saved my door panels from parking lot monsters who don't look before they open their door.
I'm not a master artist, and I like to save money where I can, so I've been using Rust-Oleum Specialty Clear Matte Spray ever since I started, and I've been very happy with the results.
that green things ar the same thing that u hold in ur hand in the last picture a screw plug just severely damaged and deteriorated. remove them with a pair of pliers and fill those holes with https://www.amazon.com/3M-Patch-Plus-Primer-fl/dp/B00UY39TZ0/ref=sr_1_1?ie=UTF8&qid=1506342376&sr=8-1&keywords=hole+filler then drill the holes where u want for the new rod.
If u cant remove easily the screw plugs, use the drill on them to help them soften.