(Part 2) Best temperature & humidity measurement tools according to redditors
We found 1,387 Reddit comments discussing the best temperature & humidity measurement tools. We ranked the 275 resulting products by number of redditors who mentioned them. Here are the products ranked 21-40. You can also go back to the previous section.


Heavy cookware and a good thermometer
Enclosure
Glass tanks with screen lids are very bad for ball pythons, you would be looking at getting a tub set up (using a rubber maid/sterilite /iris tub & soldering or drilling holes into the sides - here is a good tutorial of setting that up ). Or you would be wanting to get a PVC enclosure. I have an Animal Plastics T8 for my ball python, it did take about five weeks for it to show up, though. So if you want to go this route, plan way ahead. The tub route is cheaper, but takes more DIY skills. The PVC cage route is more expensive, but very aesthetically pleasing. To make a glass tank work, I suggest covering three sides with foam board to help insulate, and covering most of the screen lid with saran wrap or foil to keep humidity in.
Humidity
A ball python needs at the minimum 60% humidity. This is incredibly difficult to achieve in a glass tank with a screen top. A tub or PVC enclosure makes this super easy. Humidity should be measured on the ground with a digital hygrometer. The stick on humidity gauges that pet stores hawk are often inaccurate and can cause serious injury or even death if they come unstuck from the wall and stick to your snake. I use this two in one hygrometer / thermometer.
Temperature
Ball pythons need a thermogradiant w one end at between 88F and 90F & a cool end of 78Fish - the ambient temperature should never be below 75F, & should be around high 70's. In a tub or a PVC enclosure, you will want an under tank heater - heat tap, heat mats, heat pads. I recommend the flexwatt that you can get with the Animal Plastics enclosure or the ultratherm from Reptile Basics. If you have trouble keeping the ambient up in the PVC enclosure, you may want to get a radiant heat panel, which installs to the ceiling of the enclosure. For a glass tank, you will probably need a ceramic heat emitter installed over the cage to keep ambient temperatures appropriate. CHE gives off no visible light. Red lights are often given out like candy at PetCo/Smart places as good ways to provide heat at night. They are not. Ball pythons can see red light, and it messes up their day/night cycle. I don't have recommendations for CHE because I don't use them.
Thermostats
Any & all heat sources you have for your BP need to be controlled by a thermostat. Failure to appropriately control your heat source can lead to it quickly becoming 120F & injuring your snake. I highly recommend Spyder Robotics Herpstats. You can get larger ones w more probes so that you can control all your heat sources w one unit. They have a ton of good safety features & a lot of people on this sub can answer any questions you have on them. The cheaper ones are around $100ish. If that is too much for you, there are a lot of people who use the Jumpstart thermostats, but they have less safety features & can wear out quickly. They also make a loud clicking sound periodically. I cannot stress this enough, this is not a place to cut corners. You need a thermostat.
Thermometers
I already linked to my recommended combo hygro/thermometer. This thermometer is great because it has a small probe to measure "outside" temperatures. I use this probe to measure the floor on my warm side (I hide it on the ground under the substrate so I know the absolute hottest place my BP can get to). I place the unit itself on the cool side, so I know all my temps & the humidity on one unit. You will also want an IR thermometer gun (there might be better recs than this one). This is good for spot checking temperatures without moving around probes & also checking the temps of the prey items.
Hides
You want at least two similar, enclosed hides. Half logs are NOT suitable, they are too open & they stress out the BP, as they can't watch both ends at once for a predator. Some of the best hides are these ones from Reptile Basics. They are enclosed on all sides with just a small entrance. They are dishwasher safe & also very cheap. You want them to be similar if not identical, so that the snake does not have to choose between feeling safe & thermoregulating. You will want one on each side of the temperature gradient. Feel free to add more that are different for diversity in the enclosure. I also have some fake vines/leaves in mine so that she feels more invisible. Go to a craft store or the fish supplies for these, the ones marketed for reptiles are way overpriced.
Water dish
You will want a water bowl that is large enough for the BP to soak in. This should be changed daily, as they like to poop & pee in their water. You'll want something sturdy as they like to tip them over. I got some crock dishes from Reptile Basics. You don't need any water treatment for the snakes water unless you treat water for yourself. If you tap is safe for human consumption, it's safe for your snake.
Feeding
BP's eat every 5 - 7 days as hatchlings and yearlings, as adults they can go longer. BP's are NOTORIOUSLY picky eaters. The ideal IMO for a BP is a proper sized rat fed either pre-killed or frozen/thawed. I feed frozen/thawed rats from Perfect Prey. Just a heads up - they ship with fiber glass insulation & dry ice. I try to open the packages outside so my cats don't get into it. They come in freezer bags and I just store them in my regular freezer. If even one thing is wrong in your husbandry, your BP will likely not eat.
How Much To Feed
The feeding amount depends on the weight of the BP. You will want a digital kitchen scale - you can get one cheaply at any box store. While under 750g, you want to feed about 10%-15% of their body weight about every 7 days. Once they are in their second year you want to feed 7%-10% of their body weight, after they are in their third year, you want to feed about 5% every 7 to 14 days. I document all feeding days and the weight of the prey in my google calender.
You should be weighing your snake at least once a month to track how much you should be feeding. You should not disturb or move or handle your snake for at least 48 hours after feeding.
Frozen / Thawed
I get the rat out the night before the day I want to feed. I put it in the fridge. About two hours before I feed, I get it out of the fridge and put it on the counter to get it to room temp. And then I soak it in a zip lock bag in warmish water (I use a temp gun to get water around 110F) for about 20 minutes, and use a temp gun to make sure the rat is around 100F, and then I run the head under running hot water until its 110F. The head of the prey should be warmer so the snake has a target. I then use tongs to move it around in the enclosure to mimic it being alive. She (usually) strikes pretty quickly. If she doesn't, I leave it in overnight, and throw it out in the morning if she doesn't eat it.
I prefer frozen thawed cause I can buy cheaply in bulk. It's also safer. As BP's get bigger, they require larger prey - and rats have sharp teeth and sharp claws and can seriously injure your snake.
Myths of Cage Aggression
You do not need a separate cage for feeding it. This is a myth. The best way to reduce stress at feeding time is to feed in their regular enclosure. This minimizes the risk of regurgitation.
Substrate
Stay away from aromatic woods - such as pine. A lot of people like to use coconut husk, unprinted newspaper, or paper towels. There are pros and cons to each. I like paper towels, they are cheap and easy to clean up messes with. I use PVC enclosure so I don't need a substrate that helps with humidity like coconut husk. This should be spot cleaned whenever a mess is made. Aspen chips can mold super easily so not really recommended. If you have a chip type substrate and are worry about ingestion of substrate while feeding, put a plate down before hand.
Shedding
Hatchlings shed more frequently, but you should expect regular shedding. Usually the most visible sign they are about to shed is them getting cloudy or "blue" eyes - just google image search for "ball python shed blue eyes". Once they "go into blue" you want to leave them alone as much as possible. Check in on them to refill their water & make sure their humidity is correct, but don't handle or disturb them while they are shedding. You will probably see them remove their skin about a week after they go blue. Right right before they shed, their eyes will clear up, but don't be fooled - if you haven't found their old skin they haven't shed yet. Once you have their old skin, you will want to remove it & inspect it. You might need to moisten it, but unroll it (there might be a poop in it) carefully & look for eye caps and make sure the whole skin is in one long piece. Then inspect the snake for any stuck shed. Don't pull off the stuck shed, but soak your BP in some warm water & it should come off mostly on its own. Stuck shed is usually a sign that humidity is off - so try to identify ways to increase humidity.
Bulk Grain storage lightning deal EDIT:2 looks like these are coming up a few times during prime day.
https://www.amazon.com/gp/product/B004L0Z4HO/ref=ox_sc_act_title_1?smid=ATVPDKIKX0DER&psc=1
Edit: Inkbird controllers going up for lightning deal starting at 6:00 p.m PDT https://www.amazon.com/dp/B07PVBG8K1/ref=gbps_tit_m-6_3b69_801408ea?pf_rd_p=db08f08d-45f1-490b-aa6c-1f4d543b3b69&pf_rd_s=merchandised-search-6&pf_rd_t=101&pf_rd_i=14611812011&pf_rd_m=ATVPDKIKX0DER&pf_rd_r=H6HJTJX7ZZV5HBJ9Z47P
Promise you aren't the only one with these questions. As others have said, an evening of research will get you many of your answers.
I'm in a state that "grow your own" legalized a few years ago. Have helped friends get setups going. Feel free to PM me if you aren't getting answers online.
My usual formula, for someone who knows plants a little but hasn't grown weed indoors it:
OK, I see you took the shield advice. Good.
Schematics
Concerning PCB:
Re MLX90614ESF
https://www.amazon.com/Thermometer-AR550-Mini-Infrared/dp/B000MX5Y9C
That will need some lens, possibly a laser to aim it (so that you can see what you are measuring/where is it pointing) and it also has quite complex data processing from what I can see. I hope you didn't buy this instead of a regular temperature sensor?
These pics are very helpful. So there are 19 holes for the ?? gallon bucket. I assume it is a 3 gallon inside the 5 gallon.
For the SCROG technique, I observed that you start the plant on the side. I've read that for LST you manipulate the plant around so it spirals around and ends in the center. From the looks of it you started this LST technique on the photo 9 but in photo 10 the plant began to veer off to the left and you began to take it counter clockwise. Attached are pics of what Im saying. In the end though, ideally you want a node per scrog square correct?
How many feet of LED strip do you recommend? I saw /u/bucketoflight design with 16.4 feet of LED is this overkill?
What are your thoughts on a thermostat like this?
How much did the grow cost you electricity wise?
What are your thoughts on using thermal resistant sealant to secure your LEDs to the side of your bucket? The cooler your LEDs are the better they preform. The resistant sealant makes LEDs act like a heat sink of their own instead of allowing the heat to accumulate in the plastic and mylar to which they are attached.
thanks
I put a temperature switched filter / fan in my lack enclosure.
Net-net it works great. I've got it set to turn on at ~28 degrees c. So it automatically turns on/off based on the ambient heat in the enclosure.
Here's a quick video of it in action, prior to installing the fan & control. YT Video
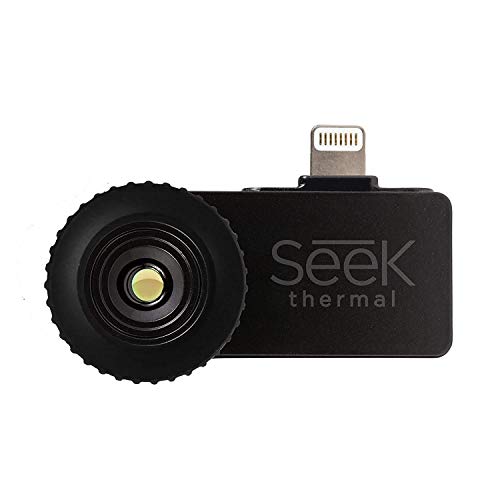
here’s one popular iphone model: Seek Thermal Compact Imager for iOS-Apple https://www.amazon.com/dp/B00NYWABAA/ref=cm_sw_r_cp_api_H-R7Bb4WQW4XH
Buy this
TL;DR: The easiest way you can show the greenhouse effect is to have two jars. Fill one jar with CO2 and fill another one with regular atmosphere. Leave them out in the sun, and the CO2 jar will become much hotter than the regular jar. You can easily generate CO2 by combining vinegar and baking soda inside a bottle, or you can use water and alka-seltzer tablets (which are just a dry powdered acid and baking soda that only react when wet). If you're using a bottle with a screw-on cap you need to be careful not to generate too much gas or you've essentially made a pressure bomb.
You can see someone do this exact experiment on Youtube. Just the first guy who pops up for my search:
https://www.youtube.com/watch?v=kwtt51gvaJQ
Explanation is below:
The earth radiates heat away through infrared radiation (called black-body radiation). This infrared radiation is the same thing as light rays, but the wavelength is longer so our eyes can't see it. All objects emit some infrared radiation, but warmer objects emit more. This is the principle of the thermal camera- which is specially made so it can pick up and "see" those infrared rays. These are useful because hotter objects (like warm blooded humans, animals, light bulbs, etc.) are brighter than background objects. Home inspectors love these because it lets you find drafts in your home or faulty wiring. The police love these because people stand out clear as day, even in the middle of night or hiding in a bush (since they're warmer than the bush).
https://youtu.be/rBnYtEYMW-Y?t=196
The key to understanding the greenhouse effect is understanding that carbon dioxide is opaque to infrared light. Carbon dioxide absorbs infrared light, while most of the rest of the atmosphere just allows this light to sail through and escape to space.
You've seen this effect in action with visible light if you've ever left something black out in the sun. Black objects absorb light and get incredibly hot during the day. Bright white objects reflect light and stay much cooler. A really simple experiment you can do is to find a place where black asphalt runs up against a white sidewalk. Go out in the middle of the day and put your hand on both- the black asphalt will be much hotter. For bonus points you can get a cheap touch-less thermometer to confirm your results- point your thermometer at all sorts of things and figure out what gets hottest. You can find these online or in hardware stores for $15 or so.
https://www.amazon.com/ANGGO-Non-contact-Temperature-Thermometer-Precisely/dp/B01FYVEJMY/ref=zg_bs_9931459011_8?_encoding=UTF8&psc=1&refRID=VSR6YWEN6WBT7DM6H6C6
For something more controlled, wrap a jar of water in a black plastic bag or in black construction paper and leave it in the sun. Then, wrap another jar in a white plastic bag or in white construction paper and do the same. Go out in the middle of the day and feel them both- the black will be hotter.
Carbon dioxide acts the same way. It absorbs the invisible infrared rays, while regular atmosphere does not. The result of more carbon dioxide is that more infrared light is absorbed, and the atmosphere gets hotter than it would be otherwise. You can easily see this happen in action by filling a bottle with CO2 and comparing it to a non-CO2 bottle, as discussed above.
You can pick up a point and read infrared thermometer for around $30-$60 from most local tool vendors in your area. Typically if they have car repair stuff they will carry them. Something similar to this: http://www.amazon.com/Thermometer-AR550-Mini-Infrared/dp/B000MX5Y9C
I mainly print ABS myself, but the concerns I know of with PLA printing are:
A couple of quick questions. How is her warm side heated? Under-tank heating is pretty much required, but supplemental heat from lights or a CHE can be added as needed. Be sure to monitor the temps for a couple days after adding supplemental heat, to make sure you aren't overheating your leo. You can get a lamp dimmer from Home Depot (or maybe even Wal-mart) to dial back the heat as needed.
How are you monitoring temperatures? I strongly recommend an infrared temp gun to measure surface temps rather than air temps. Especially on the warm side, surface temps are the most important--leos absorb heat through their belly to power their digestive process. As you know, insufficient surface temps will slow or halt digestion, and your leo will not eat.
How does Luna look? Is she stick thin, or a little fat? Post a picture if you can. If her weight is good, she's fine to go a week or two without food. Perhaps she doesn't need to eat as much as you're trying to feed her, and she's rejecting food because she isn't hungry? If she looks healthy enough for it, give her a dish of mealworms (don't let crickets run loose in her enclosure--they will bite her and cause infection) and otherwise don't feed her. If everything else is good, she will eventually get hungry and eat the food available.
Remember, as cold blooded animals, reptiles don't need to burn calories to maintain their body temps. Therefore, they can eat a surprisingly small amount. Growing hatchlings and juveniles actually eat far more than adults.
What wattage is your heater? Rule of thumb is 5 watts per gallon, so at 10g you should be using no more than 50watts for the entire tank, unless you are in an extreme cold environment and 50watt heater isn't doing enough then you can go up a bit more on wattage, otherwise 50watt should be maximum.
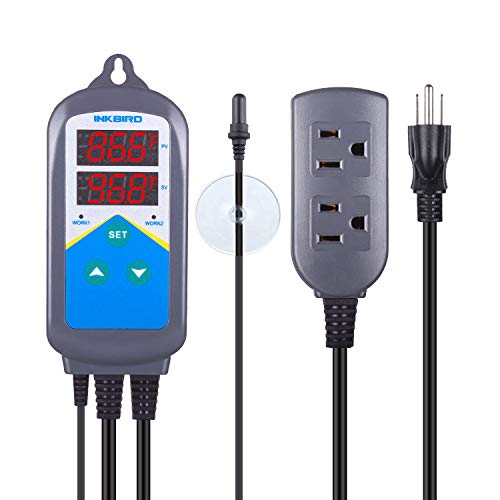
One thing you can try though, if you prefer to keep the current heater as-is, I recommend this product to externally help regulate the temperatures: https://www.amazon.com/Inkbird-Thermostat-Temperature-Controller-50-108°F/dp/B01M6WMUYI/
Basically plug your heater power cable into this thermostat outlet controller, set the desired temperature range on it, plug the thermometer probe into the thermostat outlet controller, and the longer/bigger silver tip goes all the way submerged into your tank's water (put it further away from the heater for more accurate readings). If the set temperature range is surpassed, this outlet thermostat controller will cut power to your heater until the lowest range has been met again. I set mine on 77-79 F and it always maintains the proper temperature range at around 78 F, regardless of what the heater does.
Or even cheaper w/ a MYPIN: http://www.amazon.com/dp/B0087O6S2A/
edit: I doubt we'll get an answer, user's account was created immediately before posting this link. And the name of the site is New England Temperature Solutions: netsinc.
I use one of these to control some 120V halogen lamps inside my chamber. It can be used to control your heat and also cool with a ventilation fan if the temp gets too high.
Yea well Amazon pricing fluctuates, so retail vs sale is a tough metric. The $150-160 price was the big sale, but they frequently drop below the $200 mark. Regardless my point was price of these thermal things is getting quite low compared to where they were 2-3 years ago. Went from a 500-600 dollar investment to try to justify down into the "cool toy" range.
Andriod one:
http://camelcamelcamel.com/Seek-Thermal-Compact-Imager-Android/product/B00NYWAHHM
iOS one:
http://camelcamelcamel.com/Seek-Thermal-Compact-Imager-iOS-Apple/product/B00NYWABAA
No worries at all, undertank heater, especially with a wooden ebclosure would want a thermostat just so it doesnt burn. What Ive done ia actually put the heat pad (you can buy these in stores buy Ill make sure to link one) and put tile over it. Tile is a lot safer and ironically more natural to them (arid rocky desert, not really sandy) and will conduct the heat well. To measure temp youll want a digital prob thermometer or what i ususlly recommend more so is a temp gun (will also link). Knowing temps is really important since all their metabolic functions depend on them. You want a 88-90 warm aidd and a 75f cool side. This allows them to regulate themselves.
https://www.amazon.com/gp/aw/s/ref=is_s?k=heat+pad+reptile
https://www.amazon.com/gp/aw/d/B019TRGYW2/ref=mp_s_a_1_3?ie=UTF8&qid=1503263283&sr=8-3&pi=AC_SX236_SY340_QL65&keywords=temp+gun+for+reptiles&dpPl=1&dpID=41Y5W8Q-7aL&ref=plSrch
https://www.amazon.com/gp/aw/s/ref=is_s?k=theromostat+for+reptiles
If that's all you're worried about, just go electric.
A thermometor gun runs you around $20, I've linked to one <$15 but can't attest to its quality. That's a drop in the bucket compared to anything else R/C will cost you. (A long-running battery will run you Closer to $30.) (Also, I love this E-bay seller. Highly recommend.) In general, a higher run time is achieved by having more mAh in a battery Usually 4,000 mAh is more than enough, especially if you have two or more batteries.)
If you find your motor getting too hot, you can buy a heatsync for it. Anything like this will work fine, even if it doesn't have a fan. Modifying the chassis to fit something like this can also be fun, if you're into it.
Also, here's a rundown on LiPo batteries, if you want to read in on them. It may seem like a lot to take in, but I promise that it's much simpler than a nitro engine, especially if you're just getting into the hobby.
Oh, and one more thing: if you don't want to deal with the relatively complicated LiPo batteries, you can simply power your car of choice with a NiMh battery, though these are generally more expensive (and offer lower performance) compared to a LiPo with the same mAh (run time). As a tradeoff, they are more durable, less volatile, and are much more of a "charge and forget" technology.
Feel free to ask around if you have any questions, the sub isn't very active but it never hurts to ask :)
il risultato mi pare perfetto ma mi permetto di suggerire la visione di questo video che permette di standardizzare il procedimento riducendo la possibilità di sbagliare: Carbonara Scientifica.
in riassunto (a memoria, o per lo meno è come faccio io attualmente):
Another option over carafoam is flaked oats or flaked wheat. Regarding a better thermometers: I have http://www.amazon.com/Arctic-Star-AR550-Infrared-Thermometer/dp/B000MX5Y9C
But I used to have http://www.amazon.com/Extech-TM25-Waterproof-Temperature-Indicator/dp/B00CDQ28IG/ref=sr_1_1?s=hi&amp;ie=UTF8&amp;qid=1426957897&amp;sr=1-1&amp;keywords=waterproof+probe+thermometer
Both work really well. Maybe get both to double check?
The way that I would do this is with a SSR. A Solid State Relay. A normal relay only has so many uses that it is rated for. A SSR has no moving parts so it won't be harmed by being rapidly switched.
And, as much as I love tinkering for tinker's sake...what you are building has already been done. https://www.amazon.com/IMAGE%C2%AE-SSR-25DA-Auto-tuning-Temperature-Controller/dp/B0087O6S2A/ref=sr_1_1?ie=UTF8&amp;qid=1465937455&amp;sr=8-1&amp;keywords=pid
Here's a controller and relay you can use to control the heating element. It's a dead simple solution, you can google sous vide diy for other ideas. They are controlling water heating, but the equipment will be similar.
Wow. Does he know that control panels are essentially just a PID temperature controller, some solid state relays, and some big clunky knobs in a metal box? Anybody can DIY one with little to no knowlege of electricity. http://www.amazon.com/gp/product/B0087O6S2A/ref=pd_lpo_sbs_dp_ss_2?pf_rd_p=1944687622&amp;pf_rd_s=lpo-top-stripe-1&amp;pf_rd_t=201&amp;pf_rd_i=B002PIM3R8&amp;pf_rd_m=ATVPDKIKX0DER&amp;pf_rd_r=047MQEK1ETMMTNZBED62There's
No mysterious expensive computer inside.
It boggles my mind that anybody would think what your friend wants to do is a good idea. Then again, it sounds like he's probably pretty wealthy and it probably doesn't matter anyways.
Or just buy this thermostat on Amazon (not affiliate link)... This writeup might help, however lifehacker says " Energy usage with a chest-freezer-turned-fridge is barely 0.1kWh a day. Modern stand-up refrigerators use around 1kWh a day."
http://www.amazon.com/gp/offer-listing/B00KCCX0EE/ref=dp_olp_new_mbc?ie=UTF8&amp;condition=new
This one is $11.19 shipped and digital. Not sure of quality/reliability differences between the two.
I am just a homeowner but bought a seek thermal attachment for my iPhone - it was $218. If i were a pro and the ROI was there I would definitely be looking at a FlIR, but if your use case fits within the performance envelope (or for other non pro subs like me) , I have found for the price, it to be very useful in finding hot water lines in my walls, insulation gaps, air leaks, etc.
https://www.amazon.com/Seek-Thermal-Compact-Imager-iOS-Apple/dp/B00NYWABAA/ref=sr_1_1_sspa?ie=UTF8&amp;qid=1549291572&amp;sr=8-1-spons&amp;keywords=seek+thermal+camera&amp;psc=1
wouldn't be hard to bullshit into existence, either. seek thermal made a smartphone infrared camera attachment that is, relative to most other thermal imagers, dirt cheap. wouldn't be hard to mount that onto goggles, get some redneck thermal imaging headsets going.
Not if you buy a flashed version:
I use an inkbird hygrostat and a small dehumidifier in my curing chambers. I know you are using a mini fridge, but that dehumidifier is really small and holds the humidity level at 75% pretty consistently.
A couple things that really help with a home set-up:
If you don't have digital thermometers inside of your cage or a temperature checking thermal gun (something like this https://www.amazon.com/ANGGO-Non-contact-Temperature-Thermometer-Precisely/dp/B01FYVEJMY/ref=zg_bs_9931459011_6/139-0586439-0036854?_encoding=UTF8&psc=1&refRID=92JFJMYZYZGMZY071HNT), do yourself a favor and get one. It takes the guesswork and anxiety out of making sure they have a good temperature gradient. If you go with digital thermometers inside the cage, you need one that can read two different temperatures (can't find the exact one I used previously, but it was something like this https://www.acurite.com/indoor-outdoor-thermometer-with-probe.html) or two within the cage (they do make extremely small ones). You should also get a humidity gauge, again digital is better. Currently I use one humidity gauge in the center of each enclosure and a thermometer gun.
Do not use the little plastic thermometers/humidity gauges that stick to the side of the glass, aside from them being less accurate they can come off and stick to your snake, which is no good.
Check for any weak points in your enclosure often. If there is mesh, make sure there are no holes or stretched spots, they are escape artists and even if they don't escape, can hurt themselves in the attempt. Lids should be secured at all times you don't have eyes on the cage.
Feeding inside or outside of the cage is a hot button issue and I won't recommend one way or another, but I will say if you feed in cage, be careful about bedding ingestion, it can cause impaction (bowels becoming obstructed with indigestible material). If you feel your snake is ingesting bedding when you feed, try making sure the food item is completely dry when you put it in and also laying down something to feed on, like flat rocks (what I personally use), a paper plate, regular plate, or newspaper. Avoid paper towels, if blood gets on it, snake could ingest that too.
Make sure to clean any new cage decor, I use regular soap and water and rinse VERY well for everything that isn't porous. That can get a little tricky, but google "How to clean *insert the thing you are trying to clean*".
Clean water regularly. Regular handling (multiple short sessions is better than longer sessions) is the key to taming them down if they are a little wild (which really depends on age and previous home handling, younger snakes tend to be more nippy than adults). Give the snake a decent amount of time to acclimate to the enclosure before you start working on getting them used to you by handling, most I have heard say a week. Don't handle for around 24 hours after feeding.
Oh, and enjoy your new buddy!
That is about all I can think of at the moment, feel free to ask specific questions if you have them. :)
There's some plans online, however mine has an aluminum insulated collar while most have wood since I have a good friend who works in a sheetmetal shop. The taps, hoses and everything else you need to hook up the kegs is a kit you can buy and the digital controller was $40 on Amazon. Other than that it's just making the collar tall enough to go over your keg or kegs.
i used this https://www.amazon.com/gp/product/B01KNXETWS/ but i'm sure there's a variety you could use
I use heating strips — hard to tell in the pic. I’ve got black fabric headbands around them to cover the big green text printed around the outside of them ‘cause it bugged me haha. I have the three strips plugged into an extension cord which is plugged into an Inkbird digital thermostat (probably not 100% safe, but I wasn’t buying 3 thermostats haha). I have the probe taped to the outside of the middle jar (since I don’t like the idea of leaving it submerged in the brew). Heat strips: here ; thermostat here
Inkbird is developing a good reputation amongst homebrewers for good reason. But for this kind of thing, you really want a PID controller to manage the temperature a bit more precisely. Inkbird did just release an all in one setup that would do the job. Though, if you're not intimidated by the wiring, a PID, probe, and separate SSR can be had cheaper.
10.90
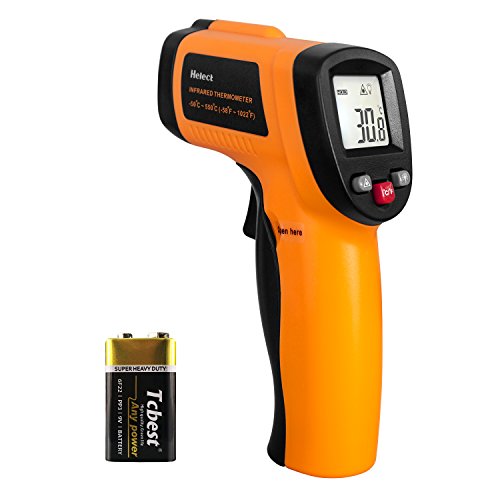
https://www.amazon.com/Infrared-Thermometer-Helect-Non-Contact-Temperature/dp/B071NBJJ2Q/ref=sr_1_4?keywords=temperature+gun&qid=1569601772&s=gateway&smid=A1RI0YHZ8J2HZU&sr=8-4
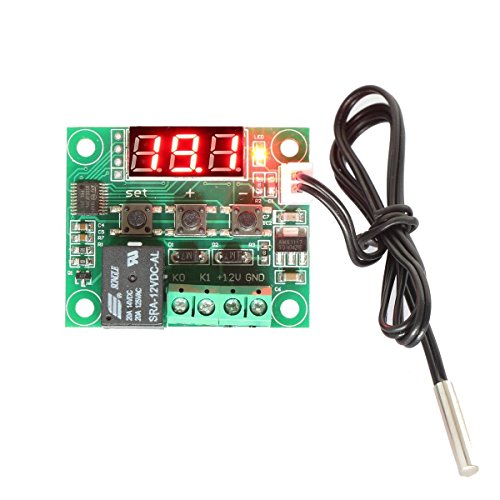
DIGITEN Digital LCD Thermostat Pre-wired Temperature Controller Heating Cooling 2 Stage Outlet https://www.amazon.com/dp/B071SDVLBG/ref=cm_sw_r_sms_apa_IOtQAbC0G64AG
Bam.
Good day everyone! this time the give away is ended. Congrats to our winners u/thescartographer from USA & u/MichelleTCM from Canada. Congratulation! I will PM you, pls check out your messages. Thank you everyone who entered! ☺️We've already got our next give away in the works so keep your eyes open for more chances to win free stuff!
Here are the 15% coupon codes if you are interested in.
US: G2UMWV9Q , https://www.amazon.com/dp/B07KC24CKD
CAN: KAV8MP3K , https://www.amazon.ca/dp/B07KF31BRT
(Enter code when you checkout)
get one of these things
https://www.amazon.com/Arctic-Star-AR550-Infrared-Thermometer/dp/B000MX5Y9C
really convenient for checking the temperature of soups when you're heating them up and for making custard. health inspector should be impressed too, they use the same thing.
get one of these things too
http://www.daymarksafety.com/date-coders/
instead of having to write out dates with a sharpie you just click this thing and slap a sticker with the date on a container.
there should be no reason to need any type of light, my house is at 70 and my Ball cage when he was in one stayed at 85ish in a 20 gallon tank, You definetly need a thermostat for the heat pad.
Ignore pretty much everything the pet store told you because most of them dont no crap about reptiles but how to sell a whole lot of stuff you dont need.
I also recommend getting a Infered thermometer similar to this https://www.amazon.com/Arctic-Star-AR550-Infrared-Thermometer/dp/B000MX5Y9C but look around they make them cheaper and do just as good.
the heating pad should be on the underside of the tank on the outside glass like so http://www.onlinegeckos.com/basic-leopard-gecko-tank-setup.html
I use a cheap analog rice cooker, these things basically spliced through an AC extension cord with a thermocouple. Works great and you can, y'know, cook rice too.
Also, /r/sousvide - join us.
Craigslist freezer - we chose upright for vertical space. Chest freezer might work - but you would have to figure out how to hang in it.
Temperature controller - there are lots of options. This one is the Johnson 419. You plug it into the wall then plug the freezer into the female lead. It cycles the freezer on and off at the set temperature. There are cheaper options - but I had this one laying around. I'll link some suggestions below.
The fan is a computer fan with speed switch. I wired it to an old 12v wall wort I had laying around in the parts bin.
Meat hooks are just stainless hooks - again from amazon.
Temp controllers:
Johnson - https://www.amazon.com/Johnson-Controls-Digital-Thermostat-Control/dp/B00368D6JA/ref=pd_sim_328_1?_encoding=UTF8&amp;psc=1&amp;refRID=SG7X9CB5Z0VYY8RM7EVB
If you're comfortable with electricity:
https://www.amazon.com/Lerway-All-Purpose-Temperature-Controller-Thermostat/dp/B00BMLCGF8/ref=sr_1_2?ie=UTF8&amp;qid=1481133568&amp;sr=8-2&amp;keywords=temperature+control
Best deal:
https://www.amazon.com/Inkbird-Temperature-Controller-Thermostat-Fermentation/dp/B015E2UFGM/ref=sr_1_1?ie=UTF8&amp;qid=1481133568&amp;sr=8-1&amp;keywords=temperature+control
Meat hooks:
https://www.amazon.com/Meat-Hooks-Inch-Pack-Pieces/dp/B0195CE08Q/ref=sr_1_3?ie=UTF8&amp;qid=1481133886&amp;sr=8-3&amp;keywords=meat+hooks
Fan:
https://www.amazon.com/Antec-TriCool-DBB-Cooling-3-Speed/dp/B00066ISES/ref=sr_1_5?ie=UTF8&amp;qid=1481133824&amp;sr=8-5&amp;keywords=speed+fan+computer
DIY sous vide style might be what you're looking for.
I've used this in my sous vide rig. You could wire this up to whatever electric (analog controlled) heating device you want. Then you only have to make it once and you'll know how long it takes.
Let me know if you want to know more.
I'd buy or rent one of these, turn on circuits, pull off cover panels on junction boxes and look for hot spots.
https://www.amazon.com/dp/B017IJF2JE/ref=cm_sw_r_awd_MQ16wbA4G2M8P
It appears to get any professional humidifier solution includes a fogger like mechanism. I won't get the cooling of an evaporative humidifier, but I should be able to keep up with the demand to add moisture to the environment.
&nbsp;
Last night I ordered one of these:
https://www.thehouseofhydro.com/store/p83/3_Disc_Mist_Maker.html
And these:
https://www.amazon.com/dp/B017IJF2JE/ref=cm_sw_r_tw_dp_U_x_ZCRRAbE9H02B6
&nbsp;
Add a bucket with the float valve connected to my R/O water and I'm back to a garden that does not need daily tending, but with now increased productivity!
Hot air station, Preheater, Dual thermometer.
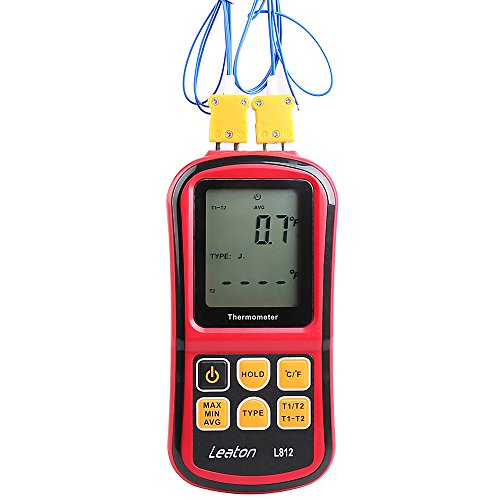
this simple hand held reader
https://www.amazon.com/Leaton-Thermocouple-Thermometer-Dual-channel-Temperature/dp/B018QHQSB8/ref=sr_1_5?keywords=thermocouple+reader&amp;qid=1567744707&amp;s=gateway&amp;sr=8-5
i leave one of the blue ones plugged in to get an ambient temp. i doubt the blue coating is food safe, so it doesn't go in the roaster
https://www.amazon.com/PerfectPrime-TL1004-HeadProbe-Thermocouple-Temperature/dp/B0142RXG84/ref=sr_1_10?keywords=thermocouple+type+k&amp;qid=1567744740&amp;s=gateway&amp;sr=8-10
that one goes in the roaster/bread chamber. i try to cram it to one corner, where it will move as little as possible. i have it low enough that i want the beans to be hitting it and giving me as close to a bean temp as possible. it has helped me a lot because i've had different green beans sound different at first crack, or not make the noise at all. so by seeing the temp, i can say "oh fuck, stop stop stop, that's reading way too high now".
Leaton Digital Thermocouple Thermometer Dual-channel LCD Backlight Temperature Meter Tester for K/J/T/E/R/S/N Great ( Batteries included ) https://www.amazon.com/dp/B018QHQSB8/ref=cm_sw_r_cp_apa_58A5BbBE01YJ2 is what I got. I only use it with one channel but it supports 2
I've been having good luck with these in my enclosures. I have a number of them, and they all agree to within a degree with each other and my other trusted thermometers.
I also use an IR gun style thermometer. I originally had the 981D, but it read like 6 degrees low and the seller replaced it with the 981C which is as accurate as these thermometers typically are (IR reading change by type of materials and the finish on it, which changes emissivity).
If you don't want to drop the money on an IR camera or rent one from Homedepot, you can get a laser infrared thermometer for around $15 and do it "manually"
https://www.amazon.com/ANGGO-Non-contact-Temperature-Thermometer-Precisely/dp/B01FYVEJMY
> The humidity controller is an Inkbird
By the way, Inkbird does a combo controler that controls both temperature and humidity with the same sensor
Hey using the exact same setup as you for a veg tent at the moment albeit I used 200W 6500k CFLs for bushier growth during first 10 days. I have a 240 CFM 6 inch inline fan I am using without any fan speed controller, I have all 3 flaps open for passive intake and my plants are thriving:
Proof: http://imgur.com/a/fMR5X
Trained 4 of them last night and here's a pic of one: http://i.imgur.com/gWDOjJL.jpg
I am using
https://www.amazon.com/Inkbird-Plug-n-Play-Humidifier-Dehumidifier-Temperature/dp/B01I6BZ2IO/ref=sr_1_1?s=industrial&amp;ie=UTF8&amp;qid=1481767548&amp;sr=1-1&amp;keywords=temperature+and+humidity+controller
and after you calibrate it to the AccuRite Humidity/Temp Monitor it'll work perfectly.
I plug in for temp when lights on (outlet 1) and humidity with lights off (outlet 2) for my exhaust fan. But unfortunately, since the tent is in a closet, it tends to get humid so fans are always on during lights on or off.
OK, Im just going to list a bunch of stuff I've purchased through this process. Nothing is in any particular order.
Almond leaves (for tannin) - https://www.amazon.com/gp/product/B00LKTX4VC/ref=oh_aui_detailpage_o03_s00?ie=UTF8&amp;psc=1
Moss - https://www.amazon.com/gp/product/B0035Q65TQ/ref=oh_aui_detailpage_o09_s00?ie=UTF8&amp;psc=1
Cholla Wood - https://www.amazon.com/gp/product/B01H4FUMHY/ref=oh_aui_detailpage_o00_s00?ie=UTF8&amp;psc=1
Dried red Shrimp (Protein and Chitin) - https://www.amazon.com/gp/product/B0027JCRVW/ref=oh_aui_detailpage_o00_s00?ie=UTF8&amp;psc=1
Instant Ocean (1/3cup per Gallon) - https://www.amazon.com/gp/product/B000255NKA/ref=oh_aui_detailpage_o00_s00?ie=UTF8&amp;psc=1
Ultrasonic Mister/Fogger (for DIY Fogger) - https://www.amazon.com/gp/product/B00PAK21WU/ref=oh_aui_detailpage_o04_s00?ie=UTF8&amp;psc=1
Digital Temp Humidity Controller - https://www.amazon.com/gp/product/B01I6BZ2IO/ref=oh_aui_detailpage_o05_s00?ie=UTF8&amp;psc=1
LED White/Blue Light - https://www.amazon.com/gp/product/B0191EWII2/ref=oh_aui_detailpage_o06_s00?ie=UTF8&amp;psc=1
UTH (You may need to get a different size and this isn't the most recommended, but it works for me currently) - https://www.amazon.com/gp/product/B00TR4HLEI/ref=oh_aui_detailpage_o06_s01?ie=UTF8&amp;psc=1 (This one has adhesive on the back of it, so you just stick it on like a sticker.)
Cork Bark Board - https://www.amazon.com/gp/product/B0019J1VPY/ref=oh_aui_detailpage_o07_s04?ie=UTF8&amp;psc=1
Water Conditioner - https://www.amazon.com/Seachem-116043304-Prime-500ml/dp/B00025694O
If you have any questions, please feel free. To mitigate confusion I felt just listing this as a reference first is the best approach. If you are looking for a new tank so that you can get friends, i would suggest 30 or more gallons and work towards that instead of investing into the current tank which would get changed.
Personally with the 5 i have i clearly see they need much more room than the 15 gallon they have now. I am in the process of acquiring an 85-120 gallon tank for permanency. These guys can live 20+ years with the proper care and environment. but not everyone has that freedom. 30 is a totally doable size for 3 crabs. they can grow to jumbos and be fine in there, but im sure if they reach that stage you'll be looking for another tank. Jumbos need at least 12" of substrate for molting.
Ok, northern lights. Day 14.
Started in rapid rooters then Planted in tupur by Gold Coast. Basically coco and perlite mixed.
Canna coco nutes currently at 1/3 recommended. Watered today after waiting 4 days.
All temps/ph is in the photo. I've ordered this and I'm just waiting on its delivery to get the temps higher and humidity in the right range via regulating the exhaust and a humidifier. So that should be fixed as soon as I get it.
Here's my problem, I watered 4 days ago with simple ph'd water(I'm only using nutes every other watering) Afterwards the two lowest true leaves started curling down. The tips touch the soil.
So I slowed down and waited 4 days, the top inch of soil (knuckle deep) was dry 12 hours later but the leaves still showed signs of overwatering so I waited 4 days. Today they were still curled but not as severely. The soil was bone dry 3" down (it's so dry the inside of my cabinet is littered with soil from the fan blowing it around)
Today I watered at 1/3 normal nute strength and the bottom leaves (only the first true leaves) are again curled down so far the tips touch the soil(you can see the tips in the picture on the left and right underside). Again indicating overwatering right?
So what do I do? Water even less? Wait 5-6-7 days?
I'm not soaking all the soil. Like I said it's super dry the next day. Just enough to soak a 5" ring around the plant and maybe get 1 cup of runoff. Which just like the water going in is at around 6.0ph.
Sorry for the long post, just trying to share all the pertinent info. This is my first grow in 6 years and I'm clearly rusty and not very confident.
Suggestions, ideas, insults, any guidance will do folks. Thanks.
YouTube video link for pid assembly
https://m.youtube.com/watch?v=Ra6Dn9tq7ks
Pid links:
Controller inkbird 106vh
https://www.amazon.com/Inkbird-Temperature-Thermostat-Controllers-Fahrenheit/dp/B01KNXETWS/ref=mp_s_a_1_4?keywords=inkbird+106vh&amp;qid=1567355320&amp;s=gateway&amp;sr=8-4
(4pc) 2-2packs
https://www.amazon.com/YXQ-Cartridge-Electric-Heating-Fittings/dp/B06XWB86GF/ref=pd_aw_fbt_328_img_2/133-1641262-1548304?_encoding=UTF8&amp;pd_rd_i=B06XWB86GF&amp;pd_rd_r=735bc2a1-e25f-4088-a7ad-d7e433f94b0a&amp;pd_rd_w=BRXp5&amp;pd_rd_wg=AjA5r&amp;pf_rd_p=3ecc74bd-d08f-44bd-96f3-d0c2b89f563a&amp;pf_rd_r=F7X5VADH85ZGY8GWENXA&amp;psc=1&amp;refRID=F7X5VADH85ZGY8GWENXA
(1per controller) if you want two controllers you need 2 cables https://www.amazon.com/Cable-Matters-2-Pack-Heavy-Extension/dp/B0153T1NF8/ref=pd_aw_fbt_60_img_3/133-1641262-1548304?_encoding=UTF8&amp;pd_rd_i=B0153T1LSM&amp;pd_rd_r=3977bf62-6ee0-490f-8e51-e018d34cce3e&amp;pd_rd_w=XfsUB&amp;pd_rd_wg=HoWmy&amp;pf_rd_p=3ecc74bd-d08f-44bd-96f3-d0c2b89f563a&amp;pf_rd_r=08T228RMHA18JN1FP6HJ&amp;psc=1&amp;refRID=08T228RMHA18JN1FP6HJ&amp;th=1
(1per controller) box for controller
https://www.amazon.com/BUD-Industries-CU-3283-Plastic-Utility/dp/B005T5A0W4/ref=mp_s_a_1_2?keywords=bud+industries+project+box&amp;qid=1567355758&amp;s=gateway&amp;sprefix=bud+industries+p&amp;sr=8-2
it was mentioned, but here is the link....try one of these
IF your heater doesnt turn off on its own, this will shut it down when it gets to the temp threshold of this heater controller.
Well it sounds like you're doing most everything right!
I'm not sure how much you've looked into thermostats but I'm currently using an Inkbird thermostat and a Hydrofarm and I like both of them! There's also the more reptile friendly ones like herpstat but your price range becomes $80+
Again, I'd recommend going with paper towel for his setup and possibly unplugging that unregulated heatpad... but I'm no expert! I'd also suggest leaving him alone for at least a week now that he's home beyond giving him water and checking to see if he's passed anything!
Thanks for being receptive to advice :) I'm super happy to help you can PM me if you need anything else! Also, Mojave isn't a recessive trait it's an incomplete or co-dominant trait. There's honestly so much to learn about morphs, literally thousands of combos!
I use this on my radiant oil heater:
https://smile.amazon.com/gp/product/B01M6WMUYI/ref=oh_aui_search_detailpage?ie=UTF8&amp;psc=1
Set it and forget it, even has a probe.
Inkbird released new model PID pre-wired controller. You can try this one. It can fit for sous vide, slow cooking.
https://www.amazon.com/dp/B06WD6X17V?m=A1RUFFFCQ74BCW&amp;ref_=v_sp_detail_page
First, these are all made in China, and, while very occasionally you hear of someone getting a faulty one, they pretty much always work. Unless you want to spend a huge amount of cash for brands like FLIR, which is completely unnecessary for confirming oven temps, there are no better or worse brands. So you'll want to look for the cheapest model that you can find that goes to the temperature that you need.
If this is your average home oven, you're not going to need a peak temp of 1022F. But if you think if you're ever going to get a Neapolitan capable oven, then 1022F can be helpful.
If you want 1022F, this will save you a whopping 39 cents over the one you linked to:
https://www.amazon.com/Infrared-Thermometer-Helect-Non-Contact-Temperature/dp/B071NBJJ2Q/
but, for what's available now, $14 is pretty reasonable for that peak temp.
If you've got some time, ebay might have something a little cheaper that ships directly from China- but that's generally about a month to ship.
Exo Terra sells a heat lamp and mount
7 inch lamp housing
bracket
The lamp housing supports up to a 150w bulb
And you might want to regulate it with a rheostat
Checking temps regularly with a temp gun
Or you can use a thermostat with the probe on the hot side to regulate the CHE, but I've heard of snakes moving them causing temps to drop or climb, depending.
Sorry to hear you did go through it. The important part is to use that lesson to your advantage! Or use this as an opportunity to join us on the evil salt side.
Edit:
This is the one. Good so far @ ~3 months.
DIGITEN Digital LCD Thermostat Pre-wired Temperature Controller Heating Cooling 2 Stage Outlet https://www.amazon.com/dp/B071SDVLBG/ref=cm_sw_r_cp_api_vGZdAbAAVVFNM
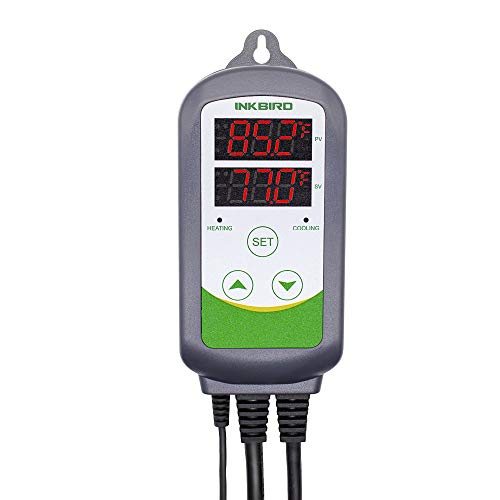
I used to experience the same heating problem. I have since started controlling my temperature from one of these and have had no issues. I also use mine to control a set of fans to cool my tank if needed.
Inkbird 10A 110V Digital Thermostat with Heat and Cool Relays ITC-308 Home Brewing https://www.amazon.com/dp/B074NYSHBM/ref=cm_sw_r_cp_apa_i_tqm3CbMJT9GQS
Check this out.
I found this https://i.imgur.com/gORCRm5.jpg, but it's a little hard to see. The mini fridge in the background is my old keg fridge that I use as my fermentation chamber. The temp controller I use is from Inkbird, just plug the fridge into the cooling port and set the temperature probe in a cup of water inside the fridge.
This is the US link to this model: https://www.amazon.com/dp/B07KC24CKD
If you can't find a decent small heater, can you find a temperature controller? In the U.S. you can get the Inkbird brand from Amazon for around $30 U.S. You plug the heater into it and it cuts power to the heater once it reaches desired temperature. I believe Finnex makes one as well. I know a number of saltwater reef keepers who use them as a backup to avoid heater failure catastrophes and keep the tanks from getting too hot.
We have this one at the lab I work at. I recommend it. It's a laser pointer and it instantly measures the surface temp of whatever the laser is on. I've gotten a reading on the back of a coworker's neck at 40 feet.
http://www.amazon.com/Arctic-Star-AR550-Infrared-Thermometer/dp/B000MX5Y9C
I'm just going to echo others stating that the stc1000 is probably not the controller you want for HERMS. Look at a PID like this: http://www.amazon.com/IMAGE%C2%AE-SSR-25DA-Auto-tuning-Temperature-Controller/dp/B0087O6S2A/ref=sr_1_1?ie=UTF8&amp;qid=1404837762&amp;sr=8-1&amp;keywords=pid
I went with this from Amazon.
It does not have an interal SSR that controls the other. Not sure if I've seen one that does. There are cheaper PID options out there, but, iirc, this was the best Prime deal I found that came with the SSR and heat sink.
Everything else in your post is spot on though as to why you'd want the PID over a temp controller.
I just use an stc 1000 temp controller with my heaters. I have used the cheap chinese heaters, eheim ,and most in between. I use the internal temp setting on the heater as a failsafe should my temp controller fail. Though the relays in the stc are n/o so they should fail off, not on. In any case I feel confident using any crap heater lying around since the temp controller is running the show, not some crappy bending metal thermostat trapped in the same tube as the heating element. The stc 1000 is like 15 bucks on amazon. They also make a similar version that is already wired up, though it costs a little more.
Pre wired https://www.amazon.com/dp/B015E2UFGM/ref=cm_sw_r_other_apa_RpJxxbCN93ZZE
Stc-1000 https://www.amazon.com/dp/B00BMLCGF8/ref=cm_sw_r_other_apa_vrJxxb8CMPCKW
I use 2 250 watt eheim currently in my dual 40b setup. That way if one fails my corals stay nice and warm while I replace it. I fear no overheating! Also I keep my house like 65 during winter. So I need some serious wattage. To keep my uncovered tank at 80f
I made one for maybe $60 and it works quite well.
Didn't really do it to save money. Just seemed like a fun project. It isn't quite done, but it is functional. Eventually it won't look so janky and will live in a project box of some sort.
Janky Sous Vide
Or be a big spender and get one of those $15 temp controls to cycle that light off and on.
I just ran into the same frustration with my DC-DC 40A Renogy charger. I ran all my wiring and have covered it with my wall so too late to run a line for the power on. I think I am going to just run splice it into the positive wire of my tail light, since I have DRL they are always on when the van is on and should have the same end result. Still, pretty frustrating!!
I noticed the DC DC charger had a temperature sensor accessory and purchased it, I assumed since it is compatible with LiFePo4 this has a low temp cut off (similar to my victron charge controller does with a temp sensor) but I am now afraid that may not be the case as there is no mention in the manual of a low temp cut off. I sent them an email to ask about it, and so far its been a week and no reply other than the automated "support ticket was opened expect a reply in 24 hours"
Hoping it does, but have a feeling it does not...I do plan to have a heater but it would suck if something went wrong and it was too cold and tried to charge the batteries. Worst case, I can install a temperature sensor relay so it only connects the power on line with something like this https://www.amazon.com/RioRand-Thermostat-Temperature-Controller-Waterproof/dp/B00KCCX0EE/ref=sr_1_1_sspa?keywords=temperature+relay&qid=1571857868&sr=8-1-spons&psc=1&spLa=ZW5jcnlwdGVkUXVhbGlmaWVyPUEzNDNYVUtNNzFVVDIyJmVuY3J5cHRlZElkPUEwMTMxMDYzMkRNSFNJRVcwOVZGTCZlbmNyeXB0ZWRBZElkPUEwNjIyMjA4S0k5WlBSSTRNRDBKJndpZGdldE5hbWU9c3BfYXRmJmFjdGlvbj1jbGlja1JlZGlyZWN0JmRvTm90TG9nQ2xpY2s9dHJ1ZQ==
Maybe I worded the question wrong, I'm referring to something like this
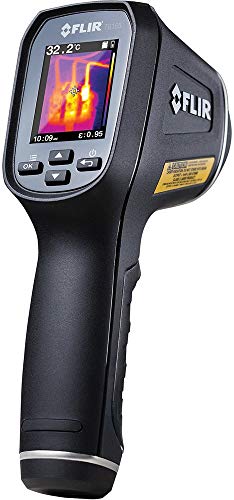
https://www.amazon.com/FLIR-TG165-Spot-Thermal-Camera/dp/B00NXJDQV0?crid=3NNBQ07R4891L&amp;keywords=flir+165&amp;qid=1538133418&amp;sprefix=flir+165&amp;sr=8-4&amp;ref=mp_s_a_1_4
I'll check out the seek brand as well
At this point, there are roughly three categories:
The bottom category is how most of us with thermal systems to mess around with have them.
I am pretty sure that /u/Yareaaeray is correct, but you could verify this with a thermal imaging camera:
https://www.amazon.com/FLIR-TG165-Spot-Thermal-Camera/dp/B00NXJDQV0
I can imagine the USB socket busting off the phone mounted ones under actual use.
Thanks for the recommendation! I'll have to get one of these things.
Amazon.com links
TG130 - $199 USD, no image capture [https://www.amazon.com/gp/aw/d/B01ALSO84E/ref=mp_s_a_1_1?ie=UTF8&amp;qid=1501424183&amp;sr=8-1&amp;pi=AC_SX236_SY340_FMwebp_QL65&amp;keywords=FLIR%2Btg130&amp;dpPl=1&amp;dpID=41oghPRgdOL&amp;ref=plSrch&amp;th=1&amp;psc=1] (https://www.amazon.com/gp/aw/d/B01ALSO84E/ref=mp_s_a_1_1?ie=UTF8&amp;qid=1501424183&amp;sr=8-1&amp;pi=AC_SX236_SY340_FMwebp_QL65&amp;keywords=FLIR%2Btg130&amp;dpPl=1&amp;dpID=41oghPRgdOL&amp;ref=plSrch&amp;th=1&amp;psc=1)
TG165 - $349 USD, save images to SD card https://www.amazon.com/gp/aw/d/B00NXJDQV0/ref=mp_s_a_1_1?ie=UTF8&qid=1501424183&sr=8-1&pi=AC_SX236_SY340_FMwebp_QL65&keywords=FLIR%2Btg130&dpPl=1&dpID=41oghPRgdOL&ref=plSrch&th=1&psc=1
Ah, I see what the issue is, I looked and mine is actually another brand: https://www.amazon.com/dp/B00NYWABAA/ref=cm_sw_em_r_mt_dp_U_BJWBCbXC2J4SF
Sorry for mis-statement
Like I said, when I bought mine, the handhelds were really expensive, like $500-1,000 and I think this was on sale for <$150. It did not have good battery life with my (rather old and failing phone, which had loads of battery issues so it was hard to tell what was at fault) BUT, on the other hand, even as a bee remover, I found that you only needed it for a minute tops, you snap a few pics, send to customer and that is all you need. I hear you on the port type. If I was buying again, I might do the handheld, but on the other hand my mentor had a lot of trouble with his very expensive handheld having problems later in its life, so maybe it is six of one half a dozen of the other. That reminds me, I have to check and see if my new phone is gonna work with the old heat camera! Swarm season is starting...
No need.
All you need is one of these things and a crock pot.
Getting everything working requires a bit of handiwork and some wiring, but it's a half hour project that has many uses beyond sous vide. I initially made mine for homebrewing, but now I use it more often for sous vide.
Here's a handy instructional.
I've found that water circulation isn't necessary unless you're doing large cuts in a massive crock, but if it's something you require you can use a high-temp water pump from Amazon for a few bucks.
All said my sous vide rig cost me about 40 bucks, plus putting the controller together was a fun project. I also use it to save money by controlling my fridge's temperature more precisely, control traditional crock meals more accurately, and to keep my space heater from over-heating my room.
Edit: I should have linked this: Inkbird ITC-1000
The other one only allows either cooling or heating at any given time as opposed to both at once. This other model is more versatile (though admittedly it won't make a difference for sous vide).
In Canada...
https://www.amazon.ca/Inkbird-ITC-2000-Temperature-Controller-Thermostat/dp/B00QQ02U42/ref=sr_1_fkmr0_2?ie=UTF8&amp;qid=1499280083&amp;sr=8-2-fkmr0&amp;keywords=Inkbird+Itc-308+Digital+Temperature+Controller+Outlet+Thermostat%2C+2-stage%2C+1100w%2C+w%2F+Sensor
Yowsa! That sounds flat-out luxurious. But take it from a guy with a reputation for overthinking it - you're waaay overthinking it. It's a beautiful design, but anything that takes me 6 months to build is an obstacle. Also consider this - it's a prototype design. It's almost certainly not going to be entirely right the first go-round. Do you really want to spend a ton of time and money building something that you'll probably remodel several times?
My suggestion is to build your enclosure to a reasonable minimum spec and then make the improvements you need. Up and running in a couple of weekends, test it, mod it, rinse, repeat. Once you know what works for you, then go all Taj Mahal on it.
I print polycarbonate at 310C, bed at 135-145C, and the enclosure at 65C. The following ideas are based on my own experience.
Most any sheet insulation used in construction will be flame retardant enough to be safe and much cheaper than durock & rockwool. More importantly, durock is heavy.
Cooling the motors is a great idea, but putting them outside the enclosure is better. Since you're running a delta, and assuming a Bowden extruder, you're mostly there already.
If you do want active cooling, consider this: if the waterblocks are all in the same fluid circuit you can control flow according to the exiting coolant temp.
I use this to manage enclosure temperature:
https://www.amazon.com/dp/B00QQ02U42
It's accurate enough and dead reliable. I haven't needed to cool the box yet but in the summer I'll add another unit to control the fan system. Basically like your description except I used old 12VDC 120mm PC case fans. Cheap, quiet, PWM-ready. You neither need nor want to move a lot of air.
Note the secondary alarm output. Reviews say that running any serious current on that output will kill the board, and the wiring diagrams explain that. It's meant to trip a relay, not power anything directly. The relay in turn would power an alarm system and maybe, I dunno, a servo-activated fire suppression system? :-)
Finally, a suggestion regarding the power supply. Crappy PSUs seem to be a primary factor in most printer-related fires, but a good one can be part of the "fire-avoidance" system.
I run a 24V system and power it off a converted pair of PC server PSUs, connected in series. They output 12V and 3.3V only, are ridiculously stable and efficient, and are designed to be reliable at constant high load. They're also hot-swappable, which matters because that means there are connectors for the wiring harness and no dangling excess. They have built-in current fault and over-temp shutoffs, and most have connectors for external safety sensors. They're cheap on the surplus market.
If you have basic soldering skills they're quite easy to convert. My setup is capable of 54A at 24V, powers up and down from the printers control board, and cost a total of about $30 and a couple of hours.
Buy an stc-1000 and follow any one of the many builds on this forum or on homebrewtalks. It's cheap, easy, and you get to learn something from it.
Mine has been attached for multiple years to the side of my fridge in a project box and works like a charm.
Inkbird makes dual programmable thermostat/hygrostat. They are fucking awesome.
Inkbird Pre-wired Plug Digital Humidity Controller,
[Inkbird Pre-Wired Dual Stage Digital Temperature Controller]
(http://www.amazon.com/dp/B015E2UFGM)
try one out, I think they're good.
Get yourself a humidity controller. It will automatically control a humidifier and dehumidifier to keep it at your set humidity levels.
https://www.amazon.ca/Inkbird-110V-Humidifier-Dehumidifier-Humidistat/dp/B017IJF2JE/ref=sr_1_7?gclid=Cj0KCQjw3JXtBRC8ARIsAEBHg4nNOYMOIcAa7S6zjcjWFOkuQiHVJrxqIsuiL1vm5xGDRhoZnVQPATgaAkluEALw_wcB&amp;hvadid=208343092706&amp;hvdev=t&amp;hvlocphy=9000673&amp;hvnetw=g&amp;hvpos=1t1&amp;hvqmt=e&amp;hvrand=15618826003650044879&amp;hvtargid=aud-748921816267%3Akwd-21760516&amp;hydadcr=23339_9622019&amp;keywords=humidity+control&amp;qid=1571169876&amp;sr=8-7
Here is theInkbird I have. Works great!
http://www.amazon.com/Thermocouple-Thermometer-Dual-channel-Backlight-Temperature/dp/B018QHQSB8/ref=sr_1_5?ie=UTF8&amp;qid=1462914613&amp;sr=8-5&amp;keywords=k+type+thermometer
https://kingpincooling.com/products/extreme-type-k-probe
would these do the job?
Personally, I like the type-K thermocouples because they are fast and accurate, and you can also switch out the probes (Thermoworks alone has a metric shitton of Type-K probes). I use a 39" wire probe for brewing, and a rigid penetration probe (hehe) for cooking.
For the meter itself (the thing you plug the probes into), Thermoworks has a bunch of them, though they're on the expensive side compared to a backlit two-probe meter from Amazon. I use one similar to this guy.
Any of them should be suitable, the more expensive ones typically just have faster response times. This one should be fine It just won't give instantaneous readings:
https://www.amazon.com/dp/B018QHQSB8
Aww jeez, Rick. That doesn't look good. I think the technical term for that is "cratered".
My guess would honestly be that the chip itself overheated due to the high current. This is a problem for a heatsink and maybe a fan. I hesitate to say this though, because both the trace AND the chip are utterly destroyed. Maybe a bad solder joint on the chip caused it to overheat?
Are you willing to sacrifice another channel of that board? Might be worth hooking up a stepper in such a way that it's permanently stalled and just running it until it pops, while carefully monitoring the board's temperature. You should at the very least be able to tape down a thermocouple with kapton, and they sell cheap dual K-type thermocouples with a digital readout on Amazon. I've personally had this one to over 700C, and while it DEFINITELY didn't like it and the insulation burned up, it still works. The best solution here is definitely a thermal camera, and if you can afford it you'll be able to pinpoint where the heat is coming from - the traces or the chip.
A good experiment would be to get a thermometer or thermal camera, and hook up one channel with a heatsink and one without. Monitor both chip's temperatures and see how hot they get, again with the motor stalled. The A4983 is supposed to be good to 150C before it detonates according to the datasheet, although it definitely won't be performing well at that temperature. If you see it getting close (within 20C or so) of that temperature, it's likely just not dissipating enough heat.
Would be very interested to see the redesign, if you decide to do one. If you haven't yet read Dave Jones' PCB layout tutorial, I suggest you do. Lots of really great information there, particularly about making your circuit boards neat and professional, not just so they work.
Minor edit: just thinking about the traces, remember that the ACTUAL current can be much higher than intended when you're working with motors or other large inductive loads. A "2A" limit can turn into 20A if something causes a large acceleration on the motor (like a robotic arm hitting a stop and stalling). That'll fry your trace if you specced it for 2A. Make the power traces big and fat. Bigger. Unless you're squeezing the other traces thinner (not just closer), you can go very large with your power traces. You're paying a flat rate for the amount of copper on the board, use it all. Don't squeeze out the ground plane (it's just as important) and don't squeeze the other traces too thin, but if there's any feel free to use it.
get this
https://www.amazon.com/Thermometer-Non-Contact-Temperature-Instant-read-Emissivity/dp/B019TRGYW2/ref=sr_1_5?ie=UTF8&amp;qid=1497666153&amp;sr=8-5&amp;keywords=Infrared+Thermometer
When you say foam, did you use a spray foam?
Or did you use polyiso?
You can get a cheapo infared gun to find the heat sources. An infared camera is much clearer however.
You can also use window sealers for the door and windows. Not sure how you would seal the garage though.
I'd recommend a digital temperature gauge with a probe or a temp gun. The temp gun would most likely be best. Downside is temp guns are a bit expensive sometimes but their worth it in the long run.
https://www.amazon.com/ANGGO-Non-contact-Temperature-Thermometer-Precisely/dp/B01FYVEJMY/ref=sr_1_2_sspa?s=home-garden&ie=UTF8&qid=1527639624&sr=1-2-spons&keywords=temp+gun&psc=1
This is the temp gun I use but it seems to be currently out of stock.
However this one should be fine.
https://www.amazon.com/Etekcity-Lasergrip-774-Non-contact-Thermometer/dp/B00837ZGRY/ref=sr_1_3?s=home-garden&ie=UTF8&qid=1527639624&sr=1-3&keywords=temp+gun
As far as UVB goes I'd get this bulb and fixture for both of the beardies. It will probably be a bit bigger than their current tanks but it'll save money when you have to upgrade each of them to 75 gallons at the very least as that is the minimum for full grown beardies. Although 4x2x2 is preferred. Do note 20 gallons only last a beardie until 6 months of age and then they must be moved to their final enclosure or a 40, 50 or 55 gallon. If you go with the grow out tanks then those will last another 6 months before you need the final enclosure since preferably you want them moved into the final enclosure at 12 months.
https://www.amazon.com/Reptile-T5HO-Standard-Fixture-Reflector/dp/B01B209YQC/ref=sr_1_5?s=pet-supplies&ie=UTF8&qid=1523586973&sr=1-5&keywords=t5+ho+fixture
\^ 34" T5 HO Fixture
https://www.amazon.com/Zoo-Med-26062-Reptisun-Fluorescent/dp/B00AQU8HKO/ref=pd_bxgy_199_img_2?_encoding=UTF8&pd_rd_i=B00AQU8HKO&pd_rd_r=ZNH52XHETCP3Y7K5FGA2&pd_rd_w=GIi1G&pd_rd_wg=oAEwd&psc=1&refRID=ZNH52XHETCP3Y7K5FGA2&dpID=31QDwNV8eSL&preST=_SY300_QL70_&dpSrc=detail
\^ 34" T5 HO 10.0
Inkbird ITC-100 PID Thermostat SSR Heat Sink: https://www.amazon.com/dp/B01MFAOLXX/ref=cm_sw_r_cp_api_i_Qn30Cb07FF17Q
Would this PID work (0-400F)? Or not sure if you use a different model with more 'channels' (I think you said you run 2 per platen, and I think from one unit?)...
https://www.amazon.com/dp/B01KNXETWS
In my old day job, I've used setups like this (for different purposes)... you might find this link handy (and maybe some within) - lots of tips for DIY lab stuff (which is entirely relevant for this venture!)... this specific link has a build for a precise/reliable "thermo-coupled heating pad" (within 0.1-0.01deg) - but maybe this is overkill (and ~$200) unless you've found reliability issues with cheaper units...
https://labrigger.com/blog/2011/09/28/diy-heat-pad/
https://www.mcmaster.com/38615k71
Otherwise, I'll wait for the post to get other details... thanks again!
https://www.amazon.com/gp/product/B01KNXETWS/ref=ppx_yo_dt_b_asin_title_o07_s00?ie=UTF8&amp;psc=1
For pico or small nano reef, one ABI PAR38 12W LED white-blue or tuna blue should be enough, see reef vases. It covers approx. 1 sq, ft of area, strongest in the middle, so for tanks with larger surface two-three of them could be used, for deeper tanks, 24W instead of 12W. For the start, hang them high above water level 12-14" and lower when corals accommodate to a new light.
FW lights are of the wrong spectrum, good for algae growth, and this should be avoided. No coral fluorescence without blues or actinics.
This AIO tank looks good to me, light has to be upgraded, check if flow is enough. I had 6 gal Nano Cube and pump had to be replaced (to MiniJet 606) and light was changed.
This sand, more than one time, was not an actual live sand for me, and it's too fine, you can get sand storms at water changes.
My reaction on this heater was "Are you joking?", it has to be 50W with built in temperature controller. For 80-82F it has to be adjustable heater, and you might need external temperature controller like Inkbird. 3 of my last adjustable heaters, reputable brands, couldn't keep temperature below 83F even on lowest settings. Mind that heater should be short enough and thin enough to fit back chamber above water pump. Cobalt Aquatics NeoTherm is flat, see if dimensions match.
Blood shrimp is a good choice, but, like a pistol shrimp, it grows big. No unasked for roommates in this volume. There are smaller shrimp, but I wouldn't risk trying them in the first year (sexy shrimp, anemone shrimp).
Aquascaping: LR structure in the middle (lease space for coral growth at the top), with 2-3 supporting "feet", lowering gradually to the left, right and a bit aside from front, more space for coral frags. Or, as with FW rock aquascaping, smaller mountains by sides.
Source of coral frags: online ordering works well, and do search for coral frags, shops in your locations should be shown first, they are out of the way, unlike big chain stores, but worth the trip there. See if BigAlsPets is somewhere nearby, they could have live corals section in store. If you are in US, AquaSwap, AquaBid, a lot of online frag stores, they ship with heat packs and corals arrive in good condition.
Kenya tree should eventually outgrow available space, and briareum looks not as nice to me as neon green star polyps. Rhodactis (hairy mushroom) should grow without problems if fed, even in low light, but it grows a little too big, comparing to common mushrooms. Neon green candycane, even single head, will grow to a colony. Branching frogspawn and hammer are similar in hardiness, but larger, they will use a lot of available area in this size of tank. A lot of corals are very tolerant, if not shock them by drastic changes or uncycled tank, and provide nutrition.
Refractometer or floating glass hydrometer to control salinity of the water you bought and in the tank, tape alone is not enough. Top off water (RO or distilled) should be slowly dripped in high flow area.
You will have to watch for ammonia at first, then for KH, NO3 and PO4.
Try this. I've used it for camping trips and it works great.
https://youtu.be/FaC0dlRENk0
Couple it with this. And keep it below 75.
https://www.amazon.com/dp/B01M6WMUYI/ref=cm_sw_r_cp_apa_sHb0zbRSER7F9
Yes, they should be the same, Inkbird also could be used for heating pads. See it here. Probe goes under water, away from heater, and maximal temperature should be set. Temperature fluctuation should be around 2C.
This is the best controller(albeit 120V) that I know of. It has a built in pump button as well.and is used in most of the clawhammer systems.
You can do it proper if you get some fans mounted in the windows and rig up a couple heating elements on separate 20 amp circuits. Don't forget the GFCI.
https://www.morebeer.com/products/weldless-stainless-steel-heating-element.html
https://smile.amazon.com/gp/product/B0049B3DIW/
https://www.brewhardware.com/product_p/hotrodrtu_xl.htm
https://smile.amazon.com/gp/product/B06WD6X17V
https://smile.amazon.com/gp/product/B000065DKJ/
https://www.homebrewing.org/10-Gallon-2-Weld-Volume-Marked-Brew-Pot_p_6827.html
Order a thermometer gun. Cheap and accurate. Heat mat goes on the outside of the glass on bottom of tank so they can warm their bellies. Usually they have a sticky side so you can stick it to the bottom of the tank. Keep to one side so theres a warm side and cool side of tank. Reptile carpet or tile is the best substrate- there is a pinned post at the top of the subreddit that has more info.
I haven't started my tank yet, planning on a 20 tall. I was going to use this.
https://www.amazon.com/dp/B071SDVLBG/ref=sspa_mw_detail_0?psc=1
Or something similar to combat possible heater runaway.
Thanks for the detailed response dude, I really appreciate it. Do you have a humidity and temp controller you recommend? I found this on Amazon. Im wondering if its worth it.
I think the easiest fridge to use is a freezerless design. You don't need a freezer at all, so a freezer just becomes wasted space. 4.4 cubic feet is a good size that doesn't take up too much space, but still has enough room for several ferments.
This is the temp controller I'm using. It's pretty good at managing the temp in the fridge. It's very easy to set up. You choose a target temp and a range. Mine is set to 75 degrees F with a 2 degree F range. The controller turns on the fridge at 77 degrees, and turns on the heater at 73 degrees F. Plug the fridge into the cooling outlet on the controller, and the heating mat goes into the heater plug on the controller.
I'm using a seedling heating mat to heat up the fridge. I'm not convinced that it's the best solution, but I'm going to give it a chance before I swap it out for something like a reptile heating coil.
Do your best not to drill any holes into the fridge! I murdered the fridge in the picture this morning and had to go out and buy another one. :( In the new fridge, I fished the temp sensor up the moisture drain and passed the heating mat cable through the door seal. It works just as well, and doesn't require any drilling.
I agree with adding a second hide. Hard to tell relative size without seeing the snake, but your current hide might be way too big. Here is one of mine sitting in her hide to show how snug and tight it should be in relation to the boa.
A UTH should be sufficient for a tub set-up unless your room is kept really cold. Be sure you have a thermostat to control the temps and I recommend a probe thermometer instead of a gauge.
Air holes will vary - if you have condensation building up inside the tub, then more air holes are necessary for adequate ventilation. If you drill too many air holes (indicated by an inability to keep humidity up even with moisture-loving substrate), you can fill 'em in with hot glue or just put a piece of tape over the hole (tape outside the tub). I usually end up putting one hole every 3-ish inches along the perimeter of the tub.
Yup as long as it doesn't come from an evergreen tree and you are confident that it hasn't been exposed to pesticides. You can soak a branch in diluted bleach overnight (rinse well afterwards of course) or bake in the oven on lowest heat for an hour to kill any bugs that might be living in it.
I use paper towel or newspaper for my new arrivals for the first 3 months at least. It's easier to spot health problems, and you can always switch to a nicer substrate later.
Mars hydro has 15% off link
Inkbird heat sensor 20% off for Amazon prime members link.
(Same for the humidity sensor switch I just don't have the link handy right now.
Yes. A thermostat is very important to maintain the appropriate temperature range. Heat mats can get very hot, too hot for your gecko. But a thermostat will keep it just perfect for your little friend.
My favorite thermostat is this Inkbird one from amazon.
You might also consider a separate temperature controller so your heater doesn't fall on. I use this one: https://www.amazon.com/gp/aw/d/B07KC24CKD/ref=ox_sc_saved_image_10?smid=A1RUFFFCQ74BCW&amp;psc=1
check it out
Price History
ReviewMeta: ★★★★✮ 4.6/5 from 26 valid reviews
CamelCamelCamel - [Info] │ Keepa - [Info]
_
Don't make a Rookie mistake, check the prices.
^(Info) ^| ^(Developer) ^| ^(Inquiries) ^| ^(Support Me!) ^| **[^(Report Bug)](/message/compose?to=The_White_Light&subject=Bug+Report&message=%2Fr%2Famazondealsus%2Fcomments%2Fcdp9wy%2Finkbird_wifi_temp_controller_lighting_deal_30off%2Fetvfo2u%2F%0D%0A%0D%0A%0D%0A%0D%0APlease+explain+here+what+you+expected+to+happen%2Fwhat+went+wrong.)**
USA!
https://www.amazon.com/Inkbird-Temperature-Controller-Controlling-Fermentation/dp/B07PVBG8K1/ref=sr_1_3?keywords=inkbird+wifi&amp;qid=1558332739&amp;s=gateway&amp;sr=8-3
Thank you very much for reply.
&#x200B;
>I don't know about where you are, but where I live, regulations require two layers of insulation between you and mains voltage.
I live in west-europe, so I guess we must have pretty strict similar regulations. Would you recommend taping all cables with electrical tapes as an extra safety measure?
>I'm also concerned that the metal screws might be live.
They are, would electrical tape not suffice?
>An easy way to deal with this might be too stack a second lid on top, although that does increase the risk of overheating.
I can do this and will do a test day to see how high temps go.
>Is there a suitable fuse?
All electricity in the house has fuses in the general fuse-box. Is that fine? I was also thinking of adding this: https://www.amazon.de/gp/product/B01N9NP1CV/ref=ox_sc_act_title_3?smid=A3JWKAKR8XB7XF&psc=1 as an extra safety measure just in case.
>Can the wires carry enough current? (They look okay, but I can't be sure just by looking at them.)
It's electrical wire I just found in the house. It's a single copper wire with about 1mm thickness. Thickness looked fine to me, but I wouldn't know tbh, I'm not electrically adept at all.
>What about heat dissipation? What will happen if your cooling fan fails?
I would like a way to shut down the lights if the fans fail, but I don't really know how to do that. I thought about using this: https://www.amazon.com/Inkbird-Max-1200W-Temperature-Controller-Greenhouse/dp/B07PVBG8K1/ It has a temperature sensor and you can shut off your "heating" in case it gets too warm. So if my fans would fail and it gets too hot, the lamps would shut off. And I also can get notified on my smartphone.
&#x200B;
This is the fan set-up: https://imgur.com/a/rny1aXL
Found this really nice connector thing: https://www.amazon.com/gp/product/B01MAU7QD4/ref=ppx_yo_dt_b_asin_title_o00_s00?ie=UTF8&psc=1
WiFi version will be $40
Edit: $35 https://www.amazon.com/Inkbird-Max-1200W-Temperature-Controller-Greenhouse/dp/B07PVBG8K1/ref=sr_1_3?keywords=inkbird&amp;qid=1563240500&amp;s=gateway&amp;smid=A1RUFFFCQ74BCW&amp;sr=8-3&amp;th=1
http://www.amazon.com/gp/aw/d/B000MX5Y9C
Quite simple really. Alton Brown swears by it