(Part 2) Best multi testers according to redditors
We found 825 Reddit comments discussing the best multi testers. We ranked the 228 resulting products by number of redditors who mentioned them. Here are the products ranked 21-40. You can also go back to the previous section.


And light it on fire?
I might actually say, this might be a time you might actually want to try and use... water...
Your going to want to remove the battery, and your gonna want to wait a few days for all the power to dissipate from capacitors..
If the water in your area is pretty bad, you might want something like this installed under your kitchen sink first to filter the water.. it's not a bad thing to have on your tap in that situation anyway.
Then just spray it down with the sprayer till it's clean, immerse it for 10-15 minutes in clean water. Then immerse it in 90% isopropyl alcohol to displace any water, remove minerals, and accelerate the drying process before corrosion can occur.
Stand the board upright, where airflow can get around all sides. It should be dry in about 2 hours, but I would still wait about 24 hours.
I have heard of people doing this with motherboards (particularly Mac classic motherboards) and having very positive results. Seeing as this board is already shorting and burning somewhere, it's worth a shot before outright replacement.
While this is also usually considered a bad idea, a really really bad idea... I like to clean out my PSU from time to time as well. It seems to extend the life considerably, especially OEM crap PSUs. I really don't like the idea of a combustible dust covering high-current capacitors.
This is also at your own risk, and it's dangerous.
First unplug your pc and press the power button to drain most of the power from the capacitors, and set the PC aside for a few DAYS!
Remove the PSU and open it, voiding the warranty. Using an air compressor with a moisture trap and a blower tip, (not a can of air!) blow out all the dust from the inside being careful not to touch a god damn thing. It might be a good bit of insurance to put an un-lubricated condom or glove with a hole at the end to insulate the tip of the nozzle just in case. Remove the fan, and clean it with isopropyl and if applicable add some 10 in 1 oil to the bearing. Reassemble the PSU as if it were a nuclear bomb, if you did everything right it should come on and run cooler than before.
I have this filter on my sink's cold water line. Last month out of curiosity I bought an EPA water test kit. Came back negative for any heavy metals, bacteria, nitrites, pesticides, or chlorine. Good enough for me.
I don't know what it would be like unfiltered, but for peace of mind I always run it through a filter just to account for things like old pipes.
Running like shit isn't normal, running lean and not being fun is.
Before starting on making sure it runs right watch this video
https://www.youtube.com/watch?v=70jokjTaGT4
Next never go back to the crappy dealer you went to, find a good mechanic you trust if you can't or don't want to work on your bike.
Pressure wash your bike, a clean bike is a much more enjoyable bike to deal with.
Grab a copy of the service manual here : Grab it soon I don't know how long the link will stay live
https://dl.dropboxusercontent.com/u/23536619/Honda-XR650L%20Service%20Manual.pdf
Carb's are easy to work on, they just seem scary, get some good screw drivers, the phillips looking ones are JIS ( google it ) and get flat ground straight blades, take a picture of every step, work slow and lay it all out where the cat won't walk through the work area.
Confirm you have a good tank of fuel, you would be amazed what duping the fuel and replacing it with ethanol free premium would do, on an XL you don't really need premium as it is like 9 to 1 compression ratio won't make a difference, but the no ethanol is nice if you can get it. I suggest adding Startron (fuel stabilizer) to every tank in case the bike sits at all.
Before you go spending money, do confirm that the plug wire is in good condition, the plug cap is in good condition, your stator is putting out good voltage and the regulator / rectifier is working. With a reasonable set of skills, a digital multi meter and a couple of beers this should take an hour. If you don't have a multimeter this one is a great little unit for cheap.
https://www.amazon.com/ELIKE-T-92-Self-Recovery-Capacitance-Identification/dp/B01B9P49B0/ref=pd_lpo_263_lp_t_4?ie=UTF8&psc=1&refRID=XRHTJ2KEEXVZHGTVFTFW
You should also confirm that your valves are in spec, not hard again and if you have the tank off it is all right there. The other half of the 6 pack and another hour at most.
That said all is pretty easily fixed, unless the motor in general is toast, so yes, dump the smog crap, open up the airbox, jet the bike properly, Dave's mods are good, even better fit an FCR carb jetted properly depending on budget, and grab at least a slip on muffler to lose a bit of weight and add performance and make the bike sound better.
Once you get it dialed in, spend money on suspension and brakes.
Go ride that beast.
These are parts I use consistently in my labs
Capacitor kit
Resistor kit
Jumper wires
Bread board(s)
Larger breadboard. Recommended for larger projects but I haven’t used it too much. Best for large IC circuits
Multimeter. This has all the right features
Other things that can be useful:
•Wire strippers
•Pliers
•Electrical Tape
•Tackle Box or tool bag (to carry everything)
•Flat jumper wires
As you get into classes you’ll need specific parts (transistors, logic gates etc) but this should get you started. I use the things I linked in every lab weekly.
Feel free to message me with any questions.
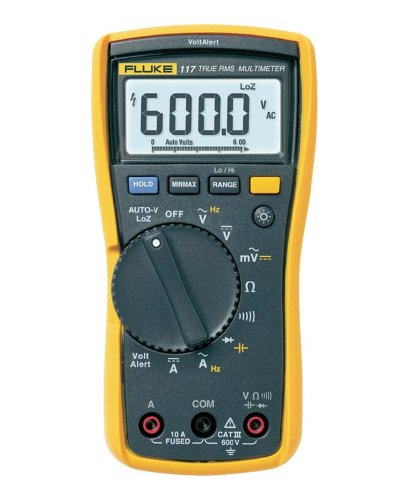
Fluke 117
I have this one and love it.
Found it on Amazon for $20
https://www.amazon.com/gp/product/B01D8G9GPW/ref=oh_aui_detailpage_o04_s00?ie=UTF8&psc=1
Works well, but a bit more novel then useful, because my old eyes can't really see the display very well when I'm using the saw. But at least it kind of gives me a general idea of how much current each piece of equipment uses.
go through your house with a multimeter/voltage tester.
shut each breaker off, one at a time.
make a map and note every outlet, switch, and light fixture, etc. and what breaker each goes to.
this will give you an idea of what the path is through the house. this ought to narrow it down some.
turn the breaker off for a mystery switch and use a toner to see if you can find the other end
https://www.amazon.com/Cable-Tracer-Tester-Generator-Signal/dp/B001MB759U
It's one of these. Allows me to keep track of how much power my car uses, since I rent out rooms in my house and don't think it's fair to make my roommates pay for the electricity my car uses.
Not possible for all three to be hot. You need to get a tester. They are about 10-25 bucks and can be purchased at any hardware store. Like this one:
http://www.amazon.com/Sperry-Instruments-VD6505-Adjustable-Sensor/dp/B000GLAC5G/ref=sr_1_6?ie=UTF8&qid=1414361365&sr=8-6&keywords=hot+wire+tester
With the power on wave this little unit beside each of the wires. One will be the hot one.
Then with the old switch you need to test the continuity between the different poles. This requires a different type of tool (a multimeter) which can also be purchased at any box hardware shop (lowes, home depot etc). Once you have figured out how the inside of the switch is connected then do the same with the new switch. Hook them up the same as when it worked before and there you go....
Alternatively, depending on the manufacturer of the switch, the common may be marked in the plastic backing of the switch. Quite often it is not and they just use the colors of the poles (brass, silver and black) to tell them apart. This isn't so convenient for people who aren't in the business of wiring switches all the time....
The other thing you should do is go open up the box for the other switch that controls this light and see how that one is hooked up. That can be very helpful as well.
In the picture, the red one is the common. It is not hot. I suspect the black one will be your hot.
Has he applied for any jobs yet? I was given one of those leather pads with paper inside and a holder for resumes (something like this) except it was from my undergrad university with their emblem. Definitely gives you some confidence for interviews and recruiting sessions. Also you can get him some nice resume paper to go with it. That lasted me for years.
I also enjoyed having one or two of these demotivational posters in my room. Depends on his humor and if he has barren walls like I did.
If you know more details about which raspberry pi he has, you could get some shield extensions. These are boards that expand its capabilities. There are also newer boards with better specs. Also with two boards you can of course make them talk to each other ;)
Depends on his area of interest and your budget, but you could get him some kind of [introductory FPGA kit] (http://store.digilentinc.com/fpga-programmable-logic/) or DE0-Nano.
Tools... so many tools he might be interested in. USB logic analyzers are so cheap these days and go well with hobby boards. Again not sure your budget, so you can go all sorts of ranges here (Open Workbench Logic Sniffer or scanaplus or Saleae Logic 8 or a china clone of Saleae Logic 8). Saleae or the knockoff I think are the better options for the software compatibility. He may be in need of a soldering iron or a multimeter.
Something else unique, you could get him a "gift card" (they don't really sell them) or an IOU to a PCB printing service. Ask him to design his own board and you'll pay $X of the service. You'll want to make sure he knows the price structure on the website because they charge per square inch and it depends on his design how many layers he may need. He makes the schematic and they will print some circuit boards for him. They won't mount the parts, just do the schematic and he would have to hand solder the components.
If he likes old videogames you could get him some old school USB controllers and tell him to install lakka on his rasberry pi, or just get him a new Raspberry Pi3 to dedicate it as an old-school console emulator. It is quite impressive how many consoles they have emulated.
And back to more tools... more micro screwdriver bits than you would actually need. You can get him a starter pack of resistors, capacitors, and other assorted electronics sparkfun. There are also so many buttons, switches, LED screen displays, etc. that he probably wouldn't want to buy on his own. Maybe you could get a container with an assortment of circuit components (resistors, capacitors, transistors, and other sensors). Careful! This can add up real quick. All types of sensors exist... ultrasonic rangefinder, stress, photocell, temperature, etc. etc. endless!.
Although not the cheapest, ebay is probably the easiest way to find faulty systems.
Some equipment recommendations:
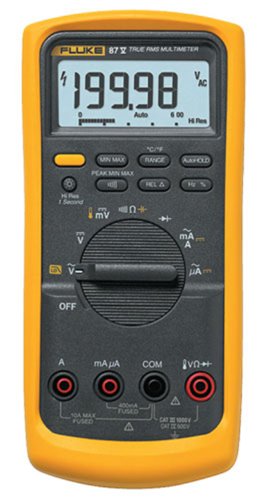
I recommend the Fluke 87 V. I have owned one for ten years or more - it will last and last and deliver consistently good performance if you take reasonable care of it. Fluke have tougher models if you are really going to kick your tools around. I recommend them unreservedly as far as their multimeter products.
http://www.amazon.com/Fluke-FLUKE-87-V-Digital-Multimeter/dp/B0002YFD1K/ref=sr_1_1?ie=UTF8&qid=1375305568&sr=8-1&keywords=fluke+87+v
Get a parts tester. There are tons of cheap clones out there. Or you can pay a few dollars more and get a model with a nicer case.
But ultimately, they are all the same thing and the differences are largely cosmetic. And they are all absolutely worth their money. It's a cheap but extremely useful tool to own.
I don't have the equipment to do it. For cheap, I might pick up something like this and run the pi off of it. If it holds at a steady amperage draw, you could calculate it out.
Suppose its drawing 250ma constantly. Without the solar panel in the picture, a 5000mah battery theoretically gets you 20hrs of use. It's literally just how many milliamps are being used multiplied by how many hours to arrive at mah.
I have a component tester which is really nice for sorting components. I just put on Youtube and sort away with it. Here it is.
Ok let me start at the beginning.
I now own my RadRover eBike for almost 7 months. Great bike, I'm closing in at 4000km on it. The bike is great but comes standard with a 48v battery and while it's decent, it doesn't compare to the Luna Dolphin 52v I run through it mostly.
I bought my 52v dolphin pack from luna cycle, as well as the advance 300 watt charger, their top model.
I always leave all my chargers plugged in even when not charging. None of my chargers have a problem except this advance charger I bought from luna.
After just 4 weeks the LCD stopped working that gave out the voltage read out, I had it warrantied, they send me a new LCD. And the weird thing is they had me manually open up the charger and do the replacement myself, rather then sending in the unit for exchange.
4 Weeks later the same LCD blew. I kept using the charger for another 2 months, and then the charger stopped working all together. I contacted support again, and they told me that the chargers are not very durable and should not be moved around, I told them it was in the same spot in my garage but they refused to replace it. They send me a 2Amp 52v charger instead, ($35)
I got pretty fed up.
I went to youtube to look for other options and I came across this a video of a Swedish guy who build his own charger.
Components looked solid and I have my own printer so I can customize it so I thought why not.
The whole reason this and many other chargers like this are failing is due to poor cooling, they have a 1x1" fan to cool as 12" box thats loaded with crap, this is why I wanted to do my own design that would focus around cooling.
Here is what I ordered
$12 - 2 of Bgears b-Blaster 90mm 2 Ball Bearing High Speed Extreme Airflow Fan
getting returned * $45 - LETOUR Power Supply 12V 40A 500W AC 110V/220V Voltage Converter
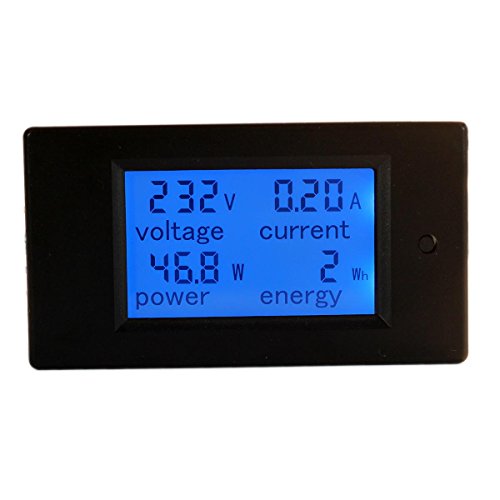
$22 - DROK® Digital Multimeter DC 6.5-100V 20A Voltage Amperage Power Energy Meter
$45 - Yeeco Numerical Control DC DC Boost Voltage Converter, 6-60V to 6-90V 10A 600W
$36 - DROK DC-DC Numerical Control Step Down Voltage Converter, 6-65V to 0-60V 8A 400W
$13 - Yeeco DC Motor Speed Control Driver Board 3V-35V 5A PWM Controller
$11 - DIGITEN DC 12V LED Digital Thermometer -50-220F Fahrenheit Temperature + Temp Probe Red
$7 - Switch I had one already but something like this will work
$10 - Screws I also had to mount the controllers + power supply to the PLA
$3 - LED Lights
$8 - Header Set of raisers x 2
$25 - PLA Wasted about 1 roll
total 212 CAD or $165 US
I've been printing for a couple months now so still a noob, and learning how to create in fusion 360, but for a first project it turned out pretty good.
I first tried this with a 500 watt 12V 40AMP power supply, which i though would work great with the step up converter to bring it up to 58.8v for my 52v battery, but it didn't, it's actually kinda bullshit advertising.
the 600 Watt step up converter I bought can only step up to 600 watts at 60v, at 12v it can only output 120 watts, 10a x 12v. Basically this charger could only charge at 120 watts / 58.8v, roughly 2 amps, or what a basic shitty charger that comes with the bike can do. No point of going through all this to make a 2 amp charger.
So I opted to switch to a 48v power supply, so i can get close to 480 watts out of the charger.
The new power supply came in and I got it up and running, but for the hell of me could not charge at more then 4 amps, I tested with bigger wires, and I didn't know why it was dropping to 30v under load. Then as i was putting it away for return, I saw the stupid small side switch that was set on 220v instead of 110v. I swapped it over to 110v, and viola the charger was flying at just over 7 amps, 7 x 53v or almost 400 watts.
Now it was time to build a case for this thing.
I designed the case in fusion 360 with cooling in mind, so I put 2 high cfm fans in, one at the top blowing air out, and the one on the bottom sucking air in.
Since the power supply is almost the size of my 300mm print bed, I knew I had to print it in 2 pieces and assemble it after.
Final assembly is still in progress, I have everything mounted in, cables hidden as much as I could, waiting on more black PLA, so i can reprint the top and make the bottom translucent with the LEDs behind.
I'm also waiting on more raisers to come, so I can bring the adjustable LCD for the Step up converter above the front cover. This way I can switch between the pre-sets I programed in, 48V Slow / Fast / Preserve ( 85% ) & 52V Slow / Fast / Preserve ( 85% )
I have a temp gauge in and it's showing a good 10 degrees cooler with the fans on. The whole idea of the fans is just to make a wind tunnel through the whole case. The step up and step down converter fans have been removed as they are not needed anymore. I also added a variable DC-DC knob thingy so I can adjust the fan speed, depending how fast I charge.
Before you say You shouldn't charge at such high amps, I actually charge around 6 amps on my 52v which has the upgraded high discharge rate cells and can handle alot more then 6 amps. And for the 48v stock battery I just run it at 3 Amps all day and it's pretty happy.
Questions ?
video of Nexi and his project
https://www.youtube.com/watch?v=vGrBT_P9Xfc
Here is a great multimeter with a lifetime warranty, but it is kinda expensive. But remember, it will pay off over time.
And Wiha makes high quality German drivers!
yes, with the optional toner
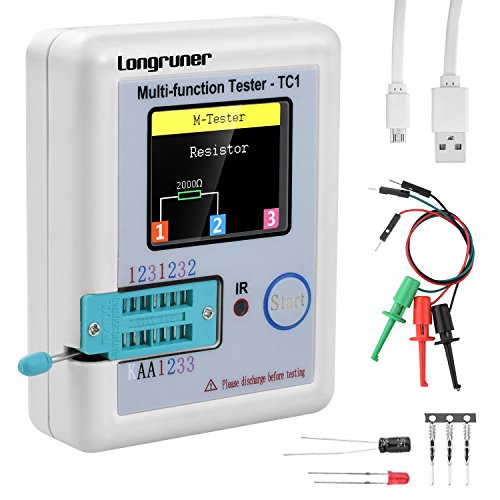
Mine is pretty old now (maybe 4 or 5 years old). The newer ones are all better. Here's an example with the same functionality and a better screen:
https://www.amazon.com/Longruner-Pocketable-Multifunctional-Backlight-Transistor/dp/B07C5LC486/ref=sr_1_4?keywords=transistor+tester&qid=1573321372&sr=8-4
You could likely consume less than you think. When I installed my mechanical interlock and power inlet I also installed a pair of these. They allow me to measure the power being consumed in realtime. When I powered it up the first time I was amazed at how little I actually consumed, so I kept turning on circuits until they were all on. In the winter with all zones heating, the lights all on, and the well pump running I didn't come close to topping out my 7k/9k generator. In the summer with 6 window AC units it gets sketchy if the well pump comes on, but still within the 7k limit. This is a big house. Now COULD it exceed it, sure. If all the ACs were to start their compressors at the same time and the well pump was running and the garage compressor is running I am sure the breaker would pop. It hasn't happened though. I turn off the mains and all circuits, move the interlock, bring on the generator circuit, make sure the voltage and frequency are stabile, then I bring each circuit on line and watch the power levels until they stabilize then add on until they are all running. I assumed I would eventually upgrade, but I doubt I am ever going to.
​
I prepared for this though. Find your electrical waste and get rid of it first, it saves you fuel in an emergency and money everytime else. Every bulb has been replaced with high efficiency LED. My heat is oil fired hydronic. All my stoves are LP.
An additional meter isn't difficult.
They sell digital meters that can be installed in-line between the outlet (or EVSE) and meter for like $20.
https://www.amazon.com/dp/B01MRZAFAF/
I mounted this in a two gang box between my HPWC and panel and it works great.
I have run an 8G boiler on one element using 110v and it worked just fine for me. I could bring a 7G wash to boil in under an hour. You really don't need more power than that if you are just running a 5G boiler.
I use this controller which is cheap and very effective, you could source cheaper (not much) if you want to shop around but tbh this kit is perfect for just getting up and running. It has everything in it, you just need some basic wiring skills, a cable and some plugs. If you wanted to you could also add a display to see what's going on inside it.
http://stilldragon.com/index.php/diy-small-controller.html
https://www.amazon.com/dp/B00YY1KOHA/ref=cm_sw_r_cp_api_GxaZAbR91VK84
Go get yourself a tick tester before you smash open your wall. I like the Sperry one with the adjustable knob, picked it up at my local hardware store for $15. Plug something into the receptacle like a lamp, and trace the wiring from that receptacle to the next. You should be able to trace the wire in the wall within an inch or two.
It would really surprise me that you are hanging a picture anywhere wiring would be strung, but who knows...
Reference to what I'm talking about: https://www.amazon.com/Sperry-Instruments-VD6505-Non-Contact-Sensitivity/dp/B000GLAC5G
This sounds similar to what I wanted to accomplish, and I'm getting closed to finish putting this together (I've been taking my sweet time on it... procrastinating in other words. I could have had it finished super fast). I wanted to have a solar setup to run a backup sump pump in case I lose power and I'm out of town. Here's what I have:
Solar panel kit. Comes with the controller (the little box that your panel plugs into that regulates the juice so your battery charges but doesn't overcharge).
Mounting Bracket for panel. There are a hundred different ways to mount a panel on a house or anything else. This is what I used. In hindsight, it was sort of a pain and I should have gotten a better one that attaches with two arms on either side, not just the one in the middle.
Pole that attaches to house for the mounting bracket.
Brace to go between that pole and the roof, because it turned out there's too much off-center weight and the pole wanted to pivot downward.
Deep cycle marine battery (I didn't get this online, but you can get them at all sorts of stores).
That's really all you need. Then you connect whatever 12v thing to the battery. You can wire up something like this to the battery to have convenient spots to plug stuff in. I'm actually building a whole "control panel" just because I like to go overkill. I'm including one of these multimeters so I can easily monitor the system at a quick glance.
I'll probably also incorporate a small inverter at some point so I can plug in lower-wattage A/C devices should the need arise. I'm also putting everything together in a way that I could expand it relatively easily (more panels, more batteries, even a small wind turbine).
So all that stuff I bought already came to about 190.00 plus battery (I don't remember.... let's say $130 for that). So once I include all the stuff I bought for the backup pump, pipes, conduit, extra wire, I'm still only at $500 or less.
You're asking a question that seems rather simple on your end but actually has a really wide scope of investigation. You're looking for a yes or no answer to your "is this safe?" question but the best I can give you is "it certainly should be". Scroll down to the end for the "final" answer.
> Presumably an EC approved device will not be giving off 'dirty current'.
I think you mean "CE", as reflected in your original post. If this is the case, be wary. Many Chinese-produced goods are now using the "CE" symbol without actual compliance in the required testing.
> But not being an electrician or an electronics buff I only understood the last sentence. It is not a specific answer in relation to the mvp 4.
Sure it is. It applies to all electronics operating on Direct Current charging from a Direct Current Power Supply. Nearly anything with a battery that charges off a "wall wart" power supply fits this description, your prospective MVP included.
> Does this device 'draw only the current required to operate'?
Again, my answer applies to all DC-operated consumer electronics. Your MVP is no different from your Cell Phone, or your Nintendo Switch.
>The word 'should' worries me
It should. Get it? Alright, enough of my poor jokes.
The reality we live in today where a staggeringly high percentage of consumer electronics are produced offshore with little to no safety oversight is that this is the best answer I can give you. "It Should". Any number of contributing factors might cause device failure from charging off an "unapproved" (if one could call any power supply "approved" to begin with) power supply.
Some examples include:
If you want to do some additional investigation yourself, go online and by an inline USB multimeter like this one: https://www.amazon.com/Diymore-Charging-Detector-Voltmeter-Multimeter/dp/B01L6Y3IMK/
Plug the male end of it into a few different power supplies and plug your devices into the female end. Try to use the shortest USB cables available to you, as they will not suffer from voltage drop as badly (although switching between long and short cables will actually illustrate what I mean by "voltage drop")
Observe the meter. USB Spec power is for 5V but a device may draw as much current as it requires, up to the maximum supplied by the power supply. How much is your device actually drawing? Many devices say they will charge at 2 Amps, but that is in laboratory conditions. Many times, 1.2 - 1.5 Amps is common. Is the Voltage remaining constant? A power supply will often supply more than 5V before the load is attached, so that when the load is attached, it actually sags down into the correct range of ~5V. It's normal to see the Voltage fluctuate a little bit. Maybe a range of 4.9-5.1V is normal, but any more or less than that could be potentially harmful to your device. Try a cheap power supply from a gas station, now try a quality one (perhaps the one that came with a Samsung/LG/Apple smartphone). Observe the differences.
The long and short of my answer is that if the device you're attempting to charge says it can charge at 2A USB (5V), plugging it into a 2.4A USB power supply should not damage it. If it is damaged by this operation, either the power supply or the device was defective by design or manufacture to begin with. Sorry for the wall of words.
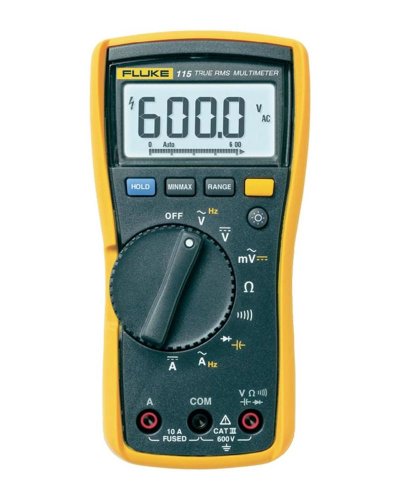
Start with a good meter. A Fluke 115 or a 117 is a good first choice for a entry-level avionics work.
I stayed strictly in avionics and never dumped money into a toolbox --- I bought a Snapon bag, and a good tackle / pin box for my contacts, terminals, splices, etc. I love that it's more portable, but big enough for everything I need.
This is the close thing I could find. Item 1
And this one is close to what you want if you look at image 3. Item 2
I have the 115:
https://www.amazon.com/gp/product/B000OCFFMW/ref=oh_aui_search_detailpage?ie=UTF8&psc=1
It's a closed-loop current meter wired into the 240v circuit (e.g. the current transformer coil goes over one leg of the 240v circuit, and the device is powered with one lead going to each hot leg).
This is the unit: https://www.amazon.com/gp/product/B00YY1KOHA/
It was actually the fluke 100 pocket meter. I remembered wrong.
Just an FYI, you can get a basic Fluke multimeter for $40.
Truth! You don't need a Fluke or anything fancy. A $20 meter is more than adequate. Though I kinda wonder what al you get with a $200 multimeter now.
Things like and use:
Multimeter
http://www.amazon.com/Fluke-115-Compact-True-RMS-Multimeter/dp/B000OCFFMW
Rejuvenator B&K 467
https://youtu.be/Vw7nmuGdDs0
Desoldering System
www.circuitspecialists.com/Compact_Desoldering_System.html
Piano Dolly
http://www.amazon.com/gp/aw/d/B008O38RRI/ref=mp_s_a_1_1?qid=1462964894&sr=8-1&pi=SY200_QL40&keywords=piano+dolly&dpPl=1&dpID=41KxMtcoCtL&ref=plSrch
Soldering Iron
http://www.amazon.com/gp/aw/d/B000ARU9PO/ref=mp_s_a_1_3?qid=1462964939&sr=8-3&pi=SX200_QL40&keywords=weller+soldering+iron&dpPl=1&dpID=41QcOpgh0eL&ref=plSrch
Nah, relax - got to be something simple.
Something like this... a handy thing. the back of your keys ? USB B? The tall fat one? Have you tried putting that into a usb hub and drive that hub with a usbc connector?
https://www.amazon.com/Eversame-Multimeter-Voltmeter-Indicator-DC3-6-30V/dp/B07JYVPLLJ/ref=sr_1_4?crid=3E7VM6QDFO8MB&keywords=usb+c+tester+meter&qid=1567037957&s=gateway&sprefix=usb+c+te%2Caps%2C152&sr=8-4
Buy a toner ( http://www.amazon.com/Cable-Tracer-Tester-Generator-Signal/dp/B001MB759U )
Turn off the panel and attach the toner to the outlet.
You can then trace the wiring through the house.
When it stops beeping you've found the problem area
Neither. They are both junk. Save up and get this instead...Brymen makes a damn good MM.
https://smile.amazon.com/EEVblog-BM235-Brymen-Multimeter/dp/B01JZ1ADCO/ref=sr_1_1?crid=1UGAJAELTA0QE&keywords=eevblog+brymen+bm235+multimeter&qid=1568772157&s=gateway&sprefix=Eevblog%2Caps%2C164&sr=8-1
If you go with a new meter for an apprentice, this is only a few bucks more than the 15b and is likely what he will be expected to have anyway.
Others have already mentioned that it is either your total wattage, or a cable or device that is worn out and causing a bit of a short circuit.
What might be worthwhile to diagnose this is a simple USB volt/current meter. You plug that in the USB port, and the device plugs into that. You can see how much current it draws, and also if the output voltage of your port starts to sag.
Example: https://www.amazon.com/Display-Tester-Current-Detector-Charger/dp/B015F83X0U/
(Note: never used one myself, I just found you a random one on Amazon, no idea how well this particular item performs).
Really, I should have dug up a model like this one:
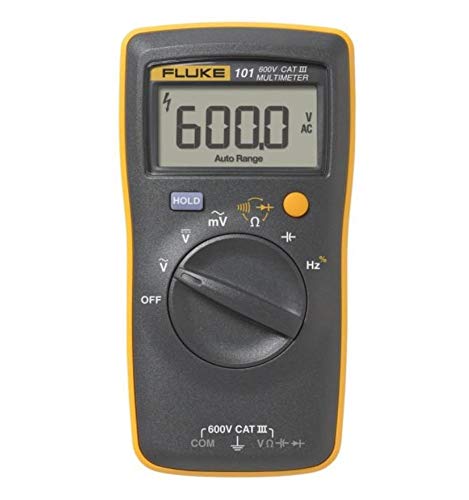
https://www.amazon.com/Fluke-101-Multimeter-Equipment-Industrial/dp/B00JT5RUUU
The 15b+ I linked first is more than is needed here - as for the difference, a big one is fidelity/sensitivity. The 15b+ can read milli and micro amps. So it's good for fussy tiny electronics projects.
The one you linked will work - but has features you don't need and thus don't need to *pay* for.
​
So winding back up - really something like the 101 or version or two up from that is what you'd want.
You can put a current monitor on the electrical feed to the charging unit and it will keep track of the total electrical use by the charger. These units are typically less than $50. Here's an example on Amazon: current monitor
Swapping out switches really isn't that difficult, the only tool you need is a screwdriver. It's not a bad idea to have a non-contact voltage detector as well.
Step 1: Locate your breaker box
Step 2: Turn off the breaker supplying power to the switch you want to replace
Step 3: Check that there is no voltage at the switch with your new handy-dandy voltage sensor
Step 4: Take off the switch faceplate, then unscrew the existing switch from the box. Pull it out gently and inspect, take a photo so you can put it back the way it was if you need to.
Step 5: There are two wires connected to the switch, one comes from the breaker you just turned off, the other goes on to the light/outlet/whatever the switch controls. The switch's job is just to connect and disconnect those two together. Unscrew the wires from the old, screw them into the new.
Step 6: Carefully push the new switch into the box and screw it back in. Replace the faceplate.
Step 7: Flip the breaker back on
Step 8: Test your new switch
Step 9: Crack open a beer, you haven't shocked or killed yourself, time to celebrate.
amazon.com/dp/B000OCFFMW
In the Amazon listing, the label on the 12 V plug says that it will output up to 1,500 mA (
1.5 A), which, from a 12 V power source should mean it would draw up to about 650 mA.That being said, I have no idea how much current it's drawing when turned "off" and unfortunately, since the USB cable and 12 V adapter are all one unit, you can't use a cheap little "USB Doctor" current tester. You would need to poke around with a multimeter or use a dedicated automotive current tester, at which point, if you don't already own either of those, you may as well just invest the money in a new dashcam instead.
It sounds like you want one of those USB power meters. This would be hardware device that plugs in between your phone and the charger. Here is one example:
https://www.amazon.com/dp/B07JYVPLLJ/ref=cm_sw_r_cp_apa_i_T0z4CbQW2PD58
You could even get it on Amazon too - $32.39
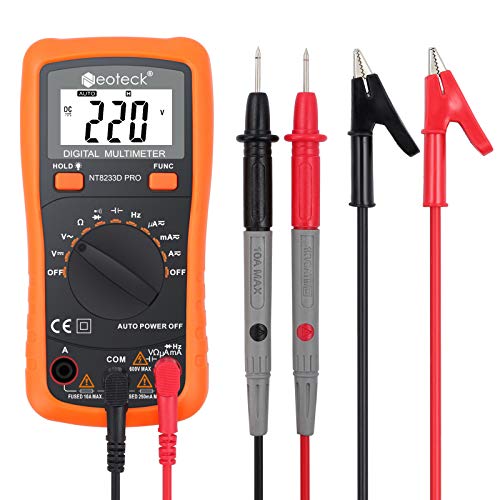
If you are going to buy a multimeter it's worth spending a little extra and getting one that auto ranges. https://www.amazon.com/Neoteck-Multimeter-Multimeters-Resistance-Transistor/dp/B01NAVAT9S
If you don't need the Arduino for anything else, a USBasp programmer will do the job instead. Just make sure you get one with a 6-pin connector included. https://www.amazon.com/Paddsun-Programming-Programmer-Quadcopter-ATMEGA128/dp/B01IBFMJEA
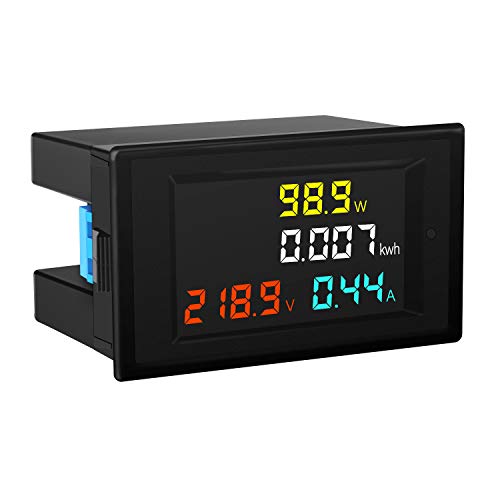
Ac meter: bayite AC 80-260V 100A BYT-VAEM-034 Digital Current Voltage Power Energy Analyzer Meter Ammeter Voltmeter with Open-close Current Transformer Split Core CT https://www.amazon.com/dp/B01D8G9GPW/ref=cm_sw_r_cp_apa_v2hPzb2TNZDNP
Dc meter: bayite DC 6.5-100V 0-100A LCD Display Digital Current Voltage Power Energy Meter Multimeter Ammeter Voltmeter with 100A Current Shunt https://www.amazon.com/dp/B013PKYILS/ref=cm_sw_r_cp_apa_g3hPzbSXR3EHB
Ok, then maybe then a combo of this:
https://www.amazon.com/Olight-Universal-Magnetic-Charger-Batteries/dp/B071NZ5S3F/
and this:
https://www.amazon.com/Diymore-Charging-Detector-Voltmeter-Multimeter/dp/B01L6Y3IMK/
but I never tried them, however, together they would be quite small to carry
Yeah I used a nice fluke when I was doing high school robotics. Right now I've got my eyes on the Brymen BM235
OK, that makes what you can do somewhat more limited. Can you get your hands on a multimeter -- at worst, you should probably be able to acquire yourself a cheap one?
That would allow you to, for example, measure current as a function of voltage, and compare ohmic materials (resistors, etc.) with things that don't have a linear response curve -- light bulbs, diodes (LEDs), and so on. Also many other things, but that was an example that occurred to me as a pretty classic E&M demo lab that is still pretty open to creativity.
E: It would appear that /u/journeymanpedant had the same idea, although specifically focused on diodes.
I wouldn't rely on anything that cheap, it's just in my truck toolbox for quick charging system checks. Something I can run over and not care about.
Generally anything sub-$100 is considered "cheap" by multimeter standards, Fluke makes the most popular meters, really the industry workhorses. They have a new entry level model called the 101 for $70.
The Extech EX330 is a popular cheaper model, I've seen it as low as $40.
Edit: Check out this video, the EX330 was the favorite of the bunch.
not an expert, but I think the units on your VAC (V~, the skwiggly line is the symbol for AC-alternating current. The other symbol is DC, direct current) are too high. I had the same problem with the first multimeter I bought. The V~ didn't go down to 2V, it started at either 20V or 200V. The one I got that works is: https://smile.amazon.com/gp/product/B01NAVAT9S/ref=oh_aui_detailpage_o01_s00?ie=UTF8&psc=1
The AC Voltage range on that one is: 2V/20V/200V+-/ 600V+-
2V (AC) is the likely range your body voltage will be.
You're right, 104 watts of CFL from to F-3 (V59) to F44. So 0.69 g/watt based off the total wattage or 1.02 g/watt taking into consideration the number of days with each light power. If I broke it down into number of hours, it would be even higher because I ran 24/0 all during veg and only had the 133 watt vipar. I was just trying to add a perspective though. I wouldn't say I'm a good grower at all, I made a ton of mistakes.
The whole point I'm trying to make, and tried to make in one of the other threads recently, is that I think its kinda pointless talking about g/watt without talking about other things like veg period, growing media and feeding/watering theory, other supplements, genetics, and more. I love the debate and thinking about things more though!
What we need is g/watt*day, or g/kWh, but most people won't calculate that I think. I have a [this] (https://www.amazon.com/gp/product/B017FSED9I/ref=oh_aui_detailpage_o03_s00?ie=UTF8&psc=1) little guy on my new strip lights and pepper lights and it's awesome (so far, 3 weeks in) and does track the kWh over time, even when the power goes off every night (bonus, the device turns off with the lights so no worries with light in flower).
Maybe it goes to show that extra light during that early-mid flower does a lot and later flower doesn't need as much, or can't use it all as effectively. This is just a crazy thought though.
You are going to want a DMM to confirm. If you look at the relays, there is going to be a schematic on the side. I've attached an image. The rectangle with the diagonal through it is the coil. This is standard on relays. Once energized, it pulls in the relay, closing the contacts. With this setup, you can switch a higher power / voltage with a lower one. It allows automotive computers to switch stuff on and off. In this case, your coil pins are 85 and 86, and contact pins are 87 and 30. Don't mind the empty square. It is a flyback diode. No need to concern yourself with it.
Now, what you will want to do, is pull out the relay for the windshield wipers, find out which pins are the coil pins by examining the schematic on the relay, and then using a DMM with the black probe on COM, the red probe on V and set to ~10VDC (or if auto ranging, the straight line with the dotted line indicates your DC setting), and read across those pins on the distribution block that the relay plugs into.
If you read voltage there, something is keeping that relay energized, rather than the relay being the problem.
If you do NOT read a voltage there, read each side to the frame of the vehicle or the (-) battery post and see if you get a voltage. This is just to double check. Report back here.
Now, if you don't have a DMM, I suggest you get yourself one. Don't get one from the parts store. The cost is about as much as a relay. Get yourself one. They are a fantastic investment and so handy once you know how to use them. They will pay for themselves in no time. Personally, I own several. Some high quality, some mid tier and some low. Here are a few of my favorites:
Fluke 115 (around $150, but by far not necessary)
Fluke T-xx (not that great for automotive stuff. Amazing meter, but I would pick something else)
Klein CL700 (this one is around 100, has amp clamp for AC readings. I carry it at work and love it) (Home Depot)
Ideal clamp meters. I just love the look and feel of them. They do well. (get at Menards)
I've also had my eye on this one in the budget range:
https://www.amazon.com/gp/product/B071JL6LLL/ref=ox_sc_saved_title_5?smid=A2NOFZGOKNP3PJ&psc=1
If in doubt, hit up an electrical supply house and ask what meter they have in the 40-50 dollar range. They can point you to a budget meter that you can rely on.
https://www.12voltplanet.co.uk/user/Relay_with_resistor_across_coil.png
Yes, you are just cutting out the inefficient wall-wart that (in a DC-AC-DC system) wastes your battery for no reason! That 4A is based on that AC conversion, so will most likely pull less than 4A under actual DC use. Also, don't forget that's the MAX the AC adapter will provide, so you should be good. As was said... watch your battery closely.
A good idea is to buy a simple DROK DC meter (I use one of these: https://www.amazon.com/gp/product/B017FSED9I). It'll tell you the battery voltage, and the power used by the end devices attached.
As little as possible. The more crap you have, the more it weighs you down.
That said, every home needs some necessities to get by. For me those generally involve cooking, sleeping, and repairs. I just finished watching Parks & Rec and am in a bit of a Ron Swanson mood.
For the kitchen (all recommended by America's Test Kitchen):
Victorinox 8" Chef's Knife
Victorinox Paring knife
CDN Instant Read Thermometer
Lodge 12" skillet - cheap and will last you forever
Crockpot, 6qt - the one kitchen appliance I'd cheat with. Easy delicious meals. Toss in a cheap cut of meat (chuck roast, etc), salt, pepper, garlic, onions, carrots, whatever. Let it sit for 6-8 hours. Dinner for 3 meals.
Tools:
I'd probably just pick up a cheap set of craftsman stuff (screwdrivers, hammer, sockets, pliers). Splurge on the ratchet and any power tools you need:
Bahco 3/8" ratchet - same as snapon F80 at 1/2 the price
Other misc. tools that are quite handy:
Magnetic stud finder - in a new place you're going to be hanging pictures, installing shelving, and mounting curtain rods. These are dirt cheap and super convenient.
Multimeter - Flukes will last you for life. If you need to do any electrical work, these are great. If you don't want to splurge up front just borrow them or buy a cheap $15 one at home depot.
Bedroom:
Get comfortable pillows and nice sheets. Don't get all caught up in the 1000 thread count crap, it's a hoax. Just get at least 400tc or so, and preferably egyptian or pima cotton. My favorite sheets are actually a super cheapo brand that are 60% cotton 40% polyester. I prefer them because they feel more "smooth and cool" rather than "soft and warm".
Obviously get real furniture: dresser, bed with headboard, etc.
Electronics
I won't go into too much detail here, but consider cutting the cord (/r/cordcutters).
A cheap Roku3 + netflix + an OTA antenna can go a long way.
If you have a lot of pictures/media/etc, don't forget about backups. I'd look into an inexpensive NAS, or at least a USB harddrive. They are dirt cheap and worth the insurance.
Insurance
Lastly, don't forget renters or homeowners insurance. If you are renting, you can get rather good coverage for quite cheap. I just paid around $50 for 12 months of coverage on my apartment ($15k coverage, $1k deductible). I shopped around at 5 different places and Amica came out the cheapest by FAR.
Other than that, you don't need much. Buy less crap. Don't buy some $50 automatic electronic wine opener when a $1 wine key will do the job. Same for a can opener.
Digikey panel meters with voltage and current
These get pretty expensive though. Especially if you want all of them in a single panel meter.
Might be cheaper/easier to get separate panel meters.
I've been using these cheapo power meters to monitor power to my 3D printer. They're "rated" for 20A, but I'd be uncomfortable pushing them so far.
There's an AC version too.
https://www.amazon.com/bayite-BYT-VAEM-034-Voltmeter-Open-close-Transformer/dp/B01D8G9GPW/ref=sr_1_1?s=hi&ie=UTF8&qid=1485269694&sr=1-1&keywords=ac+energy+meter
https://www.amazon.com/UCTRONICS-80-260V-Multifunction-Voltmeter-Transformer/dp/B01K9JD53U/ref=sr_1_3?s=hi&ie=UTF8&qid=1485269694&sr=1-3&keywords=ac+energy+meter
Could wire one of these up.
This one is not the most aesthetically pleasing but I think it will do the job
While searching for a drive power database, I stumbled upon this tool. Really cool. Could be useful...
What powerbank did you use?
This would be the first time I've heard of a Switch bricking on a power bank if this is indeed a brick. If the battery is completely flat (some powerbanks will not work with the switch). It won't show any signs of life. I suggest leave the switch on its dock or on the stock charger for as long as possible and see what happens. If you're not seeing signs of life after, and you're out of warranty and are not scared to open it, you can try a different battery that is charged. If taking it apart is not your speed, there's another option. Get a voltameter like this one https://www.amazon.com/Eversame-Multimeter-Voltmeter-Indicator-DC3-6-30V/dp/B07JYVPLLJ/ref=sr_1_1_sspa?crid=XD3MEGPIJZU9&keywords=usb+c+voltage+tester&qid=1562739257&s=gateway&sprefix=usb+c+volt%2Cmobile%2C159&sr=8-1-spons&psc=1
Or a regular usb one and see if any amperage is flowing to the console. If its charging it should report at least .40 amps. Any lower or zero indicates that likely the power management chip is dead. This can be fixed by getting a new chip and soldering it to the board. If all else fails, you can sell the switch as broken (even tablet only for around $100) and someone capable of fixing it may just buy it.
Brutal!!! My stack draws ~950W. Around 600kWh/month. I have a dedicated 20amp circuit and threw a meter on there from Amazon: bayite AC 80-260V 100A... https://www.amazon.com/dp/B01D8G9GPW?ref=ppx_pop_mob_ap_share
> USB digital volt /amp meter from Amazon
Something like this?
https://www.amazon.com/Display-Tester-Current-Detector-Charger/dp/B015F83X0U/ref=pd_lpo_469_lp_img_3?ie=UTF8&refRID=WK80BEHH5GMWT04ED3WD
Same item from amazon with prime shipping available:
https://www.amazon.com/bayite-BAYITE-PZEM-061-Multimeter-Voltmeter-Transformer/dp/B00YY1KOHA/ref=sr_1_10?ie=UTF8&qid=1469059785&sr=8-10&keywords=watt+meter
Well then buy a 117 and be done with it. Happy day.
Digital multimeter... here's a couple decent looking ones that should do most of what you want.
Of course Fluke makes the best, but they certainly charge for it.
I have a Craftsman Professional myself and it's perfectly fine.
So it sounds like the thing to do would be to fix the broken speaker wire. There's a number of ways to do that. I'll list them in decreasing difficulty, and also decreasing quality of fix.
You could:
The DMM will come in handy for a lot of things (checking grounds, seeing if your RTO is working, checking fuses, verifying continuity of wires - which you're doing here). If you get a good one now, it'll last you years (I've had mine for more than 10 years and I use it at least a couple times a month for all sorts of automotive and household things!).
I use this guy but, admittedly, I do a lot more than just measuring coils with it.
I've been looking at picking up a remote continuity tester, such as the one linked below. I saw them use this exact one on "Ask This Old House", and I thought it could help figure out the exact run of the wiring between the outlets. Given the diagram I attached, I was a little confused at how it was exactly run, given that the end points (ie: the middle of the left and right wall of the bedroom) don't appear to be the furthest away from the breaker box.
http://www.amazon.com/Extech-CT20-Remote-Continuity-Tester/dp/B000LYTTRK/ref=sr_1_1?ie=UTF8&qid=1394145664&sr=8-1&keywords=continuity+tester
I have one of these. It's pretty basic, but solid.
https://www.amazon.com/Fluke-101-Multimeter-Equipment-Industrial/dp/B00JT5RUUU/
Try to measure how much Wh/mAh go in your battery while charging from 0 to full. A measurement device only costs a few bucks and is very useful to check charging speeds and condition of your batterys.
​
For example: https://www.amazon.com/Eversame-Multimeter-Voltmeter-Indicator-DC3-6-30V/dp/B07JYVPLLJ/ref=sr_1_15?keywords=charge+meter&qid=1567584800&s=gateway&sr=8-15
You could add a simple power meter such as this to your charging station to calculate the amount of charging power you are using.
https://www.amazon.com/bayite-BAYITE-PZEM-061-Multimeter-Voltmeter-Transformer/dp/B00YY1KOHA/ref=sr_1_3?ie=UTF8&qid=1536610368&sr=8-3&keywords=energy+meter+240v
Granted at work we have some pretty badass meters.
All we do is take it and measure the voltage across the DC load and switch the meter to measure AC. It will autoscale to the amount of AC noise in the circuit. The limits for noise in an acceptable power supply in our test consoles are like ±12mVAC in a 15VDC power supply. And these meters measure that low very accurately.
Edit for clarification: You don't need to show a sine waveform to show noise, you can just use the ac part of the meter.
I used data from Poland Spring, Amazon, the USDA and the NYC DEP and then compiled it in Excel to produce the graphs you see in the post.
reason78,
i'm no pro engineer and would use a meter just for small projects. So I guess a cheapo meter will be sufficient. On Amazon, I see $10 meters:
Would love to hear from you all about these inexpensive meters. Which of the 2 is better?
I think you are looking for a remote continuity tester. I have used them for tracing and testing network and telephone cable runs. Should work well for what you are trying to do. http://www.amazon.com/Extech-CT20-Remote-Continuity-Tester/dp/B000LYTTRK.
Edit: Never mind, I just saw whatcantyoudo's comment.
If you’re in the mood to use money to solve the problem buy a multimeter. Then you can check to make sure your 12v power supply really is 12v and monitor the current draw of your LED strands. Lastly it has a diode tester so you can troubleshoot individual LEDs. I had a strip of LEDs die out and they blinked as they started getting bad. If just one diode fails it breaks the chain.
Something like this may work well. Just make sure the one you get can read DC current. https://www.amazon.com/Neoteck-Multimeter-Multimeters-Resistance-Transistor/dp/B01NAVAT9S/ref=mp_s_a_1_7?ie=UTF8&qid=1541125146&sr=8-7&pi=AC_SX236_SY340_QL65&keywords=multimeter&dpPl=1&dpID=51O8dm25vtL&ref=plSrch
P.s - I would wager the LEDs are dying from running at too high of a voltage. You might calculate a bit of headroom in the resistor choice for your replacement LEDs. Running cheap stuff at 100% it’s rated power non stop is asking for trouble. I’d shoot for 75-80% of their rated voltage.
Was looking at this one https://www.amazon.com/dp/B071JL6LLL/ref=cm_sw_r_other_apa_zeC6Bb1DABX6N is this too cheap?
Should be good then. Like I said, should take 11 hours from dead. The only other possible limitation can be the cable. There are some cheap cables that can only pass through 1A, or even only 0.5A regardless if the wall port is 2A. It's a real thing (unfortunately) that not all cables are equal.
I have something similar to this USB Meter Tester and tested all of the cables that I own and threw out all of mine that weren't capable of 2A because I don't have time to wait around on poor performing cables.
As far as I'm aware, the thought process goes, "the resistance reader in mods isn't always top-notch, so having a secondary fail-safe helps".
Except... a $10-20 piece of shit ohm meter isn't going to be much (if any) better / more accurate than whatever cheapo parts they stuffed in the mod. Depending on circumstances it may be identical parts stuffed inside a different case. Ahhh, China. It becomes something like "This possibly-shady used car dealer may be trying to screw me, so let's ask this other possibly-shady used car dealer for a second opinion", or "hmm, I know the e-juice in these gas station starter kits isn't always the greatest... so let's get a second bottle from the same gas station".
Just to be clear: I'm not saying "oh my god, mod meters are garbage, and so are the cheap ones, if you don't run out and spend $100 on a Fluke multimeter your face will explode!". It's more that in 2016, mod meters are generally pretty accurate, and in order to see a substantial improvement you really are going to have to spend more than ten bucks. Because, seriously.
And of course, all this goes out the window if you're running a mech / non-readout mod - in that case, the $10 el cheapo ohm reader is going to be a lifesaver.
Much like the cheapo parts inside the average regulated mod :)
I'd recommend buying a very small and cheap multi meter. You can measure the resistance of the wire without ever having to coil it so you can get a ballpark estimate, most of the time it'll be pretty close if the wire is cut to length.
Something like this
Reviewers are saying it's really small (I think it looks like a headache to read) and one says the probes aren't standard size. If they're smaller I'd just buy something different for 120VAC home. Testing a computer power cord for an intermittent open circuit, for instance, could be made more difficult to do reliably with probes that are too short to fully plug into the computer side or too narrow to plug in solidly. The probes look unacceptably short for this without creating a work-around and adding an additional point of failure. Also, I like to free hands up whenever possible and still have the meter as close to where I'm taking measurements as I safely can. I don't see a stand or hanging holes.
​
If you go with something different, just make sure the unit as well as the leads is rated for Cat.II minimum and at least the highest voltage you'll be reading. Here are a few options. My preference is the one with magnetic hanging strap:
​
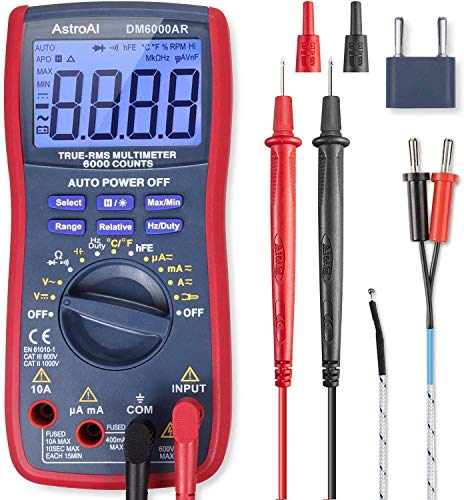
https://www.amazon.com/AstroAI-Multimeter-Resistance-Transistors-Temperature/dp/B071JL6LLL/ref=sr_1_3?ie=UTF8&qid=1549942139&sr=8-3&keywords=multimeter+true+rms
​
This one has non-contact voltage indication:
​
https://www.amazon.com/Ranging-Digital-Multimeter-Battery-Alligator/dp/B06ZZG2F2N/ref=sr_1_6?ie=UTF8&qid=1549942290&sr=8-6&keywords=multimeter+true+rms
​
Hook up a continuity tester to the lamp end of the electrical line and then go hunting around the fuse box for the test light to ignite.
It's a 1-man job, but having a helper will reduce the time it takes.
Make sure you disconnect the battery and shore power before you do it.
How to use a continuity tester
I may just go with the AM-510 to start with and save up for a Fluke 17B+ or the EEVblog Brymen B235 on amazon while I learn how to properly use the multimeter and learn more about electronics. This way I will have two multimeters in the end.
Only other option would be to get a USB amp meter to see how much power it's pulling.
https://www.amazon.com/Display-Tester-Current-Detector-Charger/dp/B015F83X0U/ref=sr_1_3?ie=UTF8&qid=1491509183&sr=8-3&keywords=usb+amp+meter
Just get one of these, and one of these and see what voltage drop is.
In my testing, the Quest can draw 2.8A at 5.1v when charging and playing.
If you have access to the leads at the float switch too, seems like something like this might work. Extech CT20 Remote and Local Continuity Tester https://www.amazon.com/dp/B000LYTTRK/ref=cm_sw_r_cp_api_i_xsbXDbTWWQY1W
:) good to hear you have been doing research. Reasonably new batteries together should be fine.
Given the price of the batteries I think buying a decent multimeter is a reasonable suggestion. That way you can make sure all the batteries are at the same voltage before connecting them up.
If you're willing to pay, the EevBlog one is worth it (and that YouTube channel possibly way too technical but possibly worth while), their forum has a chart: https://www.eevblog.com/forum/testgear/multimeter-spreadsheet/ The "VC97" is one of the better generic multimeters and much cheaper (~$30 on ebay). I have both, the EevBlog one is slightly more accurate and a lot more capable, but it you're just measuring voltage and not building electronics it's overkill. Just remember that the cheap meter really is "12.05V, plus or minus 0.05V" where the EevBlog one adds a decimal place. And the $5 junk meters are "12V, give or take a volt or so, probably". Also buy some leads with proper clips on them, because you will end up wanting to have the meter connected while you do something. You just will.
I would still buy a pack of 10, 10 ohm 5W resistors and use those to connect the batteries. If the resistor blows up because there's too much current you've lost less than a dollar, and learned that 0.1V difference is too much :) Once those are happy (ie, there's zero volts across them), put in your proper wiring.
Edit: formating.
You want something with micro amp range
Check out:
https://www.amazon.com/EEVblog-BM235-Brymen-Multimeter/dp/B01JZ1ADCO
or
https://www.amazon.com/Extech-EX330-Autoranging-Multimeter-Temperature/dp/B000EX0AE4/ref=sr_1_1?s=hi&ie=UTF8&qid=1503255467&sr=1-1&keywords=extech+multimeter
Checkout EEVBlog for good recommendations and comparisons.
Also, Reddit search.
https://www.reddit.com/r/electronics/comments/2poy8p/help_me_pick_a_sub_75_multimeter/
There are two programs out there that may provide this info to you:
USBView and USBTreeView. Both are free and both show you more info about your usb ports than you ever needed to know. and/or get a new cable to narrow down the problem? or maybe this :
https://www.amazon.com/Centech-USB-Power-Meter/dp/B00DAR4ITE
or this:
https://www.amazon.com/Diymore-Charging-Detector-Voltmeter-Multimeter/
This one should do the things you need. You just want to make sure you get one that's not just for electricians (which usually only measure whole volts, no mV) I have one that does tach, dwell etc, but I'd be surprised if you need anything like that on a car as new as yours :)
https://www.amazon.com/gp/aw/d/B01NAVAT9S/ref=mp_s_a_1_3?ie=UTF8&qid=1518504054&sr=8-3&pi=AC_SX236_SY340_QL65&keywords=digital+multimeter+autoranging&dpPl=1&dpID=51O8dm25vtL&ref=plSrch
AC Power Meter: https://www.amazon.com/gp/product/B01MRZAFAF/ref=oh_aui_detailpage_o06_s00?ie=UTF8&psc=1
Or a service like teslafi that will show you your charging history, and do the math for you on cost.
Going to try this one...
https://www.amazon.com/gp/aw/d/B01MRZAFAF/ref=ya_aw_od_pi?ie=UTF8&psc=1
How about something like this: http://eyedro.com/
I put one CT on my car charger and one on my computer rack. Not sure how accurate it is, but at the very least it's helpful in tracking changes over time.
Thinking about getting another pair to put on the main legs coming into the house (Canada 240v/120v residential).
I also wired one of these up to the car charger circuit: https://www.amazon.ca/gp/product/B01MRZAFAF No networking capability, but the display is kinda neat.
Get an inexpensive AC non-contact voltage tester - I have this one and it works well. You can adjust the sensitivity so it beeps when near powered wires, or very close to find which wire is live. This will help give you confidence and help troubleshoot.
Old wiring is often not what you expect. Often, many outlets are in series from one wire, where the neutral wire is not available. Sometimes, they might have used a white/black pair for a switch, where neither is neutral. It's supposed to be marked but don't count on it.
Step 1: Buy a multimeter. I prefer the Fluke 87v http://amzn.com/B0002YFD1K Sure it's $387, but it'll pay for itself eventually.
Step 2: You'll need to take apart the charger. A good set of screwdrivers would definitely help. http://amzn.com/B000NZ5QG0 It's only $40. Wiha maybe isn't the best, but I like them and they do offer a 100% satisfaction guarantee.
Step 3: Once you open it up, you can start testing it with the multimeter. Inevitably, however, you'll probably have to solder something. Hakko is a popular brand for good reason. This one is under $100 AND it comes with wire cutters: http://amzn.com/B00AWUFVY8
Step 4: After you put it back together and find out that it's still not working, buy a replacement charger.
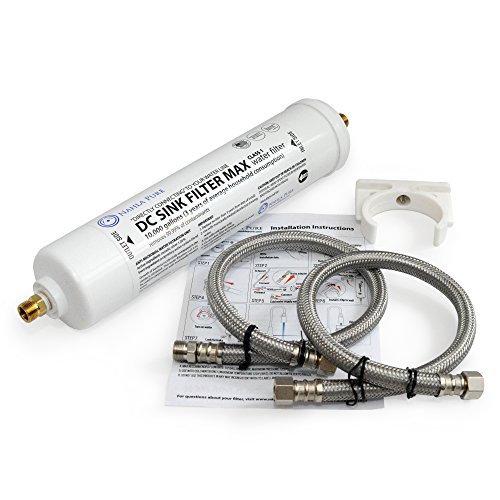
Unsolicited advice---Do not give your baby bottled water, or drink it yourself, because bpa is leeched into it from the plastic container. Get a filter and install it below the sink if you can afford it, and all your cold water will be filtered and better than store bought bottled water.
if you do not have an amazon account, i will buy this for you and you can pay me.
https://www.amazon.com/gp/product/B00ZO6MEHM/ref=oh_aui_search_detailpage?ie=UTF8&psc=1