(Part 2) Best welding equipment & accessories according to redditors
We found 1,521 Reddit comments discussing the best welding equipment & accessories. We ranked the 569 resulting products by number of redditors who mentioned them. Here are the products ranked 21-40. You can also go back to the previous section.
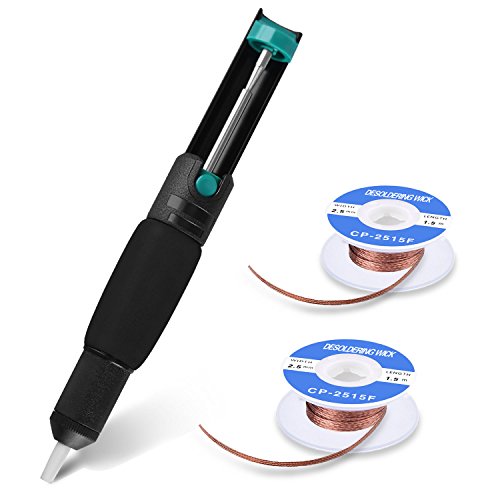
![Nulink153; Deluxe Series Desoldering Pump Solder Iron Remover Sucker Hand Tool [Blue, Plastic] [Heavy Duty]](https://m.media-amazon.com/images/I/41iBJQJFYiL.jpg)


https://www.amazon.com/dp/B016MB0JF6/ref=cm_sw_r_sms_apa_i_GgSKDbEK32CB0 tada
Here you go, it qualifies for prime too
Easy-peasey repair even for a beginner.
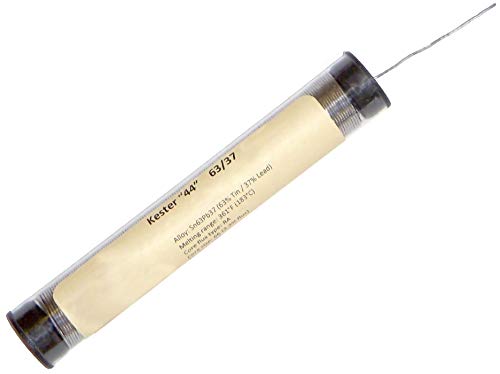
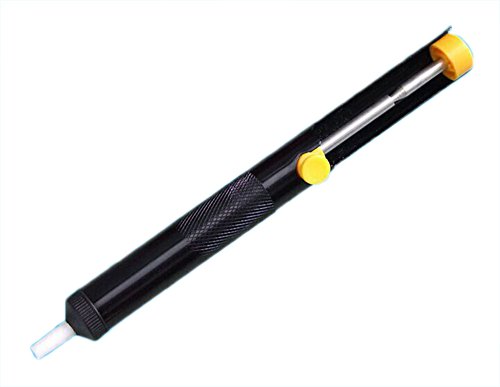
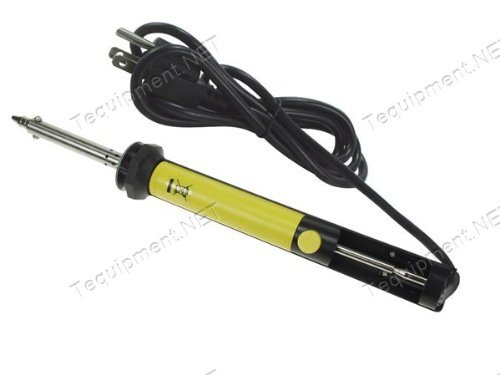
First you'll need a decent soldering iron like this, some 63/37 solder and a solder sucker like this.
You'll need to remove the old solder on the three pads to the left of where the connector was mounted. Heat up the soldering iron, touch it to each pad and add a tiny dab of solder so the whole thing melts. If it doesn't melt within 5 seconds you'll need to turn up the iron temperature. Then grab your soldapullt, cock it by pushing down on the plunger until it clicks, put it on top of the liquid solder and push its button. The solder should get sucked into the soldapullt and the joint should be shiny and flat with the board. Repeat this for all three pads.
Now place the old headphone socket so the solder tabs on its left side line up with the circuit board pads and its case hole. Grab the soldering iron and touch it to one of the solder pads then add enough solder to cover the pad and the tab. Pull the iron away and let the joint cool for 10 seconds. Make sure the jack is still aligned and if it is then solder the other pads.
Give this a shot but mind your temperatures. 600-650F is all you need to back those out.
clip the straight pins short then apply some chipquik to the nubs - and heat it all at one time. It should only take about 10-15 seconds and the whole header assembly will just slide out.
Finish by cleaning up the through holes with plenty of flux and solder braid.
http://www.amazon.com/ChipQuik-SMD1-Leaded-Temperature-Removal/dp/B0019UZP7I
I just did a little research and found a guide on how to make a homemade flash cart. They suggested getting a 16Mbit cartridge because it had all the wiring needed for all different ROM sizes so I figured that should work for this.
I used this desoldering pump, which was recommended by John Riggs on YouTube and this soldering station, recommended by Voultar on YouTube, as well as some standard flux paste.
The solder job turned out pretty good looking.
It looks like you have a decent soldering station, that is really the main thing. You'll need a small tip, but probably not as small as you think. I like the Weller ETL, but a ~2mm screwdriver style tip works well for SMD in my experience. If you go too small it can actually cause trouble for heat transfer and thermal recovery.
If you've mostly been doing through-hole stuff, you'll want smaller solder. Having small diameter solder makes it easier to feed just the right amount. I like Kester 0.020, some people go even smaller. Of course there are lead-free versions of that, too, if you prefer.
For through-hole, the flux that is inside the solder is usually enough, but for surface mount, you'll need extra flux. You'll probably be fine with a flux pen. You'll probably want some solder wick because mistakes happen, and a solder sucker thingie doesn't work as well with surface mount.
As u/t_Lancer says, you won't need a hot air station and solder paste unless you're planning on doing leadless packages. If you decide to get a hot air station, though, they're pretty cheap. You don't even strictly need solder paste, I've been making do by tinning the pads with regular solder first with my soldering iron before hitting it with the hot air.
For vision, it depends on how your eyesight is. I'm fine eyeballing down to 0603 but I can't read the markings without help. I've started doing all of my soldering under light magnification with the Optivisor DA-3 with a LED attachment which has really helped, but it isn't strictly necessary. You can get those visors with more magnification at the cost of a shorter working distance. Good room lighting and a magnifying glass work fine, too.
And most important thing you need is practice. Watch this video and grab one or two of those SMD practice kits and you'll be knocking out surface mount stuff in no time.
So you've selected some intense elbow grease as the trade off. That's honestly my preferred route. What I suggest in that case, is to get a weedeater or a mower and take the whole yard down as low as you can get it. Probably not all in one pass. Then I would dispose of as much material as possible via a green waste bin. Then you have a couple options. You can either keep cutting it back, and it will eventually end up kinda-sorta lawn-ish after enough consistent cuttings. Second option is to "sheet" the area with cardboard and some weights. Bricks, rocks, paint cans, whatever is handy. If you let that sit a week or two, it will mostly shade out the plants, they'll wilt, and die. Third option is to solarize the area. You get some rolls of painter's plastic, and essentially plastic wrap the entire ground like it's a casserole dish of leftovers. The idea there is that the plastic creates a greenhouse effect and cooks off all of the plants underneath.
Regardless of your choice, you'll probably still have some pretty serious grow-back from whatever roots survive, and any dormant seeds that sprout after the fact. You can then either repeat the process later, which will produce fewer and fewer survivors, or you can just cut and/or hand pull whatever manages to return.
I strongly advise against the use of any herbicides like Roundup, as the chemicals in them do a lot of damage to the ecosystem beyond your yard. It's pretty selfish and petty to broadly apply such damaging chemicals over some inconvenient-at-worst weeds in a backyard.
Edit: As an alternative to spraying, a solution for the touch up work after using one of the above methods, is to use a propane torch (example). You can get them at home improvement stores, and they do a pretty decent job of toasting weeds into submission. Just read the directions thoroughly, watch some youtube videos about how to do it, and have a hose on standby in case things get exciting.
Although not the cheapest, ebay is probably the easiest way to find faulty systems.
Some equipment recommendations:
The BZ4500HS is $67 on amazon I got one and like it. I'm also interested in trying one of those weed burning torches you hook up to a propane tank, for around $20-30 you can find them at places like Harbor Freight
Absolutely there are ways to bring up the pattern. You can do this!
The professionals use Ferric Chloride and I recommend you do too. It's easy, it's (relatively) safe (compared to the other methods), and it produces a nice finish.
You will need; a bottle of ferric chloride solution, a new kitchen sponge, some 0000 steel wool, baking soda, gloves, and some masking tape.
First, put on some damn gloves, this stuff eats metal, don't let it burn your skin too.
Clean and degrease your knife.
Next you're going to want to mask off the cutting edge of your blade. If you use super thin tape you can get damn close to the edge and have it be almost unnoticeable. Like automotive pin striping thin masking.
Take the ferric chloride solution and mix one part FC to three parts water in a glass or ceramic bowl. This is your etching solution
Next you will want to simply wet the sponge with the etching solution and rub it along the blade, taking care not to get it on the cutting edge. You masked it off, but let's not test the mask alright. Typically knife makes do a full immersion etch then sharpen the blade, so the edge isn't really there until after the etch, but for a home done cosmetic upgrade we will only apply the chemicals to the flats not the edge. Anywhere the solution touched will be eaten by the chemicals. The carbon steel will be eaten first and turn black, the nickle steel will last longer and stay shiny.
You will begin to see results in a few moments, but the longer you leave it sit, the deeper and more lasting the etch will be. Too little and it will wear quickly, too much and it eat into the steel. I know a knife maker who does one hour full immersion etching and the pattern is VERY aggressive, almost like your fingerprints, you can feel the layers. Too much for a prized kitchen knife. Fifteen minutes of exposure tends to be very pretty. I would guess that 5-10 minutes of exposure will produce a nice cosmetic etch on a blade. When you see what you like, add some baking soda to neutralize the acid, and wash it off.
Being able to see where you are in the etching process moment to moment makes it east to know when to stop. Full immersion etching doesn't really unless you're constantly pulling it out.
Immediately after the etch, the knife will be matte in appearance from all the microscopic pitting. You're going to want to gently gently gently buff that up to a good sheen with some steel wool. Too much and you'll wear right through the pattern again. You could also use 600 grit sand paper and wet sand it to bring up the sheen.
To cleanup, you'll need to add baking soda to the etching solution before disposal. Hold on to the concentrate FC solution, you'll probably want to do this again someday.
It may seem like there's a lot going on here, but it's not really difficult.
Chip Quik is your best friend for these kinds of jobs
http://www.amazon.com/ChipQuik-SMD1-Low-Temperature-Removal/dp/B0019UZP7I
This is the Hakko.
If you don't mind manual, then the Tenma will also work
Absolutely!
How to Solder
Various soldering irons from Radioshack - If you're doing simple DIY stuff you won't need anything for overkill.
Some lead solder (hard to find at a store, works better than resin solder and won't be legal for much longer so stock up)
A good website for project kits, parts, tutorials, and schematics - site is down for maintenance at the moment
Shameless plug for a class I took- Links to CircuitMaker (abandon-ware but good circuit modeling software, easier to use than PSPICE or similar). It also has charts for reading resistors and standard capacitor/inductor/resistor component values as well as datasheets for common components in audio.
The advanced section of that class with links to schematics, datasheets, and parts stores.
Some more topics to look over
Distortion:
Diode clipper and clamper circuits. Simple, cheap, and easy to build. They also sound pretty good too and there are tons of circuits out there. Tube screamer's use diodes.
Transistor distortion circuits are usually variations on these effects, or by using a transistor as two diodes (I've seen it in a few circuits, kind of weird and I'm not sure it totally works in theory). The Fuzz Face and other "fuzz" pedals use transistor distortion circuits.
I can't find any good sources for using tubes for distortion and I've only done it once for a school project where I had to modify a tube screamer to actually use tubes, and my only source is a textbook that isn't officially published. If I find any later I'll post this again.
Filters, equalizers, etc
Texas Instruments has a good resource on designing active filters, low pass, high pass, bandpass and band reject. Don't skip over the math, it's actually important for designing the filters. You don't really need to understand the complex numbers and transfer functions in the s domain but understanding how to find a cutoff frequency is important.
Probably the most popular filter of all time, the moog transistor ladder filter is pretty freaking cool in design. I have no idea how it works, but it sounds awesome and looks like an advanced DIY project.
Another popular filter, the Dunlop Crybaby. The thing to note is it uses a bandpass filter using a toroidal inductor and capacitor instead of two capacitors. This makes it pretty expensive to build (the housings can be a bitch to find too), but it sounds amazing. I've seen mods with a variable Q pot but I'm not sure how that one works.
Dynamics Processors
How they work is difficult to explain without understanding some circuit theory and electronics and there tends to be math involved (as you may notice from the filter section)
THAT Corporation makes awesome audio ICs and has example circuits for designing compressor/limiter/gate circuits using them. Way easier than trying to figure out FET circuits and how to design a VCA.
Also, /r/diyaudio and /r/diypedals are good subreddits where most people know what they're talking about and are supportive of projects.
Remember if you ever find yourself trying to design something and it isn't working out, there's probably an IC for that. My friend who works for Shure tells me when he interned he was designing a bunch of complicated circuits, and the boss just laughed and told him to order an IC. They make ICs for everything.
Build Log 5: Viterbi
Highlights
Parts List
Resources
Tools
Notes
Thank you for the tips! I'll definitely keep them in mind and I'll watch some thorough tutorials as well before even touching my PCB. I did already order some solder though...I could probably just snag some flux though. Do you have any recommendations?
​
Also, the last bit was sexual don't lie lol
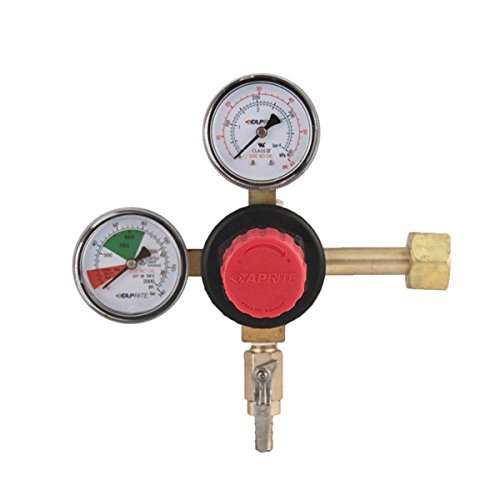
This Taprite is what I use. Never had any issues at all. I like the nice knob so I don't have to use a screwdriver to increase or decrease the pressure. Just be very careful not to drop these things in any way. They are very delicate.
ChipQwik - use it like solder. It mixes with the solder and lowers its melting point, making it stay molten longer. This is good for desoldering tiny things.
Flux pen - flux is a liquid that helps guide the solder. Any youtube video about soldering can provide an explanation.
Solder sucker - melt the solder, suck it up
Solder wick - melt the solder, soak it up.
You don't need to get these exact products, but they're all handy. You can get by without the chipqwik, but the rest should be in every soldering toolkit. Also remember that solder will like to move towards the soldering iron, so you can kind of use it to pick up any excess solder if you do it right.
I should note that I've never done a usb port before, so I can't guide you on exactly how to do it. I'm a bit of a newb myself. Just devour a few youtube tutorials, and try it. Soldering is really a skill learned by doing, and like I said, you have nothing to lose at this point. No point in being afraid to fail now.
Little expensive but looks like it works great. https://www.amazon.com/Hakko-FR300-05-P-Desoldering-Tool/dp/B00KWM69C4/ref=sr_1_1?ie=UTF8&qid=1518192740&sr=8-1&keywords=Hakko+FR300
Do you ever plan on doing 5 gallon batches? If you have the space it will be more cost effective to just go for a full size keging system. Mini kegs are going to cost you roughly what a new 5 gallon keg will.
That said if it's only a one-off thing you could use some 2 liter bottles and get yourself a co2 tank and regulator and a carbonation cap and force carb that way, it won't be on "tap" but it will be force carbonated.. and you can keep it carbonated if you leave the cap on and top off the bottle with co2 each time you pour from it.
If you have nothing then you'll need a regulator I have this one: (taprite t742hp primary double gauge co2 regulator, brass https://www.amazon.com/dp/B002UZUJ22/ref=cm_sw_r_cp_apa_i_auBCDbBPZ3V0H)
A co2 tank, something like this: (5lb co2 tank- new aluminum cylinder with cga320 valve https://www.amazon.com/dp/B00HQQ3WWE/ref=cm_sw_r_cp_apa_i_BvBCDbXPB33KP)
Some 5/16 tubing l, and a ball lock gas disconnect like this (5/16" gas line assembly - ball lock https://www.amazon.com/dp/B0064OI77Y/ref=cm_sw_r_cp_apa_i_6wBCDbSWZWMNY)
And a carbonation cap like this : (stainless carbonation cap counter pressure bottle filling with 5/16" barb,co2 coupling to carbonate soda beer fruit juice water https://www.amazon.com/dp/B01K4GGYT0/ref=cm_sw_r_cp_apa_i_BxBCDbK0V3J35)
I also have this regulator for my mobile mini keg set-up: Ultimate CO2 Regulator works with 5 types of CO2 tanks (0-50psi) https://www.amazon.com/dp/B071J9FKVD/ref=cm_sw_r_cp_apa_i_nABCDbQWF87S3
It works great and I use it with a soda stream co2 tank which are a little pricey for how much co2 you get but they're convenient and available everywhere. This makes a nice compact system since you don't have the big regulator and big co2 tank.
Yeah, the Edysn Soldapullt works really well.
It's not a bad deal if you need the sheet and rack as well. Provided those two pieces are of a quality that would rival something for close to $100 in the stores.
If you don't need those things then it's just a prettier version of the heat shrink torch from Bernz. The BZ4500HS is a torch that throws a wider flame used to heat shrink vinyl and is available from Amazon for $50. Though it's definitely not as pretty as the all white Apple-esque version from Sansaire.
I don't think anyone that already has a Bernz soldering torch would benefit enough to warrant buying this. Though if you don't have a torch at all yet, it might be a better option.
That being said I doubt it fits the Searzall, though I don't know if it's still necessary when using the wider flame from the BZ4500HS.
Got it covered.
I have a personal version of this, a handheld red dragon flame thrower for weeding, hook to a propane tank, light it, have way too much fun weeding until you realize weeding next to a PVC pipe is making the pipe start to melt... Also, I wouldn't use it in a grass yard as it will kill all the grass around the weed too. But in an Arizona rock yard, it works great. Can't kill rocks.
In all seriousness, it works really well. My yard is rock, anything growing in it is most likely a weed, run the flame over it for a couple seconds and the weed looks normal, but dies inside. 3-4 days later the weed completely brown and dried out to the point where the next time the wind blows it disintegrates. Or you can walk over it and it pulverizes from the impact.
It is not harmful to the soil like sprays can be, and it doesn't prevent new weeds from sprouting, so if you want to use it to control weeds you have to do it daily to catch new growth before it can germinate for a while. But its the most stupid-fun way to weed my yard I've ever had. I just don't do weeds right up against the house, cause I like my house, and don't want to risk it.
I'd imagine for farmers, this kind of thing could be very useful, you're killing all the weeds that grew while you prepped the field, before you planted, which could provide nutrients back to the soil from decomposing plant growth and your crop doesn't have to compete with the larger weeds to grow and you don't have to spend time pulling the weeds on a large field before the crop is planted.
Kill the weeds with fire! I use a propane weed burner, there's no chemicals and it works pretty well. Of course you have to keep up with it since the weeds will grow back, but that's only an excuse to use your new flame thrower! I have this one, it's somewhat propane hungry, and can be finicky about staying lit but it gets the job done without too much fuss.
Use a desoldering braid instead of a solder bulb. You're welcome.
Roundup or a weed torch will make quick work of them.
If you don't like Roundup (I try to avoid it, but will use it if necessary) you can try boiling water and/or vinegar. Neither is as effective or quick as Roundup, but both work.
In the end, no matter how you kill the weeds, they will come back quickly unless you fill the cracks and seal the blacktop.
Chip Quik is a low-temperature solder alloy. All you have to do is flood the pins with this stuff and your part will come right off. I have used it for large SMD devices with no trouble.
https://www.youtube.com/watch?v=7kyaz4Zrd78
http://www.amazon.com/ChipQuik-SMD1-Low-Temperature-Removal/dp/B0019UZP7I/ref=sr_1_1?ie=UTF8&qid=1411674018&sr=8-1&keywords=chip+quik
It is kind of expensive, but a little goes a long way.
Holy crap, I need some of that. The magnet that holds my in-cabinet garbage can shut just fell off its mounting and superglue won't hold it on. Got an Amazon link?
EDIT:
Google exists
I have this desoldering iron and have been very pleased with it. Far more convenient that separate iron and pump. Simply press the plunger to prime the pump, hold the iron against the solder joint until the solder melts, press the release button to suck up the melted solder.
Well, if you can use the lab and it has a scope in it then you just scored big time.
As far as $100. I would get:
(amazon links for convenience, use any supplier you wish)
EDIT: Light bulb socket, 100W + 60W real light bulbs (not the hippy engery saving kind), electrical outlet - these are for making a dim bulb tester.
All I can think of right now.
How much are you going to be making electronics a hobby? If you're just going to be soldering some boards occasionally you could save a bit on the iron and get this Weller. Also a cleaner. If you go with the 888 that will have a wire cleaner built in. I'm getting old so I personally would recommend at least a magnifying glass. I have this helping hand The clips didn't do much for me but the glass did. There are times where the switch pin just gets lost and the glass helped a lot. I also picked up this kit when I started, primarily for the sucker, but I thought the other tools may come in handy. So far they haven't, other than the solder. The first time I tried to use the sucker I could not get it to work correctly, I just wasn't getting enough of a seal around the hot solder, thinking I'd melt the tip, so I ended up buying a different pump that I still have never used, because I eventually DID learn to use the cheaper sucker. I also can't make solder wick work properly, apparently. If this is your first time soldering/desoldering I recommend getting a cheap practice kit that you don't care if you ruin. I can recommend this one as it has you intentionally foul up joins so you can learn to fix them. You won't need strippers. Flush cutters would be helpful if you need to trim the pcb mount legs off your switches (like Zealios, which you will if you have a GH60 Satan pcb) or trimming LEDs. Work mat would be helpful to keep your work area clean but not necessary. You will need a small screwdriver but I can't remember what size. Tweezers or one of these grabber thingies are always helpful when the screw flips sideways when you are trying to seat it. I used this solder on 3 builds so far and have had no issues with joins failing.
Let me introduce you to my friend: http://www.amazon.com/Bernzomatic-BZ4500HS-Electricians-Shrink-Torch/dp/B00834RCLU/ref=sr_1_12?ie=UTF8&qid=1457916395&sr=8-12&keywords=bernzomatic
$48 Taprite T742HP
I was dinking around on her here and that made me laugh out loud. I never really thought about this before. Honest. You just blew my mind...like a 18 year old taking their first philosophy class.
I'm a fire ecologist who grew up in the true middle of nowhere on a ranch. I love welding, but I'm not that good at it. My dad is. I also LOVE glassblowing. I learned how to do it during my masters and took to it like a duck in water. I'll never get to do it again as it's too expensive (like $80 an hour). I'm too much of a tight ass. I'm in my early 30's.
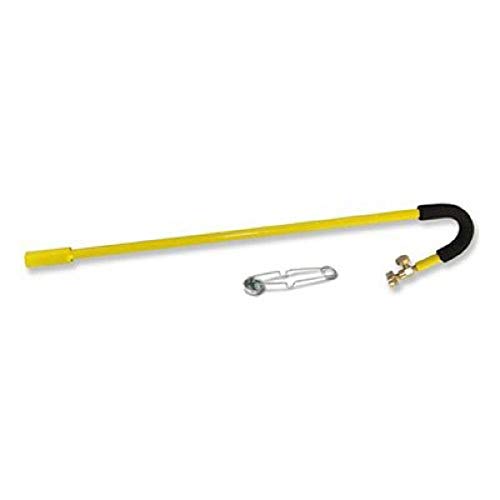
I pretty much light shit on fire for work and fun. I'm a complete pyro. One of my proudest achievements is a 10,000 acre prescribed burn I planned and was in charge of. This spring, my girlfriend bought me this for my birthday. I wanted it to light cedars on fire. Plus I can melt a beer can in seconds.
https://www.amazon.com/Red-Dragon-VT-3-30-Propane/dp/B00004Z2FQ/ref=sr_1_3?ie=UTF8&qid=1498565976&sr=8-3&keywords=red+dragon+torch
My brother bought me a JATO rocket for the same birthday.
I don't think I could be more of pyro if I tried. I never realized this. No one ever pointed this out to me...
I just spent 5k getting 3 phase power into a shed my dad owns. Why? Because I bought a super nice and fancy plasma cutter at an auction. I didn't need it. My dad didn't need it. It was just cheap and awesome. Plus I wanted to be able to run a good welder in that shop.
My masters is literally about plant responses to lighting shit on fire after it got chainsawed.
There is a video of me starting a campfire with 5 gallons of white gas. It was zesty.
Random person...you just gave me an existential crisis. My name is probably on federal watchlists. Hello government worker! I never realized I was a pyro before.....
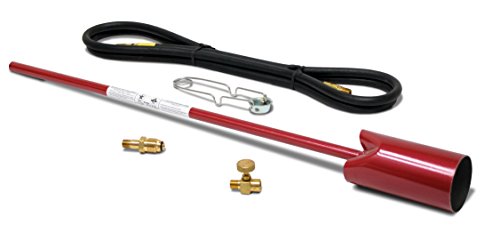
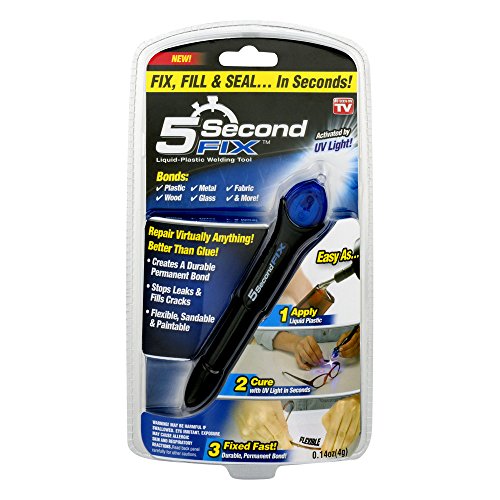
This "5 second fix" infomercial stuff is pretty decent for mending plastic.
https://www.amazon.com/Second-Fix-Liquid-Plastic-Welding/dp/B016MB0JF6
I don't think it would hold up for anything that requires pressure/torque but it works decent for putting a lot of my kids' toys back together (like little plastic Pokemon figures).
Amazon
I bought this one off of Amazon for $20, and it was exactly what I needed.
Don't forget to buy some paperclips/wire to hang it on, nail polish to cover up the important bits (pivot hole, threads, detent, lock faces), nail polish remover to remove the nail polish, and a container to put it all in. I used a large mason jar for that.
This bad boy right here. It is admittedly the nuclear option, but I work on a lot of old fragile boards that will lift a trace if you look at it the wrong way. I also tend to replace a lot of 40 pin DIPs, which is freaking annoying. It can be had much cheaper, but grainger was the first link that popped up.
​
Before I invested in that, this or this were my favorite styles of desoldering tools. Much more reasonable, and pretty damned effective.
​
edit:
Also, if you can, cut the legs from the top side and clear the holes without anything in the way.
I'm going through the same journey right now. Here are a few of the things I picked up. The first 3 are the actual soldering equipment/materials you will need. The fourth is a good electronic screwdriver set and tweezers (not required but useful).
https://smile.amazon.com/Weller-WLC100-40-Watt-Soldering-Station/dp/B000AS28UC/ref=sr_1_4?ie=UTF8&qid=1520432768&sr=8-4&keywords=Weller
https://smile.amazon.com/gp/product/B072WN1DMG/ref=oh_aui_detailpage_o02_s00?ie=UTF8&psc=1
https://smile.amazon.com/gp/product/B0777LMVTT/ref=oh_aui_detailpage_o02_s01?ie=UTF8&psc=1
https://smile.amazon.com/gp/product/B019ZSK57K/ref=oh_aui_detailpage_o02_s01?ie=UTF8&psc=1
LOL, that last part, it's happened to all of us though being honest. :P Anyways u/superuser41's suggestions are spot on. I use a Hakko FX888D myself & love it, very nice station for the money IMHO. Never used that particular sodapult but they are well regarded in the community.
Edit: This is a good tip for soldering switches & LEDs (my personal fav size/type for it). You may want to grab a few, it looks like the linked bundle only comes with one tip. Also this is a high quality solder in the right diameter for soldering switches/LEDs. This is good solder wick, This is a good flux, & I always recommend getting some tip tinner.
You certainly can use that soldering gun but it won't be fun or easy because it is so large (that's what I started with and used for a few years). I'd suggest picking up a Hakko FX-888D or Hakko FX-951 if you have a desire to continue with electronics.
Definitely add more solder because it has flux in it which will clean the oxides and allow the solder to flow out. You will also need to use a bit of solder wick/desoldering braid to clean up the pad before fixing it. You'll want to get some Kester leaded solder to work with.
Watch these Pace soldering tutorials before you begin to understand the basics. Heat the pad and wire then touch the solder wire to the joint. If you add it to the tip of the gun/iron the flux will burn away and it will start to oxidize. Doing it that way certainly has it's place but it isn't for this type of work as you'll need to add extra flux to protect the joint.
I purchased the BernzOmatic 361472 BZ4500HS Heat Shrink Torch its great it disperses the flame so you don't get that unpleasant taste. For the torch you have you can purchase the tip from eBay and just screw it on your TS8000, its on eBay and called WORTHINGTON Torch Tip,Propane/MAPP,Use with 4NE84
Edit: Please make sure you turn off and unplug your power supply before cutting any wires.
Parts / tool list below, this what i used but there are substitutes out there.
Note: Main thing that is slightly challenging is soldering the XT60s, basic idea is to “tin” (soldering term) the wires and the XT60s first, then heat the connector with your iron as you put the wire in to get a good fusion. Decent video on soldering them:solder XT60s
My soldering Iron:
https://www.amazon.com/gp/product/B00ANZRT4M/ref=ppx_yo_dt_b_asin_title_o00_s00?ie=UTF8&psc=1
Soldering Flux:
https://www.amazon.com/gp/product/B008ZIV85A/ref=ppx_yo_dt_b_asin_title_o01_s00?ie=UTF8&psc=1
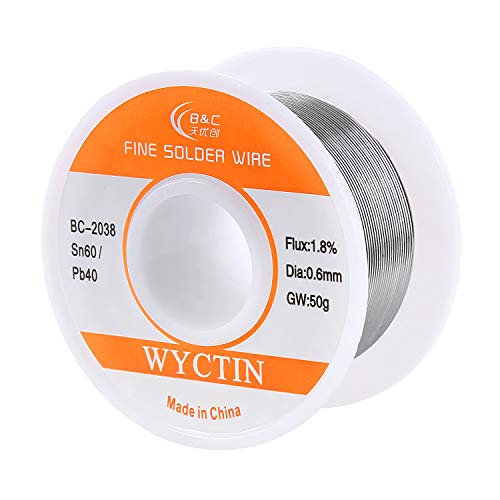
Solder (60-40)
https://www.amazon.com/gp/product/B071G1J3W6/ref=ppx_yo_dt_b_asin_title_o01_s00?ie=UTF8&psc=1
New XT-60’s and Shroud:
https://www.amazon.com/gp/product/B074PN6N4K/ref=ppx_yo_dt_b_asin_title_o03_s00?ie=UTF8&psc=1
Helping Hands (not required, but def helpful)
https://www.amazon.com/gp/product/B000RB38X8/ref=ppx_yo_dt_b_asin_title_o01_s01?ie=UTF8&psc=1
Bought this a while ago, but any heat shrink will do:
https://www.amazon.com/gp/product/B01MFA3OFA/ref=ppx_yo_dt_b_asin_title_o02_s00?ie=UTF8&psc=1
Wire - If you’re new to soldering and need practice, or you’re going to split your cables for Rasberry Pi, or other components, etc:
https://www.amazon.com/gp/product/B01ABOPMEI/ref=ppx_yo_dt_b_asin_title_o03_s00?ie=UTF8&psc=1
The soldering iron you have is fine. I bought my batteries from console5.com . As far as other things, I would suggest some flux and a desolder braid/wick. If you don't have solder I would grab some of that too. I've got alphafry solder, mg chemicals desolder wick, and sra flux.
Batteries:
https://console5.com/store/panasonic-cr2032-3v-lithium-battery-with-solder-tabs-pins.html
Desolder wick:
https://www.amazon.com/gp/aw/d/B00424S2C8/ref=mp_s_a_1_6?ie=UTF8&qid=1525828012&sr=8-6&pi=AC_SX236_SY340_FMwebp_QL65&keywords=solder+wick
Flux:
https://www.amazon.com/gp/aw/d/B008OC0E5M/ref=mp_s_a_1_3?ie=UTF8&qid=1525828121&sr=8-3&pi=AC_SX236_SY340_FMwebp_QL65&keywords=solder+flux+pen&dpPl=1&dpID=31u2-ijUmFL&ref=plSrch
Solder:
https://www.amazon.com/gp/aw/d/B00030AP48/ref=mp_s_a_1_3?ie=UTF8&qid=1525828185&sr=8-3&pi=AC_SX236_SY340_QL65&keywords=solder
This it?
Or this?
If not here is a good wick and sucker
You can buy them off of amazon for ~10.
https://www.amazon.com/Hakko-T18D16P-Fx-888-Station-1-6mm/dp/B004OR9BV4/ref=sr_1_6?ie=UTF8&qid=1484107753&sr=8-6&keywords=hakko+soldering+tip
I use this iron for everything I do. It has basic thermal control and the iron has a good selection of tips that you can buy: https://www.amazon.com/dp/B000AS28UC/ref=cm_sw_r_cp_apa_divAyb3066AWC. I would definitely get fine point tips. Here is a vacuum that I use as well for desoldering: https://www.amazon.com/dp/B00U1SFNYE/ref=cm_sw_r_cp_apa_LkvAybGPPWMF1.
Whatever iron you have now will probably be fine, but definitely will want precision tips if you can find them.
depending on the size of the connections, I'd take it one at a time
I use the ribbon to soak up some of the old solder and remove the component initially
Once the component has been removed, if the holes are still plugged with solder, I heat up the remaining solder and use a bulb to remove it
If you try to do both at once the solder can follow your iron and short the 2 contacts together.
You're getting some great advice here, and I'm glad you're enjoying the process of learning to solder! I thought I'd copy a previous post of mine going over my favorite fluxes. Maybe it'll be useful to you as well!
-----------------------------------------------------------------
Certainly not the same. Over time you'll acquire a number of fluxes that you use for different things. You'll want different types depending on the kind of soldering you're doing, or if you're trying to ensure compatibility (i.e. with a flux-cored solder) between fluxes. I mostly use no-clean but rosin fluxes are great. You're supposed to clean them off but there are plenty of 30 year old boards with rosin flux residue on them that work fine. A note on flux pens, I personally hate them. I'm referring to the ones that are built like those paint markers with the tip you need to push in to get it to flow. Very overpriced for the amount of flux and they never work right. Bonkote brush pens are the best, but unfortunately expensive. They are however refillable and the brush tips are replaceable and relatively cheap. The cheap dispenser bottles work great as well but for very thin fluxes are easier to make a mess with.
Here are my go-to fluxes:
I have a water soluble flux that I use as well Kester 2331-ZX but you must clean all traces of it off before you put boards into service, so it only comes out rarely.
Flux - like solder - is one of those things that seems expensive when you buy the good stuff, but unless you're a CM buying drums of it the cost-per-use is so low that it makes no sense to fuss with the cheap shit IMHO.
And speaking of flux, if you want clean shiny boards then consider getting some flux remover. The best I've used so far is Techspray E-line Universal Cleaner. Used to use MG Chemicals Heavy Duty Flux Remover but this beats the pants off it - does the job in 5 minutes where the MG would take half an hour. Rosin-fluxes clean easily unless you reflow them or let them get baked on. No-clean fluxes don't usually need to be cleaned - hence the name - but if you use rosin flux to rework a board (i.e. solder through-hole parts onto a board that was reflowed with no-clean) and then use bad flux remover, the no-clean will turn into a white powdery film that's very unattractive and hard to clean. Thus a good flux remover is handy.
If you're careful with it you can really stretch it out. I recommend against the aerosol cans of flux remover. While they can work well they're expensive and very wasteful, and by the time you clean off a particularly challenging flux you'll have emptied the $20 can.
EDIT: One little trick that most EEs I've met aren't aware of - pick up a little bit of straight phosphoric acid. It works like magic if you ever need to solder to bare aluminum, steel, or stainless steel. You could probably use an acid flux (usually intended for plumbing) but I can't imagine it being any better than regular old cheap phosphoric acid. You'll never get regular flux and solder to wet steel, but this makes it just as easy as soldering anything else.
Which ones did you get? Buy the smallest diameter solder you can. This works great Kester 44 Rosin Core Solder 63/37 .020" 3/4oz Dispense-Pak https://www.amazon.com/dp/B00AYJ0B7Y/ref=cm_sw_r_cp_api_i_WEWlDbJ4VFMPW
Also I find the cheaper longer ones much easier to solder as long as your board has the clearance for them.
Pen pump vacuum same thing
https://www.amazon.com/gp/aw/d/B07QS1VTZ4/ref=sspa_mw_detail_2?ie=UTF8&psc=1
Braid
https://www.amazon.com/Steren-400-168-Desoldering-Braid/dp/B004NEUII8
Yeah, there are all kinds of good ones. Weller and Hakko are the big names, but I've also used some units made by a group called auyue? that I liked. The ones with the digital readouts are worth a few extra dollars if you ask me.
I use a hakko fx-888 and I love it. Mine even came with a bunch of extra tips, I prefer the smaller chisel tip like this. I feel like I can get joints hotter faster and I get better solder joints with a flat tip vs a conical one. Again, personal preference. I didn't mind using the Auyue 937 and that is like 40$ cheaper than mine. Just see what you can find on sale, but a good station like that is easily worth a couple crappy handheld soldiering irons from radioshack.
Kester 44 Rosin Core Solder 63/37 .020" 3/4oz Dispense-Pak http://www.amazon.com/Kester-Rosin-Core-Solder-Dispense-Pak/dp/B00AYJ0B7Y/ref=sr_1_7?s=hi&ie=UTF8&qid=1395671772&sr=1-7&keywords=kester+44
Desoldering Wick - 2mm http://www.amazon.com/Aven-17541-Desoldering-Wick-Width/dp/B003E48ERK/ref=sr_1_3?ie=UTF8&qid=1395672458&sr=8-3&keywords=desoldering+braid
No Clean Flux Paste http://www.amazon.com/MG-Chemicals-Clean-Paste-Syringe/dp/B00425FUW2/ref=sr_1_2?ie=UTF8&qid=1395672365&sr=8-2&keywords=flux
Solder Tip Cleaner
http://www.amazon.com/Hakko-599B-02-Solder-Cleaning-Holder/dp/B00FZPGDLA/ref=sr_1_1?ie=UTF8&qid=1395673163&sr=8-1&keywords=solder+tip+cleaner
I ordered caps for both the DB-114 and the DB-212 at the same time, so you'll want to verify by counting the caps in your amp to be sure I've got them correct.
Here's the list of the parts I ordered that I believe went in the 212, it might be best to order a spare of everything but the multipart caps, just in case you find you clipped the leads too short or something:
2x https://www.tubesandmore.com/products/C-EC2010X2-475 (multi-section filter caps, the big cans on top)
6x https://www.tubesandmore.com/products/C-P-600V -- .022uF (smaller good-all, two on the input selector, 4 on the 12AX7s)
4x https://www.tubesandmore.com/products/C-P-600V -- .1uF (big good-all, between the 7199 and 6V6s)
1x https://www.tubesandmore.com/products/C-T-630V (Between case and neutral on mains input)
The reset of these are the standard electrolytics, if your amp is like mine, you should be able to spin the cardboard wrapping on them so you can read which is which without desoldering anything, keep track of polarization on them when you take them off:
2x https://www.tubesandmore.com/products/C-ET50-50
2x https://www.tubesandmore.com/products/C-ET10-50
Not so sure on these counts.. I ordered 3x and 5x, but I believe the mono used one of each:
2x(?) https://www.tubesandmore.com/products/C-ET100-25-IL
4x(?) https://www.tubesandmore.com/products/C-ET4D7-350
If you've not worked on anything like this before, feel free to message me with any questions you have about doing it, and I'll help the best I can.
I highly recommend obtaining a proper desoldering vacuum gun, I've got an Aoyue 2702 station which did a pretty good job clearing the old solder out of the way. You can probably get a cheaper setup, but my first repair job on this amp using only desoldering braid was a real pain in the ass.
You may also want to pick up some chip-quik low-temp alloy like this:
http://www.amazon.com/ChipQuik-SMD1-Low-Temperature-Removal/dp/B0019UZP7I/
It came in very handy to remove the soldered tabs between the multi-part capacitors and the chassis, as I just couldn't get it melted otherwise. The metal would just carry all the heat away. Even with the easy melting chip-quik, it was still a two hand, high powered soldering iron job to get them free.
Also, you'll want some kind of a very pointy knife or tool that you don't care too much about to use to unwrap the leads as you work over the circuit. You will have to detach plenty of resistors and the like from at least one end as you go, to move them out of the way.
Just take your time with it, and only work on one component at a time, so you don't lose track of where things are all attached. Also, if you're going to get up and take a break, tack the parts back down first! And pay attention to which driver tubes your schematic shows vs. what is in use. The schematic for my DB-114 showed a 6U8 driver, but my amp is wired and labeled for the 7199, the pinouts aren't quite the same.
Also, tubes are HIGH VOLTAGE... Don't plug the thing in while you're working on it at all, unless you're 100% confident in your ability to not kill yourself. I also advise that you set up a dim bulb tester when you first fire it back up, just to make sure you aren't going to burn your house down with a bad short. http://www.ppinyot.com/dimbulb/dim_bulb_tester.htm
Ferric chloride. It's really easy.
https://www.amazon.com/MG-Chemicals-Ferric-Chloride-Liquid/dp/B008UH3SAE
https://www.youtube.com/watch?v=XofFmA8wT3E
You may need to swap out your pump. The first one I tried didn't work worth a damn either, but then I bought one that was about three times the size on Amazon and it works beautifully. This is the one I bought.
The weed burner is probably your best bet for a big flame, if you need a smaller torch then use a torch that's for soldering, not welding. Bernzomatic makes a good selection of these, look at their heat-shrink torches or their other broad-flame torches. Those sound like exactly what you want. Even their plumbing torches would probably work. You can experiment with blocking some of the air holes if you want a flame with more red in it. Also, you want to use a cooler burning gas, like propane (instead of mapp or acetylene). If you need to hold the flame on aluminum for more than 30 seconds fill the flashlight with water.
For example;
https://www.amazon.com/BernzOmatic-361472-BZ4500HS-Shrink-Torch/dp/B00834RCLU
https://www.amazon.com/BernzoMatic-JT680-361473-Jumbo-Flame/dp/B00008ZA0D
The Soldapullt is fantastic. If people havn't used one, then it makes sense that they are steering you towards the bargain bin. Get the Edsyn. The large diameter barrel makes a massive difference in the volume of air that this thing draws in. I likewise had the same concern as you regarding tip degradation so I picked up a couple spare tips when I bought mine. I'm still on the first tip though. For the record, silicone begins to degrade above 300C (it doesn't melt per se), while PTFE's melting point is 326C. I've never had a jamming issue and the one handed operation of flip and bump (it has integral bumper for this) makes it a fast workhorse.
I suppose if you're really trying to save dough, you can get a $6 knockoff:
https://www.amazon.com/dp/B01K72SBWY
or this $9 one if you want spare tips:
https://www.amazon.com/dp/B00U1SFNYE
UK cheapie:
https://www.amazon.co.uk/dp/B00ZBUCNE0
Can't vouch for the durability of any of these clones though.
Two things- iron may have trouble heating that much mass, and/or use flux.
Something like 'MG Chemicals Liquid Rosin Flux, Non Corrosive and Non Conductive residue'
Is a game changer, and should be recommended more often in my opinion.
I have a $40 AOYUE 40ish watt adjustable soldering station (it's a clone of the hakko old 936) I got from Amazon, then added a real hakko 1/16" chisel tip. These have been reviewed by a bunch of people including EEVBlog and Big Clive on YouTube. They are solid and inexpensive. They are Chinese, so if you ebay or aliexpress etc around you'll find identical ones under other brands. There's also now several slight variations, like digital control etc with very similar looks and naming (937 are the digital for example). All the variations have the same soldering iron. They take genuine hakko tips, and since chisel tips are better than thin pointy "pen" type tips for our usage, I went ahead and just got a real tip. Had this for like 3 years and it's never let me down.
Plus you can find them as low as $19+shipping from some places.
https://www.amazon.com/Aoyue-AO936-AOYUE-Soldering-Station/dp/B000VINMRO
https://www.amazon.com/gp/aw/d/B004OR9BV4/ref=mp_s_a_1_4?ie=UTF8&qid=1495002165&sr=8-4&pi=AC_SX236_SY340_FMwebp_QL65&keywords=hakko+chisel+tip&dpPl=1&dpID=41bjcAF3UYL&ref=plSrch
Could be a few things but mostly likely the wrong wick for the job. If you get wick from the hardware store it won't work well. That wick is designed usually for plumbing size jobs and higher temps.
For PCB size jobs and SMD components getting the right wick is important just like using the right solder. Something like this may do well for you:
MG Chemicals #3 No Clean Super Wick Desoldering Braid, 0.075" Width x 5' Length, Green https://www.amazon.com/dp/B00424S2C8/ref=cm_sw_r_other_apa_Fe5Dzb8XT56FK
I also use this wick and like it:
Aven 17542 Desoldering Wick, 2.5mm Width, 5' Length https://www.amazon.com/dp/B003E48ERU/ref=cm_sw_r_other_apa_9g5Dzb43FFNZ3
As far as technique, clean then tin your tip, heat the solder you are removing, re-tin your tip quickly and heavily, apply the braid and your tip on top. Solder should flow into the braid very quickly now that the solder was pre heated on the bottom of the wick and the tinned iron tip on top heats and flows into the braid sucking up the solder from below the wick.
And as the author of that thread, I could advise you to buy this (in 125 mL):
MG Chemicals 835 Liquid RA Flux 125 mL
And this (or something like it):
Needle Flux Applicator
And a cleaner of your choice, I use:
MG Chemicals 4140 Flux Cleaner
Although I don't clean everything, normally just the solder side of pcbs.
Those needle tip flux applicators are much much better than the pens (in my opinion) and they are refillable so you will save a lot of money buying flux in (hobbyist sized) bulk.
Just keep using a rosin based solder (RMA, RA) with that flux and everything will go very smoothly. As a hobbyist I don't think there is much point in using no-clean because it only takes a couple minutes to clean a board anyways.
As for general information I found these two links helpful:
https://www.youtube.com/watch?v=V1aONINVkSE
http://store.curiousinventor.com/guides/how_to_solder/kind_of_solder
BONUS TABLE
All of the above is assuming you have everything required for building your quad if not below is a table with everything i think is necessary for building a quad. All these links will be from amazon
Part Type | Part Name | Quantity | Total Cost | Reason | Link
---------|---------|----------|----------|---------|----------|
Soldering Station | Hakko FX888D-23BY Digital Soldering Station | 1 | $100 | When it comes to working with quads and electronics you really don't want to skimp on the thing that's putting it together. A good soldering station can change your entire experience when it comes to building quads. For this reason we go with a Hakko once bought you will not need anything else later on. | http://www.amazon.com/Hakko-FX888D-23BY-Digital-Soldering-FX-888D/dp/B00ANZRT4M/ref=sr_1_7?ie=UTF8&qid=1458237822&sr=8-7&keywords=soldering+station
Hot Glue Gun | CCbetter® Mini Hot Glue Gun | 1 | $15 | You will use this more than you think, everything from securing your camera, antennas, etc to adding extra insulation to your components to ensure nothing falls off or gets ripped off. | http://www.amazon.com/CCbetter%C2%AE-Temperature-Melting-Flexible-Projects/dp/B01178RVI2/ref=sr_1_3?ie=UTF8&qid=1458237957&sr=8-3&keywords=hot+glue+gun
Velcro | VELCRO Brand - Sticky Back | 1 | $11 | Sometimes you need things to only stick for a bit then take it off. Velcro is pretty much self explanatory keep your vtx in place among other things | http://www.amazon.com/VELCRO-Brand-Sticky-Back-Black/dp/B00006RSWT/ref=sr_1_sc_1?ie=UTF8&qid=1458238198&sr=8-1-spell&keywords=stick+yvelcro
Zip Ties | Heavy Duty Black Cable Ties | 1 | $11 | The corner stone of fpv IMO. These are keeping more quads flying than anything else. | http://www.amazon.com/Heavy-Black-Cable-Ties-120lbs/dp/B003Y61A10/ref=pd_sim_60_4?ie=UTF8&dpID=41r7oTe3IpL&dpSrc=sims&preST=_AC_UL160_SR160,160_&refRID=1G5GJ28Z3M8JBJDW67RV
Solder | Miniatronics Corp 1064004 Rosin Core Solder 60/40 4oz | 1 | $12 | You are always going to need solder and this as the flux mixed in meaning it will be a very easy to use solder. | http://www.amazon.com/Miniatronics-Corp-1064004-Rosin-Solder/dp/B0006O933K/ref=sr_1_7?s=hi&rps=1&ie=UTF8&qid=1458238393&sr=1-7&keywords=solder&refinements=p_85:2470955011
Velcro Straps | Reusable Dubbex Black Velcro Cable Ties | 1 | $13 | Can be used for pretty much anything like batterystrap, hold wires down etc. | http://www.amazon.com/dp/B01AW0BDNK?psc=1
Voltmeter | Blackcell DC 3.2-30V LED 0.56inch Panel Meter Digital Voltmeter | 1 | $7 | Eventually something is going to go wrong and you are going to have to ensure that your voltages are correct. You are going to need this to verify volt outputs and to figure out what they are when there is no documentation for what you are looking at | http://www.amazon.com/Blackcell-3-2-30V-0-56inch-Voltmeter-Two-wire/dp/B00ZZIXT8W/ref=sr_1_6?s=electronics&rps=1&ie=UTF8&qid=1458238663&sr=1-6&keywords=voltmeter&refinements=p_85:2470955011
Desolder Tool | LyonsBlue Desoldering Vacuum Pump | 1 | $9 | Very useful for cleaning up to much solder or removing solder from contact pads to redo. Simply heat up the solder and suck it out. | http://www.amazon.com/LyonsBlue-Desoldering-Vacuum-Solder-Removal/dp/B003FHYL7I/ref=sr_1_2?ie=UTF8&qid=1458238959&sr=8-2&keywords=desolder
TOTAL | FOR | ALL | $178 | |
I wear nitrile gloves while sanding, and the blade went right from sanding, to a cotton cloth, to the bath. The steel is O1 from Jantz, so I trust that, and the bath was made using this.
I haven't sanded it other than a water and cloth rub down, because I am still debating if I like the look.
Are you asking about the large soldapullt or one of the smaller ones?
I have one of each of those, and I find I always use the smaller one as I can use it single handed. I can 'single hand it' with the large one if I invert it and push the plunger down on the table, but then you don't evacuate what you can of the sucked up solder and the chamber becomes more full and is then more prone to bind on the sides. Also when the tip clearing rod pushes solder out that has stuck to the inside of the tip it falls out on the desk and your hand, so it is more messy. I also have used my forearm/wrist of the hand holding the soldering iron to push it down, but as you can expect after burning my hand, or dealing with the iron cord for a few times it gets old fast.
Also the larger one I have is one of the mkawa modified ones with the viton quad or x-ring oring and krytox lubricated. And I found that having a better seal just means it jams more often. These are tools that are meant to be messy inside so you need your engineered tolerances for gunk and crud.
I soldered my ergodox PCBs with my hakko set to 650 F (about 340-350 C). Just don't keep the iron on the switch solder posts any longer than necessary. Basically, if you don't have a perfect joint in 3 seconds, you did something wrong. The traces are small enough on keyboard PCBs that you probably don't even need that high of a temp, but I think it helped to make nice shiny joints when using lead-free solder.
The same temps worked with a separate de-soldering pump that I have that is similar to this one. I haven't used the integrated kind that you linked to before. Over 400C, you are risking burning up small traces and delicate components, but you are probably okay if you work fast. If you really wanted to control temp on that cheap desoldering iron, you could plug it in through a variable transformer.
Soldering components to a huge, thick PCB ground plane on my tesla coil kit, on the other hand... that was more of a challenge. I dialed it up to 750F (400C), and should have been using extra flux.
I have https://www.amazon.com/NulinkTM-Deluxe-Desoldering-Remover-Plastic/dp/B00U1SFNYE/ref=sr_1_9?ie=UTF8&qid=1486421878&sr=8-9&keywords=solder+sucker. It's big but works very well.
Is braid of any use or is it just not practical for what you need?
Here
red dragon
Been using one of these whenever the wick doesn't work.
Edsyn Deluxe Soldapullt
Good for when there is a lot of solder in a plated through hole.
There are also special solder alloys (see: chipquik) that melt rather low temperature and can aid in removing parts like that.
I'm just going to assume this may interest you.. I really only use 2 things.. Photo gloss paper from office depot with a laserjet printer:
https://www.officedepot.com/a/products/394925/Office-Depot-Brand-Standard-Photo-Paper/
And etching fluid in an old plastic tupperware container:
https://www.amazon.com/MG-Chemicals-Chloride-Etchant-Solution/dp/B008UH3SAE/ref=sr_1_3?ie=UTF8&qid=1550866951&sr=8-3&keywords=ferric+chloride
Print off your circuit (I use Fritzing to make my circuit designs) onto the inkjet paper.. It adheres pretty well.. Transfer with an iron and a roller.. It takes 3-4 minutes and should get so hot that the paper kind of sticks to it.. Peel off the paper, I usually have to run it under water to get all the paper off.. You should be able to rub on it w/o hurting the transfer once it gets to this point..
All you'll be left w/ is a mask.. There'll be some spots that didn't transfer.. Just use a black sharpie to mask those spots in..
Drop it in the fluid for about 6-12 minutes.. It only takes enough to barely cover the board.. And that amount of fluid can do 3-5 boards. Close the tupperware and shake it like one of those old pictures people talk about..
Drill your holes w/ a dremel.. Boom.. Done.. I have probably done 20 or 30 of these and they're a pain in the butt, but you can have them done in an hour and know if your design works before sending off and wasting money.
I called my city disposal team and they said that it's safe to dispose of in the drain with lots of water.. Alternatively, you can soak paper towels with the material after it's spent and throw those out.. I wear a vapor mask, goggles and gloves when I use the ferric chloride, but I think I go overboard.. Just gloves and goggles are probably fine. Always make sure you're in a well ventilated area..
​
​
> Do these look good? What else will I need?
Get a chisel tip for the iron. Looks like that X-tronic uses Hakko tips
https://www.amazon.com/Hakko-T18D16P-Fx-888-Station-1-6mm/dp/B004OR9BV4/ref=sr_1_1?ie=UTF8&qid=1503937038&sr=8-1&keywords=hakko+chisel+tip
https://www.amazon.com/Soldering-Tip-Chisel-2-4mm-14-5mm/dp/B004ORB8J2/ref=sr_1_2?ie=UTF8&qid=1503937038&sr=8-2&keywords=hakko+chisel+tip
Quick and simple guide: http://www.popsci.com/diy/article/2012-06/how-make-your-own-home-carbonation-system
Carbonation cap: https://www.amazon.com/dp/B00V334SME/
Hose and quick disconnect: https://www.amazon.com/dp/B0064OI77Y/
Pressure regulator: https://www.amazon.com/dp/B002UZUJ22/
For the tank, contact a local welding shop and ask them to price a pure CO2 cylinder. Tell them what it's for if they ask about grade. Make sure you find out cylinder cost as well as refill cost. I could have gotten a cheaper cylinder on Amazon apparently, but I didn't overpay by much. Mine's a 20 pound, but you can get 5 and 10 as well.
I've been messing with small electronics since I was a kid, but just started getting more serious about it in the last few years. I own a recording studio so I like to build my own gear and make repairs.
One of the best investments I ever made was buying some high-quality Hakko tips (and a decent solder station of course). I didn't realize what a MASSIVE difference the tip makes. In both even heat distribution and length of life for the tip. I also got really particular about keeping my tips clean and properly-tinned. I check before and after every use to make sure there aren't any rough spots or leftover solder/burn marks. If your tip isn't properly tinned and cleaned you're going to end up with exactly what you see in your picture.
Something like this: Radioshack Tip Cleaner & Tinner has been absolutely invaluable to me!
I also never use flux, but I do typically use a solder with a rosin core. It all depends on what you're working on, but it seems like you may be running your iron too hot, or completely un-tinned. Which is just going to burn out tips pretty quickly. Look up some rough temperature guidelines and recommended tip sizes/types for what you're working on.
I work on small electronics. So guitar pots and jacks, audio connectors, PCB boards (not the teeny tiny surface mounted ones), making audio cables, swapping dead components on a PCB, etc.
So I use This soldering station that I actually just got recently. It was only $50 and I'm REALLY impressed with its performance and build quality. Couldn't recommend it more for a rig on a tight budget. I typically run it anywhere from 350c to 450c (if I'm working pretty fast).
I use This Hakko tip which I found to be the perfect one-size-fits-all solution for what I usually need.
For the CO2 tank, decide what size you'll want. The most-common sizes are 5, 10, and 20LB; larger tanks are more expensive but are generally much cheaper to refill. Depending on the size, you're probably looking at $50 - $130.
For a regulator, Taprite is generally well-regarded. My main recommendation is to get something that doesn't require a screwdriver or wrench to change the pressure.
You'll also need a line to get to the bottle-cap. If you just need one, buying a pre-built assembly is probably cheaper than getting the parts.
And the cap /u/BretBeermann linked works on standard 2L soda bottles, so save a few of them to reuse.
By the way, SeriousEats did an article on building a DIY carbonation rig a few years ago. Probably worth a read.
soldering iron $40
solder (I think this might be a little too thick, but I can't find any 0.022" solder)
I recommend this if you can squeeze it into your budget because it makes cleaning the soldering iron tip sooo much easier
desoldering pump
if you want ergo clears, you'll need some springs too.
The soldering station you're looking at will be fine for replacing capacitors. Its adjustable, which will come in handy when you want to further your skills. Get some extra tips, and find some fine point ones. I like to use long conical ones, as well as long small flat ones.
As other posters have said, you want to practice on something you don't necessarily want to keep. Find something cheap from a thrift store and take it apart.. an old clock radio, vcr, something of that sort. Then identify the capacitors and give it a go. Once you get the hang of it, try on the genesis.
Solder - you want some 60/40 solder (60%tin 40%lead). Stay away from acid core, its not for electronics. Find this in a thin gauge, you'll have a better time with it.
Flux - nice to have around. On some joints, the old solder doesn't really like to flow all that well. You can put some flux on it, and it'll flow a bit better. Use it on the new joint as well. There's several different types, and you can get lost in it, but you really want a liquid or gel type flux that is "no clean". I still give it a rinse with alcohol and a brush after I'm finished, but it cleans up way easier than regular flux. Here's what I use : MG Chemical's Paste flux
You will also need something to remove the old solder from the holes. Tools like this Vacuum pump and desoldering wick like Desoldering wick are good for removing the old solder.
As for the actual removal and replacement of the capacitors, I usually heat up one side from the bottom of the board, and rock the cap so it slides out a bit, then do the other side, working the cap out a little at a time. After that I clear the hole with a vacuum pump (while heating the solder up, get the vacuum pump as close as possible and press the button) or the desoldering wick (put the wick on top of the solder, then heat both, pull the soldering iron and the wick off at the same time, lest you pull up traces - This takes a bit more practice to perfect)
Make sure you put the new capacitor in correctly. Electrolytic caps are polarized. You want to make sure positive goes to positive and negative to negative. Look at the cap before you remove it. Most boards are marked, but no reason to risk the board being marked wrong.
Make sure the caps you're using are the proper rating. A general rule is the capacitance needs to be the same (farad rating), and the voltage rating needs to be at least the rated, but can be higher with no ill effects.
Its late and I'm rambling. Hope this helps.
That stuff looks good. Definitely pick up some desoldering braid and flux if you can afford it. Usually there is enough in the solder so you might be able to get away without it for now, but it helps a ton with the braid for fixing mistakes and great for heat transfer and stuff.
Edit: one more thing I thought of, heatshrink tube for wiring. Sorry to wreck your budget but now you'll have a good kit. All that's left is to get your skills up. :D
Edit 2: if you get serious and start repairing boards, this shit is literally magic for removing components because it stays liquid for longer and allows you heat multiple points at once. Check a video
Essentially the same thing, no paperwork required
I use a Weller WES-51 and you'll need this or a clone:
http://www.amazon.com/Edsyn-Deluxe-Soldapullt-Heavy-Vacuum/dp/B006GOKVKI/ref=sr_1_1?s=hi&ie=UTF8&qid=1426885680&sr=1-1&keywords=soldapullt
Also see the Modifications Wiki for soldering equipment suggestions.
https://www.reddit.com/r/MechanicalKeyboards/wiki/modifications#wiki_soldering_tutorials
I have used the hot knife for cutting ropes and even very thin woods. I wouldn't recommend it if you're trying to cut through plastic. Actually, I wouldn't recommend anything heated for cutting through plastic (when you burn plastic, the fumes can be toxic). You could try to use it for cutting wires, but why would you need to when you can just desolder the parts you don't need and solder them in different places? If you're planning on taking all the wires out, just disconnect them from the switches and take them out. No need for a hot knife. But for the sake of answering your question, you could use a hot knife for cutting through wires if you're careful. I'd argue that it may take a skilled hand (mind you, my hands aren't really steady so even I don't consider my hands too "skilled") to cut through the wires without hitting the plastic parts of the blaster. I wouldn't worry about melting through them, though because if you get everything out of the way and pay attention to what you're doing, you should be fine. Using a hot knife is something I haven't really heard of or witnessed in the rewiring process not would I try doing it considering how small the wires are and how precise I'd have to be.
Just something to consider. Hopefully I helped you and didn't make you more on the fence after saying that.
Also, you should take /u/darthskids advice. YouTube is a better place to go than reddit for precise instructions and tutorials.
desoldering pump
I just got one of these for weeding between pavers. Seems to work well in gravel/paved areas. Spots with nearby plantings or areas of flammable brush are not good.
There's also a bit of a learning curve on which weeds need just a quick pass and which ones (grasses) need a longer pause. And the obvious risk of fire danger, though vinegar has its own health risks (you'll want to wear face/eye protection).
I'd veto getting a non powered desoldering pump. I had one for a while and mostly hated it. Then I picked up this one https://www.amazon.com/gp/product/B00B88FRME/ref=oh_aui_detailpage_o00_s00?ie=UTF8&psc=1 and by holy guacamole is it 100000% better.
It's more spendy, but this Hakko model has been a life saver for me more times than I care to admit. Much better than the $10 pumps (although those have their uses for sure). If you plan on removing components regularly or maybe even attempt repairs, this is super handy.
https://www.amazon.com/gp/product/B00KWM69C4/ref=oh_aui_search_detailpage?ie=UTF8&psc=1
This is the one that I have
It's pretty cheap but it gets the job done most of the time.
Here is the mobile version of your link
+1 for kester 63/37 I like the .020 size
Use a solder sucker or some desoldering wick to remove the excess solder that is touching the logo.
Something like this https://www.amazon.com/gp/product/B00424S2C8
I don't know the dimensions but I prefer this
https://www.amazon.com/gp/aw/d/B004OR9BV4/ref=mp_s_a_1_6?ie=UTF8&qid=1502302745&sr=8-6&pi=AC_SX236_SY340_FMwebp_QL65&keywords=hakko+soldering+tips&dpPl=1&dpID=41bjcAF3UYL&ref=plSrch
Does this look good?
https://www.amazon.com/gp/product/B0747KYF6S/ref=oh_aui_detailpage_o00_s01?ie=UTF8&psc=1
https://www.amazon.com/gp/product/B008ZIV85A/ref=oh_aui_detailpage_o00_s00?ie=UTF8&psc=1
https://www.amazon.com/gp/product/B000G36BYU/ref=oh_aui_detailpage_o00_s00?ie=UTF8&psc=1
Here's ours. Keep an extra person with a hose nearby, esp. since it's near burnables like that fence and there is likely some dried up detritus nestled with the rocks that could burn. You don't have to actually set fire to anything--the passing of the torch over the weeds causes cellular damage and they wilt and die. It is, however, very torch-like with a scary hissing sound and flame. But still, don't burn your house down.
Here's a few pictures I just took. The neck on the rubber cover is a little too tight to fit over the 360 cables, so I had to stretch it quite a few times with a needle nose pliers before it would squeeze on.
Just make sure you remove the metal covers on the original Xbox cable carefully. Then you can reassemble them on your finished product. Just make sure you test it before you go putting it back together. And It would be a good idea to cover you new solder joints with at least a little hot glue to help protect them from breaking off.
As for the solder, I just used some cheap stuff off Amazon. I think it was this stuff. But I'm no solder expert, so that stuff could be terrible for all I know.
As for s/pdif, while I suspect it's possible, but I haven't seen any schematics for that. So you're on your own there.
Don't really know brands. This is actually the same one I bought from the same vendor.. It's half the price of what Prest-O wanted in-store.
This is the regulator I use, if you're interested.
solder
I keep the heat almost all the way down. My kit is actually slightly different here and came with a stand, sponge, and the tweezers are SUPER useful
The ones in the front that we can see should be fine, since both pads are GROUND pads. WE cant see the other pads though from that pic. As long as you arent grounding Ground pads to Positive pads you should be okay.
Do you have any desoldering-braid/desoldering wick? If not I would recommend picking some up: https://www.amazon.com/Steren-400-168-Desoldering-Braid/dp/B004NEUII8 it makes it super easy to desolder connection.
You have too much solder on those pads though, I would try and use less in the future.
Sure thing. Like with most hobbies, it's when you first get into things that is the most expensive. Thankfully, it's not that bad to get started.
First off, you'll need some solder. That's a meltable metal used to join two things together. This roll will last you for several projects: https://www.amazon.com/gp/product/B000G36BYU/ref=oh_aui_search_detailpage?ie=UTF8&psc=1
Next, you'll need a soldering iron. I've been pretty happy with this one: https://www.amazon.com/gp/product/B00KS8XA2Y/ref=oh_aui_search_detailpage?ie=UTF8&psc=1 but people swear by Weller. I'm not sure I'd get that 40 watt one that's a similar price on Amazon though, I tend to keep mine at a fairly high power and it works nicely that way.
(I'm assuming you have a Harbor Freight near you for the other stuff. They're pretty common) Then you'll want a multimeter. This is your cheapest option, and if you check your junk mail you might have a coupon for a free one: https://www.harborfreight.com/7-function-digital-multimeter-90899.html but it's lacking in audible continuity (translation: if you want to check that two points are electrically connected, it beeps if they are). This might be worth the extra money: https://www.harborfreight.com/11-function-digital-multimeter-with-audible-continuity-61593.html. Or if you really have some money burning a hole in your pocket, get one of these: https://www.harborfreight.com/5-in-1-digital-multimeter-98674.html - that has some extra features that really come in handy, but aren't totally necessary either.
That covers the most expensive tools, but there are still a few odds and ends you'll want.
If you're going the solder sucker route, get the Soldapult. Trust me. Save yourself the aggravation and decrease the chances of ruining your expensive keyboards.
I went through 2 cheapies. You will appreciate it in the end. Or as posted a day or two ago, get a desoldering iron with the bulb attached. I kinda wish and still may buy one... though I'm more about building than modding at this point. It's just such a pain in the ass.
So the one that I've used at my job is the Edsyn Deluxe Soldapullt but I've seen some third party clones on amazon for about the a third of the price, and they look pretty much identical and have the same design. I've personally never used any of the third party clones, but I can imagine it works just just as well as the Sodapullt. Here's the one I'm looking at on amazon, and it looks to have pretty good reviews. What's nice about this kind of desoldering pump is that you can 'reload" the pump while holding the iron in one hand and the pump in the other. Just push the end with the spring against the table and it will lock in place until you press the trigger to release it.
Is this: https://smile.amazon.com/Tabiger-Solder-Desoldering-Sucker-Remover/dp/B0777LMVTT/ref=sxin_2_ac_d_pm?keywords=desoldering+wick&pd_rd_i=B0777LMVTT&pd_rd_r=7ab22bf0-6f6c-4447-9d41-36a988ff2739&pd_rd_w=xyYZ6&pd_rd_wg=KscEQ&pf_rd_p=be5d8dec-444e-4770-91df-1e16a8c46da8&pf_rd_r=7T5RWK7VMRTPK0YD3VNN&qid=1562837543&s=gateway
good enough to desolder the attached pins or whatever on the little OLEDs that work on a Corne PCB?
Kester is the best brand .02" diameter.
https://www.amazon.com/Kester-Rosin-Core-Solder-Dispense-Pak/dp/B00AYJ0B7Y/ref=sr_1_11?keywords=kester+solder&link_code=qs&qid=1562729149&s=gateway&sourceid=Mozilla-search&sr=8-11
If you can swing it, this is a boss. I only sold mine because I hate desoldering no matter how easy it is.
well let's see, not so good iron, not so good solder, wrong flux = no mystery there.
Get solder wick (not the exact one I used, just one of the first ones I found on Amazon) and make sure to get your soldering iron hot enough. I first tried at 300 C and was having a heck of a time. Tried again at 400 C and everything went much smoother.
Well to replace the battery you'll need to open the cart, carefully desolder the old battery, and solder in the new one. It's fairly straightforward and easy, but you can go look up a youtube video for a walkthrough. In theory you can tape in a new untabbed one in, but going with the original design/intention is preferable and won't come loose and lose your save if done properly. However, you'll need the following:
optional:
I got my batteries and screwdriver from a online store that sells gameboy stuff:
https://www.mortoffgames.com/cr2025-coin-cell-battery-with-tabs-panasonic-
https://www.mortoffgames.com/gameboy-color/repair-and-replacement-parts35/game-repair-parts39/38mm-security-screw-driver
From Amazon:
https://www.amazon.com/Steel-3-8mm-Screwdriver-Security-Nintendo/dp/B000F8GWH2/ (3.8mm security bit)
https://www.amazon.com/Super-Nintendo-Genesis-Master-System-Advance/dp/B00ES2B0CI/ (CR2025 w/solder tabs)
https://www.amazon.com/Weller-WLC100-40-Watt-Soldering-Station/dp/B000AS28UC
https://www.amazon.com/WYCTIN-Solder-Electrical-Solderding-0-11lbs/dp/B071G1J3W6/
^ lots of options, this is close to what I use --- 60/40 Sn-Pb, rosin core, 0.6mm diameter -- it don't think it's that much solder for the price, but I probably paid at least twice that at least and I've done lots of stuff and I still have way more than I needed. You can probably use a smaller diameter for this specific job, but that size is easy to hold.
It seems like a lot of money, but you got a pretty good deal on the unit and game. They can go for $20-30 and $12-18 respectively. Also, the screwdriver/bit and soldering iron are one-time investments in being able to do it again later and also do other soldering work.
If you don't mind making separate purchases the other source I mentioned has way better battery prices and their screwdriver is a bit cheaper and has a handle, I have one myself and it works fine. In general though I recommend going for the best quality one just so you don't have cheap, crappy tools. Sometimes that means you pay a little one more, and sometimes pricing is about the same.
Same but I use this for the Smokey Joe, and this for the big fires.
Continued.....
Ok, so for the electronics:
Get a solder sucker for all the electronics work. This guitar has leaded solder, and a lot of what you find in stores now is lead-free. Mixing those two can cause bad solder joints, so it's best to remove all the old solder and start fresh (assuming the solder lugs and eyelets hold up).
I'd start with testing the pickups to see if they work. This is easy - just hold the leads on a cable plugged into an amp (one on the tip, one on the sleeve) and they'll pass signal if they work. You can either tap the pole pieces with a screwdriver or anything that sticks to a magnet, or hold the pickup to the strings of another guitar. You can also take ohm readings of the coils, but this tests the entire unit to see if it generates signal.
After testing the pickups, I'd replace the jack and battery connections, tag all the switches and pots with electronics cleaner, and test all these parts with a multimeter to see that they work. This would isolate any electronics issues to just the circuitry on the board.
That circuit is actually fairly simple, but you have some components that might give you problems. Those metal cylinders with three orange wires coming out look to be old school transistors. The problem is, I don't see any markings on them to let you know what variety they are or which leg is which. This means that if you have to rebuild the circuit, you can't replace these or lose track of where the legs are connect. You also have to just hope that they still work. If you get it all together and it still doesn't have signal, you can never know with 100% certainty that the problem is or isn't these parts.
Past that, the rest of components are very straightforward - just caps and resistors. You can replace all these if you want just going off the labels. It's not a terrible idea to replace all the capacitors. The material they're made from degrades over time, so even if they work, they certainly won't be operating to the specs printed on the label.
Try something like this:
Alpha Metals #am31605 4oz.032elec Lead Solder https://www.amazon.com/dp/B000G36BYU/
Don't you think that fire would be a more effective and quicker option than the one you are using?
Dunno about the DA but for keyboards you can. As /u/01111000x said it'll void any warranty you may have with it.
I changed out all my LED's and Cherry switches using the following items:
Weller SP40NKUS - May be too powerful but it got the job done fine.
Solder sucker
Leaded solder with rosin core
Desoldering wick
I guess for Green LED's anything on eBay would work. 2x3x4mm square led's or flangless 3mm will both work. I got mine frome here because im impatient.
Since the Majestouch is plate-mounted I don't believe you can open the switch without desoldering. Desoldering isn't too hard assuming you have the right tools. I just did a huge desoldering project with an iron, some solder, and a little vacuum pump like this.
Sometimes just heating up the existing solder with the pump doesn't work too well, so you might try adding a little extra solder to the connection before you vacuum it up. That way it all comes off in a huge chunk. Then it's just a matter of popping the switch out. Have a look at the repair guide.
So you don't need a concealed carry permit for a flamethrower?
Cool.
This one is a half million BTU per hour. Propane, not jellied gasoline. I guess I can't have everything.
Wait. One of the recommended uses is "starting charcoal". I think I'm gonna need a video camera, too.
> ferric chloride acid (which you might be able to get online or from computer supply stores)
I've gotten it from Amazon. This is the one.
You might find a solder sucker - https://www.amazon.com/WEmake-WM-SP4-Solder-Sucker-desoldering/dp/B0002KRAAG.
Or some de-soldering braid/wick - https://www.amazon.com/MG-Chemicals-Clean-Desoldering-Length/dp/B00424S2C8 useful for removing the solder easily when removing header pins. Also before you try de-soldering, remove the plastic part from the pins by pulling it off with some pliars, this allows you to remove the pins 1 by 1, preventing the solder pads getting to hot and coming off.
That solder looks pretty thick, this one would be easier to work with: https://www.amazon.com/Alpha-Metals-am31605-4oz-032elec-Solder/dp/B000G36BYU
You won't need additional flux.
might need to get some desoldering braid as well. Or you can just go balls out and get a dedicated desoldering iron. They are quite amazing and take all the fun out of desoldering.
It almost seems to me like there's a problem with the trace getting broken somehow, which is not exactly normal during regular soldering. I'd try reflowing the joints with some flux like this one:
http://www.amazon.com/dp/B005DNR01Q
then if that doesn't help with continuity, try soldering some wire along the affected trace, and see if you have continuity that way.
Soldering is a good skill to have, in general.
And if you're careful, there's not much you can screw up.
Watch a YT tutorial or two and you'll be good to go.
For tools you'll eventually want what is in this kit, but probably not that kit itself.
I bought a Weller WLC100 40 watt kit (definitely get a norrower ST2 or ST3 tip as well), a solder sucker tool (you can use desoldering wick, but the solder sucker is worth the money), a Helping Hands and 60/40 rosin-core solder.
In addition, I like using tip tinner, a wire tip cleaner like this because I found that using a wet sponge reduced the tip temperature too much.
Also, solder fumes are not great so only do this is in a well-ventilated area. I like to use a small fan to blow the fumes away from my face.
The only thing you'll need to do is desolder/clip the existing swtich and wire up the replacement. You don't have to mess with the pots or caps unless you want to.
Phostenix Tele diagram page.
edit: fixed solder type
How good?
Here is one that will last you pretty much for whatever no matter what you do with it, its the soldering iron I have used for the past several years and has been great on a number of projects: https://www.amazon.com/Hakko-FX888D-23BY-Digital-Soldering-Station/dp/B00ANZRT4M/
Here is one that will do just fine but isn't great or anything:
https://www.amazon.com/Weller-WLC100-40-Watt-Soldering-Station/dp/B000AS28UC
The most important feature for a good soldering station is variable temperature.
The only other things you will need is solder:
https://www.amazon.com/WYCTIN-Solder-Electrical-Soldering-0-11lbs/dp/B071G1J3W6, a solder wick: https://www.amazon.com/MIYAKO-Desoldering-Wire-Handy-Dispenser/dp/B010VMHR5M, and possibly wire cutters if you don't have them: https://www.amazon.com/Hakko-CHP-170-Micro-Cutter/dp/B00FZPDG1K
Some personal advice is get the best one you can afford if you thing you will use it a lot, the difference between a okay one and a great one is huge. I hated soldering till I got a good iron.
something like this. This might be the exact one I bought. There are probably better solutions out there, but this has worked for me so far.
https://www.amazon.com/Velleman-VTDESOL3U-Vacuum-Desoldering-Heater/dp/B00B88FRME/
https://www.amazon.com/Velleman-VTDESOL3U-Vacuum-Desoldering-Heater/dp/B00B88FRME/
This just happened to my Win too, but because I fell of my bike and it was in my backpack. I know this doesn't answer your question, but I used a heat gun to mold it back into shape and this stuff to weld the crack: https://www.amazon.com/Ontel-Second-Fix-Liquid-Plastic-Welding/dp/B016MB0JF6
​
Its knock off Bondic, pretty sure they are the exact same stuff but this is 80% cheaper.
you could try 5 second fix https://www.amazon.com/Second-Fix-Liquid-Plastic-Welding/dp/B016MB0JF6
I'm almost ready to start soldering my custom keyboard. However I wanted to check and make sure that my solder/ soldering iron combo is okay for a keyboard. This is my iron and [this]
(https://www.amazon.com/gp/product/B00AYJ0B7Y/ref=oh_aui_search_detailpage?ie=UTF8&psc=1) is the solder I got.
The iron isn't adjustable and it says
"up to 925.F"
and the solder says
"Solder iron tip temperatures between 315-371°C (600-700°F)"
Is this gonna be okay, or should I get an adjustable temp iron? Thanks for any help.
I have heard it is slightly better than the standard plumbing torches.
I already have a Bernzomatic 8000 for soldering, so I don't think I would buy another torch. I don't think the extra expense of the Sansaire would be worth it to me. People suggested the Sansaire was probably just a repainted Bernzomatic Heat Shrink Torch, which is much cheaper. The branding+paint on the sansaire look like a $80 mark up.
The downside of the Heat Shrink Torch/Sansaire is that if you want to get a Searzall down the road, the thing is designed only to fit the 4000/8000 models.
The instruction manual for the Sansaire Searing Kit confirms that it is simply a model BZ4500HS torch with a new paint job. http://www.bernzomatic.com/content/uploads/2015/08/Sansaire-Searing-Kit-Manual.pdf
The BZ4500HS torch is available for $70 on Amazon. http://www.amazon.com/dp/B00834RCLU/ Couple it with a sheet pan and cooling rack that you likely already own and you're set.
This helped me. It helps pull out the solder I was able to just remove all the solder holding in pins with it. MG Chemicals 400-NS Series #3 No Clean Super Wick Desoldering Braid, 0.075" Width x 5' Length, Green https://www.amazon.com/dp/B00424S2C8/ref=cm_sw_r_other_awd_xK6xwbDCA2VBF
I use this as well as some .04" 60/40.
then something like this?
http://www.amazon.com/LyonsBlue-Desoldering-Vacuum-Solder-Removal/dp/B003FHYL7I/ref=sr_1_1?ie=UTF8&qid=1449426345&sr=8-1&keywords=soldering+vacuum
and this?
http://www.amazon.com/0-8mm-Rosin-Core-Soldering-Solder/dp/B00JR3ROV4/ref=sr_1_4?ie=UTF8&qid=1449426415&sr=8-4&keywords=60+40+solder+tin
and this to practice on?
http://www.amazon.com/Solderable-BreadBoard-matches-tie-point-breadboards/dp/B0040Z3012/ref=sr_1_8?ie=UTF8&qid=1449426442&sr=8-8&keywords=prototype+pcb
and this (which i saw WFD use)
http://www.amazon.com/Hakko-599B-02-Solder-Cleaning-Holder/dp/B00FZPGDLA/ref=sr_1_9?s=hi&ie=UTF8&qid=1449426488&sr=1-9&keywords=soldering
Flamethrower and some good dry wood splits and you'll be cruisin.
My success rate with wiring guitar builds increased greatly when I bought a "nice" soldering iron and some small diameter solder. You'll get much cleaner joints with a soldering iron that lets you control the temperature. I bought this Weller soldering station, and it was the best investment I've made.
I can't seem to find this conclusively anywhere aside from one lone Amazon review. If I want individualized CO2 control for THREE taps (and delay the nitro hookup for now), can I hook up a Taprite double regulator to a single somehow? Or is this the more correct option: https://www.kegerator.com/taprite-three-product-secondary-co2-regulator/T1683ST.html
Edit: Seems I would use the above three-way regulator in-line with a standard one-body dual-gauge regulator like this one: https://www.amazon.com/Taprite-T742HP-Primary-Pressure-Regulator/dp/B002UZUJ22
Also just a note, this seems like a steal: http://www.beveragefactory.com/draftbeer/towers/triplefaucet/14-tall-polished-stainless-steel-draft-tower-perlick-630ss-faucts.html
Triple faucet tower with Perlick 630ss for only $228. I don't seem to come close to that anywhere else.
De-Soldering is definitely one of the most annoying things involved in this hobby lol.
If I could...I would love to buy one of those Hakko De-Soldering Pump...if it wasn't like $350.00 LOL.
Would make my life so much better
I bought that exact same soldering station. It is really nice! Love how fast it heats up and that it takes standard tips. If you want a cheap alternative to a desoldering gun you can try using a heated solder sucker. Just don't try using it on oem solder joints.
Velleman VTDESOL3U Vacuum... https://www.amazon.com/dp/B00B88FRME?ref=ppx_pop_mob_ap_share
http://www.amazon.com/Red-Dragon-VT-3-30-Propane/dp/B00004Z2FQ/
Soldering Iron
Solder Sucker
Solder just be aware this does have lead in it, so wear gloves and a mask if possible when working with it. it has a small enough diameter that makes it quite easy to do work with switches though
Looks like you've started down the road to learning how to make your own cables, and you need some guidance while you're practicing.
This page has a nice picture of good, bad and ugly results. Yours are not bad for a beginner but ... ugly.
This set of search results will provide lots of information. Read as much as you can.
Here's what I use for guitar cable soldering tools. The links are for explanation. You don't have to get them at Amazon. An electronics store will have them. You may decide it's less expensive to buy the patch cables. But, if you are a do it yourself type, the tools will pay for themselves.
Weller 25W iron Get some extra chisel tips. They get destroyed quickly by noobs.
Helping hands
Wire stripper
Solder sucker
Brass wool solder iron cleaner
63/37/resin core .6mm solder
I like to add patients lots of patients! I desoldered 2 switches recently. I found the best advice one can give is take your time and don't apply to much heat for to long. Also buy a decent solder sucker otherwise, be prepared to hate life. Personally I have this one https://www.amazon.com/Tabiger-Solder-Desoldering-Sucker-Remover/dp/B0777LMVTT/ref=sr_1_4?s=hi&ie=UTF8&qid=1526775806&sr=1-4&keywords=Solder+sucker and its a step up from the one included with my 25 dollar kit. I have heard this one is amazing. I have thought about investing in it https://www.amazon.com/Engineer-SS-02-Solder-Sucker/dp/B002MJMXD4/ref=sr_1_6?s=hi&ie=UTF8&qid=1526775806&sr=1-6&keywords=Solder+sucker
Get yourself a desoldering pump and some desoldering wick. https://www.amazon.com/Tabiger-Solder-Desoldering-Sucker-Remover/dp/B0777LMVTT
No worries.
Has anyone tried this solder? I know that Kester is good and recommended frequently, but are there any slightly cheaper options that aren't bad quality?
Also, desoldering braid vs solder sucker for putting together 2 keyboards (doesn't have to last a long time)? What about those cheap kits with both?
I realize that it's stupid to send money on kits and then not spend just a little more on soldering supplies, so I'll gladly spend more for quality if it makes sense.
If you have no experience with a soldering iron, it'll be a little tough. However, learning is half the battle!
You'll need a soldering iron and some sort of desoldering tool. The two I know are desoldering braids and desoldering pumps
I'd probably go with the braid, but I would youtube both and see how they're used.
Other than that, good luck!
The solder sucker I'm using.
It looks like you can unscrew the bottom, but unfortunately you can't. I tried using a clamp wrench, nothing came off.
This or maybe a slightly smaller diameter. It was recommended to me by another /u/
https://www.amazon.com/gp/product/B00AYJ0B7Y/ref=ppx_yo_dt_b_search_asin_title?ie=UTF8&psc=1
Supplies you'll need -
Finally, check out parts 1-3 of this [video series] (https://www.youtube.com/watch?v=J5Sb21qbpEQ). It will show you a lot of the basics.
http://www.amazon.com/gp/aw/d/B00004Z2FQ/ref=mp_s_a_1_3?qid=1462376270&sr=1-3&pi=SX200_QL40&keywords=Dragon+torch&dpPl=1&dpID=313Db7iqdWL&ref=plSrch
Thanks for the information, what temperature should I be using?
I have some braid I can use to try to get it out tonight and maybe clean up the board. Originally I used this flux, https://www.amazon.com/gp/product/B005DNR01Q/ref=oh_aui_detailpage_o06_s00?ie=UTF8&psc=1 but my pen is this (which is the one I normally stick with) https://www.amazon.com/gp/product/B008OC3VMU/ref=oh_aui_search_detailpage?ie=UTF8&psc=1
This is the connector https://www.amazon.com/gp/product/B07DC7M8CJ/ref=ppx_yo_dt_b_asin_image_o04_s01?ie=UTF8&psc=1
but I got he 4 pin, should have gotten the 5 pin.
https://www.amazon.com/gp/product/B000RB38X8/ref=ppx_yo_dt_b_asin_image_o00_s00?ie=UTF8&psc=1
​
https://www.amazon.com/gp/product/B000RB38X8/ref=ppx_yo_dt_b_asin_image_o00_s00?ie=UTF8&psc=1
​
https://www.amazon.com/gp/product/B071G1J3W6/ref=ppx_yo_dt_b_asin_image_o00_s00?ie=UTF8&psc=1
I ordered one of these. Should I cancel the order?
This solder is amazing! 60/40 and thin diameter. Alpha Metals
No, that's solder paste made by the same company. What I'm talking about is this stuff.
Edit: Oh, what you linked is low-temperature solder paste. Dunno the use case for that...but what I was talking about is the actual low-temperature solder wire that I linked.
Wait a second...
http://astore.amazon.com/wwwpropanefla-20/detail/B00004Z2FQ
lol yeah sorry.
Desolder
Iron
Solder
Cool gold thing Amazon suggested
AmazonSmile Link 1: Tabiger Solder Wick & Desoldering Pump, Solder Sucker & Desoldering Wick, 2pcs Solder Braid (2.5mm Width, 1.5m Length)- Desoldering Vacuum Pump Solder Remover
AmazonSmile Link 2: Engineer SS-02 Solder Sucker
^Use AmazonSmile to donate 0.5% of your purchase price to a charity of your choice at no extra cost to you.
I only will be using the fisheye in daylight. I have this thing called
5 second fix that I have been considering to use.
You guys are making it sound easier than it is.
SOLDERING is easy. Anyone can do that. Just heat the work and the solder drips right in the hole.
It's DESOLDERING which is hard. And without proper desoldering equipmenet (like an Aoyue or a Hakko), it can be even HARDER and if you do it wrong, you could damage the PCB. You need more than just a soldering iron to desolder. You also need a desoldering pump (vacuum tool pump (NOT recommended unless you have no other choice) or a proper desoldering iron which is $$$).
The key is probably damaged and those are not easy to fix without making the problem worse. If the metal tab is damaged or bent out of shape there's no fixing that. With a switch top remover (from MK.com) you can remove the switch top and the cherry stem, after desoldering the switch (ONLY PCB mount switches can be popped open without desoldering), but if you don't have spare switches, I would just RMA the thing.
A good desoldering pump is https://www.amazon.com/Aoyue-Contained-Desoldering-Internal-Carrying/dp/B00PGFAJWS
But as you can see it's expensive. But it does come with some extra tip tops.
An even better one but more expensive is https://www.amazon.com/Hakko-FR300-05-P-Desoldering-Tool/dp/B00KWM69C4/ref=sr_1_1?ie=UTF8&qid=1490577663&sr=8-1&keywords=Hakko+FR300-05+desoldering+tool
Yes that's $$. And a lot.
A good starter kit, which includes solder and a vacuum pump is https://www.amazon.com/gp/product/B01E1ISGH0/ref=oh_aui_detailpage_o01_s00?ie=UTF8&psc=1 ; not too expensive for what you get.
Once you're ready to move up to higher quality you can buy this:
https://www.amazon.com/Hakko-FX888D-23BY-Soldering-Station-599-029/dp/B00C2BHTBI/ref=sr_1_3?ie=UTF8&qid=1489522270&sr=8-3&keywords=Hakko+FX888D