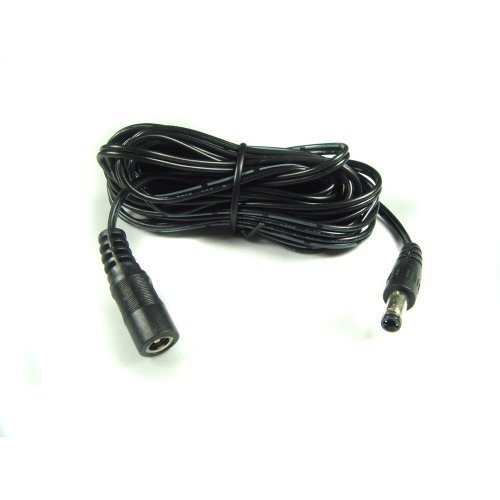
Best security camera cables according to redditors
We found 267 Reddit comments discussing the best security camera cables. We ranked the 112 resulting products by number of redditors who mentioned them. Here are the top 20.
We found 267 Reddit comments discussing the best security camera cables. We ranked the 112 resulting products by number of redditors who mentioned them. Here are the top 20.


From what Pre users have said, they use a 2.1x5.5mm DC plug, so if that is the case then either of those links will work. Personally, I'll be getting white ones so that they don't stand out as much on my walls.
This company has multiple sizes:
6 foot: http://www.amazon.com/Hanvex-2-1mm-5-5mm-Extension-Adapter/dp/B00JDTY61S/
12 foot: http://www.amazon.com/Hanvex-2-1mm-5-5mm-Extension-Adapter/dp/B00JDTZ26G/
20 foot: http://www.amazon.com/Hanvex-2-1mm-5-5mm-Extension-Adapter/dp/B00JDU4HYS/
what i use
I used THIS, THIS and THIS to extend my Pimax. Works great, no problems.
Materials:
Gut this wall clock
Cut this in half and adhere around board. I used carpet tape
Stick these LEDs around the inner perimeter
note that these LEDs were intentionally chosen for their brightness and color, you can use others but I can't guarantee you'll like the illumination
Plug this guy in between the power supply and LEDs for a power switch
That's it! Now just pressure fit that bad boy on top of the foam you adhered around your board and this thing stays put, it's super sturdy and super sleek, way less intrusive than the retail options available right now I think.
I shared my XBOX 360 power supply and induction heater on top of a tupperware some weeks ago, people had concerns for safety ;). Sharing my updated version. Cost breakdown:
$11 Induction heater:
https://www.amazon.com/Yosoo-5V-12V-Voltage-Induction-Heating/dp/B01C71XKZ6/ref=sr_1_2?ie=UTF8&qid=1518898882&sr=8-2&keywords=induction+heater
$2 Button:
https://www.amazon.com/gp/product/B00XVJ9NPK/ref=oh_aui_detailpage_o01_s00?ie=UTF8&psc=1
$2dll Wooden Box from local craft store
~$5 dll Xbox power supply from Gamestop
$2dll of filament: Base for induction heater is 3d printed, so is the the case for the switch on the power supply and the tube the guides the bottle into the hole.
$0.5 Glass container from craft store
~$1 12v male and female connectors. Not these exact same ones though:
https://www.amazon.com/43x2pcs-Connectors-Security-Lighting-MILAPEAK/dp/B072BXB2Y8/ref=sr_1_1_sspa?ie=UTF8&qid=1518899060&sr=8-1-spons&keywords=12v+male+female+connectors&psc=1
could you maybe buy a dc extension cord ?
https://www.amazon.com/Hanvex-HDCQ12-Adapter-Extension-Wireless/dp/B00FTFYH0U?ref=ast_p_ei
This is what I got and works for me: http://www.amazon.com/gp/product/B00WO99GRI?psc=1&redirect=true&ref_=oh_aui_detailpage_o06_s00
Says 2.1x5.5mm
power:https://www.amazon.com/dp/B00FT9VW0O/ref=cm_sw_r_other_awd_WTxdxbG2WKX4D
Usb:https://www.amazon.com/dp/B00C7SA21U/ref=cm_sw_r_other_awd_YGxdxbPW3R45Z
HDMI:https://www.amazon.com/Monoprice-Commercial-Premium-Female-Extension/dp/B004C4SECG/ref=sr_1_1?ie=UTF8&qid=1460784534&sr=8-1&keywords=Monoprice+Commercial+Series+Premium+10ft+24AWG+CL2+High+Speed+HDMI+Cable+Male+to+Female+Extension+-+Black
I used black electrical tape to group the cables together after stretching them out and it works great. I accidentally made the usb to tight and occaisonally it pops out during transportation but rarely so if your going to group them together make sure they have enough slack.
I'll link the full order:
I am
not 100%happy with the light strip I got.They are super sensitive to the power draw and flickers time to time(maybe it's the power adapter =/). Though, it's cheap and does its job pretty well![EDIT] correcting the led power connect as opinted out by /u/BishoujoReview
[EDIT] flickering was due to an old extension cord. I plugged the power adapter directly to the wall outlet and that solved the problem.
Here's the items I purchased to extend the headset 10 feet.
Power cable- https://www.amazon.com/gp/aw/d/B00FT9VW0O/ref=yo_ii_img?ie=UTF8&psc=1
HDMI- https://www.amazon.com/gp/aw/d/B00JJ517VI/ref=yo_ii_img?ie=UTF8&psc=1
USB- https://www.amazon.com/gp/aw/d/B00C7SA21U/ref=yo_ii_img?ie=UTF8&psc=1
I also went with a 1/2" braided sleeve to hold them all together. https://www.amazon.com/gp/aw/d/B00ZATN3WI/ref=yo_ii_img?ie=UTF8&psc=1
Edit: Including like where I got my info originally. https://www.reddit.com/r/Vive/comments/4eiqda/10ft_extension_cables_after_the_breakout_box/?sort=confidence
The Spongeface kits are awesome, and require very little modification on the pack itself, have fun with it and take your time!
As for the battery you want something along the lines of this: https://www.amazon.com/TalentCell-Rechargeable-12000mAh-Multi-led-indicator/dp/B00ME3ZH7C/ref=sr_1_1_sspa?keywords=talentcell+12v&qid=1562712683&s=gateway&sr=8-1-spons&psc=1
And some Barrel plugs to wire it with like these: https://www.amazon.com/43x2pcs-Connectors-Security-Lighting-MILAPEAK/dp/B072BXB2Y8/ref=sr_1_4?keywords=barrel+plug&qid=1562712775&s=gateway&sr=8-4
Also definitely check out GBFans.com! The forums are a really handy place to find info and parts of all kinds for Ghostbusters props of all types.
I've successfully created a 10 ft (~2m??) extension beyond the break out box. Total cost was under $50. I have a 3.2m x 3.5m or so area and I have more than enough space. One thing I'd note is that the HDMI cable extension is HEAVY/THICK. After I put all the extension cables through the mesh casing, it makes the cable paclage very rigid. Still, this works flawlessly for me! Links to amazon below...
HDMI: Monoprice Commercial Series Premium 10ft 24AWG CL2 High Speed HDMI Cable Male to Female Extension - Black https://www.amazon.com/dp/B004C4SECG/ref=cm_sw_r_other_apa_2a4HxbGN1CTQG
USB: Cable Matters SuperSpeed USB 3.0 Type A Male to Female Extension Cable in Black 10 Feet https://www.amazon.com/dp/B00C7SA21U/ref=cm_sw_r_other_apa_Qb4Hxb1AHSCGS
DC Power: Hanvex HDCA12 12 ft 1.3mm DC Power Extension Cable for Foscam, Agasio, Tenvis, Loftek Wireless IP Camera https://www.amazon.com/dp/B00FT9VW0O/ref=cm_sw_r_other_apa_yc4HxbRGNZ5AB
1/2" casing sleeve: 1/2" PET Expandable Braided Sleeving- 10ft - Black https://www.amazon.com/dp/B00ZATN3WI/ref=cm_sw_r_other_apa_Md4HxbR1Y7KTX
They are pretty long but not super long. I would recommend buying an extension cord, or a pair of these which is what I did.
http://www.amazon.com/Hanvex-2-1mm-5-5mm-Extension-Adapter/dp/B00FTFYH0U
For controllers, I've been happy with this: https://www.amazon.com/gp/product/B018ICLC3K/ref=oh_aui_detailpage_o02_s00?ie=UTF8&psc=1
It's simple and the two USB outlets are very convenient. I haven't tested it on the playa yet but it works great in my backyard!
SUNKINGDOM still has a massive sale going on right now for panels: https://www.amazon.com/SUNKINGDOM/b/ref=bl_dp_s_web_9956573011?ie=UTF8&node=9956573011&field-lbr_brands_browse-bin=SUNKINGDOM
For battery, I 'm going to pick up a 100+ AH deep cycle in reno. Even without my 39 watt panel, it should be enough to run my swamp cooler for several hours a day. That said, I like having the back up trickle.
I use similar gauge to wherever my part uses and I use these to connect them: https://www.amazon.com/gp/product/B015OCV5XO/ref=oh_aui_detailpage_o09_s00?ie=UTF8&psc=1
Good on you for posting this guide! I've been meaning to post my method of doing it but this works the same. However:
Where did you get $40 from? Did you have to buy a new soldering kit as well?
Also I would HIGHLY recommend anyone doing this mod using pigtail adapters instead of hardwiring the AC adapter directly into the kinect that way if you ever need to move it or if the AC Adapter goes out you don't have to re-do the entire mod/splice a new adapter in there.
Here's a link to the adapters:Amazon I bought a pack of 10 similar to this one.
Amazon sells a PSU that works without any modification: https://www.amazon.com/dp/B018G3ABWY/ref=cm_sw_su_dp
Raspberry Pi zero w
Relay
Boards
Power Connector
USB Power
Solder kit
Tower Light
Wire diagram
Code in python not the best but that I got on phone.
!/usr/bin/env python2
import RPi.GPIO as GPIO
import json
import base64
import requests
import datetime
import logging
import random
from time import sleep
logging.basicConfig(filename='ci-light.log', filemode='w', format='%(name)s - %(levelname)s - %(message)s')
RED = 17
GREEN = 22
YELLOW = 27
global_state = -2
times = {
"1" : datetime.time(2, 0),
"2" : datetime.time(2, 15),
"5" : datetime.time(2, 30),
"3" : datetime.time(2, 45),
"4" : datetime.time(3, 0),
"5" : datetime.time(3, 15)
}
Pat= “{token}”
bauth = "Basic " + base64.b64encode(':'+pat)
GPIO.setmode(GPIO.BCM)
GPIO.setup(RED, GPIO.OUT)
GPIO.setup(GREEN, GPIO.OUT)
GPIO.setup(YELLOW, GPIO.OUT)
def clearRed():
GPIO.output(RED, 0)
def setRed():
GPIO.output(RED, 1)
def clearGreen():
GPIO.output(GREEN, 0)
def setGreen():
GPIO.output(GREEN, 1)
def clearYellow():
GPIO.output(YELLOW, 0)
def setYellow():
GPIO.output(YELLOW, 1)
def clearLights():
GPIO.output(RED, 0)
GPIO.output(GREEN, 0)
GPIO.output(YELLOW, 0)
tests to make sure lights and relay are functioning as appropriate
def start_up():
clearLights()
setRed()
sleep(1)
clearRed()
setYellow()
sleep(1)
clearYellow()
setGreen()
sleep(1)
clearGreen()
Does little click and light dance to be passive aggressive. don't break builds
def put_on_show(times):
factor = 0.2
while (times > 0):
setRed()
sleep(factor)
clearRed()
setYellow()
sleep(factor)
clearYellow()
setGreen()
sleep(factor)
clearGreen()
setYellow()
sleep(factor)
clearYellow()
times -= 1
factor -= 0.015
blinks light
def blink_light(light_pin):
GPIO.output(light_pin, 1)
sleep(0.1)
GPIO.output(light_pin, 0)
sleep(0.1)
GPIO.output(light_pin, 1)
sleep(0.1)
GPIO.output(light_pin, 0)
sleep(0.1)
GPIO.output(light_pin, 1)
sleep(0.1)
GPIO.output(light_pin, 0)
sleep(0.1)
GPIO.output(light_pin, 1)
sleep(0.1)
GPIO.output(light_pin, 0)
sleep(0.1)
GPIO.output(light_pin, 1)
sleep(0.1)
GPIO.output(light_pin, 0)
sleep(0.1)
GPIO.output(light_pin, 1)
sleep(0.1)
GPIO.output(light_pin, 0)
sleep(0.1)
Checks the builds for D or T then determines if broken
will need to be updated to account for unit tests being broken to change to yellow
def check_builds():
buildDefs = "http://{tfsserver}:8080/tfs/defaultcollection/Development/_apis/build/definitions"
buildsUri = "http://{tfsserver}:8080/tfs/defaultcollection/Development/_apis/build/builds?MaxBuildsPerDefinition=1&deletedFilter=excludeDeleted&queryOrder=finishTimeDescending&resultFilter=failed,succeeded,partiallySucceeded&definitions="
s = requests.Session()
s.headers.update({'Authorization': bauth})
r = s.get(buildDefs)
json1 = json.loads(r.text)
str1 = ''
for x in json1['value']:
if 'D' in x['name']:
str1 += str(x['id']) + ','
elif 'T' in x['name']:
str1 += str(x['id']) + ','
buildsUri += str1
r2 = s.get(buildsUri)
json2 = json.loads(r2.text)
state = 0
print(r2.status_code)
for x in json2['value']:
if x['result'] != 'succeeded':
return 1
return 0
print('starting up')
start_up()
print('started')
main logic loop
while (1):
sleep(3)
logging.info('Checking builds')
print('Checking builds')
new_state = check_builds()
check builds
Also a random human! Good luck!
Thanks! Please let me know what you find. Luckily, my son just got back from college ...with a digital calipers.
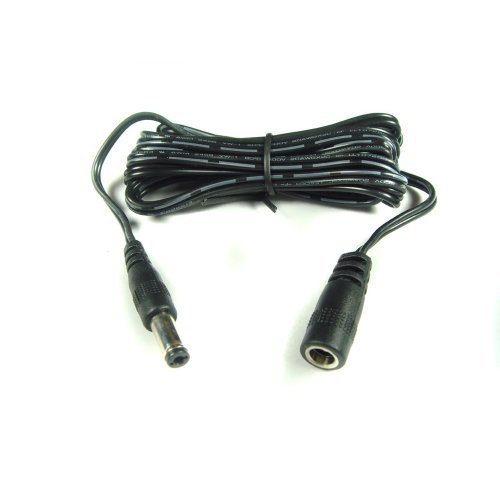
They confirm power AFTER the breakout is 1.3mm (inner dia.) x 3.5mm (outer dia.) like this cable I'm using:
http://www.amazon.com/Hanvex-HDCA12-Extension-Foscam-Wireless/dp/B00FT9VW0O
And the power IN to the breakout appears to be 1.3mm (inner dia.) x 3.75mm (outer dia.) And this roughly agrees with my caveman assessment: it feels like I can cram the breakout A/C adapter into the extension cable above, but I can't quite - even with some force.
But, I don't see an extension cable like than anywhere. Mouser has a 1.3x3.7 connector, and a few 1.3x3.8 connectors. 1.35 inner diameter also seems to be popular. This stuff is all new to me.
HDMI + USB + Power + Cable Sleeve = Good extension cable.
I use this setup on the HMD end of the Linkbox with no issues.
I'll search my amazon purchase history...gimme 5 min.
Here ya go:
Hanvex HDCA12 12 ft 1.3mm DC Power Extension Cable for Foscam, Agasio, Tenvis, Loftek Wireless IP Camera https://www.amazon.com/dp/B00FT9VW0O/ref=cm_sw_r_cp_apa_7SwDxbQHJJX94
Landscape edging: https://thd.co/1iWcILO
LEDs: https://www.amazon.com/dp/B00JQV6Q4I/ref=cm_sw_r_cp_apa_lBEgzbGCKJFKQ
Power supply: https://www.amazon.com/dp/B01KM3OIAW/ref=cm_sw_r_cp_apa_dCEgzbZV2F3W3
Switch: https://www.amazon.com/dp/B01CM30TQM/ref=cm_sw_r_cp_apa_WCEgzb9027XB0
I used contact cement to help keep the LEDs on the edging.
I'll add pictures of the whole deal tonight.
Glad Y'all like it! 😊
I got this one for use with my HD558s. I'm then running a 30 ft long headphone extension (15ft from computer to link box, 15 ft for Vive cable) back to a Behringer headphone amp and then a DAC. I also have other 15 ft extensions (DisplayPort, USB, power) from the link box back to my PC.
The end result? 30 ft of Vive leash, headphone cable is cable-wrapped back to a proper headphone amp and DAC. No plugging/unplugging, and good sound quality to boot.
Granted, take everything I just said above with the understanding that I don't have a Vive yet, and it might work great...or not!
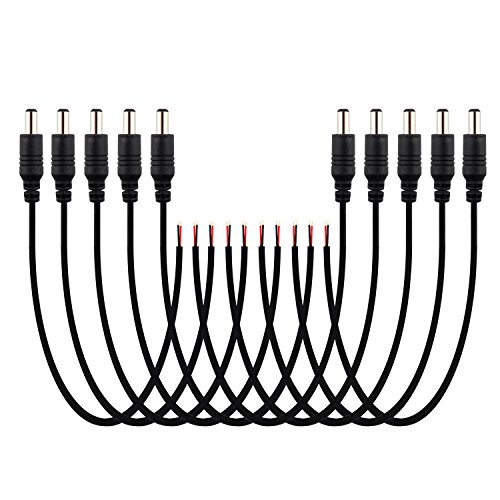
SIM&NAT Male DC 2.1mm x 5.5mm Wire Power Pigtails Adapter Barrel Plug Socket Cables for CCTV Security Camera, DVR, Car Rearview Monitor System Video, LED Strip Light, Surveillance (20 inch / 50 cm) https://www.amazon.com/dp/B01GPL8MVG/ref=cm_sw_r_cp_apa_eeHMzbZ5K8BHP I would use a kit like these and a terminal block to break out the 5v lines. After that just make sure you get the red lines to positive and you should be good to go!
I've been using this power cable as an extension between the link box and the normal VIVE power cable, and it's been working great. Not sure how it would work as the only cable connected directly to the VIVE though.
https://www.amazon.com/gp/product/B00FT9VW0O
> One cool thing your Rift works with your Vive linkbox..
Well it used to on the original vive linkbox, but remember the pro has a proprietary "3-in-1" connector on the HMD side of the linkbox now.
This is more directed towards the first comment in this chain: I successfully used two of the following cable for permanent installation of my v1.0 basestations: https://www.amazon.com/gp/product/B00JDTZ26G/
This particular extension was recommended by someone that has a Vive pre.
https://www.amazon.com/gp/aw/d/B00FTFYH0U
I can't find the original recommendation at the moment :/
Currently using:
https://www.amazon.com/gp/product/B0745BZV6T
and I have one of these wired to the breakout board:
https://www.amazon.com/gp/product/B079RCNNCK
​
For less than $50 I am now able to fill my outdoor graveyard with 8 colorful spot lights.
Amazon:
https://www.amazon.com/gp/product/B072BXB2Y8/ref=ppx_yo_dt_b_asin_title_o00_s00?ie=UTF8&psc=1 . (DC Connectors)
https://www.amazon.com/gp/product/B00Q2E5IXW/ref=ppx_yo_dt_b_asin_title_o01_s00?ie=UTF8&psc=1 . (12V Adapter)
https://www.amazon.com/gp/product/B07PVVL2S6/ref=ppx_yo_dt_b_asin_title_o01_s00?ie=UTF8&psc=1 . (120 LED's)
https://www.amazon.com/gp/product/B07DDG7J9K/ref=ppx_yo_dt_b_asin_title_o01_s00?ie=UTF8&psc=1 . (100ft 18-Gauge Wire)
Hi there,
I'm wondering how many of you have successfully resolved your heating issues on the MPMD. I've upgraded the power supply to this (https://www.amazon.com/gp/product/B018G3ABWY/ref=oh_aui_detailpage_o03_s00?ie=UTF8&psc=1), and it's certainly made the bed heat a little more quickly. However, I'm still seeing a lot of fluctuation from the bed and the hot end. I don't care about the bed too much, but +-10 degrees constantly on the hot end is... not ideal.
I've got the v43 firmware (got this as a graduation gift, and that was the firmware it came with)...
What am I missing?
I've got 3 or 4 of the Winkeyes AC 100-240V to DC 12V 10A Switching Power Supply Adapter from Amazon
that I use with my MP Mini Delta's and Select Mini's V1/V2
There is no harm in using a higher amperage power supply. The printer will only take what it needs.
This the Amazon link for the 10ft extension: https://www.amazon.com/dp/B00FT9VW0O/ref=cm_sw_r_other_awd_WTxdxbG2WKX4D
Male: 1.3mm (inner dia.) x 3.5mm (outer dia.) plug, Female: Accepts 1.3mm x 3.5mm plug
http://www.amazon.com/Hanvex-HDCQ12-Extension-Adapter-UL2468/dp/B00FTFYH0U?ie=UTF8&psc=1&redirect=true&ref_=oh_aui_detailpage_o00_s00
I have those and they work fine. There might be cheaper ones around but that's the plug size you'll want
If you're good with soldering or slicing and twisting wires; I recommend this one:
http://www.amazon.com/dp/B00FT9VW0O
I used it as an extension between breakout and headset but the plug should be same. I'm not at home so cannot confirm. Check with your breakout box. Cut the damaged part and use this one to connect it to breakout box.
These are the cables I use:
https://www.amazon.com/dp/B00C7SA21U/ref=cm_sw_r_other_awd_YGxdxbPW3R45Z http://www.amazon.com/Cable-Matters-2-Pack-Extension-Ethernet/dp/B00JJ517VI?ie=UTF8&keywords=2m%20HDMI%20EXTENSION%20Cable%20Male%20to%20Female%20v1.4%203D%20High%20Speed%20With%20Ethernet%20BLACK&qid=1460783173&ref_=sr_1_fkmr3_3&sr=8-3-fkmr3 https://www.amazon.com/dp/B00FT9VW0O/ref=cm_sw_r_other_awd_WTxdxbG2WKX4D http://www.amazon.com/Techflex-Split-Sleeving-Ft-Black/dp/B007VSTFMI?ie=UTF8&psc=1&redirect=true&ref_=oh_aui_detailpage_o01_s00
If you want 50ft HDMI I can confirm that this cable works perfectly, camera turned on and everything, for only a couple bucks more than the OP's cable. I'm using this extender for linkbox power and two of these extenders for the lighthouses.
It really is nice to move your setup to a much bigger play space, and being able to extend so far is really handy.
i'm going to follow this guide except i think i'm going to splice on 2.1x5.5mm DC jacks to the light bars and dummy light bulb so i can use DC extension cords and splitter to keep the wiring neat
i linked amazon stuff for convenience sake, this stuff can be bought much cheaper on ebay or aliexpress.
Np, I overnighted a smaller sized one and I'll report back when I get it.
Edit: This is the correct one: http://www.amazon.com/Hanvex-Extension-Foscam-Agasio-Wireless/dp/B00FT9VW0O?ie=UTF8&psc=1&redirect=true&ref_=oh_aui_detailpage_o00_s00
You want to use 24v strip in these cases in order to not have to deal with power injection, which is where novices can easily get into trouble. With 24v you can run up to 10M, or 32.8ft, and is such often sold in 10M reels. Purchase four of these and cut each down to the length of it's respective wall, being sure to only cut on the line in the center of the copper pads every 6 LEDs.
{With addressable strip, the pixel "size" is TYPICALLY determined by voltage, so for 24v strip, each 6 LEDs will act as a single "pixel," when playing back patterns, 12v strip is 3 LEDs, 5v is 1.}
After cutting the strip to length, you will want to remove the connectors from the cut off ends and solder them to your new ends. IT IS IMPORTANT FOR THIS SCENARIO TO NOT solder on the RED (+24v) wire, as it will be safer to use 4 smaller power supplies, you are only wanting to interconnect the green Data wire and white Ground wire between each strip. If using IP68 waterproof strip, don't forget to remove the silicone endcap from your cut end, replacing it on the new end with a dab of silicone sealant.
Attach the 2.1mm socket adapters to the RED (+) and White (-) bare wires at the beginning of each strip using a jewelers screwdriver. Connect the 3-pin connectors between each strip, and tape off the bare wires with electrical tape, then connect the PSUs to the last three strips. For the first strip, connect it's PSU to the 2.1mm splitter, plugging one end into the strip and the other into the controller. Wire the 3pin connector included with the controller to the Data and Ground of the controller, again in this case, DO NOT CONNECT THE RED (+24v) WIRE to the controller; just wrap the end in electrical tape. Finally, connect the 3-pin connector from the controller to the first strip and power up your PSUs. From here it's just configuring the controller with your phone or tablet.
4x: https://www.amazon.com/Waterproof-Visdoll-Flexible-Addressable-Programmable/dp/B075GCKPHB?th=1&psc=1
4x:https://www.amazon.com/gp/aw/d/B074GJ22P6/ref=ox_sc_act_image_1?smid=A325274ZEF9XYZ&psc=1
1x: https://www.amazon.com/ALITOVE-Controller-Individually-Addressable-Programmable/dp/B01LW1J10W/ref=mp_s_a_1_1?ie=UTF8&qid=1541825064&sr=8-1-spons&pi=AC_SX236_SY340_QL65&keywords=4+output+ws2811+controller&psc=1
1x: https://www.amazon.com/Chanzon-Female-Connector-Security-Adapter/dp/B079RCNNCK
1x: https://www.amazon.com/dp/B00G6G5DJ0/ref=sspa_dk_detail_1?psc=1
Search for DC extension, they make them. Stuff like this but you'll have to get the plug size right. Alternatively just cut the plug end off and extend / reterminate the existing cable...
The problem with extending the DC side of any wall power adapter is that the voltage drop from wire gauge, length and connector loss is much more significant for low voltage DC than it is on the 110VAC side. Adding a dozen feet is probably not a problem at [email protected] but it would still be ideal to extend the other side of the transformer wiring (add a regular household extension cord) instead.
I ran power cables to 2/4 of my cameras and will be doing the other two shortly. I ran wires and an outlet through my attic into the soffit cavity close to my cameras where I was able to plugged the cameras in. You can't just use any power cable. In my attempts you had to get specific "arlo" cables.
I got ones that were designed for outdoors that had a little boot on the end to keep water out.
Wasserstein Weatherproof 16ft/5m... https://www.amazon.ca/dp/B06XYBRVX9?ref=ppx_pop_mob_ap_share
Apparently some people had issues with these cables but mine worked flawlessly. YMMV
IMO you need to power your arlo cameras if they are in any area of high traffic.
Anyway. That has been experience
The light strip comes with a bare-wire end and a barrel-connector end. I've never seen a Molex-to-barrel-connector adapter though.
There are a few different ways to use a strip like this in a PC. I always solder a Molex connector onto the bare-wire end, so that's one option. If you want to go that route remember that on Molex, the YELLOW wire is 12V, not the red one.
You could also wire one of these to your Molex and plug it into the other end. Soldering would also be needed there though.
If soldering's isn't your thing I could easily make one for you.
Oh, so something like this? and this ?
I can almost guarantee it's a 5.5x2.1 barrel jack, as that's more or less the standard on cheaper PSUs. You could possibly try picking up one of these to help adapt your PSU, as you just need to screw the wires into the terminals the way you're used to. I will say, though, that I'm somewhat unsure what kind of power load those can withstand.
Here it is
Something like https://www.amazon.co.uk/gp/product/B004K94SQY/ref=oh_aui_detailpage_o01_s00?ie=UTF8&psc=1 is super cheap though :)
I needed the exact same thing. This is what I went with from amazon. They work great. One is the set of the tripods and the other is the mini ball head you will need for each lighthouse with the tripod.
https://www.amazon.com/gp/product/B012FTXOW4/
https://www.amazon.com/gp/product/B001WB02Z4/
I would also recommend extending the triple cable an extra 10 feet. You won't be able to keep the cable and HMD in the box after adding the cables, but it doesn't get tangled as easy and just works better when having other people try it for the first time.
https://www.amazon.com/gp/product/B00C7SA21U/
https://www.amazon.com/gp/product/B00JJ517VI/
https://www.amazon.com/gp/product/B00FT9VW0O/
https://www.amazon.com/gp/product/B0008JHB14/
White cables:
https://www.amazon.com/gp/product/B00JDTZ26G/
No shit. I just received the barebones board today and must have opened about 30 different browser tabs trying to figure out how to power the damn thing *tonight* with what I have on hand (not much, basically a PC power supply with molex connector.) Can't do it.
​
Didn't want to leave a bad review for the seller, but for a while there I was SERIOUSLY thinking about just returning it cuz I could feel my blood pressure literally rising and stress getting to be a little too much.
​
Ended up ordering a $10 power supply, $7.50 10-pack of ends for the adapter, and a $6 pack of dupont breadboard wires. So all in all ~$23.50 extra expense JUST TO GET POWER (and JACKLEG power, at that!) TO THE BOARD. Because the easier way, the mini breakout board, is out of stock on Amazon until June 6th or something. We'll see if it's worth it. If not, next step is prolly a Jetson Nano.
​
GenBasic 80 Piece Male to Male 4 and 8 Inch Solderless Ribbon Dupont-Compatible Jumper Wires for Breadboard Prototyping
Sold by: LoveRPi - $5.99
Chanzon (10 x Female) 12V DC Power Connector 5.5mm x 2.1mm 24V Power Jack Socket for Led Strip CCTV Security Camera Cable Wire Ends 10Pcs Plug Barrel Adapter
Sold by: Chanzon - $7.49
IBERLS AC to DC Regulated Transformer Wall Power Adapter Supply Cord Plug Charger 5V 3A(Compatible with 5V2A) for LED Pixel Light, USB-HUB, Kindle Fire Tablet, DJ Controller, Nextbook
Sold by: IBERLS - $9.99
I am new to fish finders, but I have the garmin in my kayak and like it so far. This is how I mounted it, and links to the power pack and accessories I used. There are larger power banks but the 6000mah, was perfect for my needs.
https://imgur.com/a/TeAAv5y
Battery
https://www.amazon.com/gp/product/B00MF70BPU/ref=ppx_yo_dt_b_asin_title_o07_s00?ie=UTF8&psc=1
Fuse (I cut the original one off and soldered in the blade sytle)
https://www.amazon.com/gp/product/B06XK4RNB3/ref=ppx_yo_dt_b_asin_title_o05_s00?ie=UTF8&psc=1
Cable gland set I used for the pelican box
https://www.amazon.com/gp/product/B077R1RT2T/ref=ppx_yo_dt_b_asin_title_o05_s00?ie=UTF8&psc=1
5.5mm plugs to soldered to the garmin cable to plug directly into the battery pack.
https://www.amazon.com/gp/product/B01GPL8MVG/ref=ppx_yo_dt_b_asin_title_o07_s00?ie=UTF8&psc=1
Pelican Case
https://www.amazon.com/gp/product/B001LZ5HDI/ref=ppx_yo_dt_b_asin_title_o06_s00?ie=UTF8&psc=1
I just bought one of these 6 ft 2.1mm x 5.5mm DC Plug Extension Cables https://www.amazon.com/dp/B00FTH6WNS/ref=cm_sw_r_cp_apa_jqh6xbBWAFQHB it takes the weight off you head and as a bonus you no longer have a bomb strapped to your skull so that's nice.
Other people said they were using this cable. https://www.amazon.com/Hanvex-HDCA12-Extension-Foscam-Wireless/dp/B00FT9VW0O
That claims to support up to 3amps. I don't remember what the vive adapter states, you will have to look.
You would just cut off the female end, strip the wires, and screw them into that male adapter. Or if you wanted, get a second shorter cable and make a male to male to leave the longer extension intact.
You could always wire the pump up with one of these and plug in a 12v wall adapter. I'm just putting the info out if anyone is interested.
For the TPlink integrates I got tired of removing and reading it constantly to try and get all the switches and plugs reintegrated. I'm glad it's working for you I hate adding stuff to the config yaml it just keeps getting bigger and bigger.
/u/DrNotThatEvil You should check to see if your outlets are close enough to your intended base station locations. The cord length is 8', so putting these up high(recommended), doesn't give you much length to work with to reach an outlet. This of course can be done with an extension cord, however I just found this while looking for the cord length(which I'm going to swap an extension cord with myself)
http://www.amazon.com/dp/B00FTFYH0U/
I don't have my Vive yet, but I'm reading they're 2.5m or approx 8ft. If you need longer cables you can either use a standard extension cord or something like this should work great for extending the cord itself.
At the advice of another post I just bought these to extend the cable from the linkbox to the headset by 10 feet.
http://www.amazon.com/Cable-Matters-2-Pack-Extension-Ethernet/dp/B00JJ517VI?ie=UTF8&psc=1&redirect=true&ref_=oh_aui_detailpage_o02_s00
http://www.amazon.com/Hanvex-HDCA12-Extension-Foscam-Wireless/dp/B00FT9VW0O?ie=UTF8&psc=1&redirect=true&ref_=oh_aui_detailpage_o02_s00
http://www.amazon.com/Cable-Matters-SuperSpeed-Female-Extension/dp/B00C7SA21U?ie=UTF8&psc=1&redirect=true&ref_=oh_aui_detailpage_o01_s00
Just received them last evening and had no problems in Holopoint or Space Pirate Trainer. Put up new high scores in both of them actually =D
I was also advised to get some 1/4" cable sleeving for them, but the advised product did not fit around the HDMI header. I had some other sleeving at home so I just used that.
Had the same issue (though on level 30 >.<). Here's now I fixed it:
I purchased 10' extensions for the HDMI/USB/Audio cables and then (this is key) wrapped them in these.
A costly upgrade but I haven't had a single wire issue since. You still get wrapped up if you're not careful but it's easy enough between rounds to see which way you need to turn during the next round to undo it.
Here's my stream from last night when I got rank #3, you can see my wire setup and technique for monitoring it (skip around).
I’ve decided to go with this: Gonine 24V 2.5A 60W AC DC Adapter Switching Power Supply with 5.5 X 2.1 mm DC Plug and 11 Pcs DC Jack Connector for led Light Strips, Computer Monitor and More. https://www.amazon.com/dp/B07Q2HMTRX/ref=cm_sw_r_cp_api_i_vI-iDbJB45F3H
Any thoughts?
Can't guarantee but I believe these are the correct cable.
&#x200B;
https://www.amazon.com/43x2pcs-Connectors-Security-Lighting-MILAPEAK/dp/B072BXB2Y8/ref=sr_1_3?keywords=12v+camera+power+pigtail&qid=1562369293&s=gateway&sr=8-3
Hanvex HDCQ20W 20ft 20AWG 2.1mm x 5.5mm DC Plug Extension Cable for Power Adapter, White, For LED, CCTV, Car, Monitors, and more https://www.amazon.com/dp/B00JDU4HYS/ref=cm_sw_r_cp_tai_otn.ybWP8R6ET
That should have the sire specs you need. I use this cable and it is the same as original.
White for wifey appoved vr livingroom set up.
https://www.amazon.com/dp/B00JDTZ26G/ref=cm_sw_r_cp_apa_9x.4yb085SECD
Just ordered this.
Here is the equipment list.
BTF-LIGHTING Digital Addressable Led Strip Music Controller X2 35.88
https://www.amazon.com/gp/product/B0759PQ46B/ref=oh_aui_detailpage_o03_s00?ie=UTF8&psc=1
BTF-LIGHTING WS2812 32.88
https://www.amazon.com/gp/product/B01CDTEKAG/ref=oh_aui_detailpage_o00_s00?ie=UTF8&psc=1
You will need a 5volt 10 am power supply. 15.99
https://www.amazon.com/gp/product/B075CZ9G11/ref=oh_aui_detailpage_o01_s01?ie=UTF8&psc=1
&#x200B;
Might need some small gauge wire although not needed.
I think power supply came with a DC Power Connector you will need one. 6.00 for a couple of them.
https://www.amazon.com/Chanzon-Connector-Female-Security-Adapter/dp/B079R9WCG2/ref=sr_1_1_sspa?ie=UTF8&qid=1539355038&sr=8-1-spons&keywords=DC+Power+Connector&psc=1
&#x200B;
Place the power supply and reciever in a plastic or weather proof container if you intend to use outdoors. I drll 2 holes in each side. One hole for power cable going in container to strip, the other hole for 1/8 min and led strip power going out of container. I use hot glue gun to seal the holes.
&#x200B;
Here is a great tutorial video from strip company. the above is for 5v 10amp strip.
https://www.youtube.com/watch?v=14i_7Rzz5Y0
Hit me up if you get stuck.
NOW GO ENJOY YOURSELVES.
&#x200B;
&#x200B;
&#x200B;
&#x200B;
&#x200B;
I got Yi Home cameras and some outdoor housings. Those two with extension cable and SD cards costs around $65 each. No subscription needed. I’ve had them up all year through snow, way below freezing temperatures and extreme heat with no issues. The housing I used is different, and it actually added a glare when the night vision is on, but my neighbor has the ring outdoor camera and out footage quality is extremely similar if not the same. Yi does make an outdoor camera, but it wasn’t out by the time I got this set up, but it works too well to replace
Camera - $35.99
Housing - $14.99
Extension Cable - $9.99
SD Card - $6.99
Here is a very old thread about the sizes for the power connectors: https://www.reddit.com/r/Vive/comments/4e3qft/size_of_dc_power_connector_for_link_box/d3pmpyw?utm_source=share&utm_medium=web2x
&#x200B;
>Thanks! Please let me know what you find. Luckily, my son just got back from college ...with a digital calipers.
>
>They confirm power AFTER the breakout is 1.3mm (inner dia.) x 3.5mm (outer dia.) like this cable I'm using: http://www.amazon.com/Hanvex-HDCA12-Extension-Foscam-Wireless/dp/B00FT9VW0O
>
>And the power IN to the breakout appears to be 1.3mm (inner dia.) x 3.75mm (outer dia.) And this roughly agrees with my caveman assessment: it feels like I can cram the breakout A/C adapter into the extension cable above, but I can't quite - even with some force.
>
>But, I don't see an extension cable like than anywhere. Mouser has a 1.3x3.7 connector, and a few 1.3x3.8 connectors. 1.35 inner diameter also seems to be popular. This stuff is all new to me.
I did find this on amazon though https://www.amazon.com/Arlo-Weatherproof-Cable-Wasserstein-White/dp/B06XYBRVX9/ref=sr_1_5?s=electronics&amp;ie=UTF8&amp;qid=1498654626&amp;sr=1-5&amp;keywords=arlo+pro+power+adapter
This will probably work for you:
http://www.rfcontrolsystem.com/index.php?main_page=product_info&amp;cPath=470&amp;products_id=579
In the manual it doesn't fully tell you where to put the power leads. Hook it up like in the youtube video linked by the other guy. If the directions are backwards, reverse the motor. Red is + and black is -.
You will need a 12 V DC power supply. Often called wall warts or wall plugs. You can get one on Amazon, Fry's, Best Buy, etc. Here's the first one I found, I have no idea about whether it's a good brand or good price or anything. Read the reviews. It's a 2 Amp which exceeds the minimum I calculated earlier, but you could go for a 3 amp as well:
http://www.amazon.com/BINZET-Adapter-Regulated-Supply-Copper/dp/B00PJZQDDO/ref=sr_1_1?s=electronics&amp;ie=UTF8&amp;qid=1457316150&amp;sr=1-1&amp;keywords=12+V+wall+plug
You will need the little plug that take DC power as input and outputs a red and black wire. Here's an example:
http://www.amazon.com/5-5mm-2-1mm-Female-Connector-Camera/dp/B005CMP434/ref=cm_cr_dp_asin_lnk
You will also need wire to go from the plug to the board, and since there are multiple points on the board to connect to +12V and 0V, you will need jumper wires to spread to multiple terminals like she does in the video. So you need something like this.
Finally to cut and strip the insulation from the wires you will need something like this.
If you have white walls this might work: http://www.amazon.com/Super-Power-Supply%C2%AE-Adapter-5-5x2-1mm/dp/B00DHN94P4
The suggested similar items also list this as an extension cable for it: http://www.amazon.com/Hanvex-2-1mm-5-5mm-Extension-Adapter/dp/B00JDTZ26G/ref=pd_bxgy_147_2?ie=UTF8&amp;refRID=1P6Q7WMBEM6DWNXWWMPM
Sure. You will need to purchase a power supply (this one is 12 volt) to drive this controller. So figure out if your strips are either 12 or 24 volt. If they happen to be 24 volt, this controller has a built in power supply for 24 volt LED strips only. Both can be added to the Philips Hue Bridge.
As for connections, I used these for RGB strips and these for power connections.
&#x200B;
&#x200B;
Another thing to mention is that there are community made scripts that allow you to alter the parameters of this flood sensor. All the parameters and what they do are even in the manual for it but it doesn't seem to be a native feature on smartthings. I think you can natively on Fibaro's own hub device. I would also mention that this flood sensor is unique in that it can be hardwired for power and the battery would act as a backup. It's quite easy to do but does require drilling a hole in the top part of the case.
You can get something cheap like this https://www.amazon.com/TNTE-Adapter-Power-Supply-2-1mm/dp/B0169AY3JI/ref=sr_1_2?ie=UTF8&amp;qid=1501307555&amp;sr=8-2&amp;keywords=dc+wall+wart
and either splice the wire to get the positive and negative or you could buy a bare wire adapter like this.
https://www.amazon.com/gp/product/B00QJAW9F4/ref=od_aui_detailpages00?ie=UTF8&amp;psc=1
I would also mention that a key benefit of doing this is that it also enables the Fibaro flood sensor to act as another transmitter for your Z Wave network. It doesn't do this when on battery
Seems like if the heatsink is in your tent it wouldnt really do much unless it's right by your out take. But cheap enough I guess you can try
You just need a 12 V power supply and then get a female dc barrel connector for the red and green wires. It says it should be six amps.
Coming Data 12V 6A 72W https://www.amazon.com/dp/B0194B7XT6/ref=cm_sw_r_cp_apa_rk14ybZG2458D
DC Power Barrel Female https://www.amazon.com/dp/B005CMP434/ref=cm_sw_r_cp_apa_Wl14ybHKGJZ4S
These are easy to use: https://www.amazon.com/Areyourshop-5-5mm-2-5mm-Camera-Connectors/dp/B01CJE0ZLI/ref=sr_1_10?s=electronics&amp;ie=UTF8&amp;qid=1502987887&amp;sr=1-10&amp;keywords=5.5+x+2.5+male+power
[This will give you plenty of chances to get it right. ](http://www.SIM.com/&amp;NAT Male DC 2.1mm x 5.5mm Wire Power Pigtails Adapter Barrel Plug Socket Cables for CCTV Security Camera, DVR, Car Rearview Monitor System Video, LED Strip Light, Surveillance (20 inch / 50 cm) https://www.amazon.com/dp/B01GPL8MVG/ref=cm_sw_r_cp_apa_uNlNAb6SQM973)
You want a 1.5mm x 3.5mm adapter. Or just an extension if it suits your fancy. If you want an entirely new adapter, make sure it's rating for at least as many amps as the original. I think it's just 1A, but you can double check to make sure.Scratch that, just reread the title. Thought you were asking for the linkbox. 2.1mm x 5.5mm for the lighthouse/base stations. 2.5A if you want to replace, though I read ~1A should work if you're in a pinch
I believe anything from 24V to 30V will work.
It's a 5.5mm x 2.1mm coaxial connector.
Some possibilities:
https://www.amazon.com/30V-1A-Adapter-Universal-Switching/dp/B07P7G7GP9
&#x200B;
https://www.amazon.com/Gonine-Adapter-Switching-Connector-Computer/dp/B07Q2HMTRX
Wasserstein Weatherproof 16ft/5m Cable Compatible With Arlo Pro & Arlo Pro 2 (White)
You don't need a stepdown transformer, just buy a 12Vdc 1A+ wall wart and rewire the plug in reverse with these
The plugs come in different sizes, I know a 2.1 x 5.5mm male connector will fit the LCD controller I have.
I don't have this adapter, but it may work for you:
www.amazon.com/Tontec®-Supply-Adapter-Raspberry-Resolution/dp/B00LFBPL7K
it seems to be sold by the same people that I got the LCD controller from, and seems to be what Amazon calls "Frequently Bought Together" when you look at the Amazon LCD controller page:
www.amazon.com/gp/product/B00JOY5PGM
however the cable length is about 110CM or 43.3 inches, thats a little short for VR usage, but you may not find many alternatives with a longer cable, and may have to make an extension cable, I used male and female power connectors like this:
www.amazon.com/5-5mm-2-1mm-Female-Connector-Camera/dp/B005CMP434
www.amazon.com/gp/product/B0058RLD9C
and some wire to give me about 10 foot of cable.
The barrel adapter? I usually see them called CCTV adapters
Does the DC cable need to go into the Link box to power the USB or HDMI? If not couldn't you bypass the link box for power and connect it to a female to male extension.
https://www.amazon.com/gp/product/B00FT9VW0O/ref=ox_sc_act_title_1?ie=UTF8&amp;psc=1&amp;smid=A1MJXBMMDKYADG
Just a thought.
Cheap tripods are great for traveling, and I've given over a hundred demos with them, but they kinda get in the way, and the larger you make the footprint (to improve stability) -the more they encroach in your play space.
I use these tripods with these swivel adapter things for my on-the-road show. As long as they don't get bumped, you're good to go.
For home, I use This tension rod and this rod mount - you may need a longer rod- I run it from the top of my dresser to the ceiling and the top of my computer desk to the ceiling. The 87 inch one isn't long enough to go from floor to ceiling for me.
As far as other essentials, two of these help with plugging the lighthouses in. An HDMI Extender, Power extender, and a USB 3.0 Extender (those three work perfectly for me) will make your life 100x more easy, especially if your computer isn't directly next to your play space. The extra 10 feet makes a world of difference for reducing tangles, reducing the number of times you have to stop and untwist your cord, and making you not worry about yanking on your computer when you get to the far corner.
Lastly, this wireless keyboard thing will save you from running back and forth from your desktop.
---
As far as sweatyness, I got over the ickyness pretty quickly. My friends have mastered basic hygiene, and face sweat doesn't smell all gross or anything. After each demo, I run the foam under the sink to rinse it off, then dab it with a paper towel and set it on a box fan to dry. It's good to go as soon as the next person is done and I repeat the process. I ended up buying a set of new face foams from the HTC website after I lost my narrow face foam though :(
https://www.amazon.com/gp/product/B00WO99GRI/ref=oh_aui_detailpage_o02_s00?ie=UTF8&amp;psc=1 These are what I use, although every now and then I have to plug into the regular outlet.
This is ours, working on Pre and dk1. Note, the long USB from PC to the box has an old powered USB 2 hub just before the box.
For HDMI cables you should stick with Category 2 HDMI cables, often marked as "High Speed".
Extension cable for lighthouse power:
https://www.amazon.co.uk/gp/product/B004K94SQY/ref=oh_aui_detailpage_o01_s00?ie=UTF8&amp;psc=1
In-line switch for lighthouse power:
https://www.amazon.co.uk/gp/product/B00KLDPX8U/ref=oh_aui_detailpage_o07_s00?ie=UTF8&amp;psc=1
Usb 3.0 extension for breakout box:
https://www.amazon.co.uk/gp/product/B005CR1IPW/ref=oh_aui_detailpage_o03_s00?ie=UTF8&amp;psc=1
Extra long HDMI cable for breakout box:
https://www.amazon.co.uk/gp/product/B008JR72SO/ref=oh_aui_detailpage_o07_s00?ie=UTF8&amp;psc=1
As for Touch, I'm yet to by the cables for mine. My plan is to set it up 3m x 4m and do a tracking VOLUME comparison. Unfortunately it's going to cost me an extra £150 in USB hubs and extension cables to set it up in the same space (on top of cables I've already got for the Vive). This is because of the requirement of amplifier usb 3.0 cables cause of the length, and the requirement of now 3 USB 3.0 ports on that side of the room, rather than just 1. I know the volume can't support Unseen Diplomacy, but I need to know the limitations before any platform development.
Grab some female led connectors https://www.amazon.com/gp/aw/d/B015OCV5XO/ref=mp_s_a_1_10?ie=UTF8&amp;qid=1466779525&amp;sr=8-10&amp;pi=AC_SX236_SY340_QL65&amp;keywords=female+led+connector
And then get rid of the standard connector for the fan, and hook them into the female connector. make sure you use the right two. http://i.stack.imgur.com/NpPzH.png :)
I was able to make a 10 foot extension from my headset to my Link Box using these three cables gave me a total of 25 feet.
https://www.amazon.com/gp/aw/d/B004C4SECG/ref=yo_ii_img?ie=UTF8&amp;psc=1
https://www.amazon.com/gp/aw/d/B00C7SA21U/ref=yo_ii_img?ie=UTF8&amp;psc=1
https://www.amazon.com/gp/aw/d/B00FT9VW0O/ref=yo_ii_img?ie=UTF8&amp;psc=1
I'm not home atm so cant take pics. Ill try to do that tomorrow but if you dont hear back just cokment on this tread again to remind me id be more than happy to show you. Here are the three cables i purchased, id recommend only these three as i had to do some research because a lot of lower quality cables will cause latency or simply not work at all also, any more than 10 feet will cause issues as hdmi cables dont transfer data over long distances very well. The towel rack and shower rings where purchased at a local home improvment store so no links for those but you can find those at any walmart target lowes etc.
Cables:
https://www.amazon.com/gp/aw/d/B00FT9VW0O/ref=ox_sc_act_image_1?ie=UTF8&amp;psc=1&amp;smid=A1MJXBMMDKYADG
ox_sc_act_image_2?ie=UTF8&psc=1&smid=ATVPDKIKX0DER
ie=UTF8&psc=1&smid=A1AMUYYA3CT6HJ
Not sure exactly what you're looking for, but I got this wire and inline switch when I was extending the base stations for our office, and they've been running just fine for several years:
https://www.amazon.co.uk/gp/product/B00KLDPX8U/
https://www.amazon.co.uk/gp/product/B004K94SQY/
Mostly you need to make sure the plug is a 2.1mm barrel jack. The actual transformer only puts out 12V and 2.5A so any cables for home CCTV seem to work. I highly recommend getting and additional inline switch btw, it makes it way easier to turn them on and off again without nudging them and needing to recalibrate.
I have tested with 10 foot and 6 foot extender with success. I purchased these back in 2013. Nothing special about them though, at the time of purchase they were half the price they are listed at now. I also purchased a 25 foot cable that I use to run outside.
6 Foot Extender https://www.amazon.com/gp/product/B00182CIB8
10 Foot Extender https://www.amazon.com/gp/product/B000YQQ9HI
25 Foot Cable https://www.amazon.com/gp/product/B0763358FV
Sorry for the late reply. This is the exact one I bought in November:
https://smile.amazon.com/gp/aw/d/B0763358FV?psc=1&amp;ref=ppx_pop_mob_b_asin_title
It is still working well today!
I'm not sure what he uses, but I use these....
&#x200B;
https://www.amazon.com/gp/product/B00L1K1KDE/ref=ppx_yo_dt_b_search_asin_title?ie=UTF8&psc=1
&#x200B;
https://www.amazon.com/gp/product/B00FT9VW0O/ref=ppx_yo_dt_b_search_asin_title?ie=UTF8&psc=1
Here's what I ordered: https://www.amazon.com/gp/product/B0763358FV/ref=oh_aui_detailpage_o00_s00?ie=UTF8&amp;psc=1
So, no. I didn't have anything close either. I was hoping you didn't ask for my rig here, lol! Kind of piece mealed together. So I bought a 20ft cable (https://www.amazon.com/gp/product/B0763358FV/ref=ppx_yo_dt_b_asin_title_o06_s02?ie=UTF8&amp;psc=1) it is not, that I see, weatherproof although it still is outside, under a piece of siding, down through my side garage door and into the garage.
Thank you for submitting to /r/SmallYTChannel. You have spent 3λ to submit here, making your current balance 0λ.
/u/jbobmillerpants, please comment
!givelambdato the most helpful advice you are given. Youwill be rewarded 1λ if you do so. For more information, read the FAQ.
Video data:
Field|Data
:-|:-
Title|Turning a broken record player into a bluetooth speaker
Thumbnail|Link
Views|99
Length|06:36
Likes/Dislikes|4/0
Comments|0
Description|In this video, I take my sister's broken record player, take out all the old parts, and put in the new bluetooth components. ⤶new parts list:⤶⤶female power jack: https://www.amazon.com/gp/product/B00QJAW9F4/ref=ppx_yo_dt_b_asin_title_o01__o00_s00?ie=UTF8&amp;psc=1⤶⤶5v male power jack to usb:⤶https://www.amazon.com/gp/product/B003MQO96U/ref=ppx_yo_dt_b_asin_title_o00__o00_s00?ie=UTF8&amp;psc=1⤶⤶5v wall charger:⤶https://www.amazon.com/gp/product/B00XUY0DFU/ref=ppx_yo_dt_b_asin_title_o00__o00_s00?ie=UTF8&amp;psc=1⤶⤶aux cord (3.5mm): https://www.amazon.com/gp/product/B078F718PM/ref=ppx_yo_dt_b_asin_title_o02__o00_s00?ie=UTF8&amp;psc=1⤶⤶bluetooth receiver board: ⤶https://www.amazon.com/gp/product/B01FU12QC8/ref=ppx_yo_dt_b_asin_title_o03__o00_s00?ie=UTF8&amp;psc=1⤶⤶amplifier board: ⤶https://www.amazon.com/gp/product/B077MKQJW2/ref=ppx_yo_dt_b_asin_title_o03__o00_s01?ie=UTF8&amp;psc=1
Channel Data:
Field|Data
:-|:-
Name|Miller's Planet
Thumbnail|Link
Subscribers|163
Videos|9
Views|23568
^/u/SmallYTChannelBot ^made ^by ^/u/jwnskanzkwk. ^PM ^for ^bug ^reports. ^For ^more ^information, ^read ^the ^FAQ.
https://www.amazon.com/gp/product/B0763358FV/ref=od_aui_detailpages00?ie=UTF8&amp;psc=1
Scroll way down and and see "special promotions"
This is what I used for the setup:
LED Strip lights
Plug splitter
[LED Power supply extension]
(https://www.amazon.com/gp/product/B00FTH6WNS/ref=oh_aui_detailpage_o00_s00?ie=UTF8&amp;psc=1)
LED Lights remote adapter
When I put an extension between the linkbox and the headset cable for a larger play area a little ways away from my computer I used the following cable for the power:
https://www.amazon.com/gp/product/B00FT9VW0O/ref=oh_aui_detailpage_o00_s00?ie=UTF8&psc=1
&#x200B;
This is NOT the cable you need since it is female on one end and male on the other end, whereas you need male connectors on both ends if you are going from the linkbox to the headset directly, but it might at least point you in the right direction. Also, I haven't pulled the cable loose from the headset in a while, but the shape of the surrounding plastic on connector end at the headset may be critical as it is a tight fit next to the other connectors.
&#x200B;
Hope this helps.
&#x200B;
Hi.
Essentially I need to connect this to a simple constant current circuit (boost converter with LM317).
The input to the circuit (via the boost converter) is a screw terminal. So I'm trying to connect the power supply (see above link) to the circuit, via a screw terminal.
I'm essentially looking for a connector like this, but the correct size (5.5x2.5mm), and capable of handling 10A (I will be drawing just under 8A but am keen to derate the circuit wherever possible for safety and longevity of components).
The arduino is right next to the servo, its the wall outlet that is far from them both. Moving that closer isn't really an option. Do you have any idea what size wire is standard in an extender like this: https://www.amazon.com/gp/product/B00WO99GRI/ref=oh_aui_detailpage_o00_s00?ie=UTF8&amp;psc=1
Also are there any alternatives? I don't know where I would find an extender that would specify a higher AWG.
Would simply switching to a 9v psu work?
https://www.amazon.com/gp/product/B00JDU4HYS/ref=oh_aui_detailpage_o09_s00?ie=UTF8&amp;psc=1
They are actually a lot longer than you would ever need, if i got again i would buy some shorter.
I've got this one on order and it should arrive tomorrow. Found it from the wiki page.
https://amzn.com/B018G3ABWY
20$ plug and play, works great
Is there a way to test if the thermistor is shorting or any resources you'd recommend checking out?
My printer will randomly shut off, during some prints and go completely black. Then I'll have to replug the power adapter and flip the switch on and off a couple times to get it to boot back up.
I already got a replacement power supply recommended by the wiki (https://amzn.com/B018G3ABWY ) because I thought that was the issue at first, but no luck since it happens with that supply in, too.
What's weird is that I was able to complete one print with the original power supply, and I came back well after it had finished, and the machine was still on and everything.
Then, it started crapping out again. I even took off the side panel by the sd card slot and aimed a small fan at the board to give it some cooling in case the card was overheating (even though this isn't a modded machine), but that died mid-print, too.
I checked the board and didn't see and obvious shorts, so I'm thinking maybe it's the bed.
Tl;dr - Tried a lot of stuff, and I think it's the thermistor. Any way to check or recommended guides?
OP from your comment sounds like you could use an old PC power supply since it puts out 12V, 5V and 3.3V.
Power supply ATX pinout board with fuses
https://www.amazon.com/dp/B078XD1652/ref=cm_sw_r_cp_awdb_t1_27GRCb4QZRJK6
TRS adapter
https://www.amazon.com/dp/B01N4N9MMZ/ref=cm_sw_r_cp_awdb_t1_x.GRCbA7GT44F
Banana tip
https://www.amazon.com/dp/B0097JLRFM/ref=cm_sw_r_cp_awdb_t1_ecHRCb108B23B
DC socket
https://www.amazon.com/dp/B079R9WCG2/ref=cm_sw_r_cp_awdb_t1_OdHRCbHH53TTS
On the ATX board just make sure to put some low amp fuses like 2 amps. Solder, Shrink wrap and LABEL to avoid plugging 12V into a mixing board.
EDIT: you could accomplish the same task much cheaper but using the 4 items listed above you would not have to modify the snake at all.