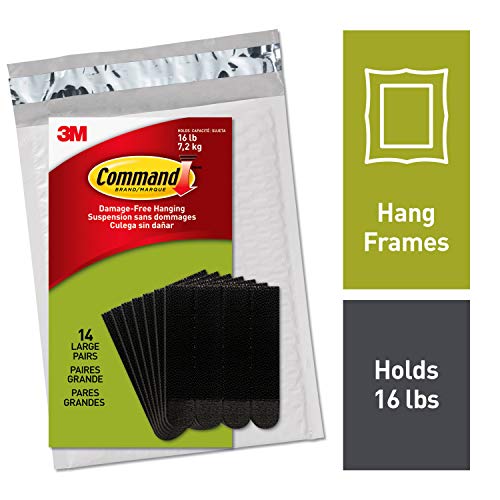
Best picture hanging hardware according to redditors
We found 434 Reddit comments discussing the best picture hanging hardware. We ranked the 164 resulting products by number of redditors who mentioned them. Here are the top 20.
We found 434 Reddit comments discussing the best picture hanging hardware. We ranked the 164 resulting products by number of redditors who mentioned them. Here are the top 20.


EDIT: Typo
Hey everyone! Thanks for the nice comments. Here is the process. I’m posting exactly what I used but obviously brand or material or process replacements can be made:
Materials:
4” x 4” x 8’ fence posts (triangles)
1” x 3” x 8’ pine slats (frame)
3/4” Hardwood composite plywood cut to size Home Depot will do this for you (maple, birch, etc)
Gorilla wood glue
Latex house paint samples of various colors (blue, purple, red, yellow, black, white)
Paint brushes
WATER-BASED aerosol polyurethane spray - satin
Wood stain for frame (dark walnut)
Brad nails (for frame)
Heavy duty hanging kit
Tools:
Table saw (with angled blade)
Miter saw
Circular saw
Brad nailer
Step 1 PUSHA PUSHA: Turn the 4” x 4” x 8’ fence posts from a rectangular prism to a triangle prism using the table saw. We’re going for perfect equilateral triangles here, so set your table saw to a 30 degree angle. Push the post through (I did this in smaller pieces). On the second pass, turn it around and get the other side of the triangle. And BOOM, you have a equilateral triangular loaf or log or prism or whatever. Do the rest of the 4” x 4” x 8’ fence posts. Looks like this:
[ ] -> [ ‘ \’] -> [‘/\’] -> /\
Step 2 CHOPPA CHOPPA: Use the miter saw to slice the triangle loaves into triangle slices. I didn’t use a guide for this (and I don’t think you should either) to get triangles of varying thicknesses. This added a little sumthin sumthin to the finished product and I dig it. Just remember that your finished product is going to hang on a wall, so don’t make your standard thickness ultra thick or the finished piece will be heavy af. A lot of my smallest triangles were only 1/4” at most, and I made the variety of bigger ones based off of that.
Step 3. CENTERING: Find the center of your plywood sheet using a t-square or whatever else is accurate. MAKE SURE YOU DON’T MESS THIS UP. You will love yourself a lot more later on if this is absolutely correct and spot on.
Step 4 PLACING: Take all of your triangles and place them where you want them. I started shallower in the middle with less variance, and used the chunkier ones with more variance towards the outside. Also sand any rough edges so they fit better.
Picture
Step 5 PAINTING: Now you need to paint Every. Single. Triangle. This is a painstaking process; I won’t lie. I started with pure white, and then ever so slightly ramped up the color as I went along. Take the pieces off, paint them, let them dry, then place them back. I tried to get a little funkier as I worked my way out, but tried not to deviate too far from the color palette. That being said, DON’T BE AFRAID TO RISK SOME WEIRD COLORS. I honestly didn’t think the pink, or aqua, or maroon would work in this, but I think those colors add a lil sumthin sumthin. Also, try not to paint too many of the same color. Add a splash of something to each triangle to change the color. Once all of your pieces are painted and placed back on the plywood, give yourself a pat on the back, and then switcheroo anything that you think needs switching.
^maybe invite some friends over for this step. It’s daunting even for two people.
Picture
Step 6 GLUEING: We found the best way to do this, while not completely messing up the layout, was to do it line by line from the inside out. This is to ensure that you don’t box yourself in (since slight inaccuracies in the triangles are gonna happen and everything won’t line up perfectly perfect). We used the leftover wood to hold the triangles in their row order while we put the glue down, and then just placed the triangles back where they went. Just use your head here and try to be as accurate as possible. Also remember to not use a ton of glue, or you’re gonna have a huge mess. A nice thin layer will be fine. Let everything dry.
Step 7 TRIMMING: Unless you’re a magician, you’re gonna have triangles hanging over the side of your plywood (or maybe you didn’t buy enough fence posts and you already returned your table saw to Home Depot so you couldn’t make any more triangles so you just had to settle for a slightly smaller product than you wanted WHICH IS FINE) Anyways, use the circular saw to trim off the excess triangles around the edges. Try to keep your lines straight here or your frame is not gonna fit well. Use this if you’re loaded.
Step 8 FRAMING: Measure your frame wood against the now-trimmed plywood. Use the miter saw to cut the 45 degree angle needed for the pieces to line up. After cutting, stain the frame pieces and let dry. Lightly glue the piece onto the plywood and brad nail into place (into the plywood, not the triangles)
Step 9 FINISHING: Use compressed air or a brush to get rid of as much dust and sawdust as possible. Then use the polyurethane aerosol spray to give the whole thing a coat. Don’t forget the frame too. Wait about an hour and then repeat. Repeat until you use the can up.
Step 10 HANGING: Center the hanger on the back of the plywood and screw into place. Then screw the other cleat onto the wall making sure you hit some studs for strength. Bask in the glow of your new art.
AND THEN YOU’RE DONE. Don’t be intimidated by the novel of instructions I’ve written. If you are intimidated (or lazy) go buy a piece from the artist that inspired this: Michalovic Wood Art
Sorry if the format sucks; I’m on mobile.
In no particular order, other than as they came to my mind:
Note that the term "Lighthouse" and "Base Station" are used interchangeably. I don't know which is technically more correct. I believe "Lighthouse" is the term given to the units by Valve, where as "Base Station" is the term used by HTC to describe the actual units provided - but this may be incorrect. I call them Lighthouses, but the Vive manual calls them Base Stations - these are the same things.
My Vive did not come with a manual, though I preordered and they may be shipping them with manuals now - I had a quick start guide, but no manual - you can find the manual here where much more information about proper setup and usage can be found.
Also - Welcome to the club :). Assuming your PC passes the SteamVR Performance Test, you will be very happy with VR :) There is nothing quite like being in true roomscale VR - it is amazingly fun.
Edit: Also, I'll take this chance to plug my (currently free) VR utility application - stop reading now if you hate self plugs :). My app - OpenVRDesktopDisplayPortal allows you to clone a Desktop Window into a cross game VR Overlay. This Overlay can be placed into the world, attached to screen like a HUD, or attached to one of the controllers. Personally, even while playing games I like to leave Netflix on and game while I watch a movie or TV show - for most VR games there's just too much action going on though - but for some games, like Elite Dangerous or Euro Truck Sim, you have a lot of down time which can get quite boring. OpenVRDesktopDisplayPortal (OVRDDP for short) can be used to bring a desktop window, like a browser window, right into VR! You can read the Instructions here, or download it from this page. The current public version can only capture a 360p up to about 480p video at 24FPS or more, which is required for the video to look smooth - though my local source can clone my full monitor, 2560x1440, at 150FPS+ :). I'm in talks with Valve to get this on the Steam Store, but right now you can just resize your content to 360p and consider it a free demo :).
There are quite a few people using OVRDDP to clone videos right into VR, there are also a few people cloning security cameras (watching the door for pizza deliveries :P) or baby monitors right into VR. You can also use it to clone browser windows into VR, which can be handy for games like Elite Dangerous where you can look up item prices online, or pretty much anything else you want.
For content like Netflix or Hulu, you can full screen the video, target it with OVRDDP, then lock the aspect and resize the video to 360p - Even though it is supposed to be full screen, it can be resized to 360p - this lets you clone just the video instead of the full browser window. I gave the exact steps in this comment here.
There are a few programs that can't be captured with the current public release - for Chrome, you must disable Hardware Acceleration. Firefox seems to work fine. I also heard that MPC-HC cannot be cloned, but VLC works great :). For VLC, you can use the fullscreen trick to clone just the video, or use the cropping settings labelled 13 in this picture to clone just the area of the video you want. For more information, see the Compatibility Article, though it's a bit outdated right now.
Full HD support coming soon regardless of if I can post it on the steam store, but right now you can use the public release as a demo for what's to come.
I figured you were rattling them off the walls with all them subs. :D
Theses work great,
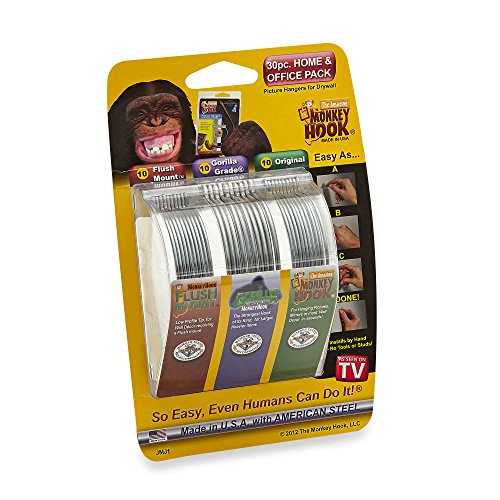
https://www.amazon.com/Monkey-Hook-Picture-Hanger-Office/dp/B001KVMNPI
Just make sure to avoid the studs.
These are a game changer especially if you’re a renter like me.
I also have this desk. This is my setup at full height:
Monitor Arms: North Bayou Arms
Monitors: Dell U2417H 24" monitors
Keyboard: Ducky One Side Print 100% Keyboard
Mouse: Logitech MX Master (Meteorite)
Mouse Pad:PECHAM Extended Pad
Speakers: Logitech Z313
Chair: Amazon Basic Mid-Back Chair
Lamp: Desk Lamp
Drawers: IKEA Alex
Plants: Random succulents from Trader Joe's
Wallpapers: Studio Ghibli Wallpapers (1920x1080)
​
Cable Management: involves the cable raceway attached below the desk using Command Strips from Wal-Mart. The cord management sleeves came in 4 pieces and I used that to organize all the wires. I have the speaker remote attached next to the lifting mechanism under the desk which is nice for quick volume control. The sub-woofer is placed on the desktop due my preference of having the fewest number of cables coming down from the desk. The one cord that hangs down is the power strip that runs to the outlet. The power strip is placed within the c-clamp of one of the monitor arms.
JOTO Cord Management System
J Channel Cable Raceway
Command Strips (Assorted)
​
Price: I was able to get a lower price in September 2018 at Office Depot using a 20% off coupon that was in general circulation. The final price with taxes and shipping to store was $149.90. But, I would gladly pay the $159.99 listed here.
​
Overall, I love the desk. In fact, I bought another one for my wife. The ability to switch between standing and sitting with the lifting mechanism is well worth the low price I paid. The setup requires minimal effort to lift - I personally use two hands for stability. I do think that an addition of a computer tower on the desktop will make it difficult, but not impossible, to lift. There is mention of wobbling in one of the review videos on YouTube, but it is barely noticeable on a day to day use. I will say that my only complaint is the desktop is not solid wood and I have experienced a bit of surface lift after a cup with condensation was left on the desktop overnight. I recommend using a coaster if you plan to having drinks on your desk.
Thanks! I just looked and I have some of the Velcro Command strips. These would be nice because you can move it from the wall to the TV so suit whatever you're playing better
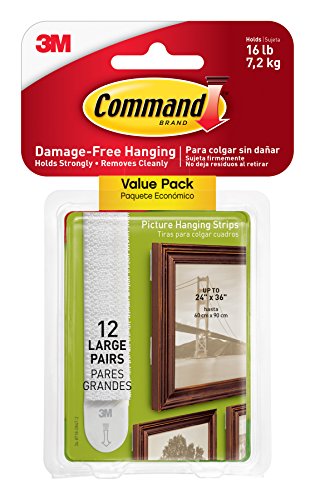
https://www.amazon.com/Command-Picture-Hanging-12-Pairs-17204-12ES/dp/B00LW1APOC/ref=sr_1_2?ie=UTF8&qid=1520093463&sr=8-2&keywords=velcro+command+strips
Again, man, blackout curtains. I have velcro anchors for hanging shit on my walls, and I sewed the other side onto the curtain so it sits flush with the window when attached. My room is pitch black in the middle of the day.
edit: these things https://www.amazon.com/Command-Picture-Frame-Hanging-Strips/dp/B00PLVLD86/
well i first wanna thank TheMagistrate he made this post about this a month ago. https://www.reddit.com/r/Steelbooks/comments/9qjdb0/about_13rd_of_my_collection_running_out_of_wall/
ive been using https://www.amazon.com/gp/product/B01GQ048EQ/
using this i have been cutting it in 5 x 4.75 squares and you can get 55 out of each roll that way. i also feel like you could get away with making them smaller. I however personally feel that they are going to be more secure the way i did it.
https://www.amazon.com/gp/product/B071YVJ1XW/ and i use about 5 of these to mount them on the wall.
Since you can't screw anything into the desk, here's what I would do:
Grab some of these while they're on sale
Then grab some 3M Command Strips to hold up some sort of cable raceway like this (Although you can probably find something cheaper than this particular one at Lowes or Home Depot.)
Or you could just buy a few of these
Or a cable box like this. Personally, I'd go with the box and velcro strips, since your tower is so close to the outlet. Unless you plan to relocate it.
But most importantly for college dorm life: 3M command strips are your friend for almost everything.
A lot of water bottles would not have enough taper to prevent that from slipping. However you do make a good point. How about something non-permanent yet reliable AND not ugly like tape?
https://www.amazon.com/Command-Refill-Strips-6-Strips-17023P-ES/dp/B000FCGS5Y/
Command poster strips are the shit
Why are you not allowed to puncture the wall? This is considered normal wear and tear and is very easily patched over when you leave.
That being said, here is a good solution that will leave a needle sized hole in the wall that will not be noticeable unless someone is really looking for it. You can also cover the hole with toothpaste before you leave and it will disappear. Rated to 100lbs.
Monkey Hook Picture Hanger Home and Office Pack, 30 pc Set https://www.amazon.com/dp/B001KVMNPI/ref=cm_sw_r_cp_api_i_pg4mDbBXS034M
The theme is here, like my transparency theme it's just a modified Midnight idea.
 
The hardware:
1 x 2012 Fire Tablet (the more recent version bought here)
1 x A3 two way acryllic sheet
1 x A3 picture frame, with sufficiently deep sides
4 x Pairs of 3M Command Strips to hang the whole thing
 
Lovelace:
The actual lovelace setup is mostly custom iframes for date/time and the little welcome image at the bottom, and the Wunderground weather panel.
The character icon next to the weather is a picture state card, decided by the type of weather. He'll have an umbrella if it's raining, or be surrounded by clouds for mild/grey weather.
 
Still to come:
At the moment this is just the functioning prototype for me. Eventually using tasker I'll have it:
It's super easy!
Just take two of these: https://www.amazon.com/gp/product/B071YVJ1XW/
Cut a 3"x3" square out of this: https://www.amazon.com/gp/product/B01GQ048EQ/
Stick the adhesive strips to the magnetic square, then to the wall!
​
Measuring out spacing on the wall was the hardest part. I'm able to mount almost 100 steelbooks for about $35.
Monkey Hooks
I've been using the same on the bezel of my TV. You must be using the 3M Command strips too? They're excellent!
https://www.amazon.com/dp/B00LW1APOC/
I use these. Always keep a pack handy. Just cut them into shorter pieces for applications like this.
https://smile.amazon.com/Command-Picture-Frame-Hanging-Strips/dp/B00PLVLD86/ref=sr_1_2?ie=UTF8&qid=1493666632&sr=8-2&keywords=command+strips
I use these and they work really well
That looks pretty nice. I came up with a different solution myself last year so I thought I'd share. It's pretty cheap and all you need are some Monkey Hooks. You can find them at any Wal-Mart or Home Depot as well
1.
If you've never used one before you simply push the longer end into the drywall and it leaves a hook it the wall like so
2.
Then I held up a record to get the spacing right, two on bottom, one on top
3.
End result
The records sit nicely in the grove left by the hook without leaving any scratches. The remaining exposed part is also pretty small so it's barely visible
https://www.amazon.com/Command-Picture-Hanging-12-Strips-17206-12ES/dp/B00LOQMCDM/ref=sr_1_4?s=hi&ie=UTF8&qid=1483898461&sr=1-4&keywords=3m+hanging+strips
Just used command strips dude
I stopped using nails years ago
https://www.amazon.com/gp/aw/d/B0751VFF2P/ref=mp_s_a_1_5?ie=UTF8&qid=1518378789&sr=8-5&pi=AC_SX236_SY340_QL65&keywords=command+strips&dpPl=1&dpID=51vrI6-Vl1L&ref=plSrch
I believe it was these... its been a while...
https://www.amazon.co.uk/Command-Mounting-Refill-Strips-Large/dp/B000FCGS5Y/ref=sr_1_7?ie=UTF8&qid=1478016301&sr=8-7&keywords=command+strips
Here is a pic of them in action...
http://imgur.com/a/9s4aJ
3M Command Strips:
http://www.amazon.com/gp/aw/d/B000FCGS5Y/ref=mp_s_a_1_2?qid=1463467896&sr=8-2&pi=SY200_QL40&keywords=3m+command+strips&dpPl=1&dpID=41H17DQObaL&ref=plSrch
One large strip will hold up to 5 pounds
I fly long flights pretty often and also prefer to use my iPad in place of the crappy seat-back screen.
I use Command Strips Velco on almost all my long flights. Two of them will hold the iPad pro the entire flight. They're super lightweight and pretty affordable for what they do.
Make sure to wait until after take off. And I always try to mount the iPad when the flight attendants aren't looking. The strips do absolutely no harm but I just don't want to get into a debate. Make sure you remove them after the flight. I'd hate for this hack to get squashed.
Using the glue and shit people use, absolutely, however I use these which hang them up with no issues and will not ruin the walls: https://www.amazon.com/Command-Picture-Hanging-12-Pairs-17204-12ES/dp/B00LW1APOC/ref=sr_1_2?ie=UTF8&qid=1496467845&sr=8-2&keywords=3m+command+strips
You can get a piece of plexi glass cut to whatever size you want at some hardware stores (you can also get a cheap poster frame and use the acrylic from that too as a cheaper alternative). You can use those [Command Velcro strips] (https://www.amazon.com/dp/B00LW1APOC/ref=cm_sw_r_cp_api_LNzqybVAJGPHV) to attach it to the wall so it's easy to remove for clean up.
I've been using these. They seem to work pretty well: https://www.amazon.com/gp/aw/d/B00LW1APOC/ref=mp_s_a_1_1?ie=UTF8&qid=1484118376&sr=8-1&pi=AC_SX236_SY340_QL65&keywords=3m+hanging+strips&dpPl=1&dpID=51Z451rdD6L&ref=plSrch
You can buy Velcro Command strips, they don't hurt paint and they hold well. You'll probably need enough for 4 corners.
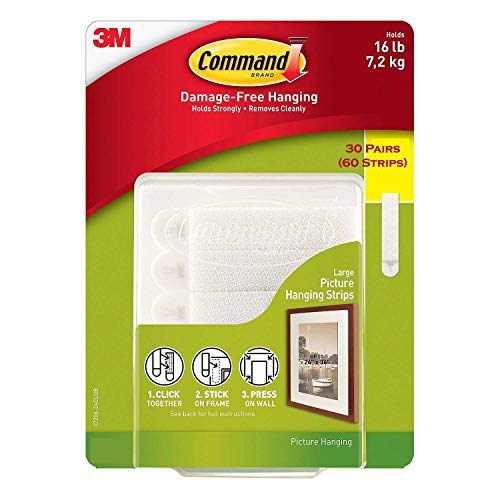
Command Picture Hanging Strips White Large 12 Pairs https://www.amazon.com/dp/B01N0X6SA5/ref=cm_sw_r_cp_apa_i_ctytDb86917K7
I use command strips for everything and I have lived in three apartments so far.
I use these for posters: https://www.amazon.com/gp/product/B01FIK56Q4/ref=ppx_yo_dt_b_search_asin_title?ie=UTF8&psc=1
These for my clothes/towels in the bathroom:
https://www.amazon.com/gp/product/B01C60C4EG/ref=ppx_yo_dt_b_search_asin_title?ie=UTF8&psc=1
These for my big white board:
https://www.amazon.com/gp/product/B073XR4X72/ref=ppx_yo_dt_b_search_asin_title?ie=UTF8&psc=1
These for a canvas painting a friend painted for me:
https://www.amazon.com/Command-Canvas-Hangers-Indoor-PH044-3NA/dp/B0751VC2WQ/ref=sr_1_1_sspa?keywords=command+strip+canvas&qid=1574831251&sr=8-1-spons&psc=1&spLa=ZW5jcnlwdGVkUXVhbGlmaWVyPUExWldDN1NDSzZLQkRBJmVuY3J5cHRlZElkPUEwNjU4MTg5M05RWk9IMTBDQVk0UCZlbmNyeXB0ZWRBZElkPUEwMjIwNTY4WThEODBCREI2TzM4JndpZGdldE5hbWU9c3BfYXRmJmFjdGlvbj1jbGlja1JlZGlyZWN0JmRvTm90TG9nQ2xpY2s9dHJ1ZQ==
​
These are really easy to set up and easy to remove. Simple instructions too. No damages.
You can of course just hang the plant on the wall. There are also some pretty awesome no damage wall hangers. No screws at all used for these.
They are also available in different shapes and sizes for potentially attaching it to the ceiling. My sister used these for paintings on a stud wall. Worked well and it's super easy to remove!
Sure you don't want to try tackling it yourself? Hangers like these can support a 100 pounds. I have very heavy mirrors with big solid frames but they're still only about 40.
https://www.amazon.com/dp/B07D4MGY7H/ref=cm_sw_r_cp_apa_i_abTCCbE792KB6
Sure thing!
The measurements you gave described the dimensions of the magnets. 1.26 inches in diameter by 1/16 inches in height, which converts to about 32mm in diameter and 1.6mm (usually rounded to 2mm) in height. I wouldn't choose any with much less height/thickness because these magnets are relatively fragile, so thickness is generally better.
N35 and N52 are kinda measures of the magnet quality. What's a bit more important is the pull force rating (how strong of a pull there is between magnets). The ones I linked have a pull force of 8 lbs. and can hold a weight of about 2.66 lbs., which converts to a 3.6 kg pull force and can hold a weight of about 1.2kg. This strength is about what you'll be looking for.
So, if you can use Amazon.co.uk to ship to you in Finland, I might suggest checking this out (and here is a similar pack with fewer magnets). They are the same size and quality rating, though they don't state the pull force (I think it'll be strong enough). As a bonus, they come with the perfect adhesives to use on the wall! The ones I suggested in my post are this brand, which I like because they can be easily removed, but the ones you get from buying that magnet set should be fine.
Rectangle ones like these also seem kinda neat if you wanted to try them out. This set doesn't come with adhesives though.
Anyway, hope that helps out. If you can't use the Amazon.co.uk options, then just make sure you try to get magnets about 2mm thick, preferably >20mm in diameter, and with a pull force of as close to 3.6kg as you can find.
Note: I use a spacer about 3mm thick (that white ring in the pictures) between the magnets. This gives them structure and reduces the force a bit. If you don't want to use a spacer, you can get magnets with less than 3.6kg pull force.
Maybe these would be better for you then putting holes in the wall?
https://www.amazon.com/Command-Picture-Hanging-12-Strips-17204-12ES/dp/B00LW1APOC
https://www.amazon.com/Command-Damage-Picture-Hanging-Strips/dp/B00404YKZI
https://www.amazon.com/Command-Picture-Hanging-Strips-Pack/dp/B0044SBCT2
(There are lots of other variations on this theme.)
I've noticed Costco also has these, if you have a membership you should check there.
I can totally relate to the reluctance to put holes in your wall. (Maybe that's not the issue, but if it is...)
So you want the other lamps to turn on when you turn on the switched outlet?
The sarcastic answer is: extension cords.
Non-sarcastic, I'm not aware of any consumer RF product that detects when an outlet turns on and sends out a signal to other smart plugs to also turn on.
I think the closest thing you'll find at the budget you're talking about are these Etekcity wireless wall plugs. I would forget about the switched outlet, and just use command strips to stick the remotes at locations you like, so all the lamps can be controlled by the remotes.
I used 2 velcro command strips per lighthouse and they've been rock solid since April. Mine are stuck to painted drywall so if you're sticking them to something else then your experience may vary
https://www.amazon.com/Command-Picture-Frame-Hanging-Strips/dp/B00PLVLD86/ref=sr_1_1?ie=UTF8&qid=1469555303&sr=8-1&keywords=command+strips+velcro
Why not skip the Velcro and just use this: http://www.amazon.com/Command-Picture-Frame-Hanging-Strips/dp/B00PLVLD86/ref=sr_1_3?ie=UTF8&qid=1459440086&sr=8-3&keywords=command+strip
I used velcro command strips and cut them down to fit behind the flat piece of the stand so they can ideally not be seen. They’ve worked great and I’ve had no issues with them falling as they’re sturdy.
They sell replacement strips pretty much everywhere they sell 3M command products, but Amazon has better bulk pricing. Here are the ones my wife ordered
I mounted my lighthouses with 2 large 3M strips each (https://www.amazon.com/Command-Mounting-Refill-Strips-6-Strip/dp/B000FCGS5Y), and they're holding up perfectly fine.
Out of an abundance of caution I take the lighthouses off the mounts when I'm not using them though, so just the wall mount stays affixed. I think doing that they'll last practically forever, or at least until the next time I move.
Haven't had any tracking issues either, the mounts stay pointed the right way so you can just stick the lighthouses back on and they end up in the exact same spot, or close enough to not matter.
Were you using these things? Those should hold more than enough weight for beads.
I would suggest just to save your walls use these instead, it can hold a good amount of weight and safe on your paint
You really should mount it with nails or anchors.
But you could try using like 20 of these
here.
I used a whole lot of these poster strips:
https://www.amazon.com/Command-Poster-Hanging-Strips-17024/dp/B000HHI6MA
I would definitely recommend them if you are worried about damaging your posters, they have worked well for me.
http://www.amazon.com/Command-17024-Poster-Strips-12-Strip/dp/B000HHI6MA
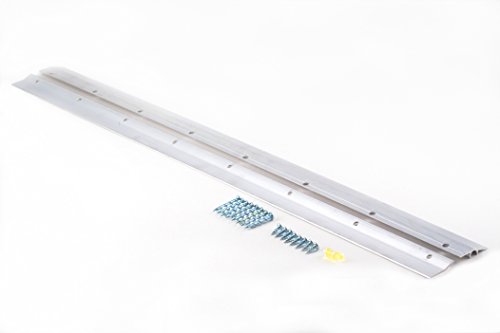
I’d recommend a french cleat. You can hit a couple studs and ensure it stays put. Good work.
https://www.amazon.com/dp/B000VWAYQC/ref=cm_sw_r_cp_api_TUeMBbKKQMJBG
http://www.amazon.com/Hangman-Products-30-Inch-Heavy-Duty-Anchorless/dp/B000VWAYQC/ref=sr_1_2?s=hi&ie=UTF8&qid=1426048183&sr=1-2&keywords=picture+rail+with+level
Try these Monkey Hooks they only make a small nail sized hole which is much easier to fix with quick dry spackle.
Install it as directed and I use leather boot laces tied in a square knot like this to loop around the neck and hang it off the hook. Be certain to tie a square knot and not a granny knot...
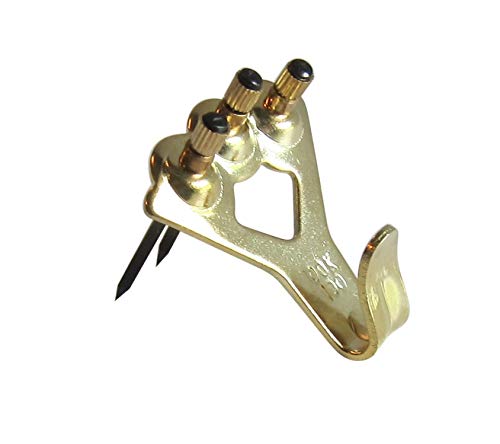
I got you bro
Complete Set SECURITY HANGER HARDWARE Brackets for Art Picture Frame Mirror Secure Safe Hanging Installation with FREE Wrench https://www.amazon.com/dp/B002RHIAYC/ref=cm_sw_r_cp_api_7LUVzbFNKSB0Z
I have seen French Clete's used at work. They are really strong aren't going to vibrate. You can use one at the top of the speaker and one at the bottom. The one I am linking to at Amazon can be cut in half. The are also pretty available. Michael's craft store and wood working stores carry them.
OOK 55316 13-Piece Up to 200 Pound Hangman French Cleat with Hardware
https://www.amazon.com/dp/B003WE9XU4/ref=cm_sw_r_cp_api_PmBpxbZNV7ECG
People should begin to sense a theme - They're from Ikea. I believe they are meant to be used vertically, but I mounted a french cleat to the back of both of them and attached them to the walls (make sure they're hitting at least 1 stud). I'm obviously not afraid of them falling down.
If you're looking for more inspiration, I clicked through a few thousand pictures on the lifehacker workspace flickr. I'm sure if you do they same, you'll find the spaces that inspired mine.
If you do come up with something - be sure to share it!
There are even cleats for sale commercially: http://www.amazon.com/OOK-13-Piece-Hangman-French-Hardware/dp/B003WE9XU4/ref=sr_1_1?ie=UTF8&qid=1453132554&sr=8-1&keywords=wall+cleat
It'd take a routed cavity in the slab to make it flush mount, but yeah, eminently doable.
Use a low-profile metal french cleat setup. If you can catch two studs with the cleat on the wall you'll be fine. Make the cleat on the wall a few inches short so you can adjust the vanity a bit either way to get it centered. You can drive a screw or two through the vanity to make sure it doesn't pop off the cleat.
Maybe you could use a couple command strips to stick it on! That way there's no holes, but it will help secure it a bit.
Looking at your picture it looks like you have a hard floor which probably helps. I have carpet which makes it a little less stable.
I would use zip ties or Velcro - or better yet, one of those cable management channel from Amazon or found in the electric supply section of most home improvement stores and use 3M command strips to attach to the wall or desk/bed.
You can get a good scale for about 20 dollars. Make sure to have you scale on a level surface(you can buy one of those levels with the bubble in it for like 3 dollars) and make sure to calibrate your scale before every use. Also keep your scale clean and make sure you keep it somewhere where it won't be dropped or anything.
Here's a good scale
Here's a cheap reliable level
Here's a nice little scooping tool for your powders
Stay safe my friend!
These little bubble levels. I recommend going to hardware store and picking one out yourself instead of buying through Amazon though.
I tried to redesign my room without one. Never again. They're not just for hanging pictures, you can use them for assembling furniture, adjusting monitors, and all sorts of things.
Just surprise me with something from my wishlist if I win.
Dont even need to spend that much. Just epoxy a mini level into the rail. Much more durable and wont get snapped off as easily.
Darice 91095-01 Mini Level Picture Hanging https://www.amazon.com/dp/B0054G62KW/ref=cm_sw_r_cp_apa_i_mnOwCbRWFG9XP
3M commands strips: https://www.amazon.com/Command-Picture-Hanging-12-Pairs-17206-12ES/dp/B00LOQMCDM/ref=sr_1_2?ie=UTF8&qid=1511833029&sr=8-2&keywords=3M+command
The 3M Velcro strips are seriously magic. I used them in all of my apartments over the years.
https://www.amazon.com/Command-Picture-Hanging-12-Strips-17204-12ES/dp/B00LW1APOC/ref=sr_1_1?ie=UTF8&qid=1488025692&sr=8-1&keywords=3m+velcro+hanging+strips
Edit: Amazon link for reference
I'm sure what you've got there will work, but someone recommended these a few months back and I've been using them ever since. Has held up my one ceiling mounted camera since sometime last December!
Fully agreed - I had similar issues until I 'mounted' my 3 sensors a bit higher.
You can just use 3M Velcro strips and either of the mounts from Amazon below:
3M Velcro strips
White stationary mount
Tripod mount
The nice thing about 3M Velcro strips is they hold tight, but are easy to remove when needed without leaving any marks or residue on the wall :)
Don't drill holes. Routers, modems, and many smaller switches are light enough that you can use 3M Command picture hanging strips. This is what I did with most of my equipment, and it's been hanging there for six months now with zero issues. Plus, you can pull them off the wall and move them around without making more holes. This is especially excellent if you're renting. :)
Hi, my tank is 80cm x 35cm x 40cm (LxBxH)
I am using screwless hooks, they stick on to a surface (people use them for hanging clothes, and you can get ones for hanging paintings with velcro, which I am using for their water bottle.)
Amazon link for hooks |
Amazon link for velcro
Any other questions, just let me know.
I used this. They come in different weight ratings so buy accordingly. They're removable too :)
Did you by chance put the adhesive rectangles on the backplate? The backplate's side that faces the motherboard has 2 rectangles of raised plastic on 2 sides, and 2 pieces of double-sided adhesive foam are attached to the backplate inside those rectangles, then the backing of the adhesive facing the motherboard is removed, and the backplate pressed into the motherboard, thus securing it to the motherboard.
This adds a couple millimeters of distance from backplate to standoff screws, and without this the standoff screws will have some slack/play.
Also, you might just be using the AMD standoffs - they're a hair taller and will leave a slight gap between cooler and CPU.
Different screws might also have different depth - the LGA 2011 screws will have less thread, so there might be some play between bracket and standoff, leading to looseness.
Try messing with all standoff/screw configurations, and if you're missing the adhesive try to improvise something that'll add a couple millimeters distance from the backplate and motherboard.. couple pieces of carboard cut to that rectangle, taped up, and then taped to motherboard would probably cut it.
Edit: I just got home and checked the adhesive and it's about half a centimeter thick. If you don't have the adhesive, you could shim it with 2 command strips. Smooth 2 together on the velcro side, cut to fit, remove adhesive, slap on bracket, remove adhesive, apply bracket to motherboard. Should give you that half centimeter distance. Hopefully you have the adhesive on hand though. Easy to lose. It's about 3/4" x 1/4", little white rectangle x 2.
What I would up getting was the following:
It is $12.99, and 14 ½x30 ¾. It will fit ten steelbooks, in the format I have shown, or horizontal.
8.5” X 11” sheets, you will get two steelbooks out of one sheet, with some left over; not enough to cover another steelbook though. You will have to cut out to size what you need.
These are 16lbs rated. I placed four on each side of it (top and bottom) and it’s holding well.
I will warn you, the board with the steelbooks is HEAVY.
https://imgur.com/gallery/x2bFz
This is one more photo to show how it looks.
Good luck man!
I use these at my apartment you're welcome
Here's OP's link. His comment got removed by automod for containing an Amazon affiliate tag.
Aight I'm home, but be warned I'm not much of a handy-man so I basically did the first thing that I thought would work and the result ended up being decent lol.
Basically I bought these command strips that are designed for hanging up photo frames: https://www.amazon.co.uk/gp/product/B01FEJ3OA4/ref=ppx_yo_dt_b_asin_title_o04_s01?ie=UTF8&psc=1
They stick together super well so I'm not worried at all about them potentially coming loose. Also since you have to stick them to both your wall and sleeve you might be concerned about removing them but they come off super cleanly. No sticky residue or anything like that gets left behind and it won't take paint off your wall or anything.
Then it's as simple as applying 2 strips to the wall for each sleeve like so: https://imgur.com/ilBSaJt
Then also 2 strips to the back of the sleeve: https://imgur.com/5VH1YnJ
The one thing that isn't ideal is that for sleeves with 2 records the middle will sort of poof out and my dumbass was out of ideas so I just put more strips inside the sleeve to stick it closed lmao:
https://imgur.com/s8AKfIt
Like I said they come off easily and cleanly so I was like "fuck it, add more strips, strips will solve all the problems".
The pros are what I mentioned above. Cheap, quick, easy, easy to modify, easy to completely remove.
The cons are that it looks ugly under the hood (nobody sees so it's fine shhhh), and that you have to push kinda hard on the sleeve to get the strips to mesh together (they're sort of like super strong velcro). So you could potentially crease the corner on thinner sleeves if you're not careful. This was by far the worst offender: https://imgur.com/avLROaA :(((
Hope you can find something useful/take inspiration from this.
I used 3m command strip poster hangers and just stuck my base table to the wall. The tabs stick out so I can remove without damage if needed in the future. Made mine a lot more stable and kept sound from transferring into the wall since it's a bit like foam.
https://www.amazon.com/Command-Picture-Hanging-Strips-PH206-14NA/dp/B073XR4X72
These things. There's probably some variation, but the results should be the same when paired with a magnet.
Command strips
These can double up as both. Display on wall or stand up...
https://www.amazon.com/gp/product/B00GP1HJQG/ref=ppx_yo_dt_b_asin_title_o03_s00?ie=UTF8&psc=1
These...im not sure. maybe can lean them and make a stand?
https://www.amazon.com/gp/product/B003O72YTG/ref=ppx_yo_dt_b_asin_image_o04_s01?ie=UTF8&psc=1
​
I hung mine with those command brand velcro strips because i cant stand holes in the wall
https://www.amazon.com/Command-Picture-Decorate-Damage-Free-PH206-14NA/dp/B073XR4X72/ref=sr_1_1?crid=DRJQCWEJ0P0C&keywords=command+strips+velcro&qid=1572549664&s=sporting-goods&sprefix=command+strips+ve%2Csporting%2C166&sr=1-1
Mine is just a cheap 720p for youtube and retro games. One pair can hold 16lbs, got 4 pairs on there it's not going anywhere
What about something like this: https://www.amazon.com/Command-Picture-Hanging-16-Pairs-PH204-16ES/dp/B073XS3CHV?ref_=fsclp_pl_dp_1
Or this:
https://www.amazon.com/Gorilla-Heavy-Double-Mounting-Inches/dp/B019HT1U9E
Or Hot glue?
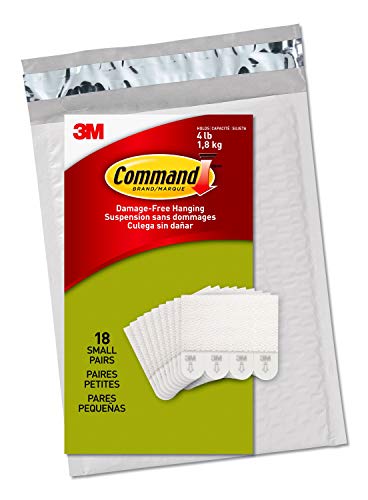
Command Picture Hanging Strips, Decorate Damage-Free, 18 pairs (36 strips), Ships In Own Container (PH202-18NA) https://www.amazon.com/dp/B073XS3CHW/ref=cm_sw_r_cp_api_i_B2eyDbVGX5AS2
I buy the small cuz it's more than enough surface area and cheaper
They definitely are bright enough to light up a room. The latest update to the Nanoleaf app/panels also comes with a few default white light settings and you can access a white light color palette when setting up a scene in the app.
For the adhesives issue you could aways test the adhesive strips on a less frequently seen part of your wall. The box comes with extra 3M adhesive strips, so you can afford to use a few as a test. Personally I use a velcro version of the strips, which were pretty helpful if you want to be able to easily move around the panels. The adhesive parts are the same though.
https://www.amazon.com/Command-Picture-Hanging-18-Pairs-PH202-18NA/dp/B073XS3CHW/
A good resource may be to look on 3M's website, as they offer advice/FAQs on how to install command strips in order to avoid damaging your walls: https://www.command.com/3M/en_US/command/contact-us/faqs/
Personally I've used command strips as well as mounting tape to hang items to walls. Mounting tape usually offers a more secure hold, but always damages paint when removed. 3M command strips usually easily remove without any lasting marks.... as long as you remove it properly by pulling the tab on the strip.
Sure thing:
https://www.amazon.com/Command-Decorate-Damage-Free-Container-PH202-18NA/dp/B073XS3CHW/ref=sr_1_1_sspa?keywords=3m+velcro+command+strips&qid=1575074074&sr=8-1-spons&psc=1&spLa=ZW5jcnlwdGVkUXVhbGlmaWVyPUEzM0NMRVNDQ0JSQloxJmVuY3J5cHRlZElkPUEwOTkwMjI2MjgySFBSRDVFSFNWTSZlbmNyeXB0ZWRBZElkPUEwMzkyNzQxMVMxMzU3NlRIRVFLRiZ3aWRnZXROYW1lPXNwX2F0ZiZhY3Rpb249Y2xpY2tSZWRpcmVjdCZkb05vdExvZ0NsaWNrPXRydWU=
So the interface stays put even when plugging in headphones?
And these are what you used?
Command Picture Hanging Strips, Small, White, 18-Pairs (PH202-18NA) - Easy to Open Packaging https://www.amazon.com/dp/B073XS3CHW/ref=cm_sw_r_cp_api_c52Yzb7FF5H6J
https://www.amazon.com/Command-Picture-Hanging-Container-PH206BLK-14NA/dp/B073XV1P16/ref=mp_s_a_1_2_sspa?keywords=command+strips&qid=1566442188&s=gateway&sprefix=comm&sr=8-2-spons&psc=1&spLa=ZW5jcnlwdGVkUXVhbGlmaWVyPUEySVk5NkhVME5CWE4mZW5jcnlwdGVkSWQ9QTAxOTQ1NjFNODhRWlBWM1A5SzEmZW5jcnlwdGVkQWRJZD1BMDc0MzI0OTFBQ1A4UUlBNk5OS1Emd2lkZ2V0TmFtZT1zcF9waG9uZV9zZWFyY2hfYXRmJmFjdGlvbj1jbGlja1JlZGlyZWN0JmRvTm90TG9nQ2xpY2s9dHJ1ZQ
https://www.amazon.com/dp/B073XV1P16/ref=cm_sw_r_cp_awdb_t1_FTfuDb6QXFX5H
One of my sensors
​
I sprayed black primer on some cheap metal L brackets and hung them on these. Inexpensive, and they haven't moved in over a year.
I bet you could put the IKEA spice racks in that space using stronger Command strips. So you’d have a little extra space.
https://www.ikea.com/gb/en/p/bekvaem-spice-rack-birch-40070185/
Command PH206BLK-14NA, Picture Hanging Strips, 14 Large Pairs https://www.amazon.com/dp/B073XV1P16/ref=cm_sw_r_cp_api_i_g.JODb2GKVZ25
Command Large Refill Strips, White, 20-Strips, (GP023-20NA) - Easy to Open Packaging https://www.amazon.com/dp/B0751VFF2P/ref=cm_sw_r_cp_apa_i_y.bCCbQDP27F8
I had the same problem with renting and not being able to properly mount my Atmos speakers. I ended up using Large Command Strips, 4 on each speaker, and put them at the top of my wall next to the ceiling. The Atmos effect works quite well after I turned up the volume on each speaker. It would be a lot better if I had ceiling speakers or could mount them to point directly at the listening area, but for $8, I was happy to finally enjoy Atmos. Here is my thread that people gave me some ideas on what to do: https://www.reddit.com/r/hometheater/comments/8g14dm/atmos_front_height_angle/
​
those 745's just take standard 3.5" SATA Hard drives. the issue is that the hard drive caddy wont carry a 2.5" SSD.
you do get adapter rails, but many of them dont have the exact hole pattern of a standard 3.5" hard drive and may not fit in the Dell caddy.
what i would do is simply use a one or two command strips to attatch the drive to the Dell caddy.
i woud opt for a 120GB drive atleast
http://www.amazon.com/Crucial-2-5-Inch-adapter-Internal-CT120M500SSD1/dp/B00BQ4F9ZA/
https://www.amazon.com/Command-Mounting-Refill-Strips-6-Strip/dp/B000FCGS5Y/ref=sr_1_1?ie=UTF8&qid=1466442168&sr=8-1&keywords=command+large+refill I've just been sticking two of these refills on the provided wall mount. I've been moving my vive around a lot for demoing so they're great for temp use. The longest I've had a mount up before moving it is a week and it still had a strong stick.
https://www.amazon.com/Command-Refill-Strips-6-Strips-17023P-ES/dp/B000FCGS5Y/ref=sr_1_1?s=hi&ie=UTF8&qid=1522505501&sr=1-1&keywords=3M+adhesive+strips&dpID=51FGGo5783L&preST=_SY300_QL70_&dpSrc=srch
The Targets by me sell refill packs. They are usually at the bottom of the shelf. Either that or Amazon.com
> Command adhesive strips
https://www.amazon.fr/3M-Command-Mounting-Refill-Strips/dp/B000FCGS5Y/ref=sr_1_6?ie=UTF8&qid=1499853040&sr=8-6&keywords=strip+adhesif
How do you remove them? do I also need to scrap some stuff with a razor blade?
I use the 3M temporary two sided tape. Holds solid and easy to take off with a plastic card between the stand and speaker. Just cut into smaller strips, they hold really well.
Edit: these
https://www.amazon.com/Command-Refill-Strips-6-Strips-17023P-ES/dp/B000FCGS5Y/ref=sr_1_1?s=hi&ie=UTF8&qid=1522505501&sr=1-1&keywords=3M+adhesive+strips&dpID=51FGGo5783L&preST=_SY300_QL70_&dpSrc=srch
I recommend the Command (https://www.amazon.com/Command-Refill-Strips-6-Strips-17023P-ES/dp/B000FCGS5Y) strips. They are SUPER good and one strip can hold around 3 pounds (I think a whole aurora ways less then that), so it should hold them pretty well, just use A TON.
(sorry - thought this got eaten in a spam filter and was sad)
This is 3M magic adhesive that I have used before and doesn't cause damage when removed a year after application.
My flatmate speculates the wall is made of plaster, if that helps.
I was planning on using either:
large 3m strips
which are rated by 3M at 5 lbs/strip, and put 9 strips/board, and maybe fill in the gaps with something that comes 9 strips/pack like these medium strips (3lbs/strip)
Should use some Command mounting strips
>EDIT:
>
>I can understand the use of referral links and lots of people say they don't care. Nor do I honestly, except he wasn't contributing to this subreddit. He posted the exact setup 9 months (and 8 months) ago, this means he's here for the sole purpose to gain profit.
>
>Sure, he spent a lot of money, it's not disruptive, it's victimless, it doesn't hurt anyone and it's not a big deal. But it seems as if he's only here to earn money, he didn't even show a walkthrough of the computer build, he isn't a regular, he doesn't contribute to discussion. He posted multiple times like I've already mentioned and nothing has changed in all those posts.
>
>He's not here to show people his setup, he didn't even build anything. He's here to profit off us. Multiple posts of the same setup with all the affiliate links in every post, including links to something like a phone...
>
>Also, the problem is links like this act as infections. For approximately 24 hours (I think) after you've clicked a referral link, he will get a portion of the sale on anything you buy, so if you click a link to see the price of the something or investigate, he will earn money off everything you purchase in the next 24 hours off Amazon.
>
>_
>
>So earlier today I came across this post.
>
>I thought it was a bit suspicious how he documented absolutely every part of this "build" even though it isn't a build, it's a battlestation.
>
>He has since removed all information from his Reddit post, presumably after I commented about the Amazon links found in the post.
>
>It didn't look right because he provided links to every single item in this setup. All Amazon affiliate links, for him to make money off us.
>
>Not so bad though, right? Well, his Reddit username is "BlackWhite01", his Imgur username is "blackandwhitebattlestation", and he's been posting this absolutely identical set up on both Imgur and Reddit multiple times for a year.
>
>He did not intend to show off his battlestation, or even his computer build, he intended to come here and make money off of /r/battlestation and /r/buildapc mainly, but he's posted to a lot of other subreddits as well - presumably to pay off this setup and the ridiculous chair ($1,500).
>
>What really pisses me off is that he's also included affiliate links to stupid products like his phone. His phone?! It's fucking /r/buildapc.
>
>Alright, so there's a run down of all his Imgur and Reddit post history.
>
>Please do not click on any of the Amazon links, I've posted all items without any affiliations below.
>
>--
>Imgur
>--
>
> Submitted Imgur albums!
>
> Imgur Album 1.
>
> Imgur Album 2
>
> Imgur Album 3
>
> Imgur Album 4
>
> Imgur Album 5
>
> Imgur Album 6
>
> Imgur Album 7
>
> Imgur Album 8
>
>--
>Reddit
>--
>
> /u/BlackWhite01 - archive link: /u/BlackWhite01
>
> Reddit Post 1
>
> Reddit Post 2
>
> Reddit Post 3
>
> Reddit Post 4
>
> Reddit Post 5
>
> Reddit Post 6
>
> Reddit Post 7
>
> Reddit Post 8
>
> Reddit Post 9
>
> Reddit Post 10
>
>* Reddit Post 11
>
>_
>
>
>Below is a list of all the items found in the pictures. These links are NOT affiliate, I spent an enormous amount of time to provide you with the unaffiliated links.
>
>This subreddit and others shouldn't be focused on making money, it should be the exact opposite, just sharing our hobbies, enthusiasm, skills and to have open discussions without the aim being to profit.
>
>Screw this guy for trying to profit.
>
>Items
>--
>
>PC Specs:
>
>Type | Name | Link
>----|----|----
>Processor | Intel i7-4790k | Link
>Memory | Corsair Dominator Platinum 16GB | Link
>Storage | Samsung 850 Pro 256GB | Link
>Motherboard | ASUS ATX DDR3 1600 LGA 1150 | Link
>CPU Cooler | Corsair Hydro Series | Link
>Video Card | ASUS GTX 980 STRIX 4GB | Link
>Case | NZXT H440 | Link
>PSU | Corsair RM750 | Link
>PSU Sleeved Cables | Corsair Power Cable Kit | Link
>
>Fans:
>
>Type | Name | Link
>---|---|----
>Front Intake | Noctua NF-F12 | Link
>CPU Cooler | Corsair SP120 | Link
>Rear Exhaust | Corsair AF140| Link
>
>Lights:
>
>Name | Link
>---|---|----
>RGB Lights | Link
>White Lights | Link
>
>Accessories:
>
>Type | Name | Link
>---|---|----
>Monitors | Dell UltraSharp 23.8" | Link
>Mounts | VideoSecu Articulating Arm | Link
>Mouse | Logitech Wireless Performance Mouse | Link
>Mousepad | Zalman Accessory AMP1000 | Link
>Keyboard | Rapoo Black KX 5.8GHz | Link
>Phone | Motorola Moto X 16GB | Link
>Phone Stand | Cooler Master JAS | Link
>Speakers | Harman Kardon SoundSticks | Link
>Webcam | Logitech HD Pro Webcam | Link
>Headphones | Samsung LEVEL | Link
>Headphone Holder | Ikea Bjärnum Folding Hook | Link
>Strip for Holder | Command Mounting Refill Strips | Link
>White Videocard Backplate | Performix 11207 Plasti-Dip | Link
>RAM Light Bar | Corsair Dominator Platinum LightBar Kit | Link
>
>Other:
>
>
>
>Type | Name | Link
>---|---|----
>Desk | Euro Style Donald Desk | Link
>Chair | Embody Chair by Herman Miller | Link
>Clock | Modern Clocks | Link
>Lights | Philips 259982 | Link
>Wire Cover | Omnimount CMK | Link
>
>Triple Monitor Wallpapers
>
>
>
>
>
>
>
>
These. They work really well. I only had to use 4 of them; one for each corner.
Thanks for this nice idea. I saw 1/2 cleat options and felt it was not so secure, given that mostly there will be down the wall force & pull away from wall force, but occasionally there might be some swing / ing that needs to secured/ locked against.
I did not like this - https://en.wikipedia.org/wiki/French_cleat
But I do like this - Maybe need something that can manage more weight? or 2 of them?
200 lb
http://www.homedepot.com/p/OOK-Hangman-200-lb-French-Cleat-Picture-Hanger-with-Wall-Dog-Mounting-Screws-55316/202341629
300 lb
http://www.amazon.com/Hangman-Heavy-Duty-Mirror-Picture-Hanger/dp/B000IU12J0/ref=pd_sim_60_5?ie=UTF8&dpID=31QnKNkTiFL&dpSrc=sims&preST=_AC_UL160_SR160%2C160_&refRID=03XP0J634798ZRZNNT0Y
300 lb
http://www.amazon.com/Hangman-Products-30-Inch-Heavy-Duty-Anchorless/dp/B000VWAYQC/ref=pd_sim_60_2?ie=UTF8&dpID=313E3-enG9L&dpSrc=sims&preST=_AC_UL160_SR160%2C160_&refRID=17D6D768YYQ21V0RA6QF
Can you share some examples that would be more secure like the second one?
What do multi cleats look like?
PS: Could you also suggest some other "locking mechanisms" that could Augment the cleats and prevent unintentional dismount.
or maybe be alternatives to cleats?
Drywall anchors are only so-so. Consider making a french-cleat with a piece of wood that you can screw into the studs.
Or use something like this:
https://www.amazon.com/gp/product/B000VWAYQC/
Even if you have plaster and lathe, the hanger product there should support the weight of your mirror if you use screws that get into the lathe.
Most people do - either those or picture hooks which don't require any tools at all. Anchors and screws are for much heavier installations, think a heavy mirror etc.
The maintenance guy came over today morning to fix something, so I just asked him. He said it is sheetrock. Is that the same as drywall? Do I still have studs placed at regular intervals behind that I should use to hang heavy stuff? Also, would you happen to know if I can use Monkey Hooks on sheetrock?
Always been my worst fear with mine, and 3 hang above my PC. I wouldn't even use nails, man. Try these. Haven't failed me yet and can hold their weight. See here.
https://www.amazon.com/Monkey-Hook-Picture-Hanger-Office/dp/B001KVMNPI
Yup, yup! Each can hold over 50lbs each (x2).
I don't think this whole thing is over 100 LBS. Prior to hanging this I was using those same hooks to hang IKEA EXPEDITS for over a year. And that whole set up was heavier than this.
https://www.amazon.com/Monkey-Hook-Picture-Hanger-Office/dp/B001KVMNPI/ref=sr_1_3
You can use picture hangers or monkey hooks. Both of these come with weight ratings, so get something rated to hold the weight of your picture or more.
Can you easily press a thumb tack into the wall? Then it is drywall. You can hammer a nail or push the hook straight into drywall. If the wall is plaster, first drill a hole slightly smaller than the nail or hook you are using, then gently hammer or push into the pre-drilled hole.
I have mine hung on the wall https://cl.ly/433ae036f4dd
Using these hooks. Easy to install and when you want to remove leaves a small hole https://www.amazon.com/Monkey-Hook-Picture-Hanger-Office/dp/B001KVMNPI/ref=sr_1_1_sspa
use gorilla hooks they hold a huge amount (especially if you use several spaced a few inches apart), and they only put a sight pinhole in the wall. You can cover it up when you leave with a bit of spackle in the pinhole.
I was going to say, basic stud finders are usually around $12. Some of them have AC voltage detection features built in as well so you don't electrocute yourself.
Really though, the easy way to do things is to buy some Monkey Hooks or equivalent. Then you can just say screw it and put most things where ever you want - as long as you don't hit a stud.
http://www.amazon.com/Monkey-Hook-M-V0030-6-SS30-Picture-Hanger/dp/B001KVMNPI/ref=sr_1_19?ie=UTF8&qid=1422475171&sr=8-19&keywords=hanging+nails
maybe you could use these somehow? if not for the fabric, they are awesome to have in a rental to hang heavier pictures and things.
At our old rental we had a tapestry hanging behind the bed and I just ran a thin rope through the top (and if your fabric doesn't already have a tunnel like curtains do you could easily fold it over and sew one) and then we just did two nails on each side and tied the tapestry up. you could use smaller panels of fabric to get that drapey effect. does this make any sense?
I hung several of these style of shelves in my gf's apartment using some of these http://www.monkeyhook.com/ without any problem. Plenty good enough to hold a picture or candles / knickknacks. Also leaves a much smaller hole.
Edit to add Amazon price of $10 for 30 instead of $30
You should have used these.
Try these safety hanging hardware.
https://www.amazon.com/Complete-SECURITY-HARDWARE-Brackets-Installation/dp/B002RHIAYC
They are similar to what is used in galleries to prevent opportunity theft and falls during earthquakes. They are a bit finicky to install but are sturdy once properly set up.
I agree with replacing the plastic frames, but I would use security hardware as opposed to screwing through the frames.
Have you considered ook hooks and an aluminum French cleat tv mount? Ook’s heavy duty hooks are rated for 100lbs each and don’t require studs.
I know they don’t look like much, but I’ve hung heavy TVs and large mirrors with ook hooks for years with no issue.
For TVs I use the tv side of the mount from this: https://hangmanproducts.com/products/no-stud-tv-hanger?variant=286515704
And two of these: OOK 50446 4 Pack 100 Lb Padded Professional Picture Hanger, Brass https://www.amazon.com/dp/B01FM46Y9Y/ref=cm_sw_r_cp_api_i_Lr20Bb83CA54M
Apparently ook makes a French cleat now: OOK 55316 13-Piece Up to 200 Pound Hangman French Cleat with Hardware https://www.amazon.com/dp/B003WE9XU4/ref=cm_sw_r_cp_api_i_7n20BbP9PGMZX
EDIT: This assumes you always want the tv to be flat to the wall
You could use a french cleat:
https://www.amazon.com/OOK-13-Piece-Hangman-French-Hardware/dp/B003WE9XU4
Here is how it works:
https://www.popularmechanics.com/home/how-to-plans/how-to/g2340/how-to-build-a-french-cleat-shelf/
No, I ended up using two brackets like this and managed to get it into a few studs. Foolishly, I bought a cheap piece of fiberboard as my backing, but it was insanely heavy and I was a bit worried about it falling down. So I went a bit overboard with the mount haha.
I like these
https://www.amazon.com/dp/B004051TE2/ref=twister_B079TRHTZN?_encoding=UTF8&th=1
https://www.amazon.co.uk/dp/B004051TE2/ref=asc_df_B004051TE258610211/?tag=googshopuk-21&creative=22110&creativeASIN=B004051TE2&linkCode=df0&hvadid=214440742293&hvpos=1o1&hvnetw=g&hvrand=8090861110265299486&hvpone=&hvptwo=&hvqmt=&hvdev=m&hvdvcmdl=&hvlocint=&hvlocphy=1006886&hvtargid=pla-305740399370&th=1&psc=1
https://www.amazon.co.uk/Command-17201-4pk-Medium-Picture-Hanging/dp/B004051TE2/ref=sr_1_3?keywords=command+strips+medium&qid=1558556800&s=diy&sr=1-3
Nice and clean, cheap and easy, no fussing about with tripods etc. Easy to tilt the camera down or up a bit when needed, and easy enough to remove the camera from the wall then stick back on again.
I leave mine in the (reasonably wide) corridor to my front door, to protect the walls I bought a bit of hardboard from homebase (about 1200 x 600mm for £5) and 2 packs of these (£2.50).
Then I just lean the bike against the board, you can paint the hardboard too if you like. Black is obviously a good colour choice.
http://www.amazon.com/Darice-Mini-Level-Picture-Hanging/dp/B0054G62KW/ref=pd_bxgy_hi_img_z
Nice job! A few suggestions:
A couple of your bends could be easily leveled. The CPU>Rad bend is a little too tall on the vertical axis and the bend coming out of your rad to the pump is too long horizontally. That's what's throwing them off (unless you intended for it to look a little wonky, nothing wrong with that).
You can buy little bubble levels like these on Amazon: https://www.amazon.com/gp/product/B0054G62KW/ref=ppx_yo_dt_b_search_asin_title?ie=UTF8&psc=1
Which are easy to place on your runs and check to see if they are even. If you want to do this just carefully shorten the respective axis until you see it's level.
Second, I'm a convert to leak testers, like EKWBs (Alphacool also makes one). Those are meant to be used with an empty loop and pressurizes it with air via a little hand pump. If the gauge hold the same pressure after 15-30 min then you don't have any leaks waiting to ruin your day. I started using them after every flush/clean (which I did a lot just building at first) and it's saved me a lot of time and grief, not to mention no leaks.
I honestly don't understand all these posts about buying $30+(x2) poles and clamps etc. It's silly, especially for a uni student.
This is what you want
Things you will need:
So essentially what you will be doing is drilling into the wood block to mount the vive brackets, and then putting the wood block assembly onto the wall with command strips.
Just make sure to get a thick piece of wood, but not too thick. 1 1/2 inches (3.8cm) thick should do, but it's up to you; and after you get the wood block, make sure to get screws that will NOT pierce your wall. IE: Stop inside the wood block.
Cheap, and doesn't wobble like light poles/clamps etc. (Which are quite silly)
PS: The drill can be found for less than $20. You don't need anything fancy. Also, if you feel confident, you can screw the screws in by hand with a screwdriver, further cheapening the mounting. Also, a tip for the wood block, most hardware stores allow you to cut down the piece of wood right there on site, just ask.
3M Adhesive.
https://www.amazon.com/Command-Picture-Hanging-12-Pairs-17206-12ES/dp/B00LOQMCDM/ref=sr_1_1?ie=UTF8&qid=1511754735&sr=8-1&keywords=3m+photo+hanging+strips
I use the pulleys on the ceiling but I attached them with Command Strips. I used the velcro ones to hang pictures. No need to worry; just remove them cleanly when needed.
this is a dope space! i'd love spend a year or two in japan someday; what's the rent for a place like this?
you can definitely still hang stuff without nails or thumbtacks; look into some heavy-duty 3M strips like this. maybe focus on finding lighter frames to ensure everything stays up.
other than that, get some standing shelves and fill them with cool/weird/interesting knick knacks. idk what the thrifting/antiquing scene is like in Nihon, but that's an easy way to find cool, vintage stuff to display. my personal favorites are old cameras, telephones, radios, etc.
Rubbing Alcohol
My entire house has a ton of command strip devices in it, including the four camera mounts. Clean the surface with rubbing alcohol, let it dry. Apply the strip to the camera mount first, then press the mount to the wall surface for a minimum of 30 seconds. Put your back into it! The only strips that have come down are the craptastic cable ties that tend to break with a light breeze.
​
Really, what you want for the camera mounts are these strips. They are overkill, velcro (easily removable/adjustable), and worth every penny.
similar to this? https://www.amazon.com/Command-Picture-Hanging-12-Pairs-17206-12ES/dp/B00LOQMCDM/ref=sr_1_4?ie=UTF8&qid=1497244332&sr=8-4&keywords=command+strips
3M Command mounting strips. They are apparently easy to remove (haven't actually tried). You can get these with just the tape or this velcro-like strips which will let you readjust the frame if needed.
Try these plus these. Admittedly I don't have mine on the ceiling, but I don't see why they wouldn't work.
Command Velcro Strips. Large size. If they are too wide, cut them up the middle so that you retain. The pull strip. Comes off the wall and object cleanly and hold very well so long as your wall paint isn't powdery. For applying to glossy backed or painted frames, they stick well. For applying directly to wood I use a little super glue with a kicker to dry it fast (don't glue to the wall obviously). We have a number of my wood projects and even a framed mirror approximates 36x24 all hung with these type strips. For your project because I over do it, I would use four strips.
https://www.amazon.com/gp/aw/d/B00LOQMCDM/ref=mp_s_a_1_2?ie=UTF8&qid=1497563244&sr=8-2&pi=AC_SX236_SY340_FMwebp_QL65&keywords=command+velcro+strips&dpPl=1&dpID=51Zr0mzkkyL&ref=plSrch
I'm in an apartment so I didn't want to go with anything permanent. After trying a few things I ended up just using two 3m Command Strips on each base and mounted them upside down. Actually works really well.
https://www.amazon.com/gp/aw/d/B00LOQMCDM/ref=mp_s_a_1_1?ie=UTF8&qid=1481636494&sr=8-1&pi=SY200_QL40&keywords=3m+command+strips&dpPl=1&dpID=51Zr0mzkkyL&ref=plSrch
So it's tough for your space since it's pretty small. Given the furniture you have that could interfere I would probably place the one camera centered on the wall above your bed up near the ceiling and angled towards the center of your play area, and the other centered above your window near the ceiling.
Generally having them in opposite corners (this is how mine are) would be better, but your cabinets would get in the way. You might have some issues since you will be fairly close to the camera, but I think you can get away with it.
My cameras are mounted using 3m command strips and small camera mounts. I chose this route since I cannot drill into my apartment walls without losing my deposit. I just stuck the strips to the back of the mounts and to the walls. If you choose this route make sure you give the adhesive some time to set before you actually put the camera up (on both the camera mount and the wall).
These are what I used:
https://www.amazon.com/gp/product/B00R96X9DS/ref=oh_aui_detailpage_o00_s00?ie=UTF8&psc=1
https://www.amazon.com/gp/product/B00LOQMCDM/ref=oh_aui_detailpage_o01_s01?ie=UTF8&psc=1
As an alternative to velcro you could use these.
these will do the job
I'm assuming you mean wires outside the case and not inside.
I picked up a bag of adhesive cable clips for a few bucks. Definitely helpful for routing wires around or under a desk. These are what I bought, but there are lots of different ones you can looks through.
Velcro ties also come in handy frequently and they are adjustable/reusable. You can also use them for cable management inside your case.
I also use Command Strips to position my router and surge protector on the wall, but that's a personal preference.
I just use my cheapo deapo laser level and a ruler. To each their own though.
Edit: Command strips are the way to go. They can be used to hang just about anything. The velcro strips can hold up to 16 pounds with 2 of them on a picture or item. Most everything even close to 16 pounds or under in my house is command strip hung. No need at all for putting holes in the drywall.
https://www.amazon.com/Command-Picture-Hanging-12-Pairs-17204-12ES/dp/B00LW1APOC - no affiliate link
If you have some basic wiring skills, you could use LED lights like some mentioned. I went this route connected to a remote controlled outlet and it works great. I like the light bars since you can reuse them later more easily than taping plain LED light strips onto the underside directly.
Some cheap lights if you're patient and willing to give AliExpress a try: LED Light strip bars, 12V driver (it also works for 120V), sticky strips, wireless outlet and/or switched cord.
I use these mounts with command strips for my sensors. Two strips per mount and they seem very stable
I used command velcro to hang things all the time. I also used them to keep the cabinets shut to keep the cat out of them.
It's the spike end of velcro interlocking to another spike end, pretty secure and it comes off without messing up the wall. Use a little heat if you cut it down to size and get rid of the tab for removal.
https://www.amazon.com/gp/aw/d/B00LW1APOC/ref=pd_aw_sim_sbs_229_3?ie=UTF8&psc=1&refRID=CH6GRZRKBD7C75HGYJVY&dpPl=1&dpID=81m5B9T6htL
Sorry about formatting. On mobile
This is what I use, and it works perfectly amazing:
Velcro Command Strips (3 lb holding limit):
https://www.amazon.com/gp/product/B00LW1APOC/
Super lightweight plastic mounts:
https://www.amazon.com/gp/product/B00DWA0QLS/
Put a strip on the wall and a strip on the mount, screw the camera head into the mount, and stick it to the wall. Holds perfectly fine. I've never had it fall off or had any problem.
here's the thing I have learned about the cameras: you don't truly need them to be 6 feet high and you don't need them to be at a 30-40 degree angle. All that really matters is that at least one camera can see the headset at all times. I've had to adapt to different demo environments, for example with one camera being on a 4.5ft tall surface while the other camera was on a 3ft tall surface; both cameras were opposite of each other and I never had problems. As long as you can set the camera on a flat surface you should be good to go.
EDIT I just saw that you said the room had no shelves or anything, sorry about that, that was my fault. I've read where some people will get a Velcro adhesive and that that's worked for them so you could try that.
They are like velcro, Amazon has them so here's a link because I didn't know how else to explain them haha
I was nervous at first but once I did it, I felt how secure they are. I mounted mine on the top corners, once I'm home I can show you a better picture, but I'm out of town! I just take them off by pulling the bottom off and they kind of peel off of the wall. The Command strip instructions said to do it that way with whatever you hang because it will be less damaging to the stuff hanging and easier to take off too. They're super secure and I am definitely not worried about them falling down anymore. And the strips peel off nicely so it will be easy to take them off if I don't want to hang them anymore.
Command Picture Frame Hanging Strips
There is a ton of variety between sizes and quantities so that might not be the one that's best for this application. We use these things all of the time. So much easier than hooks/nails.
I orderd 4 of these for my 4 cameras and some 3M command Velcro Picture Hanging strips to attach them to the walls.
I use 3M Velcro hanging strips and they work great for Dots, Echos and speakers. I was a little worried the Dot connected speaker I have mounted in my shower might be a problem because the sticky side and steam but (rather heavy) Anker Soundcore 2 Speaker has been mounted here for a couple of months and no problems. The 24 hour battery life is long enough I haven’t had to charge it yet but the Velcro allows it to be snapped down fairly effortlessly to do so.
I used some of the removable 3m picture hangers. Two of the large ones for each lighthouse. It works perfectly. So instead of screw holes i just have a little gum potentially when i move.
https://amzn.com/B00PLVLD86
almost anything from the 3M range - I see a few suggestions below, but I always find these are the most resilient https://www.amazon.com/Command-Damage-Picture-Hanging-Strips/dp/B01FEJ3OA4/ref=sr_1_1?keywords=3m+picture+mount&qid=1555418121&s=gateway&sr=8-1
Command 3M 12ct Pack Picture & Frame Hanging Strips Sets Large Size White Damage-Free https://www.amazon.com/dp/B01N0X6SA5/ref=cm_sw_r_cp_apa_P2qJyb24HTP7K
https://www.amazon.com/Command-Picture-Hanging-Strips-Damage-Free/dp/B01N0X6SA5/
These work pretty well for apartments. (I use a bunch). Out of all 20 frames I have I have only had 2 issues and that was because my brother didn't apply them correctly. The rest have been up for almost 2 years with no issues.
Isn’t possible to reuse the adhesive. I bought new one on amazon:
https://www.amazon.com/dp/B071YVJ1XW/ref=cm_sw_r_cp_apip_QQEALhBjfXDe3
Most of my panel are bought Kijiji (similar at Craigslist in Canada).
https://www.amazon.com/Command-17024-136ES-Poster-Value-Strips/dp/B071YVJ1XW/ref=mp_s_a_1_4?keywords=3m+poster+hanging+strips&qid=1571954579&sprefix=3m+poater&sr=8-4
The cosmetic parts of my keezer are pretty much glued on, so drilling anything into it was a no go. My drip tray sits on a glued on piece of trim that is about halfway up (it wraps around the whole thing). I just used those damage free picture hangers to keep it attached.
I would trust just about any amount of weight I can fit on it honestly (e.g. multiple full growlers). Each strip holds up to 16 lbs apparently, I use 4 of them. It also sits on the "crossbar" trim.
It also has a huge plus because it is very easy to take the whole thing off to wash. Only cosmetic downside is you can see thing picture hangers slightly if you look at it from an angle.
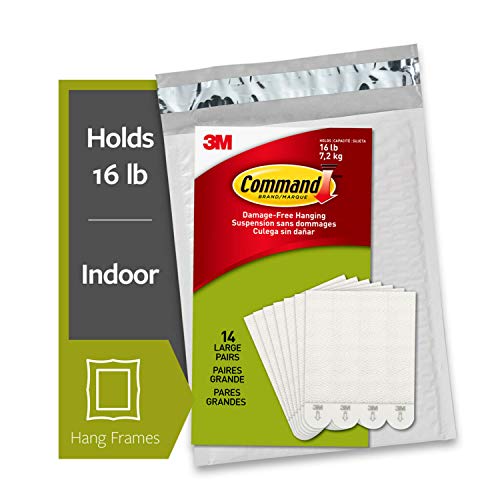
Command Picture Hanging Strips, this link will tell you the weight they can hold. https://www.amazon.com/Command-Picture-Hanging-Strips-14-Pairs/dp/B073XR4X72/ref=mp_s_a_1_1?ie=UTF8&qid=1536157613&sr=8-1-spons&pi=AC_SX236_SY340_QL65&keywords=3m+command+strips&psc=1
> I currently live in a rental and cannot drill into the kitchen tile
You might be able to use command strips: https://www.amazon.com/Command-Picture-Decorate-Damage-Free-PH206-14NA/dp/B073XR4X72
These work well for hanging pictures and will bond very well to a clean tile surface. Supposedly 4 strips holds 16lbs but I would test that first. Probably adding more strips will hold more weight as well.
You can also find some more magnetic knife blocks here: https://www.cuttingboard.com/knife-blocks/
3M photo hanging strips rated for 25LBs use double what's rated
https://www.amazon.com/dp/B073XR4X72/
You can use this kind of command strips. They make the panels sit off the wall a little bit more, but no tabs and easier to remove without damaging the wall.
Thanks for the quick reply.
There are these on Amazon. Rated for 12lbs
https://www.amazon.com/dp/B073XS3CHV/ref=cm\_sw\_em\_r\_mt\_dp\_U\_eIdzDbC53JD3A
I'll try them out.
I recommend these
It’s easy to pull up the dock if needed and easy to put back down
I use these in my camper where I don’t want to put holes in the wall:
Command Medium Picture Frame Hangers, Create Gallery Walls, Hangs up to 6 frames, Value Pack (PH204-16NA) https://www.amazon.com/dp/B073XS3CHV/ref=cm_sw_r_cp_api_i_vs0CCbDYJCZAR
Sure! https://www.amazon.com/Command-Picture-Hanging-18-Pairs-PH202-18NA/dp/B073XS3CHW/ref=mp_s_a_1_1?ie=UTF8&qid=1536072593&sr=8-1&pi=AC_SX236_SY340_QL65&keywords=3m+velcro+hanging+strips+small&dpPl=1&dpID=41L8ekXIDeL&ref=plSrch
Just keep in mind you need 6 per panel. 3 on panel, 3 on wall.
I just went to Walmart and bought up packs. They have value packs that were a better deal than amazon.
I'm so glad you like them!
I would pick up some of these:
https://www.amazon.com/Command-Picture-Hanging-18-Pairs-PH202-18NA/dp/B073XS3CHW/
Either small or medium should work fine, just get whichever are cheaper! I ended up getting this huge box:
https://express.google.com/product/Command-Picture-Hanging-Strips-Medium-Mounting-adhesive-white-non-permanent-pack-of-50/7770280929795108356_4374697721581210615_7472660
But with nine, using 3 on each panel (the other ones stick to the wall), you really only need 27 pairs (for now -- you're gonna want to upgrade, trust me, heh). Looks like the best deal right now is $12 for two of the 18-pair sets from Amazon, and you'll have some to spare in case you end up moving them, getting more, etc.
I still need to set mine up -- be sure to post pictures of what you decide on!
You didn’t state a budget so I’m just gonna suggest these for more room/ cleaner work area: Bigger desk (at least 55” in width), monitor mounts, cable raceways/cable box for all of your cable management needs.
For a desk I would suggest looking into something like an IKEA Bekant, the one I linked is the bigger one, 63” x 31”and that should give you more room to work with for textbooks on the desk.
For monitors mounting is best (imo) so you can have that much more room to push stuff alll the way back to take advantage of the depth. This monitor arm Is good.
For cable management I would suggest this raceway. It comes with 9 15” long pieces that you can mount under your desk. I would use some command strips to hold them in place. Use the raceway to feed all your cables through to a cable management box, Something similar to this one, so you can stuff in the excess cables and make it look nicer. Just have the box behind your pc or along on of the desk legs.
NOTE: the IKEA Bekant does come included with a cable management pouch/net under the desk but imo with 2 monitors, a switch, and keyboard it would be too much worse for that little thing.
Ps: you don’t have to use the stuff I listed, there’s always alternatives if you have a question just ask, I’ll see if I can help.
After painting our dining room and reducing some other items along the way, wifey made me hang my first few.
The 3M Command strips worked quite well, more for better hold for larger I suppose. Held the canvases and panels just fine.
https://www.amazon.com/gp/product/B073XV1P16
Bonus, I can take them off and not have to spackle holes yet again.. because wall painting isn't as happy as oil painting. ;)
I have had great success with these.
I have a couple giant mirrors I’ve put up using those, plus several big movie and concert posters in heavy frames. They should be available at pretty much any hardware store or home center.
Also, for heavier pieces, if you do want to use glass, these hangers are rated to 100lb, hang in drywall, even without a stud, and leave only 3 tiny holes in the wall.
https://www.amazon.com/dp/B07D4MGY7H/ref=cm_sw_r_cp_apa_i_yMZNDbVJ5SDQ2
These have worked great for me. They come with less nails/holes depending on how much weight you need it to hold.
I'm curious how long you had them up before they lost their stick... Did you remove them at all once set up, or reposition them from time to time?
The adhesive that comes with them is just a set of 3M command strips from what I understand (https://www.amazon.com/Command-Picture-Hanging-12-Pairs-17206-12ES/dp/B00LOQMCDM) so you can order replacements or just buy them at a local hardware store if needed.
3M Command strips will handle it. They have ones that can handle 10 pounds. I had my home made projector screen mounted on the wall using these.
https://www.amazon.com/Command-Picture-Hanging-12-Pairs-17204-12ES/dp/B00LW1APOC?th=1&psc=1
Don't do any of that. Use a bunch of these. My full length mirror has been hanging for years.
Edit: not sure why I'm being downvoted. OP said she isn't handy, and doesn't know what any of that means. These command things work very well and are easy to use. I always use them for my pictures and mirrors.