(Part 2) Best artist painting supplies according to redditors
We found 2,366 Reddit comments discussing the best artist painting supplies. We ranked the 948 resulting products by number of redditors who mentioned them. Here are the products ranked 21-40. You can also go back to the previous section.


Based on the width of the '' '' '' spilled '' '' '' coffee, and the way it stays on nearly perfectly parallel tracks throughout the shape of the
'' '' '' stain '' '' ''
The fact that we have a deeper hue on the part of the '' '' '' stain '' '' '' near the pot, and a corresponding wide splotch, indicates the pressure on the beginning of a brush stroke. and then a lighter tail that breaks of into two parallel strokes, indicating OP quickly flicked up with the intention of making a steamy effect.
Based on the look of the mark I'd guess a flat or angular flat
In fact I would guess that you've been rough with your brushes. When you dry off a flat to aggressively you bend the bristles and sometimes a 'V' shape gets stuck in the brushes dry state. Which I'm guessing is what the brush you used to do this with looks like.
Here's a link to some new brushes, the one you used is clearly in need of replacement
and here's a guide on how to look after your brushes better
I'm gonna give this bullshit attempt at a post a 1/10 for effort. You'll have a more realistic fake stain if you blotch coffee with a paper towel and run the end between your finger tips to squeeze out actual liquid drops. The naturalization of your faked stain was the goal. You went over the top in your artistic efforts. Better luck next time though.
Yeah, you can get away with even putting these in the wash. You can wrap them in a tied pillow case or preferably a mesh bag made for washing sneakers. Put the cycle on normal and put in a tide pod. Make sure to remove laces and inner sole (although I've left the sole in on accident with no issues). Don't put them in the dryer.
This should clean the fabric quite easily and most of the boost as well. These oil based paint markers do the trick. You can even fix some imperfections on the plastic part of the cage too if you're careful.
First off, Great work! As someone just starting you did really well!
As for things to look to do to improve that I noticed.
Warhammer TV is an excellent resource for figuring out how to do painting tecniques with a demonstration and walk through.
A lot of what I'm sharing with you I ignored for far too long. I can tell you the model I am painting now looks far better than the model I was painting a year ago.
This article is great inspiration for painters of any skill level.
Keep it up, keep improving, and if you learn something don't hesitate to share it and how it works for you.
I look forward to seeing your next model and/or squad you paint.
https://www.amazon.com/gp/product/B000BQS3UW/ref=oh_aui_detailpage_o01_s00?ie=UTF8&psc=1
$90, just make sure to order a hose too (only airbrush i bought that didnt come with one). You can use a cheapy air compressor till you save for a good one.
Damn good airbrush. With Flo Improver i can run ANY paint through it, GW, P3, Vallejo, doesnt matter
My recommended buying list for a new painter is:
Tools
Sprays
○ Grey is standard, white if you're painting a majority of light colors, and black if the majority is dark.
Brushes
○ Round 0
○ Round 1
○ Round 2
All in all it should be around $60 USD for the tools and about $40 USD for the brushes. However, this list gives you every tool you will need to get started and to continue with the hobby.
This is just what I like to have on hand, this does not reflect the "perfect list". I hope it helps :)
I painted the base with a variety of shades of blue and then put a very thick layer of distressed crackle paint clear rock candy on it. Once dry I did a heavy dry brush of white over it. The crack pattern seems to depend on how heavy the crackle paint is applied and it there was anything on the base before the paint was applied.
https://www.amazon.com/Holtz-Distress-Crackle-Paint-Clear/dp/B005FY5HCW/ref=sr_1_2?ie=UTF8&qid=1500396638&sr=8-2&keywords=distressed+paint
>Hey guys noob here trying to get into the hobby. I've just been adding up some prices and it's getting ridiculous... am I doing something wrong or is this the entry fee we're talking about? Here is my math.
>
>TOTAL
>$29 - Chaos Black Spray
>$11 - Agrax Earthshade
>$6 - Lamenters Yellow
>$6 - Flash Gitz Yellow
>$6 - Yriel Yellow
>$6 - Ardcoat
>$11 - Agrellan Earth (x3)
>SUBTOTAL $97
>
>$6 - Kantor Blue
>$11 - Coelia Greenshade
>$6 - Lothern Blue
>$6 - Sotek Green
>$6 - Temple Guard Blue
>$6 - Ushabti Bone
>$6 - Screaming Skull
>$6 - Balthasar Gold
>$6 - Gehenna's Gold
>$6 - Khorne Red
>$11 - Carroburg Crimson
>$6 - Wazdakka Red
>SUBTOTAL $82
>
>Paints $179
>Start Collecting! Seraphon $140
>Essential Citadel Brush Selection $87
>Mouldline Remover $19
>TOTAL: $425
>
>^ This paint is for bases and Saurus Warriors only, haven't even calculated the cost of paints for the Cold One Knights and the Carnosaur yet because it was already getting out of control and this is supposed to be my intro into the hobby...
It hurts my pocket book to see people pay $11 for black primer and clear coat when you can buy the same quality of spray for ~$3-4 each.
And $6 for single colors is ridiculous. But then I don't use GW paints. I prefer army painter shade washes, and Vallejo model color or game color for regular colors. I use Rustoleum black, grey, and white primer and always have great experiences with it as long as you follow the use instructions (like don't spray when too hot or too cold or rainy). And I thought my Testors Dull clear coat was expensive at ~$8.
[Vallejo basic model color] (https://www.amazon.com/dp/B009162PWU/ref=cm_sw_r_cp_apa_7xLcAbSVVT1V1) 16 basic colors for $42, which is a ton better than $6 per color.
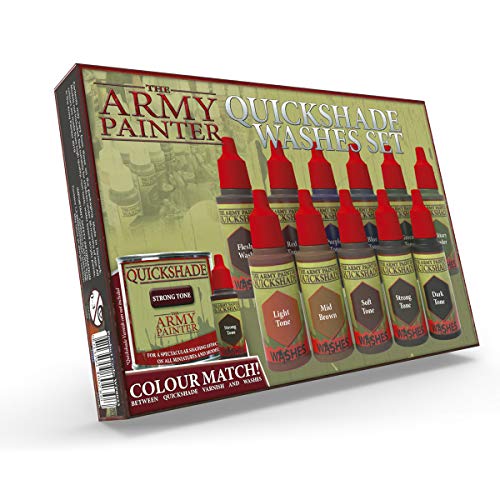
Army Painter Quickshades 11 washes for $27.50
And if you like army painter paints which they are great paints there is the starter set: Mega Paint Set by Army Painter 50 paints includingbasic colors, shade washes, and a few metallics for $90.
Don't buy into GW's propaganda, their regular paints aren't any better than other common brands like Army Painter and Vallejo, and they are a fraction of the price, usually about half the cost.
Personally I used to use exclusively GW paints and wish someone would have told me this stuff early, I would have saved a lot of money. When I started using other products I realized I didn't even like the GW method for most things. Base paints are too thick, and layer paints are the exact same as army painter or model color paints. Then you get things like acrylic medium, airbrush medium, and glaze medium which you can buy in big bottles from other companies, like Golden, which is the same gunk that GW sells for $6 per pot that you can buy from Liquitex or Golden 8 oz bottlrs for ~$10-$15.
If you're worried about getting studio colors without using GW paints then the community has you covered with the paint conversion chart.
Save yourself some money if you're worried about cost and don't overpay for GW materials when it's the same stuff across the board.
I used these to transfer the paint to the bottles
https://www.amazon.co.uk/dp/B075WR8BWV/ref=dp_prsubs_3
I used glass beads from eBay
https://www.ebay.co.uk/itm/100-Glass-Paint-Agitators-SPECIAL-OFFER-SALE-PRICE-citadel-vallejo-mixing-ball/163406170842?hash=item260bc44ada:g:RFIAAOSw2bRdokOJ
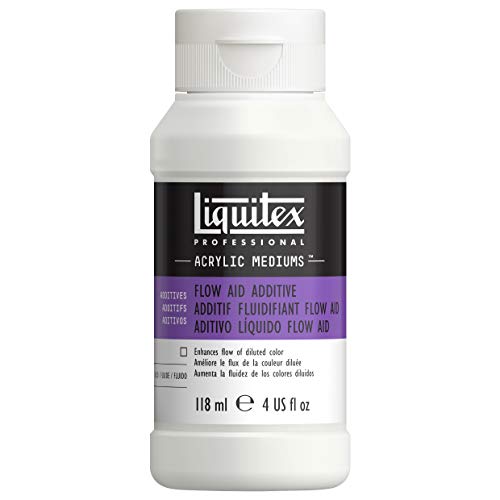
Flow aid
https://www.amazon.co.uk/gp/aw/d/B000KNPM46?psc=1&ref=ppx_pop_mob_b_asin_title
Best bottles are from warcolors
https://www.warcolours.com/index.php?route=product/product&path=68&product_id=66
Hope this helps
For my figures flesh tones I use Games Workshop’s Citadel Kislev Flesh which works VERY well with their Cadian Fleshtone.
I've been eyeing Vallejo's Face/Skin Colors Paint Set for awhile. It's 8 colors that'll help add a bit of variety. Amazon Link
Eh, I personally recommend not buying bundles even-though they seem like a better deal. I started by just buying paints that I would need for a particular model and continuing from there. Before I knew it I had a full range of paint from all different companies.
Buying a set of paints will only save you a little cash, but I'd bet that the big sets will include paints you will never really touch so you aren't actually saving any money buying them.
If you really want to go the paint route on Amazon then I will admit that I did in fact buy these sets when I was starting painting on a set of Zombicide minis:
https://www.amazon.com/dp/B004EKCOE2/ref=sr_ph_1?ie=UTF8&qid=1487690557&sr=sr-1&keywords=vallejo+paint
https://www.amazon.com/Vallejo-Face-Colors-Paint-8-Colors/dp/B000PHCPTM/ref=sr_1_1?ie=UTF8&qid=1487690721&sr=8-1&keywords=vallejo+paint+flesh
So I've been trying to get more into basing and wanted some ice effect for my wolves. I've seen a lot of tutorials on getting white Ice but I came up with something I felt more realistic looking.
No texture, I just painted russ grey down then watered down ceramite white and covered the base. Then I just plopped a ton of Clear crackle paint and let it dry. The thicker you lay it on the bigger the cracks.
Couldnt resist the sns sale on this pair for about $130. and i knew id be blacking out that boost before i bought. (sorry dont see it available any longer, but its on goat and stockx for 120-160ish depending on size.) i wanted to try the full angelus method since heskicks said it lasted on youtube, and it took me 3 days on and off this weekend.
full photo album progress here with comparison pix in different steps of the method and against "OEM" black adidas boost https://imgur.com/a/5RE2d
STEPS
Day 1 – deglaze and dye. Deglazed before dinner, painted dye layer 1, wait 10 mins then dye layer 2. Let dry overnight.
Day 2 – Dye reducer. Feelgoodkicks on youtube said this was important to eliminate cracking and that purpleish sharpie-like tint, so I tried it. Make sure to very lightly roll a Q-tip over your dye work, otherwise else you can completely remove all your work. Later that day I painted with the flat black paint. Waited 10 mins then did a 2nd layer.
Day 3 – Acrylic Paint. Wait 10 mins and do a 2nd layer. Still looked too glossy to me, so I masked the upper and sprayed with krylon later that day. And a 2nd layer a few mins after as the instructions state to get my finished product. Also added alternate laces and gunmetal grey aglets. Didnt end up using the mink oil since Im worried the boost will gloss up, but I still might try some later.
OVERALL TIPS
With any painting, take your time and do LIGHT layers to prevent chipping/cracking as much as possible.
I didnt mask the upper when painting since i went slowly, but paint brushes are actually easier to use very close to the primeknit than the sharpies were. I normally painted that upper edge first, then used a larger brush to paint the main part of the boost.
Krylon spray was a must. Album has a comparison photo with just angelus finish and its super glossy compared to the krylon finish. Using krylon finish alone, however, the paint rubbed off the boost whenever i touched it. so gotta do both
PREVIOUS POST (sharpie method)
https://www.reddit.com/r/Sneakers/comments/7thl9p/iniki_boost_blackout_oil_based_sharpie_matte/
Since the previous sharpie method rubbed off a bit on my fingers, I retouched with the anglus acrylic finish and then krylon again to get it more matte. Seemed to do the job.
I think for the sharpie method id have to add deglazer and angelus finish. so a total of 4 purchases would be good (deglazer, sharpie, angelus acrylic finish, krylon matte finish)
PRODUCT LINKS
Angelus Leather Preparer & Deglazer 4 Oz - $6.60
https://www.amazon.com/gp/product/B00EU322DQ
Angelus Brand Leather Dye W/applicator - 3 Oz ''Jet Black'' - $6.75
https://www.amazon.com/gp/product/B016QV7XIS
Angelus Acrylic 4 Ounce Paint (Flat Black) - $8.49
https://www.amazon.com/gp/product/B00MPXF6XG
Angelus Brand Acrylic Leather Paint Matte Finisher No. 620 - 4oz - $7.59
https://www.amazon.com/gp/product/B00B5W4LX4
Krylon Matte Finish - $3.47
https://www.amazon.com/gp/product/B005ENZ8CS
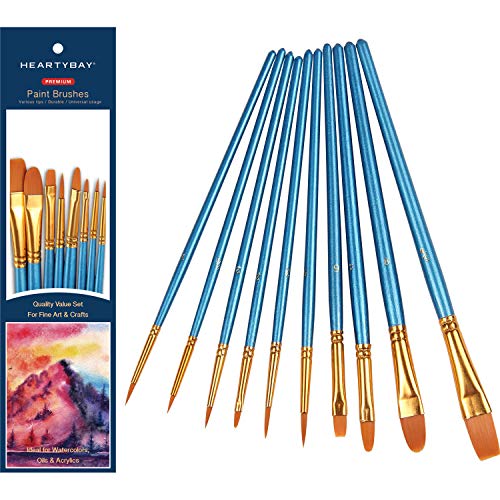
Heartybay Nylon Paint Brush Set - $5.98
https://www.amazon.com/Heartybay-10Pieces-Round-Pointed-Nylon/dp/B00V4EG6D6
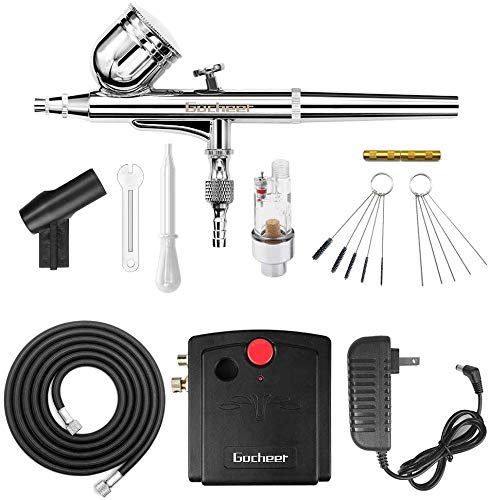
https://www.amazon.com/Cafego-100-250V-Airbrush-Portable-Compressor/dp/B071J4M3X6
I use these and they're really good so far;
https://www.amazon.co.uk/dp/B010QLOJ3G/ref=pe_3187911_185740111_TE_item
Gocheer 100-250V Dual Action... https://www.amazon.ca/dp/B071J4M3X6?ref=yo_pop_ma_swf
I used mr. metallic colour GX: GX metal red
What I did for these wedges:
Thanks, for flesh tones I'm mainly using Vallejo's flesh tone pack.
I use:
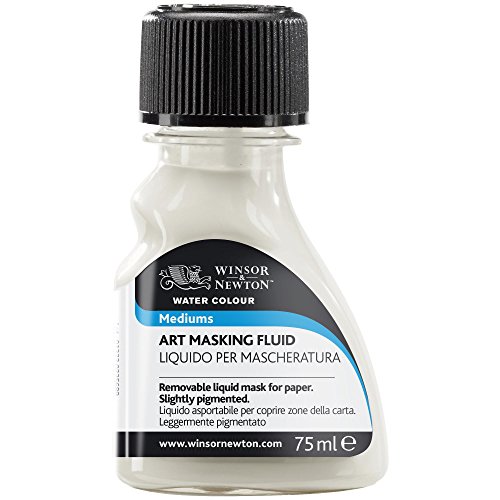
https://www.amazon.com/Winsor-Newton-Masking-Fluid-75ml/dp/B005P1ROEY
Some artists suggest that you split the difference of the bottle once you own one so that you can save half for later and avoid drying out the whole bottle as it tends to react to air very poorly, speeding up the drying process of the contents inside when uncapped during use.
Jason Mark Essential kit: $16.99
https://www.amazon.com/gp/product/B00D12KGVW/ref=oh_aui_detailpage_o00_s01?ie=UTF8&psc=1
Brush Set- $5.89
https://www.amazon.com/gp/product/B00V4EG6D6/ref=oh_aui_detailpage_o00_s00?ie=UTF8&psc=1
Angelus Paint: $8.49
https://www.amazon.com/gp/product/B00HQ53QA8/ref=oh_aui_detailpage_o00_s01?ie=UTF8&psc=1
Disclaimer: In this video I'm lubing a linear switch but if you're lubing a tactile switch, you might want to skip lubing the legs of the stem and the leaf bumps, because this decreases the tactility of the switch.
This video shows what I do when I lubricate keyboard switches with grease and a paintbrush. This video can even help someone who doesn't know anything about lubing keyboard switches and just wants to see what it involves and how they could get started.
​
I will go slowly in the video, trying to be sure you can see what I'm doing.
​
My choices of where to apply lube are based on experience and on the results of an experiment I did and documented here:
https://imgur.com/gallery/hijSYcp
​
I wanted to show 2 different ways to open the switch, using a special opener tool or using regular tweezers. Both methods work fine.
​
The grease I typically use for this method is Tribosys 3204, which you can purchase from keyboard vendors such as switchmod.net, novelkeys.xyz, 1upkeyboards.com, etc. Other greases I like to use are Krytox 205g0 and Christo Lube MCG 129.
​
Tools:
Painbrush: https://www.amazon.com/gp/product/B00V4EG6D6/ref=ppx_yo_dt_b_search_asin_title?ie=UTF8&psc=1
​
Tweezers: https://www.amazon.com/gp/product/B00FZPFQHM/ref=ppx_yo_dt_b_search_asin_title?ie=UTF8&psc=1
​
4 Prong Pick-Up Tool: https://www.amazon.com/gp/product/B000RB3KZ4/ref=ppx_yo_dt_b_search_asin_title?ie=UTF8&psc=1
​
Switch Opener tool: https://kiiboss.studio/products/kiiopener_mx.html
​
In case you are opening Halo switches or BOX switches: https://kiiboss.studio/products/kiiopener_kailh.html
​
Acrylic switch holder / modding station: https://item.taobao.com/item.htm?id=525320012520
​
Or https://www.aliexpress.com/item/Keyboard-Axis-Board-for-Machanical-Keyboard-Black-Axis-Blue-Brown-Red-Gray-Green-White-Axis-Acrylic/32802439596.html?spm=a2g0s.9042311.0.0.37e34c4dgCIZli
​
A 3d printed option: https://www.thingiverse.com/thing:3294929
The reviews are a bit special, I doubt it'll last you long, even if it manages to spray once for you. I've never come across such a compressor, in honesty, save your money, buy once and buy right.
If you're that tight on funds then one of these will get you going, but the compressor leaves a lot to be desired. If you can stretch further, a kit like this has a decent compressor, the airbrush is still a cheap chinese kit. If you want to spend money more wisely then a compressor like this and an airbrush like this will serve many years for a beginner before upgrading the airbrush to something with higher detail. The compressor will serve any model airbrush very well. You can get that compressor or similar in a kit too.
This one? https://www.amazon.com/Cafego-100-250V-Airbrush-Portable-Compressor/dp/B071J4M3X6
Want to get into airbrushing but not sure which kit to get - was hoping someone could recommend one to me
So far I'm interested in these two
https://www.amazon.com/dp/B001TO578Q/?coliid=I1SXGU2NC07752&colid=R7SNPP6EN7WU&psc=0&ref_=lv_ov_lig_dp_it
https://www.amazon.com/dp/B071J4M3X6/?coliid=I1XQMNT8SQI7FQ&colid=R7SNPP6EN7WU&psc=1&ref_=lv_ov_lig_dp_it
Also wanted to get this airbrush booth and was wondering how frequently I would have to change filters and how difficult it is to do so (ie. is it easy to find replacement filters and is it difficult to take apart and put back in)
https://www.amazon.com/F2C-Airbrush-Extractory-Portable-Powerful/dp/B01N7KS6WD/ref=pd_sbs_201_3?_encoding=UTF8&pd_rd_i=B01N7KS6WD&pd_rd_r=VEZEEP5S6M236Z4M1K9M&pd_rd_w=lqEqi&pd_rd_wg=HcIxM&psc=1&refRID=VEZEEP5S6M236Z4M1K9M
Of course :D
Inks are basically pigmented water, so they flow better then layer paint, while not pooling as much as washes. They're used in glazing, as you mentionned.
Glazing is a more advanced technique which is used to get really smooth transitions between colors. There was a post a while ago that really showcased what glazing does (see here). It's a very time consuming process, where you take a range of colors and go back and forth applying this layers of it to blend and smooth your colors.
If you want to get into glazing, then you'll need to buy some retarder medium. It's a type of liquid that will slow down the drying process of your paint so you can take your time and mix it up on the model while it's wet to get those smooth blends. Someting like this should work. You add a tiny bit of it to your paint as your apply it.
This was hand brushed. I felt that I would fork out for an airbrush down the line if I was serious about picking up the hobby. Originally I planned to use some Mr Hobby colours I got off Ebay. Unfortunately I realised too late that most of the colours I had purchased were gloss and I read that they don't do well for parts that are not meant to be glossy! I then settled on some Vallejo Model colors off Amazon, this and this set. In my very limited experience they seem quite easy to work with, water based, easy to thin down and apply.
What putty would you suggest using? I tried using some Milliput Epoxy putty and a bit of vaseline so the parts wouldn't stick together, but I found that I was either not mixing it in the right proportions so it wouldn't set or that it still stuck the parts together despite using vaseline.
Something like this?
Unless you live in a desert-dry climate, you'll at least want to add a moisture trap like this. Having a fine control regulator (like the one included) is nice, too; you'll have much better control over airflow.
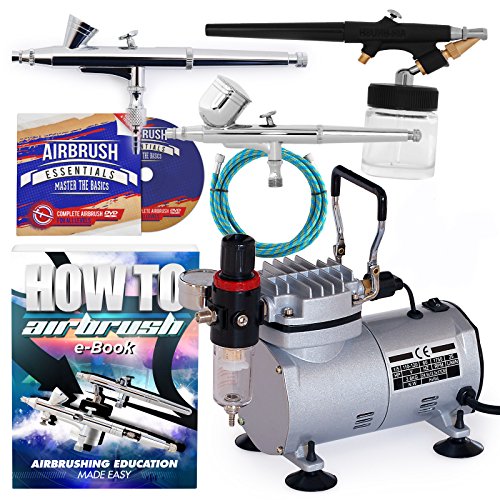
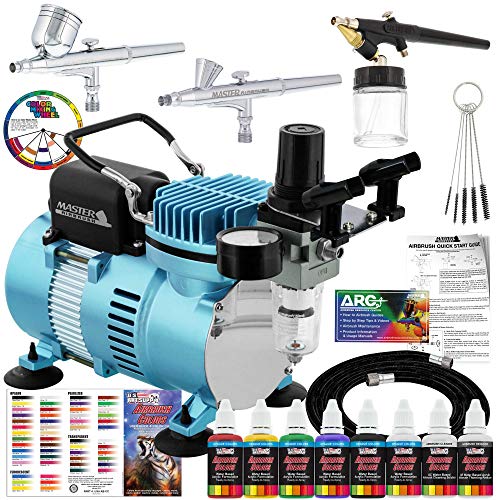
The Master airbrush kit with a compressor is probably the entry level kit you'd want. The compressor with that kit is also known as the AS-186 compressor, and is quite a capable compressor.
The airbrush is probably nothing fancy, but a basic cheap airbrush is a good starter since you can learn how they work, how to maintain them, and most importantly not give a damn the first time you bend a needle.
Once you've got some practice under your belt, move up to a reputable artists airbrush since they are better made. You won't actually see much of a difference in the quality of the spray in a cheap airbrush to an expensive one, expensive ones typically have more options in components and are easier to source replacement parts for.
I moved up from a no-name ebay airbrush to an Iwata, and immediately bought the parts to change the Iwata airbrush to a 0.5mm needle instead of its stock 0.3mm.
I bought the Master Deluxe Airbrush kit on Amazon (likely the one you saw), and everything /u/BigBraddWolfe said has been my exact experience.
I originally got mine for Gundam model kits, though the brush works fantastically for priming and base-coating miniatures as well. I would definitely recommend the Deluxe over the cheaper version, because the "extras" make all the difference.
The tank allows you a fair bit of continuous spray before the motor kicks in, and pretty much ensures you don't get any rattling or crazy pressure differences. It fills back up pretty quickly, so you won't spend more than a few seconds waiting on it if you choose to wait it out vs. continuing to spray. I'm pretty sure that the extra needles of various sizes, quick-disconnect, fancy hose, and moisture trap are a savings in this bundle when compared to upgrading an existing compressor. In any case, it's doubtful that I'll have to get another compressor in the future assuming this one continues to hold up. It does everything I could ask of it, in about the best way any compressor is going to. It gives me air steadily and for a long time, pressurized to a level I determine, keeps moisture out, and allows me to quickly connect and disconnect the brush.
That last point turns out to be quite the life-saver for the brush itself. It works fine, sprays well, and can go wider or tighter with the included needles. Where this thing may have a little more upkeep vs. an Iwata is in the clean-up between colors. I find myself breaking it down to clean the needle guard and do a "deep cleaning" just about every time I change colors. It just doesn't satisfy me to wash a bunch of cleaner through it and hope for the best. I would imagine an Iwata will create less buildup on the needle and in the guard, allowing you to clean it out a bit quicker. For me, it's not too much of a hassle because I just need to rinse the cup, slide the needle out, give it a wipe, remove and clean the guard, then stick everything back together. With the quick-disconnect I don't have to worry about my compressor's pressure, or the line, or any of that. I pop the brush off, do the quick cleaning, and it's all but spotless a minute later when I pop it back on and go back to spraying.
Even if you have no intention of using the included brush, you're probably still getting a decent compressor fully decked out at a steal. If you want to go and drop the remaining budget on a neo, by all means do so and you'll have a fantastic setup for airbrushing dolls and whatever other large surfaces you want to repaint. If you grab another quick-connect fitting (it seems like most of the hose fittings for compressors are standardized by one of a few manufacturers), then you could switch between them at will for different jobs. Use the basic Master one for priming or whatever rough jobs you need to crank out, and break out the neo for finer detail work.
Thoughts on the first Neo kit I found: it looks like the brush is better but I can't speak definitively on the compressor's workings. It may be quieter than mine, or it could be louder. It looks like the three settings on it are all you get, while I have a little gauge on mine to set my PSI to whatever I want (I typically use 20-25). It may seem like a small thing, but I think it's kind of nice that it has a little holder on it. It's a kind of profound terror to pick up the airbrush, fill it with paint, and realize you have nowhere to put it down when you suddenly need two hands again.
If you can afford the extra price then I'd go for the version with the tank (https://www.amazon.com/dp/B002KSQHB6/). It will allow the compressor to turn off when the tank is full, as well as reducing any potential concerns with air pulsation.
A lot of people seem to use cheap compressors like that (myself included), and I've seen them recommended pretty often.
I’m on my second master compressor. I upgraded last week to one with a tank. The master brand of compressors are decent for beginners.
I’m not a fan of the actual airbrush they come with and upgraded that early on.
I’m also not familiar with the paints listed in that link.
I second the suggestion to find one without the paints and pick up something from vallejo. Vallejo has two lines of air brush paint and both are decent. They offer different colors in each. You can also get citadel/games workshop brand air paint but I’m not a fan of the bottles they come in. Plus they tend to be more expensive.
While the accessories in the one you linked are nice to have, he can get away without having them. I mix my paints in the airbrush so I don’t need cups or mixing sticks. You could check out the one below which is the compressor with tank and a basic airbrush.
Master Airbrush Cool Runner II Dual Fan Air Tank Compressor System Kit with a Pro Set G222 Gravity Airbrush Kit with 3 Tips 0.2, 0.3 & 0.5 mm - Hose, Holder, How-to Guide - Hobby, Auto, Cake, Tattoo https://www.amazon.com/dp/B002KSQHB6/ref=cm_sw_r_cp_api_i_YWP3DbEJ9QG39
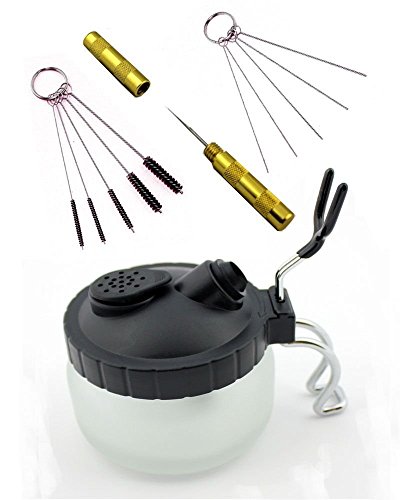
I recommend getting this to air in cleaning the airbrush.
4 SET Airbrush Spray Gun Wash Cleaning Tools Needle Nozzle Brush Glass Cleaning Pot Holder https://www.amazon.com/dp/B0154HN2NA/ref=cm_sw_r_cp_api_i_sYP3Db0DV1NXC
Tim Holtz Distress Crackle Paint 4 oz Jar, Clear Rock Candy https://www.amazon.com/dp/B005FY5HCW/ref=cm_sw_r_cp_apa_sF2gAb0DNZFKX
Ranger TDC31888 Tim Holtz... https://www.amazon.com/dp/B005FY5HCW?ref=ppx_pop_mob_ap_share
I'm loving your watercolour portraits! My advice would be to avoid the white for highlights and instead using something like masking fluid for small parts without colour. This way you can also go a bit more crazy with the watercolors and use layers if necessary. I would also suggest trying out some less obvious colours - blues would suit this style v. well and look suitably lacrymose!
The best way I know how is to start by masking the trees with a masking fluid like this one and then painting the background first (you can drag your horizon line all the way over the dry masking fluid so it looks more continuous). Then you take up the masking fluid with something like a rubber pick-up block like this. And then paint in your trees at the end. I also prefer this way so that if I'm trying to do a flat or gradient in the sky or ground, I can assure that the gradient or flat wash is the same all the way across the paper easier.
Otherwise, the way you've done it works fine if you've got a steady hand and good pencil guides. You could also potentially start with the background and just leave the tree spots empty to start (requiring a good pre-sketch) but you can run into the same troubles with wonky, not quite lining up horizon lines.
I don't think your piece looks all that silly. I like the color scheme you've got going.
One thing I just thought of, if you continue to do without masking fluid for now, consider a bit of the principles of atmospheric perspective and that things farther away from the viewer generally get lighter and lower contrast. Part of what draws the eye to the horizon line so much and highlights the fact that it doesn't match up quite right is that it's one of the areas of highest contrast. Either make that blue lighter as you get closer to the horizon line, or the purple sky darker as you move towards it to draw the attention to other parts of the scene instead.
You can purchase it at most hobby/art stores like Hobby Lobby or Michael's. Here's a link to what I use on Amazon. If you read the reviews, some of the reviewers posted pics of how they used it in some of their art pieces. https://www.amazon.com/Winsor-Newton-Masking-Fluid-75ml/dp/B005P1ROEY/ref=sr_1_3?s=arts-crafts&ie=UTF8&qid=1503581563&sr=1-3&keywords=masking+fluid
I bought a master brand airbrush kit off amazon this Christmas and along with what i found here. Here are my thoughts:
What i don't like about the Ninja:
The spirit jet is very similar to the compressor I have but mine was significantly cheaper. If you look on Amazon there are tons of this exact compressor that companies have just stuck their sticker on.
Iwata Paasche Master
Personally, I would get one of the no-name brands with a tank for less than what you would pay for the name brand ones. Then use the money you saved to get a decent brush or the accessories you need. The ones that come with the Master kits isn't terrible if you are new but once you use a higher quality brush you'll see the difference.
An air brush kit like this will work fine for starters.
I have something similar and it works great.
The learning curve comes with setting up the airbrush just right. There are several points of adjustment that effect how the paint comes out, and it took me a while to figure out. So lots of trial and error. Getting a giant bottle of cheap water based acrylic primer and playing with that is a good way to start. Or even just plain water on sprayed onto something that will show being wet, brown paper towel or bag, or cardboard worked well.
https://www.amazon.com/Master-Airbrush-Professional-Compressor-Primary/dp/B00EKT30JK
I really like this writeup as a jumping point for learning how to lube. There's also lots of helpful info in the comments, or you could just ask questions there. If you're looking for a specific video guide I'd recommend Krelbit's; IIRC he uses 3204 in it but the process is the same.
As for brushes, I like this pack from amazon. There's one in there that's the exact size of an MX bottom housing slider rail which is nice, but it also includes a bunch of smaller ones. Brush size is a preference thing so it's best to test a bunch IMO.
Speaking of testing, experimentation is SUPER important with lubing. Everyone has different preferences so it's good to try different amounts of lube on a few switches to see what it feels like. I'd recommend at least intentionally overlubing one switch to see what it feels like, then trying different combinations of lubing certain spots and not lubing others. e.g. I prefer to only lube my stems.
edit: Here's one specifically using 205g0: https://www.youtube.com/watch?v=5y5KoRFWXe8
I actually just started getting into miniature painting a few weeks ago, and went the same route as you to start out with. I have very shaky hands, and I wasn't sure if I would even be able to do it so I went cheap at first. I picked up this brush set from Amazon. Then I bought some primer from Walmart, and bought the Army Painter Zombicide paint set since I have the game and figured even if I messed them up, I cold just slap some blood on those parts and they would looks ok (which was the case for a few).
I think the Wargame one would be a good starter set as well.
The primer I picked up is cheap and works great, but it takes a while to dry. Since I started, I picked up a couple of cans of Army Painter primer and that dries in a few minutes. If you don't mind waiting a day, then just use the cheap stuff. There may be other cheap ones that dry faster, but I can't speak to those.
Brushes
basic paint set
I ordered this back in February and have been using it ever since. The compressor has been pretty reliable, and it doesn't hurt to have 2 gravity-fed brushes in the kit for that price.
I probably sit down to use mine a couple of times a week with a few down weeks mixed in. I'd probably estimate that the compressor has probably logged a solid 55 to 70 hours of total work over the past 3 months between learning/practice, X-Wing Minis, Legion, and terrain making.
First of all, you need to use a flesh wash for flesh. Black will only ever work in a zombie situation. Secondly, wash does not work on flatter surfaces like that cloak. When using washes you need to mop up the areas that have pooling going on with a clean brush.
To fix this mini, repaint the cloak and the flesh, use a flesh wash (in my experience you need to get this right in one wash because multiple flesh washes looks bad), and use either a feathering/glazing technique (more advanced techniques) or a drybrush technique (easy as pie technique) on the cloak (paint the dark red base, heavy drybrush medium red, lighter drybrush light red, ultra light drybrush yellow). I think you should drybrush, honestly.
If you don't have the washes you need, I cannot possibly recommend the army painter quickshade set more. Their paint kinda sucks, but their washes are a must have. https://www.amazon.com/Army-Painter-Warpaints-Quickshade-Wash/dp/B0714QL55V/
Airbrush
Compressor
X-acto -Z series blades are great.
For sandpaper you can just buy some popsicle sticks and 400, 600, 1000 grain, and then a buffing pad from a nearby hobby store or something like walmart even, it's all the same honestly. The popsicle sticks you can wrap the paper over to give you something to rub it against easily. Just practice on some of the parts that come with a kit that don't get used so you aren't eating away too much plastic.
Thanks. I used a paint pen (http://www.amazon.com/dp/B000GOYAPQ/ref=sr_ph?ie=UTF8&qid=1406745010&sr=1&keywords=paint+pen) and it worked pretty well.
https://www.amazon.com/Liquitex-Professional-Flow-Effects-Medium/dp/B000KNPM46/ref=asc_df_B000KNPM46/?tag=hyprod-20&linkCode=df0&hvadid=167130062341&hvpos=1o3&hvnetw=g&hvrand=17550406855758447522&hvpone=&hvptwo=&hvqmt=&hvdev=c&hvdvcmdl=&hvlocint=&hvlocphy=9033614&hvtargid=pla-83844654326&psc=1
I did not use a funnel. I did use some flow medium but only like 1-2mm to make it run smoother.
Vktech 50pcs 15ml Empty Plastic Squeezable Dropper Bottles Eye Liquid Dropper LDPE https://www.amazon.com/dp/B00D1GUAHS/ref=cm_sw_r_cp_apip_Ju5Jyd4sZrHKA
Liquitex Professional Flow Aid Effects Medium, 4-oz https://www.amazon.com/dp/B000KNPM46/ref=cm_sw_r_cp_apip_Eg3tMY5uA5Hla
Hey!
If you're using water, sometimes you gotta keep mixing it up so the pigment actually stays in the mixture. I recommend Lahmian medium, or Flow Aid for thinning down paints. Also try a wet palette!
To blend colours you want to glaze the highlights. You can do this by snagging a glazing medium, or just thin the shit out of your paint and go over the levels of highlight. Normally you'd want a mix of your darkest and lightest colour when doing this.
I try to paint the entire model, but don't bother with things that will never see the light of day. I paint for tabletop quality, so that's that.
If I'm disappointed I try again! That's why test models are important.
I prefer citadel over all. I use the citadel Colour app to help with the color choice and how to apply. I do use Vallejo when I need an air brush version of a color that Citadel doesn’t have or for priming.
I understand the stance you have on the pricing with citadel, but you can make that line of paint last longer.
Head to amazon and order these items
15ml dropper bottles
1ml needless syringe
flow aid
small stainless steel ball baring
By following the steps in this video on YouTube I was able to transfer all my base and layer paints to dropper bottles. Now I can limit how much paint I’m wasting to a minimum. Because like you said, they can be expensive
I'm partial to using Liquitex Airbrush Medium to thin acrylics - http://amzn.to/Ui4x1T. You can use water or alcohol or other thinners, but I actually have a much easier time with the medium. I'm pretty sure that it's because you're getting a better distribution of pigment particles. Also, with thinners it's possible to overthin to the point where the paint just doesn't want to do anything but bead on the surface. It's nearly impossible to do that with medium.
Just my 2 cents.
About two hours and only around 20 bucks! Here the the links to what I used.
https://www.amazon.com/gp/product/B000KNPM46/ref=oh_aui_detailpage_o00_s00?ie=UTF8&psc=1
https://www.amazon.com/gp/product/B007IK9M4K/ref=oh_aui_detailpage_o00_s00?ie=UTF8&psc=1
https://www.amazon.com/gp/product/B01COLW9IS/ref=oh_aui_detailpage_o00_s00?ie=UTF8&psc=1 (10ml bottles, good enough but next time I might spring for 30ml)
For the Model Color, use the Thinner Medium. You just need 1 or 2 drops of this thinner for a drop of Model Color. Too much will make your paint have a watery/runny consistency.
On the other hand, use the Airbrush Thinner for the Model Air. It works best with a Retarder Medium. Vallejo's air brush thinner is quite tricky to use though. You have to get the right paint to thinner ratio that will work best with your air brush. Try out different combinations on an old kit or a plastic sheet before painting your models.
EDIT: There's also an air brush flow improver from Vallejo.
To get the effect I mixed my white and blue 1:1 with THIS. Then painted it very thickly with white and dabbed blue dots into the white. Then with a ton of water I swirled as best I could, letting the pooling water do as much of the work as I could. I kind of made it up as I went...that youtube video looks like it might get overall better effects--I'm also not sure you need to use paint retarder, though it did keep it pretty thick so it didn't all just blend together. Definitely something I'd like to work with more!
I've never heard of a hardener for paint. I've heard of drying retarders to lengthen the amount of time you have to work with the wet paint, and I've heard of putting a glossy clear coat of varnish over the paint before doing a matte coat to protect the mini. I've also heard of 'ard coat, the glossy finish for metallics that GW produces.
Just did a quick search for paint hardener on google. Looks like it's mostly used in enamels to give a harder, glossy finish. Minis are mostly done in Acrylics, so I doubt they work well together.
If your already thinning it to that ratio I don't think you should go any further. Vallejo has there own brand of retardant specific to their paints.
https://www.amazon.ca/Vallejo-VJ70597-Retarder-17ml/dp/B000PH9JP0
See if retarder agents might help with that. http://www.amazon.com/Vallejo-VJ70597-Retarder-17ml/dp/B000PH9JP0
You're welcome! I appreciate that you're open to suggestions - it's easy to get attached to a plan. Since you seemed receptive I'm going to elaborate:
I ordered KD:M and then this Vallejo flesh tone set and this Vallejo basic colors set, which got me going. Like I said, i had to supplement with a lot of citadel paints from my LGS that ended up being frustrating, so I wish I had gotten some more saturated base colors in the beginning, maybe something like this, that comes with purples and oranges.
https://www.amazon.com/Vallejo-Face-Colors-Paint-8-Colors/dp/B000PHCPTM/ref=sr_1_10?keywords=flesh+tone+acrylic&qid=1568523918&sr=8-10
I have this one https://www.amazon.com/gp/aw/d/B00171BFKK/ref=oh_aui_i_sh_in_o0_img?ie=UTF8&psc=1 on my 20 gallon Kobalt compressor from Lowes. http://imgur.com/gallery/JqUD8
Im not super familiar with a VL but it looks like its all there
Both is preferable. Doesn't hurt to double up. Either of which are relatively inexpensive. Depending on what compressor you are using, it is preferable to have a regulator that uses a 'closed' system rather than a 'bleed-through' system. The reg that comes with Iwata's SmartJet (like mine) uses a 'bleed-through' which meant that if you wanted lower than 40 PSI, the excess air was vented to get to the PSI you wanted so that meant that the compressor was constantly running even if you weren't actually spraying which could decrease your comps longevity. I've since replaced the reg with a closed system that contains all the air so now my comp shuts down once it reaches it's max PSI when not in active use.
http://www.amazon.com/gp/product/B00171BFKK?psc=1&redirect=true&ref_=oh_aui_detailpage_o06_s00
This is what I have currently installed.
I'd imagine it would. You could use this regulator to get it down to 30psi to airbrush with using this regulator http://www.amazon.co.uk/gp/product/B00171BFKK/ref=as_li_tl?ie=UTF8&camp=1634&creative=19450&creativeASIN=B00171BFKK&linkCode=as2&tag=theplacrablo-21&linkId=B2UA7GBYXFXSCCFS
It's one I have attached to my compressor.
Badgers are great and I have a velocity and it's the best I've ever had (http://www.amazon.co.uk/gp/product/B0013NBQLA/ref=as_li_tl?ie=UTF8&camp=1634&creative=19450&creativeASIN=B0013NBQLA&linkCode=as2&tag=theplacrablo-21&linkId=JBYG4F6UTGNAA6PD), however it might be worth getting a cheaper one to learn with as they get broken easily because the needles and parts are so fine. So maybe pick one up like the iwata neo. That was my second one and the only reason I replace it was because I fucked it up in my ultrasonic cleaner by keeping part of it together.
http://www.amazon.co.uk/gp/product/B00792I04U/ref=as_li_tl?ie=UTF8&camp=1634&creative=19450&creativeASIN=B00792I04U&linkCode=as2&tag=theplacrablo-21&linkId=ODKBVSRHLROHJ7KI
Its an endearing model because every modeler has one like it. Pretty good job for being a first kit!
As for airbrushes... I started with the super cheap Master brand airbrush. Later on I got a Japanese made Iwata. I can say that buying the Master airbrush + compressor is the perfect starter. This is a good example: https://www.amazon.com/Master-Performance-Airbrushing-Dual-Action-Airbrush/dp/B0017640RK/ref=sr_1_7?ie=UTF8&qid=1482902837&sr=8-7&keywords=airbrush+compressor+tank
You get an airbrush that will be a perfect starter and a good compressor that will last you into your next step up airbrush.
I recommend staying with acrylic paints-- just easier to work with.
For putty, to fill seams with, I also recommend Perfect Putty. It's water based so it's easy to clean up and work with. You put some on a tray and use a toothpick to apply to a gap or seam, then wipe excess off with brush or finger. After it dries you can use sandpaper or a wet cottonswab to remove excess.
https://www.amazon.com/DELUXE-MATERIALS-DLXBD044-Perfect-Plastic/dp/B0076LAVFK/ref=sr_1_2?ie=UTF8&qid=1482902965&sr=8-2&keywords=hobby+putty
What is your next kit?
A really quiet airbrush-compressor. We ran one of those in a shop i worked in and we never had any problems. http://www.amazon.com/Quiet-AIRBRUSH-COMPRESSOR-Regulator-FREE-HOSE/dp/B001BJFHAW
This is pretty much the cheap standard.
https://www.amazon.com/Master-Airbrush-Compressor-Regulator-Training/dp/B001BJFHAW/
There are a million repackaged versions of essentially that same compressor. The important part is that you get a regulator with a moisture trap or you'll end up with water in your paint.
What works insanely well is an adjustable small air compressor. You should take it outside though because it blows dust EVERYWHERE. Also make sure you start off with a low PSI, because something higher could damage parts! This is mine, it's relatively quiet and a BEAST!
http://www.amazon.com/gp/product/B001BJFHAW/ref=ox_sc_sfl_title_10?ie=UTF8&psc=1&smid=A23ADOZFIJNPFB
I just bought one as a starting kit a few weeks ago. I bought the one with the compressor with attached air tank. So far it's worked great for me and it's eased me into airbrushing and airbrush maintenance without having to worry about spoiling it, because the airbrush itself is just 25 bucks or less. If you do buy it, before starting, make sure you apply thread seal tape on all male connectors, and also soak the little nozzle and small parts in a warm mix of dish soap and water.
Edit : here's the Amazon link. https://www.amazon.com/Master-Airbrush-Dual-Action-TC-20T-Compressor/dp/B002KSQHB6/ref=mp_s_a_1_5?ie=UTF8&qid=1549108384&sr=8-5&pi=AC_SX236_SY340_QL65&keywords=master+airbrush+with+air+compressor&dpPl=1&dpID=41nADShdRIL&ref=plSrch
If you live in the US, Masters Airbrushes are very affordable test beds for air brushing.
Master Airbrush Multi-purpose Gravity Feed Dual-action Airbrush Kit
With an Air Tank.
If you live in other countries, you can consider AS186. Almost the same compressor but 220V. You can get a Chinese airbrush for testing purposes.
If you like Aurbrushing, you can upgrade to more branded Airbrushes like Iwata and Badger while keeping the Compressor... Then use the budget airbrush for Priming and such.
I personally have the AS186 for a year and painted assortment of 15+ HGs and MGs with it. Used included China airbrush for a few kits before deciding to get a Sparmax Airbrush since I'm convinced I'll enjoy airbrushing
Branded Airbrush gives better control over the thickness of the line, better for pre-shading.
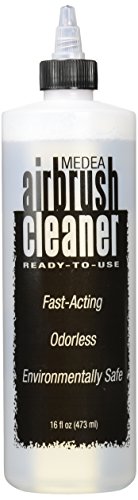
Use this stuff after each color change and when finished for the day. http://www.amazon.com/Iwata-Medea-Airbrush-Cleaner-16-Oz/dp/B003TJA0S6/ref=sr_1_1?s=arts-crafts&ie=UTF8&qid=1453525091&sr=1-1&keywords=airbrush+cleaner
I dump the excess paint out then rinse with water quick before spraying some water through to get some more paint out. I dump the dirty water and spray some of this until no more color comes out. It works very well for me. 20-30 color changes so far with no problems at all. Good luck with your future painting!
You don't need airbrush cleaner, but it's cheap, lasts forever, and you'll want to have it around. You won't just use it to clean your airbrush, but anything you spill paint on, including yourself. It cuts through paint like nobodies business. So it's well worth keeping around.
I use GW paints and water them down with Airbrush Medium rather than water. Again, it's cheap and lasts freaking forever.
I think it's cool you want to pick up a hobby your father had. It will be a nice reminder every time you pick up the gun.
I use this 100% for miniatures, and it works great!!
​
Alright, here is the list I bought. It's a bit more than you want to spend, but this will ensure you can get going right away, and not be frustrated. I did a fair amount of research on different forums, sites, and youtube videos. If you want to know why I chose something, feel free to ask. I was going to bold the ones that you absolutely need, but I would say everything in the first set are a must.
​
​
​
​
For the compressor, I keep mine at about 18-20 while doing miniatures and it's perfect.
I do 1 drop Improver, 5 drops thinner, and 6 drops primer and have perfect flow.
​
Feel free to ask any questions! Good luck!
Hvstle
I can offer a little feedback, not a lot though, sorry. I've only ever used two types of crackle:
Agrellan Earth works well. It creates a rather fine web of cracks as it dries. A little wash, a little drybrushing, and its done. I used it on the base on the right in this picture.
I have also used Tim Holtz Distress Crackle Paint in Clear Rock Candy. This stuff is less like paint and more like a thin gel. I like it though - it gives it more versatility. Layer it on thin and you get fine cracks. Gob it on thickly and you get deeper, more dramatic cracks - larger than I've manage to get with Agrellan Earth. I got clear so I could do nifty ice effects like on this miniature..
You could probably mix it with paint, or even let it dry real good and paint over. I washed and drybrushed it for the ice, so I know paint will stick pretty well if you wanted to paint it desert colors.
https://www.amazon.com/Ranger-TDC31888-Holtz-Distress-Crackle/dp/B005FY5HCW/ref=sr_1_4?keywords=crackle+paint&qid=1554127199&s=gateway&sr=8-4
What I do is pour it so its ~1/8" thick into a flat bottomed tupperware container and let it dry for 2-3 days. After that it is nice and hard and can be broken into little pieces (kinda like the crystal blue on breaking bad lol)
If you plan on doing any sort of precision work, or plan on leaving clean spaces under a wash (like for text), and this is your first foray into water color, then you'll probably want some masking fluid. You paint this over areas you don't want paint on so that when you're painting close to them, any paint that gets on these areas is repelled. You either peel or rub it off once the surrounding paint is dry. It's not a necessity, but it may make your life easier.
EDIT: Since this is your first time using watercolor, you might want to invest a weekend in tutorials on YouTube. Just search for something like, "beginner watercolor," "watercolor techniques," "watercolor basics," etc. You'll want to know about how to do things like stretching your paper, and basic painting methods. Watercolor is a really cool, fun medium. Lots of people hate it and say it's really difficult, but I've always enjoyed it because I think of it as a study in negative space, and realized that it's more subtractive than additive (my own terminology--I think). By that I mean, you need to think less about what to put on the paper, and more about what to leave off the paper.
Have fun!
Known as masking fluid.
Glad to see you playing with your boyfriend. those are some nicely painted minis as well.
as for airbrushes, I just got into this myself so I'm no real expert but I was able to get a nice starter set from Amazon. the master airbrush set seems like a cheap, but quality series. here is a link to a starter set.
http://www.amazon.com/Master-Airbrush-Multi-purpose-Professional-Airbrushing/dp/B006FQCBZK/ref=sr_1_8?ie=UTF8&qid=1374210946&sr=8-8&keywords=master+airbrush+compressor
or you could always just get the compressor and a brush separate, I would try to get one with a .3mm needle (out of .2, .3, and .5). as the .2 brush that come with that set seemed to get clogged for me (but that could just be from noobness and poor care).
sadly, I dont know too much about tables. I've just been using foldaway tables with felt on top.
as for the skaven Idea, most of the forgeworld stuff is awsome looking and makes a great centerpiece, but if you go play in tournaments or local clubs, most arn't entirely "legal" but I doubt many people would have too much problem playing against it.
and skaven do love their screaming bells. so that would be my recommendation, but only because I think it would find more use. the forgeworld Idea would be more of a nice surprise.
this is a lot of money for a birthday present, that's one lucky guy.
pm me or reply back to this if you want more info
I've been using the equivalent of this for three years: https://www.amazon.com/Master-Airbrush-Professional-Compressor-Primary/dp/B00EKT30JK/ref=sr_1_3?ie=UTF8&qid=1543307927&sr=8-3&keywords=Airbrush+kit+with+compressor Master and equivalent kits like this are the cheapest end of acceptable airbrushes, although enthusiasts will nudge you in the direction of higher end airbrushes made by Badger, Iwata, etc.
I've found that a simple kit like that is more than adequate for basecoating, lighting, shadows and varnishing. If you're going to buy an airbrush kit, the things you absolutely need are:
Dual-action gravity-fed airbrushes. Gravity feeds allow you to work with smaller amounts of paint and dual-action is mandatory for the extra control you get when doing smaller work.
A decent compressor. The kind pictured in that kit is a good start and there are variants with tanks. These compressors run well and run without maintenance just fine, but you need one of a good size. Never fall into the trap of buying an ultra-portable mini compressor used for cake decorating or nail art because they are too small and tend to overheat.
In my opinion, the compressor is actually more important than your choice of airbrush because if your airbrush fails, you can just buy another one and screw it onto the hose. And having a weaker airbrush mostly means more cleaning and hassle, but won't necessarily make your product worse. Having a shitty compressor means you will always have shitty painting experiences.
Thank you!
I've used the The Army Painter inks, I've got a kit on amazon
I made everything using those inks, washes and a regular miniature brush from this regular set
I've focused on having areas of high contrast to make the mini more interesting
​
I borrowed my Aunt's airbrush just to test it so I tried in the Bat, but since it's a cheap airbrush and sometimes it clogs I've only used to give a base coat of dark red, then I went back to the basic brush
​
Im glad you liked, it makes me happy :D
I'll save you $10 immediately: A cork, and bluetac. Now you don't need to spend 9.45 on a painting handle. You also probably don't need to be starting with wet palette. A 8 colour ink set is also probably overkill, stick to black and brown and be done with it.
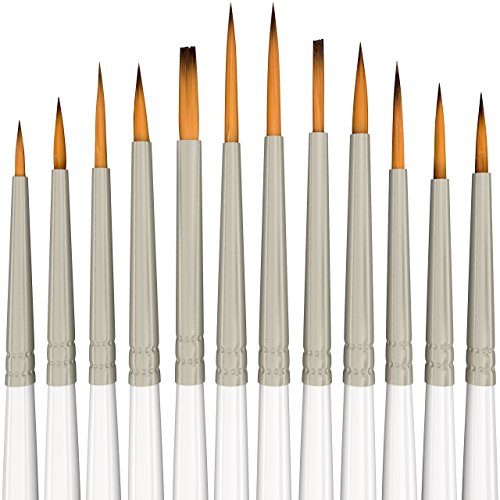
And I suggest swapping your brush set to this: https://www.amazon.com/MyArtscape-Detail-Paint-Brush-Set/dp/B010QLOJ3G
4 rounds, 4 liners, 2 flats.
I sincerely want to thank you for such a thorough reply! I would like to address some of your points so perhaps you can expand on them a little deeper when you have the time.
>You seem to have thinned your paints, so that's half the battle won right there. They look like they could be thinned a little bit more though, and perhaps load your brushes a little bit less.
>
I did thin the paints with small amounts of water as that seems to be the golden rule from having lurked on this sub for a few days before starting my painting, the difficulty I had this area was not really knowing how much/little to thin them and what the consistency was supposed to look like(admittedly I did not watch any youtube videos on the subject as I didnt even think about it).
>The most glaring issue I see is a lack of colour depth. Your shadows aren't particularly prominent or seem absent in some areas and there seems to be a complete lack of any highlights.
>
This was exactly what I was thinking when I was painting them and this stems from looking at the box art and thinking "wow these figures really "pop" the colors are not at all what I would expect a command team to have" and while I was painting I kept telling myself they needed to be brighter. As for shadows and highlights, I did apply nuln oil shader but I watered it down so much that it doesnt even look like its been applied. I was concerened it would make the minis too dark(i.e. the Domaru's shotgun). As for the highlights, One of the biggest issues/concepts I am having trouble wrapping my head around is the highlighting. I have watched a few videos of the procedure itself but I am having trouble mixing paint to brighten it up for highlights and then where the highlights should be applied.
> Your neatness and thoroughness are pretty good. Could use a little work but fine for a beginner.
>
Thanks! I was actually working with a set of brushes that were recommended to me that ended up being sub par in my opinion and lacked the very small brushes that were needed to get some of the very fine details. I have started to educate myself on quality brushes and the sizing numbers on what they mean.
As for the color "blocks" that had not occurred to me so thank you for pointing that out, I will definitely keep that in mind for when I start working on the next group of my army. I am not quite sure how to get those subdued shades that are present on the box art but more practice will definitely help. Thank you again for your reply!
This was perfect for me to get started:
https://www.amazon.com/PointZero-Airbrush-Dual-Action-Guns/dp/B010TQCOEE/ref=sr_1_1?keywords=POINTZERO&qid=1567225880&s=arts-crafts&sr=1-1
I have a similar one looks like just the name on the side is different
PointZero Airbrush Dual Action... https://www.amazon.com/dp/B010TQCOEE?ref=ppx_pop_mob_ap_share
Heres a link to the airbrush kit I started with. I got good results with the 2 gravity feed brushes it comes with. Im still using the air compressor with the Iwata brush I upgraded to:
https://www.amazon.com/PointZero-Airbrush-Dual-Action-Guns/dp/B010TQCOEE/ref=sr_1_6?s=arts-crafts&ie=UTF8&qid=1517488015&sr=1-6&keywords=airbrush+kit
Personally, I like Tamiya branded supplies. Their kits have great details and Ill also use their masking tape, primer, and paints. I like acrylic paint in general since its easy to clean i.e. wash everything out in the kitchen sink with water.
For clear coating, Ive used testors dullcote and glosscote and had good results over Tamiya paint except for when I spray too much at once with the rattle can. For that reason Im thinking of switching to Mr. Color super clear so I can use it with my airbrush and have more control and a finer mist.
I use Microset & Microsol with my decals
Vallejo acrylic putty is easy to use. Model Master cement (for thicker more viscous applications) and Tamiya extra thin cement for the fine detail work. Tamiya line accent color (black or brown) for my panel lining. I wipe it off with testors enamel thinner.
For weathering pigments, MIG products work well or you can DIY by scraping artist pastels and using the dust created.
Finally, most of my small tools (knife, chisel/scraper, tweezers) are branded "excel". I think that is just the brand my local hobby store happens to sell.
There are of course many more options for materials/supplies that work great for modelling but this is just a sampling of the brands that I use on my kits.
I just got one and the thing is a piece of junk. I returned it and got a whole set of three really high quality airguns and a compressor for about 80 bucks. Here is the link for it btw: https://www.amazon.com/PointZero-Airbrush-Dual-Action-Guns/dp/B010TQCOEE/ref=mp_s_a_1_3?ie=UTF8&qid=1536461562&sr=8-3&pi=AC_SX236_SY340_FMwebp_QL65&keywords=airbrush
Seriously considering getting an airbrush since brush painting is my least favorite part of modeling lol. I have a large stand up compressor but it doesn't have a moisture trap. Price wise to get everything I need to use my current compressor I could get this set for a little less money. I'd get a better brush down the road if I I liked airbrushing but would this be a decent starting set or should I just save up a little more and hope I enjoy it lol.
https://www.amazon.com/gp/aw/d/B010TQCOEE/ref=mp_s_a_1_11?ie=UTF8&qid=1486139264&sr=8-11&pi=AC_SX236_SY340_FMwebp_QL65&keywords=airbrush
Without knowing the condition of the brushes/compressor, you can get a new compressor and brush for about the same price. Honestly starting out it would probably be more confusing to have all those brushes at your disposal instead of becoming proficient with one.
​
Compressor with tank - $70
Badger 105 brush - - $78
Cleaning kit - $14
Total new (minus tax) - $162
Thanks for the information! I never considered that the Iwata Ninja will pulse air as there is no collection tank.
​
I thought of getting this cleaning kit and this cleaning solution.
Army Painter has some some really nice washes as well.
You should definitely look at some washes/shades to really bring out the details, especially on the faces.
It's amazing how much of a difference a little wash makes. There are lots of tutorials on YouTube if you want to see how washes work.
I prefer Games Workshop washes, but Army Painter washes work well and aren't super expensive.
Looking for opinion on an airbrush to buy narrowed it down to these three.
Iwata HP-CS
Iwata Revolution CR
Paasche TG-3F
So, I saved up some money and have a break from school finally coming up. I see that alot of the badgers are decently priced (i think im going to stay away from the iwata as they are generally over 100). But is there a certain badger that you recommend? the one you originally linked seems like a good one, but is there any details with these other ones that you may have dealt with?
1)
2)
3)
[4)](http://www.amazon.com/Badger-Air-Brush-200-10-Gravity-Airbrush/dp/B003970D3U/ref=sr_1_31?ie=UTF8&qid=1456908816&sr=8-31&keywords=gravity+feed+airbrush
)
5)
Im sorry for sending a bunch of links, but i'd thought id ask and see what you may say :D
The Iwata Revolution is always on sale on Amazon. For $100, this airbrush is amazing. It's what I use day to day.
Further, you could go with the Iwata NEO. I've heard great things about this airbrush, though I've never used it. It's also on sale.
I bought one very similar to yours (the $50 version I believe). It broke on the second day of use :/
I think you would be much better off getting this one or this one. I have the Iwata Eclipse now, and it's good.
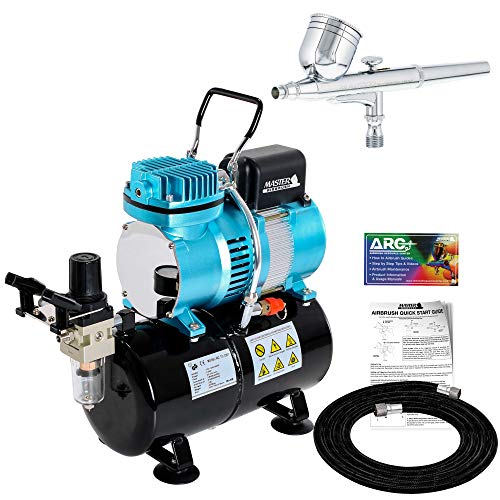
This is my setup, I'm happy with it.
https://www.amazon.com/Iwata-Medea-Revolution-Action-Large-Gravity/dp/B000BQS3UWhttps://www.amazon.com/Paasche-D500SR-Compressor-Regulator-Moisture/dp/B000BR2HOO
Additionally, a decent airbrush that is a little cheaper.https://www.amazon.com/NEO-Gravity-Feed-Action-Airbrush/dp/B004INERK4Something to keep in mind, is that the NEO is NOT made by Iwata. It's a Chinese airbrush with their name on it. But I've heard it's quite decent. Here's a video on it, and it's got a great video for learning to clean your airbrush in the description. https://www.youtube.com/watch?v=q8YKUA2SGzU
What about the Iwata Revolution. Seems to be halfway there is terms of price, but unlike NEO is actually manufactured in Japan (supposedly higher quality). That's what I as a beginner bought and I love it.
I have that Master Airbrush kit. You get what you pay for. It worked alright for a couple uses then crapped out on me. The compressor is still kicking though and I currently use it to power my Iwata Revolution, which has taken a couple months of heavy use like a champion so far.
Save your money you are like $100 bucks off getting a decent set up.
Edit: Let me elaborate on my reasons a little bit.
You want an air compressor with a tank and an automatic on/off switch.
This will keep your airbrush from getting pulsating air and the on/off switch will extend the life of your compressor (so will the tank as it isn't running all the time). Some added bonuses is being able to work without a lot of noise.
There are some cheap ones you can buy on amazon. ( TheTC-40T and the Master Tank Compressor)
Airbrushes are tricky. but you still can get soem good ones under $100. Like the Badger Krome RK-1, Badger 105 Patriot, Iwata Neo (Not made by Iwata but supported by them), and Iwata Revolution
http://www.amazon.com/gp/product/B000BQS3UW?psc=1&redirect=true&ref_=oh_aui_detailpage_o03_s00
I just bought this, and it's great for me. It has a .5mm tip which would probably be considered large - they're usually .3mm. That big honkin' tip means I can blow any paint through it with little or no thinning.
I also bought the Master starter kit for like $70 that comes with a working compressor and crappy airbrush. Honestly, if it could blow the glittery createx crap that I use it would have been perfectly OK for gunpla. My plan is to use this compressor until it burns up (reviews say it will). http://www.amazon.com/gp/product/B001TO578Q?psc=1&redirect=true&ref_=oh_aui_search_detailpage
Thanks for the info!
So now I'm look at the Iwata Revolution and TC-40T. Do you have any other recommendations for tanked compressors? How do you refill the airtank?
https://www.amazon.com/gp/product/B000BQS3UW/ref=ox_sc_act_title_1?smid=ACD4013XBS5C9&psc=1
https://www.amazon.com/gp/product/B00WBT7PTW/ref=ox_sc_act_title_2?smid=A23ADOZFIJNPFB&psc=1
Fine tipped paint pen is your best option. The paint is pretty resilient so will show well into grinding.
It will probably be fine, but if you want to ensure that a signature is permanent, use a paint marker instead of a normal Sharpie. It's expensive, but it is guarantueed permanent. It uses an oil based paint instead of standard marker ink, and you'll never wipe that stuff off.
Why a laptop though? Seems like an odd thing to have someone sign.
Cheap too!
Sharpie 37371PP Oil-Based Paint Markers, Fine Point, Assorted Colors, 1 Blister Pack with 5 Markers, Total of 5 Markers https://www.amazon.com/dp/B000GOYAPQ/ref=cm_sw_r_cp_api_i_2LVrDb8KHKG84
It sounds pretty easy, was it? Has the paint held up?
Were these the pens?
Sharpie 37371PP Oil-Based Paint Markers, Fine Point, Assorted Colors, 1 Blister Pack with 5 Markers, Total of 5 Markers https://www.amazon.com/dp/B000GOYAPQ/ref=cm_sw_r_cp_api_i_hyZBCb8WHEC48
Great idea. I literally got my first set of bumpers today and they're all black Diamond Pros. I may give this a shot. When you said oil based paint pens, would those be something like these?
https://www.amazon.com/Sharpie-Oil-Based-Markers-Assorted-Colors/dp/B000GOYAPQ/
You want to use flow aid to thin paints. This will dilute the color without thinning the paint.
To tell the truth, you'll want both as flow aid will make paint more glossy. You can either add matte medium or varnish it with matte finish to counteract.
It's probably the same thing, but the one I bought was: Flow Aid
Add a few drops of this to your paint
Iwata Revolution, Vallejo Paints. I have this exact problem. And I am just now heading out to the local hobby store to pickup some redarder if they have it in stock.
I will report back how that goes.
You need some of this.
https://www.amazon.com/Vallejo-Airbrush-Improver-200ml-Paint/dp/B00QD780G0/ref=sr_1_1?ie=UTF8&qid=1482515101&sr=8-1&keywords=vallejo+airbrush
Then maybe add a few drops of retarder...
https://www.amazon.com/Vallejo-VJ70597-Acrylic-Paint-Retarder/dp/B000PH9JP0/ref=sr_1_1?ie=UTF8&qid=1482515136&sr=8-1&keywords=vallejo+retarder
You're fine using brush on primers. I used some Vallejo primer after seeing your brush on post and liked it as well. On the topic of paint drying on the tip, Vallejo (and many others) have a product called acrylic retarder which specifically is made to extend drying time. People mainly use it to do wet blending. But it could help you as well. You'll want to start very small (like 20:1 or 10:1 water:retarding agent) and test it out to see how much is needed.
An example of what I'm referring to.
Vallejo Acrylic Paint, Retarder https://www.amazon.com/dp/B000PH9JP0/ref=cm_sw_r_cp_apa_3f3GzbXDFMQM7
Looking at the photos, I'd say that you need to thin your paints a little bit more on the GW figures. Two or more coats may be required to get full coverage, but your results will look smoother.
How's the humidity where you live? We're moving into the summer months and that can affect how quickly paint dries. If it's drying too quickly, it may pick up some extra brush strokes. And if that is the case, you can either thin it farther or add some retarder medium to your stand water. I use Vallejo's. A wet palette can also help.
I dont know what colors GW would have used, but the Vallejo face/skin tone set has a few options that should work, I've tried a couple of the darker tones on my Star Wars Legion rebels to good effect. Link is a bit long below, I'm on mobile and in a hurry so it's the first link I could find.
https://www.amazon.com/Vallejo-Face-Colors-Paint-8-Colors/dp/B000PHCPTM/ref=asc_df_B000PHCPTM/?tag=hyprod-20&linkCode=df0&hvadid=309765208504&hvpos=1o1&hvnetw=g&hvrand=10430058833642169688&hvpone=&hvptwo=&hvqmt=&hvdev=m&hvdvcmdl=&hvlocint=&hvlocphy=9023889&hvtargid=aud-801381245258:pla-436757734711&psc=1&tag=&ref=&adgrpid=60439471103&hvpone=&hvptwo=&hvadid=309765208504&hvpos=1o1&hvnetw=g&hvrand=10430058833642169688&hvqmt=&hvdev=m&hvdvcmdl=&hvlocint=&hvlocphy=9023889&hvtargid=aud-801381245258:pla-436757734711
I was looking at the are these a good set to start with. https://www.amazon.com/gp/aw/d/B000PHCPTM/ref=ox_sc_act_image_3?smid=ATVPDKIKX0DER&psc=1
Can't you just add a secondary regulator downstream from the broken one? Then you can drop your 60 to 30 without worrying about the original.
That said, I have an older Badger and the regulator appears to do nothing until it is turned almost to the extreme end of its range-- sits at 80 psi until the last 1/2 turn, after which it drops right to where I need it.
So, I have a smaller compressor at home for tools and the such, this guy
https://www.amazon.com/gp/product/B000N5UHK0/ref=oh_aui_search_detailpage?ie=UTF8&psc=1
and I have attached an airbrush regulator with filter
https://www.amazon.com/gp/product/B00171BFKK/ref=oh_aui_search_detailpage?ie=UTF8&psc=1
Will these work good for air assist? I rarely use the compressor and would love to make it more useful ;)
If you're buy an Airbrush Compressor it should have it included along with a water trap. Should Look Something like this.
As others have said. The only difference between an airbrush compressor and a shop compressor is the water trap and max output pressure.
You can buy a water trap for £15 in the uk. Prolly equiv in US. That also has a pressure control switch and a gauge to ensure you keep the pressure at the 20psi or below that is usually needed for an airbrush.
But the water trap is about the most important bit. Without that as the air expands into the hose water condensation will build up messing up your paint royally.
This is the trap that came with my airbrush specific compressor.
http://www.amazon.co.uk/gp/aw/d/B00171BFKK/ref=mp_s_a_1_1?qid=1453719845&sr=8-1&pi=SY200_QL40&keywords=water+trap+airbrush&dpPl=1&dpID=418p-7bshxL&ref=plSrch
Master Performance G22 Airbrushing System Kit with Master TC-20T Compressor with Air Tank, Air Hose & G22 Dual-Action Gravity Feed Airbrush https://www.amazon.com/dp/B0017640RK/ref=cm_sw_r_cp_api_jUvhAb1FG863K
It's that I also have cleaning fluid, thinning stuff, and a pot/stand. But that's pretty much it.
Master Performance G22 Airbrushing System Kit with Master TC-20T Compressor with Air Tank, Air Hose & G22 Dual-Action Gravity Feed Airbrush https://www.amazon.com/dp/B0017640RK/ref=cm_sw_r_cp_apa_AjwYAbM7FK796
this is what I started with, its a good deal not the best airbrush. I've since upgraded to a badger, but tge compressor still works 5 years later
Was this the kit?
https://www.amazon.com/Master-Performance-Airbrushing-Dual-Action-Airbrush/dp/B0017640RK/ref=sr_1_16?keywords=master+compressor&qid=1550267610&s=gateway&sr=8-16
I have this kit (more or less) https://www.amazon.com/Master-Performance-Airbrushing-Dual-Action-Airbrush/dp/B0017640RK
Definitely that compressor, and some similar Master branded airbrush. I'm lazy and inevitably end up fucking up the cleaning every few months and need to replace it, but at $26 it's not that big a deal. For a long time I just sprayed into a cardboard box near a window with a fan running, recently switched to one of the master branded spraybooths and while nicer, it's far from required.
The big issue with that compressor is that it is tankless so it is unlikely to give a good consistent flow of air. If you can I would save up a bit extra and get a compressor with a tank like this one. While it is a bit bigger it isn't that big being about the size of two 2-liter bottles staked on their side and is pretty easy to store.
I personally purchased a version of this kit a couple years back and while I have moved on to a better airbrush, I still use that same compressor.
This one and the one that comes with the air tank are on my amazon wishlist and I'm watching a ton of videos to make sure it will be a good fit for me.
Airtank airbrush
I use Master Airbrush stuff. I never used the super expensive airbrushes or whatever, and I don't plan on doing so when i can get a everything I need for a complete airbrushing solution for the price of just one airbrush.
I currently use this: https://www.amazon.com/Master-Airbrush-Multi-purpose-Professional-Airbrushing/dp/B006HJCP8S/ref=sr_1_9?ie=UTF8&qid=1478092330&sr=8-9&keywords=airbrush
However I wish I had gotten one with an airtank and not just a compressor, as the compressor is always running when I'm actually brushing.
I would recommend going with this:
https://www.amazon.com/gp/product/B0017640RK/ref=pd_sbs_201_3?ie=UTF8&pd_rd_i=B0017640RK&pd_rd_r=CS5PGKKXM5455B94V0DA&pd_rd_w=LpOU8&pd_rd_wg=rukUc&psc=1&refRID=CS5PGKKXM5455B94V0DA
It's the same as I am currently using, but comes with an airtank (And that's the lowest price I've seen for it).
If that is a little steep to jump in with, I started with this months ago:
https://www.amazon.com/Master-Airbrush-MAS-KIT-VC16-B22-Compressor/dp/B00BF0MW9G/ref=sr_1_1?ie=UTF8&qid=1478092330&sr=8-1&keywords=airbrush
And it has everything you need (minus paint) to get started, It's a great kit to get started, but the lack of a PSI gauge will limit you fairly quickly. And if you upgrade, the airbrush can still be kept moving forward.
I have a Master setup (mine came with different needles though,) and the brush is certainly decent for a beginner. However, I would recommend a combo with a compressor that has a tank (like this: http://amzn.to/2sTb0WB). Tanks help regulate the pressure and won't constantly run, like a tankless setup.
As for cleaning, like Jacers said, water is usually enough. You may want to pick up some airbrush cleaner to run through after a session, just to be thorough.
I second the Badger Krome series. I just started airbrushing as well and decided to purchase the Badger RK-1 Krome airbrush and it's been working great. A decent compressor for a decent price is the Master Airbrush Compressor. I have the one with the water trap but not tank (an oversight on my part), but even without the tank, it has a shutoff feature whenever you hit the set PSI. This is the one with the water trap and air tank: https://www.amazon.com/gp/aw/d/B0017640RK?psc=1
Is it worth getting an airbrush and air compressor? Would this air compressor and air brush be good? I've been interested in painting and building more complex kits and was wondering if I should make the investment.
Yo! I'm no expert, but I'm related to one and I think I can help a little bit.
The basic essentials are a sprue clipper, a model knife, and sandpaper. The wiki has links to those.
As far as painting/lining, there are a lot of options. I 'm pretty lucky in that I already had an airbush and compressor at my disposal, but I've been getting a lot of mileage out of this entry level airbrush. I have two of my own (metallic and non-metallic paints), plus a bevy of nicer badgers/iwatas from my old man.
The real big thing with airbrushing is that you're gonna need a compressor to go with it, as well. Make sure it has a moisture trap, like this one, or things can go very wrong very fast. (That's actually the one I use).
As for paints, the ones my old man recommends are Tamiya acrylics and Model Masters enamels. With the acrylics, I just spray directly on the cleaned part, whereas with the enamels, I use enamel primer first, and let that set before spraying. That's the quick and dirty version of it, though, since actual airbrushing involves mixing paint with thinner, cleaning everything all the time, etc.
As for lining, I like to use Prismacolor lining pens, but that gets expensive fast since they tend to clog up and need to be replaced VERY quickly. Otherwise, gunpla markers (see wiki) are good, and I recently got recommended Tamiya liner, though they recommend only using it over gloss paints or it will be impossible to apply cleanly to mattes.
Anyway, until you get a better answer from a more experienced builder, I hope this helps!
Make sure you buy a hose if you buy a compressor without one (eg. if you buy used).
You will want to buy a respirator.
You can also jump-start his accessories list by including some cleaning supplies (spray-out pot, airbrush cleaner), as well as some paints/primer/topcoat (tamiya, mr color, vallejo, alclad ii, etc.).
I believe this can all be done with a budget of 300$ (assuming US). At this point, he could start spraying that day if he wanted.
EDIT: I use this Master Airbrush Compressor and the Iwata HP-CS airbrush. I've been happy with them so far, but I do wish I spent a little more on a compressor with a tank (as /u/7x13 recommends).
Interested in the lot, have airbrush and compressor, opened but never used.
Compressor
Airbrush
Got a cheap one: https://www.amazon.com/dp/B002KSQHB6/ref=cm_sw_r_other_apa_i_5M-GDbKX1X3P9. Works fine for me, but I'm still pretty new to it. Nice for priming (with the 0.5 tip) and basecoating at least.
I prefer this one. I recently upgraded my compressor to this one from the 80 USD one and do not regret it.
Oh great wizards of plastic! Newb airbrushing question. I am stuck on trying to decide which is more worth it for gunpla. I have found these two are decently off, but one comes with a few extras. I just do not know if the extras are needed for the extra price. Here are exhibit a and exhibit b. What do you lot think?
I got this one off Amazon: Gravity Feed Multi-Purpose Airbrushing System Kit with a Pro Set G222 Master Airbrush with 3 Nozzle Sets (0.2, 0.3 & 0.5mm Needles, Fluid Tips and Air Caps) - Powerful Compressor with Air Storage Tank https://www.amazon.com/dp/B002KSQHB6/ref=cm_sw_r_cp_api_i_ES-QCbZCKBJE9
Worked really well, glad I got the one with the tank!
its a master. i bought the kit off amazon ,
its this set
https://www.amazon.com/gp/product/B002KSQHB6/ref=ppx_yo_dt_b_asin_title_o08_s00?ie=UTF8&psc=1
https://www.amazon.com/gp/product/B002KSQHB6/ref=oh_aui_detailpage_o03_s00?ie=UTF8&psc=1#customerReviews
This is the model I use! I'm not sure where you're located -- but I use the Master Airbrush G222 and my airbrush is dual action
So, you could start with this (this is what I started with, and while it tends to clog, it does the job):https://www.amazon.com/Master-Airbrush-Multi-purpose-Dual-action-Compressor/dp/B001TO578Q/ref=sr_1_4?ie=UTF8&qid=1520958546&sr=8-4&keywords=masters+airbrush
But if you want to dive in head first...I recommend the below:
https://www.amazon.com/AIRBRUSH-COMPRESSOR-Airbrush-Published-Exclusively/dp/B001738DXU/ref=sr_1_12?ie=UTF8&qid=1520958546&sr=8-12&keywords=masters+airbrush
& https://www.amazon.com/Iwata-Eclipse-Hp-Cs-W-Airhose/dp/B00695CY54/ref=sr_1_2?ie=UTF8&qid=1520958642&sr=8-2&keywords=iwata+hpcs
As for accessories - get yourself some m3 masks, gloves, medea airbrush cleaner https://www.amazon.com/Iwata-Medea-Airbrush-Cleaner-16-Oz/dp/B003TJA0S6/ref=pd_sim_21_1?_encoding=UTF8&pd_rd_i=B003TJA0S6&pd_rd_r=ZNFGCQKPJZHMJ0HX1Y51&pd_rd_w=sFOW8&pd_rd_wg=8bTp7&psc=1&refRID=ZNFGCQKPJZHMJ0HX1Y51, and one of these https://www.amazon.com/Airbrush-Cleaning-Needle-Nozzle-Holder/dp/B0154HN2NA/ref=pd_sim_21_3?_encoding=UTF8&pd_rd_i=B0154HN2NA&pd_rd_r=ZNFGCQKPJZHMJ0HX1Y51&pd_rd_w=sFOW8&pd_rd_wg=8bTp7&psc=1&refRID=ZNFGCQKPJZHMJ0HX1Y51
I just went through this myself and am very happy with my purchases. This is a complete entry level set with the tools you will need to maintain it. Assuming you're US based, you could have everything Monday with Prime shipping.
This will allow you to setup a bare-bones station. You could also get a fume hood or just spray into a box in a well ventilated room. Get a good white led light (if you don't have on already) to illuminate your workspace and you're good to go.
Long post incoming....
So, I don't think I've seen many airbrush discounts. Badger did a nice promotion where you could buy any airbrush for $55 for their 55 year anniversary this summer, but other than that it's kind of hard to find discounts. As far as Prime Day, I doubt they're going to have discounts on airbrushes, that's a pretty niche product they don't really get into. If you want to get started with that, I'd do something like this:
You then need a cleaning pot, some cleaning fluid, and an airbrush hose All told, that's like $300.
Then you need paint, paint brushes, a hobby knife, super glue, a mini hand drill, some small drill bits, sprue cutters, basing materials (cork board, model railroad ballast, etc) and I find a pair of tweezers helpful. That could add up to another $200 in materials (and obviously can cost way more, paint is expensive). So of your $550 budget, you would then have $50 remaining for models... which will buy you one model kit. So if you're looking to get started for $550, I'd probably forget the airbrush for now, and just get paints that can be used with one later. I recommend Vallejo paints. The eyedropper bottles work great for airbrushing, and you can just thin them with water. I haven't met one yet that doesn't work. A paint set like this would set you up nicely for doing an Imperial Guard army.
As far as what army to play... Guard is fun, but if you like the modern military aesthetic, Space Marines might be more what you're after. The new Repulsor Executioner tanks look awesome, and the new Primaris marines are great looking models... some of the best GW has produced. The Guard kits are looking kinda... dated IMO.
This, and getting out of the hobby and won't need them, nor the cleaning kit and pot, the gloss top coat, or the air brush cleaner.
Oh, I know that basing! Tim Holtz Distress Crackle Paint! I have a jar of it, but I haven't used any of it yet. It turned out perfect! I am also guessing we watched the same youtube video :P
Just going to leave this here;
https://www.amazon.com/gp/product/B005FY5HCW
I bought this same product last week.
Ranger Tim Holtz 4 oz Rock Candy Distress Crackle Paint
You're already on the right path and looking great. Base silver, mask and spray on top.
First thing stop using toothpaste, go to Micheals, Joanns, or hobby lobby and pick up some liquid latex masking fluid and silicone brushes. Having the right tools will make your job much easier.
https://www.amazon.com/Winsor-Newton-Masking-Fluid-75ml/dp/B005P1ROEY
https://www.amazon.com/MEEDEN-Artist-Professional-Silicone-Brushes/dp/B078XZ1WZ9/ref=sr_1_2?keywords=silicone+paintb+brush&qid=1568208585&s=office-products&sr=1-2-spell
The amount of control you'll get will just be so much better. and that masking fluid will last you a LONG time,
Then study the way paint chips on metal and boba's helmet. You want to make sure you're not just chipping down to bare metal, but in some places chipping down to the color underneath, this will give you some extra depth.
Last is give it a grime wash. Multiple ways to do that, youtube tutorials are your friend as you can see exactly what to do. I take a brown acrylic paint, mix a little black until I get a used motor oil color, then water it down a lot, like whole milk consistency. then I paint the entire helmet with it, let it dry, then lightly sand it off with 320 grit sand paper and repeat. It causes the grime to end up collecting in the recesses, I can control where I want it dirtier by not sanding as much in certain areas, and it scuffs up the paint a bit to give it a more worn in look. Note that your helmets will look cleaner in pictures than they will in person.
Here's some of my stuff for the look I end up with.
https://www.instagram.com/p/Bvp2yROlKE3/
https://www.instagram.com/p/BvxcD9AHiCP/
https://www.instagram.com/p/Bvl7KVxnObg/
Masking fluid is this stuff that you paint over parts of your watercolor that you don't want to get painted. You rub it off your painting when you're done. I just started using it myself.
I was just looking at that I believe Here. Seems to be a good kit since it comes with a compressor, can always get a nicer airbrush from Badger later if I need I suppose. Do you know if the cable for the compressor would be universal to use on a Badger? (I am assuming they would make this universal since it is probably a compressor/airbrush standard)
I bought a kit similar to this but with only 1 siphon fed dual action airbrush. I have little to complain about it.
This is what ill be saving up for first i think.
http://www.amazon.com/Master-Airbrush-Multi-purpose-Professional-Airbrushing/dp/B006FQCBZK/ref=wl_it_dp_o_pC_nS_nC?ie=UTF8&colid=EA1E21Z4PQB5&coliid=I2UNQ6CNSGJS4R
I will use it for painting models mainly, but may look into starting designs for motorcycles and cars as well, this will give me everything i need all in one package
I want to get an airbrush, wondering what would be the best to start with - in a video about airbrush the guy had one he labeled as "beginner" for ~100$, now I found one on ebay that goes for half that but doesn't have a compressor like the other one, I'm wondering if it'd still do the job...
https://www.amazon.com/dp/B006FQCBZK/ref=cm_sw_r_cp_awdb_t1_jC1iDbZH3RHNJ
https://rover.ebay.com/rover/0/0/0?mpre=https%3A%2F%2Fwww.ebay.de%2Fulk%2Fitm%2F303154927748
http://www.amazon.com/Master-Airbrush-Multi-purpose-Professional-Airbrushing/dp/B006FQCBZK/ref=pd_sbs_ac_1
I got this as my first set about a week ago. I've only used it once, but it was easy to assemble and use.
https://www.amazon.com/Master-Airbrush-Professional-Compressor-Primary/dp/B00EKT30JK/ref=mp_s_a_1_3?ie=UTF8&qid=1549047922&sr=8-3&pi=AC_SX236_SY340_FMwebp_QL65&keywords=master%2Bairbrush&dpPl=1&dpID=61tUsjMt1OL&ref=plSrch&th=1&psc=1
Can some one give me input, preferably some one who owns this product, towards how it performs in their current usage and how it's been holding up. I'm trying to get into painting my gunplas but I dont wanma brake the bank on the airbrush kit, rather break the bank buying a gundam, other cheap recommendations are greatly appreciated.
Just go on Amazon and grab yourself a Master’s Airbrush kit -> Airbrush Kit Its what I got and isnt bad. The compressor gets the job done and in December I will have had everything for a year.
Hope that helps with the airbrush decision making, make sure you post final product!
It's an okay deal - the same set runs about 120 on amazon. https://www.amazon.com/dp/B00EKT30JK/ref=cm_sw_r_cp_apa_TaZUAbW42VZ49.
What is your budget? I have used the master air brushes, but I found them to be very hard to use as a beginner. In my opinion, they are very temperamental. That said, they do get the job done. If you decide to pick it up, make sure to check it for bent needles and faulty o rings. One of the issues with the masters is the o ring they use. It deteriorates when you clean the brush with certain solvents.
I see a lot of people recommend this one
I actually went to Amazon and looked at a few of their airbrush kits. Would you recommend something like this?
is this going to be an heavy hobby? like doing this a couple times a month? I bought this one
https://www.amazon.com/gp/product/B00EKT30JK/ref=oh_aui_detailpage_o06_s00?ie=UTF8&psc=1
Alot of people will say the airbrushes included arent the best but Ill be honest. I had no issues using it for my first kit ever or my first paint job. This is what the results were for the body.
http://imgur.com/a/7XDaq
if you can invest in a better air gun and compressor that would probably be wiser if you plan to do this alot
Thanks, good tip. Was planning on getting this from amazon: https://www.amazon.com/Heartybay-10Pieces-Round-Pointed-Nylon/dp/B00V4EG6D6
Some folks just tip the handle of the brush and use it to transfer (personally I think that's a bit of a mess but could work in a pinch). You could probably use toothpicks or cotton swabs just as well as you just need something...
You could use a good brush but you need to be careful to avoid getting paint in the ferrule as that can damage the brush and it ultimately probably isn't worth it when there's cheaper / safer options.
I'd say grab a few cheap brushes and sacrifice them to the paint pot gods. They're really helpful for basing (applying PVA glue), transferring paint to pallets, whatever.
Don't sacrifice a more expensive nylon or sable brush as you should be able to get a bunch of cheap nylon brushes for $5 or so:
https://www.amazon.com/dp/B00V4EG6D6/ref=sxts_kp_bs_tr_lp_1?pf_rd_m=ATVPDKIKX0DER&pf_rd_p=8778bc68-27e7-403f-8460-de48b6e788fb&pd_rd_wg=sg8RE&pf_rd_r=9305E087JXWVP7GH3QN6&pf_rd_s=desktop-sx-top-slot&pf_rd_t=301&pd_rd_i=B00V4EG6D6&pd_rd_w=LaPb9&pf_rd_i=brushes&pd_rd_r=630f9240-898b-4d16-8b7a-8d86041a5674&ie=UTF8&qid=1538679271&sr=1
They should! I've used that exact brand of white before.
You should also get a set of small tip paint brushes like these if you don't already have some.
Testors Matte spray, I assume? You said I should do matte followed by gloss, but I read that I should do gloss (for durability) followed by matte (for non-shiny appearance). Which is best?
I may have to go with Vallejo paints if I can find them, as they're frequently recommended and come in droppers (which I think will be less fuss).
I read that cheap brushes will be more frustrating than they are worth, and since my free time is scarce, I planned on using nicer brushes. What would you recommend for a cheap brush set that's not a pain in the ass? Something like [this on Amazon, $15] (https://www.amazon.com/Detail-Paint-Brush-Set-Watercolor/dp/B010QLOJ3G)?
I'll post it here, so others can see.
Paint: Miniature Painting Kit with Bonus... https://www.amazon.com/dp/B01MTXRUUT?ref=yo_pop_ma_swf
Brushes: MyArtscape Detail Paint Brush Set -... https://www.amazon.com/dp/B010QLOJ3G?ref=yo_pop_ma_swf
Printer: Monoprice Mini Delta 3D Printer With... https://www.amazon.com/dp/B07CJQ3D6L?ref=yo_pop_ma_swf
Thanks for the recommendations
After finding no hobby store with paint near me, I finally pulled the trigger on $22 red spray primer, $39 paint set, and $14 brushes on Amazon. Thankful that this game is so cheap at $75 because the paints really kicked it up!
I looked at a lot of reviews, if anyone is curious:
https://www.amazon.com/gp/product/B010QLOJ3G/ref=oh_aui_detailpage_o00_s00?ie=UTF8&psc=1
https://www.amazon.com/gp/product/B01AC4LATI/ref=oh_aui_detailpage_o01_s00?ie=UTF8&psc=1
https://www.amazon.com/gp/product/B004EKCOE2/ref=oh_aui_detailpage_o00_s00?ie=UTF8&psc=1
Looking to get my first air-brush kit so I can start to do proper paint jobs. I found this on Amazon and was wondering if the community thought this would be a good starter kit?
https://www.amazon.com/dp/B010TQCOEE
I found a kit on amazon for around 80 bucks. It came with a compressor and three types of airbrushes.
PointZero Airbrush Dual Action Airbrush Kit with 3 Guns https://www.amazon.com/dp/B010TQCOEE/ref=cm_sw_r_cp_apip_8mMivZb67PArw
It's not top quality, but I've been happy with it, and it comes with a DVD that has tons of useful info for a beginner on it.
What are your thoughts on something like this? https://www.amazon.com/dp/B010TQCOEE/ref=cm_sw_r_cp_ep_dp_Pc.LzbPHQ3Z47
Thinking for a beginner to get their feet wet, and have a few junk(?) brushes to learn on so you don't have to worry about totally screwing up one of the $100+ airbrushes?
Is this a good set up sir? PointZero Airbrush Dual Action Airbrush Kit with 3 Guns https://www.amazon.com/dp/B010TQCOEE/ref=cm_sw_r_cp_apa_i_frLPCb08VJ4FC
Hey man, I've been using the air compressor from this for over a year and it performs admirably: https://www.amazon.com/gp/product/B010TQCOEE/ref=ppx_yo_dt_b_asin_title_o07_s01?ie=UTF8&psc=1
​
Only downside is that it's slightly noisy but It has an adjustable pressure and works very well for the price. I personally use a PSI of 30 or so but if you wanna be a cowboy and use 50 you certainly can.
Well something like the little brushes and the pot in this bundle are handy. I have a cleaning pot like that one that usually doubles as a stand for the airbrush, too. Other than that, I don't have much else, besides consumables like pipettes and mixing cups.
For the cleaning, is a kit like this + a cleaner bottle sufficient ?
https://www.amazon.com/Airbrush-Cleaning-Needle-Nozzle-Holder/dp/B0154HN2NA/ref=pd_sbs_201_3?_encoding=UTF8&pd_rd_i=B0154HN2NA&pd_rd_r=DZ25PQSDETTFJ34XKR7V&pd_rd_w=I9Shh&pd_rd_wg=KKqnH&psc=1&refRID=DZ25PQSDETTFJ34XKR7V
So this:
https://smile.amazon.com/Citadel-Shade-Paint-Games-Workshop/dp/B00KOD3FM8/ref=sr_1_4?ie=UTF8&qid=1519681521&sr=8-4&keywords=paint+wash
or this?:
https://smile.amazon.com/Nontoxic-Miniature-Washes-Dropper-Bottles/dp/B0714QL55V/ref=sr_1_1_sspa?ie=UTF8&qid=1519681988&sr=8-1-spons&keywords=army+painter+wash&psc=1
For primer is there a benefit to using paint on, vs spray? I think the bases will be separate from my pieces. So I would think a spray can of like, white, grey, and black would be my best bet?
First some basics:
for miniature painting we use acrylic colours and there are a lot of different brands available some are more famous among miniatures and scale models (because they have specific colours available, like the one you linked is a palette fur US WW2 military colours) some are more often used by artists and all of them have their advantages. The same with brushes and in the end it is more about personal preference and availability (makes no sense to buy the brand people say it is good but you have to order it while something of equal quality is available in the store around the corner and for a beginner a more basic set with ~10 basic colours is better than such a specific one)
For the brushes you want something similar to this https://www.amazon.com/Detailing-Watercolor-Miniature-Ergonomic-Precision/dp/B004HHIO50/ref=sr_1_10?keywords=army+painter+brushes&qid=1550092128&s=gateway&sr=8-10
in addition to the one you linked because you need more straight/fine detail ones and some larger one depending on the techniques used (dry brushing for example)
​
The only thing that I really recommend is to use a caned spray primer as colours won't stick very well to the pure plastic surface and you already have a basecoat if you use a coloured one. But it need to be a Primer and not a spray colour. I prefer Army Painter but mostly because of the colours available
Another thin would be Washes which are kind of thinner colours that add a translucent layer to the model or are used for blacklining
https://www.amazon.com/Army-Painter-Warpaints-Quickshade-Wash/dp/B0714QL55V/
(I also prefer Army Painter over Vallejo here, but the link is more for the example pictures)
​
For a beginner, a coloured Primer and a Wash can already give good (and fast) results on models like Stormtroopers
​
The Army Painter Warpaints Quickshade Wash Set - Miniature Painting Kit of 11 Dropper Bottles with Fluid Acrylic Paint Color Washes https://www.amazon.com/dp/B0714QL55V/ref=cm_sw_r_cp_apa_i_Ay-JDbGNRG16A
This is what I got and I like it a lot. Plenty of washes and not too expensive.
https://www.amazon.ca/Gocheer-100-250V-Airbrush-Portable-Compressor/dp/B071J4M3X6/ref=mp_s_a_1_2_sspa?crid=286UUYC9557Y8&keywords=airbrush+kit&qid=1556889282&refinements=p_85%3A5690392011&rnid=5690384011&rps=1&s=gateway&sprefix=+airbrush&sr=8-2-spons&psc=1
This is what Im looking at atm
I got this one. It's a little more than I remember, but still under 100.
I have this one and it works great, I've had no problems with at all and its been awesome to use especially since I was unsure about it and didn't want a bigger one with a tank. Granted I plan on buying one with a tank for the future, but starting out why not use that one your friend is offering