Best wire strippers according to redditors
We found 744 Reddit comments discussing the best wire strippers. We ranked the 139 resulting products by number of redditors who mentioned them. Here are the top 20.
We found 744 Reddit comments discussing the best wire strippers. We ranked the 139 resulting products by number of redditors who mentioned them. Here are the top 20.


First off, credit for this idea goes to /u/jaredj who mentioned using one of these in his build log here.
I ordered one on Amazon to try it out, and it arrived today so I thought I'd share a little demo of how well this thing works. If you've done any handwired builds, I think you'll immediately be sold on it.
Also, I trimmed off a bit of the connected diode leg before wrapping it, but you could leave it the full length if needed. I tested it that way, too.
NOT making a cent from this, just a link to the product so people can check it out.
They're rather common and are available anywhere from Harbor Freight to Home Depot. This is the set that I own.
JIS Screwdrivers - Regular Phillips don't fit bicycles well. Park is ironically one of the worst offenders.
Use these to cut zip ties. Alternatively, cut the zip tie with regular side cuts and then burn the remaining bit to "mushroom" the cut portion, making it less likely to pull out.
If you're wrapping handlebars and get pulled away, grab some Park pin spanners and slide it over the section you're leaving to keep it from unraveling.
Presta nuts are spacers. Use them to push the water bottle cage away from band-clamp front derailleurs, or in between a frame and a set of fenders to create smoother lines.
"Bike wash" is a scam. Put a few drops of Dawn (or any dish soap) into a spray bottle. Works better than anything costing more than $.00004 an bottle. Simple Green isn't safe for aluminum and is generally less effective at removing grease than Dawn (this has been tested and proven by Consumer Reports).
If you're installing new road levers, take the handlebar off and put them flat on a bench or table. Find the angle you want and tighten both levers down before you install them, and they will be perfectly even.
Boeshield T9 is a better frame protectant than Frame Saver, and it's much cheaper. You can also use it for chains (it sucks in the rain, though) and anything else at home you need moving.
Pedals with hash marks are always left side pedals.
Shimano's next-generation slick cables dramatically improve the performance of 7900/6700/5700 generation shifting. It can be a hard sell to convince a customer to buy $50 cables and housing, but if they have persistent shifting woes, this is the trick.
Speaking of cables, if you need a Campy cable in a pinch (and don't stock them), use a file or bench grinder to reduce the head of a regular Shimano or SRAM shift cable. Test before you install, of course, but this method works just fine.
Lube the bottom bracket cable guide. Shimano SP41 grease is perfect for this, but even a bit of Tri-Flow can make a big difference.
Sharpen a spoke on the bench grinder to make your own picks. You're going to be ruining them all the time no matter what, so they might as well be free.
I've got a lot more, but I need to make breakfast and study, now.
These are the things I bought. You could get by without some of the wire cutting tools. The crimper is kinda necessary, and I'd definitely buy the molex hand tool for pushing the wire into the SATA connector. Much easier than using a screwdriver.
16 AWG Guage Wire
Wire Stripper (you can get by without this)
Flush Cutter (probably not necessary but nice to have)
Crimping Tool
SATA Power Connector
SATA Passthrough Cap
SATA Terminal/End-of-Line Cap
Molex Hand Tool <-- buy the real thing, mimics on Amazon aren't as good
ATX Header Pins (these are 18 AWG which are a little small for 16 AWG gauge wire)
ATX Header Housing
Sure, they are $120 new.
Alternatives:
Powered/Active: 4" Edifiers start at $70. Edifier R980T or larger 5" Swan D1080-IV $140 or Fluance Ai40 $200
Amp+Passive:
$53 Bundle 6-1/2" 2-Way Bookshelf Speaker Pair and Hi-Fi Mini Amplifier
Mini amps:
Kinter K2020A $33. SMSL SA50 $67, Dayton Audio DTA-120BT $75, Micca OriGain $80 or $100 with USB DAC, more at Zeos AMP and DAC guide.
Speakers:
AverageJoe's Speaker List
Polk Audio T15 $50
Micca MB42X $80
Pioneer SP-BS22-LR 4" Bookshelf Speakers (Pair) $68 or if sale is over, PIONEERSP-BS22-LR $90
Sony SSCS5 3-Way 3-Driver Bookshelf Speaker $73
DIY C-notes $100
Clearance sale dual 5.25" Polk Audio Monitor 40 Series $100
Speaker wire and self adjusting wire strippers or basic.
Subwoofer:
Franklin Audio FPS10 10" 100 Watt Powered Subwoofer $90 with $10 off coupon
I'll make a list of stuff you need. For the best "bang for your buck" in the $200ish price range.
-----------------------------------------
Speaker wire. Amazon Basics makes great stuff. If you want, you can get 100 feet of it for an extra $2 I think. You can get those monoprice banana plugs if you want. They just help if you're going to be switching speakers around a lot.
Simple wire stripper. Should work just fine.
Cable to plug it in. That'll just plug the amp into a computer. And that cable is amazing quality. For real. I don't know what it is about it, but the moment I touched that cable I knew it was special. This isn't a joke either. You'll understand when you get one. Trust me.
50 watt per channel amp. This thing will be more than enough. I just like it because it is open box, so cheap. The same one new on amazon is $65. If you want to order from amazon, you can just get the smsl sa-36a. Same amp, just 20 watts per channel. Which, again, is plenty.
[Here's that cheaper smsl amp] https://www.amazon.com/dp/B017W13OR0/ref=cm_sw_r_cp_api_U2NSBbTRHGFS5). I've got a few of them. They're great. This is what I'd go for if the other one is sold out.
Cheap but good little amp. I don't have one of these because I'm not a fan of the looks, but they get great reviews and a lot of people really like them.
---------------
Speakers:
Miccas. These things are nice for that price. In this price range, you really won't be getting anything better unless you go DIY.
Fluance SX6. These guys are big, but they throw a good amount of sound and some pretty deep bass for a pair of bookshelf speakers. Careful, they're pretty big.
Pioneer. These things are decent, but I think the Fluances would be better for this price. The SX6s throw more bass, which is good if you're not getting a sub. However, these are smaller.
Fluance signature series. I know, you said your budget is only $200, but you said if you need to spend more, then you will. These will sound better than all of the other speakers linked, however, that's not why they're here. I put them here for two reasons. The first is that they're front ported. Most people that are new to speakers might put them up against a wall or close to it, not understanding that the port needs some room to breathe. These have front ports so that's not a problem. The second reason, just look at them. If you really care about looks, these ones are the ones. They're beautiful. (My opinion obviously).
Oof almost forgot. Pleaae don't place the speakers directly on your desk.
--------------------------------
That's a lot. I'll sum it up with my opinion and why.
Amp: smsl sa36a. For close range, you don't need anything with more power. This thing will do whatever you need for bookshelf speakers.
Speakers: micca mb42x. Why? Here's why: for this price range, you won't notice a huge difference in any speakers, unless you get some bad ones. So, get the cheapest ones you can. Later on, if you can afford to upgrade them, you'll probably want to do that. Then you'll have a pair of $80 speakers that you don't need rather than a pair of 130 speakers that you don't need. Another reason I would pick the miccas is because they punch above their price range. Most people say they sound more like a pair of $125 speakers rather than a pair of $80 speakers. So, for real, they're good. Also, they're the smallest of the bunch.
Or, build a pair of C Notes and get something way better than any of these.
Hope this helps!
Reviews here are pretty bad.
https://www.amazon.com/dp/B07GVNPDZM/
A few of the 5 star reviews are invalid, should have like 2 star average.
And don't be like every other neophyte here and just JAM the speakers super close together on your entertainment unit... you need to get your bookshelves about as far apart from each other, as you are sitting from them... so get some stands too.
&#x200B;
These are affordable and adjustable.
&#x200B;
&#x200B;
I highly recommend the
Hakko 936 soldering ironHakko 888 soldering iron, which is still actually available. It's hard to fathom how a $100 soldering iron could be that much better than a $20 one, but once you start doing anything more serious than just sticking some wires together, it's worth it.As for other tools,
As for components, I've been buying them piece-meal for years, so other's will probably be able to yield you a better recommendation for kits than anything I can find just from a quick search. I do mostly digital work, so as far as passives, my main stock is:
If I need any other resistor for a specific project, I'll tend to just buy an extra 10 and keep them in labeled coin envelopes.
Random other pieces:
Edit: Fixed the soldering iron model.
Disclaimer: I'm using my Amazon Associate links for all of these, which always feel a little amoral and a conflict of interest, but really, if my apartment were to go up in flames and I could afford it, I'd buy every link on this list right now. Does anyone have strong opinions one way or the other on using them?
What type of list would you be looking for? I have a spreadsheet with all the Knipex tools I own, and my wish list of tools I'm looking to buy when I find them at the right price, but I don't think that spreadsheet would be that useful to most people.
I work with shielded cable all the time at work. The Knipex Snips are great at stripping them. You can get the Knipex snips for about $20 if you look around. Check out the design on them and you'll see the little indention at the base of them which makes them really good at stripping stuff like shielded cable and Cat5/6.
for 18/2 or 22/4 shielded cable the #12 stripper slot on a regular pair of Klein strippers works really well. The Knipex automatic wire strippers are only designed for individual conductors, but they do a really good job of stripping every wire the exact same length which is really handy for terminating panels.
I have a pair of Irwin automatic strippers, and they do OK with stripping the jackets off cables, but overall I wasn't impressed with them and stopped carrying them at work. You might have good luck with them - they have good reviews.
These wire strippers right here. These things make stripping wires so freaking easy. I never had a proper set of wire strippers and would use Xacto knives and my fingernails prior to buying these. Now it takes a second and a half to strip a wire, no measuring or anything. Stick the wire in the thing, squeeze the thing, pull the thing, and you have a stripped wire. Highly, highly recommended.
Tracking-free link:
https://www.amazon.com/dp/B07GVNPDZM/
For small wires, an automatic wire stripper is great. I have one that I got from my dad thirty years ago and it still holds up in hobby electronics. I don't recall the brand, but the handles are similar to channellock blue.
For most wire, I use an old Klein. It looks like the Katapult, but doesn't have the cutter. For fine wire, I use a Jonard ST-500.
These self adjusting wire strippers are pretty fantastic:
http://www.amazon.com/Irwin-Industrial-Tools-2078300-Self-Adjusting/dp/B000OQ21CA
Nice - you'll be glad to have that variety of tips, depending on what you are working on! If you have any spare Christmas money, I'd recommend picking up one of these self-adjusting wire strippers - it sort of matches your color scheme too! And if you do a lot of de-soldering (anything with lots of headers or through-hole IC sockets), a desoldering iron can save a ton of time compared to your solder wick and desoldering pump.
A few other things that I've found useful (mostly repairing electronic keyboards / synthesizers, although I'm hoping to get more into Arduino / Pi soon):
Hakko wire cutter
Helping hand
Hemostat / Forceps
Digital multimeter with audible continuity tester
Well, most things (because its cheaper) have square pins these days. Round ones are a little trickier to wrap, but aren't really a problem.
I use this tool:
https://www.amazon.com/gp/product/B00BFYE0CY
It works well enough. The stripping blade is a little finnicky, that's my only real complaint with it.
Inspired by this design with very few changes.
This is a wort/water pumping box that shields the pump from the elements/spills and allows you to use a simple switch button to turn the pump on and off instead of having to plug/unplug it to power cycle it. It also protects the pump head/pump body from getting damaged because I'm clumsy. It also provides 2 extra GFCI outlets for you to plug in a computer or anything else as needed.
Box/pump:
Fittings for pump:
Had on hand:
Hoses:
Build Steps:
Switch overview in brief:
Note about using step bit: It kicks out pretty hard when you move between steps. My wrist hurts today from it binding up a bit between steps and torquing my wrist.
I did submit this yesterday, but the link that imgur provided was giving 404 errors when you viewed it, so I deleted that post & resubmitted.
I own 3 of these. They are good robust basic multimeters. For learning this is plenty. The thermocouple function is one of those things that you didn't know you needed until you had it. As you progress you will probably find that you wish you had more multimeters before you wish you had better multimeters.
With the money you save, I highly recommend some test clips, some wire cutters / strippers, and perhaps some side cutters (links to the ones I recommend).
My absolute favorite vape related thing that I use daily.
I take it you mean crimpers, but I'm going to call them crumpets from now on.
It's one of these - my favorite stripper for shielded cable.
The quickest easiest fix for a novice would be to just cut the connector out and butt connect it all back together.
Any auto parts store should have a tool similar to this:
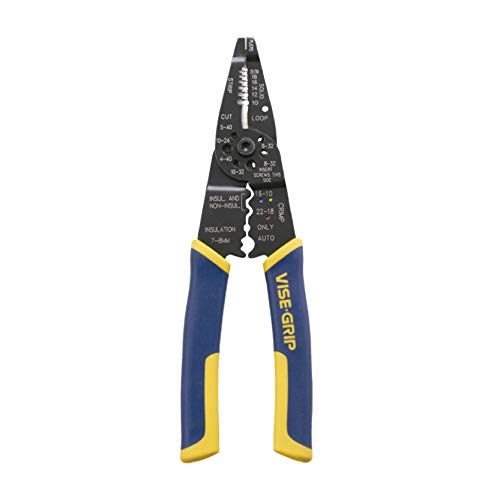
https://www.amazon.com/VISE-GRIP-Multi-Tool-Stripper-Crimper-2078309/dp/B000JNNWQ2
and butt connectors
youtube video
https://youtu.be/r_XrBeCR6og
The correct way would be to get a pigtail harness or to pop those pins out of the connector and solder heat shrink them back and then put the connector back together.
Here's a list and example found on amazon for all the major parts. I'll also include a wiring diagram at the end.
Solar Panel $169.99 - 100W Flexible & Thin
Solar Cable $18.99 - 20ft with male and female heads (cut in half for + & -)
[Charge Controller]
(https://smile.amazon.com/gp/product/B019QSX0CG/ref=oh_aui_detailpage_o09_s00?ie=UTF8&amp;psc=1) $34.99 - 30A gives you room to add more panels
Battery $160 - 100Ah AGM will provide enough power depending on fridge but requires no maintenance
Fuse Panel $35 - 6 circuits with negative and cover
12V Sockets $6 - Get some of these for plugging in appliances and phones. You can buy 12V adapters for almost any electronic besides most kitchen appliances.
Pick up some 10 gauge stranded wire from your local hardware store (home depot) to wire the battery and fuse panel to the charge controller. You shouldn't need much since you want the battery as close as possible to the controller. You can buy smaller wire (16 or 18 guage) for wiring outlets/appliances to the fuse panel. 50ft of that should be fine unless you want multiple outlets on the other side of the van.
You'll also need some ATC blade fuses for your fuse panel. You can buy these at a local auto parts store pretty cheap. 15 amps should be enough than anything you'll be pulling.
To connect the wire ends to the battery and fuse panel you will need these wire terminals for the corresponding wire guages you are using. Along with these female terminals to connect to the 12V sockets. All of these can be found at your local auto parts store for cheap sometimes all together in a kit.
You'll also want a pair of wire strippers/crimper for wiring.
This is the best wiring diagram I can find. Most are so overcomplicated. This diagram does not show the fuse panel but you can see the empty slots on the far right of the charge controller where you insert the wiring for that, it's called the "load." This diagram also shows an inverter which is something I didn't go into because you will only need that if you HAVE to run a 110V appliance. I know you mentioned a kettle but maybe you could just install a gas stove in your van and use that to heat water? That's what we use :) Installing the inverter should be pretty straight forward though if you need it but remember you will waste energy going from 12v to 110v so 12v is more efficient.
Hope this can help you (and maybe others) in some way. I plan on making a more in depth version of this guide in the near future along with a video but finding the time has been difficult! Let me know any more questions you have :D
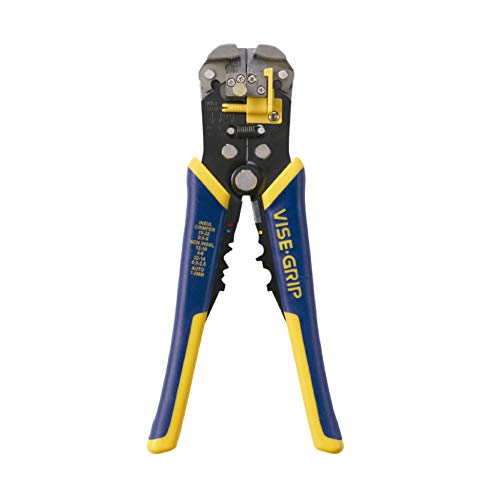
These wire strippers are amazing. They save me so much time!
IRWIN Tools VISE-GRIP Self-Adjusting Wire Stripper, 8-Inch (2078300) https://www.amazon.com/dp/B000OQ21CA/ref=cm_sw_r_awd_tRzcvb0NA9RNA
https://www.amazon.com/dp/B000OQ21CA/ref=cm_sw_r_awd_tRzcvb0NA9RNA
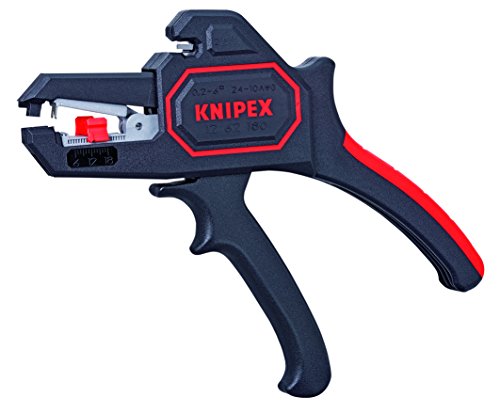
https://www.amazon.com/Knipex-1262180-Adjusting-Insulation-Strippers/dp/B003B8WB5U/ref=pd_bxgy_img_2/145-0542271-5957420?_encoding=UTF8&pd_rd_i=B003B8WB5U&pd_rd_r=0445d9a1-eb31-4aa2-b939-015ae7346440&pd_rd_w=RxwVS&pd_rd_wg=tOnZU&pf_rd_p=a2006322-0bc0-4db9-a08e-d168c18ce6f0&pf_rd_r=WBZKSCJVBYHXD54QT67D&psc=1&refRID=WBZKSCJVBYHXD54QT67D
these are my favorite!
https://www.amazon.com/Knipex-1262180-Adjusting-Insulation-Strippers/dp/B003B8WB5U
One of the better ones for the price. Need adjusting every once in awhile.
https://www.amazon.com/Knipex-1240200-Adjusting-Insulation-Strippers/dp/B000R895YM
Is a lot better but double the price.
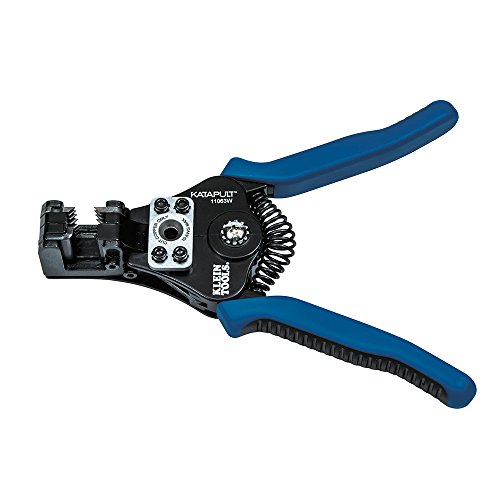
On a budget? Kleins side cutters are great.
https://www.amazon.com/Stripper-Electrical-Klein-Tools-11063W/dp/B00BC39YFQ
All of these have China clones on Aliexpress. I would avoid them as they dull too quickly or knick the wires.
No problem!
The wire: https://www.amazon.com/gp/product/B00GWFECWO/
The wrapping tool: https://www.amazon.com/gp/product/B00BFYE0CY/
Bageeka is right it's pretty easy. Cut the plastic clips off both ends, strip the wire about a 1/4 inch, stick the two ends into the butt connector, crimp(pinch) the wire in place, and apply heat.
Butt connector:
Polyolefin Heat Shrink Butt Connector, 22-18 Gauge, Red Waterproof Crimping Terminal - Bag of 25 PCS https://www.amazon.com/dp/B01MRBZ6IK/ref=cm_sw_r_cp_apa_mRgtzbW7GRB28
You'll probably want a wire stripper/crimper as well:
IRWIN VISE-GRIP Multi-Tool Wire Stripper/Crimper/Cutter, 2078309 https://www.amazon.com/dp/B000JNNWQ2/ref=cm_sw_r_cp_apa_k1gtzbWVC4V7G
Do you have a volt meter by chance?
This is what black electrical tape (or, worst case, wire cutters) are for.
No worries, buddy. Happy to help. You don't need to worry about a preamp just yet, as your turntable has one built in. Just make sure you have the selector switch on the back of the unit set to "line" rather than "phono" and you're all set. As for connecting the speakers to the receiver, I managed to find a pic of the rear connections on the U310. It looks like they use spring clips to connect, so you're going to have to use bare wire.
First thing you'll need is a spool of speaker wire. I've had good luck with the Amazon Basics stuff, and it's about as cheap as decent wire gets. You'll need to strip a bit of the jacket off of each wire on each end. I do it by hand, but you might want to try a wire stripper if you're not comfortable free-handing things. Once you've exposed the bare wire, simply give each side a quick twist to secure them into separate threads and insert each thread into the back of the speaker, depressing the spring clip to allow the wire to fit into the hole and releasing it to bite down on the wire. As for the back of the amp, the procedure's the same if it has spring clips. If it has binding posts like the SMSL I linked earlier, you'll want to unscrew them a bit, wrap the bare wire around the exposed post, and tighten the post heads back down to create a nice, tight seal.
One word of warning on the off chance you've never done anything like this before. Remember to connect your positive (red) terminals on your speakers to your positive terminals on your amp, and your negative (black) to negative. The speaker wire makes that pretty easy, as one channel is marked with a little white line so you'll always know what's going where. Additionally, make sure your amp's left output is wired to your left speaker and the right to the right. Simple stuff, but it's easy to miss if this is your first time.
I wonder how the Katapult compares to the cheaper but highly-rated Irwin model.
I'm going to put down "wire strippers", because no one has said that yet. About $30 should get you a good pair. I got this pair for my brother for Christmas, and he seemed happy with them.
Sweet load out, one thing that sticks out is the cheap cable stripper. I learned on those grey strippers and hated them. A few years ago I bought my own decent kit and it came with these These are a must if you're going to be doing a lot of termination. I just redid our main patch closet and had to re-terminate half our connections ~150 or so.
https://www.amazon.com/Platinum-Tools-15015-Jacket-Stripper/dp/B000FI2RVC/
Best stripper ever made. Put it on. Spin twice one way, once the other way. In my 10 years of using mine, I have never had it even scratch one of the pairs, but it cleanly cuts through even thicker cat6a jacket.
Pair that with this, and a good set of electricians scissors and you are set.
https://www.amazon.com/TRENDnet-RJ-45-RJ-12-RJ-11-TC-CT68/dp/B0000AZK4G
https://www.amazon.com/Platinum-Tools-15015-Jacket-Stripper/dp/B000FI2RVC
not sure if this one has a set screw to limit cut depth.
https://www.amazon.com/Coaxial-Cable-Stripper-RG59-RG58/dp/B01NBODKDJ/
coax stripper is another option, but those sometimes only have set cable diameters.
if you're terminating a whole panel, this type of jacket cutter is much easier than regular strippers
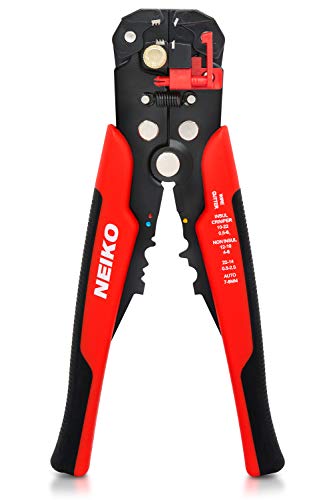
For anyone interested, it's 17 dollars.
https://www.amazon.com/Neiko-01924A-Ultimate-Self-Adjusting-Stripper/dp/B000IYTCG6
Get on Crutchfield, they'll sell you what you need all in one package for a competitive price.
As for wiring the harness, sorry to say but it's very rare to find a pre-made double ended harness. Blaupunkt used to offer those for "select cars" a decade ago, but stopped because not enough takers.
If you're not comfortable with soldering and hate crimp connectors, you have two other options that are pretty good:
First there's these things...
https://www.amazon.com/Ginsco-Connector-Waterproof-10White-5Yellow/dp/B01GRKAMI6/ref=sr_1_4?ie=UTF8&amp;qid=1486599367&amp;sr=8-4&amp;keywords=solder+heat+shrink
They kick a lot of ass, literally solder and heat shrink in one step with a cig lighter or heat gun. I wouldn't use them under the hood (too hot under there) but in the dash? Awesome!
Other option is these things:
https://www.amazon.com/Posi-Lock-Connectors-14-16-gauge-601/dp/B00HTA8O9S/ref=sr_1_fkmr0_2?ie=UTF8&amp;qid=1486599506&amp;sr=8-2-fkmr0&amp;keywords=posi+lock+butt+connectors
Those things will join wires with no tools at all, apart from strippers of course.
These are fantastic btw, if you think you'll ever strip another wire in your life later https://www.amazon.com/Neiko-01924A-Ultimate-Self-Adjusting-Stripper/dp/B000IYTCG6/ref=sr_1_9?s=hi&amp;ie=UTF8&amp;qid=1486599547&amp;sr=1-9&amp;keywords=wire+stripper
I'll answer what I can:
2. I like to use an automatic wire stripper like the one here. It's a lot faster and more accurate. For connections, I'd use banana plugs if your receiver and/or speakers can use them. I've heard that compression type (rather than crimp) will hold on better. Something like this
3. Static at loud volume when nothing is playing is normal.
6. Most people agree that speaker wire quality makes little to no difference. Just get the right guage for the length of wire you need to run. To be safe you can use 12 guage which should be enough for most home installations, EG. this one from Monoprice is commonly recommended.
https://www.amazon.com/gp/product/B000IYTCG6/ref=oh_aui_detailpage_o03_s01?ie=UTF8&amp;psc=1
They went up a few bucks but these things are awesome. Saves me so much time from stripping by hand, and you can get really accurate lengths so you don't have to cut off extra wire. These are totally worth investing in!
Get yourself a decent crimping tool. An assortment of terminals is a good start, too.
https://www.amazon.com/VISE-GRIP-Multi-Tool-Stripper-Crimper-2078309/dp/B000JNNWQ2/ref=sr_1_4?ie=UTF8&amp;qid=1469334380&amp;sr=8-4&amp;keywords=crimping+tool
When you make a crimp, test it mechanically by pulling the wire. It should not move.
That wire should work fine unless you have a very expensive setup or have to run the wires very long distances.
You shouldn't need any tools but a wire stripper like this will make it go more quickly. This is just to shave the ends of the wires.
http://www.amazon.com/TEKTON-3775-Electricians-Combination-Tool/dp/B000NPUK2A/ref=sr_1_4?ie=UTF8&amp;qid=1420676466&amp;sr=8-4&amp;keywords=wire+stripping+tool
> Splice them into your trailer wiring
That's what I did. I went up about 4" from the 7-pin plug, cut the necessary wires, used uninsulated butt connectors with a closed-barrel crimper and adhesive-lined heat shrink to splice in a 6-pin Deutsch DT connector pigtail, then built my own wiring harness that plugs into the Deutsch connector and ran it up to the headache rack.
Went with the 6-pin Deutsch connector since I only needed 5 of the 7 wires (LT, RT, Tail, Backup, and Ground) and 5-pin Deutsch connectors aren't available. Deutsch DT connectors are frequently used in the automotive aftermarket (probably more so than Delphi Weatherpack connectors). I know Rigid Industries uses them for their LED lights, and Smith Race Wire uses them for parts of their custom wiring harnesses.
Also, since you can only close-barrel crimp one end of the uninsulated butt connectors, I chose to close-barrel crimp the side that had only one wire (since closed-barrel crimping is more secure, and the one wire was looser in the connector) and used Channel Lock 909 Pliers to crimp the end with two wires.
Once you made your harness, make sure you slip it into some split wiring loom. Using a loom insertion tool makes quick work of that. Wrap the wiring loom with non-adhesive dry vinyl tape for a factory-finished look and to avoid a gooey, sticky mess in case you need to unwrap the wiring harness in the future.
Finally, a good wire stripper will save your hands a lot of fatigue compared to using a standard wire stripper that you have to always pull the wire through.
22 AWG stranded wire is pretty standard for wiring anything.
i usually buy these, as they're a good price, 2 day shipping w/ prime, and its a nice multi color kit, which helps when wiring...in case you have to trace the wire back to the board when debugging. plus everyone likes colors:
http://www.amazon.com/Electronix-Express-Hook-Wire-Stranded/dp/B00B4ZQ3L0/ref=sr_1_1?ie=UTF8&amp;qid=1418566941&amp;sr=8-1&amp;keywords=wire+kit
http://www.amazon.com/Electronix-Express-Hook-Wire-Solid/dp/B00B4ZRPEY/ref=sr_1_2?ie=UTF8&amp;qid=1418566941&amp;sr=8-2&amp;keywords=wire+kit
use shielded wire (with the 'shield grounded') for any audio signal inputs/outputs if you get noise. not 100% necessary, but might be worth it in the end for the sound quality and reducing any noise.
i also recommend you get a real wire stripper. this one is the bees knees:
http://www.amazon.com/Tools-VISE-GRIP-Self-Adjusting-Stripper-2078300/dp/B000OQ21CA/ref=sr_1_2?s=power-hand-tools&amp;ie=UTF8&amp;qid=1418567132&amp;sr=1-2&amp;keywords=wire+stripper
Something like this. Makes stripping so easy that a child could do it. https://www.amazon.com/dp/B000OQ21CA/ref=cm_sw_r_cp_apa_EZTOAbT5TCC02
thanks for the reply... i have strippers that go down to 6awg, i was just wondering what folks recommend for lower gauge and/or faster speed (like this self-adjusting stripper, but for 4/6/8 gauge)
Sorry but I only buy high class strippers. Here she is in action. (NSFW)
Completely not responding to OP's question, but these are so amazing : https://www.amazon.ca/dp/B003B8WB5U/ref=pe_3034960_236394800_TE_dp_i1
For stripping the inner usb cables, I recommend this tool.
Also highly recommend a helping hand tool; you can use that to hold the usb terminals or GX16-4 which makes soldering way easier.
I agree, build you own kit. Below is my take. Know that some of those tools are not for every day use in networking, but who can resist getting more tools? Also, if you get all of these I realize it will be over $200. So, just use this list as a guide not a definitive list.
BAGS
ETHERNET TOOLS
SCREWDRIVERS
PLIERS and WRENCHES
POWER
MISC
SUPPLIES
https://www.amazon.ca/Klein-Tools-11063-Katapult-Stripper/dp/B00BC39YFQ/ref=sr_1_1?ie=UTF8&amp;qid=1511652674&amp;sr=8-1&amp;keywords=klein+katapult
I know tools so here we go. Focusing on the extras, luxuries, and conveniences. If I don't specifically note a manufacturer/model I probably just grabbed the first Amazon link to make it clear what I'm talking about.
I'm not an electrician, but I have a pair of those and I hate them. I bought myself a pair of these and haven't looked back once.
This is my go to list for what you need for soldering:
hakko soldering iron w/ diagonal cutters $91
hakko diagonal cutters $4.37
solder $7
solder sucker $6
solder flux $8 check digikey
solder wick $7 check digikey
wire strippers $10
helping hands $7 check harbor freight
check for lower price
One of the hakko clone stations paired with some genuine hakko tips is probably a good compromise on price/value. Maybe someone else that's from the UK could suggest something different that's also affordable there.
Here is a good link that really explains everything well.
http://www.ecigclick.co.uk/ultimate-rda-guide-for-beginners/
Some pointers, get a building kit, they are life savers, I would however recommend a different pair of wire cutters, this is the pair I use, and they are phenominal:
http://www.amazon.com/Hakko-CHP-170-Stand-off-Construction-21-Degree/dp/B017ODDPNO/ref=sr_1_1?ie=UTF8&amp;qid=1463530354&amp;sr=8-1&amp;keywords=flush+cutter
I use Koh Gen Do cotton, they spelled it wrong, but it's my go to. I just like it. Hope this helps
Hey, would you mind taking a look at my Audi? The sunroof won't open.... Kidding, of course.
For future use, and for all the techs out there, this is the ideal tool to cut and trim zip ties. They'll never have that irritating little sharp tang again, and you wont accidentally slice the wire you're working on:
https://www.amazon.com/Hakko-CHP-170-Stand-off-Construction-21-Degree/dp/B017ODDPNO
I use these. They're cheap, cut really well, and are just small enough to fit between my coil and the post. They're one of the best investments I've ever made in terms of RDA tools
> Thanks in advance for answering my questions.
I purchased it last August. (781 hours logged) It's almost litterly been printing out of the box since day one. The only issue I had out of the box is that the one screw on the build plate got bent as a result of the 2 free spools bouncing into it. I ordered a box of them from McMaster and had it fixed by the end of the week. I contacted Lisa on their google chat form and from what I understand, they now come with the screw as a result of my support ticket. This was an annoyance yes, but I've had more issues with my reprap and that costed me more than this pritner when I bought it. (I originally had a Makergear Prusa)
Most: I love the fact that it prints 100% of the times I try to print something. I rarely, and I mean RARELY have a failed print. I love that I can hit print before I go to bed and wake up to a completed part in the morning.
Least: This is small, and it took a while but I have since out grown the build platform (9x6x6 inches). I recently ordred an 8x12 plate from McMaster and that arrives on monday and we'll see how that works. (PSA this requires removing one of the extruders - if you want more info on this let me know)
Yes, no issues. Just close up the printer with the included panels.
No, I use a glass build plate and a thin coat of purple glue stick. I then spritz water on the plate before each print. I never have a sticking issue and I never have warpage. I personally prefer PLA though since Hatchbox has come to light and makes GREAT PLA
Like I said just above, I use a glass build plate, so I haven't had any warpage issues with the bp. Leveling the bed is a bit of a challenge but I'm fussy about it and I want it within 0.0005 or less so it takes me a while. The reason I'm fussy is because I've only had to level the bed 2 or 3 times since owning it.
The first was when I got it
The second was when I added the glass build plate
The third was when I removed one extruder and added an aluminum carriage.
That's it. It never lost it's level and it's gone through 3 moves (like I moved apartment to apartment)
The only experience I had was with that screw initially. I contacted Lisa on their Google Chat forum and she handled it mostly. Sadly, it wasn't as 'perfect' as I wanted since their solution was to send the printer back instead of sending me a new screw. Never the less, they did try to help on the matter and told me how I could go about getting money for the screw if I so desired. In the long run, it's a screw and I just ordered them from McMaster. I have zero regrets from it and I think I know my printer a bit beter because of it.
single extruder carriage (PSA: their single extruder block is not FF compatible.
My Thingiverse for example prints
Some things I would buy shortly after getting the printer:
Spare Extruder fan : I tend to slip and put a screw drive in the path of this, shattering the blades. If you're a clutz like me, get it. I've needed 4 so far. ::hangs head in shame::
Glass Build Plate : Best purchase I've made for my FF. Works great, easy to install and use. Also get thermal sheets and purple elmers glue, and print the spacer found on my Thingiverse page under "Flashforge Upgrades". Also get a spatula, and dikes
Simplify3D : A lot people tend to spend $X,XXX on a printer and then try to use free software with it and complain when it doesn't print right. To me that's like buying a car without tires. A Corvette ain't shit without a decent set of tires. It's kind of pricy compared to free, I know, but at real CAM programs (which is what this basically is) cost $8,000 or more. It truely is a great printer program and I wish I had purchased it much MUCH sooner than I had.
Last and most importantly, get the an active cooling fan. I originally printed this, and purchased a 12v power supply and added some fans to it. I have since moved on to the offical one from FF. It's not as good but I haven't really ran into an issue. If I had to print from my right extruder, it would be an issue though. What I liked about it, is that it's a plug and play added on. No "modifications" needed to added.
TL;DR / Closing thoughts: I would buy this printer again in a heartbeat. ESPECIALLY if they came out with one similar to the Replicator 2 with the 11.9" build plate. Instead it looks like they went a different way judging by CES but oh well, there's always next year. Further more, I think this is a great entry level printer for someone looking to have a printer help with projects and not be one of them. That doesn't mean you can't mod it or upgrade or whatever, it just means you don't have to if you don't want to.
Hope this helps and answers any questions you might have. Feel free to ask more though!
Let me let you in on a little secret: http://www.amazon.com/gp/product/B017ODDPNO?keywords=hakko%20flush%20cutters&amp;qid=1449088184&amp;ref_=sr_1_1&amp;sr=8-1
The HF are good for the money, no doubt, but the Hakko are better.
Ye, most people use a Brook Universal Board which works with all platforms (except Nintendo). Only tools you'll need are a screwdriver, allen keys and any decent wire stripper.
You'd pay about the same for a prebuilt one for all the parts so it's up to you.
If he's working with Romex a lot, the heavy duty version may be preferable. I use the standard pair but to strip romex it's a two tool process. I use my linesman to remove the out sheath, then the strippers to trim and strip the individual wires. The heavy duty strippers work fine to remove the outer sheath.
On the other hand the standard strippers are a little lighter and superior at bending hooks to go around screws.
I've typically done more commercial work than residential, so the standard strippers are good for that. The heavy duty are a better option for residential.
https://www.amazon.com/Stripper-Stranded-Klein-Tools-K12055/dp/B071G1QJ7G/ref=mp_s_a_1_2?ie=UTF8&amp;qid=1541358132&amp;sr=8-2&amp;pi=AC_SX236_SY340_FMwebp_QL65&amp;keywords=klien+heavy+duty+stripper&amp;dpPl=1&amp;dpID=419g0yPrBxL&amp;ref=plSrch
I don’t use them often, but the Klein automatic wire stripper works good if you are stripping a large amount of wire every day. It is bulky and some people have problems using them and don’t like them, so it may or may not be a good choice for you.
I have used the Klein kurve stripper before and it is decent, but I haven’t used one that goes from 10-24 awg. This model of Klein kurve wire stripper goes from 10-26 solid and 12-28 stranded.
I personally prefer and use wire strippers with thicker handles and use the Klein heavy duty wire stripper because of the thicker handles and I can twist wire and don’t need to carry lineman’s pliers. I don’t strip wire below 14 awg often so I just keep a cheap pair of strippers in my tool bag for those smaller sizes.
You will need HDMI cables to connect your sources (Xbox, AppleTV, etc...) to your Receiver. Another HDMI cable out from your Receiver and into your TV. And speaker wire to connect your speakers to your receiver. You will need wire strippers.. And an RCA coax cable to connect your sub to receiver
EDIT: Since it sounds like you're a beginner with setting up AV equipment, read through your TV and Receiver owner's manuals. There should be diagrams and hookup instructions.
these guys
Yes you will need speaker wire.
100 ft Oxygen Free - $24
Wire Strippers $7
Monoprice Subwoofer Cable - $10
There are options for wireless surrounds, but I've never heard of any of them working very well.
They all work more or less the same. I have a Dowell stripper I've been using for a couple years and it works great, Klein's a good brand as well.
One other thing I just noticed is you have 3 black wires and 1 white wire; is this how it was previously wired? This is very non-standard.
Did you pay attention to which wires were connected to where when you took it apart? Which was line/load, and which was connected to the brass vs gold screws?
If you're getting a crimper, I highly recommend the Platinum tools ez rj-45 crimper and ez rj-45 connectors. This has changed my cabling making game.
crimprer
cat 5e connectors
[strain relief, optional but look prettt] ( http://www.amazon.com/dp/B0034B3KYU/ref=cm_sw_r_udp_awd_BLIrtb16NPMC2)
Platinum tool jacket stripper
Currently these are the tools I use... Mostly Klein. I've been using these for a few years now with minimal issues...
Crimper
Punch Down
Side Cutters
Scissors
Stripper
Lan Tracer / Tester
what you should use:
https://www.amazon.com/Platinum-Tools-15015-Jacket-Stripper/dp/B000FI2RVC
what I actually use:
https://www.amazon.com/Classic-Full-Size-Lighter-Maxi/dp/B0086630A2/ref=mp_s_a_1_8?keywords=bic+lighter&amp;qid=1571335177&amp;sr=8-8
just put your man hands on, heat the wire where you need to strip it, twist and pull the end off. not the cleanest cut, but it works. tired of those spinner style cutters nicking the inner wires.
Sub - BIC F12 or save some money and go with this Dayton sub 1200
Amp- If you want a mini amp go with this SMSL SA50 or get a stereo reciever like this Sony STRDH130. I like the receiver because of the integrated tuner, remote and tone controls. If you have room for it it's the way to go.
Wire- You'll need some speaker wire and a stripping tool. Either get some electrical pliers or an automatic stripper. I would go with the pliers as you can strip but also crimp on connectors ect. However, if you're not going to do more electrical work just go for the auto strippers.
Without pricing the entire thing out I can make some observations:
Is the heavier gauge cable broken, split, or frayed anywhere along its length? Or just the ends? If it's just the ends, just clip the ends off and strip a fresh 1/2 inch.
You might be able to do this successfully with some good scissors, but a wire stripper would be much easier.
If you don't want to keep the other wire, 16 gauge is plenty thick for most situations, especially the short runs as pictured.
NO. See the crimp section on these below the pivot point? Marked with blue yellow and red?
https://www.amazon.com/VISE-GRIP-Multi-Tool-Stripper-Crimper-2078309/dp/B000JNNWQ2/ref=sr_1_7?ie=UTF8&amp;qid=1509811354&amp;sr=8-7&amp;keywords=crimp+tool&amp;dpID=31uY1TVTmaL&amp;preST=_SY300_QL70_&amp;dpSrc=srch
Everything will need to be grounded or it will not operate. The easiest way to do this is to use a fusebox as you mentioned. The number of items you'll want to power should determine the number of terminals you'll need. Connect your Anderson Powerpole terminals to their corresponding spots on the Blue Sea Systems fuse box (12 terminals with negative because you can always not use some, but you can't add any on the 6 terminal model).
https://www.amazon.com/Goal-Zero-Terminal-Connector-Cable/dp/B00URTHQTC/ref=sr_1_1?s=lawn-garden&amp;ie=UTF8&amp;qid=1496442293&amp;sr=1-1&amp;keywords=yeti+1250+terminal+ring
https://www.amazon.com/Blue-Sea-Systems-Blade-Block/dp/B001P6FTHC/ref=sr_1_1?ie=UTF8&amp;qid=1496442487&amp;sr=8-1&amp;keywords=blue+sea+fuse+box+12
Use a disconnect switch below and a ring connector cable to make sure you don't draw any power when not intended. It will go between your positive leads.
https://www.amazon.com/gp/product/B011EYWMDS/ref=oh_aui_detailpage_o02_s00?ie=UTF8&amp;psc=1
https://www.amazon.com/Camco-47453-4-Gauge-Battery-Assembly/dp/B00JGJGCV2/ref=sr_1_9?ie=UTF8&amp;qid=1496442659&amp;sr=8-9&amp;keywords=4+awg+cable
For the wiring to indidual 12v sources I use copper-clad aluminum because I'm cheap and use 12 gauge (non-awg because it's cheaper and only slightly smaller in gauge diameter) and it hasn't given me any problems because for the price I go a bit bigger than I might need.
https://www.amazon.com/PRIMARY-POWER-GROUND-100FT-ROLLS/dp/B00OU0IIFU/ref=sr_1_6?s=automotive&amp;ie=UTF8&amp;qid=1496442827&amp;sr=1-6&amp;keywords=12+gauge+wire
For the fridge though you may want to go to 10 gauge.
https://www.amazon.com/GAUGE-GROUND-PRIMARY-STRANDED-COPPER/dp/B01C7O8166/ref=sr_1_6?s=automotive&amp;ie=UTF8&amp;qid=1496442902&amp;sr=1-6&amp;keywords=10+gauge+wire.
Look at the 12v chart below and make sure you're within the range for the length of wire you want to run which I can't imagine you wont be since everything you're describing is super low amp.
https://s-media-cache-ak0.pinimg.com/originals/57/22/80/57228076ef240ed796b328a7d6387eac.jpg
Then to connect the equipment to power you can either solder the wires together or use these below to crimp them (crimping video below that). You're wire stripping pliers should have a crimping portion on them already. if not buy the ones in the 4th link.
https://www.amazon.com/Hilitchi-Insulated-Terminals-Electrical-Connectors/dp/B01D8HIQ2K/ref=sr_1_4?s=automotive&amp;ie=UTF8&amp;qid=1496443951&amp;sr=1-4&amp;keywords=12-10+gauge+wire+connectors
https://www.amazon.com/Glarks-Electrical-Insulated-Terminals-Connectors/dp/B01E7SY49I/ref=sr_1_11?s=automotive&amp;ie=UTF8&amp;qid=1496444024&amp;sr=1-11&amp;keywords=12-10+gauge+wire+connectors
https://www.youtube.com/watch?v=Svja8zEcKNQ&amp;t=9s
https://www.amazon.com/VISE-GRIP-Multi-Tool-Stripper-Crimper-2078309/dp/B000JNNWQ2/ref=sr_1_cc_2?s=aps&amp;ie=UTF8&amp;qid=1496443370&amp;sr=1-2-catcorr&amp;keywords=wire+stripping+pliers+irwin
You'll then use the terminal rings from the link above (pretty sure that's the correct size ring) to connect the end of those wires to the fuse box on the negative and positive sides. Fuse based on the amps you'll be drawing. Since I think someone somewhere will complain that this is expensive and there are cheaper ways to do it, I set you up on the "new everything" route since I don't think you'll have any of these things and if you're getting a goal zero I don't think price is a limiting factor. Unless you already have a lot of experience with wiring this is the basic version with everything you'll need pre-made as much as possible.
Wire strippers
Cheap multimeter
Outlet tester w/GFCI
Heat shrink tubing
Cheap work light
A massive supply of various writing tools -- sharpies, grease pencils, carpenter's pencils.
Should be able to pick all that up for <$100 and it'll make your life easier.
What about this for a more affordae option. IRWIN Tools VISE-GRIP Multi Tool Stripper, Cutter and Crimper, 8-inch (2078309) https://www.amazon.com/dp/B000JNNWQ2/ref=cm_sw_r_awd_P15Mub1CA7W5K
Some wire strippers also have a hole to cut screws, I bet you have one somewhere.
Something like this.
https://www.amazon.com/gp/product/B000JNNWQ2/ref=zg_bs_553392_1?ie=UTF8&amp;psc=1&amp;refRID=X2QBJMEQ2JM1NKK3KSSX
Sorry for the late response hah.
It looks like you'll need an amplifier, just run left and right speaker outputs on your amplifier into the left and right inputs in the sub, then hook the smaller speakers to the speaker outputs on the sub. [Here's a video on that:] (https://www.youtube.com/watch?v=3zFs8uSZsCc)
Your amplifier (or receiver as they're many times called.) won't be as crazy as the back of that guy's, but the speaker hookups will probably somewhat be the same. Unless you get one that has RCA style speaker connections. Those are found a lot in older receivers though. Everything is color coded.
As for wire that's not to difficult at all. [Here's what you're looking for] (http://www.amazon.com/Mediabridge-14AWG-Speaker-Wire-Feet/dp/B00I8V8YE2/ref=sr_1_14?ie=UTF8&amp;qid=1452545344&amp;sr=8-14&amp;keywords=speaker+wire)
Any thing labeled speaker wire will probably do. Higher quality stuff is thicker, meaning more copper wire inside, and has better rubber insulation on it. Wire thickness is measured in "Gage" The lower the gage number the thicker the wire. So 2 Gage wire is thicker than 14 gage wire. I know it seems backwards haha.
[Here's a video on how to strip speaker wire] (https://www.youtube.com/watch?v=ySfOKtW_Aig)
The spool of wire I linked is about 50 feet long. You may not need that much, or maybe you'll need more. You'll want to plan where you'll put your speakers before you buy the wire to make sure that it's enough. You'll be surprised at how fast you go through it!
With that large spool you'll make multiple speaker wires at whatever length you need. A pair of wire clippers cuts through them pretty easy. You'll also want a pair of wire strippers to cut the insulation off of the end, but not the copper wires inside. Need wire strippers? How about a clipper for when you need to cut through the whole wire? [Here's a cheap pair that combines both.] (http://www.amazon.com/TEKTON-3775-Electricians-Combination-Tool/dp/B000NPUK2A/ref=sr_1_9?s=power-hand-tools&amp;ie=UTF8&amp;qid=1452546538&amp;sr=1-9&amp;keywords=wire+strippers)
You can probably fine speaker wire and strippers somewhere locally too if you don't want to wait for shipping. Hopefully those links will let you know what you need.
Those wire strippers I linked have holes in the middle with numbers next to them. If you buy 16 gauge wire, place the wire in the hole labeled 16AWG, if you buy 12 gage wire place it in the hole labeled 12 AWG clamp down, and pull. It'll strip the wire nice n clean. I used to use scissors before I had one. Strippers make things so much easier though. It's really hard to carve off the insulation with a pair of ruddy scissors.
It's a lot to figure out at first, but it'll be worth it! Having this knowledge is a good thing for the future too. Installation companies charge a lot where I live.
I just use a pair of these.Not the best but they do the job.
like this?
https://smile.amazon.com/dp/B000OQ21CA/?coliid=I3SZYGQY60UGV8&amp;colid=2SRZ1IXGMHXZB&amp;psc=1&amp;ref_=lv_ov_lig_dp_it
does it push the wire off the end? so like i could just keep making the stripped areas and then itll all just be cut off on the end?
Also if you are doing alot of electrical work.
These are very useful tools.
IRWIN VISE-GRIP 2078300 Self-Adjusting Wire Stripper, 8" https://www.amazon.com/dp/B000OQ21CA/ref=cm_sw_r_cp_apa_i_Kj0rDbPFT84GB
2-in-1 Interchangeable Rapi-Driv Screwdriver Klein Tools 67100 https://www.amazon.com/dp/B003FC75YE/ref=cm_sw_r_cp_apa_i_Ak0rDbVZ5C5BV
Also buy a small roll of romex. To use in pigtails and jumpers.
I just got the Irwin wire strippers that I've heard good reviews on. Only ~$20 and man they're awesome.
For (bigger) diagonal cutters/pliers, I think the most BIFL are NWS with their "Titan finish". Knipex is a fairly close second, but I like the finish on NWS better. Both can handle hard and medium hard wire (including nails and screws) without a problem, unlike most Klein, Snap-On, etc. The biggest issue is finding NWS in the US. The NWS Fantastico Plus are the best diagonal cutters I've ever laid my hands on.
For precision cutters/pliers, Xuron. They're semi-flush (Xuron call them flush, but I'd still call them semi-flush) micro sheer cutters are great but thankfully don't seem to nick up easily like (Xcelite, Snap-On, etc.) flush cutters do. I like the ones with that are ESD safe, with extra long handles, and the lead retainer best if you're going to be populating a lot of circuit boards. Otherwise, their cheaper models are just as nice.
Wiha precision screwdrivers. I've given this set as a gift before. Wera for the bigger stuff if you need it. Wiha or Wera bits (only larger sizes, I've never found precision bits I've particularly liked).
Klein to fill in gaps.
Bondhus hex keys.
Find a nice used Fluke multimeter on eBay. 89IV go for under $200 and have pretty much identical features to the 189 (believe the 189 mostly just has a bigger inductance/capacitance range). Most universities will have someone tasked with calibration/maintaining the measurement equipment. Make friends and he'll probably calibrate it for you/teach you how/just let you jump in and try. Mine was falling out of the box after UPS drop kicked it to my door, but the calibration was still super boring as nothing needed adjustment.
Hakko or Weller soldering station. Easy to find tips, especially for Weller. WESD51 dropped to $99 on Amazon a couple times in the last year, great time to scoop one up for little more than the analog version. The Stahl Tools one Amazon sells is also good for dirt cheap, but not really BIFL; good luck on finding tips. Metcal is too rich for my blood, but if you ever happen across one that is cheap.
Kester "44" solder, accept no substitute. 63/37 or 60/40, but since the spool will last you half a lifetime, I'd probably go with the 63/37.
I have a love/hate relationship with wire strippers. Something like this usually gets the job done, but sometimes you'll get wire with a strange jacket size and they'll fail. For the automatic kind, this style works ok (especially if you adjust it to what you're stripping), but I usually like this style better; again, as long as the jacket isn't too small and you wire is in the right range. Sadly, I probably most often grab for cheapies like this. The adjustment screw is great if you have to do a lot of a certain size, but I tend to free hand them. It takes quite a bit of practice, but once you get the hang of it, it's the fastest. Thermal wire strippers are just too pricey for the home user, especially if you want to do PVC, teflon, etc. jacketed wire.
I also have a love/hate relationship with crimpers. I have some crimpers I got for Anderson Powerpole connectors from West Mountain Radio (largely because I couldn't believe how cheap they are-- connector-specific crimpers are usually many times the price they charge) and they were great for the Powerpoles. I even bought some of the other die sets, but I've been less happy with those. I often end up using a similar pair to these or the die on a pair of Klein lineman's pliers for the larger crimps.
If you don't want to wait, and have some network cable lying around, you can just use the wires inside the network cable. The wires are just the right gauge, and they're color coded, so they are perfect for handwiring keyboards.
Here's what mine looks like done using network cable: https://imgur.com/a/P0W7sIP (I have later moved the pro micros and organized the wires to the pro micros a bit better). I removed the insulation using a self-adjusting wire stripper.
Note that the two bottom images (1, 2) on the page you linked to show a row-driven wiring diagram, while the rest of the images use column-driven wiring. So make sure to only follow one set of images.
Thank you! To be honest, power cables are extremely easy to work with. Just need a decent pair of wire strippers.
That said, all thanks on the PSU sleeving goes to /u/pslate from [pslatecustoms](https://www.pslatecustoms.com/
).
Absolutely. I'd recommend the following if you are going to be sleeving existing PSU cables:
Tool | Price | Description
:--------|:--------:|--------:
MFC Molex Extractor | $10.99 | This is the most important tool you'll need, don't cheap out here. This one from MainFrame Customs is the best I've used
Side Cutters | $5 | You'll want these to cut the sleeving. It works way better than scissors
Now those are the basic tools, if that's all you want to get away with then be very careful and take your time while extracting the pins. Otherwise you'll want the following to re-crimp the broken pins.
Tool | Price | Description
:--------|:--------:|--------:
Crimping Tool | $23 | Great quality crimping tool, works for all PC pin types (atx goes in the larger slot :) )
Stripper | $41 | Great stripper, makes it very easy to get consistent strips, ideal for crimping, however you could use regular stippers
ATX female pins | $0.30 for 5 | Replacement pins
If you end up needing to get these tools, one benefit is you can cut your cables to the lengths you need which will make it very clean for cable management. Lastly, if you are going to use paracord and are not re-crimping the pins, I would recommend this Paracord threader. It'll keep the pins from tearing the paracord and make sleeving a lot easier. If you are going with PET Teleios Sleeve, you wont need it, as PET expands enough to make it easy to sleeve over the connector.
wires
Stripper
I got these off Amazon for practically Aliexpress prices. They work fine.
Other useful things:
Great job. I'd recommend upgrading to automatic wire strippers. They'll change your life.
Knipex for Lineman's pliers: (with or without crimper). Their grip and cutting edge are significantly better than any other brand I've tried.
Wera for screwdrivers: I recommend the XXL 3 set. For sale here.
I still like Klein for strippers. I use the Kurve everyday and the Katapult for wire with thick insulation like PV wire.
Fluke for your meter. Most people recommend the T5 for basic stuff, but the 323 has a proper clamp and removable leads for the same price.
Knipex Cobras for your channel lock style pliers. These are absurdly good and have saved my ass a couple times.
I also recommend buying a Knipex Pliers Wrench. I own a 7-inch and a 10-inch pair and they're way better than a traditional adjustable wrench.
Stanley newest Leverlock tape measures are just as good as Milwaukee's tape and less bulky for half the price.
Milwaukee's Fastback series are the best utility knives by a pretty wide margin. I use the compact one, but that's a matter a preference.
Belden brand wire?
Are you using a stripper like THIS KIND from Klein Tools? It's better than other types of strippers, and I use one regularly on Teflon insulated wire (very glossy), which is worse to strip than regular vinyl wire.
Worth every penny IMO: https://www.amazon.com/gp/product/B00BC39YFQ/ref=oh_aui_search_detailpage?ie=UTF8&amp;psc=1
I've found a wire wrap tool to be ideal for straightening pins in the past. Between one of those, long nose pliers, and a thin, stiff card, I've had good success.
get a wire stripper for that sized wire then. This one will work.
I would recommend buying the Adafruit 200mAh battery, just to avoid Chinese knockoffs.
https://www.amazon.com/Battery-Packs-Lithium-3-7v-2000mAh/dp/B0137ITW46/ref=sr_1_1?ie=UTF8&amp;qid=1485110664&amp;sr=8-1&amp;keywords=2000mah+battery
There's a video you can Google pretty easily for replacing the battery. I'd recommend having a small screwdriver set and also angle cutters of some sort, something like https://www.amazon.com/Hakko-CHP-170-Stand-off-Construction-21-Degree/dp/B017ODDPNO/ref=sr_1_1?ie=UTF8&amp;qid=1485110742&amp;sr=8-1&amp;keywords=angle+cutter though it isn't really necessary, just makes it easier than using needle nose pliers and it is cleaner.
HEY THANKS! When I was new to the game I didn't know how to tell what props go on which motor, and when i threw them into my bag I wanted to be able to know what i'm pulling out. SO I wrote the motor numbers under the props (see this pic for motor numbers. I no longer do this, I started flying with some guys who showed me a "trick", if you will. With the kwad facing forward from you, putting on props the pitch will always face UP when parallel front and back... errr wow that's hard to explain in words. If you don't know what i'm talking about let me know I can post a pic, lol.
As far as what's in my "tool stand", lol. I have Hex Drivers, X-Acto knife, multibit screw driver, flashlight, sharpie, wire snips, and small pair of plyers. tagging /u/medium2slow.
Not sure if you already have these clippers yet but I find them pretty convenient when trimming leads.
With decks like that I generally like to use the positive that's furthest away from the negative per coil, I find it easier to keep the coil centered and accessible for trimming. Usually I'd make my adjustments after everything is trimmed.
I'm not telling you to buy anything different but a velocity style deck is really easy to build on for someone new and keep things as even as possible.
No problem; also a pair of tweezers (ones that don't cut and have blunt ends) helps with applying stickers.
These are the side cutters I bought if you're buying from Amazon
HOLY SHIT!!!! TRIM YOUR ZIP-TIES!!!
https://www.amazon.com/Hakko-CHP-170-Stand-off-Construction-21-Degree/dp/B017ODDPNO/
EDIT: I have to agree with everyone else. Whoever made the splice tray did a great job, they just need to "finish" it.
I just watched this youtube [video] (https://youtu.be/Ck9dfeoKwhs?t=1097) and it doesn't look all that complicated since there is no need to do it perfectly, you can just cut them on the go using something like this also you gonna need a rubber mallet and double check you order the molding with the proper width.
Hm, I suspect you might have damaged one of the pads by using those cutters (if you did use them). Something like https://www.amazon.com/dp/B017ODDPNO would be much better.
Great job finding the broken link though!
I've been using a small Hakko wire cutter. If you gently cut into the plastic housing it breaks apart and the metal pins just fall right out.
Checklist:
Coupon code for Lightning Vapes: ohmsweetohm (17% off)
http://www.lightningvapes.com/collections/kanthal/products/kanthal-a1-resistance-wire?variant=993078056
http://www.lightningvapes.com/products/ceramic-heat-resistant-tweezers-pointed-tip?variant=740212113
http://sweet-vapes.com/coil-master-v3.html
http://www.amazon.com/Koh-Gen-Do-Organic-Cotton/dp/B00NU3H3KE/ref=sr_1_2?ie=UTF8&amp;qid=1453852567&amp;sr=8-2&amp;keywords=koh+gen+do
http://www.amazon.com/Hakko-CHP-170-Stand-off-Construction-21-Degree/dp/B017ODDPNO/ref=sr_1_1?ie=UTF8&amp;qid=1453852717&amp;sr=8-1&amp;keywords=flush+cutters
http://www.amazon.com/Fiskars-Inch-Micro-Tip-Scissors-94817897J/dp/B00006IFNA/ref=sr_1_6?ie=UTF8&amp;qid=1453852757&amp;sr=8-6&amp;keywords=fiskar+scissors
You should buy an ohm meter if you have a regulated mod. Also, you can use the steam-engine website to calculate your ohms and your mod will be able to read it out for you. But an ohm meter is just for safety precautions.
Personally, I like storing all my gear in a bin so I bought this
http://www.amazon.com/Stanley-STST14027-SortMaster-Tool-Organizer/dp/B00O7R6RS6/ref=sr_1_2?ie=UTF8&amp;qid=1453852881&amp;sr=8-2&amp;keywords=stanley+storage+boxes
You could also use needle nose pliers to help you with your leads when trying to get them in your post holes.
PSA: Buy the protective tube with your ceramic tweezers. It will shatter your heart to see the tips break if the tweezers are dropped.
You could just buy the coil master kit but I'm not a very big fan of it because you can only store what comes with the kit (no room to expand your tool selection)
With SS316 wire, you can run it in power (wattage) or TC mode, whichever you prefer. With Kathal wire, only power mode. I mostly stick with power mode. TC mode is fiddly, even with a DNA mod, especially with clapton coils.
The 50mm x 60mm organic Japanese cotton pads are very popular among builders. "Puff" is one of those brands you can get on Amazon.
An RDTA is essentially an RDA sitting over a tank. Since neither has a chimney, you can get great flavor from each, depending on the particular unit.
Dual coils will produce a more intensive vape but can also be twice the work, use twice the cotton, twice the wire, twice the juice, and make your RDA twice as hot. That last one is real important to me. I only use one fused clapton in my Goon to keep it from getting too hot. Not all RDAs support single coil mode, however. You typically want to shut off the airflow on the empty side so as not to dilute the flavor.
Coils are ambidextrous, they don't care which end is negative or positive.
You'll save a lot of money buying spools of wire. A good flush cut wire cutter is essential.
Paracord-
This is what I used: https://www.amazon.com/gp/product/B072JPJDBK/ref=ppx_yo_dt_b_asin_title_o04_s01?ie=UTF8&psc=1
You really have endless options, this store on amazon has almost 600 different paracord:
https://www.amazon.com/gp/product/B007Z1QOTS/ref=ppx_yo_dt_b_asin_title_o01_s00?ie=UTF8&th=1&psc=1
&#x200B;
The Wire-
https://www.amazon.com/gp/product/B07G2SWB19/ref=ppx_yo_dt_b_asin_title_o04_s00?ie=UTF8&psc=1
or (These are just the 2 I bought, I am sure there are others out there)
https://www.amazon.com/gp/product/B01KQ2JNLI/ref=ppx_yo_dt_b_asin_title_o08_s01?ie=UTF8&psc=1
&#x200B;
Bodkin-
https://www.amazon.com/gp/product/B003WMFVRA/ref=ppx_yo_dt_b_asin_title_o04_s00?ie=UTF8&psc=1 (To Thread the Paracord through. I stripped the ends of the 4 wire, twisted 2 and 2 together, threaded through the back hole, twisted those combined wires together, and then heat shrinked the over it with the small clear one in the box (link shown later))
&#x200B;
Heat Shrink-
https://www.amazon.com/gp/product/B07KT25J42/ref=ppx_yo_dt_b_asin_title_o08_s01?ie=UTF8&psc=1
&#x200B;
USB Type A-
https://www.amazon.com/gp/product/B07G9FLG28/ref=ppx_yo_dt_b_asin_title_o08_s01?ie=UTF8&psc=1
&#x200B;
JST 2.0 ph 5 pin connector (There is way more here than you will need as it comes with 5/6/7 pin connectors. Most mice use the 5 pin)-
https://www.amazon.com/gp/product/B077LYP4T9/ref=ppx_yo_dt_b_asin_title_o08_s00?ie=UTF8&psc=1
&#x200B;
Wire Strippers- As Long as they go to 30AWG, you should be good. This is just a cheap option
https://www.amazon.com/gp/product/B07D25N45F/ref=ppx_yo_dt_b_asin_title_o00_s00?ie=UTF8&psc=1
&#x200B;
Precision Screw Drivers-
https://www.amazon.com/gp/product/B0747DYJJR/ref=ppx_yo_dt_b_asin_title_o09_s00?ie=UTF8&psc=1
&#x200B;
A Third Hand (Not needed but will probably make your life easier)-
https://www.amazon.com/dp/B076WSZLDL/ref=sspa_dk_detail_1?psc=1&pd_rd_i=B076WSZLDL&pd_rd_w=IeORA&pf_rd_p=8a8f3917-7900-4ce8-ad90-adf0d53c0985&pd_rd_wg=SCnJH&pf_rd_r=AKZJGB4959GQT25YX2ZJ&pd_rd_r=cf871c96-9c47-11e9-99da-dd5cbc43a5ca
&#x200B;
You will also need a soldering iron, and thin solder, the points to solder are small. https://www.amazon.com/Welding-Diameter-Storage-Electrical-Electronics/dp/B01N0VNNKO/ref=sr_1_5?keywords=solder&qid=1562018188&s=gateway&sr=8-5&th=1
&#x200B;
Other references I used:
https://www.overclock.net/forum/375-mice/1588984-mice-cable-pin-arrangement-internal-connector-size-database.html#/topics/1588984
&#x200B;
https://www.reddit.com/r/MouseReview/comments/7xtnyi/diy_how_to_make_your_own_paracord_cable_for_any/?utm_medium=android_app&utm_source=share
&#x200B;
*Unless you have replacement mouse feet, be careful removing your current set*
No worries, you've got a good mindset to learn and no time like the present.
I'll add that most swear by solder and heatshrink + electrical tape. This is nice once you're really acclimated but you'll likely end up reconnecting things several times as you tinker and expand. I'll list below my couple of absolute favorite things I've picked up over the years and why I bought it:
Ratcheting Wire Crimper-- Can't tell you how many crimps have failed just because I didn't apply enough force. The ratchet ensures you get that final click down.
And a pricier ratchet I invested in over time-- Nice because it's more modular but not needed.
Posi Twists and also Posi Taps-- These make for quick connections + testing. Various sizes available but I tend to get some that cover 14+, and another set for smaller gauges ~22+
Solder Seal Wire Connectors-- I started buying these in bulk recently because they're just stupidly easy to use and make a rather quick and solid connection. Soldering is another experience onto itself if you've never done it before. While I tend to do more circuit-board soldering than wire to wire, it's all relatively similar and you'll find certain products that you fancy more over time. The biggest thing I'd say here is to buy solder WITH lead. Can't tell you how much frustration I've had over shit solder, haha.
My most recent wire stripper-- I chose because it has the largest range of gauges and there's no internal spring that forces the stripper open. Having one tool to do 10awg all the way to 26 is pretty sweet.
That kit looks pretty good, though I haven't used it. From my own experience, I would recommend a couple of optional upgrades to be thrown in. First, a brass wire type soldering iron cleaner. The sponge on stations like these is fine, but it's much easier to clean with the brass type mid-project. There are cheaper versions available, but my experience is all with the Hakko. Second, I've never had luck with those wire cutters. I've had much more luck with strippers that give separate holes for each gauge. Here's a cheap one and here's the Hakko pair I have.
Like I said, these are optional as the kit comes with basic solutions for both of these tools, but maybe something to think about for the future.
No, the stripper part would not work as a wire measuring tool. The holes are sized just big enough to cut through the insulation of the wire and not damage the conductors inside. They are not sized to fit around the outside of the insulation or measure it, so if you bit down on the wire to measure it, it might damage the insulation. (Unless you're talking about measuring the already stripped conductor part, then I guess it would work).
The tool that you have is not great, but it probably will get the job done if that's all you have.
These are my personal favorite wire strippers. Although, not the best crimping tool on the market, they also have crimpers built in for 4 differnt types of crimps. (insulated, non-insulated, IDC, and Type B) and they do a totally acceptable job crimping.
Amazon - https://www.amazon.com/Neepanda-Connector-Accessories-Simultaneously-Stripping/dp/B07GVNPDZM?th=1
Thanks for the advice! Do keystones need to be rated exactly for Cat6a, or are they interchangable? I saw this 25-pack on Amazon for 29USD but they say they're for Cat6.
This is the punchdown tool I've got so I think I'm set there. I have ordinary wire strippers (very similar to these), would those work or would I have to buy something like this instead?
You're welcome. Paladin (and their cheaper entry-level Datashark brand) also has some decent offerings if you want something more "name brand" but still inexpensive.
Paladin:
Crimpers
Stripper
Tester
The Paladin stripper works really well; I think I prefer that one to the cheap Monoprice one I purchased (though it gets the job done). Both are adjustable for different thickness wire / sheathing.
Datashark:
Crimpers
Striper
Tester
The Datashark crimpers lack a ratcheting mechanism, so I'm not a huge fan of them, but a coworker owns a pair and they work fine. The testers from both are nearly identical, and don't really offer any more functions than the cheap no-name import ones do (except perhaps a better warranty).
I bought EZ-RJ45 HD and it was a little more expensive! I can't compare it to the non ratcheting version, but feel it was worth every penny.
Also platinum tools makes this jacket stripper that is wicked fast.
Every time I tried one of these on cat wire the blade cut into the inner wire insulation. You're better off either using the blades built into the handle of most cat crimpers or getting a jacket cutter.
I have this one
works awesome
I would recommend Platinum tools for all networking gear. They really think this stuff through. The only other company that spends as much engineering hours re-inventing existing products to make the installers job easier is Siemon, but they charge you a lot for it.
These connectors + Strain Reliefs
With this crimper
With this separate stripper
That set will put your RJ-45 termination time to under 2 minutes with just a bit of practice, and under 1 minute after some experience. Even pros that have decades of experience wont be able to touch you with standard connectors.
Why separate stripper? If you terminate a lot, try the thing. All-in-one tools are garbage, you can't make 5 completely different tools work well in one tool, you have to sacrifice. When the separate tools cost a couple bucks, why make any sacrifices? I wish they made one of these for Cat6a, as I have yet to find a decent stripper for it.
Driver set
I would recommend this set, but maybe get it for yourself later as a gift. These cover the most used drivers, and they will outlast you. Stick to cheapos for rare ones unless you want to treat yourself. Wiha is the snap-on of electronics screwdrivers. Except without the payment plan.
Get yourself a cheapo kit for testing cable. All the cheap ones work just fine, as long as it tests the pairs you're generally set. You can even get one to test multiple runs at the same time, just takes a few short patch cables and oddly wired keystones, you can make those from spare parts. If you want something more substantial without spending money, get yourself a pockethernet.
I would stay away from Klein, they just invest quality of materials into age old designs. Yeah they'll last, but they really didn't think about it.
This one is from Amazon.ca
Here's one from Amazon.com for cheaper.
This is a wonderful project, mainly because you've done every step that I've been planning and I'm deeply gratified that it appears I can make it work.
Can you provide details about your wire cutter? Make? Model? I'll track one down on Amazon. Maybe this one: Neiko 01924A Wire and Cable Stripper with Self-Adjusting Jaws 10-26AWG
I've seen these. They seem counterintuitive to me.
Most of my wiring is done in tiny shitty spaces retrofitting and replacing wires. One of our mechanics has these
Neiko 01924A Wire and Cable Stripper with Self-Adjusting Jaws 10-26AWG https://www.amazon.ca/dp/B000IYTCG6/ref=cm_sw_r_cp_api_dPzZzbMJ3FCZ2
But just another brand, and they work awesome.
Not that expensive either.
Neiko 01924A Ultimate Self-Adjusting Wire and Cable Stripper https://www.amazon.com/dp/B000IYTCG6/ref=cm_sw_r_cp_api_i_3zWaBbEC6DNE6
Next time, order some butt connectors and a stripper/crimper. You need these tools anyway.
I need to buy a extension cable for my antenna for it to reach and I will take pictures when I install it. It was way simpler than I thought it would be to install. This is the first mod I have really ever done to my car.
My parts list so far is:
Tools:
I am going to wait until Google I/O and see what the next gen Nexus will look like before I purchase the tablet.
If you don't have the the proper tools, installing this can be a pain, you need screwdrivers, a metric socket set if you have a modern vehicle, wire stripper and crimper something like this:
https://smile.amazon.com/VISE-GRIP-Multi-Tool-Stripper-Crimper-2078309/dp/B000JNNWQ2
you should have a multimeter but a simple circuit tester would also work for this, BTW I was sent a free circuit tester with my Android mirror that looks something like this:
https://smile.amazon.com/ATD-5513-Heavy-Duty-Circuit-Tester/dp/B000M5ZWBA
if you don't know how to use the multimeter or circuit tester have a look on Youtube for instructional videos, you also need some sort of automotive trim
clip removal kit, like this:
https://smile.amazon.com/gp/product/B009QLBDSW
I was using my hands to remove most of the plastic trim but I kept breaking the plastic clips, what I do now is firmly but gently pry the plastic trim away with my hands and when I feel more or stronger resistance I stop, then use the clip removal kit to pry that tough clip lose, the clip removal kit also helps when running wires under the plastic trim without removing the plastic trim, and when working around the edge of the headliner, BTW if you break some trim clips most of them can be found on Amazon or eBay.
Some vehicles also need a Torx screwdriver/bit/socket set, mine did, I needed a Torx screwdriver set and a Torx socket set, you may not need them for other vehicles but GM/Chevy seems to use them a lot.
When I installed the wires for the Android mirror, I started at the fuse box thats in the dash, and worked up to the Android mirror, on my Chevy I ran the GPS,main wire, backup camera wire, up the passenger side door frame trim, and ran the backup camera wire along the headliner trim to the back, but I think on most cars the backup camera wire should go along the floor under the carpet trim.
You need to have to two power wires connected, (Battery +) that always has power, and (Ignition) that only has power when your key is in ACC or when the motor is running, thats were the multimeter and circuit tester come in handy, the multimeter is also helpful in finding a good ground for the ground wire that needs to be connected.
I had to be careful working around the door trim area because of the Airbags, you might want to disconnect your battery and let it set for few minutes before working around any Airbag stuff, the service manual for my Chevy says with the ignition off, disconnect the negative battery cable and wait 1 minute.
The Chinese voice can be disabled or changed when you have root, but sadly even when you change the voice it still talks in a broken English.
I installed this in my 01 Corolla a couple weeks ago. It fits in the stock mounting bracket and has AUX, BT and USB. All you will need to install it is this wiring harness, a set of crimp caps and a wire stripper/crimp tool.
The hardest part is wiring the new head unit to the wiring harness. The actual installation should take 10 minutes.
Yup, you need a receiver.
Oddly enough, those are the plates for a 7.1 system... so "four" connectors probably aren't connected to anything.
If you look, each Red/Black pair should go to a speaker. Figuring out which speaker is which will be fun!
So, a shopping list just to get you started.
All in, you're looking about $200, but keep in mind this is working on the assumption that the house has a subwoofer built-in somewhere... if it doesn't you'll be sorely lacking in bass, and that'll add another $100 or so.
What you would do is take the speaker wire, cut it into 10 roughly equal lengths (two wires per speaker, five speakers), put the banana plugs on (not "required", but they do make life simpler), and use the receiver to identify which plug goes to which speaker. The faceplate you (presumably) took off SHOULD have them labeled.
Once you have them identified, plug the wires into the back of the receiver, matching up the spots. Plug your PS4 into the Receiver, the Receiver into the Television, and go to town.
Slightly more involved, but that should at least get you making noise. ;)
You need a wire stripper. Its pretty easy. First you cut to desired length then you strip about an inch off the ends revealing the copper inside.
IRWIN VISE-GRIP Wire Stripping Tool / Wire Cutter, 8-Inch (2078309) https://www.amazon.com/dp/B000JNNWQ2/ref=cm_sw_r_cp_apa_i_PoP1DbR8G6GVX
Alright, you and /u/PioneerStandard have convinced me.
Would you mind helping me figure out which would work best?
Would a ratcheting one like this be best despite the cost? https://www.amazon.ca/Titan-11477-Ratcheting-Terminal-Crimper/dp/B0069TRKJ0
Or would a nice/decent wire stripper/cutter/crimper like this work alright? https://www.amazon.ca/Gardner-Bender-GS-366-Multi-Purpose-Crimp/dp/B00164C0KW
Also, would a more "plier-type" tool work as well? https://www.amazon.ca/Irwin-Industrial-2078309-Stripper-ProTouch/dp/B000JNNWQ2
Thanks by the way.
Some basic things to get:
>Wire crimper/stripper
>Fish tape
>Drywall or keyhole saw
Amazon has good prices on tools, boxes, and connection panels.
Agreed ... but I use large wire, just because I tend to break a few strands when stripping ... but my 12 gauge short runs are overkill.
I highly recommend staying away from cheap wire-stripping tools. I got this wire stripping tool: http://amzn.com/B000JNNWQ2 and it worked much better than my cheaper one (virtually no broken strands, etc.)
Diy lm317 power supply. these things aren't the best but it is a linear supply and for hobbies you won't need anything more sophisticated. It's dirt cheap, and you get to practice soldering. Imo, buy 2 so you can supply the negative voltages for the common op amp.
Soldering station I have fondness for this station as it was the one we had to buy for our program at school. I like it a lot because the iron stand, heating element, sponge holder, and a solder wire spool are all connected so you just need to haul around 1 object. Don't need to go digging for your iron stand or setting your spool of solder somewhere and forget it. Works well enough for your use and I believe there are tips out there.
Breadboard and wires this is mandatory. If there's anything on my list you choose to buy, you must buy this first. Breadboards are essential. If you can buy two of these.
63/37 solder you don't work for a company that is rohs compliant, don't burden yourself with leadless solder. Look for a us shipping of that if you don't want to wait.
Wire snips if you own side cutters you probably won't need these.
Wire strippers again you might not need these if you are patient and strip them with cutters. Also the breadboards above come with pre cut
Helping hands I do SMD rework professionally and I don't use hands because I'm an idiot. Don't be an idiot and learn from the get go using these.
If you can find any of these for cheaper than I found, go for it. Should be around 70 bucks. Good puck!
This is one i usually use or similar but different brand: http://www.amazon.com/TEKTON-3775-Electricians-Combination-Tool/dp/B000NPUK2A/ref=lp_553398_1_6?s=power-hand-tools&amp;ie=UTF8&amp;qid=1418488304&amp;sr=1-6
If you want to go a little fancier :
http://www.amazon.com/Klein-11057-Tools-Kurve-Stripper-Cutter/dp/B000XEUPMQ/ref=lp_553398_1_8?s=power-hand-tools&amp;ie=UTF8&amp;qid=1418488304&amp;sr=1-8
the nice thing about the second one is it will be easier to work with for smaller wires. The first is more of a jack of all wire strippers.
US here. sorry i
f you cant get these in Denmark.
Sadly I don't know the type of connector this is, but would be interested to for other projects I have. I'm in need of some small in-line connectors like this.
[edit1] If I'm not mistaken though, it look like some kind of MOLEX brand connector.
[edit2] You could also just splice the wire and add an in-line extension with something like this. You can get them at any hardware store. These are the cripless kind and are a bit more expensive. The others you can get for a few $ if you've got a crimper.
Will they work? Absolutely! Are they the best? Depends on what your using them for.
I personally prefer a auto stripper and a dedicated crimper, it just works better for my needs.
These wire strippers. They are awesome.
First of all, amazing. Second of all, how are you not platinum?
And I have to agree with your general thoughts on soldering. When I ended up using every io on my teensy and I didn’t have a short or cross, I almost jumped for joy. I know I at least stood up, fists in the air. It was so ugly but damn if it didn’t work.
The trick, in the end, was flux and a heavier duty mask : ) it’s like congealed magic poison but in a good way!
And, ya know, I ended up using the too large straight tip I had on my last project as well. I had just figured I’d have to use this one for something so fine. Sounds like I might like and have as much luck with a finer straight tip. I was finding that it was hard to keep those fine tips clean though. Hoping the lower temps were part of that.
And I’m absolutely going to try the hot air station. Let’s face it. I’m going to pretty much try every one of your suggestions, from leaded solder to 28 gage wire. You seem like someone who is passionate about this stuff and knows what you’re taking about. That’s a winning combo in my book. I’ve just gotta get past my fear of melting lead close to my face.
One last question: have you found any solid core 28 gage wire that is worth a damn? The best I’ve found is this 30 gage wire . It’s okay but it came in such a rats nest.
Finally, I’m going to attempt to give back a little. You’re probably already aware of this device but it has been a godsend. Are you familiar with this Irwin Vice Grip Wire Stripper. I’d used similar devices before and found them to be more trouble than they are worth. These, though, are amazing. Truly. Barely ever have to adjust. They strip most small electronics wire (10-24) in one fluid motion with zero adjustment. Sometimes I have to tighten but it’s rare. Really one of my favorite tools of all time.
And, again, thank you for taking the time to give such helpful suggestions. I’ll be referring back to this often.
Self-adjusting wire strippers are amazing, but may be expensive for a single-use tool. Here is a cheaper version.
Buy a tool of the correct gauge or use a razor. You aren't going to be able to do a job without tools
I bought this thing.
Oboy, I'm probably the wrong person to ask. However, /u/BriThePiGuy recommends Joe Knows Electronics boxes, and /u/NeoMarxismIsEvil recommends the following:
> I would order some cheap assortment kits from people on aliexpress. These are the sort that come with like 10 of most common values of resistor, capacitor, etc.
> Other stuff:
> - WeMos d1 mini or mini pro
> - small i2c OLED displays
> - small LCD display
> - tacswitches (buttons)
> - SPDT switches
> - 74HC595 and 74HC165 shift registers
> - either bidirectional logic level shifter modules or mosfets and resistors needed to make them
> - 7 segment led displays (individual)
> - 8x8 led matrices
> - various environmental and physics sensors (often come as a kit of 20+ different modules)
> - extra breadboards
> - jumper wires
> - male and female header strips (for modules that lack pins)
> - cheap breadboard power supplies
> - voltage regulators (both LDO ICs and buck converter)
> - possibly some 4xAA or 4xAAA battery holders
> - trim pot assortment
> Those are just ideas. Some things like 7 seg led digits are pretty cheap and worth having a few of but not terribly important if you have a real display of some sort.
I personally like the assortment of bits I got in my Sparkfun Inventor's Kit, but found that I wanted more of the following:
Thanks!
I used a vise grip to strip the wiring. You can also just burn off the insulation with the soldering iron but that's more difficult and smells bad if your fume flume isn't perfect.
Yeah, save you the embarrassment of asking for vice grips and getting handed This
that should work. I honestly don't think mine is the best though, it feels a little shoddy but it got the job done.
https://www.amazon.ca/Capri-Tools-CP20012-Self-Adjusting-Stripper/dp/B01018CYV8/ref=sr_1_2?ie=UTF8&amp;qid=1491433643&amp;sr=8-2&amp;keywords=wire+stripper
and
https://www.amazon.ca/Irwin-Industrial-2078300-Self-Adjusting-Stripper/dp/B000OQ21CA/ref=sr_1_6?ie=UTF8&amp;qid=1491433643&amp;sr=8-6&amp;keywords=wire+stripper
should also work.
Magic if you're working on smaller cables
Without knowing what he's already got it's hard to say. He's probably already got all the basics. I'm just assuming he's already got boardsaws, tape measures, screwdriver sets, plier sets and so forth.
I'll list off a couple of things I would rather not live without:
[Irwin wire strippers] (http://www.amazon.com/Irwin-Industrial-Tools-2078300-Self-Adjusting/dp/B000OQ21CA) These are totally awesome.
[Non contact voltage detector] (http://www.amazon.com/Fluke-1AC-A1-II-VoltAlert-Non-Contact-Voltage/dp/B000EJ332O/ref=sr_1_3?s=hi&amp;ie=UTF8&amp;qid=1449993757&amp;sr=1-3&amp;keywords=Non+contact+voltage+detector)
Stubby ratchet screwdriver
Get this one, or a similar one. I bought one from MAC Tools when I was a tech, don't know what I paid, but I've never once regretted it.
IRWIN VISE-GRIP 2078300 Self-Adjusting Wire Stripper, 8" https://www.amazon.com/dp/B000OQ21CA/ref=cm_sw_r_cp_apa_FlWOAbA5745J2
Not really. I just use these and sometimes have to just hold the clamp tight with my fingers.
depending on what type of work you're doing, I prefer these:
http://www.amazon.com/Irwin-Industrial-2078300-Self-Adjusting-Stripper/dp/B000OQ21CA/ref=pd_cp_hi_3
but depending on whether or not you're doing work with aerospace stuff or REALLY tough insulation (fireproof etc) the pair I'm suggesting either won't be allowed or wont make clean strips.
better than these? https://www.amazon.com/IRWIN-VISE-GRIP-Self-Adjusting-Stripper-2078300/dp/B000OQ21CA/ref=lp_553398_1_2?s=power-hand-tools&amp;ie=UTF8&amp;qid=150169786
ive had no trouble with this style of stripper
Get this for a wire stipper, totally worth every penny. Especially if your going ot keep it around.
http://www.amazon.com/Irwin-Industrial-Tools-2078300-Self-Adjusting/dp/B000OQ21CA/ref=pd_bxgy_hi_img_y
As the stripping goes, I use one of those 'self-adjusting' strippers, and they have pretty much changed my life:
https://www.amazon.com/IRWIN-VISE-GRIP-2078300-Self-Adjusting-Stripper/dp/B000OQ21CA/
Video in action: https://youtu.be/o9EdPiEoXM0?t=50 He only shows large solid-core wires, but it's just as slick and easy for small stranded wire too.
Anyone have any experience with this Irwin crimper? im starting to get serious about doing more electronics projects and want something inexpensive and durable.
Ask the current owner if they will leave the TV mount for you, you can even offer to pay/buy them another one if they decline. With that already in place you could probably lift it yourself, if you get an LED LCD, or find someone to help lift it, no skills required.
Speakers are incredibly easy to hookup, you just cut wire to length, pull the two ends apart a bit, strip the ends, stick it in the holes, and tighten. A youtube video and a few practice strips will make it a breeze in no time even if you've never used tools. You'll need these wire cutters, and optionally these auto-strippers, and some wire.
As far as your setup goes you could get the following, or anything similar:
TV $785 - 50" Samsung LED
Receiver $310 - Denon AVR1913
Subwoofer $280 - Newegg has the Klipsch RW-12D for $280 until 5/22.
L/R speakers ~$300- Polk or Pioneer towers from Newegg
Center ~$150- A matching Polk or Pioneer center from Newegg
Surrounds - none yet; the wiring would require some drilling to conceal, if you have a crawl space going under the floor would probably be your best bet.
Adjust as needed to fit your budget or to get any features you want; pushing closer to $2000 and installing it yourself would be best.
EDIT: I forgot to add that tower speakers just stand on the floor, no mounting required. The center channel will just sit on the top shelf of whatever entertainment center you have under the TV, put it flush with the front edge of that. You will also need a single RCA cable to connect the subwoofer to the receiver, you may have one already, any RCA cable will work, or you can buy a 10ft+ one for ~$8.
I have this wire stripper that I used for speaker wires, is that the same thing as a crimper? Do I need something more precise for the tiny wires inside these cables? I remember adding RJ45 ends in school when I was a kid, I can probably relearn from YouTube.
EDIT: Got it, a crimper is something entirely different from a stripper.
https://www.amazon.com/gp/aw/d/B000OQ21CA/
26g is such a pita, I feel for you. I have used a lighter before. Its not the cleanest but its the easiest way with I have found to make sure I don't slice any of the strands.
Edit: woops. Let me explain. I use a lighter to heat up some metal like a needle or paper clip. Then take the hot metal and score around the wire then pull the sheathing off
I have had these for quite a while. Finishing up re-wiring about 80% of my Ericson 39-B. I'll never go back to the cheap crimpers and strippers...these take a lot of the menial frustration out of involved re-wiring projects.
Ratcheting Crimper
Self-adjusting wire stripper
I would also advise a set of knee pads!
I have these and LOVE them.
-Even metric sockets/wrenches from 8-14 mm
-#2 Phillips screwdriver
-flat blade screw driver
(All above are used for removal and disassembly of the battery)
-multi-meter (for testing battery voltage and checking to make sure you're not grabbing a hot lead) You can get one super cheap at Walmart. You don't need a $100 meter for most basic multi meter usage
https://www.amazon.com/gp/aw/d/B01ISAMUA6/ref=mp_s_a_1_3?ie=UTF8&amp;qid=1502035847&amp;sr=8-3&amp;pi=AC_SX236_SY340_QL65&amp;keywords=multimeter+digital&amp;dpPl=1&amp;dpID=51BVqQYiV1L&amp;ref=plSrch
-balance charger (for rebalancing the batteries)
https://www.amazon.com/gp/aw/d/B017Y2G4Y2/ref=mp_s_a_1_1?ie=UTF8&amp;qid=1502036066&amp;sr=8-1&amp;pi=AC_SX236_SY340_QL65&amp;keywords=imax+b6ac+v2&amp;dpPl=1&amp;dpID=51GvA3h-MNL&amp;ref=plSrch
-18 gauge wire (I made my own wire harnesses)
https://www.amazon.com/gp/aw/d/B01LZRV0HV/ref=mp_s_a_1_8?ie=UTF8&amp;qid=1502036364&amp;sr=8-8&amp;pi=AC_SX236_SY340_QL65&amp;keywords=18+gauge+wire&amp;dpPl=1&amp;dpID=51CpIxqIWbL&amp;ref=plSrch
-wire strippers
https://www.amazon.com/gp/aw/d/B000OQ21CA/ref=mp_s_a_1_2?ie=UTF8&amp;qid=1502036896&amp;sr=8-2&amp;pi=AC_SX236_SY340_QL65&amp;keywords=wire+strippers&amp;dpPl=1&amp;dpID=415oINm8uRL&amp;ref=plSrch
-spade connectors
https://www.amazon.com/gp/aw/d/B01B1753K2/ref=mp_s_a_1_5?ie=UTF8&amp;qid=1502036854&amp;sr=8-5&amp;pi=AC_SX236_SY340_QL65&amp;keywords=red+spade+connector&amp;dpPl=1&amp;dpID=31HVegxklVL&amp;ref=plSrch
-banana plugs
https://www.amazon.com/gp/aw/d/B00APVQZ8U/ref=mp_s_a_1_13?ie=UTF8&amp;qid=1502036751&amp;sr=8-13&amp;pi=AC_SX236_SY340_QL65&amp;keywords=banana+plugs
I just got these in the middle of a huge aftermarket upfit. So nice. They can be a little hit or mis on 18ga until you figure out the angle of the wire. Saved me a lot of muscle aches from stripping 800 connections.
http://www.amazon.com/Knipex-1262180-Adjusting-Insulation-Strippers/dp/B003B8WB5U
Here you go!
I bought this Knipex wire stripper.
It's a bit pricey but you can select your strip length, then put the wire in, pull the trigger and it strips it + pulls off the extra wire automatically. Being that I did every cable of the build it saved me a lot of time, and now it's a handy tool for the future.
Really you could use any wire stripper though, as long as it can strip the 16 or 18 AWG wire, whichever you would choose to use.
As for the crimper, something like this would work. Some people don't say to get the cheap ones, but I bought the one from lutro0 and just ended up having issues with it, meanwhile I know a few guys who had the cheap one and had no issues with it. Luck of the draw maybe, who knows.
https://www.amazon.com/Knipex-1262180-Adjusting-Insulation-Strippers/dp/B003B8WB5U/ref=sr_1_3?ie=UTF8&amp;qid=1522500255&amp;sr=8-3&amp;keywords=knipex+stripper&amp;dpID=41Zec6vGvSL&amp;preST=_SX300_QL70_&amp;dpSrc=srch
I use this stripping tool. It works great.
As far as the crimpers go I don't know. I bought the MDPC ones.
https://www.amazon.com/gp/product/B008L3QJAS/ref=as_li_tl?ie=UTF8&amp;tag=beneater-20&amp;camp=1789&amp;creative=9325&amp;linkCode=as2&amp;creativeASIN=B008L3QJAS&amp;linkId=0f1d8e8cf5aab5f782b917e7feff75a5
https://www.amazon.com/Eclipse-CP-301G-ProsKit-Precision-Stripper/dp/B005JVJDIA/ref=sr_1_4?s=hi&amp;ie=UTF8&amp;qid=1520325405&amp;sr=1-4&amp;keywords=wire+stripper
That's the kind of stuff you need :)
Archives for the links in comments:
----
I am Mnemosyne 2.1, THE KEKISTANI PEOPLE MUST BE FREE! ^^^^/r/botsrights ^^^^Contribute ^^^^message ^^^^me ^^^^suggestions ^^^^at ^^^^any ^^^^time ^^^^Opt ^^^^out ^^^^of ^^^^tracking ^^^^by ^^^^messaging ^^^^me ^^^^"Opt ^^^^Out" ^^^^at ^^^^any ^^^^time
I prefer self-adjusting strippers, but these are very nice too:
https://www.amazon.com/Stripper-Electrical-Klein-Tools-11063W/dp/B00BC39YFQ
This one eh?
https://www.amazon.com/Klein-Tools-11063W-Katapult-Stripper/dp/B00BC39YFQ
I've used it with Romex a bit and braided cable once. If you're going for Romex, the Irwin one (like the one in the video) should work fine. As they show in the video, you basically do it twice. First one for the outer sheath and then again for the individual wires. The nice thing about the one in the video is it's auto-sizing. Just put the wire in and go. The one made by Klein isn't auto-sizing, but it has blades with notches for different sizes. For cord, or thicker cable, I really like the one Klein makes.
Again, I'm not a professional electrician at all. Most of what I've done is using THHN. For that kind of thing, I absolutely love it. I don't know how people just use a knife. That seems slow, but I'm sure there's a technique to it.
The young guys love these catapults https://www.amazon.com/Stripper-Electrical-Klein-Tools-11063W/dp/B00BC39YFQ#immersive-view_1542070820113
I prefer the regular strippers myself however
What about these strippers? They cut the insulation almost right through. https://www.amazon.com/Klein-Tools-11063W-Katapult-Stripper/dp/B00BC39YFQ
Klein katapult wire strippers
https://www.amazon.com/Klein-Tools-11063W-Katapult-Stripper/dp/B00BC39YFQ
This is one of those specialty tools that was mentioned. I use mine whenever i have a lot of makeup to do, or when i am doing control work with a lot of wires to land. Most guys don't have a set and wouldn't buy themselves one, so a good option for a gift! Thats how i got mine.
Did you know Amazon will donate a portion of every purchase if you shop by going to smile.amazon.com instead? Over $50,000,000 has been raised for charity - all you need to do is change the URL!
Here are your smile-ified links:
https://smile.amazon.com/Klein-Tools-11063W-Katapult-Stripper/dp/B00BC39YFQ
---
^^i'm ^^a ^^friendly&nbsp;bot
This kind of wire stripper will make stripping them super easy, I've used it at least 200 times for speaker wiring. Don't bother with this kind, I've always found them super awkward to use.
Breadboards or perf boards?
Breadboards are usually for temporary/prototyping, with push in wires. Not very durable.
For wire wrap you will need thin wire, usually gauge 28 or 30 kynar wire, and a wire wrap tool like this one: https://www.amazon.com/Wire-Wrap-Gauge-ELECTRONIX-EXPRESS/dp/B00BFYE0CY
Also besides the perf board you usually need wire wrap IC sockets
Get a wire wrapping tool like this. It has a stripper in the middle.
You could change the method that you use to attach the power wire to the motherboard. Check this tool out. You slide the wire into this thing then twist it around the motherboard pin. It's a solderless, reversible process.
https://www.amazon.com/dp/B00BFYE0CY
If you are already able to solder, just use some CAT5 or similar cable wire. Those dupont cables are usually pretty short, and expensive if that's all you're using, all the time.
Get some heat shrink tubing to cover your connections and prevent shorts.
If you really feel like you need a mechanical connection before you solder, a wire wrap tool is a good way to get that. I have the one I linked, and I like it a lot. you can wire wrap the resistor directly to the LED, put a touch of solder on it, and it's a very solid connection.
I have this one; works well. 30ga kynar is the best.
Sure, so if you aren't concerned about looks and you just want to get one type of wire and conserve cost I'd recommend this
If you want to match something similar to what I've done here, I used this for the leads and this for the columns. If you decide to go with the tiny wire I used, you are going to want to make sure you have a set of wire strippers that is designed to work with 30 AWG wire like these
thanks. something like the Hakko CHP CSP-30-1 Wire Stripper, 30-20 Gauge Maximum Cutting Capacity should work right?
solder wick
fume extractor
All good?
My recommendation:
Six colored spools of 22AWG Wire - $15.95 great for soldering and breadboards
Hakko AWG Wire Cutters - $10.07
This is one way of doing it: https://youtu.be/MrokZ1afnVg?t=105
I use this instead of self adjusting wire strippers: https://www.amazon.com/dp/B00FZPHMUG/
Doubtful, but it can't hurt to shoot them an email.
You can get a decent pair for $5 on Amazon.
https://www.amazon.com/Hakko-CHP-170-Stand-off-Construction-21-Degree/dp/B017ODDPNO/
Check out some of these videos:
https://www.youtube.com/results?search_query=build+your+first+coil
I order my wire on Amazon, and its like $8 for 100ft of your choice in gauges, $12 or so for a bag of Japanese Organic Cotton, maybe another $15-$20 for wire cutters/tweezers, and $18 for a Coil Master jig if you want to use them. Oh, and don't forget anything your atty might need like a Phillips screwdriver (though even though they're crappy, pretty much every atty comes with a tool for it). All in all you're probably looking at around $40 up front, but you'll have about a years supply of cotton at least, and even rebuilding a lot to test things enough wire to last a couple months or so.
Here's some of the stuff you'll want to look for (don't have to use these ones specifically of course):
https://www.amazon.com/100ft-Kanthal-Resistance-Gauge-Lengths/dp/B00MW4O0WG/
https://www.amazon.com/Koh-Gen-Do-Organic-Cotton/dp/B00NU3H3KE/
https://www.amazon.com/Hakko-CHP-170-Stand-off-Construction-21-Degree/dp/B017ODDPNO
https://www.amazon.com/Authentic-InnoVaper-Precision-Ceramic-Tweezers/dp/B00TI6M3WK
https://www.amazon.com/Stanley-66-052-6-Piece-Precision-Screwdriver/dp/B00009OYGV
flush cuts? just cheap little nippers for cutting off the ends of zip ties but if you don't hold it flush it leaves sharp lil points on all those zip ties. https://www.amazon.com/Hakko-CHP-170-Stand-off-Construction-21-Degree/dp/B017ODDPNO/ref=sr_1_1?ie=UTF8&amp;qid=1466608831&amp;sr=8-1&amp;keywords=flush+cuts
For sure get these wire cutters. I bought a couple other ones before from B&M stores and they ended up breaking on lower gauge wire. Complete crap.
These are on amazon for $5 and if you have prime free 2 day shipping. Been using over a year no problems at all.
https://www.amazon.com/Hakko-CHP-170-Stand-off-Construction-21-Degree/dp/B017ODDPNO
These ceramic tweezers are nice and cheap too.
https://www.amazon.com/Genuine-Lightning-Vapes-Ceramic-Tweezers/
These are nice for cutting cotton.
https://www.amazon.com/Thread-Tailor-Spring-Scissors-Stitch/dp/B00M6JK3T6/
Best thing you can do is just build up a kit separately. Purchasing the preassembled kits are usually over priced and junk.
You don't use scissors to cut zip ties, you use wire cutters.
Buy pass through connectors like these. - EDIT: Good up to Cat5e.
Edit
Here is a youtube video about the same type of connector. Your existing crimper should work, but you will have the extra wire to cut off. Just get a cheap pair of edge cutters.
/Edit
Use a cable tester.
You Tube videos will also help.
This is a PITA exercise. You will get better at it.
Oh, get a cable tester. $9.
Did I mention a tester?
Did I mention do not use a cable tester if the cable is hooked up to anything? Only use a tester to test Both ends of the cable at the same time.
I can work with that. Buy a tobecco velocity clone and a geek vape tsunami. You will also need drill bits in various sizes, or a coil jig to wrap the coils. A set of precision screwdrivers is also helpful. Get a roll of 24 and 26 gauge A1 kanthal. Plus this, this and tweezers or needle nose pliers to work the coils.
I use these: https://www.amazon.com/Hakko-CHP-170-Stand-off-Construction-21-Degree/dp/B017ODDPNO/ref=sr_1_3?ie=UTF8&amp;qid=1499887364&amp;sr=8-3&amp;keywords=flush+cut+pliers
And these: https://www.amazon.com/SE-DD312-12-Piece-Stainless-Double-Sided/dp/B000SVRSRY/ref=sr_1_2?ie=UTF8&amp;qid=1499887406&amp;sr=8-2&amp;keywords=wax+carving
I make my own beaded bracelets, basically you just need a crimp plier and a [wire cutter] (http://www.amazon.com/Hakko-CHP-170-Stand-off-Construction-21-Degree/dp/B017ODDPNO/ref=sr_1_1?s=power-hand-tools&amp;ie=UTF8&amp;qid=1453178055&amp;sr=1-1&amp;keywords=wire+cutter). After that you choose your beads, wire, and clamp. The obvious benefit is you will always have bracelets that fit you exactly the way you want, and you choose your beads. And they will always be cheaper than store-bought bracelets. Same goes for leather bracelets.
Would this cable cutter suffice to cut custom length patch cables?
I'm assuming since you ask that we are not talking about a high-end, high power $5k+ system. The good news is that unless you are doing some long runs (ie over 50 ft), inexpensive speaker wire would work fine for most setups. I would suggest 16 gauge or less, really no reason to spend over $20.Look at amazon or monoprice. You may want to invest in a pair of wire strippers so you can make your own ends now and in the future.
https://www.amazon.com/DOWELL-Stripper-Crimper-Pliers-Multi-Function/dp/B06X9875Z7/ref=zg_bs_553398_4?_encoding=UTF8&amp;psc=1&amp;refRID=ZD01WRRQERTJ8V0RWH23
Decent modern ones
I didn't shop the price
I appreciate the effort. This seems promising and may be the better idea, the other route I was going to take was the Bardwell kit with some other stuff.
https://store.rotorriot.com/bardwells-budget-build-kit/
https://www.racedayquads.com/products/rdq-series-1300mah-4s-100c-fpv-lipo-battery
https://www.amazon.com/usmile-receiver-Support-FS-iT4S-Evolution/dp/B07FMFG6Q3/ref=sr_1_1?s=toys-and-games&ie=UTF8&qid=1542217789&sr=1-1&keywords=fli14
https://www.amazon.com/Flysky-FS-i6X-Transmitter-FS-iA6B-Receiver/dp/B0744DPPL8
https://www.getfpv.com/new-arrivals/ev-peak-e3-falcore-edition-35w-3a-lipo-battery-balance-charger.html
https://www.amazon.com/dp/B01N4571Q6/ref=as_li_ss_tl?psc=1&linkCode=sl1&tag=fpvknowitall-web-20&linkId=6769f39dd3014cb5619db31a54b18438
https://www.racedayquads.com/products/rdq-quad-solder-38-62-0-8mm-100g
https://www.amazon.com/DOWELL-Stripper-Multi-Function-Tool%EF%BC%8CProfessional-Craftsmanship/dp/B06X9875Z7/ref=sr_1_4?s=hi&ie=UTF8&qid=1542221619&sr=1-4&keywords=wire+stripper+and+cutter
https://www.amazon.com/NEEWER-Titanium-Nitride-Driver-Wrench/dp/B00CP2GGBI/ref=as_li_ss_tl?ie=UTF8&qid=1488911480&sr=8-3&keywords=hex+driver&linkCode=sl1&tag=dre-youtube-20&linkId=d53d845db871ab90fe110b2918f60a7e
$381 no shipping/tax and the build kit comes with accessory kit including motor screws for CL1 5mm thick arms, double-sided tape, FC stack mounting screws, XT60 power lead, zip ties, and heat shrink.
&#x200B;
Your idea seems like it may be "too little" for the project but I am honestly ok with that because I rather get something done then bite off something too big to chew and end up having to figure something out last second and it being a piece of crap.
&#x200B;
So does that flight controller stick right into those frames and then you screw them in or something? You say I only need to solder the the power wires to the camera, where do the motors go? I probably sound like an idiot but I'm not really an electrician or carpenter, I don't build things, other then computers :P. I need to head off now so I can't do so much research right now and I spent all day researching today.. won't have much time tomorrow, we are going to tour a college. Can you recommend a good video that would go along with this build? Tomorrow, I am going to ask the teacher if the TV in the room I am presenting in has analog input, if not we go from there. We have access to a 3D printer but a lot of people are going to be using it most likely and I think its slow but I can definitely get the camera mount printed. Once again, appreciate the effort.
Just don’t go to Home depot and ask for strippers.
They didn’t find it funny the last three times I asked.
By the way, these are awesome for prepping cables for punchdown:
Wire Stripper,ZOTO Self-adjusting Cable Cutter Crimper,Automatic Wire Stripping Tool/Cutting Pliers Tool for Industry https://www.amazon.com/dp/B072J62TBN/ref=cm_sw_r_cp_api_QUA9BbGA6RKW7
Just about every hand-tool manufacturer has their brand attached to these. This one seems like it has the most trust on amazon: https://www.amazon.com/IRWIN-VISE-GRIP-2078300-Self-Adjusting-Stripper/dp/B000OQ21CA/ref=sr_1_4?s=hi&amp;ie=UTF8&amp;qid=1526925570&amp;sr=1-4&amp;keywords=wire+strippers+self
if you can find a more reputable brand like knipex that has them and you want to pay for german engineering, I'd recommend it.
Vise-grips is under the stanley black&decker umbrella so YMMV with quality. Everyone else looks like they use the same or similar manufacturer based on the lack of much discernible difference apart from the handles
And in case anyone forgot what a guillotine for the internet looks like, it's scary.
/s