(Part 3) Best test, measure & inspect products according to redditors
We found 4,660 Reddit comments discussing the best test, measure & inspect products. We ranked the 1,275 resulting products by number of redditors who mentioned them. Here are the products ranked 41-60. You can also go back to the previous section.


$20 carbide drill bit + $17 endoscope and then you'll then know if its worth the effort to get inside.
Note, links here with a [!] are ones not in the album.
Off to the right is a desk which has been converted to a ghetto entertainment center. I'd rather buy servers than furniture! My apartment is absolutely tiny anyway, like 600 SQFT. Logitech 2.1, Dell S2740L. I'd not pay that much for a dashboard monitor, but, I use it for media as well, so the price of it new when I got it, nearly 450 after taxes/shipping, was worth it.
The last two graphs honestly tell me a LOT. ELK Stack is WAY more powerful than I thought. Unfortunately I don't like how Kibana's dashboards look, so save the geoIP stuff, I am using Grafana all the way. TODO: Get the Pie chart plugin working!
---
Power is metered/controlled with THIS switch. Make sure you have no way of shutting this off! Else you cut power to the whole lab. So far it hasn't had any random-shutoff issues. So I'm happy.
This lab has taught me A TON, entertained me during off hours, given me uninterrupted sanctuary, prepped me for exams, and everything. After I get MCSA, the R710s + C2100 will be clustered to teach me much more advanced stuff for VCP5/VCP6 study.
Or you can just take a rheostat or dimmer switch or whatever and and mount it in a wallbox inline with the AC and badabing badaboom your twenty dollar weller just got a whole lot fancier. The just use a thermocouple and sharpy to mark various temps around the dial.
For my own recommendation I would say do an extract beer can kit. You'll get about 40 bottles of beer out of it.
Almost everything below you can get at your local homebrew shop. In fact, many of these items might be part of a "beer starter kit" etc. I do recommend getting the 5 gallon carboy instead of a kit with pails. You'll thank me later. pails can get messy.
Total $128 by my guestimates, but you do get 2 cases of beer out of it and $113 worth of brew equipment. Hell, in Ontario the two cases of beer can easily be more expensive than $128 lol... Not cheap, but everything here you will use over and over and over again (except of course the sugar and the brew kit)
---------------------------------
The Coopers Can Kit comes with instructions to make your beer, a hopped extract and yeast.
After you make your beer it'll be a few weeks before the fermentation is done (which you'll know by hydrometer readings)
In that time you can start getting your stuff together for bottling and carbonating them.
You'll also need (for bottling) 48 empty clean bottles (cleaned and then sanitized with star-san solution) NON TWIST OFF TYPE
A handheld Beer capper
Bottle caps (box)
I gotta run, but this was fun to type out. If you need any help, glad to help ya.
any (well reviewed) pen style PH meter from amazon will do. I use this one: http://www.amazon.com/Milwaukee-Instruments-pH600AQ-Tester-Calibration/dp/B005H78ZI0/ref=pd_sbs_indust_6
There’s a $40 lab analysis fee added on to that, so it’s really just under $50. I used this one which includes the lab fee and is under $30.
https://www.amazon.com/Fluke-Networks-MS2-100-Cable-Tester/dp/B000QJ3G42?ref_=fsclp_pl_dp_2
​
Anything from Fluke will work for ages
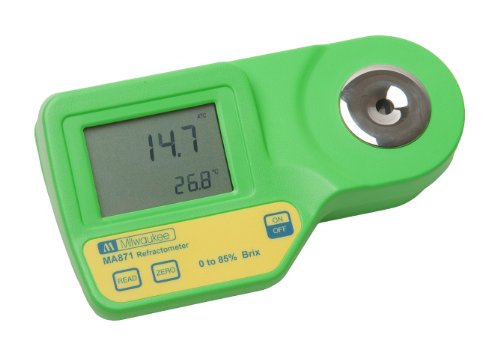
My recommendation would be to save up for a digital refractometer. Something like this: https://www.amazon.com/Milwaukee-Instruments-MA871-Digital-Refractometer/dp/B007Z4IN58
I hate reading the dumb blue/white line separation and it doesn't seem that accurate to me. I eventually ditched it for the digital and I think the hydrometer would be just as accurate as the analog refractometer.
That being said I don't think there would be much difference between those two other than mark up.
There's a lot of useful info about growing in coco at Coco for Cannabis. He's all-in on using timers, automatic irrigation, and drain-to-waste with lots of runoff 100% of the time. It works really well, but it can be a bit tricky to get dialed in, and dealing with runoff can be a pain (especially if you care about disposing of it in an environmentally responsible way). I'd take his "you need to always water to 20% runoff" advice with a grain of salt; just try to water often enough that salts don't build up too much, and maybe err on the side of feeding with lower EC. Last grow I used automatic irrigation, but aimed for just barely having any runoff, and then hand-watered extra to get runoff once a week, when I felt like dealing with it. Definitely note his advice about
preparing and re-using coco, though. One of the best parts about coco is that you should be able to reuse it for a while.
There are other approaches, such as hempy buckets or bottom-feeding that may be simpler, particularly if you're doing a really small personal grow like I am. There's also an approach that combines them, with zero runoff. I haven't tried that one yet, but plant to try my next full size (not 1L SOG) run that way.
For nutrients, I don't know if it's available where you are, but I've been using Dyna-Gro: Foliage-Pro in veg, Bloom in flower. The only other thing I'd add is Pro-Tekt, a silica supplement that also works well as a pH Up. They're pretty inexpensive, simple to use, buffer pH nicely, great all-in-one option. People have also recommended MaxiBloom and Mega-Crop as other simple all-in-one fertilizers (both powdered). I can't personally speak to those, but worth looking into.
I use this EC/ppm meter and these pH test drops. I haven't tried using a pH meter, because the periodic calibration sounds like more trouble than it's worth. The EC meter and the test drops have worked fine for me, and in coco you'll probably only need to check pH of nutrient mixes, then compare EC going in (feed) and coming out (runoff). For that, the drops and that EC meter work great. (That EC meter probably isn't anything special, most cheap ones are probably fine.)
People will probably also recommend Grow Weed Easy, but some of their info about coco (particularly watering recommendations) is pretty dodgy. If you haven't done a full grow before, they have helpful info about harvesting and curing, though.
Strain recommendations will depend on a ton on personal taste, but I particularly like Mephisto's Fugue State. :) Good luck!
There are maps like this, and you'll see mineral deposits where water evaporates like on pots and pans, or around the faucet. As well as test kits.
Yup. I’ve used this one myself.
Since you are in the UK I imagine, the selection is a good bit different and many of the budget recommendations are not available. However there are some great speakers still to be had.
Wharfedale 9.0 for £60
Boston Acoustics A25 for £90
Wharfedale Diamond 10.0 for £93
It looks like the Lepai is available, which would make for a suitable amp to get started with.
So is the SMSL SA-50 which would be a good step up in mini amps but is 2x the price.
If neither of those suited your needs, I would look for a basic 2.0 receiver. That you can find used or from you local electronic store.
I'd spend the $10 and buy a digital tester:
https://www.amazon.com/gp/product/B00N7432II/
I got mine on amazon for $11. small (perfect for my office) and is a quick read. I don't care about timers since i use my phone. and if it craps out in a year or gets wet and shorts out - I spent $11 on it.
​
Test it. Then you will know whether your fears are correct:
https://www.amazon.com/Asbestos-Test-Bus-Days-Schneider/dp/B008J3ZK8M
Not sure how long that will take, but, you can buy an asbestos test kid for pretty cheap on amazon with 1-day turn-around. Personally, unless the city was responsive immediately I would buy it and test to find out NOW. Asbestos is nothing to fuck around with.
I was in a similar situation to you a few months ago, mainly a PC gamer, with the occasional film. Most of the advice on here was for US brands unavailable without expensive postage costs in the UK.
My desk space was a bit limited, so I ended up using a LEPY 2024A Plus (£24) and Wharfedale Diamond 9.0 (£60), they have almost no background hiss (with my ear to the speaker, I can only just hear it over my quiet PC fans, and my PC is under the desk). I can't hear any background hiss from my normal typing / gaming position.
They go really loud for PC gaming (assuming you're sat in from of the computer). It's uncomfortably loud at 50% volume. I'm using the power supply that came with the amp, but some have replaced it with a more potent one.
If you sign up with richersounds email list, then occasionally the Wharfedale 9.0's go on offer for £40, but it's a collect-from-store only offer, not online.
I was a bit limited on desk space around my PC, but if you've got more space, you could try the Wharfedale 9.1's, (£100), maybe with a SMSL SA-50 (£52). The speakers are notably larger. Double check the plug socket if you get an SMSL though, some reports of non-fused plugs.
Whatever you get, make sure they are front-ported if they'll be against a wall.
Have you seen what Amazon has on sale today?
http://www.amazon.com/Signstek-Channel-Digital-Thermometer-Thermocouple/dp/B00FFYEPVQ/
Get a camera for your smart phone and go exploring:
https://www.amazon.com/DBPOWER-Waterproof-Borescope-Endoscope-Inspection/dp/B00JERRES6
I saw this one on Big Clive's YouTube channel and it's served me very well.
Uni-T B4Q094 UT210E True RMS AC/DC Current Mini Clamp M W Capacitance Tester https://www.amazon.com/dp/B00O1Q2HOQ/ref=cm_sw_r_cp_apap_SCHenkNd6Avzz
I'm betting it was a baffle strike, sometimes they are hard to spot. Either way, that little camera is really cheap, and will show the truth. It is either shitty construction or a strike.
Sorry to hear that. Had that happen to my 55 gal, but I caught it at 94 degrees and saved most of my fish.
My main suggestion would be this little lifesaver.
https://www.amazon.com/Inkbird-Temperature-Controller-Aquarium-Breeding/dp/B01DZ5NVBQ/ref=sr_1_20_sspa?keywords=Temperature+sensing+plug&qid=1567371827&s=gateway&sr=8-20-spons&psc=1&spLa=ZW5jcnlwdGVkUXVhbGlmaWVyPUEyV043M1pDVTRMTjIyJmVuY3J5cHRlZElkPUEwMzY3NDM0MlZKNkpRMkc4Skw2SyZlbmNyeXB0ZWRBZElkPUEwMjczMzE2WlBPTE9PU004M1NMJndpZGdldE5hbWU9c3BfbXRmJmFjdGlvbj1jbGlja1JlZGlyZWN0JmRvTm90TG9nQ2xpY2s9dHJ1ZQ==
You can't measure accurately when the wort is that far out of the calibration range. You need a refractometer, preferably one that says ATC (Automatic Temperature Compensation). A regular one will run you about $30. If you want to make your life easier and money really isn't an issue, get a digital refractometer.
Remotely diagnosing "bad" tasting water is not easy, but not impossible. Lets err on the side of caution and assume that in a wealthy county of Texas you don't have a well contaminated with nasty stuff.
It sounds like you have what is called "hard" water. There could be other trace impurities too, such as sulphides or alkaline ions.
Hard water just means there are a lot of dissolved minerals, such as calcium and magnesium. You can purchase some filtration systems depending on the amount of water you want per day.
The main issue is you will get a lot of scale buildup in your pipes. That is bad, especially in a new build if you don't have a total house filtration system.
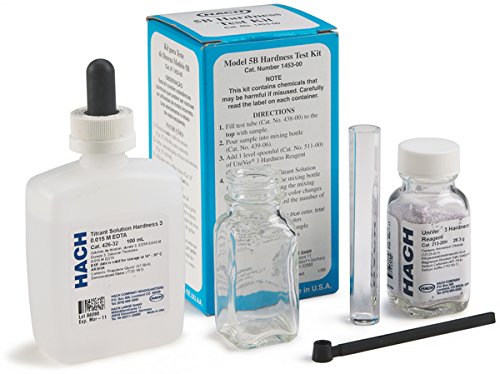
A simple test kit like this Hach unit will help you start to diagnose the problem.
Can you answer these questions and we will try to remotely diagnose your problem.
My father used to work for the city water department and this is one of the ones they used regularly. http://www.amazon.com/gp/aw/d/B008FM7WLU/
https://www.amazon.com/Schneider-Labs-Asbestos-Test-Bus/dp/B008J3ZK8M/ref=sr_1_1_a_it?ie=UTF8&qid=1500249858&sr=8-1&keywords=asbestos+testing
Nothing you posted suggests that you were exposed to asbestos.
Buy this kit and get your drywall testing to know if it contains asbestos. https://www.amazon.com/Asbestos-Test-Bus-Days-Schneider/dp/B008J3ZK8M/ref=sr_1_3?keywords=asbestos&qid=1567314620&s=gateway&sr=8-3
This whole situation seems like no big deal to me.
https://www.amazon.com/Asbestos-Test-Bus-Days-Schneider/dp/B008J3ZK8M/ref=sr_1_sc_1_a_it?ie=UTF8&qid=1506272638&sr=8-1-spell&keywords=absptos%2Btesting%2Bkit&th=1
I used this kit to test some tile I had. Its super easy, and results are very fast. If you are worried the only real way to know is to test it.
I'm just a small-time hobbyist with a few basil plants in my window and due to my limited budget I've been using a super cheap no-name sketchy $13 chinese meter. What are the technical differences between something like that and the meters you sell, and what advantages does that provide?
pet stores are actually known to NOT (or rarely) carry thermostats, which is one of the reasons why a lot of people don't know you need them.
you can buy them on amazon, pay for fast shipping (this one is widely used)
same for the gun, any cheap one is fine (i use this one)
if you can only get one, definitely get the thermostat as it's one of the most important things
so at petsmart just pick up hides and the aspen bedding. ideally both hides should be the same. get a hide that looks pretty small! you would be surprised at how small my hides are compared to how big my snake is. they can really squeeze in there and feel secure. if the hide is too big, it won't make them feel safe.
i would recommend joining this forum, there are a ton of people there who have been keeping snakes 10+ years who can better answer your questions.
Inkbird is very sturdy, no problems, and by far the cheapest I have found. (also Prime on amazon) https://www.amazon.com/Inkbird-Temperature-Controller-Aquarium-Breeding/dp/B01DZ5NVBQ/ref=sr_1_1?ie=UTF8&qid=1484141333&sr=8-1-spons&keywords=inkbird&psc=1
https://www.amazon.com/gp/product/B01KMA6EAM/ref=oh_aui_detailpage_o00_s00?ie=UTF8&psc=1
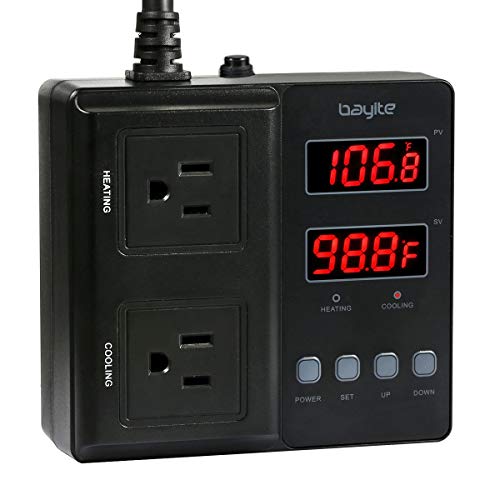
If you get the oil filled radiator and need an outlet turns on and off at different temps, this is one option. I used this all winter and it worked well. You set it to say, turn on at 34 and off at 40. I use the other outlet (which turns on if it gets too warm) to control a fan that helps make the most of the vents on the greenhouse.
Of the four things, only the first and third are functional on their own, but here you go...
That one would work fine. Get a test jar too while you're at it.
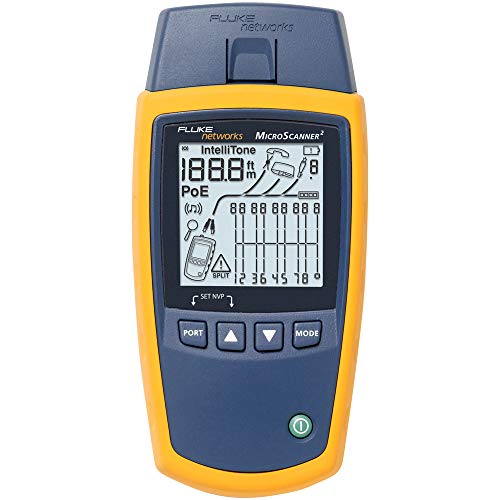
I can not speak highly enough about Fluke's intellitone equipment. It's not cheap, but it is well worth the price. The basic kit starts at about $160
(Amazon Link)
One of the reasons I really like the Intellitone is it is digital instead of analog. This means it won't pick up interference from near by florescent lights or network chatter from other cables. With the Cisco equipment, you can also tone "live" cables plugged into a switch, which is HUGELY useful when the guy before you didn't leave any documentation.
If you have the money (or an employer to pay for it), the Microscanner is a nice entry level tester which will also work with the intellitone wand. It is a little pricey starting at about $400 (Amazon Link)
Whatever tester you get, make sure it can do TDR. Knowing the length of a cable in the wall is incredibly useful for tracking down the other end.
The only rule I have for crimper's is make sure they are ratcheting. After crimping 20-30 ends in a row, your hands will get tired and you won't always make proper crimps unless you have the ratchet to make sure. A padded handle also helps. The Ratchet Telemaster (Amazon Link) has served me well for many years. Also, if you turn them upside down and look at the red plastic guard, it looks like a face chomping the cable when you trim the ends, which to this day still cracks me up.
Reading your post I'm not 100% sure if you need something that'll test network connectivity, but I have this for my personal kit and it is a great tool: https://smile.amazon.com/Fluke-Networks-MS2-100-Cable-Tester/dp/B000QJ3G42
I'd start with the cheaper $500 option and like you said if you are asked to certify the cable rent one or buy the Pocket Ethernet (sure it isn't rugged, but even a $10k tester you'll be taking good care of) and isn't going to break the bank to buy a new one if it gets broken.
I don't generally see bad cables creating 'occasional network problems' either it works or it doesn't. I've dealt with bad patch panels that caused degraded connectivity where 1Gb devices would only connect at 10/100Mb. A decent tester can check cable distances and pair connectivity - buy one and use it. The cabling may not be officially certified, but you'll be able to find issues, fix them, and verify your cabling. After that you have the equipment to continue to support cabling issues/additions.
Seems like budget is an issue, so you could use said tester to check the handmade patch cables instead of buying a bunch of new ones. The gift that keeps giving.
https://www.amazon.com/Fluke-Networks-MS2-100-Cable-Tester/dp/B000QJ3G42
https://www.amazon.com/Fluke-Networks-MS2-100-MicroScanner2-Network/dp/B000QJ3G42
https://www.amazon.com/NETSCOUT-LSPRNTR-100-LinkSprinter-Network-Tester/dp/B00I5CKF3M
Get a real hardness test first. Money well spent.
Hach 145300 Total Hardness Test Kit, Model 5-B https://www.amazon.com/dp/B008FM7WLU/
Then get a water softener. Put it after your filters. They are easy to install if you have done any plumbing work. I got this one, it’s great (edit: size your water softener based on your hardness test! I had 19 grains hardness. You want to run a week between regen, give or take, with a 20% buffer. 19 grains x 4 people x 75 gallons per day x 7 days x 1.20 buffer is 47,880. I got a 48,000 grain softener):
Metered water softener with 3/4" Fleck 5600SXT control, 48,000 grain capacity with by-pass valve https://www.amazon.com/dp/B000GBZ2P6/
My water was quite hard, around 19 grains. The softener fixed that, but made it taste like mud.
So I got an RO system and plumbed it to my fridge only. That was easy too. Took me a couple hours total.
I got this one:
iSpring RCC7 High Capacity Under Sink 5-Stage Reverse Osmosis Drinking Water Filtration System and Ultimate Water Softener- WQA Gold Seal Certified https://www.amazon.com/dp/B003XELTTG/
It’s been a trouble free year now with great tasting water. The showers are a bit slipprier, yes, but my kids are less itchy, and gross shit doesn’t grow over every water source in my house any more. Worth it.
I use an in-tank filter, but also have softened water so I rarely need to recharge it (I do a hardness test monthly with this to make sure).
Daily routine is three water-only backflushes.
Once a week I do a Cafiza backflush.
I descale once a quarter.
I agree that reliable info is hard to find. Chris Coffee and WLL give different opinions on what is right, but this is what I've settled on.
I ordered a hardness testing kit. When it gets in, I'll maybe post some results.
I normally use Rectorseal Calci-Free for flushing. Pretty sure that stuff is muriatic acid. In my opinion, it works better than vinegar. This last time around, I ran it through the heater for about 45 minutes. Probably should have run it longer.
If you can take this guy apart, please let me know how you did it.
What year was your house built?
You can get an asbestos test kit and test the insulation yourself.
If it is negative still wear a respirator when up there, not a paper dust mask.
If you’re wanting to add floor decking you would be better off sucking out the blown in insulation and installing fiberglass batts. You can rent an insulation vacuum to speed removal.
Should it test positive you will need to contact a remediation company to remove the insulation.
There are sometimes grants available for help with asbestos removal. Contacting your home owners insurance could be a good start for that.
Finally adding insulation to a home is usually a tax break.
The only correct answer about asbestos is that you need an actual asbestos test done to be sure. You can't see asbestos or test for it at home, and you can research the material all you want and find 100 conflicting answers. If you can wait a week, this is the cheapest/easiest test.
That speaker is even lower budget than the turntable and it would be terrible. Half the point of vinyl is that it is analog. Converting the analog signal to compressed digital bluetooth and back to analog for amplification to a speaker is ridiculous.
Just get a turntable by itself and a PAIR of powered or passive bookshelf speakers for stereo separation.
Look used for everything if on a low budget. A stereo or AV receiver and a pair of passive bookshelf speakers.
Start with speakers for Spotify then add the turntable later.
New speaker options:
I'm a fan of the DS18b20s, I don't use the land line in my house so I disconnected the phone line at the junction box outside, put Rj-11 connectors on the end of some ds18b20s and viola whole home temperature readings for about $10! One wire for the win! Vktech DS18b20 Waterproof Temperature Sensors Temperature Transmitter (5pcs) https://www.amazon.com/dp/B00CHEZ250/ref=cm_sw_r_cp_api_um4Gyb2TX32HQ maybe a little more than $10...
I'm on my 4th or 5th roast with the same setup and it's worked out well so far. I haven't had much to tweak, just:
I haven't had to touch the stirrer rod yet. Monitoring the temperature of the beans is done with a digital thermometer, I simply shove the probe down into the beans. Feel free to hit me up with any other questions.
Also, for the price, this thermocouple can't be beat:
https://www.amazon.com/gp/product/B00FFYEPVQ/ref=oh_aui_search_detailpage?ie=UTF8&psc=1
Two questions. First, I bought this pH meter. Reviews seemed generally positive, but I found even having it sit still in calibrating solution for an hour it jumps around SO much which seemed to make it unusable. Is this common? Are there other products that zero in on a pH value better and don't cost a fortune?
Second, I bought this refractometer. Seemed to work very well for OG measurement as compared to my hygrometer. Can someone clarify, can I use this for later SG measurements? Based on discussion, I must use the Brix scale, then convert to SG?
dr meter
Great work! You've basically made a bombe calorimeter of sorts.
Your figures might be a little low because I don't see any mention of the mass of the light/battery. That is at least 85 grams of stuff also being heated with the 300 grams of water.
(The UT210E is a great cheap clamp meter for this.)
Where are you measuring the AC voltage, at the battery? Any ripple will read as AC voltage, 40millivolt ripple isn't much.
If you have a DC clamp meter, put that on the alternator cable and you can easily read if thats the cause. If you don't own one, they're handy and this ones nice for the price: link. Another option is to measure the other circuits in your car like this with a regular meter: https://www.youtube.com/watch?v=lRcj1fQcWwU
Unfortunately the alternator is the one thing that cant be measured this way since it doesn't go through the fuse box. But you can eliminate everything else this way.
Here are some links for you to read and learn from people that have gone before you....
Handy Bob, kind of grumpy but knows how to make solar work, will give you the basics. It is getting dated but a good place to start.
Voltage Drop Calculator,you need to know how much loss will be in the wires and compensate for it or else watts are just heating wires and not charging batteries.
A Multimeter so that you can troubleshoot and verify that your system is working.
Ohm's law, you should at least understand the concept and relationship between voltage, amperage, and watts. Watts are universal. a 1,000 watt device be it Ac or Dc is always 1,000 watts. But 1,000 watts at 12 VDC draws 84 amps (lots of current. AT 120 VAC 1,000 watts draws 8.4 amps. See the relationship there? Volts x amps = watts.
also, if you want to know specific temperatures, purchase a laser thermometer, like this (https://www.amazon.com/HDE-Non-Contact-Thermometer-Temperature-Functional/dp/B00QYX6F5G). I use something like this to know what temperature my pan is, so that I know it's hot enough for seasoning, or perfect temperature for cooking.
Amazon ~$20
https://www.amazon.com/gp/aw/d/B01CL1QUCW
I use this AMIR scale I picked up off Amazon for $11. It has 0.1 gram accuracy and I check it with a calibration weight one a week. It still works perfect a year later.
I had to break this into another comment due to per comment character limits.
The following previously belonged to the above comment, but was moved here due to the above mentioned limts.
> Something you can do now: Build a filament drybox. Seriously, some filaments such as certain Nylons can go bad in just a few hours, depending on ambient humidity levels. All filaments are susceptible to moisture absorption, and ideally should be kept in something like a Spannerhands holder, even while printing, but at worst you should store them in a big plastic tub with silica gel beads to keep them dry.
> If I had to give one last tip, don't stock up on too much filament yet! Seriously! I thought I would be printing mostly in PLA but now that I've had a few weeks to work with it, I've learned I prefer PETG more, and now I have so much extra PLA! I'm sure I'll find something to do with it, but for my final tip I would add "And get a good variety!". Services like MakerBox (referral) let you try a bunch of different filaments on the cheap. It's not a ton of each filament (about 50g), but I love the variety of materials and colors.
Original second level comment begins:
Final Tips: Bonus Round!
There are tons of other accessories you can get ahead of time. None of these are necessary, but are small things you might end up using (or wanting to try :P), and should help get you started getting a wishlist together. Besides the ones mentioned in this comment (and the one that precedes it) already:
Edit: Upon rereading my comment I realized I have a problem.. I own every product I just listed..
^^Except ^^for ^^the ^^nozzles ^^kit ^^so ^^it's ^^not ^^that ^^big ^^of ^^a ^^problem, ^^right?... ^^Right?!
Pretty much the same one I have. Tenth gram resolution. 3000g max (good for roasting). $11 (It's 13 now, but it'll drop). Does everything I've asked of it (I no timer, but I don't want one. I have another timer on my machine). A functional bargain. https://www.amazon.com/gp/product/B01DGEWHN4/
Maybe 2 (50w) heaters on both sides? Gives you redundancy and if one fails off, you still have one to heat it somewhat. If you are going by the length of the tank then you'd probably need to place that 100w more towards the middle, but shouldn't be a problem with a submersible heater laid sideways.
As for brand, I like my aqueon pro. But it's a 250w model.
Another suggestion would be to run them on a temp controller to control then rather than rely on their enternal thermostat. It's a failsafe and gives you better control.
I use this inkbird
About the size, I've got a fairly large enclosure for my wife's little ball python, but there are two hides and lots of clutter, including greenery for him to hide in. Feeding has been a non-issue and he seems totally happy. Generally speaking, I can bet money on finding him in a hide, which is a good sign for them. At night, he's more active (as they're nocturnal by nature), but it's usually drinking, exploring and then back to sleep in a hide. Sometimes he'll climb his vines, sometimes not.
And yes, UTH (in my opinion) needs a thermostat. I've got an Inkbird that allows me to set both the UTH and CHE to the same temps and it works great.
https://www.amazon.com/dp/B01DZ5NVBQ/ref=cm_sw_r_cp_apip_4L5KskVt1pW1Y
Thanks, great idea! I didn't know these types of controllers existed.
I purchased a new eheim heater and this controller: https://www.amazon.com/gp/product/B01DZ5NVBQ/ref=od_aui_detailpages00?ie=UTF8&psc=1
Second this. I also put my CHE on one of these https://www.amazon.com/gp/product/B01DZ5NVBQ so that the general area will stay at one temperature during the day, but a bit cooler at night.
CHE is a ceramic heat emitter. They screw into a light socket and make heat only, no light. They can be run 24/7.
The heat mat caused the bottom to crack because you had no thermostat on it. You are very lucky you didn't end up with a burned snake. Uncontrolled overhead heat can lead to neurological damage if the snake stays in it too long.
Thermostats for reptile use have a probe you place in an appropriate area to measure the temperature coming from whatever they are measuring. They range from cheap but functional on/off types to more expensive but much more advanced reptile specific devices that provide much more consistent temps.
80F should be enough for digestion, but it might take a little longer to do so. If you are concerned, missing a meal is no big deal for a snake.
Yeah no problem. The fridge I got off one of those facebook local rummage/yard sale pages for $75. The temperature controller is a Bayite that ran me $50. The humidity controller is an Inkbird that was $35. Then add $30 or so for the ultrasonic humidifier. Not too bad around $185 total
It look like you are doing great! Sometimes hiccups in the process will elongate things but you will learn and, in most cases, do so without too much detriment to your final harvest.
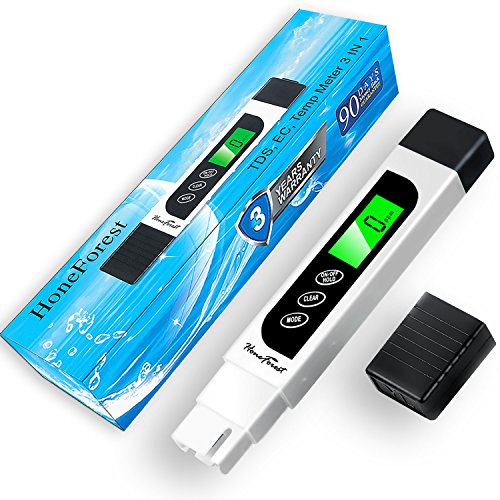
A bit of advice, if I may. Assuming you arent already doing so, grab an inexpensive TDS meter and start measuring/recording the EC of your inflow and outflow fertigation solution every time you feed. Once you start keeping track of these metrics you can stop guessing about whether you are under/overfeeding your gals. Unlike pH meters, TDS meters are not comprised of complex or terribly sensitive components, so spending a lot on a high dollar product is not necessary.
There are general guidelines about ppm ranges for both autos and photoperiods based on where they are in their lifecycle. As long as you keep within those ranges, it's rare to run into nutrient issues.
I also like to read GrowDiaries for the strains I'm growing to see how other folks fared with the same genetics and what pitfalls they ran into in their process.
Good luck with your garden, friend!
Remove the top, pull out a sample (or a couple if you need to), and fill container tall enough to float your hydrometer. I use a glass tube like this test jar but you may be able to jury rig a similar one from the tube your hydrometer came in.
Do not pour your sample back into your beer, that can lead to contamination. Feel free to taste it though.
Your LHBS should have hydrometer tubes. If not, you can order them online as well.
This one from NB and this one from Amazon should work just fine.
I really like [this one] (http://www.amazon.com/RiteBrew-Hydrometer-Triple-Scale/dp/B000E60U6Y/ref=pd_bxgy_misc_text_c) from amazon. I recommend getting the testing cylinder as well. (~$7) I take gravity 3 times. Right after boil (original gravity, aka initial gravity), when I transfer to secondary, and when fermentation is done (final gravity). This tells me my % alcohol using this simple calculator. This really helps to get consistent results, and lets me know when fermentation is complete.
And that's Mr. Madbrewer to you :P
That kit in your edit looks pretty darn good to me. Bonus for including a hydrometer. I'd probably get that considering the price point (the buckets, capper, and siphon alone make it worth the price). I'm not sure about Idophor, but Starsan can be
Idophor does not foam but take a couple minutes to sanitize. Star san santinizes in 30 seconds and foams quite heavily. The foam isn't harmful and does not need to be rinsed.
The only real advantage of having a car boy is the fact that you can scrub it with an abrasive. It MAY be nice to see where your krausen levels are to determine whether you need a blowoff tube or not, but there's no harm in opening a fermentation bucket just a tad for a little peek.
Yes, you'd basically need two of everything for sours (or at least, everything that touches the beer/wort after it has been infected with the souring bugs).
edit: I just noticed the kit doesn't include a hydrometer test jar or thief to use for hydrometer testing. Not being able to measure gravity will not prevent you from brewing, but it does allow you to; calculate ABV, control ABV pre-fermentation, and identify if problems have occurred during the brewing process.
I will write up some more specific feedback because I am interested in seeing the Pockethernet get better, and thanks for telling me about long-pressing the measure button.
To be clear though, I wasn't comparing the Pockethernet to the AT 2000. I was comparing it to the Fluke MicroScanner 2 for $440 which I own, and the T3 Net Prowler for $730, which I might have purchased instead of the Pockethernet.
Hardware criticisms:
Make sure all internal connectors are fully seated. My battery came unplugged. Make sure that the plexiglass protection film is removed. And at least in my case, the plastic on the wiremap/loopback tester is so loose that I had to take it off to use the tester.
App Bugs (iPhone):
I experience frequent crashes. Usually it seems when I leave and return to the app, or when I save results to Dropbox using the "Send" feature. This has persisted from an iPhone 6s Plus, to a brand new installation on a brand new iPhone X.
There is also a bug where the bottom half of the app disappears, or becomes covered in a white rectangle, and I am no longer able to scroll. This might be from the app trying to hide itself where the keybaord appears. Only way to fix is to quit and relaunch the app. Very frustrating.
App Workflow:
App flow should probably be like this: First HOME screen is a grid of icons for PRESET TESTS and an icon for a CUSTOM TEST. PRESET TESTS should be user-defined groups of frequently run tests. They should be icons, because that way more fit on the screen. Clicking on a PRESET TEST should take you to the RESULTS screen.
The RESULTS screen should only show the test results of the tests you just ran. It should have some persistent icons at the bottom of the page, that include a couple of selectable PRESET tests, as well as RETEST, CUSTOM, and HOME. This will make it easy to always quickly run a test.
The RESULTS screen should have the option to save results to a DATABASE. Often I will run additional tests for an outlet in the future, and I want the ability to EXPORT all of the tests from one outlet together, not have a separate PDF for each group of tests I ran on each outlet. The PDF export should only show the results of tests that were run.
If you instead clicked CUSTOM TEST on the HOME screen, you should be taken to a grid of icons with all possible tests. Check your desired test icons, click TEST, and be taken to the same RESULTS page as before.
There should be an interface for viewing the test results in the database, and deleting of specific tests for specific outlets.
This would make the Pockethernet interface much closer to Fluke's, Ideal's, and T3's interfaces, and much more useful.
Thanks!
plenty of people have already brought up CDP and LLDP, which are ways that certain networking devices can advertise themselves to their neighbors, and can be really helpful...
Another helpful command is "sh mac-address table". That'll give you a list of all the mac addresses that switch has seen "recently" (I forget the actual timeout), and on what port. More than one mac address showing up on a port means exactly that. Several devices connected by a switch or hub are accessible via that port.
If you need to track down a particular cable and you don't have access to a toner or other helpful tool, then:
on a windows PC:
ipconfig /all
note the MAC (physical address)
on the switch
sh mac-address table | inc XXYY
XXYY being the last 4 digits of the physical address.
Why couldn't you say 100% that your cable was working? Get one of these if you don't have one or equivalent.
http://www.amazon.com/Fluke-Networks-MS2-100-MicroScanner2-Verifier/dp/B000QJ3G42
Yes they are safe to use for plants. Its actually what I started with until I purchased a meter.
Amazon
also get calibration soultion
Amazon
Here's what I use. It works wonderfully. You have to convert from brix to TDS, but that's just a multiplication by .8455 to save hundreds of dollars.
http://www.amazon.com/Milwaukee-Refractometer-Automatic-Compensation-Resolution/dp/B007Z4IN58/ref=sr_1_2?ie=UTF8&qid=1414704702&sr=8-2&keywords=brix+digital+refractometer
I have this one. It works well. You can even measure the brix of honey (although I'm skeptical that actually works well).
https://www.amazon.com/Milwaukee-Refractometer-Automatic-Compensation-Resolution/dp/B007Z4IN58
I use my hydrometer 90% of the time cause I make 5 gallon batches but I have found this useful for measuring the sugar in my fruit.
For quick reads during runoff, I've been happy with the Milwaukee digital refractometer. Cheap, fast read and accurate enough to keep an eye on gravity before kettle full:
https://www.amazon.com/gp/product/B007Z4IN58/
There is no "common setting." You need to figure out how hard your water is. I'd recommend this kit since it's very accurate and not too expensive: https://www.amazon.com/Hach-145300-Total-Hardness-Model/dp/B008FM7WLU
Otherwise, your municipality probably has a water report that you can lookup online or request from them that might have hardness information.
If you just want the softener to work, set it to 50 and see if you end up with any hard water before it regenerates. If so, adjust up as needed. If not, adjust down until you find the right number. A higher number won't hurt anything, it will just waste salt.
https://www.amazon.com/Hach-145300-Total-Hardness-Model/dp/B008FM7WLU
if water it hard, try posting water softener info and pics to terry love water softener forums. smart group of guys there that know about varies valves, etc.
[Asbestos Test Kit 1 PK (5 Bus. Days) $30](
https://www.amazon.com/Asbestos-Test-Bus-Days-Schneider/dp/B008J3ZK8M)
Pick up These speakers, this SMSL amp, funny that the product is listed in feet but this speaker wire should be more than adequate. The cable used to connect to your SMSL amp depends on what you will be playing music from.
http://www.amazon.co.uk/Wharfedale-9-0-Black/dp/B00A1E94J8/ref=sr_1_4?s=electronics&ie=UTF8&qid=1421467165&sr=1-4&keywords=bookshelf+speakers#Ask
I had parts laying around so I decided to build a temperature monitor instead of having multiple individual thermometers. My buddy wanted one and i thought, "these have to be a thing", but i cant find them. It seems like the only product that has multiple temperature probes is an expensive controller.
Does anyone know if these things exist on the market?
For those interested, this is just a led segment display, arduino, and i2c temperature probes. You could build this for $20 - $30. I have the code but would encourage someone to try it on their own, its a pretty good beginner project.
I'm just about to leave town for a few days, but I'll link you what I have so far. Here are the various parts I am using:
This pump for water
This power supply for my 12v items
This relay board to control valves and the pumps
And these valves
an esp8266 for wifi connectivity with main control computer
Several of these ds18b20 temperature sensors
And these water level float sensors
Beyond that, its just arduino stuff and glue logic, like shift registers and whatnot.
EDIT - also the usual electric brewery stuff, ie water heater elements. Those I've wired to relays to be controllable by the arduino as well.
I used DS18b20 Temperature Sensors. I tied them down to each component. It's difficult to see in the gif, there is a small aluminium cylinder on top of the CPU heat sink. That's the module.
Throw a themocouple in your oven next time you clean it. You can be within a few %, which is more accurate than your oven's built in thermometer is anyway.
If you don't have one or a multimeter, you can buy a themometer with 2 probes for $20: http://smile.amazon.com/Signstek-6802-Channel-Thermometer-Thermocouple/dp/B00FFYEPVQ/ref=pd_sim_hi_21?ie=UTF8&refRID=03ER12NYTAT2H33ZTVAH
When I got my new source XL gr1 inset it to 366 and it defiantly improved. If you want to test it get one of these Signstek 3 1/2 6802 II Dual Channel Digital Thermometer 1300°C 2372°F with 2 K-Type Thermocouple Sensor Probe https://www.amazon.com/dp/B00FFYEPVQ/ref=cm_sw_r_cp_awd_xHQLwb0FWK2S2
If this is not your property, don't touch it. This would be the responsibility of the owner.
It just could be a crappy installation, or it might be hiding some significant problems underneath. Only an inspection would reveal what is under there.
A USB camera could be run behind the wall, so that you'd have an idea what you are facing:
https://www.amazon.com/DBPOWER-Waterproof-Borescope-Endoscope-Inspection/dp/B00JERRES6
Drill the back, use a flexible scope to see if there's anything inside. It's worth nothing more than scrap value in its current condition anyway.
AvE reviewed one of these jobbies awhile back. Durable? Probably not if you're using it all day every day, but for 20 bucks max? Sold.
Some come with little attachments too, like little mirrors, magnets, and hooks. And like 15 feet of cable.
Get a Borescope.
Just a note on that soil pH meter- for about $4 more, you can get a pH pen that can be calibrated for accuracy. I have had bad luck with the dual prong, in the soil types like that one, not particularly accurate.
http://www.amazon.com/Automatic-Temperature-Compensation-Measurement-Resolution/dp/B00LNSEZH2/ref=sr_1_4?ie=UTF8&qid=1421335703&sr=8-4&keywords=dr+ph+meter
This is the one I have. Good because it reads in .01 resolution. Reads out just fine. Just make sure you purchase 4 and 7 pH calibration solution, as well as storage solution so the electrode doesn't wear out. I'm sure the more expensive ones are tres better, but I don't have that kind of a budget.
Have you any interest in a ph meter? THey aren't super expensive, and are really useful in your brew kit. I also use mine to test viability of starsan solution, and they could be used to test "sourness" of a lacto ferment. At least you'd know ahead of time if there are fluctuations in your base water, which would explain mash fluctuations.
http://www.amazon.com/dp/B00LNSEZH2/
I use a baking soda solution and acetic acid (vinegar) to calibrate mine on the cheap.
Nice tip, i'll remember it ! Just tried it, i mixed 3tbsp of soil with 3tbsp of tap water in a glass. I filled another glass with just tap water. 20mins after, the glass of tap water is at 6PH and the mix of soil & water is at around 5.75
So if this test is accurate it means my soil PH is under 6 so i should stop feeding them lemon juice right now. Is there something like lemon juice to raise PH or should i just stop messing with PH and feed them water ?
Note that the PH tester i'm using is very cheap and could also be inaccurate : https://www.amazon.ca/gp/product/B00LNSEZH2/ref=oh_aui_detailpage_o00_s00?ie=UTF8&psc=1
Looks like bad pH is making your plant unable to take up the nutrients it needs. Grab a pH tester from Amazon and keep it between 6.5-7.0. My household tap water tests at a 9.1, as high as 9.6 sometimes, and that's way too alkaline for the plant.
I wanted to try testing the ph of my products and I was wondering if there was something better than the strips.
I fount this in amazon. It's for testing the ph of pools but it looks like it could work for cosmetics? I have done a quick search but I only found people using the stribs in the subreddit (maybe I didn't search correctly), anyone used something similar to this?
I paid 13.95 I have dropped it twice in the reservoir and it works accurately every time and bonus, I don't feel bad if it breaks.
I love this cheap ph pen: http://www.amazon.com/gp/product/B00N7432II?psc=1&redirect=true&ref_=oh_aui_detailpage_o01_s00
I read the same warnings and had the same concerns about the sata cables. So I bought one of these: Uni-T B4Q094 UT210E True RMS AC/DC Current Mini Clamp M W Capacitance Tester https://www.amazon.com/dp/B00O1Q2HOQ and measured the current. Each of my GPUs pulls 0.3A from the sata connector, which is well within spec for sata.
Battery could still be severely shorted but it sounds unlikely. If that were the case you would notice a very large spark when connecting the jumper cables and possibly see a reaction from the second car. Everyone should own a good multimeter, you can get pretty good ones in the $40 range, or crap ones for like $5 at harbor freight.
I'm thinking most likely warranty will come into play for you, but if it ends up being battery after all the dealer battery prices are surprisingly reasonable. So you could have it towed there if you want.
Edit: BTW, I like this Uni-T UT210E clamp meter for the price: https://www.amazon.com/Uni-T-B4Q094-UT210E-Current-Capacitance/dp/B00O1Q2HOQ.
I've had one of these for years and it works pretty well, but it is unnecessarily big and clunky. Personally, I would go with this one instead. I bought it a little over a year ago and it has been a very good meter. I would honestly take it over pretty much any of the Ames meters we sell. If you need one with a current clamp on it, this one will probably do it for you. I don't have one personally, but Big Clive on YouTube does and he seems to like it.
​
If you don't already have a meter, don't even bother getting the $4 one. I have a couple that I got with a free coupon and they are all junk. The leads are downright trash. The only time I use one is if I am doing current measurement and I don't want to risk blowing a fuse in one of my good meters.
Just found one for $15
The directions on the site are pretty clear regarding the stir fry pan.
If you have difficulty judging temperature I recommend getting one of those infrared thermometer guns:
Something similar to this:
https://www.amazon.com/HDE-Non-Contact-Thermometer-Temperature-Functional/dp/B00QYX6F5G
Then you just point and read.
Here are the use directions from the website for the nonstick stir fry pan:
-=-=-=-=-
GETTING STARTED
Remove all packaging and labels. Wash the pan in hot, soapy water. Rinse and dry thoroughly.
Condition the interior nonstick cooking surface by rubbing a film of vegetable or corn oil over the entire cooking surface with a paper towel. Rinse the pan with hot water and dry thoroughly. The pan is now ready for use.
Occasional re-conditioning will help protect the surface and promote a longer life. Do not condition the black exterior.
BEFORE FIRST USE
Remove all packaging and labels. Wash the pan in hot, soapy water, then rinse and dry thoroughly. Your pan is now ready to be used and does not require any further preparation.
When frying in an uncoated pan, season the food only after searing on the hot surface. Turn food only when the surface has seared and is easily released. Reduce the temperature after searing.
HEAT RECOMMENDATIONS
Use medium and low heat settings for the majority of cooking on all heat sources, and allow the pan to heat gradually and evenly.
When searing meat, poultry or fish, a medium high heat can be used initially, but once the pan is hot and the food added, the heat should be lowered.
The pan should never be used on the highest heat setting for either preheating or cooking. Excessive surface temperatures will damage the nonstick cooking surface. See section on details of misuse.
Always use a stovetop burner that is similar in size to the base of the pan. Gas flames must always be confined to the base area and never extend up the sidewalls of the pan.
On any glass-topped stove always lift the pan to move it. Never slide the pan, as this may cause damage to the stovetop or the base of the pan.
The maximum safe temperature for oven use is 500°F / 260°C. When used under a hot broiler there should be a minimum distance of two inches (5cm) between the heat source and the top rim of the pan.
TOOLS TO USE
Le Creuset Silicone Tools are recommended. You can also use wooden or heat-resistant plastic tools.
Metal tools, spoons or balloon whisks may be used with care, but should not be used harshly or scraped over the nonstick surface. Do not knock these on the top rim of the pan. Knives or other utensils with sharp edges should never be used to cut foods on the nonstick surface. Hand-held electric or battery-operated beaters should not be used on the nonstick surface.
Always use an oven mitt or silicone Cool Tool™ when handling a hot pan during and after cooking.
OILS AND FATS
Add a little oil or fat to the cooking surface before heating begins. This will improve the flavor and browning of foods. At no time should the oil or fat become hot enough to smoke. If this occurs, cool the pan before proceeding. For fat-free cooking, preheat the pan on a medium heat setting for approximately two minutes before adding the food.
Do not leave the pan unattended during this time or allow the dry nonstick surface to overheat, as permanent damage may occur.
FOOD STORAGE AND MARINATING
Do not store raw, marinating or cooked foods in the pans. The ingredients may damage the surface.
CLEANING AND CARE
Cool the pan for a few minutes before cleaning. Do not plunge a hot pan into cold water.
Only recommended nonstick cleaning pads should be used on the nonstick surfaces. Do not use any metal or abrasive pads or abrasive cleaning agents on any of the surfaces.
The pan is dishwasher-safe, but washing by hand is recommended. Simply wash with hot, soapy water, and rinse and dry thoroughly. If the pan is regularly washed in the dishwasher some darkening of the rivets and outer ring of the base may occur, or a powdery white deposit may form. This is normal and will not affect the performance of the pan. The surface dulling or white deposits can be removed by carefully cleaning the affected areas with a gentle nylon pad and detergent. After cleaning, rinse and dry thoroughly.
Each time the pan is cleaned in the dishwasher, the cooking surface should be re-conditioned with vegetable or corn oil before the next use.
LE CREUSET HEAT-RESISTANT GLASS LIDS
Add another dimension to cooking with a Le Creuset Forged Hard-Anodized pan by using a Le Creuset heat-resistant glass lid. The tempered glass lid allows you to check the recipe without disturbing the cooking progress or temperature. It retains moisture and flavor and converts the pan to one for poaching, braising or casseroling. The lids are oven-safe up to 425°F.
MISUSE OF THE NONSTICK SURFACE
The Le Creuset lifetime warranty does not cover damage to the nonstick surface caused by overheating or scratching.
Overheating: Damage from overheating during cooking is instantly recognizable. The nonstick surface becomes discolored, and in severe cases will blister or peel away from the pan.
Scratching: Score marks or severe scratching caused by heavy use of metal tools is not covered by the warranty. Such damage is permanent and will result in a reduction of the nonstick release performance.
-=-=-=-=-
I wouldn't, i dont see any light burns.. if anything maybe a little closer once the stretch is done.
Do you have a ir heat gun? If not i would pick one up, fairly cheap. Canadian tire sells them for under 50 bucks, not sure if your in the usa or canada
https://www.canadiantire.ca/en/pdp/maximum-infrared-thermometer-0574632p.html
HDE Non-Contact Infrared Thermometer Digital Temperature Gun with Laser Functional Range -26 to 716 Degree Fahrenheit (-32 to 380 Degrees Celsius) https://www.amazon.ca/dp/B00QYX6F5G/ref=cm_sw_r_cp_apa_i_klnPCbXDC1QEQ
If there is a next time a toner like this one (amazon) is very useful. This one is sold elsewhere, I picked one up at a Home Depot some time ago.
Note that I linked an inexpensive one, however it works and is fine for the once every few years use of a home installer. If you want quality get a fluke brand one, but it's 3x the cost.
Technically this is /r/homenetworking like others have pointed out.
However, /r/homenetworking isn't really suitable for asking questions about anything involving toning out a drop and finding it on a patch panel. If you do a search for it there's basically no useful information for you there. Home networking or not, you're not just asking about "Why is my LANKSIS router so sloooooww".
Don't waste your money on a decent toner and cable tester, if it's just going to be used for a couple of drops around your house the cheapest of the cheap will do just fine. Grab one of these, plug it into the port in the room, and you can tone the cable out through the wall and easily find it on the patch panel. Once you find the port, hook up the cable mapper part of it at the patch panel and set the generator to test and you should get it sequentially going through each wire. If it tests fine on the cable map then you need to look closely at the termination itself and follow one of the many guides on YouTube to re terminate it.
https://www.ebay.com/p/Rj45-Telephone-Phone-Wire-Tracker-Tracer-Ethernet-LAN-Network-Cable-Tester-Toner/1061532813?iid=152635976413
If you need it faster, you can grab that same toner from Amazon.
https://www.amazon.com/ELEGIANT-Telephone-Tracker-Ethernet-Upgraded/dp/B015EFE3XA/
That being said, you really want to check behind the wall plate first just to confirm that it's actually hooked up to something and make sure that they didn't wire up those two ports for a phone and ethernet over the same cable. I've seen plenty of wallplates for coax and ethernet that aren't actually terminated behind the wall plate.
This is the tone-generator/probe I bought:
https://www.amazon.com/gp/product/B015EFE3XA/ref=oh_aui_detailpage_o07_s00?ie=UTF8&psc=1
And yes, I connect it to one side of the wires, and can only trace it through the wall for a foot or two. It gets quieter and quieter and is eventually much too weak to hear, even with headphones. I was wondering if I could, with some modification, plug this thing into a wall to be powered instead of using a 9-volt? And actually, now that I think about it, I probably want to strengthen the probe, the tone generator is probably strong enough.
Also, is there a better sub in which I should ask about this?
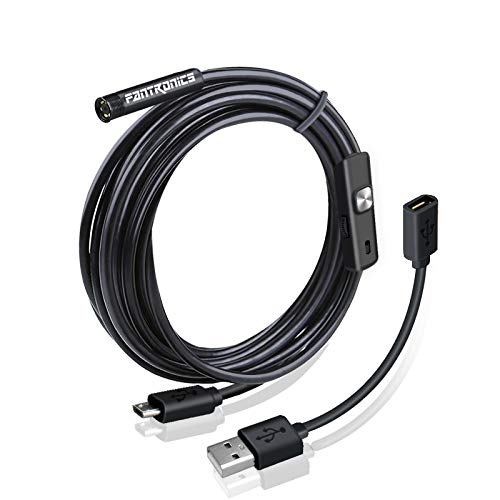
$17 on amazon. There's other versions for iPhone
Fantronics 7mm Android Endoscope OTG Micro USB Endoscope Waterproof Borescopes Inspection Camera with 6 LED and 3.5M Cable https://www.amazon.com/dp/B01CL1QUCW/ref=cm_sw_r_cp_apa_OAIDybBV23KXB
If you have access to something behind them I would stick a bright ass light in there. That will drive them out since they hate light. That should drive them out. If you have something like an LED flashlight that would stay cool enough I wouldn't hesitate to leave it in there for a few hours.
The urine and feces can have bacteria and parasites in it that can be harmful, not to mention the smell. It's going to be tough to know just how much is up there and what dealing with it would entail given the tight space.
Since you have access somewhat you could buy a cheap endoscope camera ($18 Amazon) and have a look around and make a decision from there. It could involve vacuuming out all the insulation and feces and then having fresh stuff blown in after you spray a disinfectant and deodorizer in the space.
One thing with eliminating the smell that is a priority is the scent will attract others to the space, so make sure when you board it up at least spray something like OdoBan all around inside the opening before covering it, and then clean off the gutter and downspout outside the hole as well.
I would also recommend something like this:
https://www.amazon.com/Fantronics-Endoscope-Waterproof-Borescopes-Inspection/dp/B01CL1QUCW/ref=sr_1_3?ie=UTF8&qid=1504374293&sr=8-3&keywords=android+inspection+camera
Or the equivalent for an iPhone if that's what you've got. Super cheap and not very good, but it'll work well enough once for you to snake it down there and maybe see where the key is. I bought one of these a while back and though it's pretty crappy video, I have used it half a dozen times already so for <$15 I think it's well worth it.
https://www.amazon.com/dp/B01CL1QUCW/
$20 inspection camera, works on most Android phones.
This is the one I use: https://www.amazon.com/AMIR-Electronic-Functions-Stainless-Batteries/dp/B01DGEWHN4/
Sometimes it goes to another dollar off on sale.
Decent, has little waterproof plastic box covers. Cheap, fast.
I’m in the same boat. Right now I’m leaning towards:
AMIR Digital Kitchen Scale, 3000g 0.01oz/ 0.1g Pocket Cooking Scale, Mini Food Scale, Pro Electronic Jewelry Scale with Back-Lit LCD Display, Tare & PCS Functions, Stainless Steel, Batteries Included https://www.amazon.com/dp/B01DGEWHN4/ref=cm_sw_r_cp_api_i_F0UyCbJ6SPCXR
Let me know what you choose.
I own this one, its been great!
Amazon, free shipping, total cost $10.99
AMIR Digital Kitchen Scale, 3000g 0.01oz/ 0.1g Pocket Cooking Scale, Mini Food Scale, Pro Electronic Jewelry Scale with Back-Lit LCD Display, Tare & PCS Functions, Stainless Steel, Batteries Included
https://www.amazon.com/AMIR-Electronic-Functions-Stainless-Batteries/dp/B01DGEWHN4/ref=sr_1_36?s=home-garden&amp;ie=UTF8&amp;qid=1520881968&amp;sr=1-36&amp;keywords=kitchen+scale
Since you asked your mom I'm assuming you're younger. I highly recommend an older beardie as they are so much cheaper to take care of. My 5 month old eats around $25 - $50 of bugs a week. I try to cycle through bugs so the cost depends on if I'm giving him BSFL (cheaper) or dubia roaches.
Adults only need bugs 2x a week and the rest of the week you just feed them veggies like collard greens and butternut squash. Which isn't only cheap but you can eat them too!
The bearded dragon kits in pet stores suck. Don't use night light lamps. Use a ceramic heater if you're house drops below 65F at night. There are also fairly cheap temperature controllers that will turn the heater on and off at night to keep the tank from getting too warm or two cold at night.
Don't get the fixture for the UVB bulb at a pet store. They're a ton cheaper at hardware stores.
I'm currently using a basking bulb from a pet store, but spot lights from a hardware store will also work for a cheaper price.
Get a bigger tank than the minimum requirement. If you end up with a beardie that likes to explore it can become stressed being cooped up in a tank that it finds too small.
These are what I use for my recommendations above:
Temperature Controller for ceramic heater
Ceramic Heater
UVB Bulb
UVB Bulb Fixture
I use this one-- https://www.amazon.com/gp/aw/d/B01DZ5NVBQ/ref=ya_aw_oh_bia_dp?ie=UTF8&amp;psc=1
It allows me to run two heaters. Was super simple to set up too, although it felt confusing at first.
Look online for Temperature Controller, it's a grounded outlet connected to a temperature controller with a temperature probe. Sort of like this.
I run my space heater outside the tent and just put it in front of a 6" flex duct that goes into the bottom of the tent with some pantyhose over the end to keep pests out. That duct is the only way fresh air can enter. I have the heater hooked up to one of these which has a sensor inside the tent and tells the heater when to turn on/off. Works really well.
Gotcha... I'd recommend checking the FG next time. Otherwise, you have no way of knowing how your yeast performed.
If you're fermenting in a colder than ideal environment, I'd recommend a temperature controller (like this one) and a cheap heating pad for your fermenter, especially if the temperature swings a lot. If possible, put the fermenter in an old sleeping bag with the heating pad, so it'll work a lot less to keep it warm.
Just don't chop until you know you can completely control your conditions/environment for the next 7ish days. Humidifier/heater/AC/dehuey, etc. Make sure the weather doesn't make shit difficult for you, and if it does, get the right equipment running.
I'm drying right now and it's 80F outside. Got an AC pumping and a humidifier humming. Earlier this week had a space heat on since it was colder. Just gotta keep shit in check.
I'm aiming for 65-70F and 55-60% humidity for 7-10 days.
This Temperature controller is a life saver for me: https://www.amazon.com/gp/product/B01KMA6EAM/ref=oh_aui_search_detailpage?ie=UTF8&amp;psc=1
You plug in your heater and AC, and set the temperature points and the swing and you're off. If it gets below 63, my heater comes on, if it gets above 68, my AC comes on. All automated. Easily customizable.
EC is Electrical conductivity. It measures the quantity of dissolved stuff, mostly salts, in the water and is a measurement of the strength of the nutrient solution. If you water with too high an EC you get nute burn. It's not actually nute "burn" but a result of the plant not being able to uptake water through osmosis.
Cannabis roots consume a lot of oxygen which they can not do if the soil is saturated. The soil MUST be allowed to become quite dry between watering so the roots can uptake oxygen.
GL!
Edit: This is the meter I use.
It's one of the things a lot of growers don't bother with but I consider it a "must have" meter. As important as pH.
Your best bet is to buy water testing strips off Amazon and test your water. Then adjust based on that. Don't just assume your Brita is doing enough. When you spend that much on an espresso machine ensure the water is good.
Test Strips
Water Quality Tester
Anti Scale Pouch
Edit: Formating
Cheap PPM Meter
I’ve got one of these. They’re cheap but seem to be accurate and simple to use. I really like it. If you want a recommendation for a modestly priced but awesome Ph meter I can link to one too.
It’s likely the stress of transitioning that’s causing it. If you want a good way to jump start your flowering, put the plants in complete darkness for 24 hours, then put them under the 12/12 light schedule.
I fucked up on my current grow by accidentally doing that. I had an issue out in my grow shed so I had to move the plants to my garage. It wasn’t supposed to be more than a couple hours. Turned into a full day in the garage. The indica plant went straight into flowering. So now here I am.
I got this one off amazon. Haven't really done extensive calibrating but it reads low in spring water and high in my tank water so...it seems good enough to give a ballpark reading.
I have a classic example of what happens to plastics exposed to high-concentration alcohol from my first run. I was using a standard acrylic tube, sold at your LHBS for floating a hydrometer, to collect distillate right out of the condenser. I was then floating my proof and tralle hydrometer in it to get a snapshot of the proof coming off my still. Long story short the well pump kicked off, causing the house water pressure to drop enough that I barely had any flow going through the condenser and it started to blow out alcohol vapor. This was quickly remedied by opening the valve more for my cooling water, but it destroyed the acrylic tube. Keep in mind it was only exposed to alcohol vapor for about a second.
Imgur
It was perfectly clear before it happened, and the entire inside of the tube turned white and the plastic became very brittle. In fact there should be a base on the tube, but it broke off when I set the tube down in the sink. I've gone to a glass sample tube now.
Keep in mind that if you try to go with a plastic condenser that the distillate will be entering while still in vapor form. If it doesn't immediately destroy it, I can't imagine what kinds of chemicals would be leached out (if nothing else just dissolved plastic) and added to your product.
did that come with the brewer's best kit? I got that kit, and found the hydrometer jar useless.
bought one of these on amazon to replace it
Hmm, just water then? My cylinder is like this one and the base screws on and off.
However, if yours doesn't screw off, and it has a balancing problem, then it may be touching the sides somewhat causing an inaccurate reading.
Triple Scale Hydrometer - $1.23 @ Amazon
12" Hydrometer Test Jar - $2.40 @ Amazon
Same vendor so you don't get smacked for shipping twice. This is seriously an almost required piece of equipment.
However, I ALWAYS recommend your LHBS first. I'll pay $20 at the LHBS for something I can get for $15 online just to keep the local guys in business. Good luck with the brew!
*EDIT: Fixed link
This is a Hydrometer, it's used to test the gravity of alcohol while brewing. How does this relate? Simple. Hydrometer tests gravity, so the lighter the liquid you're brewing the higher the % of alcohol content. So, you use the meter to find out how hammered you'll get! If you give something like our mead which is 12% alcohol but tastes like sweet honey- your girl will squeak with delight while getting hammered. squeaky hammers. Use with caution!
This has been public service announcement from Revmamacrystal
The MicroScanner^2 (like its predecessor) is an excellent tool. However, I recommend just buying the tool itself (w/carrying case), not the entire kit.
The kit you linked includes an inductive amplifier (tone probe), numbered terminators (for identifying multiple drops simultaneously), and some miscellaneous cables. These are nice to have but definitely not worth an extra $300. The only critical component is the inductive amp, and you can find a very decent one at a much more reasonable price.
I got this one.
Works great, though kinda slow to settle. But for the price, hard to beat.
>I've been neglecting to ph my water and so far It hasn't been necessary.
That's the thing with soil grows :) It's a more forgiving medium because it does take longer to make changes. But this can make it really difficult at times in determining what's out of whack.
Liquid/paper pH kits are a good start, but an actual pH meter is really the only way to go. You can find them around $20 on Amazon
Link
If you determine your soil pH we can use that value to find what nutrients may have gotten locked out. A good way to do this is to pH your water before adding it, and then pHing the runoff water that comes out of the bottom of the pot. If you put in 7.0 and it drained out at 6.5, you know your soil pH had to be around a 6.0 to influence that change.
Based on the nute deficiencies showing I'm guessing acidic as well. (P - Ca - Mg will lock out first from acidic soil) Pick up some pH up/down solution and simply be sure to water in the correct range after this. (6.5-7.0) I don't have experience with wood ash, but soil additives typically take a while to break down and release fully. No time! :)
If your pH is severely off you'll want to flush, but your plant doesn't seem that upset yet.
reliable Ph meter from my own experience is the most important thing. I PH test my water everytime, and check runoff every once in awhile. I'm on my first grow as well. CFL. Here's the PH meter I use from amazon that has been great!and cheap. http://www.amazon.com/Milwaukee-Instruments-PH600AQ-Tester-Calibration/dp/B005H78ZI0/ref=sr_1_1?ie=UTF8&amp;qid=1331514593&amp;sr=8-1
I also got that PPM blue meter as well. Good luck!
believe it or not, I find I have much better luck with hydro than I do with soil. I've read in a few places that one should grow in soil because it's easier, good for beginners etc... but I had a hell of a time keeping shit alive in dirt. Idk what it is, but I've had super good luck with my 3 hydro grows to date. This is the first time I'm having bad discoloration, but I think it's important that my next purchase is a good ppm/ph meter. I'm just using one of those shitty milwaukee meters. I don't trust the calibration.
the Bluelabs gear is nice if you have the money.
I bought a simple $15 PH600 on amazon
http://www.amazon.com/Milwaukee-Instruments-PH600AQ-Tester-Calibration/dp/B005H78ZI0/ref=sr_1_1?s=lawn-garden&amp;ie=UTF8&amp;qid=1334068927&amp;sr=1-1
and just as cheap a TDS meter
http://www.amazon.com/HM-Digital-TDS-EZ-Tester-Purity/dp/B002C0A7ZY/ref=sr_1_2?ie=UTF8&amp;qid=1334068952&amp;sr=8-2
both work incredibly well
PH TEST I guess the question for you is how do you test your run off . what steps do you take
Is this the one your talking your talking about? Milwaukee Instruments PH600AQ Ph Tester With 1 Point Manual Calibration https://www.amazon.com/dp/B005H78ZI0/ref=cm_sw_r_cp_apa_i_E2K7AbD8K6068
These are what I use. They work just fine.
pH:
http://www.amazon.com/Milwaukee-Instruments-pH600AQ-Tester-Calibration/dp/B005H78ZI0/ref=sr_1_1?ie=UTF8&amp;qid=1348464821&amp;sr=8-1&amp;keywords=milwaukee+ph+test
TDS/EC:
http://www.amazon.com/HM-Digital-TDS-EZ-Auto-off-Function/dp/B002C0A7ZY/ref=sr_1_6?ie=UTF8&amp;qid=1348464821&amp;sr=8-6&amp;keywords=milwaukee+ph+test
http://www.amazon.com/gp/aw/d/B005H78ZI0 - PH meters are actually fairly accurate and inexpensive...
I have this one. Works good. You have to convert brix to SG which not really an issues. Pretty much Brix=Plato so I just think of it that way now.
https://www.amazon.com/Milwaukee-Refractometer-Automatic-Compensation-Resolution/dp/B007Z4IN58/ref=sr_1_2?ie=UTF8&amp;qid=1468898926&amp;sr=8-2&amp;keywords=digital+refractometer
I still use a hydrometer for FG for the reasons others stated
I use a milwaukee digital refractometer, and keep it pretty well calibrated, so i dont think it's likely that i'm getting a bad reading. It reads %Brix and then I convert that to SG to calculate ABV.
I have tasted it, and it is damn good! I just don't want to jump the gun and it end up too sweet (and not strong enough).
If you want to pay just a bit extra, you can buy one with temperature compensation
Then all you need to do is to multiply your brix reading by 0.85 to get TDS.
And this is why I now use a digital refractometer
Digital refractometer. Once you calibrate your specific unit in Beersmith, you can even use it during/after fermentation. All you need is a few drops.
Or, if you have a few thousand dollars, you can buy a digital specific gravity meter. A guy in my brew club has one that he acquired because his work was throwing them out. So. Jealous.
I’ll see if we get anywhere with the testing kit and actually turning the softener on. If it works, I’ll see about getting the other information you specified to see if it’s set close to where it should be.
Based on this test the hardness is 30 before running the softener.
We do have an iron filter in line ahead of the softener and the tank was just replaced a month ago or so due to it being close to full and a recommendation of the previous homeowner to replace it in 2015 (we found an old invoice for that).
You can do a test at home if all you are looking at is hardness. I've seen this recommended. If you are on municipal water there should be water quality reports available.
This is the water hardness test kit we use: https://www.amazon.com/gp/product/B008FM7WLU/ . It's slightly more expensive than the test strips, but it's a lifetime supply.
This is the guy that I bought. Any good?
Get an asbestos testing kit.
If there's asbestos, hire a pro for the abatement. If no asbestos, just decide if you'd rather spend your time scraping the ceiling or hanging, taping, and mudding new drywall... There is no happy answer here.
Amazon has test kits one can use:
http://www.amazon.com/SLGI-Certified-Test-Kits-Asbestos/dp/B008J3ZK8M/ref=sr_1_1?ie=UTF8&amp;qid=1376676024&amp;sr=8-1&amp;keywords=asbestos+test+kit
I purchased this (twice) and it worked great! Just got my sample, filled out the form, made an account, filled out my account. Sent it in to the company and in 7 days I had my results. Very professional product.
My sample consisted of: A segment of popcorn ceiling from 5 different rooms.
https://www.amazon.com/dp/B008J3ZK8M?ref=ppx_pop_mob_ap_share
https://www.amazon.co.uk/Wharfedale-9-0-Black/dp/B00A1E94J8/ref=sr_1_23?ie=UTF8&amp;qid=1493860831&amp;sr=8-23&amp;keywords=bookshelf+speaker
with
https://www.amazon.co.uk/Gemtune-SA-50-Amplifier-Adapter-Standard/dp/B00KBIV1WW/ref=sr_1_6?s=electronics&amp;ie=UTF8&amp;qid=1493860892&amp;sr=1-6&amp;keywords=stereo+amplifier
This looks like the cheapest decent new integrated amp or receiver available where you are at. I think that works out to about 150 euros.
http://www.amazon.co.uk/Pioneer--10-K-50W-Stereo-Amplifier/dp/B0082JFKPQ/ref=sr_1_2?ie=UTF8&amp;qid=1459372804&amp;sr=8-2&amp;keywords=stereo+receiver
Here are some inexpensive speakers that should be pretty decent:
http://www.amazon.co.uk/Wharfedale-9-0-Black/dp/B00A1E94J8/ref=sr_1_1?ie=UTF8&amp;qid=1459372974&amp;sr=8-1&amp;keywords=wharfedale+speakers
Phono pre:
http://www.amazon.co.uk/Project-Phono-Turntable-Pre-Amplifier-White/dp/B00KWTK086/ref=sr_1_2?ie=UTF8&amp;qid=1459373098&amp;sr=8-2&amp;keywords=project+mm+phono
You'll need some speaker stands, a roll of copper speaker wire, and some wire strippers to get it all set up properly.
Ah interesting, thanks! I love that he has an 8" sub to go with his
18"12" mains XD.I actually have a similar mis-match of speakers though I paid considerably less. Wharfedale Diamond 9s and Bose 201 Series III's, connected to two Yamaha CRX-M170 amps. One was given to me and the other was bought 'faulty' for £50, however the amplifier part works fine. Gale 3090 sub bought second hand for £50. Overall it all sounds pretty good to me, and I'm happy with it :)
I'm thinking of investing into a quality audio setup for my computer. Usually I just buy any old pair of speakers, but they have been lack luster.
The parts I've picked so far are;
Speakers: https://www.amazon.co.uk/dp/B00A1E94J8/ref=wl_it_dp_o_pC_S_img?_encoding=UTF8&amp;colid=DREJUA7DFCR&amp;coliid=I1DE7COFWGHI3X
Amp: https://www.amazon.co.uk/dp/B00KBIV1WW/ref=wl_it_dp_o_pC_nS_img?_encoding=UTF8&amp;colid=DREJUA7DFCR&amp;coliid=I2MD7CS1F3VRTE
Speaker Wire: https://www.amazon.co.uk/dp/B00C5R3OG8/ref=wl_it_dp_o_pC_S_img?_encoding=UTF8&amp;colid=DREJUA7DFCR&amp;coliid=IMB3EN04SQ5JI&amp;psc=1
Also how much cables do I need, from my understanding I need one cable that goes from my computer(with the green jack) that then splits and goes into the red and white port on the amp.
Then I need two further cables from each speaker to the amp? And a power cable of course.
Anything else I'm missing?
Completely new at this, so I have a very basic understanding.
Thank you! Although I've noticed my choices are much more limited here in the UK. People don't really use craiglist, or other cool websites where things are cheap :( The only one is gumtree really or ebay.
Now, these are really cheap options I'm aware, but what do you think?
http://www.amazon.co.uk/Wharfedale-9-0-Black/dp/B00A1E94J8/ref=sr_1_1?ie=UTF8&amp;qid=1450372409&amp;sr=8-1&amp;keywords=Dayton+B652
http://www.amazon.co.uk/JBL-LSR305-Active-Studio-Monitor/dp/B00DUKP37C/ref=sr_1_1?ie=UTF8&amp;qid=1450372355&amp;sr=8-1&amp;keywords=JBL+LSR305+5%22+Active
Recently I found an old Sony MHC-881 Hi-Fi system [MANUAL], the problem is the main section that houses the Radio, CD and Tape player is really just too big and heavy for the space I have.
What interested me was the two SS-H991 3 way speakers:
There are also a pair of smaller speaker SS-SR991 I probably won't end up using but I think is worth mentioning.
If I was to purchase an SMSL SA50 would it provide enough power to both 100W speakers (and produce a decent and loud enough sound) or would I have to get a stronger receiver, if so what would you guys recommend?
The other option would be just to get myself a pair of WHARFEDALE DIAMOND 9.0's and use the SMSL SA50 with it.
Thanks
Edit: Formatting
Unfortunately £100 is just around the lower limit of the very-entry level, not really mid-range if we're going to be honest.
The easy solution is M-audio AV-40s. They are 'powered monitors' so the amplifier is inside, all you have to do is feed them signal.
Alternatively, you could go for "passive" bookshelf loudspeakers and an amplifier. The advantage to this route is that you can upgrade the speakers or amp separately (edit: also each individual component is probably at least a bit better than the av40s, and if anything ever fails it can be replaced separately; it's just more flexible overall). There's some extra work involved but it's not difficult..
These Wharfedale 9.0 should be good for the price (the Diamond 9.1 were reviewed by Stereophile and they measure well for the price).
You'll need an amp, speaker wire, and some banana plugs are helpful. Oh, and probably a 3.5mm stereo to 2RCA cable to connect your 3.5mm source(s) to the amp.
How much better are either of these compared to tiny computer speakers like Logitech or Creative etc.? Much better.
If you're after quick and cheap, then you could do worse than the Ds18b20 sensors in the waterproof housing ( https://www.amazon.co.uk/dp/B00CHEZ250/) - they use the 1-wire protocol so are easy to get working with the devices you're looking at using.
If you want something a bit more substantial and industrial, DM me and I'll contact some of our suppliers to get some options for you.
Why didn't you just go with a pre-made and cheap option? Waterproof DS18B20's are all over the place. I use these for the monitor on my reeftanks which would arguably be a much more harsh environment than a greenhouse.
DS18b20 Waterproof
I will find the script in a bit but basically you take a DS18B20 temperature sensor and hook it up to the GPIO pins. In some part of whatever Raspberry Pi distribution config utility you're using, will be an option to enable I2C connectivity.
Basically you run the cat command to get the temperature of the sensor, have a script to write that to a file with a timestamp, and make a cron job to run that every minute. You can then have another script to alert you if the temperature gets above a certain level. Some temperature logging tutorials want some sort of SQL but you can do this without it.
edit: here's the pastebin with the two scripts. The cronjob entry looks like this:
> * /root/thermcron.sh
I would say about $25-$30 with parts and everything. Once you have the code for one, putting it on others would be quick and simple. It would be a good option for future projects as well since you could just add other things to the board.
Screen
Temp sensor
Mostly Wemos D1 Mini and whatever USB supply I have at hand (have had good luck with Motorola dual-ports). I like the idea of the Feathers, but haven't run into an application yet for myself where I want to put up with periodically recharging the device.
For indoor temp/humidity sensors, Amazon seller HiLetgo (and probably others) sell a D1 Mini shield with a DHT22 prewired to D4. Between those parts and ESPEasy, it takes about 15-20 minutes to put a new sensor together.
For outdoor and remote temp, I grabbed a 5-pack of ds18b20 probes from Amazon. Each probe has a unique ID in rom which ESPEasy honors, so multiple sensors can be wired in parallel (on the same bus) and still be read separately. For ease of wiring, D3 supplies the power, D4 is the data (pulled up by the LED), and GND on the Mini is right next to D4.
All publish to Mosquitto, of which Home Assistant is a subscriber.
Yes, I will post a link. Red breadboards are just for convenience. One has 16 resistors. You need 1 resistor for each relay because relays are 3.3v and board is 5v. 1K to 3K seem to do the job. And the other board only has 3 connectors for DS18b20 Waterproof Temperature Sensors along with 10K pull down resistor.
If you can afford it (say $70) - don't get a Thermapen, get a K Type thermocouple brain and a food-grade submersible probe.
The brains are universal and cheap (and read up to two probes independently)
https://www.amazon.com/Signstek-Channel-Digital-Thermometer-Thermocouple/dp/B00FFYEPVQ/ref=sr_1_9?ie=UTF8&amp;qid=1483083745&amp;sr=8-9&amp;keywords=K+type
The probe looks like this:
https://www.amazon.com/Cooper-Atkins-50360-K-Thermocouple-Stainless-Temperature/dp/B00DYC9ZUW/ref=sr_1_1?ie=UTF8&amp;qid=1483083631&amp;sr=8-1&amp;keywords=K+type+thermocouple+food
Apart from these two pieces, you need a 9V battery. Some 3M foam tape is also good if your dad does Sous Vide. These thermocouples allow for constant probe readings the way you'd use an old fashioned roasting probe, except you can use this under water, in oil, in a smoker, on a grill, in a fridge, or in a pan. For things that overcook quickly or are blind cooked, this is the best thermal tool you can get right now.
Do you need that many channels? I would go with something simple [this] (http://www.omega.com/pptst/OM-EL-USB-TC.html) if you don't need to centralize a bunch of inputs.
If you don't need USB (logging/monitoring) you could use something like this instead.
A cheap thermocouple will go a long ways with this (and future diagnostics). I got one from amazing for about 20$.
http://www.amazon.com/gp/product/B00FFYEPVQ/ref=oh_aui_detailpage_o06_s00?ie=UTF8&amp;psc=1
Alternatively - you could just replace the resistor with a 4.7k pull up - which would cost all of 50cents.
Drill a hole for a probe and use something like this https://amzn.com/B00FFYEPVQ
Only way to find out is cut that hole bigger and take a peek inside, maybe with an inspection snake camera. They can get expensive but this seems relatively cheap, Inspection Tube Camera
You can probably take off some outlet covers & poke around.
https://www.amazon.com/dp/B00JERRES6/ref=cm_sw_r_cp_api_UGFSybT4QKAP0
I like using this to probe inside walls. I tape it to the end of wire fishing rods to go up vertically. Just gotta find an entry point. Outlet, light switch, etc. or just make a whole where it's easy to hide.
If the water is clear enough, try one of these first
http://www.amazon.com/DBPOWER-Waterproof-Borescope-Endoscope-Inspection/dp/B00JERRES6/ref=sr_1_3?s=industrial&amp;ie=UTF8&amp;qid=1458942585&amp;sr=1-3&amp;keywords=endoscope
What about one of these? DBPOWER 2Million Pixels 5M USB Waterproof HD 6LED Borescope Endoscope Inspection Tube Camera https://www.amazon.com/dp/B00JERRES6/ref=cm_sw_r_cp_awd_wMoGwbN71F5WD
Haven't tried one but they seem plentiful online.
Dr.meter PH001 Backlit pH Meter 0.01 High Accuracy Pocket Size pH Tester with ATC 0-14 Measurement Range https://www.amazon.com/dp/B00LNSEZH2/ref=cm_sw_r_cp_api_vIBTybWWVN35T. Have used this for 3 years and have never had a problem. No sense in spending extra $$ for a name brand.
http://www.amazon.com/Automatic-Temperature-Compensation-Measurement-Resolution/dp/B00LNSEZH2/ref=sr_1_6?ie=UTF8&amp;qid=1418193182&amp;sr=8-6&amp;keywords=ph+meter or something similar with good reviews
Thanks. Would you consider this a decent pH meter?
https://smile.amazon.com/gp/product/B00LNSEZH2
If not, any suggestions?
http://www.amazon.com/Tester-PH-009-Digital-Meter-Calibration/dp/B00N7432II?ie=UTF8&amp;keywords=Ph%20pen&amp;qid=1463251803&amp;ref_=sr_1_1&amp;sr=8-1
Here's a inexpensive one that comes with some testing solution. Make sure to keep the probe calibrated because they are sensitive.
the only advice i can offer is that this ph pen is very reliable and only $13 lol. im interested to see what others say because my friends plants has exactly the same issue
https://www.amazon.com/Tester-PH-009-Digital-Meter-Calibration/dp/B00N7432II/ref=sr_1_1?ie=UTF8&amp;qid=1466896770&amp;sr=8-1&amp;keywords=ph+pen
You could buy a small pack for like $3.00 that would possibly last you the rest of your life. I understand you don’t want to be wasteful, but you don’t nneeed to use them very often - probably only a couple strips every year to double-check the readings of one of these -
Digital PH Meter PH-009 Pocket Size Water Quality pH Tester for Household Drinking Water, Hydroponics, Aquariums, Swimming Pools - Extra Two Packs of PH Calibration Solution Mixture https://www.amazon.com/dp/B00N7432II/ref=cm_sw_r_cp_tai_GBYSAbC90CFC3
Dude, just grab this. Trust me on this one.
edit: Is that Grizzly Adams on your test kit?
this is the one me and my buddy bought. Instructions that came with it were basically junk... Very poor English.
There are quite a few of these meters on Amazon that look similar and having decent reviews (including people that use them for making beer). I'm not sure if they're all the same or what...
I treat it like any other pH meter: I rinse with distilled water and dry with kimwipes after each use. I put a small piece of sponge in the cap and bought some KCl (pH storage solution) off eBay. I wet the probe and sponge with the kcl before storing it.
http://www.amazon.com/gp/product/B00N7432II?psc=1&amp;redirect=true&amp;ref_=oh_aui_detailpage_o00_s00 Just bought a cheap one to make sure I wasn't above 6. I'll probably upgrade later but for now this was just for piece of mind.
Take the time to learn how to use a multi meter. It will help you for the rest of your life. Electricity and electronics should be taught in primary school and everyone should know how to use a multimeter. A multimeter is simply a combination various meters and testers into one device: a voltmeter to measure volts, ohmmeter to measure resistance in ohms, an ammeter to measure current in amps, and various other things like electrical connection continuity, temperature (with temp probes).
You can purchase a simple multimeter for less than $10, however for your specific electrical problems, I recommend one that has a DC clamp-on ammeter like this one. That lets you clamp the meter around a wire to measure how much current is flowing, like on brake light circuit to see if it's drawing the correct current needed for the light bulb, or whether there's a short circuit that's drawing a lot more current than it should be doing.
If you aren't willing to learn how to use a multimeter, then don't bother attempting to fix this problem by yourself. Find another mechanic. You need to know basic electronics to diagnose and fix most electrical problems, and it can be dangerous to you and to others for you to mess with electrical things without that knowledge.
are you using one of these to measure?
https://www.amazon.com/Uni-T-B4Q094-UT210E-Current-Capacitance/dp/B00O1Q2HOQ/ref=sr_1_5?ie=UTF8&amp;qid=1499406313&amp;sr=8-5&amp;keywords=current+clamp
I keep a small bag in my main bag that I can clip to my belt. I mostly use it when I know I'm going to be working in a panel for a while but in general this covers 75% of my needs. Here's the bag.
Here is what I keep in it.
Wire Stripper / Needle Nose I haven't had these for too long but I really like them.
Small meter I like this one for a lot of reasons. One is that will fit in the bag and is good enough to use under 480 in my opinion.
Voltage Detector The meter has non-contact voltage detection, but I like this one more.
Crescent Wrench I like this one because it also has the monkey wrench on it so it's good for tightening air lines from time to time. Though in reality I don't use that feature much.
A couple larger screwdrivers #2 phillips and a flat head big enough to open panels easily.
Controls Screwdriver For terminals and such. I sometimes use the ones with the rotating end.
Flashlight These are not the best, but they're cheap and work as a penlight and they can do area illumination with a magnetic base.
I have seconds (and in the case of the meter and flashlights - a higher quality version) of all these in my main bag, but I mostly use this little pouch.
As an RV owner, you should consider getting one of these:
https://www.amazon.com/gp/product/B00O1Q2HOQ/
I promise I'm not an amazon shill, and I'm RVing my way back from Rocky Mountain National Park. I was with 4 other RVs and we were all using this meter to track how much current our batteries were taking in & putting out. We only had limited time in the park to run generators to recharge the batteries, so we wanted to know exactly what was going on.
If you get this meter, you can clamp it onto a wire and it will tell you what amount of current is going through the wire. It measures other things as well such as voltage, continuity, etc. It's great to keep in the RV.
If you do buy it, and want some explanation on how to use it, shoot me a message.
UTHs is going to do little to nothing for your ambient temps, they really only heat the surface they touch. You're gonna want a "heat gun" to measure surface temps for it.
You can always use one of these on the heatsink to see if the temps are even remotely close to what it's saying. I don't think your motherboard actually has a CPU temp sensor (how would it? The temp readings from a CPU come from the silicon die, not any part of the motherboard), and may just be misinterpreting the data it's poling the CPU for.
Specialist tools? I'm not referring to one of those FLIR thermal cameras.
I'm referring to one of these cheap-o guns like this: https://www.amazon.com/HDE-Non-Contact-Infrared-mometer-Temperature/dp/B00QYX6F5G
With one of these: https://www.amazon.com/HDE-Temperature-Infrared-Thermometer-Laser/dp/B00QYX6F5G
Man they’re like $15 on Amazon
HDE Non-Contact Infrared Ther mometer Digital Laser Surface Temperature Gun with Backlit LCD Display - Range -26°F to 716°F (-32° to 380° Celsius) https://www.amazon.com/dp/B00QYX6F5G/ref=cm_sw_r_cp_api_i_IT4SCbTM19YFY
Hmmm, trying free-hand was actually what made me waste most of my concentrates. It wasn't until I actually got the thermometer that I was able to get proper tokes. I'll try what you said though, 20s heat 50s cool.
Edit: I also don't know if it makes a difference or not with the thermometer, but it actually has two functions, 1 is a laser and the other seems to be some sort of wide band. Here's the exact one just in case. https://www.amazon.ca/gp/product/B00QYX6F5G/ref=oh_aui_detailpage_o02_s00?ie=UTF8&psc=1
Cable tester for the drop: https://www.amazon.com/Upgraded-Version-ELEGIANT-Telephone-Ethernet/dp/B015EFE3XA/ref=sr_1_20?ie=UTF8&amp;qid=1485309064&amp;sr=8-20&amp;keywords=cable+tester
Sounds like this product might be a good solution for you (if you are willing to install in the wall) https://www.ubnt.com/unifi/unifi-ap-wall/
Get one of these:
Cable Tester, ELEGIANT XQ-350 Wire Tracker Tester RJ45 RJ11 Network Tester Telephone Phone Wire Finder Ethernet LAN Line Finder Cat5 Cat6 with 2 Network Wire Stripper, Headphone, Toolkit https://www.amazon.com/dp/B015EFE3XA/ref=cm_sw_r_cp_apa_i_S1JrDb10NQ84F
And clip the alligator clips on the low voltage wires and use the reviever to trace the wires through the wall
-With power off-
Ended up researching into a bag and eventually found one I think will work well.
I will link to everything I've found on amazon. I have found others on our distributors website. Hopefully this will help others put together something as well!
Bag
SATA Adapter
Toolkit
Toner/Fox and Hound
Small LED Flashlight
Velcro Wire Ties - Zip ties are awful
Network Kit
External HDD
Analog Phone - For testing Fax Lines mainly
There's more, such as cables and things, but everyone should be OK with figuring that out for yourselves. Total the kit (with cables and stuff included) is only about $370.91 per technician.
Hope this helps someone!
A cable tester would work...a toner might be better though, and certainly cheaper.
Cable tester, ELEGIANT XQ-350 Wire Tester Telephone Phone RJ45 RJ11 Wire Tracker Ethernet LAN Line Finder [Upgraded Version] https://www.amazon.com/dp/B015EFE3XA/ref=cm_sw_r_cp_apa_jgHFzb2Y1PF6N
I had a similar situation in the house we moved into several years ago. Original owners had wiring for whole-home audio done before drywall was on. They never got around to installing anything else.
Only clue was - in each room pre-wired for speakers - there was a blank wall plate. The speaker wires ran behind it. This is where the wall volume controls were intended to go.
I was able to locate the wires behind the drywall using a "Tone and Probe kit" similar to this one on Amazon:
Tone and Probe Kit
Basically, you hook up a small battery powered device to the exposed wires and it send a signal down that line. Then you sweep the receiver along the wall/ceiling until it detects the signal.
Can be a bit frustrating if you have no idea where to look, as you need to be very close to the wire for the receiver to hear anything.
I use this cheapo. It has the loudest tone generator I have come across. As long as there is a good connection to the toner it can read through double layer sheetrock.
https://www.amazon.com/dp/B015EFE3XA/ref=cm_sw_r_sms_apap_MXVIaESDsmVIE
You can get a decent cable tester for under $20. Here's what I have in my tool bag: https://www.amazon.com/gp/product/B015EFE3XA
Or you can plug a laptop into one end and the router on the other and see what works if you want to do it for free.
Yes, I did all the terminations myself. I am 100% completely certain they are all A-style terminations.
I used this to test.
You could get an endoscope camera like this:
http://www.amazon.com/Fantronics-Endoscope-Waterproof-Borescopes-Inspection/dp/B01CL1QUCW/ref=zg_bs_401578011_1
A look inside the hopper might help you figure it out.
the quarter panel doesn't look that bad but the bad news is rust is always much worse than it appears from the outside.
if i were you i would learn to weld and start saving for a welder and quarter panel or patches.
I wish you were local i would give you a hand. replacing panels is a daunting task if you haven't done it before.
you might consider buying some high quality primer and grind sand back the rust on the quarter panel and prime it before it gets worse. jam a endoscope up there and see how bad it really is inside. https://www.amazon.com/Fantronics-Endoscope-Waterproof-Borescopes-Inspection/dp/B01CL1QUCW/ref=sr_1_2?ie=UTF8&amp;qid=1481175004&amp;sr=8-2&amp;keywords=endoscope
here is a pretty good repair to give you an idea of what might be required.
http://forum.miata.net/vb/showthread.php?t=578166
I wonder if something like a cheap boroscope would help in situations like this:
https://www.amazon.com/dp/B01CL1QUCW/ref=cm_sw_r_taa_-VEjybVHEX9A6
Thread the camera end thru the cabin air duct, watch the screen, thread it deeper, repeat.
I got this one for my AeroPress needs. It isn’t waterproof, but it is cheap enough that if it breaks I can replace it 10 times and still be ahead of the acaia one.
3000 g x0.1g scale
> My current machine doesn't have any recipe settings
Very few do, but that's OK! All you need is a cheap scale and a stopwatch. Measure the ground espresso going in (the "dose"), then put the scale on your drip tray and set the cup on the scale (you'll see me doing that in the picture I posted of my machine). Press the button on your machine and start a stopwatch (on your phone or whatever) to set a timer.
If your machine allows for manual control, stop it somewhere before the desired final shot mass. There will be some espresso dripping out after you press stop so you'll have to learn approximately when to stop (on mine there's about 3 grams or so, so for 27g I'll stop at 24g). If your machine is fully automatic, first check to confirm that you can't control it manually, otherwise you just need to let it run until it's done and hopefully it's not a straight timer.
Finally, if the 27g shot (or whatever the recipe would call for) took too long, then adjust your grinder to a looser grind. If it ran too quickly (again, based on the recipe), then adjust your grinder for a finer grind.
This is the basic process for following an espresso recipe. Espresso is a super tweaky process and everything you do impacts the result in one way or another. Using the scale and stopwatch you can track the process against your recipe and then you can use your grinder settings to control the result.
I got one of these cheap ones.
It works. Seems as precise as it can be, clear display, easy controls. But it's irritatingly slow. For coffee beans that's not a problem. But when pouring slow drip it's irritating. I often overshoot.
I think the general opinion is that using a consistent method of coffeemaking is most important. But how to achieve this?
There are several variables involved in coffeemaking, and if you're sloppy, it's hard to get consistency, or even to refine your technique once you start to get it right. So I will list a few variables and how to keep them consistent.
But above all, the quality of the coffee is probably the biggest effect on a good tasting brew. Always use fresh, whole beans and grind them immediately before use.
Here is what I use:
So I spent about $300 total, you could get the $100 cheaper grinder and do this all for $200. And you would be a very happy coffee drinker.
Hello! I would reccomend using the inkbird ITC-306T. I've been using one for over a year with a heat cable and it has worked great! You can set a temperature range you like on it and set an alarm to go off if it goes outside the set zone. To monitor the heat, attach the probe to the glass or the surface closest to the heat mat (the nearest surface between the snake and heat mat). Hope that made sense!
Link: https://www.amazon.com/dp/B01DZ5NVBQ/ref=cm_sw_r_cp_apa_i_MzgqDbNTY789D
Instructions on set up (the advanced model, but set up is very similar) : https://youtu.be/MOQL2llj7AM
A thick dish towel?
Here's another thermostat:
https://www.amazon.com/dp/B01DZ5NVBQ/ref=cm_sw_r_cp_apa_IHvIxbZ4M248V
I use the same source of light for my frog. If my pothos can grow in there then I feel like it’s sufficient.
The heating mat is MUCH less drying than any bulbs. I didn’t need to use the CHE as much when it was warmer but as the temperatures have gone down I’ve had to use it more and I have been having to keep a closer eye on the humidity gauge. I’ve got it plugged into the thermostat all the time now and I’ve got to mist at least once a day, oftentimes twice.
I do really recommend a thermostat. I really love mine. I use an Inkbird Day/Night Thermostat thermostat so I can have a temp drop at night.
Maybe something like this would help. I use this in both of my greenhouses. Heat side activates when temperature drops a set amount below a set point (which you can vary) and cooling side activates when temperature rises a set amount above a set point.
https://www.amazon.com/bayite-Temperature-Controller-Thermostat-Pre-wired/dp/B01KMA6EAM/ref=sr_1_1?keywords=bayite+Temperature+Controller+1650W+BTC211+Digital+Outlet+Thermostat%2C+Pre-Wired%2C+2+Stage+Heating+and+Cooling+Mode%2C+110V+-+240V+15A&amp;qid=1567183786&amp;s=industrial&amp;sr=1-1
I bught this looks to be about the same thing
bayite Temperature Controller 1650W BTC211 Digital Outlet Thermostat, Pre-Wired, 2 Stage Heating and Cooling Mode, 110V - 240V 15A https://www.amazon.com/dp/B01KMA6EAM/ref=cm_sw_r_cp_apa_i_CjK2CbQ8PN8XZ
i would like to build an air conditioning system like that. what air conditioner do you use? does the air conditioner go back to its settings when it turns back on? can you provide a link to the black box and can you provide a link to the air conditioner. i found this on on amazon
is this the one u used?
edit: this one is rated for more amps
This was the entire set up I bought and it's working very well.
You might do fine with just one light instead of three.
One of these: $79.99
Roleadro LED Grow Light, Galaxyhydro Series 300W Indoor Plant Grow Lights Full Spectrum with UV&IR for Veg and Flower
https://www.amazon.com/gp/product/B00PH1MQV8/ref=oh_aui_detailpage_o03_s00?ie=UTF8&amp;psc=1
Two of these: $69.99
Roleadro Upgrade and Newly Developed LED Grow Light Full Spectrum 2nd Generation Series 300w Plants Light
https://www.amazon.com/gp/product/B01HI3AFYM/ref=oh_aui_detailpage_o03_s00?ie=UTF8&amp;psc=1
VIVOSUN Durable Waterproof Seedling Heat Mat Warm Hydroponic Heating Pad 48" x 20.75"
https://www.amazon.com/gp/product/B01EMXI6VA/ref=oh_aui_detailpage_o01_s00?ie=UTF8&amp;psc=1
$53.99
Bayite Temperature Controller
https://www.amazon.com/gp/product/B01KMA6EAM/ref=oh_aui_detailpage_o04_s00?ie=UTF8&amp;psc=1
I didn't realize you'd already ordered the items in your list. That pH pen should work OK, but you'll need to calibrate it every couple of weeks. THIS kit has 4.0 and 7.0 calibration solutions and the storage solution. You definitely need those items to keep the pH pen operational (same goes for ANY pH meter). And you still need a tds/ppm meter... THIS cheap one should do.
Probably chlorine, you can also get one of these to check for ppm Water Quality Tester, https://www.amazon.com/dp/B073713G5F/ref=cm_sw_r_cp_apa_i_5P4xCbVFMJWFQ
I was looking at these online EC Meter at Amazon
Will eventually get one but trying to limit the gear for the first couple of runs. With gardening I have been going slowly to spread out the joy of learning and experimentation !
The TDS of the RO (Bought from LFS) is 10 ppm. The Meter I use is: TDS Meter
http://www.amazon.com/Milwaukee-Instruments-PH600AQ-Tester-Calibration/dp/B005H78ZI0/ref=sr_1_cc_2?s=aps&amp;ie=UTF8&amp;qid=1345215012&amp;sr=1-2-catcorr&amp;keywords=aquarium+ph+tester
well then theres 21 bucks and made by a reputable brand. my mistake for assuming hydrofarm would make a decent product, haha.
A refractometer could get the same reading I believe. If the digital aspect is what you are looking for, maybe this would be another way
Now, I'm not in the medical field, don't play one on TV, and haven't stayed at any Hotels recently, let alone a Holiday Inn...
That said, wouldn't a borescope be a more accurate simulation?
Totally want a set of little graspers though....
I've had good results from this one: http://www.smile.amazon.com/gp/product/B00LNSEZH2?psc=1&amp;redirect=true&amp;ref_=oh_aui_detailpage_o08_s00
You'll have to calibrate it before using it and clean it after use, but if you do that then it's spot on
I'm using one of these:
https://www.amazon.com/gp/product/B073713G5F/ref=oh_aui_search_asin_title?ie=UTF8&amp;psc=1
It is cheaply made, but the EC value it gives matched the lab work I had one on my tap water within a few percent.
How do you like that Apera meter?