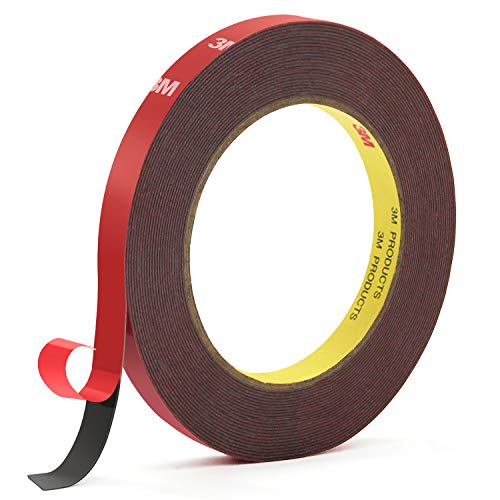
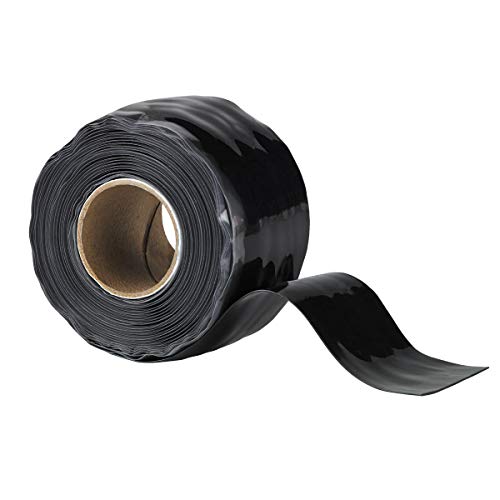
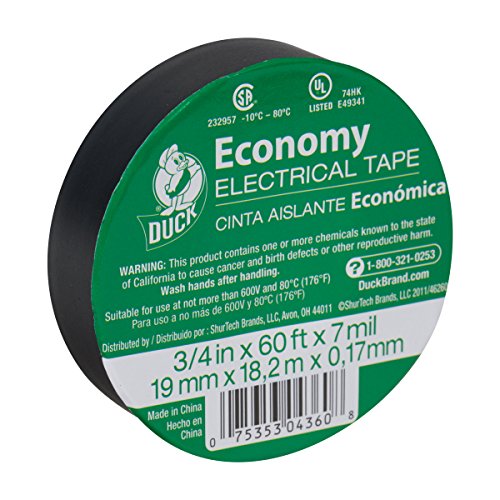
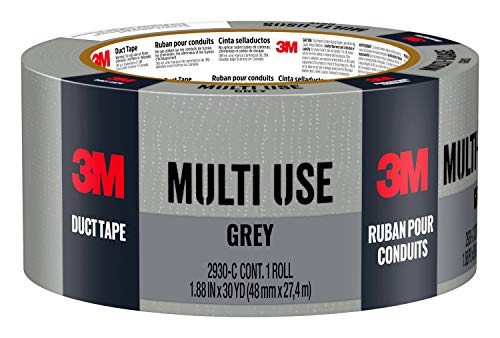
(Part 2) Best adhesive tapes according to redditors
We found 971 Reddit comments discussing the best adhesive tapes. We ranked the 411 resulting products by number of redditors who mentioned them. Here are the products ranked 21-40. You can also go back to the previous section.


Additional pictures/gifs if anyone's interested:
https://imgur.com/a/hShEq2F
EDIT: Thought I'd include links for some things being asked for on here. I didn't purchase everything new nor recently so there are some things I wasn't able to ID.
Art/Deco:
Technology/Peripherals:
Hey everyone, I cringe when I see the cost vs contents of most first aid kits on the market. Too much unnecessary stuff and only the highest priced kits have clotting powder, which I’ve used on the trail for controlling bleeding with large abrasions and deep or tangential lacerations. I put together my suggestions, with an eye toward maximizing usefulness and minimizing per unit cost. IMO this is superior to most kits costing 2-3x more. Light enough for the discernible backpacker, but makes a great gift for family and friends to throw in the car pocket, the boat, ATV, or carry along to kids sporting events. Feel free to add, subtract or substitute to customize your own.
Ever-Ready First Aid Adhesives, assorted sizes, 280ct $6.95 https://www.amazon.com/dp/B0179S0IAW
Self explanatory, enough for 2-3 of each size per DIY kit.
Vakly Stretch Gauze: 12 pk 4” x 4yds $7.99 https://www.amazon.com/dp/B01MTQFPA6
1 pk per kit and 4 left over for the home medicine cabinet.
McKesson individually wrapped sterile gauze pads: 50ct $5.17 https://www.amazon.com/dp/B002C5P9J8
6 per kit, throw them in a ziploc baggie to protect against moisture.
Woundseal clotting powder: 20 pkts $28.06 https://www.amazon.com/dp/B008RUJXR6
Remember that compression alone, when done properly, effectively controls most bleeding. But when a member of your group is on aspirin or other blood thinners, or sustains a nasty cut that won’t stop bleeding, this stuff is awesome.
3M Duct tape: 1.88in x 30yds $3.89 https://www.amazon.com/dp/B0013B1XHE
Countless uses for the backpacker / camper, from tourniquet, fracture splinting, reinforcement of wound dressings, fashioning a moleskin barrier for blisters, not to mention tent, pack or sleeping bag repair. Grab a few extra straws from your local fast food joint, trim them to 2 inches, then roll up 4 to 6ft lengths of duct tape around the straw. The straw in the middle doubles as a pocket billows for fire starting.
Rensow white petroleum jelly 5gms, 144 pkts: $24.99 https://www.amazon.com/dp/B00KAGT85M
Lip balm, burn treatment, also apply to rashes, blisters and abrasions to keep gauze from adhering. Doubles as an excellent fire accelerant for bushcrafting. I squeeze some on a cotton ball to use with my tender for catching a spark.
Kirkland anti-diarrheal (loperamide) tablets: 400ct $9.99 https://www.amazon.com/dp/B00EXPY004
Put 12 per kit and keep the rest for that week-old lasagna that you should have thrown out.
Ibuprofen 200mg tabs: 2x500ct $3.93 https://www.amazon.com/dp/B00P1NJAJS
Put at least 40 per kit as this is likely to be the first supply used.
Diphenhydramine capsules 25mg, 100ct : $4.99 https://www.amazon.com/dp/B00080CKDW
Useful for allergies, insect stings, contact dermatitis, and doubles as a sleep aid for those restless nights in the hammock. 12 per kit should do.
Triple antibiotic ointment 0.5oz 144 pkts: $12.18 https://www.amazon.com/dp/B00H2T9K3K
6 to 8 per kit should do, and keep the rest for replen.
Ziplock snack bags, 40ct (for storing meds): $2.73 https://www.amazon.com/dp/B00U9ZFFCY
Please clearly label each baggie using an indelible marker with name of med, adult dose and expiration date. Pediatric dose optional. Individual “gas station” packets are much more expensive but if routinely carried in vehicle this may be a consideration (law enforcement doesn’t like unlabeled pills floating around in baggies).
First Aid Bags (empty), Alazco, 8 bags $32.82 https://www.amazon.com/dp/B0182MQ4MU
Highly optional but nice for making your kit look pretty if you’re giving these away as gifts. I double wrap mine in gallon ziploc bags for moisture control.
A printable first aid primer: https://s3.amazonaws.com/yohsresourcelibrary/First+Aid+Quick+Guide.pdf
Certainly not a comprehensive guide, but has some key information like helpful reminders on how to properly perform CPR on kiddos and babies 👶.
No need to buy a whole new charger. Just use some electrical tape like this to block the light. It’s been a lifesaver for me in the night as any small amount of light drives me crazy when trying to sleep.
here
It might be a 55 inch. I saw this mod on amazon that converts a regular 16:9 monitor into 2 ultra wides. https://www.amazon.com/Scotch-Electrical-Tape-4-Inch-66-Foot/dp/B001ULCB1O
I'm a renter - I've learned to get ethernet all sorts of fun places without taking the hassle or expense of running cables through walls and under floors.
Step 1 - What you need:#
Buy 100 ft. of flat, white, Cat 6 cable - something like this will do.
You'll also want some white gaffer tape. Be SURE you get gaffer tape, and not duct tape. It's just strong enough to string up cable, and won't peel paint. Something like this.
Pour yourself a glass of lemonade. We'll come back to this later.
Step 2 - What to do:#
Here's where you get to be creative.
Find the crown moulding where the walls meets the ceilings and floors of your house. The little creases are perfect for disguising that thin white cable. I have hundreds of feet of ethernet going all over my house, and it's practically invisible. If you don't have crown moulding, improvise. Match the tape to your paint colors on your walls. Take your time, measure twice, and an extra pair of hands is always helpful. Be sure to be gentle with Cat6, especially with sharp bends and corners.
You also might want a couple ethernet switches on either end, depending on what your needs are. I've had good luck with TP-Link switches, they're fairly affordable, but people don't seem to like them very much around here.
Step 3 - Drink that glass of lemonade from earlier.
'Cause you're done, baby. Enjoy your gigabit LAN.
P.S. If you've got any more questions or whatever, shoot me a message. This sub is a VERY helpful resource, too.
I got you fam
I designed a very low cost aeroponic timer in the mid 1990s when I was an electrician and used to make them for people word of mouth.
Even with a mechanical relay, I've gotten around 3 million cycles so far at about 3 seconds on, 90 seconds off with a 20 watt pump (changed pump a few times) in a low pressure system.
I made some adjustable units but most people went back to about 3 seconds on, 90 seconds off.
If you google aeroponic pump controller mine is the first to pop up in the Google results with an old Flickr account. Schematics and how it's wired up are shown. It costs less than $10 if you can scrounge up a 12 volt power supply and a power cord.
http://www.flickr.com/photos/22670731@N08/sets/72157603801652807/
The pump cycle unit from the OP would be easier to make if one isn't familiar with basic electronics and soldering.
Be sure you have the proper ground if needed. Some pumps, like the Little Giant series, are designed for 3 prong receptacles so you should not use a 2 prong plug with it.
Anytime you wire stuff up in a metal box or something with any exposed metal parts it should also be ground bonded unless it specifically says it's double insulated. Look for a square inside a square symbol. The OP's timer looks good to go with the PVC box and 2 prongs.
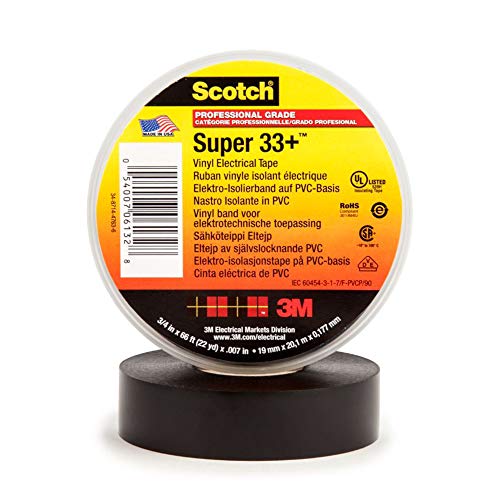
The only change I would make is to use Scotch Super 33+ electrical tape which is good for higher temperatures and has a far superior glue that will also hold up better under higher humidity. I wouldn't trust anything else in a long term wrap job and only use cheap tape to temporarily hold stuff together. Home Depot and the like will have it.
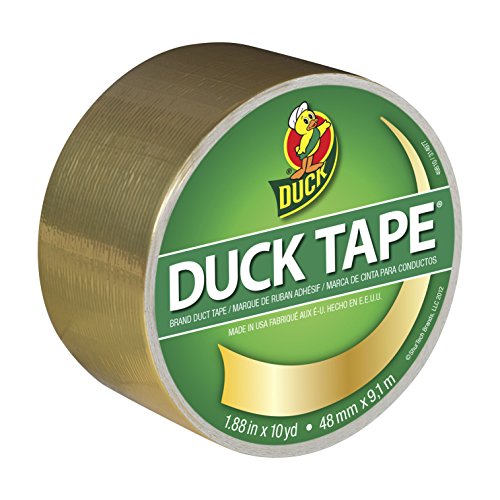
But you can get duct tape in all sorts of colors including gold
https://www.amazon.com/Duck-280748-Metallic-Inches-Single/dp/B0065LRTES
The short answer is: It depends.
Any rim can be sealed off at the spoke holes with rim tape if you clean it thoroughly and use the right width of tape.
The tricky part is how well the tire will seat at the bead. Stan's Rims and Spank are two rim manufacturers that I know take extra care with this area (and I think simply use a slightly larger diameter at this critical point) so that tires will seal well without much latex milk being needed to help.
You can do a simple test on the cheap. Buy the 3M equivalent of Stan's expensive rim tape like this one and buy or borrow a tubeless valve like this one. Put your existing tire on without a tube, using just a little bit of soapy water. If it pops in and inflates, you're good to go.
Maybe someone has experience with your rim type. I swear by tubeless, and so far have tried on Stan's Flow and FlowEX, Spank Spike 35 and Oozy Trail 345, and a couple of sets of made in China carbon rims, and it has always worked well.
The much bigger issue IMO is the type of tire. Schwalbe was the company that started with the "tubeless ready" slogan, which I guess involves having a little more rubber on the bead to help with sealing, Conti used to be stupidly difficult but have also improved especially with the Apex sidewall, Maxxis always worked well. These are the ones I have personally tried.
Its been a while since I've done this, but the below should get you started. I may have missed some things though.
​
Do you have a ductulator handy? Its the fastest way to do what you want. There are online calculators that can do the same thing but I've never found them to be as handy.
https://www.amazon.com/Trane-TD1-Ductulator-Sleeve-Calculator/dp/B01BUGXB7G
​
Calculate the amount of air out of each room, decide on a maximum velocity of the air, IIRC 3 m/s is a good number for supply and extract from grilles as it doesn't create to much noise, and then size your duct. Note down the pressure loss that your ductulator says that you'll have through this section of duct and write down the length.
Where your individual extracts join together, you can have higher airflows as the noise shouldn't carry into the rooms to much. You could increase your air speed to say 4 m/s. Figure out the air flow though this duct, and calculate the size and pressure loss again. Also write down the length.
​
Carry on like this all the way up to where your extract fan will be.
​
Add up all your pressure losses over your index circuit (usually the furthermost extract grille to your fan, but you'll need to check this if all your duct fittings are not the same) - Pressure loss is calculated as (Pressure loss per metre of duct) x (length of duct) = Pressure loss for each section of duct. Add all these up over your index circuit. Calculate the pressure losses though your index circuit the various fittings (grilles, elbows, tees, balancing dampers, smoke/fire dampers, transitions, etc (basically anything that isn't straight duct).
​
At this point you should know your total airflow and your total pressure loss that you'll experience in the system. Add on a fuck factor to your pressure loss (20% is what I've used for piping water, I'm not sure what a good factor is for ducts though). Then you can go to your supplier with your pressure loss and airflow and they will tell you what fan you'll need.
Best 6 bucks in the garden
https://www.amazon.com/dp/B002CREFIC/ref=cm_sw_r_cp_apa_rA-Iyb2TD3PT3
And dis
https://www.amazon.com/dp/B000HBOYZO/ref=cm_sw_r_cp_apa_lC-Iyb53JPKVN
I have found that electrical tape (the black stretchy stuff) is really good at totally sealing off the tops of dapper decants as well as spray tops. Just kind of gently stretch it as you go around. It also comes off pretty easily as long as it's not on there for like 3 years or something.
Do you have a picture (peferably inside and out), and have you been able to locate the specific location of the leaks? Is there rust on the metal side of the seam?
If no significant rust, this stuff is great for sealing leaks. You want the non-leveling type as the leveling kind is for use on a flat surface like a roof.
If the seam gap is big, first plug it with butyl tape then the non-sag sealant.
If the whole seam around the perimeter of the roof is leaking, I'd first clean it really well (one of the most critical parts of effectively applying sealant), then pack a thin line of butyl in there, then seal it off with the non-sag sealant. Treating only from the exterior should fix it, but if you have direct access to the seam from the inside, a bead of sealant there too won't hurt you.
I've done basically that process a couple times to seal rv leaks, and it works very well. Gotta have super clean surfaces, though. Worth buying a bottle of alcohol and going over it with that before applying butyl/sealant just to be sure, once you've cleaned/scraped any crud off.
Kudos for not using silicone; you'd be in a world of hurt if you'd done that.
Edit to add: I agree with u/crockett5 in the Q&A thread, we need photos and to know if there are any holes in the fiberglass and/or metal and what the seam looks like to find the best fix. Do NOT plug metal or fiberglass holes with butyl/sealant. They are for seams only, and while it might solve your problem in the short term, you'll probably be in a world of hurt a few months down the line
Also, post stalked you, and from the far away shots, it kinda looks like there might be a black rubber strip around the seam? Is that true?
Do not use silicone. You will regret it later when it is time to re-seal your roof.
You will need to get on the roof and reseal the skylight, and, if it were my roof, I would go ahead and do the whole thing if it's needed. You can find plenty of videos on Youtube on how to do this.
Lap sealant can be bought on Amazon (Dicor Self-Leveling Lap Sealant 4-pack), and I would recommend two other items as well; Butyl Tape for laying down as an extra barrier under the roof equipment, and a roll of Eternabond for emergency repair.
This should fix the problem for you.
Failing that, yeah, my Intel 520 SSDs never threw errors. I can't speak for other SSDs though.
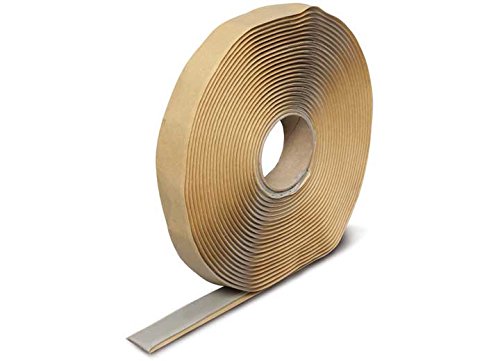
Dicor BT-1834-1 1/8" x 3/4" x 30' Butyl Seal Tape https://www.amazon.com/dp/B001FCB4JS/ref=cm_sw_r_cp_apa_i_TaU5CbGXR5W9Z
This stuff is cheap, but sealed my sheet metal really well.
I would say it's as close to the vive w/ DAS as the quest could be comfort-wise, an immense improvement overall. The face cushion of the vive is more plush but that's the only difference IMO.
Links are in the description, but here they are as well:
edit: added new velcro
Genuine Velcro 1804-OW-PB/B-5 One-Wrap Self Gripping Strap, 5' Length x 1" Width, Black https://www.amazon.com/dp/B00I0TTPL8/ref=cm_sw_r_cp_api_i_mta8CbRMKHF5W
> Can I get a sticker to put over the Ubuntu logo on my S76 laptop keyboard?
Yes.
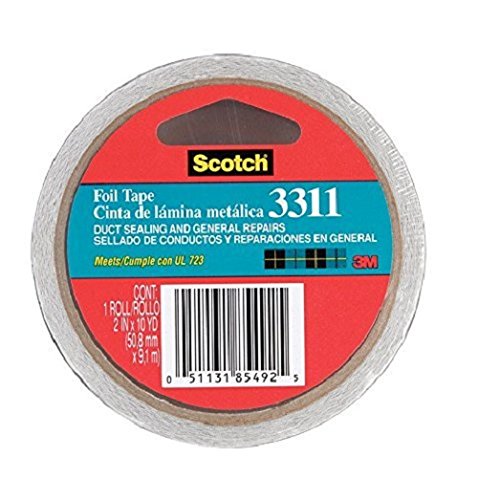
This should link to an Amazon page for 3M Silver Aluminum Foil Tape 1" Width: https://www.amazon.com/dp/B00N3TYIP8/
I wrap all my mason jar lids with it before I screw on the retaining lid.
Duct tape can be used to fix anything! ...except ducts.
Not that huge a deal.
But, this will work fine. http://www.amazon.com/DiversiTech-6-9718-Foam-Insulation-Black/dp/B00SYQ3VNA
Or find and hvac guy and give him 5 bucks for 10' of it.
Next time, use fancy holiday duct tape.
It's safe. Those bags aren't going to put much if any, stress on the frame. The only thing I would recommend is buying tape to cover up the paint where the bag touches the frame. The rubbing will dull the paint. I use this stuff:
https://www.amazon.com/X-Treme-Tape-TPE-X36ZLB-Silicone-Triangular/dp/B00HWROLIG/ref=sxin_3_ac_d_rm?ac_md=0-0-c2lsaWNvbmUgdGFwZQ%3D%3D-ac_d_rm&keywords=silicone+tape&pd_rd_i=B00HWROLIG&pd_rd_r=d518d7e9-c4e9-438d-a40f-a90937f876d2&pd_rd_w=0NmAq&pd_rd_wg=IpCCn&pf_rd_p=6d29ef56-fc35-411a-8a8e-7114f01518f7&pf_rd_r=VS9YFJBF1MVZ04YB8FPY&psc=1&qid=1574198327
It has less to do with the Gorilla tape and everything to do with Compass tires being the most loosely defined "tubeless ready" product on the market. I say this as a fan, early adopter, and regular rider of Compass Tires, with multiple friends who work or have worked for Jan and Compass.
Anyway, the tape will be fine. If it's not, just remove it and apply some strapping tape.
Nope, it is definatelly THIS
I use it for the exact purpose as OP, it is very heat resistant stuff. I use it all over the place....
I had leftover padding from my GPU box (that weird synthetic foam padding) that I cut into a desirable width that didn't effect my headset and taped it on with some electric tape (https://www.amazon.com/gp/product/B00HWRO744/ref=oh_aui_detailpage_o04_s00?ie=UTF8&psc=1)
Any tape would probably work honestly and any type of padding, as long as it isn't too thick.
Cut out the damaged portion (pay attention to any wire markings or make your own if none are present) restrip the wire but stager the lengths so that the splices aren't all in one area. Install the splices then wrap in a self adhering silicone tape. When using the tape start 1 inch past where the insulation starts, wrap with 50% overlap until you reach 1 inch on to the insulation across the repaired area. The wrap should be tight and the first and last wrap sould be perpendicular to the repaired wire.
Edit: required supplies...
Splices with Crimper Tool
Silicone Tape
Quick Guide
I agree, build you own kit. Below is my take. Know that some of those tools are not for every day use in networking, but who can resist getting more tools? Also, if you get all of these I realize it will be over $200. So, just use this list as a guide not a definitive list.
BAGS
ETHERNET TOOLS
SCREWDRIVERS
PLIERS and WRENCHES
POWER
MISC
SUPPLIES
To get right to the point their amazing the sound quality is defiantly a bump up even though I’ve had them for only a day now. I sound deadened the door inside behind the weather shielding and the door panel as seen in the imgur. The vocals are much clearer, and the bass is much more pronounced than the under seat subwoofers. Keep in mind the OEM HIFI is 2 OHM’s @ 40 W’s on everything so you’ll need twice as much volume to run the 4 OHM 35 W Helix Match’s I bought (which are getting around 20W at this moment). I’ll probably overtax the amp if I put the volume up too loud but…… I’m aiming for a better amp anyway! *The sound deadening was a big factor I would say in addition to the speakers. I’m you want to know more just look through the below:
_________________________________________________________________
First off, the E90Post is amazing for finding info although most of the products they used are now discontinued and cost a fortune so its up to you to find their replacements. Yes, you can spend a grand or two on some system premade from BAVSound or ... but I still can’t justify it. https://www.e90post.com/forums/showthread.php?t=641323
To find what system you have: *It’s a pdf download before you click
http://www.e90post.com/forums/attachment.php?attachmentid=350502&d=1266451970
Parts so far:
280Pcs SAMOFU Electrical Wire Connectors Kit | Suitable for Marine, Home, Speakers, Various Crimp Terminal Shovel Shapes Butt Connector Kit $11.99 just needed the circle connectors
https://www.amazon.com/gp/product/B07KWX812C/ref=ppx_yo_dt_b_asin_title_o01_s00?ie=UTF8&psc=1
DiversiTech 6-9718 Foam Insulation Tape, 1/8" x 2" x 30' Roll, Black $11.49 I’ve done two cars and still have more than enough left for future endeavors
https://www.amazon.com/gp/product/B00SYQ3VNA/ref=ppx_yo_dt_b_asin_title_o00_s00?ie=UTF8&psc=1
Kilmat 50 mil 50 sqft Car Sound Deadening Mat, Butyl Automotive Sound Deadener, Audio Noise Insulation and dampening $57.99 (25% Coverage before diminishing returns so after two cars I still have left overs)
https://www.amazon.com/gp/product/B0751G6TMV/ref=ppx_yo_dt_b_asin_title_o00_s00?ie=UTF8&psc=1
Exact Fit Front Speaker Adapter Spacer Rings For BMW Vehicles - SAK076_4-1 Pair $15.48
https://www.amazon.com/gp/product/B01M755KAD/ref=ppx_yo_dt_b_asin_title_o00_s00?ie=UTF8&psc=1
Helix Match MS 42C Universal 4" component speaker system $99 each so for one pairs (2 speakers 2 tweeters and 2 crossovers) $107 with tax Thanks New Jersey ☹! I had to trim the twitter to fit and needed an adapter to make the 4 point to a 3 point mount.
https://www.amazon.com/gp/product/B00PCLVNJO/ref=ppx_od_dt_b_asin_title_s00?ie=UTF8&psc=1
OEM wiring so I can revert at any time $11.60 for 4 (2 Pols) and $27.84 for 8 contacts.
BMW Universal Pin Terminal Uncoded (2 Pol) - Genuine BMW 61138373583
BMW Pin-Contact (075mm) - Genuine BMW 61130006664
$11.49 Foam Tape + $57.99 Sound deadening = $69.48. I’ve had this for years and used them for multiple projects so I’m not sure whether to include them. *I’m going to exclude them for now
Spending so far: $107 speakers + 15.48 Adapter + $11.99 Connectors + $39.44 OEM Wiring for front and rear =$173.91 with multiple parts left over for future projects and the rear
________________________________________________________________
Overall my plan is:
Front Component Speakers: Helix Match MS42C (Not buying the BMW specific kit for $100 to 150 more because I can deal with making a few custom things or finding them)
Rear Component Speakers: Helix Match MS42C (I have OCD so I’m just doing this because… Otherwise I coaxial full range with similar specs would have been a lot better) * I still need to either buy another 4 to 3 mount adapter and custom make a tweeter holder. The BMW tweeter is one piece.
Both Under seat Subs: I plan to just scavenge for some L7 subwoofers since they are more than power for most needs. The HIFI is a 40W on 2OHMs and the TOP HIFI L7 is 70W at 4 OHMs. They run about $80-100 for the pair on ebay instead of the Earthquakes at $200 a pair.
_________________________________________________________________
The speakers I bought can run constantly at 35 Watts RMS without an Issue at 4 OHMs and 105 Watts at 4 OHM for short bursts.
So, from research on the forums I’m good with most amps and won’t damage the alternator due to overtaxing it for power since I’m not trying to do some crazy setup.
In addition the BMW Professional from the Hifi isn’t the best but apparently has a pretty clean signal so a DSP isn’t really need although a audiophile will say so. *AMP and speakers will make a world of difference, go with a DSP if you really want insanity like filtering all the minerals out of your water to wash your car.
_________________________________________________________________
Helix Match MS 42C Universal 4" component speaker system $99 for a pair
https://www.amazon.com/gp/product/B00PCLVNJO/ref=ppx_od_dt_b_asin_title_s00?ie=UTF8&psc=1
AMP I’m between the Rockford Fosgate R600X5 and the Pioneer GM DX975 since they’ll both fit in the little crevice where the normal amp sits when removed. $200-250 on amazon or scavenging deals. I need 35 RMS @ 4OHM x 4 so 140 RMS Min @ 4 OHM for speakers and 70 W @ 8 OHMs x 2 so 140 W at 8 OHMs or 240 W @ 4 OHMs
https://www.crutchfield.com/p_130GMDX975/Pioneer-GM-DX975.html
4-gauge amplifier power wiring kit $70 I might go cheaper but It’s a critical part so I’d rather not burn my car down
https://www.crutchfield.com/p_007CK4/Crutchfield-CK4.html
BMW E90/F10/F20/F30 Hi Fi AMP Connector Harness $60 to change the stock HIFI amp to a 5 channel or 6 channel *I’m go 5 channel, the 6 channels are way too expensive and rare
(4 channels for speakers and 1 channel for the subs under the seats to make an 8 OHM) *Lower OHMs usually results in worse sound quality. *A 4 OHM amp can run an 8 OHM without a problem just at half the capacity.
https://www.ebay.com/itm/BMW-E90-F10-F20-F30-Hi-Fi-AMP-Connector-Harness/163830179229?hash=item26250a259d:g:OTIAAOSwgQ9V4UKR
Future Spending $107 Speakers + $250 AMP + $70 wiring + $60 adapter = $487
Spending so far: $107 speakers + 15.48 Adapter + $11.99 Connectors + $39.44 OEM Wiring for front and rear =$173.91 with multiple parts left over for future projects and the rear
In total when fully finished this should come out to $660.91 or a little more but I’m left with many parts for future endeavors.
*That's for Speakers, AMP, Sound Deadening, mounts and everything. The bimmertech amp is $900 alone I understanding tuning they've done but dam.
I have just got them from Amazon but I may be biased because Prime. PEI isn't really cheap anywhere. I went with a .06 sheet (rather thick) for my replacement and couldn't be happier with it. Mirror smooth surface makes shiny parts.
Shiny bed
After struggling with having the thinner sheet pull up (and bubble) over time after trying to remove stubbornly stuck parts, I went with a thicker sheet and it hasn't budged. The only downside is a slightly longer warmup time. Maybe a minute or so. It's never been a real issue.
Amazon PEI Link
You'll also need 1 of these or something similar.
What you're looking for is something called a ductulator. It's a moving chart where you can easily translate iwc to cfm. Not sure how to link from mobile but Amazon has them for cheap and there may be an online version if you look.
https://www.amazon.com/Trane-TD1-Ductulator-Sleeve-Calculator/dp/B01BUGXB7G
I got something like this, but there's so many listings on Amazon that look the same, I'd just go for the cheapest
https://www.amazon.com/dp/B019QT97WM/ref=cm_sw_r_cp_apa_vbNGAb2WY2HK4
Some people say parafilm is optional and you can use a plastic bag instead, but if you're going to do it, might as well try learning how to use this stuff:
https://www.amazon.com/dp/B0085OFNVE/ref=cm_sw_r_cp_apa_hdNGAb1MGMG47
Before the shears, I got one of these, but I reground the bevel to the other side because I was using it I guess opposite of how people normally hold it
https://www.amazon.com/dp/B008U7IYZI/ref=cm_sw_r_cp_apa_xhNGAbT2GB803
I never tried this, but if you're not a fan of sharpening knives so they're super sharp, but you want to try using a knife, I saw a video where a guy suggested using something like this (not sure what size to get, I guess depends on how big the wood is):
https://www.amazon.com/dp/B00096SCAK/ref=cm_sw_r_cp_apa_PlNGAbB0FY889
What you need is a duct-o-lator. Or search for HVAC duct design on youtube, there are many to choose from.
How about a 90 foot roll for $8? I've picked up mine from Amazon two years ago and I have yet to need to buy a new roll. I might have to buy a new roll probably sometime next year. This stuff goes a long way.
I imagine you'd plant a ring of cuttings, so you have clones to work with. Then you'd skin off a little bark on both trunks wherever you'd like them to join, maybe rub them with a little rooting hormone, then wrap them with grafting tape.
[PEI for $17] (https://www.amazon.com/gp/product/B0013HKZTA/ref=oh_aui_detailpage_o09_s00?ie=UTF8&psc=1) this will last you for a long time (Through many many prints) if you are careful with it.
[Transfer tape for sticking PEI to buildplate] (https://www.amazon.com/Gizmo-Dorks-Adhesive-Transfer-Sheets/dp/B01HP2CEG8)
[Here is a site with more information] (http://reprap.org/wiki/PEI_build_surface)
Edit: For immediate printing buy a cut sheet of glass from the glass or hardware store, then spray 2 layers of [Aqua net extra strength super hold unscented] (http://www.walmart.com/ip/Aqua-Net-Extra-Super-Hold-3-Unscented-Hair-Spray-11-Oz/10997068) it must be this brand and product. Or you could match ingredients. This method will work for fairly large prints but is not as good as PEI. After each print just spray another coat of hairspray.
Electrical tape or heat shrink.
I find it funny but understandable that the things that break and don't get fixed are the things that can be fixed for <$5.00 if people only knew what to buy or what to use. It's easy to know you need a new chair, but it's harder to know it's wobbling because of a small loose screw. So the little things fall into the category of not broken enough to need a new dishwasher but inconveniently broken. There's nothing Sugru can do that you can't find a better solution for in the adhesive aisle of a hardware store.
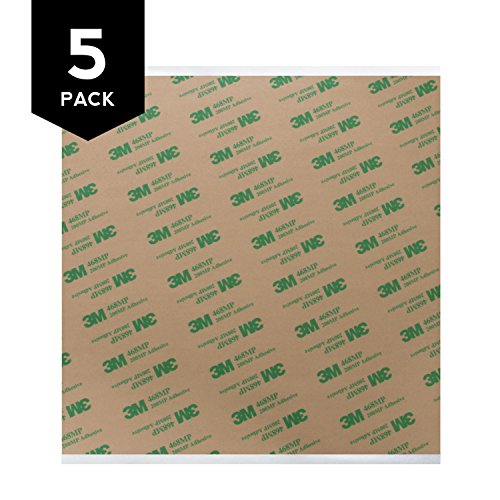
3M 468MP adhesive came with my PEI sheet. I used it to get the sheet on the glass and I ordered some more that I will be using to get the glass to stay on the bed without binder clips.
Gizmo Dorks 3M 468MP Adhesive Transfer Tape Sheets 12" x 12" (5-Pack) https://www.amazon.com/dp/B01HP2CEG8/ref=cm_sw_r_em_apa_i_1V2nDbF6XTMKC
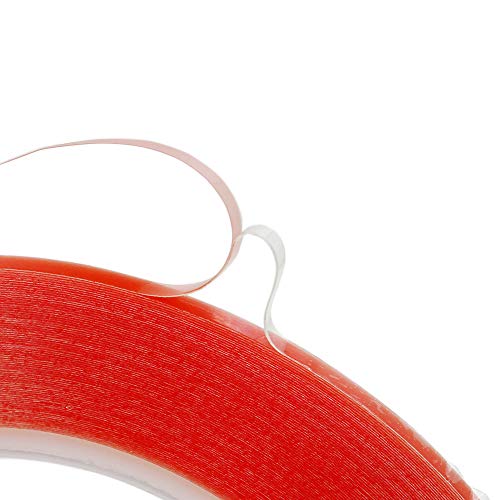
I think it's adhered with a double sided tape like this
2mm Clear Double Sided Strong Adhesive Acrylic Tape For Phone LCD Screen Repair https://www.amazon.com/dp/B019OQ4Z10/ref=cm_sw_r_cp_apa_IfqWAb3FXRBGH
Shouldn't be tough to the repair shop to fix.
If you want to try yourself you could blast the screen with a little heat (heat gun or hair dryer) and then hold the screen down until it cools down (wrap it in a towel after heating it up so you don't burn yourself). Don't heat it up too much or you could damage the LCD.
Edit: added diy option
http://www.amazon.com/Scotch-03429NA-Electrical-4-Inch-66-Foot/dp/B001ULCB1O
Posted to a diff user but here:
Here's a pro tip I can share.
My gf has a bunch of these and I kept knocking them over since they are on the same stand as our key holder.
HitLights Heavy Duty Double Sided Foam Mounting Tape, 32 Feet. https://www.amazon.com/dp/B00PKI7IBG/ref=cm_sw_r_cp_apip_WKWqhm3aTpXGs
Buy that. I initially bought them to mount LED strips. They are AMAZING and last forever.
They don't peel off paint and stick like crazy even tho if u touch the strip ud think it wouldn't do anything. Used it for LED strips, taping cardboard to fill gaps in a window for an internal AC unit, and lastly and most relevant took tiny strips and put them on the bottom of their feet. Now they are super sturdy and the cat can't even knock em over.
TL;DR: buy this (whatever size) and stick em to the bottom of their feet.
HitLights Heavy Duty Double Sided Foam Mounting Tape, 32 Feet. https://www.amazon.com/dp/B00PKI7IBG/ref=cm_sw_r_cp_apip_WKWqhm3aTpXGs
It's probably similar stuff, but I'd personally go for a specific product that's application specific unless circumstances dictated.
https://www.amazon.com/Dicor-BT-1834-1-Butyl-Seal-Tape/dp/B001FCB4JS/ref=pd_cp_60_1?pd_rd_w=6mOgb&amp;pf_rd_p=ef4dc990-a9ca-4945-ae0b-f8d549198ed6&amp;pf_rd_r=YS4ETMY804RHR3JWBPTP&amp;pd_rd_r=95b219c1-7b09-11e9-919b-4f0ed8ac280f&amp;pd_rd_wg=vrkia&amp;pd_rd_i=B001FCB4JS&amp;psc=1&amp;refRID=YS4ETMY804RHR3JWBPTP
Here is a low tech solution.
Scotch Electrical Tape, 3/4-Inch by 66-Foot https://www.amazon.com/dp/B001ULCB1O/ref=cm_sw_r_cp_api_i_uHLYCb4WHE575
While I'm not sure if it'll work for a dreamcast controller, what I've done for a remote for an AV receiver is to buy some foil tape, cut out pieces that'll fit on top of the old conductive pads, and stick them to it. It worked like a charm for the remote, but I'm not sure how it would hold up to constant button presses that video games require.
Self healing port. Is this the type of tape you use?
Foam insulation tape would work better.
Why are you worried about the icemaker water line freezing - is it outside or something?
This was the one I got, and I also got these adhesive pads to hold it to the bed. Right now the PEI is just clipped on since I wasn't sure how well it would work, but I'm planning to throw the adhesive sheet on and make it a little more permanent this weekend.
DoubleSided tape will stay there. Just clean it with Alcohol. I used the 3M grey with red plastic on it. It's the same tape that holds on car emblems and if it can take that abuse, it will hold on the dot matrix. :)
https://www.amazon.com/HitLights-Heavy-Double-Sided-Mounting/dp/B00PKI7IBG/ref=sr_1_2_sspa?crid=94PW5YUCOHMT&amp;keywords=3m+double+sided+tape&amp;qid=1555861337&amp;s=gateway&amp;sprefix=3m+double%2Caps%2C156&amp;sr=8-2-spons&amp;psc=1
Yup, wikipedia is an authoritative source. So's the company that markets a brand of the stuff, who wouldn't find it useful at all to closely associate their product with being "the original" and "the right way to do it" ...
Anyway, here, have a real source. http://www.boston.com/bostonglobe/ideas/articles/2010/03/14/tale_of_the_tape/ -- it was duck tape before it was known as duct tape, and we haven't as a culture gotten around that stupid error yet.
The reason that I said that Duct tape shouldn't be called it or used on ducts is because it fails quickly in most modern HVAC environments (moisture and heat) and can smolder and cause toxic fumes to spread through the house if it's too close to the heat source. Aluminum duct tape is the proper thing to use if you're going to use tape. But if you are concerned at all about heating or cooling your attic instead of your house, you should probably use mastic instead.
That's scary! There seems to be some ringing issues in the upper layers of the print. I solved the issue on my printer using a couple of z-braces https://www.thingiverse.com/thing:921948 by AzzA. I would also recommend removing the stock buildtak bed and have the, I would presume, PEI adhered directly on the heatplate using https://www.amazon.com/dp/B01HP2C9FE/ref=cm_sw_r_cp_ep_dp_L2CaBb5ZXYWRZ . Happy printing!
This should work well for a 200mm X 200mm heater. There are larger versions of 468mp transfer tape if you need that instead. It sucks to have to spend more but this is probably your best option to make sure you don't end up having to spend more on other adhesive options or worse, a new heater.
Oh I thought those are NeonFlex lights. Did you use electrical tape for the battery? That's going to rattle and fall off. I had similar set up and used this. https://smile.amazon.com/gp/product/B00PKI7IBG/ref=ppx_yo_dt_b_search_asin_title?ie=UTF8&amp;psc=1
https://smile.amazon.com/gp/product/B005X1Y7I2/ref=ppx_yo_dt_b_search_asin_title?ie=UTF8&amp;psc=1
http://www.golfmk7.com/forums/showpost.php?p=87891&amp;postcount=24
For me, the soft velcro wasn't resilient enough and the rattle has returned. I'm going to take another crack at it with some foam tape I had previously bought to fix the rear hatch rattle I also had.
For hiding the power cord, you could try white gaffer's tape: https://smile.amazon.com/Professional-Premium-Grade-Gaffer-Power/dp/B00LMNYFHI
It feels more like a fabric, so it won't shine like duct tape would. Also, gaffer's tape is stronger than masking tape, but shouldn't leave residue like duct tape might.
https://www.youtube.com/watch?v=LyQSlMxT5RA
https://www.amazon.com/Soldering-Electronics-Adjustable-Temperature-Desoldering/dp/B077VR96GH
https://www.amazon.com/gp/product/B01B6AXJIM/
https://www.amazon.com/Duck-299006-4-Inch-Utility-Electrical/dp/B001B19JLS
Tip: put a towel on the ground and just take it off from the bumper and then do all the work behind the car. And either disconnect the brake light and the reverse light, or disconnect the battery. Finished product: https://i.imgur.com/uGGyVUC.jpg
This always works
https://www.amazon.com/dp/B0013B1XHE/ref=cm_sw_r_cp_apa_i_bLaqDbS2G7QD4
Possibly this.
Ha! hope you find what you were looking for on Amazon. If you plan on shipping any of your sample bottles, this parafilm tape is great for sealing bottle tops to prevent leakage. You can also get the shrink sleeves for the bottles, but they can be a nuisance to use.
You can easily make your current wheels tubeless. Get the Stan's tape on it's own: http://www.amazon.com/Scotch-Film-Strapping-Tape-8896/dp/B00QVIBIMO You just need valves and sealant now.
What is your budget for new wheels? Basically, you can pick 2 of the following: light, cheap, or strong. Also, your challenge may be finding quick release wheels, as most aftermarket wheels now come setup for the latest through-axle standards. Your best bet may be getting wheels built for you (through your local shop, or prowheelbuilder.com), or you will likely have to track down adapters through the hub manufacturer...
>...They are up against white trim...any temporary-ish solutions on sticking the cable to the door trim?
www.amazon.com/Professional-Premium-Grade-Gaffer-Power/dp/B00LMNYFHI/
White colored gaffer's tape. If you aren't familiar with the product, it's basically duct tape, but does NOT leave behind sticky residue when you remove it.
color matching for now, easy removal and clean up later
I won't lie... Cheap Amazon Prime accessible tape.
The two names are as follows;
2mm Clear Double Sided Strong Adhesive Acrylic Tape For Phone LCD Screen Repair https://www.amazon.com/dp/B019OQ4Z10?ref=yo_pop_ma_swf
Eco-Fused Adhesive Sticker Tape for Use in Cell Phone Repair - 2mm Tape - also including 1 Pair of Tweezers / Eco-Fused Microfiber Cleaning Cloth (black) https://www.amazon.com/dp/B00BXYWXY8?ref=yo_pop_ma_swf
I know they're cheap, but how much should I spend/what should I search for when I purchase? Computers are my hobby, but I work in kitchens and bake bread full time... Soooo, I'm pretty good with my hands. Application is not the issue here.
Thank you! That is much cheaper than Parafilm, and looks different from the gardening film but is probably the same material. https://www.amazon.com/dp/B0085OFNVE/ref=pe_2640190_350905710_TE_3p_dp_1 I was mistaken too it's 90' not 250' but for $9 I'm eager to test nonetheless but yours is definitely interesting and I'm going to order some to test as well!
I’ve used this for other projects and it’s seriously strong.
I wouldn’t use use if for tape though. It’s too permanent.
Double Sided Tape, HitLights Heavy Duty Mounting Tape 3M VHB Waterproof Foam Tape, 32ft Length, 10mm Width for LED Strip Lights, Home Decor, Office Decor https://www.amazon.com/dp/B00PKI7IBG/ref=cm_sw_r_cp_api_i_sA-CDbRCY1Q8Q
I use these and I’m really happy with them.
Command Outdoor Light Clips, Clear, 20 clips, 24 strips (AW017-20NA) https://www.amazon.com/dp/B076ZM1799/ref=cm_sw_r_cp_api_i_8C-CDbX9ZNDAY
Silicone tape. Here's one: http://www.amazon.com/X-Treme-Tape-TPE-X36ZLB-Silicone-Triangular/dp/B00HWROLIG/ref=sr_1_2?ie=UTF8&amp;qid=1458831855&amp;sr=8-2&amp;keywords=silicone+tape
have you tried this? https://www.amazon.co.uk/468MP-Adhesive-Transfer-Sheets-5-Pack/dp/B01HP2C9FE/ref=sr_1_5?ie=UTF8&amp;qid=1487539141&amp;sr=8-5&amp;keywords=pei
This stuff or something similar. works perfectly.
Yeah that would be a problem. The stuff I'm using has a wax paper backing that you remove after laying the tape down. It's stretchy and a bit sticky, so handling it without any backing would be difficult. The one I bought is made by Dicor. Here is a link. It seems like there are a bunch of similar tapes on Amazon. You might want to take your keyboard apart before ordering to make sure you have at least 1/8" of empty space under the PCB. All my keyboards but one had room for a layer or two of tape.
Try here: https://www.amazon.co.uk/468MP-Adhesive-Transfer-Sheets-5-Pack/dp/B01HP2CEG8/ref=sr_1_4?ie=UTF8&amp;qid=1492613611&amp;sr=8-4&amp;keywords=PEI+Sheet
Sousaphone
Purple Spray Paint
Gold Spray Paint
Electrical Tape
Cat
Yes, yes you can.
Double Sided Tape, HitLights... https://www.amazon.com/dp/B00PKI7IBG?ref=ppx_pop_mob_ap_share
I’ve also used even stronger stuff than this, but it’s not necessary and just a bigger pain to get off. Many aftermarket parts come with the tape I have linked and have never heard of anyone having an issue.
Hood
Window tint for inside the hood
Suit
Gloves
Duct tape
&#x200B;
It is definitly called Duct Tape. https://www.amazon.com/Multi-Use-Duct-2930-C-Inches-Yards/dp/B0013B1XHEIt was origionaly invented for use in ducting and the company decided to use the name “duck” because it sounds simular. It has become an genericized trademark over the years.
I use the ductulator and the system syzer wheel (see bottom of page) on a weekly basis. If you're regularly designing equipment, they are free from your local Bell & Gossett or Trane representative.
FYI I just learned in another thread that Stan's Tubeless tape is just TESA 4289 strapping tape.
You can get the generic equivalent at ebay for $10 incl. shipping.
This 3M tape at Amazon is also supposed to do the same thing. Some of the widths are weirdly expensive for some reason, but may be available elsewhere.
It looks as if you you bought a rectangle battery pack then velco straps should work very well to hold it into place. Maybe a bit of black high-density foam rubber backing it to provide some spring/compression action to prevent bouncing.
If there is enough room for it.
There's a non-destructive way to turn off the port LEDs as well, and it works for every switch on the planet. And it only costs $4 with Amazon Prime.
Now that requirement #1 is solved, let's move on to #2. Fan noise is highly subjective. Personally, I've got my Sun X4170 plugged in (but off) right now. Literally less than a foot away from the head of my bed. Most people would probably complain about the noise the PSU fans alone make within 5 minutes. I sleep with it. Doesn't bother me. You could try to find something fanless, in which case HP would probably be your best bet, but I don't have any specific model recommendations there. I just know I've seen several people mention fanless ProCurves.
Quiet, PoE and low operating power are going to be the hardest boxes to check in one device. PoE devices generally draw more power, and generate more heat (which means more fan noise). If you can live without the PoE (injectors are an option if you need it), I don't see why you can't check all of your other boxes (except maybe the 10GbE via RJ45 instead of SFP+, but if worst comes to worst you can get an SFP+ converter).
The only thing that might be difficult is finding 10GbE on a fanless switch, but you don't necessarily need fanless, just quiet.
Unfortunately I don't know HPs model line that well for switches, but if you search eBay for something like "fanless procurve", that should give you a start.
An inexpensive alternative to "black wrap" or "Black Tack" that could solve your issue would be something like this. It's used primarily by HVAC to seal joints, but should function perfectly for your task. It's also well within your budget.
It looks like butyl tape to me. I use this stuff extensively in my line of work.
Dicor BT-1834-1 1/8" x 3/4" x 30' Butyl Seal Tape https://www.amazon.com/dp/B001FCB4JS/ref=cm_sw_r_cp_api_i_.H1SDbS7WX4RK
Picked up my from Amazon.
Thanks for mentioning gaffers tape. What kind of gaffers tape did you use? I don't know much about tapes and 3D printing. Would this work?
http://www.amazon.com/Professional-Premium-Grade-Gaffer-Tape/dp/B00LMNYFHI/
Thanks!
Well, I don't think there are really that many specialized tools the average user would need. I guess if you want to do some minor modifications or sleeve your psu, you would really benefit from some specialty tools. Generally speaking, I think nearly everyone would benefit from:
total: $15.60
It goes without saying that you should also have a Phillips screwdriver, but who doesn't have one of those around anyway? Of course, there are some extras you might want if you're messing with your psu cables (like if you're sleeving them or whatever), installed and reinstalling coolers, I don't know. It is all stuff I've used with my PC at one time or another.
total: $48.61
I don't know why you'd really want that ultra-mega-deluxe $49 kit I put together, unless you're certain you will be modding your pc. If you want to be all hardcore you could get a soldering iron just for your pc, but I wouldn't recommend doing that unless you already have experience. Seriously though, everyone should get some cable ties and compressed air.
HVAC guy here too. I wear gloves and boom, while I look like a pansy, I never get a cut. Here's an example of foil tape. Duct tape, actually sucks for ducts. What murm87 said is a little incorrect. It's not used to "fix" anything, so much as it's used to completely seal the ductwork. The problem with duct tape, is that it dries out. Foil tape will dry out as well, but not to the same degree, and is a much better seal. If you see foil tape (or even duct tape), it's not that the duct work is broken, just that they're making it air tight.
Not always.
Use this! Silicone Rubber Self Fusing Tape
It saved me already when I used them on 2 lighting cables and 2 magsafe chargers (I bought the clear version)
One thing I've learned is that zip tying your shit is a pain in the ass to do, and a pain in the ass to remove.
This is what you wanna get
I used 12"x12" 3M double-sided adhesive tape sheets to adhere my PEI to 12"x12" mirror tile I bought from Lowes. I use bulldog clips to clip the mirror tile onto my heated bed.
https://www.amazon.com/gp/product/B01HP2CEG8/ref=oh_aui_detailpage_o04_s00?ie=UTF8&amp;psc=1
I use this
Another user posted the identical tape, but the listing they gave was to something that cost 4x as much per foot, and had one slightly jagged edge. I honestly think they took the two inch roll and sawed it in half and then listed it as a new item? No idea if that user was trying to drum up some revenue for themselves or just found one of the thousands of shitty items on Amazon.
Audio rattle is still there under Windows 10 and is because of Waves Maxx audio or whatever bundled bloatware comes with the realtek driver. Under any Linux distro, there is no rattle.
&#x200B;
The other things you mentioned are not really software issues - they are quality control issues. No BIOS update is going to fix horrible thermal paste jobs, or bad heat removal engineering.
The 9570 should be viewed as a "some assembly required" sort of device. It has great hardware at a great price, but is poorly put together. However, on the upside, it is a profoundly easy system to disassemble (just get any old computer/cellphone repair kit with a T5 star bit). My advice is, if you buy it, do so before you even boot it the first time. There are dozens and dozens of posts on both Reddit and elsewhere showing how to fix the heat removal problems in the 9560/9570. My approach was:
&#x200B;
&#x200B;
After doing this my temps hang out around 37 idle, around 50-something under heavy load. Previously I was ready to send it back but didn't have the heart to because it was such a good set of hardware for the money. I was a little intimidated ripping it apart at first, but it was well worth it and quite simple. PM me if you want any further guidance. I have a lot of experience using Linux on this machine as well and it is thoroughly documented all over the internet, so if you want to go that route there's lots of help available too.
Is this tape good enough? or is it too thin?
Today will be a good day since I find out if I got my promotion or not! 5.03 thanks!
Here is the desktop version of your link
Scrape off all old adhesive and use 2mm redtape all around.
Here is the mobile version of your link
Hello there