Best electrical tape according to redditors
We found 183 Reddit comments discussing the best electrical tape. We ranked the 65 resulting products by number of redditors who mentioned them. Here are the top 20.
We found 183 Reddit comments discussing the best electrical tape. We ranked the 65 resulting products by number of redditors who mentioned them. Here are the top 20.


white scotch electrical tape
don't bother with "stick tape", its just electrical tape but more expensive
No need to buy a whole new charger. Just use some electrical tape like this to block the light. It’s been a lifesaver for me in the night as any small amount of light drives me crazy when trying to sleep.
It might be a 55 inch. I saw this mod on amazon that converts a regular 16:9 monitor into 2 ultra wides. https://www.amazon.com/Scotch-Electrical-Tape-4-Inch-66-Foot/dp/B001ULCB1O
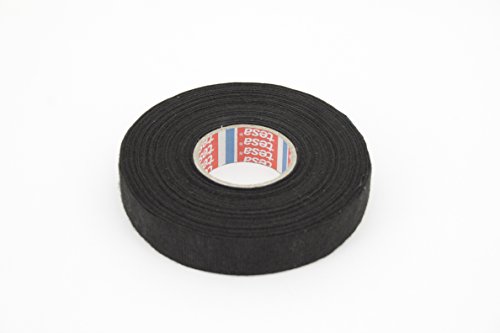
Though you're right, it's still not the right stuff to use. You want Wire loom Cloth Tape. It's the shit they use from the factory on wire harnesses.
https://www.amazon.com/Tesa-Wire-Loom-Harness-Mercedes/dp/B00EH6IZ6Y
I used this and used scissors to make it thinner. It's not conductive on the adhesive side hence the solder joints.
On my Jeep I did all the traces, tested everything, then put a thick layer of glue over it to act like an insulator/laminate. Otherwise I bet the adhesive would peel pretty quickly.
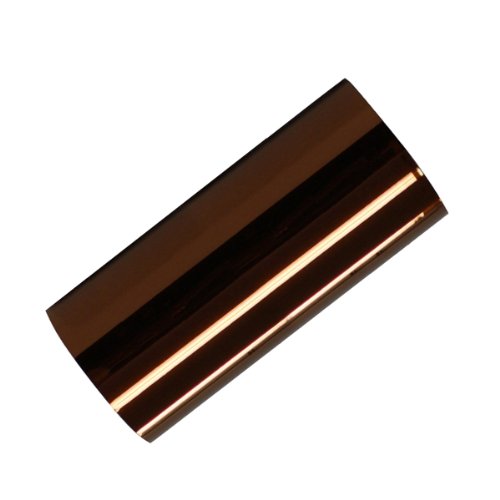
http://www.amazon.com/gp/aw/d/B009KB86BU/ref=mp_s_a_1_2?qid=1462757506&sr=8-2&pi=SX200_QL40&keywords=copper+tape&dpPl=1&dpID=41cYsWETcRL&ref=plSrch
I got you fam
I try to recommend this whenever I see a keezer build since it has helped me so much. For what it's worth, if you have a hard time remembering which keg goes to which regulator and faucet, you can use multi colored electrical tape to color code things.
Also, nice setup. I really dig the sign and the tap handles too.
I designed a very low cost aeroponic timer in the mid 1990s when I was an electrician and used to make them for people word of mouth.
Even with a mechanical relay, I've gotten around 3 million cycles so far at about 3 seconds on, 90 seconds off with a 20 watt pump (changed pump a few times) in a low pressure system.
I made some adjustable units but most people went back to about 3 seconds on, 90 seconds off.
If you google aeroponic pump controller mine is the first to pop up in the Google results with an old Flickr account. Schematics and how it's wired up are shown. It costs less than $10 if you can scrounge up a 12 volt power supply and a power cord.
http://www.flickr.com/photos/22670731@N08/sets/72157603801652807/
The pump cycle unit from the OP would be easier to make if one isn't familiar with basic electronics and soldering.
Be sure you have the proper ground if needed. Some pumps, like the Little Giant series, are designed for 3 prong receptacles so you should not use a 2 prong plug with it.
Anytime you wire stuff up in a metal box or something with any exposed metal parts it should also be ground bonded unless it specifically says it's double insulated. Look for a square inside a square symbol. The OP's timer looks good to go with the PVC box and 2 prongs.
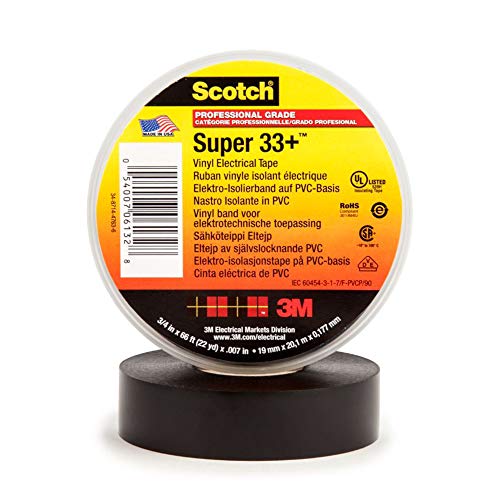
The only change I would make is to use Scotch Super 33+ electrical tape which is good for higher temperatures and has a far superior glue that will also hold up better under higher humidity. I wouldn't trust anything else in a long term wrap job and only use cheap tape to temporarily hold stuff together. Home Depot and the like will have it.
Hello there! I use lifting blocks when I jump, and what I have found works is foam pipe lagging , taped up really tight into a saussage with electrical tape. Then you want to tape them to your thighs with non-elasticated sports tape. (I use the 5cm stuff)
Position blocks, and with your knee straight tape it on around your thigh. 3 times around usually does it for me. I then like to secure it with electrical tape. I position them so the blocks are just below my compression shorts.
I've posted this a number of times, and will continue to do so until the Gospel has been spread. Copper tape + Thumbies = 4 buttons, one for each touch quadrant.
http://www.amazon.com/Copper-Conductive-Adhesive-Width-Length/dp/B009KB86BU
http://www.amazon.com/Psyclone-Thumbies-Button-Gaming-Controls/dp/B004MEZ3B6/ref=sr_1_1?s=wireless&ie=UTF8&qid=1420218254&sr=1-1&keywords=thumbies
I use these boxes with color identity appropriate
Electric Tape which fit PERFECTLY (like it was designed intentionally) in this box from Lowe's
I have found that electrical tape (the black stretchy stuff) is really good at totally sealing off the tops of dapper decants as well as spray tops. Just kind of gently stretch it as you go around. It also comes off pretty easily as long as it's not on there for like 3 years or something.
things i use, that you may already have/may not need depending on your application:
I hate to just say "upgraded grub screws" - but i cant recommend enough getting some hex-headed bolts from lowes/home depot. sadly ive forgotten the exact size, (i believe them to be m6x16mm but really want someone to confirm that. you'll need 2 of them, so i picked up 4 just in case). the included grub screws in the build plate locking mechanism are just so soft, and the allen keys just go through them like mush after 5-10 good torques.
painter's tool or similar - some kind of metal/hard plastic that will be able to get the prints off the build plate. the included spatula wont last long and I generally use it to mix resins that have separated in the vat. using it to also get prints off the build plate damages the plastic and increases risk of puncturing the FEP
lots of paper towels- wiping up drips, cleaning off the bottle drips, cleaning rim of the tank, cleaning off the spatula, placing print to dry after alcohol bath.
paint brushes- both medium and small. even with ultrasonic cleaner, ive seen some people say it doesnt get every nook and cranny and need to wipe down with a soft tip brush to get all excess resin off (i dont use an ultra sonic, but rather a "clean" and "dirty" ipa tubs to try and make sure as much of it comes off before curing)
x-acto knife - sometimes the micro-shears are just too wonky/large to clip a support without damaging the print.
sandpaper- 300 or so grit, not ultra needed, but depends on what you're doing. if printing minis i cant recommend some enough in order to get a smooth bottom on the base after all the supports come off
extra paint strainers - believe it comes with some, but go pick up a 50 pack at lowes, and wont need to worry about using the last of the 5 i think they give you for free
extra, opaque tupperware/jars/containers with wide top. i use old sour cream containers. just to pour off and strain resin into (far easier than trying to get it back into the bottle). can even use some as a final "last wash" ipa bath after ultrasonic cleaner.
random extra to consider: 1 mil kapton tape to seal the LCD and prevent spills from dripping down into the unit. ( https://www.amazon.com/Mil-Kapton-Tape-Polyimide-Yds/dp/B006ZFQNT6/ref=sr_1_3?keywords=kapton+tape+1+mil&qid=1574726246&sr=8-3 ) some might call it superfluous, but id rather not have my fep puncture then come to find resin all over the motherboard
- just a side note if doing the ultrasonic, put water in the actual tub, and put ipa in a ziplock bag, and put your print in the ziplock bag and seal it, then put the ziplock bag in the water. Wont have any clean out the ultrasonic tub, reduce IPA required to operate. reduce smell. reduce IPA vapors.
Just a couple of things. DEFINITELY don't use electrical tape. Use Kapton tape. It feels more like a sturdy scotch tape, and is specifically designed for this. More importantly, it won't leave sticky goo like regular electrical tape. I've used this with zero issues:
https://smile.amazon.com/Mil-Kapton-Tape-Polyimide-Yds/dp/B006ZFQNT6
Second thing, that $8 tape roll will last me for any of these I do for myself and any I could possibly do for anyone else. I know it's not a huge amount of money, but I've never heard of a single person having any issues with the tape method. It's not like you will hurt them with the tape, they just won't start if the tape falls off. Easy fix.
Edit: Also, you're not going to talk about where to get "custom" cables? Never even heard of it.
This is what black electrical tape (or, worst case, wire cutters) are for.
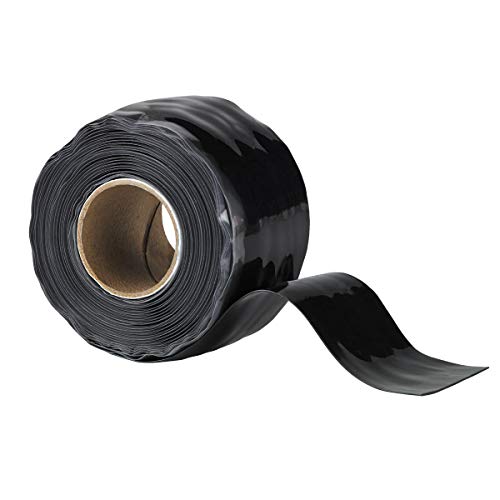
Use electrical tape but don't use the cheap stuff, it will leave a residue and get melty and move around in the heat. If you wanna be fancy, buy a roll of self amalgamating tape. It's cheap and I use it for all sorts of random stuff around the house now that I have it.
Probably not.
If you're going to shuck them to use internally (duh right, but I have some of mine in my own 4-bay enclosure and they power on fine) then buy a roll of this to tape the pin, don't do any weird bullshit like splicing cables getting molex adapters whatever, this is easiest
I looked in my gig bag for inspiration - it turns out that I just have way too much shit in there, most of which is under £15. Cheaper DIY options offered where applicable:
Conspicuous consumerism at its finest, ladies and gents.
This should fix the problem for you.
Failing that, yeah, my Intel 520 SSDs never threw errors. I can't speak for other SSDs though.
This is the perfect sailor gift for him:
Leatherman with one handed knife on the outside. I currently use the Sidekick
OR
Buck Redpoint Knife. This is the best knife I have found for sailing (if you don't want to carry a leatherman)
AND
Nylon belt sheath for Leatherman/Knife
AND
Double D ring belt, in nylon. This is the type of belt sailors wear. Pick whatever colors/pattern you like.
You can get this for $60 or so, and he will love it and use it all the time.
For a little added treat, get him some white electrical tape. 3M brand only, type 35. White only.
Caulk is not a good solution for this. Use self-amalgamating tape like 3M TemFlex. You stretch it and wrap it around the pipe and the joint, and it bonds to itself and turns into a waterproof shield similar to heat shrink tubing. You have to cut it away to remove it, but it has no adhesive so it won't leave a mess. I use this to protect antenna and RF cable connections, it lasts forever and completely protects from water and weather.
Search for silicone tape on Amazon. Numbers of makers and sellers. Here's one example also come in clear and other colors.
Hey! No problem
Honestly, using hot air for soldering is very difficult. It's great for desoldering however.
I did this method as a test, all my previous builds were just done with the fine tip iron, and I think I'll go back to the iron for next time. The time spent is about the same, so there's no real savings there, but it's trickier. Maybe if I were doing 3 or 4 at a time I would do this process again. Actually, If I were doing more, I might just order a film stencil and knock these out in 30 minutes.
> Can I get a sticker to put over the Ubuntu logo on my S76 laptop keyboard?
Yes.
white electrical tape
It's safe. Those bags aren't going to put much if any, stress on the frame. The only thing I would recommend is buying tape to cover up the paint where the bag touches the frame. The rubbing will dull the paint. I use this stuff:
https://www.amazon.com/X-Treme-Tape-TPE-X36ZLB-Silicone-Triangular/dp/B00HWROLIG/ref=sxin_3_ac_d_rm?ac_md=0-0-c2lsaWNvbmUgdGFwZQ%3D%3D-ac_d_rm&keywords=silicone+tape&pd_rd_i=B00HWROLIG&pd_rd_r=d518d7e9-c4e9-438d-a40f-a90937f876d2&pd_rd_w=0NmAq&pd_rd_wg=IpCCn&pf_rd_p=6d29ef56-fc35-411a-8a8e-7114f01518f7&pf_rd_r=VS9YFJBF1MVZ04YB8FPY&psc=1&qid=1574198327
I have and it did help. I realized I needed it after playing in a bar with a Pool Table light over us. The hum was unbearable. After I played the bar again with the bass shielded I didn't have any more problems.
Funny story, my guitarist got his hands on a Strat with 3 single coil pickups. The next time we played that bar, he plugged in and looked at me like like, WTF is that noise. I then explained to him why I did what I did. He wasn't impressed when I did it originally, but I certainly had his attention then:)
I used something like this
Just go slow and overlap each pass on the previous one. Also, WATCH YOUR FINGERS. Picture a paper cut but from a piece of copper.
Good luck.
I can probably hunt down pics if you're interested.
Sorry about that. I didn’t know they made various kinds. Here’s an Amazon link where I got mine:
Tesa Wire Loom Tape
I have no idea, but even if the one you got has a 3.3V issue, it's not that hard to solve. Here is a nice album detailing the workaround. I would strongly recommend using kapton tape instead of the kind used in the album. It's the ideal tape for the job, since it's basically made to work with electronics. If you're willing to wait a few weeks, you can get a roll perfect for this situation for as little as one dollar. If you're not able to wait, it'll cost you about ten bucks.
Nope, it is definatelly THIS
I use it for the exact purpose as OP, it is very heat resistant stuff. I use it all over the place....
I had leftover padding from my GPU box (that weird synthetic foam padding) that I cut into a desirable width that didn't effect my headset and taped it on with some electric tape (https://www.amazon.com/gp/product/B00HWRO744/ref=oh_aui_detailpage_o04_s00?ie=UTF8&psc=1)
Any tape would probably work honestly and any type of padding, as long as it isn't too thick.
Cut out the damaged portion (pay attention to any wire markings or make your own if none are present) restrip the wire but stager the lengths so that the splices aren't all in one area. Install the splices then wrap in a self adhering silicone tape. When using the tape start 1 inch past where the insulation starts, wrap with 50% overlap until you reach 1 inch on to the insulation across the repaired area. The wrap should be tight and the first and last wrap sould be perpendicular to the repaired wire.
Edit: required supplies...
Splices with Crimper Tool
Silicone Tape
Quick Guide
I agree, build you own kit. Below is my take. Know that some of those tools are not for every day use in networking, but who can resist getting more tools? Also, if you get all of these I realize it will be over $200. So, just use this list as a guide not a definitive list.
BAGS
ETHERNET TOOLS
SCREWDRIVERS
PLIERS and WRENCHES
POWER
MISC
SUPPLIES
I'm pretty sure kapton tape is what spank and maybe a few other rim makers are selling as tubeless tape. It is working well for me so far.
Silicon tape wrapped around the exposed wire fixed it for me. So it's no longer shorting out.
X-Treme Tape TPE-XR1510ZLB Silicone Rubber Self Fusing Tape, 1.5" x 10', Rectangular, Black https://www.amazon.com/dp/B00HWROO7E/ref=cm_sw_r_cp_apa_i_eADyDbNEZJTB2
It has to have a good thermo, so it turns out the board wasn't the problem. In my case I tightened it down and it cracked the protective coating and shorted it out. The tape fixed it
This is what I use for wrapping ice tools, if you want a cheap fix.
http://www.amazon.com/3M-2155-Rubber-Splicing-Tape/dp/B001CGVEXS
Some people use PlastiDip which is more durable but not as grippy.
I haven't bothered with either on my mountaineering axe because I mostly hold it by the pick anyway.
X-Treme Tape TPE-XR1510ZLB Silicone Rubber Self Fusing Tape, 1.5" x 10', Rectangular, Black https://www.amazon.com/dp/B00HWROO7E/ref=cm_sw_r_cp_apa_i_hLTzDbDAW6STJ
This stuff shrink wraps itself, but is non adhesive do no mess like electrical tape. The secret to a nice looking build is to color coordinate AKA not have a bundle of multi colored wires hanging out on the front side of the Mobo.
Without pictures, I can't give super-specific advice, but I'll try to give some pointers:
First of all, a caution: now that you've pulled up part of a track, heating that track makes it more likely to de-laminate even further. So keep your heating as brief as possible.
Secondly, solder is not meant to be a mechanical connection. Anything you place should be securely taped down so it won't shake loose or put strain on the soldered connections. Similarly, do not attempt to force or strain parts that are soldered down - disconnect, adjust, reconnect.
Next - as for the potential short you have (exposed ground right next to your intended connection point) - we can fix that too.
Use insulating tape (preferably kapton tape - it can withstand high temperatures and you're unlikely to melt it with your iron). to cover up the exposed ground area. Now you can work in that area without fear of an accidental short.
Now you can use standard hookup wire to repair the connections that were once serviced by the now lifted track. In places where you solder down the hookup wire, use kapton tape to reinforce the connection and keep the trace from lifting further. Minimize heating of the broken traces. Once all connections are made and the wire has cooled, you can reinforce those points with something stronger, like electrical tape.
Finally, be sure to test your handiwork before inserting the batteries. Use a multimeter to measure the resistance between the battery positive and negative terminals. It should be non-zero (Above 1k sounds about right).
I hope this helps and good luck!
I would take the driver assembly off of the frame (aka remove the thand use an epoxy specially formulated to bond plastic to glue the pieces together. I recommend JB PlasticWeld. You probably want to practice on something else before you try it on your cans, since it dries super quick and you only have one shot at this.
One that has fully cured (it says 1hr but definitely give it a full 24hours), I would wrap the cracked part of the frame tightly in a self-sealing tape. This is a rubber tape which resembles electrical tape but it has no 'adhesives'. What you do is stretch it out as you wrap it and then tightly overlay half of the width over your last pass each time. It will fuse to itself and should support it pretty well. Make sure you have enough clearance to put the layer of tape on and still reattach the driver assembly back on, because once it's one there it's not going to come off without a huge fight (which is the whole point). Again, practice beforehand on something else. I personally use the 3M brand all the time with good results, and it's super cheap. Link.
Good luck.
Electrical tape or heat shrink.
I find it funny but understandable that the things that break and don't get fixed are the things that can be fixed for <$5.00 if people only knew what to buy or what to use. It's easy to know you need a new chair, but it's harder to know it's wobbling because of a small loose screw. So the little things fall into the category of not broken enough to need a new dishwasher but inconveniently broken. There's nothing Sugru can do that you can't find a better solution for in the adhesive aisle of a hardware store.
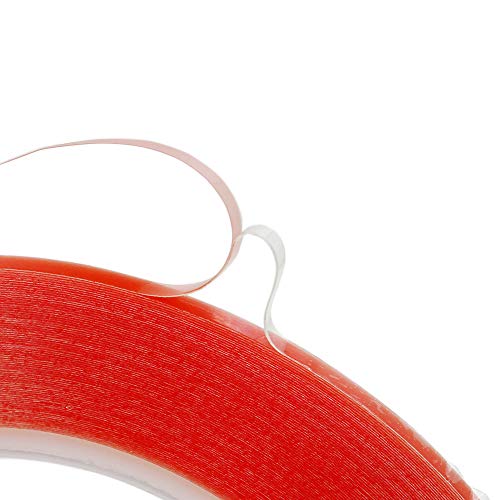
I think it's adhered with a double sided tape like this
2mm Clear Double Sided Strong Adhesive Acrylic Tape For Phone LCD Screen Repair https://www.amazon.com/dp/B019OQ4Z10/ref=cm_sw_r_cp_apa_IfqWAb3FXRBGH
Shouldn't be tough to the repair shop to fix.
If you want to try yourself you could blast the screen with a little heat (heat gun or hair dryer) and then hold the screen down until it cools down (wrap it in a towel after heating it up so you don't burn yourself). Don't heat it up too much or you could damage the LCD.
Edit: added diy option
http://www.amazon.com/Scotch-03429NA-Electrical-4-Inch-66-Foot/dp/B001ULCB1O
If you're concerned about shorting something out, you can spray some conformal coating on any contact areas. Another option would be to use kapton tape on the bottom of the hot wheels or where ever you position it. If it's not making direct contact with any components, you should be fine, however, those cars can roll very easily. For this reason, I'd look at maybe using a light adhesive or something to hold them in place. Common sense warning, don't use adhesive on any components.
Link to conformal coating
Link to kapton tape
Colored electrical tape is easy, usually comes in multicolored packs, like this
For wiring harnesses Im about to blow your mind:
Tesa Tape, use what the OEM's use.... No Brainer: http://www.amazon.com/Tesa-Black-High-Harness-Mercedes/dp/B00EH6IZ6Y/ref=sr_1_1?ie=UTF8&amp;qid=1414157204&amp;sr=8-1&amp;keywords=tesa+tape
Solder and Heat shrink for connections of course.
http://www.amazon.com/3M-Electrical-75-Inch-66-Foot-007-Inch/dp/B000FP8HSM/ref=pd_sim_hi_1?ie=UTF8&amp;refRID=1ET8NTXDF31WFTEHP445
Tricky question since it depends on a few factors. Since this is for the Mini, I would go with 130mm x 130mm via Amazon;
https://www.amazon.com/130mm-5-125-Borosilicate-Polished-Printer/dp/B01LX3CS6Y/
I would also recommend the following clips to hold the glass down on the sides;
https://www.amazon.com/gp/product/B004BN98F0/
Coat the glass with Kapton tape, and you should be all set;
https://www.amazon.com/gp/product/B00FXN0IXS/
Have I spent all your allowance yet? ;-)
The is what I recently ordered and used to block pins.
I used a box cutter to slice a small strip and side it into place. It can be a little tricky at first, but it only takes a few minutes.
https://www.amazon.com/Mil-Kapton-Tape-Polyimide-Yds/dp/B006ZFQNT6/ref=mp_s_a_1_6?ie=UTF8&amp;qid=1541983263&amp;sr=8-6&amp;pi=AC_SX236_SY340_FMwebp_QL65&amp;keywords=kapton+tape&amp;dpPl=1&amp;dpID=51B2bKUSrQL&amp;ref=plSrch
Here is a low tech solution.
Scotch Electrical Tape, 3/4-Inch by 66-Foot https://www.amazon.com/dp/B001ULCB1O/ref=cm_sw_r_cp_api_i_uHLYCb4WHE575
Nice write up. But I have a few suggestions.
Instead of electrical tape you should use actual loom tape next time, the electrical tape will start to degrade over time.
http://www.amazon.com/Tesa-Black-High-Harness-Mercedes/dp/B00EH6IZ6Y
Generally using a relay, like in the diagram linked below will increase your light output and make your setup safer as the load isn't being carried by the switch.
http://www.offroaders.com/info/tech-corner/reading/relay-diagram.gif
Also, you should look into this type of connector for the battery end. You can slip it on under the nut on the battery connector and then use the screw to secure the power wire for your lights.
http://www.amazon.com/Panduit-ML8-CY-Barrel-Straight-Tongue/dp/B00B5P3KT2/ref=sr_1_49?ie=UTF8&amp;qid=1414773726&amp;sr=8-49&amp;keywords=post+and+tap+connector
Tesa tape if you want it to look OEM.
I put some plastic tape over the top of it and it mostly did the trick. I bought this from Target and used 4 layers of blue, with four layers of white stacked on top of each other and cut down to a small square. It didn't end up completely covering it, but it dulls the brightness quite a bit! That plus a huge H7 cooler pretty much get rid of it haha! Here's a photo of my results! I wish I had thought to take a picture before changing the cooler!!
https://www.amazon.com/3M-2155-Rubber-Splicing-Tape/dp/B001CGVEXS/ref=sr_1_4?ie=UTF8&amp;qid=1480268004&amp;sr=8-4&amp;keywords=self+amalgamating+tape
It looks like only the solder mask was damaged, which is much more susceptible to abrasion than the underlying copper. A simple square of Kapton tape applied directly to the board to keep the copper from oxidizing would likely constitute a full repair. The only other action that might be needed would be to smooth out any rough edges on the post.
You can buy a wire harness these days.
Race versions won't include provisions for turn signals, a stereo, or, a legit accessory position; that won't power the full pump and ignition system, especially important if you run a points style ignition (cause you're not only draining the battery a hair quicker, but now you risk burning up your points).
As for making your own, that's going to depend on your application.
Boats will need a power and a ground wire ran for all accessories. You can reduce the ground wire count by using a distribution block. Power will be run to a switch from the battery, to a fuse block, then to the device, then to the distribution block, back to the battery, completing the circuit. A large fuse, circuit breaker, or a cut off switch is recommended.
For a car, things get a little more complicated. You generally want a clutch/neutral safety cut off switch, reverse lights, brake lights, and more. It gets more complicated because the brakes are powered full time along with the lights, but your signal lights aren't. This can cause back feed issues when the lights are on and you signal or brake. Diodes are one option, multiple bulbs/dual filament bulbs are another. High draw circuits are controlled by relays so you can use smaller switches and less fuses. The circuits are usually completed to a chassis ground. Ensure all your ground connections are free from paint and rust.
The best place to get a good visual is your local library. Check out ohms law to get an idea on how thick of a wire you'll need so you don't burn your car down or run an extra 200 pounds of wire.
If you have the old harness, it's a lot easier. Take it out complete. Lay it down on a few 4*8 sheets of board. Unwrap all the conduit and connect the dots. Automotive connectors are usually unique, so they only fit that one plug on the car. The exception to that rules is for light bulbs, though the socket around the bulb might be different.
Good luck. LPT: Don't pull the electric tape to break it, cut it off clean without stretching it so it's less likely to unravel. Use high heat conduit under the hood to protect wires. Wire loom tape is ideal for wrapping multiple wires and is a way better option than electric tape.
Self healing port. Is this the type of tape you use?
To avoid kinks that bad in the future you may want to try this , and this is what I used to cover the ends of sleeving. I found a few reddit posts and it seemed to work well for people. However, others used heat shrink tubing not silicone tape like I did. The tape has held up well for a few weeks now, and when I see any sort of twisting it’s really easy to undo as with the sleeving the cable just sort of pushes itself around instead of gathering kinks.
The magnet wire wrapped around a typical toroid is enameled. This enamel is "just enough" insulation for the job it does. Now, assuming the tape didn't pull off any of the enamel, you still need that outer layer to protect the somewhat fragile enamel. Enamel insulation tends to get brittle when the transformer is used, due to heat. Kapton tape is good for this, and there are a lot of other good options.
Just don't use "electrical tape". That stuff will melt right off.
Thanks!
Yeah, I've thought about that and I might do it. Comfort-wise it really doesn't need to be done as the TPU grips feel fine even without gloves, but the look would surely be nicer with the grips wrapped in something.
There's a silicone rubber tape that fuses with itself when wrapped around something, and it's used to wrap handles on various tools as well as sealing water tubes. It doesn't have any glue on it and it attaches only to itself, so it would be ideal for this kind of thing. I'll probably order it at some point and see how it would do around these grips. Something like this, but maybe a bit narrower would be what I have in mind: https://www.amazon.com/X-Treme-Tape-TPE-XR1510ZLB-Silicone-Rectangular/dp/B00HWROO7E/ref=pd_cp_328_1?pd_rd_w=TjtWn&amp;pf_rd_p=ef4dc990-a9ca-4945-ae0b-f8d549198ed6&amp;pf_rd_r=NHWY47ZSHGV250NA3EWS&amp;pd_rd_r=232d9373-4cbd-11e9-a258-1dc4cbbc6958&amp;pd_rd_wg=AQ5YE&amp;pd_rd_i=B00HWROO7E&amp;psc=1&amp;refRID=NHWY47ZSHGV250NA3EWS
You could probably also use Sugru to wrap the grips, but it's a more permanent solution as I think it's much harder to remove once it settles.
Use “self adhearing silicone tape” durable and sticks only to itself. Revelate Designs used to sell it for this. https://www.amazon.com/dp/B00HWROO7E/ref=cm_sw_r_cp_api_i_bs2bBbCHPHKVN
I had a shelving unit that had built in fluorescent tubes. Now, granted it is an accent shelf, and each shelf was approximately 20" x 18". The fluorescent tubes were on the 20" sides, and there was no lighting on the 18" sides. I used Hue Gen 2 light strips all the way around on all three shelves, and the light (without all the CRI calculations) passed the "wife test". No discernible difference at full power detected. (SCORE!).
I also didn't care for the dots of each LED, so I put the Hue lightstrips into these:
https://www.amazon.com/gp/product/B01NCS0WE8/ref=oh_aui_detailpage_o00_s00?ie=UTF8&amp;psc=1
These are super easy to cut with a handsaw, easy to install, and nicely diffuse the LED light and protect the strips.
Where I needed a non-lit extension (such as between each shelf), I used these:
https://www.amazon.com/gp/product/B01M7XDZ5V/ref=oh_aui_detailpage_o03_s00?ie=UTF8&amp;psc=1
And finally whenever there was a junction, I used white electrical tape to make sure the two strips stayed affixed. Just a small bit to wrap around the joint.
https://www.amazon.com/gp/product/B000FP8HSM/ref=oh_aui_detailpage_o00_s01?ie=UTF8&amp;psc=1
http://www.amazon.com/gp/aw/d/B00FXN0IXS/ref=mp_s_a_1_4?qid=1418430310&amp;sr=8-4&amp;pi=AC_SX110_SY165_QL70
I bought this. My only complaint is that it's really difficult to get off the roll. I need to get a dispenser. But I only change it when it rips. I clean it with rubbing alcohol between prints. Applying it is easy if you mix a little soap with alcohol and spray it on the bed first. No bubbles at all
Ask away, we learn “safely” by asking questions 😀
It’s hard to say, thermistors are very tricky to attach because you have to make sure it’s placed correctly and that the wires don’t short on each other or the block or the screw. They’re relatively inexpensive and good to have extras on hand. you’ll know fairly quickly if its not working just Test before reassembling, wear protection they get super hot super fast.
This is another advantage with the E3D hot end. They use a canister type thermistor which is 100x easier to mount. There are E3D knock offs that are way cheaper but I haven’t found any that use this thermistor.
Your heat cartridge looks perfectly fine..
I realize you might be asking about the kapton tape they used to cover the wires. I’m not sure it’s required, certainly doesn’t hurt 😀
https://smile.amazon.com/gp/aw/d/B006ZFNB2I/ref=sxts_1?ie=UTF8&amp;qid=1521905792&amp;sr=1&amp;pi=AC_SX236_SY340_QL65
> an be a pain sometimes.
Yes, its silicone tape. I don't have a heat gun, so this is next best thing. I also like that it is more forgiving in a crash than a zip tie.
https://www.amazon.com/gp/product/B00HWROKAK/ref=oh_aui_detailpage_o03_s01?ie=UTF8&amp;psc=1
Was it this? Or am I thinking of something else?
https://www.amazon.com/Mil-Kapton-Tape-Polyimide-yds/dp/B006ZFNB2I
https://www.youtube.com/watch?v=LyQSlMxT5RA
https://www.amazon.com/Soldering-Electronics-Adjustable-Temperature-Desoldering/dp/B077VR96GH
https://www.amazon.com/gp/product/B01B6AXJIM/
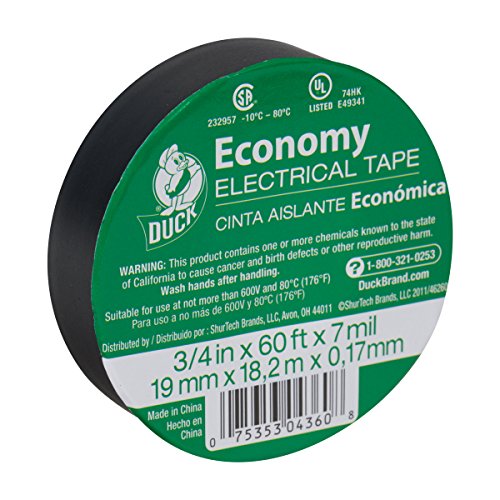
https://www.amazon.com/Duck-299006-4-Inch-Utility-Electrical/dp/B001B19JLS
Tip: put a towel on the ground and just take it off from the bumper and then do all the work behind the car. And either disconnect the brake light and the reverse light, or disconnect the battery. Finished product: https://i.imgur.com/uGGyVUC.jpg
https://www.amazon.com/X-Treme-Tape-TPE-XZLBRD-Silicone-Triangular/dp/B01EG7MBJU/ref=sr_1_13?ie=UTF8&amp;qid=1466384298&amp;sr=8-13&amp;keywords=silicone+tape
or
https://www.amazon.com/X-Treme-Tape-TPE-XR1510ZLB-Silicone-Rectangular/dp/B00HWROO7E/ref=sr_1_3?ie=UTF8&amp;qid=1466384298&amp;sr=8-3&amp;keywords=silicone+tape
Imgur
Here you go: http://smile.amazon.com/X-Treme-Tape-TPE-XZLCLR-Silicone-Triangular/dp/B00HWROKAK?ie=UTF8&amp;psc=1&amp;redirect=true&amp;ref_=oh_aui_detailpage_o00_s00
At the show, the vendor had different colors. Amazon has a few different colors, but this one was the cheapest.
Possibly this.
Silicone Self-fusing Tape
Totally awesome for multiple purposes
Liquid tape tool coating
If you like the look and the properties of this stuff, you can get an almost identical product from your local hardware store. I'm really happy with the durability of mine and that single cheap roll can do a couple bikes
Yes, both filaments I've used worked perfectly without any warping or detaching. I've successfully used Hatchbox ABS and Taulman T-Glase PETT successfully. I use Acetone to clean off the Kapton tape before each print and the prints pop off with a little prodding from the plastic spatula included with the printer.
The elephant model that comes on the SD car printed fine without a brim but everything I've sliced myself has been with a brim.
This is the Kapton tape that I use. I ordered it for my Solidoodle Press so it's obviously too big but easily cut down. They sell a 5" version better suited for the Mini. It will probably last longer than the printer.
I won't lie... Cheap Amazon Prime accessible tape.
The two names are as follows;
2mm Clear Double Sided Strong Adhesive Acrylic Tape For Phone LCD Screen Repair https://www.amazon.com/dp/B019OQ4Z10?ref=yo_pop_ma_swf
Eco-Fused Adhesive Sticker Tape for Use in Cell Phone Repair - 2mm Tape - also including 1 Pair of Tweezers / Eco-Fused Microfiber Cleaning Cloth (black) https://www.amazon.com/dp/B00BXYWXY8?ref=yo_pop_ma_swf
I know they're cheap, but how much should I spend/what should I search for when I purchase? Computers are my hobby, but I work in kitchens and bake bread full time... Soooo, I'm pretty good with my hands. Application is not the issue here.
Here's the tape I was referring to. It's pretty good stuff.
https://www.amazon.com/dp/B00HWROO7E/ref=cm_sw_r_cp_awdb_p2pKybHH6A56G
As I mentioned, heat shrink looks better but this stuff is excellent for when you can't get heat shrink over a component.
Kapton tape
should work as well, if you happen to have some, but you might need to wrap it a few times, it's pretty thin. Might be a bit more permanent as well. I don't have shrink-wrap on hand, so I just use the tape.
Yeah I’ll have to wait till I get home tonight, but it’s this kind of tape
https://www.amazon.com/X-Treme-Tape-TPE-XR1510ZLB-Silicone-Rectangular/dp/B00HWROO7E/ref=pd_aw_sim_328_1/137-3978350-5422325?_encoding=UTF8&amp;pd_rd_i=B00HWROO7E&amp;pd_rd_r=ce7504d5-3528-11e9-b839-4be84d534962&amp;pd_rd_w=kXX6q&amp;pd_rd_wg=XxJmE&amp;pf_rd_p=469620d9-3e90-496d-9dc8-b19f900ba5fe&amp;pf_rd_r=8YKZ9VJPE5NHYECWX4WY&amp;psc=1&amp;refRID=8YKZ9VJPE5NHYECWX4WY
I used superglue on the corner of the IHS (on the OUTSIDE) to secure the PCB in place without adding any extra height. If you want to remove the IHS again just add a drop of acetone and it will dissolve the glue.
By the way, for the life of me I can't think why people keep using nail polish to protect the pcb components - has everyone forgotten that liquid electrical tape exists precisely for this sort of use?
https://www.amazon.co.uk/Insulating-Tape-Liquid-Electrical-Black/dp/B000LNKIFS
Silicone tape. Here's one: http://www.amazon.com/X-Treme-Tape-TPE-X36ZLB-Silicone-Triangular/dp/B00HWROLIG/ref=sr_1_2?ie=UTF8&amp;qid=1458831855&amp;sr=8-2&amp;keywords=silicone+tape
Have you thought about putting up some white electrical tape to cover up the loose wire?
This stuff or something similar. works perfectly.
Yes, this is correct. If you search for 'liquid tape' or 'liquid electical tape' you'll get loads of results to choose from.
Link
We bought this and it has stayed flawlessly on the bottles for 5 months and counting! I highly recommend it.
Eta, Sharpie will come off very quickly (which I found counterintuitive)!
Sousaphone
Purple Spray Paint
Gold Spray Paint
Electrical Tape
Cat
Yes, yes you can.
I would use this.
Ok, I've been trying to mod pair of t50rp myself so for past few days I was reading about modding t50rp and doing my research.
How well you mod t50rp depends on ability of modder and no 2 mods will be the same.
Anyway, short representation of mods:
https://www.youtube.com/watch?v=rgccbW6BXJY
As you can see it's very simple. However there are tons of mods and everyone of them is slightly different... So here is ultimate wiki giving you everything need about modding t50rp:
http://www.head-fi.org/a/fostex-t50rp-modification-summary-links-wiki
Now you might ask, can you fuck up modding t50rp?
Like with anything, yes but if you be careful and follow the most basic mods then there will be no harm done. All of the mods on the video are reversible.
Are there any cons? Well for one you will have to take t50rp like 20 times apart to see if you like any specific mods. Secondly the end product will be difficult to drive from your average laptop, so amp might be best if you want to get 100% of them. (The base goes away with several mods if you don't have the t50rp amped.)
My advice to you? Read everything about t50rp modding and do as it's on the video with few possible changes ( adjusting depending on your own tastes )
Do everything on the video but:
Now summary of materials you may need:
Acoustic foam paxmate/silverstone: http://www.amazon.co.uk/Akasa-AK-PAX-2-Paxmate-PLUS-full/dp/B000OGX548
Transpore tape: http://www.ebay.co.uk/itm/3M-Transpore-Tape-2-5cm-x-9-1m-Cheapest-on-Ebay-/331325272161?pt=UK_BOI_Medical_Lab_Equipment_Medical_Supplies_Disposables_ET&amp;var=&amp;hash=item4d24867061
Earpads (Makes hugeee difference from stock ones): http://www.amazon.co.uk/Brainwavz-Replacement-Memory-Foam-Earpads-Black-Velour/dp/B00MFDX4YO/ref=sr_1_18?ie=UTF8&amp;qid=1420724959&amp;sr=8-18&amp;keywords=earpads
or
http://www.amazon.co.uk/Replacement-Cushions-HPAEC840-Shure-Headphones/dp/B00A8MLJ50/ref=sr_1_2?ie=UTF8&amp;qid=1420724995&amp;sr=8-2&amp;keywords=shure+840
Electrical tape: http://www.amazon.co.uk/Insulation-Tape-Electrical-19mm-Black/dp/B004CSC4W8/ref=sr_1_1?ie=UTF8&amp;qid=1420725009&amp;sr=8-1&amp;keywords=electrical+tape
Non drying clay: not sure which one myself but you get the goal.
100% Cotton balls: again, not sure which product exactly. Go to your local store for one.
Some other links:
http://www.reddit.com/r/headphones/comments/1lfnsi/fostex_t50rp_dbv3_full_build_diy_w_instructions/
http://www.innerfidelity.com/content/diy-headphone-measurement-contest-winners
I actually did a ton or research and took some precautions that I saw no one mention; i.e. covering the area surrounding the CPU die in Kapton tape to prevent any spilled metal from causing a short. It just slipped my mind in the end that the metal block around the cpu wasn't also copper like the heat pipes which look fine Imgur.
There's a non-destructive way to turn off the port LEDs as well, and it works for every switch on the planet. And it only costs $4 with Amazon Prime.
Now that requirement #1 is solved, let's move on to #2. Fan noise is highly subjective. Personally, I've got my Sun X4170 plugged in (but off) right now. Literally less than a foot away from the head of my bed. Most people would probably complain about the noise the PSU fans alone make within 5 minutes. I sleep with it. Doesn't bother me. You could try to find something fanless, in which case HP would probably be your best bet, but I don't have any specific model recommendations there. I just know I've seen several people mention fanless ProCurves.
Quiet, PoE and low operating power are going to be the hardest boxes to check in one device. PoE devices generally draw more power, and generate more heat (which means more fan noise). If you can live without the PoE (injectors are an option if you need it), I don't see why you can't check all of your other boxes (except maybe the 10GbE via RJ45 instead of SFP+, but if worst comes to worst you can get an SFP+ converter).
The only thing that might be difficult is finding 10GbE on a fanless switch, but you don't necessarily need fanless, just quiet.
Unfortunately I don't know HPs model line that well for switches, but if you search eBay for something like "fanless procurve", that should give you a start.
Too bad, but there's always next year. Smile!
This tape is under $5.
Self-fusing tape is really good for this as well. Just a quick snip or two with the scissors and you've got access to the ESC.. No residue at all, not to mention it insulates electrical connections, is waterproof and works from -60F to like +500F or something ridiculous.
http://www.amazon.com/X-Treme-Tape-TPE-XR1510ZLB-Silicone-Rectangular/dp/B00HWROO7E
Oh here is something: http://www.amazon.com/Tesa-Black-High-Harness-Mercedes/dp/B00EH6IZ6Y
White electrical tape
Kapton Tape - $13
Orange Seal 8oz - $14
Valve Stems - $15
MBR's Instructional Video
Additionally, you can change out kapton tape for something like gorilla tape for less money.
Try rubber splicing tape. It'll stick to itself but not anything else. Makes for good handle grips and it's easy to clean if it gets dirty. Just rinse it off and it's all good.
Another potential easier option is silicone fuse tape - it permanently adheres to itself, but doesn't stick to anything else.
Picked up my from Amazon.
Well, I don't think there are really that many specialized tools the average user would need. I guess if you want to do some minor modifications or sleeve your psu, you would really benefit from some specialty tools. Generally speaking, I think nearly everyone would benefit from:
total: $15.60
It goes without saying that you should also have a Phillips screwdriver, but who doesn't have one of those around anyway? Of course, there are some extras you might want if you're messing with your psu cables (like if you're sleeving them or whatever), installed and reinstalling coolers, I don't know. It is all stuff I've used with my PC at one time or another.
total: $48.61
I don't know why you'd really want that ultra-mega-deluxe $49 kit I put together, unless you're certain you will be modding your pc. If you want to be all hardcore you could get a soldering iron just for your pc, but I wouldn't recommend doing that unless you already have experience. Seriously though, everyone should get some cable ties and compressed air.
Not for long.
Problem solved.
Use this! Silicone Rubber Self Fusing Tape
It saved me already when I used them on 2 lighting cables and 2 magsafe chargers (I bought the clear version)
I'm just looking on Amazon, I see 3M Rubber Splicing Tape as Temflex 2155.
3M Rubber Splicing Tape https://www.amazon.com/dp/B001CGVEXS
Maybe Temflex 1300 is more traditional (sticky) electrical tape.
I wanted to know what tape you use. Originally I bought this tape
because it's rubber, but it was too thick to fit around the motors and put the motor cover back on.
Could you link me what brand you use to add noise reduction to your wheels. That's my biggest issue.
Here is the mobile version of your link
What I do is first wrap the tubing where my hose clamp will go with this self fusing tape https://www.amazon.com/gp/product/B00HWROKAK/ref=oh_aui_detailpage_o01_s00?ie=UTF8&amp;psc=1 Then put the clamp over that.
Awesome, thank you for the recommendations (there goes the money I partitioned for dominators, ha)!
I ordered:
FrSky Taranis X9D plus
D4R-II
Spare motors + ESC
X-treme tape
That's certainly one option. There are a TON of ways that you could do it. 2-way splitters would work too - that'll reduce the number of Commander Pros (CoPros) and make management easier. Depending on your fan configuration, you may also want to consider something like this Silverstone PWM Fan hub - it has its own power supply and allows you to control 8 fans as one. I have used one of these with a CoPro and it worked just fine.For lighting control - you'll need fan hubs; there's no way around that. The multipacks of the HDs come with a Fan Hub and a push-button controller - not a Lighting Node Pro (NoPro). That may drive you to get a second CoPro (for the additional lighting channels) or get some strips (they come with the NoPro). How you configure them is going to revolve around how you want the effects to work. For example - it sounds like you'll have 16 fans on the front, right? That's 3 fan hubs, minimum. But let's think about that ... each radiator will have 4 in front and 4 in back. That gives you 4 logical groups of 4 fans each. So that you can have a super-cool light show, you might well want to use 4 fan hubs with 4 fans each. Then, you can use a Fan Hub Splitter to sync the 2 hubs in the front with each other and the 2 hubs in the back with each other.
Like this: https://1drv.ms/u/s!AjLE3OnL_l3klfRGb1xdGQAUsh7xsQ
That would give you 4 channels and control over 16 fans from a single Commander Pro. Now, that's just the front panel but on the 1000D, that's the real beastie.
Some other tips - I used a label maker to label each fan hub and NoPro in my system (I have 3 Fan Hubs and 2 NoPros). I find it super helpful. Second - I use colored electrical tape to mark the fans. I'll put one little piece on an unobtrusive part of the fan and then wrap each end (both the RGB and the fan speed) with a piece of the same color. Again, super-helpful.
EDIT: Here's a link to the multicolor electrical tape that I bought. For the number of fans that you'll have, you might use 2 colors for some of the fans.
Audio rattle is still there under Windows 10 and is because of Waves Maxx audio or whatever bundled bloatware comes with the realtek driver. Under any Linux distro, there is no rattle.
&#x200B;
The other things you mentioned are not really software issues - they are quality control issues. No BIOS update is going to fix horrible thermal paste jobs, or bad heat removal engineering.
The 9570 should be viewed as a "some assembly required" sort of device. It has great hardware at a great price, but is poorly put together. However, on the upside, it is a profoundly easy system to disassemble (just get any old computer/cellphone repair kit with a T5 star bit). My advice is, if you buy it, do so before you even boot it the first time. There are dozens and dozens of posts on both Reddit and elsewhere showing how to fix the heat removal problems in the 9560/9570. My approach was:
&#x200B;
&#x200B;
After doing this my temps hang out around 37 idle, around 50-something under heavy load. Previously I was ready to send it back but didn't have the heart to because it was such a good set of hardware for the money. I was a little intimidated ripping it apart at first, but it was well worth it and quite simple. PM me if you want any further guidance. I have a lot of experience using Linux on this machine as well and it is thoroughly documented all over the internet, so if you want to go that route there's lots of help available too.
Is this tape good enough? or is it too thin?
Scrape off all old adhesive and use 2mm redtape all around.