(Part 2) Best hobbies according to redditors
We found 6,915 Reddit comments discussing the best hobbies. We ranked the 3,169 resulting products by number of redditors who mentioned them. Here are the products ranked 21-40. You can also go back to the previous section.


Oh no, you didn't get extra batteries!. If I may, let me pass down some wisdom:
It's a helping hands. For soldering typically but for any time you need a device to hold something in place to free your hands to work on it somehow.
https://www.amazon.com/Neiko-01902-Adjustable-Magnifying-Alligator/dp/B000P42O3C
Helping hands
https://www.amazon.com/Neiko-01902-Adjustable-Magnifying-Alligator/dp/B000P42O3C/
Can use for fly tying or holding circuit boards while soldering, etc.
What you're noticing is oxidation from the ambient air. It may give it a bit more sheen, but you could use a clear flat spray lacquer such as this to minimize the erosion over time.
As far as bringing it back - You could tumble polish the brass, but that would more or less restore it to it's unfired state, not fired. As such, leaving it as is would be my recommendation.
collecting robot action figures. Cheapest way to get into it is buying kits you put together yourself, most of which are models from the Gundam sci-fi universe. There are a lot of factors that go into collecting including articulation, color accuracy, stability, materials, and price point, but that's not terribly relevant in the beginning!
if you want to try it out, all you need is a pair of wire cutters or an xacto knife! I'd recommend the high grade Gundam Barbatos or the high grade Burning Gundam. High grade means smallish and easy to put together in an afternoon, so for less than the cost of snacks and a movie you can put together your own little shelf buddy.
Your best bet is to delete this and post it again on r/Gunpla. They have an incredibly friendly community and they'd love to help you choose a good model to start with, as well as give you some recommendations on beginner tools.
For a more immediate answerm there are three MG versions of the Wing The TV version, the EW Version, the EW Zero Version, and the Proto Zero. The Wing Zero EW is an older kit, but does have the angel-style wings if you're looking for those, and my personal preference is the Wing EW.
Also, while there's certainly nothing wrong with starting with an MG, I highly recommend with either the HG Wing, or the HG Wing Zero. They're both really modern HG's that look great out of the box, and are cheaper too.
At the end of the day, you should definitely check out r/Gunpla for any further questions, or even just to check out some builds you're interested in.
This line of quadrocopter is a great place to start. These little guys are very affordable and robust.
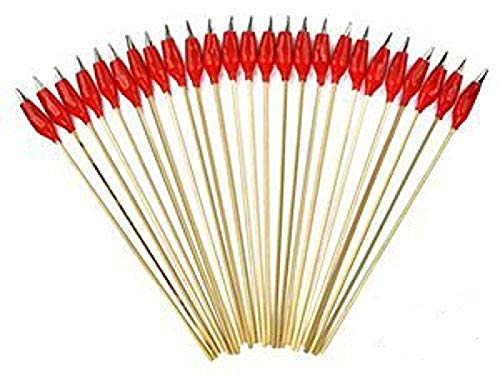
It's just cheap alligator clips on bamboo skewers. You can buy 25 pre-made for like $5. https://www.amazon.com/dp/B00CWRCO6M/ref=cm_sw_r_cp_apa_8ffRzbMP2AFNG
The charge time really isn't all that bad. It'll charge back up in 10-15 minutes. I really thought it'd bother me but I'm totally okay with it. This is the perfect starter copter to learn how to fly these things.
If it's really a deal breaker and you're okay with spending more, one of the cheapest way you're going to get significantly improved flight time would probably be a Hubsan X4, a 5 pack of batteries, a simple charger, and a prop guard for about $70 before tax.
I'd call that step 2 in the hobby though and would absolutely recommend the Cheerson CX-10 as step 1.
I would honestly buy them separately. A helping hands like this one, and a lamp like this.
That print does look rather large to me though. Lets assume it took 20h. I've assumed an average power consumption of 62 W [1].
Thus, the total print would require 1240 Wh.
The most commonly sold RC battery on amazon.com offers 2200mAh at 11,1V which equals to 24,42 Wh per battery. [2] I'm pretty sure you can run a printer on 11,1V without a step-up converter. You would need 50 of those, and that is not going to fit the box that he packed at 0:23.
[1] https://www.youtube.com/watch?v=cR1IvZCZo5U
[2] http://www.amazon.com/Turnigy-2200mAh-20C-Lipo-Pack/dp/B0072AEY5I/ref=sr_1_3?ie=UTF8&qid=1458235448&sr=8-3&keywords=lipo+battery+3s
I use this thing
http://www.amazon.com/dp/B00AQAANDS
A set of helping hands with alligator clips can hold the pieces still, so you only have to use one hand to paint.
Good luck!
http://www.amazon.com/gp/offer-listing/B0035LOUMU/ref=dp_olp_new?ie=UTF8&condition=new
try it. you'll like it. nothing else compares. :)
I've been experimenting with different things.
Plastruct Plastic Weld makes a pretty solid bond. The only time I've had trouble with it is lately while trying to bond sections of a sword blade that are 0.3" thick and 3" wide. The sections with the most stress on them can snap if I let it flex enough.
I used Gorilla Glue to glue together pieces that left gaps. It expands and fills, so that was handy. The bond seemed strong, so I'm going to try that on the blade pieces next.
I've also used Loctite gel control super glue and it worked fairly well, but I don't believe the bond is as strong as Plastic Weld.
As for finishing prints, my current method is to use XTC 3D to smooth the print. After that, I prime, sand, and paint using spray paints. I will probably get an airbrush soon to try for nicer looking paint jobs.
I feel you. I just suggested them to another user, but you should check out these. They come with a panel lining marker, and the metallic ones are great for accents and the like.
Here's a set I found on Amazon.
In our Wiki we have a list of retailers listed under "Shopping". As a general suggestion from me, Amazon (with Prime shipping, otherwise it might come from Japan, taking a few weeks to a month to arrive) is usually the easiest way to get your first kit. Figure out international shipping once you get into the hobby.
As a beginner, it would be a good idea to check out the rest of the wiki for some useful info before you start.
Also, the PG is considered pretty bad. The MG and RG kits are fairly well regarded. The old HG is outdated but not too bad, might be your best bet for a first kit.
Another option is the SDEX if you like chibi proportions.
Sure, maybe check out this one: Bandai Hobby Wing Gundam Zero Version EW 1/100 - Master Grade https://www.amazon.com/dp/B0004EAFWK/ref=cm_sw_r_cp_api_i_6KmCCb1YYNJAD
I think it would look really nice with a glossy look.
First kit I ever did was a HG Epyon. Being the dumb kid I was, I just broke the pieces off the runner and then chewed the nubs off. ....I know.
I ordered this guy as well as this little dude.
MG Epyon is next, followed by Deathscythe Hell then Tallgeese III, and of course SD versions of all.
Yeah, making your own at home is pretty easy to do. I've done it many times over the years. Requires a standard color printer, Decal paper, and a can of clear coat. $20 worth of materials will net you 6 pages of decals.
If you have a printer, you can do anything!
I'd say all you need in life is this traxxas kit. it'll last like 5 years. 50k, 30k, and 10k. 150cc's total
Link
Get this and you don't have to worry for a long time: https://www.amazon.de/Traxxas-5136-Differential-Oil-Kit/dp/B000BP1AIA/ref=mp_s_a_1_2?keywords=traxxas+50k&qid=1570300073&sr=8-2
Though most of the time you can get this for ~22€.
I'm using Amazon links as requested, but if you have a local big box tool stop you can get the store brand of most all these items for the same price or less. I know from personal experience, that from the tools I've listed all but two of the items are cheaper in store than on Amazon.
Everyone needs a knife! (~$7 home depot)
Razor blade
Where are you going to keep everything? (~$10 home depot)
Utility Sack
You'll need a good all around screw driver. (~$8 home depot)
6-in-1 Reversible Screwdriver
Need some basic general maintenance pliers? (~$20 home depot)
Pliers Set
Ratcheting screwdriver for those repetitive screw jobs. (~$20 sears)
Ratcheting Screwdriver
Where the hell did I put that T6?
Magnetic Precision Screwdriver Set
Where did that damn screw go?
Flashlight
Extra stuff!
I recommend the ball end ones specifically if you don't have a good angle on what your trying to get at (cough towel bar cough cough).
Long Arm Ball End Hex Key Wrench Set
For those damn pesky wires and that damn lack of a third hand.
Helping hands
When duck tape and gum wont cut it.
Beginners soldering iron kit
I have used all of these specific items extensively besides the ball end hex keys, and that specific helping hands.
+1 for the Hakko FX888D-23BY
Some solder wick and a desolder pump is something else I would add. Also a cheap tip thinner for a noob (like me). Helping hands are cheap and can be useful. Also a cheap variety pack of tips. Nothing expensive till you are comfortable with keeping them clean and tinned.
These are all things I bought when I purchased my Hakko FX888. All have been useful.
Desolder Pumps and Wick
[Tip tinner] (https://www.amazon.com/dp/B00NS4J6BY/ref=cm_sw_r_cp_apa_i_k1kZDbJ5TS5Q6)
Helping hands w/magnifying glass
Various Tips
Hakko FX888D-23BY
All of this cost me $146 shipped. Right now, it'll all total to $139.83 shipped if in the US
Here is my list I will put links when I can.
Citadel Shades- also known as washes. I would suggest Nuln Oil as your black wash and Reikland Fleshshade as a brown wash. Example you would black wash the probe droids but I would suggest the brown wash for the wookie.
I find these washes great for new painters because you don’t have to do anything to them. Use them right out of the pot.
http://www.games-workshop.com/en-AU/Citadel-Shade
Also the Citadel base paints that have the metal look to them like lead belcher are excellent for doing highlights on metal surfaces like the blasters or the droids.
For all my normal colors I only use the 1$ acrylic paint from normal craft stores. They work just as well as long as you water them down. You pay more for the special miniature paints and Side by side I did not see the difference in my Minis.
For primer I use white for most things even stuff that will be dark. It is much easier to make something darker. It is harder to lighten up it back up. The washes especially the black wash will darken up the mini as well so it is important for the colors to be brighter than you think they will needed to be.
Some talked about having to do more than one coat and for about half my colors I normally do two coats but the white gives me the freedom to just do one coat if I want it to look lighter. Example I have to paint a mini one time that was wearing jeans. I only applied one coat of blue paint then used the black wash over it. This gave the jeans this faded look and was done much easier than having to do the lighter highlights by hand.
For brushes a size 0 1 and 2 would be a good start. For washing I use a side 3-4 as well since that makes it quicker.
Varnishes there is only one to use Testors Dull coat
http://www.amazon.com/Testor-Corp-1260-Spray-Testors/dp/B0035LOUMU
Ok here are items that are just really nice to have that you may not have thought about
You will need something to put the models on while you are painting them. I use corks and you can get those at a local craft store then you pick your brushes up. You don’t want to be holding on the mini while painting as your figures will pull even some of the dry paint off with enough handling.
Best way to attach them to the corks is poster tack. It is reusable and holds them very secure.
http://www.amazon.com/Elmers-Poster-Reusable-Adhesive-E1531/dp/B000BKQDB4/ref=sr_1_3?ie=UTF8&qid=1420900105&sr=8-3&keywords=poster+tac
For priming I have seen a lot of people use a box to prime the minis and I have done this but I find it sometimes hard to get primer over the bottom of the minis. My solution to that is a yard stick. You are going to get paint all over it so make sure it is not one you ever plan on using as a yard stick again. Use the poster tack to minis to the stick. This allows me to flip the minis over completely to be able to get primer even in the hard to reach spots. I can spray about 12 minis at one time.
Edit wanted to add some examples of my work. These are the first minis I ever painted.
http://s750.photobucket.com/user/mrush007/slideshow/Zombicide%20First%20Batch
Here's a quick list of goodies to consider:
Testor's Model Master Glue - works on all of the kit's plastics except clear glass (use Elmer's glue for that). Be sure he scrapes any paint or chrome plating off the parts before gluing.
Tamiya Fine Surface Primer - painting is much easier with a primer coat. It gives the paint something to bite into. This can be used on the body and really any other parts that get paint. Makes it much easier to brush paint on smaller parts, too.
Model Master Black Lacquer - this will give him the base for a great matte black finish.
Model Master Flat Clear - this is a clear, non-shiny protective top coat that will take the shine off the black paint and give him a nice, matte finish.
Here is a build guide - much more than he needs, but the painting process is the same, except he'll be using a flat clear instead of gloss.
Feel free to ask any questions or send him over to /r/modelcars when he gets the kit. Have fun!
YUCK! Neither!! GW Products are crap.
Order some Testors: Model Master - Flat Clear Coat and thank me later.
Thanks! I went with Testors lusterless flat. Decent price for what it covers!
Every thermoelectric device I've seen consumes a pretty significant amount of power (~20W on one of the ones I've played with, which the one pictured looks very similar to). A LiPoly pack that can do that for an hour (with a suitable converter in between, I'm assuming ~80% efficiency) would need to be ~24Wh, for a 3-cell pack (nominal voltage 11.1V) this is ~2200mAh. Here is an example of a pack that can do that. The article also says they run it 5s on, 10s off, which would approximately triples that runtime to 3 hours (followed by ~4-5 hours charging, based on nearly identical packs I have for various things).
That said, the batteries shown in the article look more like a 2-cell pack of approximately 1100mAh (hard to guess though, since I can't see the pack fully), so they're either running much less power to the TECs than their upper limit, or they're not running it for very long (~1 hour).
So, it needs a decent sized battery, but if you only want to run it for a couple hours, it probably won't be too bad.
I used to recommend the Syma X1, and it's what I started with before building my first tricopter. However, I think there has been a lot of progress with the flight controllers in these mini quads. My Syma X1 feels very sluggish now.
I would spend a bit more and get a Hubsan x4. http://www.amazon.com/Hubsan-H107-L_M2-The-X4-H107L/dp/B00CP5NSGG/ref=sr_1_1?s=toys-and-games&ie=UTF8&qid=1396292286&sr=1-1&keywords=hubsan+x4
Absolutely buy a cheap starter quad like the syma x1
or the slightly more expensive, but better hubsan x4
These things are crazy bullet proof but will show you how difficult they are to fly at first, and whether this is a hobby you want to get into. This subreddit and the forums on rcgroups are fantastic sources of info.
Once you have fully mastered the starter quad and can fly it in every orientation, then look into building your first "hobby grade" level quad.
Has he ever flown anything?
If not then the stock answer is to go with one of the "toy" quads. They are fairly inexpensive, very durable, and replacement parts are plentiful and cheap for the inevitable crashes. Once he gets the hang of that, then he can move up to something that's more powerful, and expensive.
Don't be fooled by the size, these are still fairly tough to get the hang of flying, and are really great fun. Most can be flown indoors as well.
The Hubsan H107 gets recommended quite a bit (I own one, and it's been great).
http://www.amazon.com/Hubsan-H107-L_M2-The-X4-H107L/dp/B00CP5NSGG/ref=sr_1_2?ie=UTF8&qid=1407263704&sr=8-2&keywords=quadcopter
With that you'd want to get both the prop guard, and the crash kit.
The Syma X1 gets a lot of recommendations as well:
http://www.amazon.com/Syma-Channel-2-4G-Quad-Copter/dp/B0096SJU3U/ref=sr_1_5?ie=UTF8&qid=1407263704&sr=8-5&keywords=quadcopter
http://www.amazon.com/Syma-Channel-2-4G-Quad-Copter/dp/B00906PKQ4/ref=sr_1_8?ie=UTF8&qid=1407263704&sr=8-8&keywords=quadcopter
And there's the Estes Proto X (I don't see many recommendations for this, but have seen it mentioned in other places quite a bit):
http://www.amazon.com/Estes-Proto-Quadcopter-Colors-Black/dp/B00G924W98/ref=sr_1_6?ie=UTF8&qid=1407263704&sr=8-6&keywords=quadcopter
I'm sure there are more that I'm missing, but I'm sure others will chime in.
I've seen people selling them at hobby stores, but I just make my own.
For example, you can get a premade set on Amazon for pretty cheap
But that's not how I do it. I went to Wal-Mart and bought a styrofoam block, a package a bamboo skewers (from the grilling section) and a couple packs of alligator clips (from the electronics section). The clips fit perfectly on the end of the skewers, and you just stab them into the styrofoam to dry/cure.
Not worries, just sharing my experience and offering some advice ;)
That back of 200 clips is only $14 which comes out to $0.07 a piece for very high quality clips. Paired with 4mm skewers and they offer a far superior tool.
I do like these little tiny ones for the smaller parts though. I picked up this set for $0.11 a piece and while the red insulation is useless, they're good clips for small parts as long as you secure them with some other adhesive.
Oh god that is terrible.
You want to use this.
http://www.amazon.com/Testors-Liquid-Cement-with-Brush/dp/B0035LOUWK/ref=sr_1_6?ie=UTF8&qid=1457137680&sr=8-6&keywords=plastic+cement
Refill it with this when you're done the small bottle.
http://www.amazon.com/Plastruct-Plastic-Weld-applicator/dp/B00FDFWJD8/ref=sr_1_14?ie=UTF8&qid=1457137771&sr=8-14&keywords=plastic+cement
Hubsan x 4.Basic version(7mm motors no cam)Get 4 spare motors,5 pack of 380 mah batteries and a bunch of walkera ladybird props.
http://www.amazon.com/gp/product/B00HS5Y6G4/ref=pd_lpo_sbs_dp_ss_1?pf_rd_p=1944687502&pf_rd_s=lpo-top-stripe-1&pf_rd_t=201&pf_rd_i=B00FDNI0SI&pf_rd_m=ATVPDKIKX0DER&pf_rd_r=1E1N0BMES63B2X4ZFCZP
http://www.amazon.com/s/ref=nb_sb_noss_1?url=search-alias%3Dtoys-and-games&field-keywords=walkera+ladybird+props
http://www.amazon.com/Tera-Quadcopter-Spare-7x20mm-Hubsan/dp/B00TI1ANQ8/ref=sr_1_1?s=toys-and-games&ie=UTF8&qid=1465070478&sr=1-1&keywords=7mm+hubsan+motors
Gundam Paint Markers - https://www.amazon.com/GSI-Creos-Gundam-Metallic-Marker/dp/B00KBRFOIU/ref=pd_bxgy_21_img_3?ie=UTF8&psc=1&refRID=RVZRSVSK61CSZE7G2MTB
I used these to gold plate an A-wing. Not the most precise, but looks pretty good. I'll add a picture when I get home.
Any Revive kit is a good choice for beginners, so the Gouf should be just fine. As for the tool kit, I've never heard of that brand before, and the nippers especially don't look like they're really high quality, but for your first tool kit it shouldn't be too bad. If you want an alternative, I'd suggest this one, since it's made by one of the best modeling tool brands (Tamiya) and I can say from experience that it comes with pretty good nippers.
I got a cheap kit when I was first starting out. I have since replaced everything inside with upgraded tools.
Here's what I put inside:
It all fits. I can usually find space in my gunpla box to carry it to and from build meets.
I don't want to get zapped by AutoModerator by posting the full Amazon link, but you can paste this after the Amazon url
Gundam-Modeler-Assemble-Building-Alemon/dp/B01D1JYXKO/There was a fairly recent release of a High Grade Wing Gundam Zero kit, but it looks like he prefers MGs... I think there are a few variations of the Wing Gundam kit, such as the Proto Version, Wing Gundam(EW), Wing Zero(EW). or if you want to be the best friend ever there is the Perfect Grade Wing Gundam.
If he is a fan of the Gundam Wing series, it is worth considering Deathscyth, Deathscythe Hell, or Sandrock, which are other 'protagonist' mobile suits that fight sort-of along side the Wing Gundam.
There is also Epyon and Tallgeese, two 'bad guy' mobile suits from the same series.
If he is a fan of the original Gundam series, the RX-78 or a Zaku kit(there are many variations) would be good as well.
Also, be careful buying on Amazon if you want it to be delivered by the 10th (or shortly after). Quite a few of the sellers with good prices are based in Japan so it can take upwards of a month or more for the item to arrive if you buy it from them. It can be easy to miss that information if you're not paying attention.
https://www.amazon.com/Bandai-Hobby-Wing-Gundam-Version/dp/B0004EAFWK/ref=pd_lpo_21_tr_t_3?_encoding=UTF8&psc=1&refRID=Z7C2JSX8Y465QD7G8Q0X
Your love of wing is as great as mine this is a solid and beautiful rendition of the Wing Zero so I would recommend this or this
https://www.amazon.com/Bandai-GUNDAM-VER-Ka-Master-Action/dp/B00030EUTY
It's possible, just very very difficult. If you want to take the easy approach, you can trace this image in Illustrator and then print it out on decal paper(https://www.amazon.com/Testors-Decal-Paper-Clear-Pack/dp/B000BLI6QS).
Probably just made his own decal. There are sheets you can buy that work in regular printers. Typically they are waterslide decals.
http://www.amazon.com/Testors-Decal-Paper-Clear-Pack/dp/B000BLI6QS/ref=sr_1_3?ie=UTF8&qid=1464136661&sr=8-3&keywords=waterslide+decal+paper
Fighting Piranha Graphics seem to be the go-to resource that people use though I've found these and ones off of eBay to be lacking in print quality and versatility. I like to have a bit more control over the size and prints (and online decals are too damned expensive).
I did a writeup on decals this week. This might help someone printing their own.
----------------
Requirements:
decal print paper (Transparent if the decals are dark OR if the mech color is light OR if the design would be difficult to cut around. White paper if the decals have white or light colors OR if the mech is dark OR if the design would be easy to cut around.) Ink printers NOT print the color white and similar tints will be underwhelming!
picture editing software
color printer
decal film
----------------
Recommended:
acrylic fixative art spray, matte
decal setting stuff
*decal solution stuff
----------------
Steps:
5a. Place a drop of decal setting stuff on the place the decal will go. This softens the decal and allows it to conform better since the medium is better than water. You'll still have a bit of give when sliding the decal around. Allow this to be visually dry.
5b. Once the decal is perfectly in place, put a drop of decal solution to thoroughly wet it. This causes the decal to fill any irregular sections of the model that you placed it. It will get gummy, stretchy, and unable to move or remove afterwards. You might try this multiple times and use a fine brush to push it into recesses.
5c. After the model is completed, seal the whole thing -including decal- with matte fixative spray or matte varnish that gets applied with a painting brush.
----------------
Notable products:
https://www.amazon.com/Testors-Decal-Paper-Clear-Pack/dp/B000BLI6QS/ref=sr_1_1?keywords=testors+decal+paper&qid=1566236237&s=gateway&sr=8-1
https://www.amazon.com/Microscale-MICRO-DECAL-3-Bottle-Combo/dp/B01BALXVQC/ref=sr_1_4?keywords=decal+solution&qid=1566234498&s=gateway&sr=8-4
Looks good. For the badges and such, try waterslide decals https://www.amazon.com/Testors-Decal-Paper-Clear-Pack/dp/B000BLI6QS/ref=sr_1_2?ie=UTF8&qid=1466705607&sr=8-2&keywords=waterslide+decal
Testors custom decal paper
Took a little playing around to get it right, but I'll use it again in the future. Took a while, but I like how it came out.
There is waterslide decal printer paper. You can make any decal you want...
Here is a few links but there are plenty of brands.
Inkjet:
http://www.amazon.com/Lazertran-Waterslide-Decal-Paper-Inkjet/dp/B001LUF54E
http://www.amazon.com/Testors-Decal-Paper-Clear-Pack/dp/B000BLI6QS
Laser:
http://www.amazon.com/Papilio-Laser-Clear-Waterslide-sheets/dp/B005DFLVOG
Water slide decals could also work in place of actually painting the image on. Water slide decals are used in a lot of industries to apply clean graphics to objects, i.e. Hotwheels, Guitar headstock logos.
http://en.wikipedia.org/wiki/Water_slide_decal
You can get this decal paper online: http://www.amazon.com/Testor-Corp-9201-Decal-Paper/dp/B000BLI6QS/ref=sr_1_2?ie=UTF8&qid=1418242921&sr=8-2&keywords=waterslide+decal
[Traxxas 10k, 30k and 50k in a bundle.] (https://www.amazon.com/Traxxas-5136X-Differential-Oil-Kit/dp/B000BP1AIA) Get lube now.
Traxxas Lube Pack
A small vise or helping hand can be invaluable, if using a helping hand I recommend wrapping the alligator clip hands in a couple layers of electrical tape as they can be quite sharp and scratch up connectors and such. Since there's virtually no risk in damaging components, most soldering irons between 60-120W should work well. Any 60/40 rosin core solder will work, if you're unable to get leaded solder due to local regulations, I've heard the 99% tin stuff is decent, again just make sure it has rosin core. A smaller tip might be beneficial if using smaller connectors such as 2.5mm. A solder sucker and wick is useful if any mistakes are made. Lastly, a DMM is helpful to make sure there are no shorts and that all connections have continuity and low resistance.
I bought the surgical tubing to pull in the pots. I have not soldered in years but I researched before I started and based on good tips I bought a hotter soldering iron (40 watts +) and 'helping hands'. Both were huge and I could not have done it without the helping hands. The magnifying glass was just in the way. The alligator clips were strong so to keep them from cutting through the wires when holding them I put rubber tubing over the clips.
The soldering went so much better than I expected.
https://www.amazon.com/Spray-Lacquer-TS-80-Flat-Clear/dp/B000ZVO3YS
If you're painting a model kit, try your best to acquire paints and topcoats specifically for plastic/plastic models. If you're in the US, Testors, Tamiya, and even Krylon can work as good flat coats and each brand has a respective gloss and semigloss spray.
Quick question, as a complete noobie to Gunpla, I was wondering if these would be the appropriate sprays to use for top coating, both for the gloss, so I could pannel line, and then do the decaling and weathering and obviously then the matte coat.
So would these work for the gloss and matte coats, or are there better options out there. Obviously price isnt to much of an option, as long as its the best bang for the buck.
The first one I've found is the gloss its by Mr.Hobby, called Mr.Super Clear Gloss and the second one was the matte final coat by Tamyia Color called Tamiya Color TS80 Flat Clear
Looks fantastic. I'd throw a matte varnish on there though to reduce the glossiness and help protect your hard work against damage.
I've had good results with Dull Cote in the past. Of course feel free to use whatever brand you can get a hold of or prefer, it will protect your paint job just the same.
I use Armstrong Multisurface Finish applied via airbrush. Solid results and very durable. For matte finishes, I then apply a very light coat of Testors Dullcote.
Armstrong Multisurface Finish: http://www.walmart.com/ip/36171477?wmlspartner=wlpa&adid=22222222228025765084&wl0=&wl1=g&wl2=m&wl3=42535549592&wl4=&wl5=pla&wl6=81197388152&veh=sem
Testors Dullcote: http://www.amazon.com/Testor-Corp-1260-Spray-Testors/dp/B0035LOUMU
I like them, the red and gold is a nice theme. I can't wait to get home and work on my 5th border legion some more >:)
On another note, do they look as glossy in person as they do in this picture? If so then when you are finished with them, you may want to use a matte varnish that reduces the shine. I believe this is the one.
IIRCC, Tamiya has only a glossy clear spray. The only ones I know are these:
I've used Tamiya rattle cans in the past, and they are pretty fool-proof. And the Testors products are used by a lot of people, so I doubt they're much harder to use.
I know we all have our own preferences but I still think Lusterless Flat Lacquer is the best matte finish out there.
This stuff will do the job https://www.amazon.com/Lusterless-Flat-Lacquer-Clear-Testors/dp/B004QPCLQG
Used by a professional (check out Next Level Painting on YouTube) He uses this to seal all his models
Testor's Model Master Lusterless Clear Coat.
https://www.amazon.com/Lusterless-Flat-Lacquer-Clear-Testors/dp/B004QPCLQG/ref=sr_1_1?s=toys-and-games&ie=UTF8&qid=1527601268&sr=1-1&keywords=lusterless+flat+lacquer+clear+coat+testors
Hello, I was just about to order a couple days ago, then figured I should ask you all here on /r/Multicopter if you have any recommendations for changes. I can solder and have tools, is there anything that I am missing here for a complete setup? Oh I also already own a Spektrum DX6i with two Spektrum AR610 receivers.
item | link | price
-|-|-
AV transmitter/receiver | Boscam 32Ch 5.8G 600mw 5km Wireless AV Transmitter TS832 Receiver RC832 for FPV | $35.63
Charger | Genuine SKYRC iMAX B6 Mini Dual Power 6Amps 60Watts Professional RC Balancing Battery Charger & Discharger (Version RCLITE) w/ Micro USB Port For RC Lipo Battery Cherge, Temperature Port | $36.58
Heat shrink | uxcell® 1 Meter 50mm Dia Ratio 2:1 Heat Shrinkable Shrinking Tube Black | $6.66
Flight Controller | AbuseMark Acro Naze32 Rev 6 Flight Controller W/ Straight / Bent Pin Headers, Breakout Cable, & Apex RC Products Nylon Standoffs | $39.99
Frame | YKS DIY Full Carbon Fiber Mini C250 Quadcopter Frame Kit for FPV Mini Quadcopter Part | $37.99
Motors | 4pcs EMAX RS2205 2300KV Brushless Motor 2CW 2CCW for QAV250 QAV300 FPV Racing Quadcopter | $78.79
ESC's | Crazepony 4pcs Littlebee 20A Mini ESC Oneshot125 Electronic Speed Controller 2-4S Brushless for FPV Multicopter Quadcopter | $39.99
Props | Hooshion® 16 pcs 8 pairs GemFan HD HQ 5030 5x3 CW CCW Propeller for Mini QAV250 Quadcopter (Black+Orange) | $12.59
Connectors | XT60 Drone Connectors 5 Pairs (5 Male and 5 Female) | $2.96
Battery | Turnigy 2200mAh 3S 20C Lipo Pack | $16.70
AV Antenna | Anbee® FPV 5.8Ghz Circular Polarized Clover Leaf Antenna High Gain Aerial Set w/RP-SMA Plug | $10.98
Camera | SC2000 600TVL D-WDR DNR Board Camera SONY Super HAD CCD for FPV, 2.8mm Lens, IR Blocked Filter | $33.99
| total | $352.85
You'll also need some Dollar tree foam, some music wire, clear tape, razor blades, ect. That setup will get you started with tons of room to grow. The one transmitter will handle 8 planes at least.
OK, I need to clarify this.
When the motors are not firing balls, and as long as I have my finger on the trigger, the motors will run great, and not slow down. So they appear to be working great.
However, It's when they are shooting balls that there is a problem. When they are firing the balls for a solid 10-15 seconds, the motors start to slow down, and sound like the battery is dying.
The battery has a 20C constant rating with 30C burst discharge rate.
The battery I'm using is this one: https://www.amazon.com/gp/product/B0072AEY5I/ref=oh_aui_detailpage_o00_s00?ie=UTF8&psc=1
I'll admit that I'm having to read up on the C rating right now. I don't know much about that. Is a 20C battery too low? Or maybe it's just not made to be held down continuously?
Thanks again with all the help you've given me. It really means a lot.
Those batteries are a little chunky for a 250. I have some and they are slightly bigger and heavier than my 2200mAh zippy compact but I like to fly 1500 zippy the best on mine. I got the 2206 motors on my h250cf 3k pro and just added 20a esc and 6040 props to it last night. It's a beast! I use that same charger and it's great. I say go with the 99$ kit h250cf pro kit.
I would also not recommended the flysky fs-t6 I was seeing brown outs with it and left negative review on Amazon for the product. I now use a taranis and it really is amazing! Here is my speed run this weekend. I need to tilt my fpv camera so I can go faster and see where I'm going. This isn't all she has by any means. This was warm up before I went tree cruising
RCX H250CF 3K Pro 3/1/15: http://youtu.be/p6pV1zKdQTw
>Thanks for the response! Which 1300mah batteries did you purchase?
>I have a chunk of amazon credit that I'd like to use to get the rest of my stuff (even if it comes at a slight premium), so I plan on getting my prop balancer, charger, etc from there if possible.
>This is the charger
>And I'm considering a few of these batteries
Is this the new Nu in question?
Thanks just ordered it and it will be my first ver ka. It’s like $40 off on amazon
Bandai Hobby Nu Gundam Version Ka "Char's Counterattack" 1/100 - Master Grade https://www.amazon.com/dp/B0091O17LM/ref=cm_sw_r_cp_api_i_4i1ACbD041P6Y
Just ordered this too
Bandai Hobby MG 1/100 Sinanju Stein Ver. Ka Model Kit Action Figure https://www.amazon.com/dp/B00APB7930/ref=cm_sw_r_cp_api_i_ln1ACbZY5DJ48
OP what have you done to me
Is it this one? https://www.amazon.com/Bandai-Hobby-Gundam-Version-Counterattack/dp/B0091O17LM
http://www.amazon.com/Bandai-Hobby-Gundam-Version-Counterattack/dp/B0091O17LM I'm planning on putting the LED in this guy once I get him (He's on his way) because the lit up eyes would just look great on him. I love gunpla just because the designs are cool and it's a step closer to the reality (Besides the 1:1 scale) To where I can believe that it's possible for gundam to exist in the near future. Also it gives a personal touch to you figures instead of saying "I bought it and now it's posed here" I can say "I built this and look how great it looks and how much time and effort I put into this."
Usualy Toy Shop Japan Hobbyone are great to order from if you don't mind ordering straight from Japan. They usually have the cheapest prices on Amazon, have a lot of things stocked regularly, and they ship registered SAL (has tracking info) which most others who sell from Japan don't. I have been using them for awhile now, and they ship fairly fast too considering it's from Japan. I usually get things at the two week mark here in California.
If you're looking to order straight from the states then you're going to have to pay a bit more than you would from Japan.
Hope this helped =)
My favorite magnifiers as someone who does bench work, beading, wire wrap, stonework:
http://www.amazon.com/SE-1013FL-Helping-Magnifier-Light/dp/B000Z7GGJC/ref=sr_1_6?ie=UTF8&qid=1405451223&sr=8-6&keywords=helping+hands
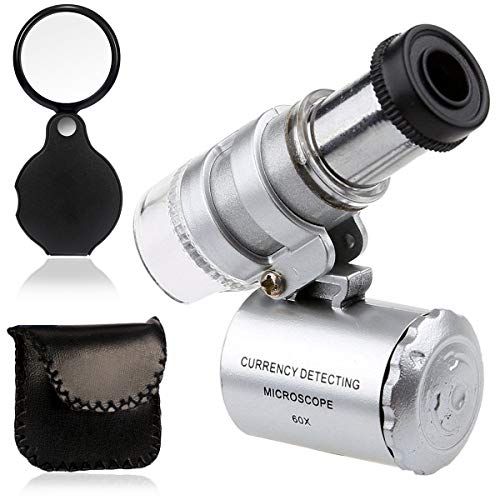
http://www.amazon.com/Microscope-Jeweler-Currency-Magnifier-Adjustable/dp/B00AQAANDS/ref=sr_1_9?ie=UTF8&qid=1405451254&sr=8-9&keywords=jewelers+loupe
(this thing is so much fun, and I keep one on me when running around goodwills)
http://www.amazon.com/Housweety-Professional-Jewelers-Lighted-Magnifier/dp/B005VIG6TA/ref=sr_1_1?ie=UTF8&qid=1405451281&sr=8-1&keywords=jewelers+magnifier
None of these are expensive and all are very useful.
In my experience those two finger turning adjustable types are garbage. They never last for very long and are dificult to manage.
I purchased these two years ago and it's all I've eve used.
[1] (https://www.amazon.com/KINGMAS-Pocket-Microscope-Jeweler-Magnifier/dp/B00AQAANDS/ref=pd_sim_200_2?_encoding=UTF8&psc=1&refRID=KEDEDRG711YM9A2DM25Y) 60x LED and adjustable. Is great for looking at trichomes.
2 40x fixed. Is great for everything else when you don't need to get as up close and personal.
Well, if you're thinking about doing it get some mylar paper from goulet and go slow and use super cheap nibs. You will break your first 4-16 nibs.
I personally like to do it on my dremel at low speeds using a finer grit spinny thing :) The way you do it is keep a vision of what the nib should look like at a very detailed level and just go slow and light with the grinding and check it with a loupe often. I use a 60x loupe (this one, it's amazing) and check the shape of the nib OFTEN. After every few seconds of work I'll check it till it's in the shape I want, then I'll take some fine files and smooth it out a bit with different sticks between 3200 and 12000 grit. I'll usually move up from 3200 and just keep going until I'm on the 12000 grit stick. I usually have the nib I'm working on in the pen by the stick tuning part but I do take out the nib when I'm using the dremel.
Now that I've gotten pretty proficient at it, it usually only takes about 5 minutes to do a nib unless it's below a F, in which case it'll take up to 10 since you really have to go slow with those because you want to keep as much material on the nib as possible, but just shape it into a finer point where the paper touches it.
The Hubsan X4 (h107L) is an amazing micro quad. It's my first quad and I can't believe the things it will do.
Hmmm. Well, I've really been enjoying my moto 360, but I'm both on android and a huge fucking nerd.
What's your coffee game look like? $200 would get a ton of great coffee gear, especially if you're just getting started.
How about sports? I'm an avid climber, so maybe you could get a punch-pass, climbing shoes, and a chalk bag and hit up a local climbing gym.
Let's talk toys, though. Quadrotors are a fucking BLAST to play with, and there's a million of them. I have this Estes ProtoNano and this Hubsan Quadrotor. They're both amazingly fun, and not too expensive.
What else are you interested in?
I just recently started myself with [this] (http://www.amazon.com/gp/aw/d/B00CP5NSGG) and have really enjoyed it a lot. Feels like I'm already immeasurably better at controlling it and I've only had ten or twelve flights. I would definitely recommend this model for learning on.
I recently started to gather a startup airbrush supplies and tools.
I purchase some alligator clips from amazon (https://www.amazon.com/dp/B00CWRCO6M/ref=sr_ph_1?ie=UTF8&qid=1484095804&sr=sr-1&keywords=alligator+clips)
while waiting for my other supplies to arrive i realize i didn't have any styofoam laying around to use as a base given that most stuff is packed using inflated air bags now. while i was watching some airbrush guide on youtube it gave me idea
I started typing and this ended up being really long, hopefully it helps. I might have gone overboard, so if you need / want a TL;DR or more info on anything just say the word and I'll do what I can :)
My personal preference is to add details and touch-ups to my figures. I've done a few full repaints, and I'm working on my first airbrushed figure, but I really like adding in details where the factory didn't :)
---
Paints:
I've had good results using alcohol based acrylics like Tamiya, Model Master, or Testors Acrylics (I think Enamels are Testors' main line, so make sure to check what type it is). Alcohol-based acrylics thin and clean up nicely with 91% isopropyl alcohol, I usually pick it up from whatever pharmacy is nearby (don't get the 70%, it doesn't work at all).
Citadel and Vallejo make nice water-based acrylic paints in additional colors, you'll definitely need a primer if you're working with Vallejo (I've only used a couple of Citadel paints, so I can't really speak to them).
You'll want to stay far away from acrylic craft paint, I've tried it in the past and it doesn't come out well at all (I just use some empty glass or plastic jars from stuff like sour cream or salsa since they're not too big).
Some folks like enamel paints, and there might be another kind of model paint, but the chemicals in those paints and their thinner tends to be quite strong so I avoid them. I used un-thinned enamels when I first started painting, and when I tried to use the thinner it ended up melting my paint tray and making a mess, so I'm not too keen to give them another try.
---
Tools are going to differ a bit depending on how you want to paint (hand painting vs airbrushing or spray painting).
---
Hand Painting:
You'll need paints, some soft bristle brushes (I have a set like these), something to stir your paint (I use a Badger Paint Mixer and love it to bits), thinner (depending on your type of paint), a mixing tray, some pipettes for measuring paint and thinner, something to hold your parts while painting (I like these Aligator Clips), something to stick the clips into (I use a styrofoam block wrapped in plastic from a craft store, but I've seen folks use taped together cardboard like from Amazon boxes or the cheap foam coolers), some fine grit sand paper or nail buffing blocks to help rough up the surface slightly to help the paint stick, and something for topcoat (I absolutely love Pledge Multisurface Floor Care, aka Future Floor Wax, it's a clear acrylic wax that dries to a semi-gloss to gloss shine, it brushes on nice and self-levels for a smooth finish, and one bottle will last a REALLY long time; I got a bottle a few years ago and I've used it on a LOT of gundams and TFs and the bottle is still half full). You may also want some smaller containers or jars to hold your thinner, brush cleaner (alcohol or water), and topcoat if you're using Pledge just so you don't need to keep the big bottle out on your workspace.
---
Airbrushing:
You'll need an airbrush and compressor, and then a lot of the same supplies as above. You'll also want some small-ish jars to store your thinned paint so you can re-use your leftover paint instead of having to toss it, and some painter's tape to mask off parts you don't want to paint and to keep your paint lines clean.
You can airbrush inside the house, but you'll want to do it in a well ventilated area if you don't have a spray booth (box with a fan and air filter to help move the fumes out the window and help keep the paint from spraying everywhere). I'm still learning to paint with my airbrush, so I don't have too many tips here.
---
Spray painting:
You'll need your choice of spray paints, alligator clips, fine sand paper, and some painter's tape to mask off areas so it doesn't get everywhere. I definitely wouldn't advise using spray paints indoors, the fumes tend to be really strong. I haven't really used spray paints in a long time, so I'm not a lot of help here either.
---
Markers:
Some folks might recommend sharpies or paint pens / markers, but I've never had good luck with them.
I do highly recommend using a Micron, Graphix, or Prismacolor marker / pen for highlighting panel lines in .005 thickness for most figures. The .01 and even .05 markers can work well too, but they might be too thick for some figures, so a couple different thicknesses can't hurt (I've got a pencil case full of lining markers from those brands). Don't use sharpies for panel lines, unless things have changed, even the thinnest ones tend to dry a purpley-blue instead of black, and the lines are still really thick compared to the Micron.
---
Painting Tips:
I wouldn't recommend spraying them while they're still on the runners. When you remove them, you'll have to sand down the nubs and paint over that area. Would work better if you got some of these and a small block of styrofoam to stand them up in. Then you can remove pieces, sand the nubs, and paint the whole piece at once.
I use Testors brand paint for most of my car models, haven't done much gunpla for a while, but I'm getting back to that and am going to try out my Testors spray cans on one.
What I like to do is as I build the Model, i do not fully assemble but test fit to get a feel for what is covered/not covered as well as if I need to fill any gaps. From there, I put the parts on some clip sticks to prime and spray. I use a piece of styrofoam to hold all the clips while I'm painting. Once the colors are all where I want them to be, then I assemble it all and do touch ups where needed.
As for general airbrushing, I practiced on ping pong balls before I tried painting models. It's something somewhat challenging to practice getting even costs on a uneven surface as well as a good way to learn control for your brush. Along with that, I also sprayed on paper just to experiment with spray patterns at different angles and pressures.
Here's a link to those clip sticks I was talking about. Good luck on your next build!
http://www.amazon.com/Bluecell-Alligator-Stick-Airbrush-Hobby/dp/B00CWRCO6M
My issue is I am not comfortable with the hobby knife, I feel like I have to put to much pressure into removing the nub even with a fresh blade. I will do the alligator trick, would these clips be to large for the method you suggest, some parts seem to small with those clips. Also I make my own sanding sticks but I do have a few sheets of sandpaper left so I will start cutting strips for other kits. Would you recommend I go higher than 2,000? I go 1,000 < 1,500 < 2,000 < Nail Buffer Block < Nail Polish and Shine. But I still see some marks after all this which makes me think I need a higher grit or maybe a fresh stick.
weld-on 3 and 4 are thinner than water - about as thin as ether. you'll want a syringe applicator for them.
personally i would attempt to use a solvent bonding solution like PLASTRUCT BONDINE https://www.amazon.com/Plastruct-Plastic-Weld-applicator-2oz/dp/B00FDFWJD8/ref=pd_lpo_sbs_21_img_0?_encoding=UTF8&amp;psc=1&amp;refRID=H3B2FZMWPEHEV608H9JS its cheap, goes far , and can melt and weld the plastic back together, just clamp the controller ring back together, then add bondine, it uses capillary action to flow into the crack and turn the plastic into a liquid, then the pressure from the clamp forces the liquid plastic together, then it dries and leaves you with a solid bond. obviously will snap if you bash it again, but as you aren't using an adhesive, it will be simple to just re-bond it. where as with gorilla glue, if it breaks the bond, you will need to remove the hardened glue to be able to re-glue it successfully
I found this plastic weld works well with PLA, and doesn't cause clouding.
Start by getting a line-of-sight drone and see if you like it first.
hubsan x4 (comes with a controller)
batteries
charger
prop guards+props
$55 to see if you like it.
When you break that, try repairing it. If you don't like that, then the hobby may not be for you.
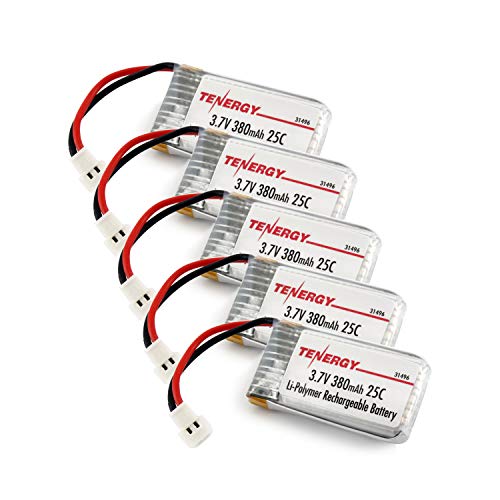
Yep, the real thing packaged in a factory box. It does not come with a battery though. I recommend the tenergy 380's on Amazon http://www.amazon.com/dp/B00HS5Y6G4/ref=sr_ph?ie=UTF8&amp;qid=1421780800&amp;sr=1&amp;keywords=tenergy. Also spend $7 on a 4 port charger: http://www.amazon.com/ThinkMax%C2%AE-In-Battery-Charger-Hubsan/dp/B00LGWQ4FG/ref=pd_bxgy_t_img_y
I bought these ones and they've worked out really well. They are slightly thicker than the OEM ones, but I haven't had a problem getting them in or out. I agree capacity-wise they generally don't provide much more flight time than OEM, but I've found I get significantly more time if I charge and then immediately use. Even charging in the morning for evening flying seems not quite as long. It's not just the aftermarket ones either.
I also have H107L, and have been super happy with these batteries. They are 380 mAh, which I wanted to try before jumping to 500 mAh. I have been super happy with them. I haven't timed it, but it does feel like I get quite a bit more flying time. But of course, the main thing that makes a difference is having five of them :)
Obviously you'll also want a charger. I was going to get the same combo that /u/jackthecat53 mentioned, but some of the reviews made it sound like the charger wasn't that good. So I got a separate charger, which seems to be doing the job, but it feels super cheap, it turns out.
At any rate, I am super stoked about these batteries, and the way-improved flight time I'm able to get.
GSI Creos AMS 121 Gundam Metallic Marker Set https://www.amazon.com/dp/B00KBRFOIU/ref=cm_sw_r_cp_api_i_IeLzDbZJT2579
I used all the colors but the silver (was worried about the metallic red but pleased with how it turned out), and I would highly recommend these. Not too bad price wise about $10 for the set.
I'd get the Creos Gundam Metallic Set, so you can do verniers, lenses, and other details. You can also go the Aurora Seal route, but it can be a little trickier (but more awesome...)
Get the 5 pack of metallic gundam markers and go to town on the frame. Maybe think about getting the purple one too.
https://www.amazon.com/GSI-Creos-Gundam-Metallic-Marker/dp/B00KBRFOIU/ref=mp_s_a_1_6?ie=UTF8&amp;qid=1549636939&amp;sr=8-6&amp;pi=AC_SX236_SY340_QL65&amp;keywords=gundam+marker&amp;dpPl=1&amp;dpID=51CMzZ7y7VL&amp;ref=plSrch
https://www.amazon.com/Bandai-GM19-Gundam-Marker-Metallic/dp/B006BNIJJO/ref=mp_s_a_1_1?ie=UTF8&amp;qid=1549637009&amp;sr=8-1&amp;pi=AC_SX236_SY340_QL65&amp;keywords=gundam+marker+violet&amp;dpPl=1&amp;dpID=41yar4LgyQL&amp;ref=plSrch
Thanks!
Literally metallic gundam markers haha
https://www.amazon.co.uk/GSI-Creos-Gundam-Metallic-Marker/dp/B00KBRFOIU/ref=mp_s_a_1_6?ie=UTF8&amp;qid=1539539201&amp;sr=8-6&amp;pi=AC_SX236_SY340_FMwebp_QL65&amp;keywords=gundam+markers&amp;dpPl=1&amp;dpID=51CMzZ7y7VL&amp;ref=plSrch
Theres a link to them!
Stuff that you need:
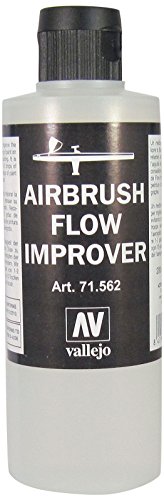
Use aribrush flow improver rather than thinner if you're doing a lot of air brushing, it slows down the drying on the paint and prevents buildups on the tip. I like the this kind.
I think it's cool you want to pick up a hobby your father had. It will be a nice reminder every time you pick up the gun.
I use this 100% for miniatures, and it works great!!
&#x200B;
Alright, here is the list I bought. It's a bit more than you want to spend, but this will ensure you can get going right away, and not be frustrated. I did a fair amount of research on different forums, sites, and youtube videos. If you want to know why I chose something, feel free to ask. I was going to bold the ones that you absolutely need, but I would say everything in the first set are a must.
&#x200B;
&#x200B;
&#x200B;
&#x200B;
For the compressor, I keep mine at about 18-20 while doing miniatures and it's perfect.
I do 1 drop Improver, 5 drops thinner, and 6 drops primer and have perfect flow.
&#x200B;
Feel free to ask any questions! Good luck!
Hvstle
This kit looks great, and it IS great! I have it on my shelf, and it's really solid, although it doesn't stand out much.
I think Jobby's torso issue is only his kit, or at least I haven't heard about it until now- That part is incredibly solid on my kit.
You can get this kit on Amazon!
Barbatos (HG 1/144)
http://www.amazon.com/Bandai-Hobby-Orphans-Barbatos-Iron-Blooded/dp/B0129DW0WG
I did paint the sword and the red marks rather than use stickers as well as the gold accents and panel lines and did the usual matte top coat.
Almost finished with my G Self as well just need the top coat.
My first ever kit: HG Barbatos ($13)
Other easy (and cheap) kits I'd recommend:
HGUC RX-78-2 ($11)
HG Gusion ($13)
HG Graze Kai ($11)
I'd start with those, and based on the suggested products, just go from there! Really, I just like to buy kits based on what I think looks coolest. The HG kits are all pretty beginner-friendly, so it's really up to you!! Hope this helps!! And if you haven't already, subscribe to r/gunpla. It can be a fickle-bitch-of-a-sub when it comes to upvotes (which can be discouraging for new posters), but more often than not people there are more than willing to offer helpful advice. And if you have any questions, feel free to PM me. That goes for anyone reading this who's interested in possibly getting into the hobby as well. Good luck and happy building!
Keep building stuff! And don’t buy something difficult or expensive until you are comfortable with it. You can improve your techniques and make the little HG and SD kits look amazing! I jumped into MG kits too fast and now I notice everything wrong with them, but I’m too lazy to re-do them lol.
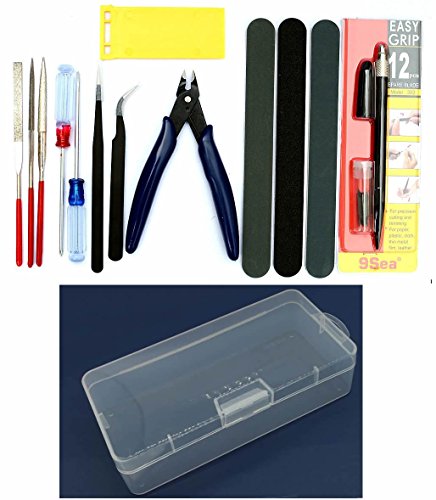
Definitely work on nub removal and panel lining. Practice makes perfect! When I first started building, my fiancé bought me this tool set and it helped tremendously. Happy building!
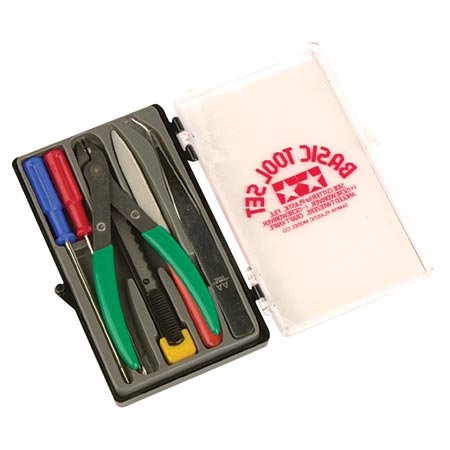
I mean if you're absolutely convinced you should buy everything in a set then:
https://www.amazon.com/Tamiya-TAM74016-Basic-Tool-Set/dp/B01AND0FRG/ref=sr_1_1?ie=UTF8&amp;qid=1505772569&amp;sr=8-1&amp;keywords=Tamiya+set
Otherwise I lay out a pretty simple starter set here:
https://goodguydangunpla.blogspot.com/p/my-tools.html
So the Justice was cheaper than the Tamiya sidecutters?
u/Manpig you evil, you should have listed him the Basic Tools Set
Here's a basic toolkit i use for gunpla highly recommend . https://www.amazon.com/gp/aw/d/B01AND0FRG
Honestly... at face value the kit looks okay but it probably comes with a lot of cheap crap you might not care about. I saw this in the similar section and I reckon that's enough if you wanna save a few more bucks and are keen on a set.
But if you're already willing to spend $20-30 then you can get what I suggested within that budget along with the knife you linked to (this and this, there's a few sellers for each you can get via Prime). That and some sandpaper from your hardware store and you'll be good to go dude.
Ultimately don't worry too much about the tools. You can make do with just sandpaper, a hobby knife and a crap pair of wire cutters and still do fine. Hell, that's all I had when I was a kid lol :P
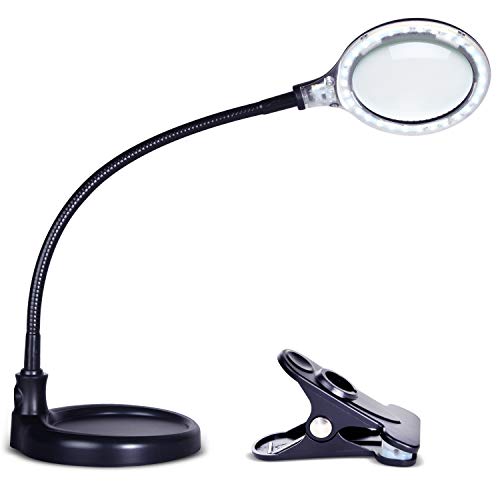
I use this, the base could use a little more weight, but all in all it is great.
Brightech LightView Pro Flex 2 in 1: Magnifying Glass LED Lamp - Lighted Magnifier with Stand & Clamp - for Desk, Sewing, Table - Bright Light for Rea https://www.amazon.com/dp/B01K10XA1O/ref=cm_sw_r_cp_apap_hJbqsNahY9meL
Got it on Amazon https://www.amazon.com/dp/B018MRI1F8/ref=cm_sw_r_cp_api_i_0mIYCb2A9PYTP
Got the lighted magnifier there too. It can be free standing or clamp on. The ones locally available look like junk. https://www.amazon.com/dp/B01K10XA1O/ref=cm_sw_r_cp_api_i_TpIYCbFB0MCVR
I got this and it’s perfect. https://www.amazon.com/dp/B01K10XA1O/ref=cm_sw_r_cp_api_pazQBbKS6AWWN
I use the Lightview Flex.
It's not the cheapest in the world but it is very bright and you have the magnifier if you need it. The flexibility of the gooseneck is great and the desk clamp is quite strong. The weighted base has good heft and doesn't move on the desk.
The downside is that the gooseneck isn't extremely long, so that could be an issue for you. I have no problems due to how I brace my elbows on my desk.
I'll chime in for a recommendation for this lamp I purchased recently.
Also/additionally, try picking up a cheap pair of low-strength readers. At least in the US, they're available at most drugstores. Even a 1.00 or a 1.25 can make a big difference in discerning tiny dates on coins.
For the gundam that he likes, depending on your budget...
HG Wing Zero (~$30):
http://www.amazon.com/Bandai-Hobby-Endless-Gundam-Custom/dp/B0006N148I/ref=sr_1_3?ie=UTF8&amp;qid=1407976011
MG Wing Zero (~$50): http://www.amazon.com/dp/B0004EAFWK/ref=wl_it_dp_o_pC_nS_ttl?_encoding=UTF8&amp;colid=26F7AFGMYHONY&amp;coliid=I19JHH8DW71UF9
PG Wing Zero (~$170):
http://www.amazon.com/Bandai-Gundam-Custom-Perfect-Grade/dp/B0009GVE7S/ref=sr_1_2?ie=UTF8&amp;qid=1407976011
Note that the PG is considered one of the worst perfect grades, I'd personally go with the Master Grade if you plan on getting him a kit rather than just tools/accessories.
I got this one https://www.amazon.com/dp/B0004EAFWK/ref=nav_timeline_asin?_encoding=UTF8&amp;psc=1
and this one https://www.amazon.com/dp/B0006N149M/ref=nav_timeline_asin?_encoding=UTF8&amp;psc=1
my two favorites 15 years ago
Wing Zero Custom at about 40$ on Amazon right now http://www.amazon.com/Bandai-Hobby-Wing-Gundam-Version/dp/B0004EAFWK/ref=sr_1_1?ie=UTF8&amp;qid=1376679847&amp;sr=8-1&amp;keywords=wing+zero+custom
I reccomended cool gunplas that familiar like this
If I remember it right, ver. EW kits are Katoki's redesigns based on Endless Waltz manga, not the OVA/movie. I guess they're very close to original anime designs there.
EW movie versions usually have 'Custom' or 'Kai' suffix.
Don't be sorry man. I'm feeling just like you. It had been years since I had build the 1/144 models I got from toys r us as a kid.
it's the master grade wing zero kit. I got it from a local store but I've seen it on Amazon and Gundam USA store.
Usa Gundam store :
https://www.usagundamstore.com/products/bandai-hobby-wing-gundam-zero-version-ew-1-100-master-grade
Amazon:
https://www.amazon.com/Bandai-Hobby-Wing-Gundam-Version/dp/B0004EAFWK/ref=mp_s_a_1_1?keywords=master+grade+wing+zero&amp;qid=1575140321&amp;sr=8-1
Finally got a useful "spam" email from Amazon, here are some of the kits that appear to be on sale.
MG Sandrock - $42.64
MG Heavyarms - $42.40
MG Deathscythe Hell - $48.90
MG Wing Zero Custom - $43.66
MG Shenlong - $41.49
MG Deathscythe - $41.79
MG Wing Ver.Ka - $47.95
MG Wing - $44.29
MG Buster - $47.50
MG Nu Ver.Ka - $72.07
You can paint standard space marines green and use these custom decals to make them Salamandry. Purchase some decal printer paper and print them on any standard printer and then you can apply them just like any other decal.
There are probably better options - but this exists.
If you're looking to produce your own decals from an image, Testors has paper you can print directly on from an inkjet printer: https://www.amazon.com/Testors-Decal-Paper-Clear-Pack/dp/B000BLI6QS
It might not fit your need, but is worth looking into if you can get sheets for MSRP.
I used Illustrator to vectorize the images and to scale them. Then I used this to print the decals Clear Decal Paper. After that I clear coated the sheet with some clear coat spray(GW brand). Then I cut the sheet as close to the images as possible. Then I used decal set solution to make it look like it was painted. I then use brush on clear coat to seal the model up. Just let me know if you have anymore questions.
Yes
http://www.amazon.com/gp/product/B000BLI6QS/ref=oh_details_o01_s00_i00
This was the one I used I think. I may have had more luck with more expensive transfer decal paper, but the forgeworld ones were exactly what I needed so I stopped trying.
Liquid silicone lubricants are more or less the standard.
http://www.amazon.com/Traxxas-5136X-Differential-Oil-Revo/dp/B000BP1AIA/ref=sr_1_2
This is a good buy. You get a pretty good amount of it, and you can mix different weights to get something you like.
I picked these up on Amazon for about $20. You can probably get them cheaper elsewhere if you don’t mind waiting.
I used the 50K on the springs and axles and will use the 10k on the pieces but I’m trying to finish off a bottle Mara lube before I open the 10K Trakkas bottle.
In that case, I guess you could just buy a single bottle of 50k which will cost you around ~$20, which will still help you with the spring noise, but it is also the same price of the set in the regular amazon, so if you can source some from there, then it could save you some money than buying from amazon.in (also people say traxxas lasts forever, which makes it a good investment)
&#x200B;
But if you're r e a l l y tight on budget, people say Gan Magic Lube is pretty nice and costs around ~$6 on thecubicle.com (idk about India prices), but won't really help with your spring problem.
Traxxas is a company that makes lube for RC cars, but it works amazingly in cubes. Traxxas 50k works great for lubricating the core, Traxxas 10k works great for lubing the pieces, and Traxxas 30k is a great intermediate lube if you know what you want to use it for. Here's a link to a bundle of the 3 lubes on U.S. Amazon. You should be able to view the link and get a feel for the product so you can find it on an applicable online store in your country for purchase.
It's great lube but doesn't really last long and doesn't add that much feeling to a puzzle. I only use it for MoYu magnetic pyraminx tips to make them faster and less dry and on my X-Man Bell Pyra to make it smoother.
Most people prefer heavier weight lube. If you were to buy lighter lube than try Traxxas 30k. The Cubicle lube line is very overpriced. You can buy it [here] (https://www.amazon.com/Traxxas-5136-30K-weight-differential/dp/B000BOLVF8) in larger quantities for cheaper. You can also buy bundles of 10k (very light), 30k (medium), and 50k (heavier) [here] (https://www.amazon.com/Traxxas-5136X-Differential-Oil-Kit/dp/B000BP1AIA/ref=sr_1_2?s=toys-and-games&amp;ie=UTF8&amp;qid=1486562813&amp;sr=1-2&amp;keywords=traxxas+50k) which is probably your best bet if you want a lot of lube for cheap.
/ddt
Lubricant is also a must.
Is it this one?
Here is the link to traxxas it is $17 usd including shipping only 1 left
https://www.amazon.com/dp/B000BP1AIA?m=A28RSVMDNB39Z1&amp;ref_=v_sp_detail_page
Valk pieces only break if you take the corners apart other than that its a really good cube! I would recommend it, as for the lube I order Maru lube and
Traxxas. https://www.amazon.com/dp/B000BP1AIA/ref=cm_sw_r_oth_api_NHwkyb17TGKQ3
I'm in Canada and I got mine from here: https://www.amazon.com/gp/product/B000BP1AIA/ref=ox_sc_act_title_1?smid=ATVPDKIKX0DER&amp;psc=1
The full set can be bought for only 20 quid which isnt too bad.
Link
Apologies, just realized I did not reply to your RCA cable comment.
When I did the tonearm rewire, I also swapped out the RCA cables which were connected to the board. I did both at once so I can't tell how much of this was the cable replacement vs the tonearm rewire - but I noticed a good drop in the overall noise floor and better clarity. In my head, I credit the noise floor drop to the RCA replacement and the clarity to the tonearm review - but again, don't take my assumptions as gospel. It did seem like a worthwhile change.
Take a look at KAB, that's where I picked up the tonearm rewire stuff and it was cheap and defiantly worth the effort. I have very limited soldering experience and it still only took me about 1.5 hours to get everything pulled apart and reassembled with the RCA cable soldering and tonearm rewire soldering. Just need to be delicate. If I were to do it again, I'd def pickup an inexpensive set of helping hands, something like this to make the job easier as it is delicate work.
Currently with the SME 309, I'm using the Sumiko Premier PIB-1 Interface Box so I get to pick the cables running out from there to my phono stage. Currently using bluejeans RCA interconnects and have no complaints. Super 'high-end' cables an area I haven't been convinced enough that it makes that huge of a difference, so I'm going to stick with what I have as I have no issues.
The run in a little longer than I like and it crosses paths with some of the power cables behind my components - so a good cleanup and cable management project is needed. I picked up the supplies a few weeks back to take care of cable management but don't want to commit to it until after the external power supply change as I know that'll need to be considered when I end up taking care of all the wire management work.
All the best brother (or sister)!
Those eyes are really cool. I've got a bunch of mini's showing up soon from the Bones 3 kickstarter and will have to try that out on some of the bigger pieces before working it down to the smaller ones. Unfortunately most of the large models I have now are Big stompy robots (privateer press Cryx) and they don't really have eyes on them.
I have not tried a magnifier head set. I tried using the magnifier on a pair of helping hands but I had no sense depth perception so it didn't really work out for me. I've heard that the headsets work fairly well and you can maintain your sense of depth. Let's just say they're on the old wishlist so I can try them out.
Glad to hear it!
For soldering, I'd recommend doing what I did and just go to Home Depot or Lowes or a hardware store and get a few feet of wire, maybe a few different gauges of it, take it home and practice. Cut it, strip it, solder it together, and use electrical tape or heat-shrink wrap to cover all exposed metal. Rinse wash repeat. Did that 3 or 4 times and got more comfortable with it.
Grab one of these helping hands along with a basic soldering kit off amazon and you're good to go.
https://www.amazon.com/Neiko-01902-Adjustable-Magnifying-Alligator/dp/B000P42O3C/ref=sr_1_4?keywords=helping+hands&qid=1569619359&sr=8-4
Have fun!
Buy a set of Helping Hands. Yes, you can solder without one, but it makes it so much easier that for a couple bucks it's absolutely worth it.
If you need to solder on a pcb you'll want a temperature controlled soldering station, other essentials are rosin core solder, some flux to apply before soldering, and a helping hand to hold the pcb/component and wire in place when soldering. I leave my soldering station at a little less than 350 when I'm tinning wires and soldering on a pcb. Wipe excess solder off the iron, heat up the spot you want to solder to with the wire in place, then apply solder to the wire when the flux has smoked off, it should flow into the joint. You don't want to keep heat on a pcb for too long as it can damage components on the board. Make sure you tin the tip/s of the soldering iron with solder before and often during use, or the tips will oxidize and refuse to tin until you scrape the oxides off with a razor knife. Typically a problem at high temps, around 300C solder will melt and oxides form very slowly and the tip will stay hot without needing a retin for a 5-10 minutes. I usually set my temp on max when I first turn it on and hold a bit of solder to the tip and then turn it down when the solder melts. Saves a few minutes of warm up between use.
If you need to heat up a larger surface area (like a battery terminal) for tinning or soldering it helps to bump up the heat - sanding a large surface also will help. Steel and other metals may require use of a corrosive flux made specially for that.
That's about all I know XD
A good magnifying glass is just as important as a good iron, especially once you realize you're not 25 anymore.
Any chance it's still salvageable or did you burn a hole through one of the chip? ;)
Amazon.
I have:
Generic Hobby Knife - Generic hobby knife kit. Blades were shit so I buy Xacto brand but the knives and case are good.
Needle Files - Extremely useful for polishing off mold lines or smoothing cuts.
Adjustable Jeweler's Saw - Handles a ton of different size blades for cutting metal, plastic, or wood.
Swivel Handle Pin Vice - Probably the best tool you can buy. Great for customizing what your troops are carrying.
Third Hand - Stupidly useful. Mostly for gluing.
Jeweler's Saw Blades - Bought these for my saw. Useful. Others might be better.
Micro Drill Bits - Bought for my pin vice. Useful. Others might be better.
Mini Drill Bits - Bought for my pin vice. Useful. Others might be better.
tamiya ts 80
&#x200B;
https://www.amazon.com/Tamiya-TS-80-Clear-Spray-100ml/dp/B000ZVO3YS/ref=sr_1_1?keywords=tamiya+top+coat&qid=1568355627&s=gateway&sr=8-1
&#x200B;
is that a good alternate top coat? mr top coat is nowhere in stock... and apparently the super clear is lacquer based and no good over decals and panel liners? so that leaves me the taimya one? is that ok to use?
You're probably looking for PS-55 or TS-80 from Tamiya as well. I personally never used these but I asked a mate I know and he said they're great
I personally recommend Tamiya's clear coats, as they spray thin and cure fast.
I haven't used it myself so I can't recommend on experience, but Mr. Hobby is another well-liked brand for clear coats.
I'm planning on top coating some HGs. I'm also using gundam markers for small details and the pour type markers for panel lines. Which top coat would be better: tamiya, mr. hobby top coat, mr. premium top coat spray, or mr. super clear, or maybe anyone have other recommendations?
unfortunately i live in somewhat of a countryside and need everything shipped...
https://www.amazon.ca/Testors-Spray-Lacquer-Clear-Coat/dp/B009FF6DN4/ref=sr_1_1?ie=UTF8&amp;qid=1525997806&amp;sr=8-1&amp;keywords=testor%27s+dullcote+spray
this looks a lot more reasonable but I've seen some people saying it melts your gunpla or something...? have you had any experience with this one?
edit:
nevermind, this looks like a very good alternative
https://www.amazon.ca/85080-Spray-TS80-Clear-100ml/dp/B000ZVO3YS/ref=sr_1_1?ie=UTF8&amp;qid=1525998118&amp;sr=8-1&amp;keywords=tamiya+flat+clear
I panel lined first, then used this https://www.amazon.com/gp/aw/d/B000ZVO3YS/ref=mp_s_a_1_1?ie=UTF8&amp;qid=1483678708&amp;sr=8-1&amp;pi=AC_SX236_SY340_QL65&amp;keywords=tamiya+top+coat&amp;dpPl=1&amp;dpID=4176x2Qtl1L&amp;ref=plSrch.
https://www.amazon.co.uk/d/Outlet/Tamiya-Acrylic-Colour-Clear-Mat-TS-80/B000ZVO3YS/ref=sr_1_2?ie=UTF8&amp;qid=1494607362&amp;sr=8-2&amp;keywords=tamiya+clear+spray
This one seems to be Mat?
This? http://www.amazon.com/Testor-Corp-1260-Spray-Testors/dp/B0035LOUMU/ref=sr_1_1?ie=UTF8&amp;qid=1407199920&amp;sr=8-1&amp;keywords=Testors+dullcote
I wonder if I can get it locally somewhere, maybe Michaels or Joanns?
I grabbed some clear coat paints from Home Depot and am going to try those first.
I learn as I go...
So order some of this
And get the Agathrax Earth and just mix it with water to make a wash to cover him in?
So I'll give you a link to a list that you may find useful for checking all the boxes on what you may need. I'll post my opinions below on some of the stuff I have found is most important. (I went through this process about 2-3 months ago)
http://www.reapermini.com/Thecraft/32
I LOVE this hobby knife Very important for removing mold lines, cutting off flash, etc. Very important to get one that starts and stays sharp
Primer is incredibly important. You want to make a suitable surface for your paint to adhere to. I would also look up some articles about how to prime. Contrary to popular belief you don't want the entire model to be the color of your prime when you are done! You want it to look almost speckled and have about 80% coverage.
Paint Here is a decent starter box of citadel paint, with a box and some 1/2 decent brushes. Obviously this is a bit pricey, but you get 45 paints plus some helpful extras
Brush Cleaner VITALLY important. Keeps paint out of the ferrule and helps your brushes stay conditioned and pointed
Brushes I just got a Winsor and Newton Series 7 #00, #1 and #2....WOW the difference between these and synthetic brushes is night and day. Painting tasks that seemed to take forever or require too much of a steady hand are MUCH easier now
Dull Cote Matte Spray Essential for providing a matte finish and protection to be able to actually use your minis. This product is excellent for that
Obviously there are many more items that are important to have that are described in more detail in that link I provided. But the ones above are the ones I would consider most essential
I think Amazon has it for around $8, but my local Michaels craft store has it for $4.99
Amazon link: http://www.amazon.com/Testor-Corp-Dull-Spray-Testors/dp/B0035LOUMU/ref=sr_1_1?ie=UTF8&amp;qid=1373855940&amp;sr=8-1&amp;keywords=testors+dullcote
I've bought it from that exact link before I realized my local store had it cheaper.
one thing worth mentioning is that the plastic ones are mostly 1 piece and basically indestructible. i have probably around 60 of the dark vengeance cultists and when i painted them, i gave them a nice thick layer of dullcote at the end. i've used them in probably over 50 games now and moved twice, none of them have chipped paint or any broken weapons. i know i've dropped at least 10 of them from a standing position to a concrete surface and they just bounce around.
I suggest Testors Dullcote. It's a fair price and specifically made for models.
I think the main problem there is using it in cold weather, which causes it to congeal faster.
People always recommend Testors Dull Cote to me as an alternative to Purity Seal, so it might be worth looking into instead.
I use Dull Cote, http://www.amazon.com/Testor-Corp-1260-Spray-Testors/dp/B0035LOUMU
Sometimes I use the non-Dull one.
Do you know if the Testors is any good? I've also had people tell me you can't use lacquers over acrylics, is this true?
this stuff right here turns any gloss finish into a very nice flat finish https://www.amazon.com/Lusterless-Flat-Lacquer-Clear-Testors/dp/B004QPCLQG
After you finish building and doing the primary paint, put on a coat of Future (that is the brand)- it will be shiny, but this will help protect the model and let you decal and weather it easier. After you get the decals on and your weathering (including panel lines), you can go shiny with another coat of Future, or go matte (normal) with a spray matte finish ($few at your local model store, or here is the one I like).
If you don't have a hobby store nearby, I recommend this: https://www.amazon.com/Lusterless-Flat-Lacquer-Clear-Testors/dp/B004QPCLQG
Can anyone tell me if this top coat would be the appropriate kind to use for a gunpla? This would be my first time top-coating and want to make sure I get the right stuff! Wanting to find a good "matte" top coat as been recommended on this sub to me.
http://www.amazon.com/gp/aw/d/B004QPCLQG?pc_redir=1407141650&amp;robot_redir=1
That's what I use, but I'm sure the other stuff would work just fine.
https://www.amazon.com/Turnigy-2200mAh-20C-Lipo-Pack/dp/B0072AEY5I/
Here's one for fairly cheap. From HobbyKing.
https://www.amazon.com/Gens-ace-Battery-2200mAh-Airplane/dp/B00WJN4LG0/
Here's a GenAce battery that works too.
I went with a Turnigy 2200mAh 3S 20C Lipo Pack for the controller with this charger and they are XT60
Could I use the same charger for the Quad packs? I have not pulled the trigger on the Turnigy nano-tech 1300mAh 3S 45/90 Lipo Pack yet.
I'm guessing the recommendation for the 1800mah 25-35C is to fly slower at first right? We would by flying FPV but not racing it so I think that's probably a good recommendation.
Since we are already using 2200mAh 3S 20C with an XT60 connector could we just use the same exact pack for the quad? It's rated at 20 constant, 30 burst and we could always use a spare for the controller if we go with a lighter battery with higher discharge for the quad later.
We aren't carrying a GoPro or anything so it would probably support the 2200.
No idea how much they draw, but I'm using this 2200mAh 20C battery with no issues:
https://www.amazon.com/Turnigy-2200mAh-20C-Lipo-Pack/dp/B0072AEY5I/
Your diagram is exactly how I wired mine, only difference is I spliced together the negatives to save wire. Should be good to go.
Perfect!!! I decided to use that!
Can you let me know if you see any problems with this list?? Anything I can improve?? Anything I don't need??
Frame, PDB, FC, Motors, ESCs
Extra XT60 Battery Connectors
Props
Standoffs
2mm Gold Bullet Connector
Cable/Zip Ties
DIY FPV Kit
Tx/Rx
Tx/Rx to USB Adapter
Drone Battery 1 (heavy) 2200mAh
Drone Battery 2 (light) 1800mAh
FPV battery 1500mAh
What's the cheapest way to be able to get voltage to show on my FPV setup?
-Would I be able to use this voltage checker/warning buzzer?
What about a cheap lost model buzzer/discovery buzzer?? Can I use a switch on my Tx to make the alarm sound??
Is it overkill to get 3 batteries total?? 2 for the drone (So I can keep flying when one is charging) and 1 for the FPV reciever/display?
Thanks for the help!!
I just burned out an ESC on a quad I just finished building :(. What's the best way to determine the cause?
It's a this ESC powered by this battery with this power distribution board. Thanks in advance!
Thanks for the response! Which 1300mah batteries did you purchase?
I have a chunk of amazon credit that I'd like to use to get the rest of my stuff (even if it comes at a slight premium), so I plan on getting my prop balancer, charger, etc from there if possible.
This is the charger
And I'm considering a few of these batteries
It seems that indeed we want to replicate the 'astronaut backpack' from your event company, though probably with a more Dr. Seus visual. Fortunately weight isn't much of an issue. We perform as a group so we can just rotate the backpack between performers. The "ideal" solution would be to use something like drill batteries so we could swap them out as needed. I really have no idea how much power a bubble machine would use relative to the energy stored in a car battery.
So to check if I'm reading this right
If we went with a SLA battery, which is a lot cheaper than a LiPo battery for the same amount of power, we'd need...
One other concern is that if the bubble machine is on a moving person, most bubble machines have a shallow resevoir and will slosh easily. How was the bubble astronaut setup?
Edit: Also I'm trying to do electrical math for how long batteries last, and brain is melting a bit. So just using examples
Bubble machine : http://amzn.com/B000LXTKMK
Battery : http://amzn.com/B0072AEY5I
The bubble machine draws 500 milliamps of power, which is .5 amp. The battery has 2200 mAh of power. So if I’m reading how it works correctly, it’s a matter of just dividing the milliamps of power into the mAh and you get about four hours of power. Is that right?
Researching the best possible colors of paint for my Nu Gundam Ver. Ka..
Besides the obvious aesthetic differences, they come from two different interpretations of the events in UC 0093. Nu Gundam comes from the Gundam movie Mobile Suit Gundam: Char's Counter Attack, whereas Hi-Nu comes from the novel series Mobile Suit Gundam: Char's Counter Attack - Beltorchika's Children.
I do not know the full details of Beltorchika's Children, but its basically Tomino's original story for Char's Counterattack.
and on a side note, the first kit of the RE/100 line, Nightingale, is Char's suit in Beltorchika's Children. Hi-Nu's counterpart, and Sazabi's parallel.
I'd recommend the Sinanju OVA Ver. or the Nu Gundam Ver. KA because I've heard they both look really good and are fun to put together.
Personally I think the MG Nu ver Ka is an excellent kit that anyone would be excited as hell to get.
I think I'm somewhere between your taste and mechanized flaming eagle wings. This first one is especially a blend between spacecraft aesthetic and medieval armor, but it doesn't exactly fit the bill as being a realistic war machine.
http://www.amazon.com/gp/product/B00APB7930?colid=3RMXBH3PKYJGI&amp;coliid=I1O66RJ8F39X9C&amp;ref_=wl_it_dp_o_pC_S_ttl
http://www.amazon.com/gp/product/B008KZ5B2E?colid=3RMXBH3PKYJGI&amp;coliid=ISV2S0P4G7A8P&amp;ref_=wl_it_dp_o_pd_S_ttl
http://www.amazon.com/gp/product/B0091O17LM?colid=3RMXBH3PKYJGI&amp;coliid=I34HD7IS9IX5AA&amp;ref_=wl_it_dp_o_pC_nS_ttl
I’m a tricomb guy, grab a cheep scope off of amazon, https://www.amazon.ca/KINGMAS-Microscope-Jewelry-Magnifier-Jeweler/dp/B00AQAANDS/ref=mp_s_a_1_5?keywords=mini+microscope&amp;qid=1567317008&amp;s=gateway&amp;sprefix=mini+micr&amp;sr=8-5 Or search mini microscope and pick one
This one is 12$ Canadian and works perfect for this, the tricombs will start clear and then start to get cloudy and then start to turn Amber. I usually check the middle of the main cola on the plant and chop when it’s approx 60/40 Amber to cloudy. it’s a personal preference thing as the high changes depending on ratio. You should be able to find some you tube videos fairly easily that’ll help. The scope is also a must for identifying some pests as well.
Great looking plant, good luck!
I seem to have linked the wrong scope, you should get at least a x45 sorry about that
This is slightly different from what you have above, but if you're using a cell phone and you want to get macro shots, give one of these a try. You can just hold it up to the back of your cell phone camera lens, and then directly over the coin. It's great for getting macro shots of specific parts of a coin.
This is another popular option: https://www.amazon.com/KINGMAS-Pocket-Microscope-Jeweler-Magnifier/dp/B00AQAANDS/ref=pd_sim_201_4?_encoding=UTF8&amp;pd_rd_i=B00AQAANDS&amp;pd_rd_r=T85T5H6TCG8FQT8Q80XR&amp;pd_rd_w=mh4B9&amp;pd_rd_wg=9WA7H&amp;psc=1&amp;refRID=T85T5H6TCG8FQT8Q80XR
Multiple vendors sell that same one for multiple price points.
After the thread here: https://www.reddit.com/r/MTGLegacy/comments/6k77zx/buying_duals_is_terrifying/ I figured I'd try to disprove the rumor that the text is the biggest give-away (hint: it's not), and bring some degree of confidence to those who do want to buy duals (hint: just buy a $5 loupe!)
&nbsp;
Here's the loupe I use: https://www.amazon.com/KINGMAS-Pocket-Microscope-Jeweler-Magnifier/dp/B00AQAANDS/ref=sr_1_11?ie=UTF8&amp;qid=1498759657&amp;sr=8-11&amp;keywords=jewelers+loupe
A pocket microscope. Might get it tomorrow when I get paid and take pictures on my phone using it. :o
I bought a cheap loupe to inspect the tip... https://www.amazon.ca/KINGMAS-Microscope-Jewelry-Magnifier-Jeweler/dp/B00AQAANDS
So far, I'm on the original 0.4mm nozzle, and I only change them to switch sizes... 0.8 for big "structural" work, and 0.2 for 1:100 scale minis.
I've run roughly 10kg through the 0.4 nozzle, including several spools of "silk" and thermo-chromatic.
The most important things are a tank and the ability to fill the tank to a PSI above a minimum of 80 or so. A tank makes it so the compressor doesn't have to run constantly, and creates a buffer so the air pulses of the compressor aren't transmitted to the brush where they can cause dotted rather than smooth lines. You want the compressor to be able to put out a higher PSI because you want the tank to hold enough so you can spray for longer at pressures of 60 PSI or below for longer intervals before the compressor has to refill the tank.
For model painting, most of your spraying will be best done at 20-30 PSI. Higher PSIs like 60 tend to be either for cleaning, or stuff like textile paints (i.e. T-shirt artists). The little "fishtank" compressors like the Ninja Jet can only deliver a max PSI of around 15 or so, which is on the very bottom edge of what most brushes can work with. PSIs of 15 and below are mainly used for tiny close-in detail work with highly thinned paint, and going that low works better with brushes that are designed specifically for detail, rather than "jack of all trades" workhorses.
Different brushes require different CFM (cubic feet per minute- a measurement of air volume rather than pressure), and little "fishtank" compressors are bare minimum here as well, so there will be many brushes where they'll make the brush spray poorly because they physically can't provide enough air to keep up at any pressure. A good target CFM rating for a tankless compressor is 1.5.
A tanked compressor can technically get away with less CFM, since it's not supplying the brush directly, but unless you want to have to stop painting whenever the compressor has to top up the tank, you want the compressor to have enough CFM to supply the brush WHILE also filling the tank, which means check your brush manual/documentation for its CFM, and look for a compressor that is specced over that by at least 1/2. The higher the CFM, the faster the tank will fill. Unfortunately I could not find specs for the Patriot that list CFM, but 1.5 is probably still a good start for a tanked compressor.
"Master" and other such Chinese import brand compressors are popular because people think they're cheap, but for very little extra a brand like California Air Tools will get you better QC, support, reliability, and specs. Chinese airbrushes are comparatively cheap, but the compressors aren't really, so there's not much reason to get the Chinese ones IMO.
Avoid regular hardware-style compressors unless you're painting in a very noise-tolerant environment, as even the "quiet" ones are LOUD AF. Seriously: when the descriptions/reviews say "super quiet" they mean by construction site standards, not household appliance standards.
As to fittings: if you live in a particularly dry climate (like Arizona, say), you can get away with not using a moisture trap, but even there it's good practice to have one just in case. If your climate is any more variable or humid than that, you will want a moisture trap. You can just get one from the local hardware store though: it doesn't have to be a special type. Always place the trap last in the air supply/fitting chain before the airbrush hose, so: compressor-> tank-> regulator-> moisture trap-> airbrush hose-> airbrush. Or if using a bench block as described below: compressor-> tank-> regulator-> connecting hose-> bench block regulator-> moisture trap-> airbrush hose-> airbrush.
In the US, compressors usually have 1/4 NPT fittings. In Metric countries, 1/4 BSP. These fittings are cross-compatible enough that you can use them together with teflon tape.
For hobby and fine art airbrushing, I HIGHLY recommend a lightweight hose like this over braided hoses. Braided hoses are for industrial-type settings like auto painting shops, where hoses need to be extra hard wearing.
BTW, when painting, loop the hose once around your forearm so if you accidentally drop the brush, the hose acts as a lanyard preventing the brush from hitting the floor. I feel like I'm constantly hearing horror stories about people damaging their brush by dropping it when preventing this is so easy.
A tanked compressor with come with a regulator. These are perfectly usable, but imprecise. It's not strictly necessary, but I do highly recommend using the built-in regulator as a step-down regulator, and getting a 0-30 or 0-60 PSI regulator to chain after it. I use one of these on my setup, and it makes adjusting airflow much better.
If you plan on locating your compressor directly on or under your "workbench" surface, that's all you need. If the compressor is going to be outside immediate/easy reach, it can be good to mount your regulator and moisture trap on a separate "bench block" so you can put it on/under your bench within easy reach. This is what I had to do with my setup (I mounted the regulator and moisture trap on a scavenged heavy steel bookend). In that case, you'll want/need a hose like this to go between the compressor and the regulator/filter block.
There are "extras" you can get like a quick-connectors and MAC valves, but I don't personally recommend them. If you're only using the compressor for your airbrush, you don't need quick connectors on the compressor side of the hose, and IMO quick connectors on the brush side don't actually save you time/energy as it only takes 2 seconds to unscrew a brush from the hose. If your regulator is in easy reach, a MAC valve similarly does not save you any time/effort. Both of these also add lots of bulk to the brush stem, which is undesirable if your instinct is to hold/use the brush like a pen instead of a gun. There are mini-filters that go between the hose and the brush, but I generally don't recommend them for the same reason: too much added bulk on the brush stem: it's better to to add to your main filters if you need better filter performance.
I don't have a Badger Patriot, but my understanding is that it's a good brush. I have two Badger SOTAR models, and if they're any indicator, I'd expect spray performance to be comparable to IWATA, but fit & finish to be more raw and "industrial" outside of the nozzle and needle, so a little fussier to keep clean. It should be much better and more reliable than a 20$ "Master" or "Point Zero" or whatnot.
The threads in the head assembly can be a little "gritty" on Badger brushes OOB. If that's the case, I recommend lapping them with something like Flitz to ensure a good seal. Basically just put a tiny dab of compound on the male threads, then screw them in and out about 20 times to polish off the burrs that are causing the gritty/sticky feeling. Make sure to clean the residue off thoroughly before spraying again.
For maintenance, get a roll of lint-free shop paper towels, a couple packs of interdental brushes from the local dollar store, a box of q-tips, and a box of round wood toothpicks. Use paper towels and q-tips wetted with solvent/thinner to clean the cup and needle, the interdental brushes to clean the passageways/tubes in the body, and use a wood toothpick whittled to a needle taper and soaked in thinner to clean the inside of the nozzle (don't use metal tools to clean the nozzle, as they might scratch it or flare the tip). Occasionally you'll need to inspect the needle tip or nozzle for gunk or damage, so you'll want a high-X pocket magnifier similar to this. Also a stick of wax-based lip balm to help the threads in the head assembly maintain a good air seal (apply a tiny amount to the male threads before reassembly after cleaning).
Get or make a spray-out pot. They're easy to DIY out of a margarine tub or soda/juice bottle, so although nice, it's not strictly necessary to buy one.
Get or make an airbrush stand/holder. This is not for storing the brush, but rather for having a way to set the brush down while in-in use without spilling the paint cup. Again: these are easy to DIY, so you don't have to splash cash on one unless you really feel like it.
Hope that helps!
A handheld for checking trichomes, I like these little cheapies: https://smile.amazon.com/gp/product/B00AQAANDS/ref=ppx_yo_dt_b_search_asin_title?ie=UTF8&amp;psc=1
But checking for broad and russet mites, the USB plug-in is the way to go.
If you think this is a one-time-purchase then you are dead wrong. You will crash, it is a matter of when and how. If you beat the odds, then good for you, you'll then want to buy upgrades. Save up and get a Phantom 2 with H3-3D and a GoPro 3+... If you can't afford that, just get a Hubsan X4 $40 and learn to fly and save money.
Without a doubt I think you should start with the Hubsan X4. I got one for my son a few months ago, and I've been flying it non-stop. A lot of fun and flies great indoors and out (with light wind.) Start inside and get good before you venture outside.
http://www.amazon.com/The-Hubsan-H107L-Improved-Version/dp/B00CP5NSGG/ref=sr_1_1?ie=UTF8&amp;qid=1393804814&amp;sr=8-1&amp;keywords=hubsan+quadcopter
These two...
http://www.amazon.com/Hubsan-H107-L_M2-The-X4-H107L/dp/B00CP5NSGG/ref=sr_1_1?ie=UTF8&amp;qid=1404693444&amp;sr=8-1&amp;keywords=hubsan+x4+107l
http://www.amazon.com/Hubsan-H107C-2-4G-Quadcopter-Camera/dp/B00EXBDYPK/ref=sr_1_3?ie=UTF8&amp;qid=1404693460&amp;sr=8-3&amp;keywords=hubsan+x4+107c
Goddammit, I dun goof'd. This shit better work.
Google isnt hard to use, people are lazy.
Here you go.
https://www.amazon.com/Bluecell-Alligator-Stick-Airbrush-Hobby/dp/B00CWRCO6M
http://www.amazon.com/Bluecell-Alligator-Stick-Airbrush-Hobby/dp/B00CWRCO6M/ref=sr_1_2?ie=UTF8&amp;qid=1417441276&amp;sr=8-2
I bought these and they are pretty decent
Correct!
Bluecell 50 pcs Alligator Clip Stick for Airbrush Hobby Model Parts by Generic
https://www.amazon.com/dp/B00CWRCO6M/ref=cm_sw_r_cp_apip_GgJ5aIplWSoA2
it leaves obvious seams, but usually works. This is the stuff I got which is just MEK. You can probably get more cheaper as a non-brand name
Plastruct Plastic Weld is my favorite (Plastruct Plastic Weld w/applicator 2oz Bottle https://www.amazon.com/dp/B00FDFWJD8/ref=cm_sw_r_cp_apa_i_BXRFDbW75C1PF)
try this one
Plastruct Plastic Weld
https://www.amazon.com/Plastruct-Plastic-Weld-applicator-2oz/dp/B00FDFWJD8/ref=sr_1_27?ie=UTF8&amp;qid=1494774556&amp;sr=8-27&amp;keywords=model+glue
That humbrol should work well, its a solvent glue. It won't work well on painted surfaces. It need to be clean bare plastic. It works by dissolving the surface of the plastic so two pieces "melt" together. I prefer Plastruct. But any plastic welder I've used has worked well. Try scraping the paint of the bonding surfaces with an exacto knife before bonding. Also, solvent glues are not like regular glues. You put the glue on after you are holding the parts in place and the capillary action pulls the glue into the joint. If you put it on the joint first it most of it will just evaporate before you get the parts together.
Solvent glues also only work on some plastics. Perhaps the combination of the clear plastic and the paint is enough to make it ineffective. As for gluing clear parts like Nacelles or Windows (in other models) generally you want something like PVA. (aka tacky glue, or elemers school glue) It won't be as strong a bond but it wont fog the plastic.
If you're dealing with a nice clean break in the plastic - i.e. no chipping or lost fragments - a plastic welding product should work nicely. These products work by melting the very top layer of the plastic so that it will bond with the molecules of whatever layer it comes into contact with (ideally though you'd probably want to apply the weld to both surfaces of the break).
Have a look at the following for an example of this type of adhesive product:
https://www.amazon.com/Plastruct-Plastic-Weld-applicator-2oz/dp/B00FDFWJD8/ref=sr_1_1?s=toys-and-games&ie=UTF8&qid=1551156641&sr=1-1&keywords=plastruct
&#x200B;
Also, if at all possible, practice on some scrap plastic, preferably some abs plastic which is similar in composition to the SP shell, so that you can get a feel for how this kind of stuff works.
I use plastic weld for my parts if there is any delamination. It's a thin liquid that you can apply to the whole part if you want. It will seep into any small openings and melt the plastic so that the pieces can bond properly together.
[This is one of the bottles I have]
(http://www.amazon.com/Plastruct-Plastic-Weld-applicator/dp/B00FDFWJD8/ref=sr_1_11?ie=UTF8&amp;qid=1450665680&amp;sr=8-11&amp;keywords=plastic+weld)
Superglue wouldn't hold that.
Your best bets are either 5 minute epoxy, built up as a layer on the inside of the door in order to make the join stronger, or Plastic Weld which will melt the two parts back together but may discolor the clear and painted plastic.
If you choose to go with the Plastic Weld, you need to be careful as it melts the plastic a bit in order to weld the two parts together. If you let it run it will melt and discolor parts you might not want it to. You should pour just a tiny bit into the cap of the bottle and then use a small natural bristle paintbrush to brush the edges of the parts with the solvent, let them sit for a few seconds and then push them together and hold them for 5 seconds until they are bonded, and then if necessary brush a little more Plastic Weld over the joint to help seal the pieces together.
If you're interested in putting them together, this glue works wonders. I've already worked through two bottles of it.
Google the props, they are everywhere. I get the 5X sets. I hate waiting on parts so I order from the states.
This is the last set of batts I bought. They are working out very well.
or these https://www.amazon.ca/Tenergy-Battery-Channel-QuadCopter-Walkera/dp/B00HS5Y6G4/ref=sr_1_1?s=toys&amp;ie=UTF8&amp;qid=1464649834&amp;sr=1-1&amp;keywords=380+mAh
They're usually for the Hubsan X4. Saw it at Radio Shack with the same connector.
http://www.amazon.com/Tenergy-Battery-Channel-QuadCopter-Walkera/dp/B00HS5Y6G4
I use both chargers, since I'm recording pre-charge and post-charge voltage, I charge batteries in different slots on the chargers to see if the issue is the battery, or the charger.
Currently I have the two stock batteries 3.7V 350mAH and five new batteries [3.7V 380mAh] (http://www.amazon.ca/dp/B00HS5Y6G4).
Seems like everyone is assuming he wants a kit and to build it himself, but I don't see that you said that. So, is that the case?
Will this be his first multicopter? If so, I would recommend something that is ready to fly (RTF) right out of the box. There are lots of good options, but I really enjoy my Hubsan x4 simply because how easy it is to get replacement parts. The price and reliability are nice as well ;)
You can put him together a nice "kit" with a hard case, spare parts, extra batteries for about
$175$135 on Amazon. It will be RTF, but also give him room to learn about the platform and repair mistakes.EDIT: Actually a little cheaper... if he has not flow before, this is a fun, cheap christmas present.
Complete Starter Kit for Hubsan x4 | ------------
---|---
Hubsan H107C | $54.00 |
Carrying Case | $24.99 |
Crash Kit | $17.50 |
5 Extra Batteries | $18.39 |
Battery Charger | $6.36 |
Prop Guard | $2.73 |
------------|------------
Total | $123.97
I think the stock X4 comes with a 280 mah battery but I read that the 380's were a good compromise of performance and flight time. I'm going to go with these from Amazon.
Which batteries did you get? I like the TEnergy Batteries:
http://www.amazon.com/Combo-Tenergy-Battery-Channel-QuadCopter/dp/B00HS5Y6G4
As opposed to these I found on banggood:
http://m.banggood.com/5-X-Upgrade-25C-3_7V-380MAH-Battery-For-Hubsan-X4-QR-Ladybird-p-69895.html
I should be getting http://www.amazon.com/gp/product/B00XHS4BKM?psc=1&amp;redirect=true&amp;ref_=oh_aui_detailpage_o02_s01 tomorrow, but the batteries I ordered were out of stock until the weekend, so they won't be coming in until next week http://www.amazon.com/Tenergy-Battery-Channel-QuadCopter-Walkera/dp/B00HS5Y6G4/ref=pd_bxgy_21_2?ie=UTF8&amp;refRID=0JAY6NC0TAPFCTAF2GMD
Edit: Just noticed you have the x5sc which doesn't look like this particular charger would work for either...
is there a difference between these two gold gundam markers? if there is, what gold do you think would look best for painting the antennas/v fin on the RG unicorn gundam? i am asking because i dont want to use the gold foil sticker for that piece
https://www.amazon.com/Bandai-GM04-Gundam-Marker-Gold/dp/B00750J0EA/ref=sr_1_1?keywords=golda+gundam+marker&qid=1564335050&s=gateway&sr=8-1-spell
and the gold in this pack
https://www.amazon.com/GSI-Creos-Gundam-Metallic-Marker/dp/B00KBRFOIU/ref=sr_1_3?keywords=gold+gundam+marker&qid=1564335062&s=gateway&sr=8-3
So i just got back from Asia and got a haul of HG and one RG and MG. I'm just getting back into Gunpla after a 10~year hiatus, and want to take a step up in to beginner level painting/panel lining/etc instead of just straight builds.
Some 1/144s I got that I want to start working on:
HGBF X-1 FullCloth (the one Lucas used in BFT)
V2 AB
HG Wing0
HGBF Wing Honoo? (Its a red.... Wing gundam?)
HD X Divider
I dont know the first thing about painting, and have watched some tutorials here and on youtube.
Gundam Marker basic set
Gundam Marker Metallic
Thanks in advance for the random questions.
I use gold, silver, and copper paint markers specifically gundam markers and sharpies
For the gundam markers I got the metallic gundam marker set: https://www.amazon.com/GSI-Creos-Gundam-Metallic-Marker/dp/B00KBRFOIU/ref=sr_1_1?ie=UTF8&amp;qid=1467993243&amp;sr=8-1&amp;keywords=gundam+marker+metallic
The gold and silver from that set is super useful but the other colors less so, they're okay but can be really uneven in the color they put out so I'd suggest for the other colors only for small and very few spots on a kit to lower your chances of getting inconsistent color (again though this is not a problem with the gold and silver they're great)
For the sharpies I used a metallic marker pack that I bought at Wal-Mart that has gold, silver, and bronze: https://www.amazon.com/Sharpie-Metallic-Permanent-Assorted-1829201/dp/B007QNWC3M/ref=sr_1_1?ie=UTF8&amp;qid=1467993555&amp;sr=8-1&amp;keywords=Metallic+sharpie+markers (It was like this pack, same markers but only one of each and it was really cheap like around $3-$5)
The sharpies are great they don't really spill like the gundam markers can but the downside to them is that they can kind of streak easily especially on bigger surfaces and they can rub off fairly easily which is great for cleaning areas where you accidentally covered, but can be a little frustrating when the color rubs away on areas that you wanted the metallic color (top coat helps protect the paint)
Is it these markers? That looks so awesome!
http://www.amazon.com/GSI-Creos-Gundam-Metallic-Marker/dp/B00KBRFOIU/ref=sr_1_9?ie=UTF8&amp;qid=1409095865&amp;sr=8-9&amp;keywords=gundam+marker
I'm not home at the moment to check up close but the gold I used came from this set
https://www.amazon.com/GSI-Creos-Gundam-Metallic-Marker/dp/B00KBRFOIU/ref=sr_1_4?ie=UTF8&amp;qid=1494274839&amp;sr=8-4&amp;keywords=gundam+marker
[Allow us to introduce ourselves.] (https://www.amazon.com/GSI-Creos-Gundam-Metallic-Marker/dp/B00KBRFOIU?keywords=gundam+markers&amp;qid=1540704503&amp;sr=8-2&amp;ref=sr_1_2)
GSI Creos AMS 121 Gundam Metallic Marker Set https://www.amazon.com/dp/B00KBRFOIU/ref=cm_sw_r_cp_api_1gUYzbAK0T5FT
Keep it a secret okay? ;)
These are the two sets that I currently own. https://www.amazon.com/gp/aw/d/B0009AFN4Y/ref=mp_s_a_1_5?ie=UTF8&amp;qid=1473087773&amp;sr=8-5&amp;pi=AC_SX236_SY340_FMwebp_QL65&amp;keywords=gundam+marker, https://www.amazon.com/gp/aw/d/B00KBRFOIU/ref=mp_s_a_1_2?ie=UTF8&amp;qid=1473087773&amp;sr=8-2&amp;pi=AC_SX236_SY340_FMwebp_QL65&amp;keywords=gundam+marker
Vallejo Flow Improver on Amazon. And I found this description on the internet: This additive increases the flow of acrylic colours, by breaking down the surface tension of the water. It is ideal for the application of areas of flat and even colour without changing colour strength.
Looks good! That's a great setup, better than what I am working with.
I'd suggest adding a few things before ordering:
http://www.amazon.com/Vallejo-Airbrush-Improver-200ml-Paint/dp/B00QD780G0 (Buy it!! Trust me)
http://www.amazon.com/Yueton-Nylon-Nozzle-Brush-Handle/dp/B010NDQWLE (Will need for cleaning)
http://www.amazon.com/Plaid-44250-30-Piece-Craft-Brush/dp/B003ZZ3PHW (Cheap, disposable and super useful for mixing in bowl, won't scar the sides.... Cheaper at Wal-Mart)
Airbrush Flow Improver
edit spelling
Water screws with the pigment distribution, I would suggest going to a hobby store (much cheaper than amazon) and picking up a bottle of airbrush flow improver. It will suspend the pigment much better than water, giving you an even distribution of paint. It is really evident when you do larger surfaces.
thinner makes it dry faster. so i agree with the other commenter its drying too fast. if you want to make it thinner to spray just use a flow improver - which slows down drying. i use liquitex flow aid (its like a 20:1 ratio of water to flowaid so it lasts forever). I've heard good things about vallejo flow improver as well.
i use tamiya paints often. i don't use thinner often... really only with clear coats. most tamiya just need a flow improver
Thin your citadel paints with some flow improver and a little water and they'll work great with an airbrush. I personally use vallejo flow improver: https://www.amazon.co.uk/Vallejo-Improver-Airbrush-Model-Bottle/dp/B00QD780G0
You need some of this.
https://www.amazon.com/Vallejo-Airbrush-Improver-200ml-Paint/dp/B00QD780G0/ref=sr_1_1?ie=UTF8&amp;qid=1482515101&amp;sr=8-1&amp;keywords=vallejo+airbrush
Then maybe add a few drops of retarder...
https://www.amazon.com/Vallejo-VJ70597-Acrylic-Paint-Retarder/dp/B000PH9JP0/ref=sr_1_1?ie=UTF8&amp;qid=1482515136&amp;sr=8-1&amp;keywords=vallejo+retarder
I use mostly Warcolours paints, which are listed on their website as "designed for use with paint brush and/or airbrush", but you need to thin them out quite a bit. I use Vallejo Airbrush Flow Improver to thin them down.
Don't use any Citadel paints in an airbrush, besides their new Air paints. The pigment particles in their regular paints are too large, and will clog up your airbrush no matter how much you thin them.
I've never tried any Vallejo paint of any kind, so I have no opinion on them. I just back in to the hobby with 8th Edition, and read nothing but good things about Warcolours paints, so I bought the full line (literally). All base coats, all layers, all metallics, something like 140 paints. Last time I played, I never used anything but Citadel, and I remember them being such a pain to use because they are so thick, and seem to dry out extremely quickly. The Warcolours paints have the awesome dropper bottles like Vallejo, which makes it super easy mix, and keep them air tight.
I still use Citadel for washes and shades, and some metallics, they probably have the best metallics.
For Vallejo, you should consider getting some flow improver (their version of paint retarder.). See: https://www.amazon.com/Vallejo-Airbrush-Improver-200ml-Paint/dp/B00QD780G0
Vallejo has a bad tendency to dry tip the brush. Water does work as a thinner.
Tamiya thins with alcohol. It's dead simple to work with by comparison, and works even better with lacquer thinner that they make (referred to as X-20 thinner; X-20A is specifically for the acrylics, but frankly, it works better with the lacquer thinner). The branded acrylic thinner is largely alcohol with some additional additives. They also make a standalone paint retarder, for brush painting and if you need longer working time.
There is no fixed PSI setting that works perfectly every time, nor is there a permanently fixed ratio. It's a ballpark figure. Spray to clear between colors or as it starts to jam up, then finally, spray clear with thinner, clean with cotton swabs the nozzle, needle, and paint cup when done.
It's not as complicated a process that you're making it out to be.
I've got this guy waiting on me for when I get home! https://www.amazon.com/dp/B0129DW0WG/ref=cm_sw_r_cp_apa_JICfAb21FM6G1
Hi there! Great gift idea. My gf actually picked out my first kit for me recently and chose a HG Barbatos model for my studio. Definitely would recommend that. http://www.amazon.com/Bandai-Hobby-Orphans-Barbatos-Iron-Blooded/dp/B0129DW0WG
From a pure aesthetic perspective, the MG Shin Musha Gundam is fucking DOPE! Nothin screams wifey material more than buying yo man a robot samurai lol... Def next on my buy list. http://www.amazon.com/Bandai-BAN153804-Shin-Musha-Gundam/dp/B0018P09QQ
I think this matches better
Just grab a Barbatos and a Graze. I think I'm going to start another graze now myself =P
Or if you want to apreciate how far bandai has come with the kits, grab a Barbatos and The old HGUC Gun Cannon or RGM-79 kit
Well, good news, you can get them in HG! :)
&#x200B;
https://www.amazon.com/Bandai-Hobby-Orphans-Barbatos-Iron-Blooded/dp/B0129DW0WG/ref=sr_1_1?keywords=hg+barbatos&qid=1555211105&s=gateway&sr=8-1
&#x200B;
https://www.amazon.com/Bandai-Hobby-Barbatos-Blooded-Orphans/dp/B018TGV2TE/ref=sr_1_9?keywords=hg+barbatos&qid=1555211105&s=gateway&sr=8-9
Hey everyone!
I'm as new as it gets. So, I made a shopping list after doing some research on everything that I think I need to start. I'll place the links to all the items in the lines below. Everything is on Amazon because... well why not?
Gundam
Glue
Marker
Tweezers
Knife
Cutters
Mat
More Markers!
*Krylon Matte Finish
Am I missing anything?
I'm not familiar with the anime but how does this one look?
Gundam
It's a HG 144 Size
TL;DR Which kit is better for a beginner with basically no tools at all?
So, I've been looking at some tool kits on amazon and I have basically narrowed it down to two brands. (I realize there are others, but these are the two I find most promising, I could be wrong though.)
1.Tamiya
This kit is from a brand I recognize and have been told about. I am aware of their high quality, but the small number of tools for $20US is a little underwhelming.
2. Keadic
So, this one has a lot more tools and a cutting mat (something I was going to purchase anyway) but I'm not sure of the quality of the tools. If anyone has any experience with Keadic, or if you know any other brands or kits that are better than Keadic, but still have the variety and amount of tools, please let me know. Thanks!
You can search depending on your budget. This and this is a $20 set.
If you don't already have a proper tool kit like This you'll want to get one, when i first started i just used household tools like scissors and my kit's came out horrible with nub marks all over the place. The file or some sandpaper will work wonders to remove those. You'll also want a panel line marker like This they come in different colors so look around to get the one that matches the model your working on, adding panel lines alone greatly improves the look of the model. After you have the nub mark removal and panel lining down the sky is the limit you can dabble in custom painting or try your hand at kitbashing custom models. Research each thoroughly before trying them and expect a lot of errors at first if you try those.
I see it looks like you're using a hobby knife.
I strongly suggest getting a pair of nippers, or a Tamiya Hobby Kit.
Nippers are game-changers over using knives alone, and they're very affordable.
Total noob here about to dive in scared on my first-ever build with a Master Grade kit. Just had to have this love at first sight.
Is a tool set like this a smart buy over getting the main essential ones separately?
If not, could you guys kindly recommend a list of half-decent quality tools that would fit a budget of $20-30 (or possibly for a bit more if absolutely necessary for a quality build)?
Thanks guys.
Hey everyone. I'm trying to get into more serious Gunpla, and am currently looking to invest in a couple of tools. However, I'm on a budget, and complicating matters is that the store closest to my house (Planet Hobby, I'm in Ontario, Canada), is quite overpriced.
I've been looking at these two toolsets on Amazon, and just wanted to hear your thoughts as to which of the two (if any), would be good to buy.
Kit 1: https://www.amazon.ca/gp/product/B01H6FM860/ref=s9u_simh_gw_i5?ie=UTF8&amp;pd_rd_i=B01H6FM860&amp;pd_rd_r=F5NYPQMTV0V160C3N4J1&amp;pd_rd_w=2M35K&amp;pd_rd_wg=WyhdJ&amp;pf_rd_m=A3DWYIK6Y9EEQB&amp;pf_rd_s=&amp;pf_rd_r=C0VHYKYXH2TG97VB7QE9&amp;pf_rd_t=36701&amp;pf_rd_p=07871b8e-d32a-4963-b98f-ba712077f7f5&amp;pf_rd_i=desktop
Kit 2: https://www.amazon.ca/gp/product/B01AND0FRG/ref=s9u_simh_gw_i2?ie=UTF8&amp;pd_rd_i=B01AND0FRG&amp;pd_rd_r=F5NYPQMTV0V160C3N4J1&amp;pd_rd_w=2M35K&amp;pd_rd_wg=WyhdJ&amp;pf_rd_m=A3DWYIK6Y9EEQB&amp;pf_rd_s=&amp;pf_rd_r=C0VHYKYXH2TG97VB7QE9&amp;pf_rd_t=36701&amp;pf_rd_p=07871b8e-d32a-4963-b98f-ba712077f7f5&amp;pf_rd_i=desktop
Thanks in advance for your help!
Well, the only things you really need to build a kit are a pair of hobby clippers and motivation. Everything else is optional, depending on how much effort you wanna put into making your model look as best as possible(hell, I used nail clippers of all things with my first gunpla because I didn't want to invest in tools before actually building one for myself and knowing if this was a hobby I wanted to pursue or not).
For this one I actually got a modeling toolkit, some Gundam markers for panel lining and a small cutting mat through amazon(although you might be able to find them at local hobby stores as well). I can't really speak for other tools, but these ones worked pretty well for me. If you're worried about costs you can always start with just some basic tools and slowly build your toolbox up from there as you build more models. Hopefully you have as much fun with your first gunpla as I had with mine!
P.S. Remember I'm also a newbie so take all of this with a grain of salt
Alright. So. I'm just starting to watch Gundam, and started with Mobile Suit. I really dug Rambal Ral's suit for some reason, and I think I'd like it to be my first build. But to someone who has never done this, it's really intimating. I know I'd want to go for the HG kit here as a first time build? And I was looking at this tool set here. Seem like a solid plan so far? And about how long does a usual kit take, give or take on experience? I know this sounds like a "please solve my problems for me" post, but there's a lot to take in. Help, please?
I have some tools but do I need to buy a basic tool kit to build these kits?
I was able to assemble my entire core set plus 11/12 expansions with these items:
https://www.amazon.com/gp/product/B0006N6ODS/ref=oh_aui_detailpage_o05_s00?ie=UTF8&amp;psc=1
and
https://www.amazon.com/gp/product/B01D1JYXKO/ref=oh_aui_detailpage_o06_?ie=UTF8&amp;psc=1
The clippers are still going strong and the files work nicely. I have no mold lines or excess glue on my minis and I filled in some gaps with green stuff:
https://www.amazon.com/Green-Stuff-Strip-RPR-75006/dp/B001BR8AU8/ref=sr_1_10?ie=UTF8&amp;qid=1498688095&amp;sr=8-10&amp;keywords=Green+stuff
You can usually find it a bit cheaper. Hopefully, that helps!
Also sanding paper / boards to sand down nubs.
I bought this kit.
Is this deal worth it? https://www.amazon.com/dp/B01D1JYXKO/ref=cm_sw_r_cp_apa_IR1NAb14D22A5
I feel like I'm letting the kits down with my current tools and was wondering if I should get it.
Building my first gunpla, and I keep making things worse when I try and sand down nubs.
I'm using tools from
https://www.amazon.com/dp/B01D1JYXKO/ref=cm_sw_r_cp_apa_Ak2nybGW2B3D8
Also what is that yellow tool included?
The gear I used for this, plus the kit itself, I all got from Amazon.
A Basic Modelling Tools Kit and the Gundam Marker Value Set.
I'd opt for a freestanding magnifying glass or combo helping hand over one of those
I bought this LED lamp with a magnifying glass back in January and, up until last week, it’s been my only source of light besides whatever is overhead in the room.
Brightech LightView Pro Flex... https://www.amazon.com/dp/B01K10XA1O?ref=yo_pop_ma_swf
This lamp is great. However, I found that because it was so bright, it was basically the only source of light my res could see on the model and it cast pretty harsh shadows, making it difficult to really paint well and straining my eyes.
So I purchased this lamp last week as a “fill” light:
RMJ Dimmable LED Desk Lamp... https://www.amazon.com/dp/B0714KST8G?ref=yo_pop_ma_swf
And it’s been such a wonderful addition. The “study” setting is perfect daylight hue and it fills my workspace with enough light so that I’m not straining my eyes and have relatively even lighting over my models while I paint.
Hope that helps.
It was another amazon find for me: https://www.amazon.com/dp/B01K10XA1O/ref=cm_sw_r_cp_apap_Fh9FMsyEilKRq Its not too bad. I dont really use the magnifying glass though
After I did a decent bit of research a few months back I ended up getting this one and enjoy it quite a bit.
i want to start painting the pilot figures. i'm thinking of buying a magnifying glass desk lamp. do you guys use such things? is it worth it? if so, any recommendations?
from my cursory research, seem this one may be decent value for relatively cheap price point.
https://www.amazon.com/gp/product/B01K10XA1O?pf_rd_p=183f5289-9dc0-416f-942e-e8f213ef368b&amp;pf_rd_r=4WEDB459278EGVMBZEX9
This helps me so much when soldering. I'm not sure how much it would help your specific weld you have to do but it will help in the future
http://www.amazon.com/TEKTON-Helping-Hand-with-Magnifier/dp/B000P42O3C/ref=sr_1_1?ie=UTF8&amp;qid=1421774456&amp;sr=8-1&amp;keywords=helping+hand+soldering
https://www.amazon.com/gp/product/B01BZG33PG/ref=ox_sc_act_title_3?ie=UTF8&amp;psc=1&amp;smid=A385B2OBZAJZO4
and
https://www.amazon.com/gp/product/B0072AEY5I/ref=ox_sc_act_title_4?ie=UTF8&amp;psc=1&amp;smid=A3AR95NHANJAX6
Which battery/charger would you get?