Best chrome & metal polishes according to redditors
We found 296 Reddit comments discussing the best chrome & metal polishes. We ranked the 53 resulting products by number of redditors who mentioned them. Here are the top 20.
We found 296 Reddit comments discussing the best chrome & metal polishes. We ranked the 53 resulting products by number of redditors who mentioned them. Here are the top 20.


I would have taken more photos but I didn't set out with the intention of making a post; however, when I saw the results I knew I had to.
Like I said, this mini van only set me back $300. But just because it's a cheap turd doesn't mean you can't take some pride in it and at least put a ribbon on it.
Anyways, I'll add some more details left out of the post.
First I mixed up regular ole dish soap and water and grabbed some 1000 grit wet/dry sand paper, dunked it in the solution and let it soak while I taped off my headlights. I don't think you have to let it soak, but that's what I did. Once I finished taping off the lights, I started wet sanding and just redunked as needed for adequate lubrication.
Now I've read some posts on here about people saying it's easier to see when you're done sanding if you go in one direction for a certain grit and the opposite in another so you can see sanding lines. I didn't do that either. I just sanded it til I felt it was smooth and/or had been doing it for a couple minutes; up, down, left, right, circles. Whatever. It worked out for me.
Repeat exact same procedure for 2000 grit wet/dry sand paper.
Now, if you've never done this before you might start to get nervous, because at this stage your headlights look (somehow) even worse than when you started. Fret not my friend. Patience is a virtue.
Now I have a DA polisher, but these headlights are narrow. So I opted at just purchasing a generic named 3" backing plate, drill adapter and pad combo set off amazon. Some of the reviews said it wasn't the greatest. But that was fine by me. I just wanted them for this headlight. Those reviewers are wrong. I think they were thinking you could do an entire vehicle with these 3" pads. The pads and backing plate were high quality and for that price, even if they weren't I wouldn't have been all that upset. I highly recommend these.
I used the two flat top oranges pads for this project. First I used M105. Polished til it "flashed" then buffed it off with a microfiber towel. Switched to my other orange pad and polished with M205 following the same procedure.
Then I stood in awe of how great they came out. Did a wipe down with isopropyl alcohol, and two coats of collinite 845 that I applied with some cheap microfiber applicators for future uv protection.
Then I went and excitedly rushed my girlfriend outside to see. She was impressed but decidedly less than me.
Also, while I was doing this, a man approached me and asked me how much I'd charge to do his car. I talked with him a bit, and informed him that for the price I would charge to do his one car he'd be better off doing some research, buying his own supplies and just learning a new skill. He thought about it and excitedly told me he already had a drill and that he decided he'd do it. He went on to say he was also going to do not just his car, but also his mom's car and his girlfriend's car. He wrote down everything I said! Haha,I hope his come out as well as mine!
Edit: formatting/spelling
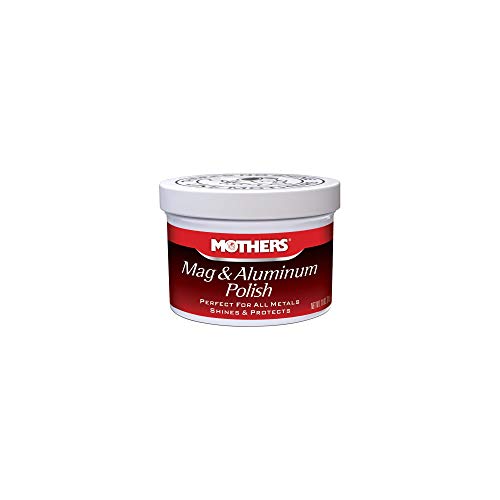
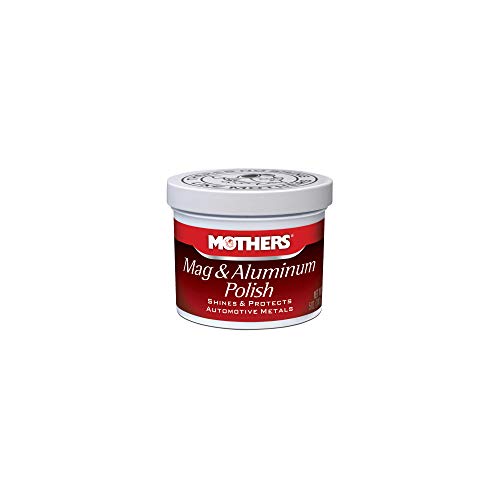
http://www.amazon.com/Mothers-05101-Mag-Aluminum-Polish/dp/B0009H519Y
/u/jwinskowski please feel free to PM me at anytime for this. EDIT: if your tank is MATTE don't use products not designed for it! (Shampoo is fine for either)
TLDR rinse bucket and bucket with soap. use auto products. dont drop your MF cloths.
I'm not familiar with Guzzi's clearcoat so ill play towards the cautious side.
Personally I'd pick up a shampoo/conditioner and a basic wash mit thats microfiber made (attracts dirt better and wont mar your question)
(I can recommend 3D pink shampoo. cheap AND I love it)
next up a light compound (you can use meguiars ultimate compound. cheap inexpensive and hard to mess up) this brings out that POP in paint pretty easy to use with a hand applicator which are also cheap :)
next upppp paint polish. this is VERY subjective. I prefer mckees37 stuff but its more expensive than most like. I can also recommend meguiars ultimate polish. good and inexpensive :)
after wards you'll need a wax. meguiars ultimate liquid wax is a great starter and once again inexpensive. (I prefer trademark extender/policoat form mckees37) easy on easy off if you're taking you're time.
afterwards you can call it quits and bam you're done.
or keep going and seal your paint to keep that POP lasting. I HIGHLY recommend collinite 845 as its inexpensive as hell and STUPID easy to apply!!
also Mckees 37 SIO 2 ceramic coating is even easier but $.
then theres coatings. you can use something like Cquarts or even carpro....I personally juse use SIO2 from mckees37 currently. spray on wash off bam. not as effective but beyond stupid easy.
oh and also pick up some microfiber cloths of your choice. theres no right/wrong for them other than DONT DROP EM AND KEEP EM CLEAN.
links to products named
ultimate megs wax
ultimate polish megs
sio 2 coating 10% off ad warning
trademark extender wax spray
3D pink car soap/shampoo
collinite 845
ultimate compound megs
ultimate liquid wax -bigger AG carried
megs ult polish AG carried
Autogeek also price matches to a fair extent! and IF you're local you can pick up. :D
these microfibers are damn nice but $
I personally use these and they're lit. 16 pack and heavy duty enough to last a while
wash mitt I use
even NEW I can highly recommend clay baring your paint dis or the kit if you're new
oh and IF your brake pads literally ooze brake dust....this stuff takes time but takes care of the dust easily linky smells WAY better than carpro even at a lower concentration :p
/u/solitudechirs thanks for the tag
/u/CG_Ops dat wall o text
I took delivery of my 3 in February of this year (also multi-coat red) and did something very similar to what you are doing. I did have full front PPF (XPEL) installed the day after I took delivery, and then I drove the car for 3 months until temps warmed up. I did the following DYI:
A friend of mine bought a White Model 3 and I did these same steps for him in July (he bought all the materials and the beer :) Both cars are looking great.
Chain brush, chain cleaner, chain lube. Basic tool kit. Stands are nice. For cleaning, I use the Honda spray cleaner/wax and it works great.
https://www.amazon.com/HONDA-08732-SCP00-Spray-Cleaner-Polish/dp/B004FSEJZA
https://www.amazon.com/gp/product/B002UD0GGS/ref=ppx_yo_dt_b_search_asin_title?ie=UTF8&psc=1
It's cheaper and a lifetime supply that does the same thing as the PolyWatch. Fine for little scratches. You just put a bit on a Qtip and twirl it around the scratch. Eventually it gets a little gritty and that's when the abrasive starts working on the scratches. You'll probably do it a few times before they are good enough. Just a tiny bit of the product at a time, it goes a long way.
You can buy everything online, though it's easier to go to a harbor freight with a coupon if you have one. There are plenty of polishers you can buy online of course, but none are as cheap (at least with decent quality) as the harbor freight model. You can of course buy a much better polisher at your local lowes / home depot however unless you have a lot more use for it it's probably not worth it over the harbor freight one (a good polisher will cost you $200+). Everything else you can find at any auto parts store, or maybe even walmart.
Here's some links
Basic steps:
You are done! In most environments the duragloss will last 6+ months. If you keep your car protected with it, you won't need to do the cutting/polishing again (or at least, not for a while).
The trickiest part of the whole process is the compounding and polishing. Here are some helpful videos.
And that's about it! It's easier if you don't do touch ups, but I figure if I'm going to put this much work in it, might as well get them. And if you do it right (with careful application and then sanding) the touch ups look nearly flawless (most look terrible because people don't bother to sand them flush).
edit: two other tips...
Someone bought these polishing sheets on Amazon and posted the results. Looked good as new. I bought them also.....they are sitting on my counter.
Cape Cod® Metal Polishing Cloths Foil Pouch 0.53oz https://www.amazon.com/dp/B0017H3PIO/ref=cm_sw_r_cp_apa_mzSrybEFT4MJX
Black or silver?
You might be able to polish light scratches. I use this:
https://www.amazon.com/Mothers-05100-Mag-Aluminum-Polish/dp/B00068GEJM/ref=sr_1_3?ie=UTF8&qid=1518023245&sr=8-3&keywords=mag+aluminum+polish&dpID=51bXDNFZtVL&preST=_SY300_QL70_&dpSrc=srch
on my stainless steel Apple Watch, and it works great! Obviously it's not a one-time thing, you'll have to polish the surface every so often, but it makes my watch sparkle like new. I polish it roughly once a week, and it takes just a few minutes.
I like automatic watches. I've also got a wife, child, and house to pay for. I also love to beat the shit out of my stuff because it just sort of happens.
Enter the SNK803. Automatic. Tough. Most importantly, easily replaced if I destroy it. But, I don't like the matte finish of the case. I DID have a dremel tool. Do I have an autozone? Yes I do. Do they carry mother's mag & aluminum polish? Every day. So I polished it up. Not mirror, a shiny satin finish. But now I need a quality strap. So I ordered a John Allen Woodward Alligator for $1,100...NO! What goes best with a satin finish and a beige face? Simple leather! This is a Ritche Genuine Leather NATO strap for a timex weekender. Happens to come in 18mm. And you know it's high quality leather. How? Says so. Genuine is right in the name. Only the best straps come WITH a tool to remove the pins.
Now I've got a watch that looks great, keeps great time, is a tiny mechanical wonder, and looks just as good at work as it does hiking. With a grand total of maybe $60 and an hour of work in it.
Yes, plenty of people including myself have done it. Purchase these and just polish them off. Your phone will end up actually looking better than new.
https://www.amazon.com/Cape-Cod-Polishing-Cloths-0-53oz/dp/B0017H3PIO
Be carefully to just polish the metal and not the glass. I used painters tape to mask off those areas. Also try and steer clear of getting the polish into ports and holes. This works for fine scratches like from case rubbing and being in pockets with abrasive debris etc , these will not work for deep scratches from dropping it etc.
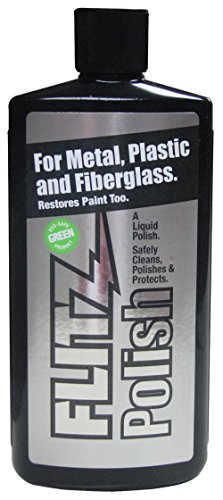
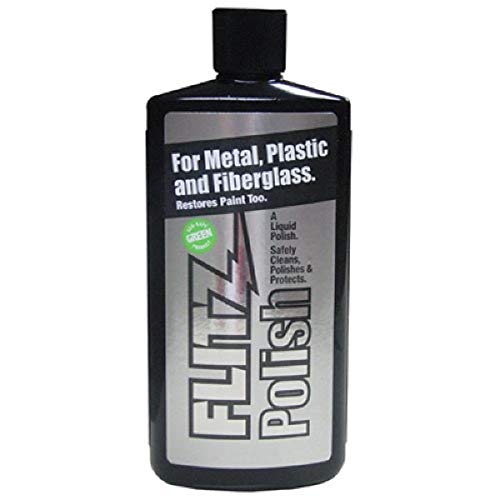
I sent a note to Henry asking what they recommend, and they said Flitz Polish. Works great!
Link to Amazon where I bought mine.
https://www.amazon.com/Flitz-BP-03511-Fiberglass-1-76-Ounce/dp/B00MUG95UI/ref=sr_1_4?ie=UTF8&qid=1501675657&sr=8-4&keywords=flitz+metal+polish
I clean my own jewelry with this polish and double layer cloths.
I got an heirloom platinum ring resized at Symmetry three years ago. They were honest with me about time frame and gave me a discount in the end. I would recommend them to anyone based on my experience, though I know others may not have had the same.
Cape Cod Metal Polishing Cloths Foil Pouch 0.53oz https://www.amazon.com/dp/B0017H3PIO/ref=cm_sw_r_cp_tai_F6w0AbEJ739V8
I was also a beginner at the beginning of the year. I went out and bought [Meguiars 105] (https://www.amazon.com/Meguiars-Mirror-Glaze-Ultra-Cut-Compound/dp/B003LMGDHI/ref=sr_1_1?ie=UTF8&qid=1496750162&sr=8-1&keywords=meguiars+105), and [Meguiars 205] (https://www.amazon.com/Meguiars-Mirror-Glaze-Finishing-Polish/dp/B003LMJP4Q/ref=pd_sim_263_1?_encoding=UTF8&pd_rd_i=B003LMJP4Q&pd_rd_r=YK6JBJ416NKY6325PPQG&pd_rd_w=WZ6u4&pd_rd_wg=LD9ed&psc=1&refRID=YK6JBJ416NKY6325PPQG), a [chicago electric DA from harbor freight] (https://www.harborfreight.com/6-in-57-Amp-Heavy-Duty-Dual-Action-Variable-Speed-Polisher-62862.html?ccdenc=eyJjb2RlIjoiODkwMjE0MTgiLCJza3UiOiI2Mjg2MiIsImlzIjoiNDkuOTkiLCJwcm9kdWN0X2lk%0D%0AIjoiMTE0NDYifQ%3D%3D%0D%0A), and ordered [orange and white hex logic pads from amazon] (https://www.amazon.com/Chemical-Guys-BUFX-102-HEX5-Hex-Logic-Medium-Heavy/dp/B0040MI9H0/ref=sr_1_1?s=automotive&ie=UTF8&qid=1496750285&sr=1-1&keywords=hex+logic+pads). This will be a good start. Get these things, should cost between 120 and 150 for all of it depending on where you buy, and that DA goes on sale quite often, looks like it's currently down to 49.99, so now would be the time to buy. I started off doing my Formula and then did my Sierra, and now have had a few other people come to me for correction and have a pretty good grasp on what I'm doing.
/u/daniell61 is all about that detailing. Here's a recent comment from him
---
do you know if that [bike] is primarily plastic or primarily metal?
for metal polishes (non painted) I can recommend marine 31's metal polish. shit works wonders on oxidized metals!!! (its my go to for non painated)
leather? any car marketed leather cleaner would be fine. I prefer mckees37 or meguiars to be fair.
for plastics I like this. a lot
leahter cleaner here
for learning these microfibers are a good cost effective start and you wont be hurt when they die and you replace them.
I can recommend any mckees37 towels or the rag company microfibers.
this or 3D pink soap (dirt cheap but i love it) is a great soap for washing without stripping waxes!
if you're like me and dont have time to clean...
once you're done. spray this and wash it off and boom bam you're set to go and have a good quality glass silia coating! here
I like mckees products a fair bit ;)
for sake of easy ass waxing I like extender wax but I do also like meguiars quik wax. that stuffs damn cheap but good. sadly its carnuba only :(
---
here's another one
---
TLDR rinse bucket and bucket with soap. use auto products. dont drop your MF cloths.
Personally I'd pick up a shampoo/conditioner and a basic wash mit thats microfiber made (attracts dirt better and wont mar your question)
(I can recommend 3D pink shampoo. cheap AND I love it)
next up a light compound (you can use meguiars ultimate compound. cheap inexpensive and hard to mess up) this brings out that POP in paint pretty easy to use with a hand applicator which are also cheap :)
next upppp paint polish. this is VERY subjective. I prefer mckees37 stuff but its more expensive than most like. I can also recommend meguiars ultimate polish. good and inexpensive :)
after wards you'll need a wax. meguiars ultimate liquid wax is a great starter and once again inexpensive. (I prefer trademark extender/policoat form mckees37) easy on easy off if you're taking you're time.
afterwards you can call it quits and bam you're done.
or keep going and seal your paint to keep that POP lasting. I HIGHLY recommend collinite 845 as its inexpensive as hell and STUPID easy to apply!!
also Mckees 37 SIO 2 ceramic coating is even easier but $.
then theres coatings. you can use something like Cquarts or even carpro....I personally juse use SIO2 from mckees37 currently. spray on wash off bam. not as effective but beyond stupid easy.
oh and also pick up some microfiber cloths of your choice. theres no right/wrong for them other than DONT DROP EM AND KEEP EM CLEAN.
links to products named
ultimate megs wax
ultimate polish megs
sio 2 coating 10% off ad warning
trademark extender wax spray
3D pink car soap/shampoo
collinite 845
ultimate compound megs
ultimate liquid wax -bigger AG carried
megs ult polish AG carried
Autogeek also price matches to a fair extent! and IF you're local you can pick up. :D
these microfibers are damn nice but $
I personally use these and they're lit. 16 pack and heavy duty enough to last a while
wash mitt I use
even NEW I can highly recommend clay baring your paint dis or the kit if you're new
oh and IF your brake pads literally ooze brake dust....this stuff takes time but takes care of the dust easily linky smells WAY better than carpro even at a lower concentration :p
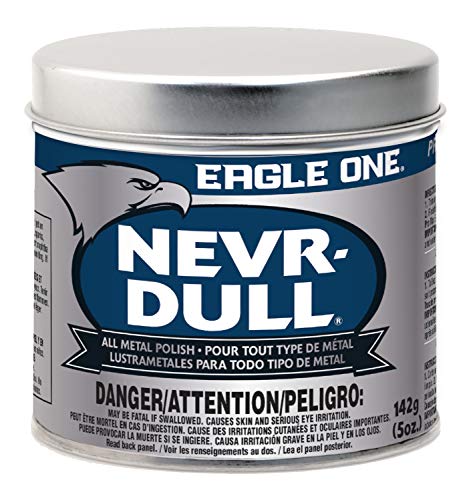
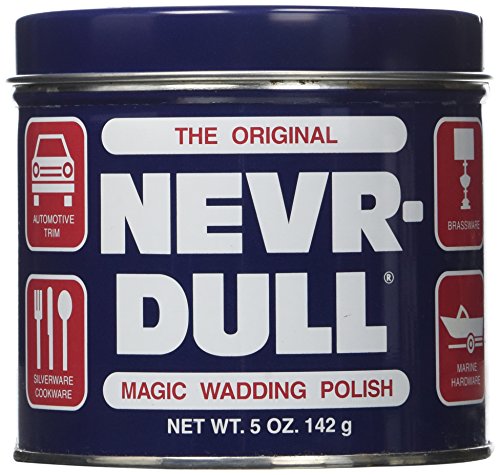
Nevr-Dull should do the trick.
It's not very likely that it's pewter. Pewter contains lead that leaches into food and is not used much anymore.
That said, does need a polish, as in removing scratches or is it just discoloration and dirt? Polishing would require proper polishing compounds and wheels. If you want to clean it up try "Eagle one Never Dull". It's a wadding that comes in a tin and it does a surprising good job at tarnish, mineral stains, and overall cleaning without scratching. That would probably be my first stop. It is a bit stinky but works well.
https://www.amazon.com/Eagle-One-E301131001-Original-Nevr-Dull/dp/B000CNBI1A
>What stones do you suggest outside of the diamond lansky system? I want to make mirror polished edges if possible. I have a few crappier knives to practice on.
I bought the deluxe kit and later on bought accessories like diamond, curved hones, ect. The diamond certainly is worth it and Lansky's diamond stones are pretty good.
As for what to get (these are cheaper on other sites, but I'm just referring to Lansky's for information sake), I'd suggest:
Ultra Fine/1000 grit/"Yellow". Comes standard in most kits, and is an excellent polishing stone.
"Blue Sapphire"/2000 grit. Sold separate, but worth it. Can put a glistening nearly/ready-for mirror edge on a blade.
Leather strop. Absolute must buy. It's a regular Lansky hone with a good quality piece of leather on it. Apply your preferred compound and strop away. Best way to finish and with the the right compounds can make mirror edges.
Curved hones In case you have any curved knife blades.
Serration/triangle hone For serrations, if you need to sharpen them (there's also a few other grits other than that, too).
Also worth mentioning a stand for Lansky clamps is available (so is a C-clamp variant). In case you get tired of wrist movements, ect. Pretty convenient.
>Also, any advice on compounds for strops
http://stropman.com/ - I buy all 4 (black/course, white/medium, green/fine, red rouge/ultra fine). Great compounds and not that chalky dried out shit you'll find elsewhere (seriously, to hell those compounds where you have to heat it/melt it on). These will apply just by using hand pressure on a strop and rubbing it in quickly like a crayon.
I also use Flitz polishing paste, simply because it's convenient to have (Flitz is damned near magical). Doesn't apply to a hard piece of strop leather (the kind that isn't potmarked and with lots of give) very well. The softer and more rough/natural kind will take to it like a fish in water, however.
I've also used Tormek's honing compound. It, too, is pretty good. As for the grit compared to Flitz, I'd say it's more aggressive but slightly less in finish.
>and oil for bearings/general use
In a pinch, Singer sewing machine oil.
The best lube I've come across, however, is Sentry Solutions' Tuf-Glide. It's absolutely mind-blowing when you first use a lube of that quality and realize how much is lessens friction. Protects decently from moisture as well.
Actually, this is just from a wash and Chemical Guys Blacklight
About a month ago I did a full detail which included:
All applied with a Porter Cable DA polisher and some high quality Micro Fiber towels
So I was cleaning my headlights, getting rid of that fog. I was using Flitz. I’ve been using this stuff on plastic and metal for a long time, but never thought to do the fenders.. I tested in a little spot and it cleaned up fast and easy! With an hours worth of elbow grease, a few rags and a bottle of Flitz I was able to get all the genders from sun bleached grey, to pretty new black. Finished them off with some 303 protect and couldn’t be happier!
(Flitz LQ 04587 Green Metal, Plastic and Fiberglass Polish Liquid, 7.6 oz. Bottle https://www.amazon.com/dp/B0025QZMRI/ref=cm_sw_r_cp_api_s4xTBbG23GNKW)
Nevr-dull works great for this. Also available at local stores, like Autozone, etc.
Have you tried emailing Noctua and asking them if the Z-height difference can be adjusted for in their cooler?
One thing you can do while you wait is to do a simple pressure test, but unfortunately this costs money since you need to buy the die frame. Delid the CPU, install the die frame, install the 1151 mounting bracket, put a small dot of -normal- (Kryonaut, NT-H1, which you should have already) thermal paste in the center of the CPU, install the heatsink, screw it down, then immediately unscrew it and lift it up.
If the small dot has spread evenly and nice and flat and did not bunch up, then it's compatible. If it didnt spread, it's not compatible. It depends a lot on what is 'preventing' the heatsink itself from touching the die. The heatsink block itself -should- touch it since there's nothing blocking it.
I'll leave you with two threads to research on your own as you wait from an email from Noctua.
(tl;dr: may require a washer mod).
https://hardforum.com/threads/noctua-nh-d15-cpu-cooler-review.1868746/
https://forums.anandtech.com/threads/mounting-noctua-heatsinks-to-bare-die.2488386/
different CPU and socket but: https://www.reddit.com/r/overclocking/comments/9fssrk/7980xe_direct_die_frame_weight_of_heatsink_on_top/
One thing I can tell you is it should be easier to do this on a 9900K than an 8700K since --both-- the PCB and die are thicker, so you have that in your favor at least.
What stops the heatsink from going lower Z-height tightness (mounting pressure) are the two metal bracket posts that you screw the heatsink screws into. However the heatsink base itself should touch the CPU without being screwed down.
If you don't want to spend $30 buying the die frame, just buy the delid/relid kit. Make sure you buy the "10 CPU" version of the quicksilver (Trust me--just do it. 1 CPU is not enough for complete removal if you want to avoid sanding/razer riskiness), and grab an extra flitz polish pack for $1 (One comes with the quicksilver). If you want to save money if you think you may need more polish in the future (or you have other stuff to clean,, you can get a much bigger bargain here: https://www.amazon.com/gp/product/B0025QZMRI/ref=ppx_yo_dt_b_asin_title_o01_s00?ie=UTF8&psc=1 but I'm getting off topic). You will also need some RTV silicone to relid and reattach the IHS, in a way which will make future delids VERY easy--apply four VERY VERY tiny dabs on each corner of the IHS (after you cleaned and sanded the IHS edges, assuming you have sandpaper), when relidding and let cure for 2 hours. If you apply the absolute minimum possible to stop the IHS from moving (its important not to apply too much; it expands as it hardens which can raise the IHS and ruin LM contact!), then you can actually remove the IHS with your fingers next time.
Anyway I'm curious what Noctua says about the direct die frames. If you email them and they give you an answer (They're in Germany I think), post back or tag me and let me know.
Regardless of what you use with a direct die frame, I do recommend foam dams in general around the CPU to stop LM runoff danger of going into the socket, but this depends on if the direct die frame contacts the green substrate and thus acts as a dam itself. If it does, you're good (although since you also should paint the heatsink as LM needs to be applied to BOTH surfaces to insure proper tension and protect against gallium absorption,a foam dam on the outside (protecting LM runoff on the heatsink) won't hurt either. I used this cheap stuff.
https://www.amazon.com/gp/product/B002GKC2US/ref=ppx_yo_dt_b_asin_title_o03_s00?ie=UTF8&psc=1
Go to Amazon and order this (I like Meg's products),
This should run you about $345 for everything and have you setup to take care of your car for a long time. You can find a 20% discount code online for harbor freight to bring the price down $55 for the DA. Go to home depot and buy a couple buckets and you will be good to go.
Edit: To add, I went to Lowes and bought a cheap inline sprayer for my hose and it works fine for foaming up the vehicle, plus it only costs $5.
Edit2: If you are going to downvote me please post why you don't like my recommendation.
Here are a couple videos that'll help with the use of products.
clay bar
everything clay bar, compound, and polish
As for the products I use/like I personally like the Meguiar's Ultimate compound and polish. However there are a ton of other options that do as well/or better. For clay I use a range of products, but for your use I would say Chemical Guys clay bar kit would probably do what you need.
Just an FYI you don't need to invest in a dual action polisher to compound and polish, it can be done by hand and save more than a couple dollars...but it'll take a while. I'd say start with clay and see where you're at afterwords. If you still have a bunch of paint transfer then go from there. Another thing I've heard will remove paint transfer (i've never tried it personally) is a carnauba wax, so if you have some around you can give that a go first.
If you do need paint work (it probably won't be as severe as a key) but this video will probably help if you want to try and tackle it yourself.
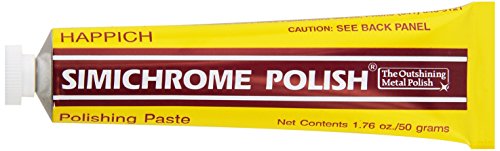
simichrome .
Used this for years on my motorcycle chrome. Works awesome, and one tube lasts forever, as you only use a tiny bit.
I've used this stuff in the past with great results:
https://smile.amazon.com/Simichrome-390050-Metal-Polish-Tube/dp/B0002YUQ4E
Not op but I’d guess mothers mag and aluminum polish. Stuff is awesome
Mothers 05101 Mag & Aluminum Polish - 10 oz https://www.amazon.com/dp/B0009H519Y/ref=cm_sw_r_cp_api_i_KQ7rDb8SDD7MD
FWIW: I bought one of these and I love it. You could establish a new edge on the most coarse stone, and refine it with the other two. As an alternative to finer stones, use automotive-grade sandpapers to get it up to 2500-3000 grit. For putting the final edge on it, I have a strop made from an old leather belt that I cover with a small amount of Mother's Mag. Honestly, though, you could stop at the fine stone on that tri-hone and be all set.
Hope this helps!
Followed this tutorial.
Got everything from amazon. Went with this dremel since it came with the polish wheels. This add-on item polish.
And these for safety. (And to meet the minimum for the add-on item.)
With 0 dremel experience, it was still easy. Didn't even mess up the glass, but I'd already upgraded mine to sapphire so I can only speak for that.
Mine were just as bad and used this stuff.
http://www.amazon.com/Eagle-One-1035605-Nevr-Dull-Wadding/dp/B000CNBI1A
Takes about 10 minutes and I was able to get my shinny back
They are surprisingly easy to repolish.
I use this and the watch looks brand new when I'm done. Removes scuffs as well!!!
Cape Cod Polish
https://www.amazon.com/Cape-Cod-Polishing-Cloths-0-53oz/dp/B0017H3PIO
Time to polish those pipes
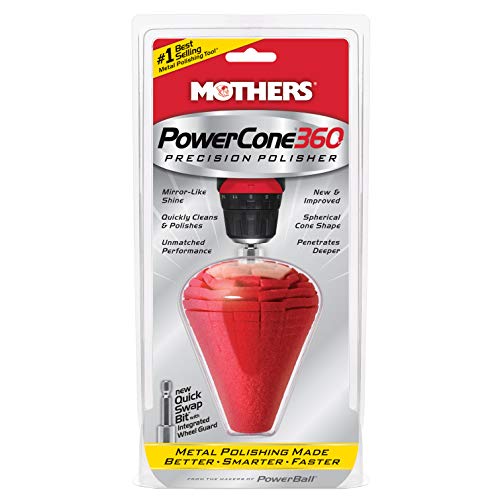
https://www.amazon.com/Mothers-05146-PowerCone-Metal-Polishing/dp/B001MXTOKQ
I use this but there are cheaper alternatives that work the same.
Personally I use a very very tiny amount of Honda Polish on almost all my electronics and have never seen it remove or tarnish any surface and it works great.
i think those scratches will come out. they dont seem so bad. you can confirm this by running your nail around them and seeing if it catches your fingernail. youll be better off if they dont really catch.
i think i would go with this car kit from meguiars
as well as ultimate compound
and some polish
i would then wash the car, clay the car, scratchx the scratches, plastx the headlights, compound the car, polish the car, then wax the car.
that will definitely do you. if you have more money, check out a bunch of the sidebar lists for more stuff. maximus's pretty much has it all.
edit: and maybe a couple of these mf applicators. i think they are easier to use and spread the product and work it in really well.
This crap. Going to buy it for the same purpose on my bike... after everything else is done. So, never. But yeah..
Cleaning a knife is easy. You can pretty much use any sort of solvent you've got handy, but if its too strong it may take off your blade labels. Start with water. It's actually a pretty good solvent. You'd be surprised how well it works most of the time. Afterwards make sure you dry it good and wipe the whole thing down with a good machine oil.
Or pick up a specialized metal polish. I like Simichrome. It's a great cleaner/polisher/protectant all in one step, but there are several good products on the market. A tube of something like that and a drop of oil for the pivot is really all you should ever need.
https://www.amazon.com/Simichrome-390050-Metal-Polish-Tube/dp/B0002YUQ4E
And to not leave anything blank, here is what I'm happy with that I use:
For polishing cartridge pins - [Mother's Mag and Aluminum Polish](http://www.amazon.com/Mothers-5100-Aluminum-Polish-Paste/dp/B00068GEJM/ref=sr_1_4?ie=UTF8&qid=1319605826&sr=8-4"She's not my mother, but I love her")
To speed up the process/ to tackle very damaged pins - my trusty [variable speed Dremel tool](http://www.amazon.com/Dremel-300-1-24-Variable-Speed-Rotary/dp/B002BAHFBE/ref=sr_1_2?ie=UTF8&qid=1319605918&sr=8-2"Don't leave home without it, unless you enjoy having friends, then don't bring that anywhere") (I use a large polishing disc with the polish, and make a huge mess, if you are going to try this - WEAR SAFETY GLASSES. You only get two eyes, it'd be a shame to ruin any of them.)
Sticker removal - [Un-Du](http://www.amazon.com/Du-Products-Adhesive-Remover-4-Ounce/dp/B002E3KMSQ/ref=sr_1_1?ie=UTF8&qid=1319606203&sr=8-1"The only thing better than this would be a product that let you punch who ever decided to put a goddamned monster sticker over the goddamned label of a copy of Duck Tales 2. If I find you, I swear I'll punch you. It'll be easy, your name is all over your carts in marker. Do you know how hard that is to take off? Do you BILLY?!?") This is made of unicorn tears, or something. You can (although I don't recommend) pour this on over your main cartridge label to pull up a sticker on the top, when it dries, the label should not show any liquid was on it, and will become sticky again (be careful, that sticker will also have it's adhesive properties return). Very good product, and if you couple it with an old gift card, you can peel up pretty much anything. I can't praise this enough.
General staples - Rubbing Alcohol (highest concentration you can find), a million or so Q-Tips, Windex, and Compressed air (try to find someone without the additive that prevents kids from using it as a drug, unless you have excellent ventilation, you'll get that taste in your mouth, and it is awful.)
Mother's Mag and Aluminum Polish is great for removing surface blemishes / rust.
https://www.amazon.com/Mothers-05100-Mag-Aluminum-Polish/dp/B00068GEJM/ref=sr_1_1?ie=UTF8&qid=1478636075&sr=8-1&keywords=mothers+mag
I used a dremel and this stuff:
Mothers 05101 Mag & Aluminum... https://www.amazon.com/dp/B0009H519Y?ref=ppx_pop_mob_ap_share
Mother’s. All I did was use the soft polish attachment and go to town on the SS. It worked great on my skx that o had gouged trying to remove the bezel with the wrong tool. It took awhile, but t worked great.
You can wash with soap and water, APC, or even aluminum-safe wheel cleaner if its really funky. When you clean it, use a pressure washer/compressed air to blow out the fins. If there is anything built up it will reduce the performance of the intercooler.
This video is a pretty good guide on polishing bare aluminum to a mirror finish. It is time consuming and messy, but you will get good results. If there aren't any deep scratches, I usually wetsand with 400, 800, 1000; sometimes finishing with #0000 steel wool before moving to the rouges. Instead of a compound at the end, I typically use something like mothers mag and aluminum polish, and finish with a coat of wax.
0000 steel wool and mothers polish. I just cleaned my 749 Termignoni's and the 0000 steel wool didn't harm them a bit. Give it a nice soap and water clean afterward. Mothers has a residue but man does it shine nice!
Pads
Polish
Wipes
Never-Dull
this works wonders for the SS version but if it's aluminum you're out of luck http://www.amazon.com/Cape-Metal-Polishing-Cloths-0-53oz/dp/B0017H3PIO
Hey guys, so idiot me managed to bang my watch into a table a cause it to dinged up. Luckily I found this cloth and after an hour of buffing it, the dent is almost completely gone. Really surprised it worked as I was looking at changing the bezel insert.
Thought I’d share in case anyone else has dents or scratches they’d like to remove.
Cape Cod Polish Co Metal Polishing Cloths Foil Pouch 0.53oz, Stainless Steel https://www.amazon.com/dp/B0017H3PIO/ref=cm_sw_r_cp_tai_Uke1CbE1Q2PSC
IF I FITS I SITS
This one is always my favorite!!
My add-on and this
Wow. I should get into paint correction. <$250 for all the tools and polish and waxes. As a car guy, I don't mind waxing my car every 6 months (or 4 months if you're in the frigid north or are anal). I also feel it's foolish to drop $2k-4k on these nano-quartz-bullshit schemes that a lot of car guys swear by nowadays. If you want to drop $4k on paint protection, go for it, but I can get a full window-out repaint for the same price!
Here's what I learned:
Buy the equipment:
https://www.amazon.com/PORTER-CABLE-7424XP-6-Inch-Variable-Speed-Polisher/dp/B002654I46
https://www.amazon.com/Dual-Action-Hook-Flexible-Backing-Plate/dp/B0008G1RDK
https://www.costco.com/Kirkland-Signature-Microfiber-Towel-Case%2C-324-count.product.100341124.html
https://www.amazon.com/Collinite-Liquid-Insulator-Wax-845/dp/B000JK2D06
http://www.autogeek.net/lake-country-beveled-pad-kit.html (MIN: 2 orange, 2 white, 1 black, 1 blue -- I prefer doubling this order; Autogeek almost always has 10-25% off coupons on their mailing list)
You will also need an extension wire with the appropriate gauge (too thin/cheap cables might cause you to burn your Porter Cable motor!)
Buy the compounds (start with UC; if swirls aren't getting cut, move up to 50%/50% UC and 105 on the pads; finish with 205 regardless):
https://www.amazon.com/Meguiars-G17216-Ultimate-Compound-15-2/dp/B001O7PNNM (medium aggressive)
https://www.amazon.com/Meguiars-Mirror-Glaze-Ultra-Cut-Compound/dp/B003LMGDHI (most aggressive)
https://www.amazon.com/Meguiars-Mirror-Glaze-Finishing-Polish/dp/B001O7PNXC
Wash your car with this, and the two-bucket method:
https://www.amazon.com/Meguiars-G7164-Class-Shampoo-Conditioner/dp/B0009IQXFO
https://www.amazon.com/Zwipes-Chenille-Microfiber-Premium-Scratch-Free/dp/B002J7KCOG
Claybar the car:
https://www.amazon.com/YGDZ-Quality-Detailing-Claybar-Shipping/dp/B01MF4BVVS
It took me about 5-6 relaxed hours on a Sunday with a few beers for the full correction. Now I simply top up the wax every few months (and that only takes 30 min).
The thing is, once you do the full correction and get rid of all your swirls and scuffs and whatever clearcoat damage (wash + claybar + M105/UC + M205 + wax), then you don't have to do the FULL correction ever again.
Ever again meaning, if you wash the car properly thereafter with the two-bucket method. You'll simply need to top up the wax once it stops beading -- the wax will protect the clearcoat from damage and swirls.
My wax lasted 6+ months being daily driven in the California sun with three coats of Collinite 845 -- I assume if yours will see more snow and ice and rain, perhaps it'll only last 3-4 months. But since a bottle costs <$20 and you'll get at least 36+ layers out of it, I always recommend this versus the "nano coatings" that people are shelling out $2-4k for.
Here's the Collinite fanboy thread:
https://www.autogeekonline.net/forum/how-articles/40243-collinite-845-definitive-how-guide-legendary-wax.html
Any other questions, feel free to ask. Good luck!
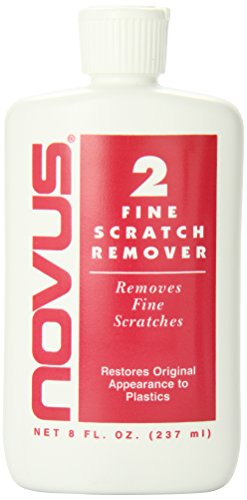
If scratches are deep then sanding is best bet. For finer scratches something like this may work fine.
&#x200B;
https://www.amazon.co.uk/NOVUS-Plastic-Fine-Scratch-Remover/dp/B002UD0GGS/ref=sr_1_fkmr0_2?keywords=Novus+7100+Plastic+Polish+Kit+-+8+Ounce&qid=1565733885&s=automotive&sr=1-2-fkmr0
This won't make it look perfect, but it will improve it a LOT.
First you need to gently clean it up best you can. I would use this stuff, but any polishing compound or liquid rubbing compound should work. Don't rub hard with this stuff, just light pressure your only trying to clean it up and give yourself a good surface for the touch up paint.
https://www.amazon.com/Meguiars-G18116-Clear-Polishing-Compound/dp/B006FUT154/
Next get some touch up paint for you car, you can get your cars paint code from any Subaru dealer if you give them your VIN number. You can get the touch up paint from either a Subaru dealer, online, or someplace like Auto Zone.
When touching up the paint less is more, so try to use very little paint and multiple coats.
After the touch up paint has dried then use something like this and just keep polishing it and slowly it will begin to blend in better and better.
https://www.amazon.com/Meguiars-Mirror-Glaze-Finishing-Polish/dp/B003LMJP4Q/
Again this isn't the best fix possible but is probably the most affordable fix for the quality you'll end up with if you do everything correctly.
Meguiars 205, HD Polish, McKee's 37 Fast Polish, Menzerna 3500 come to mind. And honorary mention for HD Speed (All In One or Polish + Sealant) since it's not just a polish but is soooooo good.
Yup, Ultimate Polish will work just fine, but if you're going off Amazon anyway I'd go with M205. It's basically the pro version of UP and has slightly more cut but finishes extremely well.
And yeah, you'll need to rewax after, but make sure you're using an IPA spray first to remove the oils so it bonds well! Which Youtube video watch before, btw?
Does this bike sit outside all the time without a cover? Do you ride it to work and park it in the direct sunlight all day? Those would be the first offenders. My bike is 9 years old and gets covered a lot - the seats still look brand new. Use this stuff when you clean your bike - it helps protect the plastic. I swear by it!
https://www.amazon.com/HONDA-08732-SCP00-Spray-Cleaner-Polish/dp/B004FSEJZA
Pro Honda Polish
I swear by it. It's the only thing I use on my Harley. Chrome/Paint/Glass. Look no further.
We got lucky, the PO used to baby this aircraft and would basically live at the hangar and wax it frequently! We try our best to keep her clean. This stuff is magical and what he used to keep the paint cleaned and protected, and It takes bugs off with ease!
Since I'm kind of known for keeping my car clean, I'll share what I have learned over my journey. Let me preface this by saying I live in a condo with a shared underground garage, just like most apartments. Due to this, I have no hose access, unless I go to the self car wash spots.
My favorite product by far is Chemical Guys EcoSmart waterless wash.
For glass, I love Stoner Invisible Glass.
For wheels, I'm a big fan of Chemical Guys Diablo Gel.
For exhaust tips, Mother's Chrome Polish.
This next one may not be for everyone, but I like it. Stoner Trim Shine.
Those are my highlights. The other products I use are pretty generic.
Clean it with flitz, https://www.amazon.com/Flitz-BP-03511-Fiberglass-1-76-Ounce/dp/B00MUG95UI . Then protect all your exposed iron on your tools with Collinite paste wax, https://www.amazon.com/Collinite-Paste-Fleetwax-885-12/dp/B008KPDA1S. The paste wax will make your table saw bed slicker than snot on a door knob. I sweat a lot, and I got pissed that my table saw bed was getting rust spots. This hasn’t happened since using the paste wax. Plus all the wood slides over the table easily.
cost me 8€
did a self-polish ;) ..using this one:
https://www.amazon.de/dp/B0128B5JZ4/ref=cm_sw_r_cp_apa_i_Nz4GDb6D2JW39
To disinfect, I soak in Dettol Disinfectant. Immerse in lukewarm water and add hot water slowly to raise the temp and let it sit for an hour...
To clean, I use a soft toothbrush and dish washing liquid...
To polish, I use Flitz to make it shine...
By the way, be gentle when cleaning the "numbers", some of the black paint on mine flaked off unlike my Slims and Fatboys...
Since you're looking at refurbing one and using the other, I'll offer the following insight:
This is how the pros do it. And, they use Flitz.
I clean my bike after almost every single ride. Sounds like overkill, but I live in a rural area with a lot of bugs.
I'm a bucket and hose guy. I usually just use some generic car wash soap from walmart with a decent car wash brush/sponge thing. For stubborn bugs, I've found that those fluffy round things that girls use in the shower work pretty good and don't leave scratches. I bought a pack of quality microfiber cloths to dry it down.
I'm still experimenting with different brands and types of wax for the painted pieces, so if anyone has any suggestions I'd love to hear them.
Finally, I polish the chrome. I've tried a few different brands and they were okay, but then I found THE ONE. This stuff is great, and not just on chrome. It made stainless steel pieces shine like I've never seen before. If you have chrome, you need this polish, thank me later.
The first thing I would try is Simichrome polish along with a lot of elbow grease. That may well help fix some of the scratches too. If that works, follow it up with an application of Renaissance Wax.
I think that should clear up your finish.
Gonna need some Simichrome, from the looks of things.
https://www.amazon.com/Simichrome-390050-Metal-Polish-Tube/dp/B0002YUQ4E
Simichrome 390050 All Metal Polish Tube - 1.76 oz. https://www.amazon.com/dp/B0002YUQ4E/ref=cm_sw_r_cp_awd_CBVFwbKVP7ZTQ
This and a brillo pad would probably do it, cover it with oil afterwards.
https://www.amazon.com/dp/B0002YUQ4E/ref=cm_sw_r_cp_apa_I7dKzbNHKJZZ1
Use an all purpose metal cleaning paste like Simichrome.
Mother's aluminum wheel polish. I know it sounds odd, but the stuff will make your headlights look like new in no time :-).
https://www.amazon.com/Mothers-05100-Mag-Aluminum-Polish/dp/B00068GEJM/
>Sony PS-X500
I've used Mother's Mag and Aluminum Polish on TT platters but be aware it will bring it to a shiny chrome like finish.
https://www.amazon.com/gp/product/B00068GEJM/ref=ppx_yo_dt_b_search_asin_title?ie=UTF8&psc=1
&#x200B;
Here's a good example:
&#x200B;
https://audiokarma.org/forums/index.php?threads/cleaned-my-vpi-scout-ii-platter.752930/
Metal mesh... that's different... never seen one like that. Is there any stamp or marking on the chair? The color tells me it's from the mid-60s, maybe later, but closer to 1965 if I had to guess.
As for the legs, I'd try a gentle buffing with 0000 (superfine) steel wool. It wil remove the rust without scratching the metal. After that's done, you can try a non-abrasive metal polish to give it a light shine. My favorite is a treated cotton wadding polish called "Nevr Dull." It's been around a long time. Rub the metal down with it, remove the excess polish with a clean cloth, and then gently wash the metal with a damp, soapy sponge and dry it.
Good luck! Nice find!
Tape off the entire fretboard with masking tape so only the frets are showing. It's also a good idea to tape off the neck pickups so the dust doesn't go to the pickup magnets. I would also tape off the sides of the neck to be extra careful in-case you accidentally scratch it with sand paper.
Then use sand paper to polish the frets. I work my way up 400, 600, 1000, 2000 grit. You only want to gently sand the surface to take off any scratches from the wound strings or fret rust.
You might have to use a paper towel to wipe off the metal dust in between.
After 2000 grit the frets will be very smooth but dull. Then I finish off with Nevr-Dull metal polishing compound. It takes off any remaining metal dust and brings it to a shine.
https://www.amazon.com/Nevr-Dull-NEVER-DULL-POLISH/dp/B00097CRY6/ref=sr_1_1?ie=UTF8&amp;qid=1478898952&amp;sr=8-1&amp;keywords=never-dull+metal+polish
I got this method from Davey4557 on youtube. He repairs guitars for a living. He also doesn't recommend using steel wool on your guitar, search for steel wool to find out why.
https://www.youtube.com/user/davey4557
As long as you tape off the fretboard, are gentle, and patient I don't think you could screw it up using this method.
as a classic car owner, Mothers Mag and Aluminium polish
http://www.amazon.com/MOTHERS-05101-Mag-Aluminum-Polish/dp/B0009H519Y
nothing comes even close to it.
It's seriously under priced. If you're looking for another hero that's under-appreciated it's mothers mag and alumanum polsih. Combine that with 0000 steel wool and they will make your tail pipes glow!
I bought 00 and 0000. Only used the 0000 because I wanted to take the least metal off. You have to cut into the metal though you will see small lines that don't look good until polished. You will see the tarnish disappear.
Chrome though, I didn't even need to polish. Brushed it with the steel wool rust came off and it was shiny and perfect looking.
Wool Grades
Steel Wool first. Then i used a aluminium/mag polish called Mothers.
Idk about the bottom of the forks at least on my bike that finish is different. But all the cross members on the forks shined up right
Man... that raw aluminum makes me want to take some Mothers to it... could probably achieve a mirror finish.
Mothers 05101 Mag & Aluminum Polish - 10 oz. https://www.amazon.com/dp/B0009H519Y/ref=cm_sw_r_cp_api_OWsoxb449WA9N
This works perfectly for me!
You can polish the blade with mothers mag polish or somthing simular, and you can patch the handle with sugru
Use Mothers mag polish.
[Mother's Polish w/ microfiber cloth] (http://www.amazon.com/MOTHERS-05101-Mag-Aluminum-Polish/dp/B0009H519Y/ref=sr_1_1?ie=UTF8&amp;qid=1419893973&amp;sr=8-1&amp;keywords=mothers+polish) for heavy duty stuff and a Jewelry Cloth for everyday use.
Use something like this.
> For batteries, I'm using some efest IMR 18650s, do you think a different battery would make a noticeable difference?
eFests and mechs do not go well together, that being said hopefully you have one of the 20 amp rated ones, but it's still likely a poor choice for a mechanical device. Before buying the mod or at the same time you should have bought at least two of these, which currently is the cheapest price out of the three known trustworthy vendors for authentic cells.
You should read more into mechanical mods if questions like this are ones you need to ask, not meaning to be rude. Using an ohms law calculator at 4.2v you're going over 1a of what hopefully is the rating of your battery (if you have the 12a then this is actually not safe) but your mod will be pulling less with voltage drop. You should be calculating for 4.2 though to give yourself some headroom for safety. Especially if you threw an efest into a mech. I apologize if I come off condescending, it's not my goal at all, it's just with mechanical mods the battery is possibly one of the most important things to know how many amps you have to work with and you should never use rewraps in a mech. There's other batteries with lower ratings people use but honestly, I don't see any reason to when the VTC5a exists, is available, and possibly the all around best battery for vaporizers in general. In regulated devices you can sacrifice that extra cdr for some more battery life but in this situation the CDR is going to be a major determining factor in building safely and knowing what is safe and isn't as you need this for ohms law calculation.
Use the 510 pin cap for now because the more safety involved currently the better. Also if you didn't already know make sure to religiously check your battery wraps for any nicks or tears. With your mod you do have the delrin insulation I believe, but honestly if there's a tear or any damage to the wrap just rewrap it to be safe, you really don't want a short to happen and I don't want to see you on the news.
If there's any other questions that you're hesitant to ask, you may as well, because I'd rather help clear some things up or show you areas in which to read more so you know how to use what you have as safe as possible, and with efest batteries it worries me that there may be some things you may have missed.
Tldr: order these and don't use the efests. 2 of them should be fine unless you plan on using it as a main device in which 4 may be a safer bet, but 2 should be fine. Plus you're still learning some things it seems to there's no reason to use a potentially risky rewrap with false ratings when something like that is so cheap, and performs so well.
edit: I use Mothers Mag & Aluminum Polish for my mech mods, they're copper but I want to say that works well for brass too. Theres videos on how to properly polish if you are unsure. You want to wash it off after you use that though so you prevent potential damage to your device by leaving some of it behind. Pick up battery wraps and insulators as well, you're going to need these if you vape regardless and with mechanical mods you should have some ready to go as soon as any damage to the wrap happens. They're dirt cheap and it's easy to do, again there's youtube videos that show how to rewrap 18650s. Don't get them mixed up with other batteries though afterwards, as you don't want to throw a 15a battery into that thinking it's 25a and pulling too much power from it than the cell can handle.
Hybrid mode is more conductive but at this stage in the game I would use the topcap with the 510 pin instead. You likely won't notice a dramatic difference and it's safer for now.
Also you will probably have better luck with simple round wire builds than things like claptons simply due to ramp up time. Especially since at the moment if you continue to use that without the batteries I linked, you want to pulse it as little as possible. I am erring on the side of caution but if I am aiming for what's safest for you right now and until you learn all you should have known before buying a mech, you probably should too. Either way though, I find simple round wire builds are better in the builds I have tried compared to the fused claptons I gave a shot once. I don't like ramp up time though and even if you look at a lot of way people who are "sponsored" build you will see half the time they are still using basic round wire builds too. They just work and are simple.
Hi All!
My family owns a heating oil delivery business and we pride ourselves on having the cleanest and best looking trucks around.
To polish the tanks, we use Mother's Aluminum polish (https://www.amazon.com/Mothers-05101-Mag-Aluminum-Polish/dp/B0009H519Y) applied by hand (to avoid swirls, I'm told)
I was wondering if you guys could shed some light on a best approach to keep these looking like a mirror finish? Could a DA polisher be used? Is there a better product than the aluminum polish? Should we be waxing the tanks as well?
Here are a couple of pictures: http://imgur.com/a/IfTnb
Thanks for any tips! I know this is a little unique since it's metal instead of paint!
Depends on how bad. I've used Autosol products for aluminum oxidation with pretty good results. It's not super cheap, though. Also, some Mothers Mag Aluminum Polish works well if the surface is pretty clean.
It's hard to say without seeing the pipes, but heavy rust is usually really difficult to remove as the metal has physically changed. Feel free to send a picture of your pipes, though!
Sure, awesome find by the way.
After removing all the tubes I wiped it down a few times with just a damp cloth to get the heavy dust off. The real pain is getting rid of the sticky yellowed smoke film that most old tube gear has. The best thing I've found to get rid of it is Zep All Purpose Cleaner. It's green and can be found at Home Depot. The nice thing about it is that you apply it, wait five to ten minutes and gently wipe it off. It takes the grime with it and leaves lettering. Keep it up until the surface is clean and your rag isn't lifting up any nasty yellow anymore. You still have to be careful, if you rub too much or apply too much or leave it on too long it will lift lettering, but it's the most forgiving product I've come across in that respect. I was pretty lucky with this one as it hadn't been smoked around that much.
For the aluminum tube covers I used Mothers metal polish. They transform from dull grey to almost a mirror finish without too much effort. I went a little nuts with the Mothers and polished as much of the steel as I could, like the tuning pot cover (while trying to keep the stickers), the sides of the chassis, and the aluminum capacitor cans. This album shows a before and after.
I removed the face panel, soaked it in Zep first and then used Blue Magic Quick Shine metal polish. I also used Zep on the back but didn't do much else since there's so much lettering around all of the connections that I didn't want to remove it. I soaked the knobs in Zep, used Brasso to shine up the caps, and then used a paper towels and a small stiff brush to get all of the Brasso out of the plastic grooves. I was lucky with the dial glass, it wasn't dirty enough that it need to be removed, I just used Zep and then Windex on the front. If you do remove it, be very careful with the lettering, it comes off easily... I'd only use a damp cloth.
After I fired it up I found I had some dirty switch pots, so I squirted them with a little Deoxit and worked them back and forth. I also used a little clock oil on the pots.
I bought a kit from this guy to replace components. There are plenty of forums (I prefer audiokarma.org) with information and willing members to assist if you want to do it yourself, but the kit takes a bit of the guess work out of it. My album shows everything that was replaced. Basically, it's every capacitor that could go bad and affect the sound, modifying the de-emphasis to modern standard, lowering the voltage (These fishers run crazy hot and eat output tubes at their original voltage), and making it a little safer to operate.
I had to replace the plastic antenna straps which had crumbled from age, one of the brass knob caps that was missing, 3 out of the 4 lightbulbs, and 9 tubes.
I then put the tubes back in and brought it slowly up on a variac for about 3 or 4 hours to reform the can caps. I still have some polishing work on it, but it's pretty much done and sounds great.
Have you powered up your 500B? Is it complete? Pictures?
Best polish product ever
Completely removes any stains and tarnishes, and leaves a sparkling shine with absolutely zero abrasion. This container has lasted me for over a year. Just rip a little off and rub away!
http://www.amazon.com/Eagle-One-1035605-Nevr-Dull-Wadding/dp/B000CNBI1A
You can get this stuff at Walmart/Autozone. I've been using it for 10+ years.
If you want to make it shiny as can be, you might hit the body with some Nevr-Dull.
i use never dull. they sell it at any autoparts store. it works great.
http://www.amazon.com/Eagle-One-1035605-Nevr-Dull-Wadding/dp/B000CNBI1A/ref=sr_1_3?ie=UTF8&amp;qid=1464995628&amp;sr=8-3&amp;keywords=never+dull
NEVR-DULL can be found in the car care section of walmart, or autoparts stores
This? http://www.amazon.com/Eagle-One-1035605-Nevr-Dull-Wadding/dp/B000CNBI1A/ref=cm_cr_pr_product_top
Eagle One E301131001 Original Nevr-Dull Wadding Polish for all Metals, 5 oz. https://www.amazon.com/dp/B000CNBI1A?ref=yo_pop_ma_swf
It looks like the rust ate through the plating so it'll take a bit of effort to make it look like new. You could use a rust remover like whink then an all purpose metal polish like eagle one never dull to make it spiffy.
You just need to polish the frets. And change those strings. Yikes. :)
Get some Eagle One Nevr-Dull from your local auto parts store. I picked some up from PepBoys recently.
Put tape on the fretboard right up to the edge of the frets to protect the wood. Then scrub the frets with Nevr-Dull. Rinse and repeat.
Once you're done, remove the frets and wipe down the fretboard with a clean cloth and naptha. You just want to get any loose bits and gunk off.
Put some graphite in the nut and saddle slots.
Toss a little bit of mineral oil on the fretboard and restring that puppy.
Like the title says, between my final semester of college, moving and starting a new job, I haven't had the time to give my KM a good cleaning. For those interested in the process, here goes:
I started by disassembling the entire thing. The coal tray, grommets and any other removable pieces got a bath in hot water and dish soap. The stem was scrubbed with a brush soaked in the soapy water, and left to soak for a few minutes. The soap worked to loosen any built up grease and other shit inside. If you've never done this, do it, its disgusting the stuff that comes out. After the good soak, I ran water down the stem and passed some paper towels through. If you've ever cleaned a gun, its basically the same thing. The base got a good soaking in plain old hot water and was scrubbed inside with a brush and wiped clean on the outside. I don't recommend the soap on the base as its a bitch to get out.
For the actual polishing, I used Eagle One Never Dull (http://amzn.com/B000CNBI1A). Lay down a towel, grab a wad and get to work. I like to rest the bottom of the stem on my foot and spin the whole stem while I hold the wadding to it. As you work, the wadding will turn gray as it removes the tarnishing. As it gets grayer or starts falling apart, just grab some more. Once you've hit the whole thing, repeat the process but with a dry microfiber towel. At this point, you're done, or you can continue repeating the process until you're satisfied! This stuff is fairly harsh, so don't use it in a poorly vented room and I recommend washing your hands thoroughly when you're done.
Enjoy!
Flitz Metal Polish for the bore; Break Free CLP for the inside of the gun; and FrogLube paste as an exterior protectant.
On my Glocks I usually use one of THESE. (I throw the slotted tip and the jag away, and use only the brush with cotton patches (occasionally) wrapped around it.)
NOTHING CLEANS A PISTOL BARREL, ABOVE 22 CALIBER, FASTER OR BETTER - NOTHING!
I, also, keep a carbon steel, 'Squirrel Daddy' Miniature Glock Tool in the handle along with a thin-bladed, narrow profile screwdriver.
I carry; so I clean my Glock BEFORE I leave the range and won't holster a dirty pistol that hasn't also been function checked. I've been working on guns for 50 + years; and I use them hard. At one time, or another I've seen it all. These guys who like to brag and post crap about (almost) never cleaning their Glocks are just plain IGF idiots; and I'm sure that Smyrna would tell them so, too.
Neither is there any good or necessary reason, whatsoever, to leave the Loctite C5-A Anti-Seize Compound (the, 'gold-colored grease') inside your Glock after you've purchased it and brought it home. The C5-A is there to: (1) Protect a Glock from corrosion between the dissimilar metals of the slide and connector tab during PROLONGED distributor storage, and (2) guarantee that a new, possibly uncleaned, and unlubricated Glock pistol will go, 'Bang!' the first time it is used.
Once the Glock pistol is put into service and receives regular maintenance you no longer need the grease - Period.
Flitz metal polish is amazing. I have used it and it works incredibly well. Read the comments at Amazon.
http://www.amazon.com/Flitz-BU-03515-Plastic-Fiberglass/dp/B001447VB2/ref=sr_1_1?ie=UTF8&amp;qid=1415075546&amp;sr=8-1&amp;keywords=flitz
This stuff works wonders. I use it to take off surface rust on my swords and knives. It smells terrible, but it's non-toxic, food safe, and most importantly, non-abrasive. It uses some sort of proprietary chemical effect to react and lift off iron oxide(rust) without damaging any actual steel. It's pretty awesome stuff, and one bottle will last you years.
Not sure how much you are willing to spend, but this Amazon store seems willing to ship worldwide.
Try these, just wear nitrile gloves while doing it. Once you’ve polished them to your liking, simply put the cloth back in the pouch & wipe the watch with a microfiber cloth.
Cape Cod Metal Polishing Cloths, I've had luck with them for minor scratches, any deep scratches would probably need to be taken to a professional. Also the cloths only work on the glossy portions of the watch, the brushed/satin portions such as the sides of the watch cannot be polished off with the cloth otherwise you'll rub off the finish, again a professional should be able to polish and resurface such areas.
Not sure if professionals work on smartwatches though as I've never tried asking, and it might cost more than it's worth considering the diminishing value of old smartwatches. ($100 - $200 for a professional's service on the upper end, and around $50 for minor jobs)
Have you tried http://www.amazon.com/gp/aw/d/B0017H3PIO?pc_redir=1411576924&amp;robot_redir=1
Cape Cod cleaning cloths? It's pretty easy and quick to get a decent shine on brass mods.
Amazon has the big bottle of M205 for $18
It depends on how aggressive you were with this "magic eraser". You say it dulled the surface rather than scratched it, which indicates that the scratches are very fine and very shallow. This should be easily repairable by just polishing it out with a very fine grade polishing compound. M205 is a popular choice. You can find it on Amazon or in most hardware/auto stores. You can (and should) post in /r/autodetailing if you want more responses.
You can totally DIY paint correct with a dual action polisher.
Here’s a straightforward shopping list and guide. This will knock out most if not all of your swirl marks.
Shopping List:
Machine Polisher - PORTER-CABLE Variable Speed Polisher, 6-Inch (7424XP) https://www.amazon.com/dp/B002654I46/ref=cm_sw_r_cp_api_i_l7SADbKPP1Q6Q
Backing Pad - Astro 4607 5" PU Velcro Backing Pad https://www.amazon.com/dp/B003CH3Z8W/ref=cm_sw_r_cp_api_i_T7SADbZ187WK1
Bugging Pads - Chemical Guys HEX_3KIT_5 5.5" Buffing Pad Sampler Kit (4 Items), 16. Fluid_Ounces, 4 Pack https://www.amazon.com/dp/B01J588UNG/ref=cm_sw_r_cp_api_i_d9SADb8WF470V
Compound - Meguiar's G17220 Ultimate Compound, 20 oz https://www.amazon.com/dp/B06W5HCZ9M/ref=cm_sw_r_cp_api_i_M9SADb0ADEMZJ
Finishing Polish - Meguiar's M20532 Mirror Glaze Ultra Finishing Polish, 32 Fluid Ounces, 1 Pack https://www.amazon.com/dp/B001O7PNXC/ref=cm_sw_r_cp_api_i_i-SADbWXADMQT
Wax - Your preference
Here’s the guide:
1 – Tool Prep
Set aside the dual-action polisher, backing pad, and foam pads. Remove the included backing plate that’s already attached to the Porter Cable polisher, use the included wrench. Re-attached using the Astro pad, secure tightly.
2 – Wash
Wash your car by hand, preferably using the two-bucket method. Afterward, move the car into your garage or shaded area. You’ll want to be out of direct sunlight, keeping the paint as cool as possible.
3 – Clay Bar
Clay bar the entire car. Make sure to wipe down the finish afterward, keeping it as clean as possible.
4 – Compound Buffing
Grab your machine polisher, the Ultimate Compound, and the orange pad. Attach the pad to the polisher using the velcro backing, make sure it’s centered. Prime the pad by dabbing 8-10 dime-sized amounts across the surface. Start working one section at a time, around 2 x 2 feet. Before you turn on the polisher, press the pad against the paint. Compound polish should be soaked within the pad, along with the paint. Press the pad against the surface, set to speed setting 2-3, and begin spreading the compound around in quick passes. Then, turn it up to 5-6 and let the fun begin. Use overlapping, slow passes. Once you’re done, wide the area clean with a microfiber towel.
5 – Inspection
Check out your results of the first section. Go over the area again if most of the swirl marks aren’t gone. If the swirls are gone, but a light haze is present, don’t worry. The finishing polish will take care of it.
6 – Polish Buffing
Use the M205 Finishing Polish with the white pad. Follow the same steps from before. Prime the pad and rub it against the paint before turning on the polisher. Use a max speed of 3-4 with medium pressure. The Finishing Polish will take care of the rest of the haze and micro scratches. Once you’re finished with the first section, wipe clean.
7 – Inspection
Again, check out the results of the M205 Finishing Polish. It’s doubtful you’ll need more than one application, but double-check all the same. If it’s looking great, move on and finish the rest of your car.
8 – Wax
Your paint is looking great. The swirl marks are gone, leaving a bright clean finish. Apply the wax using the black foam pad. Use very light pressure, letting the pad float along with the paint. You’re just coating your car’s finish, that’s all. Wipe clean with a microfiber towel.
oh boy now you are getting in detailing! what your going to need is meguiars 205 finish polish, a DA polisher. and a lake country orange cutting pad and a backing pad (theres one that comes with the harbor freight one, but its considered trash)
https://www.harborfreight.com/6-in-57-amp-heavy-duty-dual-action-variable-speed-polisher-69924.html
https://www.amazon.com/Meguiars-Mirror-Glaze-Finishing-Polish/dp/B001O7PNXC?keywords=meguairs+205&amp;qid=1536994013&amp;sr=8-1&amp;ref=sr_1_1
https://www.amazon.com/gp/product/B003CH3Z8W/ref=oh_aui_detailpage_o05_s00?ie=UTF8&amp;psc=1
I use Meguiar's M105 then M205 on my headlights.
Start with a polish instead. Always least aggressive. M205 if Amazon ships to you or maybe you can find some Meg's Ultimate Polish at an auto shop.
50% off 32oz M205 polish on Amazon!
Yeah I got confused, https://www.amazon.com/gp/product/B001O7PNXC/ref=oh_aui_detailpage_o08_s00?ie=UTF8&amp;psc=1 that is what I ended up buying, so it was correct to use this right? It did not get rid of the swirls at all however, should I try M105 or something, not sure what heavy cuts is.
glass polish will take off water spots
https://www.amazon.com/Griots-Garage-11063-Glass-Polish/dp/B002L29FEM
another option I think the Dawn just thickens/wets the vinegar so it will have time to dissolve hard water spots
https://www.youtube.com/watch?v=_hyX_-Qev7o
Plastic polish:
http://www.amazon.com/NOVUS-Plastic-Fine-Scratch-Remover/dp/B002UD0GGS/ref=sr_1_2?ie=UTF8&amp;qid=1407377821&amp;sr=8-2&amp;keywords=novus+2+plastic+polish
They also have a kit:
http://www.amazon.com/Novus-Plastic-Polish-Scratch-Remover/dp/B000J41VDM/ref=sr_1_3?ie=UTF8&amp;qid=1407377821&amp;sr=8-3&amp;keywords=novus+2+plastic+polish
Similar to what Justniz posted, I had some scratches on my lenses and picked up this stuff NOVUS 2 Plastic Find Scratch remover. You put a small dab on the lens and rub it in a circle pattern for about 2 minutes with a clean microfiber cloth until the lens is clear again. Was a bit scary at first but it worked out and my lenses look brand new again.
I am now cleaning the dust out of the headset regularly to avoid any future issues, although the repair stuff works well so it's less of a concern.
https://smile.amazon.com/Meguiars-Mirror-Glaze-Finishing-Polish/dp/B003LMJP4Q/ref=as_li_ss_tl?s=automotive&amp;ie=UTF8&amp;qid=1462198514&amp;sr=1-1&amp;keywords=m205&amp;linkCode=ll1&amp;linkId=0d2bd2ea6afed7cc4b86a9a1c1afb05f&amp;sa-no-redirect=1
I've gotta say, that's less than encouraging. The only folks I know that regularly use both a rotary and 3M products are body shops or car dealers. And they are not generally known for being great detailers. 3M products actually kind of suck compared to more modern options.
As someone else mentioned, the Meguiar's M105 and M205 would both be good products (M105 is a first-step, more abrasive polish, M205 a finishing polish to take out any marring left by M105). You can get 8oz bottles on Amazon for about $10/ea. They're easier to work with, dust SIGNIFICANTLY less, and work better than the 3M products. Plus, you can get them in 8oz bottles vs. 32oz bottles.
http://www.amazon.com/Meguiars-Mirror-Glaze-Ultra-Cut-Compound/dp/B001O7PNW8/
http://www.amazon.com/Meguiars-Mirror-Glaze-Finishing-Polish/dp/B003LMJP4Q/
You don't rinse off glazed wax. You wipe it off with about 4 or 5 microfiber cloths and if any dried that you discovered later, some quick detailing acrylic spritz and a microfiber rag will remove it.
I used to own a 16 year old black volvo. It looked like this.
http://i.imgur.com/5gFUa.jpg
http://i.imgur.com/vV9UrIf.jpg
http://i.imgur.com/ohPul7n.jpg
The trick to black cars (or really any color) is that it's not simply a matter of washing and then wiping on some wax and wiping the glazed wax off. It doesn't work that way.
It should go without saying, all of this should be done with paint that is cool to the touch. Do not do anything in direct sunlight unless it's cold outside. You do not want to be working with warm/hot paint.
Anyways, your wash mitt doesn't remove the dirt that is in the microscopic pores of the clear coat. You have to use paint cleaning claybar and a claybar lubricant spray to get that. I really like the pinnacle clay.
Once you go over the car with the clay, depending on the condition of the clearcoat (major scratches or minor swirls) you need to use an orbital buffer with the appropriate softness polishing pads and more or less gritty polishing compound. This will smooth out swirl marks and remove any oxidized rain drop marks and stuff like that.
Don't be afraid of damaging your paint/clear coat. Unless you get a heavy cutting compound for deep scratch removal, the orbital buffer and sponge pads can't damage it. If your paint is in pretty good shape (minor swirls) Meguiars ultra finish polish should be all you need and works really well and isn't super expensive.
http://www.amazon.com/gp/product/B003LMJP4Q/ref=wms_ohs_product?ie=UTF8&amp;psc=1
Once that's done, you can use either a nice caranuba wax or a polymer acrylic sealant. I really like the Werkstat Jett Acrylic because it doesn't dry all thick and cakey and hard to remove.
Also, one trick I use is to avoid the dried wax/acrylic on plastic molding and trim pieces is to use blue painters tape on the edges. Tape off the badges, logos, etc. Getting dried wax off injection molded plastic can be a pain.
Wax will typically only last about 3 months and acrylic will last 6 or more months. Keeping the car in a garage and limiting exposure to the elements can prolong this. You can apply wax first and then a coat or two of acrylic if you want.
After each wash, use something like blackfire wet diamond or sonus acrylic spritz (I've used and enjoy both) to help preserve the acrylic sealant.
One thing worth noting is that when you wash the car just before you plan to polish/wax, use dish washing liquid as it will efficiently strip off any remaining wax/sealant left on the clear coat.
This is just the tip of the iceberg and car detailing is a very deep rabbit hole but doesn't HAVE to be expensive. A good polisher like a porter cable or griot's garage random buffer is a great investment and much cheaper these days than what they used to be. If you decide to get one, the cobra cross groove pads are great and you will need about 4 of them as they will collect a lot of dirt during the process of polishing so use one per side of the car.
I use this on my bike.
Honda Spray is the shit.
http://www.amazon.com/Pro-Honda-Spray-Cleaner-Polish/dp/B004FSEJZA
hey thanks for the advice i took into consideration what you suggested and ended with this stuff,
http://www.ebay.com/itm/170694956256?ssPageName=STRK:MEWAX:IT&amp;_trksid=p3984.m1423.l2649
http://www.ebay.com/itm/190381853105?ssPageName=STRK:MEWAX:IT&amp;_trksid=p3984.m1423.l2649
and maybe this?
http://www.amazon.com/Meguiars-Ultimate-Polish-16-oz/dp/B004HCOE8Q/ref=pd_bxgy_auto_text_y
http://www.amazon.com/Meguiars-G17216-Ultimate-Compound/dp/B001O7PNNM/ref=pd_bxgy_auto_text_y
Hey guys i'm new to this detailing scene..but I do hope to learn a lot from everyone! I have an 05' white civic and the exterior isn't terrible, but there's definitely parts where there's medium oxidation and swirl marks. Just overall the paint doesn't feel glossy and smooth, just weathered and feels like metal.
Please let me know if I got the steps correct...any inputs is greatly appreciated!
Thanks so much for all your suggestions and inputs. I hope to learn a lot from all of you.
PS. Extra question, I'm doing a roadtrip after the detail...(stupid i know) but what's a good product to get rid of the bug stains while I'm out on the road?
THANKS!!
Maybe try using a very light cutting Polish or Compound and buffing it out with a Dual action buffer.
Yup. See if you can pick up some Meguiar's Plastx or Ultimate Compound or Ultimate Polish. Depending on the severity of the haze, you may need to start with Ultimate Compound first.
I've had great luck with Flitz: https://www.amazon.com/Flitz-BP-03511-Fiberglass-1-76-Ounce/dp/B00MUG95UI/ref=sr_1_9?s=automotive&amp;ie=UTF8&amp;qid=1465573928&amp;sr=1-9&amp;keywords=flitz
On pretty much everything plastic I own including the Charge.
My Norinco 1911 had a very gritty slide, so I bought some of this stuff (https://www.amazon.ca/gp/product/B00MUG95UI/ref=oh_aui_detailpage_o08_s00?ie=UTF8&amp;psc=1) and applied dabs of it to where the rails and worked the slide for about 10 minutes. Smoothed it right out. I also did a bit of dremel work to clean up the inside with a buffing attachment. These are things that would work themselves about eventually with use, but it speeds up the breaking in.
>Ok that doesn't sound too bad or expensive, actually sounds kind of fun, maybe I'll make it a hobby, supplement my income or use some to trade my RAD might get in the way of that though.
Danger! This way be dragons. :)
>Where can you get those polishes, I have never seen those particular ones?
I buy them locally at an ACE Hardware, but if you can't find them locally you can get them on Amazon: Flitz and Maas
>Also how did I do value wise, are any of those valuable or anything? Did I spend too much?
Let's see...
I think you took a bit of a bath on the third lot with the Red Tip. The Techmatic doesn't get any love because it's not all that pleasant to shave with and even if it were it's not exactly easy to find replacement cartridges for it. The Valet Auto-Strop is also not going to bring a whole lot. They're not bad shavers, and that gold one at least can take regular SE blades if you pop the spine off of them, but they're basically filler razors that people use to pad out lots. If you get into collecting at all seriously you should basically value them at $0 when you're figuring what you're willing to pay for a lot because you'll end up with a shoebox of them without even trying.
Take that other lot, for example. The way I'd look at that grouping is to immediately discount the Christie and the clippers as just somebody else's junk. That particular Auto-Strop requires special SE blades with a knockout inside the blade, so it's even less desirable than usual. So you're left with the Flare Tip Super Speed, the Ever-Ready 1924-patent "Shovelhead," and the brush. The razors are both good shavers, although the Super Speed is missing at least one end cap -- not an issue from a functional standpoint, but it hurts its value. The brush looks like a decent little travel brush. The old knot is probably shot (though maybe not) but it might be worth reknotting it if the handle were nice enough.
Still, you're only into the lot for $25 shipped, which is fine unless you're looking to flip any of it. Figure about $10 each for the Super Speed (dinged for condition) and the 1924, a couple bucks for the brush, and a couple bucks for postage and you're at fair money.
I'd say the other two Super Speeds are about the same -- decent prices for your own use, not great if you're looking to resell them.
Everyone does it differently but we all probably use the same product called Nesquik Instant Coffee. Generally brew up a batch at room temperature with distilled water. Boiling it turns allot of the acids into base and well water has allot of minerals in it.
Basic ferric chloride etch to get an even base coat going. I'll generally neutralize with Windex. Then clean the oxides off with a cotton makeup pad with a dab of Green Flitz. Making sure its all even. If not repeat.
Then as simple as dropping it in the coffee and checking every 5-10 minutes since it etches slow. Repeated etching intervals of 5 minutes with a quick Windex neutralization and light makeup surface wiping to continually remove the surface oxides will get you there. (No Flitz if your going for dark until your set on the color since it will drop it a shade)
The finer the grind the darker an etch will take.
But as I said before ultimately it all comes down to the steel to achieve a full black etch. There's just not enough Manganese in 1080 and 1095. Without using something like a blueing agent it'll always be closer to a deep grey. Steels like D2, 5160, 1084, and 80CRV2 all have a higher Manganese content which allows for a deeper darker etch. There are others I just can't remember them off the top of my head.
Flitz
I used this stuff with a microfiber. Didn't take long at all and came out really nicely. I was just amazed at how much soot built up in a few months.
This is the link to the one I got costs a lot less. Simichrome 390050 All Metal Polish Tube - 1.76 oz. https://www.amazon.com/dp/B0002YUQ4E/ref=cm_sw_r_cp_apa_W.vKAbHYWEWSK
And here's the exact lens cleaner spray. Set of 2 Carl Zeiss Lens Cleaning Spray 2oz - 60ml Travel Pack https://www.amazon.com/dp/B00JFD6KAW/ref=cm_sw_r_cp_apa_8bwKAbYQA3VMW
A couple things that I've read here that I want to clear up. The fresnal ridges are not on the side of the lens that you look through, they are on the other side so you're not sanding that down you're sanding down a side that is supposed to be smooth. If the scratches on your lens are not visible in the hmd then obviously you don't *need to do anything, unless you're like me and just can't stand scratches.
Proceed with caution but a pro tip - it doesn't matter. You'll be happier after the scratches are gone. Also get yourself a small thumb sized led flashlight. You can hold it in near the lenses to better see the scratches. Enjoy the clarity...
So this: https://www.amazon.co.uk/Simichrome-390050-Metal-Polish-Tube/dp/B0002YUQ4E
Polishing sheets
www.amazon.com/dp/B001BHGC7G/ref=cm_sw_r_udp_awd_oJMttb14VTZ9R
Simichrome
http://www.amazon.com/dp/B0002YUQ4E/ref=cm_sw_r_udp_awd_jKMttb1EX6ENW
Renaissance Wax Polish 65ml
http://www.amazon.com/dp/B003AJWN62/ref=cm_sw_r_udp_awd_RKMttb1YM5YXC
arnauba Wax
http://www.amazon.com/dp/B0009IQXCM/ref=cm_sw_r_udp_awd_NMMttb1MPHYVW
And if you really want it to shine, the steel wool + [simichrome] (http://www.amazon.com/dp/B0002YUQ4E/ref=cm_sw_r_udp_awd_ejWgub1RK0D7Z) . It's a metal polish and works amazing. Plus makes it for easier cleaning on the next application. A little bit goes a long way.
Try Simichrome. I found that it works great on flat areas on silver. Use a soft cloth and the compound.
Simichrome 390050 All Metal Polish Tube - 1.76 oz. https://www.amazon.com/dp/B0002YUQ4E/ref=cm_sw_r_cp_api_i_S2d8CbHMHRMM5
They one on the left is raw aluminum, and the two stacked up are nickel. I did a titanium that just arrived last week with the same polish as well, but it didn't seem to do much for that material, but it totally blasts out nickel and aluminum. :)
I use Semichrome polish
https://www.amazon.com/Simichrome-390050-Metal-Polish-Tube/dp/B0002YUQ4E/ref=sr_1_1?ie=UTF8&amp;qid=1525812594&amp;sr=8-1&amp;keywords=simichrome+polish
https://www.amazon.co.uk/dp/B00068GEJM/ref=asc_df_B00068GEJM55768446/?tag=googshopuk-21&amp;creative=22110&amp;creativeASIN=B00068GEJM&amp;linkCode=df0&amp;hvadid=205312686904&amp;hvpos=1o1&amp;hvnetw=g&amp;hvrand=11474337088846749024&amp;hvpone=&amp;hvptwo=&amp;hvqmt=&amp;hvdev=m&amp;hvdvcmdl=&amp;hvlocint=&amp;hvlocphy=9046811&amp;hvtargid=pla-404900476440&amp;th=1&amp;psc=1
Mother's Aluminum Polish has worked wonders for my aluminum Cannondale. Just wipe some on a cloth and swab it around. The cloth will be black after awhile because it gets so much grime off.
I can polish aluminum to a mirror surface with that stuff
Mother's Mag Polish on a Dremel with the Jewelry cleaning attachments.
Mothers
Polishing Kit
I know a lot of people use a basic metal polish like this
There is a product call never dull, for any chrome and steel.
https://www.amazon.ca/Nevr-Dull-L-5-Ounce/dp/B00097CRY6/ref=mp_s_a_1_2?adgrpid=62792834802&amp;gclid=EAIaIQobChMImszGzczN4wIVzZ-zCh1crgm3EAAYASAAEgLc7_D_BwE&amp;hvadid=310058773424&amp;hvdev=m&amp;hvlocphy=1002604&amp;hvnetw=g&amp;hvpos=1t1&amp;hvqmt=e&amp;hvrand=6306287711392518763&amp;hvtargid=kwd-299414274150&amp;hydadcr=22536_10308499&amp;keywords=never-dull&amp;qid=1563972779&amp;s=gateway&amp;sr=8-2
For black plastic use soft soap.
Hope i help you.
Nevr Dull cleaned that right up for me. Also works great on the bumpers.
https://www.amazon.com/Nevr-Dull-NEVER-DULL-POLISH/dp/B00097CRY6
This shit right here. Wear gloves.
I'd recommend spending the money on a set of Grace USA punches. Bought mine from Amazon and I absolutely love them. I bought these. I also bought this set of Grace roll spring holders. Very useful for starting roll pins. A decent hammer (I have a dedicated brass mallet and a dedicated nylon mallet), and a [bench block]https://www.amazon.com/Wheeler-60981-Universal-Bench-Block/dp/B0047WKF84) if you like things to be easy.
I also have a needle file set (don't remember the brand, but they were like $20 for 6-8 of them). For sanding on the internals I generally just use wet/dry sandpaper. Usually start with around 200-grit, and end with 800-grit. For polishing, Mothers Mag and Aluminum Polish and a white t-shirt. With enough time, it will give a nice mirror finish and be as smooth as ice.
Yup that’s exactly what i used.
https://www.amazon.com/dp/B0009H519Y/ref=cm_sw_r_cp_api_i_gb4kDbS54XQ5W
This stuff is amazing!
If this is aluminum go with this one. One of my favorite products!
They also have mag/aluminum wheel polish for almost half off. I really recommend this stuff. I have cheap aluminum american racing wheels on my jeep and this stuff makes them look real good.
http://www.amazon.com/MOTHERS-05101-Mag-Aluminum-Polish/dp/B0009H519Y/ref=lp_2596858011_1_16?srs=2596858011&amp;ie=UTF8&amp;qid=1393773460&amp;sr=8-16
On my personal vehicle i clean them with soap and water. Then i use either a powerball or a Cotton buffing pad with Mothers mag polish. Take your time and it will look amazing.
I would give this a try
Mothers Mag & Aluminum Polish works well too. I use it all the time for my mods and other assorted things.
Your mother usually does a good job cleaning my blow holes
https://www.amazon.com/Mothers-05101-Mag-Aluminum-Polish/dp/B0009H519Y
Hope this helps! This isn't an exhaustive list of the best professional products but some of the best top rated affordable and highly rated by forums and high subscriber YouTubers. I'll try to answer questions as they come. Thanks for all tye comments and positive/critical feedback. Promise is all helps in the end!
Wash/Decontamination
Wheels/Tires
Compounding/Polishing
Finshing Wax/Protectant/Plastic & Trim Restorer
Interior/Glass Cleaners
Convertible Fabric Top Cleaner/Protectant/Sealer
Microfiber Cloths/Car Drying Microfiber Cloths/Buffing Microfibers/Brushes/Etc.
They are called finger pump oil cans. Thanks for making me look that up!
First thing I did was scrub it down with some 000 steel wool and Goo Gone. I've never honestly seen anyone else use this combination but it works amazing on aluminum, steel, plated metals and tons of other stuff.
After I got all of the grim off I wiped it down with some all purpose cleaner.
Next I put a buffing ball on my drill and used some Mothers Aluminum polish. After a few pases with the mothers I cleaned off the ball, and finished out with some Blue Magic 400. The Mothers polish has a small amount of abrasive which helped smooth out what the steel wool did and the Blue Magic 400 has no abrasive and leaves a longer lasting protective coat then the Mothers. I have found you can make just about anything look new with this quick and easy method. Check out how nice it cleaned up the shocks on my bike Album.
http://www.amazon.com/MOTHERS-05101-Mag-Aluminum-Polish/dp/B0009H519Y/ref=sr_1_1?ie=UTF8&amp;qid=1382723868&amp;sr=8-1&amp;keywords=mags+aluminum+polish they sell it at walmart, it won't make it like it was out of the box but it can get it shiny again but be prepared to be at it for awhile. Imo just leave it be
When it's time to polish the metal, head to your local version of Walmart or Amazon and pick up some aluminum polish. I use Mother's. It's strong enough to work on the metals harmonicas use, but also pretty gentle. Just rub that on and if your cloth starts going black it's working. Get that elbow grease going and every few minutes wipe it off so you can see your progress. Repeat until fine scratches are gone and it's shiny new.
If you have deeper scratches, then you'll need to use sandpaper in increasingly finer grades first. 120 -> 220 -> 400 -> 1000 -> aluminum polish will take a seriously messed up cover plate to shiny new in about 15 minutes total. It's pretty easy to do.
This pack of sandpaperwill do hundreds of harps
Mother's polish
Mothers 05101 Mag & Aluminum Polish - https://www.amazon.com/dp/B0009H519Y/ref=cm_sw_r_cp_tai_T.uHzbMVDV4PZ plus a lil’ elbow grease
Ok, I was having a TON of problems with adhesion with PLA, and a fair deal of issues with PETG on the textured sheet. I tried it all: Lower Z, 99% alcohol, dish soap, increased bed temp. Everything was coming loose after a few layers, or warping (or warping worse with the higher bed temp). It would still warp with a 2cm brim.
I was seriously considering tossing the textured sheet because it was completely useless for me, so I tried a more drastic approach. I figured that acetone was risking chemically changing the surface (which is why they warn against it), so I decided instead to physically change the surface.
I got some "Mothers Mag & Aluminum Polish" and softly polished one side of the textured sheet. This stuff has an extremely fine grit in it (aluminum oxide), and it scuffed/polished the top layer of the powder coat. I didn't polish too hard, I didn't want to change the look or texture of the sheet. After that, I washed the surface thoroughly with dish soap, dried it with towels, did a pass with the 99% alcohol, then heated the bet to 80c for a few min.
The difference was night and day. PLA sticks incredibly well (nozzle 200c, bed 50c), but still easily pops off with a light bend of the sheet. It didn't change the surface texture of the sheet at all, you still get that nice textured finish. I haven't tested PETG on it yet, but considering how well the PLA sticks, I'll only want to only do small test parts first until I have confidence that the bigger parts will actually pop off (I still have the reverse side of the sheet for PETG in case this polished side works too well). I've accumulated about 50h of printing on the polished textured sheet now without issue.
WARNING: Mothers contains petroleum distillates. I'm not a chemist, but I may have in the end actually chemically changed my textured sheet anyways (similar to what using acetone would have done). I don't know if there will be long term issues with this method, but in my case, I at least turned a useless textured sheet into something I can actually use for a bit.
This is the stuff I used: https://www.amazon.com/Mothers-05100-Mag-Aluminum-Polish/dp/B0009H519Y
Thank you. Is this the one?
Mother's 05101 Mag and Aluminum Polished Metal, 283 g https://www.amazon.co.uk/dp/B0009H519Y/ref=cm_sw_r_cp_apa_i_CPZQCb0V7JHCW
I use mother's aluminum polish on my exhaust tips. It works great!
Mothers 05101 Mag & Aluminum Polish - 10 oz
https://www.amazon.com/dp/B0009H519Y/ref=cm_sw_r_cp_apa_i_e84-AbXQ7GWW2
Guy at a track day clued me into this stuff a few years back - Nevr-Dull Wadding Polish.
Removes everything without hard scrubbing, leaves a protective coating that makes it so you can wipe daily carbon buildup away with a dry rag.
Fucking amazing, all four chrome tips of my 2013 WRX are still stainless/spotless after seven years.
Pro-tip, wad the wadding up in a rag or wear gloves to apply it. The chems in that stuff will seep into your skin very easily.
Eagle One "Never Dull" and a clean terry cloth or similar rag-type article of cloth. 30 seconds and some elbow grease and it will be all gone.
Link: [https://www.amazon.com/Eagle-One-1035605-Nevr-Dull-Wadding/dp/B000CNBI1A]
I've had good luck with Nevr-Dull: http://www.amazon.com/Eagle-One-1035605-Nevr-Dull-Wadding/dp/B000CNBI1A
It's slightly pitted so it may never be great again. However Eagle One Never Dull, any parts store will have it, will shine it up. Rub it on and polish it up, then wipe off with clean rag. Enjoy.
http://www.amazon.com/Eagle-One-1035605-Nevr-Dull-Wadding/dp/B000CNBI1A
I've used this on a lot of non automotive related (reason I bought it in first place) pieces before with good results.https://www.amazon.com/Eagle-One-E301131001-Original-Nevr-Dull/dp/B000CNBI1A
As for the upholstery part, you might need to take that to an upholstery guy, some of that stuff is rather tricky. I think once you rip the fabric off you might have hard time getting another fabric on without a specialized sewing machine.
haha I always love parking next to another GTI. Even better when I return to my car to find another one parked next to it :]
I also recommend some Nevr Dull to help keep your exhaust tips shiny https://www.amazon.com/Eagle-One-1035605-Nevr-Dull-Wadding/dp/B000CNBI1A :P
It happens. I haven't used it myself yet, but Eagle One - Never Dull is supposed to make an easy(er) time of cleaning it up.
You should use this on all the luggage hardware.
It will make an incredible difference. I use it on old bicycles.
I pretty sure they are aluminum maybe billet but that is a stretch. I would use Eagle One Never Dull. That shit works on everything like a charm!
Thanks. I went with this stuff http://www.amazon.com/Eagle-One-1035605-Nevr-Dull-Wadding/dp/B000CNBI1A since it said safe on all metal. Worked really well. If I know for sure it was stainless I was going to go at it with some 0000 steel wool. I read that it's a bad idea to use that on chromed metal.
Nevr-Dull works pretty good, but I agree many others, I like the patina.
Those rust spots/chips on the deadbolt, no way to get rid of those without replacing the lock.
I like Flitz polish. It works great for so much.
https://www.amazon.com/dp/B001447VB2/
Also https://www.amazon.com/dp/B000H6MNRU and/or https://www.amazon.com/dp/B000TV6DLU
Combine with a drill and you should be able to get that sparkling.
However, another potential option would be the tried and true when something needs some tough love: http://brillo.com/products-2014.asp
https://smile.amazon.com/Flitz-BU-03515-Plastic-Fiberglass/dp/B001447VB2/ref=mp_s_a_1_6?keywords=Flitz%2BPolish&amp;qid=1556752685&amp;s=gateway&amp;sr=8-6&amp;th=1&amp;psc=1
Here’s the link for the one I use, I use it both with a buffing bit for my dremel and manually with a microfiber cloth. I told someone else today that the dremel option is great if you’re impatient (like me.), and it will give you a beautiful shine just like that, but I personally think that rubbing it really hard on a microfiber cloth by hand makes it shinier sometimes, but even when I do use the dremel I like to give it a few rubs on the microfiber cloth afterwards as well, I feel like it helps. I’m not completely certain of how well it will “cover up” the seem in your pieces, but it does shine up the scuffs I sometimes get in my resin jewelry pieces, so I feel like it will at least help to cover it a little bit!
https://www.amazon.com/Cape-Metal-Polishing-Cloths-0-53oz/dp/B0017H3PIO/ref=sr_1_1?ie=UTF8&amp;qid=1474768803&amp;sr=8-1&amp;keywords=cape+cod+polish
My Angels Birkin pins also were very tarnished. I used tiny Cape cod polishing cloth and it lightened a bit, but not perfect like my UB’s Kelly pins. Angel’s bags often have tarnished pins unfortunately.
Just this?
https://www.amazon.ca/Cape-Metal-Polishing-Cloths-0-53oz/dp/B0017H3PIO
I’ll just wipe it on the clasp? Anything that can go bad with this?
If you are trying to remove smudges/scratches - pick up a high quality microfiber and I honestly use glasses lens cleaner. You need liquid for lubrication so you aren't "rubbing" the surface, but more "buffing" because the liquid is doing all the cleaning/emulsifying. Spray onto the cloth then apply to the watch
Lens cleaner works great for removing oils and such, crystal or metal doesn't seem to matter. Most lens cleaner is designed to be safe for AR coatings
&#x200B;
After that, you can use some metal polish or polishing cloths to help level the area around the scratch to "remove" the scratch.
https://www.amazon.com/Cape-Cod-Polishing-Cloths-0-53oz/dp/B0017H3PIO
&#x200B;
Note: that you can't really remove a scratch, but you can level the surrounding area so the scratch doesn't exist any more.
Also be very careful when you are using polishing cloths or compound - you don't want to affect any brushed areas or it will change the finish. I don't have too much issue with that personally, just need to be careful.
&#x200B;
http://www.amazon.com/Cape-Metal-Polishing-Cloths-0-53oz/dp/B0017H3PIO
These will be your best friends. They're great for mostly everything but the deep deep nicks. Take off your band from the watch, turn off the watch, put on gloves scrub away, rinse. I do it about once a month and mine looks brand new each time.
It won't take it all the way off but it'll look better if you use a cape cod cloth on it.
Cape Cod Metal Polishing Cloths Foil Pouch 0.53oz https://www.amazon.com/dp/B0017H3PIO/ref=cm_sw_r_cp_apa_i_rqAcBbJQQBC9N
Any competent watchmaker could polish that out as well.
As far as too deep.... It all comes down to how much surrounding metal you want to loose. Usually if your fingernail catches good on it, it won't come out unless you really polish the hell out of it.
For the polished bezel - Cape Cod Polishing Cloth...
For the brushed parts, a set of 3M papers...
Nothing will 100% match a factory finish, but those are the easiest things for most people to do at home - and if you’re patient and work slowly/carefully you should get close.
Brushed area is harder to match, so make sure you work somewhere stable and with a steady hand using the 3M papers. One direction only...etc. Hardest part to “freehand” would probably be the circular brushing on the caseback.
wtc CapeCod cloth - This one? https://www.amazon.com/Cape-Cod-Polishing-Cloths-0-53oz/dp/B0017H3PIO/ref=sr_1_1?ie=UTF8&amp;qid=1525727483&amp;sr=8-1&amp;keywords=cape+cod+cloth
Whoops - I purchased this guy yesterday to try it out: https://www.amazon.ca/gp/product/B0017H3PIO/ref=oh_aui_detailpage_o00_s00?ie=UTF8&amp;psc=1
But if I end up liking it, I will get the full tin, as you say.
I guess what I've been doing when I polish is applying the polishing compound on the cloth disk, and giving up instantly as soon as I see that it is turning my pieces grey and cloudy. I'll give it a bit longer this time. Thanks for your reply! All the best.
I’m a big fan of keeping my DeWalt drill plus one of [these](Mothers 05146 PowerCone Metal Polishing Tool https://www.amazon.com/dp/B001MXTOKQ/ref=cm_sw_r_cp_api_A.eWAb82CBSTZ)
for those days when my hard to reach places need a little extra cleaning.
I've used Borla Exhaust Cleaner and a Drill Polishing Tool
I'll admit I only did a small section several years ago but it took no more than 30 seconds. I've found hand polishing takes plenty of time and several passes to bring back the luster.
Mine get tons of carbon buildup as well (2013 R60). I have black tips so it's not obvious, but it's definitely there.
Cleaning tips: Get the following items:
Start by spraying the wheel cleaner in and around the tip. Let it sit for a minute then agitate with the wheel brush. Spray some water in there after agitation to rinse the crud out. Follow it up with a spray of Simple Green. Place the microfiber towel around the wheel brush and agitate again. This'll get the little bits that the stiff brush left behind. Rinse again.
Then attach the powercone to your drill. dunk the powercone into soapy water. Put it inside the tip and spin it. This gets the inside pretty darn clean.
You can clean the outside with the same products. It typically doesn't need it as bad and a simple wipedown with simple green and a microfiber is usually good enough. You can always shine it up with the chrome polish as well, if it needs it.
Unless you can bang out that from the back there's no hope to straighten it with home tools. It can be done from the outside with a stud welder + puller (video) but this is something best left to pros. It's much easier to replace the door for ~$200-500 at a junk yard, search car-part.com -- thats what my insurance did for a similar issue, came out to almost a thousand bucks at the body shop when you add the paint and labor on. But if you do it yourself you might be able to just get one in the right color and not paint it.
If you just want to fix the paint, just do the touch up. Call your dealer to get a small jar in the right color. You can fix the other less deep scratches with polish (heavy cut, light cut).
Also check this channel out if you are interested in how professionals do it: https://www.youtube.com/user/tussik01/videos
Hi, I'm really new to detailing so can you explain what you did exactly? I googled your terms and got these.
http://www.detailedimage.com/Meguiars-M43/Ultra-Cut-Compound-M105-P388/32-oz-S1/
http://www.amazon.com/Meguiars-Mirror-Glaze-Finishing-Polish/dp/B001O7PNXC
They are both polishes, right? Those sure are expensive..And you need a orange pad? A white pad? I see those pads in the first link I posted, detailedimage..The total cost for a newbie to do this is like around $60-70? Damn..I might have to live with the few scratches. Trying to invest in buckets and the whole newbie starter kit.
Torq22DDA: Torq22dD
Pads: ChemicalGuys orange then white for finish
Compound: Meguiar's M205
Ceramic Coat: Gtechniq Crystal Serum Light (didn’t use the exo to humid for application)
Sealant: Gtechniq C2 Liquid Crystal v3
Microfiber: Chemical Guys MIC_507_06 Professional Grade Premium Microfiber Towel, Gold (do not skimp out on your MF!)
Sorry, I called it the wrong name. It's Meguiar's Ultra Finishing Polish. My plan was to use M105 OR M205 to polish, and NXT to wax. In between those two steps I was told I could use Isopropyl Alcohol. I don't know if this is true or not but that's definitely a cheaper option, lol.
This is what I use to clean up all my knives.
https://www.amazon.com/Flitz-LQ-04587-Plastic-Fiberglass/dp/B0025QZMRI/ref=mp_s_a_1_6?ie=UTF8&amp;qid=1539408010&amp;sr=8-6&amp;pi=AC_SX236_SY340_FMwebp_QL65&amp;keywords=flitz+metal+polish&amp;dpPl=1&amp;dpID=41dqPXl5QiL&amp;ref=plSrch
Can you order off of amazon?
I would recommend using Griot's Garage Glass Polish.
I used this along with a glass polishing pad on my DA and quickly cleaned an entire window that was absolutely covered with overspray from a single stage paint job. Since you don't have a DA I would recommend a handheld pad such as a CG Polishing Pad.
However before trying the polish you might try using glass clay. It works pretty well - it should remove the gunk/spots but may not remove tough water spots. If you do use the clay I use Meguiar's or Stoner glass cleaner as lubrication.
Hope some of this will help!
Also on a side note - the pad you used probably didn't do much, if any, damage to the windshield, automotive glass is pretty tough stuff.
https://www.amazon.com/Griots-Garage-11063-Glass-Polish/dp/B002L29FEM
In the frequently bought together section there is the buffer pad and clay made by the same company. Clay the windshield thoroughly (any clay will work) and polish it. Finally get some stoner invisible glass and clean it with clean microfibers.
Try to go easy on the cleaning chemicals when possible. Simple green should work fine on most of the exterior. Magic erasers can be good for stubborn or stained control panels, side art or general trouble spots, but be warned they do tend to take some of the paint off especially on old art. Novus 2 is a fantastic polisher for just about anything plastic, can work on rusted metal too if you want to tumble some parts. Goo gone (NOT goof off!) is great for removing old adhesives if you need to replace a CP or side art and take off some old glue underneath. Any glass cleaner is fine for the monitor (CRT!) screens, use simple green or a light cleaner on the plexiglass bezels or around art on the underside of a glass marquee. If you have some stained or smelly particle board inside your cabinet, white vinegar and a scrubbing brush can take out some of the smell and discoloration.
Those are the main tools I use, I'm sure each collector has their own set of favorites.
Use a high-grit sandpaper and follow it up with a plastic polish like Novus 2.
I did that with mine and you can barely tell.
Others have offered good info, but here's my contribution. Get some of this stuff:
http://www.amazon.com/NOVUS-Plastic-Fine-Scratch-Remover/dp/B002UD0GGS
You won't believe how it will make the wraps and chrome look. I restore drums, and I'm currently on my 5th or 6th bottle of the stuff.
Then take your pictures of the kit in natural light. 14" floor toms are a desirable size, as is red sparkle wrap.
Good luck!
Been looking to detail my car, and while I am still getting my stuff along with trying to find the time to do it.. I've started to come up with a couple of questions.
The windshield has it's fair share of micro pitting and surface knicks (not cracks). And since a magic eraser acts as a very fine sandpaper I was thinking that it could possibly help to smooth out some of the pitting and knicks just to make these spots less noticeable when light hits it at certain angles.
&#x200B;
Currently they are not that faded, but id like to keep them up before they get to that point.
&#x200B;
I have microfiber towels for cleaning and buffing but not sure what type of applicator pads to use.
&#x200B;
Also, any recommendations on a good / reliable, but repetitively inexpensive shopvac?
Not looking for one with a bag or anything, just something for cleaning out the interior as those dam gas station vacuums are not worth 2$ for 4 minutes when you cant even get under the seats..
&#x200B;
Thank you for any and all feedback!
Am I on the right track? I am currently looking for all the products I need to completely detail my car. I know there is no way I could purchase all of these at once, so I am planning on purchasing the major ones first and adding the others over time. I have spent almost two weeks researching on everything I need to do. There is so much information and so many opinions that it is hard to find a definitive answer on what I need.
> Wheel
Wheel soap:
Wheel cleaner:
Tire dressing:
Wheel wax:
> Paint
Paint soap:
Paint soap addition:
Leaf blower:
Clay bar:
Dual action polisher:
Backing plate:
Pad:
Compound:
Polish:
Sealant/wax:
> Interior
Carpet cleaner:
Dashboard cleaner:
Leather cleaner:
Leather conditioner:
Glass cleaner:
There are a bunch of other tools not listed here, but the ones listed above are the areas I am most concerned about.
> Other Concerns
I am still anxious about spraying water in my engine bay, so I decided to use a spray bottle with soap and water and a microfiber towel to wipe down the engine bay while it is still decently clean. Can I use diluted Meguiar's D143 or will I have to purchase Meguiar's D101 instead? Can the Optimum Tire Gel be used on the black plastics of the engine bay, as well as the other black trims of my car?
I want to protect my interior, in addition to cleaning it. I am very confused on what product I need to use to protect my dashboard from the sun. The same goes for the leather seats, where the creases are forming. I have been using a conditioner (although I am unsure of the exact name) to slow down the crease formation. Should I use the same product for both the dashboard and leather seats (with Lexol Conditioner on top of that)? I have heard of Leatherique Leather Rejuvenator/Prestine Clean, but I am unsure of when I should use that.
Honda Pro Polish
.
https://www.amazon.com/Pro-Honda-Spray-Cleaner-Polish/dp/B004FSEJZA
Sorry, linked the wrong one. A little goes a long way - I ride year round and only go through 2 of these full size cans:
https://www.amazon.com/dp/B004FSEJZA/
Try this stuff https://www.amazon.com/HONDA-08732-SCP00-Spray-Cleaner-Polish/dp/B004FSEJZA
My mechanic uses it to clean everything off of everything.
You can take paint transfer off your car with some polish and an applicator pad:
Polish: https://www.amazon.com/Meguiars-G19220-Ultimate-Polish-fluid_ounces/dp/B004HCOE8Q/ref=sr_1_3?keywords=meguiars%2Bpolish&qid=1556888366&s=gateway&sr=8-3&th=1
Applicator: https://www.amazon.com/Viking-Car-Care-Microfiber-Applicator/dp/B001GJ9JV0/ref=sr_1_3?crid=TF14W8WDIISK&keywords=polish%2Bapplicator&qid=1556888486&s=gateway&sprefix=polish%2Bappl%2Caps%2C131&sr=8-3&th=1
I've used this method before, works great. Just remember to clean the area before and after, and consider adding some wax after.
Here is the desktop version of your link
Not sure how "safe" it is, but when I polished the chrome on my old set I used this stuff and it seemed to do the job pretty well.
Ive used this with decent success on a display sword.
You can also try Flitz does wonder on shallow marks. Cleaned up the top of a used hybrid I bought.
SECTION | CONTENT
:--|:--
Title | Mirror Polish Your Spinner: Level 2
Description | Today we try our hand a little more involved spinner polishing. We aren't just polishing flat surfaces y'all! Want to get in on the action? Quick links down below. Assorted set of Sandpaper: https://www.amazon.com/dp/B01LZVWBT0/ref=cm_sw_r_cp_tai_pbTlzb65TH4NK Higher grit sandpaper: https://www.amazon.com/dp/B013W44ESY/ref=cm_sw_r_cp_tai_vcTlzbJ5S0QN3 Flitz Metal Polish: https://www.amazon.com/dp/B00MUG95UI/ref=cm_sw_r_cp_tai_yGkpzbNPZ3GRY
Length | 0:11:58
****
^(I am a bot, this is an auto-generated reply | )^Info ^| ^Feedback ^| ^(Reply STOP to opt out permanently)
Flitz polish
Flitz BP 03511 Metal, Plastic and Fiberglass Polish with Paint Restorer, 1.76-Ounce, Small https://www.amazon.com/dp/B00MUG95UI/ref=cm_sw_r_cp_api_i_DJEdBbTT9ZPF3
Use a standard AR-15 cleaning rod and load up some barrel swabs (or just cut up a t-shirt) with it and just run it back and forth until desired smoothness is reached. I use flitz on my real bolt actions to polish the bolt/receiver so they cycle smoothly.
I had tried polishing off the first few scratches off my FR 645 using a polishing cloth (I had tried with this one: https://www.amazon.de/gp/product/B0128B5JZ4/)
While the cloth works amazingly well, the scratches were too deep to be completely removed. That said, with time I just got used to seeing them.
http://www.amazon.com/Mothers-05101-Mag-Aluminum-Polish/dp/B0009H519Y?ie=UTF8&amp;psc=1&amp;redirect=true&amp;ref_=oh_aui_detailpage_o02_s00
Thank me later.
I've always used this stuff
http://www.amazon.com/Eagle-One-1035605-Nevr-Dull-Wadding/dp/tags-on-product/B000CNBI1A
to clean and polish my CPUs and heatsinks. You get the same results, and not quite as risky as sandpaper. You may want to try it out next time.
Do Not Use Scotchbrite pads or sandpaper as a poster below suggested, you want to be as gentle as you can be. Use Flitz a very gentle polish. use it sparingly!
http://www.amazon.com/Flitz-BU-03515-Plastic-Fiberglass/dp/B001447VB2/ref=sr_1_1?ie=UTF8&amp;qid=1416656541&amp;sr=8-1&amp;keywords=flitz+metal+polish+tube
Perhaps the wax you're using isn't strong enough to protect against the hard water etching. If you're using a carnauba wax, perhaps try switching to a poly wax, like Meguiar's Ultimate Wax. It has a tackier feel to it when it's cured (not slick) so I imagine it forms a thicker, stronger layer of protection over the car.
To fix lots of etching, I recommend getting a DA polisher, porter cable DA is good, here's a whole kit for under $200,: http://www.autogeek.net/poca74pofcop.html?productid=poca74pofcop&amp;channelid=FROOG&amp;utm_source=CSEs&amp;utm_medium=GoogleProductSearch&amp;utm_campaign=CSE&amp;gclid=CJ_twp2IncACFSsV7AodMSwAAA
though I use Meguiar's microfiber DA correction system on mine, a little more expensive but better.
You can try a number of products to "clean" etching by hand. I'd prefer a cleaner polish like Meguiar's Ultimate Compound, a couple meguiar's foam pads, and a quality microfiber. And follow up with an oil-heavy pure polish like Meguiar's Ultimate Polish
Another tip is to avoid letting water dry over your car. If you have a brief shower and your car gets wet with lots of water beads, drive the car around the block, wipe it down with a huge soft microfiber, or use an electric leaf blower to blow the water off. Or get a Metropolitan Master Blaster air dryer https://www.youtube.com/watch?v=dfGSLSTaOB4