(Part 2) Best building supplies according to redditors
We found 4,658 Reddit comments discussing the best building supplies. We ranked the 1,869 resulting products by number of redditors who mentioned them. Here are the products ranked 21-40. You can also go back to the previous section.


I'm glad that video helped you decide to do sound treatment, but frankly it's a terrible video. He is well intentioned and seems like he is doing some decent things but is woefully off base.
He confuses sound isolation from sound absorption (acoustic treatment). They work totally differently, and his microphone tests are, sadly, a farce. Stick a thin piece of sheetrock in between the sound source and the microphone, and it will block sound better than anything in his test. But does that make sheetrock good for sound absorption? Heck no.
The reasons the towels work better than foam in his test is because they do a better job blocking sound. But what works best for sound absorption used in acoustic room treatments? His tests, and yours show that towels DO work to absorb sound and reduce reverb (echo). But are they the best materials? No.
The standard DIY materials for sound absorption are Owens Corning 703or 705, or Roxul/Rockswool rockboard, in various thickness, though 2" is probably the most common. These have been tested along with other cost effective materials to be the primary goto items for sound absorption. Also sound diffusion panels are often very useful, especially to the rear of the listening position.
Sheetrock on the other hand, because of its density, is great for blocking sound waves. If for example, you were trying to "soundproof" a room - heavy sheetrock is a staple of cost-effective approaches, combined with isolation clips and damping. The mass helps to stop stubborn low frequency waves.
The towels will indeed work as you've found out, and can be done pretty cheaply, especially if you have enough on hand. But don't go thinking that what this guy's video showed was reasonable.
/sorry, rant mode off/
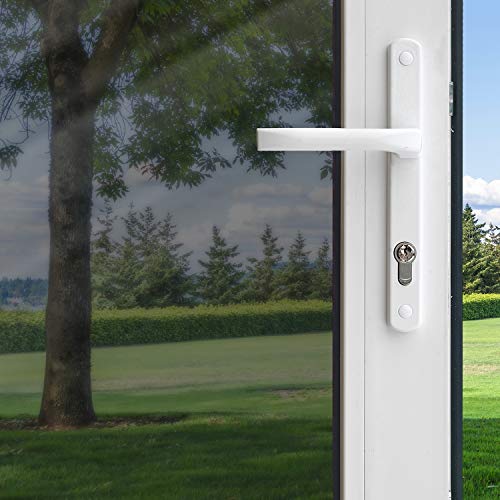
If you have big windows, buy some window film. I bought this and applied it to all my windows/sliding doors this spring. The downside is that it's a somewhat mirror finish.
Last year during the July when it was over 100 like every day, my electricity bill was about $200. This year, after applying that, the highest my bill ever got was $124. Also, make sure your AC is running efficiently. I had a tune up, and the only thing that was wrong was the fins in my AC unit were a little bit clogged. Blew it out with a hose (from the inside towards the outside. You'll need to take off the fan to do this).
Or a thermostat lock box for $15.99
Filter: https://www.amazon.com/dp/B005KMETHS/ref=cm_sw_r_cp_apa_N39fybPBJK5ZG
Exhaust Fan: https://www.amazon.com/dp/B005KMOJPK/ref=cm_sw_r_cp_apa_z49fyb4P1CRJ1
Intake Fans: https://www.amazon.com/dp/B009OXMZ3Y/ref=cm_sw_r_cp_apa_j59fybSC6H4BM
LED:https://www.amazon.com/dp/B00RWYCRB2/ref=cm_sw_r_cp_apa_f69fyb5RCSWEH
Bucket Adapter for PC Fans:
https://www.etsy.com/shop/HighTech3D?ref=pr_shop_more
The rest were miscellaneous things I picked up at home depot. The links above are the main parts.
Absolutely, here we go:
Essential Hardware
$80 Clones - $20 from dispensary.
$325 Lights: Horticulture Lighting Group 260 QB LED Kit
$70 2' x 4' x 5' Mylar tent
$90 4" Inline duct fan and Carbon Filter
$10 - Ducting/Clamps from ACE
$21 Osculating Fan
Already on hand: Box Fan
$25 [Humidifier] (https://www.walmart.com/ip/Sunbeam-Warm-Mist-Humidifier-SWM6000-BWM/32664862)
$45Dehumidifier$184" inline duct booster fan$13 Ph Meter
$12 TDS PPM meter
$9 Soil Moisture, Light, Ph meter - Does it's job
$9 Ph Control Kit
$14 Ph Calibration solution
$6 Spray Bottles (Did not use these much, only very early during transplanting.)
$7 for 30ctStarter grow bags$18 Hygrometer for Temp/Humidity
$8 for 6ct 5 gal Smart Pot knockoff
$40 - Soil: Two bags of Happy Frog. Ocean forest was sitting around.
Nutrients: $165
$13 - Scrog net: for something like 50-100ft of plastic garden fence from Home Depot. Using a lot of it for a garden.
$15 - Miscelaneous: Eyedroppers, duct tape, zip ties, and odds and ends: Call it $15.
So to total that all out we're looking just over 1000 that I spent, could have kept it under $950 if I had not purchased the small duct fan or dehumidifier. Also: Soil and nutrients for $205. Could work that down to under $150 by dropping a couple unnecessary yet desirable nutrients.
Sorry for the formatting! I'm going to do a big post write up and this is a great place to start at least. Thanks for the motivation.
Okay, as a 9mm reloader living in an apartment, here's my take.
First off, for everyone saying it won't save you much money: this is flat fucking wrong if you can get brass for free. I do this at the local outdoor range where people just leave their brass, especially after IDPA matches. The membership there is $100/year, so I guess that's my brass cost, but I was a member there before I started reloading and it was worth it.
Buying components in bulk, my ammo costs for 9mm with the particular kind of bullet I like (124gr flat point), powder I like (Clays), and whatever primers were cheap (Winchester in this case), is 11.3c/round. Even buying remanufactured Ultramax or Freedom or whatever you can't touch that price.
For apartment reloading, I use a Lee Classic Turret bolted to a 2x10 that I c-clamp to a tactical TV tray. When it's not set up, the press just sits on a shelf in my closet and it takes a single minute to pull out the "workbench", set it up, clamp the press to it and get cracking. And after loading a thousand or two rounds on it, I can crank out 100 rounds in an hour or so once I get up and going, so it's plenty fast. It's all the one-round-at-a-time focus of a single stage, with the speed and mechanical efficiency of a progressive. I love it.
I bought most of my gear secondhand, so I only have about $300 invested, but it'd probably be more like $400 new for the press, dies, powder measure (as a part of the press), bullet puller, calipers, and tumbler.
As for good load, I'm currently running a 124 grain whatever (currently roundnose, but I'm switching back to flatpoints after this thousand because they punch cleaner holes for competition) over 3.1grains of Clays. It's a pretty sweet round (less snappy than the Titegroup loads I was using) and the Clays powder is loose enough that it'd obviously overflow the case if I tried to doublecharge. I haven't chrono'ed it yet, but it's definitely accurate and feels like it should make 125 powerfactor for IDPA.
I can't believe it took me so long to start reloading, and the earlier you do it the more money you'll save in the long run. You can do it, I promise. PM me if you have any other questions; I'll be glad to help.
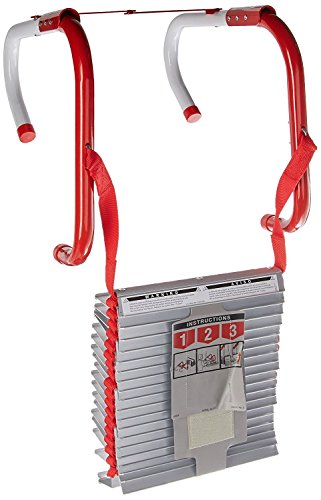
https://www.amazon.com/Baby-Rescue-Emergency-Evacuation-Device/dp/B005DM9AEW?th=1
https://www.amazon.com/Kidde-468094-Three-Story-Anti-Slip-25-Foot/dp/B000H5S96A/ref=pd_bxgy_75_img_2?_encoding=UTF8&pd_rd_i=B000H5S96A&pd_rd_r=39a46de0-dcc7-11e8-be33-093c3431dd59&pd_rd_w=SCcHQ&pd_rd_wg=Us1aj&pf_rd_i=desktop-dp-sims&pf_rd_m=ATVPDKIKX0DER&pf_rd_p=6725dbd6-9917-451d-beba-16af7874e407&pf_rd_r=Q71PT20Q8YZCFQRMA03J&pf_rd_s=desktop-dp-sims&pf_rd_t=40701&psc=1&refRID=Q71PT20Q8YZCFQRMA03J
Lights: I have the mars hydro 300 (132 true watts) as my main light on the top, and plan to add a couple strips for side lighting in the near future.
Ventilation: As you may see from the pictures, I have the heat exhaust on the top side. The exhaust is being pulled into a secondary tote. In the secondary tote I have a large carbon filter attached to a 6 inch inline fan with variable speed control. This kit. Definitely overkill but I like the room for expansion.
I plan to start growing in a 3 gallon smart pot knock off, with some ak-48 autoflower seeds.
I have really enjoyed watching this community grow through the years.
Thank you everyone for your wonderful contributions. Guys like /u/Ekrof, SAG, /u/Halfmpty, /u/exactly25smeckles, and the rest have really inspired me to try this for myself.
I would like to add some filtration to my passive intake, any suggestions?
Sure:
$53.00 will fix that!
How terrible, I was just in one of those units helping a customer on Monday. Every time I've ever lived in dense housing I always had that morbid fear of a fire in the back of my head.
Sounds like the fire alarms were malfunctioning. I hope people are reminded by this tragedy to take the time to make sure all their smoke alarms and carbon monoxide detectors are working with fresh batteries. In my house we change the batteries every year no matter what and practice fire safety drills including how to use window ladders.
Edit - You should also have renters insurance, when I was renting you could get a years coverage for all your stuff for less than 10 dollars a month.
Be prepared and safe.
Double Edit - Got a pm asking about window ladders. I'm talking about these things.
Honestly, you are much better off grabbing everything from amazon and save over 500 dollars. I bought these before:
Tent (200 with taxes and shipping): http://www.amazon.com/gp/product/B00H9P51LW/ref=oh_aui_detailpage_o00_s00?ie=UTF8&psc=1
Lights (300 with taxes and shipping):
http://www.amazon.com/Apollo-Horticulture-GLK1000LS24-Digital-Dimmable/dp/B005ECZVXK/ref=sr_1_1?s=lawn-garden&ie=UTF8&qid=1407976749&sr=1-1&keywords=1000+watt+grow+light+system
And then you have money for two fans:
http://www.amazon.com/LEDwholesalers-GYO2402-6-Inch-Hydroponic-Booster/dp/B003YFADW8/ref=sr_1_18?s=lawn-garden&ie=UTF8&qid=1407976749&sr=1-18&keywords=1000+watt+grow+light+system
And a carbon filter (this one comes with a fan, so you only need another fan to bring air inside the tent:
http://www.amazon.com/VenTech-IF6CF620-Inline-Virgin-Charcoal/dp/B0052ZPMAG/ref=sr_1_10?s=lawn-garden&ie=UTF8&qid=1407976749&sr=1-10&keywords=1000+watt+grow+light+system
I never bought a hydroponics system before, but amazon search yields some good systems for less than 700:
http://www.amazon.com/s/ref=nb_sb_ss_i_0_10?url=search-alias%3Daps&field-keywords=ebb%20hydroponic&sprefix=ebb+hydrop%2Caps%2C227&rh=i%3Aaps%2Ck%3Aebb%20hydroponic
If you buy the system you describe, you might still need a tent or at least a carbon filter. I think you end up saving yourself money and you can get exactly what you need and add extra lights, etc as you move forward.
Eh, I'll probably catch flak for this but I hate pie cuts. I think it makes charge piping look like dryer duct, and I'd much rather go polished or powdercoated.
/u/tainttrauma, read his post again. He has electric baseboards. Those have line voltage thermostats. You've recommended low voltage units.
Yea, that's not gonna' work for him.
There aren't a whole lot of options for smart line voltage units. Especially if the baseboards have a fan incorporated into them.
This one MIGHT work. Need to see if it is compatible with O.P.'s units:
https://www.amazon.com/STZW402WB-Thermostat-Electric-Baseboards-Convectors/dp/B01BYL1OAS
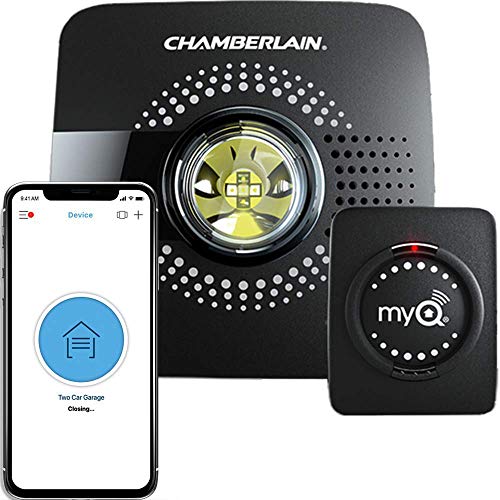
MyQ Smart Garage Door Opener Chamberlain MYQ-G0301 - Wireless & Wi-Fi enabled Garage Hub with Smartphone Control https://www.amazon.com/dp/B075H7Z5L8/ref=cm_sw_r_cp_apa_i_aSe2DbJSKHWY7
It reminds me of a thermostat guard. I can't quite see how this would function as one, but it could be something similar. It has just enough access for some functions, but blocks others maybe.
https://www.amazon.com/dp/B000BPGP6M
You may want to give these a try.
https://www.amazon.com/Kidde-468094-Three-Story-Anti-Slip-25-Foot/dp/B000H5S96A/ref=sr_1_2?ie=UTF8&qid=1483132967&sr=8-2&keywords=3+story+fire+escape+ladder
I purchased two (one to try myself - they are single use, one to stage in my second story where my children sleep) and it worked flawlessly. It may seem a bit expensive but for the $35USD that I paid for my 2-story version was totally worth being able to get to safety in about 15 seconds (and the look I got from my neighbor who wasn't expecting to see me traversing down the side of my house was a bonus as well).
Hi, I had a similar problem. Everything out there seemed ridiculously expensive, so I built my own solution. Essentially, it's a nice pictureframe wall-art looking thing that has soundproofing baffles (Auralex Studiofoam) on it. Very cheap but very effective - our bedroom is like a tomb when these things are hung and bonus: they're easy to hang and remove as needed.
Update: I would likely use these boards now instead of the Auralex, after learning a bit about soundproofing materials.
Hope this helps. :)
I second this. This is what I use to filter my 3x3 tent.
All-Filters CP-6005 Cut to Fit Carbon Pad for Air Purifiers https://www.amazon.com/dp/B000U204W2/ref=cm_sw_r_cp_apa_ypR-Bb4QTMBKY
VIVOSUN 4 inch Inline Duct Booster Fan 100 CFM, Low Noise & Extra Long 5.5' Grounded Power Cord https://www.amazon.com/dp/B01C82SYZ0/ref=cm_sw_r_cp_apa_uqR-Bb4D3ADEY
And just used a hose clamp to clamp a piece of the carbon filter over the intake of the fan. So it sucks air from the tent outside. Keeps my tent at perfect temps and scrubs smell.
Here you go, friend
Buy something like this
https://www.amazon.com/gp/aw/d/B000H5S96A/ref=mp_s_a_1_2?ie=UTF8&qid=1497475010&sr=8-2&pi=AC_SX236_SY340_FMwebp_QL65&keywords=4%2Bstory%2Bfire%2Bescape%2Bladder&dpPl=1&dpID=51Odcg9LC0L&ref=plSrch&th=1&psc=1
Here’s links for uk amazon, will give you an idea of what to search if you’re based elsewhere.
Link for the telescopic poles: https://www.amazon.co.uk/dp/B000LFVE68?ref=ppx_pop_mob_ap_share
Link for the clamp mount: CamKix Clamp Mount compatible... https://www.amazon.co.uk/dp/B00NIBQXGS?ref=ppx_pop_mob_ap_share
The clamp mounts aren’t the best tbh, but they work. They were only £10 so may be worth spending a bit more for some better ones.
I used these poles and these clamps. They are perfect and I haven't had any problems with them at all :)
VenTech VT IF6+CF6-B Inline Exhaust Blower Fan with Carbon Filter and Variable Speed Controller, 440 CFM, 6" https://www.amazon.com/dp/B0051HDECS/ref=cm_sw_r_cp_apa_.cj4xb40DD9M8
I have electric baseboard heat in my basement.
This is what I use to control it.
It works great.
Beat's the hell out of my old setup of a transformer, relay, and standard stat.
Pick a controller of your choice to control them all. Home Assistant on a Pi would be the cheapest local solution to get going.
Honestly I thought the same thing, but it was a lot easier than I thought. Without having to wire anything, it was all pretty common handiwork with a drill or a Dremel saw. It's a GardenMate 8 Gal grow bag
Link: https://www.amazon.com/gp/product/B073NJYCFJ/ref=oh_aui_detailpage_o00_s01?ie=UTF8&psc=1
I used an Apollo Horticulture GL60LED Full Spectrum 180W LED Grow Light
Link: https://www.amazon.com/gp/product/B00FGFW0XO/ref=oh_aui_detailpage_o01_s02?ie=UTF8&psc=1
Fans:
https://www.amazon.com/gp/product/B01C82SYZ0/ref=oh_aui_detailpage_o01_s03?ie=UTF8&psc=1
> De fleste godkendte du køber i forretninger er fine nok,
Enig. Dem man kan købe i IKEA er også ganske fine og holder batteri fint.
> Hvis man er ekstra paranoia, så har man et reb/rebstige liggende under sengen, til at binde rundt om radiatoren så man i det mindste kan komme ud, når der er ild i hele opgangen fordi din alkoholiker underbo er faldet i søvn på sofaen med en tændt smøg i hånden.
Jeg har selv sådan en fætter her liggende i soveværelset, da soveværelset ikke er i stueetagen.
You probably don't want blackout curtains, that will absorb all the incident sun light and radiate heat indoors. You want something reflective to reflect the incoming sunlight back out the window. Something like this
http://www.amazon.com/gp/product/B000KKM8EG/ref=pd_lpo_sbs_dp_ss_1?pf_rd_p=1944687622&pf_rd_s=lpo-top-stripe-1&pf_rd_t=201&pf_rd_i=B00CST53LW&pf_rd_m=ATVPDKIKX0DER&pf_rd_r=0BFHK527AAVRR79DTKMD
or a simple white solar shade could be helpful.
The purpose of those lines is to create airflow to prevent carbon monoxide poisoning. They function passively, so you should uncap them, for safety sake (or at least make sure a COO monitor is installed... fuck, I don't have one installed....). Notice how one inlet is (or was, or should be) at eye level, and the other is near the floor? That is to make use of when heat rises, the air near the inlet of one will rise out, and the cold air near the bottom of the other will sink, starting a circulating flow. Yes, this chills the basement, but, if it's unfinished that's OK.
a 100k but furnace may use rpoportionatly more air for combustion, but its in a controled space and a very efficient combustion, while the 54K burner will disperse the COO along the heat current it creates meaning you need to remove much much more air to gather all the gasses you should, than with just a sealed vented furnace. Also, there is a difference between inline duct booster fans, which aid in airflow, but lack dynamic pressure, and turbine fans which are both consistant rate and high dynaic pressure (meaning it would be able to pull air from a further distance with less drop in CFM)
These http://www.amazon.com/LEDwholesalers-GYO2402-6-Inch-Hydroponic-Booster/dp/B003YFADW8 won't work,
you'll need this http://www.amazon.com/Active-Air-720-Inline-8-Inch/dp/B002JQ4K1I
or for a quieter operation with better dynamic pressure, this http://www.amazon.com/gp/product/B001I4DHJI/ref=pd_lpo_sbs_dp_ss_2?pf_rd_p=1944687782&pf_rd_s=lpo-top-stripe-1&pf_rd_t=201&pf_rd_i=B004C2IWIE&pf_rd_m=ATVPDKIKX0DER&pf_rd_r=1V2RCEEAMG31CYMSKC7B
I am not trying to be alarmist, but I know the math off the top of my head, because I've worked with it SOOOoo many times, and as they are for safety, I urge you to heed my warning.
Everything looks good besides the ventilation. That fan lacks the static pressure needed to pull air through a carbon filter. You need something more like this, though I recommend a quality fan if affordable. Also, you want to pull air from the top of the tent. If you pull from the bottom, you are going to have hot, stagnant air above the filter.
You'll probably be alright, but a dimmable power supply is helpful, especially in a small space.
Ah, a question I can help with as it's right up my alley (audio engineer).
Simply put, sound bounces around like balls on a pool table, loves hard surfaces and tends to pile up in corners so your best angle of attack is to soften the rebound. First get some carpeting going on, the thicker the better. It doesn't have to be wall to wall but it needs to cover at least 80% of the floor. That will eliminate a lot of the vertical bouncing.
Next go get some of this stuff. Build some wooden frames for it and cover them in burlap, hang them on the wall. You shouldn't need more than one box for a single car garage, two for a double. They don't have to be butted up edge to edge, you can spread them out. Keep putting them up till the reverb goes away.
If you do that and it still sounds boomy, you probably have a problem with low frequencies building up in the corners. Google up corner traps and build a couple. It's a little more involved but basically the same thing as the panels. That should get you going in the right direction!
Container: Rubbermaid 20 gal Brute Bin
Lights: Kingbrite 60 W Quantum Board (if you want dimmable, ask for a dimmable driver like the HLG-60H-36B and a potentiometer)
Screws: You'll need lots of nuts, long screws, washers, and spacers to mount the board and PSU. First put the board on the lid and mark where to drill, then drill holes. Then put the power supply on the outside in the middle, mark and drill those hoses. Mount power supply and then flip lid over and mount the light, using long screws and nuts to hold it in place (the light should NOT touch the lid but be 1-2 inches from it, held in place by nuts). Drill small hole for power line, then connect. Finally, drill 3 inch hole for exhaust beside the light. You'll also need long screws with nuts to keep the fan and shrouds together. Be sure to use spaces anywhere the screw heads or nuts are touching the lid or the lights. For light spacers, I used rubber spaces between the nuts.
Cooling shrouds: 120mm Fan Duct Cooling Shroud to 4 Inch Vent Hose
90 degree 4 inch elbow for exhaust: 4 in. 90° Round Adjustable Elbow
4" to 3" reducer for exhaust: 4 in. to 3 in. Round Reducer
2x regular JB Weld to mount the reducer and 3 inch "trunk"
Fan: Delta AFB1212SHE-PWM 120mm x 38mm 4pin PWM+Tac Sensor Extreme Hi-speed 3700 RPM 151 CFM
Fan controller: Noctua NA-FC1 4-pin PWM Fan Controller
Fan power supply: LE Power Adapter, UL Listed, 3A, 120V AC to 12V DC Transformer, 36W Power Supply
Fan power supply adapter: CRJ Female DC Power Supply Plug to 12V Molex Power Adapter Cable
Fan molex adapter: Coolerguys Mini 3-4 pin Fan Adapter (Single)
2x ABS fan elbow (for "snout" intake): 3 in. ABS DWV 90-Degree Hub x Hub Long-Turn Elbow
Air filter for intake: 16.25 in. x 12.5 in. x 0.19 in. - 16.3 in. x .2 in. x 12.5 in. - CF300 Carbon Filter
Air filter (not pictured): VIVOSUN 4 Inch Air Carbon Filter Odor Control with Australia Virgin Charcoal for Inline Fan
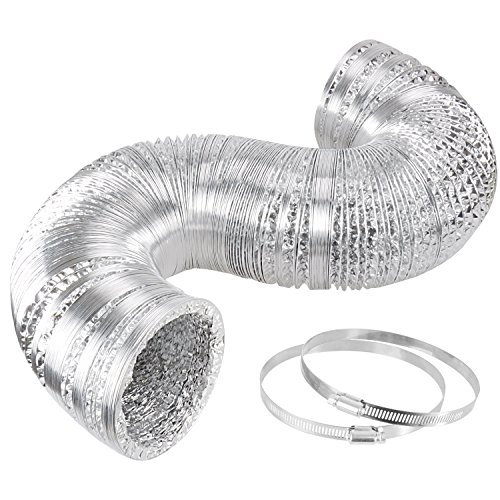
Fan hose (not pictured): iPower GLDUCT4X8C 4 inch 8 feet Non-Insulated Flex Air Aluminum Foil
Watering device (not pictured): Janolia Automatic Irrigation Kit, Self Watering System, with Electronic Water Timer
Camera (not pictured): Wyze Cam 1080p HD Indoor Wireless Smart Home Camera with Night Vision (glue steel piece for magnetic base onto the upper side of the bin)
Notes: This design is very safe because it keeps all electronic components high in the bin. At the same time, using a battery powered watering system keeps you from requiring to ever open it. The lamp runs very cool. The PWM fan controller works well and keeping the air moving without using a lot of power (do NOT buy a cheap voltage modulator, I did first and it doesn't work nearly as well as the PWM controller). The Wyze cam is super cheap and lets you keep an eye on everything or make timelapses. Have fun growing your tomatoes!
The best inline is one you can buy locally, and has a 3+ year walk-in with broken fan, walk-out with new fan, warranty. Grow/Hydro stores should have this. Also industrial supply. If your inline breaks, you can't wait 3 days for a new one in the mail. Much less sending it away for warranty repair.
If you are in a situation where you need to mail order, Active Air has been solid for me. Three on timers and one on 24/7 duty, no failures in 2+ years. Don't buy anything that looks like this.
I just ordered a couple of these.
Stelpro Z-Wave Plus KI STZW402WB+ Thermostat (White) for Electric Baseboards and Convectors
https://www.amazon.com/dp/B01BYL1OAS/ref=cm_sw_r_cp_api_yap9BbV3PDQET
Great white and Growers Recharge seem to be more popular and well thought of.
Here is a fan with speed controller built into it
Here is my copy paste daily response to people planning on using shit tier LEDs.
> TL;DR Don't waste your cash on shit tier LEDs - buy HPS/MH/CMH if you are short on money.
> LEDs are not better in any measurable way then HID until you get to at least mid tier stuff.
> DE HPS / CMH are close to comparable to COBs. That said I believe the results of lab testing that I've seen show more usable light from Vero / Cree COBs ( and possible Citizen , but I haven't seen as much data on them). The number that you are looking for is the ppfd. This is the photosynthetic photon flux density. It is the measurement of PAR at the canopy and is measured in micromoles per second per meter squared.
> IIRC really good HIDs like Gavita DE HPS or CMH are around 1.7 - 1.8 micromoles per joule and COBs are 1.8-2.2, and quantum board type setups are 2.5+. Shit tier LEDs from amazon (mars hydro , vivaspectra) are like 1.0 or less.
> I'm not saying you can't grow bud with shit tier LEDs I'm saying you will grow more and better bud using HPS of the same $ amount vs shit tier LEDs.
In your example your spending $140 on 10 year old LED tech and getting 264W at the wall which doesn't even come close to the 40 - 50W per SF rule most people use. This $120 400W HPS will crush those Mars lights in yield and quality. This is why I say don't use LEDs unless your ready to spread that wallet wide.
Things to think about later are drying racks, jars, and trimming scissors.
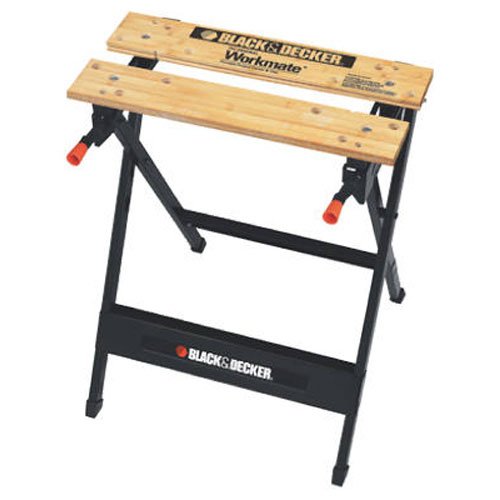
This is my apartment work bench. Plus it folds up and I can stow it in my closet. Doesn't take up much space.
Gorilla Racks (or equivalent) can be assembled into a workbench; if you purchase a couple of them, you can even get some extra flexibility with assembly and layout. Be sure to the kind with multiple holes, so you can vary the shelving height. Also buy some nuts and bolts to attach units side-by-side. One other thing you'll want to buy is something better for the top surface; use the shelving wood pieces that come with the shelves for the "base" (to align it with the shelving edges), but drill some holes in it and drill/glue a slightly larger piece of 3/4" plywood or something on top. Then polyurethane it to finish it up (alternatively, put a piece of thin steel or aluminum over the top and bend the edges down and screw or glue in place).
Another option if space is tight, and your needs are fairly "light duty" - get one of these:
https://www.amazon.com/WM125-Workmate-350-Pound-Capacity-Portable/dp/B000077CQ0/
Then get a piece of 4' x 4' 3/4" plywood. Open the jaws of the bench up to their widest point and measure it; subtract a 1/2" or so. Cut a piece of plywood out to this width, then center and attach it to the remainder of the plywood with screws and glue. Once that is dry, clamp it into the workbench, then on each "jaw" draw a couple of the "circles" on each plywood side. Then find the center of those circles, and drill thru with a 1/4" drill to the other side. Then on the top side, use a spade bit (say 1" or slightly more) to "widen" up the hole, but only go thru about 1/3 to 1/2 of the way into the wood. Do this for all four holes. Polyurethane the top to finish it.
Get some bolts - flat hex head, or pan-head with phillips or similar - long enough to go thru the top you made, and thru the hole in the bench, plus a bit extra (about an inch); they should be about 1 3/4 to 2" long - 1/4 x 20 - get four of those, four washer to fit into the countersunk holes, four larger fender washers, and four 1/4 x 20 wingnuts.
Chuck the top into the workbench; tighten it up. Drop thru the holes a bolt with a washer, then on the other side, back each up with a fender washer and snug it down with a wingnut. And there you go.
This kind of bench is light duty (or you can get one of the "heavier duty" Workmates if your budget allows for it), but very versatile. For instance, you could make a variety of "tops" to mount tools on that can be chucked into place (or make a "universal" top for several smaller tools) - things like a miter saw, router table, small table saw, scroll saw, grinder, small drill press, etc. You could even potentially make an aluminum top for welding on (welding steel won't stick to the aluminum - or make a steel top if you want). Again, this is only light-duty stuff, but it's portable, lightweight, folds up, etc.
Be sure to pick up additional clamp dogs for the Workmate, and a "repair parts" assortment; these will be handy to keep the main workbench in shape. Also one other tip (kinda OT): If you ever needed to split a piece of transmission hose lengthwise, the Workmate bench has the answer! The jaws have a v-groove, so you can chuck a length of the hose in the groove, then use a box-cutter razor, guided along the edge of the jaw, to cut the tubing down the side in a very straight line. You can probably do this up to about 1" diameter tubing; anything larger would flex too much. I had to do this to custom make some u-bolt "padding" for use on a vehicle roof-rack to protect the cross bars.
If you needed something a bit more heavy duty than the Workmate, Harbor Freight sells a low-cost welding table, that you could make your own custom wood tops to bolt down onto the table (when you weren't welding on it, of course). The table folds up, but it doesn't have any vice-like jaw system, so keep that in mind. It's also much heavier than a Workmate, being made of heavier gauge steel.
Here are things from my wishlist (past and present)
Wera Screwdrivers
https://smile.amazon.com/dp/B0085NTQJK/
Oscillating blade set:
https://smile.amazon.com/dp/B0109SELWA/
Clamp multimeter:
https://smile.amazon.com/dp/B00NWGZ4XC/
Kreg Jig Jr.:
https://smile.amazon.com/dp/B000J43A7W/
Angled Long Nose Pliers:
https://smile.amazon.com/dp/B00N3VSS4S/
Groove Lock Pliers:
https://smile.amazon.com/dp/B000FK1R0W/
11 ft wifi endoscope:
https://smile.amazon.com/dp/B01MYTHWK4/
non contact voltage tester:
https://smile.amazon.com/dp/B001UAHZAM/
claw nail puller:
https://smile.amazon.com/dp/B0015YPJMY/
Workmate portable work bench:
https://smile.amazon.com/dp/B000077CQ0/
Cable snake fish tape:
https://smile.amazon.com/dp/B000BP7WBO/
9 Outlet metal power bar:
https://smile.amazon.com/dp/B00F8ZQY5M/
Spade drill bit set:
https://smile.amazon.com/dp/B00099E7WE/
36" bubble level:
https://smile.amazon.com/dp/B000UKMWMO/
https://www.amazon.com/Honeywell-CG511A1000-Thermostat-Prevent-Tampering/dp/B000BPGP6M
Do it
Okay I've been sufficiently frightened. Over here in the UK the news has been nothing but the giant tower fire for days now...
I've been motivated to buy one of these things. I live on the third floor myself but I figure I can climb down two and jump one. Fuck it, I'll hopefully never ever use it and it will sit in a cupboard being useless but I know I have it.
They're cheaper than I expected, too.
When I was a student, I used to live in a downstairs room that was always freezing (unlike the rest of the house). I ended up putting some temporary window sheets up to fake double-glazing (http://www.amazon.com/Gila-LES361-Control-Residential-Platinum/dp/B000KKM8EG Like that, your local DIY store would likely have some and I've seen people DIY it with household stuff like clingfilm).
The other thing to do is make sure all the drafts are sealed up - fill in any gaps around the window frame with some caulk or similar, and if you can change the curtains, opt for something much heavier (like a velvet or heavy-lined) to act as a draft excluder - I had these ugly red velvet curtains in that house that I basically kept closed all winter.
http://www.selleys.com/home-improvement/living-room-renovation/filling-gaps-and-prevent-draughts/
P.S. There's some cute draft excluders on etsy for along windowsils and bottoms of doors: https://www.etsy.com/listing/218215925/chevron-door-stopper-draft-dodger
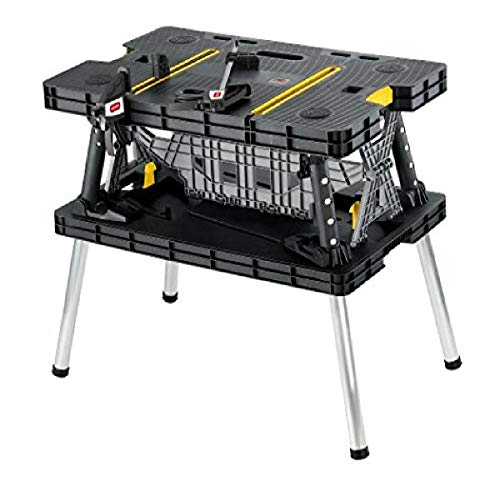
I use mine on a Keter Folding Work Stand. It has not melted or been damaged. The surface area is big enough to set items beside the Blackstone while cooking.
Keter Folding Compact Workbench Sawhorse Work Table with Clamps 1000 lb Capacity https://www.amazon.com/dp/B001CWX26Y/ref=cm_sw_r_cp_apa_i_T0BUCbKF07HG8
http://www.amazon.com/LEDwholesalers-GYO2402-6-Inch-Hydroponic-Booster/dp/B003YFADW8/ref=sr_1_3?ie=UTF8&qid=1368564334&sr=8-3&keywords=blower+fan
With Dryer style ducting works like a champ. I use it for ahem some basement grows.
That's a lot of money for a fan. You could always get a cheaper fan that moves more cfm and simply get a fan silencer. You would still save money at that rate and spend the rest on an enclosed hood or cool tube to help with temperature control.
Overall you're good.
Fan Silencer (out of stock at the moment, but cheaper): http://www.amazon.com/VenTech-VT-FS-6-Muffler-Silencer/dp/B00HWILBSS/ref=sr_1_3?ie=UTF8&qid=1450225496&sr=8-3&keywords=fan+silencer
Fan silencer (more expensive, but in stock): http://www.amazon.com/Phresh-701200-Silencer-4-Inch-12-Inch/dp/B007ZU5YQS/ref=sr_1_6?ie=UTF8&qid=1450225496&sr=8-6&keywords=fan+silencer
Hood Upgrade: http://www.amazon.com/Apollo-Horticulture-GLRLS24-Hydroponic-Reflector/dp/B00BMVK8HG/ref=sr_1_1?ie=UTF8&qid=1450225652&sr=8-1&keywords=air+cooled+hood
Fan and Carbon Scrubber Replacements: http://www.amazon.com/VenTech-VT-IF6-CF6-B-Controller/dp/B0051HDECS/ref=sr_1_1?ie=UTF8&qid=1450225799&sr=8-1&keywords=ventech+vt+if6
If you're going to be flowering in the tent, I would recommend lightproofing it, as well. Use only the ports in your tent for intake and cut some carbon filters to size. http://www.amazon.com/Carbon-Pre-Filter-38002-Activated-Sheets/dp/B00LXIWNT4/ref=sr_1_1?ie=UTF8&qid=1450225982&sr=8-1&keywords=carbon+filter+sheet
Your tent is a little expensive, too. If that's the one you have your heart set on, go for it. As an alternative, I suggest http://www.amazon.com/MILLIARD-Reflective-Hydroponic-Mylar-Window/dp/B00ETBDX14/ref=sr_1_1?ie=UTF8&qid=1450226158&sr=8-1&keywords=milliard+grow+tent
You will want a fan or two of some kind to circulate air inside the tent. 6 Inch clip fans are popular. I use a pair of 4 inch clip fans and a tower fan.
Make sure to look into a DIY Ona Bucket for smells. During flower it will stink up your room when you open the tent. Just turn the Ona bucket on a little before that and you're good. If you're really paranoid about smell, you can also get an inline carbon scrubber. They're pretty expensive and probably not necessary unless you pick some especially fragrant strains. http://www.amazon.com/Phresh-500-Inline-Filter-6-Inch/dp/B00CJIMUH2/ref=sr_1_1?ie=UTF8&qid=1450226390&sr=8-1&keywords=phresh+inline
That's my $.02, anyway. There are much more experienced growers here.
You should only need an exhaust. I would recommend a 6" centrifugal inline fan.
Here is the combo I used when starting out
And here is what I am using now
So this combo should work? It's 6 inches duct at 440cfm.
I spent some more time today reading up on fans on some other forums. I've ruled out "booster fans" completely as it seems the only upside to those is the price. Noise and power seem to be the big trade off.
PC fans certainly are low cost and fairly quiet, but they also seem like they'll require a bit more work to get them installed in terms of adapting a square fan to round ducting/grow tent ports. They too seem to be at the low end in terms of power, and though I don't need a carbon scrubber with my current setup, it might be prudent to allow for one if required down the road...
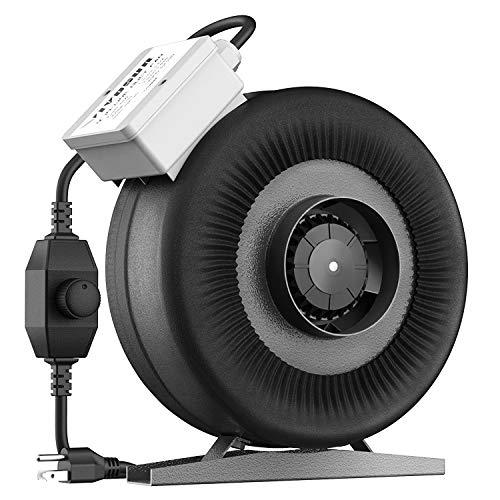
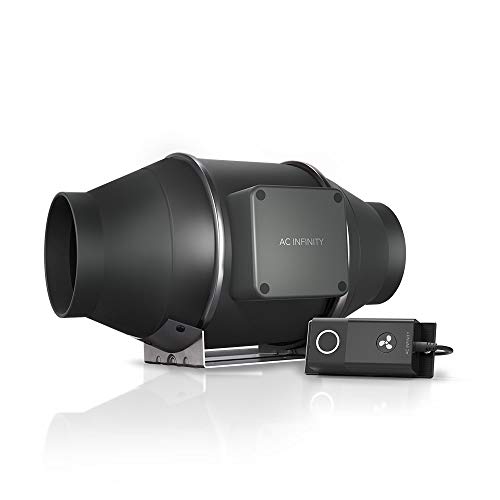
So, now I'm leaning towards a proper centrifugal fan (eg. http://www.amazon.com/gp/aw/d/B005KMOJPK/ref=aw_2nd_sims_5?pi=SS115) along with a speed controller, as it seems they can be relatively quiet when running at lower speeds. The added benefit is that I could potentially cool a 400W HID with this fan if I decided to repurpose this little tent at some point.
Thoughts? Would a similar fan from Sunleaves (at three times the price) be significantly quieter?
Buy https://www.amazon.com/Owens-Corning-703-Fiberglass-Boards/dp/B005V3L834 and wrap them in fleece.
As someone intimately aware alcoholism and bipolar in parents and roommates - don't live with your mom.
Babies suck. Newborns shit at least a dozen times a day, only sleep for like 2-3 hours at a time at best, and cry because it's the only way they can communicate. It sucks. As a stay-at-home dad who raised two of them, I have a theory that all parents eventually abandon dealing with the poop smell, because we've grown so accustomed that we just don't smell it.
My solution to noise, for parents or anyone else in the house, is noise cancelling headphones and soft music. They start at about $30 on Amazon, and between noise-cancelling and listening to soft music through them, you will hardly hear the baby cry. Even regular headphones can do the trick, if they are the bulky around-the-ears type. And if you can pull together a couple hundred bucks, something like these headphones will change your life in more ways than one.
Alternatively, if you are looking to sleep and can't do that with headphones, you could look into soundproofing your room or building a box around the head of your bed. These are what you would use, although you'd definitely want to cover them with a cheap fabric of some kind as fiberglass is not fun to breathe or touch (Walmart is great for that, or you can use old towels/blankets). It's not a solution for everyone, but as someone who built an isolation room for sound recording I can say it works really well.
I know money is hard to come by at that age, and I know these solutions aren't perfect. I'm sorry babies suck.
https://www.amazon.com/Owens-Corning-703-Fiberglass-Boards/dp/B005V3L834
Frame it in some 2x2s and stretch fabric over it. Add a couple and you'll be good.
I do all sorts of audio recommendations on /r/zeos and the only other speakers I recommend cheaper than these are the Dayton B652's which are larger than these but only $50. You can also grab the Lepai 2020 amp (which is also larger) for only $20 and since it is SO cheap and has smaller capacitors most normal battery packs will power it. Like the this one
So that is under $100 for all the main components you just have to work out the cutting board bits to accommodate it all.
https://www.amazon.com/HitLights-Rechargeable-Lithium-Battery-Strip/dp/B007RQW5WG
Like /u/blackboard mentioned, purchase a carbon filter (4" or 6" depending on size of your setup/plant total) and also get the matching duct (4" duct for 4" filter and vice versa). Also, pick up an inline-fan. A simple and effective way to set it up is to connect fan to the filter, then connect the duct to the fan so it sucks the air through the filter and through the duct, out of the tent. If you have a grow light that is set up to be cooled, just connect the light to be in between the filter and the fan. Make sure you hang or attach the carbon filter higher up in you tent/box, so it removes the hot air. Vent the duct (which is blowing out the warm/stinky air to the outdoors if possible. You can have another inline-fan/duct setup blowing into the tent, but it is not necessary. Just make sure that you have a hole or small opening on the lower, opposite side of your box for fresh air to get sucked in to replace the hot stinky air that your blowing out through the filter/fan/duct.
If that doesn't make sense to you, I can PM you a picture of my current setup.
So I've put two Mars hydro 600 watt lights in a 2x4x5 tent and if I left it sealed up it will get too hot of course. In that tent I can get away with a 240cfm duct fan at the top vent hole of the tent and be in the 80s. I still have to leave the tents flap open or it gets too hot even with one clip fan and a large standing fan aimed at the tent door. This is in a cool basement and it's not even summer yet. I'm actually in the market for a couple of 300-400 CFL inline fans that are somewhat quiet if anyone knows of any. Looking at this one
Absolutely! You can get as crazy as you want with it, but there are some basics you need to figure out before you really start.
Where are you growing this plant? Do you have a space you're going to use? A closet, an unused bathroom, the basement? Are you going to be purchasing a tent, or maybe emptying out a dresser like this?
The light choice is one you can spend many (too many) hours on. LEDS have their benefits and drawbacks, as do CMH. Heat is more of an issue with CMH, but LEDs can also pump out serious heat. CMH is easy to know what to buy, no real dialing in the height, no worry you're not getting the right spectrum, etc. I'll probablu go LED at some point, but for now CMH is easier (for me). This is the CMH kit I started with. Ballast, bulb, reflector all included. if you have an option for the light, you'll want to get one that is 3100K and NOT the 4000K. 3100K is not as good for veg, but is great for flower. You can detatch the ballast from the reflector - helps keep temps in the tent down, since you can place the ballast outside.
How are you going to deal with heat? Lights run hot, and you WILL need to manage it at some point. Check my previous posts to see my light tube setup.
How are you going to deal with smell? Smell will be an issue, no ifs ands or buts. You can DIY carbon filters, but only if you trust yourself to do it right and hope it won't fail. You will need a carbon filter and fan to manage the smell. I'm running a 6" inline fan with a CAN33 filter. There is 0 smell from the exhaust, the filter is clutch. If noise is an issue for you, fans are decently loud running at full tilt. To work around this, a speed controller on a larger diameter fan, turned down to a lower speed, will reduce noise significantly while giving you the same airflow as a smaller fan on high.
You'll need to get soil and nutrients. Myself and a lot of growers really like Fox Farm Ocean Forest soil. FF Happy Frog is another good one. Get fabric pots if you can - lets the roots breathe a bit.
The above is very, very basic starting info. An enclosed space to grow; an exhaust fan and odor control; full spectrum light; water and nutrients.
Let me know if you have any other questions!
HERE'S WHAT YOU DO
I am assuming your fireplace is propane or natural gas and not wood. A real wood fire would be hard to automate. I am also assuming that your fireplace has an IR remote control...otherwise we are in the realm of servos and stuff to automate a physical control.
Embed a small magnet in the tip of the wand, and embed the controller half of a door sensor somewhere near the fireplace; a recessed one like this may offer the cleanest install. When the magnet in the wand gets close to the door sensor, it will report that it's closed and you can use that as a trigger for the action. From there, a Harmony Hub is probably the best way to turn the door close into an IR signal.
You could also set "incendio" as a custom voice command for a nearby Google Home, so it's the spoken charm that makes the action and all the wand-waving is just for show, but having to say the "hey google" wake word kind of breaks the illusion.
Well.. If that's not working you should just buy the cheapest carbon filter + fan on amazon and be done with it IMO.
Although, even with a good filter and fan you have to have some negative pressure meaning that you have to suck out more air than you pull in. If you can't get negative pressure then the smell can leak out. If you have a tent and you get a real fan and filter you'll see the walls suck in when you close the tent and that means theirs negative pressure.
Here's some amazon links.
Filters-
https://www.amazon.com/VenTech-Carbon-Charcoal-Control-Filter/dp/B00QLB5U70/ref=sr_1_9?ie=UTF8&qid=1480987037&sr=8-9&keywords=carbon+filter
https://www.amazon.com/VenTech-Carbon-Charcoal-Control-Filter/dp/B00QLB5U70/ref=sr_1_9?ie=UTF8&qid=1480987037&sr=8-9&keywords=carbon+filter
Fans-
https://www.amazon.com/Apollo-Horticulture-Variable-Controller-Ventilation/dp/B01C6IJSB0/ref=sr_1_11?ie=UTF8&qid=1480987316&sr=8-11&keywords=inline+fan+4%22
https://www.amazon.com/VIVOSUN-Inline-Variable-Speed-Controller/dp/B01CTM0H6I/ref=sr_1_14?ie=UTF8&qid=1480987316&sr=8-14&keywords=inline+fan+4%22
Or just get a whole kit..
https://www.amazon.com/VenTech-VT-IF4-CF4-B-Controller/dp/B005GJ7TFE/ref=sr_1_8?ie=UTF8&qid=1480987446&sr=8-8&keywords=inline+fan+4+inch
I went with this: https://www.amazon.com/Chamberlain-MYQ-G0301-Garage-Delivery-Eligible/dp/B075H7Z5L8
https://www.amazon.com/Smart-Garage-Opener-Chamberlain-MYQ-G0301/dp/B075H7Z5L8
This might work for you
I never thought about venting to the attic. I think, as others have suggested, I'll flip the fans to be intakes instead of exhausts, add filters on the inlets and use this to vent up to the attic.
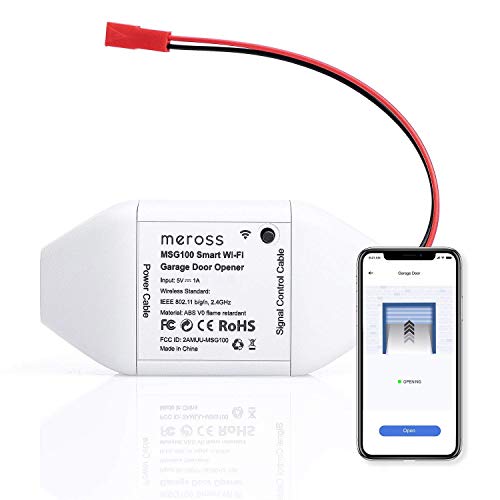
And you don't even have to replace your opener. You can buy something like the Meross garage door kit (https://www.amazon.com/meross-Smart-Control-Compatible-Assistant/dp/B07L5DPK8P). It needs power, wifi signal, and needs to connect to contacts on your existing opener. If you have a wired "doorbell style" button, you can just splice it into those wires. It also comes with a door sensor so you can see if the door is currently open or closed and get warnings if the door is open longer than a set time limit.
I've been using Meross, which goes on sale pretty frequently on Amazon. It works well and has Alexa integration.
https://www.amazon.com/meross-Smart-Control-Compatible-Assistant/dp/B07L5DPK8P
I used one of these and it works quite well.
https://www.amazon.com/meross-Smart-Control-Compatible-Assistant/dp/B07L5DPK8P
I bought meross. Couldn't be happier. Frequently available as low as $38 on Amazon
https://www.amazon.com/dp/B07L5DPK8P/ref=cm_sw_r_cp_apa_i_jsMmDbSQRT34A
Have you tried this one? You should be able to jump right from the switch even though they recommend from the opener itself.
meross Smart Wi-Fi Garage Door Opener Remote, APP Control, Compatible with Alexa, ... https://www.amazon.com/dp/B07L5DPK8P/ref=cm_sw_r_sms_c_api_i_NooVDbXWPEKA7
If this is your model, look at the bottom of page 17. You can buy a rolling code receiver (like this)and connect in place of the wall mounted button. Get something that can have additional remotes added, and mount on to the wall if you need that convenience.
You could wire a smart opener in here too, or DIY something with a Arduino or similar and NO relay that closes for a few hundred milliseconds when triggered, which will operate the motor too.
Get a foldable workbench like this:
https://www.amazon.com/WM125-Workmate-350-Pound-Capacity-Portable/dp/B000077CQ0/ref=pd_lpo_469_bs_img_2?_encoding=UTF8&psc=1&refRID=S88A53MHW0K5XHFJ99JG
And then also get another 1 inch piece of plywood to reinforce the press and the top of the work bench.
Works surprisingly well.
https://www.amazon.com/IRWIN-Tools-Double-Edge-9-5-Inch-213103/dp/B0001GLEZ8
https://www.amazon.com/Z-saw-Dozuki-Z-Saw/dp/B001DSY7G6/ref=pd_sbs_469_3?_encoding=UTF8&pd_rd_i=B001DSY7G6&pd_rd_r=RBVEGF6TKKCZHVCH7WSH&pd_rd_w=16INj&pd_rd_wg=gFI50&psc=1&refRID=RBVEGF6TKKCZHVCH7WSH
https://www.amazon.com/Narex-Republic-Woodworking-Chisels-863010/dp/B00GPC74ZQ/ref=sr_1_1?s=hi&ie=UTF8&qid=1499302108&sr=1-1&keywords=narex+chisels
https://www.amazon.com/Crown-135-Marking-Gauge-Beech/dp/B00EC9AOZQ/ref=pd_lpo_vtph_469_lp_t_4?_encoding=UTF8&psc=1&refRID=ZBYMV8TF850C6M5JDGDG
Other than clamps, glue, mortice gauge, etc, this is good enough to get you started making carcass (dovetailed) pieces of furniture, like a shoe cubby or bookshelf. (Currently making a chimney bookshelf for myself)
Thats around $200 for getting you started. Add a mortise chisel and mortise gauge and you can start mortise and tenon work. Invest in pipe clamps when you reach a glue up point.
[cough cough....I'll just leave this here](http://www.Honeywell.com/ CG511A1000/C Medium The[cough cough I'll just leave this here](http://www.Honeywell.com/ CG511A1000/C Medium Thermostat Guard with Inner Shelf to Prevent Tampering (Clear) https://www.amazon.ca/dp/B000BPGP6M/ref=cm_sw_r_cp_apa_i_NR84CbN0YABKB)
Like a thermostat cover?
https://smile.amazon.com/Honeywell-CG511A1000-Thermostat-Prevent-Tampering/dp/B000BPGP6M/ref=sr_1_3?ie=UTF8&qid=1526416064&sr=8-3&keywords=thermostat+cover
Double check your dimensions based on your AP but I'd think something like that would work.
However, I've taken the APs apart, and if they're well mounted they'll likely hold up to most hits from most objects.
http://www.amazon.com/gp/aw/d/B000BPGP6M?cache=463d98138e8baf7d6cd55acf56906614&pi=SY200_QL40&qid=1410403482&sr=8-1#ref=mp_s_a_1_1
This. Until he starts paying his share. There will be drama but if he's not putting in he has no right.
Perhaps this might help: https://www.amazon.com/Kidde-468094-Three-Story-Anti-Slip-25-Foot/dp/B000H5S96A
http://www.amazon.com/Gila-LES361-Control-Residential-Platinum/dp/B000KKM8EG/ref=sr_1_4?ie=UTF8&qid=1406364384&sr=8-4&keywords=Window+tint
Just installed this at my dad's new office. I can't speak to the day version but this has a shiny reflective feeling to it that didn't let me look in. In the middle of application I walked outside on a bright 90* Fahrenheit day and looked at the window my dad was working on. You could easily see him quite clearly in the section that did not have tint. The other half of the window did have the film and just reflected my view so I would see clouds and the sky BUT I saw the light fixture in the office. I did NOT see him. Not even a shadowy figure. Just a head shaped object(that from my angle looked like clouds and the blue sky) covered up a portion of the light fixture. Any window film should be a great help and I doubt you'll have a bad experience with any window film unless you get a transparent one. I say go for the type of tint that you would like to have in that location. Black? Slight blue or green tinge to it? Reflective like a mirror? I'm sure you've seen the different styles in cars. Hell, some are even red! There are two ratings usually given to window film. Heat index and light index. I'm guessing you want the one that does not allow much light to enter or one with a reflective material which I personally believe is the best option for a house. Black tint works better for a car in my personal opinion.
Curtains suck. [This](Gila LES361 Heat Control Residential Window Film, Platinum, 36-Inch by 15-Feet https://www.amazon.com/dp/B000KKM8EG/ref=cm_sw_r_cp_tai_CazAxbCC8GFT1) is what I used. My front window is my home office, it faces East and receives direct morning sunlight with no other houses in the way to block any of the light. This tint easily keeps it 15-20 degrees cooler during the summer, it's amazing.
I think windows (for the most part) block UV rays and those are what yellow/fade things.
I know you can get uv window film for added protection if you want.
You could also try applying some reflective film like this on your windows, particularly any that face south.
This is the one I got: Gila Heat Control Platinum Adhesive Residential DIY Window Film Sun Blocking Glare Reduction 3ft x 15ft (36in x 180in) https://www.amazon.com/dp/B000KKM8EG/ref=cm_sw_r_cp_apa_i_H1z7CbH1M0RRW
They are very much removable and definitely suitable for renters. The first window you do will be difficult, but you'll eventually get the hang of it.
If your apartment gets full, direct sun, get some thermal curtains and reflective window film. Gila puts out a window film kit that works well and can be easily removed when you need to move. You can find it at Lowes and Home Depot. If you get the film, be sure you get the Application Kit for it too.
I had this same issue in my old apartment. The AC would run full tilt, without stopping, and I'd be lucky to see temps below 85F in the summer. I was on the top floor and got full afternoon sun. The curtains and film helped drop the temp a few degrees.
had a look around, https://www.amazon.com/Silverline-Easy-Prop-1-15-2-9m/dp/B000LFVE68/ref=sr_1_3?srs=6050981011&ie=UTF8&qid=1483655647&sr=8-3&keywords=prop best i seem to get.
uk here. I bought the woolcraft one but unfortunately they recently increased the price. so get the silveline one. do it quick cause they only have two in stock (and you need two) https://www.amazon.co.uk/Silverline-465983-Easy-Prop-1-15-2-9/dp/B000LFVE68/ref=pd_sim_60_10?_encoding=UTF8&psc=1&refRID=3AM3K57DCRJMPVY3Z0H2
and a pair of these also https://www.amazon.co.uk/gp/product/B01A6KJDFG/ref=oh_aui_detailpage_o03_s00?ie=UTF8&psc=1
Edit: yes I know they are gonna cost a little extra, and you can do without them if you choose to hammer the basestations to your wall. but I didn't mind 'cause 1) the benefit outweighed the cost 2) I'm not worried about spending a little extra 3) my landlord wouldn't allow me to screw crap into the wall :-P
Happy Viving!
And if you don't want to drill holes in your walls, buy some of these . I have my lighthouses attached to these and they're perfect. I didn't want to drill the walls as we're in rented accommodation and I also don't trust my DIY skills.
I'm getting two of these plus two grips to hold the lighthouses...
https://www.amazon.co.uk/gp/aw/d/B000LFVE68/ref=pd_aw_sbs_60_1?ie=UTF8&dpID=313Q1KZqDNL&dpSrc=sims&preST=_AC_UL130_SR130%2C130_&refRID=SH3CT0RZNP5CB4Z4WXDH
I live in rented so am not allowed to drill.
I highly recommend these, with these.
The poles extend from floor to ceiling, so you can get the lighthouses high up. And they have a very small footprint compared to tripods, etc. I'm very very happy with them
here's a link of the contractor pole http://www.amazon.co.uk/gp/product/B000LFVE68?psc=1&redirect=true&ref_=oh_aui_detailpage_o00_s00
As it's just a pole it can go behind my desk with no problem, I extend it from the floor to the ceiling and I set up an adapter on it http://www.amazon.fr/gp/product/B00E5M39AW?psc=1&redirect=true&ref_=oh_aui_detailpage_o00_s00
Its made up of two parts, the pole:
https://www.amazon.co.uk/gp/product/B000LFVE68/ref=oh_aui_detailpage_o09_s00?ie=UTF8&psc=1
and the thing that holds the tripod to the pole:
https://www.amazon.co.uk/gp/product/B00ZIOHZP6/ref=oh_aui_detailpage_o09_s01?ie=UTF8&psc=1
I would advise you use clamps instead and dont buy the pole i linked, that brand is way too cheaply made.
The 3m tape is bad as the lighthouses vibrate, vibration causes 3m tape to lose its seal and your lighthouses will fall off, some peoples light houses fell off immediately, some stayed up for a few months, either way its a ticking time bomb.
Check out this one Not sure what kind of stores they have in spain, but they have them at costco for around $50.
I recently picked up a Keter worktable seen here: http://www.amazon.com/Keter-17182239-Folding-Work-Table/dp/B001CWX26Y, Surprisingly well-made and sturdy. Comes with some built-in clamps which can be helpful, too.
Here it is. So handy. I use it all the time and it supports up to 1,000 pounds
http://www.amazon.com/Keter-17182239-Folding-Work-Table/dp/B001CWX26Y
Rockwell Jawhorse used to make a workbench attachment quite similar but I don't see any for sale anymore although the miter table is available which makes a good sub, and you could always get a jaw horse and make something custom. It has a saddlebag component for holding tools.
Also maybe this thing:
http://www.amazon.com/Keter-17182239-Folding-Work-Table/dp/B001CWX26Y/ref=sr_1_fkmr1_1?s=hi&ie=UTF8&qid=1405813718&sr=1-1-fkmr1&keywords=rockwell+jawhorse+clamp
I'd get the 12 sliding miter saw because it will do everything for the rest of your life. You will need it someday, or a friend. I got a Keter folding work table with a couple roller stands. The table can be used for other tasks.
That depends on how long-term you want it to be. You can put two 2x4's on the flat on your garage floor, put the shelf board on top of that and set your blade depth correctly and be fine (note the blade goes on the outside of the supports, not between them). A step up from that would be a pair of sawhorses (build or buy) and a sheet of plywood (optionally ripped in half lengthwise and doubled over). Another option is a pair of sawhorses and a solid-core door. Beyond that, you can make a real workbench, anything from a few 2x4's and a sheet of plywood up to a Rubou bench. The "newfangled workbench" has some cool ideas in it if you decide you want to build a full bench. If you want something prebuilt and portable, you can get something like this, which looks pretty cool but I have no first-hand experience with.
I live in a high rise apartment in the middle of Philly so I have to take everything outside anytime I want to do anything. This has been a dream - sturdy work surface, breaks down and sets up in a heartbeat, has some clamps that come in handy, and weighs very little. www.amazon.com/Keter-17182239-Folding-Work-Table/dp/B001CWX26Y
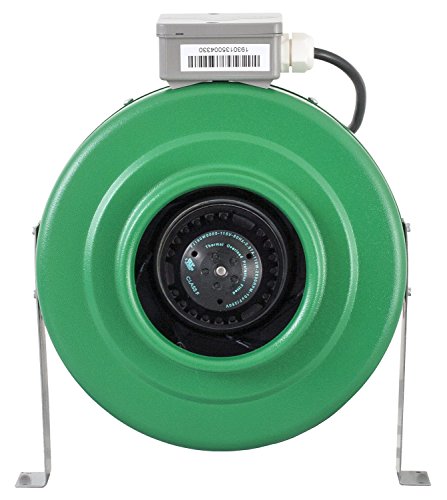
Depends on the strain and the temperatures in the tent. Most likely there will be smell even with a small grow. I have a friend that has a box in his basement and uses one of these fans to pull air through a 14 inch carbon filter 24/7. With one plant and a 150 HPS it get extremely smelly w/o the filter.
Honestly, don't bother with this project and instead get something like this; its almost the same price you would spend on a power supply. If you use it as an exhaust fan and you have an infan hole in your cabinet, it will just suck the air from the outside without needing another fan.
I would just get a fan / filter combo like this - VenTech VT IF6+CF6-B Inline Exhaust Blower Fan with Carbon Filter and Variable Speed Controller, 440 CFM, 6" https://www.amazon.com/dp/B0051HDECS/ref=cm_sw_r_cp_api_qURgzbNF9GVP3
Extra plants don't necessarily equate to more yield if they are fighting for space and light.
I just posted a few pics of my second grow. I use a 440 CFM carbon fiber scrubber. The physical carbon scrubber is mounted inside at the top of the tent. I'm running 6 inch duct which is a bit extreme because my tent is 2x4x5. So, the scrubber is mounted, with a six inch duct from there, leading into my air cooled hood. Another six inch duct runs out of the hood and up towards the ceiling of the tent where it goes into the intake fan and led away from the tent.
Before I had an air cooled hood and carbon fiber scrubber (my first grow), I was constantly battling heat issues with a 400w light. I had two six inch inline fans, one bringing in fresh air and one pulling hot air from the top. Then I had two cooling fans inside the tent to move the air around the tent. It was crowded with four plants that stretched because I didn't have a proper cooling system. Average temps where mid, to high, 80s (26°+ c). In the end I made out okay with no problems 5.2oz with no stress training.
Here's my scrubber It's huge, but I don't need any other fans except the two blowing on my girls to strengthen their stems and roots. Just a thought.
https://www.amazon.com/VenTech-VT-IF6-CF6-B-Controller/dp/B0051HDECS/ref=as_li_ss_tl?ie=UTF8&qid=1462551273&sr=8-9&keywords=inline+fan&refinements=p_85:2470955011&linkCode=sl1&tag=christieheavy-20&linkId=8ba551246f14af8ea4691eed28b8cd45
That's the one I'm looking at getting. Or here is a website that has good reviews on other ones.
http://heavy.com/garden/2016/05/best-inline-duct-fan-grow-room-how-to-cannabis-weed-marijuana/
hell yeah. There are activated carbon air scrubbers that you can even make on your own. Essentially all it needs to do is pass air through the filter. You can pick up activated carbon at pet stores. They sell it for fish tanks. Youtube has all kinds of DIY instructions for building an air scrubber.
If you have the money and don't feel like getting creative with some lowes buckets and a house fan though, you can get whole kits at amazon. Now keep in mind, the one I linked to is pretty nice, but you still need to get the duct tubing and if heat is an issue in your grow area, you'll most likely use this as an exhaust, but from what I've read they are your best solution.
You may be fine with that fan, you just need to monitor the air flow you are getting with it. If your not feeling much air exit out of your filter or if the enclosure doesn't seem to have any negative pressure you may want to upgrade. Something like this: VenTech IF4 4" Inline Duct Fan 190 CFM https://www.amazon.com/dp/B005KMOJPK/ref=cm_sw_r_sms_apa_u3rDxbFJWWDD1
I use the 6" version
This is bad ass. Doesn't use much space to boot. Model of your fan and filter?
Edit: Is this your fan? http://www.amazon.com/VenTech-Inline-Exhaust-Ventilation-Blower/dp/B005KMOJPK
Yes to the rockwool.
A sound room design is a lot like a high end home theater design. Look on those web sites for info and tips. You can also find DIY recording room designs out there.
There is another product out there called Homosote. It is a pressed cellulose fiber board. Dense and has good vibration absorption. It is designed to go between sheet rock and a stud wall/ceiling.
Having been involved with commercial anechoic chamber design and use, your best bet is to build a "room within a room". So basically a sub room that does not physically touch the rafters above. If the rafters are somewhat clear of water/drain/electrical stuff you can nest the new ceiling joists into the existing floor joists. At least 2x6s or 2x8s if the span is long. Then homosote / sheetrock / quietrock to the new "room".
Pay very careful attention to the joints and gaps. Seal them up with caulk or expanding foam in a can.
Use a garage service / fire door as it will have built in weather stripping to seal in noise. Put it at an odd fraction of the wall dimension. So not right in the middle. Put it at 1/3rd or 1/5th from the end of a wall.
The room dimensions need to be carefully considered. A square room will have really odd echos in it. There are calculators out there that will do the math for you, but you basically need each room dimension to be off by a factor of 1.4 (or square root of 2) Give or take. If you can't make it x1.4 off, then at least make them odd number dimensions and not the same. I don't care how much wall treatment you put up, it won't fix a room with a nasty reverb in it. Bigger is better as well. You will put a lot of sound energy into the room. Better dissipated in a bigger room, than a small one. Basically need to avoid even harmonics due to room dimensions.
> Not:
8' - ceiling, 8' - width, 8' - length
> More like this:
8' - ceiling, 11.5' - width, 9' - length
For wall treatments, the simple solution is to buy rigid fiberglass insulation panels. They are sold in 2x4 panels. Cover them with muslin and back them with 2x4 plywood and hang on the wall.
These things:
https://www.amazon.com/Owens-Corning-703-Fiberglass-Boards/dp/B005V3L834
For HVAC, use flex ducts and ensure that the holes into the house's existing ducts are not straight. You want the ducts to go around corners. If you want to go nuts, you can make the ducts out the rigid fiber boards.
The last thing, Don't muck it up. Sooner or later, you will sell the house. Make it look "normal" so it can be converted to a storage room or something.
Take a look at this post. OP used this.
Cheapest way I've found to treat your space. Wrap these in cloth from your local fabric store. Pin to walls with long T pins. Cheep cheep. They actually link burlap cloth for sale for very cheap as well.
https://www.amazon.com/Owens-Corning-703-Fiberglass-Boards/dp/B005V3L834
For what it's worth, none of these booths are 100% sound PROOF.
Whisper Room was at VO Atlanta last year and had one of their 4 x 6 booths set up in the vendor room. With the door closed, I could still very clearly hear everyone outside the room. Yes, the sound was reduced dramatically, but I could still hear it clearly.
Short of building an anechoic chamber, You are NEVER going to have a room completely isolated from the outside world. You have to come up with a level of noise you can or cant afford to be acceptable with.
Unless you are doing audiobooks with a lot of long empty silences between paragraphs or lines of dialog, you are probably not going to need a whisper room.
There are two different things to consider: outside sound and inside sound.
The biggest problem with voiceover audio is inside sounds. The sounds created inside the room and bounce around the hard walls, ceilings and floors. This is the easiest thing to deal with and there are a number of things that you can use to absorb these reflections and reduce the echo. Things like acoustic foam or OC703 panels.
If the room is already acoustically treated, you could probably buy pre-built panels if you are just trying to remove some troublesome reflections. And if you want a specific room to work in, you might want to try a loose-walled curtain style booth like what Vocal Booth 2 Go has.
As for outside sound...if you live on a busy street, there's not much you can do about it. You could spend tens of thousands of dollars to completely acoustically treat your environment and youll still hear the Subaru with the coffee can-sized muffler when it drives by.
Depending on what type of space you need to treat, I strongly prefer OC703. It's great to work with (wear a dust mask!) because it's rigid, easy to cut, and light enough to hang on a wall without glue.
You can make panels with it. I have them in my makeshift "control room".
And, I've also heavily treated my voiceover booth with it.
Amazon has a bunch of portable battery packs that put out 12 volts natively. They are cheap enough that it almost isn't worth building your own.
https://www.amazon.com/HitLights-Rechargeable-Lithium-Battery-Strip/dp/B007RQW5WG
Yep. I used a 12v Lithium Battery. Works pretty good. The power lasts for hours. Longer than my phone (8 month old s3)...
You could use one of these;
https://www.amazon.com/HitLights-Rechargeable-Lithium-Ion-Battery-Pack/dp/B007RQW5WG/ref=sr_1_7?ie=UTF8&qid=1524793293&sr=8-7&keywords=small+12v+battery
I got 12v battery packs. Hers the link:
HitLights 12V DC / 5V DC (USB) Rechargeable Lithium-Ion Battery Pack - 3500 mAh, Includes Charger - for LED Light Strips, Phones, and More https://www.amazon.com/dp/B007RQW5WG/ref=cm_sw_r_cp_api_8XmWBbR4ZEZE9
They run a long time - way more than trick or treating...in the off season I use them as my mobile phone chargers when I travel. They will juice up an iPhone to full at least 4 times.
That's exactly what I did. The poster board is taped to the top of the back, and naturally falls a that curve. I'm using an LED strip I got off Amazon, cut into 3 sections (both side flaps and the top) and soldered them together with wire. It's a little overly bright for my purpose and has the white/blue kind of tint to it. But it works very well and runs off a rechargeable battery pack I also picked up from Amazon.
I was working on something very similar yesterday. Yes you will need to power the servo's separately. I was able to get everything from Amazon yesterday. You will need a power supply. I bought a 12V power supply from amazon.
Battery Pack
http://www.amazon.com/gp/product/B007RQW5WG/ref=oh_aui_detailpage_o07_s01?ie=UTF8&psc=1
You will also need probably two dc-dc step down converters
http://www.amazon.com/gp/product/B00CXKBJI2/ref=oh_aui_detailpage_o00_s00?ie=UTF8&psc=1
You can split these with a simple adapter and connect both of your step down converters
http://www.amazon.com/dp/B00NNL1YA8/ref=twister_B00NNL1XIG
You will wire the output from one converter to the one side of your breadboard and the other to the otherside. You probably want to separate the power from the pi and your servo's so that you don't get a voltage drop which could damage your pi. There are cheaper solutions to this like using a simple voltage regulator but you would give up 7v in heat. So it is recommended to get an efficient dc converter.
My 2cents
4in fan
Ducting
Hi there. I went with that combo because some of the cheaper combos had pretty poor ratings on FakeSpot, but that's really the only reason. If you have a cheaper (and reliable) combo, I'd certainly take a look!
Okay. Do you think I would be sacrificing any "noob-friendliness" by ditching the peat pellets on my first go? I know you can just dump the seed into the medium, but I want to "get it right" my first time and reduce the margin of error. Maybe I'm overthinking it.
EDIT: Would these two work instead of the combo I had?
https://www.amazon.com/dp/B07D8TZ2KV/?coliid=I190I6ZPDD0E93&colid=WARD1BGFR803&psc=0&ref_=lv_ov_lig_dp_it
https://www.amazon.com/dp/B00EPE3XHY/?coliid=I1X2Q9SFFQF5I8&colid=WARD1BGFR803&psc=0&ref_=lv_ov_lig_dp_it
You can get one of these for the exhaust and turn it to the front of your car.
iPower GLDUCT4X8C 4 inch 8 feet Non-insulated Ducting Aluminum Foil Vent with 2 Clamps https://www.amazon.com/dp/B00EPE3XHY/ref=cm_sw_r_cp_api_i_BOQPCb3A41XHT
As an example for a smallish grow:
2 x 2 x 4 Tent: https://www.amazon.ca/gp/product/B074H5DKPY/ref=ppx_yo_dt_b_asin_title_o01_s00
Lights: https://www.amazon.ca/gp/product/B0752CL6KJ/ref=ppx_yo_dt_b_asin_title_o01_s00
Exhaust fan: https://www.amazon.ca/gp/product/B01C82SYZ0/ref=ppx_yo_dt_b_asin_title_o05_s00
Ducting: https://www.amazon.ca/gp/product/B00EPE3XHY/ref=ppx_yo_dt_b_asin_title_o05_s00
Timer: https://www.amazon.ca/gp/product/B00MVFF59S/ref=ppx_yo_dt_b_asin_title_o00_s00
Total cost: ~270 CAD
I have a similarly sized tent and I use this fan with this speed controller. It seems to provide very good suction and the controller does not cause the fan to hum or anything. I estimate 10+ full air cycles per minute with this thing going at full blast. I'm running a Mars 600 and a home built 240W COB setup to supplement, pulls about 500W at the wall and my tent is at about 75 F with 60% humidity. Intake air is about 62 F right now.
I would always go 6 inch, simply because that gives you the option to run the fan at 50% power and still get more CFM than you would with a 4 inch.
One thing to consider is the cost of carbon filters if you're worried about smell. My neighbors don't care so I vent outside, but a 6 inch carbon filter will cost at least $50 more than the 4 inch equivalent. Granted they can move more air and will last longer, but still certainly something to consider.
I see you have 4" ducting but trust me you're definitely going to want to have this, thankfully 6" ducting isn't to expensive. Also buy these, so much easier than duct tape and these for managing the ducting. This and this too for supporting the inline fan and filter, the inline fan at full power will vibrate very slightly and I feel that the bungee cords help minimize vibration. I usually use zip ties for managing cords but also as a precautionary measure, I have a few loosely secured zip ties on my inline fans just in case a bungee cord were to become unsecured which that has never happened thankfully but you can never be to safe.
If its a european frequency there's no chance of it working with a US hub. Period.
why not go with these:
http://www.amazon.com/NYCE-NCZ-3011-HA-ZigBee-Window-Sensor/dp/B00WTE61FI/ref=sr_1_fkmr1_3?ie=UTF8&qid=1465176632&sr=8-3-fkmr1&keywords=zigbee+open+close
they're maybe a little thicker but still very tiny
or this:
http://www.amazon.com/Z-wave-Window-Sensor-rechargeable-battery/dp/B01E0OMQR6/ref=pd_sim_421_7?ie=UTF8&dpID=3143ovC4LML&dpSrc=sims&preST=_AC_UL160_SR159%2C160_&refRID=01QQHKVCRGTKF7VPY6XC
and this is invisible on a door:
http://www.amazon.com/Recessed-Door-Sensor-ZW089-Aeotec/dp/B0151Z49BO/ref=pd_sim_421_5?ie=UTF8&dpID=31oLnDLu6ZL&dpSrc=sims&preST=_AC_UL320_SR236%2C320_&refRID=01QQHKVCRGTKF7VPY6XC
as is this hinge sensor:
http://www.amazon.com/NYCE-NCZ-3010-2-HA-Door-Hinge-Sensor/dp/B01C3HFAV6/ref=sr_1_fkmr0_3?ie=UTF8&qid=1465176766&sr=8-3-fkmr0&keywords=zigbee+open+close+nyce+hinge
This is what you need:
https://www.amazon.com/dp/B0151Z49BO/ref=cm_sw_r_cp_api_epMlxb1HFWVJB
recesses door sensor is my recomendation
http://www.amazon.com/Recessed-Door-Sensor-ZW089--Aeotec/dp/B0151Z49BO/ref=sr_1_3?ie=UTF8&qid=1462661137&sr=8-3&keywords=ZWAVE+DOOR+SENSOR
Z wave recessed door sensor?
Half the cost at Monoprice.
Chance are that those baseboard thermostats are 'line voltage' units. Either 115v or 230v AC. Which means that they control the units by turning the power to them on and off.
Conventional (smart) thermostats are low voltage. They operate on 24v AC. They tell relays to operate the system. You cannot use a low voltage unit on a line voltage device. Well, you can, for about 2 seconds. Then you let the smoke out of your new thermostat.
I have seen a StelPro unit, which is designed for your application. You might want to check it out:
https://www.amazon.com/STZW402WB-Thermostat-Electric-Baseboards-Convectors/dp/B01BYL1OAS
For electric baseboards: https://www.amazon.com/Stelpro-STZW402WB-Thermostat-Baseboards-Convectors/dp/B01BYL1OAS
For the main oil heating zones, I would honestly do a few more z-wave thermostats then pull it all together with your home automation software of choice (Home Assistant, HomeSeer, Smart Things, Wink, etc...)
Depending on what was used for floor heating, you may not be able to do much with this besides wire something for on/off.
Depends what kind of hub you have. If you don't have z-wave, you're options are pretty limited. Easiest and safest IMO would be a zwave baseboard thermostat. Something like this, depending on size of heaters, etc: https://www.amazon.com/Stelpro-STZW402WB-Electric-Heater-Thermostats/dp/B01BYL1OAS
​
So you think I should just have one of these VIVOSUN 4 inch Inline Duct... https://www.amazon.com/dp/B01C82SYZ0?ref=ppx_pop_mob_ap_share on top and just have passive airflow at the bottom? It is only one plant but will that be enough airflow
I'm sure the fan will help but check whatever user guide that came with your light to be sure. The last thing you want is a fire. If you have the space and resources, having an exhaust fan like this to pull air out of near the top of your tent will do wonders for temp control.
Something like this https://www.amazon.com/VIVOSUN-Inline-Variable-Speed-Controller/dp/B01CTM0H6I is what you should be using with a carbon filter.
just want to chime in here, I was in the same boat as you. Starting out as just an experiment seeing if I could actually sprout a seed, turned into a dedicated project :p But I can tell you I didn't have any idea with like lights, tents, air filters etc. So first thing I bought was this LED , but a better option would be this Viparspectra (the one I bought though has been just fine) and just hung it in my closet with the plant, and that's it. veg'ed it for 4 weeks just like that with the light on a timer and my closet door closed. (get a little desk fan to to move some air over the leaves) Then I figured I'd switch to flower, and was kinda on the edge about investing in a tent and carbon filter. but every thread I read about smell, veterans would always say "It's gonna smell a lot!" So I bit the bullet and got a 2x2x4 tent and this carbon filter and fan . You can probably use your DIY carbon filter just fine. Anyway, long story short, I started to flower and literally two days later I walk into my house after work and the smell just hits me. And this is just one plant. So definitely invest in that stuff. But as for the PC fan, unfortunately it's not going to have enough static pressure to force air through a carbon filter. You don't have to go with the one I got, like brotha said the duct boosters will work too. If you have any question let me know cause I relate very well to your situation, except I've now been halfway through the process lol. pm me if you want
Giantex Indoor Grow Tent Room Reflective Mylar Hydroponic Non Toxic Clone Hut 6 Size (32''X32''X63'') https://www.amazon.com/dp/B00PXK7ICK/ref=cm_sw_r_cp_api_UhVuybY2C4CHS
Roleadro 2nd Generation 600W LED Plant Grow Light Upgraded Full Spectrum Indoor Growing Light with 120pcs 5W Chips https://www.amazon.com/dp/B01IVQ96MW/ref=cm_sw_r_cp_api_diVuybHJCV7XV
VIVOSUN 4 Inch 203 CFM Duct Inline Fan with Variable Speed Controller https://www.amazon.com/dp/B01CTM0H6I/ref=cm_sw_r_cp_api_BiVuybSGHVZTE
Century 24 Hour Heavy Duty Plug-in Mechanical Timer Grounded https://www.amazon.com/dp/B00MVFF59S/ref=cm_sw_r_cp_api_nkVuybNGBW6PS
MacDoDo PH-02 Digital PH Meter Tester Best For Water Aquarium Pool Hot Tub Hydroponics Wine - Push Button Calibration Resolution 0.01 / High Accuracy +/- 0.05 - Large LCD Display - 100% Guaranteed https://www.amazon.com/dp/B01JOHTMEO/ref=cm_sw_r_cp_api_MkVuybZ08V91M
VIVOSUN Pair of 1/8" Adjustable Grow Light Reflector Clip Hanger Rope Ratchet with Zinc Alloy Internal Gears 75lb Each https://www.amazon.com/dp/B00P7TZNPQ/ref=cm_sw_r_cp_api_nlVuyb1Q8670K
This is my setup, my fan is coming in today and my seedlings sprouted this morning. I did quite a bit of research and The light is a little underpowered but I was on a pretty tight budget and can always add more light later.
I spent $40 on seeds and super soil mix from Mephisto genetics, going a more organic route and won't require nutes.
I also spent about $30 on peat moss, perlite, and compost. I already had some ducting and pots.
that's a duct booster. it won't have the power to properly exhaust your tent, especially if you're using that filter. i would look at something more like this. i can't vouch for that fan, but it will be a lot better than the booster.
in terms of pushing or pulling, i've been told it's better to pull through the filter than to push, idk, maybe something to do with how long the carbon will stay effective. i personally have my tent setup to push through mine right now, as the fan is a lot smaller than the filter so i elected to put the filter outside. either works tbh.
Yes. You need three things:
An Apple TV 4k, iPad, or HomePod
One of these:
MyQ Smart Garage Door Opener Chamberlain MYQ-G0301 - Wireless & Wi-Fi enabled Garage Hub with Smartphone Control https://www.amazon.com/dp/B075H7Z5L8/ref=cm_sw_r_cp_api_i_FMbsDbWY8DV71
And either need to run homebridge 24x7 somewhere in your house on a computer, or get this:
LiftMaster MYQ 819LMB MyQ Home Bridge https://www.amazon.com/dp/B075RQVSY7/ref=cm_sw_r_cp_api_i_HObsDb3PB0G0S
here
To add more detail to what u/mwwalk pointed out, you can install homebridge (https://github.com/nfarina/homebridge) on a raspberry pi and use the homebridge-chamberlain plugin (https://github.com/caseywebdev/homebridge-chamberlain#readme). This is a lower cost alternative to purchasing the MyQ Home Bridge ($97 on Amazon) but requires a level of comfort in using an rpi and linux command line.
Raspberry pi homebridge helps to add non-HomeKit accessories into HomeKit. At some point in the past, Chamberlain/LiftMaster did not have a HomeKit option.
My garage door opener setup is not exactly the same as yours... I have a non-WiFi Chamberlain but added a MyQ Smart Hub (https://www.amazon.com/gp/product/B075H7Z5L8) purchased on discount for $20 to add in WiFi capability.
I've linked in my Ring cameras, Plex, and other stuff as well, so this approach with rpi homebridge was greater value for the time, money, effort.
​
edit: fixed the link to the chamberlain plugin
Yes. This one works fine.
Purchased my UniFi Switch 16 last September. Prior to my purchase I had done research much like you have. I read the same negative reviews and posted a similar question to the UniFi Forums. The majority of the replies related positive experiences.
My Switch 16 has been up and running in a rack in our master closet since late September 2018. We have two AP’s, a CKG2+ and 11 UniFi cameras connected to and powered by the switch. One additional port was used to distribute the network further via a non-POE switch. The remaining ports are used for non-POE connections. Total POE consumption hovers right around 60 watts.
Over the winter and into spring we never heard the fan come on once. As summer set in (90’s-100”s most days) I noticed the fan coming on. It was loud but didn’t disturb us due to the location of the rack. Knowing heat is the enemy of all electronics I purchased an in-line duct fan to create positive air flow into the rack from outside the closet. This was the fan I purchased Link.
The internal switch fan hasn’t come on again and the temperature typically runs around 62 C most days. No regrets and would purchase again. I will report back if it acts up right after the warranty expires but so far it hasn’t missed a beat.
Alright taking into consideration the 12 plant limit here, my previous setup was too big for so few plants. So with some downsizing hopefully saves even more!
Tent - GROWNEER 48"x36"x72" Lodge Propagation Tent
Lights - HLG65 lm301b and red 660nm hydroponic grow light 4000K x 2
Kingbrite 240W samsung lm301h 288v3 quantum board X1
Fan - AC Infinity CLOUDLINE S4, Quiet 4” Inline Duct Fan with Speed Controller
PH Meter - Wellcows Digital PH Meter
PPM Meter - HM Digital TDS-EZ Water Quality TDS Tester
Carbon Filter - VIVOSUN 4 Inch Air Carbon Filter
Ducting - VIVOSUN 2-PACK 4 Inch 8 Feet Non-Insulated Flex Air Aluminum Ducting
Nutrients - MEGA Crop (2500g)
Botanicare CAL-MAG Plus Plant Supplement 2-0-0 Formula, 1 Quart
PH Control - General Hydroponics pH Control Kit
Soil - PREMIER HORTICULTURE 20380RG PRO-Mix HP High Porosity Grower Mix
Pots - Gardzen 10-Pack 1 Gallon Grow Bags x 2
Cloning Machine - CLONE KING 25
Total - 880.62 (includes shipping)
So with this setup ill keep 1 or 2 mother plants and then run the rest in SoG in 1 gallon pots. Using the 2 4000k lights for the mother plant and the cloning station and the 240w for the SoG area of the tent. Its a small setup but I think it'll work. Any idea what kinds of yeilds this could achieve? Any further input would be greatly appreciated.
Got it! So I'll go for the first link. What about the air pump I was looking at this
AC Infinity CLOUDLINE S4, Quiet 4" Inline Duct Fan with Speed Controller - https://www.amazon.com/dp/B07JB292JC/ref=cm_sw_r_cp_apa_i_jgXnDbQ20EA3X
Think it's worth spending a lot more on the humidity controller and shit or for the next size up?
Also since smell is a priority think it's worth getting this over a standard carbon filter?
Phresh Filter 701003 Inline Filter, 4 in x 12 in | 200 CFM
https://www.amazon.com/dp/B007ZU6IUY/ref=cm_sw_r_cp_apa_i_IhXnDbW4GJB7Q
A.C infinity
https://www.amazon.ca/AC-Infinity-CLOUDLINE-S4-Controller/dp/B07JB292JC/ref=aw_pd_cart_vw_crc_2_9?_encoding=UTF8&pd_rd_i=B07JB292JC&pd_rd_r=BHZEKCSHVVWMW4Y16CAV&pd_rd_w=UIioN&pd_rd_wg=T7cyA&pf_rd_p=10f3baa6-c286-419b-abe1-f643497d12c1&pf_rd_r=BHZEKCSHVVWMW4Y16CAV&psc=1&refRID=CDW2XKYKT8C95C77NEF3
Infinity Fan
I bought this and it’s surprisingly quite. At full speed it’s about as loud a old microwave running.
Take a look at AC Infinity CLOUDLINE, it's designed with av rooms and grow rooms in mind.
https://www.amazon.com/dp/B07JB292JC/ref=cm_sw_r_cp_apa_i_Kb4QCb329EHBP
Tools - Here are a few tools I would suggest getting. They are all relatively cheap, portable, and with a little creativity, they can do almost anything.
-drill
-router
-chop saw
-oscillating sander
Hand tools are a great way to go in an apartment. They are very portable and don't make a lot of noise. They do usually require more skill than power tools though.
Wood - Home Depot is an okay place to get wood. The one near me has oak, maple, poplar, and pine. There prices are about average. I would suggest starting on small projects like boxes and stuff so you don't need to bring home an 8' piece of wood. You can also order smaller pieces online from places like Rockler. The price will depend on the species. If you buy it in a store, you want to avoid pieces with big knots or cracks in them. These are weak points in the wood. You should also avoid winds and bows in the wood. Sight down the edge of the board to see how straight it is.
Work Bench - They sell portable benches that collapse down and are very cheap. Check this one out. collapsible bench . These are great, the one problem with them is they do not weight a lot, so if your doing anything that puts force in any direction but down you have to worry about tipping. Some of the nicer benches probably weight a little more.
I did all the woodworking and finishing outside. I got a Black & Decker Workmate, which I would not recommend. It is pretty unstable when it comes to using power tools. There are a few tutorials and plans around for small 2x4 workbenches, and even some that are collapsible. I might build one of those before my next guitar project. The other downside to the Workmate is that it is pretty low, so I had to bend over a lot. I'm not a giant, either.
For tools, I got a basic Black and Decker router, drill, sander, and jigsaw. If you get the jigsaw, I recommend upgrading the blade for just a few bucks. I bought only the router bits I absolutely needed. I didn't do this until late in the project, but I built a router table with some plywood scrap. It made routing a million times easier with the crummy workbench. All of those tools and the workbench are easily stashed in a closet. For spraying, I used products from the Reranch, which required no air compressor or anything. Zero storage space needed.
Finally, I did the outside work in our back parking area. I did the spraying in our screened porch to avoid wind. I swept up some of the sawdust, and some of it just ended up in the grass. I did power tool work on weekends or early evenings on weekdays. None of the neighbors ever complained.
I have been using a Black and Decker Workmate for about 6 months now. Cheap and mobile. I added a 3/4" piece of plywood to the top to make it more rigid. Probably under $50 and I have 2 presses loaded to it.
thanks for the responce. i will be storing all my tools indoors so im not too concerned about rust. the drill press i saw was not that big so i could put inside, but you make a good point that i really dont need it currently. i was looking into a dowling jig, and a circular saw as well. whats your thoughts about the folding work benches they sell, like this: https://www.amazon.ca/WM125-Workmate-Portable-350-Pound-Capacity/dp/B000077CQ0/ref=sr_1_3?s=hi&ie=UTF8&qid=1542555148&sr=8-3&keywords=folding+workbench
i have a fold up pastic table but im conerned its not a pracital solution. its about 2ft by 1 1/2ft
I bought these starter punches from Amazon. For $8.50, it's a no-brainer.
To replace muzzle devices, I use a Black and Decker Workmate folding workbench I bought for $15 and a short chunk of 2x4 that I drilled a 3/4" hole through and then cut in half (with the grain) through the hole to make a impromptu barrel vise out of the workbench. Worked great.
Tactical TV tray seems to be a good option.
I'm completely new to woodworking, too. I did a workbench for my first project.
I bought this cheap B&D Workmate, and built this simple workbench. Got the cheap lumber from Home Depot. The solid core door that serves as the workbench surface is heavy, probably >50lbs.
All I used was a circular saw, drill and a couple clamps. I did it in a day and a half. I know some could do it in like an hour or two, but I literally don't/didn't know how to do anything more than hang a picture on the wall before I built this bench. I was actually very surprised at how easy it was and how well it came together. It actually looks like a real table/workbench! LOL
I've put these. in my class. I've also put these in my class. And if you want to go all out, get this.
In my class, I only have 1/2 of the lights on and it helps. A kid mentioned it being too bright so I took another light bulb out. Put lower watt bulbs in. Also, go to Home Depot and they have displays of different brightness of light bulbs. They have some soft white light bulbs that may help. But go to their display and check out the different light bulbs. The softer light may help.
What about one of these anti-tamper thermostat covers that's keyed?
Link
If your relationship is anything like mine and my wife's, you're the one headed downstairs at night when she's cold and the thermostat needs adjusted. Much easier to adjust on phone (or via GH/Echo)
And you can just do the passive-aggressive thing and install this over it and set the schedule from your phone: https://www.amazon.com/dp/B000BPGP6M/ref=cm_sw_r_cp_apa_PfohAbSQ1GTH8
Had a similar problem in my old office. Solved it with this:
https://www.amazon.com/dp/B000BPGP6M/ref=cm_sw_r_cp_api_i_SBNgDbK1VJMSV
Gave the manager one key, I kept the other as a sign of dominance.
> Everyone was sick last week, so no action. That's fine.
​
Man, you guys seem to get sick quite regularly according to your previous OYS's. Any idea why that is?
​
>Before they left, I made a decision about keeping the A/C at a certain temperature while we'll be gone. She argued and I didn't back down (honestly, after DEERing a couple times). Then Broken Record. She finally said, "I think you're prideful." Me: "I think I'm being assertive." I realized within minutes that her comment was my wife's version of "You're an @$$****." Progress. My response still needs work. I'll do better in the future.
​
Install one of these and just end the argument once and for all. If you're the only one who has a key, then you control the temperature and nobody else can screw with it. I used to have the same problem until I installed that cover, and once the rest of the family realized that's the way it was going to be, it was never brought up again. Easy win.
Might i suggest something like this Honeywell CG511A1000 Medium Inner Shelf to Prevent Tampering Thermostat Guard, White https://www.amazon.com/dp/B000BPGP6M/ref=cm_sw_r_cp_apa_i_DwcGDbM6JA9R4 cheap effective and practical for your issue...
Edit: Might be too small after thinking about it but probably could make something that would fit the switch
you should get one of these. Problem solved.
People who don't wear warmer clothes to keep energy and heating bills reasonable are idiots.
Since he won't listen to you (A great signal for the amount of respect he has for you) there isn't much you can do that isn't petty.
Once you guys start getting petty the relationship has an expiry date.
So here are my shitty suggestions as you are locked in a real catch 22 because he doesn't give two shits about your opinion.
Open all the windows while he has the heat high till it cools down and then you both pay 3x the heating bill till one of you breaks or you go broke.
Buy This
Hi, I'm writing to you to remind you of this comment. Do not put it off.
I will search on the internet this weekend, and contact a trusted worker next week, to see if I can install hooks on the kitchen balcony. That way, I will have an exit if ever the stairs go up in flames.
I will also buy and leave some kind of safety plank (?) in the kitchen, so I can at least cross to my neighbor's balcony if there's a fire. My neigbors have a different staircase.
And finally, I will buy fire extinguishers. I have a small one, but apparently the small, 1L ones don't really do much.
Home fire extinguishes can:
You have a baby, your building is 100 years old (hey, mine too!), let's not put off safety measures any longer. I will honestly start all these things this weekend, I should have done it earlier. I've lived here for a year and a half already...
EDIT: Hi again, another comment posted this:
https://www.amazon.com/Kidde-468094-Three-Story-Anti-Slip-25-Foot/dp/B000H5S96A/ref=redir_mobile_desktop?_encoding=UTF8&dpID=51Odcg9LC0L&dpPl=1&keywords=4%2Bstory%2Bfire%2Bescape%2Bladder&pi=AC_SX236_SY340_FMwebp_QL65&psc=1&qid=1497475010&ref=plSrch&ref_=mp_s_a_1_2&sr=8-2&th=1
It's, literaly, a fire escape ladder! I'm totally researching and buying one of those. Just thought you might want to know!
You or the landlord can buy a couple of these. I've lived in places where they were provided in lieu of fire escapes (historic homes).
>What should I look for, how much might it cost, and any helpful words or advice?
I bought a 3-bed-converted-to-4-bed house (my son has the attic so the rest of the house can be kept tidy!). The previous owners spent £30K converting the attic, which includes a large bedroom, a fancy bathroom and a study.
Things to look out for:
Personally I love mine and would definitely consider getting another one if I decide to move house again.
Hmm, a lot cheaper option than single user abseiling harness/carabiner/rope option. In fact, this one is ridiculously cheap I reckon my landlord should provide them to every apartment. There are mains powered fire alarms everywhere, but once you are alerted to the fact the building is burning there appears to be no way of physically escaping.
Consider something like this too: https://smile.amazon.com/Gila-LES361-Control-Residential-Platinum/dp/B000KKM8EG/ref=cm_cd_al_qh_dp_t
Made a huge diff in here.
Your CPU will generally just downclock if it is getting too hot, but that's only if it's reaching over 90 C. I can't imagine it's very pleasant having the PC heat up a 40 C room even more.
Is there a window on the west facing side? I've heard that installing heat-reflecting window film can really help and doesn't cost much. They have different tints so you can still let light through or mirror coat, etc.
Idk if the term is different in Aus but here's the brand I see sold in the US: https://www.amazon.com.au/Gila-LES361-Control-Residential-Platinum/dp/B000KKM8EG/
Adhesive/non-Adhesive Tinted Window Film, blocks UV rays and solar heat.
Available in varying opacity, patterns and mirror finishes.
example:
http://www.amazon.com/Gila-LES361-Control-Residential-Platinum/dp/B000KKM8EG/ref=pd_sim_60_5?ie=UTF8&dpID=51OQvi0orCL&dpSrc=sims&preST=_AC_UL160_SR160%2C160_&refRID=11YTSPSK0ES0VCFF9NV6
Those windows may be old enough not to have a coating at all. I'd suggest applying some heat control window film to the inside of the glass, which will reflect both UV and infrared light, as well as a portion of the visible light to reduce glare. Gila Platinum is a great option, they also have it in a non-adhesive peel-and-stick version, though it's harder to install.
Check if they truly are single-pane by holding up your phone's flashlight or other bright point of light and seeing how many reflections appear in the window. If it looks like a mirror it's a single-pane, if you see two reflections it's double-pane. If it's a single-pane window it is definitely worth replacing with a good double-pane window. If it's already double-pane then it probably isn't worth replacing unless it has a metal frame, just use window film and try to seal up any air leaks.
Thank you for this write-up.
This is the Gila film that I installed on my window. I'm not sure how that compares to the titanium, but I may look into upgrading to the titanium film if the difference is dramatic enough. I'm assuming this film is safe for my patio door?
I'll definitely look into thermal curtains. I've thought about doing something like this, essentially trying to keep the heat trapped in the area between my curtains and the door or putting something in the space my patio door sits to try to insulate that area better.
Unfortunately my AC unit is virtually new... I just had it installed less than two years ago. I'm curious what the seasonal efficiency rating is... I do know that he made some adjustments to what I previously had to account for the fact that I'm on the third floor and my unit gets a lot of sun exposure.
I'll have to look into an evaporative cooler. My place is pretty small, so it doesn't take much to cool it. If it weren't for the fact that I lived on the third floor and my unit baked like an oven during the hottest days of the summer, my power bill during the summer would be negligible because it would take so little to cool it. If I could put one of those units in the room at night for sleeping that may be worth it.
Thanks again for this write-up. It gives me a lot of ideas to look into.
I've got these for my UK setup.
https://www.amazon.co.uk/Silverline-465983-Easy-Prop-1-15-2-9/dp/B000LFVE68/
https://www.amazon.co.uk/Wolfcraft-4042000-80mm-Telescopic-Support/dp/B001BWT2PA/
https://www.amazon.co.uk/gp/product/B01A6KJDFG/
They work great and are easy to put up and take down, so if you want to take it over to a friends house, you don't need to spend ages disassembling things.
These poles and these mounts has worked great for me.
Takes minimal space as well, but they only work up to 2.9m.
From UK Amazon but equivalent should be available in US:
To create mounting platform: https://www.amazon.co.uk/gp/product/B000LFVE68/ref=oh_aui_detailpage_o02_s00?ie=UTF8&psc=1
To mount lighthouses to above: https://www.amazon.co.uk/gp/product/B01A6KJDFG/ref=oh_aui_detailpage_o03_s00?ie=UTF8&psc=1
The extending poles can be put up or taken down in seconds, also be sure to look at some power cable extenders for the lighthouses if you plan to have them away from plug sockets: https://www.amazon.co.uk/gp/product/B00DVZYBBU/ref=oh_aui_detailpage_o05_s00?ie=UTF8&psc=1
I use one of these for small projects and I love it:
https://smile.amazon.com/dp/B001CWX26Y/ref=cm_sw_r_cp_ep_dp_sbE-zb3JKAP10
Would something like this work?
This is the Keter Folding Workbench
And this is the Kreg KWS1000 Mobile Project Center
Depending on what you plan to do, this could be a good solution for the apartment woodworking you want to do.
These are by no means equal to a heavy sturdy self-made workbench, but they do get the job done, are practice, mobile and easy to store.
The work stand is a made by Keter. Here's a link to it on amazon. I have a small garage with no room for permanent work tables so this works great for my needs.
Thank you so much! This is perfect. I thought sanding to square was serving me poorly. I've been on the fence about buying a #4 Stanley for months, but thought it might be frivolous and unnecessary. I've been especially worried about how useful it is on my wobbly fold-up table.
Lights: 300W and 120W Leds
Tent: 32x48x60
Fan: Shat Fan
Humidity: 34-40%
Temp: 72-78F
Soil pH: Roughly 6.9
Soil: Unigrow organic potting soil
Additives: Just distilled water, the clones have been fed calmag once
> programmable power strip so I can set it to fan for as low as one minute a time several times throughout the day. Guess I should go pick up a fan
Automating as much as you can really makes your life easier, and you'll get more consistent results.
I used a setup where I had a duct booster fan blowing fresh air and the output of an ultrasonic humidifier and a small space heater into a 25 foot length of dryer duct that I piled into a plastic bin. The fan, humidifier, and blower (and lighting) were on X10 controllers to switch them on and off.
I had a scheduler program on the computer that would switch on the humidifier, and heater (if needed) then run the fan to blow the fresh air down the duct. The purpose of the duct was to give the water droplets time to evaporate; by the time the air reached the grow chamber it was nice warm and wet, but not dripping.
Once I got it all dialed in and added a thermometer in the grow chamber it was easy to maintain the right conditions with very little effort.
Something like [this]?(http://www.amazon.com/dp/B003YFADW8/ref=asc_df_B003YFADW81810636?smid=ATVPDKIKX0DER&tag=hyprod-20&linkCode=asn&creative=395093&creativeASIN=B003YFADW8)?
Yeah dude, as a general FYI amazon is where I get EVERYTHING because you can get free delivery and no neighbors will know what you bought.
For your small grow, I would try and find the smallest carbon filter they sell. You might not actually have too much of a problem without one if you're only growing one or two plants (unless you don't have a medical card in which case better safe than sorry).
EDIT: You could probably use this filter and this inline fan. I've used about 3 of those inline fans in my grow and they're pretty solid.
Right in my price range too! Would this fan work? to Amazon we go!
I use Can-Fan 4" for cool-air intake. I use a General 6" exhaust from amazon.
Besides that I have the run of the mill oscillating fan bathing them in sweet little whispers.
Beneath the reflectors hanging by some ratchet straps is a Booster Fan to act as a ghetto air cooling system for the hoods, and push the air towards the exhaust.
I live in a cold climate, and this tent is in my basement; so cool air intake is usually between 65-69 degrees. In the winter 59-65.
For computer fans, you could always use a 12v->DC adapter. I found mine on NewEgg last.
For around the same price or cheaper (especially per CFM) something like this works great.
Yea, this one didnt come with any documentation or wiring diagrams and I've searched all over the internet but can't find anything.
Here is the fan in question
http://www.amazon.com/gp/product/B003YFADW8
I popped my seedlings under the light, great for the warmth, and they immediately have light when they pop. As far as carbon filters, you can have one in your tent and blow it directly into your room, no need to blow outside. I recommend this : https://www.amazon.com/gp/product/B0051HDECS/ref=oh_aui_detailpage_o00_s00?ie=UTF8&psc=1 very well priced,and includes carbon filter and speed controller for smaller setups. I have no experience growing without a carbon filter/ passive intake, but i can imagine without air flow(stale air), you may not have enough fresh air (specifically carbon dioxide) to grow properly Good luck!
https://www.amazon.com/gp/aw/d/B0051HDECS/ref=mp_s_a_1_4?ie=UTF8&qid=1484254597&sr=8-4&pi=AC_SX236_SY340_FMwebp_QL65&keywords=carbon+filter&dpPl=1&dpID=51lFVy2sSVL&ref=plSrch
I don't think I got that exact filter but the fan and controller are the same. Besides that you just need some flex duct and 2- 6" clamps.
So I recently added this fan & filter combo, which I must say was MUCH larger than I had anticipated, and has had an immediate effect on my RH. I went from about 35% to around 16% in a couple hours. Shortly after, my flowering plants are showing twisted and drooping leaves. Can this be the cause?
The Aussie Blues is 90% Sativa and already had drooping leaves closest to the flower, but no twisting. Note that the plant looks healthy otherwise, all the leaves have a nice even color and are perky. Do certain strains look like this when flowering?
Also it is growing a lot of popcorn, should I trim this off before it develops more?
Thanks for the input, guys.
I bought this kit and it is more than enough for my 3x3 tent with 600w light:
http://www.amazon.com/gp/aw/d/B0051HDECS/ref=mp_s_a_1_2?qid=1450214704&sr=8-2&pi=SY200_QL40&keywords=ventech+6+inch+inline+fan&dpPl=1&dpID=51lFVy2sSVL&ref=plSrch
My tent has intake flaps on the sides along the bottom and they seem to work well
https://www.amazon.com/gp/aw/d/B0051HDECS/ref=yo_ii_img?ie=UTF8&psc=1
Not using this carbon filter however, I am using a phresh 6 inch inline scrubber 500 cfm
>Can you explain your buckets air flow and air filtration?
My bucket has two passive 120mm intakes that are covered with mesh filters and a single 120mm exhaust in the lid that connects to a 4" flange with dryer ducting. There is a 4" 190 CFM In-Line fan connected to a 4x12 Carbon Filter. I also have a variable fan controller on the in-line fan. I run mine at about half power.
>What do you have your plant in? Planter and soil on the bottom of bucket ect?
I use a 5g nursery pot. For my next grow I will be switching to a smart pot to avoid it getting rootbound.
>I was thinking of extending a 5g bucket under the brute can so the soil is under the setup and the plant itself is in the brute only allowing more space to grow.
If you're gonna do that you're better off getting one of those 5g DWC setups. With that said, I'd advise against doing that. Reason being is you add another layer of complexity in that you have to figure out how to support the brute and you run risks with light leaks. This also puts the brute much higher than you are which can make servicing/watering awkward.
I just have mine sitting on the bottom of the bucket in the pot. The newer style Brutes cause you to lose a few inches but if you can budget to buy two of them and use one as a spacer, it works well.
>Would that work or would I have an issue with temperature difference between roots and plant?
I am not experienced enough to say yay or nay but I doubt it?
I run my filter blower at night that vents the light out via a cool tube, but I only run the intake during the light hours. I use two of these blowers in the link below, once set for intake and the other does outake
http://www.amazon.com/VenTech-IF4-Inline-Duct-Fan/dp/B005KMOJPK/ref=sr_1_1?ie=UTF8&qid=1398191541&sr=8-1&keywords=4+inch+blower+fan
Thank you very much, I think I will go with the brake drum forge. I found a decent set of instructions here: http://www.instructables.com/id/Brake-drum-blacksmithing-forge/?ALLSTEPS, although I still might use fire bricks instead of the cement ones they used. I don't know much about centrifuge fans, and google wasn't especially helpful, do you think this centrifuge fan would be adequate? http://www.amazon.com/VenTech-IF4-Inline-Duct-Fan/dp/B005KMOJPK/ref=sr_1_3?ie=UTF8&qid=1409761541&sr=8-3&keywords=centrifugal+fan
Thanks again for your insight
Hm that makes sense. I got the one that's recommended in the starter guides. this one
The duct work isn't very long. Only a few feet after the fan. I'd rather not extend it much for space reasons, and also I think it would reduce air flow to have more length.
No, pretty quiet IMO. It's no louder then the inline pump. I use this fan. It required a little bit of silicon to plug places where water was dripping out. I did drill a hole in the bottom of the fan to let any resting water out.
Passive isn't enough for me but might be for you if you can keep temps under 78. I have two of these, each with a controller. Without the controller they run on full which is loud and unnecessary most of the time. I started with only one but couldn't get the heat down enough. I also wanted to eliminate the possibility of mites/dust/bugs coming into my passive intake. Tent is 2x3x6 with roleadro led and timber cob light. I have a phresh filter on the Intake and a phresh scrubber inside for exhaust. No bugs or dust coming in, and no smell coming out.
https://www.amazon.com/VenTech-IF4-Inline-Duct-Fan/dp/B005KMOJPK
Going to be in a small ish closet in a room thats partially underground. I live in west side washington state if that gives you a general sense of climate, roughly 60 F ambient temp inside said room. It has a window that can be opened for fresh air, average temp in the summer is about 70F. If i run [this fan from amazon] (http://www.amazon.com/gp/aw/d/B005KMOJPK/ref=mp_s_a_1_1?qid=1458783951&sr=8-1&pi=SY200_QL40&keywords=50+CFM+inline+fan&dpPl=1&dpID=51xL2qyZJAL&ref=plSrch) with the fan control in the frequently bought together section below will that give me the range of speeds i need?
4 inches of power
This is what you are looking for.
This advice has been shared with me by people with decades of combined experience, who record sample libraries professionally.
For recording the best/most flexible samples, your goals are:
When you stack sound effects, the noise stacks with them. It may sound great as a single sample, until you stack 4 or more, then the noise is pretty audible. So you want clean preamps in a quiet space.
Convolution software these days is flexible enough to let you put any sound in any environment realistically. Try to minimize the sound of the room as much as possible. This stuff is great for building isolation booths, make sure to cover it with felt or something though
I'd recommend getting a handheld recorder like the Sony D100 (or older D50), the sound quality is great and has an extremely low noise floor. Excellent preamps.
If you had more of a budget, I'd recommend going with a few Neumann TLM 102 or 103, and a sound devices recorder. That would give you the absolute lowest noise and best sound quality. This is what we use, and have gone through much trial and error.
TL;DR For your budget, get the Sony D100
So, if I were to have a room typically used for recording podcasts, these would make a noticeable improvement on sound quality?
You mentioned fiberglass insulation. Something like Owens Corning 703?
"Item Weight 2.6 pounds"
And that's why that product doesn't work. Foam is not used in bass traps because of that.
Bass traps in general need a good amount of density to work and the right material. Dense fiberglass is what is commonly used.
Compare that foam product with this one:
https://www.amazon.com/Owens-Corning-703-Fiberglass-Boards/dp/B005V3L834
There are plenty of tutorials on how to make a good bass trap out of fiberglass boards. You will get far better results.
This is what I use:
https://www.amazon.com/Owens-Corning-703-Fiberglass-Boards/dp/B005V3L834
With a little searching you should be able to get a case for about $100 shipped. You'll need 5 cases to cover 220 square feet.
The downside is that you'll need to cover it with cloth. I've used muslin with good results, anything similar that breathes will do, so see what's on sale at the fabric store. The easiest method I've found for wrapping these is to cut a piece of cloth long enough to fold over and cover both sides of the fiberglass, then sew up the remaining three sides with the fiberglass inside. To finish use upholstery pins to pull the extra cloth around back.
https://www.amazon.com/Dritz-9070-Upholstery-4-Inch-30-Pack/dp/B002LN9TS8
If you have space, you can get better low frequency absorption by placing these panels a few inches away from the wall or ceiling, so hanging them somehow would be ideal.
Start with Owens Corning 703: https://amzn.com/B005V3L834
Then build a lightweight frame and wrap in a breathable black fabric. Google "DIY Acoustic Panels" and you'll see a ton of options.
The problem is that most 12V DC devices draw a lot of power (like your heated jacket) and so because of that the batteries with that kind of output are all on the larger side. This is the smallest one I could find on Amazon.
[Here is a better option] (http://www.amazon.com/HitLights-Rechargeable-3800mAh-Lithium-Connector/dp/B007RQW5WG/ref=sr_1_1?s=hi&ie=UTF8&qid=1405311237&sr=1-1&keywords=12v+lithium+battery), in my opinion. Or [this] (http://www.amazon.com/Portable-4500mAh-Rechargeable-Battery-Wireless/dp/B008UKKXRC/ref=cm_cr_pr_product_top) I would also take a look at building your own battery pack [similar to this] (http://www.amazon.com/ExpertPower%C2%AE-3500mAh-Extended-Battery-iRobot/dp/B007V6UL1Y/ref=sr_1_95?ie=UTF8&qid=1405311619&sr=8-95&keywords=14.4v+battery). The first two look like they might even plug right into your amp.
Heck even [this] (http://www.amazon.com/12v-Standscan-Battery-Power-Pack/dp/B00BTGTJPG/ref=sr_1_4?s=electronics&ie=UTF8&qid=1405312250&sr=1-4&keywords=12v+portable+battery) would work better and be cheaper/lighter if you put some rechargeables in it.
I would want any battery pack around 12-15V. I would also consider getting a [cheaper amplifier] (http://www.amazon.com/LP-2020A-Lepai-Tripath-Class-T-Amplifier/dp/B0049P6OTI/ref=pd_cp_e_0). It uses the same amp chip (ta2020) as the one you posted
Edit: Essentially, I wouldn't want to carry around 7 pounds of lead acid batteries when I could carry much lighter batteries to do the same job.
i bought one locally but this one on amazon looks like it might work https://www.amazon.com/HitLights-Rechargeable-Lithium-Ion-Battery-Pack/dp/B007RQW5WG/
This will be difficult because this is a very uncommon configuration.
I do know of a couple monitors made by DoubleSight which use USB for both power and video signal (rebranded and refurbished for $42 at tigerdirect), but because the video goes through USB it will require a little bit of CPU power. It's a non-issue even with my Core 2 Duo (same story with netbooks - not a problem), but I don't know if there's a driver or enough power in the Raspberry Pi for this. Touch screen could be a nice feature, and you don't even have to use it.
The next thing I could suggest which has some use would be a Lilliput (which specializes in small monitors, and will have the greatest selection of features and inputs) or other kinds of field monitors. Probably the only way to get something affordable will be to avoid HDMI, since at that price range you'll need something a little older.
Finally, if you really want to get your hands dirty, check out a Chinese monitor kit from eBay. You'll need to make your own case, but you may even have fun with that!
Edit: I also found a battery/charger which looks promising.
This is my idea buy this unit
Black + Decker BPACT10WT Portable Air Conditioner, 10,000 BTU https://www.amazon.com/dp/B01DLPUWG2/ref=cm_sw_r_cp_apa_i_rhgmDbH3D8P2D
Run a duct into my tent from my AC unit
iPower GLDUCT4X8C 4 inch 8 feet Non-Insulated Aluminum Foil Vent with 2 Clamps, Ducting https://www.amazon.com/dp/B00EPE3XHY/ref=cm_sw_r_cp_apa_i_fjgmDbSBGP211
Then eventually connect both into one duct and vent out my window
Ideal-Air 736185 Branch, 4x4x4 Inch https://www.amazon.com/dp/B002JLA4PE/ref=cm_sw_r_cp_apa_i_3jgmDb3R218GH
Set up was super easy, old port screws right off and you screw the new one right one and then slap on a filter and a fan (any carbon filter should do but here’s what I bought that works well)
VIVOSUN 4 Inch Air Carbon Filter... https://www.amazon.com/dp/B01DXYMBU6?ref=ppx_pop_mob_ap_share
VIVOHOME 4 Inch 195 CFM Plastic... https://www.amazon.com/dp/B078HFVTYX?ref=ppx_pop_mob_ap_share
And finally some ducting-
iPower GLDUCT4X8C 4 inch 8 feet Non-Insulated Aluminum Foil Vent with 2 Clamps, Ducting https://www.amazon.com/dp/B00EPE3XHY/ref=cm_sw_r_cp_api_i_CfrZCb6YXV1V7
This really works well for me. The smell otherwise is intolerable. Carbon filters are really amazing.
I also live in an apartment. I've got a Photon, I used my Ender 3 to print this vent adapter and attached 4" dryer duct and an inline fan to it and vented it outside. Luckily my place is kind of dumpy, and I have a piece of plywood in the space that's left from my window AC, since I have sliding windows.
Honestly, the smell of isopropyl tends to be worse.
You could get this https://www.amazon.com/gp/aw/d/B00F6BL11U/ref=mp_s_a_1_4?ie=UTF8&qid=1484578858&sr=8-4&pi=AC_SX236_SY340_QL65&keywords=inline+duct+fan&dpPl=1&dpID=41FrUZOvkKL&ref=plSrch and this https://www.amazon.com/gp/aw/d/B00EPE3XHY/ref=mp_s_a_1_1?ie=UTF8&qid=1484578916&sr=8-1&pi=AC_SX236_SY340_QL65&keywords=4+inch+duct&dpPl=1&dpID=5139MLHSyHL&ref=plSrch and use your imagination
You'll likely need to move more CFM than the fan you linked.
Just from a quick search of Amazon Canada, I'd go with THIS FAN, and THIS CONTROLLER.
I don't see any legit filters on Amazon Canada... or they are super-expensive. I definitely recommend getting a name-brand filter... that's not somewhere you want to cut costs (IMO). I'd try to find a hydro shop near you and see what they've got. Phresh and CAN are good ones... I know there are others.
You just need to make sure the filter is rated to handle at least as many CFM as the fan. The fan I linked is 400CFM... most (if not all) 6" filters will match up fine.
4x4 tent with 4 plants and a decent veg time and you could get about a lb or maybe a little less every 5 months.
4x4 set up is a lot less than $1000
tent $100 https://www.amazon.com/Apollo-Horticulture-Hydroponic-Indoor-Growing/dp/B00H9O6UJ0
light $170 https://www.amazon.com/iPower-Digital-Dimmable-System-Reflector/dp/B005GYRZV2
exhaust fan $100 https://www.amazon.com/Hydrofarm-ACDF6-Active-Air-Inline/dp/B00KWYJQYA
clip fans $20 - $40 https://www.amazon.com/Comfort-Zone-Clip-Stands-anywhere/dp/B000U9V47E
You still need buckets and soil as well as seeds or clones, but the bulk of what you need is right there.
You could swap out the HID lamp for some leds easily enough. Or upgrade to slightly better quality items, but you can get started for pretty cheap if you want.
Add a second set up like this and you can go perpetual grow and harvest several times a year.
I understand being overwhelmed at first here, but I couldn't imagine trying to figure it out from a different language, so props to you! You can definitely build your own setup, or you could purchase a grow tent. The sizes range anywhere from 4x4x7' (or 4 feet by 4 feet wide and 7 feet tall), smaller, bigger, there's something out there for everyone. Some common lighting sizes with MH/HID (metal-halide/high intensity discharge, just different styles for different stages) bulbs are 400W, 600W, 1000W or so I've seen on here. You could also go with LED lights, but I don't know much about those. It depends on how many plants you'd like to grow and the size of your space.
As far as fans, I would get more powerful inline fans like this or this to actually move the air around if you're planning a bigger grow. If you're not too worried about a carbon filter, which it never hurts to be, maybe you could try making a DIY one with some supplies from your store and a guide from this sub?
Hope this helped, best of luck and please update us! (ps your English is actually fine and easy to understand)
This fan
This pump
Right now it's venting outside but I'm looking into at least some filtration to not upset the neighbors.
I installed a 6" inline fan in the attic and have the exhaust run to the return air side of the AC for the house. The closet that the servers are in has a large enough opening between the bottom of the door and the flooring to pull enough air to create a cold and hot side for the servers.
https://www.amazon.com/gp/product/B00KWYJQYA/ref=oh_aui_detailpage_o05_s01?ie=UTF8&psc=1
i read where someone used a recessed door sensor and put it inside where the deadbolt locks. when it's locked, the sensor is 'closed' and when unlocked it's 'open'.
like this thing: https://www.amazon.com/Recessed-Door-Sensor-ZW089-Aeotec/dp/B0151Z49BO
I’d love to see Ring certify wireless in door sensors like these. I have monitoring so it’s not an option, but for self monitored maybe someone can confirm if they work?
Aeotec Recessed Door Sensor Gen5, Invisible Z-Wave Plus security and open / close sensor, Battery powered https://www.amazon.com/dp/B0151Z49BO/ref=cm_sw_r_cp_api_i_IsahDbKZMR709
I bought these door sensors for my doors coming in from the garage. So now my lights in the stairs turn on whenever the door is opened and stays on for 3 minutes.
Aeotec Recessed Door Sensor Gen5, Invisible Z-Wave Plus security and open / close sensor, Battery powered https://www.amazon.com/dp/B0151Z49BO/ref=cm_sw_r_cp_api_LmIFAbH89XVBC
I can't believe no one has said this yet. It does need a HUB though...
If you already dabble in home automation or want to get started, you could hard-wire this type of fixture each of them, then install this recessed z-wave sensor. In this case you'd also need to get smart bulbs (I like Osram LIGHTIFY bulbs. You can get on/off only ones for $20). Then you'd configure your hub to turn on the lights every time the contact opens, and turn them off when it closes.
If you don't want visible contact sensors on your door you can also use the Aeon Labs Recessed Door Sensor (ZW089-ZWUS). This requires you to drill a hole in the edge of the door and the door frame.
https://www.amazon.com/Aeotec-Aeon-Labs-ZW089-Recessed/dp/B0151Z49BO
A lot of the regular sensors have options for this. I actually haven't done this myself (my door is a bit of a problem for this sort of solution). Here are some I found (not affiliate links):
​
https://www.amazon.com/Aeotec-Recessed-Invisible-security-Battery/dp/B0151Z49BO
https://www.amazon.com/GE-Wireless-Attaches-Existing-32563/dp/B01KQDIUAW
https://www.monoprice.com/product?p_id=15268
If you're a homeowner, I would recommend going with a recessed sensor. https://www.amazon.com/Aeotec-Aeon-Labs-ZW089-Recessed/dp/B0151Z49BO
Otherwise, I would probably install the magnet (small piece) on the interior lip of the molding assuming the door has enough clearance to pass, then stick the sensor (big piece) to the door. I'm not really sure how the vibration from the door would affect life and longevity of the the sensor, though.
I had similar issue with old style "fluted" casing. I went with these traditional sensors. https://www.amazon.com/Recessed-Invisible-security-Battery-powered/dp/B0151Z49BO/ref=sr_1_3?ie=UTF8&qid=1520789443&sr=8-3&keywords=aeon+door+sensor
I'm using ecolink sensors, thinking of buying these. I just don't ever want to have to fuss with changing out batteries ever again, whether 1 month of 5 months or a year later. Just want to wire them and be done with it.
https://www.amazon.com/gp/product/B0151Z49BO
Being line voltage, that limits your choices. No Nest or Ecobee for you, unfortunately.
The StelPro may work for you, though:
https://www.amazon.com/STZW402WB-Thermostat-Electric-Baseboards-Convectors/dp/B01BYL1OAS
The statement about no smart thermostats for baseboard heating is not entirely accurate. Look at the StelPro:
https://www.amazon.com/Stelpro-STZW402WB-Thermostat-Baseboards-Convectors/dp/B01BYL1OAS
https://www.amazon.ca/Stelpro-STZW402WB-Electronic-Thermostats-Smart/dp/B01BYL1OAS/
I use these z-wave thermostat's for my electric baseboards...I quite like them as they are easy to set up and configure. I use a pi running HA and a z-stick.
Now if I can only figure out how to get the "outside temperature" feature to work with a virtual temperature sensor....
https://www.amazon.com/STZW402WB-Thermostat-Electric-Baseboards-Convectors/dp/B01BYL1OAS
This is for line voltage thermostats. Not sure if yours fits that bill
You need to cut the power, and open it up. There are two ways your baseboard heat could be wired:
Two hots (black and red wires, no neutral, and a ground). The line voltage thermostat controls both wires. Or, the thermostat controls one wire only. This is old school, and while it works, you still have one leg that is carrying voltage. But since you don't have a completed circuit, it doesn't get hot.
Hopefully the new wall heaters will have their own t-stat built into them. There are currently very few choices for modern smart 'stats that will work in your situation:
https://www.amazon.com/STZW402WB-Thermostat-Electric-Baseboards-Convectors/dp/B01BYL1OAS
A Bluetooth only version:
http://www.morelectricheating.com/default.aspx?page=item+detail&itemcode=KINGELECTRIC10395&catlist=2299&parent=9629
A wifi version, to connect to your home network:
http://www.morelectricheating.com/default.aspx?page=item+detail&itemcode=KINGELECTRIC10397&catlist=2299&parent=9629
I'm looking to do this too, and it looks like the Stelpro KI STZW402WB+ is the way to go as /u/jryanishere mentioned.
It's worth noting, that hooking a Nest up via a relay is NOT supported. Nest have taken down their community forum that had a good guide on how to do it. There are others on the web, but I'd steer clear.
Electric baseboard units typically have line-voltage thermostats, which the ecobee3 (or ecobee3lite) is not. So you need a different solution if you want to make them "smart", such as the Stelpro KI STZW402WB+, along with a z-wave controller.
For your radiator, you can use either the ecobee or the ecobee3 lite depending on how uniformly the radiators heat your downstairs. If there are hot/cold spots, then the ecobee3's sensors may be useful.
i have electric baseboard and use a stelpro KI z-wave thermostat for control.
you'd need a z-wave hub to bridge the two systems (i use smartthings), and with this unit alexa doesn't have native thermostat control -- i had to install the alexa helper apps for smartthings.
right now i have an 'off' temperature setpoint and an 'on' temperature setpoint, so i just have to say 'Alexa, turn the heat on' or 'Alexa turn the heat off' to switch setpoints respectively. i can also say 'Alexa turn the heat up' and it bumps the setpoint by 5 or 10 degrees (i forget which, and i'm not home to check). asking alexa to turn the heat down just turns it off (with my setup anyway).
Maybe this Stelpro KI STZW402WB+ Thermostat for Electric Baseboards and Convectors https://www.amazon.com/dp/B01BYL1OAS/ref=cm_sw_r_cp_api_i_XBr6AbR8BCPXT
Is that duct fan this one: https://www.amazon.com/VIVOSUN-Inline-Booster-Noise-Grounded/dp/B01C82SYZ0/ ? If so, I'm curious to know if it works with the filter. I almost got it, but the product descriptions says it's not for use with a carbon filter, so I thought it might not have enough pressure to push air through the filter. If it works, though, it is certainly a lot cheaper than the high-powered fans.
You can get a Vivosun inline 4" fan for like $25...
inline fan
I just use a 15$ 4” intake booster fan. Also made by vivosun.
VIVOSUN 4 inch Inline Duct... https://www.amazon.com/dp/B01C82SYZ0?ref=ppx_pop_mob_ap_share
I did something similar. I used PVC rather than aluminum because it was cheaper. I also installed an inline fan closer to the gable, which I wired with the ceiling van, and it helps a lot with the fan trying to push air that far. I have had zero issues with ice buildup on the outside vent.
https://www.amazon.com/VIVOSUN-Inline-Booster-Noise-Grounded/dp/B01C82SYZ0
First hit on 4" duct booster fan [amazon.ca](
https://www.amazon.ca/VIVOSUN-Duct-Booster-Fan-100CFM/dp/B01C82SYZ0/ref=sr_1_1?ie=UTF8&qid=1479753535&sr=8-1&keywords=4%22+duct+booster+fan)
Shopping list;
AmazonBasics 6-Outlet Surge Protector Power Strip, 6-Foot Long Cord, 790 Joule - White https://www.amazon.ca/dp/B00TP1C1UC/ref=cm_sw_r_sms_apa_i_H4B1DbVABEKV0
VIVOSUN 4 inch Inline Duct Booster Fan 100 CFM, Extreme Low Noise & Extra Long 5.5' Grounded Power Cord https://www.amazon.ca/dp/B01C82SYZ0/ref=cm_sw_r_sms_apa_i_33B1DbZQFHVBT
VIVOSUN 4 Inch Air Carbon Filter Odor Control with Australia Virgin Charcoal for Inline Fan Pre-Filter Included https://www.amazon.ca/dp/B01DXYMBU6/ref=cm_sw_r_sms_apa_i_D3B1DbXZRD3RS
Hydrofarm TM01015D Dual Outlet Grounded Timer https://www.amazon.ca/dp/B001Q1FZWA/ref=cm_sw_r_sms_apa_i_.2B1Db0WE33FY
LED Lights Strip 5M 5050 SMD Waterproof 150LEDs RGB Color Changing Flexible LED Light Strip Kit https://www.amazon.ca/dp/B07B5Z2Y34/ref=cm_sw_r_sms_apa_i_H2B1Db47ZRW0K
COB LED Grow Light, Niello Full Spectrum Grow Lights for Indoor Plants, Higher Light-Gathering, Space Saving and Easy to Install, Professional Greenhouse Hydroponic Indoor Plants(150W) https://www.amazon.ca/dp/B07DJ5WZQD/ref=cm_sw_r_sms_apa_i_M0B1DbJMFAJ20
Not included; tin tape, duct tape, 2" curved pvc tubes x3, zip ties, hot glue, and the Rubbermaid wheeled bin + lid.
Are they sucking air out of the tent or just out of the room?
Fans like this
Comfort Zone 6 Inch Clip-On Fan | Great for Table Tops, Night Stands and anywhere you need Light https://www.amazon.com/dp/B000U9V47E/ref=cm_sw_r_cp_api_DNq0AbD8QY6YQ
Or like this?
VIVOSUN 4 Inch 203 CFM Inline Duct Ventilation Fan with Variable Speed Controller https://www.amazon.com/dp/B01CTM0H6I/ref=cm_sw_r_cp_api_oOq0AbW0Q1Q5X
Also, are you exhausting from the ports at the top of the tent or the bottom?
Vivosun! Pretty great little fans:
https://www.amazon.com/dp/B01CTM0H6I/ref=cm_sw_r_cp_awdb_t1_l9aWBbGG2NW8R
It depends what fan you have. If you wanna spend $100 you can get one that’s way quieter. I have this one VIVOSUN 4 Inch 203 CFM Inline Duct... https://www.amazon.com/dp/B01CTM0H6I?ref=yo_pop_ma_swf
With mine you would probably be fine since there’s a door in the way for you. I can’t really hear mine if I go into another room.
Nope I own the one your talking about I believe.
VIVOSUN 4 Inch 203 CFM Inline Duct Ventilation Fan with Variable Speed Controller https://www.amazon.ca/dp/B01CTM0H6I/ref=cm_sw_r_cp_apa_E5BSAbG6PBC7B
They have another that was 10$ more then this one that I couldn't figure out the difference of. But the controller is built into the cable no installation needed.
Weird, your page looks a lot different than mine but its the same fan.
https://www.amazon.com/VIVOSUN-Inline-Variable-Speed-Controller/dp/B01CTM0H6I/ref=sr_1_1?ie=UTF8&qid=1516814367&sr=8-1&keywords=vivosun%2B4%2Binch&th=1&psc=1
Thanks for all of your help man, I'll be thinking of you when I get this beast set up.
https://www.amazon.com/gp/aw/d/B01CTM0H6I/ref=mp_s_a_1_1?ie=UTF8&qid=1522434096&sr=8-1&pi=AC_SX236_SY340_QL65&keywords=4in+inline+fan&dpPl=1&dpID=517%2B2qeoicL&ref=plSrch
This looks more like what I see people using. How's the brand?
this one is great, high quality and all you can hear is it moving a lot of air.
https://www.amazon.com/gp/aw/d/B01CTM0H6I/ref=mp_s_a_1_1?ie=UTF8&qid=1481517924&sr=8-1&pi=AC_SX236_SY340_FMwebp_QL65&keywords=vivosun+203
This is the one I bought on prime day for $25, pretty awesome so far, you can even set schedules and alerts. App Pretty user friendly and it was easy to set up.
Looks like it dropped to $80
MyQ Smart Garage Door Opener Chamberlain MYQ-G0301 - Wireless & Wi-Fi enabled Garage Hub with Smartphone Control
https://www.amazon.com/dp/B075H7Z5L8/ref=cm_sw_r_cp_apa_kia2BbS5X0XZ8
Liftmaster internet gateway (for newer liftmaster openers)
MyQ MYQ-G0301 for just about anything else
​
They had them on sale at walmart, Amazon & Best Buy this week for $30 and we picked one up for a friend of mine and worked instantly.... maybe its a faulty device.
https://www.amazon.com/Smart-Garage-Opener-Chamberlain-MYQ-G0301/dp/B075H7Z5L8/ref=sr_1_1_sspa?crid=3PYXX79JVZY06&
I bought the MyQ on prime day this year, https://www.amazon.com/dp/B075H7Z5L8, It works as expected but it doesn't integrate with nest, It does with Google but you can only open it through the app not voice command, you can close it with a voice command though.
M using this. It’s very simple to setup.
MyQ Smart Garage Door Opener Chamberlain MYQ-G0301 - Wireless & Wi-Fi enabled Garage Hub with Smartphone Control https://www.amazon.com/dp/B075H7Z5L8/ref=cm_sw_r_cp_api_i_PbDSDb4K2K0JZ
AC Infinity Cloudline, model depending on what you’re looking for and tent size. I have the basic S4 for my 2x3, it’s super quiet even when running on full power. Strong, durable construction and comes apart really easy for cleaning. I know they’re just exhaust fans and not super interesting but I played with mine for like a half hour before doing anything with it.
https://www.amazon.com/AC-Infinity-CLOUDLINE-S4-Controller/dp/B07JB292JC
I agree, I would not spend too much on the tent, and spent the most on the light, I would suggest the AC Infinity filter fan it is light powerful and adjustable
Move air through vents with in line fans. Super easy if you have an attic.
AC Infinity CLOUDLINE S4, Quiet 4" Inline Duct Fan with Speed Controller - Ventilation Exhaust Fan for Heating Cooling Booster, Grow Tents, Hydroponics https://www.amazon.com/dp/B07JB292JC/ref=cm_sw_r_cp_apa_i_lGRZDbYTQ5HB8
The duct fan that im using is this one on amazon.
https://www.amazon.com/AC-Infinity-CLOUDLINE-S4-Controller/dp/B07JB292JC/ref=sr_1_6?crid=1RWB03A6H659R&keywords=duct+fan+4+inch&qid=1573145365&sprefix=duct+fan+8+inch%2Caps%2C134&sr=8-6
I originally had used a smaller 4" duct fan that was rated for 100cfm but that wasnt strong enough to evacuate the fumes from my enclosure. Im pretty happy with this fan as its quiet and i can barely notice it running sitting next to the printer.
Im in a full enclosure that i built and my enclosure temps stay around 80 degrees F while printing with this fan running at max.
I’ve check out the CloudLine s4 but haven’t heard much about it. Is it fairly new?
What about Meross?
https://www.amazon.com/meross-Smart-Control-Compatible-Assistant/dp/B07L5DPK8P/ref=mp_s_a_1_4?keywords=meross&qid=1563418189&s=gateway&sprefix=mero&sr=8-4
I bought and installed this for my dad. Highly recommend - you can view status and control door from your phone. Easy all around. I'm sure there are similar front door locks to do similar.
meross Smart Wi-Fi Garage Door Opener Remote, APP Control, Compatible with Alexa, Google Assistant and IFTTT, No Hub Needed https://www.amazon.com/dp/B07L5DPK8P/ref=cm_sw_r_cp_apa_i_YuDxDb7RVMM2N
https://www.amazon.com/meross-Smart-Control-Compatible-Assistant/dp/B07L5DPK8P
This was recomended above and I am thinking of getting it.
Meross garage door opener
https://www.amazon.com/dp/B07L5DPK8P/ref=cm_sw_r_sms_apa_i_CVe2Db0HKQ8AK
This doesn't help with your question but, if this thing goes on sale this week (Amazon Prime Days), then replace the MYQ https://www.amazon.com/gp/product/B07L5DPK8P
The idea that Chamberlain will charge to use something free like IFTTT is just ridiculous.
Meross Smart Wifi Adapter https://www.amazon.com/exec/obidos/ASIN/B07L5DPK8P/ is a whole lot better than Myq g0301. It's currently $20 OFF applied at checkout too, so it's $30 total with Prime. Scroll down to the bottom of this article for the comparison why you shouldn't use Chamberlain, mostly because of the multiple hoops and delays the signal has to jump through.
I use this: http://www.amazon.com/dp/B0051HDECS/ref=pe_175190_21431760_cs_sce_3p_dp_1
my tent is 4x4x7
I would stick with using a fan. The trick is you cannot just put a computer fan blowing upwards into some insulated tubing. Think of blowing into a 12' pipe with a cap on the end; the air needs somewhere to go or it will not flow. You need to use a centrifugal fan (like this) in your keezer and figure out a way to attach it to smaller tubing (probably 1"ish in diameter) and run the tubing up to your beer tower in the kitchen. This way the cold air is blowing out at the top of your beer lines and will circulate back down into the keezer. If you try this with a normal computer fan it will not work; they are very low pressure but high cfm. Since your fan will be acting more like an air pump than a fan it needs to be a powerful centrifugal fan (higher pressure) or their will not be enough air pressure to travel through a 12' tube.
You should be able to pull that metal part down to get better reach on it.
​
Go to your home improvement store and buy a new hose, you want a more metal looking one.
It should come with 4" hose clamps that screw to tighten them.
​
https://www.amazon.com/iPower-Non-Insulated-Aluminum-Ventilation-included/dp/B00EPE3XHY/ref=sr_1_3?keywords=dryer+hose&qid=1563120074&s=gateway&sr=8-3
​
It is much easier to tighten these hose clamps with a nut driver or nut.
This Hydrofarm Active Air is the one you want. No bells. No whistles. Super well-built.