(Part 3) Best wall painting supplies according to redditors
We found 3,520 Reddit comments discussing the best wall painting supplies. We ranked the 1,670 resulting products by number of redditors who mentioned them. Here are the products ranked 41-60. You can also go back to the previous section.


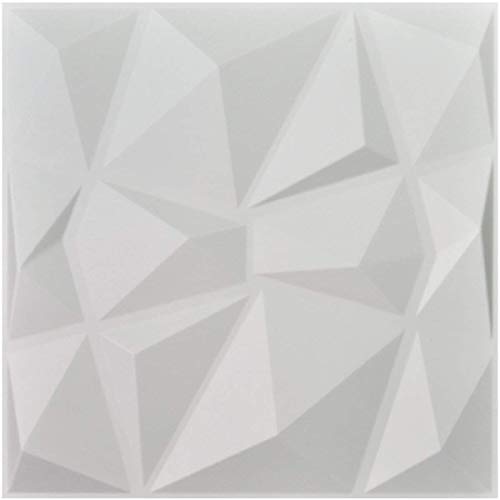
Art3d Decorative 3D Wall Panels Diamond Design Pack of 12 Tiles 32 Sq Ft (Plant Fiber) https://www.amazon.com/dp/B01A6TV9H2/ref=cm_sw_r_cp_api_i_RLe4Db3EJTPWE
Another tool you may be able to rent or buy is a wallpaper steamer:
https://www.amazon.com/Wagner-Products-1-Gallon-Wallpaper-Steamer-x/dp/B0009XEL4O
As an old house lover (and fellow old house owner), I'm begging you to please restore those windows! It can be done!
I'm making this response extra long and detailed since this question comes up from time to time. Hopefully it can be a resource for others.
But I say this as a guy who bought a real wreck of a house where the previous owner had let everything go. We needed to fix all 45 openings at once as part of a major rehab, and after 6 weeks of effort, about $3000 of experimentation (including taking a week off work and hiring two people to help me), I finally gave up and put in vinyl windows. It completely broke my heart, and my house is uglier because of it. But sometimes, an old window is just too far gone to save. But in that process I learned a lot and I'd like to share a few things.
OK, on to your questions.
General resources and tools I found useful:
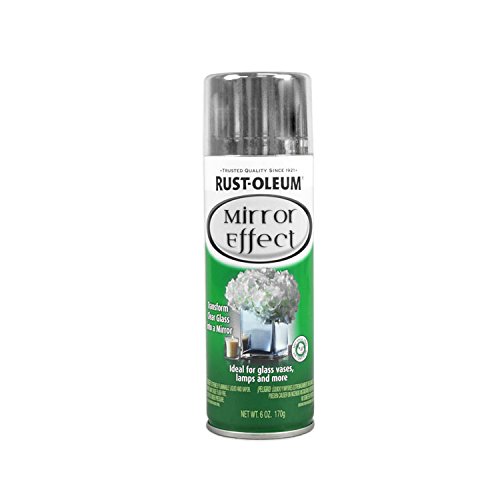
You can buy mirror spray though- that turns glass into mirrors, so you sort of can.
Two-way mirrors are pretty cheap, you can even make some okay ones yourself with some mirror spray paint.
https://www.amazon.com/3M-OCS1137-Classic-Earplugs-Pillow/dp/B008MCU2M4
My dad has a box of hundreds and hundreds of pairs at home from when he worked at GM. He used custom re-usable ear plugs but GM was forced to give these to everyone so he kinda collected them and saved them just in-case.
Rustoleom has been making this stuff for like a decade. http://www.amazon.com/Rust-Oleum-214944-Reflective-10-Ounce-Spray/dp/B000LNVC1M
Ive had success with this spray but it comes off fairly easily.
My next project is to install a servo to a switch on the bars that just flips the plates up when going through them.
My recommended buying list for a new painter is:
Tools
Sprays
○ Grey is standard, white if you're painting a majority of light colors, and black if the majority is dark.
Brushes
○ Round 0
○ Round 1
○ Round 2
All in all it should be around $60 USD for the tools and about $40 USD for the brushes. However, this list gives you every tool you will need to get started and to continue with the hobby.
This is just what I like to have on hand, this does not reflect the "perfect list". I hope it helps :)
Retroreflectives are fuckin cool.
Here's some spray if anyone wants to experiment with stenciling, but there's also tape and all kinds of stuff. Fun when everyone has headlamps.
https://www.amazon.com/Rust-Oleum-214944-Reflective-10-Ounce-Spray/dp/B000LNVC1M
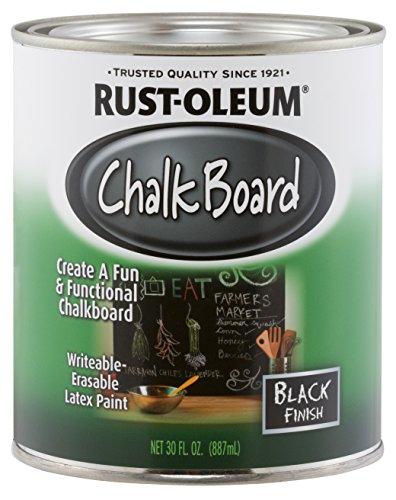
What about chalkboard paint?
https://www.amazon.com/Rust-Oleum-206540-Chalkboard-Brush-30-Ounce/dp/B0006BAEI6
This would keep the doors movable for any repairs, but would make the space look more purposeful with a contrast color.
Yep! The first aid / medical center at any park should have them. They're just the cheap 3M disposable ones.
You can get a spiky tool that will puncture the wall paper and make it possible to either spread a wallpaper release agent or steam the wallpaper off.
I don't know anything about any of those products, but figured they would give you a place to start more research.
EDIT: you will probably need to skim coat some areas of the walls and retexture.
Here is a list of things that people will always need, I understand you can't stock everything as overhead is an issue with retail, and storage as well, but most of these are small enough that they can occupy the shelf space you currently have. As for the larger things, like the 2020 extrusions, you could sell them in common lengths of 500mm and 1000mm and let the customer cut them down to the size they need, or just don't carry these at all. It's not a niche item, but for a retail store like you it would be hard to store and maintain, but man, would it be nice to be able to get those locally if i needed a piece for a project instead of having to wait on mail order.
this is just a basic list, others have listed other things as well, Steppers, Belts, Pulleys, Bearings etc. If you want 3d printing as a reason for other people to go to your store, these items will satisfy the need. Just keep prices fair, I have no issue paying a bit more compared to amazon to get it today.
Reflective paint would be harder to prove if pulled over
https://www.amazon.com/Rust-Oleum-214944-Reflective-10-Ounce-Spray/dp/B000LNVC1M/ref=sr_1_1?ie=UTF8&qid=1480431180&sr=8-1&keywords=reflective+clear+paint
Haha, thanks dude. You can get the art here.
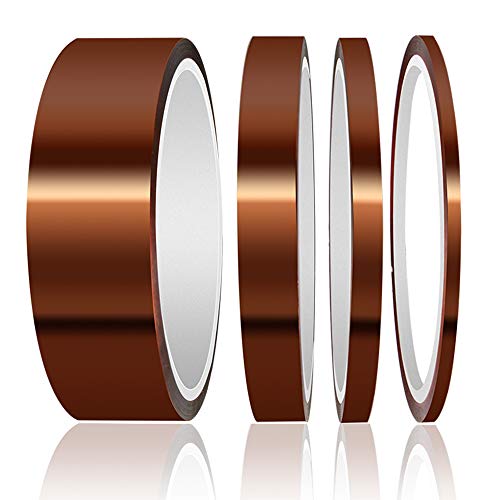
As /u/kent_eh pointed out, Kapton tape is frequently used for this because it’s heat resistant. But if you’re trying to position a large component body or a cable, you might want something more like helping hands. You could also use ceramic modeling clay (not polymer clay) if you want something that behaves more like sticky tack. It won’t be as sticky, but it’d be easily deformed to hold a part in place and won’t melt with heat.
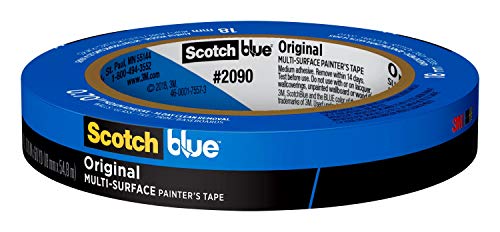
https://www.amazon.com/ScotchBlue-Painters-Multi-Use-70-Inch-60-Yard/dp/B00004Z4BB
Things I've learned starting out:
Wash the miniatures. I found the easiest way was those little ziploc plastic containers. Warm dishsoapy water in them, throw a few minis in, scrub them with an old toothbrush, rinse them off and toss them into a second ziploc container filled with plain water. Then drain and refill that a few times to get all the soap out. Be careful you don't dump them down a drain.
Take them out of the warm fresh water and put em onto a plate with a paper towel or something to dry. I like to organize them into which model belongs to what at this point.
I invested on a sprue cutter and it has been WONDERFUL for me to remove pesky mold lines and the bigger tags sticking out of models. Also an xacto knife helps.
I got some cheap needle files from Harbor Freight and they've helped get the flash lines flush without any weirdness.
After your stuffs all pretty and moldline free I tend to toss it into a sonic cleaner because I work at a lab. It might be placebo but the industrial strength badass one at work seems to get clean and I mean... why not? But you can do the water and rinse again. Or even just do it once, after the mold line removal. (Side note: sonic cleaners are PRETTY RADICAL for removing paint from miniatures with some simple green. I love it. Saves me a lot of scrubbing.)
Anyway once its dry I personally use this glue and some stuff called green stuff to fill in gaps. Heres a tut showing the basic idea
Once they're assembled I use some good ol elmer's white glue on the bases and dip em in sand and shake them off. Tutorial that shows that
Then prime your stuff. Tons of tutorials about it and tons of everyone saying which is their favorite primer, spray or brush on, different types of primer, different brands. Some stand by Army Painter or Citadel. I've had good results with Rustoleum Ultra Cover 2x White primer. I've recently picked up some TAMIYA WHITE which I hear good things about. Trying them on some Morats tomorrow.
Lots of other good info has been posted too! I also just started probably, shit, 6 months ago, so this is stuff I've had to pick up and learn as I go.
Because it is!
They make paint that will turn any surface into a chalkboard. It really works too, when I was little my parents painted a whole wall with it and it was pretty neat.
Here's a link:
http://www.amazon.com/gp/aw/d/B0006BAEI6
For stickers on glass, don't use goo-gone. Use a razor blade to scrape the glass.
https://www.amazon.com/Hyde-Tools-13050-Scraper-Blades/dp/B000BPEPSC
It does not scratch, and takes less than a minute. Also, use it for your glass top stoves too.... Years of baked on grime on the rings will come off and it will look like new.
Agreed.
I have all my friends keep New Glarus bottles because they are AWESOME to remove. The adhesive is water soluble and they literally fall off in an iced down cooler (which can be a pain at the beach, but great for me!)
I also recommend a small glass scraper blade like this guy. Even the hardest labels only take a minute to scrape off. Especially when already soaked.
My suggestion is forget the wax. Strip the remaining wax out, and get a product called Envirotex. It's a simple two part epoxy, is food safe, and you can put pretty much any liquid in the horn after. When you do it, there are some procedures (which I can elaborate on if needed) that will ensure a good coating, and will even protect that edge from further chipping.
Now, that said, this post isn't really suitable for this sub. It's not really about heathenry. My suggestion to you is to either PM me if you need more help than this answer, or go ask on /r/SCA. They'll have your answer there for sure if you want other opinions. I'll leave this post up for a short time because I know your problem is a frustrating one to have, but I'm going to have to delete it soon unless you delete it first.
best markers I've found are POSCA paint markers.
I would do a light sanding with 800 grade sand paper on them, prime them with the backing color you want, and let it dry. Then you can draw on them and clear coat.
I recommend doing it this way, as sometimes if you don't prep the plate first the clear coat can have weird effects.
The items I've used:
https://www.amazon.com/280715-American-Accents-Primer-12-Ounce/dp/B00KZ6LLZW/ref=sr_1_2?ie=UTF8&qid=1491242783&sr=8-2&keywords=Rustoleum+Primer
https://www.amazon.com/Uni-posca-Paint-Marker-Pen-PC-5M15C/dp/B001ANVDMU
The primer you can use black/white/any color for backing, and I use the same brand in a clear matte finish for the clear coat.
Yup. I think they're a pretty neat idea if it works well for the room.
https://www.amazon.com/dp/B01A6TV9H2/ref=dp_cerb_1
Don't know if those are the exact ones, as they have different materials for sale.
If you have any questions about getting the Photon going, give me a holler. I made all of the regular mistakes, so can probably help.
I will say the following:
Leveling the plate is the most important thing you can do. My process is a lot like the generic instructions, but I take it a step farther: When I level the very first time, I loosen the top screw, and the four build plate screws as well. I then use the paper method (Get a regular piece of printer paper under the plate and gently .01mm lower the plate from 0 until the paper can be pulled out, but not pushed back in. I then hold the plate in my hand and don't let it move as I tighten down the 4 plate screws in an X formation. I then check the paper, and usually have to lower it a few .01 mm at a time until it's back to being tight. Then I hold the plate again by hand and tighten the center screw. Finally, I hold the square head and tighten down a quarter turn or so more to really lock it in place. At that point, I try to leave it alone until it gets moved, or prints get weird. I haven't had to re-level this since then.
For the Thumb Drive: Seriously, replace the one it comes with. I fixed a lot of problems by spending $10 at Frys. Resist temptation to get a large drive. You don't need it, and it can mess up on the Photon. I got a 16GB Sony, and it works really well. I still have occasional issues where I've ejected the drive, and will have to put it back in the computer, and re-eject. This happens about 1/6 or so times. A little irritating, but not a huge issue.
Download Chitubox. Use it. Forget the included Photon Slicer, which is simply an older version of Chitubox, and is inferior in every way.
Don't be afraid to use 3rd party resin. Like I said, I use Elegoo grey. It's a little thinner, but that doesn't seem to give me any less in the way of prints, but it does make it a little easier to get off of the build plate.
Invest in some plastic putty knives. By some, I mean a lot. They're about $1 each at Home Depot, or you can buy in bulk from Amaozn. I also sometimes use a [plastic razor scraper ] (https://www.amazon.com/gp/product/B076BBW1WM/ref=ppx_yo_dt_b_asin_title_o05__o00_s00?ie=UTF8&psc=1), but honestly, the plastic putty knives work great. I never use metal on the build plate.
Stir your resin between prints.
Don't overfill resin.
Inspect your print basin every few days for leaks. A leak onto your LED screen is a bear to get off.
Buy a big pack of nitrile gloves, a bunch of 99% IPA, and some jars or bins where you can rinse off resin.
You can buy a $11 UV nail curing station from Amazon that'll work beautifully to cure your prints. It actually works great, and there's no real reason to buy something more expensive, except for convenience.
Anyway, I could go on, but this is a basic overview based on all of the mistakes I've made, and hopefully learned from!
Edit : thanks for the gold!
This stuff, aka painter's tape, for those that don't wanna click.
Edit to add - vinegar also helps remove rust, and if you're afraid steel wool will be too abrasive, use aluminum foil as your scrubber. Foil and vinegar is a long-standing rust removal tool, but use only tiny amounts of vinegar, you don't want it to drip down along the side of the pole inside the pickup.
Add'l edit to add - anything that removes the rust is going to make it go somewhere - I read that having a vacuum running while you do it is a good precaution to keep the tiny rusty bits being removed from getting everywhere.
Meta-hobby! I've only been back into collecting for about 3 months. I have about 60 at the moment.
My washing method (3rd time I posted this today...I should probably just make it a post :) is as follows:
The technique:
Pan 1 has the water, tergikleen (just a few drops) and rubber washers. Pan 2 has clean water for rinsing
I fill pan 1 just deep enough to cover the rubber pads and the top of a record when placed in.
I then place in a record, submerge it, then take the paint pad and do a few laps in one direction, then a few in the other. The rubber pads allow you to wash the record right in the pan without hurting the underside of the record. It also prevents the LP from 'sticking' to the pan due to suction.
Flip the record over, repeat.
Give it a bath in the rinse water.
Dry with the towels.
Prop up on a shelf to finish air drying.
Works great.
Larger ones: https://smile.amazon.com/Art3d-Decorative-Panels-Diamond-Design/dp/B01A6TV9H2/?pldnSite=1
This is more for anyone else that needs it, but this tape has a size that fits it about perfect. Also while I believe pin #3 is the only one required for it to work, pins 1 and 2 can also be covered without causing any issues.
You want plastic razor blades.
https://www.amazon.com/FOSHIO-Scrapers-Contoured-Refillable-Application/dp/B076BBW1WM/ref=sr_1_2_sspa?keywords=plastic+razor+blade&qid=1568816210&sr=8-2-spons&psc=1&spLa=ZW5jcnlwdGVkUXVhbGlmaWVyPUEzSlc0M0NQTkkzSFJDJmVuY3J5cHRlZElkPUEwNjI3NDg5M09TSkVBOTJJV1pIOSZlbmNyeXB0ZWRBZElkPUEwNjM2MzYwM0xLREs0T05IVjhJUCZ3aWRnZXROYW1lPXNwX2F0ZiZhY3Rpb249Y2xpY2tSZWRpcmVjdCZkb05vdExvZ0NsaWNrPXRydWU=
Definitely tape the fretboard off with painter's tape! It's specifically designed to seal/stick well and release cleanly/easily. Aside from using it to tape off guitar necks, as a former roller derby ref we used it to tape down tracks on top of expensive roller skating rinks floors. Always came up easily!
I painted my stairwell this weekend and used this. http://www.amazon.com/gp/aw/d/B0001MQI9E. worked great.
Edit: I also used a 10 or 12 ft extension.
If it is paper-like, get a wallpaper remover (like this: http://www.amazon.com/Wagner-0282018-Steamer-1-Gallon-Wallpaper/dp/B0009XEL4O/ref=sr_1_1?ie=UTF8&qid=1418328051&sr=8-1&keywords=wagner+wall+paper+steamer) and let it do it's thing on small sections at a time.
My Fiancee and I (really her though :) ) removed lots of glued-down linoleum paper backing after scraping up the top part. Worked great, just took a while with the steamer and a good putty knife.
I use burned pieces of wood with all sorts of cracks and imperfections http://imgur.com/xkuVfVG and what I use and stand by is http://www.amazon.ca/gp/aw/d/B000LNS9CW that.
Get a few different sizes of brush and you'll be set.
There is reflective spray paint available. I've been thinking about getting it for my foul weather commuter.
http://www.amazon.com/Rust-Oleum-214944-Reflective-10-Ounce-Spray/dp/B000LNVC1M
EDIT: another option is to use reflective glass beads. Process would be something like: paint, coat with beads while tacky, and maybe clear coat.
They are actually stickers I got off Amazon. Let me find a link.... :)
Edit: these are the ones I bought
Nintendo Wall Graphics - Super Mario Bros https://www.amazon.com/dp/B001JK6EXW/ref=cm_sw_r_cp_apa_i_pWmQCbEP0K0CZ
I re-finished my 870 recently. http://i.imgur.com/vcYaJgt.jpg
Take some steel wool and strip the shitty old park off. Degrease with Break cleaner or acetone. Buy a can of this: http://www.amazon.com/Rust-Oleum-248903-Automotive-12-Ounce-Degree/dp/B003CT4AKC and spray all the metal with it. Bake it in the oven according to the instructions (but do the 3rd round of baking @ 450 not 600+) (NOTE: DO NO BAKE THE TRIGGER GROUP/BOLT).
(the wood was done with pine tar and leather dye)
The total cost for re-doing the metal was 10-12$ and it is at least as durable if not more durable than something like duracote.
Nope, although you might get away with it depending on your goals.
Finishing wood for outdoors is really difficult, largely because of the UV exposure. Almost any finish breaks down over time and needs reapplied every so often, but if the finish isn't UV-stabilized specifically for outdoor use, that process takes days or weeks instead of years.
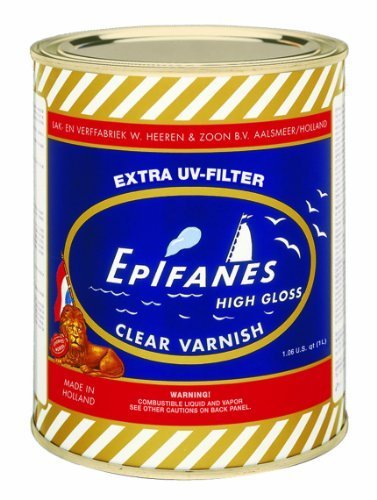
The most protection you can give wood is paint, or a semi-opaque deck stain, which is pretty much the same thing. If you don't want to obscure the grain that much, you need to look at marine varnishes, since they're typically formulated for serious long-term exposure. Epifanes Classic is widely regarded as one of the best options, but any boat supply place will have other options. Follow the directions exactly, no matter how complex the coating schedule. "Spar urethane" from a hardware store, like Minwax Helmsman, is plenty waterproof and can handle a bit of sunlight, but it can't handle long-term daily exposure like the better finishes. Unfortunately, even those better finishes will eventually break down and need recoated.
Another option is to skip the finish entirely. Trees spend quite a lot of time outdoors, and perhaps unsurprisingly some species are quite good at it even once you strip off the bark. Ipe, osage orange, black locust, and teak are some of the best choices, and white oak, western red cedar, and black walnut are pretty decent as well. Those woods, with no finish at all, will survive longer than most wood finishes.
If you happened to make your marker out of a resilient wood, the Danish oil won't help much but also won't hurt. You could stick it outside now and likely be fine for a decade or two. If it's not one of those woods, spend some time putting a high-end marine varnish on. It'll still need touched up occasionally, but that'll give it a shot.
Ultimately, I hope you're not expecting a century of service out of this. Wood is great, but tombstones are usually granite for a reason.
$8.04
$6.21
$3.09
$1.65
$1.00
$19.99
--------
Gifting is fun!
Rust-Oleum 267727 Specialty Mirror Spray, 6-Ounce https://www.amazon.com/dp/B00FMRXJW2/ref=cm_sw_r_cp_apa_06L1BbWXAW89Y
Already put in a can by yours truly... Rustoleum
I generally use the black version of this:
https://www.amazon.com/gp/aw/d/B00KZ6LLZW/ref=mp_s_a_1_5?ie=UTF8&qid=1525458432&sr=8-5&pi=AC_SX236_SY340_QL65&keywords=rustoleum+primer+spray&dpPl=1&dpID=411BtTZGTJL&ref=plSrch
It is relatively inexpensive and plastic safe.
Alternatively you can use Games Workshop's spray primers, but they are really expensive.
3D art panels
Art3d Decorative 3D Wall Panels Diamond Design Pack of 12 Tiles 32 Sq Ft (Plant Fiber) https://www.amazon.com/dp/B01A6TV9H2/ref=cm_sw_r_cp_api_i_jx16CbY383NRB
Oops my bad I’m at work so just skimming. No me and my roommate work in body shops and we each got one from our shops lol. We use plastic blades to peel off decals and bumper stickers and whatnot.
FOSHIO 2PCS Plastic Razor Scrapers Knife with Contoured Grip + 100 PCS 1.5 inch Refillable Double Edge Plastic Razor Blades Ideal for Auto Window Tint Vinyl Tool Application https://www.amazon.com/dp/B076BBW1WM/ref=cm_sw_r_cp_api_i_T0GjDb9ZB50AX
>duct-tape or similar items at the hardware store.
No! It'll DESTROY the surface. Use this stuff
It appears to be painter's tape which doesn't leave a residue.
http://imgur.com/a/EMEaU
This is a christmas light I printed as a gift for my Grandma on a Rostock V2 Max.
I used cheap white PLA from bgastore on ebay (link later).
I designed the file in Autodesk Inventor 2017 Student Version and in Meshmixer. I also used Meshmixer to create the custom supports for the model. http://www.thingiverse.com/thing:1914863
The model was printed on Blue Tape with no glue or bed heat.
Support removal took around 3 hours, I started with the middle, then went around the text and then finished up at the top of the model. I used needle nose pliers and wire cutters I would not recommend printing this unless you have both.
Afterwards I used acrylic paint to paint over the text. The surface was rough if you’re planning on painting this model I would recommend sanding it first.
The print can be kept as a christmas tree ornament or as a light. It’s possible cut a hole in it to fit a large lightbulb in or order a small one off of amazon. Make sure the bulb doesn’t touch the sides of the print as it can melt the plastic.
Cura Settings:
Layer Height: .3mm
Line Width: .5mm
Wall Line Width: 1mm
Top/Bottom Thickness: 2mm
Infil: solid
Print temp : 205
Build Plate: 0
Retraction speed: 50mm/s
Extra Prime amount: .1mm
Minimum Extrusion Distance Window: 6.5mm
Speed: 30mm/s
Wall Speed: 15mm/s
Initial Layer Speed: 8mm/s
Combing mode: all
Z hop when travelling: 2mm
Cooling: fan 100%
No support, the meshmixer supports are enough
Brim: 1mm
Link to plastic:
http://www.ebay.com/itm/like/391087201228?lpid=82&chn=ps&ul_ref=http%253A%252F%252Frover.ebay.com%252Frover%252F1%252F711-117182-37290-0%252F2%253Fmtid%253D1588%2526kwid%253D1%2526crlp%253D145795696709_324272%2526itemid%253D391087201228%2526targetid%253D265536273303%2526rpc%253D0.08%2526rpc_upld_id%253D91336%2526device%253Dm%2526mpre%253Dhttp%25253A%25252F%25252Fwww.ebay.com%25252Fulk%25252Fitm%25252Flike%25252F391087201228%25253Flpid%25253D82%252526chn%25253Dps%2526adtype%253Dpla%2526googleloc%253D9005779%2526poi%253D%2526campaignid%253D672333784%2526adgroupid%253D29658622530%2526rlsatarget%253Dpla-265536273303%2526gclid%253DCj0KEQiA08rBBRDUn4qproqwzYMBEiQAqpzns6jXyE4PiaoJpcMmUbU6nRO9XAd2FxXUSDttHbQfGFAaAjGt8P8HAQ%2526srcrot%253D711-117182-37290-0%2526rvr_id%253D1127005495389&ul_noapp=true
Tape:
https://www.amazon.com/ScotchBlue-Painters-Multi-Use-70-Inch-60-Yard/dp/B00004Z4BB
https://www.amazon.com/3M-ScotchBlue-Painters-Tape-Multi-Surfaces/dp/B00004Z4BB?th=1
This stuff is an absolute godsend for dorm walls
so far i brush, i tend to use different varnish depending on where im using it, gloss on lenses semi gloss on armor flat on dirt ect. I do hope to get an airbrugh before christmas comes though, have a drop pod i need to paint and im just not happy with how brushing the base color is looking, no matter how thin or how many coats i cant get a nice even tone to work from
try this for primer, ive absolutely love using it, goes on super thing but nice and solid, doesnt fill in details
Tamiya fine surface primer is a really thin primer that I'm using for my resin minis, does a good job of not filling in all the fine details.
https://www.amazon.com/dp/B0000WS01E/ref=cm_sw_r_em_apa_i_Ef6TDbK9HYY3F
This tool helped a lot for edging in our house. We didn't even have to tape for it. Just kept a damp rag on hand for quickly wiping up mistakes.
It does need an actual hard edge to work well though. If your baseboards end in a soft curvy finish, you'll probably still want to tape them.
I am linking this Chalkboard Paint. And I think it would be just fabulous because it is currently snowing in NY (which one could argue is just colder rain) and I am in the mood to paint a fun & functional wall somewhere in my house. I also kind of want to paint a big chalkboard for my office for the kids to use. They definitely don't have real chalk boards in school anymore. Plus it's under $10 and prime eligible.
Rust-Oleum 206540 Chalkboard Brush-On, Black, 30-Ounce by Rust-Oleum http://www.amazon.com/dp/B0006BAEI6/ref=cm_sw_r_udp_awd_3SYetb1J8HNJV
The old man in snoring
It's painted on. You can make the board any size, shape, etc. I plan to do this for our son when he gets older.
I would suggest using some of that whiteboard paint or chalkboard paint for the top. Minimizes the number of pieces that can be lost by the drunks.
http://www.amazon.com/Wagner-0282018-Steamer-1-Gallon-Wallpaper/dp/B0009XEL4O/ref=sr_1_1?ie=UTF8&qid=1420737039&sr=8-1&keywords=wagner+wallpaper+steamer This is the steamer that is pictured. I bought this steamer myself. It was worth every cent. I believe it was 2-4 times faster (compared to Fabric Softener and hot water) and much cleaner. You can always sell it on craigslist when you are done with it.
Try some filter floss. Pack a bunch into the final stage of your filter(s) it does a great job of cleaning up the very fine floaties.
As for the algae, a razor blade does wonders. Just be careful around the silicone joints. Something like this is easier on the hands than just a blade.
countertop epoxy resin
e.g.
http://smile.amazon.com/Environmental-Technology-16-Ounce-Pour-On-Finish/dp/B000LNS9CW/ref=sr_1_1?ie=UTF8&qid=1404959896&sr=8-1&keywords=countertop+epoxy+resin
I have refinished a few tabletops using this method:
Good Luck!
Yeah, I thought about that too after I posted my reply. Another possible option would be some flat black automotive exhaust system paint.
You're on the right track. The single barrel UDS upright is really only 4 main parts. You have your drum, a fire basket, grate, and lid. I'm at work otherwise I would take pics of mine and walk you through it. Might be able to still do that later but here are a couple things to look at to get you started. link cross section
I have a heat deflector on my charcoal basket as well. It was cheaper to just make a clover shape deflector out of 3 pizza pans with a bolt through the edge. All about getting creative.
Here's a write up of how I made mine:
Now I don't move mine far so I never installed the castors that I was planning on using. I had the basic design in my head of using angle iron and basically making a permanent hand truck that attaches to the side of the drum and all you had to do to move it was tilt the drum onto the wheels and you're off.
This is a pretty rough write up and I apologize for the lack of pics. If I can find my build pics, I'll post them here. Let me know if you have any questions or if I can help!
A can of black Grill Paint will tolerate the heat and cover that mark.
http://www.amazon.com/Rust-Oleum-248903-Automotive-12-Ounce-Degree/dp/B003CT4AKC/ref=sr_1_2?ie=UTF8&qid=1414706936&sr=8-2&keywords=grill+paint
If you want it black I suggest high temp paint
Poly will. You can mess around with spar/long oil varnishes, or you can just do it right the first time and stop fucking around
Water based poly wont stand up for long if it's left outside. If you want to refinish it every year it will work. Oil based poly will last a little longer but spar urethane will last longer outside and marine varnish (something like Epifanes Marine Varnish will last for years exposed to the elements. It's not the cheapest option though.
I would use spar varnish with UV blockers, like a marine finish meant for boats, for example this one:
https://www.amazon.com/Epifanes-ECVSA-Clear-Varnish/dp/B005ADWQ9U?th=1&psc=1
Cheapest
What I REALLY want :P it is an amazing iron that does NOT ruin your hair every time you use it! OR basically anything else on my list :P
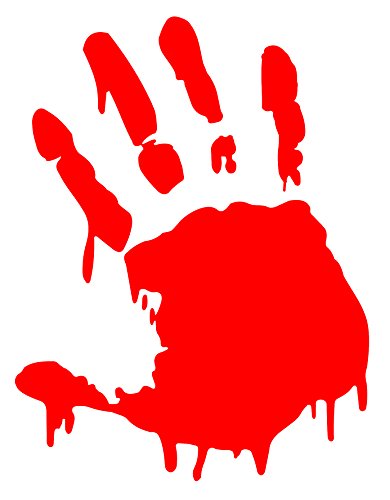
Bloody Handprint decal for $1.54 with free shipping
Syringe pens $3.50 with free shipping
Awesome "grown up" coloring book for $3.59 with free shipping If you enjoy coloring but don't want to color "kiddie" coloring books search for "Dover Design Coloring Books" They have tons of all different kinds of coloring books that are more for older people. Some stuff that are just cool designs, some stuff actually different subjects. I find coloring soothing, and theses books are really awesome to color in. Especially if you get some nice gel pens.
25 tiny monkeys for $4.10 and free shipping Because who doesn't like tiny monkeys? ;)
I have odd and varied stuff because I like a bit of everything.
$1.05 with free shipping!
Thanks for the contest!
There's this cool bloody hand sticker that can be used almost anywhere! I have yet to get one for myself, but I think it would look nice.
https://www.amazon.com/3M-OCS1137-Classic-Earplugs-Pillow/dp/B008MCU2M4
Yellow foam earplugs, the most effective and most comfortable.
> Whenever I wear earplugs for more than an hour or so they hurt my ears,
Well, what kind of earplugs? Not all earplugs are created equal.
>I'm afraid these types of headsets will do the same,
I have extremely narrow ear canals, especially in my left ear, as in Q tips are a tight fit. But I've never had comfort issues. Yes, when brand new I do feel a bit of pressure but it's not bad, and after 5 hours of use or so they mold to your ears perfectly fine and hold the shape of your canal.
The Halos will ship with 3 different types of plugs. So you can see which ones fit you best. The ones most people use are these which are basically these with a tube through them. I recommend you buy a set of these and try them out. And don't be so quick to dismiss them, genuinely wear them for several hours. Also, it wouldn't be that hard to trim them down on your own with an box cutter/exacto knife.
http://www.amazon.com/gp/aw/d/B008MCU2M4/ref=mp_s_a_1_6?qid=1452223564&sr=8-6&pi=SL75_QL70&keywords=3m+ear+plugs
This picture is actually on my fridge. We had //just// gotten her and she was sitting in boxes all the time and jumped into a box that I was wrapping christmas presents in and then storing nice and neat. When we weren't looking, she would lean down and oh so delicately nibble the cardboard or the presents then look so innocent when caught :points to the picture:
Or paper.
Or any paper and cardboard or card stock. She's got a think for paper.
I have a thing for cardstock of another nature, if I can so be indulged if I win and/or some stars and planets to make a Dr. Who bedroom just that more awesome. Because it's just the same unless the tardis has the universe around it!
Edit: Raffle phrase! IF I FITS I SITS ... She sat.
$1.64 plus free shipping. Thanks for the contest!
Glow in the dark stickers, duh.
I'm watching Doctor Who and this is my favorite recurring pun.
[Doctor somehow ends up in a locked facility] Random dude: How do you suppose he got in? Other random dude: In-tru-der window?
Pigeons, pigeons, on the wall,
If you don't glue them,
They will fall!
My son would love these
What time is it?
Adventure Time!!!!!!
This, this and this are lumping awesome!
This isn't adventure time, but your baby could make his own adventures!
I LOVE wall decals so I'd naturally go crazy all over the walls with them.
Adventure Time :)
Adventure Time
THis is a cute pillow case
wall decals are awesome Adventure Time
you can choose lol
Oooo what a cool room! How about an Adventure Time Wall Decals?
Pirates of the Caribbean!
Adventure Time
Thanks for the contest!
Decals
Poster
Blanket & Plush
Pillow cover
Nightlight
Clock
Lightswitch plate
Item I want
It's $15 a can but $8 on Amazon
Howdy all,
I'm fairly new to the hobby and been experimenting with painting up an army of salamanders. I tried using black then grey primer but that always made my greens too dark for my taste when using the GW formula or Waagh flesh, Warpstone Hlow, Moot green, they looked more like Dark Angels. I can get the shade I want with white primer, but the base coat is always going on very spotty and uneven. I've tried thinning my paints with more water but that made it worse. I tried only thinning it with the water in my brush and that made it better but it still collected in spots. You can see that in the first picture above marked “1 thin coat”. Another thin coat helps fix this but the paint job is still very uneven. I then have to do another thin coat in spots that are really white to try and bring it out, that is the second picture marked 2.5 thin coats. When I then do the Warpstone Glow and Moot it still runs and puddles in large blotches and doesn't look very even.
Could this be a problem with the primer? I'm using white Rust-oleum 2X ultra cover primer.
https://www.amazon.com/Rust-Oleum-American-Accents-Ultra-Cover/dp/B00KZ6LLZW
I've used the same brand in grey and never run into this issue. Is this just an issue when painting on white surfaces? I know it can be a real pain sometimes. I'm also thinning my paints with clean distilled water and tried various amounts of thinning.
Definitely need new primer then. This or this is pretty good, can't really go wrong with it.
Here's a big fat messy shopping list I made for someone a while ago. You might find it useful too.
http://www.amazon.com/Quickshade-Ink-Warpaints-Army-Painter/dp/B00HC8D80W
Amazon.com: Quickshade Ink Set Warpaints Army Painter
http://www.amazon.com/Pacer-Technology-Zap-Zap-Adhesives/dp/B00SXJJ2QI
Amazon.com: Pacer Technology (Zap) Pacer Technology (Zap) Zap-A-Gap Adhesives, 1 oz
http://www.amazon.com/General-Pencil-Company-Masters-Preserver/dp/B0009RRT9Y
Amazon.com : General Pencil Company The Masters Brush Cleaner & Preserver 2.5 0z. : Brush Soap
http://www.amazon.com/Army-Painter-Wargame-Starter-Paint/dp/B01BJ55UDQ
Buy Army Painter Wargame Starter Paint Set - PLUS Promo Undead figure
http://www.amazon.com/280715-American-Accents-Primer-12-Ounce/dp/B00KZ6LLZW?
Buy Rust Oleum 280715 American Accents Ultra Cover 2X Spray Paint, White Primer, 12-Ounce
http://www.amazon.com/TEKTON-6655-Needle-File-10-Piece/dp/B000NPUKYS?
TEKTON 6655 Needle File Set, 10-Piece
http://www.amazon.com/Xacto-X3311-Precision-Knife-Blades/dp/B0000DD1N4?
Buy Xacto X3311 N0. 1 Precision Knife With 5 No. 11 Blades
http://www.amazon.com/Most-Wanted-Wargamer-Set/dp/B007H4YR8S
Amazon.com: 1 X Most Wanted Wargamer Brush Set
http://www.amazon.com/Xuron-170-II-Micro-Shear-Flush-Cutter/dp/B000IBSFAI
Xuron 170-II Micro-Shear Flush Cutter: Wire Cutters
http://www.amazon.com/Milliput-Standard-2-Part-Hardening-Yellow/dp/B011BO9R5W
Amazon.com: 2 X Milliput Standard 2-Part Self Hardening Putty, Yellow/Grey
Edit: Of, and I used this guide for making my Thinner. http://www.reapermini.com/Thecraft/15 But I'm going to experiment more, because this is not perfect.
https://www.amazon.com/Art3d-Decorative-Panels-Diamond-Design/dp/B01A6TV9H2/ref=zg_bs_16163642011_15?_encoding=UTF8&psc=1&refRID=TMFFNYY0J3RRPVZ5CFQ8
Ok - please - stop colorizing these things blue! Neither Meridiani Planum nor the Martian Sky look like that.
This research : http://pancam.sese.asu.edu/projects_1.html
And these images : http://pancam.sese.asu.edu/true_color.html represent the best 'color' from Opportunity.
What you're doing with this kind of colorization is making it worse. I mean -the cable right infront of the camera is wrapped in kapton tape - which is definitively orange and yet your video is editing it to be blue. I get what you're trying to do - but it's not working and is both confusing people and stoking conspiratorial nonsense.
That's an odd failure mode. Sounds like the clutch ring got stuck or something. Either way, the new one should be with you for a long time~
As for wobble, I did the tape fix, and it was dead solid for a little while, but I've since noticed the nib clicking on the inside of the barrel again while I'm writing. I'm planning to try Kapton tape instead of the clear packing tape that's currently on there, and I'm gonna try adding in an o-ring at some point once I either decide to buy 99 more than I need at that link or find a source for smaller quantities (gonna try Home Depot, they're size A005), for what that's worth.
Havent done the IPS Mod but here’s a link to where I bought my kapton tape:
https://www.amazon.com/dp/B072Z92QZ2/ref=cm_sw_r_cp_api_i_dhmYDbF7RR2PG
I just recovered from this exact same thing this week with PLA (printing something right now actually). Get the hot end hot and pick away at the material with pliers or scissors (toenail clippers work great). You don't want a jerking motion, you want a crushing/cutting motion - don't put stress/force on the printer. Use a heat gun to soften the material if you need to. DONT SHRED THE RED AND WHITE (black?) WIRES ON THE RIGHT SIDE. Destroy the Kapton tape & insulation (yellow) and order some more on amazon. You might have to take the hot end off. The real question is if you can separate the wires from the material. If you can do that everything else on the hot end is durable and you can scrape it off. Dont heat it up if you remove the thermocouple wire.
Pack of new insulation: https://www.amazon.com/gp/product/B0725WLM1N/ref=oh_aui_detailpage_o00_s00?ie=UTF8&psc=1
Kapton Tape (you'll need to fix the insulation on the hot end): https://www.amazon.com/gp/product/B072Z92QZ2/ref=oh_aui_detailpage_o01_s00?ie=UTF8&psc=1
This is after i got all the material away from teh wires. You can then unscrew the white wires and get them away from the hot end and go to town: http://imgur.com/a/zwTQR
For vat removal, I got this from an earlier recommendation. FOSHIO 2PCS Plastic Razor... https://www.amazon.com/dp/B076BBW1WM?ref=ppx_pop_mob_ap_share
Works way better than the provided scraper and it is plastic so less chance of damage than a metal one.
ScotchBlue Original Multi-Surface Painter’s Tape, .70 inch x 60 yard, 2090, 1 Roll https://www.amazon.com/dp/B00004Z4BB/ref=cm_sw_r_cp_apa_i_11y6CbB0P2K7S
So for a frame like the PG strike freedom, if I wanted to paint the inner frame so that it isn't crap gold, I'd prime that and then spray it with gold paint? Can I do it with inner frame assembled or would that run the risk of the joints getting too stiff?
And does it matter what color the primer color is, be it gray or white? I assume the tamiya primer is ideal (as linked below):
https://www.amazon.com/Tamiya-Surface-Primer-White-180ml/dp/B0000WS01E/ref=sr_1_4?ie=UTF8&qid=1487211789&sr=8-4&keywords=tamiya+primer
And a side question, someone told me acrylic paint is ideal for beginners as its less of a pain to work with. However I assume this is regarding brush painting. I notice stuff like the tamiya gold spray is lacquer. Does it matter? And is it bad if you primer, lacquer gold, and then paint some sort of acrylic on top of the gold?
Sorry for all the questions, but thanks for taking the time to answer!
So I'm looking into my first project that's more than a straight build. Specifically I'm thinking of a recolor of a Kyrios from orange to green (college/workplace colors, and fortunately white is our secondary).
The right order is Primer, paint, panel line, topcoat right? And then just topcoat for the pieces I don't recolor?
Also on topcoating, do you spray that on each external piece individually, or on the whole unit assembled?
Lastly, if I get into weathering effects, that's after painting and before topcoat right?
My batch of cheap Leos finally came in, so I have a few grunt units to mess with.
So, I'm planning to fully paint my next kit (HG Barbatos) and I'm wondering what paint product to use. Is this Tamiya TS-27 Matte White the typical white gundam color, like on the barbatos? Does it matter if it's matte or not, or is there a regular white color for the spray paint?
Also, I plan to use this white primer. Is this okay? It says "fine", but the gray tamiya primer doesn't say that so is this different in an important way? I hand paint in acrylics if that information is important.
Also, bonus question, should you use white or gray primer before hand painting/spraying on red? I assume white?
Thank you for the help friends, sorry for yet another barrage of questions, but it is much appreciated!!!
Since no one has actually answered your question, I used grey Rust-Oleum primer for my Gloomhaven minis (Amazon link).
Now, I'm not 100% sure if this is the exact same one that I use, but it looks awfully similar. All I know is that it goes on smooth, doesn't obscure tiny details (as long as you don't heavily spray a single area), and dries nicely. I also have a white can of Rust-Oleum primer, but I'm not too impressed with that one. I'm thinking about giving the white Tamiya primer a try. Maybe that'll be better.
I tape the bottom of my figures to a paint stirring stick and then spray the primer on to them in quick, short bursts, spraying about 6 inches away from them and moving in a lateral sweep. Turn and rotate the stirring stick so that you hit all angles on the mini. Once finished, set aside in a dry room for at least 24 hours before you begin painting.
Well, look. There's a simple and complex answer to your question:
The simple answer is: for a white stormtrooper, you want white primer. This is what is highly regarded: https://www.amazon.com/Tamiya-USA-TAM87044-Surface-Primer/dp/B0000WS01E
After that, you'd have him paint it white (using the vallejo paint), and black, or whatever color the joints are. You can also use gray as the primer, Tamiya makes it in that color, but for obvious reasons, it makes painting the white final layer harder.
Then I'd gloss coat it, in this case, using a wide brush and this stuff:
https://www.amazon.com/Johnson-Pledge-Floor-Multi-Surface-Finish/dp/B000ARPH4C/ref=sr_1_3_a_it?ie=UTF8&qid=1525394737&sr=8-3&keywords=pledge+multi+surface+floor+care
I recommend this stuff because it's one of the few gloss coatings that can be brush painted with relative ease. If there are decals, I'd apply them after the gloss coat dries.
Then, I'd apply the wash. There are several varieties, including prepacked versions:
Tamiya Panel Liner (But you'd need some kind of enamel or whatever thinner they recommend to remove the excess)
Or, more typical for many is an enamel wash (I think Mig AMMO makes those), or oil paint with turpenoid.
If you care about non-toxic (relatively speaking), watercolors will work in a pinch, but like I said, put a drop of alcohol or soap to break surface tension. It's not as good as oil paints for most people.
And then you can spray it with a final coat of matte varnish. I have an airbrush, so I'm partial to this stuff:
https://www.amazon.com/Acrylic-Bottle-Testors-Testor-Corp/dp/B004I0EVK8
Again, it's one of the flat coatings that can be brush painted rather than sprayed, if you know what you're doing.
The way to think about primer and matte/gloss coating is this :
All three come in spray and non-spray varieties. Future however is a household product with no spray version.
This would be a handy add-on!
I loved this article. It was definitely bizarre and the picture is adorable. Somehow a baby anteater was born even though there was no male in the enclosure.
How bizarre
Have a great day!
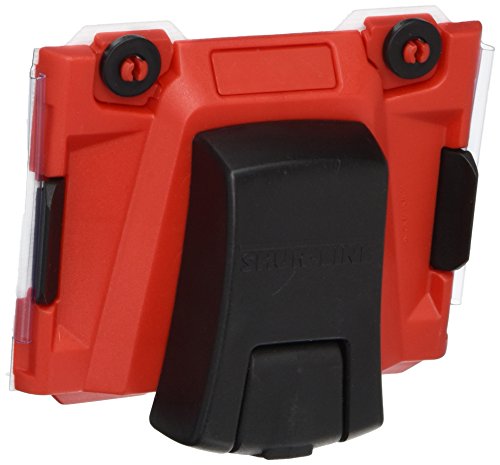
Same item, but desktop site:
Shur-Line 500 Premium Paint Edger
It's chalkboard paint.
make some chalkboards and have plenty of colored chalks.
linkin logs are way more fun than makes any sense, and very low mess. hurts less to step on than lego, and can be used as fuel in case of emergency.
First get This and then use this
http://www.amazon.com/Wagner-Products-282018-1-Gallon-Wallpaper/dp/B0009XEL4O
I had really good luck with a wallpaper steamer. It heats the water really hot, in a plastic square. You hot it in one place for 20-30 seconds, then scrub with a cleaning liquid. It's not the fastest process, but it worked really well. One of these things:
https://www.amazon.com/Wagner-0282018-Steamer-1-Gallon-Wallpaper/dp/B0009XEL4O
It's not a process you really want to repeat, so I concur with sealing it well, once it's clean.
Any actual JBP fan seeing that would get one of these: https://www.amazon.com/Hyde-Tools-13050-Scraper-Blades/dp/B000BPEPSC
And clean that up...
use one of these guys https://www.amazon.com/Hyde-Tools-13050-Scraper-Blades/dp/B000BPEPSC for scraping
As someone who has removed a lot of crap from glass in my time, mix some dish soap and hot water and spread it over and around the sticker. Then get a good flat razer blade like this:
https://www.amazon.com/Hyde-Tools-13050-Delta-Scraper/dp/B000BPEPSC/ref=sr_1_13?keywords=scraper&qid=1569900031&s=gateway&sr=8-13
And go at it gently.
Good for Dallas for finding the adhesive that's most appropriate for the job.
I wish Houston had it and would use it a LOT.
So, yeah, FIRST: Don't leave your car parked on a public street without moving it for 3 days or more. If leaving it there is your only option, you have to go move it a foot or two every couple of days, but that's still wrong.
Second, get an old wash rag or terry cloth towel or rag and soak it with Goo Gone and drape it across the sticker residue. Let it sit there for 5 to 10 minutes. If it won't stay there, hold it or find some way to anchor it.
Then use a straight-edged razor, installed in a paint scraper (they cost less than 2 bucks) and the stuff will come off.
This will take a little effort - kind of like having to move a car every 2 days - so you may just have to sell the car.
Reiterating what the other commenters have said, you'll want to stick the caps down somehow because when you pour the self leveling epoxy over them, they'll want to float and you'll end up with an uneven surface.
I used this stuff: https://www.amazon.com/Environmental-Technology-16-Ounce-Pour-Finish/dp/B000LNS9CW
Source: Have made that mistake myself.
Thanks so much!
Poured on two layers of this epoxy, sanded to 400 grit between each, let them both cure and they came out super glossy so I put down a really thin layer of minwax satin poly. The epoxy definitely brought out a lot of beautiful color and helped fill all the imperfections without covering them up.
Thanks! The bases (Pic here: http://imgur.com/aFChvwH) are filled with Envirotex Lite, but any epoxy resin would have worked. The blue color came from a few added drops of acrylic paint.
I appreciate the feedback so far!
I'm still doing some research. When I went to JoAnn's earlier I explained the situation and had someone recommend the following:
https://www.amazon.com/Environmental-Technology-16-Ounce-Pour-Finish/dp/B000LNS9CW
I thought that what's essentially a varnish of sorts was an odd idea, but bought the box as I had a 60% off coupon, and figured I could return it if I end up not using it.
Does anyone have any experience using a product like this? Would it do the job?
How about something like this?
Just something like this?
Is this new?
SportBike riders have been putting this stuff on their license plates forever. It makes it look normal all day, but when a cop tails you to get your plate, the camera (and cop) get too much reflection to make it out.
http://www.amazon.com/dp/B000LNVC1M/?tag=googhydr-20&hvadid=48510694836&hvpos=1s1&hvexid=&hvnetw=g&hvrand=5358276887281050394&hvpone=&hvptwo=&hvqmt=b&hvdev=c&ref=pd_sl_4wgq8zht8d_b
http://www.amazon.com/Nintendo-Wall-Graphics-Super-Mario/dp/B001JK6EXW
I remain unimpressed, yet strangely aroused.
http://www.amazon.com/dp/B001JK6EXW/?tag=047-20
Mine are like big vinyl stickers, rather than full wallpaper.
The link below has some at Amazon, but they cost nearly double what I paid for em.
https://smile.amazon.com/dp/B001JK6EXW
Upped to $70 it seems
http://www.amazon.com/gp/aw/d/B001JK6EXW/ref=mp_s_a_1_8?qid=1370099908&sr=8-8&pi=SL75
To add to this suggestion, this paint works well:
https://smile.amazon.com/dp/B003CT4AKC/ref=cm_sw_em_r_mt_dp_U_alFVCbDETHETK
Seconded (thirded?). I bought a can of high heat paint off amazon for a rebuild that I ended up letting a buddy use on his Sporty's pipes. disassemble the whole shebang and tape over the ends, paint it on a nice day, let it totally dry. This stuff goes on almost like primer so it didn't need much prep work either.
http://www.amazon.com/Rust-Oleum-248903-Automotive-12-Ounce-Degree/dp/B003CT4AKC/ref=sr_1_3?s=hi&ie=UTF8&qid=1375303554&sr=1-3&keywords=grill+spray+paint
The best clear finish for wood, bar none, is this stuff: https://www.amazon.com/Epifanes-ECVSA-Clear-Varnish/dp/B005ADWQ9U
Highly recommend. Goes on smooth, and extremely durable. Also great customer support. You can contact the mfg if you have questions about application.
I would stain first, and then use a high quality spar varnish like Epifanes to seal, waterproof, and UV protect the final product.
Epoxy is a decent idea, but I'd add a couple of coats of good spar varnish on top of that. At that point, it doesn't much matter what type of wood you use.
Epifanes varnish. Use the Wood Finish Gloss to build up a smooth surface without sanding between each coat. Sand after a few coats and apply the Clear varnish for a stunning finish. It will give you the rich color you're after and the clear super smooth high gloss finish you want. Plus it has super UV and water resistance.
http://www.amazon.com/gp/aw/d/B005ADX4N2/ref=pd_aw_sims_1?pi=SY115&simLd=1&dpPl=1&dpID=51QTN7uDRlL._SY200_QL15_&slTrans=0&ref=nsDpPl
http://www.amazon.com/Epifanes-ECVSA-Clear-Varnish/dp/B005ADWQ9U
If I were you, I would use 2 x 12" joist material. Laminate two lengths of the material together such that it becomes a 4 x 12". Then, you will want to have a support as /u/wbgraphic suggests out of the same 4 x 12 material. Since this will be outside (from the sounds of it), you will want to use titebond III and then finish the entire assembly in marine varnish for durability (epifanes http://www.amazon.com/Epifanes-ECVSA-Clear-Varnish/dp/B005ADWQ9U is some hardcore shit). I would also suggest that the entire support structure should be attached not just by lagging to one side of the pole, but via a complete wrap around the pole either with steel cable or some other such structure.
100lbs isn't that much weight, but if you're going to use it as a heavy bag for martial arts, there are quite a few lateral forces to contend with and not just static load. Research how heavy signs are hung from buildings using a boom arm and you'll have a better idea.
I share a birthday(October 21st) with Kim Kardashian, Carrie Fisher, Judge Judy, Alfred Nobel, and Dizzy Gillespie!! It's quite an eclectic group!!
I'd really love this bloody handprint for my car its super cheap and has free shipping!!
http://www.amazon.com/BLOODY-ZOMBIE-HAND-PRINT-Right/dp/B005VFWOOE/ref=wl_it_dp_o_pd_nS_nC?ie=UTF8&colid=1LUD12LFFP1BF&coliid=I2PE0T0AE196M9
$1.39 sticker, you perfect being
Zombie stickers are always good
More zombie
Why is it that every time I do a decal/sticker contest, I find stuff I need to add to my own wishlist? :P
Stick 'em Up!
I use "3M Peltor X-Series Over-the-Head Earmuffs". They work great, they're comfy, and $30.
​
I've tried a bunch of different earpro options. The most important thing is that the muffs seal around your ears... as best they can while wearing safety glasses. I always wear a baseball cap and Smith & Wessson Magnum 3G safety glasses. (Hot .22 brass inside your glasses really sucks.) For ear plugs, most people like the long skinny kind that you roll and stuff into your ear canal. They really bother me, so the only ones I like are the 3M classics. I even had some custom ear plugs made and they did not work at all. (And it's only a matter of time before you lose them.) Also make sure to clean reusable plugs between uses.
​
I'm not a fan of electronic ear muffs, especially Howard Leight Low Profile. The speakers inside the muffs stand on my ears and they don't seal for crap. One of my buddies was using these and had a terrible flinch. I gave him the X4's his flinch was gone. I haven't tried any of the mid-range electronic ear muffs. The high end MSA Sordins are very nice and pretty effective, but I haven't got around to picking some up yet. The only time you really want electronic muffs is when you're doing a shooting class, and you need to listen to the instructor. (Or for hunting, I suppose.) For general BS'ing during shooting or listening to the Range Safety Officer, I can hear just fine.
​
Another point about PPE (Personal Protective Equipment), don't take it off! Leave your ear plugs in and your glasses on so you don't lose or damage them. Ear muffs are easy to take off during cease fires.
I know I'm really late to the party, but I wanted to add my two cents. I've worked construction all my life. On the road, I've shared rooms with a number of heavy snorers. Ear plugs always worked the best for me.
Now for the last 6 months I've been working in a production plant and it's loud as hell. My employer is kind enough to provide us with about 7 options for earplugs. I've tried them all extensively and these are by far the best. They block out plenty of noise, are insanely comfortable, and stay secure all day.
There's about 120 guys between the two shifts and the safety man says he has to order these ear plugs twice as much as all the other types combined.
I'm sure you'd be able to find those in Europe.
If you have the time and a little money, you can put together goody bags for your fellow travelers. It was super trendy on Facebook last year, I think. Just a snack size ziploc with a few hard candies, a pair of foam earplugs, and a note that says, "Today is Bryce's first flight. We hope it goes well. If not, please accept these earplugs and candies with our apologies. Thank you for your patience and understanding."
The earplugs are pretty cheap on Amazon - - 200 individual packs for less than $30.
You should buy these because you deserve to reach the stars!
You should pick me a nail polishy item because I saw your nail art striping tape, so we are fellow reddit laqueristas ;)
[glow in the dark stars because i have them too!] (http://www.amazon.ca/Sodial-Luminous-Bedroom-Stickers-Universe/dp/B00A7JWJIU/ref=wl_it_dp_v_nS_nC?ie=UTF8&colid=3DWC0GSFS6IUY&coliid=I3OYRAXMFPQVXM)
im gonna gues 602 this week
Well I can't really help you but you can go to the official Cartoon Network shop cartoonnetworkshop.com and shop for decoration such as bedding, pillows, plushies etc
How about some Adventure Time themed wall decal like this Adventure Time
Don't call it Frisco.
So, I think these are pretty awesome.
It's a neat look. Rustoleum's spray is called Mirror Effect, and Krylon's is called Looking Glass. I haven't tried either of them, yet, but they seem to have similar reviews.
Ish.
Definitely a phantom.
I'd been using a piece of corrugated plastic as a landing pad, but wanted something that would reflect the phantom's leds. I had a piece of poly-carbonate around and some mirror paint, so I decided to give that shot. Turned out well. Now I just need to get some plastidip to prevent any more scratches on the non-mirrored side.
https://www.amazon.com/Rust-Oleum-267727-Specialty-Mirror-6-Ounce/dp/B00FMRXJW2/ref=sr_1_3?ie=UTF8&qid=1505538563&sr=8-3&keywords=mirror+spray
This is what he's using I believe.
Thanks, so something like this would be fine for the primer?
https://www.amazon.com/280715-American-Accents-Primer-12-Ounce/dp/B00KZ6LLZW/ref=sr_1_1?ie=UTF8&qid=1487959986&sr=8-1&keywords=primer+spray+paint
This build will be able to play anything at 1080p 60fps high settings:
PCPartPicker part list / Price breakdown by merchant
Type|Item|Price
:----|:----|:----
CPU | Intel - Pentium G4560 3.5GHz Dual-Core Processor | $79.44 @ OutletPC
Motherboard | MSI - B250M PRO-VD Micro ATX LGA1151 Motherboard | $54.89 @ OutletPC
Memory | G.Skill - Ripjaws V Series 8GB (1 x 8GB) DDR4-2800 Memory | $65.99 @ Newegg
Storage | Crucial - MX300 275GB 2.5" Solid State Drive | $97.88 @ OutletPC
Video Card | Gigabyte - GeForce GTX 1060 3GB 3GB Windforce OC Video Card | $216.89 @ SuperBiiz
Case | Fractal Design - Focus G (White) ATX Mid Tower Case | $44.99 @ Newegg
Power Supply | EVGA - 450W 80+ Bronze Certified ATX Power Supply | $34.97 @ Amazon
| Prices include shipping, taxes, rebates, and discounts |
| Total (before mail-in rebates) | $605.05
| Mail-in rebates | -$10.00
| Total | $595.05
| Generated by PCPartPicker 2017-08-07 00:58 EDT-0400 |
If you want 4k 60fps high settings, you're going to have to significantly increase your budget:
PCPartPicker part list / Price breakdown by merchant
Type|Item|Price
:----|:----|:----
CPU | AMD - Ryzen 5 1600 3.2GHz 6-Core Processor | $197.88 @ OutletPC
Motherboard | ASRock - AB350M Micro ATX AM4 Motherboard | $59.99 @ Newegg
Memory | G.Skill - Ripjaws V Series 16GB (2 x 8GB) DDR4-3000 Memory | $124.99 @ Newegg
Storage | Crucial - MX300 275GB 2.5" Solid State Drive | $97.88 @ OutletPC
Video Card | Gigabyte - GeForce GTX 1080 8GB WINDFORCE OC 8G Video Card | $514.98 @ Newegg
Case | Fractal Design - Define Mini C with Window MicroATX Mid Tower Case | $69.99 @ Newegg
Power Supply | EVGA - SuperNOVA G2 550W 80+ Gold Certified Fully-Modular ATX Power Supply | $72.98 @ Newegg
| Prices include shipping, taxes, rebates, and discounts |
| Total (before mail-in rebates) | $1148.69
| Mail-in rebates | -$10.00
| Total | $1138.69
| Generated by PCPartPicker 2017-08-07 01:01 EDT-0400 |
Edit: Here is the stuff you'll need to paint your case orange:
https://www.amazon.com/Sandpaper-Assortment-Automotive-Furniture-Finishing/dp/B01MZALAD9/ref=sr_1_5?ie=UTF8&qid=1502082191&sr=8-5&keywords=sandpaper
https://www.amazon.com/Rust-Oleum-280715-Primer-American-Accents/dp/B00KZ6LLZW/ref=sr_1_1?s=hi&ie=UTF8&qid=1502082223&sr=1-1&keywords=white+primer+spray+paint
https://www.amazon.com/280698-American-Accents-Orange-12-Ounce/dp/B00KZ6LVUW/ref=sr_1_2?s=hi&ie=UTF8&qid=1502082246&sr=1-2&keywords=orange+spray+paint
https://www.amazon.com/Oleum-280702-American-Accents-12-Ounce/dp/B00KZ6LYMM/ref=sr_1_1?s=hi&ie=UTF8&qid=1502082271&sr=1-1&keywords=spray+paint+gloss+finish
Yeah, I couldn't be much happier with how it turned out. Watch the spray tip on the Montana paint, mine gummed up a bit and caused a little blob on the right controller (which was my first/test one).
Primer: https://www.amazon.com/gp/product/B00KZ6LLZW/ref=oh_aui_detailpage_o01_s00?ie=UTF8&psc=1
Base:
https://www.amazon.com/gp/product/B005JZINNC/ref=oh_aui_search_detailpage?ie=UTF8&psc=1
Seal:
https://www.amazon.com/gp/product/B000VKY3I4/ref=oh_aui_detailpage_o03_s00?ie=UTF8&psc=1
It's not. They are just decorative panels to cover a wall. Zero sound deadening but might do a bit of sound diffusion. https://www.amazon.com/Art3d-Decorative-Panels-Diamond-Design/dp/B01A6TV9H2
I'm from Germany, but here is a Link to what looks to be the same panels i got.
https://www.amazon.com/dp/B01A6TV9H2/ref=cm_sw_r_cp_api_i_RLe4Db3EJTPWE
“Kapton tape” /Polyimide Tape
From Wikipedia: Due to its large range of temperature stability, and its electrical isolation ability, Kapton tape is usually used in electronic manufacturing as an insulation and protection layer on electrostatic sensitive and fragile components.
https://www.amazon.com/ELEGOO-Polyimide-Temperature-Resistant-Multi-Sized/dp/B072Z92QZ2
Use a plastic razor
https://www.amazon.com/FOSHIO-Scrapers-Contoured-Refillable-Application/dp/B076BBW1WM/ref=asc_df_B076BBW1WM/?tag=hyprod-20&linkCode=df0&hvadid=309805457405&hvpos=1o1&hvnetw=g&hvrand=2768152868600843908&hvpone=&hvptwo=&hvqmt=&hvdev=m&hvdvcmdl=&hvlocint=&hvlocphy=9029703&hvtargid=pla-570646761565&psc=1
It should be thin enough to atleast take a bit out and If not you could sandpaper it down
I think you can still order the paint from Porsche, they still carry Guards red, but it's expensive. $23 for a paint marker the size of my finger... I can't imagine the cost worth a whole car.
With paint that old the new paint may stand out too much and you'll be unhappy with it even if you did a perfect job.
There are some plastic razor blades you can buy off amazon and use to scrape the paint can splatter- I'd try that before a thinner. For cost effective (and time) I would use a paint marker from porsche for the scratches if it doesnt bother you to do it that way. If you want to fill every scratch, nick and ding with bondo then you may as well repaint the whole girl when you're putting in that much effort
​
Amazon razor blade example:
https://www.amazon.com/FOSHIO-Scrapers-Contoured-Refillable-Application/dp/B076BBW1WM/ref=sr_1_1_sspa?crid=2JQ4C968XSF5X&keywords=plastic+razor+blade&qid=1571288437&sprefix=plastic+razo%2Caps%2C320&sr=8-1-spons&psc=1&spLa=ZW5jcnlwdGVkUXVhbGlmaWVyPUFCSDRPS1pQMTBSOUEmZW5jcnlwdGVkSWQ9QTAwNzUzMjIyM1NQWVoxNVEwUTJIJmVuY3J5cHRlZEFkSWQ9QTA2MzYzNjAzTEtESzRPTkhWOElQJndpZGdldE5hbWU9c3BfYXRmJmFjdGlvbj1jbGlja1JlZGlyZWN0JmRvTm90TG9nQ2xpY2s9dHJ1ZQ==
good video. you should check out plastic razor blades. super helpful in peeling acrylic!
https://www.amazon.com/FOSHIO-Scrapers-Contoured-Refillable-Application/dp/B076BBW1WM/ref=sr_1_4?keywords=plastic+razor+blades&qid=1574494005&sr=8-4
I use plastic razors as a first “scrape” pass and then Gorilla clear tape as a “clean up” pass.
Yellow Frog tape is meant for delicate surfaces, like uncured paint. They still recommend a minimum of 24 hours before applying tape.
I've never used one, but I used to sell tons of these:
https://www.amazon.com/Shur-Line-2000874-Premium-Paint-Edger/dp/B0001MQI9E
You'll still want to wait as long as possible for the first color to dry before running this tool up against it. If they work as well as people tell me you won't need tape.
Really, you get what you pay for, but in the end I'd still recommend doing it yourself. I feel that in this day and age we rely so heavily on others to do things for us (paid or unpaid) that we end up losing basic knowledge of simple things. I do home remodeling and handyman work for a living and though I'm getting paid to do the work, sometimes it just amazes me to get paid for doing some of the most simple of tasks. And when it come to painting, cutting lines, double (or more) coats and making sure you don't get paint on the floors is really the only issues. That can be solved by patience and careful planning. And personally, I use the edger plus to cut the lines. Follow the instructions and maybe do two coats, you'll be fine.
where is your TV?
Wall stickers! I got a set of classic Mario wall stickers off amazon and it looks fucking great.
You don't have to buy frames. You can cover a large area with one purchase, and you can easily theme rooms. If you rent they are easy to remove and can sometimes restick at your next place.
Just keep in mind they often show multiple sets in the photos and it may be smaller when you get them, just check the details of what you actually get.
By far the easiest and coolest way to decorate.
https://www.amazon.com/Nintendo-Wall-Graphics-Super-Mario/dp/B001JK6EXW
That sucks. Get some good paint to repair it and it shouldn't happen again.
Edit: https://www.amazon.com/gp/aw/d/B003CT4AKC/