(Part 3) Best electrical equipment according to redditors
We found 12,839 Reddit comments discussing the best electrical equipment. We ranked the 4,230 resulting products by number of redditors who mentioned them. Here are the products ranked 41-60. You can also go back to the previous section.


buy me
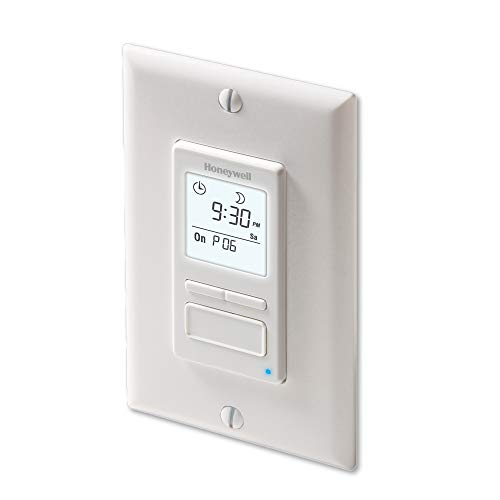
I have a Honeywell programmable light switch that knows sunrise and sunset for wherever you live. It comes on at dusk and turns off when I want. So I never have to turn the porch lights on or off, and it looks like I'm home when I'm away.
http://www.amazon.com/Honeywell-Econoswitch-RPLS740B-Programmable-Switch/dp/B004AP92N2/ref=sr_1_1?ie=UTF8&qid=1415045747&sr=8-1&keywords=honeywell+light+switch+programmable
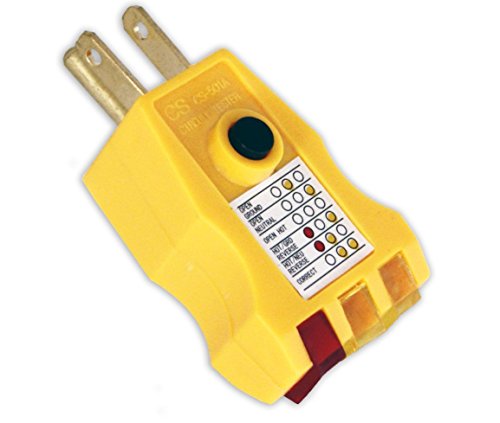
https://www.amazon.com/Electrical-Receptacle-Outlet-Ground-Tester/dp/B0012DHVQ0
Above is the answer.
Also, do not consult this electrician again after:
> He also said that the the electricity has been "cleaned out" even before the house could use it so it's not possible that it's the grounding.
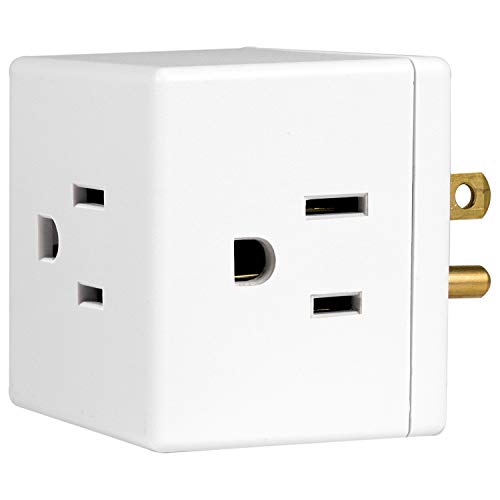
I actually went in the opposite direction, favoring compactness over convenience. I just use a 3-outlet tap combined with the power adapter for whatever country I'm in.
I've never had issues fitting things on the outlet tap and it packs up to a tiny size.
No joke, I travel with one of these. I'm never without a plug. Just ask people politely if I can unplug them for a second.
So, to be fair, this is in a closet and fastened to a high shelf just below the equipment. It' really never in danger of accidental actuation, but it's a good thing to consider. Otherwise, these are good for accidental protection and if I wanted to make real project out of it I could probably hook up a microcontroller to turn on a warning light locally plus somewhere else in the house which was obvious. But, lucklily, my home crew is the reliable sort.
Hey! So sorry you've had to deal with this, it must be really scary.
I lived in a sketchy area for a while, and though I didn't get a weapon, I felt safer after I took a women's self-defense class and put alarms on the windows and doors.
A self-defense class will make you feel safer and provide you with some practical tips on what to do during a dangerous situation like a break-in. A good program should also lay out what legally counts as self defense in your state, which is really good to know. I did (and highly recommend!) the RAD program. It's designed specifically with women's safety in mind, and the course will teach you how to escape a variety of different holds, project your voice to scare off assailants, and fight back long enough to escape. At the higher levels, they teach how to use pepper spray, which is a skill that needs practice.
One other cool thing RAD teaches you is to use your voice as defense-- they make you practice a firm, assertive shout of "NO!" It feels silly at first, but knowing you have that in you can make a difference. My mother in law, who is a tiny librarian, once scared off a car-jacker just with a calm but loud shout of "GET OUT OF MY CAR."
You can get door and window alarms really cheaply on Amazon. They're not a real home security system in that they don't alert the police, but they DO make one HELL of a noise if someone rattles or breaks your door or window, and that can be enough to scare a thief off. They usually come with a sticker you can display on the door or window as a deterrant, too.
Make sure your external lights (porch, etc) are working, and leave them on at night. (You can also get an outlet timer to turn the lights/radio/tv on and off, so you can make it look like you're at home when you're not.) Introduce yourself to your neighbors (you don't have to tell them you're living alone-- you can even recruit a friend to pay these visits with you if your neighbors are super sketchy) and let them know what happened-- if they know your name and associate you with a friendly warning, they'll be interested in your safety and keep an eye out. If you have a sliding glass door, lay a stick in the track when you're away so it can't slide open. Even if the thieves didn't take anything, file a police report anyway so the cops will know what's up.
It's really awful to not feel safe in your house, but you can take steps to make yourself safer.
EDIT: Should add that my friend who teaches self-defense really, really stresses that you should know the basics before you rely on any object to keep you safe. Everyone has to make this choice on their own, but she always says that a knife or a gun (or even pepper spray) can be taken out of your hands and then used against anyone, and that having a weapon often escalates a situation. If you're going to go that route, get training so you know how to use your weapon!
I've built several pi and Arduino projects in the past and just glancing over this I feel you spent more on the parts then it would have cost you to just buy a smart light switch or a zwave relay (capable of controlling two light switches)
Light switch https://www.amazon.com/dp/B07DQDNBZ2/ref=cm_sw_r_cp_apa_IwC5BbGS8JHF7
Inwall Zwave relay
https://www.amazon.com/dp/B00R883YKU/ref=cm_sw_r_cp_apa_oyC5BbWDBJHTQ
Switch cover from Amazon like one of these
https://smile.amazon.com/Mitzvah-Family-2202-Magnetic-Switches/dp/B01ATZDAWU
https://smile.amazon.com/Light-Switch-Guard-Security-product/dp/B00DUBOSTA
Former electrician here. Electrical grounding is very important for your safety. That is why the ground line to every outlet is highly regulated, and not optional. That being said, the grounding on any outlet in your home is connected to every other ground in your home. If there is some kind of ground fault, say for example a neutral-to-ground anywhere on that circuit, it can not only cause hum (sarcastic understatement /s)... it can cause a fire! Audio people tend to deal with "hum" and it leads to a phenomena called "audiophile" where bogus suppositions become regarded as audio truths, pretty much any unchallenged supposition eventually becomes a bias over time. That being said, it's not entirely untrue; Many audio cables are unbalanced circuits and generate their own noise. Induction, and RF interference are big contributors to this effect. Anyways, all I can say for your power outlets is to test them with a device mostly because I would not want you to damage your expensive equipment on faulty wiring. I would also highly recommend using a UPS between the wall and the equipment.
Perhaps you could use a timer for the outlet and set it to go on 30 minutes prior to your usual medicating time, and to go off around your stop time. Something like this:
https://www.amazon.com/Woods-50006-24-Hour-Mechanical-Settings/dp/B006LYHED0/ref=sr_1_3?ie=UTF8&qid=1473442959&sr=8-3&keywords=outlet+timer
The low-tech solution is to go to the hardware store and get an electrical timer for $5. There are ones that work in 15-minute increments; just set it to power off from 4:00 to 4:15 in the morning and be on the rest of the day.
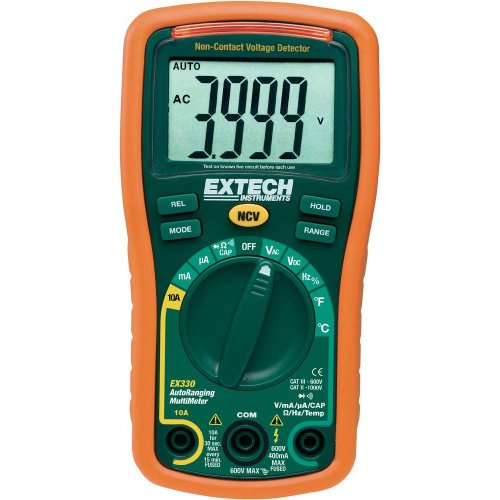
Extech EX330
SLA battery + DC-AC inverter + cheapo analog light timer + light bulb.
Edit here's a parts list.
Inverter - https://www.amazon.com/Silicon-Devices-Inverter-Converter-Adapter/dp/B01J4S7YKC/ref=sr_1_3?s=lawn-garden&ie=UTF8&qid=1479399479&sr=1-3&keywords=power+inverter+clip
Timer (2pk) - https://www.amazon.com/Woods-50006-24-Hour-Mechanical-Settings/dp/B006LYHED0/ref=sr_1_3?ie=UTF8&qid=1479399756&sr=8-3&keywords=outlet+timer
Plug light - https://www.amazon.com/JACKYLED-Extension-Hanging-Lantern-2-Prong/dp/B016MDPWL0/ref=sr_1_6?ie=UTF8&qid=1479399822&sr=8-6&keywords=plug+in+light
Then just grab a 12V car, boat, lawn tractor battery. Use an led bulb for less power draw. You'll have to recharge every so often (the battery capacity will determine how often).
Also you can add a solar charger so you never have to charge it. http://www.harborfreight.com/15-watt-solar-battery-charger-68692.html
This tester is what you are describing and should do pretty much everything (testing to see if outlet still works, checking for ground faults, etc.) No need for carrying a lamp around.
And yeah, they are super cheap.
All 3 lights are controlled by a single switch??? If so, one of these might work
My Extech EX330 just survived a pit bull, so I'm impressed with it. It's a pretty good multimeter for the price. I bought mine at OSH for $49.95.
I bought a long, white coax cable from home depot, and ran it down the wall, and around the baseboards to the opposite wall, to be hidden on my media unit. Used these to secure it tightly in place, along boards. It is basically invisible. You can also get different styles of clips at your hardware store.
If you're just trying to maximize outlet space, something like this cube tap would be light, since there's no cord.
(2 prong version)
hard plastic ones are generally lighter than the rubber ones, you can generally find these at hardware stores, though the shapes vary.
(Edit: as a note,, sometimes with the horizontal shape, the plugs are too close together to fit multiple plugs, cube version can sometimes help that).
https://www.amazon.com/Aeon-Labs-DSC18103-ZWUS-White-AL001/dp/B008VWAPU4
A zwave door sensor would be the first thing i think of
https://www.amazon.com/Ecolink-Intelligent-Technology-Operated-DWZWAVE2-ECO/dp/B00HPIYJWU
It's pretty easy to add a usb charging port with this and this.
You can either get a physical cover for the switch so people know not to turn it off or you can remove the switch and just join the line and load wires to be permanently closed and then put a blank cover over the switch.
I have an Ecobee4 thermostat (although Alexa doesn’t work as well for me as I hoped) w/ Ecobee remote sensors mounted in every room. Not only is this great for managing the temp in the house overall, but now I can include temp changes in my automations and geo-fencing.
In addition, although I find them a bit slow to respond when using them as room entry motion sensors, the Ecobee remote sensors are great for automatically turning off the lights when a room is no longer occupied.
I also recently added some non-HomeKit “smarter” switches in my bathroom and laundry room. In the laundry room, I put a simple Lutron (not Caseta) motion sensor switch to auto turn the light on/off when someone comes/goes from the laundry room. Works fantastically, it’s simple, and not too expensive.
In my bathroom, I added three new Lutron (not Caseta) switches.
The first two of those switches are far more programmable than I thought... reading the instructions really paid off! :)
The Lutron Claro wall plates are really great as well. They are very clean, simple, and modern looking... and their 2-part design makes it really easy to adjust all your switches for a precision installation (i.e. flush and straight).
In my bedroom, my bedside lamps are controlled by 1 Lutron Caseta lamp dimmer w/ remote. I use the same style Caseta lamp dimmer for a few other standalone lamps... and even used one to automate (just on/off) my outside LED holiday lights last winter (the dimmability of which was fantastic, as they are normally way too bright).
In conclusion, before spending a bunch of money, my advice would be to think carefully about how you/others use certain rooms and if a motion detection switch would suffice or if a more complex automation control is needed. Also... do the math. As others have pointed out, one alternative may be way more cost effective over another when you factor in the number of bulbs and/or switches involved.
One last thing... I am renting a room to a guy who's on a totally different schedule than me and as such, I never knew if he was in his room sleeping or out of the house elsewhere. So... since I had previously added him to my HomeKit household... I use a combination of geofencing with his phone, and the Ecobee motion sensor in his room, to switch on/off a particular lamp when he comes & goes. That way... it's easy for me to know if I need to be quiet, or if I can rock out with my socks out.
*EDIT: Added a bunch of links and more...
Any zwave switch should be able to toggle power. They are relatively easy to wire in. Just watch a few YouTube videos (TURN THE BREAKER OFF FIRST).
I wanted to have a toggle switch that matched the other toggles in the house (not the flat 'paddles'). These are a little large but should find in a double box like that.
https://www.amazon.com/GE-Wireless-Lighting-Control-12727/dp/B00PYMGOHM
Use this: Vision In Wall Z-Wave Micro Switch, 2 relay https://www.amazon.com/dp/B00R883YKU/ref=cm_sw_r_cp_api_tpBryb5W40S9P with the switch you linked.
I have a similar situation. I'm in a house built in 1955 and in the process of replacing switches with a Lutron setup.
One thing I wanted to be clear on is what you mention about a lack of neutral wires. From my understanding (and granted, I'm not an electrician, but have done my fair share of wiring jobs around the house), even houses from the 50s would have neutral wires. I'm wondering if you've confused ground wires with neutral wires. Neutrals are usually white wires while grounds are usually green or bare copper. Again, I know this as I'm in the exact situation. My house has no ground wires in most locations, but neutrals are everywhere as expected.
I only have one switch in the house the controls an outlet, but here's now I tackled it.
This has actually worked out great, as it means we have an extra outlet in the living room for plugging in things like our laptops, but we still have a switch in the wall for the lamps.
Why would you build something when for $9 bucks you can get one that's UL approved and won't look like absolute shit?
You want to go one notch higher? Get the Caseta version and do it wirelessly.
Closest thing I have seen is z wave based. Lutron makes a plug that you can get a remote with.
Edit: link; Caseta Wireless Smart Lighting Lamp Dimmer and Remote Kit, P-PKG1P-WH, White, Works with Alexa https://www.amazon.com/dp/B00JJY1QG0/ref=cm_sw_r_cp_api_i_OeJbBb7389Z6A
I got a couple of these: https://www.amazon.com/GE-Wireless-Lighting-Control-12727/dp/B00PYMGOHM/ref=sr_1_2?ie=UTF8&qid=1473194366&sr=8-2&keywords=ge+zwave+switch
they seem to come highly recommended and I know at least one person personally that has installed a number of them.
The switch itself looks normal except that the toggle points straght out (so it looks like it's stuck inbetween on and off. Basically it's operation is push up for on and push down for off. GE also makes a dimmer version and a 3 way add on switch.
This is my parts list.... Simple and it works
The enclosure I used: https://www.amazon.com/dp/B07TS6RY85/ref=cmswrcpapaiAyhxDbV7EHBCN
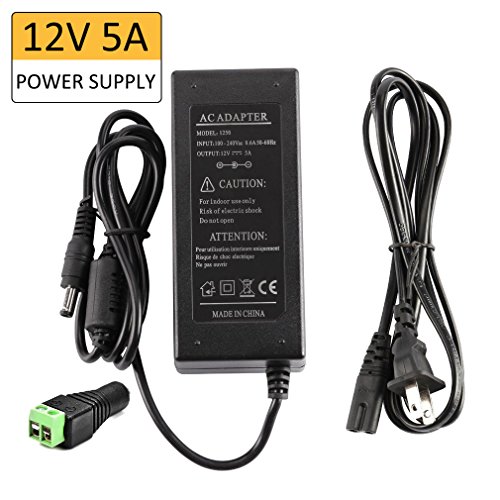
The 5A power supply (5A and you don't have to use a mosfet): https://www.amazon.com/dp/B01461MOGQ/ref=cmswrcpapaiGzhxDbQWPT5QR
I used a glass slide tube for inside of the coil. You will have to rewrap the coil on the IH to fit around the slide, not hard at all: https://www.amazon.com/dp/B001FWYAWQ/ref=cmswrcpapaiMAhxDbTK5P2YY
The actual IH: https://www.amazon.com/dp/B01GDVVANA/ref=cmswrcpapailChxDb0DGE3TM
The 5v switch w/ wiring harness (you don't need any extra wires this way): https://www.amazon.com/dp/B075QBJVTS/ref=cmswrcpapaifDhxDb7HTYE19
A Unibit would be a good thing to have to get the 3 holes drilled in the box. A hotglue gun and a screwdriver and your set....
https://smile.amazon.com/gp/product/B06XP9M2FT
I bought those and put them on the switches. Cleaner look than tape.
I think rampant destruction is one of the things that you just have to be prepared for when you decide to have pets or small children, it comes with the territory :-) No matter how careful you try to be, the best you can do is plan on the fact that something will get destroyed, and try to make sure that it doesn't end with a trip to the emergency vet/hospital.
I have a very curious Great Dane who's now 16 months old. Even in his puppy days he was big enough to reach my vanity table-top and/or knock the table over. A few months ago I solved the problem entirely by moving my battlestation into my master closet, which is a walk-in. Dexter is afraid of the bathroom (which is between the bedroom and closet), so he won't go near it at all. It didn't sound like you have a place to put your stuff that's off-limits to the cats, so here are some other things I've done in the past to pet-proof my valuables-
Is this more like what you're looking for?
https://www.amazon.com/gp/product/B000I97FHY/
Or a little more power and finish
https://www.homedepot.com/p/PowerShot-5900-Insulated-Cable-and-Wire-Tacker-5900/202097439
These are covered on the other side, but allow you to flip them if you need to. Hopping they discourage accidental flipping.
Got them here: Amazon - Westek Amertac CSG1 Switch Guard, White, 2 Pack
> would the inspector only look at my work, or would they look at the whole electrical system?
Just the item s/he's inspecting. They'll look over the box and your mains connection. If there's anything truly bad (frayed wires, splices in junction boxes to extend circuit runs, knob & tube still in use,) they may look that over.
Fixing things yourself is not a stupid idea at all! Safety is important, but so is learning and doing.
Stop fretting! My gf & I do all our own electrical work, and have for decades. If an inspector asks, play dumb. They'll tell you what you need to do. This stuff ain't rocket science, and at very worst, you might have to pay a small fine on top of a permit fee.
If you have the time, do a bit of reading and fix it yourself. You must follow some rules: use proper gauge or heavier wire for your load, don't mix wire sizes in a circuit, understand that a 220v circuit is two "ganged" 110v circuits from different phases in your box. (Sounds like you've got that right.)
You should have pulled 8 AWG wire for a stove & oven. Did you?
Know which wire is what. A cheap receptical tester will tell you that, though it sounds like you've at least got a meter.
Don't worry about your work. Sounds solid. Leave it be.
Replace the terminal block in the stove if it looks bad enough. That's easier to do than the work you've already done!
Don't sweat it! You can do it!
Turn off circuits or the MAIN!
If worried: Wear work gloves or use insulated tools.
DIY!
If you're in Bangor, Maine I'll come by and help out! Easy peasy!
The problem is that your husband works 60 hours a week, so you are expected to be the parent the 60 hours he is unavailable, while doing the whole "emotional labor" for everyone in the house (like having to even bring up the fact that you need a service to clean - that should have been obvious).
This pace will not be able to be kept up.
When I had a hectic schedule I would do crockpot freezer meals...You have to prep a bunch, which will easily take up one of your days off (shopping one day, prepping the next, b/c it's really too much to do on one day). But what I usually did was planned about 20-30 crockpot meals that I could put in the crockpot and put it on a timer so it would turn itself off and on (couldn't just do this with the machine - maybe you can now...but my machine had a timer that let me start it hours after I left, but then it just went into "warm" mode after- which was still too hot and left the meal unappealing and kind of like mush, so I used a light timer to automatically shut off my machine. It was still warm when it was time to eat. I would use bag salad, frozen bread/canned biscuits, frozen veggies as sides...b/c they were all quick and tended to be ready in under 15 minutes.
It sounds like you're not home for meals for a few of the days, though. So even this may not be an option. Is your husband home during this time and HE could do things that a normal adult does at mealtime?
This isn't a sustainable existence unless you have A LOT more help - like a nanny taking care of the kids and also doing the shopping, and a few general chores so on your days off you aren't running around like a mad person.
They still function like regular light switches. You can control them manually via the wall or remotely.
Note that all ZWave switches that I've seen basically amount to push buttons instead of the typical rocker that most homes use. That is to say, they have a physical switch with both and on and an off, but the switch doesn't physically move to indicate whether it's on or off. They usually have an led built into them that shows this.
If you want to keep your existing switches, check out something like Aeotec's micro-switches: http://www.amazon.com/gp/product/B008VWAPU4/ref=oh_aui_detailpage_o01_s00?ie=UTF8&psc=1. You install these behind your existing wall switches. Once you do that, your existing switches continue to work the same as before, and you can control them remotely.
This would do it: http://amzn.com/B00JWVNH4Y
And so would this: http://amzn.com/B008VWAPU4
You could use a Switch guard
This is for a decora style, but they make ones for regular toggle style switches as well
I bought these.
I'm still pretty new to this myself, but like you I have some electronics experience in the past. I just got this Weller 40w iron station with a desolder braid/sucker and a solder tip cleaner. Oh and a more precise tip for the solder iron
I'm really happy with it all so far, and couln't imagine needing more for a while. A heat gun would be nice for de-soldering and reflowing premade boards (like modding Boss pedals), but that can also be done with a regular solder iron as far as I know. You can get the above for about $60 total, so it's a nice way to get your feet wet without a huge investment. Then you gotta add on components/enclosures/pots/switches etc. Maybe get a helping hands and/or circuit holder if you need
Oh and get a good multimeter. I went a step up from the $20 ones and got this one which I'm also really happy with.
If your 2.4GHz spectrum is crowded, then moving to the 5GHz spectrum could really help. Remember, though, that both the router and the computer have to support 5GHz to talk there. You might need to buy a new wireless card for it.
If you want to be sure you'll never have to deal with wireless interference again, though, you have to ditch the wireless. You can buy network cable in all kinds of lengths for pretty cheap, and just tack it to your baseboards.
I would have had the same problem, but instead I bought these [bad boys] (http://www.amazon.com/Cable-Clip-White-RG6-100-pieces/dp/B000I97FHY/ref=sr_1_1?ie=UTF8&qid=1344787963&sr=8-1&keywords=ethernet+clips). I don't know how your parents would like the cable going along the trim though :\
You can get a ground tester
Awesome thanks! I actually saw a perfect one in the recommended items section: https://www.amazon.com/GE-Grounded-3-Outlet-Tap-58368/dp/B001UE7SC8/ref=pd_sim_60_5?_encoding=UTF8&psc=1&refRID=XAD316KK676BG96HAEJ5
Yours looked good too but I'd be concerned at how loose the swiveling outlets are - the air freshener is an oil heater so I wouldn't want it to swivel sideways at some point.
Anyway I found what I was looking for so thanks so much!
I think the solution you're looking for lies in the switch not the light. I just recently switched my front outdoor lights to a timer switch that has 7 days of programming available. You enter where you live and adjusts for when the sun rises and sets. You can also program a particular time as well for it to shut off or turn on. So far it works great and was a fairly easy install.
Here's a Link:
http://www.amazon.com/gp/product/B004AP92N2/ref=oh_details_o02_s00_i00?ie=UTF8&psc=1
It's the "Honeywell Econoswitch RPLS740B 7-Day Solar Time Table Programmable Switch for Lights and Motors"
Damn almost all mine are pork based. However in terms of fixing your cook time problem just get something like this http://www.amazon.com/Woods-50006-Indoor-24-Hour-Mechanical/dp/B006LYHED0/ref=sr_1_1?ie=UTF8&qid=1406851393&sr=8-1&keywords=outlet+timer&dpPl=1
Leave it on and put it on a timer. If it loses power, does it require you to touch it to turn it back on? Mine doesn't. I use these timers:
https://www.amazon.com/Woods-50006WD-24-Hour-Mechanical-Settings/dp/B006LYHED0/
I'm not aware of anything ready to go. You could, however, get one of these guys: https://smile.amazon.com/Vision-Z-Wave-Micro-Switch-relay/dp/B00R883YKU
Then add in a regular stacked switch. At least assuming the box is larger enough to fit that and the switch.
https://www.amazon.com/Switch-Protects-Lights-Circuits-Accidentally/dp/B06XP9M2FT
So you would realistically do smart switches instead of having smart bulbs. The only reason I would see to use smart bulbs is because you don't own the property or because you want the ability to change colors of a color lightbulb.
> Do smart switches always keep the smart bulbs powered?
It depends on what you mean by smart switches. You would realistically just use a smart switch like this. The light switch itself would always have power no matter if you turn the light on or off (unless you kill the breaker), so you could control it no matter the state of the light.
Your best bet if you want to continue using the smart bulbs, and not smart switches, is by buying the Philips Hue Dimmer switches. You would still need the power for the light to be on (meaning don't touch it/block it off if needed). They would still be at the mercy of people using the light switch itself.
But, unless you rent or need color control, it doesn't make sense to keep dropping money on this path.
There are a lot of options out there for basic home automation. None are particularly cheap, but also not outrageously expensive. As a thought, if I were going to set this up in my place, using what I have in place:
SmartThings Hub
z-wave compatible outlet
z-wave compatible door sensor
Have the outlet turn on every time the door sensor closes and turn off when it opens.
As an alternative, you could use a motion sensor in the room, but some people may find that a bit creepy.
You can definitely get outlets and various sensors cheaper in other places, such as monoprice.
Lutron Caseta will take care of that for you. Bonus: you can plug two lamps in to one, however they can't be independently controlled.
If you end up getting a hub then you can use your iPhone, or Alexa, amongst other devices to control them, however I wouldn't bother with the hub unless you expanded the switches to multiple areas of your house...
https://www.amazon.com/dp/B00JJY1QG0/
The Lutron Lamp Dimmer doesn’t cover both outlets. See photos here: https://www.amazon.com/Lutron-Wireless-Lighting-P-PKG1P-WH-Assistant/dp/B00JJY1QG0
Generally speaking, it's not recommended to put a dimmer on an outlet. Lutron has on/off switches, but they also require a neutral.
But you may be over thinking it. You can just do this and then get the "switch" wall mount for the remote.
Edit: I didn't fully read your post. You can program any of the Lutron remotes to control multiple Lutron lights. Mounting one and having it control multiple I think is the best solution.
A Caseta plug-in lamp dimmer along with a wireless remote can do this. https://www.amazon.com/Lutron-Wireless-Lighting-P-PKG1P-WH-Assistant/dp/B00JJY1QG0
You can mount the remote on the wall using the wall mount kit (not included with the kit above, but should be pretty easy to find). If you no longer use the switch that you’re trying to replace, you could remove that switch, tie the wires together to make that receptacle always on, then mount this wireless remote right on top of the old switch location.
You just set up the lamp dimmer as you would normally. The extender functionality is automatically activated.
You can see which device, if any, is acting as an extender in the Lutron app. Open the app, and tap the gear icon in the top-left corner to open Settings. Then, tap on "Advanced". Choose "Range Extender". If one of your lamp dimmers is acting as a range extender, then it will show up there.
If you want to change which device is an extender, you have to remove the existing device acting as current extender from your Lutron app and then re-add it. (So it might be easier to just physically swap the lamp dimmers in your home and then change their assigned rooms, scenes, and triggers in Lutron and HomeKit).
It's worth emphasizing that only the lamp dimmer (https://www.amazon.com/Caseta-Wireless-Lighting-Dimmer-P-PKG1P-WH/dp/B00JJY1QG0) can act as an extender. None of the in-wall dimmers or switches are capable of acting as extenders.
(edit: corrected "set it" to "set up" in the first sentence)
The Lutron Connected Bulb Remote will do what you want for zigbee and z-wave lighting/switches etc.
As will the Aeotec Minimote with z-wave bulbs/switches/dimmers.
I got this done in fewer steps with my Echo. It should work the same on Google Home since you're interfacing with Samsung SmartThings.
For the longest time I was trying to find a WiFi-controlled switch, and I found it with the WeMo Maker. I didn't want to go the RPi route, but certainly that makes a lot of sense.
Here's the complete list of what you'll need for my method.
-WeMo Maker
-Samsung SmartThings hub (no device needed since we'll make a virtual switch)
-IFTTT
-Echo/Google Home
Bonus! I bought a cheap Z-wave remote, interfaced it with SmartThings, and had it toggle the virtual switch. So I can put one of these remotes in my bedroom near my nightstand and when I wake up in the morning, hit the button and boom, fire is warming up. You can have multiple removes that do this same thing. My wife hates talking to my Echo (she refuses to talk to a cylindrical object--can someone give her a pep talk lol), so the remote is a good backup for her to use. This is what I used:
https://www.amazon.com/Aeon-Labs-DSA03202-v1-Minimote/dp/B00KU7ERAW/ref=sr_1_1?ie=UTF8&qid=1480279272&sr=8-1&keywords=aeon+minimote
Happy to answer any questions about this method :)
Zwave remote, $20. Even comes with three other buttons for free!
Not that one - it's an "add-on" switch for use where you have a couple of switches that control the same set of lights (a 3-way switch scenario), it's a dummy switch which is why it's half the price of other zwave switches :)
Here's what you'll want: https://www.amazon.com/GE-Wireless-Lighting-Control-12727/dp/B00PYMGOHM
You'll be able to link the sensor to it about 6 ways to Sunday with smartthings, no problem. The more you look into it, the more you'll realize how powerful smartthings can be - you could even have it turn on the lights when it senses motion only on Tuesdays between 6-9pm when the temperature is less than 72 degrees in the den, your wife isn't home and the fridge door is closed if that's what you wanted to do. Just plain motion it can do in its sleep.
i was thinking i could get a z-wave wall switch like this. I was hoping there was some kind of wireless/battery powered z-wave switch that i could put on the bedside tables.
On a side note is that GE add on switches basically what i am looking for but not wireless? Meaning do the ge add-on switches simply trigger a different z-wave control (for instance the switch by the door)?
I know that GE makes a toggle style z-wave switch; I haven't done much searching for toggle style switches previously, so there may be others too. As far as how they work, I have never used the toggle style switch but on the decora models, yea, it's basically one momentary switch under both sides of the paddle.
GE's toggle-style switches (12727, switch; 12728, add-on switch; 12729, dimmer) will fit into an existing toggle setup, but they don't stay up and down like a regular toggle switch does. They're always pointing straight out in the middle and you press them up or down to turn the light on and off (or hold the dimmer up or down to brighten and dim, respectively). They return to their center position as soon as you let go.
I like the decora series a little better (12722, switch; 12723, add-on switch; 12724, dimmer). They have a little LED on them that indicates the current status of the light. The toggle-style switches don't have any indication of whether they're on or off, which is kind of a bummer for outside lights.
One thing to be aware of for the add-on switches: they require a traveler wire, but can only be paired with GE primary switches. The traveler doesn't carry full line voltage; it's just used for the add-on switch to signal the primary when the add-on's been pressed.
I have both of these: GE 12727 (no dimming) & GE 12729 (dimming). They require a Z-Wave hub (I'm using SmartThings 2.0) to integrate with Alexa. The switch + hub + Echo all pair and work together wonderfully.
EDIT: Also no faceplate change needed.
2nd EDIT: You should really be asking this on /r/HomeAutomation instead.
If you refer to this line,
> For the pusher, I recommend a relay rather than a mosfet half bridge. Much easier to wire up and work with.
I wasn't referring to the motor, I was refer to what you use to control the motor.
That said, you absolutely do want to replace the stock motor.
Not only do you remove the risk of the motor burning it, but the pusher becomes much more responsive and controllable. Especially important if you want proper select fire, but just as useful in full auto.
As for what to use to controller the motor....
Since you want an microprocessor to control it, we can't just use a microswitch like in a standard build.
There are two main options.
An electromechanical device.
Exactly the same as a microswitch, but instead of being pushed by a finger, there's no button.
Instead, there's a solenoid which pushes the switch closed.
Can be obtained on their own for very cheap, and very small, or in bulkier, but easy and ready to go packages.
See https://www.amazon.com/dp/B00VRUAHLE/ref=cm_sw_r_cp_apa_Pt2rAb6Z63HVK for an example.
Allows you to easily make the motor either brake, or run. Aka, easy pusher control.
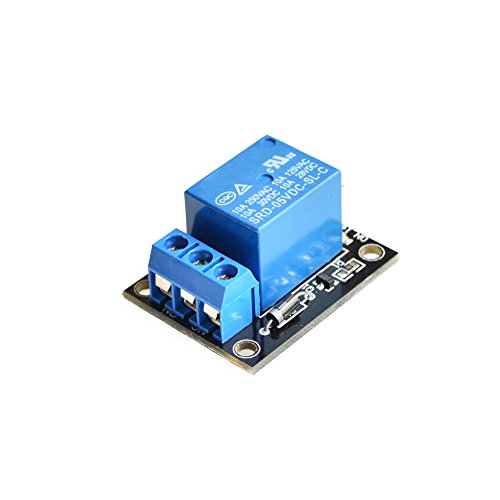
The relay itself has no risk of being damaged by ESD, it's just a coil of wire and a microswitch.
Slightly bigger than a mosfet. Can't control RoF like you can with a mosfet, but there isn't much of a reason to do this.
This is a really cool idea! Once you have this working you really need to post a "How-to", I think a lot of people would like something like this for their driveways. You could even have your speakers say "car entering driveway" or something when someone pulls up. Anyways, for the how-to (source, I'm an electrical engineer but 'non practicing', so I'm somewhat good with this stuff but not an expert):
I believe the door sensor works by sensing when the loop of wire is closed, vs having a contact voltage applied to it. You can test this easily by just touching the two terminals together with a piece of wire, and seeing if it properly triggers. If this is the case, you may need to incorporate a small relay into this project to close the sensors together. To trigger the relay, you could use the voltage from every time the LED is triggered.
You'll need a simple voltmeter if you don't have one already. These are very cheap and helpful to have around the house. Here's one that's cheap and seems to get good reviews. Use this to measure the voltage across at the LED when it's 'on'. If this is 5V-12V, you can use this relay which is for simple arduino projects, and is controllable via TTL signals.
You would connect the + and - terminals on the back of that relay board to the power supply in the driveway module you have. That provides power to the relay board. The, figure out which pin is driving that LED (the line will go from 0V to 5V when it triggers), and connect a wire to the 'S' pin on the back of the relay board. Now, when the LED changes to the on position, it will also flip your relay 'closed'. Simply connect each relay output terminal (front of the relay board) to the door sensor, one to each side. Now when the relay closes, it should also trigger your door sensor.
Hopefully this makes sense... let me know if you have any questions and good luck! Soldering is not all that hard once you get the hang of it. Just remember that you're trying to heat up the components metal contacts, and then apply solder to that (vs applying solder iron directly to the solder). This prevents cold contacts, which can break overtime.
If you're ok with the strips only being one color at a time (no rainbows, fire effects, chasing lights, etc.), then the absolute simplest thing to do would be a wifi controller with a set of rgb(w) lights:
Once you get it wired up, you can add that to Home Assistant like this:
light:
devices:
192.168.1.10:
name: NAME
protocol: 'ledenet'
You can also find snap-on 5-wire connections to extend or change the direction of the led strips, but I add a little solder to the connections on them anyway, to make sure they connect.
That controller has a few effects you can choose from but if you want something fancier like fire effects & rainbow, then go with the ws8212b/esp8266 solution that /user/MeudA67 suggested.
You will need an induction heater
https://www.amazon.com/gp/product/B01ALTHK5W/ref=ppx_yo_dt_b_asin_title_o01_s02?ie=UTF8&psc=1
You will need a power supply
https://www.amazon.com/gp/product/B01461MOGQ/ref=ppx_yo_dt_b_asin_title_o01_s00?ie=UTF8&psc=1
Technically that's really all you need. You could wire the leads to the induction heater and plug it in and it will be on. But I don't think anyone likes the idea of leaving this thing plugged in and always on. Which is why most users will choose some sort of switch set up. For my induction heater I used this one.
https://www.amazon.com/gp/product/B07D373HZF/ref=ppx_yo_dt_b_asin_title_o01_s01?ie=UTF8&psc=1
Several users have pretty in-depth full guides. I think the best and most clear one out right now is this one https://www.reddit.com/r/Dynavap/comments/c94dxj/diy_induction_heater_guide/
Big shout out to the /u/beasthoss guide in the sidebar. Worked like a charm first time. Induction heating really makes the already awesome dynavap experience even better. All parts used are listed below for anyone interested. I did use some t-taps I had laying around but no solder.
Induction Heating Module
Power Supply
Glass Adapter
Momentary Switch
Project Enclosure
Drill Bit
Edit for parts list.
Related products on Amazon actually showed me exactly what I remember seeing before also, here's the link!
https://www.amazon.com/dp/B01G7OD1F8/ref=sspa_dk_detail_6?psc=1&pd_rd_i=B01G7OD1F8&pf_rd_m=ATVPDKIKX0DER&pf_rd_p=f52e26da-1287-4616-824b-efc564ff75a4&pf_rd_r=5TEPJ8EECGC1HTAF6VNP&pd_rd_wg=Tp7vt&pf_rd_s=desktop-dp-sims&pf_rd_t=40701&pd_rd_w=33lB4&pf_rd_i=desktop-dp-sims&pd_rd_r=2fe93901-cf5a-11e8-b413-df24a88cfed6
A cheaper way to convert 3/4 way switches is to use one of the micro relays from enerwave, aeotec, vision, aeon labs, quibino, etc. You just need to put one of these fellows behind the switch closest to the light (or at the light itself), and don't need to replace any switches. These relays are more expensive than a single z-wave switch, but often cheaper than a master+slave switch.
Here's a link to one example.
I covered all of my switches with these
It's enough for me to remember not to switch them, for my guests to realize they probably shouldn't switch them, but for me or guests to be able to do so if necessary.
These are another option depending on what kind of switches you have. We have a couple of these at our house.
Something like this is what I used to stop my mother in law from turning off the switch.
https://www.amazon.com/dp/B06XP9M2FT
Use a multimeter, and figure out which of your fuses are only activated when the key is on.
Then use a fuse tapper("add-a-circuit kit") in place of it.
Done. Nice an easy, no splicing or anything.
I've got the old version of that camera and it's very good. Importantly for me, it's small enough to fit behind my rear view mirror and has a really nice small mounting bracket with tape rather than a huge suction cup that will fall off every other week.
My power outlet is inconveniently placed, so I used add a circuit to hard wire it into my fuse box.
How I did the wiring on mine:
Install the angel eyes themselves per instructions. Run the wiring so everything leads to the relay being mounted in the bin at the right rear of the engine bay. Early models have the DSC/ABS module there, later models have just an empty bin.
Use the following image of the relay as a guide to where you lead the wires. The Pinout will be the most useful part.
http://i.imgur.com/Yrm9vxU.jpg
30 - Angel eye positive wire
87A - To footwell light
87 - To positive battery terminal
85 - Trigger wire
86 - Ground
Most instructions have you running the trigger wire to the DME and here's where I differ. In the bin where you mount the relay you'll see a grommet with a rubber plug on the firewall side. Carefully cut a little "+" into that and feed the trigger wire and the one that goes to the footwell light through there. (See link at the bottom for a picture showing it)
Inside the car you're now going to work in/under/behind the glove compartment. With a flashlight look for where those wires you poked through the grommet came in and pull them through. Tap the footwell wire into the positive lead to a footwell light. The other one will share a connection with a circuit in the fuse panel. You want to use a slot that is on only when the ignition is in the "on" position, and is off when it's in "accessory" or "off". You can use a multimeter or a test light to confirm this. There should be several options. Now you need an "add-a-circuit" adapter like the link below. Use that to connect to the trigger lead. Be sure to use the fuse with the same rating as the one the angel eye wiring harness came with.
http://www.amazon.com/Littelfuse-FHA200BP-ATO-Add-A-Circuit-Kit/dp/B0002BGELQ/ref=sr_1_1?ie=UTF8&qid=1427662052&sr=8-1&keywords=car+add+on+fuse
The link below is to a great step-by-step that I modified, so use it for the pictures and most individual steps, just on its Step 4, run the trigger to the fuse panel instead of the ECU accessory wire. These instructions also don't include step-by-step for running the other wire to the footwell light for the fade-on when you unlock and fade-off when you lock your car. It does show the grommet you'll be slicing to get the wires to the cabin though.
http://www.fastm.com/m3/angeleyes_orionv2.html
Ya, it's fairly easy. Use a company like Sonicelectronix.com, who have the best prices and often include free accessories for the install like wiring harnesses dash kits and antenna adapters.
The two things you will need to be aware of is that you will need the "keys" to get the radio out. They don't tend to come with the gear but you can usually take your car to your local shop and they will have keys and remove it for a few bucks. The next thing, to get an accessory wire, you must run a fusetap over to the fuse box on the driver side and tap into something that turns on and off with the car, like wipers.
The module plugs into the antenna jack on the PCM. The plug types are different so that's where the adapters come in. There is a stick on button to turn it on and off and control calls and audio track. You tune the radio to a specific station and hold the button to turn on the module and go into BT mode. Hold the button to turn it off if you want to listen to the radio.
Here is a good DIY guide. Pretty easy, even for a dunce like me. If you don't want to splice the power to your PCM harness, you can get a fuse doubler to plug into the fuse box in the driver's side footwell. For the mic, I just wedged it in the corner of the dome light frame piece and ran the cable along the headliner and around the passenger side, behind the glove box, and into the rear of the center console. You can tuck the wire into the passenger door rubber molding with a plastic card so it's hidden and tight.
/r/porsche thread
I generally go with Dave Jones' opinion on these matters. Lucky for you, there's an EEVblog $50 multimeter shootout video. Don't think you'll find a more qualified opinion or thorough comparison anywhere.
Spoiler: The Extech EX330 is the winner.
I'd recommend that you put in the extra money and get a nice second tier DMM. You can get away with a cheapy $25 one, but when it's your eyes and ears, I've found spending a little extra is worth it.
I love this multimeter, and Dave from the EEV Blog liked it as well. He did a whole teardown on a bunch of $50-$100 meters.
Yea if its a brick house you need basement or attic access to be minimally invasive. If the landlord is cool and does not care... you could just drill in through the side of the house right next to what ever room you were running the wire into.
If you do the eyehole thing on the door. Just be sure to run the wires so they will not get pinched :)
These will help with that
Staple gun is not a good idea, it will almost certainly damage it. They make purpose made staple guns for running wires, or you can get a pack of cable tacks Example.
Edit: If you really want to use a staple gun, don't staple the wire, staple a zip tie up in the middle and then use that to secure the cable.
Just buy these...
http://www.amazon.com/CableWholesale-Cable-Clip-White-Pieces-200-961/dp/B000I97FHY
I have my entire rented house ran using those things, I just do it along the wall/baseboard all neat and stuff. They have wider versions if you wanna run two cables instead of one. When I need to run it up a wall and there is no corner near by, I just use this...
http://www.amazon.com/s/ref=sr_pg_2?rh=n%3A172282%2Ck%3Acable+channel+raceway+wall&page=2&keywords=cable+channel+raceway+wall&ie=UTF8&qid=1418615205
Hmm, wonder why they did that. Anyway, here's an Amazon link - https://www.amazon.ca/CableWholesale-Cable-Clip-White-Pieces-200-961/dp/B000I97FHY/ref=sr_1_3?keywords=coaxial+cable+clip&qid=1571259964&sr=8-3
The hue dimmer switch works GREAT. I just installed one in my kitchen and bedroom this weekend. They are only $24/ea, and require no wiring. They look great on the wall, and function perfectly.
As for stopping people from turning off the lights... Something like this? =)
https://www.amazon.com/Westek-Amertac-CSG1-Switch-Guard/dp/B000NCV1SK/ref=sr_1_1?ie=UTF8&qid=1482873839&sr=8-1&keywords=light+switch+guard
Amerelle SG1 Switch Guard, White, 2 Pack https://www.amazon.com/dp/B000NCV1SK/ref=cm_sw_r_cp_apa_2FvRzbK890BDB
I have used these in the past. Similar idea to what was already posted, but allows you to stick your finger through the side and control it without a screwdriver. Used them on smart bulb cks, but allows you to cycle them off and on when you might not have your phone.
Something is improperly grounded in/on your case, or there's voltage on the ground in your outlet. Make sure you don't have any loose screws behind your mobo or something, and that all your connections are secure. Go to Walmart or something and pick up one of these to make sure your outlet isn't screwed up.
Buy one of these:
http://www.amazon.com/Electrical-Receptacle-Outlet-Ground-Tester/dp/B0012DHVQ0/ref=sr_1_1?ie=UTF8&qid=1457031556&sr=8-1&keywords=ground+plug+checker
And check. They should be for sale at any local hardware store for under $10. That is a easy 5 second test to see if you are grounded or not.
You can pick one of these up at Walmart, Home Depot, Lowes, Amazon, etc., for only a couple of bucks usually: http://www.amazon.com/Electrical-Receptacle-Outlet-Ground-Tester/dp/B0012DHVQ0
They're worth it.
Check your doorbell transformer. We had a 16V 10VA when I first installed the Ring Pro and was getting video issues and the mechanical bell would barely ding (not full ding dong; we have 2 mechanical bells).
Replaced the transformer with a 16V 30VA (from Amazon) and it's all good now.
EDIT: Adding link to the transformer I ordered and installed: https://www.amazon.com/NuTone-C907-16V-30VA-Transformer/dp/B001POBN92/
No, they will still recommend a higher one as soon as you have any issues.
I had the 10VA at first and it seemed to work fine, but eventually it seems it affects the internals of the unit causing issues.
I'd save the headache and get a new one.
This is the one I got on Amazon for $24:
NuTone C907 16V, 30VA Transformer
It replaced my existing one with little effort.
Ring $100/yr and save an extra $20. The Ring Pro is solid, they are now in a 3gen for it which I just received 2 days ago as a replacement. (Old Pro was marked as needed replacing by ring for some reason). To do it right make sure you have the right transformer. Ring offers one but you can find a NuTone on Amazon a bit cheaper. .
The Alarm is solid, zwave+ platform (also zigbee) and don’t forget to get the smoke alarms so you can print out a full cert to give to your home owners for a discount on premium.
Within the last few days, Amazon alexa released the Guard update turning all your echos into smoke/co listeners and glass break detectors. IMO, it was the last thing missing from the ring alarm.
The issue with the pro is running the wrong transformers to power it. My 1st pro lasted 6mo, 2nd 1.5yrs and now I got my 3rd which has a slight different build, they also included 2 angle wedges with the unit.
The smart lock thing is slick, just make sure to visit their site to see which is compatible.
Lastly, if you’re going all in with Ring, stay away from battery cameras and invest in a mesh system that has triband and mu-Mimo to prepare you for the future of IOT.
GOOD LUCK!
Well there's always something like this: http://www.amazon.com/GE-Grounded-3-Outlet-Tap-58368/dp/B001UE7SC8?ie=UTF8&keywords=multiple%20outlet&qid=1465347497&ref_=sr_1_4&sr=8-4
or one of these.
http://www.amazon.com/QICENT-SC-4A5U-US-WH-Protector-Protection-Appliances/dp/B00XMON80A?ie=UTF8&keywords=thin%20outlet%20extension%20cord&qid=1465347594&ref_=sr_1_1&sr=8-1
I like bringing a power splitter just to charge my phone, in case all the outlets are full. Though it's not as bad as 5 years ago.
https://www.amazon.com/GE-Grounded-3-Outlet-Tap-58368/dp/B001UE7SC8/
Don't wear a lot of accessories. You have to remove them all during security. Also bring comfortable shoes. Sometimes my feet swell due to the high altitude and it's such cramped seating that it's hard to stretch.
And if you're on a smaller two engine plane you may experience more turbulence (shaking and tiny sudden drops).
It also gets pretty cold in flight, regardless if where you're going. I like to bring a zip up hoodie because it's easier to put on than a sweater. Also the air is very dry. They have lotion in the tiny bathrooms, but I prefer to bring my own. I'll even put vaseline in my nose because it's so dry.
If you're bringing shampoo bottles or other liquids, store the bottles in a ziploc bag. The high altitude may cause them to burst the lid and leak everywhere. Before storing, I like to squeeze out all the air in the bottles and then cap them so there's less air to expand. It doesn't always work though because some lids aren't as air tight as they should be.
If you think you will use the bathroom a lot or don't mind getting up with other people have to use it, get the aisle seat. If you think you will be fine or don't like to be bothered to move, get the window seat. The seats are so damn cramped, it's unavoidable waking someone when you have to use the bathroom, especially since all the chairs are leaned back. If you're taller than 5'8", try to sit at the emergency exits, they usually have more leg room.
Power strips will get confiscated if they have surge protectors. They may even get confiscated if they don't, because of overzealous security people who have been told to take anything with a switch. I use one of these if I need more outlets.
GE Wall Tap
The 6-power USB charging station would work well and is basically what I carry with me. I'm just partial to the Anker brand:
Anker 6-Port USB Charger
Newer ships may have 2 110v outlets, and will have multiple USB ports.
We have a Honeywell astro-timer switch for our front yard lights. Love it. I set it 2 years ago and it's never not worked. Best part about it is that it never needs adjustments throughout the year. It already knows based on the date when dusk/dawn is. All I had to do is set what time I want them to shut off.
The added bonus for us is that there's also an outdoor outlet on that leg. So we run all our holiday lights off it and everything comes on and shuts off together.
You could have 2 next to each other (they're standard single-gang size). But in your case, you could probably get one and tie the two switch legs together.
+1 for keeping it simple. A smart switch could certainly do this but I wouldn't set up a home automation system for a single light.
Your call of course, but I'd feel a bit weird having a light with no user-operable switch. You could put in a programmable timer which keeps the light on for a set time every day. If the light is already on they would be less inclined to mess with it. And you could still turn it on if necessary. I have this one, highly recommend it. It has a feature to come on/off at sunrise and/or sunset plus an offset feature. I have mine come on 20 mins after sunset and go off at 11:00, it handles all the seasonal variation in sunset just fine. I've had mine a bit over a year and I haven't touched it since the original programming.
My husband wants one of these so I will probably get it for him.
Yep! It’s pretty cool. Turns off in the morning. Here’s the link:
Honeywell Home RPLS740B1008 Econoswitch 7-Day Programmable Light Switch Timer White https://www.amazon.com/dp/B004AP92N2/ref=cm_sw_r_cp_api_i_qqMQCbZZPGVZS
greyam already covered how to get if off.
I'm not sure if you just don't like the timer in general or where this switch is, but I replaced a switch with one of these fancy timers that also has a simple on/off switch. It's nice and even has a "vacation" mode if you're into that sort of thing (randomly turns lights on and off during "on" times).
http://www.amazon.com/Honeywell-Econoswitch-RPLS740B-Programmable-Switch/dp/B004AP92N2
http://www.amazon.com/Aeon-Labs-DSC18103-ZWUS-White-AL001/dp/B008VWAPU4
or for dimmer :
http://www.amazon.com/Aeon-Labs-DSC27103-ZWUS-White-AL001/dp/B00IRI1CEK/ref=pd_sim_60_1?ie=UTF8&dpID=31seJADBH5L&dpSrc=sims&preST=_AC_UL160_SR160%2C160_&refRID=0328RRAJWFQ5PZM7CJGB
Virtually all smart switches require a neutral (typically a white wire). Some dimmers only require 3 connections (live, load, and ground).
Smart bulbs are the easiest solution, but the most expensive (and annoying) in the long term (if the switch is off you can't control the light from other devices)
For using smart switches running an additional wire from the switch box to the neutral bus in the breaker box is an option but is usually the most labor intensive option. For other options you need to identify how the switches were wired. There are 3 common ways:
Hopefully that helps.
SmartThings and Alex work very well together. Not to mention SmartThings automation is second to none as far as I have experienced with other hubs. This prevents you from having all those apps as you mentioned. All you have to do is add zwave or zigbee devices to your hub and you can control them from one place.
In your case, especially with the outside lights, I would just install one of these Aeontec microswitches. They come in dimmers too. You can hide them in the walls and your switches still work just as they did before, with the exception that you can now control them wirelessly. Just be sure to watch your draw. A lot of outdoor flood lights might be too much wattage for them. I installed a Lutron Caseta switch and hub for my father and quickly brushed up against the 650 Watt limit of those switches with all his outdoor flood lights. I'll be honest I don't know the limit of these switches and I can't find it on Aeontec's website, but you should be fine bellow 700 watts per switch.
With SmartThings you can set up timers for devices, link them to motion detectors, and even check on their power consumption if you have the right kind of switch.
Dual Option Wall Switch Guard (3 Pack) Clear Rocker https://www.amazon.com/dp/B00DUBOSTA/ref=cm_sw_r_cp_apip_MtqPl51JqD4sa
I have two Hunter Signal fans and love them. I have the remote "cradles" next to the swithces and use these covers over the switches so nobody turns them off.Switch covers
Just block them off.
decora
toggle
Depends on the sensors. I moved into a house that had an ADT system with the embedded door sensors in all the exterior doors. I used the ecolink door sensors to add the z wave functionality to those sensors. https://www.amazon.com/Ecolink-Intelligent-Technology-Operated-DWZWAVE2-ECO/dp/B00HPIYJWU
They have a dry contact which I used to connect the already installed door sensor wiring to. I removed the wiring from the ADT panel and installed the ecolink sensors next to the panel where the hardwired door sensors were run to.
If your home has wireless sensors on the doors then you will have to look at the protocols that it uses and supports.
The knivio bluetooth is a good call, ive had mine for almost a year now which works perfectly and have done exactly what you want to do. What i used was an Add a circuit and then wired a new cig socket to the add a circuit i bought form autozone. Now it will auto connect and turn on only when the key is switched to acc position when connected to the right fuse, typically rap, ign, with that specific size fuse. Also i just hid the extra socket under the dash. Also if you do end up getting a noticeable noise/interference which i highly doubt use this ground loop isolator.
Cigartte lighter socket + quality car phone charger + Add-a-circuit kit (check your fuse type) + some quality tape + Right-angle USB charging cable
You wire the red wire on the cigarette adapter to an add-a-ciruit (i.e. with a crimp tool). The black wire goes to ground (i.e. tucked under some bolt someplace, or a ring terminal ). You put the charger in the now-attached cigarette adapter in the fuse area under your driver's side dash. Then you need to route an appropriate USB cable (i.e. with one with a right-angle head or right-angle adapter on the dash cam side) to the under dash area (usually by tucking it under the headliner over the windshield, and then by popping the A-pillar cover off and the side panel of the dashboard, and feeding the cable through). Once you have all the wires under the dash, you just need to hook them up, test them, and then tape them together so they can't come loose.
The advantage of going this route is that you 'own' all the pieces. If any part of the formula isn't working out, you can change just that part. You also get a spare USB-C charging port for free since that adapter has both A and C.
I have had the 9500ix for 4+ years now and it's been working pretty well. It's saved me from at least 4-5 tickets. As /u/13489194 stated below though, there are newer models out there that work better and are worth a few extra bucks. What I've noticed in the past few years is a very annoying increase in false positives with all the new cars that have side radar blind spot detection.
I mounted mine up on the top of the windshield a few inches below the headliner and to the right of the rearview mirror. It doesn't obstruct my view, and only prevents the passenger sunshade from fully opening a bit.
What you want to do is get a hardwire cable, a tap-a-fuse, and a trim tool and just gently pull on the trim and use the plastic trim tool (aka bone tool) to push the wire in behind the trim, down the A-pillar, and then into the fuse box. Not sure about the S6, but on my A5, it made it easier getting it down the A pillar to remove the "Airbag" plastic cover piece that covers up a Torx screw, and slightly unscrew the cover over the pillar so you can more easily fish it in.
Hardwire that bad boy into a fuse that is only on when the car's ignition is on, such as the Homelink Garage door opening or something. I dunno about the S6, but on my A5 there are fuse panels on both the passenger and driver's side. I put mine on the driver's side so that I can mount the little mute button assembly w/ the included velcro right below the headlight switch assembly. I can easily and quickly mute it as well as see the flashing light while driving.
Some stuff I'd recommend:
Escort Max 360 Detector
Hardwire adapter unit (no need for the bluetooth one as the Max has bluetooth built into it now)
Tape a fuse
Trim tools to fish the wire in
Other common tools you'll need would be a screwdriver, Wire Crimper/Stripper, and a socket to punch down the ground connection in the fuse panel.
Also, you'll want to be running the Waze application when driving as it will notify you of police locations reported by users. That's saved me a lot, especially when they aren't using radar or are using laser.
Easy way:
Get one of these: http://www.amazon.com/Littelfuse-FHA200BP-ATO-Add-A-Circuit-Kit/dp/B0002BGELQ/ref=sr_1_4?ie=UTF8&qid=1347317089&sr=8-4&keywords=mini+fuse+add+a+circuit
Plug it into a circuit that comes on with ACC, being sure not to overload the fuses.
Run wires through the firewall. Attach red to red, black to Battery Neg.
Right way:
Use ACC/RUN signal to trigger fused relay. Output of relay runs radio.
I don't like mine being taken up either. I used a female cig lighter adapter and a fuse tap. So, this means I didn't have to cut up the BT adapter and have a non-destructive way to get 12v to the BT adapter.
https://www.amazon.com/gp/product/B0006TIRZA/
https://www.amazon.com/gp/product/B0002BGELQ
Extech EX330 Autoranging Mini Multimeter with Built In Thermometer with Type K Remote Probe by Extech http://www.amazon.com/dp/B000EX0AE4/ref=cm_sw_r_udp_awd_-TGntb18D6ZH8
I bought that one in 2011, so it may be a bit outdated, but it's still working fantastically if you're looking for a good meter for more than building coils. The auto ranging is pretty spiffy.
I would stay away from really cheap meters if you are going to be measuring mains voltages. I have one of these in my portable tool bag. It's small and the non-contact voltage checker is handy.
Fluke makes great equipment, of course, but I would also consider Extech. While they don't cater to the professional market as much as Fluke, they make great meters and you can find a full featured one new for well under $100. Extech also manufactures Sears Craftsman branded meters. The one I use is similar to this one
Soldering iron: https://www.amazon.com/Hakko-FX888D-23BY-Digital-Soldering-FX-888D/dp/B00ANZRT4M
Edit: most people recommend getting a chisel tip for the soldering iron. Big tips for big jobs, small tips for small jobs. Just having the pencil tip and one chisel will get you by for a long time.
Desoldering braid: https://www.amazon.com/Aven-17542-Desoldering-2-5mm-Length/dp/B003E48ERU/
Desoldering pump: https://www.amazon.com/WEmake-WM-SP4-Solder-Sucker-desoldering/dp/B0002KRAAG
You want both the pump and the braid. Get thin solder for electronics. You should probably use lead-free, but I like good old 60/40.
There are a ton of suggestions on multimeters. The exact right one for you depends on what you eventually want to do. Dave Jone's EEVBlog has some good suggestions. As does Adafruit. Anything Adafruit recommends isn't too far off the mark. If you just want a suggestion: Extech EX330 for $45 https://www.amazon.com/Extech-EX330-Autoranging-Multimeter-Thermometer/dp/B000EX0AE4 Cheaper ones will do the job, but this is a better one. The next step up are True RMS meters for about $100.
You are going to want to balance tools and parts.
TOOLS (must haves)
.
.
TOOLS (eventually)
.
.
PARTS (vaguely in order of usefullness)
(Of couse you don't have to get the Elenco kits, those are just the ones I use and really like)
.
.
.
I think that's all for now...
I wouldn't rely on anything that cheap, it's just in my truck toolbox for quick charging system checks. Something I can run over and not care about.
Generally anything sub-$100 is considered "cheap" by multimeter standards, Fluke makes the most popular meters, really the industry workhorses. They have a new entry level model called the 101 for $70.
The Extech EX330 is a popular cheaper model, I've seen it as low as $40.
Edit: Check out this video, the EX330 was the favorite of the bunch.
Flukes are definitely the best, but for automotive use, you're not really going to be super demanding. Less expensive + disposable may be a better way to start off your career on this specific item.. i'm sure you have other expensive tools to buy ;-) You can always upgrade later.
I have one of these guys, and it does what I need it to, personally: http://www.amazon.com/gp/product/B000EX0AE4
These - I was able to get a smaller container of them at Walmart for like $1-2 bucks. They work well if you dont mind putting a nail in the floor.
Just run one along the wall above head level and hold it up using these things
thats what I did, not 200 feet though.
They have cable holders that do exactly this.
http://www.amazon.com/Cable-Clip-White-RG6-100-pieces/dp/B000I97FHY
Either solution will introduce latency. So if you're playing competitive fps games, it'll negatively affect your game.
Why not use something like this to make the wire run look neater?
Something like this: https://www.amazon.com/CableWholesale-Cable-Clip-White-Pieces-200-961/dp/B000I97FHY/ref=sr_1_2?ie=UTF8&qid=1481834961&sr=8-2&keywords=cable+tacks
Maybe you can find one sized exactly for USB, Q&A indicates this might be just a touch loose.
I'm in a pretty arid place, but even I have gutters. How does your house handle rain?
That being said: electrical staples.
I suspect your light may have a switch inside it that cycles when you cycle power to it in a certain time frame.
It probable switched to always on/off vs motion and your wife flipped it back to motion. I have a few of these and put a switch guard over those switches.
Westek Amertac CSG1 Switch Guard, White, 2 Pack https://www.amazon.com/dp/B000NCV1SK/ref=cm_sw_r_cp_api_3A-1AbHS8XZJV
I'm using these
They cover the switch with an opening on the side in case you do need to use the switch. The flip ones you listed would be sweet, too.
You could always go the pop button route and use a light switch cover like one of these: https://www.amazon.com/Amerelle-SG1-Switch-Guard-White/dp/B000NCV1SK/ref=pd_sim_75_2/131-1612548-3818927?_encoding=UTF8&psc=1&refRID=HMXFP98TV7Y6YRZAKCSC
Or here’s another style: https://www.amazon.com/Clear-Switch-Light-National-Mfg/dp/B00O6WYE1E/ref=pd_sim_60_3/131-1612548-3818927?_encoding=UTF8&psc=1&refRID=HNXK7ZCG6WBJ46QYNDPD&dpID=31KilZn0JDL&preST=_SY300_QL70_&dpSrc=detail
I've thought about using these on my wall switches.. will let me resist the temptation of using the wall switch.
https://www.amazon.com/gp/aw/d/B000NCV1SK/ref=mp_s_a_1_1?ie=UTF8&qid=1499281949&sr=8-1&pi=AC_SX236_SY340_QL65&keywords=switch+blocker&dpPl=1&dpID=31-JdmvrGsL&ref=plSrch
For somethings I find flicking the switch faster than using my phone, watch or Siri to turn the lights on
If you are doing that get these or these.
Edit: Fixed links
Another option would be to turn the switches on and then install switch cover guards which screw on over the cover plate, making it impossible to operate the switch. Something like this: http://amzn.com/B000NCV1SK
Doepfer PSUs are solid. As others have said, you may have another issue. Try find an outlet tester like the one shown here, but for continental Europe obviously. This will quickly rule out or identify the mains wiring to that outlet as the problem
https://www.amazon.com/Electrical-Receptacle-Outlet-Ground-Tester/dp/B0012DHVQ0
Also, I would suggest disconnecting the Bus Boards if they aren't already.
The case and PSU body should both be grounded, such that you should not receive any current even if there is an electrical fault within the computer.
Are you using a grounded cable (with all three pins going to the outlet), and is your electrical system grounded correctly? (Might need one of these to test) Anyway that's all safety related stuff, if there is current flowing from your PSU body then it sounds faulty and I would avoid using it or at least try to do some testing if you have a multimeter.
You need to first check the power plug is properly grounding. https://www.amazon.com/Electrical-Receptacle-Outlet-Ground-Tester/dp/B0012DHVQ0
get one of these, will tell you right away. I'm having the same problem, none of my outlets are grounded, however its a mix of three prong and two prong outlets, but that doesn't matter, there is just no ground at all.
As lenne0816 said, it's either a grounding issue or there could be a short to your front panel causing it to trip the power button.
Check that the front panel wires/pins are all placed correctly and that everything is how it generally should be in your case. If everything is absolutely correct, it may be in your best interest to get one of these and call an electrician if something is wrong. You'd be surprised how many houses are improperly grounded.
Could also just be one of your LED strips or the controller are bad. Try unplugging everything not necessary for booting and see if it fixes it.
http://www.amazon.com/Electrical-Receptacle-Outlet-Ground-Tester/dp/B0012DHVQ0
one of those will tell you if your wall socket has a ground and wired correctly.
> The wall outlet may not be grounded but is 3-prong.
Pick up one of these puppies and get that outlet tested, stat. If the outlet checks out, check the power cord for any frays/cuts, then check the PSU and consider replacing it.
Either way, definitely sounds like something isn't properly grounded.
the narrow slot is the hot one. there's voltage there; there's not usually in the neutral one. But what non-contact testers detect are magnetic fields, not actually voltage. Different outlets have different patterns of magnetic fields, and how you put the wires in the box can mater too. If you're worried about wiring the outlet, use an outlet tester to check it.
Updating this... I've installed the new transformer recommended by pandaman1784 ( https://www.amazon.com/NuTone-C907-16V-30VA-Transformer/dp/B001POBN92 ) and I do get 18-20VAC from the door bell wiring behind the ring when measuring but looks like the ring pro has a pulsing white light... rings the internal chime, setup button still has no effect what so ever and if I push the door bell the white light goes out completely after the blue circle and then after a few seconds to a minute goes back to a pulsing white light (Reboot?).
​
At this point figured I'd wait it out maybe 30mins see if it does anything different with the extra voltage and if it's still behaving funny take it back to the BestBuy and exchange it? Any other ideas?
Pictures of new vs old transformer:https://imgur.com/a/BGDBM8l
New one had a ground wire but I also had no ground point so I capped that off, old had no ground wire.
UPDATE 2: Got impatient, exchanged it... worked just as well as the last one was able to link it to my ring account get it connected on WiFi etc. The only issue I have now is Live view showed a black screen and then I started just getting "Streaming Error" after that with no live view and no motion events or etc... could have swore after connecting the first one the motion events were almost immediate and I'd get the notifications in the app; guess this kinda warrants a separate thread though as it's no longer a low voltage issue/confirmed that even though I had low voltage the other one seemingly was damaged.
Yes, the pro will ring the mechanical chime.
You will need to install a compatible chime kit:
https://support.ring.com/hc/en-us/articles/209028546-Ring-Video-Doorbell-Pro-Chime-Kit-Compatibility-List
​
I would also suggest upgrading the transformer to a 30VA unit and ditch what comes with the chime:
https://www.amazon.com/NuTone-C907-16V-30VA-Transformer/dp/B001POBN92
I think the VA rating matters more than the actual voltage - and you wouldn't need to replace your chime. Something like this - 16V but 30VA instead of the more common 10VA.
You're running a 10V / 50VA now? Sure it's not .5A?
*edit - decimal place
NuTone C907 16V, 30VA Transformer https://www.amazon.com/dp/B001POBN92/ref=cm_sw_r_cp_apa_A1tBzbEE476A2
this is usually what people recommend: https://www.amazon.com/NuTone-C907-16V-30VA-Transformer/dp/B001POBN92
​
I personally use it as well. no problems keeping the Pro powered and mechanical chime ringing like normal.
I was thinking bandwidth/wifi, but thats not the case, at least in my short time running tests. I'm running 3 ubiquity ac-pros and a custom built pfsense router. I've ran multiple tests on bandwidth, dropped packets, wifi signal etc and it's rock solid. The only thing that makes sense is my transformer isn't providing a consistent level of power. I wasn't even leaning that direction until another user said they had a very similar issue.
Also, when dealing with power having it sit inside in a controlled environment isn't even close to the same as having it outside in the cold and having multiple variables.
Here's the transformer I purchased. NuTone C907 16V, 30VA Transformer https://www.amazon.com/dp/B001POBN92/ref=cm_sw_r_cp_apa_6AbRAbQKW84XA
That's the transformer. It has a 16VAC/10VA output, which will not be sufficient for a Ring Pro setup. My house initially had a similar transformer and I replaced it with a 16VAC/30VA transformer.
Here's a link: https://www.amazon.com/gp/product/B001POBN92
Some have stated that you really need a 30VA transformer for a ring pro connected to a mechanical chime. I had problems with freezing when the doorbell was rung but that all went away when I upgraded my transformer to this one:
https://www.amazon.com/gp/product/B001POBN92/ref=oh_aui_detailpage_o09_s00?ie=UTF8&psc=1
https://www.amazon.com/gp/product/B001POBN92/ref=oh_aui_detailpage_o00_s00?ie=UTF8&psc=1
30A. Works like a charm.
I got this at the recommendation of Ring customer support based on my physical doorbell model: https://www.amazon.com/gp/product/B001POBN92/
Purchase a 30va 16v transformer from Amazon. That will solve the low voltage issue. Worked for me and solved the problem. The issue is amps not voltage on the line.
This is the one to buy from amazon. https://www.amazon.com/gp/product/B001POBN92/ref=oh_aui_detailpage_o00_s00?ie=UTF8&psc=1
I have the Pro set up as well. Looks like what was happening when I set mine up. Come to find out that since I had it at an older house, the doorbell transformer wasn't strong enough and causing it to 'reset' since it would drop power and 'reconnect' back to power. It was only a 10VA transformer. I read it somewhere on some forum that you need to make sure your doorbell transformer is around 30VA. I bought this one off Amazon, installed it and have not had any issues since. The flashing typically means it's in setup mode waiting to connect (even though you may have already connected it once before).
Id say maybe make sure one of the pants is a nice normal looking one that you can pair with the shirt for a nice date night, so many places you would want to do that.
I'd prefer an extra shirt and underwear or two just so I don't have to deal with the washing, weight is low enough that it was worth it for me, space has never been a concern, I personally travel with 5 tshirt and undies, but many people travel with just 2 pairs.
Do you really need the vest when you have the hoodie and down jacket and rain shell?
Compact alternative for power strip: a 3 way power splitter, combine with a 1ft extension cord for a more compact power strip that can also deal with bulky wall warts better.
This one is a bit more compact.
Actually is using a power strip. that's what's in the priority mail box.
btw a generous thing to travel with or take to starbucks-- this http://www.amazon.com/GE-Grounded-3-Outlet-Tap-58368/dp/B001UE7SC8
I didn't have the dorm experience, but I lived far enough from campus that I would hang out there all day most days.
Quality shoes - you will be walking quite a bit. Depending on your style, consider something like a waterproof hiking shoe that will last through some like snows.
Reusable water bottle that will fit in your backpack well. Sparty's will fill it up, or you can use the drinking fountains.
I'm a fan of some of the /r/edc stuff as well, a small flashlight can be very useful, and shouldn't run over $20.
A small plug splitter, would be very useful. I have a more complicated one, but if I did it again, I'd get this. A lot easier to charge your laptop/phone when you don't have to convince someone to unplug theirs.
Either a collapsible umbrella or packable raincoat.
Extra headphones. I'm lucky enough to have accumulated several pairs of iphone earbuds, so if I lose/break one, I'm still okay.
I’ve had good luck with just daylight led bulbs. Just amazon the daylight led t8 bulbs. You can also hook up a timer switch to mock daylight hours. Honeywell Home RPLS740B1008 Econoswitch 7-Day Programmable Light Switch Timer White https://www.amazon.com/dp/B004AP92N2
I keep them 6-24 inches from the plants with a small fan to help them dry out between watering
This sounds like the BS I went through with my grandmother. She was entirely focused on photoelectric eyes for dusk-and-dawn and didn't respond to the idea of motion sensing or timers. The result was a lot of halogen lights that would stay on for 12 hours at a time and burned out fairly quickly and attempts at CFLs that burned out even quicker due to the photoelectric eye.
LEDs are likely to run cool enough that they won't care about an enclosure... mine don't. I'd also recommend a 7 day timer like this solar one, that adjusts to date-based dusk/dawn cycles. https://www.amazon.com/Honeywell-Econoswitch-RPLS740B-Programmable-Switch/dp/B004AP92N2
How about a timer instead? I have a programmable timer on my front light that automatically comes on at sunset and shuts off at 10pm (or a different time you program). And recognizes changes in sunset times.
https://www.amazon.com/gp/product/B004AP92N2/ref=oh_aui_detailpage_o05_s00?ie=UTF8&psc=1
it's not exactly a "smart" switch, but i got this switch that lets you plug in your lat/lon, date, and time, and it automatically flips the lights on at dusk and on at dawn based on a preprogrammed schedule. this handles my front porch light and my driveway light. it can also be programmed to turn off at a specific time if you don't want the light on all night long, but i have LEDs in so i just keep them on all night. there's also a button that will let you control the lights off schedule as well.
very easy to install, requires zero intervention once programmed. i'm strongly considering getting a second to control my side porch light as well.
It's the little things that make the journey that much better. :) (You could always get an outlet timer to turn it on automatically, btw.)
My dad has a Christmas light timer for his. Starts when he turns the lights off when he leaves and runs for 6 hours(I think) then stays off until the lights come back on.
While not the same thing. I use a mechanical timer for my dehydrator. http://www.amazon.com/dp/B006LYHED0/ref=cm_sw_r_udp_awd_r-fntb0DC62QJ
Just plug it in, let it run. Get the stuff out the next morning. Usually for that, I will have it turn on for a few minutes every hour or so even after the actual dry time so the stuff doesn't absorb moisture before I get to it.
I just use these. Cheap and works well.
Timer search on Amazon.
I have posted Amazon links to what I use below. You should be able to do under $20 for just 5 plants. I haven't used these long but my plants seem like they are pretty happy with it so far.
The lamp.
https://www.amazon.com/gp/product/B000HHQ94C/ref=oh_aui_detailpage_o00_s00?ie=UTF8&psc=1
The bulb.
https://www.amazon.com/gp/product/B005P29K1S/ref=oh_aui_detailpage_o00_s00?ie=UTF8&psc=1
Optional Timer.
https://www.amazon.com/gp/product/B006LYHED0/ref=oh_aui_detailpage_o00_s00?ie=UTF8&psc=1
I'm on my phone so I'll try to come back with a link but I've seen these outlet timers you could use? Basically plug it between your slow cooker and the wall outlet and it keeps power from hitting your cooker until whatever time you set. Originally made to turn lamps on at night but would work. That way you could get whatever slow cooker you liked, set it, then it wouldn't come on until you wanted it to.
Edit: something like this http://www.amazon.com/gp/aw/d/B006LYHED0/ref=mp_s_a_1_1?qid=1396462397&sr=8-1&pi=SX200_QL40
https://www.amazon.com/gp/aw/d/B006LYHED0/ref=sr_ph_1?ie=UTF8&qid=1483374648&sr=sr-1&pi=AC_SX236_SY340_FMwebp_QL65&keywords=timer
Extremely convenient. Plug the timer into an outlet, turn the little arrow to the current time, and push down the tabs for the time you want the light on. Set it to timer mode and you are good to go. It's very intuitive when you use it.
Do you have an existing z-wave system at all? If you wanted to do so in the future, and not replace the dimmer, you could wire in an in-line dimmer (assuming the fixtures are dimable) and then put in a wireless switch that is tied to the z-wave modules.
http://www.amazon.com/Aeon-Labs-Aeotec-Z-Wave-Edition/dp/B008VWAPU4/ref=sr_1_2?ie=UTF8&qid=1406580706&sr=8-2&keywords=aeotec
http://www.smarthome.com/59373/GE-45631-Z-Wave-Wireless-Keypad-Controller/p.aspx
GE makes a toggle-style switch, which is what I imagine you have in your home: https://www.lowes.com/pd/GE-Z-Wave-15-amp-Single-Pole-3-way-Wireless-White-Toggle-Indoor-Light-Switch/1000241625
You could also purchase "micro switches" that would go behind your regular ("dumb") switch and add the smart capability: https://www.amazon.com/Aeon-Labs-DSC18103-ZWUS-White-AL001/dp/B008VWAPU4
Given it's an old home, how much renovation you can do? A past home I've owned was heritage listed, so small installations were the most I could achieve - that brought me to Z-Wave (wireless), a hub (Vera at the time), and in-wall micro controllers from Aeotec http://www.amazon.com/Aeon-Labs-Aeotec-Edition-DSC18103-ZWUS/dp/B008VWAPU4
Micro zwave switch in the gang box for the switch or at the light.
Switch interrupts the "hot" wire to the light.
Put the HA controller on a schedule to be off from bedtime til morning.
Switch will work normally at all other times.
Aeon Labs DSC18103-ZWUS,White,US,AL001 Aeotec Z-Wave Micro Smart Energy Switch, 2nd Edition, White, Small https://www.amazon.com/dp/B008VWAPU4/ref=cm_sw_r_cp_apa_2H-Nzb7KB7F84
Look for in-wall micro relays like these. You use your existing switches. You pull the load wire off the existing switch and put it on the relay, then the load from the switch goes into the relay and acts as a trigger.
My wife burnt our counter top in our bathroom. I put in an outlet with this.
I have a controller let me know if it is consuming energy. If it consumes energy for greater than 30 minutes, I turn the outlet off.
For anyone that needs em too - here it is.
They only work with the thinner switches. There appear to be some options for the wider switches on Amazon if you search for "light switch guard". For example:
https://www.amazon.com/Option-Switch-Guard-Clear-Rocker/dp/B00DUBOSTA/ref=sr_1_8?s=lamps-light&ie=UTF8&qid=1511223225&sr=1-8&keywords=light+switch+guard
I'm guessing you're not in the US based on the wire color coding, so any references to the NEC would not apply to you. You should verify everything you're doing with your local electrical code.
>I would assume that pigtailing the yellow wire is still the best option?
Yes, cut the yellow wire in the middle and connect your now pair of yellow wires with the red wire using a properly sized wire nut. You would then put a rocker and blank switch plate over your now single switch.
>There's no switch cover out there that i can replace this switch with, that simply keeps the circuit "always on" is there?
You could do something like this to lock it in the on position if you don't want to mess with the wiring anymore.
I use these. Blocked but still usable.
https://www.amazon.com/Option-Switch-Guard-Clear-Rocker/dp/B00DUBOSTA
key word here was apartment. I wouldn't be doing any electrical work if I was renting. You are just asking for a heap of trouble. I agree that smart switches are way better but for an apartment bulbs are probably the safest bet. Rocker Blocker or Toggle Blocker work if you are worried about guests hitting switches.
Search for Shabbat light switch cover. You will find a bunch of options. For instance:
https://www.amazon.com/Option-Switch-Guards-Clear-Toggle/dp/B00DTXKOTM/ref=sr_1_6?keywords=shabbat+light+switch+cover&qid=1570197758&sr=8-6
https://www.amazon.com/Option-Switch-Guards-Clear-Rocker/dp/B00DUBOSTA/ref=sr_1_14?keywords=shabbat+light+switch+cover&qid=1570197758&sr=8-14
You can go with something like this, which has terminals under the cover for you to wire external sensors to. I had embedded contact sensors in my exterior doors from an old (previous owner's) home security system. I just took the existing wiring, stripped the jacket back, used a multimeter to test resistance and verify the hardwired sensors still worked (installer had used 4-wire on one of the runs, even though only 2 were used, so I also had to verify which wires), and wired it into the sensor.
Here's a video I found of the terminals for external sensors.
Now I have a sleek z-wave door sensor install, with the wireless sensors tucked out of sight. Hopefully that helps!
I looked for this about a year ago and never found anything reliable. Ended up using several ecolink door sensors which have a dry contact port if you open them up. Works pretty reliably fortunately.
https://www.amazon.com/Ecolink-Z-Wave-Window-Sensor-DWZWAVE2-ECO/dp/B00HPIYJWU
Should be noted that I combined many of the individual sensors in to zones, like all the upstairs windows are 1 zone, all downstairs windows... Doors are individual.
I haven't installed it yet, but when I dove in too deep about a year ago I got one of these:
https://www.amazon.com/Ecolink-Intelligent-Technology-Operated-DWZWAVE2-ECO/dp/B00HPIYJWU
​
There are probably cheaper options, but this one has pins to connect a physical switch, which I've just attached to a standard doorbell:
https://i.imgur.com/76KJuk7.jpg
​
I remember setup in HASS being tricky because the states are reversed for what you'd want from a chime. I sent notifications to my phone with pushbullet with a doorbell chime as the notification sound. There's some annoying lag occasionally getting the notification, but there might be better methods now.
​
Ecolink Intelligent Technology Z-Wave Easy Install, Battery Operated, White & Brown (DWZWAVE2-ECO) https://www.amazon.com/dp/B00HPIYJWU/ref=cm_sw_r_cp_apa_wGXvybTMAV6VJ is what I have for a door sensor. But you'll just have to keep looking for something a bit cheaper.
But there is! You just need this and this. The pressure mat is just two wires that connect to the terminals in the door sensor. I'm running ST and the default DH works fine, but I switched to a custom for a better visual aspect. It basically reverses the open/close and reports as Empty and Stepped On instead. Not sure why the mat is so much right now. When I bought mine a year ago they were only $23.
I have to say that they do work very we. Initially I got one for the dog, but after annoyance set in I picked up another and put them outside under my "welcome" mats. Sensor is inside. Now I get a notification any time someone comes to my door, whether they knock or not.
Here is what the mats look like with the custom DH.
Go control didn't go out of business, it's just that the combo packs are a great deal for the consumer, so they aren't really available anymore. You have to buy the pieces separately.
I use the go control siren and it's great.
I also use these door and window sensors which work great and are cheaper: https://www.amazon.com/gp/product/B00HPIYJWU/ref=oh_aui_detailpage_o01_s00?ie=UTF8&psc=1
Some of the window/door sensors allow you to connect a pair of wires which in this case would allow you to connect alarm wire to the sensor and trigger the z-wave part by pressing the doorbell button connected to the other end of the wire.
I used this one: https://amzn.com/B00HPIYJWU
Once you can send a z-wave command via the doorbell button then you can make it do a number of things. I trigger an MP3 using this z-wave doorbell: https://amzn.com/B0182XG27Q (note that bad reviews are related the the useless wireless button, the actual device is really useful as you can add many other sounds and trigger them with any number of z-wave devices) as well as flash the strobe on a couple of these: https://amzn.com/B00MNYSEKY. Other people have it flash lights, play sounds from their Sonos speakers etc.
This all is assuming you have some sort of HA hub as well.
I'm a big fan of Lutron. Their in-wall and plug-in dimmers can work without a hub. Then if you eventually decide you want Homekit and other such features, you can easily add in a hub.
In-wall dimmer: https://www.amazon.com/Lutron-Wireless-600-watt-150-watt-Multi-Location/dp/B00JJY0S4G
Plug-in dimmer: https://www.amazon.com/Lutron-Caseta-Wireless-Dimmer-300-watt/dp/B00JJY1QG0
http://www.amazon.com/Lutron-P-PKG1P-WH-Wireless-300-watt-100-watt/dp/B00JJY1QG0
The Lutron Caseta plug-in dimmer might be a good choice. Amazon Link.
Put in any light fixture and bulbs you want and use a Lutron Caseta in wall dimmer switch. First light switch is about 100 bucks,
https://www.amazon.com/Lutron-P-BDG-PKG1W-Caseta-Wireless-Selected/dp/B00MXCRAX8/ref=sr_1_3?s=lamps-light&ie=UTF8&qid=1482958038&sr=1-3&keywords=lutron+caseta
This includes the Smart hub needed to make it internet accessible.
Each additional switch thereafter is around 50$.
https://www.amazon.com/Lutron-Caseta-Wireless-Dimmer-150-Watt/dp/B00KLAXFQA/ref=sr_1_2?s=lamps-light&ie=UTF8&qid=1482958148&sr=1-2&keywords=lutron+caseta
You can also purchase them with remotes for $60
https://www.amazon.com/Lutron-Wireless-600-watt-150-watt-Multi-Location/dp/B00JJY0S4G/ref=sr_1_1?s=lamps-light&ie=UTF8&qid=1482958148&sr=1-1&keywords=lutron+caseta
and you can purchase plug in versions that allow you to control standard lamps and such ($60)
https://www.amazon.com/Lutron-Caseta-Wireless-Dimmer-300-watt/dp/B00JJY1QG0/ref=sr_1_7?s=lamps-light&ie=UTF8&qid=1482958148&sr=1-7&keywords=lutron+caseta
Lutron Caseta is not only compatible with alexa, ("alexa turn my living room to 50%" "alexa turn off my bed room" "alexa turn my living room to 10%" etc.) it is also fully homekit enabled. ("Hey siri, set my chamber to 2%" ) and utilizing the home app on your iDevice, you can set up schedules and such, for example my bedroom light turns on to 10% 30min before my alarm, and up to 50% 5 minutes before my alarm. This really helps me wake up on time.
Lutron caseta work great. worth the money
Take a look at the Lutron lamp dimmer: https://www.amazon.com/gp/product/B00JJY1QG0/ref=ppx_yo_dt_b_search_asin_title?ie=UTF8&psc=1
You do need the Lutron hub to make it Homekit capable though.
https://shop.smartthings.com/#!/products/ge-in-wall-on-slash-off-switch
plus
https://shop.smartthings.com/#!/products/aeon-labs-minimote
Way cheaper if you buy them from Amazon, of course:
https://www.amazon.com/GE12722-Z-Wave-Wireless-Lighting-Control/dp/B0035YRCR2
https://www.amazon.com/Aeon-Labs-DSA03202-v1-Minimote/dp/B00KU7ERAW
I am also looking for something very similar, except I would like it to be powered off of 120v AC. Right now I am using Aeon Minimote spliced together with an addon remote switch.
The addon remote switch is essentially just a button that looks like a light switch. I soldered the button from that to one of the buttons on the Aeon Minimote, so when I push the remote switch button it is the same as pressing the Aeon Minimote button.
The minimote is small already, but you can remote the casing so it can fit under other switches in the gang box, as well as remove the unnecessary parts of the remote switch that make it hook into the standard 120v lines like a normal light switch.
I have two problems with this solution which is why I am still looking for a better solution:
This may be a problem with my remote, or a signal strength/connection issue since the remote is inside the metal gang box inside the wall.
I am trying to control Hue lights (on/off) with a normal looking light switch, and am open to other ideas if people have them. I figure if I can fix the connection issue, I will live with them being battery powered.
https://www.amazon.com/Cooper-Wiring-Devices-RF9500AW-Operated/dp/B004I7YSVI
But you need some controller to program it, possibly only a minimote. Or you could just use the minimote, stick it to the wall.
https://www.amazon.com/Aeon-Labs-DSA03202-v1-Minimote/dp/B00KU7ERAW/
I'm assuming you don't already have a switch in the place you'd like to add one? In that case, a zwave remote is your best bet. If you want something that looks like it belongs on a wal, this would be a good option. If you just want a cheap solution, a minimote would also work.
So this is what I did in a similar situation.
First I replaced the switch that actually powers the lights with this GoControl switch. This will make it "smart" and you can the control it with accessory switches.
The next thing you will need to do is install the Accessory Switch where you want to be able to control the light from. If you want to still control your outlets youll need to replace the box with a 2 gang box. If you do not want to control your outlets anymore you could simply wire them to power on all the time and replace the old switch with this one. This switch just needs 120v power to it to run.
Once you have the accessory switch in you need to tell it what master switch to control. You do this with an Aeon Minimote.
There may be other ways of doing what you are looking for, but this worked for me. Let me know if you have any follow up questions.
You can also get v1 of this remote for way cheaper: https://www.amazon.com/dp/B00KU7ERAW
For my apartment, I you utilize two solutions to almost solve this problem. Neither one is perfect but for controlling rooms with only hue bulbs I use the hue dimmer switch. Those work nicely because the plate they come with is about the right size to replace a regular switch, but they only control Hue bulbs. For other rooms that have other lighting solutions, I have attached some Aeon Minimotes to the wall. In those rooms, I don't have light switches that need to be in any position, but you could always rewire them to bypass the switches and build some custom mounting solutions for the,
I'm not familiar with Wink, but seeing as how it's Z-wave what about this or this?
www.gocontrol.com/detail.php?productId=12
I have no personal experience with this particular device but I do use go control door/window sensors without issue.
Another option, over $100 spendy! http://www.zwaveproducts.com/shop/z-wave-lighting/dimmer-switches/battery-operated-z-wave-dimmer-switch
https://www.amazon.com/gp/aw/d/B00KU7ERAW/ref=mp_s_a_1_1?ie=UTF8&qid=1498307662&sr=8-1&pi=AC_SX236_SY340_FMwebp_QL65&keywords=zwave+remote+control&dpPl=1&dpID=41TL10uhQxL&ref=plSrch
This is what I use to control Caitlin fans and lights in the house. Four buttons capable of two commands each. Light control and fan control in a small package. This is one of the best zwave deals out there.
I think you're out of luck if you're looking for a single switch that can do fluorescent tubes today, and dim bulbs later. Such a thing doesn't exist, as far as I know.
As for Zwave switches that can handle your current lights, I don't think there's really a bad option:
Linear/GoControl has a Decora-style switch that is really reliable.
GE has Decora-style and toggle-style switches (this is what I primarily use. Haven't had any problems).
You're probably going to spend $30-$45 per switch for these models.
Have you sorted out your hub already?
I used this for an outlet most recemtly:
GoControl WO15Z-1 Z-Wave Single Wall Outlet, White https://www.amazon.com/dp/B00JFK1YRE/ref=cm_sw_r_cp_apa_WW8iybATX7XG4
This is the plug in lamp dimmer module
GE Lighting Lamp Module with Dimmer Control, Z-Wave, Plug-In, White, Works with Amazon Alexa https://www.amazon.com/dp/B00PYMM7E6/ref=cm_sw_r_cp_apa_2X8iybCTVJ88R
This is the regular switch... Notice this is a "regular" style but you can find it in paddle as well.
GE Z-Wave Wireless Lighting Control Smart Toggle Switch, In-Wall, White, 12727 https://www.amazon.com/dp/B00PYMGOHM/ref=cm_sw_r_cp_apa_d08iybB4CY6HZ
I just replaced the switches in a four gang box with these which are being controlled by a Smartthings hub.
The GE Z-wave switches are the only toggle type switches I could find. They can be purchased as regular switches or dimmers and can do three or four way switching.
They fit in my box, cramped but, it worked.
Cloud based control from your phone or Alexa. Switch still works like a regular switch, it just stays in the middle all the time.
Nice thing is you can buy others and add them as you want.
I've been using the GE z-wave toggle switches with SmartThings and haven't had any issues. I initially tried to avoid replacing the switches and put in the smart bulbs but our issue was if the power goes out in the middle of the night the bulbs would then turn on and wake us up. The other added benefit with the switches is that anyone visiting doesn't need anything special to control the lights (parents, friends, dog watchers).
Just as a tip, when installing the switches we had issues with them working in the first hour or so (probably due to needing to do the z-wave network repair). Initially the z-wave network repair was failing. What I found worked was to install the switch, connect to smartthings and do setup for a couple minutes, flip breaker to kill power to switch for 10 minutes, turn breaker back on, and then run the z-wave network repair. Since doing that process we've had zero issues. Hope this helps you out.
Edit: Here is the link to how to do SmartThings Z-Wave Repair :) https://support.smartthings.com/hc/en-us/articles/200981864-How-do-I-make-sure-my-Z-Wave-devices-are-routing-optimally-
It sounds like you want an on/off switch.
GE makes those but other manufacturers probably do as well.
https://www.amazon.com/gp/product/B00PYMGOHM/ref=crt_ewc_title_gw_1?ie=UTF8&psc=1&smid=ATVPDKIKX0DER
We recently installed these GE switches and have so far liked them a lot. They don't look dramatically different from traditional switches, and you can then use whatever bulb you need in the actual outlet.
Just as a note, we did have issues with the newer SmartThings app automating the lights coming on at night and going off in the morning, but it seemed to be an issue with the app- we used the classic app and it's worked perfectly ever since.
The switch I'm installing tonight/tomorrow is just a GE Z-wave switch, one of these. The fan that I have operates on standard 110 power, it's almost exactly one of these
Installing it last weekend was a lot of work, so I haven't ran a real switch to it yet. I cheated and wired it up to an extension cord, and plugged that in to a wifi outlet. I just wanted to see it in action and ran out of time before mother's day plans happened.
So no existing timer switch yet. If I wasn't doing a z-wave switch, I'd be installing a timer switch like you have. That's what my neighbor has and he says it works great. I'll use a timer component to set this up so that it turns off automatically after a period as well.
EDIT: Also, thanks for making me think about automatic "shut off" conditions! Auto shut off is a great idea.
AFAIK the only way to do this is to use a relay with the dumb switch.
This is an example: Vision In Wall Z-Wave Micro Switch, 2 relay https://www.amazon.com/dp/B00R883YKU/ref=cm_sw_r_cp_api_i_uxbwDb7N2SBCD
But you might be better off converting it to a two gang box (assuming there's room there).
Ive never considered an in line switch before but you use case makes sense. Here is another relay that is a little cheaper. https://www.amazon.com/dp/B00R883YKU/ref=cm_sw_r_cp_api_ar.RBbWNCNN4K. You could then pair it with a zwave button or something. Now I'm considering where I could use something like this haha
With no neutral in the switch box, you must have it at the fixture. Could you rewire the fixture such that the fixture is always hot, convert the return leg of the wire to the switch back to a neutral, use it to power a smart relay like this one: https://www.amazon.com/Vision-Z-Wave-Micro-Switch-relay/dp/B00R883YKU/ and use your existing switch to control it? Then trigger the robot for the other bulbs off of that relay’s status.
Thanks for the suggestions!
While searching for the Aeotec switch, I came across the Vision In Wall Z-Wave Micro Switch, 2 relay (https://www.amazon.com/gp/product/B00R883YKU/), which seems to be a cheaper alternative.
OK got it. I hope you don't mind all my questions. Hopfully this is the last of it.
I have amazon prime so is this close enough to your link above: https://www.amazon.com/Tolako-Module-Arduino-Official-Boards/dp/B00VRUAHLE/ref=sr_1_1?ie=UTF8&qid=1474495841&sr=8-1&keywords=5V+to+12v+relay
Also, what end would I connect the 5v to trigger the other end 12v?
Thanks again!
It's pretty simple if you use a 5v relay. You can think of a 'relay' like a light-switch that can be turned off and on with a digital pin on the arduino. You will actually hear a mechanical 'click' when you trigger it.
So you can use a 5v relay like this one to control a 12v power supply like this one.
And then wire it up with your light like this.
​
Let me know if you have any questions about how to use the relay properly.
Items:
https://www.amazon.com/Tolako-Arduino-Indicator-Channel-Official/dp/B00VRUAHLE/ref=sr_1_3?ie=UTF8&qid=1522213485&sr=8-3&keywords=5v+relay
If you need to save on some space, go with a Solid State Relay like this:
https://www.amazon.com/G3MB-202P-DC-AC-Solid-State-Module/dp/B01JCPPBI4/ref=sr_1_3?s=industrial&ie=UTF8&qid=1522213949&sr=1-3&keywords=5v+solid+state+relay
and
https://www.amazon.com/CO-RODE-Battery-Holder-Wired-Switch/dp/B00VE7HBMS/ref=sr_1_8?ie=UTF8&qid=1522213257&sr=8-8&keywords=small+12v+battery
or
Get this and a 3x AA battery holder for your 11.1 volts
https://www.amazon.com/WAY%C2%AECharger-2000mAh-Rechargeable-Batteries-Flashlight/dp/B00PIDNTRA/ref=sr_1_3?s=electronics&ie=UTF8&qid=1522213739&sr=1-3&keywords=Lithium-ion+AA
and
https://www.amazon.com/Gfortune-Cable-Plastic-Batteries-Holder/dp/B06XW8QC6N/ref=sr_1_3?s=electronics&ie=UTF8&qid=1522213842&sr=1-3&keywords=3+cell+aa+battery+holder
It's called a relay. They are cheap. here is a 5v relay. you can get them in multiples, with multiple current ratings.
Just put one inline with a wall switch. They are small enough to fit in the switch box.
If you want the switch to always invert the state, (i.e. If light is on, and switch is down) you could hook the wall switch up to gpio and have it swap the state of the relay for every switch state change. This way you won't run into a situation where you want to manually turn off the light but can't because it was remote controlled.
I probably could have been more specific, I am using a relay module (https://smile.amazon.com/gp/product/B00VRUAHLE/ref=oh_aui_detailpage_o09_s00?ie=UTF8&psc=1) to toggle the solenoid, connected to the Arduino's ground, 5 V and D4 signal pin.
Here ya go:
https://www.amazon.com/LEDMO-Power-Supply-Transformers-Adapter/dp/B01461MOGQ/ref=sr_1_3?ie=UTF8&qid=1485796874&sr=8-3&keywords=12v+5A+power+supply
I don't use the plugs on my FLS-pp's that I have. I just cut the plug off the power supply and hard wired it directly to the FLS-pp. Since mine is a permanent installation this isn't an issue. Honestly I don't see why you would ever want the plug. It not like you will be swapping power supplies that often or ever.
I followed the Ikea LACK build, with my own mods.
I don't live near an IKEA, so I bought two end tables @ $8/ea, but ended up paying $26 total after shipping. I then purchased $60 in plexi, but used corrugated plastic for the back panel since it's significantly cheaper and the white background reflects more light on the print bed. It's basically the stuff that political yard signs are made out of (if that makes sense). I printed standoffs / brackets to hold the plexiglass (see Thingiverse), $14 in brackets & board for the side shelf. The lights were about $45, using this, this, & this. I put the LED strips on aluminum channel, but that really could have been skipped. I just had some from a previous project.
Because I went "full nerd", I used an arduino & temperature sensor to create a temperature controlled fan, with LED control panel (designed & printed bracket), and used sketch-up to build an exhaust housing very similar to this one, except for a 120mm fan. I don't have a filter on the enclosure now, and to be honest, 90% of the time, the fan is off. But I wanted to be able to place a charcoal filter on the exhaust fan for ABS, so I planned ahead. I'm going to tie my OctoPi to the Arduino and trigger the fan on high after a print ends to cool the enclosure down faster so I can pull parts off the glass bed sooner.
I'll guess my all-up price was about $200. It could have been done for probably $130 without the arduino & lighting tom foolery.
Other mods pictured are the printed Z-axis braces on the printer itself, this fan shroud on the control box (because the stock fan is a joke), and the aforementioned borosilicate glass print bed.
Until you have an enclosure sorted, even surrounding the printer on 3 sides with cardboard proved to be a huge step in the right direction for me. It proved that yeah, I really do want an enclosure.
A lot of this depends on how the fan and lights are wired.
In general, there should be two circuits in the fan- one for the fan motor, one for the lights. That means two pull chains since you say you use chains.
Complicating this is the fact that you have one and only one on-off switch, which probably kills power to the whole fan fixture.
If this were me, I'd hardwire the switch so that it ALWAYS supplies power. Or just cover the switch with something like this.
Then I'd get two Micro Switches or equivalent, and put them above the fan. One controls the fan motor circuit, the other controls the lighting circuit.
I'd then replace the pull chains with momentary pull chain switches and wire those into the micro switches to activate them.
End result of this- fan and light have working local control with the pull chains. The switch location has an on/off button that you program to turn on fan or light or both. And both are addressable in Google Home.
Also note- the products I linked are Z-Wave. To make them work with Google Home you'll need a hub to sit between Google Home and Z-Wave. Vera is a good choice, SmartThings works too.
You could get WiFi products instead- Here's a micro switch and while I couldn't find a switch cover plate like the Z-Wave one, there are a lot of WiFi light switches you could hardwire in as long as you have a neutral wire in the light switch box. Just wire hot to load (so the fan is always powered) and connect the switch to neutral and hot (so the switch gets power). Thus switch isn't actually switching anything, just sending a WiFi signal for Google Home to react to and turn on fan / light / etc.
While WiFi products don't require a hub, it does mean if you ever reset your WiFi password you'll have to dismantle your ceiling fan.
My advice was only 100% relevant to the brands I mentioned and am not advising splicing wires.
In the case of the brands I mentioned, the difference between a unit with a pump and one without is literally a pump installed into the machine compartment. The cord which would otherwise be plugged into the wall from the ice maker is plugged into a socket on the pump and the pump itself has its own cord that then goes to the wall. The pump is supposed to shut off power to the ice maker if the pump fails.
Looking at the pump kit for the Scotsman it is clear that this isn't the case. I don't have any suggestions at this point, though you could try splicing if you really wanted to with one of the in-wall switches like:
https://www.amazon.com/Enerwave-ZWN-RSM1-PLUS-Wireless-Control-Required/dp/B01G7OD1F8
You could put a hidden micro-switch inside the back of the receptacle and keep the non-smart outlet downstream. Here is an example of one: https://www.amazon.com/Enerwave-ZWN-RSM1-PLUS-Wireless-Control-Required/dp/B01G7OD1F8
Yep! Here's a link of something similar. Not sure if that's the exact one I got.
Mostly a gimmick. A fun gimmick, but a gimmick nonetheless. It really depends on what your budget is. Is approx $20/bulb worth it for a novelty? For me, it was in a few places, but I probably wouldn't do it again. The temperature thing is now a must after having the color and the ambient. I hope to never go back to a single temp bulb again. That's worth $15 premium of the ambient over the cheap white ones.
Get the dimmer switches. 100% worth the money. Then put these guards over your current switches.
I had a buddy 3D Print a handful of these for me.
https://www.amazon.com/Switch-Protects-Lights-Circuits-Accidentally/dp/B06XP9M2FT
Anddddddd I think I just found the solution.
https://www.amazon.com/dp/B06XP9M2FT/ref=cm_sw_r_cp_api_i_22-yDb5MV2TNP
https://www.amazon.com/Switch-Protects-Lights-Circuits-Accidentally/dp/B06XP9M2FT
https://www.amazon.com/slp/switch-guard/sog5o5kwrvya7hq
https://www.thingiverse.com/thing:69806
https://www.thingiverse.com/thing:134995
https://www.thingiverse.com/thing:1308378
That would work, but I was thinking something a little easier to install: https://www.amazon.com/Switch-protects-lights-circuits-accidentally/dp/B06XP9M2FT/ref=sr_1_9?s=lamps-light&ie=UTF8&qid=1536608373&sr=1-9&keywords=switch+cover.
Easy, buy this https://www.amazon.com/Switch-Protects-Lights-Circuits-Accidentally/dp/B06XP9M2FT/ref=sr_1_3?ie=UTF8&qid=1541447968&sr=8-3&keywords=switch+guard
I just use these:
White Switch Plate Cover Guard Keeps Light Switch ON or Off Protects Your Lights or Circuits from Accidentally Being Turned on or Off. https://www.amazon.com/dp/B06XP9M2FT/ref=cm_sw_r_cp_apa_i_2avDCbS9KW9JM
if it's just a 2 wire switch you can wire nut it and blanket off
but the easier option would just get switch protectors
White Switch Plate Cover Guard Keeps Light Switch ON or Off Protects Your Lights or Circuits from Accidentally Being Turned on or Off. https://www.amazon.com/dp/B06XP9M2FT/ref=cm_sw_r_other_apa_i_yh-ADbT6NH58F
Just try one, with the dimmer cranked all the way up. If they're ok, install these to keep power to the bulb.
EcoLink Door sensor on Amazon for $29 works great. You add it as a Z-Wave sensor and it works fast and consistently.
Ecolink Intelligent Technology Z-Wave Door & Window Sensor, White & Brown (DWZWAVE2-ECO) https://www.amazon.com/dp/B00HPIYJWU/ref=cm_sw_r_cp_api_ufrnyb2JP9NZN
I would have thought to just use a Window/Door sensor...but this looks much easier.
http://www.amazon.com/Ecolink-Z-Wave-Window-Sensor-DWZWAVE2-ECO/dp/B00HPIYJWU/
Security: Look at it this way, How often are you opening windows, and forgetting to close and relock them? A contact sensor only works at the point of contact. IE, If the window is broken into (The glass is broken), the contact sensor will still show closed.
There goes the security argument out the window.
As far as automation, sure, sensors on windows would be a plus, but if you're doing something just checking if ANY window is open, You might try a hardwired solution and wire it to one sensor. You can get hardwired contacts for somewhere around 3 USD a pop. Combine that with one Ecolink door and window sensor (That has a hardwire port on it) and you'd be good to go.
Homeassistant supports Alarm Decoder and Envisalink (Two solutions I used just for this purpose) as well as a couple of others, but if youve already got a hardwired solution, That'd be your way to go.
For what you are trying to achieve, z-wave and/or zigbee will do you best. The first thing you are going to need is a smart hub that has z-wave and/or zigbee radios. I use Samsung SmartThings, and it's decent and has both radios. There are other options on the market, but I think SmartThings is probably the most popular one on the market.
I can link you some products that I have in my house that work great with my SmartThings hub, and will work with various other hubs on the market.
Fan Control (speed only, not light)
Motion sensor (You can normally find these for $30 or less)
Door/window sensor
Dimmer switch
Garage door opener
Plug in outlet
Like this that allows you to connect external wires, so you can connect the original switch to it.
I would test the 2 wires when the door is closed and see if you get continuity, and when the door is open if it is broken. You can use these Ecolink, or Schlage ones that have a contact terminal in them and have Z-wave door sensors. http://www.amazon.com/gp/product/B00HPIYJWU
Here are my thoughts:
​
That should get you going!
I was going to get a few Lutron plug in switches but I found the bluetooth auto-off fairly reliable. Now that latest steamvr beta allows the entire system to be turned on from the wands and headset, I think that's actually superior to a third party switch setup.
You don't need the pro hub anymore, it works with the regular hub. I don't think the pico remote is individually programmable with HA yet but you could use this lamp dimmer if you just want to turn it on and off.
This one has prime, same thing: https://smile.amazon.com/dp/B00JJY1QG0/ref=twister_B07RR5V7SN?_encoding=UTF8&psc=1
I'm just using a plug-in lamp dimmer for mine, but there are several ways to go about it...lamp dimmer, smart bulb, smart switch...
Yes. The Lutron dimmer is a physical switch that controls the device wired to it just like a normal non-smart switch.
These are the plug in dimmers: https://www.amazon.com/Lutron-Wireless-Lighting-P-PKG1P-WH-Assistant/dp/B00JJY1QG0
You can pair them with wireless remotes to control lamps.
Lutron has a lamp outlet dimmer switch but you'll need to get the hub as well. There's a home assistant component which would then allow you to feed in the sunrise schedule.
I'm doubtful that a standalone dimmer like you're describing exists.
Lutron Caseta Wireless Smart Lighting Lamp Dimmer and Remote Kit, P-PKG1P-WH, White, Works with Alexa, Apple HomeKit, and the Google Assistant https://www.amazon.com/dp/B00JJY1QG0/ref=cm_sw_r_cp_apa_i_Q7GPCbYBJ7WJ8
Best way I can think of would be to get a scene controller like this or a remote like this or this. Just note that you'll need to use another hub to control them, whether it is Home Assistant with a uzb stick, smartthings, wink, or something else. Other than that, you could stick a cheap tablet on the wall and just have the LIFX app running constantly.
EDIT: I see that is sounds like you haven't actually purchased the LIFX bulbs yet. If that's true you may just want to go with Philips Hue and add a Hue Tap instead. Kinda ugly but it's a much easier setup. Hue is a lot cheaper than LIFX anyway if you want more than 1 bulb
Look on Amazon. They have zwave remotes for $20
minimote
You have a few options, you can use traditional z-wave devices and then pair them to a remote like the Aeon Labs minimote and operate them that way (no hub required). I also discovered that GE has a bluetooth switch that you can program and operate remotely with your phone but looks like you don't want to use a phone.
Edit: as /u/gurase mentioned Lutron has a system that will work too.
I'd suggest:
https://www.amazon.com/GE-Dimmer-Z-Wave-12724-Amazon/dp/B006LQFHN2/
https://www.amazon.com/Aeon-Labs-DSA03202-v1-Minimote/dp/B00KU7ERAW/
and if you get a hub later, you can still use these devices so that is a plus.
https://www.amazon.com/Aeon-Labs-DSA03202-v1-Minimote/dp/B00KU7ERAW/ref=sr_1_2?ie=UTF8&qid=1541635285&sr=8-2&keywords=minimote&dpID=41qVOaM7nvL&preST=_SY300_QL70_&dpSrc=srch
Is that the minimote?
These zwave minimotes are pretty nice. They work well with SmartThings. Also like them because they're rechargeable.
I also use a bunch of hacked dash buttons.
I've been using these https://www.amazon.com/Aeon-Labs-DSA03202-v1-Minimote/dp/B00KU7ERAW/ref=pd_lpo_60_bs_t_2?_encoding=UTF8&psc=1&refRID=HDB1DN7CA5ADZT1VSKQH They aren't as sexy looking at the Lutron switches you have in your post, but these have a battery so don't require any sort of wiring and works fine with the Smartthings hub.
Minimote can be found for as low as $13 on sale
Currently $18+ on amazon
https://www.amazon.com/Aeon-Labs-DSA03202-v1-Minimote/dp/B00KU7ERAW/
Lowes has the Iris single button on sale for $20
If you use the switches I mentioned in my other comment then you can use any Z-Wave remote to control the fan. The Aeotec Minimote is a popular choice. Just keep in mind that those switches aren't compatible with the manufacturer's RF module, so you'll need to remove that from the fan's canopy.
https://www.amazon.com/dp/B00PYMGOHM/ref=sr_ph_1?ie=UTF8&qid=1468330935&sr=sr-1&keywords=ge+zwave
This is the switch I use. They also have paddle switches and dimmers.
I'm not fully following what you are asking for.
You want a smart switch with no dimming capability.
But are you saying you want it to only control one light, or two?
Is this a for a three way switch?
If I have put it together properly, you are just looking for a regular ordinary on/off single pole light switch with no dimming capability?
like this?: switch
I have GE switches in my house... and like you I switched out everything that kinda needs to be smart (I left bathrooms alone, visitors don't want a motion sensor in the bathroom :-)).GE does make a toggle style, though if you want my personal opinion i think they are kind of ugly. If you are going to replace almost everything in your house just go with the paddle style.
​
why would you need two hubs? what are you planning on using as a hub?
OKay, so for each 3-way, I'd need something like one of these:
https://www.amazon.com/dp/B00PYMGOHM/ref=asc_df_B006LQFHN25032304/
and one of these?:
https://www.amazon.com/dp/B00PYMGYY0/
(And the hub of course)
I would guess that this would work: https://www.amazon.com/dp/B00PYMGOHM/ref=cm_sw_r_cp_dp_T2_khTszb520VX84
However, you may want to check with abode about compatibility.
Thanks for the response BreakfastBeerz. A quick search there makes it seem like this device may work:
https://www.amazon.com/GE-45605-Z-Wave-Technology-Receptacle/dp/B00PYMGOHM/
But since our one light has three separate switches in the room I'm hesitant to move forward with this plan due to the expense and complexity that may be involved.
> See, I didn't even know that was a thing. Glad I opened this thread already. So much to research.
>
> Thanks.
No prob man, and they really do work amazingly. Here's an amazon link for the z-wave plus outlets:
https://www.amazon.com/gp/product/B07361JZ2H/
Here's the link for the switches and add-on switches. They come in either paddle or toggle style, and in a couple colors. You can also get switches that support dimming if that's your thing.
https://www.amazon.com/gp/product/B00PYMGOHM/
If it's a 3-way, the functionality of the add-on will match that of the other switch. So if it's a dimmer on the main side, the add-on has that as well.
Thanks. I also asked in /r/homeautomation and had this suggested. Looks like it could possibly work if I can jam a couple of them in the box with the rest of the wires.
I have used these successfully with Smartthings and Vera Lite. You only need one to work with two switches. It must be wired in the box behind the switches, so you need to make sure you've got room in your box. Based on the instructions, I'm certain there is a European variant. I hope this helps.
Vision In Wall Z-Wave Micro Switch, 2 relay https://www.amazon.com/dp/B00R883YKU/ref=cm_sw_r_cp_apa_q6iIAbKA2Z3JB
You could tuck one of these up into the range hood somewhere: Vision In Wall Z-Wave Micro Switch, 2 relay https://www.amazon.com/dp/B00R883YKU/ref=cm_sw_r_cp_apa_i_Qw94AbMSPQHRX
I like to use ones like these: https://www.amazon.com/Vision-Z-Wave-Micro-Switch-relay/dp/B00R883YKU/ref=sr_1_4?s=hi&ie=UTF8&qid=1524829057&sr=1-4&keywords=In+Wall+Z-Wave+Micro+Switch
you can still use the same switch so it looks like a normal wall switch because it is a normal wall switch.
Vision In Wall Z-Wave Micro Switch, 2 relay https://www.amazon.com/dp/B00R883YKU/ref=cm_sw_r_cp_api_VXCbAb1NHPYCC
Yep basically it goes on between your existing light switches and your home's wiring. The instructions arent super helpful but the top Amazon review has a really useful wiring diagram.
I'd probably look into using a couple of these to automate double-rocker switches (if there's room in the gang boxes, you have neutrals, etc.)
Disclaimer: I’m in the US.
When I wanted to start adding this functionality I went zwave and added a couple of zwave in-wall switches for the most important and commonly used lights (I was also doing a zwave lock at the time).
Now I am trying one of these modules which go in the switch junction box or light junction box. This one in particular has two relays for a double switch box. You can still use the normal switch (the module notices the switch flip either direction and cycles the state of the device). I haven’t installed one yet but others have reported good results.
You could also incorporate zigbee or another protocol. You need two way communication between devices and the system instead of one way from the system to the device as you have now.
In places where space is tight (3 or 4 switches in a box) I use Vision in-wall double relays and keep the existing switches there. See this or this. 2 of these will work with 4 rockers, will be in the box and no other changes.
If you go with Smartthings you can use both z-wave and zigbee devices.
Be careful though as for most devices you need neutral wire for each circuit in every box. Some lighting do not have them as they are at the fixture, but you can install these relays right at the fixture.
Also do some reading/ask for advice here.
If you do this, I have one piece of advice - daisy chain the neutral wire from switch to switch. You can make them the correct length and they will use a lot less room. Each wire connector should have 2 holes to insert wiring. The screws are basically a no-go.
You can also keep the switches and go with these :
https://www.amazon.com/Vision-Z-Wave-Micro-Switch-relay/dp/B00R883YKU/
https://www.amazon.com/Fibaro-Fgs-222-Dual-Relay-Switch/dp/B00WH0S8F0
​
Each controls two loads.
Maybe. I have used these, and they support 2 switches, but only if your controller supports 2 switches on the same device. My 2Gig alarm panel does not, so I can only use it for one switch.
They also make 'double' versions of these to control two switches. I wish i'd understood more before converting the house over to GE/Jasco.
https://www.amazon.com/Vision-Z-Wave-Micro-Switch-relay/dp/B00R883YKU
Dimmer versions:
https://www.amazon.com/Aeotec-Z-Wave-Micro-Dimmer-2nd/dp/B00IRI1CEK/ref=sr_1_3?s=hi&ie=UTF8&qid=1486063509&sr=1-3&keywords=zwave+in+wall
second 2 gang option: https://www.amazon.com/Aeon-Labs-Aeotec-DSC-17103/dp/B01DDQS07W/ref=pd_sim_60_1?_encoding=UTF8&pd_rd_i=B01DDQS07W&pd_rd_r=YFHWK6KFSSQT2MNBSMT7&pd_rd_w=ahlIA&pd_rd_wg=Oo1Qn&psc=1&refRID=YFHWK6KFSSQT2MNBSMT7
I was waiting for the same thing, but I finally bit the bullet and got a dual relay. It's a tight fit (you'll need to stuff it all the way to the back), but I got it to work in a standard single-gang box. Your existing switches will work and will toggle on/off regardless of the position of the switch. The switch also reports instant status to your z-wave controller.
The model I listed is good because the built in wires minimize the number of wire nuts you'll need (only 2 to connect the red and yellow wires to the 2 loads), which conserves space. You can follow along with the wiring guide in the comments. It's cheap and works great for on/off control.
I use this one from amazon. It has a 120v coil so it is easier to control. I use a contactor the pool pump and one for the pool cleaner pump controlled with a dual relay z wave micro switch. But any z wave switch that you can mount will work. Many pool pump panels have a place for a switch to mount. Mine is inside the panel and works great.
you could try one of these in-wall relay micro switches. I have these in my bathroom dual gangbox and they work really great. Single relay switches should be smaller too.
I have one of these but haven't setup with a 3way switch yet. Have you seen this person's review on Amazon?
https://www.amazon.com/gp/aw/review/B00R883YKU/RC9RA0BUNBS5I/ref=cm_cr_dp_mb_rvw_1?ie=UTF8&cursor=1
A dual-relay Z-wave in-box switch and a Z-wave scene controller will get you wireless control over the fan however in order to get Alexa compatibility, you're going to need a hub of some sort (Vera, Wink, Smartthings). Alexa's commands go from the Amazon Voice Service to the smart hub's API, and the hub is what sends the actual commands to turn on/off things. Without a hub, there's nothing for Alexa to see much less control.
Trying to find a wifi solution to this is either going to be expensive as it's a single-purpose item (to control a fan/light kit) or it's going to be kludgy. You could technically get a couple of wifi appliance switches (one for fan, one for lights), however it's going to be a bit ugly up on the ceiling or on the wall wherever you tap in to get the power for the ceiling fan.
This is the relay you are looking for (allows you to control any 120V AC load at 10A):
https://www.amazon.com/Tolako-Arduino-Indicator-Channel-Official/dp/B00VRUAHLE/ref=asc_df_B00VRUAHLE/?tag=hyprod-20&linkCode=df0&hvadid=309803885710&hvpos=1o2&hvnetw=g&hvrand=3454667229330550267&hvpone=&hvptwo=&hvqmt=&hvdev=c&hvdvcmdl=&hvlocint=&hvlocphy=1014421&hvtargid=pla-568715033020&psc=1
This is a really common thing to do with an Arduino, you can learn more about it here:
https://www.instructables.com/id/Home-Automation-How-to-Add-Relays-to-Arduino/
You could also use a relay board. They work out of the box with no soldering and you can get boards with up to 16 relays.
https://www.amazon.com/Tolako-Arduino-Indicator-Channel-Official/dp/B00VRUAHLE/
2 5v triggered arduino relays will get you to 1P4T
The two servos and linear actuator Im using are all getting power directly from the 12v power source. The only things connecting these items to arduino are their signal lines and ground.
Im actually not sure how much current Im drawing from the 5V rail. The only things being powered by the +5V rail are three of these photosensors, two of these relay boards (to change the direction of the linear actuator), and two limit switches with 10k ohm pull-down resistors. Ill try to find my multimeter and see if this is the problem.
If I was drawing over 150mA from the 5V rail, wouldnt my arduino overheat even if it was plugged into the USB of a computer? Because right now it's fine if I keep it plugged into the computer and dont have 12 going directly to Vin.
That depends on the size of your motor, the digital pins on the arduino can provide 40 milliamps of 5v power, but given that your motor is out of a car I suspect it requires 12v to operate, at a substantially higher current. For the purposes of your demonstration I you can either get a 12v battery box, or a 12v wall transformer and just say that in a production run the motor would be run by the car's 12v electrical system. Then use a relay to control the power to the motor.
You'd be fine if you used a relay such as this one. It has a transistor to protect from back voltage to the Pi and is really easy to use. I've set one up in the past to control a lamp with my cell phone.
You probably want to ask over at r/raspberry_pi. I have completed projects with power switching and would probably recommend using a relay. You can still use python to turn the relay off and on... And it's kinda the whole point of using a pi for this type of project. Here is an [example project] (https://elementztechblog.wordpress.com/2014/09/09/controlling-relay-boards-using-raspberrypi/) (not mine)...
Alternatively, you could use a pump like this combined with a motor controler you would get much more precision over the flow.
This. Used this guide, an iDevices switch (Wemo or anything else would be fine) and less than $10 in parts, including this $5 relay:
Tolako 5v Relay Module for Arduino... https://www.amazon.com/dp/B00VRUAHLE?ref=yo_pop_ma_swf
You could try rigging it into a relay such as this one, then powering it with a 9v battery. It may take some fiddling, and I'm way too tired to think right now, but it could work. I used it to hook a lamp up to an arduino and powered it with much lower voltage than the lamp would normally take. Of course, you'll still have the normal issues you'd get by using a doorbell circuit.
If you really want to get it done you could wire up a killswitch with a doorbell looking button, and add an LED that is controlled by the killswitch button.
I actually bought a 0.96" OLED screen that I might add to display when the plant was last watered.
Arduino
Raspberry Pi
Pump
Relay
Sensor
I got this relay board:
https://www.amazon.com/gp/product/B00VRUAHLE/ref=oh_aui_detailpage_o00_s00?ie=UTF8&psc=1
I ordered this relay module online in hopes i could use it to control the electromagnet. Would this work instead of a mosfet. I could solder the 12vDC electromagnet into the 12v adapter wires to power it and the arduino from the same source? https://www.amazon.com/gp/product/B00VRUAHLE/ref=oh_aui_detailpage_o00_s00?ie=UTF8&psc=1
And this is the magnet i ordered:
https://www.amazon.com/gp/product/B00JERC00S/ref=oh_aui_detailpage_o00_s00?ie=UTF8&psc=1
This is the relay that triggers the on/off button, but any 5V relay works, it doesn't have to be high voltage. I don't know about the other one, I just found it laying around. Here's a picture of it more in focus. It doesn't have to be anything fancy, if it's rated to handle household current it's plenty good.
Iv been looking for something like this, thanks. For those that are looking here's the parts...
LED strip
Power supply
Connectors
LEDMO Power Supply, Transformers,LED Adapter, 12V, 5A Max, 60 Watt Max, for LED Strip https://www.amazon.com/dp/B01461MOGQ/ref=cm_sw_r_cp_apa_i_FEDqDbE02Z0BA this is the power supply we used!
Module: SainSmart 5V~12V Zero Voltage... https://www.amazon.com/dp/B01GDVVANA?ref=ppx_pop_mob_ap_share
Power Supply: LEDMO Power Supply, Transformers,LED Adapter, 12V, 5A Max, 60 Watt Max, for LED Strip https://www.amazon.com/dp/B01461MOGQ/ref=cm_sw_r_cp_api_i_OKGHDbACFYZQB
(You May want to find a 10a one instead)
Momentary Switch: yueton DC 36V 2A 16mm High Round... https://www.amazon.com/dp/B0131XF9KS?ref=ppx_pop_mob_ap_share
Box: Pinfox 2 Pack Black Waterproof... https://www.amazon.com/dp/B07M5SZNR9?ref=ppx_pop_mob_ap_share
The heat up time is how I calibrated it - ya I like it that way
I put a small rock at the bottom to adjust the height - see this guys post https://www.reddit.com/r/Dynavap/comments/d7pcew/make_sure_to_calibrate_your_home_made_induction
Without the rock it heats FAST - Too fast. I could try a smaller rock when I get around to it
Supply: https://www.amazon.com/dp/B01461MOGQ
IH module: https://www.amazon.com/dp/B01GDVVANA
I was more so talking about a normal power supply brick, something like this (DC power supply is the proper term, just used to incorrectly calling them transformers). I've used similar of these to drive simple LED strip light setups.
That one doesn't supply enough current unfortunately.
You can use a generic 12V supply so long as it provides 5A or more. Something like this one on Amazon would probably work provided the tip size is correct. Anyone know what the plug diameter is? 2.1mm inner / 5.5mm outer is the most common but you see a variety in the real world.
So, I would just go with 4A and assume you're ok, but that's just how I roll.
How much is your usb pulling, probably not much, honestly I really doubt you'll have a problem with the 12v/4a.
If you want to be safer, go with: https://www.amazon.com/LEDMO-Power-Supply-Transformers-Adapter/dp/B01461MOGQ but you'll still need a splitter.
If you're on a budget, it's pretty easy to convert an old PC power supply into a 12v bench power supply and those usually have more than enough power to power several battery chargers at once.
Or if that's too hard, you can buy one of these or even one of these or something similar and they'll do the job nicely and can usually power more than one charger if you wire things up properly.
Not that there's anything wrong with spending a few dollars extra for a charger that has an AC input, of course. (And that's what I'd suggest if you buy any new chargers.) And if you want to be able to charge two batteries at once, often it's cheaper to buy two seperate chargers than a single charger that can handle two batteries simultaneously -- at least check the prices.
I had picked up this charger from HK for about $20 about a year ago and it's been really good -- but they don't seem to carry it any more. And it doesn't do AC input so ... I see no reason not to go with ohhnoez's suggested charger if you do buy a new charger.
I put my intakes towards the top of the bucket and my exhaust fan in the lid. It mostly depends on what type of pot you're going to use. If it fills your bucket then you'll want to have them high enough so the air isn't blocked. If there's some space around it then you could go lower but be sure to leave a little space at the bottom if you plan to make a drainage tray. I planned my bucket with a 3 gallon smart pot in mind so i kept the intakes high enough to not be obstructed. There's a link to my first bucket in my profile as Ekropf was kind enough to put it on spacebuckets.com. I haven't taken pics of my 2nd bucket yet, but it's similar. That site has lots of great pictures and info. If you do end up using an intake fan you'll want to mount it somewhere that doesn't blow directly on the top of your pot as it will dry out the top layer of the medium too quickly so the wet/dry cycle will be tough to maintain.
I can't stress the passive intake enough. I was very much of the opinion that I was going to have 1 intake and 1 exhaust fan but some very good people here pointed me in the right direction before I started building. You can see the thread and comments in my profile. (Hoping I can pass along the knowledge I gained. The people on this subreddit are awesome and helped me immensely.) I was very pleasantly surprised by the pvc elbows. They're only about 80 cents each and since I had already ordered 2 fans I made a 2nd bucket. Also, if odor control is important to you then you'll want to maintain negative pressure in your bucket. Intake fans can lead to positive pressure and air leak whereas passive will guarantee negative pressure. Just Google it if you haven't read about it yet.
Regarding the fans; here's what I bought. They're plug and play for a regular outlet.
https://www.amazon.com/gp/product/B009OWRMZ6/ref=ya_st_dp_summary
I also got lamp dimmers for my fans and they work great. Here's a link but I found them for 7 bucks at a local home store similar to Lowes or Home Depot.
http://www.amazon.com/Lutron-TT-300NLH-WH-Credenza-Dimmer-White/dp/B0000DI241
I'd recommend getting a temp/humidity weather monitor and try your bucket with 1 fan first. You can always install a 2nd if needed. It's important to check temp/humidity with your pot and medium in the bucket...I found its much different than an empty bucket. Something like this...
http://www.amazon.com/AcuRite-00611A3-Wireless-Thermometer-Humidity/dp/B001B35APA
I found cheap bricks of coco at Petsmart. It's also used for bedding/substrate in reptile terrariums. Roughly 6 bucks for 8 quarts...add about 30% perlite or vermiculite and you can easily fill a 2-3 gallon pot.
http://m.petsmart.com/h5/hub?id=/reptile/substrate-bedding/exo-terra-coco-husk-tropical-reptile-terrarium-substrate-zid36-5133039/cat-36-catid-500013?null
Here's what I did for led side lighting and power supply. It's not an absolute must, but definitely helpful from what I've read.
http://www.amazon.com/gp/aw/d/B01339F5ZO/ref=mp_s_a_1_3?qid=1457338928&sr=8-3&pi=SY200_QL40&keywords=led+tape+5630&dpPl=1&dpID=512cIyl2inL&ref=plSrch
http://www.amazon.com/gp/aw/d/B01461MOGQ/ref=psdcmw_15704861_t1_B01339F5ZO
If you have any more questions, feel free to pm me. I highly suggest looking through spacebuckets.com though...it'll give you lots of different ideas and you'll be able to see how they work before building your bucket.
Hope this helps!
I've been using this power supply for two 16ft light strips that are connected to one controller and it's been working good.
LEDMO Power Supply, Transformers,LED Adapter, 12V, 5A Max, 60 Watt Max, for LED Strip https://www.amazon.com/dp/B01461MOGQ/ref=cm_sw_r_cp_apa_i_9YTRDb5S1HY57
Here's what I think I've settled on - Thoughts?
Magic Home RGB controller - Flash with ESPHome
BTF-LIGHTING WS2811 - 12v, 60led per meter, individually addressable.
Power Supply - 12v, 5a, 60w - Do I need to step this down to power the Magic Home with 5v, and the strip qith 12v, or can the MAgic Home handle 12v?
Step-Down - If I do need to step down.
No you need something more like this
LEDMO Power Supply, Transformers,LED Adapter, 12V, 5A Max, 60 Watt Max, for LED Strip https://www.amazon.com/dp/B01461MOGQ/ref=cm_sw_r_cp_apa_i_dfX2DbY18XP3R
This is what I got.
https://www.smile.amazon.com/dp/B013C2U09S/ref=cm_sw_r_cp_apa_oCdsybMS72SB8
https://www.smile.amazon.com/dp/B01461MOGQ/ref=cm_sw_r_cp_apa_eDdsybYH0EKW5
They don't have ones that are specifically white -> red but what you could do is buy addressable RGB LED strips and use a controller to do that. Adafruit would be a good place to start. https://www.adafruit.com
Hah! Not at all, this is the one I got. LEDMO Power Supply, Transformers,LED Adapter, 12V, 5A Max, 60 Watt Max, for LED Strip https://www.amazon.com/dp/B01461MOGQ/ref=cm_sw_r_cp_api_i_AME1DbXG6XC11
Had a lot of issues deciding, myself. For the price, I went with this and skipped the MOSFET. I followed this guide to the T, if it helps.
https://www.reddit.com/r/Dynavap/comments/c94dxj/comment/etwdtf8?utm_source=amp&utm_medium=&utm_content=comment_timestamp
This one works wonderfully, and at a great price (~$10)
12 V LEDs?
https://www.amazon.com/gp/aw/d/B01461MOGQ/ref=mp_s_a_1_3?ie=UTF8&qid=1492592370&sr=8-3&pi=AC_SX236_SY340_FMwebp_QL65&keywords=12v+led+transformer&dpPl=1&dpID=51LCdONZWbL&ref=plSrch
This’s the one I bought.
I have a Wink Hub as my smart controller, then am getting some of these to convert my light switches: https://www.amazon.com/dp/B01G7OD1F8/ref=cm_sw_r_cp_api_vDODybFPS73D2
There are also 2 switch versions that would control 2 lights, but basically they act like a 2nd switch for the light but it's hidden in the wall box so both the hub or switch can control the light.
Stick this in the ceiling box for the florescent. https://www.amazon.com/Enerwave-ZWN-RSM1-PLUS-Wireless-Control-Required/dp/B01G7OD1F8/
Your worst case scenario is to put 2 remote zwave switches up in the ceiling fan. This will require bypassing the remote module in the fan, and wiring the lights driectly to one of these zwave switches. Secondly, You would remove the wall switch as it won't help this setup (wire it straight through and put a cover on the box.) And finally, you would still have to use the original remote to control fan speed. Maybe put a zwave scene controller panel over the unused wall switch box.
If you open the wall switch box and you find that 14-3 wire was run between the switch and fan, then your options just got alot better. You could expand the box to be 2 gangs, Put in a zwave switch for the lights, zwave fan controller, and send the power down that the black wire, and the other the red. You'll still have to bypass the fan's remote control module, but now for the fan and the lights as the zwave in wall fan controller will handle the speed.
Currently controlling Honeywell thermostat with Alexa. Single zone
The purpose of my question is to cool the bedroom(s) at night and let the rest of the house be warmer. I just don't want to drop the cash required for a 4 zone system.
If I wired on or off electrical dampers with something like:
Enerwave Z-Wave Plus ZWN-RSM1 Smart Hidden Switch Wireless Remote Control to Lights & Ceiling Fans, Neutral Wire Required, Black https://www.amazon.com/dp/B01G7OD1F8/ref=cm_sw_r_cp_api_IMYhzbYEXKF1J
Couldn't I simply close off all areas I don't need cooled. I would imagine someone smarter than me could set up a web interface or IFTTT that could reference wifi temp sensors to command av on off based on which dampers were on or off.
>The important question to ask is what kind of 3-phase (they aren’t all alike), and what voltage is our lighting? (A possible answer not compatible with your switch is 277v).
Yeah I mean if he has 3 phase with a neutral they are most likely 277vac. Seems like the z-wave relay/contactor method is the best bet at like ~$40. Can be installed in the ceiling at the fixture or in the switch box - See Here . You can get straight up switches for 277vac but they are price $65 - See Here
Yes but how do I fit two switches where only one was before and without running another 3 way switch wire?
Is it as simple as getting a dual rocker switch like https://www.amazon.com/Enerlites-Single-Pole-Decorator-Combination-Residential/dp/B075KJMSP3 and a couple of relays like these https://www.amazon.com/Enerwave-ZWN-RSM1-PLUS-Wireless-Control-Required/dp/B01G7OD1F8 ?
It seems like an overly complicated solution to me and i'm not even sure if it would work.
This is my favorite solution so far. My only reservation is having a dependency on SmartThings to shut off the fan, versus the timer switch.
Would it be possible to use a Z-Wave Micro Switch and keep my physical timer switch?
My thought is that if everything is working (SmartThings), then the automation would start the fan and shut off the fan. But for any reason, if my automation/smartthing, isn't working, everything still acts normal via the physical timer switch.
I imagine this would work, but not sure what would interface with it. https://www.amazon.com/Enerwave-ZWN-RSM1-Wireless-Control-Required/dp/B01G7OD1F8/ref=pd_sbs_421_1?_encoding=UTF8&pd_rd_i=B01G7OD1F8&pd_rd_r=7E6HY1E3RSSN4QHYS66N&pd_rd_w=ZedD4&pd_rd_wg=YnaG3&psc=1&refRID=7E6HY1E3RSSN4QHYS66N
Updating my own post because I think I figured out a way.
They make garage door universal receivers (intended for driveway gates), which are basically N.O. relays that work with garage door openers. Example I can then connect that relay to a Z-Wave switch module, such as this, and that will allow the garage door relays to communicate via Z-wave with my home automation system. I haven't tried it yet, but seems feasible.
If the use case is to be able to buy yourself in, geofence is not accurate enough to trigger that.
Sounds like you'll need to wire something into the door buzzer in your apartment. Like this thing.
Enerwave ZWN-RSM1-PLUS Z-Wave Relay, Z-Wave Plus Micro Switch, Smart Hidden Switch Wireless Remote Control to Lights and Ceiling Fans, Neutral Wire Required, Black https://www.amazon.com/dp/B01G7OD1F8/ref=cm_sw_r_cp_apa_i_ugPQCbSETGY9R
How exactly? Could not say.... It'll depend on the way the buzzer works.
Keep in mind that this will mean if your internet or power goes down, you are stuck outside.
Nope, you can keep the regular one. Like this micro switch
So I just found this:
https://www.amazon.com/gp/aw/d/B01G7OD1F8/ref=pd_aw_sbs_60_of_5?ie=UTF8&psc=1&refRID=6PCH57G7MYJCP1PFDJ8M
There are a bunch of different brands and sizes on Amazon.
Basically I think you could put that inside the fan electrical box. I'm assuming the fan power and light power should be separated in there? (If not you're out of options). If they are you still wouldn't be able to control fan speed but it would go to whatever setting is on the pull chain. It's z-wave so you'd still need something like Smartthings hub which isnt horrible because then you can open a door of other things to control if you choose.
You could try this, it's a zwave relay that you can install on dumb switches.
https://www.amazon.com/Switch-protects-lights-circuits-accidentally/dp/B06XP9M2FT/ref=sr_1_1?ie=UTF8&qid=1517699357&sr=8-1&keywords=light+switch+blocker
You could get some of these:https://www.amazon.com/Switch-Protects-Lights-Circuits-Accidentally/dp/B06XP9M2FT/ref=pd_bxgy_60_img_2?_encoding=UTF8&pd_rd_i=B06XP9M2FT&pd_rd_r=28848c2c-dd1f-11e8-a3d1-552a6c0f9979&pd_rd_w=ChFCN&pd_rd_wg=FVCwE&pf_rd_i=desktop-dp-sims&pf_rd_m=ATVPDKIKX0DER&pf_rd_p=6725dbd6-9917-451d-beba-16af7874e407&pf_rd_r=1W59ZG85B8TV0NDGQE0N&pf_rd_s=desktop-dp-sims&pf_rd_t=40701&psc=1&refRID=1W59ZG85B8TV0NDGQE0N
Not to state the obvious but this pretty much the main selling point of smart switches instead of smart bulbs.
If you’re renting or otherwise can’t modify the wiring for some reason, some physical “childproof” cover should work - https://www.amazon.com/dp/B06XP9M2FT/
A switch guard is the easiest way:
https://www.amazon.com/Switch-protects-lights-circuits-accidentally/dp/B06XP9M2FT
Just get one of these
It's nice to be able to change a light bulb without having a live socket. A functioning switch is better than a breaker for doing that.
As to what you are trying, what you said you did should have worked. My gut says you pulled something loose in the box. Are there any other wire nuts with pigtails in the box? Getting a voltage tester would help you see what wires are actually hot.
I just installed one of these in my front porch light fixture yesterday! Powers a v2 no problem at all. Note that this device is fairly wide so may not fit in every light fixture. It’s pretty tight in mine, to the point that I’m going to install a right angle USB adapter. Also, it obviously adds some to the height of the bulb so it may not work well in shorter fixtures.
Had to get a little creative routing the USB cable but overall I’m pleased with the setup. I leave the wall switch on 24x7x375 and use a dusk to dawn bulb. If you’re worried about accidentally turning off the switch, you can install little covers like these - https://www.amazon.com/dp/B06XP9M2FT
I've done this same thing and love it.
A couple of small issues:
Even with those issues, I just love this feature.
I'd recommend https://www.amazon.com/gp/aw/d/B06XP9M2FT?psc=1&ref=yo_pop_mb_yo_pop_mb_pd_t2
It's what we use over our switch that controls the 1 exterior smart bulb. You CA quickly and easily take it off with nothing but a butter knife.
Duct tape will probably leave adhesive residue.
This is what I used: https://www.amazon.com/gp/product/B06XP9M2FT/ref=oh_aui_detailpage_o00_s00?ie=UTF8&psc=1
So something like this? And then just strip the end of the wire for the dash cam and connect it to that?
I don't know what the grommet looks like through the firewall, but if there's room, you may try using a piece of safety wire or similar and pushing it through next to the wire loom, then make a loop on the end and pull your wire back through. That's what I've done in the past for similar applications.
For the fuse and ground, I know that many people have used Add-A-Circuit kits for this sort of thing. They sell them on Amazon or at any auto parts store. That's probably your best bet. I much prefer not to have to cut and splice factory wiring whenever possible.
I couldn't answer all your questions, but I hope that's at least a start. You may want to head over to MSF and see what others have done. Here's a thread for a similar install that I found after a quick search. Looks like OP used the hole for the hood release cable through the firewall and tapped into the BPV line for the pressure reading.
Hey, I was wondering if it would be possible to use an adapter that turns one fuse into two rather than splicing the cable?
If not, do you think something like this would work?
Also, is this what you mean by testing light?
If any of these parts aren't correct, could you send me amazon links for the correct parts because I'm trying to use up my gift cards.
I really appreciate your help and I'll try to order the right parts as soon as I get the O.K. from you.
I wouldn't recommend tieing into anything after the fuse since it could overload that circuit and blow it (I doubt it will happen, but it could).
You can buy something like this: http://www.amazon.com/Littelfuse-FHA200BP-ATO-Add-A-Circuit-Kit/dp/B0002BGELQ and make it a new circuit with it's own fuse.
Hope that helps.
Get one of these and run a new wire. No need to splice into existing OEM wire harnesses that cost a fortune to replace.
****Do any of this at your own risk or hire a professional to do it for you.***
Here are the parts I ordered to put mine together. I'm posting this bc of PMs.
Mobius or [Cheaper Mobius but longer wait from China] (http://www.banggood.com/Mobius-Action-Camera-1080P-HD-Mini-Sports-Camera-Wide-Angle-Edition-p-917817.html) I wanted the Wide Angle Lens for a better shot
Capacitor You don't want the battery sitting in the sun. A capacitor can handle it. So you replace the battery completely with this capacitor
Windshield Mount My mobius came with a mounting bracket that fits on this mount. The mount itself is very small, but the 3M sticker is very strong.
Hardwire Kit When hard wiring this in to the car via fuse box, this knocks the voltage down from 12v to 5v, which is what the camera needs. I used some wire strippers to expose about 5" of the red and black cables. Then stripped about an inch off each cable to expose the actual wire. The red wire goes in to the add-a-circuit mentioned below, then you crimp it closed with pliers (wasn't super easy, I must be weak). You partially unscrew a metal bolt that is attached to the metal car frame as a ground ( I used the one on top of my fuse box).
USB to Mini-USB This connects from the hardwire kit to the camera or 90 degree elbow mentioned next, for a better angle. If you are setting up the auto record when external power is on, which is what you want to do for a dash cam, you need to cut a piece of electrical tape width-wise and cover the two middle pins inside the USB cable. This is because the two middle pins (2 and 3) are data pins. Leaving those exposed makes the camera think its connected to a computer and will only do data transferring. By covering them, it only get power from pins 1 and 4 and doesn't think it's connected to a computer and will actually record.
Right Angle Mini-USB to Mini-USB Adapted This just helped keep the USB cable from sticking out too much (better angle)
Add-a-circuit This is the ATO (bigger fuse), but I ended up using the ATM (Mini) because my car has both and the fuse I wanted to use ended up being a Mini. It'd be best to look through your fuse diagram and find something non-vital (meaning don't tap in to a fuse that controls ABS or airbags, etc) and switchable (meaning it only comes on when the car turns on. You don't want the camera running 24/7), figure out what type of fuse it is, and buy that size. I ended up getting my new add-a-circuit (Littlefuse) from Oreilly auto parts for $6.99 and it came with 3, 4, 7.5, and 10A fuses. Also take note of the amperage (Never use a higher amp fuse than your add-a-circuit supports because the wire gauge may not support it and melt/burn. When adding the circuit, I removed the original fuse from the fuse box, a 10A fuse and put it the first slot(my add-a-circuit supports up to 10A) and for the 2nd slot, I used a 3A fuse because the camera and radar don't draw much. You don't want to use a higher amp fuse than necessary. Also, in my car 2011 JettaSportwagen, the add-a-circuit points down or it doesn't work. Make sure it's plugged in the correct direction or it won't do anything
32GB MicroSD Card Works fine, just make sure to format it through the camera.
Unofficial but awesome Mobius Configuration Tool Use the tooltips(hover over each option) to figure out what each things does. I set mine to autorecord when external power or the button are pushed.
You can find a lot of info here: dashcamtalk.com
To summarize the connections are:
Choose a fuse from your car's fuse diagram (non-essential and switchable), pull it, place it in the correct slot of the add-a-circuit (don't go to higher amps than is supported), plug in a fuse from the add-a-circuit kit in to the other slot to protect your camera (I used a 3A), strip the hardwire kit's cables mentioned above, put the red cable (+) from the hard wire kit in the the red end of the add-a-circuit and crimp it closed, attach the black cable (-) to a screw attached to the metal car frame, tape the two middle pins (2 and 3) in the USB cable with electrical tape, plug the USB in to the female USB on the hardwire kit, run the USB cable from the fuse box around the edges of your cars trim, up by the rearview mirror, attach the right-angle mini-usb adapter, choose where you want to mount the camera (make sure to check using the USB plugged in and camera mounted to the mount, in case it bumps the rearview mirror) (I held it on the windshield about where I thought I wanted it (to behind and to the right of the rearview mirror and took some test footage, watched it on a computer, decided it looked ok, pulled the sticker cover and attached it), clean your windshield with glass cleaner, attach the mount.
Not in my jeep but I installed a sat radio box in my moms new honda and had to top into a constant and switched source. I bought two Add-A-Circuits from AutoZone. Just get the right size for your fuses.
Use a multimeter to find an open fuse slot in the fuse box that is a switched source. (Just have someone in passenger seat turned key on/off for you while you check them) Tap into it with the add-a-circuit and most have their own fuse holder so you can prevent any problems.
Nah I'm totally okay with running cable through the firewall. I've set up the sound system in my car so I've already done that for the power cable, I've also tapped into the clock for the remote wire for the amp.
So essentially, find out where the fuse is for dome lights, (insert object always on here), plug in one of these bad boys: http://www.amazon.com/Littelfuse-FHA200BP-ATO-Add-A-Circuit-Kit/dp/B0002BGELQ
and use the wire for power?
I did the same, took me a while to get it working properly though.
I don't know, I don't use the cable clips. I used one of these to wire it into my car and ran the cable behind the siding roof lining.
The power connector needs to run to a switched power source. In Trailblazers (and most other late model GMs), there is no switched power wire for the stereo. This gives you 2 options. Option 1 is to run the power connector wire to a physical switch that you would have to flip to turn the amp on and off. This is less than ideal, because if you forget to turn it off, you can end up draining your battery. Option 2 is to get an add-a-fuse, and put it in to a slot (such as cigarette lighter) in the fuse box (under the rear seat) that will give you switched power. You might have to try a few different slots until one works.
Hook the Bazooka harness's red cable to your car radio harness's orange cable. Hook the Bazooka harness's blue/white cable into your fuse box with an "add-a-circuit" available at your local Walmart or Autozone. Use some speaker wire or something to get it over there and ziptie it neatly along they way. Add it to a circuit that turns on and off with the key, maybe the cigarette lighter circuit. Hook the black ground ring to a bare metal (not painted) bolt on your car's chassis. Hook the speakers up as stated. When you're all done, make sure it works and that it turns off when your car is off. Enjoy!
http://www.amazon.com/Littelfuse-FHA200BP-ATO-Add-A-Circuit-Kit/dp/B0002BGELQ/ref=sr_1_1?ie=UTF8&qid=1369754411&sr=8-1&keywords=add+a+circuit
Check out this site to find an always-on circuit. Likely door locks, cabin lights, etc. Or you could splice one of the fuses under the steering column. Avoid anything airbag related (yellow stickers, yellow wires, yellow tape) and the illumination circuits (dash lights, backlit buttons, they are backwards from other circuits and you'll short it like I did). I'd probably recommend getting a fuse jumper and tapping into an always-on circuit. Be careful about draining the battery, of course. I'd suggest a mobile jump starter if you're planning on using power with the car off.
Yes. You'll need to find a 12 volt power source that turns off with the key is removed from the ignition. This may or may not be simple. You'll need a multi-meter, and you'll need to probe power sources under the dash until you find one that cuts off when the key is out. Usually, the best place to start is at the inside fuse block. You can get a fuse tap that fits into the existing fuse slot and gives you a power lead and the existing fuse. [Like this] (http://www.amazon.com/gp/product/B0002BGELQ/ref=pd_lpo_sbs_dp_ss_2?pf_rd_p=1944687442&pf_rd_s=lpo-top-stripe-1&pf_rd_t=201&pf_rd_i=B000CQDRTI&pf_rd_m=ATVPDKIKX0DER&pf_rd_r=0HP8993WYB5TQ9Q8D907)
You may need to look at your fuse block to see if you need one with a lower profile.
I have heard good things about the Extech EX330 and its thermocouple-less cousin the EX320. They are $60 and $40 on Amazon, respecively.
If you plan on measuring AC signals that aren't perfect sine waves, you probably want a True RMS multimeter (see why in this pdf). I use a BK 2707 ($95) that has stood up excellently compared to $200+ Fluke meters I've tried.
Safety aside (given it's low voltage), I wouldn't want to go too crappy for the sake of reliability/accuracy.
For the ~$20 mark, I'd try an inexpensive Extech:
https://www.amazon.com/Extech-645618-Digital-Mini-MultiMeter/dp/B0012VWR20/
For the ~$50 mark, the EX-330 was well received on the EEVblog $50 multimeter shootout:
https://www.amazon.com/dp/B000EX0AE4/
The uno is going to be the most compatible with just about anything you encounter.
For components, get leds, caps, transitors, resistors, diodes, buttons, switches, breaboards, jumper wires, hook up wire, and other odds and ends from aliexpress, deal extreme or ebay. The shipping times can be a bit lengthy, but you'll get the best selection and prices this way.
For tools, check out dave's amazon list or ladyada's tool list. You should at least get a multimeter and a wire cutter. Don't skimp on tools.
After that, check out sparkfun, adafruit, seeedstudio, hackaday, the eevblog, and this subreddit to get some ideas flowing. By the way, in addition to the eevblog, Sparkfun and adafruit have youtube channels that are really good. To get started, try out some simply shields: anything with audio or video is always fun; also anything with motors can be cool, but robotics can get expensive. Or, perhaps go shield-less and try doing stuff with just the arduino. You can do a lot with just LEDs, a speaker, some resistors and the uno.
I'd recommend getting a temp sensor; possibly one of these multimeter/temp sensor combos so you can calibrate. The FX-888D should be very reliable, provided you haven't received a knockoff.
https://www.amazon.com/Extech-EX330-Autoranging-Multimeter-Temperature/dp/B000EX0AE4/ref=sr_1_2?keywords=extech+multimeter+thermometer&qid=1558588555&s=gateway&sr=8-2
You're measuring AC voltage so you should set it to the V with the wavy line, in the 200 range. (As an aside, if you're a homeowner and do anything with electrical systems ever, you should really consider buying an auto ranging multimeter with a non contact voltage detector, like https://www.amazon.com/dp/B000EX0AE4)
I did. I searched this subreddit as I trust a group of redditors more than random google results.
I found this multimeter from a post from 2 years ago.
Is it still a good bargain?
Dave from EEVblog recommends building power supplies. They're pretty simple, and it doesn't hurt to have a bunch of them. You can find kits, which will teach you how to solder parts onto a PCB, but it's not too hard to design a supply around an LM317 regulator, the data sheet will have the circuit you need right on it. This will also be a good chance to learn the non-electronics skills you'll need; instead of buying a plastic box, make one out of plywood and paint it up.
Once you have a power supply or three, start playing around with simple analog circuits. You should have a breadboard and jumper wires and at least one good multimeter, though the aforementioned EEVblog recommends two, and not cheaping out on them. He did a $50 multimeter shootout , if you don't want to watch an hourlong video this was the winner, but it's worth watching to see why it won. Anyhow, you can find kits and project ideas online, get some random parts and start playing around until you have a good feel for old school analog circuits. Try to make up your own project and build it, even if it's completely useless.
At some point, preferably after you have a good grasp of analog circuits, you're going to have to move up to digital. Arduinos are a good start, they're popular enough that you can't look at a single page of Instructables without tripping over an Arduino project. You're going to have to learn some programming to make it go, but there's a million tutorials online. To make the pinball machine go, you're going to have to learn how to use the Arduino (or something like it) to control analog components, probably while giving them their own external power source. You'll also need to know how to drive a display for the scoreboard, and of course you'll have to program the logic for keeping track of the number of balls left, current score, and what inputs translate to what increase in score. The programming alone is a big undertaking, so if you go forward on this, be prepared to spend years on it.
A good project to do would also be to make a MAME cabinet. It's much simpler on the electronics side, you either hack the buttons and joysticks into a USB keyboard controller, or buy one of these which does the same thing, and then use an old PC and monitor. The hard part is building an arcade cabinet, which is still a lot simpler than building a pinball table. You'd be looking at a couple hundred dollars in parts, but that's not too bad compared to what you want to end up doing.
You want something with micro amp range
Check out:
https://www.amazon.com/EEVblog-BM235-Brymen-Multimeter/dp/B01JZ1ADCO
or
https://www.amazon.com/Extech-EX330-Autoranging-Multimeter-Temperature/dp/B000EX0AE4/ref=sr_1_1?s=hi&ie=UTF8&qid=1503255467&sr=1-1&keywords=extech+multimeter
Checkout EEVBlog for good recommendations and comparisons.
Also, Reddit search.
https://www.reddit.com/r/electronics/comments/2poy8p/help_me_pick_a_sub_75_multimeter/
i went with this Extech EX330, all the good features including non-contact voltage widowmaker, includes a temp probe too, good quality as evidenced by the eevblog shootout, moderately cheap. im not a mechanic though :/
I have been very impressed with the Extech EX330 I bought for about $77 Canadian:
https://www.amazon.ca/gp/product/B000EX0AE4
(Edit: Just looked, and the price was quite a bit lower when I bought it last yer. I paid $59.99 CAD then.)
hey, the relay won't work very well if you're using RGB LEDs. One of the coolest features of RGB is the ability to mix colours by pulsing each in sequence for different amounts of time. The relay may not be able to switch fast enough, and you'd need of for each 'colour'.
Personally I don't find the Reddit format to be the best for asking these types of questions, as often the 'popular vote' goes to the answers that are short and easy to understand, which may not be the 'best' answer. I prefer http://www.eevblog.com/forum/index.php and the related electronics vblogs, and https://electronics.stackexchange.com/.
For a great mid-range multimeter I love the Extech EX330 (https://www.amazon.ca/gp/product/B000EX0AE4/ref=oh_aui_search_detailpage?ie=UTF8&psc=1), especially with its built-in non-contact voltage detection for working on household wiring (not related, but it's so handy!). The Fluke 87-V is, in my opinion, the cream of the crop and priced accordingly. There are cheap multimeters for $5 that will get the job done, and I do keep these in my vehicles -- eBay and a month of shipping time works well here. Searching eevblog.com for "shootout" (search Google for "site:eevblog.com shootout") reveals great comparisons, too many to read through but indulge the a bit to get a feel for what to look for.
I bought an Extech EX330 for the exact same purpose as you. Eventually I will upgrade to a higher end model, but this one is a good balance of price, size, and durability to keep in a toolbox or have banging around in my backpack. I expect it to last for many years, so I plan to keep it as a backup when I upgrade. Right now, looks like Amazon is running a discount on them, as well. http://amzn.com/B000EX0AE4. Also, the EX430, which adds RMS capability, is about the same price right now: http://amzn.com/B0000WU1AC.
Good luck!
I would attach the cable to the shelves/wall using these to make sure it is straight and tidy, then tape or otherwise attach the leftover cable to the bottom of the bottom shelves. It would really neaten it up a lot.
When I was renting I used a lot of these with network cable that was also white so it didn't look terrible. If you nail them below the trim ling or at the bottom edge of the trim you won't have to putty/paint later. But powerline ethernet adapters are a pretty good option too.
Now moved into a new place and will be running Cat6 through the attic. If you have ceiling/floor access you could see if the landlord is interested in you wiring the place properly if you can make it look clean.
I was planning on using clips like these...I use these on my cable cords in 1-2 of my bedrooms... as long as I can find ones that are that large.
If the lag ONLY occurs when using wifi and never occurs while using ethernet (and you don't care about others' experiences), the best solution is to try to hard-wire as much as you can. Get tacks, run an ethernet cable (my walls are white so I use white) in a very tasteful way and make it look pretty.
https://www.amazon.com/CableWholesale-Cable-Clip-White-Pieces-200-961/dp/B000I97FHY/
with that said, yeah, in the best of cases your wifi is set up so that you're never more than ~10 meters from a wireless access point and you have both 2.4 and 5GHz bands to choose from (wireless-b/g/n all work with 2.4GHz, wireless-a/n/ac work with 5GHz). Wifi will never be as good as hard wired though.
Well the wire just need to be plugged into both end, how it get there does not matter to the wire but most people like to hide long wires.
The staple cannot go through the wire of course. I would use something like this:
https://www.amazon.com/CableWholesale-Cable-Clip-White-Pieces-200-961/dp/B000I97FHY
I see. So you are saying double sided tape didn't really work for you either? Maybe we would need to get something like this then
standards we follow for certified installs are in a crawlspace under a building if there is 500mm (around 2 foot i guess?) clearance between the ground and the floor we can use indoor cabling.
as someone who runs into old installs all the time i have seen indoor cabling used in nasty ass wet environments and still running after 10 years or so.
i would say in your case used cable clips like this
http://www.amazon.com/CableWholesale-Cable-Clip-White-Pieces-200-961/dp/B000I97FHY
on indoor cat6, if theres a bit of slack make a coil and cable tie it gently onto the supported cable.
Those little hook and nail things are great for running a cable line long the wall and keeping it in place as well...
https://www.amazon.com/CableWholesale-Cable-Clip-White-Pieces-200-961/dp/B000I97FHY
could be something like this https://www.amazon.com/CableWholesale-Cable-Clip-White-Pieces-200-961/dp/B000I97FHY
I have friend that just ran a plain old Cat6 Cable straight from the room that the router was in throw a window up into to his bedroom. The trouble was over time the tiny hole the window screen became a massive tear. You could also get some coax clips and pin that cable along the ceiling. I've done that for my home theater system because there was too much insolation in the walls to fish the cable.
Cable Staples
I've put these. in my class. I've also put these in my class. And if you want to go all out, get this.
In my class, I only have 1/2 of the lights on and it helps. A kid mentioned it being too bright so I took another light bulb out. Put lower watt bulbs in. Also, go to Home Depot and they have displays of different brightness of light bulbs. They have some soft white light bulbs that may help. But go to their display and check out the different light bulbs. The softer light may help.
We use these, not just for the switches that control smart lights, but for other switches. My office used to be a reading room with lamps before we bought the house. The power outlets are turned off by the light switch. Don't want a switch turning off the Modem, Router, Server, PC, etc.
It isn't perfectly kid proof, there is an opening on one side, but it does stop accidental bumps.
https://www.amazon.com/Westek-Amertac-Switch-Guard-White/dp/B000NCV1SK/ref=sr_1_5?s=hi&ie=UTF8&qid=1511272327&sr=1-5&keywords=switch+plate+cover+guard
I cover them with these. It has the advantage of stopping people from hitting your lightswitch inadvertently but you have easy access from the side if you need to toggle power for any reason.
https://www.amazon.com/Westek-Amertac-CSG1-Switch-Guard/dp/B000NCV1SK/ref=pd_lpo_23_bs_lp_t_2?_encoding=UTF8&psc=1&refRID=07A2JWD27N8MQCCB5QHB
There are a few different types of child locks for switches available on Amazon. Some are covers over the switch that allow usage through small access holes, others actually use a screw from the plate to hold the switch on or off.
Amerelle SG1 Switch Guard, White, 2 Pack https://www.amazon.com/dp/B000NCV1SK/ref=cm_sw_r_cp_api_7wlNzbEPGZREZ
Toggle Switch Light Switch Locks , Child-Safe, Residential, Lighting https://www.amazon.com/dp/B06XC44D9H/ref=cm_sw_r_cp_api_VxlNzbZNCE79Z
I opted for smart switches. It's cheaper in the long run, one switch controls many bulbs. And the switches still operate manually for guests.
Smart bulbs allow color changing bulbs, but it makes it hard for anyone other than you to operate them. Unless you install remote switches. But at that point, might as well get a real smart switch.
I'm going to say +1 for switch covers. I got some from Amazon for about $2. They're pretty nice and have 1 open side so if you need to get to the switch you can, without taking the cover off.
Amertac-Westek CSG1 Switch Guard, White https://www.amazon.com/dp/B000NCV1SK/ref=cm_sw_r_other_awd_u8AQwbYJ9G6CP
> they keep state through power outages and they are a massive PITA to use as everyday lights if you want to keep them powered on and ready to be controlled. If you just want to switch them on for light, you need to get out the phone/tablet and fade them up.
Since you say they're compatible with Hue, have you tried the Hue dimmer switch? I've been installing them next to my power switches and putting switch blockers on the actual switches.
It's really no different than leaving your switch up all the time and using one of these they sell at most hardware stores
Pico Remotes are battery operated, no wires necessary.
I'm saying it's bad to hardwire a light socket, like you did with your hue lights. It can cause a fire or electrocute you. Since it's against code if it does cause a fire, insurance doesn't cover it. There are other options if you're worried about people turning the switch off like these.
Just installed a couple of these switch guards where my kids kept turning off the light switch.
I have a very similar setup (just installed in the past week). The only difference is I'm using an iPad for a hub and voice control instead of Google Home.
If you want to use Homekit on your phone keep in mind that wemo switches are not homekit compatible and you'd have to run a Homebridge server (very easy if you have a computer that's always home/on).
One thing that I didn't really think about was guests coming over and flipping the dumb switches all over the place, and making all of your hue bulbs unresponsive. I installed two of these to prevent that, as well as a Hue Dimmer Switch for the living room to control a floor lamp and ceiling lamp simultaneously.
Get a 2 gang switch plate (or 1 wider than you currently have) and a switch cover/guard. You can install a 2 gang plate on a 1 gang box with the 2nd gang covering the wall a bit. Attach the dimmer to the unused side of the plate. The Hue dimmer comes with tape on the back and will cover the unused screw holes.
This is much easier, MUCH safer if you don't know what you are doing, and will still allow you to turn the power off if you need to.
I've seen people suggest a metal plate with a blank 2nd gang to take advantage of the magnets on the back if the dimmer.
For the switch cover, I'm using a magnetic cover:
https://www.amazon.com/gp/aw/d/B002X88GYY/ref=mp_s_a_1_2?ie=UTF8&qid=1479335243&sr=8-2&pi=SY200_QL40&keywords=switch+cover&dpPl=1&dpID=31rKEqw%2BSZL&ref=plSrch
The hue dimmer's base takes up more than 1/2 of the switch plate, so I had to mount it with about a millimeter hanging off the side. Barely noticeable, but next time I'll use something like this:
https://www.amazon.com/gp/aw/d/B000NCV1SK/ref=mp_s_a_1_1?ie=UTF8&qid=1479335243&sr=8-1&pi=SX200_QL40&keywords=switch+cover&dpPl=1&dpID=31HrCmi9fBL&ref=plSrch
I have dusk to dawn porch fixtures with normal LED bulbs in them.
I then bought these so I wouldn't turn the switch off:
https://www.amazon.com/gp/product/B000NCV1SK/
Set it and forget it. I felt I didn't need smart connectivity for something I didn't really touch to begin with. I know I wanted it on at dusk and off at dawn and this was the cheapest solution.
Here are some links for the product in the above comment for different countries:
Amazon Smile Link: Try something like this
|Country|Link|Charity Links|
|:-----------|:------------|:------------|
|USA|smile.amazon.com|EFF|
|UK|www.amazon.co.uk|Macmillan|
|Canada|www.amazon.ca||
To help add charity links, please have a look at this thread.
This bot is currently in testing so let me know what you think by voting (or commenting). The thread for feature requests can be found here.
shocked as in electrically? The power (or your amp) is not grounded correctly. You could get something like this here to check the outlets before you play; you can make sure they are grounded with that.
I believe another option would be to get a power conditioner although I do not know much about it.
$5 shipped from amazon.
http://www.amazon.com/Electrical-Receptacle-Outlet-Ground-Tester/dp/B0012DHVQ0
https://www.amazon.com/Electrical-Receptacle-Outlet-Ground-Tester/dp/B0012DHVQ0
Usually when I see problems like this its because of a ground issue with the house wiring. Even if you have a ground socket, the ground might not be grounded properly. You may have to contact an electrician or use a ground tester
get a ground tester https://www.amazon.com/Electrical-Receptacle-Outlet-Ground-Tester/dp/B0012DHVQ0
start testing outlets to see if its just one outlet or a entire circuit
in a short term you can attach a wire to one of the screws on the case and connect it to a good ground source such as copper plumbing
Wall tester
Plug strip with ground fault led
A company that delivers packages.
Has fuck-all to do with networking...
(kidding)
A UPS has a battery that is constantly being recharged. You plug your computer into the UPS. The computer gets its power from the battery.
Think of a bucket. At the to of the bucket you are pouring water in very fast. At the bottom of the bucket is a hole that doesn't allow the water to leave faster then it is being added.
Not only will the bucket always be full - but if there are problems with the rate the water comes into the bucket (what you are calling dirty electricity) it does not effect how fast the water comes out the hole.
While you are at the store buying the UPS, buy yourself a device to check grounding in your electrical outlets.
http://www.amazon.com/Electrical-Receptacle-Outlet-Ground-Tester/dp/B0012DHVQ0/ref=sr_1_5?s=hi&ie=UTF8&qid=1419779475&sr=1-5&keywords=ground+tester
An ungrounded outlet can cause all kinds of havok.
------------
Microwave is line of site.
Check that nothing - no leaves, no trees, no nothing is blocking the path of the antenna.
Also, look for damage to the antenna, is there any evidence that something is occuring to knock it out of alignment (maybe heavy winds shake it on its post)?
-----------
Use Wireshark to check for collisions on the network.
-----------
Interference, interference, interference.
Shitty electrical lines inside the walls. Flourescent lighting. Microwaves. Cordless phones. All these things interfere with the 2.4 ghz spectrum.
Think HARD about this.
Do you have a LAN cable running near a flourescent light? MOVE IT. LAN cables (Cat 5, Cat6, etc) are unshielded and open to electrical interference.
-------------------
Internet speeds slow down until I restart my router:
http://www.tomshardware.com/answers/id-1812209/internet-speeds-slow-restart-router.html
https://www.amazon.com/Electrical-Receptacle-Outlet-Ground-Tester/dp/B0012DHVQ0?SubscriptionId=AKIAILSHYYTFIVPWUY6Q&tag=duckduckgo-d-20&linkCode=xm2&camp=2025&creative=165953&creativeASIN=B0012DHVQ0 (that is a non-referral link, i'm not making money on it)
Also spring for an electrical outlet tester from Amazon and plug it into every outlet. Even if they're 3-prong it doesn't mean they're grounded (a problem that doesn't necessarily need fixing). A full-house rewire can be five figures.
https://www.amazon.com/gp/product/B0012DHVQ0/ref=oh_aui_detailpage_o06_s00?ie=UTF8&psc=1
The ground at the plug is not necessary for solar.
To test the plugs that have a ground get Electrical Receptacle Ground Tester they are about $6-7.
This is the one that I ordered.
NuTone C907 16V, 30VA Transformer https://www.amazon.com/dp/B001POBN92
The one you listed above showed 20-30VA so I thought I would go with a single voltage transformer that had only 30VA. I am glad to hear it is working for you though.
Seems like you have a small transformer. It looks like it says 5VA which is small. Get one that is 30VA and outputs 16vac. Like this one NuTone C907 16V, 30VA Transformer https://www.amazon.com/dp/B001POBN92/ref=cm_sw_r_cp_apa_hA1KAb4T9SPQY
That's the first step. Then see if your ring pro can function properly.
That's what I figured you had, so you'd need to upgrade the transformer for the Pro. The Nutone C907 is 16VAC@30VA and the one I generally use. https://smile.amazon.com/NuTone-C907-16V-30VA-Transformer/dp/B001POBN92/
Just shut off the breaker that powers the transformer and its a like for like swap (though the 30VA transformer is physically larger, the connections are the same). And then just install the Ring Pro in place of the button. And install the Pro Power Kit's black wires with one under the screw for the Trans terminal on the Doorbell chime, and the other under the screw corresponding to the button you're using (front or rear). So usually it would be front+trans, and it doesn't matter which wire goes under which terminal. Just make sure you leave the existing wires in place. It just piggybacks on those two terminals. Then restore power to the transformer and you should be in business. Note that it can take up to 20 minutes before its ready to setup, since it will charge up the little battery that is inside that it uses to bridge the power when it has to ring the mechanical chime, which causes it to lose access to AC power for a few seconds. That's also why it needs the bigger transformer, so it doesn't use that battery for other purposes, like supplementing an undersized transfomer, which would kill that battery in a year, vs 5-10 years with normal use. So to use the Pro, you definitely want to upgrade the transformer.
I'd recommend swapping the transfomer and keeping the Pro, rather than downgrading the Ring. The Pro is a much better device with the pixel-based detection and you'll get ~1 min videos plus the event that triggered the alert, vs the battery models (Doorbell 1&2) which only record 30 seconds, and only after they're woken up by motion, which means the event that triggered them is not recorded on battery devices. Plus the motion zones are so much better than relying on PIR detection that is imprecise.
I can’t be certain but I don’t think that’s the doorbell transformer. Again, I could be wrong.
The wires you saw going through the hole in the wall are most likely attached to the doorbell transformer that’s located somewhere.
https://www.amazon.com/NuTone-C907-16V-30VA-Transformer/dp/B001POBN92/ref=mp_s_a_1_1?keywords=nutone+c907&qid=1567203545&s=gateway&sr=8-1
This is what the transformer should look like.
That’s the one that is recommended by folks.
Also looking closer at the pic, I can see some writing on the red part that says front rear etc. that is just part of the chime.
I just bought mine and had a similar issue as yours. I figured out that it wasn't getting enough juice even though it was the minimum required to run the doorbell. It would constantly be good voltage during the day but once it hit night time and night vision kicked in it would freeze up and disconnect. Ring recommend I upgrade my transformer and provided me with the Amazon link since the one they sell was sold out. I bought It and so far the Ring doorbell been has running flawless with no issues such as freezes or disconnects.
Link in case you wanted to try.
https://www.amazon.com/NuTone-C907-16V-30VA-Transformer/dp/B001POBN92/ref=sr_1_2?ie=UTF8&qid=1522996843&sr=8-2&keywords=16v+20va
Added note for the issue if having to go and buy a new transformer. Ring issued me a free chime which was cool of them.
NuTone C907 16V, 30VA Transformer https://www.amazon.com/dp/B001POBN92/ref=cm_sw_r_cp_apa_SstRAb67CZY6H
You'll have no problem if you use this with anything you want to power.
It's large though
Here is what I got
Transformer:
https://www.amazon.com/NuTone-C907-16V-30VA-Transformer/dp/B001POBN92/ref=sr_1_5?ie=UTF8&qid=1521326571&sr=8-5&keywords=doorbell+transformer
Chime:
https://www.amazon.com/NuTone-LA11WH-Decorative-Two-Note-Textured/dp/B001EG272I/ref=sr_1_5?ie=UTF8&qid=1521326631&sr=8-5&keywords=nutone+chime
16V is enough, what matters is the power number. Nest require at least 10VA. 30VA is enough for 3 smart doorbell.
Lowe's model: https://www.lowes.com/pd/Utilitech-Multi-Color-Doorbell-Transformer/3482857
The one many people here prefer:
NuTone C907 16V, 30VA Transformer https://www.amazon.com/dp/B001POBN92/ref=cm_sw_r_cp_apa_i_UAz-AbJNKY54Y
I personally went to Lowe's since I could return it if it didn't work. Mines been great though.
Maybe double check that your mechanical doorbell can handle 24V. Mine said 16V, so I ended up getting this 16V transformer
I went and took everything apart and found the manuals, it is actually really straight forward. You just need a [transformer] (https://www.amazon.com/gp/product/B001POBN92/ref=ox_sc_act_title_2?smid=ATVPDKIKX0DER&psc=1) which you can pick up for not much to turn the 100~110v to 16v, and you are good to go. Right now the video display unit does that but for a clean install I want that thing gone. And right now Best Buy has a killer deal on the Ring Pro I might have to go all in.
It appears if the voltage on the Ring Pro drops too low when ringing the doorbell, it turns this setting off. I fixed the issue by replacing my 16V 10VA transformer with a 16V 30VA transformer. 16V 30VA Transformer on Amazon
Installed this transformer and directly ran the wire to the Ring Video Doorbell Pro a few months back (No existing chime, and brand new wiring direct to Ring Doorbell PRO).
I have zero issues with voltage/power until this morning when I noticed the red lighting bolt icon on my camera.
https://www.amazon.com/gp/product/B001POBN92/ref=ppx_yo_dt_b_asin_title_o07_s00?ie=UTF8&psc=1
Is this a bug, or am I missing something? Curious if this is a known issue or something else I can solve for with a software update, etc.?
https://imgur.com/A3P3zMh
I'll let the more electrically inclined reply, I just know from an older discussion about this. I think you were able to test somewhere on the chime itself? I would recommend getting a bigger transformer either way. This one works perfectly and provides plenty of power:
https://www.amazon.com/gp/product/B001POBN92/ref=oh_aui_detailpage_o05_s00?ie=UTF8&psc=1
I fly with this: http://www.amazon.com/GE-Grounded-3-Outlet-Tap-58368/dp/B001UE7SC8/ref=pd_sim_e_2?ie=UTF8&refRID=1YWGSF40WYH1RWWSWM72
Do this instead. Use an adapter (not converter) and one of these expanders: https://www.amazon.com/dp/B001UE7SC8/
I’ve been traveling the world for 9 months (24 countries and counting) using this and it works like a charm. Everything you plug into it needs to have its own converter (most modern electronics chargers like cell phones, etc, and any brick plug with a “100-240v” on it should be fine.)
Never plug a hair iron or similar heat-producing device into this setup. Those always need a converter.
Also recommend a usb charging hub like one of these: https://www.amazon.com/dp/B00VH8G1SY/ With the 3-prong expander and this you can charge multiple USB devices and have room to plug in a non-usb charger. This can handle 100-240v.
I've got a Dot plugged into one of these since I also only have one outlet:
https://smile.amazon.com/GE-Grounded-3-Outlet-Tap-58368/dp/B001UE7SC8/
Echo in the bathroom is a game changer. I can listen to music or podcasts and set reminders when I think of stuff while I'm washing up or on the can. Also have it connected to a waterproof bluetooth speaker in the shower since the Dot isn't very loud.
The gfci should pop and turn off the electricity to the power strip if it shorts, but I’m not positive. Should be okay I think, I do it. Or get something like this GE 3 Plug, Wall Tap, Adapter, Grounded Access Design, Indoor Use Only, UL Listed, White, 58368 Outlet adatper https://www.amazon.com/dp/B001UE7SC8/ref=cm_sw_r_cp_api_A.G2BbHTQVRGH
About your Cons. (1) I know it's not the same, but you can control the switches using Tasker, Send/Expect Tasker Plugin & AutoRemote Tasker Plugin. Let me know if you'd like the links for how to do so and I'll dig them up for you :) (2) I know it's not ideal, but if you're concerned about the second outlet not being available (which many people are, and for good reason) you can always opt for something like this outlet adapter from Amazon. This one in particular would work well because the plugs are sideways, meaning the tp-link plug won't be hogging the other outlet. Plus, you'll get an additional spot or two for small-plugged appliances such as lamps.
The USB port on the charging brick is not overly powerful. There have been a lot of people who have had trouble charging their phones with it over the years, especially larger phones. I've never heard of having to replace the battery for this.
Easy fix? Maybe not what you'd like but if the charger still works on the SP3 alone something like this plus this.
I carry one of these in my computer bag at all times.
Great, thanks!
Do you think the one you sent would work better or this? https://www.amazon.com/gp/product/B001UE7SC8/ref=ox_sc_act_title_2
(quick note that the power cord is 2 prong)
Why don't you use one of these?
Run the line out of your keezer and to the inkbird temp controller. If its the Itc-308, get a Grounded 3-outlet tap and plug the freezer and the fan into the cooling side.
Then the fan will turn on only when the freezer is running.
There are never enough power outlets at conferences, especially IT ones. You'd think they'd realize that a large chunk of their attendees have multiple gadgets that will need charging between sessions, sobring a power strip or splitter. I have one of these (http://www.amazon.com/gp/product/B001UE7SC8) in my laptop bag, and it is awesome for conferences and airports, it is a cube about an inch on a side that splits out to three power outlets.
Programmable light switches are super handly for when you're out of town and want to make it look like you're home, and if you're forgetful about turning off lights.
Keypad deadbolt never worry about getting locked out. If someone is house sitting you can give them the code and then change it when you get home.
Energy saving outlets are great for things like charging cell phones or computers and keeping your power bill lower.
Wifi thermostat. I think Nest is overrated and expensive for what it is.
Electric crockpot-pressure cooker-rice cooker-yogurt maker. This thing does it all, seriously. Pressure cookers are awesome for getting things cooked quickly so you can buy cheaper groceries (dried beans vs. canned). Slow cookers are great for tough pieces of meat, roasts, soups... They're also great in summer as they don't heat up the whole kitchen. It being multi-purpose is a bonus for kitchen space.
Thanks for the sugestion. I will just go ahead and try it this way. so something like this: https://www.amazon.com/Honeywell-Econoswitch-RPLS740B-Programmable-Switch/dp/B004AP92N2/ref=sr_1_4?ie=UTF8&qid=1467182862&sr=8-4&keywords=timer+switch+for+lights
alternately, if you have many light bulbs on your porch, this dusk to dawn switch: https://www.amazon.com/Honeywell-Econoswitch-RPLS740B-Programmable-Switch/dp/B004AP92N2
you could also get an internet-connected smart switch if you plan on building out more of a smart home, but this is great as a standalone.
it's very nice to get home at night with the porch lights already on, and not have to keep adjusting a mechanical timer as the days get longer or shorter.
Thank you so much for the response
​
https://www.amazon.com/Honeywell-Econoswitch-RPLS740B-Programmable-Switch/dp/B004AP92N2/ref=sr_1_2_sspa?crid=V4RK6EJQLE81&keywords=programmable+light+switch&qid=1557905889&s=gateway&sprefix=programma%2Caps%2C175&sr=8-2-spons&psc=1
​
I would prefer that both lights don't come on together. I also don't care for how the switch looks at all, I'm only concerned with function.
I put up 2 standard light fixtures on either side of my garage. I then replaced the actual light switch (I'll see if I can find link) with one that you program date and time. It then turns itself on at dusk, off at dawn. Been going strong for about 8 years.
Edit: Not the exact one I have, but essentially the same thing.
Honeywell Econoswitch RPLS740B 7-Day Solar Time Table Programmable Switch for Lights and Motors https://www.amazon.com/dp/B004AP92N2/ref=cm_sw_r_awd_ld.Eub046W4J1
Honeywell econswitch
Use something like this. Set it and forget it.
First I just had lamps on something like this: http://www.amazon.com/Woods-50007-24-Hour-Digital-Settings/dp/B005WQIDHY/ you probably can find something like this much cheaper.
I ended up installing a switch like this: http://www.amazon.com/Honeywell-Econoswitch-RPLS740B-Programmable-Switch/dp/B004AP92N2/
Not exactly what you are looking for, but I have this and works great. Always when dark and I use LED bulbs so the electricity wont cost too much.
https://www.amazon.com/gp/product/B004AP92N2/ref=oh_aui_search_detailpage?ie=UTF8&psc=1
I recently replaced my porch light switch with one of these: https://www.amazon.com/gp/product/B004AP92N2 It turns them on at sunset, off at sunrise, auto adjusts with the day of the year, and self adjusts for daylight savings time.
Depending on your use cases "home automation" doesn't mean you have to tie it into a hub or do something fancy - it simply means automating what you would do manually. I'm extremely happy with my timer so far.
If you literally just want the light off/on at certain times and don't need to control it remotely, get a Honeywell Econoswitch RPLS740B 7-Day Solar Time Table Programmable Switch. No hub required.
This is the switch that I have: http://www.amazon.com/gp/product/B004AP92N2/ref=oh_aui_detailpage_o01_s00?ie=UTF8&psc=1
You're interested in a smart switch that's aware of sunset, right? You want a switch to go on at or some time after sunset, and then go out after an interval or at a set time?
Check out this and this
They have internal batteries that keep the clock going during power outages.
I'm off next week. On the docket for this weekend and next week:
I think that's about it.
Edit: We're staining the stairs, not painting them. Also clarify that we painted the walls and link the paint we used.
Edit #2: I threw my back out digging underneath the sink looking for a vase to put some flowers in for mother's day. My week of home improvement activities just turned into a week of me struggling to take a shit.
Yup, I think he used an old Christmas tree timer. From a search on amazon, it looks like anything like this would work just fine: http://www.amazon.com/Woods-50006-Indoor-24-Hour-Mechanical/dp/B006LYHED0/ref=sr_1_1?ie=UTF8&qid=1405527429&sr=8-1&keywords=outlet+timer
There are a lot of schools of thought on keeping various animals, I read up on what differences full spectrum lighting does for pets and for snakes and crabs there seemed to be limited ROI. Crabs do supposedly do better when there is a day/night cycle as well as temperature variation but the later is more expensive to emulate and probably not very important.
A cheap timer like this one set to 12 hours on 12 off is fine but you could research and find out how long days actually are in summer/winter and adjust it if you're super OCD.
Biggest mistakes I see being made are having too small a tank, incorrect/insufficient substrate, lack of salt water (which I'm still not sure they need honestly), not having multiple hides, incorrect temp/humidity, and not having enough spare shells. If you've got those things then the rest is just fluff.
I don't like the analog timers because they make clicky noises. I've also been through A LOT of various timers on Amazon because I own 2 auto cat feeders along with my multitude of reptile lights. I will break down my experience for you:
Enover TS18 Digital Timer -- I needed this for my triple-prong power strip and it worked for a couple months but then started turning the "random" feature on by itself and wouldn't turn off in the evening. Junked.
Westek TE08WHB Timer Strip -- I really like this one and I still use it for a couple of my cages. I like that 4 are timed and 4 are always on. NOTE though that when the power goes out this does NOT keep the time and will reset, which is very annoying.
WenTop Digital Timer -- I used this one for my single cat feeder for awhile, but it eventually stopped working for some reason. I never figured out why but it stopped turning anything on. Junked.
Century Digital Timer -- I bought a second feeder and needed a timer that had 2 outlets. This one has worked well so far, but you may just need a single outlet.
Woods 50006WD Analog Timer -- I still use these when my digital timers break lol. Honestly, they're really reliable, they just make that clicky sound that drives me nuts. But it's a great deal if you're just looking for something that works with no frills.
Nearpow Digital Timer -- My most recent purchase. I've only been using it for a few weeks but has been working fine. It has a bunch of settings, I have no idea what all of them do, I just need it to turn the lights off and on lol.
I picked up these and they seem to work okay, although I would prefer something that had a countdown rather than programing a 24-hour dial. If I were to purchase something again, I would go with something more like this.
Well you say you warm the engine up for 10mins, but that's only the engine, your trans will still be 90% cold (all but little bit of conductive heat from the engine). Do you happen to have a garage? You could get a transmission pan heater (might as well get an oil pan heater too) then you can just set one of those wall timer things, just wire them up so the cords are on the driver's side, and hopefully you have an outlet on the driver's side, then you can just plug them in when you get home and unplug them before you leave. I'd set the timer 2 hours before you leave, and then you could start your truck like 5 minutes before you leave (just so the oil has enough time to go through everything, but the block should be warm anyways, just an extra safety measure i guess). I'd highly recommend doing it.
Heater
Mechanical Timer
Proctor-Silex 33043 4-Quart Slow Cooker https://www.amazon.com/dp/B004O07LRC/ref=cm_sw_r_awd_62vWub04N0C5D
This is the slow cooker I've used for the years. I warn you that you might want to throw open a window before you cook because after four hours whatever you're cooking is going to permeate the house.
Woods 50006 Indoor 24-Hour Mechanical Outlet Timer, 2-Pack https://www.amazon.com/dp/B006LYHED0/ref=cm_sw_r_awd_I4vWub1FYZVTB
Woods 50006 Indoor 24-Hour Mechanical Outlet Timer, 2-Pack https://www.amazon.com/dp/B006LYHED0/ref=cm_sw_r_other_awd_RXdGwbFHBWAZP
They sell similar things at Walmart
Timer switch. http://www.amazon.com/Woods-50006-24-Hour-Mechanical-Settings/dp/B006LYHED0/ref=sr_1_7?s=hi&ie=UTF8&qid=1452954535&sr=1-7&keywords=timer+switch
Here is the mobile version of your link
Are you in the USA? if so I've had pretty good luck with these cheap timers off Amazon: https://www.amazon.com/gp/aw/d/B006LYHED0/ref=mp_s_a_1_10?ie=UTF8&qid=1499851115&sr=8-10&pi=AC_SX236_SY340_FMwebp_QL65&keywords=timers+for+electrical+outlets&dpPl=1&dpID=410-DNaFBZL&ref=plSrch
The caveat is that some of them start making a faint clicking/buzzing noise after a while so if you're keeping it in your bedroom i wouldn't recommend it. Also they don't have a ground.
get one of those plugs that lets you set when it turns on and off, something like http://amzn.com/B006LYHED0 .
You might try a normal switch connected to an
Aeon Labs Z-Wave Micro Smart Energy Switch
https://www.amazon.com/dp/B008VWAPU4/ref=cm_sw_r_cp_api_0gD-zbVX154GH
Turns your dumb switch smart :)
There's also a dimmer module:
https://www.amazon.com/dp/B00IRI1CEK/ref=cm_sw_r_cp_api_PiD-zbWY6WYJM
Are you running a hub? You could use a normal bulb and go this route: http://www.amazon.com/Aeon-Labs-DSC18103-ZWUS-White-AL001/dp/B008VWAPU4
Look for z wave micro switches. They wire in and fit behind the switch. Or you can enlarge the hole and retrofit a 2 gang remodel box.
Either option is similar in work and wire expertise. For the box you will just need a little slack in the wires or to use wire nuts and extend them, also you will need to cut a larger hole in the drywall. If you can handle wiring a light switch diy, then either option is doable.
The other option is smart bulbs. Hue bulbs can be controlled by a smartthings hub directly.
Since you have a metal box it won't work like that. I would probably suggest something like this maybe.
https://www.amazon.com/Aeon-Labs-DSC18103-ZWUS-White-AL001/dp/B008VWAPU4
Maybe you could place it inline somewhere closer to your network. Not sure on the ratings though.
How does your blower fan connect to power, hard wired I assume?
this meter will do it, but you need (some) infrastructure to be able to collect/log the data depending on what you want.
Once you have meter(s) like that you can do cool things with them though.
I think something like this:
https://www.amazon.com/Aeon-Labs-DSC18103-ZWUS-White-AL001/dp/B008VWAPU4
would work for you. You can keep your existing switches even. This is assuming you have enough room behind the existing switch in the gang box. You'll need a hub like a smart things, but previous comments seem to show you are alright with that.
Personally, I love the idea of the old style edison bulbs and fixtures. This would allow you to do it with no visible changes at all.
One problem I had with smart outlets is that one one of the plugs is controlled by the switch, the other is just on 100% of the time.
In my use case, paranoia over leaving the hair curler plugged in, that down fall was two much. Sure I could see the outlet was off but I had no idea if the device was plugged into the right outlet.
My solution was this little guy
Aeon Labs DSC18103-ZWUS,White,US,AL001 Aeotec Z-Wave Micro Smart Energy Switch, 2nd Edition, White, Small https://www.amazon.com/dp/B008VWAPU4/ref=cm_sw_r_cp_apa_fBzqybV7TXXRH
Fits behind the standard outlet and turns the entire thing into a switch.
I'm also thinking this might be a good thing to add to a couple more outlets for Christmas lights
https://www.amazon.com/dp/B008VWAPU4/ref=cm_sw_r_cp_apa_fBzqybV7TXXRH
This will make a standard plug z wave. You can't control each plug individually but should do the trick.
You could look into products utilizing Z-Wave. There's a few modules that can be placed into a box behind switches or above light fixtures, like potentially this one. But you'd still need a Z-Wave controller, something like the SmartThings Hub, perhaps.
EDIT: Here's another Z-Wave wire-in switch. There are even motion sensors like this one and other things that speak Z-Wave.
ive got some of these that work great with existing switches and their faceplates and are about the same cost as whole new switches.
If I were you, I would go with Aeon Labs Z Wave Smart Energy Switch . They are cheap, hides behind regular light switches, and works flawlessly with Abode.
Also I'm guessing something like this would partially solve your problem: https://www.amazon.com/gp/product/B008VWAPU4/
The Relay could link up to two of your switches and the micro switch to the third.
Of course the problem with any of these solutions is that you will only end up with two, physical switches. Whichever switch you do not connect to the relay should be something you don't mind activating primarily through the Relay touchscreen, your phone app, or, better yet, schedules and robots.
Dual Option Wall Switch Guards (3 Pack) Clear Rocker Style
I've had a similar problem with a poorly placed switch. I already had a bunch of Hue lights, so I got a Hue Smart Dimmer Switch (Amazon Link) and stuck it to the wall where I wanted the switch and covered the old switch with a tamper-proof cover (Amazon Link).
​
No electrical work required.
[Rocker Switch] (https://www.amazon.com/Light-Switch-Guard-Switches-Shields/dp/B00DUBOSTA/)
I used these https://www.amazon.com/Light-Switch-Guard-Switches-Shields/dp/B00DUBOSTA/ref=sr_1_1?ie=UTF8&qid=1482935004&sr=8-1&keywords=rocker+switch+cover
Then I just used some 3M double sided tape and it looks fine. This way I can still have access to the light switch if I need to.
Thanks everyone for the responses..... This was my solution:
Step 1:
http://www.amazon.ca/Light-Switch-Guard-Switches-Shields/dp/B00DUBOSTA/ref=sr_1_1?ie=UTF8&qid=1454016617&sr=8-1&keywords=switch+guards
Looks like these guards are perfect; they'll be here next week and will frustrate my lovely bride to no end for at least a week BUT
Step 2:
Hue Dimmer. What a great product; easy to use, easy to set up and no playing around with electronics needed. I've set up one at the base of the stairs to just turn all lights on at full "soft white" brightness and one at the top of our stairs to do the same so she can turn everything off without walking down when the kids inevitably leave them all on.
Step 3:
iPhone 6 widgets with 10 scenes.
This appears to be what is going to work. Thanks everyone for the help.
Please don't do this.
This can potentially do 2 things:
A) Eliminate a redundant means of disconnecting the light fixture (that isn't the main breaker of your house)
B) Confuse someone that doesn't have knowledge of the situation
While this may not discretely violate code (breaker counts as a disconnecting means), it would provide confusion to the next person that owns your house.
The purpose of the electrical code is to primarily act as a guideline for proper electrical design / practice, but it is also meant to be used as a cookie cutter set of rules to provide consistency across all electrical installations and avoid confusion.
In your particular suggestion, i can forsee OP forgetting to wire the existing switch back in if he/ she were to move. Then the next homeowner will call an electrician in to ask why the switch isn't working, and the electrician will be confused because he doesn't know if the black wire leaving the box goes to the light fixture or is a jumper to the next switch.
[Please use a switch lockout mechanism] (https://www.amazon.com/dp/B00DUBOSTA/ref=psdc_6291359011_t2_B0019KBYE6) or install a smart switch.
There are purpose-built switch covers for both trditional and Decora style switches, that attach using the existing (or extended) screws on the wall plate. I've used covers like these in several rooms quite successfully.
I bought this to cover the original switch but still can get at it just in case and have a Phillips switch for the Hue lights next to it.
https://www.amazon.ca/Option-Switch-Guards-Clear-Rocker/dp/B00DUBOSTA
I recommend something like this
You will probably need to get in touch with Qolsys support. The Qolsys panel is not primarily a Z-wave Panel, so you should expect many Z-wave devices to not act as they should out of the box. Even the panels that are specifically mainly Z-wave ( Smart Things, Vera, etc.) often show these types of issues. The only controller i have found that is reliable on nearly every device has been by HomeSeer. However, the HomeSeer panel is not very user friendly and can be quite difficult to set up. As well as some of their hubs are quite expensive due to their premium nature.
it also may be possible that the older version of the sensor will work as it sends a different set of messages. (DWZWAVE2-ECO)
https://www.amazon.com/Ecolink-Intelligent-Technology-Operated-DWZWAVE2-ECO/dp/B00HPIYJWU/ref=sr_1_3?keywords=ecolink+door+window&qid=1564714876&s=gateway&sr=8-3
however, these sensors are no longer manufactured, so they are a bit more expensive.
You'd need window and door sensors, like these, a hub to interpret (I recommend hass.io or SmartThings) and an IFTTT recipe to interact with your thermostat.
You'd be better off asking this question in /r/HomeAutomation.
I was able to connect my hardwired smoke detectors to my SmartThings system with a BRK RM4 Relay. I installed it in the junction box behind the detector in my basement. When the alarm sounds it will open its switch. By connecting this switch to the auxiliary contact terminals on a door sensor mounted nearby, my HA system knows that the alarms are sounding. This should also work with any other hub that supports a zwave door switch (read: all of them.)
Here's the magic:
BRK RM4 Smoke Alarm Accessory Relay https://www.amazon.com/dp/B0039PF21U/ref=cm_sw_r_other_awd_-HVLwb9C5KFTY
And the door switch I'm using:
Ecolink Z-Wave Door/Window Sensor (DWZWAVE2-ECO) https://www.amazon.com/dp/B00HPIYJWU/ref=cm_sw_r_other_awd_qKVLwbPRVRM5Y
So the main level has every door pre-wired and all windows that open on the main level pre-wired as well. Pre-wired door photos.
I assume you were talking about these Ecolink sensors? Just curious why go for a z-wave sensor and also hardwire it? Is this for redundancy?
I came across these that mount flush inside the door and I think would be hardwired the same way as the Ecolink sensor (GPIOs on a rPi in my case)? That way they're completely invisible and a lot less expensive to outfit every door and window. I don't know if these would work well for the front door that has the pre-wire on the hinge side of the door (depending on how far apart they need to get), but they should work for the other door that has the wires on the deadbolt side?
Again, super new to this, so I may be missing something. I really appreciate the help!
I have an Extech EX330, the auto ranging is a little slow, but otherwise it's a great accurate budget minded meter.
It depends on your desires. If you want more phones now I have a feeling this is going to be the best option. If you are willing to wait the price may lower again. One thing I recommend if you don't already have one is a outlet timer. People say LG devices (LG Fuel mostly) have battery bloating issues more than other devices.
Outlet timers allow you to set the hours a device charges and doesn't charge. So you may say charge for 3 hours stop for 3 and repeat the remainder of the day. The one I linked is a two pack (Cheapest I could find) for $9. At Walmart they are $5-ish for one outlet timer.
__
https://www.amazon.com/dp/B006LYHED0
You can do this with home automation stuff. You'd need a Z-Wave or Zigbee home controller and then one of these.
You may also want to try the lutron dimmer plug you could set different light levels different periods of the day: 11pm-7am 40%; 7am-10:59 100% etc. you can set two homekit automations for when motion detected and when not detected (turn off) for each time period. I’ve found the hue motion sensor to be very responsive in this scenario, make sure firmware is updated.
https://www.amazon.com/Lutron-Wireless-Lighting-P-PKG1P-WH-Assistant/dp/B00JJY1QG0 (needs hub and it’s worth it)
I use this.
Aeon Labs DSA03202 v1 - Z-Wave Minimote https://www.amazon.com/dp/B00KU7ERAW/ref=cm_sw_r_cp_apa_AIuBybXTQB3DT
Works well with smart things.
You can replace the switch on the right with this https://www.amazon.com/dp/B00PYMGOHM/ref=cm_sw_r_cp_apa_78CDybP8MXER9
A power inverter is what you'll need. As for wiring it in, perhaps something like this will help. You could just find a circuit that comes on with the key (radio circuit usually) to plug that into. However, that wire does seem a little too thin to run an inverter..