(Part 4) Best automotive according to redditors
We found 43,458 Reddit comments discussing the best automotive. We ranked the 19,913 resulting products by number of redditors who mentioned them. Here are the products ranked 61-80. You can also go back to the previous section.


Yes - I bought a cheap $15 bluetooth ODB2 module that links to my phone. From there, I use Torque to manage everything. Great for testing sensors, checking codes, etc... Also cool to have it in my glovebox for when my coworkers need one out of the blue - makes you look cool for half a second.
EDIT: Here is what I use for the module:
https://www.amazon.com/Kitbest-Bluetooth-Scanner-Diagnostic-Warranty/dp/B01BY2CK32
As for the app, I use Torque Pro:
https://play.google.com/store/apps/details?id=org.prowl.torque
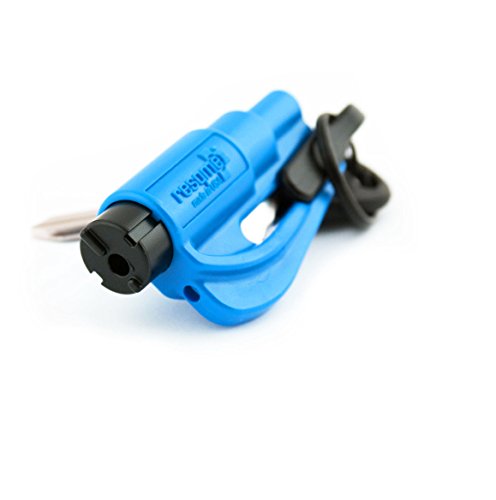
Resqme. $10.
You'll want to add a fuse, it's the safest way to go about it and super easy. https://www.amazon.com/BUSS-HHH-Amp-Add-Fuse/dp/B000GKEXK2
Resqme. $10.
Also
[–]30ocho 25 points 13 hours ago
Cars made after 2017 (a lot today as well) have laminated glass making this not possible. Soon those glass breakers many people carry will be nothing more than clutter in your glove box. Laminated glass needs to be cut out to be removed. So just don't drive Into the water any time soon
Source: Law enforcement officer & volunteer Firefighter/EMT
permalinksavereportgive goldreply
Gimme karma.
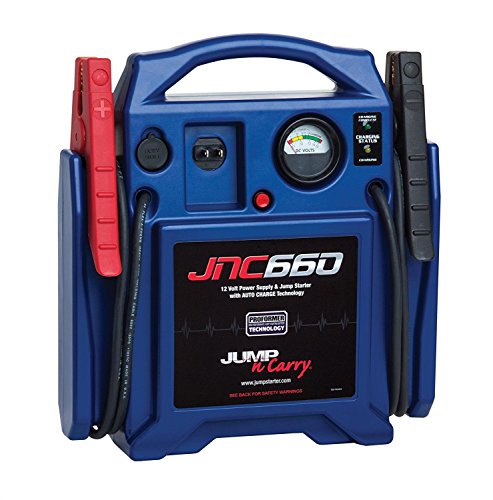
This is the one the pros use, auto shops and roadside assistance techs
https://www.amazon.com/gp/aw/d/B000JFJLP6/ref=mp_s_a_1_1?ie=UTF8&qid=1484856498&sr=8-1&pi=AC_SX236_SY340_QL65&keywords=clore+jump+starter
2008 BMW Z4M Coupe
I can't believe I haven't posted in so long. This job is back from February.
I performed my Maintenance Package on this 2008 BMW Z4M for a client. This client emailed me about wanting a maintenance Detail on their vehicle. I informed them that this package is usually reserved for previous clients because of the cleanliness requirements (clayed vehicle). I figured worse case scenario I'd bring everything if it's too dirty and needs more stuff.
Products Used:
Wash
Wheels
Decontamination
Interior
Engine Bay
Notes
This was an eye opening experience for me about cleaning a clean car. I learned that it's difficult to make a clean car even cleaner and really focuses you as a detailer to focus on details more than the big picture.
Price: $155
Time: 3.5 Hours
Thank you for your business!
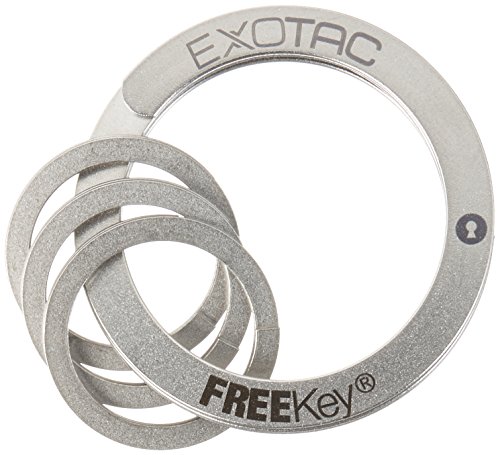
http://www.amazon.com/Exotac-002825-FreeKey-System/dp/B00AQ664H6/
Super useful IMO
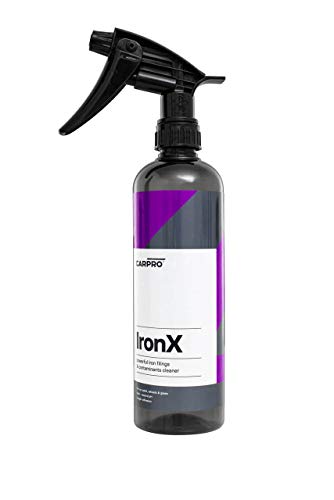
Iron x - http://www.amazon.com/Carpro-Iron-Remover-500-Ml/dp/B004UM6DLE/ref=sr_1_1?ie=UTF8&qid=1407107216&sr=8-1&keywords=iron+x
The 6v golf cart batteries from Costco or Sams Club are what people usually recommend. I have them and they work well.
Also, get one of these: https://www.amazon.com/gp/product/B013PKYILS Single best upgrade I've done to my trailer.
Most people don't carry one of the simplest tools: a window-breaker/seatbelt cutter. Often you see knives that can second as seatbelt-cutters too, but they take a lot of time to use when it comes to just seatbelts.
So along with a knife (which I think is common), I also always have this on my keychain. I can't tell you how easy it is for the seatbelt cutter to cut the seatbelt, either. No pocket knife blade can cut a seatbelt like a seatbelt cutter can. It doesn't even take a second; it's as smooth as butter if you do it in the right angle. With a knife blade, you have to essentially wear and tear the seatbelt down. It takes too long.
It becomes extremely useful. People also tend to think that window hammers on the bottom of knives or flashlights work just as well. This is incorrect.
I recommend everyone have these in their car: Res-Q-Me. It's an emergency tool for your car. Glass breaker and seat belt cutter.
I feel you friend. I also went camping but did take one of those car jump all in one batteries along with a 12 volt power adapter for my machine. it had worked the previous camping trip for about three to four days just fine. But this time, it died at 1 a.m. the first night and I was awake the rest of the night. I simply cannot sleep without my cpap at this point. The rest of the trip was a misery, next night slept in the passenger seat of my Prius with the CPAP plugged and car on (on but not running). trying to sleep in a seat sucks, but the car turned itself off every hour so it was hardly any better than that first night. I believe the next night I slept in the bed of a truck with a CPAP plugged in in the truck (again, on but not running) through the little back window and it worked much better. Until it rained.
So the NEXT camping trip I got my shit together.
Get a deep marine battery. These are designed to power small things on a boat and are used to the small dribble of electricity over a long period of time. Get a battery box to place it in for safety, and a battery tender to charge it before the trip. You'll want a ring terminal harness to attach to the battery posts, and a female 12 volt adapter to plug your machine into.
The box contains everything safely with just the plugs you want sticking out the slots in the lid, but if there's small children in the camp you may want to ratchet strap it closed to be on the safe side.
I got battery and box at my local walmart. The rest from Amazon.
Female cigarette adapter:
Battery Tender Black 081-0069-8 Female Cigarette Adaptor for Quick Disconnect https://www.amazon.com/dp/B0041CDPQO/ref=cm_sw_r_cp_apa_i_173UCbVCXJH0M
Ring terminal harness:
Battery Tender 081-0069-6 Ring Terminal Harness with Black Fused 2-Pin Quick Disconnect Plug https://www.amazon.com/dp/B000NCOKZQ/ref=cm_sw_r_cp_apa_i_7-3UCbPET1K8N
Battery tender to charge your battery:
Battery Tender 12 Volt Junior Automatic Battery Charger https://www.amazon.com/dp/B000CITK8S/ref=cm_sw_r_cp_apa_i_Ak4UCbQYJBZCA
And of course you'll need to get the 12 volt power adapter. Look up the model maker of your CPAP machine and Google away to see where you can find one. I looked for my manual and then I found the one that was recommended in the manual along with recommendations. Mine recommends I do not use the water chamber when using the 12 volt power adapter due to power consumption and no way am I risking the battery running out of power before the trip is over. I got the adapter from a generic CPAP supplies website.
Good luck! I'm going camping this summer I hope my setup still works!
I usually camp out of state with family and have a few nights in a house before heading home. I always bring a new face mask new filter and even a new hose if I have one as after camping the machine reeks of woodsmoke and it drives me absolutely batty.
Edited to fix oh so many typos.
PS: I will edit the links more pretty when I'm on a desktop sorry about the non pretty formatting
It's actually a self adhesive vinyl, I assume it's quite replaceable with a bit of goo gone if needed. Here's the exact product I ordered
This was my first attempt at engine detailing and I think it went pretty well! I covered some of the electrical components (alternator, battery terminals, etc) and proceeded with the typical spray down of water, followed by a good misting of APC, followed by agitation with a Solo Horton brush, and rounded out with another misting of water. I finished the process by drying the engine bay with a leaf blower and a coating of 303 Aerospace Protectant. Looks good to me!
Products Used:
You can buy everything online, though it's easier to go to a harbor freight with a coupon if you have one. There are plenty of polishers you can buy online of course, but none are as cheap (at least with decent quality) as the harbor freight model. You can of course buy a much better polisher at your local lowes / home depot however unless you have a lot more use for it it's probably not worth it over the harbor freight one (a good polisher will cost you $200+). Everything else you can find at any auto parts store, or maybe even walmart.
Here's some links
Basic steps:
You are done! In most environments the duragloss will last 6+ months. If you keep your car protected with it, you won't need to do the cutting/polishing again (or at least, not for a while).
The trickiest part of the whole process is the compounding and polishing. Here are some helpful videos.
And that's about it! It's easier if you don't do touch ups, but I figure if I'm going to put this much work in it, might as well get them. And if you do it right (with careful application and then sanding) the touch ups look nearly flawless (most look terrible because people don't bother to sand them flush).
edit: two other tips...
Meguiars Gold Class Shampoo
Chenille Wash Mitt
Turtle Wax Seal n Shine
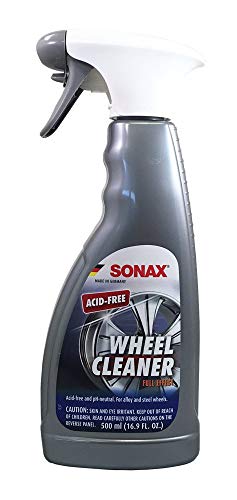
Maybe try sonax wheel cleaner. I've used it before with some success but yours looks caked on really bad.
http://www.amazon.com/gp/aw/d/B003UT3S6Q?pc_redir=1412738872&robot_redir=1#immersive-view_1413683469928
Wow, I've never seen those.
It'd be super simple to get that same look with some carbon look viny.
Bluetooth OBDII readers are ~$10 on Amazon!
Combine one with an app like torque- lite version that reads codes and does the basics is free, pro is like $5 and has bells and whistles.
This way, as opposed to simply reading the codes, you can get real-time data directly from your car's ecu.
Shits amazing for ~$20. What you save in repairs by catching issues before they turn into expensive problems is amazing.
So something like this "life hammer" would be ineffective?
Or this resqme tool that pops the steel bar into the window with force?
I also know an LEO that has similar tools to the life hammer in his family's cars.
Soap
Interior Cleaner
Foam Cannon
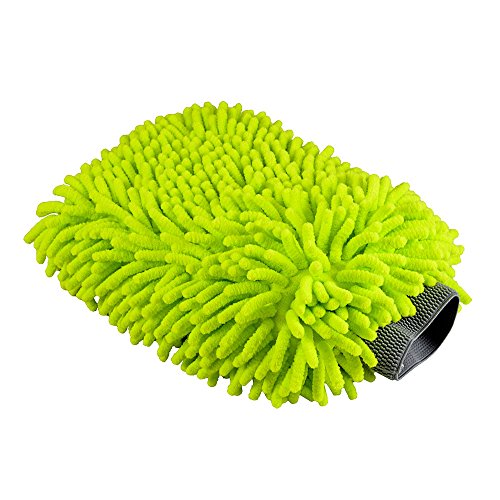
Scratch Free Wash Mitt
I'm really enjoying what chemical guys has to offer in their cleaning line up. I'm going to pick up hydro charge from them soon. It's a spray on ceramic coating.
The chamois and quick detailer help to remove grime, oil spots or whatever they are. It's very apparent on a white car. but glad I can actually see it too remove it versus another color car.
​
cc: u/simply_lime
Only hand wash, all the time, lovingly, with microfiber everything. It's going to be your new hobby, and on a car this size, takes less time than you would think to do it right.
Here is my amazon list, a lot of stuff has subscribe and save deals, everything Chemical Guys has been top notch.
http://www.amazon.com/Chemical-Guys-MIC_493-Microfiber-Scratch-Free/dp/B003TTL0TE/ref=sr_1_10?ie=UTF8&qid=1465225930&sr=8-10&keywords=chemical+guys
http://www.amazon.com/303-30520-Convertible-Fabric-Cleaning/dp/B000A8JNF0/ref=sr_1_1?ie=UTF8&qid=1465226066&sr=8-1&keywords=303+aerospace+protectant+convertible
http://www.amazon.com/Chemical-Guys-MIC_506_12-Professional-Microfiber/dp/B00A8MZ7IA/ref=sr_1_3?ie=UTF8&qid=1465225930&sr=8-3&keywords=chemical+guys
http://www.amazon.com/Chemical-Guys-CWS_301-Citrus-Concentrated/dp/B004K9KETY/ref=sr_1_6?ie=UTF8&qid=1465225930&sr=8-6&keywords=chemical+guys
http://www.amazon.com/Collinite-Liquid-Insulator-Wax-845/dp/B000JK2D06/ref=sr_1_1?ie=UTF8&qid=1465225985&sr=8-1&keywords=collinite+insulator+wax OR http://www.amazon.com/Collinite-No-Super-Doublecoat-Auto/dp/B000AP8DZY/ref=pd_sbs_263_5?ie=UTF8&dpID=51Nde%2B7iakL&dpSrc=sims&preST=_AC_UL160_SR160%2C160_&refRID=0KRY8VA4QS2RZE3XG1R5
http://www.amazon.com/Viking-862400-Blue-Microfiber-Applicator/dp/B0051MYL8E/ref=sr_1_2?ie=UTF8&qid=1465226014&sr=8-2&keywords=microfiber+applicator
http://www.amazon.com/Chemical-Guys-TVD_109_16-Sprayable-Dressing/dp/B001TI1F5Q/ref=sr_1_3?ie=UTF8&qid=1465226032&sr=8-3&keywords=chemical+guys+tire+shine
http://www.amazon.com/Mothers-155700-Wheel-Brush/dp/B001GJ3DZS/ref=sr_1_1?ie=UTF8&qid=1465226178&sr=8-1&keywords=tire+brush
Here's all the stuff I use :)
I agree, drying is also my least favorite part. I strongly advise to not use a water blade. It is guaranteed to put scratches in your paint. I bought one a while ago before learning what damage it could do. Here is a picture of the damaged it caused.
If you have wax or sealant on the car it should be much easier to dry with air. You can buy a leaf blower or a metro master blaster.
Otherwise you could use a cobra guzzler or good quality microfiber with some detailing spray.
If you're trying to keep costs at a minimum then I recommend ditching that kit. Have you googled the Gary dean method of washing? If not then check it out. Basically he uses one bucket and a couple of microfibers as washing media. The pros to this is that 1. You don't have to lug around two buckets. 2. No need for grit guards. 3. After im done washing my car. Since the water is clean I can actually save it for later use. Gary deans method has one downside which is that you have to invest in more microfibers. Honestly, you can buy the ONR, and bucket. Then buy about 6-20 good quality microfiber towels. The clay you have is good and you're on the right track. You can also never go wrong with collinite 845. For the towels I recommend these
Because these are synthetics, you can use a non-rise all-purpose cleaner like this one.
Also, I think durability is why we don't have the perforated, vented seats anymore.
I feel like there's a general lack of ResQMes. It amazes me to see people carrying everything from 12" pry bars to full size knives on their key chains but completely skipping this awesome $10 tool.
I just put these in my 2018. No word on longevity as they've only been in there two days but they look nice and weren't expensive.
High Beam
Low Beam
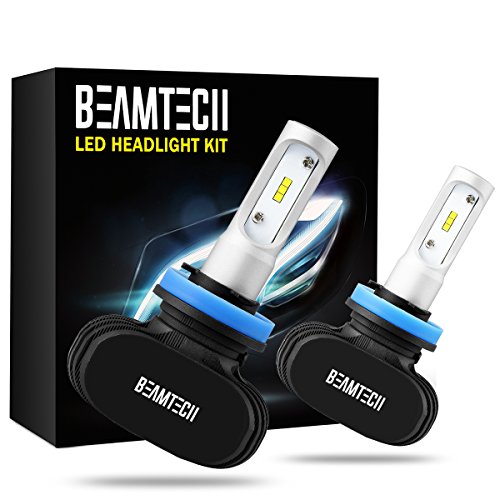
Nether out of the 5 LED headlights I’ve experimented with have an error code. The “BeamTech LED’s” are literally the cheapest durable LED bulbs you can buy which gives a decent beam pattern👇
BEAMTECH H11 LED Headlight Bulb, 50W 6500K 8000Lumens Extremely Brigh H8 H9 CSP Chips Conversion Kit https://www.amazon.com/dp/B06XHDYTGL/ref=cm_sw_r_cp_api_fg9VBbZK6ZAG6
The “Hikari LED’s” are premium LED bulbs with a premium price that are bright as hell with a perfect beam pattern👇
HIKARI Ultra LED Headlight Bulbs Conversion Kit -H11 (H8,H9),Philips Lumileds 12000lm 6K Cool White,2 Yr Warranty https://www.amazon.com/dp/B077BT6M6Z/ref=cm_sw_r_cp_api_nm9VBbP60B2VP
Well, there's always plan B.
http://www.amazon.com/3M-Scotchprint-Carbon-Fiber-Vinyl/dp/B0058DIDTY
It's not very likely that it's pewter. Pewter contains lead that leaches into food and is not used much anymore.
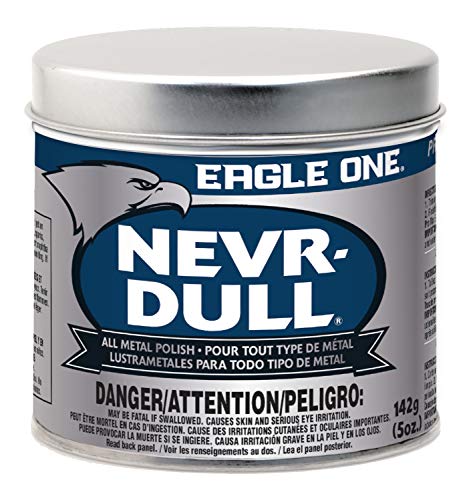
That said, does need a polish, as in removing scratches or is it just discoloration and dirt? Polishing would require proper polishing compounds and wheels. If you want to clean it up try "Eagle one Never Dull". It's a wadding that comes in a tin and it does a surprising good job at tarnish, mineral stains, and overall cleaning without scratching. That would probably be my first stop. It is a bit stinky but works well.
https://www.amazon.com/Eagle-One-E301131001-Original-Nevr-Dull/dp/B000CNBI1A
Equipment
Must Have Apps
Very excited to be ~95% complete with the install. A couple things left:
More than happy to try to answer questions for anyone else looking to do the same thing. Very happy with the outcome thus far.
[Resqme] (http://www.amazon.com/resqme-Original-Keychain-Escape-Tool/dp/B000IDYKNC) $10
FTFY
Window breaker and a seat belt cutter. As well as a first aid kit, multi-tool/knife. Also invest in a nice jump starter that doesn't require another car.
I used to work at a car auction, jump starting hundreds of cars a day. We went through several different brands before settling on these, from Amazon. I had one that lasted through the better part of 2 years, with 2x daily drain/charge cycles, getting thrown off golf carts, cracked, dropped, ran over, etc.
https://www.amazon.com/Clore-Automotive-Jump-N-Carry-JNC660-Starter/dp/B000JFJLP6/ref=mp_s_a_1_4?keywords=jump+starter&qid=1574138847&s=automotive&sr=1-4
Sorry this kinda became a small essay, I hope it's not too verbose but there's a lot of ground to cover if you're just starting out.
I got kinda shafted started out since I had a pretty damn oxidized, single-stage red Miata as well as a pretty-ok silver 2015 Subaru, so I kinda had to build two kits at a time since I didn't want to cross-contaminate my systems. I ended up getting a bunch of orange and white Lake Country CCS foam pads along with playing around with some Meguiars foam cutting pads for the Miata and the 5" Meguiars Microfiber Correction Kit for the Subaru and anything else that's clear coated.
I'm using the same Harbor Freight DA, but with the 5" backing plate that comes with the Meguiars kit. If you don't get the Meguiars kit, at the very least you need to order a new backing plate for Harbor Freight DA because the one that comes with it is well-known for being really shitty. I prefer using a 5" system as it fits a better into tighter spots and gives you noticeably more correction power over a 6" at very little perceived loss of coverage efficiency because of the smaller size.
Of note: I've only had poor experiences with microfiber pads on single-stage since they seem to clog up so fast, but they've been great on clear coat. Most people won't face this issue, but I figured I'd put it out there.
Pair whatever kit you build/get with the 36-pack of microfibers from Costco and you'll be in business in no time.
I did pick up a 6.5" Lake Country CCS red wax/sealant pad since I like to apply Collinite 845 to everything I care about. I intentionally picked an oversized pad for my backing plate because I'm only using my DA at the minimum speed possible (like 1.5 on the HF DA) to spread a thin layer of wax efficiently. If you crank up the speed by accident or out of curiosity, yes, the 6.5" pad does tend to get totally out of control in a hurry, so don't do that haha.
Don't forget your pad brush, or if you have an air compressor, you can use that to blow out your pads (Youtube it). Some method of cleaning pads is absolutely mandatory and for some reason, this is often overlooked or skipped by many people starting out.
Whatever you get, I like to have at least 2 cutting pads on hand and I'll make a conscious effort to switch halfway through the car, usually hood/driver's side for one and trunk/roof/passenger side for the other. I usually can get through a car with just one polishing pad but it's reassuring to have a backup on hand in case the pad explodes or I'm an idiot and set it down on the ground or something. I'm also kinda anal about cross-contamination of LSPs, so I now have a dedicated Lake Country red CCS pad for each LSP I use.
Finally, I know you're looking for advice on pads, but I ended up getting a bottle of the Meguiars DA Microfiber Polish since I prefer to lay down my own LSPs and the lifespan of the DA Finishing Wax was iffy, especially compared to the Powerlock+ and Collinite 845 combo that I use on cars I actually care about. The DA Finishing Wax is now reserved for my detailing side-hustle (which is currently helping fund putting a turbo in my Miata), since it saves quite a bit of time over separate polishing and waxing.
Go to Amazon and order this (I like Meg's products),
This should run you about $345 for everything and have you setup to take care of your car for a long time. You can find a 20% discount code online for harbor freight to bring the price down $55 for the DA. Go to home depot and buy a couple buckets and you will be good to go.
Edit: To add, I went to Lowes and bought a cheap inline sprayer for my hose and it works fine for foaming up the vehicle, plus it only costs $5.
Edit2: If you are going to downvote me please post why you don't like my recommendation.
Nevr-dull works great for this. Also available at local stores, like Autozone, etc.
They make add-a-fuses which are cheap and super easy to install. Pick one up next time you're at the parts store and whack it in for peace of mind. I used one to install my dashcam.
For a glass-breaker, get a ResQMe.
It's affordable, proven to work and available on Amazon. And getting it as a separate tool is highly recommended, since it's only use is as a glass breaker, it doesn't have to worry about any short-comings to accommodate other tools.
As for other EDC-related suggestions :
Pocket-knife - Victorinox Classic Swiss Army Knife
Pocket tool - Gerber Shard
Pocket flash light - Fenix E05
Pocket suspension clip - Tec Accessories P-7 suspension clip
Wrist watch - Timex Weekender
Pen - Parker Jotter all stainless steel body
Generic stuff - cheap Bic lighter, cheap pocket notebook, cheap front pocket wallet, a dice or pebble.
Why all these ? Because they are useful, affordable and good quality. Victorinox, Timex, Parker, Bic are household names. The rest like Tec Accessories and Fenix are well-known in their own specific circles.
The dice or pebble can be anything else, it's just something you carry around that might have a story behind it. People love that shit, cool conversation starters. Or maybe even some thing you can fiddle around with, like a small top or a coin.
8 bucks on Amazon...
I have one of these. It stays on your car keys, and then in the event of an accident it can be pulled off the keychain with fairly light force, revealing a cutter for the seatbelt (in case it gets jammed) and a spring powered window smasher. I tried it out at an auto wrecker's and it works pretty great!
I keep one of these in my trunk.
https://www.amazon.com/gp/aw/d/B000JFJLP6/
Here are a couple videos that'll help with the use of products.
clay bar
everything clay bar, compound, and polish
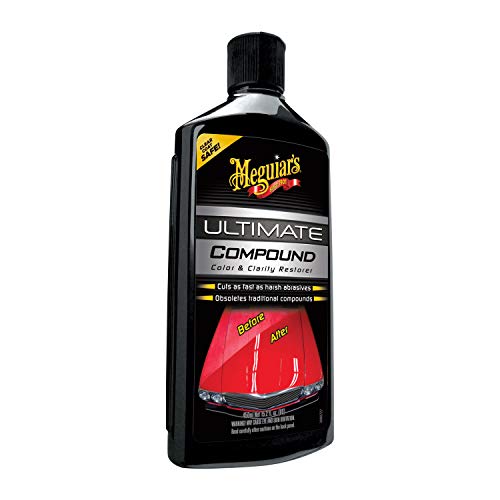
As for the products I use/like I personally like the Meguiar's Ultimate compound and polish. However there are a ton of other options that do as well/or better. For clay I use a range of products, but for your use I would say Chemical Guys clay bar kit would probably do what you need.
Just an FYI you don't need to invest in a dual action polisher to compound and polish, it can be done by hand and save more than a couple dollars...but it'll take a while. I'd say start with clay and see where you're at afterwords. If you still have a bunch of paint transfer then go from there. Another thing I've heard will remove paint transfer (i've never tried it personally) is a carnauba wax, so if you have some around you can give that a go first.
If you do need paint work (it probably won't be as severe as a key) but this video will probably help if you want to try and tackle it yourself.
certainly.
also see r/AutoDetailing for the noob questions/ info. Its a huge help. so is Youtube! hope that points you in the right direction!
Get this
DA Polisher Griots $99 [Lifetime warranty]
Pads $45+25% off = 33.75
Get 3 orange, 2 white and 1 blue or whatever you want
Use BLK25 Coupon Code to get 25% off
Backing pad $10
Then the rest you can pick whatever, a polisher/compound, MFs or an ONR and dilute it 1:16 for quick detailing
The kit is fine, but you should take advantage of the sale that's going on right now.
I purchased these a few months ago. I'd say their output is similar to halogen, maybe a touch more. Definitely no where near their advertised 8000lm - which is ideal for me. Simply install and adjust your headlights vertically down a turn or two and golden. Cut off is great, don't blind oncoming drivers, and looks good, too!
Sonax Full Effect
4.4 stars from 800 scamazon reviews. Works great.
This might be what you are looking for
Get This and then get This. You should be golden.
If you want to still keep your work keys on a separate ring from your house keys, you could try something like the Free Key System.
Otherwise, you could try something like the Keysmart, and put your 5 keys in that, and then just have that, the car key, and the fob on the ring.
I personally use the Keysmart, and it's been great so far. I've had mine for a few months already, and it's held up great. My best friend has had one for several years, and his is also in great condition.
I also recommend a suspension clip, I've been using this one by Keysmart recently, so I just drop my keys in my pocket but hook them on the top of my pocket. That makes it easier to pull the keys out of your pocket, and also keeps them dangling in your pocket as opposed to bunching up at the bottom.
Hope this helps!
I just switched to a Freekey key ring and it's great. I can't make extra copies of my apartment key, so I needed an easy way to take my house keys off my enormous key ring when I go for a run, and this is working perfectly.
Nice Walther, nice knife. You could go with a standard carabiner or an S-biner, both available at Home Depot, both like to stay closed. I use a Freekey system that hangs from a standard carabiner, myself. Keybars and Keysmarts are pretty popular around here and they seem like they are worth looking into.
Amazon, there are a ton that have fantastic reviews and are only around $15.
I ordered this one, its for Android only, but it does everything you need when paired with the Torque app.
https://www.amazon.com/gp/product/B01BY2CK32/ref=oh_aui_detailpage_o00_s00?ie=UTF8&psc=1
I choose to keep the battery part separate. If that's what you want, here's what I got.
Battery Tender 081-0069-8... https://www.amazon.com/dp/B0041CDPQO?ref=yo_pop_ma_swf
Battery Tender 081-0069-6... https://www.amazon.com/dp/B000NCOKZQ?ref=yo_pop_ma_swf
I use one of these
http://www.amazon.com/Battery-Tender-081-0069-8-Cigarette-Disconnect/dp/B0041CDPQO/ref=pd_bxgy_auto_img_b
Conncted to one of these
http://www.amazon.com/Battery-Tender-081-0069-6-Terminal-Disconnect/dp/B000NCOKZQ/ref=pd_bxgy_auto_img_b
Get a small 12v-usb adapter and you can charge most small electronics.
http://www.amazon.com/Belkin-F8Z445ttP-F8Z445ea-USB-Charger/dp/B0047T79TA/ref=sr_1_3?s=automotive&ie=UTF8&qid=1343024563&sr=1-3&keywords=12v+usb+adapter
The whole set up cost me under 25$ to make and I can charge most small electronics, my GPS, and the SAE cable lets me run my battery tender during the winter without removing any fairings. The only thing I wish I had done differently was put them all to a relay for fuse block, but they all have inline fuses so I'm not terribly concerned about it.
Yes, the Battery Tender SAE 2-pin to USB charger works fine.
As an alternative to that charger, or perhaps a supplemental item that you might also find useful is an SAE 2-pin to Cigarette Lighter Adapter. This adapter cable will also plug into your Battery Tender charging cable, to allow you to plug in most 12V powered accessories (up to the capacity of the fuse in the charging cable), including a USB charger with dual outputs, etc.
You can even power a 12V air compressor if the fuse is sufficiently large.
Amazon also carries an SAE 2-pin extension cable which can be useful when camping, to bring 12V power into your tent.
I would get a dash cam for starters. I personally like to keep my interior clean, aside from audio upgrade in the future, I only have all weather floor mats, collapsible cargo storage & cargo net for the trunk. However, I'm planning to do a lot on the exterior since I plan to do a lot of camping & off roading.
What it currently looks like right now: https://i.redd.it/k9lez1u607931.jpg
ARB Awning 2000: https://www.amazon.com/ARB-4x4-Accessories-Awning-2000/dp/B00MI3V7YA/ref=sr_1_1_sspa?keywords=arb+awning+2000&qid=1562902808&s=gateway&sr=8-1-spons&psc=1
Awning Clamps: https://www.gziladesigns.com/products/awning-mounting-clamps
Rola V-Tex Roof Basket: https://www.amazon.com/59504-V-Tex-Rooftop-Cargo-Basket/dp/B004R34HDC/ref=sr_1_2?keywords=rola+vortex&qid=1562902837&s=gateway&sr=8-2
This is the best product I've used for cleaning brake dust from wheels.
Lesse. The instinct will be to paint over. Spray paint can compromise the shell integrity and foam of a helmet. If you go over em, make sure you get paint that's safe for a helmet.
You might try vinyl decal stickers. I did my helmet with pinstripe tape, which is very similar in terms of construction. Try something like so - just cut a big stripe and run it up the middle of the helmet.
So something like this? https://www.amazon.com/3M-CF12-BLACK-CARBON-FIBER/dp/B0058DIDTY
I'm just worried it may interfere with heat dissipation.
I've always struggled to keep my vehicles clean because 1) they were always old, 2) I've lived in condos, 3) car washes did a terrible job / detailers charged too much, and 4) I didn't realize you could do all of this yourself pretty effectively.
When I bought a new truck at the beginnging of the year, I randomly stumbled upon an Ammo NYC video and the nerd / clean-freak was intrigued. A couple dozen videos later, and I was hooked. Shout out to Larry for your passion - thank you for the insane amount of information on your channel. (Wish I could afford all of your products, or that you had some of them on Amazon!).
Living in a condo, I have to swing by my local coin wash and take up a bay with a few buckets during off-peak hours, but I've gotten it down to 1.5 hours and looking like this every time.
I've only been doing this for a few months, but thought I'd share the products I've researched and selected based on reviews and costs. Hope this helps save someone time!
TOOLS
BUCKETS
CHEMICALS
INTERIOR
WHEELS
TOWELS
1. M&P Shield 9mm w/ kydex holster
2. Invicta 8932 Pro Diver
On the FreeKey System:
3. GUS Made Mini Pill Fob
4. Ranger Bic keychain lighter
5. NiteCore Tube USB Flashlight
6. MSTR Key multi-tool
7. 32GB 3.0 USB flash drive
8. Samsung Galaxy S7
*9. Dango MT02 Wallet
Watch. Really overpriced for this challenge but I don't really care.
Keychain
FreeKey System, I've always wanted to try this
Light, already own it and I see no reason to change it
Gerber Shard, haven't seen anything that I think might be better, although I don't use all its features
I don't carry a knife.
Dangerous as is, the battery needs a large main fuse and a manual disconnect switch
https://www.westmarine.com/buy/blue-sea-systems--m-series-mini-on-off-battery-switch-with-knob-black--
Your inverter and fridge aren't fused.
10 gauge wire is not enough to run a fridge and an inverter I would suspect. Also, you might want to run the fridge and inverter on its own, proportionally sized fuse; that way the fuses don't have to be so massive, requiring less potential sparks and fire to blow the fuses. As it is, there's no fuse, and the inverter and fridge share the same cable; the most load hungry devices. That means the cable needs to be double thick from the battery to a bus bar, to the fridge and inverter. Otherwise you will have considerable voltage drop or possibly even melt your wires and cause a fire.
Same thing for the solar charge controller. According to this chart: http://www.affordable-solar.com/solar-tools/wire-sizing-charts/ you can only go 3.5 feet before you get more than 2% voltage drop with 10awg and 30amps - and it says that no more than 2% is acceptable. This might help: https://www.scribd.com/document/334383567/Solar-Setup-by-sprinterpirate
Also I see no battery/amp meter. This is limited to 100a but you get the idea: https://www.amazon.com/bayite-6-5-100V-Display-Multimeter-Voltmeter/dp/B013PKYILS/ref=sr_1_3?ie=UTF8&qid=1495073407&sr=8-3&keywords=battery+meter
And brokedown is correct, you can't just leave different types of batteries always connected whenever the engine is on. You need to disconnect it either with a programmed ACR or manually.
You can. Get a Bluetooth OBD-II module from Amazon for about $10 and you can monitor your engine on your smartphone.
This bluetooth based obd2 scanner (for $20) should work well with a phone app:
https://www.amazon.ca/dp/B01BY2CK32/. You'll probably find cheaper ones online as well.
My friend has this one and it seems to work well enough actually. I'm going to order one for myself right now. I have a magnetic phone mount that goes in my CD slot that works really well due to the layout in my car. I might use a spare phone to run as extra gauges and a music player. You could get a BlueDriver but those are about $100 though I hear they are really awesome. Though honestly for just $10 it can't hurt to at least try it out.
Edit: For $20 this one looks to be a bit nicer. I'm ordering one for myself right now. Thanks for reminding me. These are really handy tools and just plain fun to play around with.
Buy a $10 ODB2 scanner on Amazon, even if they've cleared the check engine light codes or disabled the light, the car will still report the codes and the failed tests.
https://www.amazon.com/Kitbest-Bluetooth-Scanner-Diagnostic-Warranty/dp/B01BY2CK32
Mine were just as bad and used this stuff.
http://www.amazon.com/Eagle-One-1035605-Nevr-Dull-Wadding/dp/B000CNBI1A
Takes about 10 minutes and I was able to get my shinny back
i would (and have used) one of these 'add a fuse'
dont just cram a wire behind a fuse
You can get license plate cameras for less than $15, and a head unit with Bluetooth, DVD player, and SD card reader for under $100. Granted, you get what you pay for, but I bought this exact combo nearly two years ago for a 92 Honda and it's served me well enough. Has two video outs so I added a 7" monitor. You can get an add-a-fuse kit to tie in to the reverse lights fuse, so you don't even need to mess with the wiring back near the reverse lights, so no permanent alterations to the car.
If you want something to cut your seatbelt and break a window, I would considering getting a car escape tool and keeping in your glove box or on your key chain. (Something like this: https://www.amazon.ca/Resqme-Original-Keychain-Escape-Tool/dp/B000IDYKNC/ref=sr_1_1?ie=UTF8&qid=1465149107&sr=8-1&keywords=seatbelt+cutter)
For the lazy
Photo of it
http://www.amazon.com/gp/aw/d/B000JFJLP6/ref=s9_simh_gw_d0_g263_i1?pf_rd_m=ATVPDKIKX0DER&pf_rd_s=mobile-1&pf_rd_r=1B2X3DQKS1CBDT41CV37&pf_rd_t=36701&pf_rd_p=1824974342&pf_rd_i=mobile
This is a good one. Definitely worth the price. I've rarely had issues with these. They're currently on sale on Amazon as well.
https://www.amazon.com/Meguiars-G17216-Ultimate-Compound-15-2/dp/B001O7PNNM
it’s essentially a micro abrasive compound, which is used to buff out scratches, hazing and whatnot. it needs to be used after wet sanding to get rid of the hazing left behind from the 3000 grit. then you polish after the compound to get an extremely clean, haze-free result. it’s best to use a buffer to apply them but can also be done by simply rubbing with a microfiber pad.
basically you can get all of these products in a simple 3m headlight restoration kit instead of buying a bigger amounts of each separately. if you only need to hit the two spots left from removing your mudguards, i’d suggest just getting a kit instead:
https://www.amazon.com/3M-39008-Headlight-Restoration-System/dp/B001AIZ5HY
i think those scratches will come out. they dont seem so bad. you can confirm this by running your nail around them and seeing if it catches your fingernail. youll be better off if they dont really catch.
i think i would go with this car kit from meguiars
as well as ultimate compound
and some polish
i would then wash the car, clay the car, scratchx the scratches, plastx the headlights, compound the car, polish the car, then wax the car.
that will definitely do you. if you have more money, check out a bunch of the sidebar lists for more stuff. maximus's pretty much has it all.
edit: and maybe a couple of these mf applicators. i think they are easier to use and spread the product and work it in really well.
Don't recommend using RainX on your front windshield - it makes the wipers squeak something fierce.
Use a wash mitt to reduce chance of scratching.
Do you mean using the Japanese standard holes for a license plate? If so I bought mine on amazon. It came with 2 screws and you place the rubber screw expander first then the screw and its super sturdy. https://www.amazon.com/gp/product/B01EKVUJC8/ref=ppx_yo_dt_b_asin_title_o03_s00?ie=UTF8&psc=1
I was in the same boat you were. So many options and so many reviews its hard to tell what is real and whats not.
I ended up going with these for my 2015 Elantra.
https://www.amazon.com/gp/product/B06XHDYTGL/ref=oh_aui_detailpage_o09_s00?ie=UTF8&psc=1
I have been very pleased with them. My wife works nights and she wasnt happy with the stock ones. She has been very happy with them.
They have been installed for about 4 months with zero problems.
A couple of notes however, at least on the 2015 Elantra, the dust caps will not fit with these in. You will either need to buy aftermarket caps which are available for cheap on amazon or go without any. I don't have any currently and haven't had an issue with dust or water etc getting into my housings.
The tend to mess with your AM radio signal if you are trying to listen to a weak station. Stronger AM stations don't seem to have an issue. No issue listening to FM or Sirius, Cd etc.
I purchased these and they have worked great. https://www.amazon.com/dp/B06XHDYTGL?ref=yo_pop_ma_swf
Or you can just buy this and use the holes that are already there. https://www.amazon.com/gp/aw/d/B01EKVUJC8/ref=yo_ii_img?ie=UTF8&psc=1
Here is one.
But you can find more if you search for "Subaru front plate adapter" or something along those lines.
I am pretty happy with this combination:
https://www.amazon.com/gp/product/B01EKVUJC8
https://www.amazon.com/gp/product/B018FUYN0O
https://www.amazon.com/gp/product/B000SOM9GQ
It did require some minor mods. I drilled the cover so it takes 4 screws instead of 2, used a dremel to make it so that the screws didn't stick out too far in the rear, and applied some JB weld around the nuts so that they wouldn't spin. A bit of work, but well worth it IMO.
Bulbs
Replacing these light bulbs are as easy any changing any old light bulb.
http://www.amazon.com/Sonax-230200-755-Wheel-Cleaner/dp/B003UT3S6Q/ref=sr_1_1?ie=UTF8&qid=1371747850&sr=8-1&keywords=sonax+wheel+cleaner
Says it doesn't have acid and is paint safe
I can't comment on your particular issue, but I use Sonax wheel cleaner and I really like it. It melts away brake dust etc. and it turns purple when it "reacts" with debris on your wheels.
I apologize in advance for this long post. None of these are "must gets", but they are what I got for my 2016 Premium forester. I'm posting this for my own future reference as well as to help some people who are wondering what accessories might be good for their new forester. I highly recommend ordering from Jackie from Annapolis Subaru @ 443-837-1422 as she can get you some good prices on the subaru accessories as well as WeatherTech products! I saved on WeatherTech shipping costs (~$20) by ordering through Jackie and the warranty is the same as if I had bought them through their website.
Please note that some of these accessory links are for my specific car year, model and configuration. I have a 2016 Premium forester without eyesight (affects the Covercraft/heatshield sunshade - they also have eyesight compatible sunshades!).
Also, I personally didn't get my windows tinted, but I think that is something that you should seriously consider doing :)
Speaker kit
Tweeter kit
WeatherTech DigitalFit floorliner (1st & 2nd row)
WeatherTech cargo/trunk liner (without bumper protector)
Weather Tech TechCare floorliner and floormat Cleaner/Protector Kit
Gorilla mud flaps
Covercraft's UVS100 sunscreen - use promo code FREESHIP
Exterior Auto Dimming Mirror w/ Approach Lighting
Luggage Compartment Cover (manual rear gate)
Rear bumper cover
Auto-Dimming Mirror with Compass and HomeLink
Rear Seat Back Protector
Two Home Depot 5 gallon homer bucket
Heatshield sunshade (driver/passenger, second row, rear windshield, sunroof) - note that their website only shows only one side window (driver/passenger), you need to call in to ask them to add the second row side window ones - on my invoice it says part #1425S-A and #1425S-B
Antigravity Batteries AG-XP-10 Multi-Function Power Supply and Jump Starter (check eBay to see if priced cheaper)
Viair 77P Portable Compressor Kit (check eBay to see if priced cheaper)
Amazon stuff:
EZ Pass Holder for VA Flex
Aux cable
Stickershield (parking stickers, etc)
Dropstop seat gap filler (driver/passenger side)
Door panel removal kit (for speaker kit install)
Two grit guards
Microfiber Drying towel
Microfiber cloths (3 pack)
Car wash shampoo
Wheel brush
Resqme (window breaker/seatbelt cutter)
Wheel cleaner
Microfiber wash mitt
Reindeer costume for Christmas
Headrest coat hanger
Road reflective triangles
Duct tape
Odor eliminator
Tire air pressure gauge
OBDII Scanner (Bluetooth)
First aid kit
it looks like you or someone may have used a cleaner for the wheels that was too strong or spray paint. I am no expert but maybe try a clay bar and lube with some [Sonax Full Effect] (http://www.amazon.com/Sonax-230200-755-Wheel-Cleaner-Full-Effect/dp/B003UT3S6Q) first
Looks great, but speaking as someone with those rims...cleaning can be a real PITA.
If you're not already using it, Sonax makes a pretty nice product that will save you a bunch of time getting in between those grooves.
You owe it to yourself to try a bottle of a good wheel cleaner. Besides saving a ton of time and frustration, wheel cleaners dissolve brake dust so it can be harmlessly cleaned off instead of scrubbing it against the wheel paint for a while.
Try one of these (in order of price). Griot's and Meguiar's can be found in most auto parts stores:
The tender and a cigarette lighter attachement
Great idea!
This one is by the same company, longer and even cheaper@
http://www.amazon.com/Battery-Tender-Female-Power-081-0069-8/dp/B0041CDPQO/ref=pd_luc_sbs_03_01_t_lh
I just ordered this and I ordered a 12' extension too (I have been using an extension cord)
Thanks!
I recommend getting leads with quick connect, so you can attach a battery tender if need be.
I also have a 12V/120V to USB adapter with USB cables under my seat so I always have a way to charge my phone on overnight trips.
Something like this: https://www.amazon.com/Battery-Tender-081-0069-8-Cigarette-Disconnect/dp/B0041CDPQO
and then the leads in the add on items.
Purchase:
http://www.amazon.com/Battery-Tender-021-0123-Junior-Charger/dp/B000CITK8S
http://www.amazon.com/Battery-Tender-081-0069-8-Cigarette-Disconnect/dp/B0041CDPQO
Install and your done.
Or you can get something like this and charge your phone. I tested to make sure I was getting 12v first with my ride
[Edit] its called a SAE plug
I also have an AirSense 10 Autoset. The power "brick" provided with the unit is a conventional 120-240 VAC to DC converter. With the Ego Lawn Mower and Inverter you're converting electricity from DC to AC to DC. There will be substantial power-to-heat losses due to less-than-optimum efficiency of the power conversion.
Additionally, the AC output of the Ego Inverter (see manual, page 9) is limited to 150 Watts. At 120 Volts, this means that the current maximum it allows is 1.25 Amp. The maximum current demand that the AirSense 10 requires is 1.50 Amp. This is why the inverter's overheat is being triggered and it cuts power to your APAP; too much current is being demanded by the unit for the inverter's circuitry to handle.
I recommend following Resmed's Battery Guide using stand-alone, deep-cycle batteries.
I take my AirSense 10 camping and I recently purchased the following items, totaling to $205.56
12V 35AH batteries ship factory-charged. If used with tube heating and humidification switched off, and maximum IPAP pressure of 16 cm H2O then a single battery will last you for two 8-hour nights. See Page 7 of Resmed's Battery Guide for details of power consumption if using any of the heat settings.
I hope this helps. Feel free to ask me questions.
Factory cross rails and rola rack from Amazon.
ROLA 59504 V-Tex Rooftop Cargo Basket https://www.amazon.com/dp/B004R34HDC/ref=cm_sw_r_cp_apa_1P5xzb7FHK3VA
Rail dust from transport is very common on new cars and may or may not shot up as small orange specs. It can be removed with a clay bar as suggested, but whenever possible it's best to avoid physical contact with the paint. So in this case a chemical decon such as IronX would be your best bet. And a bonus, it has a unique smell.
IronX will help with the removal of any Iron product on your wheels.
and some tools:
well then everyone else is SCREWED. mwahahaha
and I can wrap my tires and headers with this stuff right?
Just saw this stuff recently at an autozone, maybe it'll help for future guns. Love your work! http://www.amazon.com/3M-Scotchprint-Carbon-Fiber-Vinyl/dp/B0058DIDTY
RR racing has a chip that came out last summer that adds like 15 horsepower (so they claim) that costs $350. Also, I love my K&N cold air intake on my 350, it's a throaty growl when you step on it and it supposedly added 12 horses. The intake system also improved mpg +2 on the highway. I also replaced all interior lights with LED's myself with a kit I found on eBay, very nice bright white light, it replaces side door lights and trunk lights too. Ummm I replaced my gear shift knob with a Lexus certified F Sport shifter and I also carbon fiber vinyl wrapped the door trim on my F-Sport. Also went with 15% tint. The only two things I want to do on mine is to powder coat my brake calipers F Sport blue and add a full catback exhaust.
Links:
Lexus F-Sport PTR51-53080 Shift Knob https://www.amazon.com/dp/B00CBR5D16/ref=cm_sw_r_cp_api_ECDfzbMZH3GD4
3M 1080 CF12 BLACK CARBON FIBER 60"x12" Vinyl Flex Wrap https://www.amazon.com/dp/B0058DIDTY/ref=cm_sw_r_cp_api_bDDfzbP2R0MC3
LEDpartsNow Lexus IS250 IS350 ISF 2006-2013 Xenon White Premium LED Interior Lights Package Kit (10 Pieces) https://www.amazon.com/dp/B00HRMSXWQ/ref=cm_sw_r_cp_api_xDDfzb3B2AYG1
K&N 69-8701TP Typhoon; Short Ram; Polished https://www.amazon.com/dp/B000NKCM3A/ref=cm_sw_r_cp_api_.DDfzb9NA8CTV
https://www.rr-racing.com/v/mobile/product.asp?productid=is350tne01
http://www.modinjapan.com/pts-joe-z/pts-isx-full.html
3m stuff is the best and it comes in all sorts of colors and patterns (carbon fiber or wood). Installing it yourself isn't too bad. You can watch a video on youtube for it.
example of product:
https://www.amazon.com/3M-CF12-BLACK-CARBON-FIBER/dp/B0058DIDTY
Not OP, but it looks like this stuff: 3M Scotchprint 1080 Carbon Fiber Vinyl Flex Wrap
If it's peel and stick its definitely not carbon fiber. It'll be some sort of weaved plastic with an adhesive backing similar to duct tape. 3m makes something like this, alot of people will wrap interior trim pieces in their cars with this because the weave makes it look like carbon fiber. Personally, i think it looks alright, but i also have fairly extensive carbon fiber experience, so my view is probably skewed from the norm.
No matter if you do the peel and stick or do carbon fiber you're gonna have some issues not getting wrinkles and air bubbles due to the shape. My suggestion would be cut out a front piece, a back piece, and a strip that runs along the edge. This will make everything much smoother, but there will be a seam.
If you want real carbon fiber....fair warning it will not come out looking as good as you hope. To get that deep clear coat looking surface that carbon is layed up against a polished steel mold of that surface so that the resin is perfectly smooth and clear. Without a mold like that it'll never looks as good.
What you could try is wrapping the bass in carbon and pouring the resin over it. Then polish and add clear coats until it looks good. If you're going to do this make sure you practice a few times first, once that resin sets you're never getting the carbon off.
Tl:dr - If you don't like the color of your bass my suggestion is to sand it down and repaint it.
Edit: here's the 3M stuff http://www.amazon.com/gp/aw/d/B0058DIDTY/ref=pd_aw_sim_263_2?ie=UTF8&dpID=41cKvFFtiKL&dpSrc=sims&preST=_AC_UL100_SR100%2C100_&refRID=1E55DSZAWGXQZYB7AJAK
I'd use this instead.
https://www.amazon.com/dp/B00A8MZ7IA/
Chemical Guys MIC_506_12 Professional Grade Premium Microfiber Towels, Gold (16 in. x 16 in.) (Pack of 12)
$12.89 after 20% off coupon and Subscribe and Save.
​
These chemical guys
Are these any good?
http://www.amazon.com/gp/aw/d/B00A8MZ7IA/ref=mp_s_a_1_1?qid=1382664326&sr=8-1&pi=AC_SX110_SY165_QL70
I have a Amazon giftcard n I am trying to use....that's why I am posting amazon links
https://www.amazon.com/FreeKey-2825-System/dp/B00AQ664H6/ref=sr_1_1?ie=UTF8&qid=1483208822&sr=8-1&keywords=freekey
This is what you want.
Wallet $15 - big skinny
knife $10 - Gerber EAB
keychain $7.50 freekey
suspension clip $5 - tec p7 ripoff
Light - I don't have a good one for this yet. Can someone recommend a small AAA light with a power button (vs twist)? I have a twist one and it kept getting turned on in my pocket.
Here's one.
Nice work, this is like a bigger, better version of my light with 1' Q strips and a mix of spectrum. I also oversized mine some, 150 watts total in a 2'x2', and have it so I can turn on and off each group. I'm using just regular switches for the groups and I have to adjust the pot manually to keep the power where I wanted it using one of these to measure. Did you go a more advanced route? I'm working on upgrading and controlling everything via an arduino and using relays to turn the light groups on/off and for autowatering and a digital potentiometer for the % power.
I finished one grow with my light at full power in flower, but ~40 watts are side lighting, 10 watts per corner. My light is only around 10"-12" from the tops, and the side lights are only a few inches away. I didn't see any big advantage to the side light, I'm not sure if I'm going to keep them, but I'm using them again this grow. Maybe I'll move 2 up top and keep 2 low and see what the different sides look like.
I'm curious to try to learn more about if this is wasted energy and if so, how to tell
You're most welcome! I bought the following:
4x100W Panels
Panel Mounting
Solar Panel Connectors
Tool Crimper
Assembly Tool
Panel Connectors
Power Information
CTEK Charger
CTEK SmartPass
200ah AMG Battery
Fuse Block
300W Pure Sine Wave Inverter
LED Strip
Dometic 35 Fridge
I bought all these items with research into my solar needs and following the advice from here in the vandwelling subreddit and also information I gathered from Amazon. I am probably doing a bit of overkill on my solar setup but I thankfully have the money to do it and don't want to mess with adding anything later.
I will have to do research myself on how to combine the four panels into the battery but that will be a few weeks away so I haven't done much in that area. I do plan to buy 10GA wire from Lowes and use the crimping tool and connectors to form my own wiring harness so it will be clean looking. \
EDIT: Adding info.
Ran an electrical system in my Subaru with an auxiliary battery charged off the alternator.
80 Amp isolator relay (switches charging on while car is running):
https://www.amazon.com/Stinger-SGP38-80-AMP-Battery-Isolator/dp/B001HC6UJ0
100AH 12V AGM battery: https://www.amazon.com/Universal-UB121000-45978-100AH-Cycle-Battery/dp/B00S1RT58C
2Ga Wire running the length from the Relay in the engine bay to the battery.
Kinda Extra things:
Kill Switch: https://www.amazon.com/Ampper-Battery-Switch-12-Disconnect/dp/B07413JWLD
100A inline Fuse
Multimeter (read current voltage, Amperage, etc): www.amazon.com/bayite-6-5-100V-Display-Multimeter-Voltmeter/dp/B013PKYILS/
This and the cheap Torque app will save you a few trips to the dealer in the future.
This is the one I have: https://www.amazon.com/gp/product/B01BY2CK32
I just ordered one last week, along with a free app like Torque Lite and you can read and reset your light codes. Most auto parts stores will read it for you, but they aren't allowed to clear the code. I have found that a vast majority of my codes were caused by loose gas caps.
https://smile.amazon.com/gp/product/B01BY2CK32/ref=od_aui_detailpages00?ie=UTF8&psc=1
https://www.amazon.com/License-Plate-Adapter-Kit-Subaru/dp/B01EKVUJC8
quick google for 'wrx front license plate adapter' turned that up on Amazon. Looks like it should work
Never-Dull
To add to this:
Ultrafire Cree XML T6 LED Zoomable 5 Mode Flashlight Torch Lamp Zoom (Black)
Micro Sport Cord 1.18mm X 125 Ft Small Spool Lightweight Braided Cord
4pc Medium Size / MEDICAL ALERT - FIRST AID container PILL CASE Set - Key Chain - Water Resistant
resqme The Original Keychain Car Escape Tool, Made in USA (Blue)
Zak Tool Universal Handcuff Key Ring Holder Belt Clip (Various Models)
Gerber 22-41770 Artifact Pocket Keychain Tool
Pocket Ref 4th Edition [Paperback]
If it's polycarbonate, you're not going to be able to do anything with a glass breaker tool. You'd need a saw of some kind - preferably a rotary saw or chain saw with a carbide blade. They're damn hard to break and you're better off trying to find other exits. See here: Forcible Entry
Volunteer firefighter here, I have the Victorinox Rescue Knife which is great for automotive rescue.
Otherwise, the ResQMe tool is handy, cheap, and easy to use.
I second this. Here is the amazon link. It's a keychain seat belt cutting tool, AND most importantly, has a spring loaded pin for window breaking. The razor is very sharp, and the steel pin is reliable. It may not have a bottle opener, but it's a damn good car opener, ya know. :P :)
That little gimmick tool will have a hard time breaking a window. It tip is just a pointed stainless end. I would find it shocking it it breaks through the front laminated or even the side tempered glass.. heck even a glass cup...
That said if you really want something for safety and function you cant skimp and get something cheap.
The resqme will be your cheapest best bet.
You can always opt for a pocket knife that has a good tip on the end designed for breaking glass.
Check last week's thread on this. In short, read the reviews on Amazon. They are not good. I would stay away.
Second, do not waste your money on a lithium jump starter. Again, check the reviews - don't just look at the star rating, but read them. They fail quickly and often dangerously. NOCOs are especially notorious for the charging circuitry blowing itself up and not working anymore only a few months after purchase. And that's the leading brand for the market... you want to carry a Chinese Taobao special lithium battery in your trunk all the time?
Finally, to answer your question, if the car's battery is totally dead, no, probably not reliably. The CVPI's starter draws around 200 amps. This battery will not be able to supply that reliably. The 600 peak amp rating is total marketing wank and means basically nothing. The 300 starting amp rating is only for 32° F or above for 5 seconds when the battery is brand new and fully charged. Your typical car battery is rated in cold cranking amps, which is measured at 0° F for 30 seconds. A CVPI's starter may only draw 200 amps, but most car batteries you find for the CVPI will be 500-1000 cold cranking amps.
I would look at one of these. Even the higher-spec Stanley units have bad reviews across the board.
out of all the camping fests ive went to over the years, forest is the most on-top of their porter poties. i schedule my bowl-movements with the clean-up crew (last year, 8am and then 5pm. judge me) at camp and in the forest, there are some nicer porter potties near sherwood court that had AC and lights, but in the venue only/VIP. as for electricity, get a portable external like [this] (https://smile.amazon.com/dp/B000JFJLP6/ref=psdc_318336011_t1_B000JFHNQA) and for lights, just make sure it runs on AA batteries, such as [this] (https://smile.amazon.com/Outdoor-Battery-Operated-dimmable-Waterproof/dp/B01AWG1SLG/ref=sr_1_4?s=home-garden&amp;ie=UTF8&amp;qid=1494260079&amp;sr=1-4&amp;keywords=battery+powered+lights). remember, it is only 4 days so you'll be able to take as many hot showers/eat as much good food you want after the fact <3
> https://www.amazon.com/gp/aw/d/B000JFJLP6/ref=mp_s_a_1_1?ie=UTF8&amp;qid=1484856498&amp;sr=8-1&amp;pi=AC_SX236_SY340_QL65&amp;keywords=clore+jump+starter
My 2000 Dakota ate batteries like they were fucking candy at Halloween. I could count on replacing it every three years. But, that was the only thing that ever went wrong in 15 years of ownership (and one heater core at 150,000 miles). Other than regular maintenance I had no expenses. Wish I hadn't upgraded.
As far as actual spare parts.... fuses. As far as important travel stuff, well all the normal goodies plus I like to carry one of those portable battery jump packs for cars. But I spent $$$ on a decent one, not the crap at Walmart.
http://www.amazon.com/gp/product/B000JFJLP6?psc=1&amp;redirect=true&amp;ref_=oh_aui_search_detailpage
I've had good success with this stuff when I've gotten paint scuffs. Should be able to get most of it off with that, and depending on how badly you rubbed against it, some touch up paint might be needed.
If you have enough coat built up, sand with 400, 800, and maybe 1500. Then use a buffing compound with some water and a pad on a ROS sander. If that doesn't add a glossy finish...Idk what will.
Wow. I should get into paint correction. <$250 for all the tools and polish and waxes. As a car guy, I don't mind waxing my car every 6 months (or 4 months if you're in the frigid north or are anal). I also feel it's foolish to drop $2k-4k on these nano-quartz-bullshit schemes that a lot of car guys swear by nowadays. If you want to drop $4k on paint protection, go for it, but I can get a full window-out repaint for the same price!
Here's what I learned:
Buy the equipment:
https://www.amazon.com/PORTER-CABLE-7424XP-6-Inch-Variable-Speed-Polisher/dp/B002654I46
https://www.amazon.com/Dual-Action-Hook-Flexible-Backing-Plate/dp/B0008G1RDK
https://www.costco.com/Kirkland-Signature-Microfiber-Towel-Case%2C-324-count.product.100341124.html
https://www.amazon.com/Collinite-Liquid-Insulator-Wax-845/dp/B000JK2D06
http://www.autogeek.net/lake-country-beveled-pad-kit.html (MIN: 2 orange, 2 white, 1 black, 1 blue -- I prefer doubling this order; Autogeek almost always has 10-25% off coupons on their mailing list)
You will also need an extension wire with the appropriate gauge (too thin/cheap cables might cause you to burn your Porter Cable motor!)
Buy the compounds (start with UC; if swirls aren't getting cut, move up to 50%/50% UC and 105 on the pads; finish with 205 regardless):
https://www.amazon.com/Meguiars-G17216-Ultimate-Compound-15-2/dp/B001O7PNNM (medium aggressive)
https://www.amazon.com/Meguiars-Mirror-Glaze-Ultra-Cut-Compound/dp/B003LMGDHI (most aggressive)
https://www.amazon.com/Meguiars-Mirror-Glaze-Finishing-Polish/dp/B001O7PNXC
Wash your car with this, and the two-bucket method:
https://www.amazon.com/Meguiars-G7164-Class-Shampoo-Conditioner/dp/B0009IQXFO
https://www.amazon.com/Zwipes-Chenille-Microfiber-Premium-Scratch-Free/dp/B002J7KCOG
Claybar the car:
https://www.amazon.com/YGDZ-Quality-Detailing-Claybar-Shipping/dp/B01MF4BVVS
It took me about 5-6 relaxed hours on a Sunday with a few beers for the full correction. Now I simply top up the wax every few months (and that only takes 30 min).
The thing is, once you do the full correction and get rid of all your swirls and scuffs and whatever clearcoat damage (wash + claybar + M105/UC + M205 + wax), then you don't have to do the FULL correction ever again.
Ever again meaning, if you wash the car properly thereafter with the two-bucket method. You'll simply need to top up the wax once it stops beading -- the wax will protect the clearcoat from damage and swirls.
My wax lasted 6+ months being daily driven in the California sun with three coats of Collinite 845 -- I assume if yours will see more snow and ice and rain, perhaps it'll only last 3-4 months. But since a bottle costs <$20 and you'll get at least 36+ layers out of it, I always recommend this versus the "nano coatings" that people are shelling out $2-4k for.
Here's the Collinite fanboy thread:
https://www.autogeekonline.net/forum/how-articles/40243-collinite-845-definitive-how-guide-legendary-wax.html
Any other questions, feel free to ask. Good luck!
This is the one I went with:
http://www.amazon.com/dp/B003CH3Z8W/ref=cm_sw_r_udp_awd_EFqiub0TTBDWG
I have had it on for a year and it is holding up great. The velcro is very strong and it holds well.
This Astro one is what I bought and it fits.
Amazon I don't have much experience but I think that it does the job. I haven't had any issues on the two projects I've used it on, so I think it's a safe bet.
Well, I'd first recommend you step down in pad size and get a different backing plate. There is a 5 inch backing plate on Amazon that you can use with the 5.5 inch pads. Secondly, I'm not a big fan of Griot's pads, and I'd get something else if you can, like Lake Country or Buff and Shine. They're just better quality to me.
You've got the sandpaper order mixed up. You go from smaller to bigger. You go with the more coarse(1500) then move to fine(2000). I'd find out the equivalent abrasiveness level of the steel wool you used to see if that grit will be able to pull out the scratches you put in. If it's the 0000 steel wool I think the equivalent is 600-800 grit sandpaper from all the Google-Fu I just did.
EDIT - I just put together a cart for you on Autopia - GG6, 5 inch backing plate, Microfiber pad, Polishing Pad, Optimum No Rinse(ridiculously useful for EVERYTHING), Speedy Sponge Medium/Fine Grade Pack, M105 32 oz, M205 32 oz, D101 and it's at $240 with our Reddit Coupon code. You need more than 1 of each pad, but it gives you an idea of the savings you can get. Ray(/u/autopiavega) will hook you up if you talk to him and he'll get you what you need at a better price than you're looking at now. You'd have plenty of product and if you get the hang of things you can do a couple other cars and make your money back once you're practiced.
Waxing is simple. There are a ton of products these days that won't require much work to keep your car protected. The easiest are the spray waxes. Use after you wash once a month(or more) and you'll be nice an protected. If you need some paint correction (i.e. polishing) and you aren't comfortable with it, you will have to spend a couple hundred if you want someone to do a good job and not actually damage the paint. Be careful of the "FUll Detail" for under $100 guys. If correction is what you need, I can suggest Odds and Ends Detailing in Sterling. If that is too far out from where you are, you might want to give them a call and ask if they can recommend someone closer. The owner is a very nice guy.
&#x200B;
Some general tips on keeping your car looking good.
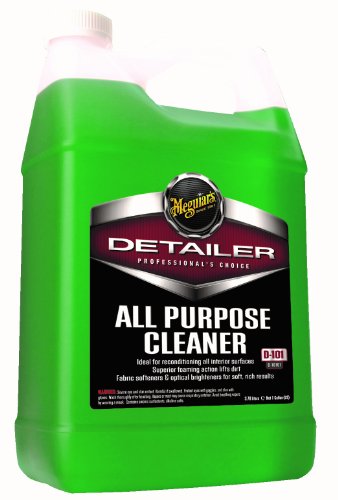
I have never used tuff stuff, but I have had good success with Meguairs APC
https://www.amazon.com/Meguiars-D10101-Detailer-Purpose-Cleaner/dp/B0006SH4GE/ref=sr_1_1?ie=UTF8&amp;qid=1469057081&amp;sr=8-1&amp;keywords=d101
Another decent one is 303 multi surface cleaner/303 spot cleaner.
http://www.detailedimage.com/303-M2/Cleaner-Spot-Remover-P15/32-oz-S1/
The process is pretty much the same regardless of which cleaner, You spray it on, agitate it, then blot with a microfiber towel.
If that doesn't work you could try using a steam cleaner
Highly recommend a gallon of Megs APC. It's cheap and it will last forever. It's great for tires/wheels, exhaust tips, engine bay, interior, etc.
Also, remember to cancel the Prime trial before it ends if you don't want to keep it. They automatically charge you at the end of the trial.
Nice ride. I myself have a 2015 Mazda 3 GT. I use Lexol for cleaning and conditiong (protecting) leather. Just use some TRC microfiber towels to clean the leather and the rest of the interior. For the dash, I just use Meguiar's Quik Interior Detailer and D101 APC. It doesn't leave a shiny residue on the dash. I use those two for almost everything on the interior.
Meguiar's APC seems to be everyone's favorite around here.
Meguiar's D101 is a really cost effective and solid product that can be diluted to interior and exterior concentrations.
Chemical Guys AllClean+ is another good option that can be diluted to interior and exterior concentrations, it also has a light almost fruity smell that I like. Some folks in /r/autodetailing have cooled a bit on Chemical Guys due to their ridiculous marketing and occasionally questionable customer service, but AllClean+ is a pretty solid product.
Ultima Interior Shampoo Gel is a nice, not dilutable product that smells amazing and does a great job on a lot of surfaces. It is less cost effective than the other 2 options but if you arent doing cars in bulk, its a good product.
The answer to your first question of what makes vehicles "have that glorious-mirror almost appearance" is paint correction. There is no miracle product that will instantly turn shitty paint into 100% flawlessness in 1 application. It will take good claying, compounding, and polishing to get the results you are looking for. I'm sure that the clay, HF DA, M105 and M205, and the various pads you have will be able to get the results you are looking for. The only problem is time. It is going to take more time to get the results because the HF DA is not powerful, when compared to something like the Rupes or the Flex.
Carnauba waxes. The consensus is that they add depth and shine, but don't last long. Sealants last longer, but with less shine and depth. Both sealants and carnauba waxes will make shitty paint look less shitty, with carnauba slightly edging out sealants. But like previously stated, its all about the prep work. Sealant on flawless paint will still look better than carnauba wax over sealant on shitty paint.
Glazes. The sole purpose of glaze is to fill in scratches. No amount or type of glaze will replace correcting paint. It is unnecessary to put glaze immediately after a vehicle just had paint correction as there are no scratches for the glaze to fill in. However, sometimes it makes sense to glaze and not correct the paint. Generally, the two situations where glaze is better than correcting paint are when you don't have enough time to correct the vehicle, or the customer does not have the funds to correct the vehicle. Correcting paint takes hours and hours, while glaze (depending on vehicle size) may take up to an hour to apply and remove. Obviously, paint correction costs more than an application of glaze.
Spray on wax compared to Collinite #845 is like comparing pee wee football to the NFL. Even a shitty application of Collinite that is 4 months old will still be better than spray on wax. That said, I think it is still good to use spray wax after washing the vehicle.
One thing I didn't see you mention is wheels, tires, and trim. You also want to spend great care on these three areas because they create contrast with the paint, thus making the paint look even better. Essentially, you want all aspects of the wheel clean (face, spokes, barrel). You want the tire to be scrubbed with cleaner and then dressed with a water based dressing. You then want to clean the trim with all purpose cleaner and use either dressing or a trim restorer to give it the original look. Good wheel cleaner: Sonax Good APC for tires and trim:Meguair's D101 Good tire dressing: Adam's Super VRT
Anything I have said here is open for constructive discussion.
TL;DR Correcting paint is above everything. Glazes mostly unnecessary. Both sealants and carnauba waxes have their purposes. Look into cleaning and dressing wheels, tires, and trim.
I'm fairly new, myself. I've driven clunkers most of my life. Spent about five years downtown where I didn't have a car. Now I'm back in suburbia, so I've got a brand new GTI, and it's the first one I've ever cared to take good care of. Here's what I started with:
I should have picked up some of Chemical Guys' citrus wash and clear, too, to help deal with a winter's worth of grime left by terrible touchless car washes. I've also got a tire brush, hand vacuum, and some assorted cheap microfiber towels around already.
Your kit looks a lot more cost-effective, though. Throw in some cheap buckets, grit guards, wash mitts, and drying towel, and an extra stack of cheap microfibers and you're still under $100 for practically everything you would need for a proper two-bucket wash and wax.
Best polish product ever
Completely removes any stains and tarnishes, and leaves a sparkling shine with absolutely zero abrasion. This container has lasted me for over a year. Just rip a little off and rub away!
http://www.amazon.com/Eagle-One-1035605-Nevr-Dull-Wadding/dp/B000CNBI1A
You can get this stuff at Walmart/Autozone. I've been using it for 10+ years.
If you want to make it shiny as can be, you might hit the body with some Nevr-Dull.
i use never dull. they sell it at any autoparts store. it works great.
http://www.amazon.com/Eagle-One-1035605-Nevr-Dull-Wadding/dp/B000CNBI1A/ref=sr_1_3?ie=UTF8&amp;qid=1464995628&amp;sr=8-3&amp;keywords=never+dull
NEVR-DULL can be found in the car care section of walmart, or autoparts stores
This? http://www.amazon.com/Eagle-One-1035605-Nevr-Dull-Wadding/dp/B000CNBI1A/ref=cm_cr_pr_product_top
Eagle One E301131001 Original Nevr-Dull Wadding Polish for all Metals, 5 oz. https://www.amazon.com/dp/B000CNBI1A?ref=yo_pop_ma_swf
It looks like the rust ate through the plating so it'll take a bit of effort to make it look like new. You could use a rust remover like whink then an all purpose metal polish like eagle one never dull to make it spiffy.
You just need to polish the frets. And change those strings. Yikes. :)
Get some Eagle One Nevr-Dull from your local auto parts store. I picked some up from PepBoys recently.
Put tape on the fretboard right up to the edge of the frets to protect the wood. Then scrub the frets with Nevr-Dull. Rinse and repeat.
Once you're done, remove the frets and wipe down the fretboard with a clean cloth and naptha. You just want to get any loose bits and gunk off.
Put some graphite in the nut and saddle slots.
Toss a little bit of mineral oil on the fretboard and restring that puppy.
Like the title says, between my final semester of college, moving and starting a new job, I haven't had the time to give my KM a good cleaning. For those interested in the process, here goes:
I started by disassembling the entire thing. The coal tray, grommets and any other removable pieces got a bath in hot water and dish soap. The stem was scrubbed with a brush soaked in the soapy water, and left to soak for a few minutes. The soap worked to loosen any built up grease and other shit inside. If you've never done this, do it, its disgusting the stuff that comes out. After the good soak, I ran water down the stem and passed some paper towels through. If you've ever cleaned a gun, its basically the same thing. The base got a good soaking in plain old hot water and was scrubbed inside with a brush and wiped clean on the outside. I don't recommend the soap on the base as its a bitch to get out.
For the actual polishing, I used Eagle One Never Dull (http://amzn.com/B000CNBI1A). Lay down a towel, grab a wad and get to work. I like to rest the bottom of the stem on my foot and spin the whole stem while I hold the wadding to it. As you work, the wadding will turn gray as it removes the tarnishing. As it gets grayer or starts falling apart, just grab some more. Once you've hit the whole thing, repeat the process but with a dry microfiber towel. At this point, you're done, or you can continue repeating the process until you're satisfied! This stuff is fairly harsh, so don't use it in a poorly vented room and I recommend washing your hands thoroughly when you're done.
Enjoy!
Don't screw with the airbags. I used an "add-a-fuse" on my ACC circuit.
you could rewire the 12v outlet so that it pulls power from a fuse in your fusebox that's only powered when the ignition is on. You can buy little adapters that let you piggy-back fuses. this
Buy one of these (or something similar) and hard-wire the radar detector into your fuse box.
I used an "add-a-fuse" kit like this: https://www.amazon.com/Bussmann-BP-HHH-ATM-Add-A-Fuse/dp/B000GKEXK2
and used it on the ignition fuse. Now whenever I start my car my radar detector turns on automatically. I imagine the same could be done with a dashcam or whatever. It was super easy. I've been wanting a dashcam though and I'd probably be able to put it onto the same circuit.
As someone with soldering skills, I would just install a supercapacitor on the power lead to power the camera for the few seconds the car is cranking.
However, if you don't have those types of skills, you could hardwire your cam to an ignition hot supply instead of accessory hot supply like it is now. What you'll need is a fuse panel tap like this one to tap into a source of ignition hot at the fuse panel, and a USB hardwire kit like this one to supply the 5V needed by the cam. Then a long enough USB cable to reach from the fuse box to the cam.
Anyone with an hour or two to spare and a crimper can do this easily. If however you aren't comfortable doing this yourself, a local audio shop should be able to install this for you very easily.
Sub amp? Hook the Pac up to the rear speaker wires and run your remote line to the fuse bloch with an add-a-fuse. Getting the power cable through the firewall can be a pain. You can run it under the car if you are very cautious with routing and protection. Be sure to read about gains and crossovers.
Add-A-Fuse. Install it in your fuse box in place of a switched ≤30amp fuse on a 12v line(radio, cigarette lighter, etc.), and you can run that fuse, as well as a ≤10amp fuse off of it. Wire the positive from the dashcam to the add-a-fuse, and ground it to the frame (either a nearby bolt on bare metal, or the bolt that the fuse box is grounded to).
There are ways to tie into the fuse box inside the cab. Depending on the options you have, you may or may not have an open circuit there.
Something like this: http://www.amazon.com/gp/aw/d/B000GKEXK2
I'm going to be doing some poking around tonight and see what I can come up with as my final solution. You'll probably see some more comments from me in your inbox later. :)
Also, is there any reason not to use these types of connectors when I splice that speaker wire in? Or do you have a better recommendation?
And I did find the fuse on the fusebox which appears to already be wired for "Subwoofer" from the factory. It's a 20 and I tested it last night and it is hot when the key is on, and not when the key is off. I was seriosuly considering just getting something like this and wiring the remote line in there. It seems like that would be the easiest option. I'm planning on probably mounting this under the passenger seat and running the power and remote lines up that passenger side...so I'll be right there at the fusebox anyways.
Sorry to ask so many questions, I just really don't want to fuck this up, and I want it done right. I'm sure I could find a way to make it work if I fucked with it enough, but I'd rather acknowledge my ignorance and seek help first BEFORE I'm in trouble instead of after. I'm leaving this all in the public comments (instead of PMs) so I can at least give you some karma...and maybe someone else with similar questions might be able to learn from my ignorance.
ZOMG We Need this! Because fucking SAFETY, woman! I do have this on my wishlist, tho it's in orange. I chose orange because it's much easier to see, which would be useful in an emergency.
And oooo, I see you have Beyond Snapshots in your book list. That was an extremely helpful book when I was just starting out. Very good choice! And I just wanna add, I picked up a set of Calvin and Hobbes today for 10¢, can you believe it!? Thrift stores are awesome.
Enjoy your movie :P
Have you considered a resqme?
http://www.amazon.com/resqme-Original-Keychain-Escape-Tool/dp/B000IDYKNC
Seat belt cutter and window breaker in a small package. Its no bigger than my thump... and Im a girl with small hands.
http://www.amazon.com/ResQMe-Escape-Tool-Made-Royal/dp/B000IDYKNC
These are really nice if you're ever in or around bad accident.
Its nice to have a seat belt cutter and glass breaker handy. I keep a Rescue me on my keyring so I can carry any pocket knife I want. Just wanted to give you an additional option.
http://www.amazon.com/resqme-Original-Keychain-Escape-Tool/dp/B000IDYKNC
They make keychains for this reason. Contains a seatbelt slicer and a window breaker!
Hey all, a keychain tool that smashes car windows open in emergencies!
Not a knife, but you should check out ResQme. I considered a rescue knife fir a while too, but found these. For something that's hopefully never going to be used it's more economical ($10!) and just as useful. I tested both the glass breaker and seatbelt cutter and
both functioned great.
http://www.amazon.com/gp/aw/d/B000IDYKNC
A typical (small) car battery will have at least 60 Ah of capacity at 12V nominal, meaning the battery has about 720 Watt-hours of capacity. An existing phone charger which is significantly larger than the magic plastic box has 15 Ah of capacity at 3.7 volts, or about 56 watt-hours of capacity (7.8% of the car battery).
Now let’s talk about boost converters, they will need to boost the internal voltage to about 13 volts to charge the car battery. Something like this 5-amp converter would work. Not only does this take up space but it is expensive, higher currents cost even more and will require fans or large heatsinks to prevent them from burning up. This converter states about a 90% efficiency for a 60W output; This will give us an 7.0% charge of the car battery and will take about 50 minutes to do it.
Not to mention most cars require the ignition to be on or in accessory mode to power the cigarette outlets, the ignition may draw upwards of 20 watts while the accessory mode will likely draw 5-10 watts, significantly reducing your battery charge.
Realistically for the size they show it will probably have about half the capacity of the existing charger I linked. Giving us about 30 watt-hours ( 4.2% of car battery) between this and losses in wires and parasitic draw you could expect about 2-3% charge, insignificant if your battery is actually low or dead.
TL;DR : Best case you could get about 7% charge on your car battery after an hour. If you like the idea get something like this instead, or better yet get one of these and a separate phone charger.
Bonus: This picture.
edit: changed picture link for a single picture instead of the massive combination one on the kickstarter.
We weren't using a second battery, we were using a battery box
Depends on how big you dont mind it being. The anker ones are good 600 and 400 amps and fit in a glove box. I personally have a jump n carry in my truck JNC660. It's large but I've used it dozens of times on my truck and 18 wheeler my generator cars tractors etc. Nothing has failed on it and I highly recommend it if the size isn't a bother.
I have an actual jump pack that I keep in my truck. It works awesome, never had a problem with it and can jump up to 15 times before it gets iffy if it will jump another. I've also jumped a big tuck engine (some international not sure what engine) with it but wouldn't recommend this one if that's what your doing. I charge it once every 6 months to be sure but it's usually around 80% either way.
If you were to get the one I have, I would recommend covers for the clips just in case, but other than that, It's very very dependable. I also use it to hook my inverter up for my stereo I bring everywhere.
http://www.amazon.com/dp/B000JFJLP6/ref=twister_B00D2HH1HI?_encoding=UTF8&amp;psc=1
The Weego seems decent, I'm just wary about not saying how many amps it provides and it may not work with a fully dead battery
I'm honestly a little shocked a shop would give you the car back like that. When I was detailing for a living, there were very few cars I detailed that I couldn't get all the water spots off of, but even those never looked as bad as that when I was done. I hope you didn't have to pay much for that.
Having said that, [Meguiar's Ultimate Compound] (https://www.amazon.com/Meguiars-G17216-Ultimate-Compound-15-2/dp/B001O7PNNM/) is what I would use. It's probably the most newbie friendly cutting compound that I've used, but there is still the chance of burning through the paint with it. I would probably go to another detail shop and see what they could do.
The first thing I would try is this:
Meguiar's Ultimate Compound
Meguiar's X3070 Soft Foam 4" Applicator Pads
Meguiar's X2020 Supreme Shine Microfiber Towels
All 3 of those together is under $20 (need to spend $25 since one is an add on item). This stuff is amazing for scratches and paint in general. While it won't make your car showroom ready, it will make it look much better and is totally worth the $20.
Essentially what you do is first make sure the area is clean, then apply the compound to the pad and rub the compound on your car using circular motions. After you do that for a minute or two, use the towel to remove the compound form the car.
WOW. That's a savings of $30. Thank-you.
This will complement the Meguiar's quick detailer I already have.
I've bought stuff off eBay before, but never Amazon. Am I buying from Amazon (store) or an individual?
EDIT: OMG. I've made a huge mistake Watch from 1:50 -2:00.
I've actually waxed my car atleast 3-4 times before the end of last year. Got my car painted (Pearl White) in summer of 2011.
EDIT 2: What is the difference: 7, 20 and 21
EDIT 3: Please note I have a Pearl White car.
EDIT 4: Haha sorry bud. I just realized how frustrating it must be trying to explain it someone inexperienced like me. I thank you for your patience.
hey thanks for the advice i took into consideration what you suggested and ended with this stuff,
http://www.ebay.com/itm/170694956256?ssPageName=STRK:MEWAX:IT&amp;_trksid=p3984.m1423.l2649
http://www.ebay.com/itm/190381853105?ssPageName=STRK:MEWAX:IT&amp;_trksid=p3984.m1423.l2649
and maybe this?
http://www.amazon.com/Meguiars-Ultimate-Polish-16-oz/dp/B004HCOE8Q/ref=pd_bxgy_auto_text_y
http://www.amazon.com/Meguiars-G17216-Ultimate-Compound/dp/B001O7PNNM/ref=pd_bxgy_auto_text_y
This + a buffer has worked wonders for me:
https://www.amazon.com/Meguiars-G17216-Ultimate-Compound-15-2/dp/B001O7PNNM
It says it "Fills and hides scratches, swirl marks and spiderwebbing" meaning once the polish evaporates (from sun exposure eventually) the swirls will re-appear, it doesn't seem to be a permanent cure.
I.e. to REMOVE the swirls you will need to use an abrasive enough compound to remove enough clear coat to get to the base of the swirls. For super-light swirls Meguiars Ultimate Compound shouldwork, even by hand, but if they are significant swirls, use Meguiars swirl remover with a polisher and light pad.
Maybe try using a very light cutting Polish or Compound and buffing it out with a Dual action buffer.
Yes, I can attest to Meguiers ultimate solution. It works wonders on your clearcoat after a rough winter. My paint is now baby-ass smooth.
Link:
http://www.amazon.com/gp/aw/d/B001O7PNNM/ref=mp_s_a_1_1?qid=1426609971&amp;sr=8-1&amp;keywords=meguiars+ultimate&amp;pi=AC_SY200_QL40
I'm trying to keep the other products on Amazon. I'm doing this all on Saturday and I have Prime, so might as well use it.
Would this work? http://www.amazon.com/Astro-Pneumatic-4607-Velcro-Backing/dp/B003CH3Z8W/ref=sr_1_13?ie=UTF8&amp;qid=1395241399&amp;sr=8-13&amp;keywords=5%27%27+polishing+pads
You can totally DIY paint correct with a dual action polisher.
Here’s a straightforward shopping list and guide. This will knock out most if not all of your swirl marks.
Shopping List:
Machine Polisher - PORTER-CABLE Variable Speed Polisher, 6-Inch (7424XP) https://www.amazon.com/dp/B002654I46/ref=cm_sw_r_cp_api_i_l7SADbKPP1Q6Q
Backing Pad - Astro 4607 5" PU Velcro Backing Pad https://www.amazon.com/dp/B003CH3Z8W/ref=cm_sw_r_cp_api_i_T7SADbZ187WK1
Bugging Pads - Chemical Guys HEX_3KIT_5 5.5" Buffing Pad Sampler Kit (4 Items), 16. Fluid_Ounces, 4 Pack https://www.amazon.com/dp/B01J588UNG/ref=cm_sw_r_cp_api_i_d9SADb8WF470V
Compound - Meguiar's G17220 Ultimate Compound, 20 oz https://www.amazon.com/dp/B06W5HCZ9M/ref=cm_sw_r_cp_api_i_M9SADb0ADEMZJ
Finishing Polish - Meguiar's M20532 Mirror Glaze Ultra Finishing Polish, 32 Fluid Ounces, 1 Pack https://www.amazon.com/dp/B001O7PNXC/ref=cm_sw_r_cp_api_i_i-SADbWXADMQT
Wax - Your preference
Here’s the guide:
1 – Tool Prep
Set aside the dual-action polisher, backing pad, and foam pads. Remove the included backing plate that’s already attached to the Porter Cable polisher, use the included wrench. Re-attached using the Astro pad, secure tightly.
2 – Wash
Wash your car by hand, preferably using the two-bucket method. Afterward, move the car into your garage or shaded area. You’ll want to be out of direct sunlight, keeping the paint as cool as possible.
3 – Clay Bar
Clay bar the entire car. Make sure to wipe down the finish afterward, keeping it as clean as possible.
4 – Compound Buffing
Grab your machine polisher, the Ultimate Compound, and the orange pad. Attach the pad to the polisher using the velcro backing, make sure it’s centered. Prime the pad by dabbing 8-10 dime-sized amounts across the surface. Start working one section at a time, around 2 x 2 feet. Before you turn on the polisher, press the pad against the paint. Compound polish should be soaked within the pad, along with the paint. Press the pad against the surface, set to speed setting 2-3, and begin spreading the compound around in quick passes. Then, turn it up to 5-6 and let the fun begin. Use overlapping, slow passes. Once you’re done, wide the area clean with a microfiber towel.
5 – Inspection
Check out your results of the first section. Go over the area again if most of the swirl marks aren’t gone. If the swirls are gone, but a light haze is present, don’t worry. The finishing polish will take care of it.
6 – Polish Buffing
Use the M205 Finishing Polish with the white pad. Follow the same steps from before. Prime the pad and rub it against the paint before turning on the polisher. Use a max speed of 3-4 with medium pressure. The Finishing Polish will take care of the rest of the haze and micro scratches. Once you’re finished with the first section, wipe clean.
7 – Inspection
Again, check out the results of the M205 Finishing Polish. It’s doubtful you’ll need more than one application, but double-check all the same. If it’s looking great, move on and finish the rest of your car.
8 – Wax
Your paint is looking great. The swirl marks are gone, leaving a bright clean finish. Apply the wax using the black foam pad. Use very light pressure, letting the pad float along with the paint. You’re just coating your car’s finish, that’s all. Wipe clean with a microfiber towel.
I would buy this DA:
http://www.amazon.com/PORTER-CABLE-7424XP-6-Inch-Variable-Speed-Polisher/dp/B002654I46/ref=sr_1_1?ie=UTF8&amp;qid=1407291588&amp;sr=8-1&amp;keywords=porter+cable+7424+xp
This backing plate:
http://www.amazon.com/Astro-Pneumatic-4607-Velcro-Backing/dp/B003CH3Z8W/ref=pd_bxgy_hi_img_y
3 of these:
http://www.amazon.com/Chemical-Guys-BUFX_102HEX5-Hex-Logic-Medium-Heavy/dp/B0040MI9H0/ref=pd_sim_hi_6?ie=UTF8&amp;refRID=0NJJRSFYV45X3EWAS3NA
2 of these:
http://www.amazon.com/Chemical-Guys-BUFX_104HEX5-Hex-Logic-Light-Medium/dp/B0041MVQ4M/ref=pd_sim_auto_1?ie=UTF8&amp;refRID=11TRQVZC789CNJ8EXED1
1 of these:
http://www.amazon.com/Chemical-Guys-BUFX_106HEX5-Hex-Logic-Finishing/dp/B0042TTIYO/ref=pd_sim_auto_2?ie=UTF8&amp;refRID=08HEKJEWM7H5NRFGAQNH
Pretty sure they are all compatible with the backing plate.
just get this: https://www.amazon.com/Astro-4607-Velcro-Backing-Pad/dp/B003CH3Z8W
A couple of notes I'll throw in, unless your car is heavily, and I mean HEAVILY contaminated, you shouldn't use the medium, you should use a fine. I bought an Astro 5inch backing pad on Amazon[https://www.amazon.com/Astro-4607-Velcro-Backing-Pad/dp/B003CH3Z8W/ref=pd_sim_263_5?_encoding=UTF8&amp;psc=1&amp;refRID=TXCWQPY3N4D5D1SA85JP]
Everyone has their own opinions on paint detailing. I don't mind spending a little time up front if the results are long-lasting. My approach has worked well on multiple cars in our family stable, both single stage (93 Mariner Blue Miata) and clear coat (95 Merlot Mica Miata) among others. I arrived at this list through research on /r/autodetailing and elsewhere in conjunction with my own trial and error.
I use a DA polisher from Harbor Freight. It is very effective and safer, in that it makes it more difficult for a non-professional to take off too much paint. Watch for sales or use a coupon and the cost isn't bad. Their polishing pads do not last so don't buy them. Plus the disc cuts into the foam--bad design. I bought a 5" disc instead and a set of pads separately. I read that 5" was better than 6" and so far, so good. Get a bunch of microfiber cloths also.
+1 for clay bar before you begin with polishing. Get a kit with detail spray and do that first. You'll be surprised how much stuff is actually on your paint that you can't see. Leaving that there can put grit into your polish work.
Meguiar's Ultimate Compound to start, using stiffer pad. Follow their directions.
Meguiar's Ultimate Polish next using a medium pad. This step might seem unnecessary but you'll see a difference before/after. This one wipes off before drying--see instructions. When done you should have a mirror-like finish.
Wolfgang Deep Gloss Paint Sealant for the last step. I LOVE this stuff. A little goes a long way. It comes off so easily, unlike some other sealants (like Klasse--OMG, it's a workout) yet it lasts. You can put it on with the DA polisher, softest pad, or by hand.
Note that I use the DA only for putting stuff ON, never for removing. This video is a bit annoying but shows a good method for removing/buffing.
Some people like to do an additional stage with wax. I haven't done that but maybe I'll try it someday. Seems like the benefit would be minimal compared to the work required.
Finally, a good car wash that won't strip your product. Never use dish detergent. If you do that, you shouldn't have to use the first compound again. Polish and sealant next year or end of season should keep you looking good.
Very last thing: take and post a photo of your work!
oh boy now you are getting in detailing! what your going to need is meguiars 205 finish polish, a DA polisher. and a lake country orange cutting pad and a backing pad (theres one that comes with the harbor freight one, but its considered trash)
https://www.harborfreight.com/6-in-57-amp-heavy-duty-dual-action-variable-speed-polisher-69924.html
https://www.amazon.com/Meguiars-Mirror-Glaze-Finishing-Polish/dp/B001O7PNXC?keywords=meguairs+205&amp;qid=1536994013&amp;sr=8-1&amp;ref=sr_1_1
https://www.amazon.com/gp/product/B003CH3Z8W/ref=oh_aui_detailpage_o05_s00?ie=UTF8&amp;psc=1
From my research, this is the one people recommend.
Haha whoops!
Here we go: Astro Pneumatic 4607 5" PU Velcro Backing Pad https://www.amazon.com/dp/B003CH3Z8W/ref=cm_sw_r_awd_JC2.ub12GYZ6D
https://www.amazon.com/dp/B003CH3Z8W/ref=cm_sw_r_awd_JC2.ub12GYZ6D
however, its perfect for 6.5" pads and this plate works well with the HF pads
http://www.amazon.com/gp/product/B003CH3Z8W/ref=oh_details_o00_s00_i00?ie=UTF8&amp;psc=1
heres a pic i took of it with HF 6" pads
http://i.imgur.com/SYid1BZ.jpg
I would reccomend these materials for the two bucket wash method. Its probably the most common method, and one of the safest. There are plenty of youtube how to's on this. These are the materials you'll need.
Not Necessarily essentials, but recommended.
I don't think you need anything like a DA at this point. Others will have recommendations for you, and I encourage you to take their advice as well. Some great youtube channels are Ammo NYC, Larry is a master at explaining how to's. He has is own line of products but they're expensive. You can even email him with questions and he'll respond quickly and go above and beyond to explain somethingto you. Junkman, also another great channel. Chemical Guys, they have some pretty good products but their customer service is shit. Their youtube videos are pretty good but all they do is upsell their products.
I'm fairly new to detailing like you. I dont have the best products, but what I use seems to work for me. There are better products out there but budgets can only be so large.
https://www.amazon.com/Microfiber-Cleaning-Absorbent-Detailing-green/dp/B00MQM0KB4
https://www.amazon.com/gp/aw/d/B003TTL0TE/ref=psdcmw_15718691_t2_B00MQM0KB4
https://www.amazon.com/gp/aw/d/B00BQYCKE8/ref=psdcmw_15718691_t1_B00MQM0KB4
https://www.amazon.com/gp/aw/d/B0128S0FS8/ref=mp_s_a_1_5?ie=UTF8&amp;qid=1491827279&amp;sr=8-5&amp;refinements=p_72%3A2661618011&amp;pi=AC_SX236_SY340_QL65&amp;keywords=clay+bar
And a M3 wax that I found on a local supermarket.
Touchless car washes don't do shit to clean your car. I spent about $8 on that useless machine, and there was still a layer of dirt on my front/rear bumper, side skirts, and grill. Best thing to do if you're on a budget is buy one of these [microfiber wash mitt] (http://www.amazon.com/Chemical-Guys-Chenille-Microfiber-Scratch-Free/dp/B003TTL0TE/ref=lp_3020674011_1_2?srs=3020674011&amp;ie=UTF8&amp;qid=1454030316&amp;sr=8-2) and the next time you head over to one of those self service car washes just pre-soak the car and the mit and scrub one panel at a time and rinse off the mitt with the pressure hose.
Edit : If you're not on a budget i would recommend doing the 2 bucket car wash method once a week or so. After about 4-6 months i would clay bar the vehicle and use ONR as a lubricant. There are many sealants out there, but only a few can last nearly 6 months. Chemical guys has some great sealants and waxes, but they have so many that it confuses the shit out of people. Save yourself the hassle and get some Jet Seal, some microfiber applicators and some microfiber towels and you're set.
Edit 2: Here is a list of tested waxes and sealants i found on the interwebs a few weeks back http://www.detailingworld.co.uk/forum/showthread.php?t=85205
These have been shown to have lasted more than 4 months
"Autoglym Extra Gloss Protection
Chemical Guys: M-Seal, Jetseal 109, Speed Amor
Klasse AIO and Sealant Glaze
Hi Temp Paste
Zaino AIO, Z2 and Z5
Wolfgang Deep Gloss Sealant."
Ryobi wand. https://www.amazon.com/dp/B00QMKHNM0/ref=cm_sw_r_cp_api_i_nN08Ab1AVTA48
Foam cannon. https://www.amazon.com/dp/B0798NQTQS/ref=cm_sw_r_cp_api_i_.N08AbJNV28Y7
Home Depot buckets. https://www.homedepot.com/p/The-Home-Depot-5-Gal-Homer-Bucket-05GLHD2/100087613
Wash mitt. https://www.amazon.com/dp/B003TTL0TE/ref=cm_sw_r_cp_api_i_IQ08Ab8VGZPNJ
Soap. https://www.amazon.com/dp/B00AFBXQNC/ref=cm_sw_r_cp_api_i_dS08AbSYF7T4H
Pressure washer. https://m.harborfreight.com/1750-psi-13-electric-pressure-washer-63255.html
Micro fiber rags/towel can be had at AutoZone or O'Reilly's. I suggest getting a pack with multiple colors and dedicate a color to windows, front of the car, above the belt line and below the belt line. Then a big microfiber drying towel or two. Somewhere around $20 for all that depending on where you go.
Also check out r/harborfreight for a coupon. 20% are pretty common.
Soap is lubrication it helps the dirt glide over the paint, where as if you had no soap you would just be pushing the dirt into the paint causing scratches. Also sponges are bad use a chenille wash mitt like this one
https://www.amazon.com/gp/aw/d/B003TTL0TE/ref=mp_s_a_1_1?ie=UTF8&amp;qid=1485112376&amp;sr=8-1&amp;pi=AC_SX236_SY340_QL65&amp;keywords=chemical+guys+wash+mitt&amp;dpPl=1&amp;dpID=5133hxCtSML&amp;ref=plSrch
If you need any other advice I'd be happy to help
And just think, some of the suds dripped off BEFORE I got this shot. Here are the links to the Foam Gun/Cannon and the soap:
Foam Gun/Cannon
Soap - Chemical Guys Honeydew Snow Foam
I also grabbed the mitt that was offered with it from Amazon.
I added some soap to the canister with the water to dilute it. I just poured in what I thought was good. My pressure washer is a gas powered Troy from Lowes rated at 2900 PSI.
Hope this helps you out.
I have quite a process now for this car.
I use the 2 bucket method with the following:
My Process
Extra stuff:
At first this took me almost 2 hours to wash my car, but after doing it every other week I'm now down to only an hour. It's extreme but it's detailed and allows me to also check if there are any rock chips, which I can then cover with some touch up paint.
I just looked back through my history, this is what I ordered..
https://www.amazon.ca/gp/product/B06XHDYTGL/
but it's no longer available in H11 (on the .CA site) but on .COM this seems to be available:
https://www.amazon.com/BEAMTECH-Headlight-8000Lumens-Extremely-Conversion/dp/B06XHDYTGL/ref=sr_1_4?keywords=beamtech+h11&amp;qid=1573045757&amp;sr=8-4
What I liked about these is that they were fan-less. They've been running for a year so far without issues or decrease in brightness.
If your headlights are in projector housings, you can get away with using *just* the right LED bulbs. The big concern is where, vertically, the cutoff is, so it doesn't blind other drivers (nor look like trash). I've had great luck with Beamtech's bulbs on Amazon [ LINK ] depending on the car I put them in. Again, gotta' have projector housings (which I think your car has, for DRL's), but these bulbs are oriented with the LED's at 3 & 9 o'clock when mounted, and cutoff at just the right height.
Straight swap. It’s also pretty easy to change the bulbs without tearing the entire front end apart. You just need to loosen the under hood fuse box and swing it a couple inches aside to fit your hand in there. The bulbs also have a positive/negative connection that isn’t marked, so if you put them in and they don’t work- just flip the plug. They look fantastic.
https://www.amazon.com/dp/B06XHDYTGL/ref=cm_sw_r_sms_c_api_i_YSBUCbTQRC64V
Seems like any H11 bulb will work. Example LED: https://www.amazon.com/BEAMTECH-Headlight-8000Lumens-Extremely-Conversion/dp/B06XHDYTGL/ref=pd_cp_263_2?pd_rd_w=KPjq9&pf_rd_p=ef4dc990-a9ca-4945-ae0b-f8d549198ed6&pf_rd_r=CQPAVFHZTA2QPGEF2YDE&pd_rd_r=77f36a60-b669-4266-96eb-c1ffb4879e8f&pd_rd_wg=L2e5d&pd_rd_i=B06XHDYTGL&psc=1&refRID=CQPAVFHZTA2QPGEF2YDE
&#x200B;
Source and guide: https://www.mybmwi3.com/forum/viewtopic.php?t=1111
BEAMTECH H11 LED Headlight Bulb, 50W 6500K 8000Lumens Extremely Brigh H8 H9 CSP Chips Conversion Kit https://www.amazon.com/dp/B06XHDYTGL/ref=cm_sw_r_cp_api_u2YEzbQVBTV4M
I just bought these and they seem pretty good so far. Better output than the halogen bulbs, plug &a play, and still have a really sharp cutoff in the stock projectors.
Not a mechanic. I've heard mixed opinions. Some say never convert to LED, some say projector housings are fine but not reflector housings. I don't even know what exactly is the conversion kit on top of the bulb itself.
I gotthisfrom Amazon on my 17 Mazda 3, they work great so far. My car may not have compatible bulb detection.update: Please read the whole thread before making a decision.
It is a 14, got these for fogs, https://www.amazon.com/gp/product/B01A1YU2TS/ref=ppx_yo_dt_b_asin_title_o00__o00_s00?ie=UTF8&psc=1
and these are the low beams, https://www.amazon.com/gp/product/B06XHDYTGL/ref=ppx_yo_dt_b_asin_title_o01__o00_s00?ie=UTF8&psc=1
Also put Diode Dynamics LEDs on the inside and license plate, plus have them for the C-lights just waiting till it's nicer out to install them.
BEAMTECH H11 LED Headlight Bulb, 50W 6500K 8000Lumens Extremely Brigh H8 H9 CSP Chips Conversion Kit https://www.amazon.com/dp/B06XHDYTGL?ref=yo_pop_ma_swf I got these LEDs for my hatch and they work perfect.
I got these from Amazon and they are plug and play and work SO much better than the stock halogens. I've had them for about 2 years now and haven't had any issues, and there was no aiming required it was perfect when I installed them.
I have the plate relocation kit that goes into the tow hook spot. You could get a bracket/adapter that mounts into the Japanese holes that come from the factory. I think the SSD light bar also has license plate mounting tabs if you wanted to go all-out :P
Well you don’t need one for the back plate, and with this you won’t need to drill new holes for the front plate:
https://www.amazon.com/dp/B01EKVUJC8/ref=cm_sw_r_cp_api_i_AHZTCb397DHEA
Great looking Impreza.
Dumb question, what are the front license plate mounting holes like?
I have a 2016 Forester and had to get a special mounting bracket because the holes are Japanese style. I have an 2017 Impreza on order was wondering if I needed the same thing.
If I zoom in the front bumper, it looks like there are two little button-ish things?
Buy some foglights, cheap, and help improve looks / night driving. https://www.amazon.com/gp/aw/d/B00QXE8HIO/ref=mp_s_a_1_3?ie=UTF8&amp;qid=1501792259&amp;sr=8-3&amp;pi=AC_SX236_SY340_FMwebp_QL65&amp;keywords=civic+coupe+fog+lights&amp;dpPl=1&amp;dpID=51dwytkwhBL&amp;ref=plSrch
I have these in my foglights:
https://www.amazon.com/gp/aw/d/B06XHDYTGL/ref=mp_s_a_1_11?ie=UTF8&amp;qid=1501792409&amp;sr=8-11&amp;pi=AC_SX236_SY340_QL65&amp;keywords=h8+led+bulb
A set of opt7 35w hids in my low beams. (Glare is not a problem if you aim after installing hid lows)
And these in my high beams / drl:
https://www.amazon.com/gp/aw/d/B06XC168CY/ref=mp_s_a_1_6?ie=UTF8&amp;qid=1501792539&amp;sr=8-6&amp;pi=AC_SX236_SY340_QL65&amp;keywords=9005+led+cree&amp;dpPl=1&amp;dpID=51u2e6nmyRL&amp;ref=plSrch
I then have some Philips tailight bulbs, and an eBay led interior kit.
fold seats + move passenger seat in the front up / lean it forward if you want it to be as smooth as possible without scuffing stuff
hood scoop i check every time I wash it for misc stuff but i've had 2 leaves get in there the past year... it's uncommon for the most part in my experience
&#x200B;
ordered https://www.amazon.com/gp/product/B01EKVUJC8/ref=ppx_yo_dt_b_asin_title_o00__o00_s00?ie=UTF8&psc=1
no drilling easily done took me 5 minutes
If you are in a front license plate State, this is nice and it is better than drilling holes in your bumper Tell the dealer not to drill the bumper when you order the car. https://www.amazon.com/gp/product/B01EKVUJC8/
My dealer told me that I don't want them to drill into the bumper when I picked it up. Ended up picking up a JDM adapter plate on amazon: https://www.amazon.com/gp/product/B01EKVUJC8/
It's a simple plastic backing with expanding rubber fasteners. I stabilized it with some foam weatherstripping to ensure it doesn't wobble. I also got a recessed chrome frame from a local auto shop.
A center mounted plate looks better imho, asymmetry is not my thing.
There is an adapter kit that will fit a US plate with the JDM holes. https://www.amazon.com/gp/product/B01EKVUJC8/ref=oh_aui_detailpage_o00_s00?ie=UTF8&amp;psc=1
Just got this for my wife's Forester, works great and looks good.
This:
http://www.amazon.com/Sonax-230200-755-Wheel-Cleaner/dp/B003UT3S6Q/ref=sr_1_1?ie=UTF8&amp;qid=1344033615&amp;sr=8-1&amp;keywords=sonax+wheel+cleaner
i have that set up. if nothing is plugged into the 12v adapter it doesn't draw power. 2 years so far without any battery related issues.
I use a regular 12v socket instead of the USB because i use a quickcharge charger with my phone because gps and screen on full brightness + data really drains the battery and normal chargers can't keep up.
Why didn't you just buy this and hook it up to your trickle charger. Seems much simpler.
https://www.amazon.com/Battery-Tender-081-0069-8-Cigarette-Disconnect/dp/B0041CDPQO?ie=UTF8&amp;*Version*=1&amp;*entries*=0
http://www.slipgripcarmounts.com/
Yes, SAE is what battery tender's use to trickle charge, buy one of these and it will let you tap power to charge your phone or GPS.
http://www.amazon.com/Battery-Tender-081-0158-Disconnect-Charger/dp/B00DJ5KEF4/ref=sr_1_1?ie=UTF8&amp;qid=1412858538&amp;sr=8-1&amp;keywords=SAE+to+usb
I personally use this instead so I can plug it up at the triple tree.
http://www.amazon.com/Weatherproof-Charger-Socket-Battery-Tender/dp/B00HQ5KY8U/ref=sr_1_4?ie=UTF8&amp;qid=1412858538&amp;sr=8-4&amp;keywords=SAE+to+usb
Here is another that goes from SAE to cigaret
http://www.amazon.com/Battery-Tender-081-0069-8-Cigarette-Disconnect/dp/B0041CDPQO/ref=sr_1_6?ie=UTF8&amp;qid=1412858538&amp;sr=8-6&amp;keywords=SAE+to+usb
They are very useful when going on long trips when you don't know the roads. I love having the ram mount.
http://ducati1199.com/ducati-1199/18926-ram-mount-iphone-2.html
i saw someone post this to /r/motorcycles on July 5th and i think it is exactly what you are looking for. i liked it so i saved it to my amazon wishlist.
http://www.amazon.com/Battery-Tender-081-0069-8-Cigarette-Disconnect/dp/B0041CDPQO/ref=wl_it_dp_o_pC_nS_nC?ie=UTF8&amp;colid=5UBS19ZMXZM3&amp;coliid=I32ECWT66U7OS6
On the Scarabeo, I use a 12v charging port that connects to the Battery Tender cable. It's 100% non-invasive and removable.
Edit: It's this, connected to a standard charging cable that came with the Tender.
No Problem! Here is everything I've done so far:
Rola 59506 Roof Rack
Cross Bars
Black Trailhawk Wheels
BFGoodrich KO2 Tires 245/65/17
LED interior lights
LED license plate lights
LED Fog Lights
[Ultra Canbus HID kit 35W.9006.4500K]
(http://www.ddmtuning.com/Products/UltraCanbusHID)
Etsy Hood Decal
I also plastidipped the roof, roof rails, crossbars, and the part of the trunk that overhangs above the back window. Let me know if you have any questions.
https://www.amazon.com/59504-V-Tex-Rooftop-Cargo-Basket/dp/B004R34HDC
https://www.readylift.com/2-0-sst-lift-kit-toyota-rav4-2019.html
https://www.discounttire.com/buy-wheels/petrol-p6a
https://www.discounttire.com/buy-tires/nitto-ridge-grappler/p/37746
https://www.knfilters.com/air-filters/33-2443-replacement-air-filter
I somehow managed to score the Rhino Rack for $152.71 on Amazon, which is about 1/3 the original cost. I'm pretty sure it was a return or scratch-and-dent because the package was partially opened and there was a 4" gouge along the bottom of the rear cross bar. I just used some black enamel paint to cover it up.
Rhino Rack 2016-2017 Compatible with Chevrolet Cruze Including Limited 4dr Sedan Vortex RS 2500 Sport Roof Rack Black RS215B
The ROLA Cargo Basket was $119.59 which again, I somehow managed to get at 30% off. I guess constantly scouring Amazon eventually pays off. The basket is pretty well constructed and very strong, but it's also heavy thick steel. I would have preferred aluminum to save weight.
ROLA 59504 V-Tex Rooftop Cargo Basket
I also got the ROLA Cargo Net that fits the rack. I figured it was best to get the matching one in case any of the other random ones on Amazon didn't fit correctly. Also very strong and has just enough stretch to accommodate about 8" of cargo in the basket.
ROLA 59200 Flat Strap Cargo Net
Finally, I ordered a two pack of Cruze logo stickers off eBay and rubbed off the ROLA logo to put that in its place. Adds a nice custom touch.
2X CHEVROLET CRUZE logo sticker vinyl decal
Rola 59504 Vortex Roof Mounted Cargo Basket https://www.amazon.com/dp/B004R34HDC/ref=cm_sw_r_cp_awd_CAf4wb8VBQAWY
Amazon!
BRIGHTLINES 2018 Subaru Crosstrek & 2017-2018 Impreza Aero Crossbars Roof Racks https://www.amazon.com/dp/B079K69B5L/ref=cm_sw_r_cp_api_K4mZBbGT8EV6B
ROLA 59504 V-Tex Rooftop Cargo Basket https://www.amazon.com/dp/B004R34HDC/ref=cm_sw_r_cp_api_e5mZBbAPW3AVJ
I bought this one https://www.amazon.com/59504-V-Tex-Rooftop-Cargo-Basket/dp/B004R34HDC/ref=sr_1_1?ie=UTF8&amp;qid=1503946608&amp;sr=8-1&amp;keywords=Rola+roof+basket
I paid a little less than the sticker price because one was available "used" for $100. Really the only thing used about it was a damaged box.
How long have you had it?
The Rola is one of the ones I have been looking at.
Looks like a nice low profile. Easy attachment to the crossbars?
It's a Rola roof rack, with the 18" extension.
Thank you! It's a rola basket with the extension to make it a lil bigger and a yitamotor 34 inch curved Led bar. The curve of the bar matches the curve of the basket almost perfectly. I wrapped the basket where it attaches together with FiberFix just for some extra strength and also the back half of the basket is suspended over the roof without support from a cross bar so it needed the reinforcement.
Rola Vertex. http://www.amazon.com/Rola-59504-Vortex-Mounted-Basket/dp/B004R34HDC/ref=sr_1_3?ie=UTF8&amp;qid=1375312790&amp;sr=8-3&amp;keywords=rola
I got it for $147 i believe on amazon
Thanks man, loving it so far and it's a absolute beast off the pavement. Stock tires Nito Grappler 32s (if I remember right). Rola cheapo rack from Amazon.
https://www.amazon.com/gp/aw/d/B004R34HDC/ref=mp_s_a_1_3?ie=UTF8&amp;qid=1503797322&amp;sr=8-3&amp;pi=AC_SX236_SY340_FMwebp_QL65&amp;keywords=rola+rack&amp;dpPl=1&amp;dpID=41xQkXPkI-L&amp;ref=plSrch
Fixed link
Thanks everyone!
https://www.amazon.com/gp/aw/d/B004R34HDC/ref=yo_ii_img?ie=UTF8&amp;psc=1
/r/AutoDetailing would be a good place to ask too, I would for see some answers would be what /u/LexusBrian400 has already said, plus;
Dub
Iron X
That's just off the top of my head.
You could try Iron X http://www.amazon.com/Carpro-Iron-Remover-500-Ml/dp/B004UM6DLE Or similar products.
I thought about having the whole car repainted or trying to do the clear myself. I know if I reclear it, it wont look right. Its that Night Hawk Black from honda with the blue flake in it. Super pretty color :( I live in Ohio, but this car has ZERO rust other than one fender that got bent up from a blowout. Most rust is on edges in the underside and on brackets under the hood.
http://www.amazon.com/Carpro-Iron-Remover-500-Ml/dp/B004UM6DLE/ref=sr_1_1?ie=UTF8&amp;qid=1377626808&amp;sr=8-1&amp;keywords=ironx
This is the stuff right?
Not too sure if it is. I use CarPro Iron X and that is sade for painted surfaces and your wheels: Carpro Iron X Iron Remover 500 ml with Sprayer https://www.amazon.com/dp/B004UM6DLE/ref=cm_sw_r_cp_api_i_H1QPCb6ZNA286
I know this isn't everyone's bag, but I bought a sheet of 3M carbin fiber vinyl wrap 60"X 12" for under 25 bucks and made my own.
Its extremely easy to do really. Precut your size, score your camera edge and the edge of the frame with your nail or a plastic score tool and gently cut there with a fresh xacto.
Fits perfectly, exact same material that you're getting from any skin distributer and there's a plethora of patterns and colors. Yes I said plethora!
3M 1080 CF12 / CFS12 Black Carbon Fiber 60"x12" Vinyl Flex Wrap https://www.amazon.com/dp/B0058DIDTY/ref=cm_sw_r_cp_apa_i_7sxnDbAWNYXBR
If anyone is curious I guess I could do a quick pic demo and links for tools. I'm a sculptor and have this stuff already but it's easy to get and do. And you'll have plenty of material left to use on other devices in the future!
Here
I the like yellow chemical guys towels that are sold on Amazon for budget towels.
https://www.amazon.com/dp/B00A8MZ7IA/ref=cm_sw_r_sms_apa_fxXByb61BA21H
edit: Ah crap I gave you the cheap option..
Harbor Freight Dual Action Polisher ~$70
4 x Harbor Freight Orange Compound Pads ~$5ea
1 x Bottle Optimum Hyper Polish
1 x 3" Backing Plate http://www.autogeek.net/3inch-dual-action-backing-plate.html ~$13
2 x 3" Griots Garage Compound Pads (also auto geek)
a pack of these http://www.amazon.com/Chemical-Guys-MIC_506_12-Professional-Microfiber/dp/B00A8MZ7IA
I buy the yellow microfibers that CG makes on amazon, because CG's customer service is TERRIBLE (if not the worst I've ever experienced with any business).
They aren't the best quality, but they are decent: http://www.amazon.com/Chemical-Guys-MIC_506_12-Professional-Microfiber/dp/B00A8MZ7IA/ref=sr_1_2?ie=UTF8&amp;qid=1394539570&amp;sr=8-2&amp;keywords=chemical+guys+microfiber
I have a bunch of these (http://www.amazon.com/Chemical-Guys-MIC_506_12-Professional-Microfiber/dp/B00A8MZ7IA/ref=sr_1_5?ie=UTF8&amp;qid=1398192169&amp;sr=8-5&amp;keywords=microfiber) and they work well.
has anyone ever use the chemical guys professional grade micro fiber before like these http://www.amazon.ca/Chemical-Guys-Professional-Premium-Microfiber/dp/B00A8MZ7IA/ref=sr_1_2?s=automotive&amp;ie=UTF8&amp;qid=1453735484&amp;sr=1-2&amp;keywords=chemical+guys how are they i know a lot of people here recommend the rag company towels but i live in Canada so when i went to order from there it was $30 shipping
No sweat! Glad the damp rag seemed to work out well. I bought these microfiber cloths a while back that I use to clean up all my flips. They work great and don't shed any lint at all. Great for cleaning up shoes and getting into all the nubs on the bottom.
Couple of options off the top of my head.
I own the Freekey system and dig it for not destroying my nails trying to get keys on them, but for organization needs, you may want to go with the other two.
Brewzkey Bottle Opener, Stainless Steel by Brewzkey https://www.amazon.com/dp/B000RZQBCE/ref=cm_sw_r_cp_api_dwoWAb6J2P0CV
I have had something like this on my keychain for 15 years. Never failed me and is compact like the rest of my keys. This particular one is made in USA stainless steel and well reviewed on Amazon so you probably can’t go wrong.
I’ll continue to look and see if I can find the exact one but it’s pretty much that design.
Also, HIGHLY recommend the FreeKey system.
FreeKey System https://www.amazon.com/dp/B00AQ664H6/ref=cm_sw_r_cp_api_rCoWAbHG4D2FQ
Here's a few I've seen
http://www.countycomm.com/cc4.html
http://www.countycomm.com/grab&amp;gokit.html
https://huckberry.com/store/huckberry/category/p/17781-stealth-edc-kit-android
http://www.countycomm.com/stockingstuffer.html
https://huckberry.com/store/huckberry/category/p/16217-edc-kit-2-0
Or, you can just buy all the things you would want on Amazon, it'll come in 1 or 2 boxes. Here's a few choices to put together a "kit"
This or this for flashlight.
This This, or, This For a multitool depending on the size you want.
This or This for knife (Note: I am not a knife person, I have a Squid and I like it and I've heard good things about the Kershaw Chill)
Exotac FreeKey System
Watch 25.49
Knife 24.00
Wallet 10.92
Flashlight 23.95
S Biner 1.78
Free Key 7.49
Total: 93.63
Sure! There are a ton of great keychain accessories out there but the criteria for mine are all items must:
1: Be < 2" (Preferably 1.5")
2: Fit in my pockets comfortably (jeans)
3: Be used at least once every 3 months
(Ambu Pouch excluded)
Accessories used Most - Least
The Freekey Sytem is the foundation of the keyring and is one of those products that is so elegant in its simplicity and functionality that it seems like it should have been invented years ago.
The SOG Straight Edge Key Knife comes sharp and has held an edge pretty well over the last few months. With its tiny blade it's not going to replace your Ka-Bar anytime soon but I can almost garuntee that you will use it more frequently.
The Swiss+ Tech 6 in 1 Utility Key coupled with The Infora Key Multitool seems to be gaining ground to overtake the SOG Key Knife as top tool in the line up with flat and Phillips screwdriver heads, bottle opener, and serrated blade.
The Streamlight Nano LED Flashlight is an awesome addition to the gang and probobly the one that has saved my ass the most, there are too many times I've wasted time looking for a light source in the dark.
The 2.0 64 GB Kingston Data Traveler SE9 USB drive. Reasonable speed coupled with great durability. The cast in keyhole eliminates the possibilty of losing the USB from a weak tether and defiantly holds a perminent place in my top 5 keychain accesories. Along with its basic utility I keep a file named "If Found: Reward" on it with my information in case I lose my key ring.
The True Utility TelePen telescoping keychain pen is one of those items that doesent get the everyday recognition the others do but is totally fucking clutch when you do need it. I owe a couple side projects I've picked up to this pen, partly because of the writing aspect but more from it as a talking piece.
The InCharge Ultra Portable Charging Cable is a cool little accessory that I thought would get the boot initially but saved my ass when I was in transit and my buddy only had an Apple cable with his charger.
The True Utility FireStash Keyring Lighter is the only item on the list that I haven't actually "needed" but will probobly keep anyway because fire is such a basic necessity and if I ever DO need it I'm probobly going to name my kids True and Utility.
The Ambu Res-Cue keychain CPR mask rounds out the list but might be the most important. Along with it being being a valuable lifesaving/self protection asset it's also super useful for locating my keys. I once read something about humans being able to see more shades of red than any other color and that our minds are geared to "ook out for it. Whether that's true or not it's always the first thing I see when I misplace them and because of its shape it stops my keys from going between the seats.
I didn't have a ton of time to type this up because I'm on my phone at work but I hope this helps!
He could have saved his nails with a few of these
The best multitool is the one he'd use all the time. I've been a fan of the Gerber Shard for a little while now, but he may prefer something with more components.
I've also heard good things about the FreeKey System. It made things too bulky for my tastes, but I'm also not exactly their target audience. (I carry two keys daily - one for my place, one for my mailbox - plus an RFID keyfob for my office and a barcode keyfob for my gym.)
Thank you! I'm kinda bummed its not a mildly industrial looking pocket clip. Anything in mind that would recommend? Currently considering pairing an H.L. Human Pelican Clip with a Free key System.
edit - Looking for a simple keyring that won't tangle, since I really only carry two keys, a Higonokami knife and a Yubikey 4 for some of my software dev stuff. Aside from that just a Nitecore SRT3 Defender and possibly some kind of Spiderco Knife since my other edc knife broke.
Snow, snow, go away
This plus this = $20 exactly.
You are so very pretty :)
I don't deserve a gift because I accidentally hit a bird today :( I'm not sure if it lived or not, but I think it did. Either way it probably had a heart attack.
Like I want anything from YOU.
вот наклеечка
Linky linky
Bubbles :)
Thanks for hosting!
a used book, valued at $5 or less
$4 or less if you look at the other options
$3 or less
$2 or less
I give up, I can't find the last one haha... happy birthday!
you need him
Put a reddit snoo sticker on your vehicle!
Search amazon?
EDIT:
https://www.amazon.com/Reddit-Alien-Window-Vinyl-Sticker/dp/B00B1UI4MY
I did it for you
Make Good Art
Congrats on the painting
Good morning and thanks for the contest. Have you even had coffee yet?
Amazon pay Jerron right Meow
http://www.amazon.com/Reddit-Alien-Window-Vinyl-Sticker/dp/B00B1UI4MY/ref=wl_it_dp_o_pC_nS_nC?ie=UTF8&amp;colid=2J4ZDN0L84QCF&amp;coliid=I3SQC7XNRPCEF6
You need a reddit alien, of course!
This is the meter, hookup is pretty easy. bayite DC 6.5-100V 0-100A LCD Display Digital Current Voltage Power Energy Meter Multimeter Ammeter Voltmeter with 100A Current Shunt https://www.amazon.com/dp/B013PKYILS/ref=cm_sw_r_cp_tai_Ou3gAb7RH4KPW
I made a Boombox out of a pair of coaxials I had laying around
pic
Amp
spectrum analyzer
6.5s
solar panel
buck converter
battery mount
I have a surplus of m12 tool batteries as well as some coaxials laying around I figured I’d make a portable speaker
With solar panels most output well over 18 volts. Which is fine for that amplifier but not for the battery. With a buck converter it takes it down to a more useable voltage for the lithium batteries.
If you wanted to run something like this on grid power you would need something like this I had planned on getting a 12 volt power supply like the one here later for home use but since with one 9AH lithium battery I have well over 12 hours of listening before the battery needs to be recharged/ swapped out.
Edit: also using this to monitor solar output
Ac meter: bayite AC 80-260V 100A BYT-VAEM-034 Digital Current Voltage Power Energy Analyzer Meter Ammeter Voltmeter with Open-close Current Transformer Split Core CT https://www.amazon.com/dp/B01D8G9GPW/ref=cm_sw_r_cp_apa_v2hPzb2TNZDNP
Dc meter: bayite DC 6.5-100V 0-100A LCD Display Digital Current Voltage Power Energy Meter Multimeter Ammeter Voltmeter with 100A Current Shunt https://www.amazon.com/dp/B013PKYILS/ref=cm_sw_r_cp_apa_g3hPzbSXR3EHB
Usually that's the case. But for this specific amp meter it needs to be on the ground. I tried it the normal way, and it would just give gibberish readings. It's really bizzare.
A bunch of the reviews are complaining about it
https://www.amazon.com/bayite-6-5-100V-Display-Multimeter-Voltmeter/dp/B013PKYILS/ref=sr_1_1?ie=UTF8&amp;qid=1521581494&amp;sr=8-1&amp;keywords=amp+meter+solar
I think the ampmeter works by measuring the voltage change over a fixed resistance.
Edit: Just tested. Anything after the shunt isn't measured. There's probably some sort of correcting it does to take into account the load after the shunt. Probably so it doesn't measure itself. I dunno.
Edit 2: it's included wiring diagramhttps://i.imgur.com/uXCRNyY.png
https://www.amazon.com/gp/product/B013PKYILS/ref=oh_aui_detailpage_o00_s00?ie=UTF8&amp;psc=1
This style of meter is useful.
Just run each component individually to get current draw. Cannot vouch for accuracy but numbers I've measured match product specs, so there's that.
Also, the recommendations for an OBDII reader are absolutely on point. I have one like this.
It connects to my phone and I can gain all kinds of info about what my car is doing. Is your check engine light on?
You could try a bluetooth OBD2 dongle. Then pair it to something like a Raspberry Pi inside which could connect to the OBD2, monitor data for engine on, and open the garage door if it's closed and the car is on.
I'd be curious to see what kind of lag there is in the cycle if it's going from a cold disconnect to garage door open, but it should be doable.
Not that I'd risk it myself, but I'm paranoid enough about CO that I've been pondering building an exhaust snorkel for my garage for during winter. =P
>All my LED's are done solid,
Solid? The problem with LEDs is that the computer expects a certain amount of draw and when the draw is low it thinks there is a bulb burned out and you typically get 'fast blink' and doesn't have anything to do with the connection being solid or not. The only way to fix this(properly) is to buy a flasher relay designed for LEDs and these don't work in every vehicle or install resistors(bad way) to bring the draw back up and defeating the purpose of LEDs. So called ODB safe LEDs just have a resistor added into the bulb which makes them very hot and prone to failure/melting lenses. In any case, LED bulbs will not create the problem you are seeing. You are on the right track with the battery sensing circuit. It lessens the life of batteries to overcharge them on a constant basis so newer cars will lower the charge voltage when the battery doesn't need the extra energy in order to extend their life. If you connected an ODB2 sensor, like this one, you will see that even though the battery/amp are only seeing 12v, the ODB2 system will still be seeing 14v(or whatever the alt is producing) and the voltage is being stepped down for battery charging purposes.
You can get something like this and use an app like Torque to find out what your engine is boosting to.
I bought one of these:
https://www.amazon.com/gp/product/B01BY2CK32/ref=oh_aui_detailpage_o00_s00?ie=UTF8&amp;psc=1
then using bluetooth, connected it to my android phone and I run the app called "DashCommand" http://www.palmerperformance.com/products/dashcommand/
That basic app will give dashboard, gauges, performance, but you need the PIDs for the Ford F150 for the 98 year. That's another $10.
Set up the misfire PIDs and run the datagrid while you are driving the truck. It'll show which cylinders are misfiring and how often they are misfiring.
Total cost was about $30 for me and it has more than paid back that cost in the information it gives me.
I believe this is what you're looking for:
grimmspeed license mount
Aren't there already holes in your front bumper? If so, you can use this mount which has expansion fasteners sized for those holes. I've been using a kit like it for 20 months now without issue.
So MannyCoon already answered the part about the spacing of the existing holes, but here you go. This license plate actually uses these holes.
https://www.amazon.com/License-Plate-Adapter-Kit-Subaru/dp/B01EKVUJC8
I have this bracket, and it works great.
License Plate Adapter Kit for Subaru https://www.amazon.com/dp/B01EKVUJC8/ref=cm_sw_r_cp_apap_2tOOd8X76jxQJ
Will definitely need to fold down the back seats to fit 4 tires.
Got it on Amazon. Seems to work ok. Got it so I could mount my light bar behind the rear grille and shine through.
https://www.amazon.com/dp/B01EKVUJC8/ref=cm_sw_r_cp_awdb_wKNOyb1AKFH65
Sonax. It's the same stuff. $17 on Amazon.
https://www.amazon.com/gp/aw/d/B003UT3S6Q/ref=mp_s_a_1_1?ie=UTF8&amp;qid=1466803620&amp;sr=8-1&amp;pi=SY200_QL40&amp;keywords=Sonax&amp;dpPl=1&amp;dpID=41FlM1230lL&amp;ref=plSrch
Adams is also the same - $15. https://www.amazon.com/Adams-DWC-16-Car-Wheel-Cleaner/dp/B00BPGGSCW
They both work equally well.
Like other mentioned, get the wheel woolies to keep the barrels clean.
&#x200B;
Unless the car is just going to sit in your garage and polished with a diaper then I wouldn't spend a bunch of money/time on it. Get one of the popular brake dust cleaners(like Sonax), do a good clean, maybe throw a cheap coat of wax on the inside barrel with whatever you have laying around, keep them clean with the woolies and then just go enjoy the car.
I use Sonax on my wheels and clean the calipers with a soft brush like this.
Not too hard with some “bleeding” wheel cleaner. Just spray it on, let it sit, agitate a little if it’s been a while, and spray it off.
Link: Sonax (230200-755) Wheel Cleaner Full Effect - 16.9 fl. oz. https://www.amazon.com/dp/B003UT3S6Q/ref=cm_sw_r_cp_api_OBd6BbAS8TXW1
Just soapy water (with this soap). I've used Sonax before, but it's a hassle because you have to rinse it off before it dries, and the red run-off stains concrete.
Sonax wheel cleaner is by far the best wheel cleaner I've ever used. Most of the dirt is brake dust which is inescapable. But sonax spray melts it away so easily.
I used to buy it on amazon but I don’t use it on my wheels anymore since they’re specifically for alloy. How it works is when your wheels are cool and in the shade you spray it on it chemically fights the iron particles on your wheels and you spray it off. I’d imagine that and a pressure washer could do most of the heavy lifting. It’s kind of expensive but worth a shot. Link below
https://www.amazon.com/Sonax-230200-755-Wheel-Cleaner-Effect/dp/B003UT3S6Q
I imagine you could connect to the ignition circuit. GPS and cell phone chargers don't draw that much power, I'm pretty sure you would be okay. I'm not 100% certain though, maybe toss a thread up in XLForums, or ask /u/gunslinger_006, he is the resident Sportster expert IMO. Wherever you add the wire, ensure to fuse it properly.
Edit for what I do on my sporty: I have a battery tender lead tucked behind my fuse panel cover, and I got a 12 volt socket adapter for my tender plug. I keep it in my saddle bag, and charge up when I need to :-)
I've already got a dedicated charger for it, looks like the inverter is probably the best plan. So picking up one of these guys - http://www.amazon.com/Battery-Tender-081-0069-8-Cigarette-Disconnect/dp/B0041CDPQO/ref=sr_1_2?ie=UTF8&amp;qid=1462991533&amp;sr=8-2&amp;keywords=usb+to+cigarette+lighter+adapter - to go with the inverter and the standard usb adapter is probably going to be my best bet.
I appreciate the help!
At first I only used this Cardo Scala G4 which installs into almost any helmet. Now I mainly use it just for music. The playback controls are super easy.
Very recently I added a Battery Tender cigarette adapter along with this Ram Handle Bar Base and my existing Ram X-Grip Mountwith a 1" socket arm. I just took it on a good 2 day ride and loved it completely.
What bike? A throttle lock will help a lot. I use this from Vista Cruise. Works well with a little bit of fiddling.
Definitely get a helmet speaker system that can bluetooth to your phone. I use the Sena SMH-10. Worth every penny. You can stream Pandora straight to your helmet and one touch on the control activates the voice dialing function on your phone.
Also a 12v lighter plug for your phone charger will keep the tunes and maps and emergency comms working. I use a cheap lighter socket ($6) that plugs into my battery tender port. I run it into my tank bag where I keep my phone.
My bike already had a battery tender cable hooked up, so I got this: http://www.amazon.com/gp/product/B0041CDPQO/ref=oh_details_o04_s00_i00?ie=UTF8&amp;psc=1
And this: http://www.amazon.com/gp/product/B0047T79TA/ref=oh_details_o04_s01_i00?ie=UTF8&amp;psc=1
The USB is super small (barely even sticks out of the cig lighter). I jam this whole thing in my pocket because I use it to power my chatterbox on long rides.
$30 all together, but then you have a battery tender connector, a cig lighter connector, and a USB connector. You can pretty much do anything with that combo.
Or just get more batteries with a charger kit like this, which I got for my Drift Ghost and really saved my bacon on the long trip I just took. I was able to film and take pictures with a camera mounted helmet and charge the extra batteries in my bag at the same time. They make them for GoPro too.
Might I also suggest a battery tender cable with fuse, SAE to female cig adapter if you don't want to attempt any soldering or rewiring, and to charge your phone and other electronics SAE to usb adapter
Yup. You want to use something like this.
http://amzn.com/B0041CDPQO
Looks like the Yakima Loadwarrior. IMHO, it's too tall. I much prefer the Rola roof basket. Slimmer profile, killer look.
Rola rack + optional extension
Rola Racks are affordable https://www.amazon.com/59504-V-Tex-Rooftop-Cargo-Basket/dp/B004R34HDC
That’s ok I’ll look some more. I found this , dose yours look like this with a front plate?
Rola makes a decent one that won't break the bank. I ran one until I could do a "better" rack that really wasn't any better. It comes disassembled and you have to put together. The only thing you'll want to do is seal the joints with silicone as you assemble, keeps it from getting water inside.
ROLA 59504 V-Tex Rooftop Cargo Basket https://www.amazon.com/dp/B004R34HDC/ref=cm_sw_r_cp_apa_4td-Bb49V7DMK
It’s a Rola basket.
ROLA 59504 V-Tex Rooftop Cargo Basket https://www.amazon.com/dp/B004R34HDC/ref=cm_sw_r_cp_api_ZLb8Bb6KNJF2K
ROLA 59504 V-Tex Rooftop Cargo Basket https://www.amazon.com/dp/B004R34HDC/ref=cm_sw_r_cp_apa_i_dx6WDbHCGPD3R
Make sure you if you get this, use wd40 to get the rubber covers on because without it, it's a pain.
I got this for our Outback:
https://www.amazon.com/Rola-59504-Vortex-Mounted-Basket/dp/B004R34HDC
Plus this:
https://www.amazon.com/Rola-59505-Vortex-Mounted-Extension/dp/B001G4Z5NQ/ref=pd_lpo_263_tr_t_3?_encoding=UTF8&amp;psc=1&amp;refRID=G17AAJSCYHB7EMTKT31N
It's a HUGE rack and half the price of Thule or Yakima. Highly recommend. I believe you'll need to purchase the crossbars for it though.
I got a Rola. Looks good and well made. They dipped down to $100, but now $130
Pic - http://i.imgur.com/oHann2H.jpg
Link - https://www.amazon.com/Rola-59504-Vortex-Mounted-Basket/dp/B004R34HDC/ref=sr_1_1?ie=UTF8&amp;qid=1483125026&amp;sr=8-1&amp;keywords=rola+vortex
Looks like one of these:
https://www.amazon.com/Rola-59504-Vortex-Mounted-Basket/dp/B004R34HDC
Rola Vortex
https://www.amazon.com/gp/aw/d/B004R34HDC/ref=mp_s_a_1_1?ie=UTF8&amp;qid=1485627012&amp;sr=8-1&amp;pi=AC_SX236_SY340_QL65&amp;keywords=rola+basket&amp;dpPl=1&amp;dpID=51XvUDtHH4L&amp;ref=plSrch
Here ya go! It's this one. I've really liked having it so far! Also, I totally have that ice chest lol.
yeeah, definitely get ya some sonax or iron-x to get rid of those metal contaminants. https://www.amazon.com/Carpro-Iron-Remover-500-Ml/dp/B004UM6DLE/ref=sr_1_1?ie=UTF8&amp;qid=1468507489&amp;sr=8-1&amp;keywords=iron-x
Definitely give Sonax Full Effect Wheel Cleaner a try. I have had amazing success with this stuff. It will turn from green to red as it is working and breaking down iron particles and break dust.
Also, you can give either CarPro's Iron-X or TRIX (Tar and Iron Remover) a try.
Honestly, by looking at the picture, the Sonax should clean up the break dust and those streaks. Just let it sit on the wheel for a couple minutes and agitate it with a brush. I use this brush to get in behind the spokes as well.
As far as keeping brake dust from accumulating as quick, I'm not sure if there's really a remedy. You can wax your rims, there is stuff out there specifically made for rims, but I've never used it, so I'll let someone with experience speak on that. However, I read the other day someone used Collinite #845 Insulator Wax on their rims (same wax I use). I may give this a try next time I wash the car and see if it helps control the brake dust.
Grab some Iron-X. While you're at it, clean that chain (you can use chain cleaner or kerosene) to get a few more miles out of it.
Pick up some of this
It smells absolutely awful but it will remove the iron deposits in the paint and wheels and leave a cleaner surface to work with. I would clay bar the paint after as well. It sprays on clear and turns purple when it is working. Well worth the price especially since you can use it to remove brake dust from your wheels during washes.
https://www.amazon.com/Carpro-Iron-Remover-500-Sprayer/dp/B004UM6DLE
go check out /r/AutoDetailing for more info.
You can use Iron X followed by a clay bar.
Time wise if it’s what I think it is hard to say, Few weeks to a month maybe?
As I say if it’s what I think it is, it’s ‘hot’ metal that’s landed on the glass from an angle grinder or welding spatter.
You should be able to improve on it with something like the below to remove the ‘rusting’ of the particles, but if damage has been done to the glass you won’t fix that.
https://www.amazon.com/Carpro-Iron-Remover-500-Sprayer/dp/B004UM6DLE
Hope this helps! This isn't an exhaustive list of the best professional products but some of the best top rated affordable and highly rated by forums and high subscriber YouTubers. I'll try to answer questions as they come. Thanks for all tye comments and positive/critical feedback. Promise is all helps in the end!
Wash/Decontamination
Wheels/Tires
Compounding/Polishing
Finshing Wax/Protectant/Plastic & Trim Restorer
Interior/Glass Cleaners
Convertible Fabric Top Cleaner/Protectant/Sealer
Microfiber Cloths/Car Drying Microfiber Cloths/Buffing Microfibers/Brushes/Etc.
Good question for r/autodetailing.
Iron-x is my go-to for cleaning wheels and removing contaminants from paint.
Unfortunately car care can be somewhat expensive when you use the right products. I have a 2013 EX in SWP, so my garage is full of detailing products. Polishes, sealants, cleaners. You name, I've probably got it.
For calipers:
https://vvividshop.com/products/vvivid-red-enamel-wrap-heat-resistant
For the rims:
https://smile.amazon.com/Carpro-Iron-Remover-500-Sprayer/dp/B004UM6DLE?sa-no-redirect=1
and then
https://smile.amazon.com/Chemical-Guys-WAC_303-8-Ounce-Sealant/dp/B001THV9D0/ref=sr_1_1?s=automotive&amp;ie=UTF8&amp;qid=1505942169&amp;sr=1-1&amp;keywords=wheel+guard
Thanks Popkins. I was confused because carpro 's site Click Herestates as such but Amazon specifically warns against Click Here using it on chrome & bare medals.
Hello! I bought a new car a little over a month ago and I wanted to do some basic cleaning with it, stuff that can be done maybe a couple times a month, since I never personally did that with my previous car.
Anyways, I live in SoCal so I'm trying to keep water usage to a minimum. This is my current "to-purchase" list that I'd like to buy soon;
ONR
iK Sprayer
Iron X
TRC Creature Edgeless 10pack
Mother's Tire Brush
ABN Wheel Woolies
Stoner's Reach Tool
Already have: Stoner's Invisible Glass, Costco multipack MF towels.
Will I still want to get a clay bar + wax for after washing, or is just washing every so often enough?
So I am looking into buying some detailing supplies for doing wheels and was hoping someone could look over this list. It is probably overkill, but I would rather have everything I need I think.
Brushes
ABN Wheel Whoolies
Boars Hair Detail Brush Set
Mothers Wheel Brush
Cleaners
Iron X
Meguiars Hot Shine Gloss Tire Spray
Meguiars D101 APC
The total comes out to $113 but I figured I would only be buying most of these items once so it will be worth it. Also this list doesnt even have any sort of sealant so not sure if I should buy one of those also?
I somehow didn't run notice any of those...just got the regular one. Can't imagine how cherry or lemon could help the scent lol.
https://www.amazon.com/gp/product/B004UM6DLE/ref=ppx_yo_dt_b_search_asin_title?ie=UTF8&psc=1
I love it. Spray it on, rub it in with my spoke brush, and power wash it off. The wheels come out perfectly clean.
https://www.amazon.com/gp/aw/d/B004UM6DLE/ref=mp_s_a_1_1?ie=UTF8&amp;qid=1482198400&amp;sr=8-1&amp;pi=SY200_QL40&amp;keywords=carpro+iron+x&amp;dpPl=1&amp;dpID=31Fqwzjw6oL&amp;ref=plSrch
Honestly, I think you should have gone with a carbon fiber vinyl wrap.
I guess technically, you still could.
I bought it from amazon, this roll i bought allowed me to screw up completely twice before i got the hang of it. The amount you would need for an entire bike would depend on how much surface you have to cover and also account for messing up a few times.
http://www.amazon.com/dp/B0058DIDTY/ref=pe_385040_30332190_TE_3p_dp_2
Would one roll of this do?
https://www.amazon.com/3M-CFS12-BLACK-CARBON-FIBER/dp/B0058DIDTY
Also is this the same stuff you used for under your windows?
Found it. As I was hoping, it comes in three colors. Laminate up with a nice, thin stripe of a different color in the middle and give it an angled bezel. That'd be pretty slick.
What everyone else is saying is right, with normal wrap material, especially glossy, that would actually make the imperfections in the plastic more noticeable probably. But they do make this carbon fiber wrap material, here is an example on amazon, that stuff is more of a satin finish and the texture of the carbon makes it very effective at hiding imperfections in the material below. And it looks pretty badass too boot, that would work to cover your fairing I think, just not sure if you want your bike to be black carbon fiber.
Also keep in mind, that it will not be easy to do. Especially if this is your first attempt at anything like wrapping or vinyl work. I myself work full time in a vinyl shop and pretty often wrap full vehicles at work, and I wrestled for hours getting the plastic trim pieces on my bike covered in the carbon wrap. It is absolutely doable though, just make sure you clean the fairings well and have a hair dryer handy to help you stretch it around the curves. If you do end up going the wrap route you'll definitely want to take your fairings apart so you can wrap them much easier than trying to do it on the bike. Plus with them off you can leave a little extra wrap around all the edges and wrap it around the edges and stick it to the back, so that no edges will be exposed and possibly start peeling up.
just get a fake carbon fiber wrap like this.
I just bought some 3M 1080 instead of the Di-Noc. I am going to be doing a vinyl wrap on my Das as well.
Did I make a mistake?
3M actually makes it, got my roll from amazon
https://www.amazon.com/gp/product/B0058DIDTY/ref=oh_aui_detailpage_o05_s01?ie=UTF8&amp;psc=1
If anyone else wants to have a go at this I wrapped with some 3M Scotchprint vinyl:
http://www.amazon.com/gp/product/B0058DIDTY?psc=1&amp;redirect=true&amp;ref_=oh_aui_detailpage_o00_s00
Very easy to work with and forgiving.
3M Scotchprint 1080 Carbon Fiber Vinyl Flex Wrap Black CF12 60"x12"
A lot of people on here use this Carbon Fiber wrap. Having also used it I highly recommend it https://www.amazon.com/gp/product/B0058DIDTY/
Are the Eurow 350gsm good? What gsm would the griots blue towels be? Can i get a mircofiber comparable to the griots for $2 each or am i crazy? How do detailers have boxes of towels that cost like $6 each?
Edit: These look promising but i really want to have some one with hands on experience guide me.
So I decided to go for it and take better care of my car detail. Want to make sure I'm not crazy with some questions.
&#x200B;
I actually LOVE the chemical guys gold MF towel
https://www.amazon.com/Chemical-Guys-MIC_506_12-Professional-Microfiber/dp/B00A8MZ7IA/ref=mp_s_a_1_3?keywords=chemical+guys+microfiber&amp;qid=1557973969&amp;s=gateway&amp;sprefix=chemical+guys&amp;sr=8-3
I've used many different types of towels and these just suit me the best. They're cheap enough ( I got a pack of 12 for $16 so I bought as many as I could afford.)
They last a long time with proper care but ate cheap enough that I'm not afraid to toss them when necessary. Enjoy!
[Chemical Guys] (https://www.amazon.com/dp/B00A8MZ7IA/ref=cm_sw_r_cp_apa_i_gTpZCbFD66DPG)
If they do they are usually expensive or if they are complimentary then they are abused and could damage your paint / clear coat. I recently picked up a 12 pack off Amazon and am happy with the quality http://www.amazon.com/dp/B00A8MZ7IA/ref=sr_ph?ie=UTF8&amp;qid=1412309266&amp;sr=1&amp;keywords=microfiber+towel
Remember to not use the foaming brush
I had this issue and aside from a tool to get in the corners, you really are simply lacking in good microfibers. Once I bought some good ones for the first time in my life, I realized how crucial towels are in the whole equation of detailing. These are the ones I bought which are just great, in fact the best mf towels I own currently: http://www.amazon.com/dp/B00A8MZ7IA/ref=pe_385040_121528360_TE_dp_1
Looking to buy my first real car towels. Are these worth?
Chemical Guys MIC_506_12 Professional Grade Premium Microfiber Towels, Gold (16 Inch x 16 Inch) (Pack of 12)
https://www.amazon.com/Chemical-Guys-MIC_506_12-Professional-Microfiber/dp/B00A8MZ7IA/ref=sr_1_3?keywords=car+towels&psr=EY17&qid=1574965681&s=black-friday&smid=ATVPDKIKX0DER&sr=1-3
Can you please link me to the MIC_506_12 you are looking at?
I found this 12 pack on Amazon... does not look like 46% off for me though. Still a pretty solid deal.
I am also curious, what would be a good use for these different microfiber:
These chemical guys towels have worked really well for me. Combined with their microfiber wash, they’ve stayed very soft and clean.
Chemical Guys MIC_506_12 Professional Grade Premium Microfiber Towels, Gold (16 in. x 16 in.) (Pack of 12) https://www.amazon.com/dp/B00A8MZ7IA/ref=cm_sw_r_cp_api_i_-NdcBbAN0K9FS
What kind of towels do you use to dry?
I typically use these but not sure if it would be the best for my car
https://www.amazon.com/gp/product/B00A8MZ7IA/ref=ox_sc_act_title_1?smid=ATVPDKIKX0DER&amp;psc=1
Because of the Prime Day deals I decided to pick up a few different products without knowing too much. I bought: Optimum No Rinse, Mothers Clay Bar System, Microfiber Clothes, Liquid Wax Paint Sealant, and Hybrid Wax.
My quick understanding is that the recommended process is: wash > clay > wash > wax. In terms of these products, does that mean:
ONR wash > Mothers Clay (should I use their lube or just the ONR water?) > ONR wash > Liquid Wax > Hybrid Wax
Just want to make sure I follow the right order so I can start to keep my car in good shape. How often should I clay? What about the sealant and the wax?
Thanks!
http://www.amazon.com/gp/product/B00A8MZ7IA
Just throwing these out there as another option.
Sorry for photo quality. First post ever on this so be gentle. Starting from top row, left to right:
Hopefully that all worked! If not, I apologize.
A brass key hook of choice and the FreeKey System is cheap, space efficient, and pretty quiet. As a bonus, you can operate your hanging car key fob without having to reach into your pockets.
$20 leather wallet, bi-fold, my last Dockers lasted me 10 years.
$50 flashlight, FourSevens QPL
$20 knife/multitool Leatherman Style CS
$10 keychain FreeKey System and Gated carabiner
For top left - there's a key ring called the FreeKey that actually works well. I got it years ago to be able to separate my car key while wearing gloves.
Another solution
https://www.amazon.com/FreeKey-2825-System/dp/B00AQ664H6
They use a more flexible metal that is easier to open. The big ring even has a slight bump so all you need to do is press down on one end which opens the other end to easily slip stuff in.
FreeKey
Just squeeze! I've used mine for over a year. Works really well.
AMAZON
I love it so far. Makes taking keys off a breeze. I like the way those other holders look (Key Smart) but I have oddly shaped keys.
How about this: http://www.amazon.com/gp/aw/d/B00AQ664H6/ref=pd_aw_sim_468_1?ie=UTF8&amp;dpID=51SzdWq%2BXUL&amp;dpSrc=sims&amp;preST=_AC_UL100_SR100%2C67_&amp;refRID=13CY9GC5Y40GY11Z1JV1
My under $2, under $3 and my under $4. :)
This is fun!
$4
$3
$2
LET'S MAKE A DEAL!
Reddit Sticker
Go Stingrays!
Reddit Window Decal
Thanks for the contest! I love these lil cheap ones! Excuse to get ma decal! lol
Found it!
http://www.amazon.com/Reddit-Alien-Window-Vinyl-Sticker/dp/B00B1UI4MY
How about a Snoo Decal? (You can get someone else one also! they are only $2.24 :) )
One such source on the Interwebz...
http://www.redbubble.com/shop/reddit+stickers
http://www.amazon.com/Reddit-Alien-Window-Vinyl-Sticker/dp/B00B1UI4MY
http://devstickers.com/reddit
Since you want to spend $50, why not gift someone a very good book which one can cherish and value for a long time.
Amazon recently opened its stores (online) in India. You can check my wishlist as my flair on this subreddit. (Prices on Indian site are cheaper in case of books).
Anyway, here are some of my suggestions (you can also gift used products available on Amazon to save some money):
Invisible Ink Marking Pen & LED UV Light, Sharpie Type Marker and Flashlight (http://www.amazon.com/Invisible-Ink-Marking-Sharpie-Flashlight/dp/B0001UQ8V4/ref=sr_1_1?s=electronics&amp;ie=UTF8&amp;qid=1374494106&amp;sr=1-1&amp;keywords=UV+pen)
Alpine Swiss Men's Leather Wallet - Euro Traveler style with Center Flip ID Window - Black Comes in a Gift Bag (http://www.amazon.com/Alpine-Swiss-Mens-Leather-Wallet/dp/B004M6UD46/ref=wl_it_dp_o_pC_nS_nC?ie=UTF8&amp;colid=3NYITGN2VAD9F&amp;coliid=I20X8VSZ91MU94)
Samsung HM1100 Bluetooth Wireless Headset (http://www.amazon.com/Samsung-HM1100-Bluetooth-Wireless-Headset/dp/B004M180HS/ref=wl_it_dp_o_pC_S_nC?ie=UTF8&amp;colid=3NYITGN2VAD9F&amp;coliid=I3CFG8VSQO43IG)
Universal PC/Stereo Gaming Headset - Yapster TM-YB100A – Black (http://www.amazon.com/Universal-Stereo-Gaming-Headset-TM-YB100A/dp/B001FY7LBQ/ref=sr_1_1?ie=UTF8&amp;qid=1374497019&amp;sr=8-1&amp;keywords=headphone+with+microphone)
Business Card Holder (Leather) (http://www.amazon.com/Leather-Business-Holder-Expandable-Wallet/dp/B000UZ9YQG/ref=sr_1_5?s=apparel&amp;ie=UTF8&amp;qid=1374498622&amp;sr=1-5&amp;keywords=credit+card+case)
Bicycle 1800 Vintage Series Playing Cards by Ellusionist.com (BLUE) (http://www.amazon.com/Bicycle-Vintage-Series-Playing-Ellusionist-com/dp/B001OVN8OY/ref=sr_1_2?ie=UTF8&amp;qid=1374497394&amp;sr=8-2&amp;keywords=vintage+cards)
Reddit Alien Car Window Vinyl Decal Sticker 4" Tall (Color: White) (http://www.amazon.com/Reddit-Alien-Window-Vinyl-Sticker/dp/B00B1UI4MY/ref=sr_1_1?ie=UTF8&amp;qid=1374496931&amp;sr=8-1&amp;keywords=reddit)
Belkin USB 2.0 4-Port Ultra-Mini Hub (http://www.amazon.com/Belkin-USB-2-0-4-Port-Ultra-Mini/dp/B000Q8UAWY/ref=wl_it_dp_o_pC_nS_nC?ie=UTF8&amp;colid=3NYITGN2VAD9F&amp;coliid=I2Z6AZXMALJOY2)
Ewatchfactory Men's 56109 Disney "Vintage" Mickey Mouse Watch (http://www.amazon.com/Ewatchfactory-56109-Disney-Vintage-Mickey/dp/B004TOXP3W/ref=sr_1_1?ie=UTF8&amp;qid=1374497721&amp;sr=8-1&amp;keywords=micky+mouse+watch)
Alpine Swiss Leather Card Case Wallet Slim Super Thin 5 Card Slots - Thinnest Front Pocket Wallet in the Market (http://www.amazon.com/Alpine-Swiss-Leather-Wallet-Super/dp/B00AB0AX4C/ref=sr_1_13?ie=UTF8&amp;qid=1374498539&amp;sr=8-13&amp;keywords=credit+card+case)
Here's my complete wishlist: http://amzn.com/w/3NYITGN2VAD9F
75
This
$2: This decal is pretty cool ($1.67)
$4: Another decal! ($3.30)
$6: Mmmmm...candy....($5.99)
$8: This one was easy ($7.99)
I don't know how you can go wrong with bacon and I mean it would make perfect sense just to have a reddit alien sticker.
http://www.amazon.com/gp/aw/d/B00B1UI4MY?pc_redir=1412016494&amp;robot_redir=1
Perfect.
Also, I am cool with giving you my address.
Vinyl ALL THE THINGS!
This is what i use to monitor my power usage. It has an alarm feature that goes off when you hit a predetermined/adjustable voltage level.
bayite DC 6.5-100V 0-100A LCD Display Digital Current Voltage Power Energy Meter Multimeter Ammeter Voltmeter with 100A Current Shunt https://www.amazon.com/dp/B013PKYILS?ref=yo_pop_ma_swf
Something to consider with a PVC shower, is supplementing your heat. Best way I've found to do so is to use a heating element like this one and couple it with a temp controller. This runs off 12v DC so you'd have to take into account electrical capacity, but I figure I could run that while on the move so the vehicle alternator takes the load, or from an onsite generator if you're in a fixed location.
Disclaimer: I have not run this yet, I'm still in the planning phases of a PVC shower. This was found through research.
Ive found this on Amazon: https://www.amazon.com/bayite-6-5-100V-Display-Multimeter-Voltmeter/dp/B013PKYILS/ref=cm_cr_arp_d_product_top?ie=UTF8
Anyone have thoughts on this? Ive you read the reviews, in reference to van power, they're generally positive.
There are a bunch of devices like this. For ac and dc. Amaz, ebay, etc
My solar controller gives me the data via the web. I use one of the above for monitoring what goes to the inverter. i could put in a ac ammeter. hmmm. Probably will at some point.
you would put one between your solar controller and batteries ... and another between battery and inverter.
not sure how to send the data to the web.
Good stuff, thank you all. One more question though, regarding the battery monitor, in order to monitor the discharge rate and not go below 50%, do I need a victron BMV-700 ($150) or can I just use this bayite meter:
r/https://www.amazon.com/bayite-6-5-100V-Display-Multimeter-Voltmeter/dp/B013PKYILS/ref=pd_lpo_vtph_107_bs_t_1?_encoding=UTF8&amp;psc=1&amp;refRID=331JX46ZCP7CH3YT868Q
bayite DC 6.5-100V 0-100A LCD Display Digital Current Voltage Power Energy Meter Multimeter Ammeter Voltmeter with 100A Current Shunt https://www.amazon.com/dp/B013PKYILS/ref=cm_sw_r_cp_apa_i_RRC2CbRANNKNH
That's what I used. I disassembled my power cord where it meets the wires coming out of the power supply. I had the current ring between the power wire. Was pretty simple to do and it keeps track of current and power and total power used.
You'll be surprised that the dial to output won't be linear.
Battery Meter. Ive been toying with making one of these for a friend after I finish upgrading my camper. Someone else may be able to offer some more insight.
> shunt
cool I got this https://www.amazon.com/bayite-6-5-100V-Display-Multimeter-Voltmeter/dp/B013PKYILS/ref=sr_1_1?ie=UTF8&amp;qid=1482213946&amp;sr=8-1&amp;keywords=shunt+12v
https://imgur.com/a/sraBw8u
Added some monitors and shunts to the previous setup. What do you think?
https://www.amazon.com/gp/product/B013PKYILS/ref=oh_aui_detailpage_o00_s00?ie=UTF8&amp;psc=1
Terminating 10# stuff
https://www.amazon.com/gp/product/B06XQ8Q1VM/ref=oh_aui_detailpage_o00_s00?ie=UTF8&amp;psc=1
and terminal fuse
https://www.amazon.com/gp/product/B0019ZBTV4/ref=oh_aui_detailpage_o00_s00?ie=UTF8&amp;psc=1
Look at this one also. Voltmeter.
Btw, i did buy this device with my system to monitor battery levels and draw. https://www.amazon.com/gp/product/B013PKYILS/ref=ppx_yo_dt_b_asin_title_o00_s00?ie=UTF8&psc=1
Fridge consumption should be way under that. It sits idle most of the day. The 5.5a is a max rate I believe. At the bottom of this article, they address it a bit. https://www.4xoverlandadventures.com/2017-winter-fridge-shootout/3/
In theory, the solar should be more than enough I think. I think I am going to buy a meter or two so I can measure amp draw from the accessories and another to measure panel production. I wish there was a unit that just displayed both but I don't see one.
https://www.amazon.com/gp/product/B013PKYILS/ref=ox_sc_act_title_1?smid=A1T3LOAKNUUM9N&amp;psc=1
Okay, would this do it?
https://www.amazon.com/gp/product/B013PKYILS/ref=oh_aui_search_detailpage?ie=UTF8&amp;psc=1
Attached in the same way like you recommended?
Also, I have no idea how much current will come out of this thing. Is there any drawback to getting a larger one?
https://www.amazon.com/gp/aw/d/B013PKYILS/ref=pd_aw_sim_469_1?ie=UTF8&amp;psc=1&amp;refRID=HG4PM9RREG7NGDCR0Z0V this is the dc ver but you wouldint need a 100 amp one
I bought this one that works great. You can also download the free app – torque from googleplay, or if you want to get more data about your car, you can choose to download other app but that may be cost a little money
If you have an android phone, these are great. They pair to your phone and give code read out and ability to reset the light if its just a glitch. You have to have an app on your phone, some are free, but one of the best is only is $5.00 (torque pro). I'm not sure about iphone stuff. (edit: its also nice to have an idea what's wrong before going to a repair person.)
https://www.amazon.com/Kitbest-Bluetooth-Scanner-Adapter-Diagnostic/dp/B01BY2CK32
I use Torque as well. You can find cheap small Bluetooth OBDII adapters on Amazon. They work great.
I bought one similar to this:
https://www.amazon.com/Kitbest-Bluetooth-Scanner-Adapter-Diagnostic/dp/B01BY2CK32/ref=mp_s_a_1_9?ie=UTF8&amp;qid=1538833599&amp;sr=8-9&amp;pi=AC_SX236_SY340_FMwebp_QL65&amp;keywords=odb2+bluetooth&amp;dpPl=1&amp;dpID=51z7L6z0ZfL&amp;ref=plSrch
Try cleaning your throttle body and run a can of Seafoam in a half tank of gas and see if that helps. Also you might get one of these Blue Tooth OBD2 readers that you can use with smartphone apps like Torque. You can check error codes and watch realtime data from many of the sensors on your engine.
KitBest Bluetooth OBD OBD2 Scanner Adapter for Android, Car Diagnostic Check Engine Light Scan Tool Code Reader. 5 Year Warranty https://www.amazon.com/dp/B01BY2CK32/ref=cm_sw_r_cp_apa_ULtVAbAS8W73W
Nope won't mess with warranty at all. It's bluetooth and pluggs into your obd port just those those snapshot things the insurance companies will give you for discounts. All torque does is monitor different sensors in the car, you may have to do a little googling to get all the PIDS set up correctly, but most work when you download them from the app. I think this is the one I have, never gave me any issues.
Do you have a Bluetooth obd2 adapter ? Kitbest Bluetooth OBD OBD2 Scanner Adapter for Android, Car Diagnostic Check Engine Light Scan Tool Code Reader. 5 Year Warranty https://www.amazon.com/dp/B01BY2CK32/ref=cm_sw_r_cp_apa_i_Gls.AbD7XY9H9
This scanner works great and only $10.99. The MyGreenVolt app gives lots of interesting stats.
FYI, this is the one that I bought, I'm sure it depends on the app that you use it with but so far it has served me well.
My dealer also drilled the holes. This is the bracket you need to put a US plate on the Japanese holes, fits perfectly, and covers up the dealer holes.
https://www.amazon.com/License-Plate-Adapter-Kit-Subaru/dp/B01EKVUJC8
Or a way cheaper version: https://www.amazon.com/dp/B01EKVUJC8/ref=cm_sw_r_cp_dp_T2_ieztzbN8TC4N8
I used to like the off-center look but quickly wore off since everyone seems to have it nowadays. That and the fact that the rod connects directly to the frame making a fender bender potentially cost way more than it should.
Eraser is a fantastic product but it's expensive. For your needs I would rather purchase this gallon of APC. It can be used diluted 4:1 for your wheels and tires and it can be used on any stubborn areas on the paint as well. It can also be diluted 10:1 for your interior. To use it to strip wax, put a few ounces of it in your soap bucket with your soap and wash as usual.
Your order of operations would be this:
Probably.
http://www.amazon.com/Meguiars-D10101-All-Purpose-Cleaner/dp/B0006SH4GE/ref=sr_1_1?ie=UTF8&amp;qid=1404866150&amp;sr=8-1&amp;keywords=meguiars+all+purpose+cleaner
This is good.
Meguiar's D101 All Purpose Cleaner Is 16 for a gallon which you dilute. Goes a long way!
Personally, I use Meguiar's D101 though if you don't want to buy a whole gallon of concentrate Chemical Guys All Clean + is also good. The AC+ is a concentrate too, even though it comes in a spray bottle.
Just found this on amazon. Not quite $10 for shipping.
Meguiar's D10101 Detailer All Purpose Cleaner Gallon https://www.amazon.com/dp/B0006SH4GE/ref=cm_sw_r_other_apa_ePumxbW5DM0W1
I'm a total noob and have no business comment here, but maybe this:
http://www.amazon.com/Meguiars-D17001-Hyper-Dressing-Gallon/dp/B0006SH4PA
?
Edit: meant to post this:
http://www.amazon.com/Meguiars-D10101-All-Purpose-Cleaner/dp/B0006SH4GE/ref=pd_sim_auto_2?ie=UTF8&amp;refRID=1XEKSX5N1PS0KJG1E1Y7
Thanks, maybe I'll just get something like this then: https://www.amazon.co.uk/Meguiars-D10101-Detailer-Purpose-Cleaner/dp/B0006SH4GE
Spray some of this on them, and I kid you not... the dirt just slides right off.
It. Is. Amazing.
I use it to clean every single thing inside my car, including the weathertechs. And it can be used as an engine detailer.
What equipment and supplies do you have already? If any.
Off the top of my head here are a few of the basics.
Meguiars D101 APC
Good Wet/Dry Shop Vac.
Stoner Invisible Glass
Adam's Polishes Interior Mitt
The Rag Company Edgeless 300
The Rag Company Glass Towels
Pressure washer or Strong hose spray. (For cleaning Carpets outside of vehicle.)
Bissell Spot Clean Auto
That is more than enough to get you started. Ill add more as I have time.
Let me know if you have any questions.
I would check with r/autodetailing first, but I think they like automotive specific all purpose cleaner and an interior brush. I use this https://www.amazon.com/Meguiars-D10101-Detailer-Purpose-Cleaner/dp/B0006SH4GE/ref=sr_1_3?ie=UTF8&amp;qid=1505776624&amp;sr=8-3&amp;keywords=Car+all+purpose+cleaner I don't know if it's the best, but autodetailing recommended it and I got it. It seems to work. You can wet dry vac it out.
I'm planning to write a post in the interior soon but for now...
The first step is to give everything a really good going over with a vacuum. This is where you need to spend most of your time. Almost everything that's not leather can be cleaned with an All Purpose Cleaner (UK link and US link):
Spray it on, agitate with a brush (ordinary paint brush will do). Then...
If it's fabric - vacuum with a wet-dry vac (use a cloth if you don't have one)
If it's trim - wipe dry with a microfibre (UK link and US link)
To protect things I really like 303 Aerospace Protectant... it protects against fading caused by UV radiation (UK link and US link)
Leather is a different kettle of fish and you need to use a cleaner then a conditioner (UK link and US link)
Guy at a track day clued me into this stuff a few years back - Nevr-Dull Wadding Polish.
Removes everything without hard scrubbing, leaves a protective coating that makes it so you can wipe daily carbon buildup away with a dry rag.
Fucking amazing, all four chrome tips of my 2013 WRX are still stainless/spotless after seven years.
Pro-tip, wad the wadding up in a rag or wear gloves to apply it. The chems in that stuff will seep into your skin very easily.
You're using this stuff?
Eagle One "Never Dull" and a clean terry cloth or similar rag-type article of cloth. 30 seconds and some elbow grease and it will be all gone.
Link: [https://www.amazon.com/Eagle-One-1035605-Nevr-Dull-Wadding/dp/B000CNBI1A]
I've had good luck with Nevr-Dull: http://www.amazon.com/Eagle-One-1035605-Nevr-Dull-Wadding/dp/B000CNBI1A
It's slightly pitted so it may never be great again. However Eagle One Never Dull, any parts store will have it, will shine it up. Rub it on and polish it up, then wipe off with clean rag. Enjoy.
http://www.amazon.com/Eagle-One-1035605-Nevr-Dull-Wadding/dp/B000CNBI1A
I've used this on a lot of non automotive related (reason I bought it in first place) pieces before with good results.https://www.amazon.com/Eagle-One-E301131001-Original-Nevr-Dull/dp/B000CNBI1A
As for the upholstery part, you might need to take that to an upholstery guy, some of that stuff is rather tricky. I think once you rip the fabric off you might have hard time getting another fabric on without a specialized sewing machine.
haha I always love parking next to another GTI. Even better when I return to my car to find another one parked next to it :]
I also recommend some Nevr Dull to help keep your exhaust tips shiny https://www.amazon.com/Eagle-One-1035605-Nevr-Dull-Wadding/dp/B000CNBI1A :P
It happens. I haven't used it myself yet, but Eagle One - Never Dull is supposed to make an easy(er) time of cleaning it up.
You should use this on all the luggage hardware.
It will make an incredible difference. I use it on old bicycles.
I pretty sure they are aluminum maybe billet but that is a stretch. I would use Eagle One Never Dull. That shit works on everything like a charm!
Thanks. I went with this stuff http://www.amazon.com/Eagle-One-1035605-Nevr-Dull-Wadding/dp/B000CNBI1A since it said safe on all metal. Worked really well. If I know for sure it was stainless I was going to go at it with some 0000 steel wool. I read that it's a bad idea to use that on chromed metal.
Nevr-Dull works pretty good, but I agree many others, I like the patina.
Those rust spots/chips on the deadbolt, no way to get rid of those without replacing the lock.
Kinda depends what you want to plug into the 12v outlet and what’s already on the circuit you’re tapping into.
If you’re just plugging in a cell phone charger or something then 5amp is fine.
If you don’t have anything plugged into the existing lighter socket plug, that’s the best one to use.
Ideally you should use a fused ‘add a fuse’ device that lets you keep the same fuse for the existing circuit and add a separate fused circuit off the vehicle accessory circuit.
https://www.amazon.com/BUSS-HHH-Amp-Add-Fuse/dp/B000GKEXK2
I did a semi-hardwire install on my 2008 Civic. It is very simple.
&nbsp;
Do you have any technical, hands-on skills?
&nbsp;
Buy 1 of each. You can buy in AutoZone too.
&nbsp;
https://www.amazon.com/Bussmann-BP-HHH-ATM-Add-A-Fuse/dp/B000GKEXK2
&nbsp;
https://www.amazon.com/uxcell%C2%AE-Charger-Cigarette-Lighter-Female/dp/B00EZJBELQ/
&nbsp;
Find a switched source (or constant if you have a camera that triggers when you are parked) using your multimeter, tap into it and route the wires. Should take 1-3 hours depending on your skills. DO NOT use the ScotchLok Taps.
You pull radio out and plug the unit inline with antenna and get power from the fuse block. https://www.amazon.com/Bussmann-BP-HHH-ATM-Add-A-Fuse/dp/B000GKEXK2. It's not too hard.
Chances are that it does and you just don't know how to access it.
Use a voltmeter and go down the line of fuses until you find one that meets the "ignition on" criteria. Then, add this.
I have an aftermarket radio so I have a remote coming off of that, but, I did have to run a switched power to the radio and used an Add a Fuse coming off of something that turns on with the car. This is an actual crappy picture of it.
****Do any of this at your own risk or hire a professional to do it for you.***
Here are the parts I ordered to put mine together. I'm posting this bc of PMs.
Mobius or [Cheaper Mobius but longer wait from China] (http://www.banggood.com/Mobius-Action-Camera-1080P-HD-Mini-Sports-Camera-Wide-Angle-Edition-p-917817.html) I wanted the Wide Angle Lens for a better shot
Capacitor You don't want the battery sitting in the sun. A capacitor can handle it. So you replace the battery completely with this capacitor
Windshield Mount My mobius came with a mounting bracket that fits on this mount. The mount itself is very small, but the 3M sticker is very strong.
Hardwire Kit When hard wiring this in to the car via fuse box, this knocks the voltage down from 12v to 5v, which is what the camera needs. I used some wire strippers to expose about 5" of the red and black cables. Then stripped about an inch off each cable to expose the actual wire. The red wire goes in to the add-a-circuit mentioned below, then you crimp it closed with pliers (wasn't super easy, I must be weak). You partially unscrew a metal bolt that is attached to the metal car frame as a ground ( I used the one on top of my fuse box).
USB to Mini-USB This connects from the hardwire kit to the camera or 90 degree elbow mentioned next, for a better angle. If you are setting up the auto record when external power is on, which is what you want to do for a dash cam, you need to cut a piece of electrical tape width-wise and cover the two middle pins inside the USB cable. This is because the two middle pins (2 and 3) are data pins. Leaving those exposed makes the camera think its connected to a computer and will only do data transferring. By covering them, it only get power from pins 1 and 4 and doesn't think it's connected to a computer and will actually record.
Right Angle Mini-USB to Mini-USB Adapted This just helped keep the USB cable from sticking out too much (better angle)
Add-a-circuit This is the ATO (bigger fuse), but I ended up using the ATM (Mini) because my car has both and the fuse I wanted to use ended up being a Mini. It'd be best to look through your fuse diagram and find something non-vital (meaning don't tap in to a fuse that controls ABS or airbags, etc) and switchable (meaning it only comes on when the car turns on. You don't want the camera running 24/7), figure out what type of fuse it is, and buy that size. I ended up getting my new add-a-circuit (Littlefuse) from Oreilly auto parts for $6.99 and it came with 3, 4, 7.5, and 10A fuses. Also take note of the amperage (Never use a higher amp fuse than your add-a-circuit supports because the wire gauge may not support it and melt/burn. When adding the circuit, I removed the original fuse from the fuse box, a 10A fuse and put it the first slot(my add-a-circuit supports up to 10A) and for the 2nd slot, I used a 3A fuse because the camera and radar don't draw much. You don't want to use a higher amp fuse than necessary. Also, in my car 2011 JettaSportwagen, the add-a-circuit points down or it doesn't work. Make sure it's plugged in the correct direction or it won't do anything
32GB MicroSD Card Works fine, just make sure to format it through the camera.
Unofficial but awesome Mobius Configuration Tool Use the tooltips(hover over each option) to figure out what each things does. I set mine to autorecord when external power or the button are pushed.
You can find a lot of info here: dashcamtalk.com
To summarize the connections are:
Choose a fuse from your car's fuse diagram (non-essential and switchable), pull it, place it in the correct slot of the add-a-circuit (don't go to higher amps than is supported), plug in a fuse from the add-a-circuit kit in to the other slot to protect your camera (I used a 3A), strip the hardwire kit's cables mentioned above, put the red cable (+) from the hard wire kit in the the red end of the add-a-circuit and crimp it closed, attach the black cable (-) to a screw attached to the metal car frame, tape the two middle pins (2 and 3) in the USB cable with electrical tape, plug the USB in to the female USB on the hardwire kit, run the USB cable from the fuse box around the edges of your cars trim, up by the rearview mirror, attach the right-angle mini-usb adapter, choose where you want to mount the camera (make sure to check using the USB plugged in and camera mounted to the mount, in case it bumps the rearview mirror) (I held it on the windshield about where I thought I wanted it (to behind and to the right of the rearview mirror and took some test footage, watched it on a computer, decided it looked ok, pulled the sticker cover and attached it), clean your windshield with glass cleaner, attach the mount.
I have gone through a few cams in my 2013 and have helped install in a friend's 2015, installation is basically the same. We tucked the power cable in the gap between the windshield and the headliner and ran it toward the driver side door. Pop off the driver side A-pillar cover and run the cable behind the airbag and down toward the dash. At this point you are only about a foot away from your fuse box. Get a Fuse Tap and plug it into your "Accessory" fuse slot (should be a map on the fuse panel door). Splice the positive wire from your camera into the Fuse Tap and and the negative to the frame as ground. The camera will start up any time your key is in the "Accessory" or "ON" positions.
The one you linked is to keep those chimes and radio on until the door is opened.
If you don't care about door chimes and warning chime for lights and key in the ignition then just buy the cheap dummy plug like this one:
The red wire goes to a key-on source in the fuse panel as with gm class 2 data there isn't one at the radio. Most people use the cruise control or the windshield wiper fuse. If you do that, do it right with something like this.
If this is an ls sport, it has amplified rear speakers which I THINK requires a different plug.
It's a signal sensing turn on, it's like a switch that's activated by sound. It gets a constant 12 volt and ground and when it sees a signal for the radio it turns on its output. When it doesn't see a signal it turns off its output. It's a little more complicated than that, but that's the simple version.
As for cigarette outlets, not all are switched. OP would have to test theirs.
If it was the proper way to tap into it would be the military splice at the plug. If a tap at the fuse block is desired the way to do it is with an add-a-fuse as simply mashing the wire into the fuse block with the fuse on top of it bends the terminal holding the fuse open further than it should making a intermittent connection more likely. The fuse and the wire may even fall out all together over time.
I haven't done it yet, but I am planning to hardwire a Mobius into my car. Apparently it's relatively simple, just run the power under your headliner and door frame panel, and use add-a-fuse to connect it to a fuse that only gets power when the ignition is on. That way you can set it and forget it, so to speak, and it is always recording while the car is running.
Spy Tec G1WH. Capable of wide angle, and 1080p/30fps recording. The way it works is that it records in 5 minute blocks - once it runs out of room in the memory card, it overwrites the oldest block. The caveat is that it doesn't play well with Class 10 micro sd cards, so I use a 32GB Class 6. I believe I have an 8-10 hour window of current 1080p footage, which should be more than sufficient.
I also purchased a dashcam hard-wire kit, in conjunction with an add-a-fuse kit. It might sound daunting to a layman, but it was actually incredibly simple to wire up. With it, the dashcam turns on when I turn the car on (I wired it in to the car stereo), and turns off when I turn the car off. This was necessary for me because one alternative, using a power adapter plugged into the cigarette lighter, wouldn't work due to my cigarette lighter always being powered, even when the truck is turned off. Also, my install is clean as hell - the only things visible are the cam itself, and about four inches of power wire running up to the headliner.
Here are the specific items I purchased, on Amazon:
Dashcam, $53 Prime
http://www.amazon.com/gp/product/B00KZ0J452
Hardwire kit, $15 shipped
http://www.amazon.com/gp/product/B00S73FE8A
Add-A-Fuse, $11 Prime
http://www.amazon.com/gp/product/B000GKEXK2
Rearview mirror mount, $9 Prime
http://www.amazon.com/gp/product/B00JWGC29U
Class 6 32GB MicroSDHC + adapter if you don't already have one, $16 Prime
www.amazon.com/dp/B00IVPU7DQ
Running total for everything above, to your door, about $105. Install takes about ten-fifteen minutes by yourself. You can probably get a local shop to do it if you prefer, for a cost. Hell, I'd even lend a hand if you wanted, so long as you promise you aren't a total fucking weirdo.
Edit to answer your second question: Yeah, I like it. For $100, it's probably the best quality you'll find. With it installed, I often forget it's even there; it's tucked away behind my mirror. The peace of mind that it adds, should I ever need it myself, is great. Also, catching stuff like what's in the video is a huge bonus!
http://www.amazon.com/dp/B000IDYKNC/ref=twister_B00K71ZXS6
Much cheaper and it's already a successful product.
That's why I'd recommend everyone have a rescue device like one of these handy. Available here. Of course, if this guy had it on his keys, it wouldn't help him, but if the guy recording had one, the problem would have been solved.
well you dont have to get that exact one there are others like this one
AAA jumped me off something like
this
what about something like this?
http://www.amazon.com/Jump-N-Carry-JNC660-1700-12-Volt-Starter/dp/B000JFJLP6/ref=sr_1_4?ie=UTF8&amp;qid=1463253195&amp;sr=8-4&amp;keywords=jump+start
designed for jumping cars I use one here in the UK. You can get them with 12volt output or even USB output.
indel B Travel Box 51 liter Fridge.
&nbsp;
I don't have solar yet; I currently run it directly off the stock starter battery. I've run it overnight a few times and had no issue starting the truck the next day, but just incase I always carry a jump starter. Stock battery obviously isn't deep cycle, so not great to be draining the battery like that, but it works for now.
&nbsp;
Here's the fridge strapped in to the truck for a trip. Ultimately it will live in the bed of the truck on a slider after I install an aux fuse box back there. Picture of the interior with a Powerade bottle for scale. Great if you like camping with your truck, no ice to worry about, nothing get's soggy as the ice melts and your cooler fills with water.
My car battery died 2 winters ago, so I got a heavy duty jumper and a power inverter, so it charges shit galore. Lasted 2 or 3 days, even with everyone using it to charge various phones. I wanted to recharge it in vip, but I forgot to bring a male to female extension cord (which I won't forget to bring this year). https://www.amazon.com/Jump-N-Carry-JNC660-1700-12-Volt-Starter/dp/B000JFJLP6
I've seen a lot of jump packs over the years. I've disassembled many for repair and recycling. Most have never really stood out in quality to me. They're all about the same. You can spend a varying degree of money on them.
There are 3 basic sizes. A lot of brands will through 'power' numbers at you like 900 peak amps or 1500 etc etc. They are all basically made the same, and usually pretty cheaply.
It's important to know that jump packs basically assist a weak battery. The chances of it starting a stone dead car battery are limited. Many factors play a roll. Size of engine/car. Temperature (cold = car needs more power, batteries produce less power). How dead the car battery is. Jumper cables and an assisting car is the best option, but jump packs can be convenient.
Jump packs are just another battery. So they have a life too. 3-5 years on average. Older they get the less power they put out. They need maintenance too. They need to be charged after every use and need periodic charging (every couple months).
Personally, I like Quick Cable's designs. Good quality. You plug an extension cord into it to charge it. Many other brands have their own charger wall pack and these get lost (trust me).
Every company uses the same quality of internal battery in these. Cheap. There are thousands of battery manufacturers for Sealed Lead Acid batteries in China. There are thousands of brands you'll find in these jump packs (even Quick Cable). Do not expect brand A's internal battery to be a lot better than brand B. When buying a jump pack, the build quality of the casing, lights, cables is what to look at.
Once your jump pack battery dies, you can replace the internal battery. It's usually most of the cost of the jump pack.
Ones with inverters or air pumps can be handy. But these are typically cheap components. I've run into my own issues with the Quick Cable ones that had these built in.
The smallest ones like this:
http://www.amazon.com/Clore-JNC300XL-Jump-N-Carry-Ultraportable-12-Volt/dp/B000XQ9MGE/ref=sr_1_1?ie=UTF8&amp;qid=1416949837&amp;sr=8-1&amp;keywords=car+jump+pack
Internally, these have a 12v 7 or 8 Amp Hour Sealed Lead Acid battery. Basically a bigger moped battery. If your Honda Civic cranks but can't start and it's 50°F outside, this would help you get it started. If your Honda had it's lights on for 2 days and is stone dead, forget about it. I'd avoid these. Priced from $30-70 typically. These have short cables that can be annoying to work with.
Most common size:
http://www.amazon.com/Clore-JNC660-Jump-N-Carry-12-Volt-Starter/dp/B000JFJLP6/ref=sr_1_3?ie=UTF8&amp;qid=1416949837&amp;sr=8-3&amp;keywords=car+jump+pack&amp;pebp=1416950179642
Internally have a 12v 17-20 Amp Hour battery. Basically a motorcycle battery. Will start most vehicles, even trucks. $50-$150 typically.
Third type, heavy duty:
http://www.quickcable.com/products.php?pageId=177
I bought this for my father-in-law because I knew it was good build quality and could start about everything. With my discount it was around $130 with a battery. The battery I used was the same size as a lawn tractor. Retail probably $200-$300.
EDIT
I live in Wisconsin, so my experience may vary depending on your climate. Typically, cold related battery failures are the leading cause. So a small $50 jump pack may work great in Florida for someone that left their lights in October. But January in Wisconsin is going to tell you a different tale.
EDIT 2
Please avoid these at all costs.
http://www.amazon.com/Weego-JS6-Standard-Batteries--Packaging/dp/B00N9XVPBS/ref=sr_1_17?ie=UTF8&amp;qid=1416951350&amp;sr=8-17&amp;keywords=car+jump+pack&amp;pebp=1416951352732
Basically you're using a laptop battery to start your car.
Where is this picture from? Can someone explain to me why there is a jump pack on the passenger floor? It's this one
https://www.amazon.com/Jump-N-Carry-JNC660-1700-Peak-Starter/dp/B000JFJLP6
Jump Start boxes are great. They make cheaper and smaller ones, but this "dumb" one (no on/off switch) is perfect when helping out someone with a problem or when you leave the map lights on overnight as long as you cover the terminals and exercise care (as there is no on/off switch)- https://www.amazon.com/Jump-N-Carry-JNC660-1700-Peak-Starter/dp/B000JFJLP6/ref=sr_1_2?ie=UTF8&amp;qid=1492454578&amp;sr=8-2&amp;keywords=jump%2Bstart%2Bbox&amp;th=1
AAA roadside assistance in the US often carries the exact same box (I assume regular tow trucks do the same). Which I later bought myself and works great and can jump many times before a recharge is needed. But if you get one of the smaller $40 ones to keep in the trunk (take it in the house to give it a re-charge every 4-6 months or after you use it) and your battery is totally dead (vs just low) and you have a V6 or larger engine, I have found that you can make due by: (a) connecting red to red and black to black (vs black to the metal in your car as the instructions generally state), and (b) leaving the thing sitting connected for a few minutes before turning the key so as to trickle in some juice.
With a big old jump box - just connect (I tend to do red to red and black to black instead of the metal in my car) and turn the key for a good clean start even in really cold weather with a dead battery. Between not driving that much, mistakes and helping others, I use my box at least 3x a year.
I would recommend something like this over jumper cables. Last thing you want is to mess up your own battery and have 2 cars stranded. This is one of the only things I was never issued that I thought should be in the standard loadout.
http://www.amazon.com/Jump-N-Carry-JNC660-1700-12-Volt-Starter/dp/B000JFJLP6/ref=sr_1_2?ie=UTF8&amp;qid=1453038363&amp;sr=8-2&amp;keywords=jump+start+box
I've went through a few and alot of them fail after a while/don't hold their charge.
Talked with a few AAA service and alot of them recommended this:
http://www.amazon.com/Jump-N-Carry-JNC660-1700-12-Volt-Starter/dp/B000JFJLP6/ref=sr_1_3?ie=UTF8&amp;qid=1453145747&amp;sr=8-3&amp;keywords=car+battery+jumper
When driving, I charge off the 12v lighter plug on the dash board with a small inverter. Like this one. Having two plugs plus USB is really useful. I always unplug it when parked though so as not to drain the car battery. Using this, I make sure my laptop batter is at full charge when I park for the night. https://www.amazon.com/BESTEK-300W-Power-Inverter-Adapter/dp/B004MDXS0U/ref=sr_1_1?ie=UTF8&amp;qid=1503271065&amp;sr=8-1&amp;keywords=12v+inverter+to+120v
At night, or when parked for a couple of days, I use something like this: https://www.amazon.com/Jump-N-Carry-JNC660-1700-Peak-Starter/dp/B000JFJLP6/ref=sr_1_7?ie=UTF8&amp;qid=1503270823&amp;sr=8-7&amp;keywords=car+jump+battery+pack
There are many makes and models of this kind of thing. The one I purchased was on sale at Harbor Freight. I recharge it with an extra long extension cord, depending on my stops/sleeping locations (not too hard to find places to plug in most of the time). It charges phones, tablet, and laptop. Plus, I have something just in case I am alone and the minivan does need a jump, or I meet someone who needs one.
I also use a solar powered light that will also charge my phone if needed. It sits on the dash board to charge up and then I can use it at night. I found a deal on it on Amazon Warehouse. https://www.amazon.com/WakaWaka-Light-Solar-Powered-Flashlight-Yellow/dp/B00W6NTLXG/ref=sr_1_1?s=automotive&amp;ie=UTF8&amp;qid=1503270978&amp;sr=1-1&amp;keywords=waka+waka
I also carry two small battery packs (great for air travel too) that charge using the USB plug on the inverter. I make sure they are fully powered all the time.
I'm sure other folks have other ideas about how to do this without solar. I'm curious about what those might be too.
http://www.amazon.com/Clore-Automotive-JNC660-Jump-N-Carry-12-Volt/dp/B000JFJLP6
It has came in handy plenty of times worth the every penny.
Ah, good to know. Although I do have the powertank, I don't use it anyway, since it doesn't hold a charge (actually use this, which works out really well!).
There is a product (I use meguiar's brand) called compound that you can use to minimize the appearance of swirls if applied by hand, and if done with a dual action polisher will remove them completely. It is also great for removing shallow scratches in clear coat and general clear coat issues (aside from flaking and scratches that are deep). Check out /r/AutoDetailing for more info :)
Meguiar's Ultimate
If anyone has lots of scratches/defects in their paint, here are a couple steps that really make a huge difference for a total of ~$25:
> some compound
Are you taking about something like this: https://smile.amazon.com/Meguiars-G17216-Ultimate-Compound-15-2/dp/B001O7PNNM/ref=smi_www_rco2_go_smi_g2609328962?_encoding=UTF8&amp;%2AVersion%2A=1&amp;%2Aentries%2A=0&amp;ie=UTF8?
https://www.amazon.com/Meguiars-G17216-Ultimate-Compound-15-2/dp/B001O7PNNM
&#x200B;
i have good luck with that stuff - wallyworld has it as well as every auto parts place
Yes, agreed. 800 -> 2000 grit. You will want to alternate directions (ie. if you are doing left & right with 800 grit, then go up & down with 1000 etc) and make sure that the scratches left behind by the previous grit are all gone before moving to the next one. You'll want swirl remover like Meguire's Ultimate Compound after you finish with the 2000 grit. There are several grades of swirl remover with finer and finer grits -- if you're really anal about it, you can get a coarse and a fine, but I only used the Ultimate compound and it worked well for me. It's a lot of work, but can be a really rewarding experience if you get the result you're looking for. You might even find you enjoyed it in the end and start building/refinishing your own partscasters, which is what I do now :)
Good luck!
Looks like delaminating clear coat. I highly recommend using McGuire's to polish just about anything with paint on it. Beautiful product that works wonders. Lovely bike it seems!
This is the backing pad I picked up. Sorry for the late reply though! I am currently looking at picking up these Lake Country pads. I was thinking 3 of the orange pads, 3 of the white, and 3 of the red? Either that or 2 of each.
If you have a Harbor Freight nearby they have a polisher that is reasonably priced, I believe they ship to Canada as well. They're polisher runs roughly $60 plus around $10-15 for a backing plate.
Here's the harbor freight one
I believe they ship to Canada.
From Amazon here's a 5" backing plate
And a 3" one
The issue with the one you have selected is it does not have enough power to double as a tool that can offer correction. So effectively it is only a wax spreader, whereas the polisher doubles as a machine that you can use for paint correction as well as a wax spreader.
Keep the speeds set low when suing wax as you are not working it into the paint (2 should do).
If you want something cheaper, this has worked well for me.
http://www.amazon.com/Astro-4607-Velcro-Backing-Pad/dp/B003CH3Z8W/ref=sr_1_1?ie=UTF8&amp;qid=1464048358&amp;sr=8-1&amp;keywords=astro+pneumatic+backing+plate
It's the Griot's Garage one from the wiki. I got the one with the longer cord and I also got a 5" backing plate from amazon as well.
Links to both:
Polisher
Backing Plate
January 9th and female
Under 40
Under 20
I think this will work right? http://www.amazon.com/Astro-Pneumatic-4607-Velcro-Backing/dp/B003CH3Z8W/ref=cm_rdp_product
Am I on the right track? I am currently looking for all the products I need to completely detail my car. I know there is no way I could purchase all of these at once, so I am planning on purchasing the major ones first and adding the others over time. I have spent almost two weeks researching on everything I need to do. There is so much information and so many opinions that it is hard to find a definitive answer on what I need.
> Wheel
Wheel soap:
Wheel cleaner:
Tire dressing:
Wheel wax:
> Paint
Paint soap:
Paint soap addition:
Leaf blower:
Clay bar:
Dual action polisher:
Backing plate:
Pad:
Compound:
Polish:
Sealant/wax:
> Interior
Carpet cleaner:
Dashboard cleaner:
Leather cleaner:
Leather conditioner:
Glass cleaner:
There are a bunch of other tools not listed here, but the ones listed above are the areas I am most concerned about.
> Other Concerns
I am still anxious about spraying water in my engine bay, so I decided to use a spray bottle with soap and water and a microfiber towel to wipe down the engine bay while it is still decently clean. Can I use diluted Meguiar's D143 or will I have to purchase Meguiar's D101 instead? Can the Optimum Tire Gel be used on the black plastics of the engine bay, as well as the other black trims of my car?
I want to protect my interior, in addition to cleaning it. I am very confused on what product I need to use to protect my dashboard from the sun. The same goes for the leather seats, where the creases are forming. I have been using a conditioner (although I am unsure of the exact name) to slow down the crease formation. Should I use the same product for both the dashboard and leather seats (with Lexol Conditioner on top of that)? I have heard of Leatherique Leather Rejuvenator/Prestine Clean, but I am unsure of when I should use that.
Hardbor freight DA polisher with a coupon along with this backing plate and this bundle of pads. Along with M105 & M205 & a good wax.
Sure
This is the one I currently use: Chemical Guys MIC_493 Chenille Microfiber Premium Scratch-Free Wash Mitt https://www.amazon.com/dp/B003TTL0TE/ref=cm_sw_r_cp_apa_0tgFxb1M1HBR5
Literally the only CG product I own. I like that it's green so I can see the dirt. However here is one that is highly rated, but is blue, but if you don't mind that these ones seem good too, especially if you have a large vehicle. Plus you can dedicate one to the upper and lower half or however
Ultimate Car Wash Mitt - 2 pack Extra Large Size - Premium Chenille Microfiber Wash Mitt - Wash Glove - Lint Free - Scratch Free https://www.amazon.com/dp/B011B25IXY/ref=cm_sw_r_cp_apa_0vgFxbQ8H8HA9
All you need is 2 buckets and a good wash mitt/drying mf towel and good soap.
Use the power washer and hose at the self wash. Done.
I recommend upgrading to a better wash mitt and drying MF over time.
Are you using a sponge, brush, or something else? I’ve had best luck with an automotive wash mitt like this.
Soapy water + big loofa e.g. https://www.amazon.com/dp/B003TTL0TE/ works reasonably well without having to take it apart.
I guess this wash mit is pretty Awwdorable .... ish?
Save your money, just get this and this instead and start washing. You'll find out what else you want/need as you go.
Adding on to this - if you don't have access to a hose you can use
ONR with washmitt then dried with microfiber towels.
I use the following wash mitt can confirm it works well. Haven’t observed any swirl marks as of yet.
I have three that I alternate between, and I like all three of them equally. I actually think 2 of the 3 are identical.
TheRagCompany - http://www.theragcompany.com/knobby-microfiber-chenille-mitt/
Autopia-Car Care - http://www.autopia-carcare.com/super-plush-wash-mitt.html
Chemical Guys - http://amzn.com/B003TTL0TE
Sonax is my go-to. But if you want to go all-out, give them a deep clean and decon, and ceramic coat them. I've used Gyeon with good results. Ceramic coating makes them a breeze during regular cleanings. A blast with my power washer gets 95% of the brake dust off.
Your list looks good, but is lacking a few item IMO:
http://www.amazon.com/Meguiars-X3002-Microfiber-Wash-Mitt/dp/B000RXKR6M/ref=sr_1_1?s=automotive&amp;ie=UTF8&amp;qid=1396913798&amp;sr=1-1&amp;keywords=microfiber+wash+mitt The mitt you listed should be fine, but I use these. I have 3 of them and it's good to have more than one lying around in case one gets too dirty during the wash. I like to use a different one for the bottom of my car anyway.
I'd get at least one more pack of those Chemical Guys microfiber towels. The more the better.
I use Sonax Full Effect Wheel Cleaner. http://www.amazon.com/Sonax-230200-755-Wheel-Cleaner/dp/B003UT3S6Q/ref=sr_1_1?s=automotive&amp;ie=UTF8&amp;qid=1396914006&amp;sr=1-1&amp;keywords=sonax+full+effect+wheel+cleaner It's a bit pricey but it's very effective at removing brake dust.
For applying the wax, you'll need an applicator pad http://www.amazon.com/Meguiars-X3070-Soft-Foam-Applicator/dp/B0009IQZPW/ref=sr_1_1?s=automotive&amp;ie=UTF8&amp;qid=1396914054&amp;sr=1-1&amp;keywords=foam+applicator+pad
You can change the halogen bulbs to LED bulbs. I am not sure what lightbulbs the Mazda 2 has. I just purchased these headlights for my Mazda 3: LED Conversion Kit
I am sure you can find the right bulbs for your car. All it takes is a bit of research.
Yes they are plug and play. Never heard of the brand but I got them quick and they have good reviews. https://www.amazon.com/gp/aw/d/B06XHDYTGL/ref=yo_ii_img?ie=UTF8&amp;psc=1
Same here but the buzzing noise bothered me a lot so I end up getting these.
https://www.amazon.com/gp/aw/d/B06XHDYTGL/ref=ya_aw_od_pi?ie=UTF8&amp;psc=1
These Bulbs are very good
Shark_and_kaya linked them above
> Beamtech H11
Is it these?
https://www.amazon.com/BEAMTECH-Headlight-8000Lumens-Extremely-Conversion/dp/B06XHDYTGL/ref=sr_1_3?ie=UTF8&amp;qid=1543369220&amp;sr=8-3&amp;keywords=BEAMTECH+H11
Did you know Amazon will donate a portion of every purchase if you shop by going to smile.amazon.com instead? Over $50,000,000 has been raised for charity - all you need to do is change the URL!
Here are your smile-ified links:
https://smile.amazon.com/dp/B06XHDYTGL/ref=cm_sw_r_cp_apip_toZAofWYNpKPX
---
^^i'm ^^a ^^friendly&nbsp;bot
BEAMTECH H11 LED Headlight Bulb, 50W 6500K 8000Lumens Extremely Brigh H8 H9 CSP Chips Conversion Kit https://www.amazon.com/dp/B06XHDYTGL/ref=cm_sw_r_cp_apip_toZAofWYNpKPX
People are gonna warn you about LEDs in projector housings (or maybe I'm getting that confused with HIDs) but I think someone on here posted about switching to these https://www.amazon.com/dp/B06XHDYTGL/ref=cm_sw_r_cp_apa_i_tukqDb4JFJZNH
I used to own a 9th gen sport and wanted to do the same upgrade as you. If you're willing to splice wires then you can purchase the touring headlights from college hills honda and do that for yourself. however, I'd recommend bulb swaps to all LED and keep the housing, any aftermarket housing imo looks cheap and ruins the aesthetic.
&#x200B;
these are bulbs i'd recommend
I had the 2017 sport so I already LED fog light strips from the factory but with these low/high beam bulbs the projection was great and didn't bother other drivers ( i had my brother drive behind me one night and I was fine)
&#x200B;
if you want to go further you can get these for the back
&#x200B;
hope it helps.
Also, might I suggest this front license plate bracket. It's much thinner and better looking than the OEM one, isn't crooked, and doesn't attach with any goop.
https://www.amazon.com/gp/product/B01EKVUJC8/ref=oh_aui_detailpage_o04_s00?ie=UTF8&amp;psc=1
The bumper on the car comes standard with the Japanese mounting holes and then two "dimples" on the plastic just above the Japanese mounts. The "standard" way Subaru mounts the plates for the US is to screw the license plate directly into the dimples in the front of the car. This puts holes in the plastic, only connects the plate at the top two screws and is kind of a crappy way to mount the plate. I think the official Subaru plate just gives you a metal backplate to screw through, you still are drilling into the bumper plastic.
A cleaner solution is to ask the dealer not to drill into the bumper at all. Then get an adaptor like this: https://www.amazon.com/gp/product/B01EKVUJC8/ref=oh_aui_detailpage_o06_s00?ie=UTF8&amp;psc=1
It screws into the Japanese molded holes in the bumper with expanding screws and provides a flat plastic plate with four mounting holes for your plate, centered on the bumper. It avoids needing to drill any bumper holes and mounts the plate nicely.
I used a bracket off of Amazon and it has worked great.
It's to prevent obstructing air to the FMIC. WRX is top mount, so it's just for aesthetics, or to avoid drilling the bumper even though these exist.
You're welcome.
just to add to this solution - i did the same, but wired in a battery tender connector. like this: http://www.batterystuff.com/battery-cables-connectors-plugs/BTLR081-0069-6.html
Then, bought a cigarette light outlet that uses that same connector, like this: http://www.amazon.com/Battery-Tender-081-0069-8-Cigarette-Disconnect/dp/B0041CDPQO
That way, when you park your bike, you can easily connect a battery tender. Then, when you head out, plug in the cigarette lighter to enable your phone charger.
You should wrap that frame with this stuff: http://www.amazon.com/3M-Scotchprint-Carbon-Fiber-Vinyl/dp/B0058DIDTY
I'm a fucking computer-building noob and I guarantee you I could build this in a day. Some of this carbon fibre vinyl wrap, some strip LEDs and solderless connectors, mounting hardware, and the computer parts is all you would need. Too easy, man. This guy is not only incompetent if it took him 100 hours, but he is definitely not Master Race.
Edit: Forgot to say, the board it's mounted on and the acrylic sheets for backing the hardware. Just buff the acrylic and put the LEDs behind it, makes it glow like that.
Eleven bucks, no real excuse.
I've always used this stuff
http://www.amazon.com/Eagle-One-1035605-Nevr-Dull-Wadding/dp/tags-on-product/B000CNBI1A
to clean and polish my CPUs and heatsinks. You get the same results, and not quite as risky as sandpaper. You may want to try it out next time.
I keep a Res-Q-Me on my keychain. http://www.amazon.com/gp/aw/d/B000IDYKNC
If you are in a situation where you'll need a seatbelt cutter and window punch, very likely everything not bolted down will go flying. This is on your key ring in your ignition. Snatch it off the ring, cut your seatbelt, press the spring loaded punch to the window.
1700 peak amps is what the booster box says. http://www.amazon.com/Clore-JNC660-Jump-N-Carry-12-Volt-Starter/dp/B000JFJLP6
Then again cold cranking amps as in a battery are measured differently I assume then regular old amps. Im no electrical engineer however.
Chemical Guys microfiber wash mitt for ~$6 on Amazon
Perhaps the wax you're using isn't strong enough to protect against the hard water etching. If you're using a carnauba wax, perhaps try switching to a poly wax, like Meguiar's Ultimate Wax. It has a tackier feel to it when it's cured (not slick) so I imagine it forms a thicker, stronger layer of protection over the car.
To fix lots of etching, I recommend getting a DA polisher, porter cable DA is good, here's a whole kit for under $200,: http://www.autogeek.net/poca74pofcop.html?productid=poca74pofcop&amp;channelid=FROOG&amp;utm_source=CSEs&amp;utm_medium=GoogleProductSearch&amp;utm_campaign=CSE&amp;gclid=CJ_twp2IncACFSsV7AodMSwAAA
though I use Meguiar's microfiber DA correction system on mine, a little more expensive but better.
You can try a number of products to "clean" etching by hand. I'd prefer a cleaner polish like Meguiar's Ultimate Compound, a couple meguiar's foam pads, and a quality microfiber. And follow up with an oil-heavy pure polish like Meguiar's Ultimate Polish
Another tip is to avoid letting water dry over your car. If you have a brief shower and your car gets wet with lots of water beads, drive the car around the block, wipe it down with a huge soft microfiber, or use an electric leaf blower to blow the water off. Or get a Metropolitan Master Blaster air dryer https://www.youtube.com/watch?v=dfGSLSTaOB4