(Part 3) Best tapes, adhesives & sealants according to redditors
We found 2,730 Reddit comments discussing the best tapes, adhesives & sealants. We ranked the 963 resulting products by number of redditors who mentioned them. Here are the products ranked 41-60. You can also go back to the previous section.


Kapton tape.
shoe goo, most likely.
so for people who don't like the idea of soldering or making this permanent,
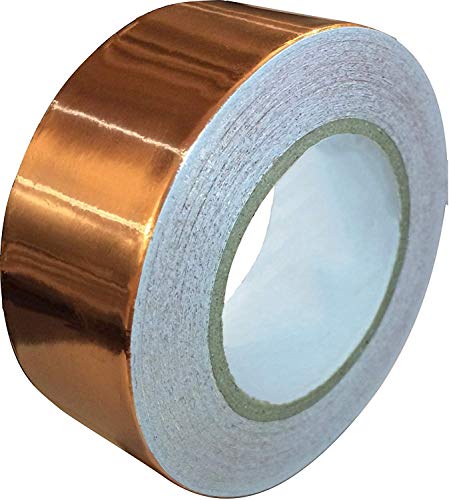
would a tiny sliver of copper foil tape with conductive adhesive make this work too?
https://www.amazon.com/Copper-Conductive-Adhesive-1inch-12yards/dp/B018RDZ3HG
i don't think it'd be too hard to put a piece over the two pins under the foam.
If it's a metal break, you might be able to fix it with some JB Weld.
Devcon!! or another plastic bonder that contains MMA
https://www.amazon.com/Devcon-22045-Plastic-Welder-Dev-Tube/dp/B003NUGL9S/ref=sr_1_1?ie=UTF8&qid=1484501696&sr=8-1&keywords=devcon+plastic+welder
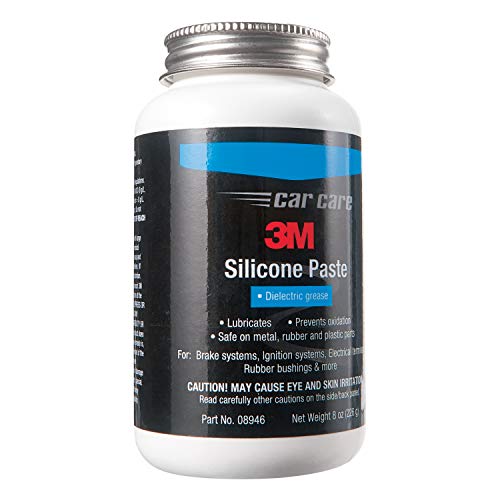
Silicone grease as to not break down the rubber. Officially its this: https://www.amazon.com/Honda-Genuine-Shin-Etsu-Grease/dp/B006Z9TZ9M
This is more for your money: https://www.amazon.com/3M-08946-Clear-Silicone-Paste/dp/B005RNEH5O
Or local napa has https://www.amazon.com/Napa-7651346-Sil-Glyde-Silicone-Lubricating/dp/B0054DWS1W
For a kit, as I did my first one last year, the biggest tip i can give you is be patient. Assembly will take a long time. Make it a weekend project. Take breaks. Don't work on it while you are tired. You may be able to finish it in a day, but I'd bet there will be mistakes. Mainly those that will cause skewed axes and an un-level bed. The autolevel can only fix so much.
Calipers are also a great tool to have. You can get a decent set of metal, digital calipers for like 20 bucks. Also helps you determine if your x-y frame is square.
As you build the axes, make sure you orient the bearings exactly as in the instructions. The bed and extruder assembly should slide up and down the rods with zero resistance with the belts off. If it binds at any point, your rods are not parallel. Tweak spacing and re-test. Don't do anything else until that is perfect. If you ignore it, at best you get some artifacts in your prints or some excess noise. At worst, you eventually wear down the bearings and belts prematurely.
Also, get sewing machine oil. Not WD40, not grease. Something like this:https://www.amazon.com/3-IN-ONE-Multi-Purpose-Oil-3-oz/dp/B0083V8LPO
Keep the bearings lubricated with that. You dont need the rods wet with oil. Just a drop on each bearing then move them on the rods. Probably once a month. More if you are printing non-stop. The bearings will already be oiled though. So you're ok for a little while out of the box. I used "Super Lube" silicone grease and I'm pretty sure its what ruined my bearings and rods. All grease does is trap dust and debris and causes friction. Combine that with a year of daily use, I ended up gouging grooves into my rods. Prints were ok but the printer got super loud. I also ended up deforming the plastic inner housing of my bearings because my rods were not perfectly parallel. Issues I just fixed last weekend when I rebuilt mine with new rods and bearings. The whole thing slides super cleanly.
After that just be prepared to learn. This isn't always an load and print thing. There will be a lot of trial and error and many, many failures. Every spool of plastic can be different. I've largely been OK with just the Prusa Slic3r presets but on occasion I'll need to fiddle with temperature, fan speed, infill and perimeter settings. Don't be afraid to experiment or seek out advice if you get stuck.
Hope some of this helps. Enjoy!
Or a conductive ink pen for those who don't solder.
???
It’s pretty common. I’ve made belt buckles out of it.
Simple amazon search:
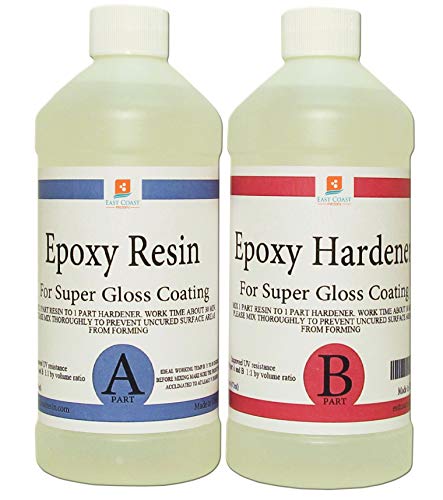
EPOXY RESIN CRYSTAL CLEAR 16 oz Kit. FOR SUPER GLOSS COATING AND TABLETOPS https://www.amazon.com/dp/B01LWT156B/ref=cm_sw_r_cp_api_DguHzbHFXJ16E
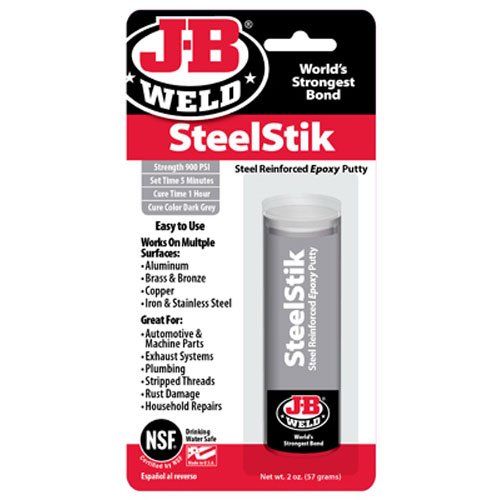
Epoxy Putty
It will dry gray, so you might want to grab a little bit of black paint to.
There is always conductive pen
Works great for the most novice modder. Since a tsop is such a small bridge I'd go this route to make sure you don't mess up a good board.
EPOXY RESIN CRYSTAL CLEAR 16 oz Kit. FOR SUPER GLOSS COATING AND TABLETOPS https://www.amazon.com/dp/B01LWT156B/ref=cm_sw_r_cp_api_mF4MBb28WHGH6
Shoe Goo
Found it here
Sorry for the potato quality.
Made of kydex. Used barrel nuts, screws and plastic weld for the adjustable part. Neoprene liner to protect the stock.
First attempt. Pretty sloppy with some of the cuts for the Velcro straps, will probably use a plunge cutter on the router next time.
Edit: How to and parts.
Here's an album of it disassembled: http://imgur.com/a/Hx72f
Threw this together quick, so sorry if its not exact, but it should give you an idea.
The parts aren't exact, go to lowes or home depot and play around with what fits best for your application and make sure all the screws screw what you want...
The Hillman Group 1/4-in Zinc-Plated Standard (SAE) Brad Hole Tee Nut - http://www.lowes.com/ProductDisplay?partNumber=137342-37672-880539&langId=-1&storeId=10151&productId=3012548&catalogId=10051&cmRelshp=req&rel=nofollow&cId=PDIO1
The Hillman Group 20-Count #10-24 x 3/8-in Button-Head Plain Steel Allen-Drive Socket Cap Screw - http://www.lowes.com/pd_426315-37672-43560_1z0vrds+1z0yjl3+1z0yjot__?productId=4212340&Ns=p_product_qty_sales_dollar|1&pl=1&currentURL=%3FNs%3Dp_product_qty_sales_dollar|1%26page%3D1&facetInfo=0.375|#10
The Hillman Group 4-Count #10 x 3/8-in Nylon Standard (SAE) Flat Washer - http://www.lowes.com/pd_139065-37672-881544_0__?productId=3013084&Ntt=nylon+washers&pl=1&currentURL=%3FNtt%3Dnylon%2Bwashers&facetInfo=
Devcon 22045 Plastic Welder - 25 ml Dev-Tube - http://www.amazon.com/gp/product/B003NUGL9S/ref=oh_aui_detailpage_o01_s00?ie=UTF8&psc=1
KYDEX V Sheet - 0.080" Thick, Black, 12" x 12" Nominal, 8PACK - http://www.amazon.com/gp/product/B009AEKJVW/ref=oh_aui_detailpage_o02_s00?ie=UTF8&psc=1
Sponge Neoprene 1/16" Thick X 54" Wide X 1' - http://www.amazon.com/gp/product/B009K7M1TW/ref=oh_aui_detailpage_o02_s00?ie=UTF8&psc=1
Others things:
Velcro
I found a caliper to be useful ( I have a cheap harbor freight one, doesn’t need to be anything special)
Straight edge
Exacto Knife
Old mouse pad
3m Formula 77
Super Glue
painters tape
Here we go…
First I made a template using some thick card stock paper. I used an old file folder. Cut out the desired shape that will be the bottom layer. Make another template for the riser (this is where the caliper, straight edge, and exacto came in handy).
Cut out the shapes on your kydex. I used a table saw, for quick accurate cuts, however, I’ve heard people use a razor to score and snap the kydex ( I didn’t have much luck with this, I think the .08 kydex is too thick to do this cleanly).
Mark where you would like the tee-bolts and velcro straps to go on the bottom layer. I put the tee bolts slightly above center. Drill your holes using a bit as close to the thickness of the tee-bolt post as you can get, this helps prevent wobbles. Match the post holes on the second sheet of kydex, then measuring half an inch (doesn’t have to be half an inch, could be closer or farther depending on what you’d like) from center add as many additional holes as you desire. Make any drills and cuts before you mold, it will make life easier. Also draw center lines for points of reference.
I wrapped the stock in the neoprene to account for the added thickness during molding. (I eventually glue the neoprene to the inside of the mold to help protect the stock.
Heat the kydex and shape around neoprene covered stock. (Note, mark center points on the kydex and neoprene to easily align).
Tape the freshly molded kydex to the stock. You’ll mold on top of this soon and don’t want it shifting.
Wrap the old mouse pad on the base mold and secure with tape. The second mold will need to be a little wider so it rests on the posts nicely.
Heat the second layer of kydex and mold on top of the mouse pad. Again, pay attention to the center.
After they’ve cooled completely, remove them.
Apply the plastic weld to the tee-posts. Insert the tee-bolts in to the base layer so they are sticking outwards. I like the brad holes, as the plastic weld gets pushed out, they help secure them to the kydex when torque is applied. Wipe away any excess.
After the plastic weld has set, spray the inside of the mold with the formula 77 and insert the neoprene. The neoprene helps protect the stock from the metal tee bolts. This is optional, I did it to protect the stock. This can be tricky, use more neoprene then you’ll need and cut out the excess, that way you get good coverage.
Grab the nylon washers and put them on the tee bolt posts, I super glued these to the kydex to make life easier. You want the washer to be slightly thicker then the posts are high, this way the second piece of kydex is setting on the nylon washer and not the metal posts. Depending on which washers you have, you may want to stack a few on top of each other and glue them.
After every thing has set, attach the second mold of kydex and use the screws to attach to the posts. Adjust height as needed.
Edit two...
Also my cuts for the velcro are very sloppy, I should have used a router or my rotary tool, I may be retarded.
Be sure to fill the key hole with JB Weld.
http://www.amazon.com/J-B-Weld-8267-S-SteelStik-Reinforced/dp/B000786GLM/ref=sr_1_2?ie=UTF8&qid=1411669575&sr=8-2&keywords=jb+weld
I haven't tried this
https://www.amazon.com/FIBER-FIX-Adhesive-Automotive-Emergency/dp/B009WSDWUG
But their ad is interesting if not entertaining.
https://www.youtube.com/watch?v=haPvuhznuyI
About $12 actually.
Get a Kiwi leather care kit and some leather conditioner
Also it looks like your toes are starting to separate, in which case I'd use some Shoe Goo or just some super glue to readhere
Materials I had to buy:
Cost me about $50, plus some materials I had lying around. ($60 after that second fan)
Hope this post is informative enough guide anyone else interested in making one of similar design.
Video of it in action
Edit: Also, huge thank you to rcombs and derinerkan of #XKCD on Foonetic IRC network for helping me troubleshoot the fan issue when I set it on fire, and helping me figure out what I did wrong.
https://www.amazon.com/Shoegoo-Shoe-GOO%C2%AE-Adhesive-3-7/dp/B00135M0MM
Yeah dude, just straighten them up and use some epoxy as Dogmai781 said, or better yet, some plastic welding methyl methacrylate such as this guy, my personal favorite.
https://www.amazon.com/Devcon-22045-Plastic-Welder-Dev-Tube/dp/B003NUGL9S?ref_=fsclp_pl_dp_5
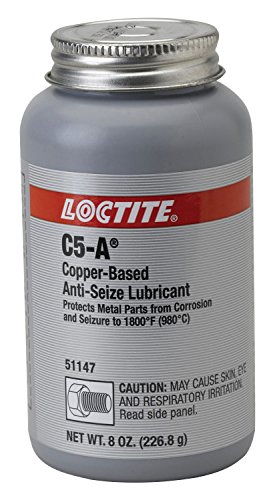
http://www.amazon.com/Loctite-Copper-Anti-Seize-51147-BOTTLE/dp/B000LDDOXG
Loctite C5-A
Airplane motherfucking approved.
Looks good. You should try this stuff for the slime. https://www.amazon.com/Sugru-Moldable-Glue-Original-Formula/dp/B007VXJM58/ref=sr_1_13?ie=UTF8&qid=1550645089&sr=8-13&keywords=Rubber+repair
It comes is different colors too.
Caulk is not a good solution for this. Use self-amalgamating tape like 3M TemFlex. You stretch it and wrap it around the pipe and the joint, and it bonds to itself and turns into a waterproof shield similar to heat shrink tubing. You have to cut it away to remove it, but it has no adhesive so it won't leave a mess. I use this to protect antenna and RF cable connections, it lasts forever and completely protects from water and weather.
Spiffy! Have you considered painting on an epoxy to seal it and improve structural integrity/longevity?
I bought this to coat 3d prints for watertightness and improved finish: "EPOXY RESIN CRYSTAL CLEAR 16 oz Kit. FOR SUPER GLOSS COATING AND TABLETOPS" https://www.amazon.com/dp/B01LWT156B and it seems like it would be ideal here.
This, only with epoxy instead of super glue.
I had a similar issue with my Ibanez, after changing the battery and I also did some diy copper shielding and re-soldered all the connections (regardless of how they looked) making sure everything has a heaping amount of goop on it and now she's a-ok, differs case to case though.
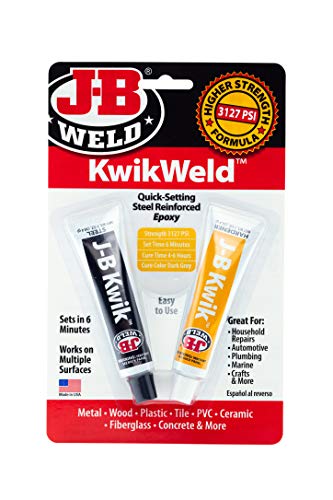
here it is. You should be able to get it at any hardware store. It will work fine for what you want to do. I'd recommend you get the kwik set version.
The biggest mistake I see mechanics do when changing the brake pads is how they deal with the brake caliper 'slide pins.' The slide pins being clean, rust free, and lubricated with the proper lubricant is very important to longevity of the pads.
What I see most mechanics do is either leave the slide pins alone or just use a petroleum-based 'brake grease' for the slide pins when they relube them. This will not do well, because the slide pins need a silicone-based caliper grease that will not eat the protective rubber boots that cover the slide pins. Many brake greases say "rubber safe" on the label when they actually are not (example Permatex Green Ultra brake grease). 3M's Silicone Paste is great for these pins, as well as Motorcraft XG3-A. Either one will do. Many times the boots will be swollen (due to petroleum grease eating away at it)
Also make sure he bleeds your brakes thoroughly to get that old dirty brake fluid out of the system. Many mechanics not do this when doing a cheap quick brake job because it means cracking open the bleeder screws (and possibly breaking them!) and dealing with that associated headache. Old fluid absorbs water and water rusts your brake lines from the inside out, as well as cause premature brake fade during heated stops.
It might be wise to also bring him the brake pad hardware (associated clips and shims) to go along with the pads and rotors.
Finally, find out what the pad manufacturer recommends for breaking in the brakes (bedding the brakes). Doing this is pretty important to proper smooth operation throughout its life.
I have no idea, but even if the one you got has a 3.3V issue, it's not that hard to solve. Here is a nice album detailing the workaround. I would strongly recommend using kapton tape instead of the kind used in the album. It's the ideal tape for the job, since it's basically made to work with electronics. If you're willing to wait a few weeks, you can get a roll perfect for this situation for as little as one dollar. If you're not able to wait, it'll cost you about ten bucks.
I've been fixing this issue for ages on Wonderswans. The underside of the button is just a black conductive carbon pad. These tend to get dirty and wear out over time, but can be easily fixed by using a Nickel Conductive Pen to re-coat the pad in a new conductive layer. It's a super quick and cheap fix and and as long as you let the layer dry properly before playing, will last for many years.
I use Acrylic Solvent, it welds it together perfectly.
https://www.amazon.com/gp/product/B0096TWKCW/ref=oh_aui_detailpage_o05_s00?ie=UTF8&psc=1
this was the epoxy we tried, this is another kind we have on-hand that is just too unwieldy/thick to do a job like this.
Is this the kind you're referring to that does work? I never really tried it, thinking it would be similar in effect to the epoxy glue. There's just so much torsion on that location, I worry about how well it would hold.
I should also mention that this is a college help desk and we provide our services 100% free of charge--the only thing the students pay is for the actual cost of parts. It's all about getting them back up and running as economically as possible, since most of the students are broke and just want it back to a functional level so they can write papers, skype, and facebook again. So while negative goodwill (badwill?) is something I'd like to avoid, it's not like we're worried about losing profit or anything as a result.
Applying some silicone grease and reseating the hardtop panels got rid of my leak.
As long as it says rust prevention it should be fine. I personally use this
https://www.amazon.com/3-ONE-100355-Multi-Purpose-Pack/dp/B0083V8LPO/ref=sr_1_1?ie=UTF8&qid=1483754990&sr=8-1&keywords=3+in+1+oil
Best. Lube. Ever.
Has anybody used Shoe Goo for instances like this? I use to use it during my broke skateboarding days and they worked pretty well for our shoes that constantly scrape across the grip tape/sandpaper. figured that would at least make climbing shoes last a little bit longer.
https://www.amazon.com/Shoe-GOO%C2%AE-Adhesive-3-7-Black/dp/B00135M0MM
Think like the lab electronics test equipment, if the seems aren't welded or fail leak testing, they'll need some sort of copper/silver foil or other material covering with conductive adhesive to RF seal like insulation for shielding to prevent penetration/transmission and any doors or covers that need to be opened and closed for some reason will need RFI/EMI seams and gaskets:
Examples:https://www.amazon.com/3M-Silver-Conductive-Acrylic-Adhesive/dp/B075V69NPY/https://www.3m.com/3M/en_US/company-us/search/?Ntt=conductive+silver+foilhttps://www.amazon.com/Copper-Conductive-Adhesive-1inch-12yards/dp/B018RDZ3HGhttps://www.cgrproducts.com/materials/emi-rfi-shieldinghttps://www.emi-shielding.net/rfi-gaskets/http://www.emiseals.com/products/
Definitely do the shocks and brakes yourself! You'll save yourself nearly a thousand dollars and they really aren't even that hard to do with common hand tools.
How to replace brake pads and rotors
How to replace shock absorbers
How to replace struts (if this is what your car has rather than separate shocks and springs)
You really shouldn't need a full brake system flush for a car that's this new, but if you really want to...
The alignment will need to be done by a professional though, but all the other stuff can be done yourself for probably $150-200. You'll learn a ton about how your car works and how to fix it, and you'll probably get a lot of supplies that you didn't know you needed, like silicone paste lubricant for the brake guide pins, copper anti-sieze, and thread locker, all supplies that can be used for many, many different things, not just this one brake job!
I hope this all is helpful. I've been doing this stuff at home for many years so feel free to reach out if you need any help at all.
Do not use super glue. This will look like garbage, especially if this a plastic or acrylic surface. You can try applying drops of clear epoxy with a fine point as water droplets OVER a matte spray. If its over the spray then it should come clear again (All of the little cavities in the matte spray will be filled in assuming you do this in warmer temps).
Link for clear resin epoxy:
https://www.amazon.com/EPOXY-RESIN-CRYSTAL-COATING-TABLETOPS/dp/B01LWT156B/ref=sr_1_3?ie=UTF8&qid=1510181305&sr=8-3&keywords=Clear+epoxy
I'm looking into repairing a cracked 51, would this acrylic adhesive help me seal the cracks?
This is what I use for wrapping ice tools, if you want a cheap fix.
http://www.amazon.com/3M-2155-Rubber-Splicing-Tape/dp/B001CGVEXS
Some people use PlastiDip which is more durable but not as grippy.
I haven't bothered with either on my mountaineering axe because I mostly hold it by the pick anyway.
That was me :) Here's what I bought for the gray Sugru: Amazon link. I had excess leftover and applied it to the power cord which is actually quite nice, now I have something sturdy to pull on to unplug it.
http://www.amazon.com/3M-08946-Clear-Silicone-Paste/dp/B005RNEH5O
I would take the driver assembly off of the frame (aka remove the thand use an epoxy specially formulated to bond plastic to glue the pieces together. I recommend JB PlasticWeld. You probably want to practice on something else before you try it on your cans, since it dries super quick and you only have one shot at this.
One that has fully cured (it says 1hr but definitely give it a full 24hours), I would wrap the cracked part of the frame tightly in a self-sealing tape. This is a rubber tape which resembles electrical tape but it has no 'adhesives'. What you do is stretch it out as you wrap it and then tightly overlay half of the width over your last pass each time. It will fuse to itself and should support it pretty well. Make sure you have enough clearance to put the layer of tape on and still reattach the driver assembly back on, because once it's one there it's not going to come off without a huge fight (which is the whole point). Again, practice beforehand on something else. I personally use the 3M brand all the time with good results, and it's super cheap. Link.
Good luck.
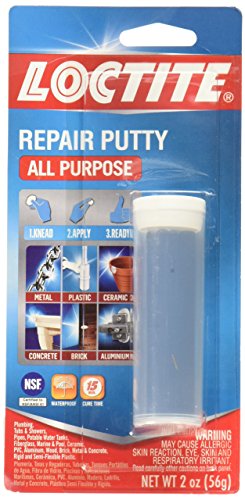
That kind of plastic can be screwed and held together with 2" drywall screws. And it will hold. Pre drilling is an option, but only drill with a very skinny bit. You don't have to pre drill that shit, unless you decide upon fatter screws than drywall. In fact you can practice screwing through the plastic on another area of the chair. And because it may be impossible for the plastic to be brought together for the repair without removing the base, which you must do, (because thinking that you can rely on the screws to bring the plastic together is a bad idea) you probably need to separate the chair and base. Separate the base by removing and sliding the top clip off, and the washer pictured, and the black metal tube will then slide off. This will allow you to hold only the plastic base for the repair. You need to close the gap of the torn plastic before and while you put the screws in. A small clamp, or a pair of vise grips. Or pull together 2 ends of the star where the wheels are, and tape or string them together. Then with a drill, in an x pattern, put 4 screws into it, 2 from each side, at 3/4 of an inch from the top, and then 3/4" further down. After your 4 screws are in place, remove your clamp device, and mix this putty and force it into the entire cavity and down over the screws, for additional solidity. Reinstall the chair to the base because it's ready to be used. The putty will begin doing its job soon enough. You can also put a 1 inch drywall screw into the other smaller crack. From the thinner piece into the heavier, or right to left.
https://www.amazon.com/Loctite-431348-Multi-Purpose-Repair/dp/B000BOB8P6/ref=sr_1_sc_1?ie=UTF8&qid=1474483504&sr=8-1-spell&keywords=loc+tite+putty+epoxy+stick
You mean my $20 Fiber Fix won't work?
I got this one, do you think it will work?
Devcon Plastic Welder.
It's strong stuff, but I don't think it's this strong.
Take the card out of the case, and have a good look at how to fans are attached to the heatsink, there should be a way to get the fans off. You'll most likely need a control screw driver to remove the tiny screws mounting the GPU fans to the heatsink.
Once the fans are off, there should be a sticker on the back side of the fan motor. This doubles as the back cover and seal of the motor of itself. Peel it off and you will see a bearing(most likely sleeve bearing instead of ball, Cheapo-depot) with a small portion of the fan shaft protruding through it. It will be held in place by a small round plastic retaining clip. Put a small drop of oil on the bearing under the retaining clip(don't go crazy or it will fly everywhere when you turn the fan on) I use stuff like 3-in-one and spin it by hand. Put the sticker back on, if it got oil on it and won't stick properly just and a tiny amount of super glue and hold it until dry.
There are many types of fans on gpus, some will come apart how I described, some will be a low profile two piece fan with a solid back that you have to pull apart. I'm not going to describe it, I'm dumb and should just link a guide
Technically if the fans noisy, the bearing is most likely shot. However I've had numerous fans run for a very long time(still are in fact) without noise just by using this method.
edit: Screwdriver set I don't own personally but will definitely work
This is exactly the kind of thing fiber tape is best for
sounds like a job for sugru..
https://smile.amazon.com/dp/B00WW8KIRI/ref=cm_sw_em_r_mt_dp_U_5FB4CbN1GY5TE
Beer traps
Just put a cheap pie container in the garden with beer in it. Go check in the morning, it'll be full of dead slugs and snails.
If its a specific plant you want to protect, you can buy something like this and outline the protected area in it. Slugs cannot crawl over this (the minor electric current bothers them). Not super pretty, but it works very well. This is probably the most low-effort option.
It's just the name of the oil, like this, you should be able to get it or something similar most places.
Put it wherever you can get to, let it soak in a bit, add some more, wrench on it a bit...
even better
Oohh thanks for the suggestion! This looks like it should do the job fine.
Are you maybe looking for something like 3-in-one oil?
If so here it is on Amazon.
Aside from giving it a good cleaning, you want a silicone based grease for electronics. I use this.
http://www.amazon.com/EliteKeyboards-MechLube-Premium-Keyboard-Lubricant/dp/B00CZIZBTK/ref=sr_1_1?ie=UTF8&qid=1421331672&sr=8-1&keywords=EK+MEchlube
Works great on everything. I use it on my game controllers all the time. You're still going to want to clean it out, eventually over time the grease will pickup hair, skin and dirt particles until it becomes very gunked up and gets worse. But since it's a grease you can localize it to one area and it doesn't drip everywhere. There's also various silicone or PTFE sprays but I don't know how I feel about spraying that stuff all over electronics, eventually you'll get deposits in areas you don't want.
You could also try a drop of Break Free CLP, I don't know how that affects electronics but I don't think it could hurt, might want a second opinion.
https://www.amazon.com/3M-2155-Rubber-Splicing-Tape/dp/B001CGVEXS/ref=sr_1_4?ie=UTF8&qid=1480268004&sr=8-4&keywords=self+amalgamating+tape
That's probably your brake pad ears rubbing against your brake clips. I had new pads and rotors installed and had the same problem until I took the pads out and lubed the clips and pad ears. It's about $18 a bottle and lasts forever. You might also want to pull your caliper pins and lube them up as well otherwise your caliper might be stuck pressing your pads into the rotors (use a different lube for that). Most dealer brake places don't do it, but good auto shops do (here's a South Main Auto brake change video).
If you are looking for something more cost effective than Sugru (which is great, but not cheap) you can try an epoxy putty.
as /u/Rathmon pointed out, it's called Kapton tape.
https://www.amazon.com/Heat-Temperature-Resistant-Adhesive-Electric/dp/B00W3FAFP0/ref=sr_1_5?ie=UTF8&qid=1522273920&sr=8-5&keywords=kapton+tape
This question doesn't have enough information in it to provide any type of answer beyond a list of handguard manufacturers so I'm going to assume no budget and no mounting preference.
http://www.amazon.com/UTG-MNTP503-Tactical-Picatinny-Weaver/dp/B002GNYCNU/
http://www.amazon.com/J-B-Weld-8276-KwikWeld-Reinforced/dp/B0006O1ICY/
Clean up the glue (rubbing alcohol works great) and get some of the 3M "Dual Hook Fastener"
IE This: https://www.amazon.com/3M-Reclosable-Fastener-SJ3560-Clear/dp/B0141MQRGI/
3m Dual Lock and a rubber mallet
3M Dual Lock Reclosable Fastener SJ3560 250 Clear, 1/2 in x 6 Ft by 3M https://www.amazon.com/dp/B0141MQRGI/ref=cm_sw_r_cp_apa_2w0Rzb9CHAC1R
Locate a local sign shop, ask if they have a routing table. This will provide clean cuts, and most can accommodate typical straight cuts or shapes easily with their CAD system. If the material is thin enough, scoring and snapping should work.
Also, I've recommend looking into the following weld-on product (https://www.amazon.com/Weld-Acrylic-Adhesive-Applicator-Bottle/dp/B0096TWKCW). It can "weld" polycarb as well, just research what "weight" glue you want and insure that it adheres to whatever design aspect of your project (aka weld-on is not intended for aquariums...etc)
As for lubrication, the design intention is more important here as to what would work best....
I just wrote this for kids in our Scout troop; feel free to use whatever you see fit:
If the new Scouts are going to be buying a pack to take on practice hikes for the West Point Camporee or the Acadia trip, maybe they could use some advice before they hit the store.
Some folks may think “Buy once, cry once” and that’s fine. REI makes good stuff, plus the premium brands like Osprey are available in sizes to fit even little guys.
Other families may want to spend less: your Scout might be headed for a growth spurt, or might be hard on their stuff, or might not be guaranteed to stay in Scouts for ever. In that case, there are some less-expensive ways to buy a pack.
WHERE TO BUY
Discount sporting goods companies include Campmor, Sierra Trading Post, Moosejaw, and REI’s own outlet (the Garage). This offers lower prices on good gear that’s maybe from last year, or a close-out, or a weird color.
http://www.campmor.com
https://www.sierra.com
https://www.moosejaw.com
https://www.rei.com/rei-garage
When shopping online, always look for a coupon code at RetailMeNot! https://www.retailmenot.com
Amazon offers knock-offs of good-quality gear by no-name Chinese manufacturers. These items often have very few (and possibly astroturfed!) reviews; proceed with caution.
Amazon also sells its own knock-offs under the “Amazon Basics” label. Some of this stuff is pretty darn good: for example, I bought the 75-liter version of this internal frame pack last year (on sale for $40.15!) and was surprised at how well-made it was, with decent materials and good features. https://www.amazon.com/dp/B0141MQRGI/
That pack is almost identical to another — and $20 more expensive -- item, the Teton 4000: https://www.amazon.com/dp/B00167TGII/
No, the Amazon Basics pack won’t last for ever, and it’s not ultralight, but it’s functional and inexpensive.
Ask around! Someone in the troop or your family or neighborhood or workplace may have gear they don’t use any more, or may be able to lend you some stuff to try before you buy.
You can sometimes buy used or new gear on Craig’s List or a FaceBook group. The usual reminders of how to shop carefully online apply: never send money electronically, meet in a public place, don’t send anyone your credit card number, bring a friend to the meet-up.
REVIEWS
As for reading reviews to help select an item, there are very good reviews at Outdoor Gear Lab. Here’s their most recent (Nov. 2017) round-up of “budget backpacks”: https://www.outdoorgearlab.com/topics/camping-and-hiking/best-budget-backpacking-pack
(Note that the super-cheap option they suggest at the end is…the Teton pack linked to above!)
Amazon reviews are often bought, so I am suspicious of items with fewer than fifty or 100 reviews.
The (often truly awful) web site Reddit has a community about camping gear, and you can search it for reviews. (Just make sure not to read any other communities there.) https://www.reddit.com/r/campinggear/
And of course you can ask around the troop! Other Scouts and families have a lot of experience camping, and can share what they know about various manufacturers, specific items, or stores.
Aside from what elskertesla suggested, maybe try some Sugru and mold new tabs? There's other types of 'moldable plastics' online which might help/are cheaper than Sugru.
you can use this shit to bond metal. it would be stronger than thin solder, imho. you can sand this when dry, with a fine sandpaper to a smooth finish. it’s nasty to work with, mixing it with the fingers, but it’s amazing stuff. rough up any metal surfaces that will come into contact with the product by scraping it on cement or a metal file or sandpaper first.
https://www.amazon.com/gp/product/B000BOB8P6/ref=oh_aui_detailpage_o05_s00?ie=UTF8&psc=1
Posted below but here is the shelf and I used these velcro strips, surprisingly affordable. Another thing recommended is some stick on rubber pads to stop it from slippin n slidin around. Only other note, the shelf brackets make the board a little steep, kinda hard to use the wah. I'm deciding what my workaround is gonna be, but it isn't too bad for now.
Also here is a link for the tape https://www.amazon.com/gp/aw/d/B018RDZ3HG/ref=pd_aw_lpo_229_bs_img_1?ie=UTF8&psc=1&refRID=FG3V1Y8B7D2NG4BMX9TA
Check out sugru you can mold it into whatever mouthpiece cover you want. Hardens into silicone
Yep, this roll in particular.
https://www.amazon.com/FIBER-FIX-Adhesive-Automotive-Emergency/dp/B009WSDWUG
Good grip, durable, only downside is its semi-permanent
I made a rest for my X55 stick. I covered the stick in cling film, moulded a rest out of FIMO, baked it and covered it in SUGRU, then fixed it in place with dual lock tape.
If you really hate the centering on the stick you might want to look into my mod for it. I can't help with the hats though, I still need to figure out how to replace the swtiches in them.
Has anyone used plumber's putty on higher-draw weight bows to modify the grip?
https://www.amazon.com/Loctite-1999131-Purpose-Repair-Ounces/dp/B000BOB8P6/ref=pd_day0_60_1?_encoding=UTF8&pd_rd_i=B000BOB8P6&pd_rd_r=S17AZ1QRQP3XHQ8KA3MM&pd_rd_w=xNmzf&pd_rd_wg=Qfnqa&psc=1&refRID=S17AZ1QRQP3XHQ8KA3MM&dpID=51eSZk39EIL&preST=_SY300_QL70_&dpSrc=detail
Alternatively, would I be better off using something like Sugru and just build up a bunch of it?
I've got a 60 lb. takedown longbow that I'll be putting this on (it's got a high-wrist grip, I want to change it to a low-wrist grip)-- just want to make sure that it's not going to crack in half as I draw the bow!
Hi, I bought a TADA68 and was thinking of lubing it. I dont wanna spend nuts amounts of money on lube; would this work? https://www.amazon.com/EliteKeyboards-MechLube-Premium-Keyboard-Lubricant/dp/B00CZIZBTK/ref=sr_1_1?s=office-products&ie=UTF8&qid=1524789018&sr=1-1&keywords=mechanical+keyboard+lube
For lubing, im just gonna press the key down and lube the insides like that. That's okay, right?
Fiber Fix might work
You can also use moldable rubber, like Sugru
You just mould it around the wire and it cures to a tough rubber.
Hi everyone! I have a few questions about a few different things.
Sorry if it was a wall of text/unclear, but any help would be greatly appreciated :) I can answer any clarifying questions relatively quickly.
Maybe dip them in epoxy like this stuff
hmm might make the paper too floppy maybe spray and then brush on some epoxy.
Any adhesive using methyl methacrylate (MMA) will work.
Devcon Plastic Welder Link
Loctite Plastic Bonder. It MUST SAY "Plastic Bonder" This stuff. Another link The loctite plastic epoxy without the word bonder on it doesn't work on the same materials. It inconveniently comes in the same color packaging.
I'm pretty sure there are others available but I don't know their names. If you look at the packaging and it says methyl methacrylate you should be good to go.
/u/Raviable
Not OP but go to Amazon and check out 3M Dual Lock. I love this stuff.
https://www.amazon.com/Dual-Reclosable-Fastener-SJ3560-Clear/dp/B0141MQRGI/ref=sr_1_5?ie=UTF8&qid=1510875817&sr=8-5&keywords=dual+lock&dpID=51wv-PLULnL&preST=_SY300_QL70_&dpSrc=srch
If you like the look and the properties of this stuff, you can get an almost identical product from your local hardware store. I'm really happy with the durability of mine and that single cheap roll can do a couple bikes
it is like a lube but not
http://www.amazon.com/Loctite-Copper-Anti-Seize-degrees-Temperature/dp/B000LDDOXG?ie=UTF8&keywords=copper%20antisease&qid=1463879334&ref_=sr_1_sc_2&sr=8-2-spell
you put a little on the threaded end of the bolt and it makes sure any defects in the thread wont grab the bolt, but at the same time it will not add to the the threads slipping, will make sure you get an accurate torque reading (if you need that,) and helps make sure they do not get corroded and stuck if you have to take them off.
so if I were to clip a sheet of PEI on my printrbot bed and then use some of this for the inductive probe would that be good? does the PETG on the PEI require heat as well?
Usually graphite lube comes in a little tube like this. http://www.mrlock.com/image/cache/data/ic/items/23065-500x500.jpg. Orielleys or Napa should carry it. Another one that I've used is http://www.amazon.com/3-IN-ONE-Multi-Purpose-Oil-3-oz/dp/B0083V8LPO. It might be easier to find. But with either one just remember that a little goes a long way.
There are even special lubricants for Keyboards. https://www.amazon.com/EliteKeyboards-MechLube-Premium-Keyboard-Lubricant/dp/B00CZIZBTK
Honestly, I went to home depot and bought a piece of PVC pipe and a 90 degree turn then mounted a clip on top with Sugru. For the helmet I also mounted a clip with Sugru, this is the helmet I use to road bike, mountain bike, kayak and raft with.
Loctite C5-A
LOL I thoguht this was a joke reply, but I googled it anyway.
http://www.amazon.com/Weld-On-Acrylic-Adhesive-Applicator-Bottle/dp/B0096TWKCW
Is this basically super glue? There are plenty of glues that will glue what I need glued, but I'm mostly concerned with the ash left afterward. Do you know if this burns away clean?
It's an odd property for someone needing glue to ask for so I can't imagine any glue being made with this property intentionally.
What about that 2-part clay compound that hardens into an almost metal like toughness? It could be molded over the bow where its broken and would hold it pretty fast.
https://www.amazon.com/J-B-Weld-8267-S-SteelStik-Reinforced/dp/B000786GLM
You mean the little keyboard feet that raises up the back?
Just repair it
https://www.amazon.com/Loctite-1999131-Purpose-Repair-Ounces/dp/B000BOB8P6/ref=lp_256244011_1_10?s=industrial&ie=UTF8&qid=1524385833&sr=1-10
First: CHECK WARRANTY
Second: Acrylic Cement
[ Weld-On 4 Acrylic Adhesive - 4 Oz and Weld-On Applicator Bottle with Needle https://www.amazon.com/dp/B0096TWKCW/ref=cm_sw_r_cp_apa_LvTZAbVPP56XN ]
http://www.amazon.com/Eclectic-Shoe-Goo/dp/B00135M0MM
Maybe something like this? I believe it will give the light an amber quality as well. Heat High Temperature Resistant Adhesive Gold Tape for Electric Task 30m 12mm https://www.amazon.com/dp/B00W3FAFP0/ref=cm_sw_r_cp_api_i_IvIJDbWJHHC0S
There is a conductive paint to re-form lines on circuit boards, if you're trying to paint lines onto that button (not sure what the exact problem is). Or, you could solder any mechanical pushbutton that fits to the board to repair it.
https://www.amazon.com/3-IN-ONE-Multi-Purpose-Oil-3-oz/dp/B0083V8LPO
Amazon
Get some JB Kwik. Sets up in 6 minutes and cures in 6 hours. Nothing beats good ol' JB weld for gluing stuff to metal.
Yeah, dry brushing can be good for imitating depth on a surface, like folds in clothing for small figurines or in this case the light shining from the bulb through the headlight fixture. But I don't know how it will look for sure, just an idea!
Kapton tape is a thin, orange-yellow translucent tape that is used in electronics and some mechanical parts because it is heat resistant. But it would be the perfect translucent covering to stick on the headlights https://www.amazon.com/dp/B00W3FAFP0/ref=cm_sw_r_cp_api_H6pEzbBGQQVNN
How about sugru moldable glue?
https://www.amazon.com/Sugru-Moldable-Glue-Original-Formula/dp/B007VXJM58/ref=sr_1_1_sspa?crid=1Q2HXDUILPNW4&keywords=sugru+black&qid=1550938440&s=hi&sprefix=sugru+black%2Ctools%2C169&sr=1-1-spons&psc=1
dude f that. just grab a whole roll of the stuff.
https://www.amazon.com/Dual-Reclosable-Fastener-SJ3560-Clear/dp/B0141MQRGI
its great and blows normal velcro outta the water.
Yes, get some epoxy putty, like this: http://www.amazon.com/Loctite-431348-Multi-Purpose-Repair/dp/B000BOB8P6 Used it to fix a very similar problem on my 7509HDs, solid as a rock now. Make sure to scrape the plastic a bit before you apply it so it binds well - wrap it around the broken area. I also painted it black afterwards, doesn't look too bad.
Edit: Here's a decent tutorial: http://www.instructables.com/id/Cheap-Fix-Bose-Headphones/
Thank you a lot for the tip. How do I remove the previous adhesive?
And is this the stuff you're talking about?
https://www.amazon.com/J-B-Weld-8276-KwikWeld-Reinforced/dp/B0006O1ICY
Or try using something like sugru I've heard great things, but never seen it used on firearms.
I have several aquaponic systems and i use beer traps and copper tape.
https://smile.amazon.com/Copper-Conductive-Adhesive-1inch-12yards/dp/B018RDZ3HG/ref=sr_1_2?ie=UTF8&qid=1496985047&sr=8-2&keywords=copper+tape
Double sided Velcro tape is my solution, and I can switch them out easily with racing pedals.
I'm canadian so https://www.amazon.ca/Sugru-Moldable-Glue-Black-Pack/dp/B007VXJM58/ref=sr_1_3?keywords=sugru&qid=1558738647&s=gateway&sr=8-3&th=1
Ding All is overkill for this repair. This is very easy to repair with Epoxy putty that is cheaper and just as durable (if not more) with this size ding. You can get it from a paddle/surf shop for $12 to $15 a tube or get the exact same thing from HomeDepot or Lowes for half the price under Loctite or JBWeld. I keep a tube with me whenever I go out for emergency repairs to keep it water tight.
https://www.amazon.com/Loctite-1999131-Purpose-Repair-Ounces/dp/B000BOB8P6
https://www.amazon.com/J-B-Weld-8277-White-Pack/dp/B000BRQ0TW/
​
BluePlanet has decent video showing how to do it. Their Ding Stick is the same stuff as above.
https://www.youtube.com/watch?v=_5SPbD-te7o
​
After it dries give the area some sanding. Start around 150 - 180 grit then finish ultra fine, like 220 grit or higher. I've used it a few times on a yellow Naish board, then hit the spot with some Krylon and it's hard to see the repair.
​
The hole was about the size of a quarter right near the slot for the trigger on the bottom. I had this JB weld putty that is more like clay than the regular liquid JB weld. It was this stuff -
https://www.amazon.com/J-B-Weld-8267-S-SteelStik-Reinforced/dp/B000786GLM/ref=sr_1_6?ie=UTF8&qid=1496607157&sr=8-6&keywords=jb+weld
I did a similar thing with a nes, and also wanted to keep the same external ports. You'll probably want to get a ps1->usb adapter, and use that for the front pad ports, and connect it to the pi via usb (you might have to get a tiny usb hub as well).
Memory cards will be hard, but if you're running an emulator maybe that's not important.
I originally wanted to keep the power and video output the same, but ended up replacing the original video out with a hdmi port, which is much more useful these days. Sugru can be good to fill in the gaps around any new ports: https://www.amazon.co.uk/Sugru-Mouldable-Glue-Black-Pack/dp/B007VXJM58
https://www.amazon.co.uk/White-Polymorph-granules-350gm/dp/B0027IZC3S
https://www.amazon.co.uk/Sugru-Mouldable-Glue-Original-Formula/dp/B00WW8KIRI/ref=sr_1_cc_1?s=aps&ie=UTF8&qid=1549898691&sr=1-1-catcorr&keywords=sugru
https://www.amazon.co.uk/d/Hardware/Premium-Stainless-Reusable-Multipurpose-Securing/B071XBGX8B/ref=sr_1_1_sspa?s=diy&ie=UTF8&qid=1549898746&sr=1-1-spons&keywords=velcro+strap&psc=1
​
If it's cool, I'm gonna just respond to this comment and the other one at the same time.
It's a Heatbed MK1? Awesome. Just like a lot of the other parts, that's totally a current component, and addressable by modern stuff. The MK2, 2B, and 3 are much more common these days, but there's still places you can buy a MK1 brand new, and while the new ones are a bit improved in terms of things like heat density and warp resistance, the original is totally usable. They do draw a lot of power, which is why the old machines often had two power supplies, as running with a heated bed isn't always necessary, so it's good to not have to worry about running 20 amps to a bed when you don't need to, haha. The orange material is what's known as Kapton tape. It's a high temperature resistant plastic (how high temperature you ask? One of its early uses was by NASA on the pods of rockets to allow them to survive re-entry. Tough stuff) that's still commonly used for a number of purposes, but back then was commonly used to ensure plastics like ABS stuck to the heatbed. There's other build surface coatings now, though some people still swear by it. The cardboard was probably just an insulator to help spread the heat more evenly, as the MK is around 200mm on both sides, and with an overhang of 100mm on the aluminum, it obviously needs some help to make sure that all stays around the same temperature. I'd keep that put together for now. Later on, there's some parts that can be changed out to make the bed operate in a manner that's a bit more modern, but for now it's serviceable, and not a big issue.
On to the other questions. When you dropped the board, you may have yanked some cables out of the screw terminals on the PSU. If you want to try and fix it, you can always shut off the power from the wall (wait a few minutes before you touch it, there's a lot of power in the caps), and carefully unscrew one terminal at a time, rearranging the wires wrapped around it so they make contact again, then put it back together. Alternatively you can ditch both PSUs and just get an ATX PSU from an old desktop capable of putting out 300-400W on the 12V rail (typically ones rated to 500 and above are good enough, as a decent amount of power is spent on the 5V rail), cutting the heads off a few leads, and plugging those into the power terminals. It's how I've run my primary printer for almost two years now, and it's an easy way to get a reliable, 12V PSU.
It sounds like your motors are all functional but they're either not getting enough current, or that other potentiometer is causing problems. It's pretty tough to kill this kind of motor, the only thing that really breaks them is dropping them, the wires ripping out, or them overheating. They're rated to operate normally at around 75C, though, so it takes a decent bit of work to really destroy ones of the size you have. If you want to test if they're all good, though, take a multimeter and test for resistance on the coil pars. Typically the coils are labeled as green/black and red/blue, but it can differ from manufacturer to manufacturer. As long as there's two distinct pairs of wires that complete a circuit with some resistance (usually it's around .8 ohms or something to that effect, but it differs from motor to motor), they work fine. Drivers are easy to kill, though, especially if you adjust them with a metal screwdriver, which can short spots on the potentiometer and kill certain things. I've easily burned through four or five out of carelessness, but luckily they're easy to source and replace. Honestly, motors are easy to source too, and only cost about $8-12 each, but the way the old Mendels mounted them means replacing them can be a bit of a task.
On the bed's readout, it definitely sounds like something's up with the thermistor, and if it's heating on its own (that is, without you telling it to), then one of the circuits on the RAMPS board may have failed, as some of the current control systems can fail in an "on" state, meaning they just directly pass power through to the bed continuously. That's fixed by replacing the thermistor/replacing the board, respectively. There's ways to replace the surface mounted components, but it's just simpler to replace the two components, in my experience.
I'm guessing it's very cheap materials.. I actually had it in a bike shop about 3 weeks back, as I had a recurring puncture problem! And the guy said so much then! I'm hoping I can at least get it to last till the summer, as I'm in my final year of Uni, so as soon as I start working properly, I'll be able to invest in something a bit nicer!
I think it has a square taper, as that's the shape of the bit that slots into the gear bit, if that makes sense?? But I have minimal access to tools, so haven't even managed to get the dust covers off the crank or anything!
I think I might try the epoxy way, and see if it can last the next few weeks at least, as money is really tight at the moment, and I won't be able to afford to get it repaired/ replaced for a few weeks!
At the moment, I've wrapped some fabric tape I had lying around around the thread on the pedal, leaving the top half uncovered, and screwed it back in, and it's holding a lot better than it was! I'm almost not happy to try using it though, as I cycle in Glasgow, and if it did fall off when I was flying down a busy road, then it could be pretty dangerous!
Will look into the epoxy route for now though, with aims to get it replaced when I can! Cheers for the help!
Just been looking and found this:
http://www.amazon.co.uk/J-B-Steel-Reinforced-Epoxy-Putty/dp/B000786GLM/ref=sr_1_3?s=diy&ie=UTF8&qid=1416764708&sr=1-3&keywords=J-B+Weld
Is this the sort of thing I should try?
I have a Pebble Time and the copper terminals on the watch started to corrode. It got to the point where I had to fiddle with the charging cord for a few minutes before it would start charging. So, I put some conductive ink on them and it starts charging everytime now. This is the pen I bought: https://www.amazon.com/dp/B01LYAA814/ref=olp_product_details?_encoding=UTF8&me=
EPOXY RESIN CRYSTAL CLEAR 16 oz Kit. FOR SUPER GLOSS COATING AND TABLETOPS https://www.amazon.com/dp/B01LWT156B/ref=cm_sw_r_cp_api_jAc7yb325RB6G
I have [loctite c5a] (http://www.amazon.com/Loctite-Copper-Anti-Seize-degrees-Temperature/dp/B000LDDOXG) on hand also. Will this work?
I found the best thing is the 3M dual Lock tape used for toll devices.
https://www.amazon.com/3M-Reclosable-Fastener-SJ3560-Clear/dp/B0141MQRGI/ref=sr_1_1?ie=UTF8&qid=1496260220&sr=8-1&keywords=3m+dual+lock+tape
I don't know about other people, but I always love looking at pictures! I need to actually see something to visualize it. All the words in the world won't help me. That being said, what exactly is this project for? Can you slide a slightly smaller tube inside the two pieces to give more surface area? Where exactly is the bond failing? Some types of plastics (specifically Polyethylene and Polypropylene) may not bond too well at all.
Let the JB weld cure for a full 24 hours before touching it. When it comes to plastics, I've had good luck with Devcon's Plastic Welder, but again, it does not work on ALL plastics, and it may cure slightly yellow, although this says clear.
Just extend the straps!
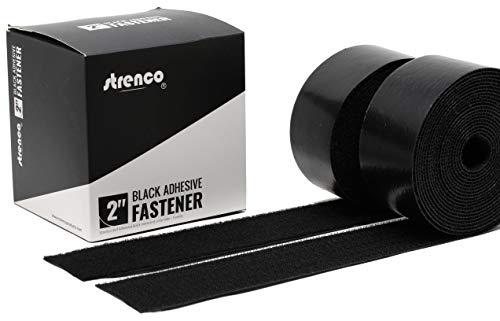
Strenco 2 Inch Adhesive Black Hook and Loop Tape - 5 Yards - Heavy Duty Strips - Sticky Back Fastener https://www.amazon.com/dp/B00H3R9S1K/ref=cm_sw_r_cp_apa_i_3lEODb8159GT9
https://www.amazon.com/FiberFix-Repair-Tape-Wrap-Waterproof/dp/B009WSDWUG
I fixed my headset in the past after breaking it off at exact same spot. Worked longer than I cared to own that headset and was way stronger than the unbroken side (mine was plastic)
J-B Weld 8276 KwikWeld Quick Setting Steel Reinforced Epoxy - 2 oz. https://www.amazon.com/dp/B0006O1ICY/ref=cm_sw_r_cp_apa_i_4M5UDbA0DT7Q4
There are plenty of PETG solvents. Try http://www.amazon.com/Weld-On-Acrylic-Adhesive-Applicator-Bottle/dp/B0096TWKCW
Or you can use a mixture of 600mL nitromethane to 4L methylene chloride.
Dube's got pretty good customer service. I'd send them an email and see what they think?
Otherwise, Shoe Goo is generally really good for fixing clubs. It's a glue designed to withstand lots and lots of impact.
should i be getting something like this to mod the top and the sides?
https://www.amazon.com/Strenco-Adhesive-Black-Hook-Loop/dp/B00H3R9S1K/ref=sr_1_3?keywords=velcro&qid=1574520914&sr=8-3
Try rubber splicing tape. It'll stick to itself but not anything else. Makes for good handle grips and it's easy to clean if it gets dirty. Just rinse it off and it's all good.
If they are the same as the MK4 Golf/Jetta, they are solid and Lemforder is the OEM brand. I actually have a set of Lemforders down in the basement I bought when I was doing a suspension refresh but didn't install them. The originals are still good at 190k miles.
As far as greasing the contact surfaces and easing installation, I would recommend silicone grease. That is safest for rubber. That is also what is used on brakes typically.
Edit: Something like this, or this.
Ah, I have never dealt with any Fractal cases. Looking at the pics on their site, I see it's not to simple to put a rad on the front since they just use that plastic bracket to hold the fans in. A 280 rad would fit, problem would be how to mount it. If still want it there, you could try some epoxy putty to fill in the gaps and get it to stay after removing all the bracket. Just mount the rad to the case, not the fans attached to the rad to the case.
I've been advised to use something like this:
I guess we should prob,b using this, not locktite...
http://www.amazon.com/Loctite-Copper-Anti-Seize-51147-BOTTLE/dp/B000LDDOXG
I haven't picked it up yet, but will be soon. Fwiw I've been using noalox for a while
This bottle will last you forever.
My doors were a bitch to get off and on, but after using some oil inside the hinges it's awesome now. I just keep a bottle of this stuff in my console. You can get it almost everywhere.
http://www.amazon.com/3-IN-ONE-Multi-Purpose-Oil-3-oz/dp/B0083V8LPO
I know everybody is saying give up, but I bet if you flipped it over, temporarily superglue it back together (just to keep it in the original position), then wrap it REALLY well with this; www.amazon.com/FiberFix-Repair-Tape-Wrap-Waterproof/dp/B009WSDWUG. it would hold.
This one does look pretty thick. There are many others out there that are thinner, though. Here's one on Amazon, or just shop around for "conductive ink pen". Copper foil tape would work pretty good, too.
I'm just looking on Amazon, I see 3M Rubber Splicing Tape as Temflex 2155.
3M Rubber Splicing Tape https://www.amazon.com/dp/B001CGVEXS
Maybe Temflex 1300 is more traditional (sticky) electrical tape.
You could try shoe goo. It’s intended for all manner of shoe fixes. I’ve heard wildly varying reviews on its effectiveness, but I know some people who swear by it.
It's fairly easy if you are just replacing a standard plate with another standard plate. (Mounting on virgin boots, doing a short-forward mount, or things like that get a bit more technical)
Chances are you will need to drill new holes in your boot (often you can get 1 or 2 holes to line up, which is a good starting point). What you want to do is match the centerline of the old plate (kingpin-to-kingpin in the case of a non-symmetrical plate) with your new plate, and marking the axle and toe stop locations on the side of the sole is a good reference for the front-to-back placement.
I use a two-part epoxy stick to fill the old holes.
There was a good beginner's guide that was published in Five on Five a few years ago.
I can't recommend the Glo. I have one and while it gets a good signal, never disconnects from my iPad and the battery lasts a long time it has some downsides:
Once I get my IR, I'll be buying a Stratus 2.
90% of my soldering experience is larger things, simple wires, such like that. I don't even have soldering equipment anywhere close to small enough to try to do a modchip.
If you've got an older version (anything before 1.6 I believe) you can do the TSOP flash mod.
I bought this: https://www.amazon.com/gp/product/B01LYAA814/ref=ppx_yo_dt_b_asin_title_o01_s00?ie=UTF8&psc=1 and used it to bridge the pins needed to TSOP flash. It's basically like one of those old white-out pens and was pretty easy to use. The only other thing I needed was a Xbox port to USB cable so I could connect a flash drive. You need a smaller flash drive (there's a compatibility list linked) but I have so many old flash drives I found one that would work.
I've never modded a console before and now after a little adventure later I have my Xbox set up with a larger hard drive that I can install games to, a much nicer dashboard, and it's a lot more future-proof.
I've already got a list of about 40 games that I want to play once I find all of them and it will be a growing list. I've found a lot of the games feel very modern in how they control and that's a huge plus the Xbox offers I think. I can't get into much other "retro" console gaming because I hate the controls. Although, most of those retro consoles will emulate on the Xbox anyway.
Devcon Plastic Welder
info
hardware store/retail example packaging
...And other similar products (methacrylate plastic welding adhesives) like Loctite Plastic Bonder and Permatex Plastic Weld.
They are FAR more suited to doing anything with ABS and PVC than any epoxy, since:
The stuff is one of my most indispensable tools as a modder.
Here is the mobile version of your link
Clears are fantastic. I had originally tried browns, but found that when you started typing quickly the bump became more of a scratchy feeling. Clears seem to fix that issue. The bump has a just a bit more tactility than typing on a nice rubber dome keyboard, but with the nice feel of a mechanical switch.
The two main issues I've noticed are:
Overall, it's my favorite switch. It's a lot of fun to type on without being overly noisy.
As for the o-rings, they're about what you might expect. They reduce the travel time just enough where you don't really hit the strongest part of the spring, but at the same time it doesn't really feel like you're distance has been reduced. They do remove a bit of the fun out of typing, but not a lot. One thing I will note: If I end up removing the o-rings, I'll be keeping them on the non-main keys. I tend to slam the shift key, or number keys and this makes that feel a bit better.
Unrelated to any questions you asked: If you pick up a WASD Code, just keep in mind that the stabilizers tend to rattle a bit on the large keys. You can grab some keyboard lube and completely fix that.
Here's the lube I bought: Amazon
And here's the o-rings I bought: Amazon
https://www.amazon.com/gp/aw/d/B00CZIZBTK
I recently had a similar problem with my 2013 corolla bumper. I used this Devcon plastic weld off amazon that I had bought from a previous LPT. I mixed up some of that, spread in inside the crack on both surfaces, pressed together. Then spread some more on both front and back of the crack. The next day, I put duct tape on the inside to provide a little more structure to the bumper. So far (about 1 month) its held up fine. The plastic weld says its sandable/paintable so if you wanted to then sand and paint it up to match you should be able to.
I did take the bumper cover off to do this, which is pretty simple.
http://imgur.com/a/ddezy
I fixed an old HTC with some sugru last year. Took almost a whole pack and about an hour of shaping and reshaping but I got to where it sealed rather nicely.
http://sugru.com/
http://www.amazon.com/gp/product/B007VXJM58/ref=pd_lpo_sbs_dp_ss_2?pf_rd_p=1944687562&pf_rd_s=lpo-top-stripe-1&pf_rd_t=201&pf_rd_i=B008MIRQUE&pf_rd_m=ATVPDKIKX0DER&pf_rd_r=1JY5NMWRE1ER40XF3EEZ
I had the same thing happen to me, no worries you can rewrap it yourself. Though taking the others advice and doing some cold pulls just in case couldn't hurt.
Anyway here the cotton and the tape I bought, worked great.
For the cotton just have a hold punch ready, perfect size to punch out a hole for the nozzle.
Do you mean that the frame is actually cracked? I just managed to glue back a similar frame with J-B Weld 8276 KwikWeld Quick Setting Steel Reinforced Epoxy if that helps. You can see the machine here while the product is setting.
I haven't tried to pull hard on it after glueing it, but so far it seems to hold.
I trust my printing setup so I am ok with very long print times. and gluing smaller parts will overall take longer and PLA and acetone form a very weak bond so do not use it, a much better option is this - https://www.amazon.com/gp/product/B0096TWKCW/ref=oh_aui_detailpage_o00_s00?ie=UTF8&psc=1
Here are some images of my setup.
https://imgur.com/PCOgUMr
I know folks are moding the HTC Vive deluxe audio strap onto the Quest but I just couldn't do it.I use to own a vive and already bought an audio strap. Gave it away when I sold my Vive.
https://imgur.com/YYUnJvL
If you want the L Extention for the usb-c you can find it here: https://www.amazon.com/gp/product/B07PHQR8P9/ref=ppx_yo_dt_b_asin_title_o00_s01?ie=UTF8&psc=1
And here's a shot of how I keep the battery on. It's not a perfect solution but it works for me. I use the quest to workout so Its important the headset be comfortable and stays in place. So far this has be a perfect solution for little money spent.
https://imgur.com/UWHRBxV
To keep the battery in place, I use Velco: https://www.amazon.com/gp/product/B00H3R9S1K/ref=ppx_yo_dt_b_asin_title_o02_s00?ie=UTF8&psc=1
It's strong and removable.
http://www.amazon.com/gp/aw/d/B000LDDOXG/
I was speaking specifically of epoxy putty like this, this or this. Will that stuff not work because it might get too hard when dry? Would the silicone actually be better in this case?
Stronger repair - http://www.amazon.com/J-B-Weld-8267-S-SteelStik-Reinforced/dp/B000786GLM/ref=sr_1_1?ie=UTF8&qid=1465149984&sr=8-1&keywords=epoxy+putty
Local hardware stores should have putty epoxy sticks like this for $2-3
?
No, I'm not. I'm saying they're trying to make every penny they can. Why would they make a solution to "grind-static" on a budget grinder? If you don't like static you're going to have to take it upon yourself to find a solution for it such as conductive tape or water, or spend a boatload more money on a higher end grinder.
But for entertainment, I googled copper tape and that shit is expensive. You cant just buy three perfectly measured strips. You have to buy a roll of it. Then what will you ever use it for? It's basically anywhere from $5-25 for a roll depending on what sizes you get. I would probably buy this one if I wanted to do this.
https://www.amazon.com/Copper-Conductive-Adhesive-1inch-12yards/dp/B018RDZ3HG
On the threading, I recommend this - http://www.amazon.com/gp/product/B000LDDOXG/ref=oh_details_o00_s00_i00?ie=UTF8&psc=1
Nasstoys Anal Ese Anal Lubricant, Strawberry, 1.5 Ounce https://www.amazon.com/dp/B005LE5OUG/ref=cm_sw_r_cp_api_i_tUO4CbWBKZSCZ
Edit Unm that was for a different person, you want this .
EliteKeyboards MechLube 2 Premium Keyboard Lubricant w/PTFE https://www.amazon.com/dp/B00CZIZBTK/ref=cm_sw_r_cp_api_i_lkP4CbQWTKTCC