(Part 4) Best industrial & scientific according to redditors
We found 29,159 Reddit comments discussing the best industrial & scientific. We ranked the 11,986 resulting products by number of redditors who mentioned them. Here are the products ranked 61-80. You can also go back to the previous section.


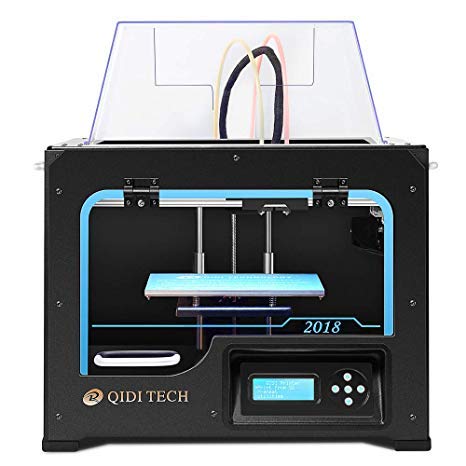

I'm using a FlashForge Creator Pro from Amazon. It is printing with Hatchbox filament from Amazon. The printer fluctuates in price. I got mine for $1000 so it should go back to that price. Printing is more of an art then a science, but you should have a pretty good technical background to make your life easier. Expect to have to take an extruder apart to clean it out or fiddle with settings. You will have failed prints and you will have awesome one. I knew really nothing about 3D printing 2 weeks ago, but I watched videos and did research. If you have any questions I can probably answer them.
$10 gets you a pair from amazon.
I've cut several pennies in half with them.
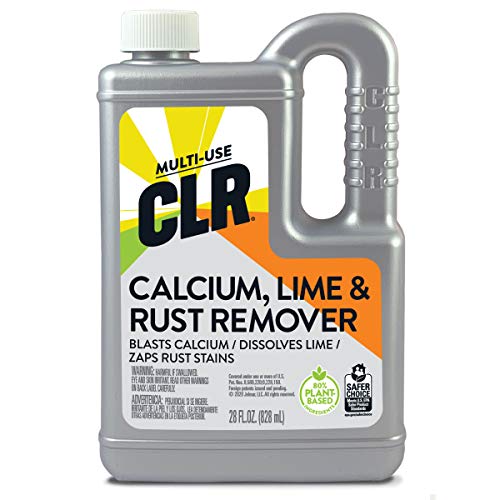
CLR® Calcium, Lime and Rust Remover
.
Comes in different sizes too, I just picked the first result on Amazon. :D
Calcium/Lime/Rust. It's a clearner specifically designed for stains and buildup caused by those types of residues.
I fly and carry with Delta regularly. A couple of times a month. Most of the time the folks that are tasked with doing the zip ties are just as annoyed as I am. The solution is simple. Scissors. You are allowed to carry scissors on your flight. I carry THESE SCISSORS in my carry on. When I get my bag from the dude after zipping it up I pull my scissors out of my carry on and cut them off right in front of them. Usually I hand him/her the trash. I've never had one push back on me. There's nothing they can do. It's your property.
This should do it https://www.amazon.com/gp/aw/d/B001IY82FM/ref=mp_s_a_1_2?ie=UTF8&qid=1497723614&sr=8-2&pi=AC_SX236_SY340_QL65&keywords=gorilla+glue&dpPl=1&dpID=51mHX2GDBrL&ref=plSrch
Honestly why do people have such boners for fixing shit with half measures when buying a new thing is so incredibly cheap and easy?
Shoo Goo costs $6
A 5 foot cable costs $0.79
Shoo goo will hold but for how long? How long until the actual wire starts breaking, not just the rubber sheath? You can get 8 brand new cables for the price of one of those shoo goo things.
Just... gah! Why don't people realize that sometimes the simple solution is the best?
It's a resin cast.
push the drill bit through, and one at the edge to pour the resin in.
This shit: https://www.amazon.com/CLR-Calcium-Remover-Enhanced-Formula/dp/B00009EFEX
I recommend going slow with hand tools. Buy them one or two at a time, and then learn to use, sharpen, and care for those before buying more. This will help you get the best stuff for you while spending as little as possible. Let your projects guide your tool purchases.
Amazon isn't a great place to buy hand tools. Most people shop at either Lee Valley, Lie-Nielsen, or eBay for planes, chisels, saws, rasps, etc. That said, there's a surprising amount of stuff you'll need that's not the tools themselves. Personally, I wouldn't want to saddle myself with an inferior tool just to use a gift certificate.
Anyways. Stuff you SHOULD buy on amazon:
Hand Tools
Clamps
Measuring/Marking
Sharpening Gear
Consumables
Safety Gear
7.4
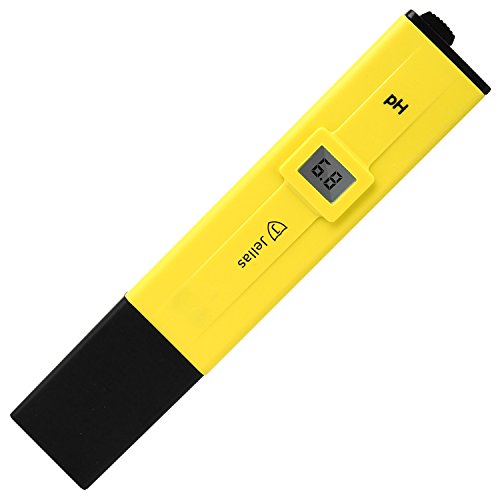
Might want to consider one of these if you are color blind. pH Meter
Ballpark $200.. I bought the wood about two years ago and believe it was ~ $80-$100 2x6x8 walnut. The epoxy, tyvek tape, mica powder and a few other things I didn’t have were about $110. Here’s the epoxy and mica powder in case anyone is interested.
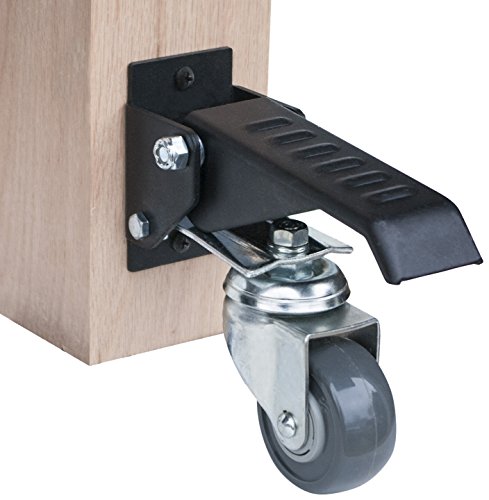
They make retractable casters
Congrats, just got mine 2 months ago.
SeeMeCNC forums are awesome. Start reading every new post.
Best upgrade I've done: PEI Bed
http://www.amazon.com/gp/product/B0013HKZTA
http://www.amazon.com/gp/product/B007Y7D5NQ
~$30 in upgrades; all my prints stick and pop off with ease. Also, the underside of every part is glassy and smooth. So good.
Buy "feeler gages" to assist with leveling the bed.
http://www.amazon.com/Stanley-Proto-J000AA-Master-Feeler/dp/B001HWDOK8/
My bed leveling process is kinda like this:
Let's see, what else. If you can spare the cash, I moved to Simplify3d for all my slicing needs ($100~$150 for the license). Love it. If you can't afford it, maybe you'll find a way.
Also, get ready to do a bajillion calibration runs. I mean it, don't be in a rush.
Find a nice 20mm box off thingiverse or whatever, and you're gonna want to print that repeatedly while you dial in your settings. Once that's set, move on to the hollow pyramid, or the 5mm stairs.
I seriously printed at least 20 of each of these while I dialed in my settings:
ASAP, move over to PLA. Prints so much nicer for me than ABS.
Oh, before you go to PLA, make sure you print 3x of the layer fans housings (not just 1x) and order up 2 more of the "squirrel cage" fans (centrifugal fans) from SeeMeCNC. edit: I spliced the single pair of layer-fan wires into three right at the connectors, I didn't bother running extra wire for them.
Oh, and one other big improvement I made was putting connectors in-line with the hot-end and for all the fans. This way, if I have to replace a fan or upgrade the hot-end I don't have to cut and splice wires, I can just pop it off and connectorize another new one. Here are the connectors I used:
That was probably too much info -- just take your time and try not to get frustrated while you get things all set up. It is not a plug-'n-play object, it requires care and feeding.
... oh, and have fun! Whatcha gonna print?
I cant' speak for other people, but in my case, I have an interest in building and making things outside of work, so I have invested time into learning how to use Fusion 360, and also purchased calipers (specifically this one) to get accurate measurements.
For this particular model, I had the broken part, and could measure everything using the pieces I had and the calipers. Using those measurements I could use Fusion 360 to model the part.
If you want to get started with making your own things, I would suggest first learning a program like Fusion. Tinkercad is a great starting point for people with no 3D modeling experience because it's free and is easier than a CAD program. Once you are comfortable with that, I would start tinkering with Fusion 360. Maker's Muse has a playlist that was helpful for me.
From there, it's whatever you think of to create.
Looks like shoe goo. A lot of pitchers use it to protect the shoe on their back foot so it doesn't rip open. I use it on mine and it works really well, it's also cheap. https://www.amazon.com/dp/B002L9AL84/ref=cm_sw_r_cp_apa_i_Y876AbYX1DB0V
If you buy even 5 30mL bottles a month of premium juice, just use that money at the start to BUILD A KIT. Don't buy one, they all have shit flavors that will turn you off to DIY. Almost all nicotine vendors sell diluted nicotine that you can just mix with flavors, but it's not a cost-efficient purchase. If you want to save money, buy 120mL of 100mg($19 at nudenicotine) nicotine and dilute it yourself. A gallon of VG is $14.49. Find a few recipes with good feedback here and order the flavors for them from bullcityvapor, gremlindiy, or ecigexpress. If you don't mind the extra work, and want to save a bit more, buy syringes instead of a scale, and clean and reuse the syringes.
I have a few recipes I could give out, [VG and PG are on Amazon] (https://www.amazon.com/Glycerin-Vegetable-Kosher-USP-Pharmaceutical/dp/B00PSGWHIO/ref=sr_1_13_a_it?ie=UTF8&qid=1524904013&sr=8-13&keywords=vegetable+glycerine). and excigexpress is where I buy all my flavors. You also need a beaker set, .01 g scale, syringes, medical gloves, glass bottles for steeping, and plastic bottles
Edit: links
This sounds like it might be a case of 'bit off more than I can chew' syndrome, but advice is free. Take it or leave it.
It's not 2 types of resins. It's resin and a hardener. Most modern resins try to make this fairly easy and do a 1 to 1 ratio. This is the chemical 'magic' that makes the liquid harden. As soon as you mix them you have a ticking clock for it to begin to harden, then once hardened, curing fully. Before you mix the two, you can mostly take as long as you want to prep.
Certain resins like Bondo Fiberglass resin use a liquid hardener that you have to measure out and drop into the resin itself. Most modern epoxy style hardeners have simplified the process as described above.
Anyway, depending on the type of wood it might be smarter to stabilize the wood itself under vacuum if possible.
Cactus juice seems to be the standard for this stuff and it does seem to be so for good reasons.
https://www.turntex.com/product/cactus-juice-resin-and-dyes
It's a hardened-upon-temperature resin so you can completely fill the pores of the wood or item, draw out all air bubbles under vacuum and bake at the right temp to stabilize the wood itself.
This has the advantage of making the wood permanently how you want it. You can also pour resin after it's cured if you so choose to make a finished smoothed surface.
I've been looking at a project that requires a good clear resin for a chair and for the price point this seems to be quite reasonable. I do not have any experience with this material yet, but there's a lot of reviews of it. I will say you need to follow instructions about a seal coat.
https://www.amazon.com/Crystal-Clear-Table-Coating-Tabletop/dp/B01LYK2NAG
Hope that helps. There's a lot of Youtube videos out there showing off how to do some of these things.
This stuff is magic, I've repaired several hiking boots with similar problems. It will last quite a while.
Are they scratches or calcium buildup? Try some CLR on that bowl, it might clean it right up.
Ok so This might get a bit long. and I apologize if you already know some of this, just being complete
tools:
I get most of this from 3-Rivers because they have everything you'll need but look elsewhere as needed. They also have some videos on there site on how to use the tools.
Taper Tool This will cut the taper for the nock and point. The 5° for the point and 11°C for the nock. Get the right size for the shaft diameter you use.
Fletching jig (answered elsewhere)
fletching glue: I use either Fletch-it or Gorilla super glue
Nock glue: same as fletching glue
Point glue: I use the Boehning Ferr-L-tight I have never had a problem with it them falling off even in the desert heat. Need a heat source; candle, alcohol lamp, etc.; to melt the glue to use. Some people use epoxy the main draw back is if you want to change or salvage points.
Something to cut the shafts to length.
Finish and or paint of your choice
pliers for putting on nocks if you use hot glue they will get hot
cup of water to cool the points when they are installed
Spine weight calculator My favorite tool for getting a starting point on the proper spine weight
components
Shafts: Lofts of good options with different properties but for simplicity right now go with Port Orford Cedar its is the cheapest option that I have found and the lightest. Pick either 5/16 or 11/32 depending on the spine weight you need.
Field Points Pick the same diameter as the shafts you selected and for simplicity go with 125 grain points. Because that is the weight that is assumed to be used in the spine weight of the shaft.
Fletching I assuming you want feather fletching if you're making wood arrows. Pick either shield or parabolic cut and the colors your want. Go with 4-5 inch long feathers.
Nocks Pick the size based on the shafts diameter and pick your color. These are the only nocks I'll use, there are others but they have never let me down.
Simplified Process
This can be done in groups just giving as doing one arrow for simplicity and once you know what your are doing some of these steps can be done in a different order
9 Fletch: The True Flight fletching guide does a better job of explain it than I ever could
and you are done.
It really is that simple. I have made (and broke) bunches of arrows so if you have questions ask away. I can elaborate on different parts if you have specific questions or wondering what to do when you get the parts in.
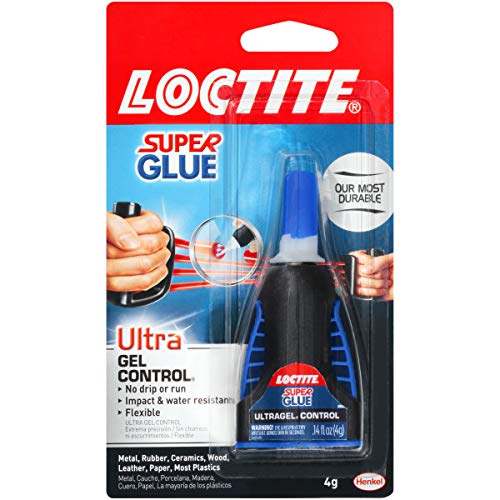
I LOVE [Loctite Ultra Gel Control Super Glue] (http://www.amazon.com/Loctite-Ultra-Control-4-Gram-1363589/dp/B003Y49R7G?ie=UTF8&psc=1&redirect=true&ref_=oh_aui_search_detailpage)
It is very strong and very easy to use with the squeeze control being built in to the container itself. It also dries in a couple minutes
I'm assuming you already have a kettle, burner, brew paddle, and thermometer. Also assuming you have good water. You will have to buy crushed grain until you get your own grain mill. The ball valve can be upgraded with a cam lock quick disconnect and tube. I like to mash on my kitchen counter, so I have to move the kettle outside for the boil and a platform dolly is a big help with that.
Right here: http://www.amazon.com/gp/product/B0057OC5O8/ref=oh_aui_detailpage_o00_s01?ie=UTF8&psc=1
A comment I submitted in a different thread:
Awesome! I've had my pax over a year and I'm still loving it. It still hits like a champ and the cleaning is to me easier than its made out to be. The stealthiness of it amazing. I've told a bouncer its a portable battery or an ecig and gotten no questions. Just a heads up the very first time cooking a fresh bowl definitely smells like weed. All vaping smells some, but that first heating and first few hits are by far the strongest. After that is gets much less pungent. If I'm packing it at home before going to a venue I'm nervous about, I'll take the first 2-3 hits at home. Out of a full oven I can get 3-6 good sessions with stirring, depending on the weed and people.
Here's a couple tips I've picked up.
Be careful of the mouthpiece spring. It's deceptively strong and will launch your mouthpiece to dark places. Also, when pushing down the mouthpiece to lock it, the "sweet spot" is juuuuust before all the way down. It's hard to explain. But you can actually push the mouthpiece down too far and it won't always lock. My first time using it I was pissed because it wasn't locking. But I was pushing it too hard and past the lock point. Pushing it down lighter was the answer.
Dental brushes dipped in alcohol work great for scrubbing out the oven and mouthpiece and can be purchased at any store/pharmacy. The lube is food grade propylene glycol and can be purchased at certain stores or online for cheap. Such as http://www.amazon.com/Propylene-Glycol-Pint-Free-Shipping/dp/B005F5KYM4/ref=sr_1_3?ie=UTF8&qid=1418272765&sr=8-3&keywords=propylene+glycol. Rub a few drops on/inside the mouthpiece tube every time you clean it to keep it from sticking.
When you're cleaning it be careful of getting the temp change button wet. If it gets wet, it will think it's on and the oven will start heating. That sucks if you are cleaning it and don't notice.
I've found its better to Charge the pax right side up with the charger on top. It helps makes sure that no resin leaks up the tube and is more stable.
If you rotate it on its long axis (doing a barrel roll) 3 times, it enters party mode and the front light flashes. This means it won't stop heating if it's kept still. Normally if it's kept still for a few seconds it goes "idle" and stops heating. The flashing light also looks pretty cool. You can also play Simon says against your pax by turning it on its long axis 7 times I think. YouTube has a good pax Simon says video with the steps. Both tricks are great when showing your pax to friends.
I have the thermoworks 8689. It seemed to never lock on to a pH, any temperature fluctuation would change the readout even though it has ATC. It also rarely showed that I hit my expected mash pH. I switched to this: Apera Instruments AI311 PH60 Premium Waterproof pH Pocket Tester, Replaceable Probe, ±0.01 pH Accuracy, -2.00-16.00 pH Range https://www.amazon.com/dp/B01ENFOIQE/ref=cm_sw_r_cp_apa_i_u1i2DbFX4E7XX. Have only used it twice but both times it showed I hit my expected mash ph, it stayed steady, and this all without calibration. Last brew day, I used both, the apera matched my target, so I calibrated the thermoworks and it still did not match. Happy with the apera, but with two different pH readings I have no idea which is correct. Apera is matching my target so I'm inclined to believe it. The apera also comes in a nice case and is easier to keep stored in solution.
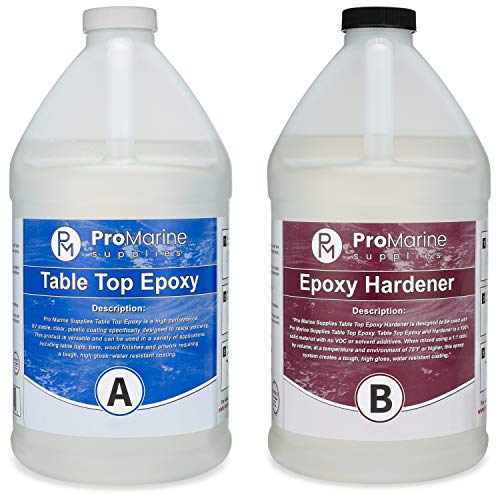
After much nail biting trying to choose the right epoxy, I went with this ProMarine from Amazon:
Apera Instruments AI311 PH60 Premium Waterproof pH Pocket Tester, Replaceable Probe, ±0.01 pH Accuracy, -2.00-16.00 pH Range https://www.amazon.com/dp/B01ENFOIQE/ref=cm_sw_r_cp_apa_i_17svCb4YECPMC
Sure, happy to
Ingredients:
Directions:
1.) Rinse and prepare the peppers as described above.
2.) Add the cherries and Thai chilies to the jar, and garlic if using fresh, followed by the larger jalapeno pieces.
4.) About an inch before the jar is filled to the shoulder, add the weight, and continue pouring brine until all produce is submerged. It is important to have some distance from the top, as the water level will continue to rise as the produce releases moisture.
5.) Apply the airlock lid and ferment for desired length. Suggested: Minimum one month. The pictures shown feature a nearly 3-month ferment.
After the ferment:
1.) Strain the brine from the peppers.
2.) Transfer the peppers to the blender, add 1/2 cup of the reserved brine, 12oz. thawed frozen cherries, sugar, and garlic powder (unless fresh cloves were used in ferment). Blend on high for a few minutes. If you prefer a thinner sauce, add additional brine, blend, continuing to add brine and blend until desired consistency is achieved.
3.) You may now store the sauce raw in the refrigerator, or go on to cook and/or pasteurize it.
Raw sauce: This method preserves the probiotic bacteria in your ferment. If you can test the pH and confirm it is 3.2 or below, there will be no issues. If the pH is above this level, it is possible the added sugar and cherries can restart the ferment, which can create excessive pressure in the storage container. It is not suitable for mailing or room temperature storage. If you are close to 3.2, you may add vinegar until the correct pH is achieved. If not, refrigerator storage is an acceptable method, but the container should be monitored and the cap periodically loosened to release potential pressure build-up.
Cooked sauce: Transfer the sauce to a medium saucepan, bring to a boil, then reduce heat to low, simmering covered for around 20 minutes. You may then opt to blend the sauce further in the blender for several minutes while hot, which will create a very smooth, easily flowing sauce. You can add a splash of vinegar for flavor and to further reduce pH as well. To transfer to 5 oz. woozy bottles, use a bottling funnel.
We actually ended up using a couple brands because we really underestimated how much we would need. So we started with this stuff from home depot and then ended with this stuff from Amazon. They both worked great. I think the part that made it look really good was using a heat gun to get rid of all the air bubbles.
It isn't my trade, but I've had conversations like that with EMTs and LEOs and one thing I've bought a few of and keep in different areas (including in my car) is a pair of EMT Shears. I bought a half dozen or so cheaper ones and for me they work fine. This was the first hit on Amazon I found, but there are plenty of cheaper ones. http://www.amazon.com/Prestige-Medical-Fluoride-Scissor-Black/dp/B002WJHE7E/
They cut through almost everything. Clothing, plastic packaging (blister packs), seat belts, wires, etc. Stuff that will your standard scissors won't handle. Usually they'll show you pics of a pair of EMT shears cutting a penny as a demonstration.
I'm torn between the duality of vanity and functionality. Most decent jackets have some reflective material on them unless they're total black out pieces of gear. I decided since I can't stand dayglo green or funky bright colors that I would mix a good portion of white in with my gear. I don't go pure white but if i have the option to buy a piece of gear that is black/white I go for it. For the pieces I couldn't get with white (like my current riding back pack) I bought 3M Scotchlite Tape and taped the hell out of it. I've also been hunting for a "Helmet Halo" which was a highly reflective fabric band you put around the bottom of your helmet (i don't like using adhesives on my helmets) but I believe it fell out of production.
If you go hand tools, you can start with Rennaissance Woodworker’s minimum tool list. You can go with a lot of vintage tools to save money, but for fun I priced out all new tools of good quality. Many tools were recommended here. I've added a workbench and some reference books and videos too.
MINIMUM TOOL LIST
$169 Jack Plane Woodriver
$125 Hand Saw backless saw ~26″ in length
$28, $30, $35 - 1/4, 3/8, and 1″ chisels Ashley Isles MK2
$79 Back Saw Veritas Crosscut Carcasse
$12 Coping Saw Olson
$18 Marking Gauge Beech Marking Guage
$12 Square IRWIN Combination
$149 Some kind of sharpening set up (stones, sandpaper, whatever) Norton Waterstone Woodworker Package
$592 Subtotal
NICE TO HAVE
$13 Honing guide Eclipse style
$13 Marking knife Veritas
$22 Mallet Thor
$15 Book to learn from Essential Woodworker Book
$63 Subtotal
WORKBENCH
$27 Workbench plans Naked Woodworker
$123 Materials for Naked Woodworker, costs from Mike Siemsen
$35 Holdfasts Gramercy
$185 Subtotal
GRAND TOTAL
$840
You can be assembled and printing with the included tools in about half an hour, with no prior 3D printer experience. That's not a problem.
Actually getting the most out of the printer though, that depends on what you want to use it for.
I use it for making functional prints, replacement parts, and sometimes cool trinkets. I am not an artist, if you want to model and print sculptures, good luck. I haven't a clue.
If you're like me and want to make what I make, here's a list of things you should get:
Things you should print:
Things you should download:
While I'm making suggestions, I'd say you should get some PLA and PETG to start with, ignore ABS entirely. It's slightly cheaper per kilogram, but there are toxic fumes to worry about and it really needs an enclosure to print (well).
PLA is cheap enough, but doesn't flex as much as ABS so it's better for different applications. PETG is like the best parts of PLA and ABS, but you have to print at lower speeds.
I print at 45mm/s, 5 second minimum layer time using both PLA and PETG and it works perfectly. 210C/60C for PLA and 250/70 for PETG.
If you have any questions, you know where to find me. :)
http://www.amazon.com/University-Arizona-Wildcat-Figurine-Antenna/dp/B005IB3N00
Plus
http://www.amazon.com/Barbie-Christmas-Morning-Slippers-Hairbrush/dp/B001JEH7ZW
Plus
http://www.amazon.com/gp/aw/d/B001IY82FM/ref=mp_s_a_1_1?qid=1419287838&sr=8-1&dpPl=1&dpID=41nNuDE7mbL&ref=plSrch&pi=AC_SY200_QL40
= DIY masterpiece
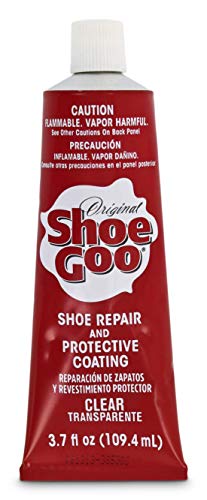
Have you ever heard of Shoe Goo? it's one of those indispensable products for me. If a shoe starts to leak or come apart it's so easy to glue and make waterproof again.
I think we buy ours at the local hardware store but it's one of those items that I think everyone should own. Apparently I walk weird, and I wear holes in my right shoes/boots, right on the pad of my foot. I've gotten months of extended wear out of my boots that look good otherwise!
This is the el wire- excuse mobile
Lychee Neon Light El Wire with Battery Pack, 15 Feet, Blue https://www.amazon.com/dp/B00EENNHMM/ref=cm_sw_r_cp_apa_wb-.zbMXQ6FDS
And I'd recommend using some scotch or painting tape with a fifteen foot string to trace out the path you want to glue down. It will make it much easier, but it does take a while.
Also, use gel glue. It's shock/water proof. I'd recommend 2 of those if you're using a full face helmet
Loctite Ultra Gel Control Super Glue 4-Gram (1363589) https://www.amazon.com/dp/B003Y49R7G/ref=cm_sw_r_cp_apa_qe-.zbFH9CXFF
Another vote here for the propylene glycol available on Amazon. This is what I got, works beautifully.
holy crap this is scary as fuck! please please please be careful. it's very obvious you don't know what you are doing. remember 2 grams is 2,000 pills. don't try to eyeball doses or keybumps or anything like that. first step: get a milligram scale!!!! you said earlier you have a gemini 20, that's would work just fine. then you are going to need a graduated cylinder, and some PG. i do 2mg per 1 ml of pg. so i weigh out 100mg of etizolam, carefully measure out 50 ml of pg then mix the two in a vial. just shake it hard core then let it rest overnight then shake it some more (takes it a while to dissolve in PG). make sure to store the vial outside of sunlight because that damages the etizolam (i wrapped electrical tape around my travel vial). then get a transfer pipette or oral syringe and make your dose (half a ml for 1 pill, 1ml for 2 pills). tastes horrible, best to put it in a drink or have a chaser handy. PLEASE BE CAREFUL!!!! it's hard to measure out under half a ml accurately so 10mg a ml means you HAVE to do at least 5 at a time. it's just a good recipe to extreme and dangerous addiction and would make it even harder to taper off.
haha! I actually bought it on amazon!
http://www.amazon.com/FlashForge-Structure-Optimized-Platform-Extruder/dp/B00I8NM6JO
It was definitely an expensive investment, but worth it. It makes prototyping things extremely efficient.
They can get pretty expensive, think Makerbots and stuff. But there are less expensive ones that do a great job too. /r/3Dprinting has a lot of great advice. There are some helpful forums elsewhere too.
This makes way more sense now... I couldn't believe you had seen that shark for $1,500.
Hi people, longtime lurker first-time commenter!
(Incoming wall of text. Just trying to be thorough!)
​
I'm looking to buy a new dual extrusion 3D printer; specifically one that can support soluble support materials such as HIPS or PVA. High layer resolutions are preferred (~<0.1mm) but are not absolutely necessary.
I've currently looked into several newer printers but can't figure out which one is likely the most reliable:
These are pretty much all the printers I have found. Devices that merge two filaments into a single extruder are unpreferred as they are pretty iffy when printing with two different types of materials and need to create purge blocks really increases print time. Right now I'm learning towards the BIBO but would like to hear more about the device.
If anyone has any other recommendations or additional experience with dual extruder 3D printers let me know!
&#x200B;
(P.S. I accidentally turned this comment into a wall of text as there was only so much information I could find on reliable, (relatively) affordable dual extrusion 3D printing. Maybe some would be willing to collaborate to make a post covering more info so others don't have to look so far!)
Ill always recommend #1 but I have seen other people suggest #2 as a safe alternative.
Before you make your decision on using an alternative take heed of this warning from Ploom (source: some site called "Rich Malley's blog", but it seems like a legit CSR Reply):
>Regarding my suggestion that AstroGlide is an acceptable substitute for the lube they offer for purchase, Ploom pointed out that if a Pax owner damages her vaporizer by using anything other than their officially approved lubricant, she could void her 10yr. warranty.
Just get it on Amazon homeslice. Essential depot is like 29$ a gallon incl shipping with prime
Swap out your casters with these. Bam...stability and mobility.
Buy an new extruder, the plastic one will start to wear out after your first roll of PLA. Get one of the all metal ones like this
If you want to do something crafty with your daughter, you could try to cut some of this 3m reflective tape into interesting shapes: http://www.amazon.com/3M-Scotchlite-Reflective-Silver-36-Inch/dp/B000BQRIV2/ref=sr_1_1?ie=UTF8&amp;qid=1452464185&amp;sr=8-1&amp;keywords=3m+reflective+tape. My experience with that tape is that it is very reflective, but you'll want to replace it after a couple years.
If you want something reflective on the spokes, these work pretty well: http://www.amazon.com/Lightweights-Power-Reflectors-Wheels-86-Piece/dp/B002KYFWQ6/ref=sr_1_4?ie=UTF8&amp;qid=1452464201&amp;sr=8-4&amp;keywords=reflective+bicycle+spoke
Also, Vespertine makes some reflective flower pins and such. My wife has one, so I can tell you they are definately very reflective, but they are kind of silly expensive: http://shop.vespertinenyc.com/category/jewelry. I'm not sure exactly where I can just get a sheet of whatever they are made of to make my own stuff.
Reflective tape is easily available if you can use that: https://www.amazon.com/3M-Scotchlite-Reflective-Silver-36-Inch/dp/B000BQRIV2
get a honing guide - http://www.amazon.com/Robert-Larson-800-1800-Honing-Guide/dp/B000CFNCKS/ref=sr_1_1?s=hi&amp;ie=UTF8&amp;qid=1450064426&amp;sr=1-1&amp;keywords=honing+guide
Start by reading the FAQ at /r/reloading. Make sure you have a look see at a reloading manual or two as well.
Bare minimum equipment you will need is:
Press
Dies for your caliber
Calipers
Scale
Lube
I started with a Lee Challenger kit which is $116 and has everything you will need, minus a set of calipers for about $25. I also got a digital scale and a tumbler. All in you will be about $200 or so to start pumping out rounds.
After seeking the guidance of all you gurus (https://www.reddit.com/r/XWingTMG/comments/4tkx3v/taking_the_plunge_with_magnets/), I finally went ahead and did it.
Components:
Ring Magnets https://www.kjmagnetics.com/proddetail.asp?prod=R421
Ball Bearings https://www.kjmagnetics.com/proddetail.asp?prod=R421
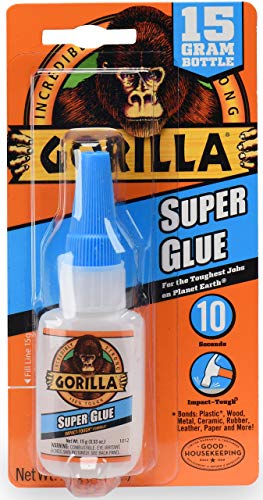
Gorialla Glue https://www.amazon.com/Gorilla-7805001-15g-Super-Glue/dp/B001IY82FM
Dremel 4000 https://www.amazon.com/Dremel-4000-3-34-120-Volt-Variable/dp/B002L3RUVQ
X-Acto Knife http://www.michaels.com/10223579.html#q=x-acto&amp;start=10
Pliers http://lmgtfy.com/?q=pliers
My process for the ships was as follows:
My Process for the stands was as follows:
Use some Gorilla Glue for it.
Amazon - Gorilla Glue
one more thing you can do , especially on tricky parts, or parts that you have unsuccessfully mated is :
take a hobby knife or exacto, and make several dozen marks on the surface area (only where it will be covered up by the other part of course) make like a "cross-hatch" pattern of score marks with your blade on the matting surfaces of both parts.
that gives the glue hundreds of little valleys to seep down into and make an extra strong bond.
If that doesnt work, lol, then you have to pin it.
If THAT doesnt work, you just need to quit this hobby and go back to your PS4.
I really fail to understand your issue with the gorilla glue, i think it is the BOMB.
Are you using THIS???
http://www.amazon.com/4-oz-Original-Gorilla-Glue/dp/B0001GAYRC/ref=sr_1_4?ie=UTF8&amp;qid=1422669512&amp;sr=8-4&amp;keywords=gorilla+super+glue
Thats not what you want!!
You want THIS
http://www.amazon.com/Gorilla-7805001-15g-Super-Glue/dp/B001IY82FM/ref=sr_1_1?ie=UTF8&amp;qid=1422669512&amp;sr=8-1&amp;keywords=gorilla+super+glue
Another reason i love the gorilla superglue is it doesnt make nearly as much cyoacrylate stain (white stain from the fume or offgassing of the glue while curing)
I dont know why im talking so much about glue tonight.
Get some shoe goo! Use an old credit/gift/rewards card to spread it around evenly to smooth out the divots, maybe add a layer to protect the smoothed out part under the balls of your feet, and give it 2 days to cure. It's tough stuff and added a good three-five months to the soles of my running/walking/work sneakers.
Shoe Goo?
I used an REI Hiker First Aid Kit as a starting point and have been adding to it. I keep everything in a Deuter external pocket so I can keep it in the bag or add it externally. I am planning on adding a basic suture kit, better shears, digital thermometer, and some burn relief gel. Anything else I am overlooking?
Contents:
Not pictured: a few pairs of nitrile gloves.
https://www.amazon.com/Prestige-Medical-Fluoride-Scissor-Black/dp/B002WJHE7E/ref=sr_1_3_a_it?ie=UTF8&amp;qid=1483349255&amp;sr=8-3&amp;keywords=surgical+scissors
Surgical Scissors brother. Good luck.
I tend to buy superglue from my local grocery store. Any kind of “Gel” superglue is what I prefer to use. Loctite has always worked really well for me!
https://www.amazon.com/Loctite-Ultra-Control-4-Gram-1363589/dp/B003Y49R7G
Here’s an amazon link as well
Calcium, Lime, and Rust Remover https://www.amazon.com/dp/B00009EFEX/ref=cm_sw_r_cp_awd_0-XFwbNSSPYEA
It's used to remove hard minerals. You have to be careful not to get it on the paint. Thus diluted CLR should be used.
It's very simple. Get something like this and then this for the smaller stripe.
You could do it without a clear coat but the clear coat will make it more resistant to pealing/chipping/more permanent. If you do decide to do a clear coat it's not coming off unless you sand the clear coat and your paint off.
Most helmets/bikes come like this from the factory with their vinyl stickers etc placed on and then just clear coated over.
I have bought both. Just save up a little longer and buy the veritas. It's a better long term investment.
That said, if you are really on a budget, realize that these honing guides are practically all copies of each other. I would not be surprised if they're made from the same factory. You can save a few bucks by buying this.
http://www.amazon.com/Robert-Larson-800-1800-Honing-Guide/dp/B000CFNCKS/ref=sr_1_1?ie=UTF8&amp;qid=1370329190&amp;sr=8-1&amp;keywords=honing+guide
after that build yourself a jig that lie nielsen suggest
http://www.lie-nielsen.com/pdf/AngleSettingJig.pdf
-----
1A) Art of Electronics book (3rd edition)
1B) you can download old versions of many text books (this suggestion is not meant as a gift)
-----
-----
Comparison Review:
iGaging EZCal IP54 6" Inch/Metric/Fraction (#100-333-8):
https://www.youtube.com/watch?v=n2lza0RZII8
Buying this: https://www.amazon.com/gp/product/B07RD6D2ZQ/ref=ppx_yo_dt_b_asin_title_o06_s00?ie=UTF8&psc=1
and buying this in order to properly calibrate e-steps: https://www.amazon.com/gp/product/B001AQEZ2W/ref=ppx_yo_dt_b_search_asin_title?ie=UTF8&psc=1
These two things took my prints from adequate to pristine. Huge improvement.
Woodworker here. It's no problem at all to repair that break and end up with a neck that's more solid than before.
You can take it to a luthier and it'll be an easy job for them, or it's a pretty easy DIY job too.
Here's what I'd do: get a bottle of CA glue (super/krazy glue), a needle-tip glue injector, a clamp (a quick clamp would be fine, or any solid clamp with padded clamping surfaces to avoid marring the neck), a wiping cloth, and acetone (paint thinner or nail polish remover).
Gently force the break open slightly, and inject CA into several locations throughout the break. (The ideal would be to get a coat of glue across the entire surface, but that's not practical in this case.) You want to work quickly, as CA has a short working time, but don't rush. Once the glue is in place, immediately apply the clamp. I'd locate it directly on the first fret so it's central on the break. If using a quick clamp, get it as tight as it goes. A screw-based clamp should only be tightened to finger tightness, as those can apply much more force than a quick clamp and you don't need a lot of clamping force in this situation. If there's any glue squeeze-out, clean it up immediately with the cloth dampened with acetone. CA glue cures very quickly, so you can remove the clamp after only 5 minutes or so. Just to be safe, I'd let it sit for a day before restringing it.
The last thing to do to make it as good as new is to repair the finish. It looks like this neck has an oiled finish, so that makes things super easy. Feel across the entire joint. If you can feel the break at all, take a piece of 220 grit sandpaper and gently sand the joint, going with the grain. It shouldn't take much effort to get it smooth. Finally, get some tung oil (make sure it's 100% tung oil, not "tung oil finish"), apply a small amount to a clean rag, and wipe a thin coat across the repaired area. Let it sit for a few hours, gently sand with fine grit sandpaper (absolutely no more coarse than 220), and repeat. I'd repeat this process for three or four coats. If you notice a different coloration on the repaired area and want to keep it even, then oil the entire neck. (Precautions for working with tung oil: work in a ventilated area, and dispose of your oily rags properly. Either burn them, or lay them out in a ventilated area (preferably outdoors) until they become hard and brittle, at which point the oil is cured and the rags can be thrown out. If thrown in the trash or balled up before the oil is cured, they can actually spontaneously ignite.)
I'm a recent graduate nurse, and I would encourage you to add a small notepad and a good pair of medical scissors. Otherwise, good carry.
http://smile.amazon.com/SainSmart-4-CH-4-Channel-Relay-Module/dp/B0057OC5O8/
Not just from prusa, pick and choose. URLs for examples.
Digital caliper, 12" https://www.amazon.com/gp/product/B000EJUBBU/ref=oh_aui_detailpage_o02_s00?ie=UTF8&amp;psc=1
Extra brass nozzles.
Hardened steel nozzle, 0.4mm to 0.6mm for printing abrasive exotics (wood, glow in the dark, carbon fiber etc)
Print removal tool https://www.amazon.com/gp/product/B00VB1U886/ref=oh_aui_detailpage_o02_s01?ie=UTF8&amp;psc=1
Locktite blue bolt-fixer (Walmart, Home Depo, Lowes etc) to stop bed sensor from moving.
High temp anti-seize for nozzle threads https://www.amazon.com/gp/product/B0053ZS1Z8/ref=oh_aui_detailpage_o02_s01?ie=UTF8&amp;psc=1
Raspberry Pi 3, 5v Pi 2A Power wart, Micro SD card, & Webcam for octoprint monitoring.
Relay board for Pi/octoprint to power up & down printer remotely. https://www.amazon.com/gp/product/B0057OC5O8/ref=oh_aui_detailpage_o04_s02?ie=UTF8&amp;psc=1
1lb of silica gel to keep filament dry.
Filaments, various.
Fire extinguisher rated for electrical fires.
Dedicated smoke alarm.
Grab some Zen Pipe Cleaners
&
Grab a bottle of Propylene Glycol (lube for the mouthpiece)
This happens when the mouthpiece loses its connection to the slot it's plugged into, making the Pax think you took the mouthpiece out. This can happen if a lot of resin has built up on the mouthpiece stem.
To fix, clean your mouthpiece stem really well. Cover the stem in the Pax provided mouthpiece lubricant (or if you want to buy it in bulk yourself, it's simply food grade Propylene Glycol) and plug it in.
To prevent build up in the future, never store your Pax mouthpiece side down. When I charge it after a session, I leave it mouthpiece up and plug the adapter onto it upside down. This way, the oils don't run down and gunk up the mouthpiece and stem.
DON'T put alcohol in there to clean it out. Ploom advises against it, and I disregarded that advice and ended up having to send mine in for an exchange (credit to Ploom's customer service though, I was able to get a new unit in less than a week, no extra charge).
I bought Propylene Glycol off of amazon. That's what I've seen everyone suggest as an alternative.
I highly advise going with the MAX v3 at that price-point. That Hatchbox delta others are recommending is quite a step down in quality and features for the price. Considering it's just a relabeled Chinese Kossel kit, the value just isn't there.
The MAX v3 is a much higher quality printer with more features and better construction, but, you have to build it yourself. IF you can swing the build, you're going to be a lot more happy with the v3 over the Alpha.
However, if you absolutely need/want an assembled printer at that price, look into the Flashforge Creator Pro. It's a solid printer that will give you great quality and provides dual extrusion capability, although dual extrusion can be difficult to get right with that design. Many people have fantastic success with it though.
I'd highly suggest just going with the MAX v3 kit though. The hardest part is soldering some large gauge wires to a flat contact on the heated bed, which you can find video instructions for in the SeeMeCNC assembly guide. If you just don't think you can solder anything, look into that Creator Pro.
They make casters that pop up and down, so that the bench rests on it's legs, but still move them.
https://www.amazon.com/POWERTEC-17000-Workbench-Caster-Pack/dp/B00SX3T2LO/ something like this.
They're badass: https://www.amazon.com/gp/product/B00SX3T2LO/
Definitely pricey, but since I spent so little on the rest of the bench, I splurged a bit on hardware.
I have been printing for about 9 months now and wanted to know if anyone has any recommendations for a budget dual extrusion printer.
I currently have a MP Maker Select 2.1 and I am looking to upgrade to a dual extrusion printer. Been looking around and found 2 that are pretty much the same,
&nbsp;
Are there any others that may be with a $500 - $800 range.
Any input or suggestions are greatly appreciated.
Sticking with Apera I recommend the PH60.
https://www.amazon.com/Apera-Instruments-AI311-Replaceable-2-00-16-00/dp/B01ENFOIQE/ref=cm_cr_arp_d_product_top?ie=UTF8
Replaceable tips are awesome!
it's worth 20$... sorry had a pretty similar one died after 6 months...
you could try and calibrate if you have calibrating powder
&#x200B;
bought this... so far so good and it feels way more accurate ... for 6x the price
https://www.amazon.ca/gp/product/B01ENFOIQE/ref=ppx_yo_dt_b_asin_title_o08_s00?ie=UTF8&psc=1
https://www.amazon.com/CHPOWER-Extruder-Upgraded-Replacement-Extruders/dp/B079JZ374W
Thanks for making a new thread. You mentioned pre-assembled and quality/reliability over cost, but do you have a general price in mind?
Extruder
The most popular option is to just go with one of the cheap aluminum extruders. These are a considerable improvement over the stock plastic version. There isn't really much assembly involved, you will need to bolt on the extruder plate/lever and put the spring in, but it's about the most simple upgrade there is.
On the more premium end, depending on which version you buy, a genuine Bondtech comes pre-assembled. It's about $70 more expensive and the benefits are negligible, but that's an alternative.
Hotend
The two main choices for Creality machines are the V6 or Micro Swiss (or a clone), both of which do have some assembly involved.
E3D sells their V6 as a bunch of parts that you assemble yourself, but Filastruder offers it as a pre-assembled version. I believe most V6 clones come loosely pre-assembled as well. Keep in mind however that V6 isn't a direct install, you will need some kind of printed bracket / fan duct like the PetsFang to mount it.
The Micro Swiss on the other hand is a drop-in installation on Creality machines. You do have minimal assembly putting a few parts together, but it bolts up to the stock machine without any changes. I wrote a guide that covers how to do it for the Ender-3, but the Ender-5 uses the same hotend carriage design, meaning the steps are the same.
---
I would personally go with the cheap aluminum extruder and a Micro Swiss hotend. This would be a cost efficient, yet effective set of upgrades for the machine. There is minimal assembly involved, but there isn't much on the market that is 100% ready to go.
Amazon has it in amounts from 1 pint to 5 gallons. Dunno about you, but they ship to me pretty quick. And no probing questions.
But NSA WILL know! :)
(EDIT): Also, I posted this link a little while ago that has some good information about PG labelling, so you'll know what you are buying.
This is what I got
http://www.amazon.com/gp/product/B005F5KYM4/ref=oh_aui_detailpage_o00_s00?ie=UTF8&amp;psc=1
less than ~$8 and will last literally as long as you could possibly need it to
I stick my pinky finger in there and dab a little bit on the metal portion of the mouthpiece, you don't need much
http://www.amazon.com/gp/aw/d/B005F5KYM4/ref=aw_2nd_sims_1?pi=SY115
Hi, Im new to owning a 3D printer but have done several different prints at my college.
I have been doing a lot of researching my self on 3d printing technologies. One of the things Ive noted is dual extrusion vs single extrusion. Also Ive heard a glass bed is very important?
Ive read that dual extrusion can be good for certain applications like printing a structure with two materials, one which is dissolvable . Ive also read that dual extruders can have a tendency to cause a print to fail as the material can cool down in the extruder not being used. This then can cause issues when that printer extruder is used again within the same print as the material on the end does not heat up again properly?
Ive looked at several good bang for the buck printers(on paper)
Please give me as much info as possible. I really don't have any experience with using different printers at all, and am really open to some good internet education. So please comment away :)
Nic river is cheap, haven't used it but have heard only good things. I use essential depot, if you buy direct from them you can get pretty good discounts on a couple gallons.
Excellent start. Highly recommend getting some rising casters to get it off the wheels when you can.
https://www.amazon.com/POWERTEC-17000-Workbench-Caster-Pack/dp/B00SX3T2LO
Gives you a more solid structure than sitting on the wheels :)
Buy one of these
Bluelab if you have the money for sure, but for a cheaper option I'd definitely recommend a Jellas Ph pen. I used it for ages before I upgraded. Just remember to calibrate once a week or so.
https://www.amazon.com/Jellas-Household-Hydroponics-Measurement-Resolution/dp/B00YBUH4RC
I bought the two below (the first results for pH meter and PPM meter respectively). They are well reviewed and have worked great for me.
https://smile.amazon.com/Jellas-Household-Hydroponics-Aquariums-Resolution/dp/B00YBUH4RC/ref=sr_1_1?ie=UTF8&amp;qid=1491933088&amp;sr=8-1-spons&amp;keywords=ph+meter&amp;psc=1
https://smile.amazon.com/HM-Digital-Measurement-Resolution-Accuracy/dp/B0002T6L5M/ref=sr_1_3?ie=UTF8&amp;qid=1491933118&amp;sr=8-3&amp;keywords=ppm+meter
If you need EC instead of PPM I can't help you, but you can convert between the two I believe.
Id definitely get a PH pen, those drops are not accurate enough for growing marijuana IMO.
I use this, haven't had any problems with it
https://www.amazon.com/Jellas-Household-Hydroponics-Aquariums-Resolution/dp/B00YBUH4RC/ref=sr_1_3?ie=UTF8&amp;qid=1496106446&amp;sr=8-3&amp;keywords=PH+pen
I have yet to have issues with this one:
https://www.amazon.com/gp/product/B00YBUH4RC/
Works well, accurate (compared with other meters and stays right on)
These have been just fine for me, and it is more economical. I bought 2 of them, one as a back up. They both hold their calibration rather well, and I won't be quite as pissed if I break one as if I had spent $80 on it.
Flashforge makes printers based on the design that was open sourced by makerbot with the replicator 2.
link this printer should be comparable and within your budget.
Some from Amazon:
MP Mini for $189 - https://www.amazon.com/Monoprice-Select-Printer-Heated-Filament/dp/B01FL49VZE
CoLiDo kit $225 - https://www.amazon.com/CoLiDo-DIY-Printer-Build-Size/dp/B01AT4ODYA
Lulzbots stuff:
Taz 5 $550 off - https://www.amazon.com/LulzBot-TAZ-Desktop-Printer-Nozzle/dp/B01143UJK2
Taz 6 $250 off - https://www.amazon.com/LulzBot-TAZ-6-3D-Printer/dp/B01DLU3M3M
Robo3D R1 for $599 - https://www.amazon.com/ROBO-3D-10x9x8-Inch-Printer-A1-0002-000/dp/B0142PHFVU
Sindoh DP200 3DWOX for $1,001 - https://www.amazon.com/Sindohs-DP200-3DWOX-3D-Printer/dp/B017IZBFB2
XYZ: Way too much stuff to list all, but looks like everything is on sale.
Mini $269 - https://www.amazon.com/XYZprinting-Vinci-mini-3D-Printer/dp/B01IXVXV9Y
Minimaker $199 - https://www.amazon.com/XYZprinting-Vinci-miniMaker-3D-Printer/dp/B01EWGJAS0
Edit - Found some more:
Qidi printer $50 off
https://www.amazon.com/TECHNOLOGY-3DP-QDA16-01-Extruder-Structure-Filaments/dp/B01D8M32LU
AIO Robotics Zeus $375 (?) off
https://www.amazon.com/AIO-Robotics-Zeus-All-Printer/dp/B00FXBFP24
Here's what I've found so far. The search continues...
Refractometer with Brix + SG scales - $19 Brülosophy link | non-affiliate link
5 gallon No Chill cube - $11.50 Brülosophy link | non-affiliate link
pH Meter (starts 3:15pm) Brülosophy link | non-affiliate link
40x-1000x Microscope (starts 3:50pm) Brülosophy link | non-affiliate link
It's probably not very difficult or time consuming.
You need some kind of resin
You can use a bunch of stuff to color it. Like Glow powder, and some kind of pigment. Then make a mold out of UHMW, (cutting board) and cut to shape with a table saw or something. Then just drilling small indents and painting them to finish it up
Extruder: get a microswiss hotend for it will be able to print flexible and other materials.
Parts cooling: Upgrade to the petsfang 5015 mod for better print cooling.
Auto bed leveling: Get the TH3D ezabl sensor for great bed leveling.
Other mods: motor dampers to reduce noise and vibration
To smoothers to smooth prints
Raspberry pi for octoprint
All metal extruder
Capricorn tubing
Hope I could help 😀
Links:
micro swiss hotend
petsfang part
ezabl sensor
motor dampers
tl smoothers
octoprint link
all metal extuder
capricorn tubing
Also this is what my petsfang with sensor looks like. https://i.imgur.com/sQahB69.jpg
i have an ender 3 pro and after saying no to any upgrades I finally started to see what everyone is talking about 6 months down the road. here is a list of things that you will see a lot of you tubers tell you to replace. the YouTube channel Tomb of 3D Printed Horrors is a great resource for everything about the ender 3.
the YouTube Chanel Tomb of 3D Printed Horrors has a step by step build guide for your ender 3 ( i used it for mine) he will recommend most of this list as well. He also has other videos on the slicer settings you will use for Cura. for D&D models you can use this google doc list https://docs.google.com/spreadsheets/d/1PemvBH7LC-hm4KoeA8OXVu5_k963Vpmw7kOEA_1tzWs/edit?pli=1#gid=0
UK Amazon I hope this helps
You can buy grips online or at your local golf retailer. The retailer should be able to install them for $2-3 per club. Installing them is best left to a professional until you know what you are doing. It doesn't look too difficult, but I've never done it myself.
And CLR is a calcium, lime, and rust remover. I've used it to clean up an old set of irons and it worked well. CLR
Do you have a light-colored jacket you always wear? Rather than a safety vest, just grab some super reflective tape and put it on your jacket, bike, helmet, panniers, etc. Definitely worth investing in a bright, rechargeable light set as well.
Amazon: 3m 36" x 2" Red $5.46
http://www.amazon.com/3M-Scotchlite-Reflective-2-Inch-36-Inch/dp/B000BO71M0
Ebay: 120" x 2" alternating red/white DOT certified tape: $12
http://www.ebay.com/itm/10-feet-dot-3m-reflective-tape-Each-piece-is-2in-wide-by-12in-long-6-red-and-6-/130906558757
I have some of the cheep 36" 3m tape (in white) and shining a light on it in a dark garage it definitely helps, has held up great though mud/rain.
The DOT certified tape is probably better (same stuff you see on semi-trailers). Looks like it has bigger hex reflector pattern.
I have been doing woodworking for upwards of 40 years. I recently bought a course DMT diamond plate
http://www.amazon.com/DMT-D8C-Dia-Sharp-Continuous-Diamond/dp/B0001WP1L0/ref=sr_1_3?ie=UTF8&amp;qid=1398809883&amp;sr=8-3&amp;keywords=DMT
some Norton water stones.
http://www.amazon.com/Norton-Japanese-Style-Combination-Waterstone-8-Inch/dp/B0006NFDPI/ref=sr_1_5?ie=UTF8&amp;qid=1398809928&amp;sr=8-5&amp;keywords=waterstone
and
http://www.amazon.com/Norton-Japanese-Style-Combination-Waterstone-8-Inch/dp/B00067ZSM2/ref=sr_1_16?ie=UTF8&amp;qid=1398809974&amp;sr=8-16&amp;keywords=waterstone
Along with a sharpening guide.
http://www.amazon.com/Robert-Larson-800-1800-Honing-Guide/dp/B000CFNCKS/ref=sr_1_2?ie=UTF8&amp;qid=1398810023&amp;sr=8-2&amp;keywords=sharpening+guide
And could not be happier with the results.
The major purpose of the diamond plate is to keep the water stones flat.
Even if you go the sandpaper route make sure that you get a guide and when you get one get your bevel-T square and a protractor (from Rite Aid) to check that the distance for the stop blocks is correct.
The first thing you're going to find on the internet is this fetishism of sharpening chisels. The Youtube rabbit hole on sharpening is deep.
What I found, and you might find something else you like better, is actually fairly simple, easy, and low cost to setup. 1) Scary Sharp --which is just sharpening your tools on a flat surface (glass, marble, MDF, jointer or table saw feed table) and graduating levels of taped down sandpaper: https://en.wikipedia.org/wiki/Scary_sharp. The second thing that is wildly useful is a $12 sharpening guide: http://www.amazon.com/Robert-Larson-800-1800-Honing-Guide/dp/B000CFNCKS/ref=sr_1_1
There are kits for hundreds of dollars involving stones and guides and apparati and I've used some of my friends' stones and setups and they work --probably as well as Scary Sharp and a guide. But, $12 for a guide and a few dollars for sandpaper is low barrier to entry and works and is pretty fast. (The soles of hand planes may take a bit longer if you're planning to do those the same day.)
Good luck on whatever you choose.
Sandpaper ranging from 80 to 2000 grit and a piece of granite countertop that a local countertop maker let me dumpster dive for. I fold and tear full sheets of sandpaper into 4 strips longways (they are useful for sanding blocks this way too) and either tape them or just hold them down with my fingers and sharpen away. The blade is held by one of these guys.
Amazon has them for $22. Match with one of these to attach it.
The actual product doesn't have that weird edge, it's just a flat sheet.
I used a combination of [magnetic sheets with adhesive] (https://www.amazon.com/gp/aw/d/B003XNAHMC/ref=ya_aw_oh_bia_dp?ie=UTF8&amp;psc=1) and a PEI sheet. Works like a charm
edit: here's some pics of when I was putting it together: https://imgur.com/gallery/kvChO
DiiCooler, Z braces, thumbscrews for bed leveling, and the melzi temp fix are all common mods that I can recommend. You could also get the all Metal Hot end from Micro Swiss but I have not done this myself.
As for supplies, I would recommend getting a sheet of PEI and some 3M adhesive to stick it to the print bed. PEI is a great, low maintenance print surface that prints stick to very well even without any form of fixative to improve bed adhesion. If you don't go that route I would say get some buildtak to put on the print bed with washable gluestick depending on the filament you use. Basically you don't want to be printing directly on to the bed as there is a hole where the thermistor comes through.
Other than that, just get extra filament and have fun with it.
These digital calipers have been great for me. They are extremely accurate and precise, and the ability to switch between mm, decimal inches, and fraction inches is great if you live in the one developed country not yet on the metric system for some reason. It also includes two batteries, which is nice.
I recently picked up a caliper ... went with this one. It's $26 rather than $9, but I read a comparison review that pushed me towards it. (review here)
I've had the really cheapo ones before and they are not very well made. They also seem to fall apart / damage relatively easily. I've only had the one above for a month or two but it meets my needs and feels very solidly made.
I use Gorilla Glue on everything including plastics, resins, and pewter. It hasn't failed me yet.
1/4 inch birch from home depot. Durablack labels, axle pegs, Gorilla glue and steel brackets. Because the laser leaves a char, glued joints are not that strong so I like the bracket / peg arrangement. To make, glue edge of each piece, knock together. When done, stick in the pegs, use a japanese flush cutting saw to whack off excess peg. DXF file is here.
I did this in my 2014 forester with a new Nexus 7 LTE a 3.00 Black TPU case from Amazon and some strong little magnets.
Super simple install, looks really great in person, holds on strong, and is removable if you want to still use your tablet or to remove it for security. You can keep your stock deck also!!
I've been using this setup to "Click" my nexus 7 over my radio for 6 months now with out an issue. The three magnets hold perfectly and stay on even when taking off ramps and not so sane speeds and off roading. I've only had it fall off once when the california heat caused the little rubber feet to melt off. I fixed this with super glue and it hasn't happened again.
The parts that I used
Magnets: http://www.amazon.com/gp/product/B001KUURP2/ref=wms_ohs_product?ie=UTF8&amp;psc=1
Rubber feet:
http://www.amazon.com/gp/product/B00CBU8XLA/ref=oh_details_o00_s00_i00?ie=UTF8&amp;psc=1
Glue:
http://www.amazon.com/gp/product/B001IY82FM/ref=wms_ohs_product?ie=UTF8&amp;psc=1
Case:
http://www.amazon.com/gp/product/B00EENEE24/ref=wms_ohs_product?ie=UTF8&amp;psc=1
EDIT:
The Nexus 7 also has a magnetic field sensor that you can use in Tasker to trigger when the tablet it on the dash. For mine I have it auto sense the magnets and open Car Home, and turn the screen timeout off, turn off Wifi, enable Bluetooth, and turn on GPS. Then when it's removed it closes Car Home, enables Wifi, disables bluetooth and GPS.
You could probably get a cobbler to stitch it down again no problem, or you could use some Shoe Goo.
A warning with super glue. When the glue dries, it will be solid as a rock. You can find flexible kinds, but even those types of super glue will be quite stiff
If you want it to remain flexible, you can use a product called Shoe Goo. It is strong and remains flexible, and can be found in quite a few local stores, like hobby shops and hardware stores. Another option could possibly be a form of fabric glue, though I have no experience with them so I can't recommend anything.
For a less permanent option, I would try some strong double sided tape, maybe something like this from 3M. It will remain flexible, and you could always remove it, but it may not hold for as long as the other options.
Those are some amazing looking scaled boots.
A shame they are separating like that.
I have no experience with the scaled versions for figures, so no idea if this suggestion will work or not...but I did wear Doc Martens for years, and had the sole separate, on a few different pairs.
When this happened I used Shoe Goo.
Obviously, no guarantee, but it might be worth a shot, if you don't get any better suggestions.
http://www.amazon.com/gp/aw/d/B002L9AL84?pc_redir=1406882480&amp;robot_redir=1
this stuff is amazing, if it's just the sole coming off
found these on Amazon. great reviews
http://www.amazon.com/Prestige-Medical-Fluoride-Scissor-Black/dp/B002WJHE7E/ref=sr_1_1?s=hpc&amp;ie=UTF8&amp;qid=1404358321&amp;sr=1-1&amp;keywords=trauma+shears
Stethoscope = Cardiology III
Shears = Sexy Black
Penlight = Reusable
Rescue Knife = Epic Knife
o2 Key = Cheap Plastic Crap
Flashlight = Maglite Mini
Holster for all of the crap above
Radio Holster
I have had the same equipment for 7 years + so far. Epic, works well.
Personally, I think belt cutters/window breakers are gimmicky and pointless, and the people with those star of life knives tend to be tools. Further, as someone else pointed out, having a knife clipped in your pocket is inviting disaster with an agitated patient.
As far as I would take it would be investing in a pair of trauma shears that have a fluoride coating so tape won't stick to them. Which should run you $10, max. Make sure you get the hot pink, too. So no one will pinch them.
I won't lie, I actually do think the Leatherman Raptor Shears are pretty neat, and a cool gadget, but also couldn't really imagine walking around with them. Nor would I be happy when I inevitably lost them at $75.
Hemostats are cheap, and you should get whatever's cheapest. A $2 Kelly will grip just as well as the $20 surgical version. It might wear out a little faster, but who cares? Long before it breaks it will only get lost, stolen, or accidentally dropped into the sharps box anyway.
For shears, quality makes a little more difference, because the very cheap ones will bend if you try to cut anything important (like motorcycle leathers). But even then you're talking less than $10 for a good pair. I have a set of these from Prestige Medical, and I like them a lot.
Not bad. A few items from my EDC if you're interested:
My pen light.
My trauma shears.
Edit: a few more.
Hip clip. I've gradually come to prefer wearing my stethoscope this way. And for goodness sake, DON'T leave yours on the rearview mirror of your car. Ever. Repeated heating/cooling caused my Cardio III to crack at the point where it hung from the mirror.
Reflex hammer. Mine isn't as cool as this one...
http://www.amazon.com/gp/product/B002WJHE7E?psc=1&amp;redirect=true&amp;ref_=oh_aui_detailpage_o04_s00
No problem. CA is just super glue. I use Loctite Ultra Gel. It's nice and thick so I can apply it with a lot of control. I just use a needle in a pin vise to apply it and then once it's built up and dried on the needle, I burn it off with a lighter to refresh the needle.
What kind of paints are you looking for? It's hard to specify brands since they all kinda have their own place. I personally prefer to use lacquers out of my airbrush, so my go to paints for that are Mr Paint, Gunze Mr Color, and Tamiya. For brush painting, I like to use Vallejo Model Color acrylics. Ammo of Mig and AK Interactive have a good line of acrylic paints, but they don't brush as well, IMO, as Vallejo Model Color. You should be able to google them all and find them. If you need links I can get them, but I'm also on mobile right now so it's a bit of a pain in the ass. If you're in the US, I do my paint shopping at Hobbyworld-USA.
If you have any questions, feel free to PM me, I'm happy to help.
I only really use superglue for magnets and the very few amount of resin models we have, but i really like this one: Loctite Ultra Gel Control Super Glue 4-Gram (1363589) https://www.amazon.com/dp/B003Y49R7G/ref=cm_sw_r_cp_apa_i_Nb9KDbT7PGKD6 because i have an insane amount of control over the amount that comes out, it is a pretty small bottle as far as i can tell though so if you need a lot of glue, i wouldn't recommend it.
A dab of super glue and you'll be back in business. I like the gel stuff. Really good.
The original LEGO design has the same design flaw - the magnets are just too strong. (kinda need to be) I tried to do this without using glue as well but at the end of the day, it really makes no difference. I would suggest Loctite. I used it with my lepin ISD and everything went fine. (almost 2 years now)
Just four dabs on the magnet holder studs will do just fine. The ones that have an extra lego piece, glue those 4 studs too. If I recall correctly, all the magnet location instructions should be fine and everything should line up but the glue really isn't all that permanent. I have sometimes pried off glued pieces using a knife and/or pliers with minimal damage.
If you are having issues with the wings falling apart, make sure to apply a lot of pressure on a flat, level surface to ensure all the long panels are inserted all the way. It takes a bit of force with the real LEGO pieces because of the size but sometimes a bit more with lepin.
I had a much easier time with the UCS Venator because of my UCS ISD lepin experience, but that one has some different issues.
Mash tun cooler (this is probably cheaper at your local hardware store or wal mart) Also, this isn't the only cooler that works. Pretty much any plastic cooler works. But you'll need a different false bottom if you use a chest cooler, which may allow you to mash bigger batches.
Weldless Ball Valve Just take the plastic valve off the cooler and screw this one on. Will work on most any cooler you choose.
False bottom Put this at the bottom, connecting the silicon hose to the ball valve and the top of the false bottom.
3/8" barb You'll need to screw this onto the ball valve on the inside of the mash tun to connect the silicon hose to.
Honestly, if you've already got a kettle that can boil 6 gallons, you're good to go there, and just add this to the mix. Otherwise, pick up a Stainless Steel Brew Kettle.
This whole setup comes in just under $200 but you'll need some hoses and some hose clamps as well. But I'm sure that if you shop around (even on amazon) you might find better deals than I linked. But that's the gist of it. And there's no need to stick with the specific brands I linked. But just make sure to stick with stainless steel for the kettle, ball valve, and connecting accessories and food-grade plastic for the cooler. And any hoses need to be high temp hoses. Silicon is ideal.
This is by no means the "only" way to do it, but a great start down the road. You may also choose to use a pump. It has advantages and disadvantages. You can make great beer with and without one.
I'm currently struggling with the same problem with my project.
You'd probably want to put a DHT11 in each pot attached to GPIO on the Pi.
The soil RH (relative humidity) could be used to determine whether to power a 12v pump or solenoid valve (if gravity fed).
Relays are super easy to set up and control using a Pi and relatively safe at 12v. The difficult question here is how to direct the water into whichever pot requires what amount of water. A naive approach is one pump per pot but that could get costly... hmm
I'm using this pump
I'm using this relay
Here's the code to read digital Celcius and RH from the DHT
I'm also considering adding an additional 'misting' nozzle to help control my super-hot (not ideal) environment :
Soil > Tempenature : 37.0 Humidity : 77.0
Feel free to follow up in PM if you have any questions.
for a beginner, I would not recommend you do this. but if you will anyway, I suggest this: http://www.amazon.com/SainSmart-101-70-101-4-Channel-Relay-Module/dp/B0057OC5O8/ref=sr_1_4?ie=UTF8&amp;qid=1462302659&amp;sr=8-4&amp;keywords=3.3v+relay
This is the relay board I'm using. I'm going to use two separate arduinos to turn each one on (using "or" logic). I don't have a lot of experience using diodes, what exactly would I use? And do you mean literally I do:
Arduino1->Digital out->diode->Relay input1, then
Arduino2->Digital out->diode->Relay input1
It's called propylene glycol. You need the good grade level. Amazon has it for $7.79 a pint and it should last you until it expires (years).
i totally agree with you, but if you just bought your pax and need an immediate solution, this is great.
edit: here's the pint of food-grade pg on amazon.
Can't believe no one's thought of [propylene glycol] (http://en.wikipedia.org/wiki/Propylene_glycol) yet. It's very safe but can literally be used as antifreeze. LD50 is very high - [>20g/kg in rats] (http://www.sciencelab.com/msds.php?msdsId=9927239), miscible with water, generally recognized as safe by the FDA, and you can buy it "kosher food grade" on Amazon. Oh yeah, it's also a little sweet and is even marketed as those [Mio fit water additives] (http://www.makeitmio.com/), which means they could've gone out, bought a bunch and mixed it with water and then put it in the freezer.
>If I can ask a quick question: Why do so many e-cig users buy a low nicotine (12-18 mg) juice? Isn't it better to buy some with a high nic content and vape less? Just something that's been bothering me.
Or buy 24mg/ml, cut it down with some PG.
There is a simple and obvious answer, I buy 18 or under because I don't like the taste of 24.
CLR....
The fiberglass gel coat may be worn off. If this is the case, good luck cleaning it. You could get it recoated. If it doesn't seem worn off, try soaking towels with white vinegar and laying them on the area for 24 hours, keeping the towels wet.
There is also a product called Sunny Brite, I used a lot when cleaning homes. Works fabulously. Ventilate the room.
Put the grates in a bucket and pour enough of this stuff to completely submerge the plates. Let sit for as long as possible, overnight would be best. Remove the plates from the bucket, hose them off, and let them dry. Now you'll want to season them, like all cast iron, by rubbing them down with peanut oil and heating them on the grill until the shine from the oil goes away.
Try CLR. The stuff is extremely effective and also extremely water soluble. A thorough rinse will remove any traces of nasty chemical goo and leave the tank safe for use.
Sorry.... Calcium Lime Rust. You can see a picture of it in the Tools photo.
http://www.amazon.com/Calcium-Lime-and-Rust-Remover/dp/B00009EFEX
Not sure what is available in your area, but it is just a simple, nice cleaner for metal and the like. Probably a LOT of different options.
http://www.amazon.com/Calcium-Lime-and-Rust-Remover/dp/B00009EFEX
It looks like a rust stain. I have had success using CLR to remove rust stains. It's the kind of product you want to sit wet on the stain for a little bit.
Disclaimer: I never tried to use CLR on a fiberglass bathtub so read the label.
https://www.amazon.com/CLR-Calcium-Remover-Enhanced-Formula/dp/B00009EFEX
A classic from Eric the Car Guy for flushing your heater core.
(Edit to add:) He used CLR cleaner. No brand endorsement is meant by this link, I usually buy generic myself.
With the engine cold (cool), you can start it up with the hood open, heat and fan on, and then feel the heater hose to see if warming up properly. The engine should warm up, and start flowing warm water through the heater core circuit (which in a VW should probably be a really long hose to the front of the car)
If you never feel any heat, you may have low or no flow through the heater core.
OTOH, if your engine overall is just never really heating up (is your dash thermostat working?) I would instead suspect a stuck thermostatic valve in the cooling system.
In really really cold weather, some people cover parts of the engine radiator with a canvas cover. This is quite often done with diesels. This helps a bit with the cab heat too.
Couple things to add for the shopping list: especially for the 3am part:
Safety Vest
Slap light for left ankle to identify your edge
Lights
About $25 for the above.
Rear mirror
Make sure the bike has the standard reflectors on the spokes, pedals, front and back as well.
Reflective tape if you are riding an all black or dark bike - wrap strips around your spokes, frame and seatpost
Some would say ALL THE ABOVE TOGETHER Is overkilling it and maybe it is all it takes is one semi-drunk who did a couple too many shots blasting down some rural road at 4am doing 90mph to end you.
Even just a glancing blow off the side of a big 4x4 mirror rig could fuck you up bad and NOW YOU'RE DOWN.
You're laying on the side (if you're lucky and didn't get hung up and dragged) of a rural road at 5am waiting for the next drunk to come along and finish the job.
This is a real concern.
Now if this happens and you are wearing dark clothes on a black bike with no reflectors they could end up hitting you before they ever see you especially when you add dark (limo) tinted windows + stereo blasting and subwoofers thumping.
Now add texting on the phone to the equation.
It's all over. You're roadkill.
You need to make yourself more than just a little visible. They need to see you from a fricken mile away. even if you are sprawled out in the street.
TIP: I use the slap light so they can see where the edge of me actually IS. I usually hang it on the left end of my handlebar - on my rearview mirror. Or on my left ankle so there is a light moving up and down along with pedal reflectors - that says 'dude on a bike up ahead'.
I agree that the reflectors are a great idea. Here is some awesome reflective tape! you could put anywhere on your bike! The wheels or pedals are great spots because they are moving and will catch a drivers attention super fast. I agree that headlamps make for an excellent light! Wal-mart sells pretty good ones for $5. I recommend people in the market for one to get the small one that has ONE led and uses a small battery as opposed to multiple LED's and bigger batteries because that extra weight is very annoying on your forehead, but if it's a small one and light, it's very comfortable
http://www.amazon.com/3M-Scotchlite-Reflective-Silver-36-Inch/dp/B000BQRIV2
I wear a blinking red light at night on the back of my belt, just set it and forget it until you get home. Something I've thought about before is making a reflective tape belt:
https://www.amazon.com/3M-Scotchlite-Reflective-Silver-36-Inch/dp/B000BQRIV2
Buy some reflective tape!
If local laws permit, the 319 bridge over the river looks like a safer bet than the 153 due to its much wider shoulder. I didn't see any signs on the onramp prohibiting bikes on the highway, but check with the Department of Highways (or whatever its called in Tennessee) to be sure.
I suggest picking up front and rear lights ($25-30 should get you a basic set), and some sort of high visibility vest (like this or this). If you're riding after dark, some reflective tape on the bike would make you stand out in headlights.
Good luck, and stay safe.
Whats I use:
Headlight, very powerful and better than others I've used
Taillight, multiple flash settings, very visible
Reflective Tape, I cut out some 1 cm wide strips and placed it on my frame and spokes, add visual safety
Cost effective alternative:
http://www.amazon.com/3M-03456C-Scotchlite-Reflective-36-Inch/dp/B000BQRIV2/
You can get scotchlite tape to put on things, and there are many pieces of clothing (like a reflective vest) that incorporate it. Shirts, pants, shoes, etc.
I used this for my stuff. But its thin, so itd be a pain for tracing a decal out.
There are 2 inch versions that would be easier to use. Finding the color you want might be hard. Example 1, Example 2
It looks like plain electrical tape until you shine a light on it when its dark.
> hard to find and buy in small quantities
http://www.amazon.com/3M-Scotchlite-Reflective-Silver-36-Inch/dp/B000BQRIV2 Amazon disagrees. There are plenty of color and size choices on there.
Apply this to your bicycle liberally.
http://www.amazon.com/3M-Scotchlite-Reflective-Silver-36-Inch/dp/B000BQRIV2
http://www.amazon.com/gp/aw/d/B000BQRIV2/ref=redir_mdp_mobile?pc_redir=T1
You could try that^ I bought some and plastered my helmet with it. Seems to stick well. There's a reviewer who says it has stayed on their messenger bag and everything else he's put it on.
I don't mean a sharpening system like a buy this one this to sharpen your stuff like folks have for their kitchen knives.
I meant a method you have to keep your stuff sharp.
I started out using the 'scary sharp' sharpening method.
https://en.m.wikipedia.org/wiki/Scary_sharp
Used a $3 tile from Home Depot and a set of sandpaper similar to this and used a honing guide like this one and then used Paul sellers techniques in this YouTube video
Also watch this Paul sellers video on preparing your chisels .
Scary sharp is great for beginner, and those that have little sharpening to do. The advantage and disadvantage is that you use up the sandpaper doing the sharpening. So the initial cost is low, but you need to keep paying for more it as your sandpaper supply runs out.
I lucked out and found a friend of a friend who gave me a pair of a course/fine combination oilstone similar to this. So I got a leather pad and stropping compound and then continued to use the honing guide and was very pleased with this result.
Now I'm pushing money towards getting a set of DMT diamond plates You want a course, fine, and extra fine. And lastly you want a 4000/8000 norton water stone.
This is what I meant by upgrading your sharpening system. All of these are options, and depending on your budget and needs, they can all work. Some advocate the buy once cry once mentality and just buy the last setup i talked about, but my progression has served me well enough that my shoestring budget allowed for continual progress, and also gave me the opportunity to cut my losses if I didn't use my chisels and planes as much as I do.
Hope this helps.
an hr?? jesus that sounds like hell. I'm not sure how you are sharpening the blades but my 3 side arkansas with a honing guide can get me some nice shavings in a few minutes.
http://www.amazon.com/Robert-Larson-800-1800-Honing-Guide/dp/B000CFNCKS/ref=sr_1_1?ie=UTF8&amp;qid=1395892808&amp;sr=8-1&amp;keywords=chisel+sharpening+guide
but yes, one day I will splurge for a Norton!
Woodworking with power tools revolves around the table saw. If you go that path, get the best one you possibly can. But used so your money goes father.
Woodworking with hand tools needs a few things:
I'm a big believer in starting small and cheap and working my way up. With a few hand tools, you can get started for under $200 and have everything you need to make good quality stuff. The skills you learn with those tools will transfer to every project in the future, no matter how big. Fine joinery is the same, whether the boards are cut with a hand saw or a table saw, and you will never learn to read wood with a power jointer, planer and table saw like you will with a handsaw and bench plane.
As you reach competency with these tools, you can decide how you want to expand your tools to achieve more. That may be more hand tools like a dovetail saw, additional planes, cabinet scrapers, etc, or it may be power tools with a table saw, band saw, dust collector, etc. Or it may be somewhere in the middle.
Personally, I do this for relaxation, so a quiet shop and a face free of respirators and face shields is much better to me. Since I am in no hurry to finish projects, I use primarily hands tools (I have a few power tools from a previous life that I'll pull out on very rare occasions. I think often about selling them).
If getting stuff done drives you, though, power tools are a great way to do that. It changes woodworking a little because it becomes a skill of setting machines up correctly (not a trivial skill!) to get the correct cut.
The Wood Whisperer, who coined the phrase and, literally, wrote the book, Hybrid Woodworking, does a pretty good job blending hand and power tools. If I cared more about getting things done (and had the space and money to devote to it), that would be the path I would follow.
Typically you store planes either on their side or just make a little shelf with a lip at the back so that when you set it down the back of the plane is raised up a bit keeping the blade from contacting the shelf.
A simple honing guide, a combination stone, and a basic strop is all you really need to sharpen plane irons. You can use sandpaper instead of the stone if you are really on a budget, but a decent combo stone is worth having in the shop. You can spend hundreds of dollars on diamond stones, higher end waterstones, sharpening jigs, grinder wheels, etc, but with proper technique, a bit of practice, and about 10 minutes work improving the honing guide the 3 items above will get any plane iron or chisel razor sharp. Grinder is mostly used for lathe tools and to speed up major regrinding or damage repair in a wood shop.
Here's a video on how to properly sharpen a plane iron with the guide.
I like to apply paste wax to the sole and other exposed steel surfaces of my planes (and most other tools in the shop) to prevent rust. I like johnson's paste wax.
Basic Honing Guide
Fancier Honing Guide
I've used and like both. The Veritas certainly makes some things easier but you pay for that convenience. I'd probably get the basic version and see if you feel the need to upgrade. Also you'll probably need a basic one anyway to sharpen spokeshave blades.
I'm no pro, but here's my suggstion.
Marking and measuring are important. Get a knife of some sort. This marking knife is cheap and well regarded. Get a combination square (lot available at all sorts of price points). For a longer straight edge, you can use extruded aluminum or angle aluminum which is cheap, lightweight, and straight enough. Then learn to create a knife edge and a handsaw (either western push style, or japanese pull style) and you can cut wood accurately to size.
You're planes will then get you to flatten and surface your boards (you can use the aluminum as winding sticks). Lots of resources available for rehabbing planes. Then the next step is joints. For this, chisels and a comfortable mallet are great (and a rabbet plane if you can find/afford one). To make life easier, a coping saw and a drill (electric or brace and bit) can clear out waste for you. It makes life easier. But the key here is keeping your planes and chisels sharp. I don't know of a budget way to do this. I've got a few Ezelap diamond stones (coarse, fine and extra fine) that I use, but there are other methods as well (sandpaper on glass, waterstones, oil stones, tormeks). But sharpening is critical to handtool woodworking happiness. You might want a sharpening guide as well. The cheap ones work great (I'm not sure why these are so expensive. I think I paid $8 for mine). Then build one of these and you're all set for sharpening. Finally, you need stuff to stick together, so glue and glue applicators are worth looking into. I also use my cabinet scrapers quite a bit, but that's just me. They're cheap so I think everyone should have one.
After that, you can spend all sorts of money on other stuff as you progress. But most anything square can be built with this setup.
[PEI for $17] (https://www.amazon.com/gp/product/B0013HKZTA/ref=oh_aui_detailpage_o09_s00?ie=UTF8&amp;psc=1) this will last you for a long time (Through many many prints) if you are careful with it.
[Transfer tape for sticking PEI to buildplate] (https://www.amazon.com/Gizmo-Dorks-Adhesive-Transfer-Sheets/dp/B01HP2CEG8)
[Here is a site with more information] (http://reprap.org/wiki/PEI_build_surface)
Edit: For immediate printing buy a cut sheet of glass from the glass or hardware store, then spray 2 layers of [Aqua net extra strength super hold unscented] (http://www.walmart.com/ip/Aqua-Net-Extra-Super-Hold-3-Unscented-Hair-Spray-11-Oz/10997068) it must be this brand and product. Or you could match ingredients. This method will work for fairly large prints but is not as good as PEI. After each print just spray another coat of hairspray.
I added a heated bed to my Simple Metal, and now everything is pancake flat. It has been such a great improvement over struggling with the blue tape. I also put a sheet of PEI on the bed too. Now all I do between prints is wipe off the bed with rubbing alcohol. Everything sticks like glue while the bed is hot, and pops off when it cools down.
http://www.amazon.com/dp/B0013HKZTA/ref=biss_dp_t_asn
attach to glass or aluminum plate with
http://www.amazon.com/TapeCase-468MP-12in-Adhesive-Transfer/dp/B00P7K7T84/ref=sr_1_4?s=industrial&amp;ie=UTF8&amp;qid=1449086424&amp;sr=1-4&amp;keywords=pei
i used 2" tape i'd suggest 3" or so -- it doesn't unroll clean, teh adhesive sticks
or buy a thick sheet of pei. and just use that. (but thats damn expensive)
This was the one I got, and I also got these adhesive pads to hold it to the bed. Right now the PEI is just clipped on since I wasn't sure how well it would work, but I'm planning to throw the adhesive sheet on and make it a little more permanent this weekend.
While I've never had success with a Rep2X and PLA (except for one roll this one time), it sounds like you've got it extruding fairly well at this point.
So your current difficulty is getting the print to stay stuck to the bed? I'd recommend getting a sheet of PEI (I use 0.03" thickness) like this:
https://www.amazon.com/gp/product/B0013HKZTA
Then cut it to size and stick it to your print bed with this:
https://www.amazon.com/gp/product/B007Y7CZ32
I've had awesome success with PEI and PLA. It sticks great until it cools down, then it comes off easily. Print with the bed at 50C.
https://www.amazon.com/gp/product/B0013HKZTA/ref=oh_aui_detailpage_o02_s00?ie=UTF8&amp;psc=1
AND
https://www.amazon.com/gp/product/B007Y7D5NQ/ref=oh_aui_detailpage_o02_s00?ie=UTF8&amp;psc=1
I have several upgrades in the queue for this weekend once my M3 hardware kit comes in:
(Note the above designs are all three by USWaterRockets, who seems to have exceptional engineering skills, but I haven't installed them yet. Hopefully, this weekend and I'll post results)
Another one I'm considering next:
Here is the E3D-v6 adapter I currently have on the printer:
Note the above design is just a quick-and-dirty solution; the author even states this. It works and will get you what you need to get things going with the new head.
Other upgrades I've done:
https://www.amazon.com/gp/product/B007Y7D5NQ/ref=oh_aui_detailpage_o05_s00?ie=UTF8&amp;psc=1
https://www.amazon.com/gp/product/B0013HKZTA/ref=oh_aui_detailpage_o05_s00?ie=UTF8&amp;psc=1
Here's the E3D-v6 printhead I bought and it's worked well: https://www.amazon.com/gp/product/B01H4V2QEK/ref=oh_aui_detailpage_o04_s00?ie=UTF8&amp;psc=1
Disclaimer: I'm new to 3D printing. This is my first printer and the learning curve is steep. I may look back on this posting in a year and think "what an idiot I was doing <this>". Take my advice with a grain of salt, as I'm muddling through this whole thing. YMMV
I got some digital 4" off amazon made by a company called igaging, they measure the same and repeat just as well as my brown and sharpe calipers.
Here is the same thing I have but the 6" version. https://www.amazon.com/iGaging-Electronic-Digital-Fractions-Stainless/dp/B001AQEZ2W/ref=sr_1_2?ie=UTF8&amp;qid=1468282237&amp;sr=8-2&amp;keywords=igaging
~$25 can get you a pretty darn good digital caliper tho.
https://www.amazon.com/iGaging-Electronic-Digital-Fractions-Stainless/dp/B001AQEZ2W/ref=pd_lpo_sbs_469_t_0?_encoding=UTF8&amp;psc=1&amp;refRID=24JYAF83MNG8BTGTSMVR
I don't do super precise stuff with mine, but it's worked well for shimming electric motors inside of fan housings.
And it doesn't eat batteries while in storage. So ¯_(ツ)_/¯
I got this caliper recently and have found it to be excellent for the money.
Best of the budget category is probably the iGaging calipers. Yes, it's absolutely worth the price difference over the $10 versions. If you weren't looking for the "best" recommendation and just looking for "cheap", then I would recommend the $10 ones. They're fine after a few minutes of cleaning them up.
https://www.amazon.com/dp/B001AQEZ2W/
This is how
Cheap digital calipers could get the job done, plus they are very useful in a lot of random situations.
I got these. Nothing at all special, but they've held up to a couple years of abuse now.
You can measure depth with the end that sticks out on the right, inside lengths with the top, and outside lengths with the bottom.
&#x200B;
But also, the movers should take responsibility.
It's not that hard if you have the mind for it and don't mind watching a lot of videos. Fusion360 has all of the tutorials built right in and it's free software if you are a maker. You will need some tools to measure things and plan them in the real world. I bought this and it has been all I have needed so far, but I've mostly been printing board game things.
https://www.amazon.com/gp/product/B001AQEZ2W/ref=ppx_yo_dt_b_asin_title_o07__o00_s00?ie=UTF8&amp;psc=1
I use a pin vice to drill the holes; I use wire (any kind will work; I've used sewing pins, paper clips, wire from a spool, piano wire... really, whatever I have within arms reach) for pinning. For the glue, I use Gorilla's Super Glue.
If I'm pinning a metal or resin model, during assembly (I don't worry about pinning plastic as it's usually light enough that plastic glue holds it together just fine), I drill my first holes, then I use a larger drill bit to flare out the entry points, so i have some wiggle room. This generally isn't needed when pinning to a base, but it helps if you want a very specific footing and you're not confident in your drilling.
What I use.
It dries a little gray/cloudy, but I just try not to use too much and you can't really tell. I just add the drop, let it set a few seconds to start to dry (I scuff up the magnets with sandpaper as I wait), then use a Q-tip to remove excess.
This is the tutorial I used to learn. I use slightly different magnets and don't drill in too much. I don't mind seeing the magnet, but I do want it to stick well and lay flat.
https://www.amazon.com/Gorilla-Super-Glue-Gram-Clear/dp/B001IY82FM/ref=mp_s_a_1_2_sspa?crid=1UPES2QIS7N6M&amp;keywords=gorilla+super+glue&amp;qid=1556923885&amp;s=gateway&amp;sprefix=gorilla&amp;sr=8-2-spons&amp;psc=1
For the base:
https://www.amazon.com/gp/aw/d/B00OSJ2RIW/
For the column:
https://www.amazon.com/Non-Stick-Silicone-Containers-Storage-Assorted/dp/B07CVWY3YY/
To put it together:
https://www.amazon.com/Gorilla-Super-Glue-15-Clear/dp/B001IY82FM
I usually use Gorilla brand super glue for plastic models. I'm sure any super glue will work well enough for a shelf model, though. Use a small amount; if you use too much it won't stick as well and will ooze out of the crack when you put it back together. I'd recommend gluing it after moving, so you're less likely to break it again. A fresh bottle always seems to be more potent than a bottle that's been sitting in a drawer for months. Also, don't eat the glue and don't glue yourself to the model. Is that everything? I think that's everything.
I actually made it. Cost me somewhere around $75 if I remember correctly. Buy all the materials listed below for the size/quantity you want, and then I custom printed and cut clear labels for the top and sides of the jar. The magnets are glued to the inside of the jar lids. If you get them strong enough they will never slide or slip. The ones I list can get about a half inch from the stainless base before they won't go back.
Stainless Steel Backplate - You can order in a lot of places - but make sure you have the correct steel makeup. Not all stainless is magnetic!
Superglue - Any standard superglue should work.
Magnets - It would seem that they don't sell these magnets anymore, but it should be easy to find something similar.
4oz Glass Hex Jars w/ Lids - This was the most reliable source at the time.
You can try using Gorilla Glue to paste the head back on. That thing can glue almost anything together.
Shoe Goo Repair Adhesive for Fixing Worn Shoes or Boots, Clear, 3.7-Ounce Tube https://www.amazon.com/dp/B002L9AL84/ref=cm_sw_r_cp_apa_i_kre6Cb2HVGHQS
Shoe Goo!
Just to add another option: Order some Shoe Goo off amazon, pull some old and busted shoes out of your closet and make them into skate shoes! I found an old pair of pumas and two pairs of destroyed Chuck Taylor's that are working great for me
If she just wants to be restrained, I would consider something like a pair of cuffs with straps on them that you can tie to the bed. They're relatively inexpensive and good for starting out.
If she specifically wants rope, start by buying a set of EMT Shears. These are so that if something bad happens you can get out of them immediately. Make sure that any time you play with rope you have them nearby.
Next, go visit Twisted Monk and check out their basic instructional videos. It'll provide a few good ties to consider. Also check online and with Youtube.
Finally go buy some rope! The most recommended rope I've encountered is 3/8" braided nylon rope. It's easy to use, thick, and nylon is fairly comfortable. 5/16" is also a good size. Twisted Monk has a video on how the different sizes work. In terms of material nylon is cheap, easy to clean, and reasonably comfortable. Hemp is the traditional material. Here's a guide on bondage rope that I found.
If you haven't purchased it yet, "Screw the Roses, Send Me the Thorns!" is a great book to learn about BDSM.
damn, those things are heavy duty. I'm not a trauma nurse (Although i start in the ICU next month!), but they seem more fitting for medics in the field than in a trauma center. Though i'm sure the ring cutter and ruler would come in handy.
edit: I use these. They're perfect for my needs as a telemetry nurse. They're coated with nonstick stuff so tape doesn't stick to them!
Every attending I've seen uses the otoscope or ophthalmoscope light, which usually fits in with the exam they are doing. Seems pointless to buy one, plus you can by a 6 pack of penlights for 5 bucks, or use your cell phone's light.
A good steth is probably best gift.
However, shears are easily second best, they are unbelievably helpful and no one ever has a pair, especially the kind that you can use as a wrench for caps that are on too tight. (http://www.amazon.com/Prestige-Medical-Fluoride-Scissor-Black/dp/B002WJHE7E/ref=sr_1_1?ie=UTF8&amp;qid=1416462131&amp;sr=8-1&amp;keywords=medical+shears)
Just my two cents
Personally, as a nurse myself, I don't carry a knife while at the hospital, but instead trauma shears and maybe a pry bar like a Gerber Shard. I haven't run into a situation yet that the shears or the pry bar haven't able to do and it isn't as intimidating to patients or visitors.
However if you do need a small knife, just like everyone else suggests, the Dragonfly 2 is exceptional.
I have the ZDP-189 version of the Dragonfly and it is perfect for EDC.
If you looking for an even smaller folder check out the Manbug which also does come in a [ZDP-189 variant]
(http://www.amazon.com/Spyderco-British-Racing-ZDP-189-Plain/dp/B0089DFLSQ/ref=sr_1_5?ie=UTF8&amp;qid=1420580166&amp;sr=8-5&amp;keywords=spyderco+zdp-189). Just be aware that these do not come with pocket clip (I think).
Any half-shite pair of trauma sheers will cut a penny (and damned near everything else that you throw at them-they're designed to cut seat belts and thick clothing). Here's the pair I paid the exorbitant price of $9.75 for-just cut a penny with them a few minutes ago to prove to myself that they would before I ran around saying it. Compared to the $112 that cutco wants and the only thing you lose is the ability to take the blades apart.
Altering is something I'm really enjoying. It's nice knowing your mini is different. To answer your questions:
The most difficult part with altering the sword was making sure I didn't cut the blades incorrectly leaving them too short or long, as well as making sure they were flush. Then it's just a matter of gluing them in place. I recommend picking up Loctite Gel Superglue. I'm finding it works well with Bones figures and gives you a lot more control.
The runes were part of the new blades I cut from the Rauthuros figure. I just dry-brushed them blood red, then highlighted using an extremely small brush.
I'll set to work on pictures of a couple other figures I have here next to me and make a new post for you to check out.
This is the stuff I use at work (computer repair); it works fine for gluing feet back onto laptops so it should be good for your keyboard. Pretty much any hardware store should have it.
This is what I use whenever a pop breaks. It works pretty good. I use it on a lot of things like acrylic, metal, wood etc. dries pretty fast also
Loctite Ultra Gel Control Super Glue 4-Gram (1363589) https://www.amazon.com/dp/B003Y49R7G/ref=cm_sw_r_cp_api_m6TpzbQKTCDFG
Oh no sorry to hear that! I would use this
https://www.amazon.com/Loctite-Ultra-Control-4-Gram-1363589/dp/B003Y49R7G/ref=sr_1_1?ie=UTF8&amp;qid=1519869341&amp;sr=8-1&amp;keywords=loctite+ultra+gel&amp;dpID=51RApY2mL2L&amp;preST=_SY300_QL70_&amp;dpSrc=srch
I have never had any problems in the past with this glue. place VERY fine amounts on her finger tips. This is what I would do, and I firmly believe it will work out fine.
So sorry :(
Edit: I purchase this from home depot all the time, but amazon would work fine. Keep me posted!
super glue that i used
has worked great for reattaching an x-wing laser cannon and 2 pegs
my raider came with the front peg holder broken off, so every time i put it on or off peg i fear it will break again, but that damn super glue connection almost seems the strongest part of the ship now lol
Upgrade. You can drill an AL kettle using dish soap as lubricant like a hot knife through butter. Step bit was like $6 at my local hardware store -- not the best ever tool but I only need one use out of it. And then this serviceable bulkhead+ball valve+barb is less than $21: link. It goes on sale for cheaper from time to time if you watch homebrewfinds.com. Even if you upgrade, it's worth doing this one and using it as an HLT or something.
If you look at the product you will see it is commonly bought with [this ball valve] (http://www.amazon.com/Weldless-Bulkhead-Stainless-Steel-valve/dp/B00420WMUU/ref=pd_bxgy_k_img_z). Just remove the old valve (it is nylon) and put this in its place. Then connect the screen inside.
Great. I was going to add a no weld ball valve to it as well.
edit: this one actually: http://www.amazon.com/Weldless-Bulkhead-Stainless-Steel-valve/dp/B00420WMUU/ref=wl_it_dp_o_pC_nS_nC?ie=UTF8&amp;colid=22WSWWQDSQRRM&amp;coliid=I193MJG09G8FHZ
I started with a 20 gallon Winware Aluminium kettle, a custom bag , ball valve, a clip on thermometer, and a couple of Aquatainers for no chill. I miss the simplicity of that setup.
Yes, cooler as a mash tun. My setup is:
Ball valve (https://www.amazon.com/dp/B00420WMUU/ref=cm_sw_r_cp_apa_i_oFpqDb0236QSQ)
Coleman 48qt cooler
https://www.homedepot.com/p/Coleman-48-Qt-Performance-Marine-Cooler-3000003702/206851499
Silicon tubing for transfer
https://www.amazon.com/dp/B079X3SCFV/ref=cm_sw_r_cp_apa_i_UGpqDb43MYVWT
Custom Wilser Brew Bag
https://biabbags.webs.com/
I did not bother with insulating the lid of the cooler. I simply place a long piece of aluminum foil down onto the mash. Works perfectly.
Having a hard time getting a perfect seal with my new 5 gallon Rubbermaid cooler. I've tried numerous o-rings and washers that always result in a drip every few seconds. This usually stops after I dump in the grain, but it's just really annoying. Using this ball valve setup
Any help with this one? Cheers!
https://www.amazon.com/Home-Brew-Stuff-SS-WV2-Stainless/dp/B00420WMUU
the shank might not be long enough for a cooler. measure before you buy
I built one and it was pretty easy and not very expensive considering. Warning: The following instructions are probably dangerous. This is what I did, and it's to demonstrate how simple it was to make.
It's maybe two hundred bucks and when combined with an inkbird it makes biab a breeze.
Stand by:
Ball Valve
False Bottom
10 gallon cooler
False Bottom - Valve adapter
Please shop around. I have no doubt you could get some of this stuff for cheaper. I was restricted in that my only form of currency was Amazon gift cards. Especially the adapter could be built / constructed for much cheaper than I paid.
Additionally, instead of the false bottom / adapter, one could simply employ a Bazooka Screen instead of a false bottom, I have just read that false bottoms are more effective and less prone to problems.
DISCLAIMER - Always do your own research and make sure the parts that you are buying are all compatible and properly sized, etc. etc.
Having said that, the parts I listed above are exactly what I ordered and all fit together perfectly, I just needed to go out and buy a female coupler (to attach the valve to the hose from the false bottom) and a washer (per the included instructions with the valve, which had a additional washer for my configuration).
Have no fear! You have a simple task ahead of you.
If I was doing this, I would use the following:
This bad little boy can handle 250 VAC at 10 Amps (which is going to be way more than you need). It has 4 relays, so you could control up to 4 drills or other widgets if you needed to. Each relay has a NO (normally open), NC (normally closed), and C (common) Contact.
This little bad boy is how you control that relay. You can write a very simple program on your computer that you put on this device (I am talking like 3 lines of code) that will turn a digital output on for 7 second, then off. Hit the reset button and it does it all over again! The digital output on this board will get a wire stuck over to the input on the Relay board above.
How this all works: Take a simply extension cord (unplugged, obviously) and open up the insulation. There are usually 3 wires in it, black, white, and green (these can vary, so be careful and choose correctly). Take the Black or White wire and cut that bitch. One end of the cut wire can be stuck into the common terminal of the relay board. The other end can be stuck into the NO (normally open) terminal. What this will do is that when the Arduino board sends 5 volts to that relay, it will switch. This will connect the Common and NO terminals together, allowing power to flow through it to the drill. On the drill end I would just zip-tie or rubberband the trigger so it goes on when the relay changes.
CAUTION 120 volts or 220 volts (depending on where you live) can be very dangerous!!! That relay board will have open terminals. Because of this I would HIGHLY RECOMMEND that you put it in some kind of plastic case. I would also run electrical tape over the pins on the underside of the board to make sure you can't zap yourself.
When I get home I can draw you up a wiring diagram if you like and I could give you the basic code you would need.
Good luck!
I didn't have a relay picked out yet, I'm kind of in the brain storming stage right now. I came across this board on amazon and thought it might do the trick:
https://www.amazon.ca/SainSmart-101-70-101-4-Channel-Relay-Module/dp/B0057OC5O8/ref=sr_1_21?ie=UTF8&amp;qid=1486504628&amp;sr=8-21&amp;keywords=usb+relay
It says it has a Standard interface that can be controlled directly by microcontroller (Arduino , 8051, AVR, PIC, DSP, ARM, ARM, MSP431, TTL logic)
Maybe i'll give it a go.
I would replace your discrete components with an Arduino Pro Mini. You can connect three output pins to some relays, and drive the LEDs with a 5V power supply. You'll probably want to put a resistor in series with each LED, instead of one resistor for the whole string, to minimize risk of damaging them: (5V-3.4V)/.025A = 64Ohms, so use somewhere between 50 and 75 Ohms for each LED. Alternatively, you could run the whole thing on 3.3V and skip the resistors, but those power supplies aren't so common. In that case you'd want the 3.3V Arduino. PM me if you need help programming the Arduino, it's pretty easy.
Non-mobile: Here's a relay
^That's ^why ^I'm ^here, ^I ^don't ^judge ^you. ^PM ^/u/xl0 ^if ^I'm ^causing ^any ^trouble. ^WUT?
The relay setup and wiring is not hard but it can be a bit confusing at first until you figure out the GPIO wiring and setup. With my setup I can control a power strip that the Pi (via Octoprint menu entry) can turn on or off via the relay as well as having LED lighting inside my enclosure controlled that can also be controlled from Octoprint. If you want to give it a go just pick up a relay and some connectors to wire it to the GPIO pins. Feel free to hit me up once you have the hardware and I can share my wiring and Pi GPIO config with you so you can get going quickly. I like the 4 channel relays since they are only a few bucks more than the 1 or 2 chan versions and it allows you to add devices in the future. They are under $10: https://www.amazon.com/gp/product/B0057OC5O8/ref=oh_aui_search_detailpage?ie=UTF8&amp;psc=1
Yeah, the arduino can supply only a couple mA from each IO pin, that pump likely needs 500-1000mA to run.
You can also use a relay for a more simple setup, like this board for example, it will let the arduino switch high current loads like the pump easily.
This is the same. Im unsure about what you posted. Propylene Glycol 1 Pint https://www.amazon.com/dp/B005F5KYM4/ref=cm_sw_r_awd_gmBeub0X9WZM7
I bought mine from Amazon (PG, VG). I read in some thread that Essential Depot is the supplier for a lot of vape shops.
Hey! I love the purple pax! The only accessories I use are rubbing alcohol, cotton pipe cleaners, and alcohol wipes. Oh, and lubricant. I did an Internet search for the lubricant, it's propylene glycol. I found a pint of it on amazon for $8. (That will last forever.)
http://www.amazon.com/Propylene-Glycol-Pint-Free-Shipping/dp/B005F5KYM4
Here is a video on how to apply the lubricant. I tend to lube it after every cleaning.
http://youtu.be/W6-IcN6segw
Every pax comes with a small amount of cleaning supplies, but they really didn't last long for me. Cleaning is a little tedious, but it vapes so much more easily when it's clean. Here is a good video about how to clean it.
http://youtu.be/Cowj6W1qxjQ
I find that 10 days is the absolute longest I can go without cleaning it, and that's with daily use. And honestly, I should probably tend to it more like once a week.
Regarding cute accessories, there are some really cute pouches for Pax on etsy!
https://www.etsy.com/market/pax_vaporizer_case
Good luck with whatever you decide to go with! :) sorry for all the links, I'm on my ipad and watching The World's End and can't bring myself to do proper formatting right now) ;)
http://www.amazon.com/gp/aw/d/B005F5KYM4/ref=mp_s_a_1_1?qid=1382292583&amp;sr=8-1&amp;pi=AC_SX110_SY165_QL70
They also have quarts for $12-13 and gallons for $33. It's USP and a highly recommended brand. I wouldn't trust a PG "solution" as that implies there's other ingredients. Also, you want USP as that's at least food grade or Pharma grade. If it doesn't say USP, it's probably industrial grade, which means lots of impurities.
http://www.amazon.com/gp/product/B005F5KYM4/ref=oh_details_o02_s00_i00?ie=UTF8&psc=1
I just ordered this about 2 weeks ago. it is the exact stuff ploom gives you and its really cheap for a lot of it!
Edit: All it takes is a couple drops of the stuff a couple times a week. So it is definitely worth it.
Don't purchase a Delta for your first printer - they're far more hassle than worth. For 900USD, I'd recommend the Flashforge Creator Pro. A replicator 2 clone that's built great, pretty much plug and play, comes with filament. Has to be set up with something like Sli3r or Cura but it's not very difficult and there is a great tutorial here.
i've used it before (with PLA) and the enclosure / heated build plate do great things for the quality of the print, fairly good build volume and top rated on 3dprinthubs.
The Flashforge Creator Pro and similar machines (they're all clones of the Replicator One dual) may do the trick. Nowadays they come with sides, front doors, and top covers so they're relatively cat safe. The Blessed Cat here recognizes the "filament loading" sound and desperately wants to catch that mysterious noodle thingie but so far she's had no luck.
They don't have so-called autoleveling, which is fine by me. The build platforms are stable enough that once you get the trick of leveling (AKA tramming) the bed to be flat with respect to the plane of the nozzle travel then it's usually good for a long time without needed to be tweaked.
They print PETG just fine, insofar as PETG ever prints "fine." It can be fussy but it's awesome when dialed in right. The bracket on the right, to replace the original swing arm lamp bracket, is done in PETG and is holding up great.
Yeah, I printed the pink divider with a Flashforge Creator Pro.
Flash Forge pro. I hear it has great support, but I've never needed to use it. Great printer
I thought about a Lulzbot for a long time, but ended up going for the Forge. Enclosed so its easier to print ABS, smaller build space, but I dont mind that with what I do with it.
Thanks! I'd not heard of that model. Someone else recommended Flashforge 3d (http://www.amazon.com/FlashForge-Structure-Optimized-Platform-Extruder/dp/B00I8NM6JO/ref=sr_1_5?ie=UTF8&amp;qid=1449683425&amp;sr=8-5&amp;keywords=ultimaker+3d+printer) any comparison.. or is the Ultimaker 2go that much better.
Casting would allow me to use different materials, adjust the painting, weigh them correctly..
WOOD FILL?? Oh my. That IS interesting.
Flash Forge Creator Pro. I had a lot of problems with it out of the box with clogging in the nozzles and things sticking to the build plate. After adding a metal hotend and magnetic build plate it has worked amazingly with no issues. I see the magnetic build plate is out of stock, so not sure where you can get those now, but being able to just flex the plate and have pieces pop right off is great.
I would avoid eBay, you can grab a gallon from Amazon of Essential Depot for $7.20 more, get double the amount (1 gal vs 1/2 gal) and have it shipped free same day (with Prime). This is what I bought last month, no issues. I tried a liter first and was also fine.
Or like /u/afflaq mentioned, if you are looking for more, 4gal comes in at $70 direct from Essential Depot.
EDIT, I believe the same day shipping is $35 on Amazon, so grab a few 8oz bottles to store it in for use.
You're going to pay like a thousand bucks for that much bubble solution, plus shipping and handling. My advice would be to pick up an empty drum, a couple of buckets of liquid detergent, and a gallon of glycerin; and make it yourself in your back yard. You'd be looking at more like $250 plus shipping (particularly, you're going to save S&H on 400 pounds of water). There's lots of recipes online but you'd generally be looking at 1 part detergent to 6-8 parts water, and 1 part glycerin to 12-16 parts detergent.
I started mixing back in January, and here's the list of the items I got off of Amazon to get set up:
There's a few incidentals, such as nitrile gloves, eye protection(You do NOT want nicotine in your eyes!) paper towels. Bottles! How could I forget bottles?!? Again, Amazon to the rescue-just head over to 510 Central's storefront They've got some of the best HDPE bottles on Amazon-Nice and squeezy but firm. If glass is more your thing, I'm sure there's a bunch of those on Amazon too.
Here's a little tip I use: When mixing, put your VG and PG in some condiment-style bottles(I picked up a couple at a craft store in the candy making dept) When you're mixing in small bottles, it saves time and mess to pour from a squeeze bottle than a syringe. Syringes and VG don't work too well-It's like sucking snot up a straw.
I'm also going to say head over to /r/DIY_eJuice and read up on mixing. There's a TON of great info in the sidebar-READ ALL OF IT. When you get ready to start mixing, pick 2 or 3 recipes that sound good and buy the flavors for those. It's a lot easier and less expensive than buying a slew of flavors that sound great but don't play well with others. Enjoy!
1g for $27 + shipping.
Or 1g for $35 with Prime free shipping.
Or $18+$9 shipping.
https://www.amazon.com/gp/product/B00PSGWHIO/ref=oh_aui_detailpage_o02_s00?ie=UTF8&amp;psc=1
$18.00 per gallon with an additional $9.00 for shipping. If you order two, its the same $9.00 shipping. So comes out to $22.50 each delivered to my door. I have found a few better deals on occasion but I like the square jugs and how they fit my shelves.
I came here to tell you to order VG from Amazon. I got a gallon for about $13, but it appears that the price almost doubled (I was going to provide link).
Does anyone know why VG price increased so much?
Edit: Link with new, almost doubled price. Was $13 _ https://www.amazon.com/gp/product/B00PSGWHIO/ref=oh_aui_detailpage_o03_s00?ie=UTF8&amp;psc=1
Hey man, I would love to help you quit smoking and didn't notice the first time I commented that you didn't have any experience with vaping. So I'm going to try to put together a list here of what you need to do to start vaping for very little money.
https://www.vapordna.com/Joyetech-eGo-AIO-All-In-One-Starter-Kit-p/egoaio.htm
This is another option for you.
https://www.vapordna.com/Eleaf-iCare-All-In-One-Ultra-Portable-System-p/icaref.htm
I love my Icare, but you will need to use high (24-36) mg ejuice with it, whereas with the ego you would need 12-24 mg/ml.
https://www.amazon.com/gp/aw/d/B005UGBG20/ref=sxts1?ie=UTF8&amp;qid=1488210602&amp;sr=1&amp;pi=AC_SX236_SY340_FMwebp_QL65
https://www.amazon.com/gp/aw/d/B00PSGWHIO/ref=mp_s_a_1_2_a_it?ie=UTF8&amp;qid=1488210630&amp;sr=8-2&amp;keywords=vg
https://www.amazon.com/gp/aw/d/B01K8UB5VO/ref=mp_s_a_1_5?ie=UTF8&amp;qid=1488210666&amp;sr=8-5&amp;pi=AC_SX236_SY340_FMwebp_QL65&amp;keywords=pg
https://www.nudenicotine.com/product/500ml-100mgml-100-pg-nicotine-base-for-mixing-only/?attribute_size=120mL&amp;attribute_solvent=100%25+PG
https://www.amazon.com/gp/aw/d/B0081SRRFO/ref=mp_s_a_1_1?ie=UTF8&amp;qid=1488210749&amp;sr=8-1&amp;pi=AC_SX236_SY340_FMwebp_QL65&amp;keywords=dropper+bottle
https://www.amazon.com/gp/aw/d/B005IQTSE0/ref=mp_s_a_1_1?ie=UTF8&amp;qid=1488210793&amp;sr=8-1&amp;pi=AC_SX236_SY340_FMwebp_QL65&amp;keywords=pippettes+plastic+droppers
OPTIONAL: flavoring. If you want flavoring just ask in a reply I'll let you know what to get based on your tastes, but it's not necessary and you're trying to go cheap.
This is the recipe for making flavorless, 12 mg juice.
http://e-liquid-recipes.com/recipe/1240996/For+cheapos
You can make an account at that site and adapt that recipe to be higher or lower nicotine if you want.
I know this seems a lot more expensive than the Ryo cigarettes, but trust me, this makes like a year or two worth of liquid and the mods I suggested have really cheap coils. Please believe me, this is worth every penny of the investment, you will never regret it. If you need help with mixing your first batch of eliquid, go to r/diy_ejuice and look at the new mixer thread in the sidebar. If you have any questions don't hesitate to ask me, but comment it cause I don't get message notifications on my phone app.
I use Essential Depot on Amazon they are top notch. Super cheap. Ship crazy fast. I only found it one time at Wal-Mart and used a small bottle. Aslong as the proper grades ans safety checks are on the bottle you'll be fine!! Hope that helps.
You can go to Amazon and buy from Essential Depot. Their VG is pretty good quality and you can get a gallon for around $28 and a quart for around $13 with shipping included. Sometimes these guys sell "Cube boxes" which will include 4 x gallon sizes of VG or PG for around $60-80 depending on the sale price. But you can find them on Amazon here https://www.amazon.com/gp/product/B00PSGWHIO/ref=oh_aui_detailpage_o09_s00?ie=UTF8&amp;psc=1
Another vote for retractable casters. This was the smartest thing I ever did in my shop.
Here's what I used. Little pricey but worth it.
POWERTEC 17000 Workbench Caster Kit (Pack of 4) https://www.amazon.com/dp/B00SX3T2LO/ref=cm_sw_r_cp_apa_gepIAb2R5WV8Y
1.) I would advise not using glue on the table top, but instead screws. Your table top will get dinged up over time. If you glue it, it will be hard to replace the top. But if you use screws. It will just be as easy as removing the screws, remove the top, and screw on the new one.
2.) For your router lift. May look at something like StumpyNubs' Design. This may be more secure than using a scissor jack that your plans call for.
3.) Beef up your legs, 2x4s are fine, but if you place two 2x4s together, than your legs are going to be more sturdy, or switch to just straight up 4x4s.Nevermind, looking at your plans again, I see you have done that.4.) Look at using plywood that already has a finish on it, like Melamine, this will make the wood coming off the tablesaw, or across the router easier to slide. Otherwise, you will want to wax your outfeed table at least every other month or so, depending on storage and use.
5.) You also want to make sure that you include the ability to use a fence on the router side. Either a custom built one or look at some aftermarket fences.
6.) Make sure to shorten the legs enough so you can add in casters, ideally something like these. It will make moving the bench around easier.
7.) You will want to place runners under your bottom shelf to help support weight.
Last month we moved into a new place that has a 500 sf basement and I am using about 40% of that space to build a workshop for leather craft and woodworking. The space is still a work in progress and a complete disaster, but it is coming along. The space will be shared with storage and a home gym (shoutout to /r/homegym!).
I just finished designing and building this workbench using a 4x8' plywood sheet top. The plywood top is 3/4" thick oak, the bottom shelf is 19/32" OSB (I originally planned on 1/2" but this was actually cheaper), the legs are 4x4s, and the rest of the frame is made of 2x4s. Cutting plus assembly by myself took about 3 hours, 2 beers (only after cutting was completed!), and only one small bruise (unrelated to the beer), though I spent much more time on top of that iterating on the design. My next step is to attach a few vises, tool mounts, some drop down casters, and possibly a thin MDF sacrificial top. If I forgo the sacrificial top I will likely route a bevel along the edges.
This thing is completely overkill for what I intend to use it for, but I like knowing that I could rebuild an engine on it if I wanted (/knew how) to. I can work on a few projects at once and really spread out, which was my ultimate goal for this build. I'll likely build a few more smaller, dedicated benches along the wall for things like a drill press, miter saw, etc. in the next few weeks.
https://www.amazon.com/POWERTEC-17000-Workbench-Caster-Pack/dp/B00SX3T2LO/
There are a ton of options like https://www.amazon.com/POWERTEC-17000-Workbench-Caster-Pack/dp/B00SX3T2LO that mount on the side of the legs and lift up the bench when needed. That way you don't have to raise the bench up.
You might be after something like this -- https://www.amazon.com/POWERTEC-17000-Workbench-Caster-Pack/dp/B00SX3T2LO
I modeled the casters roughly after these, so yeah you would have to go around and engage them all before moving the bench.
Basically I think I want a split top and expect that's how i'll set it up at first, but I'm nervous I won't like it, so I thought I'd give myself both options.
I'll make a nice insert tool-holder strip thing and leave it split for a while, then close the gap if its not working for me. It will also be nice to not have a 200lb+ slab top when I move shops.
I bought my casters on Amazon.
https://smile.amazon.com/gp/product/B00SX3T2LO/ref=ppx_yo_dt_b_search_asin_title?ie=UTF8&amp;psc=1
They seem to hold up very nicely.
I bought similar on Amazon when they were prime for $67. They installed easy and seem to hold up well so far. I'm careful and slow when I move my bench around with a lot of weight thought. I'm mostly concerned that one of the wheels will get caught on sawdust or a seam in the concrete and ruin my day.
As far as do they work as you'd expect, yes. It's really easy to use your foot to lift the bench up.
http://www.amazon.com/gp/product/B00SX3T2LO
I got these casters for my bench and they're the best of both worlds - they retract above the floor when not in use so the bench actually rests just on its legs: https://www.amazon.com/gp/aw/d/B00SX3T2LO/ref=ya_aw_od_pi?ie=UTF8&amp;psc=1
you need to get a ph meter: https://www.amazon.com/Jellas-Household-Hydroponics-Measurement-Resolution/dp/B00YBUH4RC/ref=lp_393271011_1_3?s=industrial&amp;ie=UTF8&amp;qid=1511300438&amp;sr=1-3 will suffice.
I would recommend a water/nutrient pH of 6.4 for promix as it is a peat based media that is acidic. Meaning your pH should be about 6.2, but if you add 6.2 and hits the acidic peat, it will not be that anymore. Some people argue lower pH for soiless, but let me assure you that at 6.4 in results in a 5.6ish out. I personally think you are safe with a pH 5.4-6.2 out. What I mean by out is run-off, you need to feed enough liquid so that ~20% just drains through. Placing the pot in a pail during feeding/watering helps. This will drain extra salts.
Also, you should add perlite (1/3 volume) with promix as it can cause drainage problems and water retention if you don't. Think about that before you transplant. You may need to also add dolomite lime in the future. Read up on that please, just thinking ahead for you, and letting you avoid mistakes I had made. It doesn't take a lot, but helps to stabilize your pH and provides cal/mag.
>Not sure what EC means
It means Electroconductivity and refers to the salinity of your water.
Do you know how hard your water is? If its too hard, you need to dilute it with RO water. Some people just use RO water only, but supplement it with CalMag solution. If you don't know what's in your tap water, call the water department and ask them. They most probably posted your water analysis online.
Yur just lucky I'm feeling nice ;)
EDIT: And ffs quit giving them miracle grow!
I got one from Jellas and I'm very happy with it, which I'll link at the end of this reply. It's been quite accurate for my purposes. I occasionally put it in distilled water to make sure it's not falling out of calibration and so far it hasn't drifted, but if it does it has a screw to adjust it back. The batteries are easy to replace, and it's easy to slide it in past the pellicle and get a quick measurement. I'm actually on my second unit because I accidentally broke the bulb on the first one while drying it. Definitely let it air dry. I always rinse it right before and right after using it. It's a great way to make sure you're brewing a consistent product, since you will know exactly when your first and second fermentations are finished. Remember that pH is logarithmic so the rate of change will not be linear, and the difference in acidity between 4.0 and 3.0 is not 25%, it's 1,000%. I start the second fermentation at 3.4-3.6 and finish around 3.1-3.2.
Jellas Pocket Size PH Meter / PH Tester / Mini Water Quality Tester for Household Drinking Water, Hydroponics, Aquariums, Swimming Pools, PH 0-14.0 Me https://www.amazon.com/dp/B00YBUH4RC/ref=cm_sw_r_cp_apap_hkOrr63kSbWzQ
Sorry for the slow response.
That is good your budget is flexible and you want to do it right from the start.
I think the tent is a good choice, and you have lots of vertical height which is great. Are you in a grow friendly state? The reason I ask is they might have some sales at local hydroponic and gardening stores that you might consider. Your plant will have at least a foot above it for clearance from the light and a foot below where you've got your pot. So your actual plant will probably just be around 4 feet tall.
I know a lot of people in america use fox farms soil and the fox farms nutrient line up. Seems to be successful. I am going a slightly more organic method using General Organics nutrients and pro mix with some compost as my soil. The fox farms soil has starting food in it while the pro mix is inert, which means full control of the food for the grower but less of a safety net for the plant if you mess it up.
There is a lot of options when it comes to food, each company has a ton of products. To get you going though I would just use the vegatative food and the flowering food. And some calmag. Everything else is just optional and you can always use next time.
Once you've got your medium and food sorted, you'll want to be able to check your ph levels.
Also grab some of the bottles of ph up and down so you can adjust it accordingly before you feed your ladies.
You'll need a tent to fit your space, I would browse amazon for deals and base your decision on their reviews!
As for what pots to use, I started using fabric pots and they are great. They allow for less over watering because the medium can breathe more easily. You'll want to start in 4 inch pots, then maybe to a gallon, then 3 gallons, perhaps all the way to 5 if you want. Kinda depends on how many plants you decide to keep? I grow small numbers and big plants.
After that you've just got to decide on lighting and ventilation. I don't know a lot about LEDs except that it cuts down on electricity and heat. Some people invest in american companies but they can be quite expensive. A popular method is just ordering cheap LED fixtures from china and not worrying too much if they break because they are so cheap.
/u/Legal_In_OR might stop by here to give some LED advice. He uses top of the line LEDS but I am wondering if he has insight on some of the cheaper options to get you going.
We also have lots of useful information on our website. http://www.herbgrow.co/
Feel free to ask more questions.
ph meter from amazon
I have this one and it works well! 16 bucks too so I recommend this if you are looking to purchase one!
Cheap ph meter:
https://www.amazon.com/gp/aw/d/B00YBUH4RC/ref=mp_s_a_1_1?ie=UTF8&amp;qid=1501379477&amp;sr=8-1-spons&amp;pi=AC_SX236_SY340_QL65&amp;keywords=ph+meter&amp;psc=1
If you live in a legal state, just buy a used digital Mh/hps system preferably 1000w.
Use advanced nutrients
http://www.advancednutrients.com/nutrient-calculator/
I like how you asked for cheaper than $30 and people respond with $200 probes lmao.
I got these two off Amazon cheap, like $15 each.
I've tested them in r/o water and they seem to be accurate, the tds measures up with my water report from the city on my tap water and reads r/o at 0.
I haven't had any issues with my plants as far as ph or PPM.
Here are the ones I got.
https://www.amazon.com/gp/aw/d/B00YBUH4RC/ref=mp_s_a_1_1?ie=UTF8&amp;qid=1483110799&amp;sr=8-1&amp;pi=AC_SX236_SY340_QL65&amp;keywords=ph+meter+for+water&amp;dpPl=1&amp;dpID=41w2JXOokIL&amp;ref=plSrch
https://www.amazon.com/gp/aw/d/B01EWZBB3S/ref=mp_s_a_1_3?ie=UTF8&amp;qid=1483110821&amp;sr=8-3&amp;pi=AC_SX236_SY340_QL65&amp;keywords=tds+water+testing+meter&amp;dpPl=1&amp;dpID=51JKkIc76NL&amp;ref=plSrch
https://www.amazon.com/dp/B01D8M32LU/ref=cm_sw_r_cp_apa_tgCGybQQN4XNJ
Its an excellent printer. I did a lot of research before buying. Comes with 2 reels of filament, and video manuals.
This is a pretty good flashforge creator pro clone. My only gripe with this printer is that leveling can be a pain in the ass sometimes.
i3s can also be modded to have multiple extruders, or use multiple filaments in one hot end (although the former adds a good amount of time to the final print if the materials have different melting points).
https://www.amazon.ca/QIDI-TECHNOLOGY-3DP-QDA16-01-Structure-Filaments/dp/B01D8M32LU/ref=sr_1_3?crid=26T35QREUTSS6&keywords=qidi+technology+3d+printer&qid=1564285583&s=hi&sprefix=QIDI+TECHNOLOGY+%2Ctools%2C183&sr=8-3 I bought this one with part of my tax return, it works pretty well, but it does take some experimenting with the default settings to get higher quality prints. If you do get a 3d printer just remember, a slower print means more detail and less chance of failure.
Just a heads up, there is a printer made by a company called Qidi Tech that is literally the exact same printer as the one linked, except a few hundred dollars cheaper.
[link!]
(https://www.amazon.com/TECHNOLOGY-3DP-QDA16-01-Extruder-Structure-Filaments/dp/B01D8M32LU/ref=sr_1_10?s=industrial&amp;ie=UTF8&amp;qid=1499831233&amp;sr=1-10&amp;keywords=3d+printer)
Look into the Qidi Tech. It's practically the same printer, is positively reviewed and is $200 cheaper. It also has a $50 off coupon today so you can get the whole thing for $650.
https://www.amazon.com/TECHNOLOGY-3DP-QDA16-01-Extruder-Structure-Filaments/dp/B01D8M32LU/ref=sr_1_1?ie=UTF8&amp;qid=1480346363&amp;sr=8-1&amp;keywords=qidi+tech
Crazy I had no idea seems like I've been helping someone out with no idea.... Thanks I'll update it.
Edit: all fixed, now that I think about it I linked from my wish list, maybe that was it.
[I was looking at this one due to budget and it seems to be reviewed highly]
(https://www.amazon.com/dp/B01D8M32LU)
I have been through 7 different 3d Printers. 2 at work and this is my 5th at home.
This is a nice starter printer: http://www.monoprice.com/product?p_id=15365
Here is the upgrade: http://www.monoprice.com/product?p_id=15711
And this is my current printer: https://www.amazon.com/TECHNOLOGY-3DP-QDA16-01-Extruder-Structure-Filaments/dp/B01D8M32LU
No matter what you spend, plan on maintenance, modification and repairs. I have had all of my machines apart enough that I can probably put them back together blind folded.
There is a brand called QIDI TECH that sells printers that are basically clones of Flashforge's range.
Here is a redditors review of a QIDI TECH 1 after having the printer for 12 months. From what I have seen around the subreddit they are good machines, so if you are wanting to save a bit possibly go that route. Flashforge is a reputable brand though, either would be a good choice. The Creator Pro equivalent would be the QIDI TECH 1 or the X PRO.
About $80. It's a lower-mid tier Apera. You could get one of their $40-$50 and I'm sure you'd be fine. They come in an awesome little case with a foam insert to hold the meter, testing cups, and calibration liquid. Here's a link if you're interested: https://www.amazon.com/Apera-Instruments-AI311-Replaceable-2-00-16-00/dp/B01ENFOIQE/ref=sr_1_2_sspa?s=industrial&amp;ie=UTF8&amp;qid=1520625309&amp;sr=1-2-spons&amp;keywords=apera&amp;psc=1
+1 for Apera, I just decided on this one by them. It was ~15 dollars more expensive than the model you have, but the increased pH sensitivity as well as the fact that it includes storage solution was more than enough for me to be willing to shell out the few extra bucks. Also, another super cool feature of this model is that you can buy replacement probes if you ever damage your current one, which will save you money in the long run. These also seemed to have a consistently higher rating than any other pH pens I looked at on amazon, and their customer service is pretty stellar from what I've gathered. Look into these too OP!
I’d guess this one:
https://www.amazon.com/gp/aw/d/B01ENFOIQE/ref=sspa_mw_detail_2?ie=UTF8&amp;psc=1
I have it as well, and highly recommend it.
I use this one. It has a replaceable probe, 1–3 point calibration, and automatic temperature compensation. You can also get other types of probes if you get into cheese-making or something. I'd also recommend buying bigger bottles of calibration solutions and storage solution.
Also be aware that the probes on pH meters need to be replaced periodically. As much as you hate strips, meters are an ongoing expense.
I did a penny top desk a few years ago and used some from Home Depot. It was in the paint section. It was like $30 a box, and I needed 3 for my desk.
If I did it again I would get the stuff from Amazon sold by the gallon. Something like this: https://www.amazon.com/dp/B01LYK2NAG/
There was nothing wrong with the stuff from the big box stores, but from a pure cost perspective I could have bought that for less, and had a ton left over for something else.
Thank you! I use this one from Amazon :)
Crystal Clear Bar Table Top Epoxy Resin Coating for Wood Tabletop - 1 Gallon Kit https://www.amazon.com/dp/B01LYK2NAG/ref=cm_sw_r_cp_apa_i_Z-OLDb6H9FNVZ
https://www.amazon.com/Crystal-Clear-Table-Coating-Tabletop/dp/B01LYK2NAG/ref=sxbs_sxwds-stvp?keywords=epoxy+resin&amp;pd_rd_i=B01LYK2NAG&amp;pd_rd_r=caf18787-693b-4fc1-8029-58245384cd77&amp;pd_rd_w=cbcYw&amp;pd_rd_wg=5G2we&amp;pf_rd_p=d006b618-5fac-44e6-850d-a0fdd19f7847&amp;pf_rd_r=EC8RAKSF8QSB5HAX671H&amp;qid=1572630183
That’s the resin I use, the acrylic paint I get from Walmart and you can use any isopropyl or denatured alcohol I believe. If you go on YouTube and lookup resin pouring there are tons of channels that show you how
I have had good results with this. I am by no means an expert and used a pressure pot to minimize bubbles, but I liked this stuff. It has worked well on several home projects.
They sure do. https://www.amazon.com/CHPOWER-Extruder-Upgraded-Replacement-Extruders/dp/B079JZ374W/ref=sr_1_8?s=industrial&amp;ie=UTF8&amp;qid=1540328899&amp;sr=1-8&amp;keywords=ender+3+extruder is one of them, although any kit for the ender 3 or cr-10 will do. And just in case you're interested in the couplers... https://www.amazon.com/Ivelink-PC4-M10-Straight-Pneumatic-Extruder/dp/B073TTWWN1/ref=sr_1_3?s=industrial&amp;ie=UTF8&amp;qid=1540328976&amp;sr=1-3&amp;keywords=ptfe+coupler you really just need one of each size and they last for a while, but I don't see a smaller set for much less $.
For me, the extruder assembly was the problem, and didn't grip the filament enough.
https://www.amazon.com/CHPOWER-Extruder-Upgraded-Replacement-Extruders/dp/B079JZ374W
I bought that and it worked great, then I upgraded to a bondtech extruder and have had zero issues since
The brass fitting is very important. Your only option if you absolutely can't wait is supergluing your fitting in the hole, but then the seller absolutely won't send you a replacement part. Luckily, replacements aren't expensive, and you can even buy a MK8 metal extruder frame which, honestly, you should do anyway as the plastic one is the absolute worst and likely the first part of your printer that will break
I found this metal replacement for $11 on amazon when I had this issue a few weeks ago, such great value
CHPOWER CR-10 Extruder Upgraded Replacement, Aluminum MK8 Drive Feed 3D Printer Extruders for Creality Ender 3, CR-10, CR-10S, CR-10 S4, CR-10 S5 https://www.amazon.com/dp/B079JZ374W/ref=cm_sw_r_cp_apa_i_NzsODb9EGYASC
Second - some Amazon links for the upgrade pieces I mention:
Springs - https://smile.amazon.com/gp/product/B07SDDHYN4/ref=ppx_yo_dt_b_search_asin_title?ie=UTF8&amp;psc=1
Bowden Tube - https://smile.amazon.com/gp/product/B079P92HN9/ref=ppx_yo_dt_b_asin_title_o00_s01?ie=UTF8&amp;psc=1
Couplings - https://smile.amazon.com/Dorhea-Straight-Pneumatic-Fittings-Accessories/dp/B07NSRCH2W/ref=sr_1_15?keywords=3d+printer+fitting&amp;qid=1574436375&amp;sr=8-15
Extruder - https://smile.amazon.com/gp/product/B079JZ374W/ref=ppx_yo_dt_b_asin_title_o00_s02?ie=UTF8&amp;psc=1
PEI Sheet - https://smile.amazon.com/gp/product/B07GSJSDWR/ref=ppx_yo_dt_b_asin_title_o00_s02?ie=UTF8&amp;psc=1
Stepper Motor Dampeners - https://smile.amazon.com/gp/product/B07C7FRLNX/ref=ppx_yo_dt_b_asin_title_o00_s02?ie=UTF8&amp;psc=1
Bootloader Flashing Kit - https://smile.amazon.com/Gulfcoast-Robotics-Bootloader-Flashing-Duplicator/dp/B07S5BBLKM/ref=sr_1_3?keywords=arduino+uno+ender+3+kit&amp;qid=1574436535&amp;s=industrial&amp;sr=1-3
Note that I didn't buy this flashing kit, but this one seems to have everything you need to get a bootloader onboard the Ender. What happens is you go through a bunch of steps to attach this so the printer and then put a bootloader onto the Ender 3 board. You only have to do that one time, then you can update the firmware as often as you want - typically via a USB cable. I have Octoprint installed, so I can flash my firmware on my basement printers from my upstairs computer using wifi. Super easy and handy.
If it slipped out, then your part is malfunctioning. Go ahead and order those couplers they really do make a world of difference. Also this is the other part I was referring to:
CHPOWER CR-10 Extruder Upgraded Replacement, Aluminum MK8 Drive Feed 3D Printer Extruders for Creality Ender 3, CR-10, CR-10S, CR-10 S4, CR-10 S5 https://www.amazon.com/dp/B079JZ374W/ref=cm_sw_r_cp_api_i_UsYUDbSXJ318G
The hole where your filament feeds into the Bowden tube will wear down over time due to friction. This part needs to be stronger than your filament or it was start to jam/slip.
It looks like the extruder arm may be squeaking the filament against the extruder wheel so tight it is causing skipped steps and filament to wear off on the wheel.
I bit the bullet and got an aluminum extruder arm kit from amazon - CHPOWER CR-10 Extruder Upgraded Replacement, https://www.amazon.com/dp/B079JZ374W/ref=cm_sw_r_cp_api_i_kCaPCbF0AF0C3 - and have had good luck and no more skipped steps since changing.
This product is the same as Ploom's mouthpiece lubricant, and it's much cheaper. All they use is food-grade propylene glycol.
I'm assuming you have a gemini-20 or something similar. Accuracy is about +/- 3mg with larger amounts. I'd suggest going for around 1mg/ml solution as this will be easy to measure and if you are mixing into 100ml+ the inaccuracy won't matter at all. You can find PG on amazon, you can also find it on some online vape shops because it's one of the main base ingredients in eliquid. Just get yourself a beaker to measure it out and a blunt tip syringe to measure your doses.
The solid red light you are having is the temperature-light issue. Make sure you clean it regularly, and leave it upside down (oven at the bottom) so that the piece stays as clean as possible.
I will buy some mouthpiece lubricant (or just Propylene Glycol (Amazon Link)) to lubricate the mouth piece connection part thoroughly. You don't need a lot, but make sure it is lubed up in the connection part. It always solves my temp-light issues.
Make sure to checkout the wiki in this subreddit on how to clean the pax.
Selling one of these 3D printers: https://www.amazon.com/FlashForge-Structure-Optimized-Platform-Extruder/dp/B00I8NM6JO/
The bed plate is upgraded to borosilicate glass, and has 3 plates to go with it. Asking for 650.
Solid machine and in excellent condition.
Pretty new to 3d printing but really interested. I basically just want to print stuff that people post and probably dabble in designing my own stuff. I am a technical guy, but I know that the designing of the models is pretty tough. I have sifted through the comments and saw two printers that stood out to me within the range I was thinking of. The CR-10 and the Prusa i3. I don't know which version is good for the CR-10 and I'm looking in the $400 range, but could go up to $800 if you guys think my value would be best there. Here are other printers I was looking at and not sure how everyone feels about those. If anyone can give me some feedback about them it'll help immensely in my decision.
https://www.amazon.com/dp/B00I8NM6JO/_encoding=UTF8?coliid=I3MX1XJ2F9XGZ7&amp;colid=30UBVRH3KC9LH
https://www.amazon.com/dp/B07421SR9J/_encoding=UTF8?coliid=I3SEAHNKKLM0QY&amp;colid=30UBVRH3KC9LH
https://www.amazon.com/dp/B016R9E7J2/_encoding=UTF8?coliid=I205Z5A0OGO6ZD&amp;colid=30UBVRH3KC9LH
how about a replicator clone then.
It's a hard choice, but I can say that when I was looking at potential units, I did consider the QIDI TECHNOLOGY 3DP-QDA16-01. This is still priced around entry level, so I wouldn't expect it to be a ton better; however, it does have some advantages. One nice thing is that it has a dual extruder setup. Initially, you might think "Why is printing in two colors a big deal?", but the advantage isn't colors but rather material. There's a specific type of filament that is water soluble, which works well for supports. This allows you to remove supports far easier than snipping them and filing down the nubs. It's not always a hard thing, but doing this for delicate parts can be a bit unnerving!
One thing to also consider when it comes to the world of 3D printing is how is the third-party support. That's where rebadges actually work out pretty well as these common designs usually mean more third-party components or even 3D printed parts available. For example, the Monoprice Maker Select V2 that I use is really just a Wanhao Duplicator i3. If I find parts for the Duplicator i3, they're likely going to work with the Select V2 as well. That QIDI unit earlier is the same as the FlashForge 3D Printer Creator Pro, and both of them are actually just rebadges of the Wanhao Duplicator 4! (Wanhao makes quite a lot of 3D printing products.)
One negative thing about that unit is that it's cantilevered. It isn't necessarily a problem, but it does mean that the weight of the carriage plate and hot plate are being carried only on a single side. Being cantilevered is normally only an issue when you start going up in build size, but it's worth noting.
I'd say the most important thing is to make sure the unit does everything that you need. It's not the worst thing if you go with a smaller, cheaper unit just to get your feet wet, and maybe work up to a larger, more capable unit.
First off, there is no perfect printer. There are only tradeoffs and choices. But between the gMax and the S5, we would choose the CR-10 S5. Why? Here are some of my thoughts about each...
gMax 1.5 XT+
Creatily CR-10 S5
The Bottom Line
That's our experience in a nutshell.
I bought an Anet A8 a while back before doing enough research, and have been pretty lucky until recently. My current printer has decided to cook itself, even after the upgrades that are suggested to make the printer safer. I would like to upgrade to a better printer that I can run for extended amounts of time without worry of setting a house fire. I would really like a printer that has a camera so I can monitor my prints while at work, and having dual extrudes would be a plus.
I have been doing a little research before posting but i'm not jazzed about what I have found so far. (although I am concerned about the build volumes) Some printers that I have come across are Mono Price Fully Enclosed Dual Extruder 3D Printer W/ Camera, FlashForge 3D Printer, and of course the Prusa i3 MK3S Kit (however adding the dual extruder is pricey)
I'm not sure if I'm all that sold on the three I listed so far mostly due to the build volume, and price, as well as not having a whole lot of reviews on them other than the Prusa.
&#x200B;
When it comes to the camera I thought about mounting my own webcam to the printer, and using that instead to help cut costs. Is this a viable idea?
&#x200B;
If anyone has any suggestions they would like to throw out please let me know.
I understand the nook and cranny issue. There would have to be some post processing to smooth the surface out. The issue I have been reading is that the material used for food safe 3d printing cant take much abuse and or quickly biodegrades, has little to no resistance to being cleaned with any sort of chemicals. Again, this is what I know of, I am hoping someone knows of a solution.
I was reading more about PTFE and 3d printing. It seems like you can not 3D print using PTFE besides the 3M material and thats going to be crazy expensive for now.
As far as making parts that dont need to be food safe, ABS seems like the way to go. It looks like getting an enclosed printer is also a good idea. Or getting a printer you can make an enclosure for. So far I have looked at a CR-10, Monoprice Maker Select Plus, and FlashForge 3D Printer Creator Pro though the build area is a bit small on this one.
This is probly the best printer for the coast. its a one for one copy of the MakerBot. You can get some for 500 but there dont print well and some other reasons that make it worth spending more for a better one. http://www.amazon.com/FlashForge-Structure-Optimized-Platform-Extruder/dp/B00I8NM6JO/ref=sr_1_sc_1?ie=UTF8&amp;qid=1414945027&amp;sr=8-1-spell&amp;keywords=forage+creater+pro
> It's definitely not as easy as it seems, and there is some post print work, but i love it.
In grad school I got to play with a Makerbot Replicator and a Lulzbot. I'm looking for one of my own, with an emphasis on cheap and big.
Is this the one you have? Very nice. A bit expensive for me, though.
Alright, seeking advice here (duh, right?)...
I'd like to keep the purchase under 1k USD so strongly considering the Prusa MK3S kit, though I noticed the below options. I'd like dual extrusion, but mainly for support materials (dissolvable), but not a requirement. Does anyone have any thoughts on the other two or should I stick to the Prusa at this price point? TIA!
Flashforge
https://www.amazon.com/FlashForge-Structure-Optimized-Platform-Extruder/dp/B00I8NM6JO and subsequently ...
Qidi
https://www.amazon.com/QIDI-TECHNOLOGY-Printer-Newest-Model/dp/B076BLQWHY
Personally, I love my FlashForge Creator Pro!
http://www.amazon.com/FlashForge-Structure-Optimized-Platform-Extruder/dp/B00I8NM6JO
To put things in perspective on the money saved.
That app needs a personal settable achievement in terms of what one intends to do with the money saved.
Ya actually $25/gal is hard to beat!
https://www.amazon.com/dp/B00PSGWHIO/ref=cm_sw_r_cp_apa_7uMeAbDMRWF8H
Amazon Prime: Essential Depot VG, 1 quart, $12.97
Amazon Prime: Essential Depot VG, 1 gallon, $23.47
All the grams - http://www.amazon.com/dp/B00PSGWHIO?psc=1
If you're going to ingest it, you should be buying USP/food grade as well. Drank a some of this and a shitload of Pedialyte to rehydrate for a grappling tournament after the morning weight in, post cut.
1 tsp = ~6g
I buy my VG and PG from there for making DIY juices.
http://www.amazon.com/Glycerin-Vegetable-Kosher-USP-Gallon/dp/B00PSGWHIO/
Shipping with kill you. It is always expensive on VG.
If you have Amazon Prime, this helps greatly: https://www.amazon.com/Glycerin-Vegetable-Kosher-USP-Pharmaceutical/dp/B00PSGWHIO/ref=sr_1_2_a_it?ie=UTF8&amp;qid=1493876395&amp;sr=8-2&amp;keywords=vg
Hmm some of those things aren't really necessary and there isn't enough VG/PG to last a while. I would recommend you piece together yourself everything you need and mix by weight. At first I tried mixing by volume but that was inaccurate and my mixes sucked. Here are most of the supplies you'll need.
VG
PG
Nic - I use Vape Clarity nic myself but their warehouse is being rebuilt after a fire so they're not operational until the end of the month. Here's an alternative I saw in the DIY subreddit.
Scale - Make sure to get the 500g one so that it measures out to the hundredths place.
I use www.bullcityvapor.com to get all the flavors I need in one place.
For bottles, I've just been rinsing out empty bottles my friends give me.
I don't bother with gloves but I use very diluted nic so that's not an issue for me (might want to use them if you have anything over 36mg/ml nic).
Here's the calculator I use and a tutorial.
I'll hook up bro!
Use ecig express to order Flavor Concentrates and bottles
— Use ELRECIPIES for 10% discount
Use The Flavor Apprentice/The Perfume Apprentice for Flavor concentrates
— Be sure that they are made for ecigs
— Better than ecig for bulk orders
Buy vegetable glycerin, and syringes from amazon
— Buy a gallon for bulk
— Buy 10ml, and 1ml syringes
— Buy Tupperware or something to contain 16 oz of liquid to steep ejuice
Buy nicotine from Nude Nicotine
—Purchase “Smooth” Nicotine salts
https://www.amazon.com/Duda-Energy-Syringepk001-Industrial-Syringes/dp/B00NDETMR2/ref=pd_lutyp_bia_3_4?_encoding=UTF8&amp;pd_rd_i=B00NDETMR2&amp;pd_rd_r=S32X53GMX38H2DP662TC&amp;pd_rd_w=NhTrE&amp;pd_rd_wg=Rt1HG&amp;pf_rd_i=desktop-typ-carousels&amp;pf_rd_m=ATVPDKIKX0DER&amp;pf_rd_p=2798022962&amp;pf_rd_r=S32X53GMX38H2DP662TC&amp;pf_rd_s=desktop-typ-carousels&amp;pf_rd_t=40701&amp;psc=1&amp;refRID=S32X53GMX38H2DP662TC
https://www.amazon.com/Duda-Energy-Syringepk010-Industrial-Syringes/dp/B00DXPRTHG/ref=pd_sim_328_5?_encoding=UTF8&amp;pd_rd_i=B00DXPRTHG&amp;pd_rd_r=G7GP5J47E1CRQPHET2VD&amp;pd_rd_w=yULCb&amp;pd_rd_wg=yRWOy&amp;psc=1&amp;refRID=G7GP5J47E1CRQPHET2VD
https://www.amazon.com/gp/product/B00PSGWHIO/ref=oh_aui_detailpage_o00_s00?ie=UTF8&amp;psc=1
https://www.ecigexpress.com
http://shop.perfumersapprentice.com
https://www.nudenicotine.com/product/nicotine-salts-smooth/
I got everything separately.. Now I know I should have gotten my flavors and nicotine from wizard labs, but I ordered nicotine from nude nicotine and flavors from TFA's website. Also don't get a pack of flavors, just pick a couple of recipes you'd like and order those flavors. Here is a shitload of VG for sale on amazon. Grab some syringes, and glass dropper bottles while you are there and you're ready..
EDIT: You'll also need some bigger syringes or a graduated cylinder..
I would read the sub for a couple of days, make sure to look at the top posts and search some stuff you think of.. I really wish I would have done that before I just bought a bunch of shit.
Yes. The flavors we add to our e-liquids don’t make them safer. What you linked is probably safer than anything flavored juice on the market.
It’s pretty expensive though. 4.4¢ a mL vs. 0.66¢ per mL
Never used nor heard of it. Just get this.
Honestly, don't. Skip any starters as they are all generally over priced. Just buy things separately.
Amazon:
VG
Scale
30mL Bottle if you need some for concentrates, nicotine, VG, PG, etc. Or just to put your juice in.
Cheap Pipettes
They are these :-)
So for a mobile workbench, consider these https://www.amazon.com/dp/B00SX3T2LO
Otherwise what types of projects are you interested in? Home improvement, cabinetry, furniture, small art items... these help to determine the tools needed, layouts and such.
Environment has a play also. Does it get too cold or hot to work with doors open, ie is ac/heat needed.
You have a nicely dimensioned space and a great start.
A pitfall, don’t focus too much of your time/money on getting the perfect tools, etc. tools typically get added with each project.
If I were to recommend min needed tools... small hand tools like drill, sander, etc. power... minimum is a table saw. You can do without the miter saw if you have a good table saw with a decent enough miter gage.
Is weather is a factor than shop vac at bare minimum and next up would be good dust collection, etc.
I hear ya. I used a set of these (Canadian link) so that it's only on the casters when I'm rolling it around, otherwise it's on its legs. Best of both worlds. They are pricey, though.
This is it
Quite expensive though
Powertec Casters! And then I used some non-slip stick-on feet from Amazon as well.
https://www.amazon.com/POWERTEC-17000-Workbench-Caster-Pack/dp/B00SX3T2LO/ref=sr_1_1?ie=UTF8&amp;qid=1520105731&amp;sr=8-1&amp;keywords=powertec+casters
that's a good looking moveable bench. how do you like the locking wheel set up? i'm considering that or the raiseable ones.
They’re Powertec Workbench Castors
I used 4" heavy duty locking casters, they were fine. Another option is retractable casters like these (https://www.amazon.ca/POWERTEC-17000-Workbench-Caster-Pack/dp/B00SX3T2LO) I use them on a workbench and they're great.
https://www.amazon.ca/gp/aw/d/B00SX3T2LO/ref=yo_ii_img?ie=UTF8&amp;psc=1&amp;th=1
Castors say they're good for 100lbs each. If that doesn't cut it I'll step it up to something large. Gonna try and keep the bench as small as possible. I'm going to build a second top/cover to cover the table saw and the rest of the table. Basically setup for working on the car or messy shit, and lift that off when it's wood working time.
Don't bother with strips. They usually don't have the range/precision you need. You can buy a digital meter for really cheap on Amazon if you really want one.
People talk down about these all the time but mine has stayed calibrated and functional since christmas. The secret apparently is storing it how you use it vertically
Jellas Pocket Size PH Meter / PH Tester / Mini Water Quality Tester for Household Drinking Water, Hydroponics, Aquariums, Swimming Pools, PH 0-14.0 Measuring Range, 0.1PH Resolution (Yellow) https://www.amazon.com/dp/B00YBUH4RC/ref=cm_sw_r_cp_api_6B6.ybMED6HWD
You could always get this as well
General Hydroponics GH1514 General Hydroponics Ph Control Kit https://www.amazon.com/dp/B000BNKWZY/ref=cm_sw_r_cp_api_tD6.yb5VT9XYB
I used this one last season. No problems with it. Cheap. https://www.amazon.com/dp/B00YBUH4RC/ref=biss_dp_t_asn
&#x200B;
&#x200B;
Not sure you can calibrate w/o the solutions.
I use this. Mine came factory calibrated. Double-checked with their provided calibration solutions. Their customer support was very helpful since the calibration solutions do not come with instructions:
https://www.amazon.com/Jellas-Household-Hydroponics-Aquariums-Resolution/dp/B00YBUH4RC/
How much should I be spending on a PH pen are these cheap $20 Ones any good? [Like this] (https://www.amazon.com/Jellas-Household-Hydroponics-Aquariums-Resolution/dp/B00YBUH4RC/ref=sr_1_3?ie=UTF8&amp;qid=1496521064&amp;sr=8-3&amp;keywords=ph+pen)
Also should the PH Be at 5.8 In the runoff, or what I feed the plant
I hope I'm not too late! I'm looking at getting a ph meter to add another element to my brewing.
Does anyone have [this meter] (https://www.amazon.com/dp/B00YBUH4RC/ref=cm_sw_r_cp_api_bgV4ybF47N2CA)? I'm not really finding anything about the temps. it works at.
I ordered and have been using this Jellas pocket sized pH meter.
By pH down solution, do you mean something like this.
This is the one I am using. Its worked perfectly right out of the box so no complaints here. I hadn't thought of that but I'm going to go do it right now, thanks for the suggestion!
These are the models I went with, they've been working flawlessly so far:
https://smile.amazon.com/gp/product/B00YBUH4RC
https://smile.amazon.com/gp/product/B007VK4YY0
Definitely worth every penny, even if they do end up breaking sooner.
https://www.amazon.com/gp/aw/d/B00YBUH4RC/ref=mp_s_a_1_2?ie=UTF8&amp;qid=1481968489&amp;sr=8-2&amp;pi=SY200_QL40&amp;keywords=ph+meter&amp;dpPl=1&amp;dpID=41w2JXOokIL&amp;ref=plSrch
So something like that would work to test dirty runoff as well? Thanks
They sell little handheld pH meters on amazon for $10-30. Used quite often for hydroponic work. This is the one I use and am happy with it. The plants haven't died! But there are other versions which have more resolution.
Like you, I needed a pen but didn't want to pay a cnote for one. I'm already using drops because I feel it's more accurate, but wanted a pen to compare to.
https://www.amazon.com/gp/aw/d/B00YBUH4RC/ref=pd_aw_lpo_469_lp_img_3?ie=UTF8&amp;psc=1&amp;refRID=H7N0T6GZ8T1Q6HVCB7SJ
I went with Amazon because if it craps out or doesn't work properly, I have like 3 months to return it. I mean, theoretically you could do this with the bluelab one and return it before their window runs out, but that feels scummy. I figure if nothing else, I'm only out like 13 bucks.
At that price range, I've been extremely happy with my QIDI Tech printer. (http://www.amazon.com/TECHNOLOGY-3DP-QDA16-01-Extruder-Structure-Filaments/dp/B01D8M32LU/ref=sr_1_1?ie=UTF8&amp;qid=1463690261&amp;sr=8-1&amp;keywords=qidi+tech) My friends who have 3d printers are all very impressed by the quality that it prints straight out of the box.
I'll also recommend, the biggest quality upgrade I've experienced is when I paid $140 to get Simplify3D. All objects instantly came out with better quality than when I used the free Makerbot slicer.
This is a great starter:
http://smile.amazon.com/dp/B01D8M32LU
Amazon does sell it themselves.
Some context. Hoping someone has some ideas or experience. Thanks for reading!
QIDI Tech I on Amazon (less common printer, I’d link to prusa if I were advertising 😉)
I am not printing anywhere on this graph. This is just a manual test of setting various temperatures to see what was going on, without extruding any material.
I first noticed the problem during a print. Some filament was scorched, but the nozzle kept jamming (I soon discovered that it was likely because then it was too cold).
Was printing with ABS, only on the right extruder (T0). I thought maybe just T0 was broken, but this test made the situation look a little more interesting. I am guessing that the ghost signal on T1 has to due with an electrical problem. But it could be any part of the feedback loop (heaters, sensors, or controllers--maybe even a fan?).
UPDATE: Note that the third number is heated bed temperature, which does not ripple. To me, that might exclude something like the power supply?
Is the QIDI Tech printer decent? Reviews and images in the reviews seem to indicate it is.
https://www.amazon.com/TECHNOLOGY-3DP-QDA16-01-Extruder-Structure-Filaments/dp/B01D8M32LU/ref=sr_1_27?s=industrial&amp;rps=1&amp;ie=UTF8&amp;qid=1499090399&amp;sr=1-27&amp;refinements=p_72%3A1248921011%2Cp_85%3A2470955011
Thanks!
I have the Qidi Tech version of this printer and love it (https://www.amazon.com/TECHNOLOGY-3DP-QDA16-01-Extruder-Structure-Filaments/dp/B01D8M32LU/ref=sr_1_1/137-3764290-4585929?ie=UTF8&amp;qid=1494515935&amp;sr=8-1&amp;keywords=qidi+tech). Well worth the money spent and a very solid printer, I did an extrusion upgrade to it as well as changing to a PEI platform and I can print flex material / ABS with zero issues.
I recommend this one. https://www.amazon.com/dp/B01D8M32LU/ref=cm_sw_r_cp_awdb_w.MLzbDYZ61B3
However if you can save up the Prusa Mk2s with the multi material upgrade does 4. Its about $1000.
Fdm
Edit: this printer to he exact
QIDI TECHNOLOGY 3DP-QDA16-01 Dual Extruder Desktop 3D Printer QIDI TECH I, Fully Metal Frame Structure, Acrylic Covers, with2 Free Filaments, Works with ABS and PLA https://www.amazon.com/dp/B01D8M32LU/ref=cm_sw_r_cp_apa_i_TRZ.AbDATWTYK
Well, starting to look at this one as well since it's enclosed:
https://www.amazon.com/gp/product/B01D8M32LU/
But the X-ONE could have an enclosure added with some work. Definitely have gotten a good impression of Qidi
I bought this one and haven't looked back yet.
https://www.amazon.com/dp/B01ENFOIQE/ref=sspa_dk_detail_0?psc=1&amp;pd_rd_i=B01ENFOIQE&amp;pd_rd_wg=zOFFC&amp;pd_rd_r=M311DYGNK99FC3RAXKX3&amp;pd_rd_w=11nSI
Thanks for your comment on the PH tester, i got this one but for only $36! : )!
https://www.amazon.com/Apera-Instruments-AI311-Replaceable-2-00-16-00/dp/B01ENFOIQE?ref_=bl_dp_s_web_14574843011
https://www.wettesonline.com/products/instruments-ph-ai311-range-ph60-ph-tester--plusmn-001--200-1600-ph-pocket-premium-apera-probe-accuracy-replaceable-waterproof
Weird site, goodness only knows what they’ll mail me.
That's a good question. I bet the larger amount of water in the full volume mash plays a very significant role in pH.
Also, this is the pH meter I got: https://www.amazon.com/Apera-Instruments-Waterproof-Replaceable-2-00-16-00/dp/B01ENFOIQE/ref=sr_1_4?ie=UTF8&amp;qid=1494965834&amp;sr=8-4&amp;keywords=apera%2Bph%2Bmeter&amp;th=1
It's the most affordable one I've found that has +/- 0.01 precision and automatic temperature compensation.
I think I might have the same set or something similar. It is about $80 off of Amazon though I think I got mine cheaper/on sale. [Here's a link] (https://www.amazon.com/dp/B01ENFOIQE/ref=cm_sw_r_cp_apa_i_aQiACb0BWZMW9). Mine works pretty well and holds the calibration decently between days. I usually use mine for hot sauces since a lot of mine were thicker and bold colors which makes pH strips harder to use.
I think we found your problem! These things are inaccurate! You can't have a good PH reading without a nice PH pen. Plus it's your water that you should test not the soil. The soil it's just to check if everything is fine and you can check it with a PH pen too. Water your plant, wait for the runoff, take this runoff and check the PH.
Don't look further and buy a nice PH pen, I have this one, pretty happy with it.
I use the this Apera I bought from amazon.
Have had it for a while and hasn't failed yet. I follow manufacturer instructions on storage. I check the calibration once every couple months and it hasn't needed calibration in about a year now. I bought extra storage solution KCl from amazon as well. https://www.amazon.ca/Apera-Instruments-Waterproof-Replaceable-2-00-16-00/dp/B01ENFOIQE/ref=redir_mobile_desktop?_encoding=UTF8&amp;psc=1&amp;ref_=oh_aui_i_sh_in_o0_img
The pH strips I picked up from my LHBS must've been expired because they didn't react to the wort at all. I've since bought this meter and been happy with it Apera Instruments AI311 PH60 Premium Waterproof pH Pocket Tester, Replaceable Probe, ±0.01 pH Accuracy, -2.00-16.00 pH Range https://www.amazon.com/dp/B01ENFOIQE/ref=cm_sw_r_cp_apa_i_UJK7CbTRZAVJC
This is the PH tester I ended up purchasing. Middle of the road with lots of opportunities to upgrade. Apera Instruments AI311 PH60 Premium Waterproof pH Pocket Tester, Replaceable Probe, ±0.01 pH Accuracy, -2.00-16.00 pH Range https://www.amazon.com/dp/B01ENFOIQE/ref=cm_sw_r_other_apa_i_LIm2DbA22PH0B
Your advice on the soil composition has been super helpful. I just ordered some additional perlite as I learned my mix is very light on non organics for airspace. I didn't even think about this until you posted. I ended up purchasing a 1 gal sprayer with a low pressure sprayer I'll post pics when it arrives. After some reads on other posts, I makes a lot of sense for reach and east of gentle watering (again, I never thought about this!).
Can you tell me a little more about recharge? I'm really unfamiliar. I'm pretty versed on compost teas but is there something to consider more into flower or late stage pre flush that has worked well for you? Again, I'm trying to do an entirely organic grow if possible.
The cheapest I would go from reviews I've read is the Apera Instruments.
https://smile.amazon.com/Apera-Instruments-AI311-Replaceable-2-00-16-00/dp/B01ENFOIQE
You could probably save $10 with this meter, though I haven't read as much about it.
https://smile.amazon.com/Apera-Instruments-AI223-Accuracy-Calibration/dp/B07BDVL66C/
Just started using this this year: https://smile.amazon.com/gp/product/B01ENFOIQE/ref=oh_aui_detailpage_o07_s00?ie=UTF8&amp;psc=1
Only 1 batch so not much of a sample size, but it was only .02 off from brunwater, calibrated the morning of brewday.
FWIW, when I was in the market for one, I asked a local craft beverage maker what the minimum I need to spend to get something worth a damn, and he figured at least $80.
Does anyone have experience with this pH meter?
https://www.amazon.com/gp/product/B01ENFOIQE/ref=ask_ql_qh_dp_hza
Seems to have good reviews on Amazon but not much in the way from homebrewers. Looks like a nice unit, just want to make sure no one has had issues.
Has anyone used this ph meter? I'm not looking to spend $200 but my year old $15 meter is starting to lose it.
I ended getting this, https://www.amazon.com/gp/product/B01ENFOIQE/ref=ox_sc_act_title_1?smid=ATVPDKIKX0DER&amp;psc=1
Got this last fall and I've been pretty happy with it https://www.amazon.ca/gp/product/B01ENFOIQE/ref=oh_aui_detailpage_o01_s00?ie=UTF8&amp;psc=1
I even broke one of the probes (my stupidity, not the fault of the unit) and it was very easy to get a replacement probe by itself
https://www.amazon.com/Crystal-Clear-Table-Coating-Tabletop/dp/B01LYK2NAG/ref=pd_lpo_vtph_79_bs_t_1?_encoding=UTF8&amp;psc=1&amp;refRID=QSARMH4356D435A0V01B I used something very much like this at work.
It was one of the cheapest I could find on YouTube.. here’s a link: https://www.amazon.com/Crystal-Clear-Table-Coating-Tabletop/dp/B01LYK2NAG/ref=pd_aw_lpo_201_bs_img_1?_encoding=UTF8&amp;psc=1&amp;refRID=HM7ACTD9CXGKXZM42WXK
Try something like this
And a blow torch to run over the top to release the bubbles. The bubbles are introduced from stiring the epoxy and just natural permeation. If you know someone with a vacuum chamber you can ensure ZERO bubbles.
This is what I use on my projects and it works very well for table tops, bar tops, etc. This would not be appropriate for your garage floor, as it's a very different type of resin than the garage floor kits.
are you talking about doing a full epoxy bar-top like finish, as in something like this. where you want a glass/plastic type look? Generally speaking as long as you follow the mixing instructions to the detail they aren't that hard, biggest thing that can happen is you'll get bubbles as the product cures. I wouldn't recomend using just the bartop stuff for the entire coat, maybe look into putting a coat or two of varnish, or more of a penetrating epoxy resin to seal it first. I think this can also help reduce the air bubbles. Regardless though on something this big you're going to get bubbles, so you get some kind of torch like this and go over the top with it as the epoxy drys.
For these type of glass/bartop look I prefer 2k poly as it can be sprayed and adding multiple coats is easy, stuff can be pretty pricey, but is cheaper if you are producing a lot of stuff for a big job rather than mixing up a bunch of epoxy. The fact that you can do multiple coats easily adds for more options in regards to glossy/sheen (they offer it from matte to gloss like any normal poly).
Now if the epoxy is for filling voids you want more of a structural epoxy (although I guess you could just fill a big void with the tabletop stuff, i've never tried), like a West systems or T-88. fill it a bit over the top, if you have bubbles getting trapped use heat or just do the large voids in multiple pours, bubbles usually congregate to the edge and often times just mixing it a bit more will get rid of it. One's like west system are nice because of their pumps that measure out the right ratio from the hardener and resin, easy to add color if you want, and after sanding it takes a finish fine and becomes clear again.
Those are generally the main applications of epoxies. reason I mentioned using 2k was because if you just want really durable finish because it will take a lot of abuse, there are other options. Also if you do want that plastic bartop, super high gloss look there are other methods out there such as just buffing a higher gloss varnish up through the grits, you don't have to deal with mixing or anything, can usually be applied easier with a brush. General finishes makes a bunch of topcoats that can be sanding, they have a high performance one that supposedly is pretty close to a 2k poly/conversion varnish, but you don't have to do any mixing and it can be applied by hand, although I've never tried it. I use their enduro-var water based urethane for a lot of residential jobs and get get a pretty gloss like look by buffing it up.
Has anyone had any luck using different resin? Art Resin like /u/peterb77 used is pretty expensive for a smaller amount. I was looking on amazon and you can get a lot more for something like this https://www.amazon.com/Crystal-Clear-Table-Coating-Tabletop/dp/B01LYK2NAG/ref=sr_1_18?ie=UTF8&amp;qid=1502468813&amp;sr=8-18&amp;keywords=resin
This will be my first but hopefully not my last resin project.
Epoxy Resin would be your best bet. I don't trust water based polyurethane on anything that may get wet.
https://smile.amazon.com/Crystal-Clear-Table-Coating-Tabletop/dp/B01LYK2NAG/ref=sr_1_3?crid=2PGLVZYV5O35O&keywords=bar+top+epoxy+resin&qid=1556287104&s=gateway&sprefix=bar+top+%2Caps%2C149&sr=8-3
&#x200B;
https://smile.amazon.com/Colorant-0-36oz-Cosmetic-Natural-Pigment/dp/B07DH8QDJN/ref=sr_1_4?crid=2VA4LC6AZZO6M&keywords=epoxy+resin+color+pigment&qid=1556287213&s=gateway&sprefix=epoxy+%2Caps%2C156&sr=8-4
> Third: My casts have a yellow hue to them instead of being crystal clear as the product should be. While setting I did block them from sunlight. Could this be the result of measurement error or mixing error?
Did you use this resin? I had the same problem, and the company said that if you pour in increments thicker than 1/4", the excess heat discolors the resin.
Here is the exact resin I use
I've found with careful control of resin temperature and slow mixing of small batches you can get a nearly bubble-free pour. These pieces are also 1x1x1.5" so they are quite small.
My initial test build had millions of bubbles but by changing a few parameters (dont store resin in the cold basement, mix with proper cups and a mixing spoon) I got something I was happy with!
Also this is regular clear epoxy resin just marked down for tables so that could be why they charge less for it.
I used this stuff and it turned out well:
https://www.amazon.com/gp/product/B01LYK2NAG/ref=ppx_yo_dt_b_search_asin_title?ie=UTF8&amp;psc=1
Check that the screw that holds the spring arm on your extruder hasn't backed out. The first time I encountered this problem my prints looked exactly like yours and it took me a couple days to figure it out. It will keep happening too, unless you change out the extruder. It's because you can't have that screw too tight or the arm won't apply pressure. So because it's a little loose, it will slowly work out over time, and there's not very many threads engaged in that hole, so the screw can wobble around.
The cheapest fix would be to install an all-metal replacement for around $13. If you look closely at the link I posted, you'll see that the spring arm has an insert for the screw that will allow you to tighten the screw all the way down but still allows the arm to rotate. I haven't had to re-tighten that screw since I installed it. It works great. Also, if you take a 5/32" drill bit and drill out the hole on the arm itself, you can insert a short piece of teflon tubing into it that will protect the filament from the leadscrew. You can just use a regular wood bit and hand drill. Aluminum drills super easy.
Mods:
Ended 3 official 1.1.5 from here. All mainboard settings are stock.
Aluminum extruded from here.
Capricorn tubing from here.
Cura 4.1 on Linux
Filament at 210 on hotend, 60 on bed.
Do you have this upgrade?
CHPOWER CR-10 Extruder Upgraded Replacement, Aluminum MK8 Drive Feed 3D Printer Extruders for Creality Ender 3, CR-10, CR-10S, CR-10 S4, CR-10 S5 https://www.amazon.com/dp/B079JZ374W/ref=cm_sw_r_cp_apa_i_HH5HDbJQ21BKB
That fixed my problem, tensioner stays very tight now
You can just replace the gear, but this is cheaper and better if you haven’t upgraded yet, or get them both 😁
Creality 3D Printer Parts 5PCS Brass Extruder Wheel 40 Teeth Drive Gear for CR-10.CR-10S,S4,S5,Ender 3,Ender 3 Pro https://www.amazon.com/dp/B07BFT6VCV/ref=cm_sw_r_cp_api_i_spo0CbCFA5YSD
CHPOWER CR-10 Extruder Upgraded Replacement, Aluminum MK8 Drive Feed 3D Printer Extruders for Creality Ender 3, CR-10, CR-10S, CR-10 S4, CR-10 S5 https://www.amazon.com/dp/B079JZ374W/ref=cm_sw_r_cp_api_i_Fqo0CbJX7V96H
https://www.amazon.com/CHPOWER-Extruder-Upgraded-Replacement-Extruders/dp/B079JZ374W
I’m not logged in on mobile, 95% sure this is it. The only weird thing you need to do: break the lock tite seal on the knurled gear on the stepper [to get it off]. Otherwise you need to buy a special replacement bearing for the one that comes stock in the kit(dunno which one).
https://smile.amazon.com/gp/product/B079JZ374W/ref=ppx_yo_dt_b_search_asin_title?ie=UTF8&amp;psc=1
Can't speak to whether others have better/worse build quality, but this one's worked for me. I did keep the original screws/metal parts instead of what came with the new one.
Here: https://www.amazon.com/gp/product/B079JZ374W/ref=ppx_yo_dt_b_asin_title_o01__o00_s00?ie=UTF8&amp;psc=1
Ah my bad, wrong thread, this one
https://www.amazon.com/gp/product/B079JZ374W
This is the one that I got: Title of link (optional) I got a metal extruder housing as well but I honestly don't think it's necessary, just nifty.
There is an all metal extruder. Here's an Amazon link to a popular one that I was thinking of getting before I figured out my problem.
CLR. Also that's kind of nasty.
I used a pumice stone and CLR to remove the ring on my toilet bowl.
https://www.amazon.com/CLR-Calcium-Remover-Enhanced-Formula/dp/B00009EFEX
Or
https://www.amazon.com/Ajax-Powder-Cleanser-Bleach-396/dp/B00005UVD9
I didn't actually know, so I did a search: "Calcium, Lime, and Rust Remover."
Ta-da!
If Iso doesn't work i usually go:
http://www.amazon.com/LAS-PURPOSE-CONCENTRATED-TOTALLY-AWESOME/dp/B0017KT3IM
(this can be found @ the dollar tree)
Then (If need be):
http://www.amazon.com/Pro-Acetone-Remover-Fluid-Ounce/dp/B0006PS3KI/ref=sr_1_1?ie=UTF8&amp;qid=1449774484&amp;sr=8-1&amp;keywords=acetone
Haven't used this brand, just acetone in general.
Lastly for hardwater/bloom:
http://www.amazon.com/Calcium-Lime-and-Rust-Remover/dp/B00009EFEX
(Publix/Walmart or any other basic market)
Is this what you are talking about? http://www.amazon.in/Calcium-Lime-and-Rust-Remover/dp/B00009EFEX Its quite expensive for where I live.
Buy some CLR it should get it out. They sell it nearly every where.
Have you tried CLR? Supposed to be specifically for that sort of thing I think
It's the 3M Scotchlite tape. 2" wide. I think I found it at my local Fred Meyer or Walmart. I've been sitting on this stuff for some time.
Or you could just order it from Amazon
These are exactly what I have on my spokes, they work really well. I also took the extra hub stickers and put them on my helmet instead.
Also in auto parts stores or paint stores (interestingly) or the corresponding departments of a larger store, you can find reflective tape. So far I've found white and red. I also usually find it right next to an identically sized green tape, but that one's not reflective, so don't fall for it. It'll be about two inches wide and not that long, it's kind of expensive. like this (though what I found wasn't that expensive)
If you cut it half as wide you can put it down the smaller parts of your frame (such as the chain guide), on pedal cranks, strips on your helmet, on any chain/cog guards, and if you really have steady and accurate fingers, around your spokes just like the Light weights stickers. Use full-width strips to make rings on the fuller parts of your frame.
I even took a leftover bit of the reflective tape and put it on the vinyl tube of my hydration pack, which hangs from the right strap. When I tuck it up into the left strap, I have a perfectly symmetrical reflective line across my chest.
I suppose if you don't mind wasting a whole lot of tape, or using a bunch of odd leftover scraps, you could lay the tape over the divots in your helmet and use a razor blade to cut out exactly the elliptical shape that's concave relative to the convex overall shape of your helmet. That would be cool to see. I don't have the guts yet.
The tapes can often be more reflective than the cheapo reflectors that come with your bike, so it's also not at all a bad idea to cover those surfaces as well.
Finally there' s the biggest amount of coverage you could possibly get, cover your frame. Or less extreme but definitely beyond the norm, buy fenders and cover those.
You could also add some reflective tape to your helmet if you already have one. Won't be noticeable during the day like a high-vis color, but it really helps at night.
http://www.amazon.com/gp/aw/d/B000BQRIV2/ref=redir_mdp_mobile?ref_=cm_cmu_pg__header
I also put it on my bicycle
Here is some tape
Any vinyl shop should have a 24" to 60" wide roll on hand.
So I also own a few planes. I tried freehand sharpening on a stone and got good results, but I could never get that "sharp enough to shave your arm hair", I could get a few strands but not enough. THen I bought the honing guide (https://www.amazon.com/Robert-Larson-800-1800-Honing-Guide/dp/B000CFNCKS/ref=sr_1_3?ie=UTF8&amp;qid=1472754117&amp;sr=8-3&amp;keywords=plane+iron+jig). This bad boy gets the blade sharp, then you use the "scary sharp" method by wetsanding with very fine grit sand paper glued to a tile. Now I can take an entire patch of hair off with a single slide of the blade on my arm.
Did you mean to post a picture of the saw?
A rubber mallet is no good for chopping mortises (all of the energy is lost to recoil). You'll want to get a wooden chisel mallet or a dead blow mallet.
You will have to sharpen your chisels. There are different methods to sharpen a chisel. You won't ever find a consensus on which way is best. If you want a cheap way to start, google "scary sharp". You'll use sandpaper and a flat surface like a piece of granite or plate glass. It works just as well as any other method, but it's not a long term solution. I use diamond whetstones and a leather strop with buffing compound to sharpen. You can buy a jig (like this one https://www.amazon.com/Robert-Larson-800-1800-Honing-Guide/dp/B000CFNCKS/ref=sr_1_sc_1?ie=UTF8&amp;qid=1468777145&amp;sr=8-1) to help you sharpen the chisel or freehand sharpen. You may want to buy a protractor gauge to check your angle, which should be around 30 degrees. You can find many Youtube tutorials on this. Paul Sellers is a popular teacher of freehand chisel sharpening.
I bought a buck Bros from HF for $10 and it actually works pretty good after flattening and sharpening. On the same day I went to a few pawn shops and got a No.4 and a 78 for $30 each. I recently got a 45 off of ebay for $45 and 12 cutters off of craigslist for $35. I suggest the re conditioning route. You need to be able to take it apart and put it back together in order to really see how it works. IMO.
I am a newb too but if you are going to get into this hobby with hand tools you are going to have to learn to hone and sharpen your chisels and irons. Most planes and chisels are not sharpened and or flattened. I have Wood River chisels (Wood Craft) and they are pretty flat but sharp, not at all.
I suggest getting a cheap honing guide off of amazon. I got this one. http://www.amazon.com/Robert-Larson-800-1800-Honing-Guide/dp/B000CFNCKS/ref=sr_1_1?ie=UTF8&amp;qid=1398874279&amp;sr=8-1&amp;keywords=honing+guide and one of these to verify your angle. http://www.homedepot.com/p/Empire-Plastic-Protractor-Angle-Finder-2791/202035328
As for sharpening I am doing the "Scary Sharp" Method and it works well. You can either DIY it or you can buy the pre made kit from Rockler.
The bottom budget (or lowest you could go without blaming your sharpening equipment for failure) would be a Norton combination India stone or King combination water stone, plus some honing compound and a scrap of denim or leather glued to a block of wood for a strop.
Use a honing guide like this if you aren't comfortable trying free hand.
A tool is sharp when two surfaces (the back/face and bevel) meet at a sharp corner with ~0 radius. The edge is honed/refined on finer and finer stones to get a better surface finish and better edge retention.
Here are some tutorials with and without a honing guide. I recommend watching both, because each covers a different aspect of initial chisel prep.
On top of your sharpening equipment, work from both sides and use knife lines to prevent blow out.
The cheapest way to get a super sharp edge is wet/dry sandpaper on glass with a honing guide.
I have this. I've only every used it for plane irons so I can't agree or disagree with the reviews about how it sucks for chisels. I like it for plane irons though.
Is this the honing guide you are referring to? How high of a grit on sandpaper do you need to go? I have not been able to find a higher grit than 400. And what is the winded for?
Edit: how many of those questions are answered in Paul sellers video? I have not watched yet.
Yea, same idea. If you hone the edge correctly, you'll almost never have to completely regrind it. I like this little thing to hold the chisel at the correct angle, but you can certainly do it by hand.
I recently bought this one for my very first plane (A Stanley #5 Sweetheart, woot!), and use it with a waterstone. It's very nice, except that my waterstone is exactly the same width as my blade.
I found a video...somewhere...about using this on the cut side and then using a very thin metal ruler as a stop for a very find back bevel, works great.
I still need to finish reprofiling my blade though, for which I'll probably use the sandpaper method.
I have one of those fairly honing cheap guides-
http://www.amazon.com/gp/product/B000CFNCKS/
I am tempted to get the Veritas guide, but I really don't want to drop another $140 on stuff right now. The ability to do the cambered edges and easily add microbevels seems valuable, though, over what this cheap guide offers.
https://www.amazon.com/gp/product/B000CFNCKS/ref=oh_aui_detailpage_o00_s00?ie=UTF8&amp;psc=1
I doubt it is a pressure issue. It's always off on the same side, and I even tried to favor the long side, and it was still cutting mostly on that one side.
Also known as Ultem, it can be purchased here from CSHyde. There are several options there for size and thickness. The bonus is that these sheets come with adhesive already laminated to the sheet. I believe you can also get custom sizes, although larger sheets are no problem to cut to size.
Alternatively (and probably more common), you can purchase PEI sheets here on Amazon. The recommended adhesive (transfer tape) is here, and there may be other sizes for both available on Amazon as well as wBay.
The whole idea on using PEI as a print surface is that you get good print adhesion with most common print materials. Using a heated bed with PEI works great for getting prints to stick while warm, and also pop off of the print bed fairly easily as the bed cools.
I went with the stuff from CSHyde for convenience, but I think most users here are going with the Amazon stuff (they have thicker sheets which many users prefer as it can last longer before needing replacement).
http://www.amazon.com/dp/B0013HKZTA/ref=biss_dp_t_asn
http://www.amazon.com/TapeCase-squares-Converted-Adhesive-Transfer/dp/B007Y7D5NQ/
Do note I am using a rostock, but psi will work on all regardless, it's also acetone resistant, so you could clean really easily
I recently stopped using blue tape and switched to PEI sheets on glass. I'll never go back. I think this would be a good thing for you to try, the PEI sheet releases pretty easily once cool.
PEI (Polyetherimide) Sheet, Opaque Natural, Standard Tolerance, ASTM D5205 PEI0113, 0.03" Thickness, 12" Width, 12" Length https://www.amazon.com/dp/B0013HKZTA/ref=cm_sw_r_cp_apa_j.9Dxb7FAEG3J
TapeCase 12" squares (pack of 6), Converted from 3M 468MP Adhesive Transfer Tape https://www.amazon.com/dp/B007Y7D5NQ/ref=cm_sw_r_cp_apa_S.9DxbBW56J7Z
Just in case you change your mind it has been amazing for me
Oh yeah. Sticks so well that, if the bed is heated, you can't even get the finished object off of it until you wait for it to cool to room temperature without the risk of damaging it.
Amazing stuff that no one should be without.
This is the stuff I have - http://www.amazon.com/dp/B0013HKZTA/ref=biss_dp_t_asn
Put it on with this - http://www.amazon.com/gp/product/B007Y7D5NQ/ref=oh_aui_search_detailpage?ie=UTF8&amp;psc=1
I used the Windex+credit card trick for both sides of the adhesive.
Cut it to size with an Xacto knife score and a metal rule. Snaps just like plexi.
You can see it in the original pic. He's sitting on a big yellow slab of the stuff. If you use a Z sensor you'll have to adjust for the height and so on.
Another option is using a PEI sheet (https://www.amazon.com/dp/B0013HKZTA?ref=yo_pop_ma_swf ). I personally use a mirror and PEI. Nice flat surface with great hold. If you don't have an IKEA near you, Home Depot has a 12 pack of mirrors for $20.
pei sheet
adhesive
Do you have any left over bits you can check for a film? Maybe the film was removed when the adhesive was applied, but it still seems odd that PET isn't sticking.
This is the PEI I bought
https://www.amazon.com/gp/product/B0013HKZTA/ref=oh_aui_detailpage_o08_s00?ie=UTF8&amp;psc=1
that's what i ordered for my printer. i have the same one, but i use simplify3D. totally worth the money.
https://www.amazon.ca/gp/product/B0013HKZTA/ref=ppx_yo_dt_b_search_asin_title?ie=UTF8&amp;psc=1
It's a specific material that has properties allowing most fdm materials to stick very well too (PETG too well at times). There is a ton of information in forums on that bed surface.
You usually buy a sheet about 30 thou (0.03") thick and stick straight to the aluminium heatbed or on to the glass bed with 3M double sided.
I bought this one: PEI amazon.ca
But here are tons of suppliers around depending where you are located.
I bought the same thing for my v1:
12"x12" 0.03" PEI
https://www.amazon.com/gp/product/B0013HKZTA/
(6) 12x12" 3M Adhesive Transfer Tape:
https://www.amazon.com/gp/product/B007Y7D5NQ/
At the time there were no practical cheaper/smaller options (although the extra 3M adhesive does come in handy).
... I scored/snapped the sheet into 4 pieces, and I'm still on the first PEI sheet after like 300 hours. It still looks flawless. I only use sharp scraper blades or no tools to remove parts. If you're printing something crazy in a cold room, you can add hairspray, but for the most part, PEI has perfect adhesion on it's own.
I definitely recommend the thicker PEI (0.03"+), as it makes the MPSM bed much more rigid. I don't have to bend the aluminum bed "flat again" anymore. I dont worry about bending the bed when ripping parts off the bed, even with super high adhesion.
Clean it with alcohol, not sandpaper.
http://www.amazon.com/gp/product/B0013HKZTA?psc=1&amp;redirect=true&amp;ref_=oh_aui_detailpage_o05_s01
Here is the version I've used, for your reference.
In used this PEI sheet: https://amzn.com/B0013HKZTA
And this adhesive: https://amzn.com/B007Y7CZDM
Try to get the adhesive down as smoothly and evenly as possible. No overlaps or gaps if possible. I scored and snapped the PEI to match the build plate, then applied the tape to the PEI, then applied that to the bed.
I have this ~25 dollar iGaging:
https://www.amazon.com/iGaging-Electronic-Digital-Fractions-Stainless/dp/B001AQEZ2W
For quick checks, sanity checks, basic stuff, etc. 20 dollar calipers are fine. My iGaging rarely disagrees with the calibrated Mitutoyo's in our quality department.
I just bought some calipers from Amazon for about $30. Can someone explain to me how these Mitutoyo calipers that cost >$100 are better than my $30 ones?
Knowing that he made a 4 ft x 4 ft cnc machine, I would venture to guess it would be a cnc router and he is planning to mainly cut wood and maybe some aluminum. That said I really wouldn't buy expensive machinist tools if you wanted to better budget your money.
Here are some stuff that can be made on a cnc router:
http://www.shopbottools.com/mSupport/projects.htm
I'm assuming he may have told you what kind of stuff he could build or wanted to build when he said he wanted to build one. If it was for wood projects, then you can get a good 6 in. digital caliper under $40, such as these:
http://www.amazon.com/iGaging-Electronic-Digital-Fractions-Stainless/dp/B001AQEZ2W
I have the large readout version of that one by the way.
Not sure what he plans to use for clamping his stuff down to the table, but here's a great option:
http://www.rockler.com/hold-down-clamp-5-1-2l-x-1-1-8w
OK, you built a cnc router, but what do you make? Here are some 3D files for purchase:
http://www.vectorart3d.com/
This 3D router bit set will work for sign making (not sure what diameter bit he needs, and also add some spiral bits)
http://www.rockler.com/rockler-3-pc-signmaking-router-bit-set
This is a great work shop apron because these shoulder straps are more comfortable than the ones the just go around your neck. Also the mesh pockets let saw dust fall out instead of collecting in there.
http://m.duluthtrading.com/store/mens/mens-workshop/tool-bags-tool-belts/85021.aspx
If your not sure what he plans to cut them a gift card is always welcomed.
iGaging IP54 Electronic Digital Caliper 0-6" Display Inch/Metric/Fractions Stainless Steel Body https://www.amazon.com/dp/B001AQEZ2W/
Most definitely. I find new uses for it all the time and they were pretty cheap!
iGaging IP54 Electronic Digital Caliper 0-6" Display Inch/Metric/Fractions Stainless Steel Body https://www.amazon.com/dp/B001AQEZ2W/ref=cm_sw_r_cp_apa_saf8ybK2EF6Y9
I'm a cnc machinist and these impressed me a lot. I highly recommend them for anyone's shop
[Igaging] (https://www.amazon.com/iGaging-Electronic-Digital-Fractions-Stainless/dp/B001AQEZ2W)
This won't give you an immediate answer, but a caliper would tell you and they are handy to have around.
Even a super cheap harbor freight one would do. Personally, I like my not as cheap as it could be, but far from costly set.
Oh and get a valve cap.
Listen: this time I am going to help you out but please understand much of this hobby is learning to do stuff for yourself. There is a ton of problem solving based on intuition, ability to search for others solutions, and taking shit apart. You will not have very much fun if you aren't willing to put in the work.
For the time being just fold up pieces of paper to shim the feet. You really need a carpenters square and a line level to make sure everything is square.
Start with the table. If the surface you are trying to level your system on isn't level then leveling the system is going to be impossible. You want gravity to help you not hurt you.
[Here] (https://www.thingiverse.com/thing:1653631) is the link for z braces.
I also highly recommend [this mod] (https://www.thingiverse.com/thing:1454073)
Once those are installed and properly calibrated then everything on the frame should be square.
Next step is to get have you system properly trammed. That is essentially leveling the build plate to the extruder. With the pressed sheet metal plate on there it cannot be done properly. You need to get a much thicker aluminum carriage. Somebody else in this thread already offered to sell you one. I for one am a big fan of supporting the maker community and think you should take him up on that offer as the same thing online costs about the same amount.
Here are the tools you need to be successful in this endeavor. A proper magnetic line level. I got mine at harbor freight for a few dollars. A carpenter's square the bigger the better IMO about 1 foot on each side. And a good pair of calipers. The calipers are the most expensive tool on this list but you don't need top of the line Mitotuyos. At work we have the Mits but at home I use [these.] (https://www.amazon.com/gp/product/B001AQEZ2W/ref=oh_aui_detailpage_o05_s00?ie=UTF8&amp;psc=1)
If you are willing to put the time in this hobby is great, very informative, and useful for all times of machining in the future.
Good luck I wish you well.
I just bought http://www.amazon.com/gp/product/B001AQEZ2W?psc=1&amp;redirect=true&amp;ref_=oh_aui_detailpage_o02_s00 the other day
Yeah, that 3M adhesive on the back of 5050 LED strips is pretty much garbage.
I just used a dot of super glue every 8 inches or so:
https://www.amazon.com/Gorilla-Super-Glue-15-g/dp/B001IY82FM/
Don't use too much superglue. It would be a bitch to remove if you ever need to.
Thanks yeah, it's mostly the removal of the old glue from the shafts that I'm most concerned with. I actually have one of those stripper doodads and it stripped the old glue off my shafts pretty well, but I'm concerned that some of the cyanos that dry rock solid could be a huge pain to remove.
Is the glue you're using this stuff?
https://www.amazon.com/Gorilla-Super-Glue-15-g/dp/B001IY82FM
http://www.amazon.com/Gorilla-7805001-15g-Super-Glue/dp/B001IY82FM
I'd just glue the magnet back on, but maybe that's just me.
Gorilla Super Glue 15 Gram, Clear
https://www.amazon.com/dp/B001IY82FM/ref=cm_sw_r_cp_api_i_81BvCb9WYWRQ3
Cufflink Backs + Superglue.
That is -hilarious-. I put Gorilla Glue on my wishlist 2 days ago, because I'm looking to make my own magnetic spice-jars.. SWEET! I totally don't mind either the glue, or the magnets would be awesome, or even just a gift card to start me off saving!
guerilla gorillas
I used shoe goo to fix the exact same problem on my quoddy camp sole penny loafers, and so far it has help up nicely
http://www.amazon.com/Shoegoo-82049-Shoe-Goo-Clear/dp/B002L9AL84
Use a little bit of shoe goo.
If you can't get them resoled, this product will fix that right up
&#x200B;
https://smile.amazon.com/Repair-Adhesive-Fixing-Shoes-3-7-Ounce/dp/B002L9AL84/ref=sr_1_2?ie=UTF8&qid=1542028069&sr=8-2&keywords=shoo+goo&dpID=41CKuZec1YL&preST=_SY395_QL70_&dpSrc=srch
I cut fine strips of gorilla tape ( Black Gorilla Tape 1.88 In. x 35 Yd., One Roll https://www.amazon.com/dp/B000CSS8UE/ref=cm_sw_r_awd_xFOTub1XKN5GT ) and placed around the inside. Then covered the tape with shoe goo ( Sof Sole Shoe Goo, Clear https://www.amazon.com/dp/B002L9AL84/ref=cm_sw_r_awd_eGOTub07851J8 )
The thing is a tank now. I do it to all my plastic bodies. My 4x4 slash, nano cpx, nano and FPV nano etc.
Hi everyone - I have a pair of 5-year-old Doc Martens where the sole (welt?) split in the foot arch area. I don't have a photo of my boots, but another reddit user has experienced the same thing:
https://i.redd.it/i0bm69q2bqx11.jpg
One of the commenters suggested "Shoe Glue." Is this recommended to repair them this way? There is no local cobbler that I'm aware of. Even if there was, isn't it more economical to just... buy another pair at this point?
Shoe Goo: https://www.amazon.com/Repair-Adhesive-Fixing-Shoes-3-7-Ounce/dp/B002L9AL84/ref=asc_df_B002L9AL84/?tag=hyprod-20&amp;linkCode=df0&amp;hvadid=198098255989&amp;hvpos=1o2&amp;hvnetw=g&amp;hvrand=16664767372845432839&amp;hvpone=&amp;hvptwo=&amp;hvqmt=&amp;hvdev=c&amp;hvdvcmdl=&amp;hvlocint=&amp;hvlocphy=9022836&amp;hvtargid=pla-383019498180&amp;psc=1
You can use that if you wanted to glue down other grip.
Its also something that you can peal off with a lot of force.
I use Shoe Goo for many things one of which is to glue back
my surfco tail guards when I re-grip. Since I cant really cut around them.
This shit holds solid, and when needing to remove the tail guard
it just peals off with mild force.
I would like to think adding a thin layer of shoe goo to any grip
would allow you to stick it to the stock grip and then peal it off
if you ever wanted to swap it.
Hey, [try this!] (https://www.amazon.ca/gp/aw/d/B002L9AL84/ref=mp_s_a_1_1?ie=UTF8&amp;qid=1485617835&amp;sr=8-1&amp;pi=AC_SX236_SY340_QL65&amp;keywords=shoe+goo&amp;dpPl=1&amp;dpID=41CKuZec1YL&amp;ref=plSrch)
It's called shoe goo, I use it all the time for my skate shoes, makes them last hella long, cause if it ever wears off from scraping grip tape or even the ground, you can always re-apply it! Also, another good alternative to this you could try is using a hot glue gun. Just apply the hot glue to the place that's scraping, let it dry for 5 mins and you're ready to rock n roll! Hope this helps m8 :)
https://www.amazon.com/gp/product/B002L9AL84/ref=oh_aui_detailpage_o01_s00?ie=UTF8&amp;psc=1
Is it possible the problem is that some of the glue entered into the hole, so now it's not smooth?
You have a few options. Just know that if you're going hard and practicing everyday, your shoes probably won't last longer than a month. If you get high end($80-90) skate shoes, they still won't last longer than a couple of months. So my suggestion is that you get some Shoe-goo. This can make your shoes last potentially forever. Just apply it to the areas of your shoes that get damaged. And you can always put on more goo as soon as you wear out the goo protection. I currently wear Etnies Marana XT's, but I'd also recommend Van's Ultrarange. It's a high premium for shoes you're going to shred but it is totally worth it, especially if you shoe goo them.
You can use this: Shoe Goo, Clear
http://amzn.com/B002L9AL84
These are all black. I've seen them used a few times and they work fine.
Pay a little more http://www.amazon.com/Prestige-Medical-Fluoride-Scissor-Black/dp/B002WJHE7E
Since you mentioned poultry sheers, here's a pro-tip.
https://www.amazon.com/Prestige-Medical-Fluoride-Scissor-Black/dp/B002WJHE7E/ref=sr_1_2_a_it?ie=UTF8&amp;qid=1487311591&amp;sr=8-2&amp;keywords=emt%2Bshears&amp;th=1
I have a set in the kitchen, a set in the car and a set in the toolbox.
These cut through coins like nothing. Chicken doesn't stand a chance.
Somehow the fluoride coating is better than even teflon.
Also, a super important aspect of bondage rope play: SAFETY!
Do not engage in rope play unless you have at least 1 or more pairs of EMT shears (medical trauma scissors) handy. These are cheap. You can order them online on Amazon or generally find them in most pharmacies or local medical supply stores. These kinds of scissors have safety tips and are designed to rapidly cut through clothing and other obstructions (like rope).
Prestige Medical Fluoride Scissor, Black, 7 1/2 Inch https://www.amazon.com/dp/B002WJHE7E/ref=cm_sw_r_cp_apa_8yqWzbJZ3D0ZM
I really do pose her like a doll sometimes as foreplay. I've also recently discovered a great love for artistically arranged rope; I recommend a visit to the Two Knotty Boys website and a trip to Lowe's / Home Depot (AKA your friendly neighborhood pervertables shop) for some extra rope if the handcuffs don't work for you. I've had good results with 3/8" braided nylon, although I rather buy it in bags and cut it myself than buy it in lengths off the spool because they don't treat their rope very kindly.
Mostly I just had to get myself in the mindset that it's OK to 'use' her in this context. You can still be 50/50 in the rest of your relationship while being 100% in control in bed. The gentlemanly thing to do, of course, is to establish some boundaries as to what you both do and don't like, which it sounds like you're doing already. Also, a safe word can be useful even when you're not playing nonconsensual scenes. Our safe word is just "safeword", it helps light a fire under my ass to get her out of the rope quickly, rather than just "Ow" or "Stop" which tend to act more like "yellow words" for us.
Always, always, always have good scissors nearby when you're playing with rope, even if it's just a wrist tie. I bought these EMT shears when I started to get into it.
This would be great to fill small dents in the floor. Just drip it in. Dries clear. If you use a wood putty of any kind, from 10 feet away, it will look like you dropped something on the floor https://www.amazon.com/Loctite-Ultra-Control-4-Gram-1363589/dp/B003Y49R7G/ref=sr_1_2?ie=UTF8&amp;qid=1474861033&amp;sr=8-2&amp;keywords=loctite+glue
+1 this tip. I recommend the super glue gel to keep it from dripping into the headphone jack, possibly causing further issues.
Something like this would work too.
Welcome to the hobby!
One more thing: terrain makes games of 40K great, but buying manufactured terrain can be very expensive. I recommend buying a double sided battle mat made of mousepad material. These are good mats in the US/Canada and these are good in the EU. As for your large, line of sight blocking terrain, I recommend...building it yourself. Wyloch's Armory is an excellent place to start with crafting your own terrain.
I hope this helps, and if you have more questions, please feel free to ask.
Ah ok, I ordered the stuff that Rockit cool recommended. I'll write up a similar post when all the stuff arrives.
Try getting Gel Superglue (like this). Apply a decent dob in the joints, then plop the arms in there and hold for 15 seconds. You can still move them a tad after, but they won't fall out. Let them set for a few minutes before putting any large amount of tension on them and you should be golden.
Second option is to use an accelerator, like this. Apply glue to the joint, then spray/dip the arm ball in kicker, and put it into the joint. This will set very quickly. It's also exothermic, so if you get glue on your hands and don't notice, then get kicker on there, it can be fairly painful.
Last, a helping-hands can be quite useful if you have it laying around. I use this one for electronics, and it works pretty well holding awkward model parts for letting glue set.
I read a study someone had done in the past few months, and oddly enough, testing PLA specific glues and other various specialty glues, the study concluded that Loctite Gel Ultra Control Superglue drastically outperformed all of the other glues as far as ease of use and overall strength bond. That being the case, I've been using it to assemble the 20" Voltron model I've been printing since Christmas and it's worked wonderfully.
link
I use this stuff -- its perfect. Has a really narrow tip so you can get glue in the sockets, and it doesn't drip/run.
&#x200B;
https://www.amazon.com/Loctite-Ultra-Control-4-Gram-1363589/dp/B003Y49R7G/ref=sr_1_1_sspa?hvadid=176369327477&hvdev=c&hvlocphy=9019699&hvnetw=g&hvpos=1t1&hvqmt=e&hvrand=2263978452012469257&hvtargid=aud-646675773986%3Akwd-3949895385&keywords=loctite+control+gel&qid=1556204318&s=gateway&sr=8-1-spons&psc=1
If you use Zap a Gap or similar they have a removable tip. It seems to stay very clog free with minimal buildup on the tip. Maybe the plastic they use has something to do with it, but my bottle seems fairly clean. That and I like the Loctite control type glues which have the squeeze sides. They tend to let me keep the tip clean as no glue seems to leak out unless I squeeze them. They also have great formulas imo. Gel or liquid depending on your needs.
I use loctite super glue on pla and it works great too. Loctite Ultra Gel Control Super Glue 4-Gram (1363589) https://www.amazon.com/dp/B003Y49R7G/ref=cm_sw_r_cp_apa_i_GY-UCbGDJ010B
I used this glue -
https://www.amazon.com/gp/product/B003Y49R7G/
I really tried to use as tiny amount as possible and kept it closed while it dried. It was a little stuck when I opened it, carefully scraped the parts that needed it. Definitly still waterproof per light testing.
The $40 is worth it to get a good silicone o-ring, washer, and SS parts, in my opinion. I got this one and I'm happy with it. I just don't think you'll save enough to make up for having inferior stuff.
I have the pot you referenced in the post and KAB4 burner that another poster recommended.
Pot is decent, but you can get better one. I've used it for a year so far, got a bit of a ding on a bottom, but it's ok. It's not super thick, but I guess it makes it lighter. What I would want in a pot is the markings for how much water is there. Another thing is having a valve there to drain the wort, built-in thermometer is nice too, i do BIAB though, so thermometer sticking out can potentially damage the brew bag. The valve you can buy yourself and drill a hole/install it - something like this:
https://www.amazon.com/Home-Brew-Stuff-SS-WV2-Stainless/dp/B00420WMUU/
The burner is good, I converted it to natural gas so I don't need to buy propane and worry about it running out in the middle of brewday.
That's actually a Bayou Classic, pretty cheap, nothing special.
Ball valve:
http://www.amazon.com/Weldless-Bulkhead-Stainless-Steel-valve/dp/B00420WMUU/ref=sr_1_1?ie=UTF8&amp;qid=1330884675&amp;sr=8-1
Themometer:
http://www.midwestsupplies.com/weld-b-gone-thermothingy-2.html
with:
http://www.midwestsupplies.com/1-4-npt-brewmometer-bi-metal-thermometer-w-adjustable-face-weldless.html
sight:
http://www.brewhardware.com/wlsightglass/49-weldless-sight-glass-kit
The key was 3-in-1 oil with a stepped drill bit.
You can look into stainless. Can't go wrong with 304 stainless. Also since this is all pre-boil sanitation is that big of a concern. Mine was stainless. Paid a little more but for the piece of mind it is nice.
I believe this is the one I got.
HomeBrewStuff 1/2" Stainless Steel Valve Weldless Bulkhead For Home Brew Kettle https://www.amazon.com/dp/B00420WMUU/ref=cm_sw_r_cp_awd_7yz6wbRPCZK53
I picked up a WinWare aluminum boiling pot for $40 last year, drilled a hole in it (I think that the bit was $20) and installed a $20 valve. Since purchasing it, I've used the bit for two valves, a thermometer, and two sightglass installs.
Edit: The pot
The Bit
The valve
Holiday Deal Valve Alternative
You might be able to find better deals on Cyber Monday, though.
All you need is a drill gun and dish soap (the soap is a nice lubricant so you don't wear the bit down quickly)
I would stay away from that starter kit. Not because its bad per se but its not worth 180 bucks. And I prefer plastic buckets over glass carboys. If you want you can convert a cooler to a mash tun but I would start with BIAB and you then can increase the complexity of your system as you see fit.
Here is my recommendation of equipment. I am function over form driven when selecting my gear. I find that these items serve their purpose at a reasonable price and are of good quality and unless you want to start doing 15 gallon batches they should serve you well.
Starter Kit
KAB4 Burner
44qt Pot with basket
Ball Valve for Kettle
Thermometer
Bag for BIAB
I ordered this one about a year ago and have used it probably about 20 times since then. I love this pot and plan on installing a weld-less ball valve on it this weekend. Like what kds1398 said, the main downside is the size if you don't have a valve because once you get 7.5 gallons of wort in it she can get heavy. The only other really minor negative I can think of is that a lot of gunk and stuff gets caught and hidden under the little lip near the top, you just have to be careful when cleaning it but it's really no big deal. I would definitely buy this pot again.
https://www.amazon.com/gp/product/B00420WMUU/ref=od_aui_detailpages00?ie=UTF8&amp;psc=1
http://www.homedepot.com/p/Rubbermaid-10-Gal-Orange-Water-Cooler-FG1610HDORAN/202260809
http://www.northernbrewer.com/universal-false-bottom
exactly what I have, works perfectly
So I finally put my mash tun together last weekend. I hit a few small snags that I should have seen ahead of time based on reviews of the spigot I bought!
Items
Total Cost: $76
Time to assemble: 15 minutes +- 5 minutes for testing the seal
Main suggestion - get either a false bottom or one of the short bazooka screens. The long bazooka screen is a pain to work with -- it barely fits in the cooler. I also heard there are spigots you can buy that come with a female connector so you wouldn't have to buy the coupling.
Take a close look at the instructions for the spigot - it spells out how to put it together correctly but the diagram was super confusing to me for some reason.
My primary frustration was that none of my local hardware stores had the coupling so I had to get and wait for it from Amazon. Lame!
My plumbing in the cooler sits pretty flush with the inner wall. Basically the only thing exposed on the inner wall is the nut.
We used a weldless valve for the boil kettle: 1/2" Stainless Steel Valve Weldless Buldhead and we used this video to make the counter flow chiller.
I did ice baths for a full year prior to making all this equipment. While I made great beer, I was tired of adding those extra hours to my brew day so I built this chiller. It's seriously amazing. I was able to empty 6 gallons of beer into my carboy and have it cooled to pitching temperature in about 10-15 minutes.
(And sorry for some of the potato quality or motion blur photos. I'm not a professional!)
Look in craigslist, Hit yard sales for the water cooler or Chest Cooler and a Stainless Steel Valve
I've done a bunch of 1 gallon all-grain batches (and a few 5 gallon extract batches) and want to try my luck with 2.5 gallon all-grain. I bought a 5 gal cooler and a ball valve kit, but would kind of like to swap out the barb on the ball valve for cam lock fittings to make it easier to clean.
What cam lock fittings are best for this type of setup? I'm guessing the "D Style" from looking here but it's a complete guess.
I recommend that you swap to using a 4 channel relay for handling the power cutoff and supply. You can use a 2 channel, but the price difference is $0.80.
The setup and control of the relays is so simple and with the price, you can't beat it. It also takes the guess work out of many of the homemade connections.
HOWEVER...
First thing is to check the relay. You have 5v on one side, 3v3 on the other. Do you have a level logic converter in the relay? Otherwise, those transistors may not recognize the 3v3 fully to flip.
Wow Thanks for the descriptive response!
I'm not very great at electronics, but here is the exact switch I'm using.
As for power source, I'm probably going to use 110 VAC to power the 4 ch relay board. http://www.amazon.com/SainSmart-101-70-101-4-Channel-Relay-Module/dp/B0057OC5O8
This is the solenoid I will be using
Thanks! Your post really helped me think it through. Just need to put it to work lol.
Not much to see yet. So far it is an R-pi, a few DHT11, a relay module, one (or maybe more) cheap PIR motion detectors, and a toggle switch.
I'm using Monkey webserver, and playing with some cgi scripting. I started piddling with HTML5, and I want to try to make it as nice as I can, but I am not a web developer, so I am having to slog through some of this. If it goes well, I might make a post in here or in /r/HomeAutomation
This.
I got one of these recently and it seems to work fine. Fairly cheap, super easy to use.
Exactly, yes! Everything that requires precise timings, instant response, and/or 5 volt logic would be on the Arduino and the Pi would just handle user interactions.
You could just get an Arduino Uno 3, that's kind of the standard Arduino board especially for people just learning. I just prefer the Mega because it is beefier and has way more GPIO pins. But the Uno 3 has enough to run three relays and your IR sensor easily (which has both 3.3 V and 5 V logic, meaning it can work with the Pi and Arduino respectively).
Speaking of relays, I really like the SainSmart ones and have never had an issue with them. This four-relay module is only $10:
https://www.amazon.com/SainSmart-101-70-101-4-Channel-Relay-Module/dp/B0057OC5O8/ref=asc_df_B0057OC5O8/
Only thing is, and you might know this already, these things are pull-down rather than up. Meaning instead of pushing a 5V signal straight from a digital GPIO pin on the Arduino straight to the relay, you have to use a transistor to basically invert the signal. When the Arduino activates the transistor, it allows the pin on the relay board to go to ground which turns it on. Also, don't forget to always wire so the power off side is your closed side for all valves and such! The last thing you want if a board dies is to have the relay that controls your solenoid valve to default to power on, dumping all your liquid!
It definitely is overwhelming at first, but once you get really confident it opens up a whole new world of fun engineering!
I ended up buying this relay module so I can actually switch both the lamp and the printer from the Pi.
Yeah, if you're not very experienced in electronics better stay with something already tested, specially for anything mains related!. Probably you could use one of these arduino relay boards, they're fairly cheap and are opto isolated to keep things safe.
The 120V part is the easiest and the most dangerous, so pay attention to it. A relay module like this acts like an SPDT switch ("changeover/three way switch") - or more like 4 of them. The light are wired up to the relays just like you'd wire up an ordinary room light to a switch.
The arduino just connects to the little pin header on the bottom and is completely isolated from the high voltage.
r/Arduino will be able to help you write the code (you'll only need the basics for this). IDK why the post was nuked, but you can make a new one asking about the optocoupler tapping of the speaker - it will require a bit of poking around to get an idea what sort of thing is going on in the speaker wires.
Hi Shadow, thanks for the response, the relay I'm using is this one from Amazon.
I connected the relay to the 5V power rail that's hooked up to the Arduino. The ground for the relay is connected to the ground of the Arduino. The signal wires are directly hooked up to the Arduino digital outputs (5,6,7). I have a photo of the circuit, but I must admit it's not the best picture.
http://i.imgur.com/tDr0nTw.jpg
Another thing I noticed, was that this occurred even when I disconnected the Arduino and just ran a 12V source through the component, it was worse when it was connected to the Arduino.
arclight: yeah, i'm liking the idea of the board though. But I ended up buying http://www.amazon.com/gp/product/B0057OC5O8/ref=oh_details_o02_s00_i00?ie=UTF8&amp;psc=1
[Here's a relay] ( http://www.amazon.com/gp/aw/d/B0057OC5O8?qid=1427254414&amp;sr=8-6&amp;vs=1#)
Wiring is pretty intuitive.
12v DC > Relay 1 blue connector 1
Motor positive wire > Relay 1 blue connector 2.
Connect Arduino ground and digital IO (set to output) pins to the pins associated with the relay that you chose, raise the DIO pin to High, and the relay will connect the motor to the power supply.
Technical note: These relays trip at 15-20ma, so there shouldn't be any issues using a DIO pin. If you choose a different relay, MAKE SURE the relay input draws less than 40ma, otherwise you may damage your Arduino. This relay board is also protected by diodes, so your Arduino is shielded completely from the 12v.
They make them pretty small.
That was just a quick google search. Dig around for size and price. You can get a bottle of PG solution locally for usually around $6-$8 for an 8oz to get you started. I'll see if I can find you a sale online....
The tubes work fine, too, but are not the same thing and do not use PG.
EDIT: The cheapest way to get PG solution is to make it yourself. Just order yourself some PG and mix it in a 1 to 1 ration with distilled water. Accuracy isn't hugely important, but should be within 10%. This will make 2 pints and last you a very long time.
something like this? seems inexpensive enough to give it a try. extr
Use some anti blur gel on your lenses and rub some in your eyes. My friend recommended some and it didn't work for me , I fact it blinded me, Buuuut it might just work for you.
Link to product: https://www.amazon.com/Loctite-Ultra-Control-4-Gram-1363589/dp/B003Y49R7G
*typed using microsoft talk to text
/s