(Part 4) Best tools & home improvement according to redditors
We found 100,714 Reddit comments discussing the best tools & home improvement. We ranked the 37,228 resulting products by number of redditors who mentioned them. Here are the products ranked 61-80. You can also go back to the previous section.


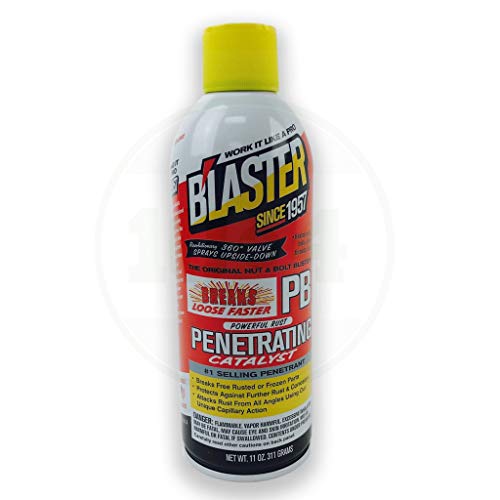
[PB Blaster] (http://www.amazon.com/Blaster-16-PB-Penetrating-Catalyst-oz/dp/B000I2079E)
Really soak those screws good - leave it alone for about 15 minutes, come back and tap on it with a hammer on each screw - you can tap it pretty good, you'll be loosening that rust.
Spray it again and repeat this process like 3 or 4 more times. After a little over an hour of doing this, tap on it with a hammer, and then try to unscrew it. If it still doesn't turn, repeat previous process again. Eventually it will turn, it just takes patience.
You can get PB Blaster at any hardware store usually. Second choice would be Liquid Wrench, but PB Blaster has always worked better for me.
Just got a new safe for xmas, hated the lighting in it so got started on a DIY lighting project. Spent 20 minutes and $24, its pressure sensitive and lights up all compartments.
Edit: The Safe is a Mesa
Hey guys,
​
I saw this awesome video by Derek Gilman about an automated curing system he had built: https://www.youtube.com/watch?v=Jho0qeTUZnA
​
His rig is with 5 gallon gamma lid buckets, and he loads about 2 pounds in each one. The way the system works is you put your dried bud in the buckets, and you hook up an air pump to the buckets, on a timer. The timer I have set is for 15 mins every 24 hours. (The timer kicks on the pump, pushing air through the buckets, and auto shuts off after 15 mins). You install little valve outlets on the container and they exhaust out the old the air when the pump comes on, and then seal back up when it shuts off.
Being a micro grower who grows autos that yield ~100g, at about 179 grams a gallon I would be nowhere close to filling a 5 gallon gamma lid bucket, and even at 2 gallons I'm still a bit short.
So, I went to the store and found 1 gallon airtight food containers and it works! I was able to fit a Seedsman Zkittlez Auto I just got finished drying/trimming and ready for cure.
The system I built is:
- Aquarium Air pump, ideally with a built in manifold so you can hook up multiple containers: (NON AFFILIATE LINKS!) https://www.amazon.com/gp/product/B008ILGHAU/ref=ppx_yo_dt_b_asin_title_o00_s00?ie=UTF8&psc=1
- Air line https://www.amazon.com/gp/product/B000255NYQ/ref=ppx_yo_dt_b_asin_title_o00_s00?ie=UTF8&psc=1
- Check Valves: https://www.amazon.com/gp/product/B07FKJXZ78/ref=ppx_yo_dt_b_asin_title_o00_s00?ie=UTF8&psc=1
- 3/16" Drill bit
- 1 Gallon airtight food storage container https://www.walmart.com/ip/Better-Homes-Gardens-Flip-Tite-Square-Food-Container-16-Cups/370961661
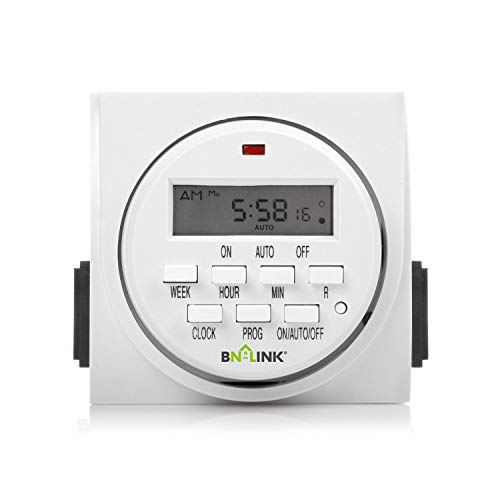
- Timer with 15 min increments: https://www.amazon.com/gp/product/B00MVFF59S/ref=ppx_yo_dt_b_asin_title_o00_s01?ie=UTF8&psc=1
​
I noticed that the pressure was a little too high when I had only one check valve as the outlet and it was causing the lid to pop up, so I added two more. If you are growing photos, you're most likely yielding more than I do with my auto plants, so you'd prolly be able to just use the 2 gallon gamma buckets, which should hold about 1/2-3/4 pound. https://www.amazon.com/Gallon-Black-Bucket-Screw-threaded/dp/B018BFY2KY/ref=sr_1_5?keywords=2+gallon+gamma&qid=1574473805&sr=8-5
I have it linked in the PCPP build: https://www.amazon.com/dp/B071P862G1
If you wanted to get the wheels moving again, this specific thing and brand is your best chance.
For anyone interested
My lights: https://www.amazon.com/dp/B01HBT3BVM/ref=cm_sw_r_cp_apa_i_CdHKDbPDRD0JF
My shelf: https://www.homedepot.com/p/HDX-48-in-W-x-72-in-H-x-18-in-D-Decorative-Wire-Chrome-Heavy-Duty-Shelving-Unit-HD18481302PS-1/203846551?MERCH=REC-_-rv_mobileweb_rr-_-NA-_-203846551-_-N
I also needed an outlet timer since the lights don't have one https://www.amazon.com/dp/B00MVFF59S/ref=cm_sw_r_cp_apa_i_FmHKDbGVVCMWT
I can't recommend one of these enough. I've had mine for a while and makes desolder work a DREAM. And at $10 with prime shipping you literally cannot beat it.
it's all about having the right tip, the right diameter solder, a temperature controlled pencil set to the right value, and that the tip is free of oxidation so that you always make good contact with the parts you're joining.
a breadboard may be more suitable until you get down your technique, watch some youtube videos in the meantime and practice on inexpensive parts.
edit: more tips:
it's also good to have a copper or steel mesh to clean your tip after every joint. the oldschool wet sponge doesn't do as good a job. here's a link:
http://www.amazon.com/Hakko-599B-02-Solder-Cleaning-Holder/dp/B00FZPGDLA
A 1mm / 1.2mm tip is suitable for most everything including surface mount, the Hakko 900M-T is recommended. Don't be tempted to use a .5mm tip, the heat transfer is not as good and with techniques like drag soldering (youtube it) there's really no reason for it.
For iron temps, if you're using standard rosin core solder the sweet spot is 430 degrees. At that temp I've fooled around with sensitive surface mount parts for longer than I should have and they've all survived.
If you're shopping for a pencil that will last, look at the value models from aoyue and hakko. if you have a bigger budget, weller is the brand to own.
invest in good tools, and practice makes perfect.
WD-40, for the most part, is piss poor at doing anything well. It is over marketed, over hyped at what it does. It is a lubricant, a poor one. It is also a rust penetrator, a poor one. In the shop, we called it monkey piss, because you might as well have used monkey piss to get that rusty rotor that has seen 10 salty Midwest winters, off the hub.
It works as a jack of all trades (kinda), which makes it handy for the home owner that wants one can that can do many things. In reality, if you want a lubricant, get a proper one. If you want a rust inhibitor, there are brands available that do the job much quicker, that foam up, penetrate and stick to the rust (instead of dripping off) where you can see the rust pulled away and fall off. Go to your auto parts supplier and ask the guys who do wholesale for the local shops, and they'll point you to what is used. If they recommend WD-40, walk out.
Edit: Thanks to DrCockenstein for reminding what we used, PB Blaster. Here's an Amazon link to the product.
I can't recommend it enough if you are trying to loosen something rusty.
https://www.amazon.com/Blaster-16-PB-Penetrating-Catalyst-11-Ounces/dp/B000I2079E/ref=sr_1_1?ie=UTF8&qid=1483636915&sr=8-1&keywords=pb+blaster#customerReviews
TLDR: WD-40 is garbage, a proper lubricant should be purchased.
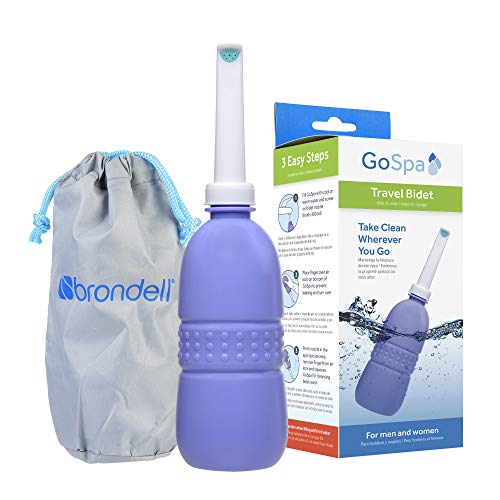
I haven't gotten quite that desperate yet, but I may eventually try out one of the portable models they have on Amazon: http://amzn.com/B008CSDKSQ.
Edit: To follow-up on your comment about how Americans can live without it, it's mostly a matter of ignorance. Nobody here seems to know that there's a better way. Once someone tries it though, they can rarely ever go back.
Yep. I really hope they catch on -- literally everyone I know who has tried it has loved it.
I've tried wetting toilet paper when I'm traveling, but it's just nowhere near the same. HOLY SHIT I was just typing "maybe I should come up with some sort of travel bidet," and did a quick google.
It is a thing and it may change my life.
Je me suis toujours demandé, vous transportez quoi vous, dans vos sacs à dos ? Depuis que je me suis intéressé à se qu'on appel des EDC (Every Day Carry), je transporte toujours avec moi un équipement qui ferait passer Marry Poppins pour une petite joueuse. Mes recherches sur le sujet m'ont forcement fait passer par le survivalisme, qui est un sujet vachement intéressant ! Mais comme pour la muscu j'ai du subir tout les clichés qui vont avec... Exemple rapide :
Muscu = Gros cons masculiniste superficiel et beauf
Survivalisme = Facho agressif et asocial
C'est dommage que les gens aient autant de clichés, parce que c'est un domaine très instructif. Bref, en gros j'ai toujours sur moi :
*Rangé dans une pochette Maxpedition.
Voila. J'vais peut être passer pour un gros taré aux yeux de certains, mais ça m'a bien aidé d'avoir tout ça sur moi, en de nombreuses occasion. Je vous invite à partager vos sac, comment vous prévoyez les coups dur, votre avis sur le sujet, etc !
PS: Il existe un sous du doux nom de /r/edc, sauf qu'eux, ils rajoutent aussi des armes à feux pour certains ('murica style...).
I bought this and I'm not ashamed. Well, maybe a bit because it's girly light-purple... My reasoning is that it seems like America is the only country really repulsed by the idea, but it solves the cleanliness and any monkeybutt/smell issues, and weighs about the same as a half roll of TP. It's waterproof and reusable, can be sorta crushed, works in any weather (summer or winter), and is a one-time-cost... no resupply.
Backcountry bidet, but only for camping where there's no toilets. No TP garbage and cleans your nether regions really well! I have the Brondell GoSpa
I use this utensil and this bowl. Both take up very little space in my backpack.
(Yes, I know the bowl is marketed for "pets" but it holds human food just fine and is collapsable. It meets my needs, even as a non-pet.)
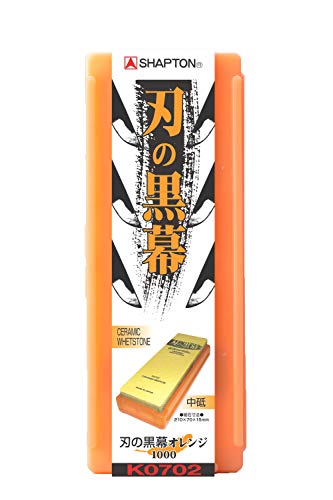
For anyone looking to get into whetstone sharpening, just know that it's really not all that difficult.
A good starter stone is the Shapton Pro 1k which can be found on Amazon for just $36. It's a splash and go stone that doesn't require any soaking and it's a hard stone that doesn't dish fast.
While the 1k is a good starting point for any knife that isn't already a butter knife, the 320 grit would be necessary for turning that butter knife into a real knife again.
If you want something with more polish and a higher level of sharpness, the 5000 grit will offer a good deal of edge refinement without going too crazy. However, this is pretty much pointless for any knife under 60 HRC (a Wusthof is at 58 HRC which is pushing it) since that softer steel won't hold a 5k edge for very long at all.
These Kuromaku stones are real Shapton Pros, but those manufactured for the Japanese market. The versions for the western market have differently labeling printed on the stones, but are otherwise identical. Prices for Kuromaku Shaptons vary widly on Amazon so it's worth waiting for a deal, and only a few are actually available at these lower prices.
An even cheaper option is the King 1k/6k combination stone which is viable, but not something I usually recommend. It dishes fast, the 6k side is overkill for most home cooks, and from what I've heard using the stone isn't a particularly good experience.
If you would like to learn about sharpening in general, or how to do it, start here: https://www.reddit.com/r/chefknives/wiki/sharpening
And if you're looking for a knife or how to care for it, consider stopping by /r/chefknives!
I highly recommend the Light My Fire titanium spork.
I bought this off Amazon and haven't had any problems.
https://smile.amazon.com/GoControl-Linear-GD00Z-4-Z-Wave-Controller/dp/B00M75TEIU
TLDR: No instructions came with the DIY kit, which is probably fine for the most part, but I had no idea wtf i was doing, so I wanted to post some info in case others were running into the same lack of how-to information when it came to simple stuff like "which wires do I solder to the usb-a/usb-c/aviator (gx16-4) connector?" or even "How to fish the cable through the paracord/techflex sleeving?" Also to see if any assumptions i made were wrong before I plug this into the Massdrop ALT keyboard that's en route.
​
Prior to attemping this, I haven't done anything electrical related anything, didn't own any of the tools other than a set of wire cutters and I basically didn't know what search terms to even search for.. so keep that in mind when reading. Also, ZapCables weren't taking orders when I wanted to make an order, so I figured "how hard could it be for a newb?" Wrong.
​
Things I still don't know:
- [solved: it works!] I'm not sure if my cable actually works because I don't own any USB-C devices other than a power bank that has a USB-C connection. I plugged it in to an ac adapter connected to the wall then connected it to the power bank and it turned on AND the cable didn't melt (hooray), so I assume power is working.
- I have no idea how to test if the rest of it works. I realized after I pieced this all together I probably could have tested the connections somehow, but I really don't want to dismantle this thing now. I'm planning to just plug it in to the ALT when it arrives and do a rain dance in the hopes that everything works.
​
Assembly Steps
​
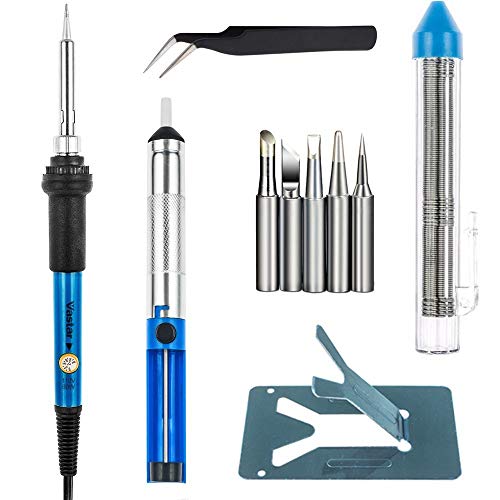
Step 1: I bought a cheap soldering kit off of amazon (https://www.amazon.com/gp/product/B06XZ31W3M/ref=ppx_yo_dt_b_asin_title_o02__o00_s00?ie=UTF8&psc=1) and hoped for the best.
​
Step 2: Stripping the usb cable and incredibly tiny wires inside
- Wire Cutters/wire stripping tool: this worked fine for the USB cable casing, but not for the wires inside. For the inner wires, it only worked 50% of the time because I couldn't get the feel right and kept cutting the strands of the wires when peeling them off. I bought a wire stripping tool and the one i got didn't work as the wires were too small. SIGH.
​
- Soldering iron: i saw some people just melt the casing off, and this kind of worked, but because the already tiny ass wires were stranded (had even more impossibly thin wires inside), the plastic melted between the strands and it took just as long to clean it off before tinning the wire.
​
- What worked for me: I ended up figuring out I could use the soldering iron to melt the plastic away to create a notch where I wanted to start stripping the wire away. Once I melted around the wire, I used my fingers and pulled the plastic off, and the underlying strands of wire were clean and in tact.
​
Step 3: Tinning the stripped wires
- What worked for me: I set the soldering heat on the soldering iron to be around 350deg or a little less as I found any higher and the solder would burn and disappear before I could get it on the wires. I took the tweezers and twisted the strands so they would not come apart when applying heat. Then I heated up the twisted wire with the soldering iron and put the solder on it and moved it all around. Seemed to work.
​
Step 4: Soldering tinned wires to the connector USB-A connector
- I have no idea if I did this correctly. Even though the packaging for USB-A had the wires in order GND, D+, D- and VCC marked, it wasn't clear to me which orientation to have the connector so that the label made sense. I assumed if your wires are on the left, and the connector is on the right, then the top connection point on the USB-A connector was GND. The connection points weren't labeled sooooo I hoped for the best. Once that was done, i assembled the rest of the connector's metal casing. To solder, I added heat to the tinned wire and it connected. I was paranoid about having the solder spread to the other connection points (the USB-C connector has no barriers unlike the A) so i didn't add extra on top.
​
Step 5: Fishing the cable through the paracord/TechFlex
- There's some videos of how to do this for the paracord on youtube, but I couldn't find a way to hack it and make it faster, so i pushed it through one aggravating inch at at time. The Techflex was easy because.. well it can flex.
​
Step 6: Soldering the male side of the Aviator/GX16-4 to your USB cable
- I don't think it matters if you choose male or female part of the connector. I chose the male side because it was easiest to detach the cover (just unscrew it) and expose the solder points. First I threaded the cable through the heat shrink to the USB-A connector. You don't have to do this but I found not all of the heat shrink pieces I got could fit over the connector. Next, I threaded the USB-Cable with the paracord/techflex through cover that was just unscrewed and left it on the cable. Looking at the male GX16-4 solder points, they are labeled 1-4, and I chose the soldering points 1:GND, 2:D+, 3:D-, 4:VCC. You'll do the same for the female connector.
​
Special note: I emailed ZapCables because I was initially confused AF when I saw the GX16 connector and had no idea what to do. John promptly replied with the tip about the labels. Thanks John! He also mentioned they might be making their own tutorial which I think they should do because I found this hard given I don't have any experience doing this.
​
When the soldering was done, I connected the GX16-4 cover back to the male connector. Be sure not to twist the cable while you're re-attaching. I ended up tearing the wires off from over-twisting and proceeded to die inside when I realized I had to do it all over.
​
At this point, you have half the cable and it's pretty much the same for the other half EXCEPT that for the female GX16-4 cable, detaching the cover to expose the solder points requires you have an small screw driver to unscrew yet another miniscule screw. The set of tiny screw drivers I use for my glasses/computers was not small enough, I was able to find one that worked in a random set i had in the garage. The size was not marked, so I have no idea what to tell you guys :( If you manage to get it off, twise the cover 1/4 rotation to the left and then pull.
​
Step 7: Do steps 2-6 for the other side of the cable + female GX16-4 connector
​
If you decide to go this route and you also have no idea what you're doing, I suggest you definitely order a little more length for the usb cable/paracord/techflex. I got a 4ft cable, and in the end, with connectors on and all, i'm 3-4 inches short of 4ft because of all the mistakes I made.
​
I hope this helps someone who wants a nice cable but can't be bothered to wait.. but can be bothered to be frustrated by the assembly process.
​
*Edit: grammar/spelling*
​
EDIT: Update on the cable, some of the parts that i soldered between the cable did not have a good connection, bending the wire ever so slightly would cause the keyboard to connect/disconnect, so i probably have to redo the connections to the male/female gx16-4 connectors.
​
EDIT2: After a quick email to ZapCables, John mentioned that i had too much exposed wire that was touching (near solder points) and suggested I resolder with less exposed wire to prevent this from happening. Rather than do that and figure out how to desolder, I took some electrical tape and wrapped any exposed wire connecting at the solder points to the USB-A/USB-C/GX16-4 connector. Happy to say, it's all working and I am now successfully using this cable. 5/5 for ZapCables and John for help.
So I got into the first batch on massdrop for the WhiteFox by Matt3o. Price wasn't too bad, picked the Aria with Cherry MX browns, came out to 189 shipped I believe (I can look at massdrop, but I don't recall if that included shipping or not). I will say that this wasn't planned, or at least I didn't think it was planned. I thought I got the assembled version, but I actually got the kit. I contacted massdrop about it, who was very kind but simply told me what I ordered and provided the receipt. Yup, I fucked up... or did I?
For those who are like me, decent with there hands but never did this before don't sweat it. It isn't that hard, but here are a few tips (esp if you have a WhiteFox you need to assemble):
Soldering the switches was a breeze. Did I fuck up a few solders? Sure, but the switch works :) Did I fuck up a few of the LED and had to desolder / resolder them, fuck ya lol. The LED solder pads are fucking tiny. That is all I will have to say. My only tip would be take your time, and when you put the LED in make sure you bent the leads a bit to make sure they don't fall through (now you know why I had to desolder and resolder).
Besides that from unboxing to testing fully on my wife's laptop (ill get into that below, which is kinda funny) took me a little under 3 hours.. Not bad for a first time, and the feeling that I actually built something I will use for years to come is amazing. The keyboard overall is a joy to type on, and I love it.
The only non-keyboard related issue I had was with the LED actually. So I did the top row of LEDs, and then plugged it into my machine. Machine recognized the keyboard like it did with all the switch tests I did as I soldered them, the LED would turn on and then off about two seconds later. I panicked, checked the solder joints and then searched the internet. I got nowhere, so I emailed Mat3o. Since it was late, I went to my wife's laptop downstairs (mine is in the truck, and I am too lazy to undo the alarm to go outside and get it) and it worked fine. Everything worked fine. This computer will be formatted tomorrow since there is a number of issues I found with system files, thank you Windows 10 updates /s (I looked at the windows updates logs to when the issue started - or issues, and it was after an update which ended up corrupting a few system DLL).
TL;DR:
Edit
Does anyone understand how the hell you update the firmware?
Edit #2
Along with updating the firmware, a manual or at least tell me which controller is in here :)
Super Important Edit #3
Flash your firmware! /u/mister-la gave me a great article here but I wanted to add that for some reason my board came with some firmware issues which caused the LED issue. It was only happening on Windows 10 for whatever reason, and what would happen is the keyboard would be recognized by Windows and LED would turn on, along with do the little "device plugged in" noise. About 2-3 seconds later the keyboard would still function but the LED would not work, and then do the "device disconnected" chime. I did some Google FU along with searching the input club and realized back in late May they released a new firmware to solve a ton of USB bugs for the KLL board, which is what the WhiteFox runs.
I ended up following the article above except the GUI tool ended up crashing. What I did was take a blank Aria firmware from input.club, and flashing it with dfu-util.exe. It is really simple:
That is what fixed my keyboard, and now it works wonderfully. I think its pretty awesome how the configurator tool on Input Club allows you to remap a bunch of the keys with ease, and then using the command line flashing is a breeze.
Cheers!
Leatherman Style PS
Sort of tempted to get one of these sometime. Could probably just keep it in one of my cargo pockets even.
C'mon OP...
The only thing I can think of is 'TSA friendly' tools:
http://smile.amazon.com/Leatherman-831488-Style-PS-Multitool/dp/B0058RX9NU/ref=sr_1_1?s=hi&ie=UTF8&qid=1417968012&sr=1-1&keywords=tsa+multitool
I think the better option -because I advocate always having a blade on you- would be to remember to just leave the blade in your car, or ask for it back when you leave. I'm not sure how often you go through security checks or what their posture is either so that advice could be useless.
I was in your shoes not too long ago, it's overwhelming! Here's a list of things that I bought, but I am not an expert so if others have better input go for that:
Equipment
Shop for whatever is cheaper, I have a huge heater because I had an extra one from before. I've read that it's not necessary but also have read that if you want them to breed you need to stimulate warm water. For now, I keep the heater off and leave it at room temperature of 72F. They seem very happy! Most important in my opinion, add plenty of plants and a marimo ball or 2.
Lastly, I'm unsure of the siphon, I think it's good to have a bucket and siphon just in case your water parameters are looking bad so you are prepared to do a water change. From what I read, shrimp have a very low bio load and should be able to sustain themselves. Make sure to do tests regularly.
EDIT I just read that this is your first aquarium, so here is a detailed write up:
Setting up your tank
After your tank has cycled
Please don't skip the important step of acclimating your shrimp! They are very sensitive to water changes and this ensures that they will survive.
Here are my water parameters, people have all kinds of ranges but this is what works for me:
I hope this helps... again, I was in your shoes not too long ago, it was really overwhelming. But after a lot of research I think my tank is in a good place :). Other users, if there's anything in my list that seems incorrect please let me know!
Here
I didn't really have any aviation related gear as a CFI. I had my headset which was way too expensive for my girlfriend to want to buy me, and I used a Jansport backpack from high school as my flight bag.
Once I got to the airlines my 'gear' increased immensely. Since I'm on the road a lot I have two of everything. Two of each toiletry, two razors, two phone chargers, two pairs of running shoes. I've forgotten things so many times that now I just keep one set of everything in my overnight bag, with a separate set at home and that way I can never forget anything on a trip.
For strictly flying related expenses I have an Aerocoast EFB bag, luggage works suitcase, nice sunglasses, a backup power brick, an anker 5 port charger, this incredibly expensive spork, some window shades, a pen recorder because passengers are idiots. Other than the sunglasses, I didn't need any of that as a CFI.
This is nice and I appreciate all the thought that went into it.
And yet, I find double-ended utensils annoying. If one end has good on it, it's awkward to use the other end.
I'd rather have this than this
Victorinox makes a 'my first' pocket knife which has a rounded tip that will prevent stabbing. There's also the flight safe swiss army knife, the jetsetter if you don't want them to have a 'real' knife right away.
There's also the Leatherman Leap which has a user-installable knife so you can give them that part at a later date or remove it if it turns out they are irresponsible. And Leatherman has a flightsafe multitool too in the leatherman style
There's a Plano tool box where the related items are almost exclusively X-Wing ships.
I hate the wet wipes thing too. I'm super happy to see another travel bidet user here. IMO, it's the best way to keep yourself clean out on the trail.
I use a different one than you do, and it weighs in at 65 grams. I can either use a sheet or two of TP afterwards to dry off, or simply pull up my merino boxers and let the water disperse into them - they're usually dry within a few minutes.
Brondell Travel Bidet on Amazon
Was in Japan over a year ago, and my butt fell in love with the bidet toilet seats. When I returned home, I bought an Izen 5. Great. Before the Izen arrived, and for traveling, I use this. Much rather have the warm water from this, compared to an icy squirt.
After using this combo, the direction of my butt crack is changing...it's becoming a smile. (Hope I didn't offend.)
My Lighting setup:
If you really want to learn, pick up a small kit like this, like 7 to 10 switches, and like 10 of any kind of keycap, and finally grab a soldering iron.
All that is around $50 total, and places like keeb.io have really detailed guides on how to assemble their PCBs. It's really not hard once you understand what to get, and once you've built even a small macro pad like that, you'll be able to build even hand wired keyboards no problem. They're really simple once you learn the basics! It's pretty much just legos, but really tiny and using a hot stick.
Sure:
Not op but I go out at night with a uv flashlight and find them. It's stupid easy.
i carry this with me to work.
Plano Molding 5231 Double Cover Stow N Go Organizer, Porsche Red https://www.amazon.com/dp/B000HJ9514/ref=cm_sw_r_cp_api_p6cpxb4BSG38Q
This seems to be an inexpensive and popular choice. It's what I we with when starting a collection.
Spray, let it soak in, repeat.
Leatherman Style PS
Swiss Army Jetsetter
Just because the don't have a blade though doesn't mean the TSA won't take them. TSA don't give a shit, TSA just take what they want.
Buy a UV flashlight:
https://www.amazon.com/Escolite-Flashlight-Ultraviolet-Blacklight-Detector/dp/B008133KB4
Go around the house after dark with the lights out and look for the urine stains. If they are there (and I bet they are), you will see them fluoresce. Once you know where they are hiding, you can eliminate them with enzymes:
https://www.walmart.com/ip/UNITED-PET-GROUP-32OZ-Urine-Destroyer-P-5727/20838653
https://www.amazon.com/Natures-Miracle-Destroyer-32-Ounce-P-5721/dp/B003I5QRJ2
Note: This does not work instantly. You have to mist the affected areas two or three times a day. Will take several days to break down the odor causing compounds into their base components. But this should work for you.
Grab yourself a can of PB Blaster, let it sit on the connection for 15 minutes, then try again with the channel locks.
If you're in an area subject to freezing, I would also consider replacing that hose bib with a frost free hose bib. Much better than forgetting to close the shutoff valve in the basement/crawl space.
Light my Fire of Sweden's titanium spork. Got it at Natural Grocers for $11.79.
List!
Watch: Luminox Navy Seal, it was a gift from my dad on my 18th birthday
Organizer: Hitch & Timber Runt 2.0 with a Wet Ones hand wipe in the back pocket
Chapstick: Burts Bees Vanilla Bean with electrical tape on it so its easier to pull out of the organizer
Flashlight: RovyVon A8U with a random paracord thing i made
Wallet: Maxpedition LPW
Pen: Pilot G2
Mulitool: Leatherman Style PS
Keys: Linwnil belt key hanger with a set of 2 KeySmart MagConnects, with a sim card remover too
> Klein Victorinox
In a few years there are knives made just for kids, though not school appropriate:
Opinel: https://www.amazon.com/Opinel-OP01698-Round-Safety-Knife/dp/B07MBK89TX/ref=sr_1_1
SAK: https://www.amazon.com/Victorinox-Swiss-Army-First-Knife/dp/B001AXCU5Y/ref=sr_1_5
And there are bladeless tools made for travel:
Leatherman: https://www.amazon.com/LEATHERMAN-Style-PS-Multitool-Black/dp/B0058RX9NU/ref=sr_1_2
Gerber: https://www.amazon.com/Gerber-Dime-Travel-Bladeless-Knife/dp/B00TOJCDM6/
SOG: https://www.amazon.com/SOG-PowerLock-Traveler-Multi-Tool-S61TR-CP/dp/B00T0UR5SG/
Yes works great with leds!
Tenma 21-8240 Vacuum Desoldering Iron https://www.amazon.com/dp/B008DJRYIG/ref=cm_sw_r_sms_apap_4HuPH8htp6ZEX
Just one more thing to add:
if you are really worried about the stamp showing in pictures, you could buy an ininked stamp pad and invisible ink, plus a blacklight (if your DJ doesn't have one) for a total of $24.
If they're coming inside, wander around with the black light after the house has been dark for an hour to see if they're on any of your baseboards/walls. They mostly come at night... Mostly.
Spread out the DE like Gibus mentioned.
Edit: Just to be clear, regular bug spray doesn't do anything to them since they don't absorb it, so DE and stomp & smash is pretty much it unless you go with some much nastier poisons.
This. You don’t need to talk to your landlord about it at all. It’s not the same as painting or putting holes in the wall, which are permanent changes the landlord has to fix after you leave. Those bidet attachments are easily installed and removable, so the landlord will never know.
Also, ditch the restaurant plan. Unless you are backed by investors, own a patent to bidet, and include installation, no one is going to take you seriously. A much cheaper and more convenient option would be to get a travel bidet bottle like this one from Amazon. You can take it with you wherever you go.
Also, an all liquid diet will still make you poop but it will be diarrhea unless you find a way to get sufficient fiber. Unfortunately I am speaking from experience! So ditch that plan as well.
I would ditch the wet wipes altogether. Even if they are unscented, they still contain detergents and other things that might be upsetting your skin. (For example, this is how I found out I am allergic to aloe vera.) Start using a bidet to clean your backside instead. If you don’t want to install a bidet onto your toilet, get a travel bidet. Cheap and easy to use.
I'll link the full order:
I am
not 100%happy with the light strip I got.They are super sensitive to the power draw and flickers time to time(maybe it's the power adapter =/). Though, it's cheap and does its job pretty well![EDIT] correcting the led power connect as opinted out by /u/BishoujoReview
[EDIT] flickering was due to an old extension cord. I plugged the power adapter directly to the wall outlet and that solved the problem.
I really like the Light My Fire utensil. It's got great utility and even has a tiny serrated knife!
Here are some affordable and extremely high quality whetstones. I recommend getting at least the 320# and 1000# or 2000#. The $2-3 whetstones will be of shitty quality, not something I'd be happy to use on a kitchen knife.
https://www.amazon.com/gp/aw/d/B004D2GCR6?psc=1&ref=yo_pop_mb_pd_title
https://www.amazon.com/gp/aw/d/B001TPFT0G?psc=1&ref=yo_pop_mb_pd_title
https://www.amazon.com/gp/aw/d/B001TPH8YG?psc=1&ref=yo_pop_mb_pd_title
Left to Right, mostly:
Green Cards - I switch this out with other cards pretty regularly, but it matched today. ( https://www.amazon.com/dp/B01ESWPAKU/ref=cm_sw_r_sms_apa_i_R-0TDbZEN6C0N )
Slim Wallet - It's super thin and it attaches to my phone. ( https://www.amazon.com/dp/B07P4J55NV/ref=cm_sw_r_cp_apa_i_9msGDb54PTKM2 )
Watch - It's durable and in my opinion doesn't look too bad for the price. ( https://www.amazon.com/dp/B009KYJAJY/ref=cm_sw_r_cp_apa_i_BosGDbN06048V )
Wireless Earbuds - They are dated so they aren't the best anymore, but they are still pretty good. ( https://www.amazon.com/dp/B07582VVJR/ref=cm_sw_r_cp_apa_i_QnCDDbV5X5EQY )
Multitool - It doesn't have a knife so I take this to school. It's not the best, but it does small things great. ( https://www.amazon.com/dp/B0058RX9NU/ref=cm_sw_r_other_apa_i_Rc1TDbRPMMDB0 )
Flashlight - For the size, it is really bright. It doesn't last forever, but it is rechargeable. I recommend it for something small. ( https://www.amazon.com/dp/B07GQRJLDP/ref=cm_sw_r_other_apa_i_6g1TDb65T465P )
Knife - This sub knows this knife. ( https://www.bladehq.com/item--Benchmade-Bugout-AXIS-Lock-Knife--98607 )
Necklace - Totally normal carbon fiber dog tag. ( https://www.bladehq.com/item--Spyderco-Panchenko-Dog-Tag-Folder--29966 )
If anyone has any questions about any of this stuff, leave a comment and I'll do my best to respond. To clarify, the knife goes in my pocket and I put on the necklace after school.
Thanks for taking the time to check out my post! Have a good rest of your day everyone!
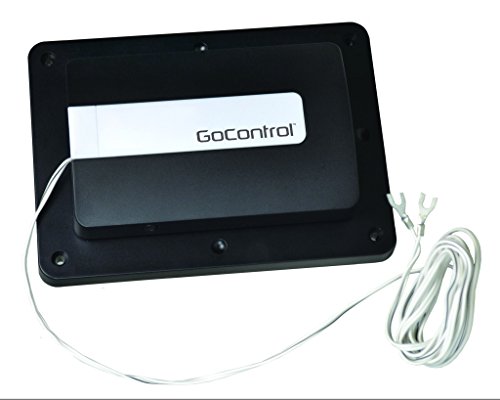
I bought this go control unit from amazon back in October and set it up without much trouble. Initially I just had a hub and this for my garage to be able to check the door status after we left the house and my wife would question whether the door had closed.
I was in my basement at about 10pm the first time I heard the garage open. I thought it was odd since I knew my wife was upstairs on her computer so I checked it out and asked if she had triggered the door to open from her phone though I wasn't sure if she knew she could do this. I checked a few things on the smart things app, shut the door from the OG button outside and went to bed.
About a month later I woke up and headed out to work to find the garage door open. When I got to my car I immediately knew it had been gone through. Nothing valuable to a thief was stolen but they did take the hand mics to both my ham radio and my cb (I offroad and use these to communicate with my group), a knife that was in the driver front door pocket, and a car phone charger.
I checked my wifes car and saw that the center console had been tossed. Her car is kind of a mess so although I knew someone had gone through it I couldn't tell if anything was gone. I knew I couldn't do anything about it at that point so I left for work and an hour later when I knew she'd be awake I texted her about what had happened. She walked down to check the garage and it was open again after I know it closed when I left. She closed it and did her thing before also leaving for work.
I was in the middle of something at the office so I couldn't immediately leave but a few minutes later I went home (20 minutes away) and disconnected the GoControl. I haven't done anything with it since then. I did realize later though that the thief took my dewalt 20v battery and unplugged my charger to also take but actually left because the power cable was twisted around a few different things. I feel fortunate that they didn't steal more because I had my drills and other tools right in front of my car on a work bench.
Here is my current (year-round) setup! I moved into a new apartment with only north and west facing windows, and nothing was getting enough light. So recently I upgraded my setup.
I have the lights on for about 12 hours a day.
I used to have a clamp lamp with CFL, and that worked for a bit, but I was trying to squeeze too many plants under it so they started to get etiolated. In comparison, these lights are amazing. You can see that some of the plants were etiolated but are now growing compactly!
That's kind of a tough set of requirements. Most of the lights we generally recommend have done away with the red mode in favor of a very dim white. While there are some military requirements that dictate its use, generally speaking you need a lot more red brightness to see what you're able to with a lower level of white. For many years it was hard to make a white light dim enough to do this properly, but technology has caught up. We can probably recommend some, but they aren't going to be the best lights around.
Next issue is the rubber strap. There are probably some available, but none that I know of off the top of my head. Most lights use an elastic fabric strap. You could probably replace it with some rubber if necessary, but the industry standard is something else.
The Skilhunt H03 mentioned in another comment is a really excellent light, it uses an 18650 size battery, which is the best compromise of size versus runtime that you'll find, and an unbeatable light for the money. You can find one here. You'll also need a couple of Batteries and a charger. This is the best setup you'll get for the $50 budget.
If by single-strap you mean that you don't want one going over the top of the head, an AA form factor light would probably be your best bet. The Thrunite TH20 is a steal for $30. It runs on normal AA batteries (not recommended because they leak, but doable in a pinch) or 14500 lithium cells. With the 14500 cells, it has over 500 lumens of brightness at the top level, and a ramping interface that lets you choose exactly the amount of light you want. It's lightweight, tough, waterproof, and the controls are intuitive. It has a very low moonlight mode that I'd rather have than any of my previous red mode lights, and there's a direct shortcut to it so you don't have to scroll through higher modes in order to get to it. If you go this route, you'd need some of these batteries and the charger I linked to above. Note that the battery and charger links are not to Amazon, there is a risk of counterfeit batteries buying there, so most people here buy from illumn.com or liionwholesale.com.
I realize these suggestions are a bit of departure from what you are asking for, but based on what I understand of your use case I think they would be your best options.
Thought I would share since this is a pretty recent development, and I was about an hour away from installing this at my vacation rental property... For those interested, The GoControl z-wave garage door opener will work with a Smart Things hub and is officially supported.
Pretty pissed that I won't finish the automation install at this house this weekend but really glad I didn't was a whole bunch of time installing this!
You could go even simpler by plugging your fish tank pump into a programmable electric timer like this one (Amazon, $13). You won't have the ability to water remotely, but how often do you need to water your trees outside of a regular watering schedule?
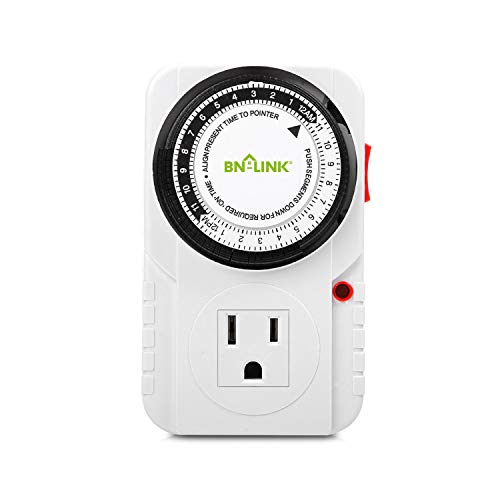
If you’re sure 15 minute cycles are good, then mechanical timers work great and are super easy to program. I’ve used these in the past:
Century 24 Hour Plug-in Mechanical Timer Grounded https://www.amazon.com/dp/B00MVFF59S/ref=cm_sw_r_cp_api_cqeYzb0HS34MQ
However, except price, digital timers are pretty much better in every way. I once had an issue where 15 minutes was too long for an ebb and flow I built. Pump was too strong, overflow didn’t drain fast enough. I switched to digital to do a shorter interval and the problem was mostly fixed. Not exactly a common scenario, but for a couple bucks extra, the convenience of digital can certainly be worth it.
This Plano box for storing my extra ships and components. I have 4.
This Plano tacklebox for storing and transporting the lists that I'm currently playing. You can definitely fit all that. I also recommend getting some bubble wrap. They sell it in large rolls at hobby stores like Hobby Lobby. I bought a roll for like $5 a couple years ago and I still haven't used it all. It makes for good padding.
I use a Plano 5231 for my tournament box.
http://www.amazon.com/Plano-Molding-5231-Organizer-Porsche/dp/B000HJ9514/ref=sr_1_4?ie=UTF8&qid=1425779123&sr=8-4&keywords=plano
2 Level Plano container has plenty of compartments up top for tokens, asteroids, damage decks galore. As well as flat ships like X-Wings etc, bottom level deep enough to hold YTs and Decimators with ease, as well as pilot cards, loadouts, and taller ships, like Ties and B-Wings
First I would try a real penetrating oil like PB Blaster. It will suck into those threads and start dissolving the rust and also lubricate between the threads. Give those nuts a little tap with a wrench or something lightly after you spray it. Give it about 20 minutes to work. Also make sure you're not using one of these.
WD-40 is sort of a general purpose chemical. It's decent at a lot of things, but not really great at anything.
Yeah that's easy. PB Blaster...by far the best stuff I've ever used at removing bolts or other severly rusted/stuck things(far far better than WD-40)
Just read these reviews...
http://www.amazon.com/gp/aw/cr/B000I2079E/ref=mw_dp_cr
Titanium Spork: https://smile.amazon.com/Light-My-Fire-Titanium-Spork/dp/B001E7S5BO/
Balisong trainer butterfly knife: https://smile.amazon.com/Amarey-Butterfly-Knife-Trainer-Unsharpened/dp/B01N2OPT60/
Novelty switchblade comb: https://smile.amazon.com/Stainless-Steel-Switch-Blade-Comb/dp/B00A967Q3O/
Kickboxing gloves: https://smile.amazon.com/Everlast-MMA-Kick-Boxing-Gloves/dp/B005OOFTA8/
Foam Nunchakus: https://smile.amazon.com/Sets-Ninja-Foam-Rubber-Nunchakus/dp/B01ER3FPNC/
(there's also Nerf swords on amazon, good for a quick battle)
MALL NINJA PATCH!!! https://smile.amazon.com/Maxpedition-Mall-Ninja-Patch-SWAT/dp/B00P18G9SI/
Rubber Throwing Stars: https://smile.amazon.com/Eight-Assorted-Rubber-Ninja-Stars/dp/B001NW1MEC/
And a Ninja Mask (that's good in winter too) https://smile.amazon.com/Balaclava-Winter-Fleece-Windproof-Women/dp/B01KG78NVE/
Not entirely mall ninja stuff, but I'm figuring you don't want the 11 year old to be lethal just yet ;)
I backpacked through Russia and China a few years back, and due to the different terrains encountered I had to pack quite a heavy bag (I think my total was almost 17kgs and I hadn't brought anything obviously unnecessary even if it felt that way).
I think you should bring:
There was another poster /u/flyinglotus1983 who'd had problems finding deodorant and similar items in China, that wasn't an issue for me but it does require some adaptions, so it's easier to bring but still a PITA. I didn't bring a computer, I simply brought my iPhone and iPad, you if I were you I'd consider if you need a computer. If you don't that's a lot of weight you can save.
I would however suggest an e-book reader. Books are heavy and I had loads of time on trains and on busses with nothing to do but read. I read more books in those months that I did in the 2 years prior. It will set you back $100, but in my opinion it's a well worth investment.
I recommend the Victorinox Fibrox, it performs well, it's comfortable and it's very durable. If you find the Fibrox handle too ugly, they offer the same blade but with a rosewood handle.
Care wise, touch up the edge with a hone to ensure it performs the best it can before you begin preparing food. Eventually however the edge will wear down, at which point you will need to sharpen it. For this I recommend the Shapton Kuromaku 1000, for guidence on how to use a whetstone check this playlist out.
The whetstone itself will also need to be maintained, as you use it you will wear it down unevenly and it will need to be flattened. Most people use a diamond plate but there is a more cost effective option that I use which is lapping the stone using SiC powder on glass, which is done like this (be aware however, that this method is MUCH louder and a bit messier than lapping with a diamond plate).
If all of this sounds like too much and you want a more simple care solution then you can get by very well by just using a ceramic sharpening rod. It combines the ability to touch up the edge quickly before use with the ability of a whetstone to remove material from the blade.
I got by with just a ceramic rod for a long time, but eventually bought whetstones when I wanted more control/better long term maintenance.
If you are OK with buying brand new, a few popular options here are some suggestions with Amazon (USA) links:
There are many other popular "solid state" keychain tools like the Shard out there, but I did not want to list out many of those.
I have one of these. It's a lifesaver for camping. You could most likely use non-potable water without ill effect.
Other options include scrap paper and reusable rags (boil them).
Haha, no, that's not too bright. It has multiple settings.
You won't be able to find a headlamp that's as bright as your handheld flashlight that doesn't use rechargeable batteries. You can always buy more cells and a charger. 18650s are very high capacity (about 5 AAs), so they'll last a long time if you're not using the brightest mode.
If you're really hung up on that though, the ThruNite TH20 is good from what I've heard.
Amazon has GE Z-wave 14291 Switches for $29.33
https://smile.amazon.com/GE-Repeater-Required-Works-SmartThings-14291/dp/B01M1AHC3R/
LOVE it. looks awesome and I think the effort really paid off.
my only question is, where did you buy the mount for the GPU? Not the PCI Extension cable, the part where it mounts the case.
edit: found it. but where did you buy it?
edit 2: oh, fuck me, it's on Amazon, now. a few months ago, you'd be luck if you got the notification from coolermaster before they sold out. I though I'd come back and leave the link incase someone else wanted it
GE: [zwave] (https://www.amazon.com/GE-Wireless-Lighting-Control-12722/dp/B0035YRCR2) or [zwave+] (https://www.amazon.com/GE-Wireless-Lighting-Control-14291/dp/B01M1AHC3R) and a [slave switch] (https://www.amazon.com/GE-Bluetooth-Wireless-STANDALONE-12723/dp/B00RKJS8MQ).
Edit: where were you planning on putting the motion sensor? GE/Jasco has combined motion sensing switches that work quite well out. 26931 and 26933 are the product numbers.
Replace the timer switch with a Z-Wave switch like this one: https://www.amazon.com/GE-Repeater-Extender-SmartThings-14291/dp/B01M1AHC3R
Then you can set up a timer in the Smart Lighting app so that whenever that switch if physically pressed, it will stay on for a certain amount of time.
Set up a sensor that monitors humidity like this one: https://www.amazon.com/ZOOZ-Z-Wave-Sensor-Temperature-Humidity/dp/B01AKSO80O
You'll also create a separate automation that activates the fan when that sensor reads above a certain humidity, and turns off when the humidity drops back down. That one is a little more complicated to setup, but not impossible.
I use the Aoyue 701A+, but a lot of people really like Hakko irons, here, like the FX-888. Honestly, it really depends on how much soldering you're going to be doing. I really don't recommend spending $80+ on an iron if you're only ever going to solder one or two boards, because that's not very good value. A lot of people recommending irons forget that. If you only plan to do a board or two, I'd recommend something with a lot of value, like this. This is what I started on. Nothing special, but a lot of features for this price and it worked fine for my first two boards.
This $20 Kit on Amazon might be goo entry level... I have NO idea if the iron is any god but have seen people use them and they work fine. This one comes with a multimeter for a few bucks more. The tool you will find a lot of use for is that curved tweezer. It can open switches, hold components, pick up clipped resistor/diode leads etc.
​
If you have never soldered do NOT let an expensive keyboard be the first time... get some PCB's and resistors and then watch youtube videos of soldering... Pete from 1upkeyboards has tons... you might need to scrub through to get to the soldering or just search youtube for soldering videos. Soldering is not that hard but if you do not know what you are doing it is easy to scew the board up and ruining a board sucks.
​
Think twice, solder once... the biggest mistakes are not thinking it through and then you find you soldered the switches and plate BEFORE the stabilizers or the Pro Micro before switches and desoldering is a pita and is easy to burn the pads.
​
Try the Sweet16 or the 9Key first. You have to setup the QMK software no matter what so those are nice affordable ways to get a board built fast and then build and flash your firmware.
​
Have fun.
To start you need an iron and some lead solder
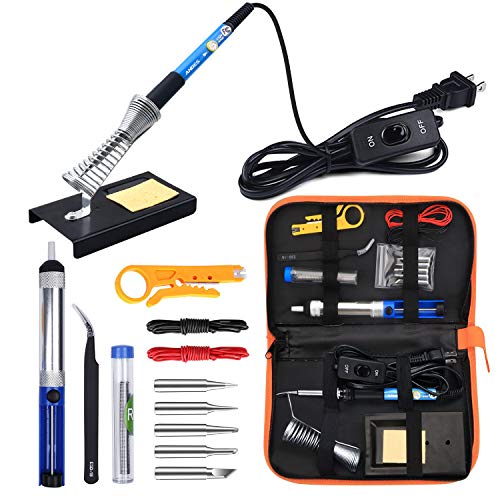
Link: ANBES Soldering Iron Kit Electronics, 60W Adjustable Temperature Welding Tool, 5pcs Soldering Tips, Desoldering Pump, Soldering Iron Stand, Tweezers https://www.amazon.com/dp/B06XZ31W3M/ref=cm_sw_r_cp_apa_GXDQAbRAZ26TT
You can get started now for pretty cheap. If you wanted to try and make an aux cable, you could follow my guide here, but I could recommend some cheaper materials so the up-front cost isn't so much.
I just bought some wire on Aliexpress that may be a cheap replacement for the mogami, and you can get a standard cheap soldering iron like this one if you plan on doing electrical work in the future anyway.
Is Preonic worth the investment?
I have a Planck rather than a Preonic but OLKB designs sturdy and reliable boards that are also very interesting.
I honestly think the Planck is like twitter. Having a very low word (key) count makes people more creative in how they express themselves. The Preonic is more like tumbler where more things can be done more easily.
Moving keys to other layers is fine due to the extra thumbable keys on the bottom row. The Preonic doesn't require as many layers because it has so many more keys, so the extra thumb keys aren't really necessary.
That said, it's a nice compromise.
Is it a good build for a beginner?
It's the same difficulty as any other keyboard build that has PCB components soldered on. All you have to do is add switches and through-hole solder them. It's definitely a fine way to learn to solder as long as you follow a few rules.
Most keyboard kits come this way with the exception of those like the Lets Split which you have to solder diodes and a promicro onto also.
The only thing More difficult is getting a PCB printed and buying diodes, resisters, and chips from DigiKey and then using a heat gun or oven to cook all the little things on.
What is a good soldering station?
Cheap ones will work fine. People around here seem to like the Hakko 888d which is what I use. The cheaper ones like this will also work fine. The extra $80 doesn't change much about how you work. Turn on the iron, heat stuff, sponge occasionally, don't touch it to your skin, then put it away safely.
Soldering rules for beginners
There are a lot of little things to do to maximize soldering experience. You'll figure these out over time. I thing this short list is enough to keep your board intact and blood in your body.
It does have it, but it's an aditional accessory you have to get. Cooler Master, CableMod and Lian li sell them.
Lian Li
Cooler Master
CableMod
Invest in some of this, kicks the shit out of WD-40 for breaking things lose:
http://www.amazon.com/Blaster-16-PB-Penetrating-Catalyst-oz/dp/B000I2079E
As someone working through this but a few years ahead of you, I'll pass along the list of stuff I've bought and/or wish to buy...
Hand Tools
Power Tools
Also, there are fluids to consider
Of these, I'd focus on the hand tools, fluids, and the Dremel. You can always ask someone to buy you a saw for Christmas. If you have these things on hand, there probably won't be a job come along that you can't handle at some basic level. I'm assuming you don't need yard grooming tools, because that's an entirely different list.
Buy some rust remover and use it after you have manually removed most of it with a wire brush. it will get into all the nooks and crannies and dissolve it away and leave you with a totally clean surface. if the rust is really deep it may have pitted the surface, but that shouldn't really be a problem for a jointer unless it's severe. Once the rust is gone you will know for sure what you need to flatten and true up.
The knives almost certainly need to be replaced and re-set, there are probably just a couple of set screws to adjust the cutter height on that model. Don't forget to finish everything with a coat of wax so it all glides smoothly.
Oh, and if any of the adjustment handles are rusted and stuck, B'laster is magical.
I didn't... I think the mods did. So I'm going to sneak in and repost.
What are some of the staple gadgets and gizmos you have to maximize portability, versatility, durability, and price, time, and space efficiency?
Here's my list:
-Feiyue shoes. Crazy cheap, they take up no room, and they don't look out-of-place in most situations.
-Light My Fire titanium spork. This is the only eating utensil I ever use, and I take it everywhere.
-Pyrex 4-cup Bowl. As long as I'm just making food for me, this dish is the only one I need. It can withstand pretty much everything, and the microwave-friendly lid is awesome.
-Platypus roll-up water bottles. Carrying around an empty water bottle is really annoying. These guys hold lots of water, and only take up as much space as the volume of water they contain.
-Milk crates and heavy-duty Rubbermaid containers instead of furniture. The only thing you can really do with a chair is use it as a chair, and the only thing you can do with a chest of drawers is use it as a chest of drawers. Might as well combine the two -- and make them really light and portable to boot!
-Lifetime folding table. This is the closest thing I have to furniture.
-Coleman 4-in-1 Quickbed. It's a twin mattress, or two separate twin mattresses, or a king-size bed, it's comfortable as poo, and it folds up to nothing.
-Night Ize Gear Ties. I've used these for everything from coathangers to patching the handle on a neighbor's lawnmower to attaching the basket to my bike.
-MicroNet Microfiber Towel. Linen actually takes up a surprising amount of room. This guy works great, and folds away to nothing.
-Wellspring FlipNote. I've had my FlipNote for 5 years and it's been in my pocket every single day -- whether I was in South Africa, military combat training, business meetings, or going out with friends. It's an idea journal, an address book, a wallet, a writing surface, a pen... all kinds of stuff, and it's super-slim and super-durable.
-Bug-out bag. This isn't quite the one I have -- mine was about $60 and came with a CamelBak and tube inside -- but it's the right idea. When I was discharged from the military, I fit my entire life in this amazing backpack with room left over for the full CamelBak and hiked up and down the California coast for several days with no problems. The same backpack's still the only piece of luggage I use for travel, for class, for everything. It expands from normal backpack size to HUGE.
TL;DR If I can't pack everything I own into my tiny car in one hour, I have too much stuff.
(Edit: This list isn't everything I own, but it's the things that I figure would be useful to anyone.)
The Leatherman Style PS is what I gotfor carrying in school, and it is supposed to be tsa compliant (as touted on their website here) however I have not tried it with mine.
Also, it is pretty small, but it's pretty much the only one I found without a knife that I knew is worth a damn.
Heres some stuff I found.
For the political
Everyone loves a swiss army knife.
Or a leatherman
Or another leatherman
Gun: A Visual History
I actually own the last book. Its a pretty cool little book to flip through now and again.
If its a Phantom go out at night with a flashlight AND a blacklight and it will glow in the trees when pointing the blacklight. Something like this would work: https://www.amazon.com/dp/B008133KB4/ref=cm_sw_r_cp_apa_LMZAxb2ERN6XF
This one works great for me. I have it set to remind me if the garage door is left open longer than 15 minutes during the day, or if it is open at all after bedtime. it will auto close at certain times of the night, and when I set the house alarm...
VIVOSUN 48"x24"x60" Mylar Hydroponic Grow Tent with Observation Window and Floor Tray for Indoor Plant Growing 2'x4' https://www.amazon.com/dp/B01DXYMQ9M/ref=cm_sw_r_cp_api_i_dx13BbGGT8164
VIPARSPECTRA Reflector-Series 300W LED Grow Light Full Spectrum for Indoor Plants Veg and Flower https://www.amazon.com/dp/B01B4GQ6MO/ref=cm_sw_r_cp_api_i_Hz13BbPVVN2TK
This light is good for 2 plants but you’ll eventually want to add a second for your tent. You definitely can’t fill the tent with just this light, but it’ll get you started.
iPower 2-Pack 1/8 Inch 8-Feet Long Adjustable Heavy Duty Rope Clip Hanger, Reinforced Metal Internal Gears,150lb Capacity https://www.amazon.com/dp/B018WIOEDA/ref=cm_sw_r_cp_api_i_wA13Bb58ZJ5GD
Century 7 Day Heavy Duty Digital Programmable Timer - Dual Outlet (Indoor) https://www.amazon.com/dp/B00MVF16JG/ref=cm_sw_r_cp_api_i_XA13Bb9NQJDG1
Comfort Zone CZ6C 6-Inch 2-Speed Clip-On Fan (White, 2 Fans) https://www.amazon.com/dp/B00JLUZSPC/ref=cm_sw_r_cp_api_i_.E13Bb05JK7B1
247Garden 5-Pack 3 Gallon Grow Bags/Aeration Fabric Pots w/Handles (Black) https://www.amazon.com/dp/B013JM3JAI/ref=cm_sw_r_cp_api_i_VG13Bb7MGJS2R
https://www.oregonsonly.com/samples/
These are great nutrients and basically foolproof. This free sample kit will get you through 4 plants full grows. I love these nutrients and even now use them in a reservoir (which people claim you can’t do but works great).
Dr.meter 0.1pH PH002 High Accuracy pH Meter/pH Pen Tester with ATC LCD 0-14 pH Measurement Range (PH002 pH Meter for Water) https://www.amazon.com/dp/B00PU0W35K/ref=cm_sw_r_cp_api_i_fI13BbNRES1BK
That will get you started on your first grow or two. I recommend auto blue mystic from nirvana for your first run. They are very low smell while growing so you can get by without a carbon filter. They’re autos so you can leave the light on 24/7, and they finish fast. Also turns out a great finished product.
https://www.nirvanashop.com/marijuana-seeds/815-blue-mystic-autoflower.html
Less than $40 for 5 seeds and very discrete shipping.
When you have a bit more $ you can add on additional items. Eventually you’ll want to upgrade to PFD sun boards or quantum boards, but you’ll probably want to get a fan and filter first:
6" Inline Fan - 395 CFM Exhaust Duct Fan, Built-In Speed Controller, ETL Listed, Pre-Wired 6 FT Grounded Cord - Great Use In Grow Tent With Carbon Filters, Light Fixtures, Intake. Fits 6 Inch Ducts. https://www.amazon.com/dp/B01L0D0UEQ/ref=cm_sw_r_cp_api_i_TM13Bb5170NC1
Activated Charcoal Carbon Filter 6" x 16", Up to 400 CFM, Premium Grow Tent Odor Scrubber, 1.8" Extra Thick Layer of Top Grade Activated Australian Virgin Charcoal-Great for Hydroponics and Growing https://www.amazon.com/dp/B01M0VN4I5/ref=cm_sw_r_cp_api_i_qN13BbEH9AG9W
Maybe you can upgrade to a 2x4 tray with reservoir so you can automate feeding.
If you don’t want autoflowers you can just do 12/12 from seed for faster harvest. https://www.royalqueenseeds.com/blog-how-to-grow-cannabis-from-seed-under-12-12-lighting-n330
But I really recommend doing the auto blue mystic for your first round or two.
Most recipes will probably be fine with an additional 2-4 hours. Crock pot recipes aren't very fussy. But that counts more for beef than chicken, because chicken dries out easier. A couple tips:
For chicken, use thighs instead of breasts. The thighs have more fat and will keep from drying out longer. And yes, chicken can still overcook and become dry while in a sauce. It's just less noticeable.
Beef will probably work great it's a bit more forgiving than chicken.
One other solution many people here do is to buy a timer you plug your crock pot into like this. That way, you can program it to turn on 4 hours after you leave. And especially if you're using frozen dump recipes this is a great solution.
Or I'm sure there's programmable crock pots you can buy to skip the plug timer.
Two things:
One. That light is made for a refugium. A lot of people will say that it's "harsh" or "cold" - that's because it's not really made for humans to look at - it's not a "display light". It'll work just fine for growing plants (it'll work really well, actually), but it will lack a lot of the "warmer" colors that look good to human eyes. Finnex makes a few others that are comparable: Plantet+ 24/7 (adjustable colors/remote/timer), Ray (bright white light), Ray 2 (very powerful white light).
Ultimately the light you choose will depend on a few factors. What kinds of plants will you grow? How deep is the aquarium (more powerful lights are needed for deeper water columns)? Do you mind if the light is "harsh"?
Of those considerations, I'd put the most weight on the tank dimensions and the plant specifications. Trying to push light through 24 inches of water for a carpeting plant? You'll want a Ray 2. Have an 8-inch deep tank that you want to grow some swords in? Don't waste your money on anything fancy.
----
Two. That CO2 kit is a money pit and here's why:
So let's say you spend 25 bucks on the kit plus 15 bucks for some cartridges. That's an upfront of 40 dollars with a 15 dollars per month in perpetuity. That means that one year of this kit will cost you $220.
Instead you could go for this paintball setup for the same price:
That build adds up to $205, will be WAY less work in the long run, much more stable, and simply easier to run. Also if you ever get sick of it and want your money back - it'll retain a lot of it's value. You could probably re-sell that whole set for 170-ish used. Also, that tank will last you a good few months before needing to be refilled.
CO2 can really help your tank flourish, but it takes a considerable buy-in. Go all the way or go home. Half-assing it to save money on sub-par equipment will just cause you headaches and a lot more money in the long run. I spent about 250 on my setup two years ago and haven't had to spend a PENNY on it since.
----
PS: /u/Elhazar, are you really gonna go around using the little 2 in "CO₂" and pretend like it's nothing? Well aren't you fancy!
https://www.amazon.com/Electric-Solenoid-110-VAC-Normally-Closed/dp/B007N0J98E/ref=sr_1_1?ie=UTF8&qid=1499072073&sr=8-1&keywords=water+solenoid+110v
https://www.amazon.com/Century-Plug-Mechanical-Timer-Grounded/dp/B00MVFF59S/ref=sr_1_6?ie=UTF8&qid=1499072056&sr=8-6&keywords=timer
+some hoses / tubes / enclosure for your electronics and a few hours of your time.
you should be able to construct a nice system for 50-100 dollar
Just get the Thrunite TH20 in neutral white:
https://www.amazon.com/dp/B01FCV32SI/
If you find that 250 lumens isn't bright enough for you (keeping in mind that high-end incandescent headlamps put out ~10-50 lumens), come back and ask about getting a 14500 lithium-ion battery and charger.
If that still isn't bright enough for you, know that even 18650 Li-ion headlamps can't sustain more brightness than that for long without getting too hot.
I'm a bit late, but here are some (pretty fuzzy) pictures I got from hunting them a while back with one of those UV Flashlights. They glow a bright greenish color!
On the wall
Three in a container
I'm in north west Phoenix and I don't see them too often in the house, but look around on the walls of your residence at night with a UV light/blacklight - I'm sure you'll find at least one or two of them just hanging out. You can find good flashlights for under 15$ on Amazon
You can find some of those rubber-coated tongs (or ice cube tongs) at the dollar store if you want something to safely relocate them elsewhere.
I got this Escolite for $13 and it's insanely bright. Haven't actually taken it out for a glow round yet, but I have used it for plenty of other glow-in-the-dark applications and it really makes discs shine.
I plan to DIY my own Whitestone Dome glass protector. I'm waiting until I can find a TGSP that:
This is the glue I'm going to use, it should be enough for 5 tgsp installs:
https://www.amazon.com/gp/product/B00IOPYLJE/
This is the IR curing light I'm going to use:
https://www.amazon.com/gp/product/B008133KB4/
I'm going to end up doing this for 4 devices, 2 x GS8 and 2x GN8. Total cost ~$40 or $10 each.
https://www.amazon.com/dp/B008DJRYIG/ref=cm_sw_r_sms_apap_4HuPH8htp6ZEX
This is the Hakko.
If you don't mind manual, then the Tenma will also work
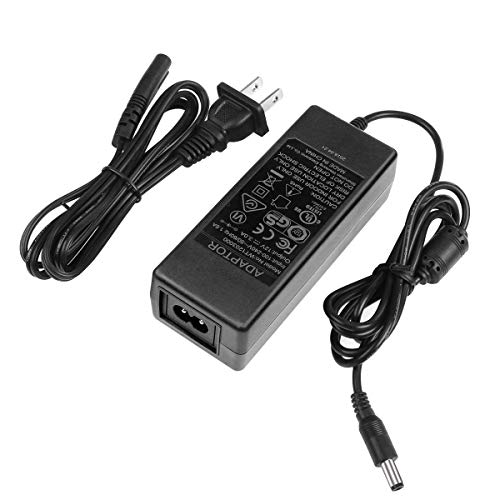
ac adaptor
right angle connectors
LED strips
LED strip lights are a great and cheap way to light up a mirror! This is a picture of my current vanity setup: http://imgur.com/HODyWkh
The whole setup should run you under $25 on amazon:
http://smile.amazon.com/Flexible-Lights-Daylight-Non-waterproof-Lighting/dp/B00HSF65MC?ie=UTF8&psc=1&redirect=true&ref_=oh_aui_detailpage_o00_s00
http://smile.amazon.com/HitLights-Light-Connector-Extension-Single/dp/B00L1MFRY0?ie=UTF8&psc=1&redirect=true&ref_=oh_aui_detailpage_o08_s00 (click the '10-pk gapless connectors' on that link)
http://smile.amazon.com/Power-Adapter-Transformers-Supply-Strip/dp/B00DKSI0S8?ie=UTF8&psc=1&redirect=true&ref_=oh_aui_detailpage_o08_s00
If you're taking your first steps into wiring, then you should get comfortable working with wires and tools. Here is a kit that will introduce you to wiring, soldering, etc.
Along with that, there are a few tools that might be useful to you:
And there are videos on YouTube that will teach you how to properly solder a wire to a soldering point. For that Elenco kit, the main goal is to get both the siren and the flashing lights to work, which it will if you wired everything correctly and used the correct resistors. It can be easy to make mistakes while learning to solder for the first time but most mistakes can be fixed, and it's very difficult to cause enough damage to render the board completely unusable.
Also, one note of caution: soldering irons are extremely hot, as the intent is to liquify the solder and attach it to the soldering points.
$10 on Amazon. Best $10 I ever spent for my Gitd pops.
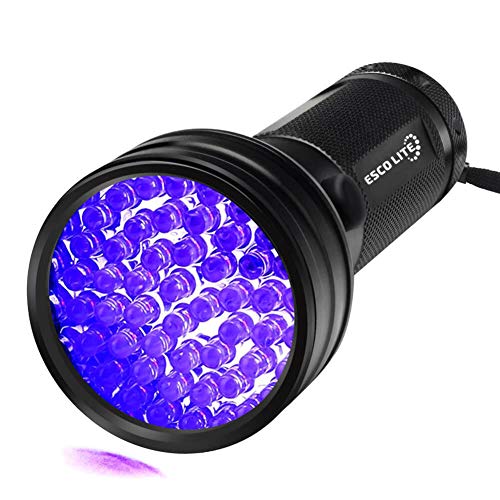
Escolite UV Flashlight Black Light, 51 LED 395 nM Ultraviolet Blacklight Detector for Dog Urine, Pet Stains and Bed Bug https://www.amazon.com/dp/B008133KB4/ref=cm_sw_r_cp_api_fzyRAb2QJAX50
Home inspection brought to you by:
Escolite UV Flashlight Black Light, 51 LED 395 nM Ultraviolet Blacklight Detector for Dog Urine, Pet Stains and Bed Bug https://www.amazon.com/dp/B008133KB4/ref=cm_sw_r_cp_api_3IbXzbAY1ATFC
I had 3 fistulas: 1 low, 2 high. They did a fistulotomyb the low one and put draining setons in the 2 high ones. That was 5 months ago.
I bathe twice per day, each time for minimum 30 minutes but often for 90-120 minutes per bath. I read books, check reddit on my phone, watch videos, etc. I'm trying to jerry-rig some setup where I'd feel secure having my laptop in there so I could work during the day. It's hard to overstate how good a hot soak feels.
I also have a bidet on my toilet and a travel bidet which I take with me whenever I'm not home. I use panty liners to deal with drainage and change those 3-4 times per day.
I'm so grateful to have flexibility with my job where I can work from home on days I don't feel well. This experience would be much worse if I had limitations on my hygiene.
Other than the fistulas and 5-6 watery bowel movements per day I'm not overly symptomatic (subject to diet) so I'm grateful for that.
Started remicade and methotrexate a month ago. GI & colorectal surgeon want to give it 9-12 months and see if the fistulas are closing up.
Bidet links:
Base $35 model, cold water only https://www.amazon.com/dp/B00A0RHSJO
Deluxe $60 model, hot and cold water https://www.amazon.com/dp/B00A0RX2UI
Travel Bidet: https://www.amazon.com/dp/B008CSDKSQ
You can get portable, hand held bidets on line too, though the maximum pressure of the water stream is less, like this
The Tenma 21-8240 is better and easier to use than that one.
https://www.amazon.com/Tenma-21-8240-Vacuum-Desoldering-Iron/dp/B008DJRYIG/
sauce
Container: Rubbermaid 20 gal Brute Bin
Lights: Kingbrite 60 W Quantum Board (if you want dimmable, ask for a dimmable driver like the HLG-60H-36B and a potentiometer)
Screws: You'll need lots of nuts, long screws, washers, and spacers to mount the board and PSU. First put the board on the lid and mark where to drill, then drill holes. Then put the power supply on the outside in the middle, mark and drill those hoses. Mount power supply and then flip lid over and mount the light, using long screws and nuts to hold it in place (the light should NOT touch the lid but be 1-2 inches from it, held in place by nuts). Drill small hole for power line, then connect. Finally, drill 3 inch hole for exhaust beside the light. You'll also need long screws with nuts to keep the fan and shrouds together. Be sure to use spaces anywhere the screw heads or nuts are touching the lid or the lights. For light spacers, I used rubber spaces between the nuts.
Cooling shrouds: 120mm Fan Duct Cooling Shroud to 4 Inch Vent Hose
90 degree 4 inch elbow for exhaust: 4 in. 90° Round Adjustable Elbow
4" to 3" reducer for exhaust: 4 in. to 3 in. Round Reducer
2x regular JB Weld to mount the reducer and 3 inch "trunk"
Fan: Delta AFB1212SHE-PWM 120mm x 38mm 4pin PWM+Tac Sensor Extreme Hi-speed 3700 RPM 151 CFM
Fan controller: Noctua NA-FC1 4-pin PWM Fan Controller
Fan power supply: LE Power Adapter, UL Listed, 3A, 120V AC to 12V DC Transformer, 36W Power Supply
Fan power supply adapter: CRJ Female DC Power Supply Plug to 12V Molex Power Adapter Cable
Fan molex adapter: Coolerguys Mini 3-4 pin Fan Adapter (Single)
2x ABS fan elbow (for "snout" intake): 3 in. ABS DWV 90-Degree Hub x Hub Long-Turn Elbow
Air filter for intake: 16.25 in. x 12.5 in. x 0.19 in. - 16.3 in. x .2 in. x 12.5 in. - CF300 Carbon Filter
Air filter (not pictured): VIVOSUN 4 Inch Air Carbon Filter Odor Control with Australia Virgin Charcoal for Inline Fan
Fan hose (not pictured): iPower GLDUCT4X8C 4 inch 8 feet Non-Insulated Flex Air Aluminum Foil
Watering device (not pictured): Janolia Automatic Irrigation Kit, Self Watering System, with Electronic Water Timer
Camera (not pictured): Wyze Cam 1080p HD Indoor Wireless Smart Home Camera with Night Vision (glue steel piece for magnetic base onto the upper side of the bin)
Notes: This design is very safe because it keeps all electronic components high in the bin. At the same time, using a battery powered watering system keeps you from requiring to ever open it. The lamp runs very cool. The PWM fan controller works well and keeping the air moving without using a lot of power (do NOT buy a cheap voltage modulator, I did first and it doesn't work nearly as well as the PWM controller). The Wyze cam is super cheap and lets you keep an eye on everything or make timelapses. Have fun growing your tomatoes!
I'm still pretty new to this myself, but like you I have some electronics experience in the past. I just got this Weller 40w iron station with a desolder braid/sucker and a solder tip cleaner. Oh and a more precise tip for the solder iron
I'm really happy with it all so far, and couln't imagine needing more for a while. A heat gun would be nice for de-soldering and reflowing premade boards (like modding Boss pedals), but that can also be done with a regular solder iron as far as I know. You can get the above for about $60 total, so it's a nice way to get your feet wet without a huge investment. Then you gotta add on components/enclosures/pots/switches etc. Maybe get a helping hands and/or circuit holder if you need
Oh and get a good multimeter. I went a step up from the $20 ones and got this one which I'm also really happy with.
Might be worth getting a solder wick for when you inevitably screw up. Solder vacuum isn't a terrible idea either. I have both, I use them for different things. A third hand is also useful. I find myself using the glass more than the arms but it's all useful. If the iron you buy doesn't come with one a brass ball is great for keeping your tip clean without cooling it off like a sponge will. Micro-cutter is useful, not sure if angled or straight is better, up to you I guess. Last but not least a pair of angled tweezers. You can get those anywhere.
These are all the things I have within arm's reach when I'm doing a project. Have fun!
You do have a problem...
It doesn't appear you have a case for them ;D
(I use these http://www.amazon.com/gp/product/B000HJ9514?psc=1&redirect=true&ref_=oh_aui_detailpage_o01_s00 but you have bigger ships than I)
Light My Fire Titanium Spork. Excellent reviews, and it's made of frikin' titanium.
EDIT: Weighs only 17 grams, and costs only $11. Pretty impressive.
I'm going to disagree strongly with anyone advising you to use ANY type of rod on this knife. This knife is is very hard. Well, the cutting edge is, the cladding isn't. The core steel is advertised as 63-64 hrc. That's hard enough to chip if you use any type or rod on it.
There are generally 2 types of honing rods. Abrasive and non-abrasive. Non-abrasive rods are meant to be used on softer steels like those found in European knives. The edge can be bent out of line by use and a honing steel rod can be used to straighten it back into line between sharpenings on a stone.
Abrasive rods are a bad idea on this knife (and all knives in general except serrated edges in my opinion) because of their hardness and shape. In order to keep the overall shape of the cutting edge you need a flatter abrasive surface (like a stone) or you could end up with a "hollow" spot in the edge profile. I apologise that i don'e have a picture to illustrate but imagine if you cut something and there is a place on the edge that can't contact the cutting board because it has been ground away too much.
For sharpening get a stone. I'd start with this one https://www.amazon.com/Kuromaku-Ceramic-Whetstone-Medium-Grit/dp/B001TPFT0G
Beautiful knife. Lucky husband. Enjoy
No, its most likely trash. You'll be much better off with a single shapton pro 1000.
https://www.amazon.com/Kuromaku-Ceramic-Whetstone-Medium-Grit/dp/B001TPFT0G
copy and paste from another post:
https://www.youtube.com/user/JKnifeImports
There is a knife sharpening playlist. I recommend watching the theory videos before the practice/demo ones.
You re most likely looking for double bevel sharpening, so skip the single bevel ones for now, unless youre interested.
I usually carry the Leatherman Style PS. It's pretty small though, but has pliers, scissors, flathead screwdriver/file, and tweezers. Plus the clip on it can be used as a bottle opener.
The Leatherman Style PS is travel friendly and has pretty much everything the dime has except for the blade.
1 (carried) Keychain
2 (on keychain) House key, Car key, Mailbox key, Office key
3 (on keychain) Leatherman Style PS
4 (on keychain) Streamlight Keymate
5 (on keychain) Data Traveler 16gb
6 (front right pocket) Kershaw Scallion
7 (front left pocket) Ronson Jetlite
8 (back right pocket) Chums Bifold
9 (in wallet) Tool Logic Survival Card
10 (in wallet) True Utility Pen
11 (in wallet) Forever Stamps
12 (left wrist) Timex Expedition Watch
13 (back left pocket) iPhone 4 with Mirrored cover
14 (face or neck) Gucci Glasses
15 (carried) Zojirushi insulated water bottle
Leatherman 831488 Style PS Multitool claims to be "TSA-Compliant"
Waterproof Flashdrive
Couldn't find any juice but had the headlamp for when I did early morning drone shots and visiting Herculaneum (looked deeper into caves). I already had it an its small so I threw it in. No knife, TSA approved multi-tool which we used a couple of times mostly for scissors. https://www.amazon.com/gp/product/B0058RX9NU/ref=oh_aui_detailpage_o07_s01?ie=UTF8&psc=1.
Weird Sandals?? Pretty normal for me and used this 95% of the time to walk/hike. Both straps on the back broke pulling the sandals on so Keen gave me credit and buying these guys http://www.keenfootwear.com/p/W-VERSAGO.html
As far as I know there's no smart bulb that hits anywhere near 1500 lumens. I'd recommend keeping her current bulbs (or picking up some 1500 lm/5000k LED bulbs) and getting smart switches/dimmers.
So you would realistically do smart switches instead of having smart bulbs. The only reason I would see to use smart bulbs is because you don't own the property or because you want the ability to change colors of a color lightbulb.
> Do smart switches always keep the smart bulbs powered?
It depends on what you mean by smart switches. You would realistically just use a smart switch like this. The light switch itself would always have power no matter if you turn the light on or off (unless you kill the breaker), so you could control it no matter the state of the light.
Your best bet if you want to continue using the smart bulbs, and not smart switches, is by buying the Philips Hue Dimmer switches. You would still need the power for the light to be on (meaning don't touch it/block it off if needed). They would still be at the mercy of people using the light switch itself.
But, unless you rent or need color control, it doesn't make sense to keep dropping money on this path.
Good morning /u/EFaden and congrats on the new house!
I'm not sure what HUB you have but there are a couple options if you want to keep the standard in-wall switch, but use scenes to automate things.
Disclaimer: I'm associated with Inovelli, so please keep that in mind. However, I'll lay out all the options that I know of since the scene switches are a passion of mine since they can do so much
On that note, there's a few brands that I'm aware of that have the scene functionality built into a normal in-wall switch and they are: GE, ZWP, HomeSeer, and ourselves.
GE, I believe has a double tap feature in their new Z-Wave Plus switches, but I just have their old ones in my house (which have been great) so I can't confirm, but I've seen posts about it.
HomeSeer was actually one of the first, if not the first companies to come out with this and I personally have one of their switches in my house as well and it's been rock solid. You can add up to I believe 10 scenes to it by single/double/triple/4x/5x tapping the switch (top and bottom). There's a specific device handler for it if you're on SmartThings.
ZWP, I don't really know much about, I just saw they had a scene switch too.
As for Inovelli, we're really proud of the work our guys put into the firmware this time and I'll highlight some of the features below:
As I said above, not sure what HUB you have, but we wrote device handlers for SmartThings and Drivers for Hubitat, but if you don't have those, the settings above can all be done via parameters (except for the dimming based on time of day, let me check with our VP of Tech)
Anyway, I hope that helped a bit. You can't go wrong with any of those brands. They're all unique in their own way and if you're thinking about Z-Wave, then they are some very reputable brands.
Have a great day and if you have any questions, feel free to reach out!
Eric
Founder | Inovelli
HomeSeer: (they have quite a few, so just type in, "HomeSeer Z-Wave Plus Switch" and they should all come up. I'm going to put the couple I know work with ST)
ZWP:
Inovelli
I started out with this one.
ANBES Soldering Iron Kit Electronics, 60W Adjustable Temperature Welding Tool, 5pcs Soldering Tips, Desoldering Pump, Soldering Iron Stand, Tweezers https://www.amazon.com/dp/B06XZ31W3M/ref=cm_sw_r_cp_apa_i_BFgFDbZKQ2TAX
The ferrule to tighten down the tips I accidentally screwed sideways and stripped the threads. So I can't use it anymore.
I upgraded to this and like it a lot. The only thing that stinks is you would have to buy a separate solder sucker.
Weller WLC100 40-Watt Soldering Station https://www.amazon.com/dp/B000AS28UC/ref=cm_sw_r_cp_apa_i_FHgFDbX2G3J1V
I have this one now and I really like it a lot. I also use 60/40 solder. I hear people rant and rave about 63/37. Either way.
Some thoughts on the IPS:
Overall, I think this really is the game changer everyone has been waiting for. I love my two AGS-101's but, with the prices rising and the availability of this kit, it's a no brainer. Again, I bought this cheap soldering iron and practiced a few times; that's really how easy the install is if you have steady hands. I cannot speak for this kit without the brightness options activated.
Hope this helps!
Cooler master vertical gpu mount. It works well but watch the clearances on your memory.
https://www.amazon.com/Cooler-Master-Accessory-MasterBox-MasterCase/dp/B071P862G1/ref=mp_s_a_1_1?keywords=cooler+master+vertical+gpu+mount&qid=1566572791&s=gateway&sprefix=cooler+master+vert&sr=8-1
Cooler Master Accessory: Fits MasterBox, MasterCase, Maker, H500P Series Vertical Display VGA Holder Kit w/ Riser Cable https://www.amazon.com/dp/B071P862G1/ref=cm_sw_r_cp_api_QFuPBb1PW0FV6
This is what you need. Y’all also have to cut the pci brackets on the back of the case of to fit the vertical gpu mount.
Coolermaster Vertical GPU mount and a ribbon cable. Amazon sells a combo. Cost about 35quid in the UK. Really easy mod =)
Here's a link Cooler Master MasterAccessory Vertical Graphics Card Holder Kit https://www.amazon.co.uk/dp/B071P862G1/ref=cm_sw_r_cp_apap_tpvueziJW2XSg
Edit: oh dam it's gone up by 11quid =(
Thanks! Cooler Master GPU bracket. Pccooler Moonlight fans.
I used this Cooler master vertical graphics card mount extension. Be warned that it will require a dremel to remove some of the metal to make it fit.
I bought the Linear GoControl Z-wave controller. It's compatible with most garage door openers, you just hook up a couple of wires into the garage door opener.
I have it connected to SmartThings, it works like a charm.
This device is currently natively supported in SmartThings and will both control your garage door and let you know if it's open/closed: http://www.amazon.com/GoControl-Linear-GD00Z-4-Z-Wave-Controller/dp/B00M75TEIU
GoControl/Linear edge
https://www.amazon.com/gp/aw/d/B00M75TEIU/ref=mp_s_a_1_1?ie=UTF8&qid=1502321646&sr=8-1&pi=AC_SX236_SY340_FMwebp_QL65&keywords=go+control+zwave&dpPl=1&dpID=41mR-vfm7WL&ref=plSrch
This works with some, but all, garage door openers. And when it works it's extremely way to use and install. I use mine with Smart things hub.
This is the light I got:
Roleadro Upgrade and Newly Developed LED Grow Light Full Spectrum 2nd Generation Series 300w Plants Light https://www.amazon.com/dp/B01HI3AFYM/ref=cm_sw_r_cp_api_TtlOzbXWSYYMW
I also just picked up a cheap $9 timer on amazon. Works like a champ. I keep mine on from 9:30am to 9:30pm
Edit: here is the timer
Century 24 Hour Plug-in Mechanical Timer Grounded https://www.amazon.com/dp/B00MVFF59S/ref=cm_sw_r_cp_api_AvlOzbW25N6CN
If you have amazon, order one of the timers like this one. I have one for my tank, and it's great! The lighting stays consistent and is one less thing to think about. I regularly am gone on the weekends without feeding, and my fish are all plenty fed. If you're worried, just feed them a bit more than usual on the last day you're there. I would definitely drop a sheet over the tank to keep the dust out.
I've been using this one for over a year without any issues - GoControl/Linear GD00Z-4 Z-Wave Garage Door Opener Remote Controller, Small, Black https://www.amazon.com/dp/B00M75TEIU/ref=cm_sw_r_cp_apa_3JsHAbS1DN09R
You have a lot of options. Easiest would probably go with a hub like a Samsung SmartThings hub and get zwave door/window sensors.
For the garage door you could use the GoControl outfit kit https://www.amazon.com/GoControl-Linear-GD00Z-4-Z-Wave-Controller/dp/B00M75TEIU
The fireplace gets a bit tricky depending on how the control is. Most newer homes with gas logs are on a milivolt system, meaning the switch on the wall that opens the gas valve doesnt actually have power, its just a signal wire. For this case you need to get power to that switch location which could be as easy as tapping into the lines of an adjacent switch. You need a Zwave dry contact swtich. https://www.amazon.com/Remotec-Zwave-Contact-Fixture-Module/dp/B00913ATFI
The best option, in my opinion, is one of these and an appropriate Z-Wave controller. Everything else will handcuff you to one specific cloud platform and limit your integration options.
I use the model that you’re talking about (GoControl/Linear GD00Z-4 Z-Wave Garage Door Opener Remote Controller, Small, Black https://www.amazon.com/dp/B00M75TEIU/) and it works great, and a shout-out to their support team for owning up to a known defect in the first version that I got where it would beep and do everything as expected, but not actually open the garage. So, technically, I’d say 5 stars, though I’d have to knock it down to 4 stars only for the trouble of replacing the lemon unit with a working one.
Every now and then, the replacement unit does exhibit this problem of beeping and not doing anything when I ask it to, but that’s so few and far between, and works if I go after it for a second time, that I’d still recommend this to you.
You can also try this. I have been looking at it, but have not used it.
http://www.amazon.com/Linear-GD00Z-4-Z-Wave-Garage-Controller/dp/B00M75TEIU/ref=pd_sim_hi_52?ie=UTF8&refRID=0PD4QQWQ1F30G2K0616A
I spent some time researching this, and ended up getting a z-wave garage door opener off Amazon (this one). It works well, communicates over Z-wave and reaches through several walls to my Z-Wave light switches to join the Z-Wave mesh my SmartThings hub communicates with - With that said, I found out rather quickly afterward that Amazon purposely prevents Alexa from working with any type of smart door/locking mechanism, which made me sadface. I could probably still get it to work through Smart Things custom scripting editor, but honestly I'm fine just doing it through the ST app.
I have the GoControl Z-Wave Controller and it works great with Smartthings.
I would get the hub earlier on since you want to monitor your washer/dryer, and if you have the hub you can buy devices that work with your hub so you can control everything from one spot.
The easiest solution for monitoring your washer/dryer are going to be z-wave devices. For the dryer, if it's electric, a sensor to detect vibration, or if it's gas, you can maybe get away with an outlet that detects current. For the washing machine, usually an outlet that detects current can work for you. It can be a bit tricky to get going though.
Skip the wemo plug and go with a z-wave plug. Any reason for the Lutron dimmers in specific?
For the bathroom fan, I use a z-wave smart switch. I don't have it tied to a humidity sensor, but I have it set (controlled by my hub) to turn off after 25 minutes, that way I don't have to worry about turning it off when I'm in a rush to leave for work. If I wanted to have it triggered by humidity levels or motion, or whatever all I need to do is add another z-wave device and I can make it happen.
The RainMachine seems cool, but pricey for an irrigation controller, no? I use the Orbit B-Hyve and it works great. I rarely ever interface with it honestly. I pull out my phone and run the zones occasionally to check that I don't have any broken heads, otherwise it just runs. It can be completely controlled from your phone, and can be controlled directly from the device as well. The other day I adjusted my schedule a little bit and increased the runtime on a few zones. Is your irrigation controller inside? If not, with the RainMachine you will also need to buy an enclosure to keep it weatherproof, whereas the B-Hyve is built into a weatherproof enclosure.
For garage door automation, there is a great z-wave option on the market. GD00Z-4 that will integrate into whatever hub you get.
Now as far as hubs go, I wouldn't go Wink personally. SmartThings is a bit annoying but it is the most used system on the market and there are some perks to that. You'll see recommendations for running Home Assistant, and that's a solution that requires some tinkering. HomeSeer is great, and if I started over completely I probably would have gone this route, but I have a bunch of zigbee devices, and the recommended way for using Zigbee with HomeSeer is to use another hub (Lightify Hub), and I don't really care for that solution. I'm using Hubitat now, it's an early product and I've had my frustrations with it but I like to tinker so it works for me.
Here's a comment I wrote the other day for someone else.
Edit: Set-and-forget with an inexpensive timer for your lights; here's my favorite.
So the wine fridge came with the house. Free.
Humidifier: $40
Crane Filter-Free Droplet, Cool Mist Humidifier, Blue and White https://www.amazon.com/dp/B00O1CQ9OO/ref=cm_sw_r_cp_api_i_FEJ1CbDZ3G50M
Fan: $17
AC Infinity AXIAL 8025, Muffin Fan, 120V AC 80mm x 25mm High Speed, for DIY Cooling Ventilation Exhaust Projects https://www.amazon.com/dp/B009OXSFBA/ref=cm_sw_r_cp_api_i_HGJ1CbDYVZV8J
Fan speed controller: $14
AC Infinity, Fan Speed Controller for 100 to 125V AC Axial Muffin Cooling Fans, Single Connector, for DIY Cooling Ventilation Exhaust Projects https://www.amazon.com/dp/B00809BQZG/ref=cm_sw_r_cp_api_i_7HJ1Cb633YCRV
Timer: $13
Century 7 Day Heavy Duty Digital Programmable Timer - Dual Outlet (Indoor) https://www.amazon.com/dp/B00MVF16JG/ref=cm_sw_r_cp_api_i_XIJ1CbQQD38YE
(I'm going to upgrade to a wemo smart plug here, at some point)
Exit vent: $10
Plastic Air Vent Grille Cover 3 Flaps Wall Duct Ventilation Grill With Net Plastic Louvre Air Vent Grille with Flyscreen Cover(1515CM) https://www.amazon.com/dp/B079N83QSG/ref=cm_sw_r_cp_api_i_GPJ1Cb3KV0CYM
(Can get for half this price at Home Depot)
Controller: $175 + shipping (day... $15)
https://www.auberins.com/index.php?main_page=product_info&cPath=37&products_id=642
Miscellaneous: $65
Total: $350 (ish)
Acquiring a suitable fridge will certainly add here. I got lucky and we had the wine cooler sitting around for years. It was literally in our house when we moved in.
Hope this helps!
https://www.dripirrigation.com/d071
https://www.dripirrigation.com/50-foot-1-8-inch-micro-tubing-with-187-od
https://www.dripirrigation.com/3-4-mnpt-x-12-pvc-riser
https://www.dripirrigation.com/sf005 (get 12 of these)
https://www.dripirrigation.com/s047 (get 24 of these)
https://www.dripirrigation.com/d075 (get 12 of these)
Add an water pump w/ a digital timer
https://www.amazon.com/Century-Digital-Programmable-Packaging-Security/dp/B00MVF16JG/ref=sr_1_5?keywords=digital+timer+electric&qid=1572359867&sr=8-5
https://www.amazon.com/EcoPlus-Adjustable-Water-Pump-172/dp/B00FH9L3QE/ref=sr_1_4?keywords=eco+pump&qid=1572360378&refinements=p_89%3AEcoPlus&rnid=2528832011&sr=8-4
Don’t mind at all! I’ll just post the whole setup below:
Using these T5s: https://www.amazon.com/dp/B00AKKUBDQ?ref=yo_pop_ma_swf
Using these LEDs: https://www.amazon.com/dp/B074Y32PFZ?ref=yo_pop_ma_swf
Using this outlet timer for 12 hours on/off: https://www.amazon.com/dp/B00MVF16JG?ref=yo_pop_ma_swf
Using these for gnat control (it was pretty bad at the beginning): https://www.amazon.com/dp/B00O2KYORO?ref=yo_pop_ma_swf
For your lighting, getting a digital timer will make your life so much easier. I have Century 7 brand from Amazon, only $13. https://www.amazon.com/gp/aw/d/B00MVF16JG/ref=mp_s_a_1_2?ie=UTF8&qid=1495566943&sr=8-2&pi=AC_SX236_SY340_QL65&keywords=light+timer+century&dpPl=1&dpID=41Qwe9JjZ5L&ref=plSrch
It has two outlets so one for heat and one for UVB. I have 2 basking lights + UVB so I plugged a power strip into the timer and now I can plug in more stuff! It'll turn your lights on and off for you every day so you don't have to worry about forgetting and won't have to wake up early to turn lights on. My lights are on at 7:30am and off at 9:30pm.
Here is a picture of my set up. Lights are about a foot away from the plants (could probably be close but they do just fine) and are on for 16 hours a day via this timer! :)
DETAILS ON SET UP
Light: Roleadro 300W LED light
Fan and filter: ipower 4" inline fan with carbon filter (my roomates are worried about the smell
Tent: Millard 30" x 18" x 36" tent
Odds and ends: A digital timer to schedule lights
A fan speed controller
3-gallon smart pots
A humidity and temp sensor
Plus a small clip on fan.
GROW DETAILS
I have three different strains, Northern Lights, Pre-99 big bud, and pure power plant, and then an unknown seed(which I planted about two weeks ago as the previous unknown seed turned out male, see previous post [here](https://www.reddit.com/r/microgrowery/comments/5qo1yo/early_sign_of_balls_details_in_comments/0. One in each 3-gallon smart pot. For the first two weeks of growing I had an 18/6 light schedule, and then switched to 12/12. (I'm essentially doing 12/12 from as early as the plant could respond to the change in light schedule). Over the past 15 days I watered twice with tiger bloom nutes.
I definitely made the mistake of not listening to your advice when I originally posted and am trying to grow 3 plants in a 1.5X2.5X3 foot tent...It is getting crowded, I should've listened and stuck with one, maybe two plants. Other than that I haven't had any problem that I have noticed other then a few spots of damage on leaves occasionally but no pests or wilting. I'm sure there are things I could've done better though. Thank you for all your help, I can't wait to get to harvest.
Sure! I used these lights from amazon. I think they are supposed to be for garages but they met the specs I was looking for (CCT: 6500k and 2100+ lumens per square foot per light) and were relatively inexpensive. I have 2 on each shelf connected to eachother by cords that are included in the pack. The pack also comes metal snaps that screw in, but I opted to attach using large command picture hanging strips. I kept the metal brackets just in case the command strips didnt work but so far they have been working great and I dont have to put as many holes in the hutch. Plus I have run the lights for 8 hours straight and can still touch the aluminum housing. I would say after that amount of time its like touching one of those hand warmer packs right when they start. Its kind of hard to see from the pictures but I did have to drill small 5/8th inch holes so the lights could connect as a continuous unit. This was honestly just for me because I am forgetful and have them hooked up to this timer. I also have some mini fans that I would like to put in so I can keep the doors shut... but I havent quite figured that out yet haha
Amazon has one here for $10!
Edit:Formatting/changed link to a better quality, grounded timer.
I'd go low tech with this.
Get a plug in appliance control module. Something like this (but whichever one will work with your system; if you have no smart hub get a mechanical timer like this one).
Wire the 24vac transformer that feeds your doorbell in through it.
Result- doorbell does nothing for the hours you specify, for under $50.
Alternatively, get a double pole relay and a small interval timer. During the day, pushing the doorbell rings the chime. During the night, pushing the doorbell opens an electronic valve that feeds a sprinkler head pointed at your front door for several seconds. If drunk college students are ringing your doorbell at night, they will quickly learn not to.
work smarter, not harder
A cheap mechanical timer can be configured for an endless 15 min on/45 min off.
I don't have super helpful advice as I don't have the space for a large collection. I use my lights year around, tho I truck my plants outside as much as possible during the summer.
I have these bulbs.
And I just pop one into a desk lamp, which is plugged into this automatic timer.
The timer does have a slight learning curve to it, but it's so nice to have something that does all the work of turning my light off and on.
The bulbs are great and cheap. I usually rotate my plants closer and further away every other day or so. I find if I leave them directly under it (about 5-6 inches away) for too many days, they will skip right thru pretty stress to ugly stress. In the dark depths of winter, I might pull out my red and blue light gooseneck as a supplement to make me feel better, but I really don't think I'll need it, and that usually has to be within 2-3 inches tops to be any good.
a cheap hps kit is a good start. Can grow plants through all stages. Just need a decent sized space like 6' tall, 4 x 4
want to spend more / better quality? get a cmh kit.
want to diy? build a LED COB kit
looking for more shelf compatible that are good for seedlings? get LED shoplights at your local lowes / depot
yeah you will want a timer. they are cheap / normal timers u see for like christmas lights
I have this 4 foot T5 with a stand, this shelf on top of a side table, this 2 foot T5 hooked to the bottom shelf with paper clips and key rings (lol), daisy-chained to this other 2 foot T5 hooked to the top shelf the same way. They are all run on two of these timers which are on ~10 hrs/day.
I have two of these plant racks from Lowe's in front of my south and east facing windows, I jimmied out the bottom shelf and sort of rested it on my windowsill and the edge of the stand (lol again). It's all very MacGuyvered.
Honestly, you are probably better off with a simple solder kit and a kitchen sponge.
Then either solder outside, or under the vent of your kitchen stove.
What the hell that's way too expensive for a soldering iron. You can get a good one for like 10-20 dollars. Here's the top amazon result to get you started: Full Set Vastar 60w 110v Soldering Iron Kit - Adjustable Temperature, 5pcs Different Tips, Desoldering Pump, Stand, anti-static Tweezers and Additional Solder Tube for Variously Repaired Usage https://www.amazon.com/dp/B01712N5C4/ref=cm_sw_r_cp_api_-13Yxb3PCAPT6
The battery is much more than required, but you'll need a 5v line and not 9v. What kind of stick is this supposed to go into? USB provides +5v.
I know you said "if I don't have to", but you should really learn how to solder. It's not hard to do it to an acceptable level, and it opens up an entire new world of projects you can do. This kit is very inexpensive and has a decent reputation. Youtube is the only other thing you'd need. https://www.amazon.com/dp/B01712N5C4/ref=cm_sw_em_r_mt_dp_U_pHn4CbPF64AF7
There is a pretty basic soldering kit on amazon that I have been using for the last few months and it has been amazing! Ill link it to you below.
https://www.amazon.com/Vastar-Full-110V-Soldering-Iron/dp/B01712N5C4
It is, but you'd be way better off if you soldered.
Permanent connections, no way a wire will come loose.
You really only need a basic iron, solder and heat shrink.
Hell, this is all you need. https://www.amazon.com/Vastar-Full-110V-Soldering-Iron/dp/B01712N5C4/
https://www.amazon.com/Uxcell-Sleeve-Shrink-Tubing-240Pcs/dp/B01461R89O
If you wanted, you can get a set of helping hands too and make your life really easy.
https://www.amazon.com/SE-MZ101B-Helping-Magnifying-Glass/dp/B000RB38X8
Soldering is very easy when you're just splicing wires. Not a ton of skill required. Get a roll of stranded wire and practice a bit.
When it's time to do the harness, cut away the excess, so you don't have a ton of wiring shoved behind the dash, slip a piece of heat shrink over one of the wires first and then do a lineman's splice, solder that connection and then shrink the tube over the bare connection.
I bought this cheap kit off Amazon and used it to desolder and then solder at least 200 switches.
It works quite well and you can adjust the temperature which is important.
The solder sucker included also works well enough, but is prone to clog up so I would empty it once in awhile and make sure that the tube isn't clogged full of dry solder.
You should be able to clean off the pads, re-tin them, and re-solder new wires to them.
 
You'll need a few tools:
 
Clean and tin the soldering iron tip:
 
Remove the solder from the pads on the heat bed:
 
 
Add some solder to the pads - you'll want a little bit of solder to cover the whole pad, with enough to make a small bump.
 
Tin the wires:
 
Attach the tinned wires to the tinned solder pads on the heat bed:
 
Also: You can use some isopropyl alcohol (rubbing alcohol) to clean up the excess rosin paste - it can get sticky.
 
Hope this helps!
YouTube videos, practicing on something that doesn't really matter too much, looking at a photo of a part. There are a couple arduino kits that require soldering but it's really easy, the Sunfounder starter kit is one I learned from. (It's 99% arduino stuff but there's a easy to solder part)
You really only need a soldering iron, solder, something to hold the iron (if you're crafty with a coat hangar you could make one yourself) and a sponge. A brass sponge is better because it's dry. You may want to get a desoldering pump if you want to remove solder. I got the bestseller kit on Amazon and I've been really happy with it.
Do NOT touch anything metal on the soldering iron when it's on. Burnt the shit out of my hand.
The power leads, assuming you mean from the battery, do take a bit more but that seems like way too long.
if you don't, you need something with adjustable temp...
I've reached the end of the life of the tip for this one
https://www.amazon.com/gp/product/B01712N5C4/ref=ppx_yo_dt_b_search_asin_title?ie=UTF8&psc=1
But i'm just going to try and find a compatible tip and keep using it, the iron works "well enough"... Obviously the $100 stations are going to be better.
The real secrets are
Those two things, + use 350 - 400 C, and soldering is almost fun now!
this. the man makes the iron, not the other way around, although a good tip does help lol. hell the iron i use now is a cheap one as i don't have the room at my desk for a real solder station. i would recommend the iron to anyone starting out looking for one to learn with or use for stuff. and like you said use leaded(rosin core) solder, lead free solder is trash. little tip if using tape to hold the wire, try not to get it too close to the end of the wire or it can melt.
Yeah, an 'ok' soldering iron could cost you around 15 bucks. I used this one for my whitefox.
Which lights are you looking at?
This or This are excellent starting points for a headlamp, have awesome run times and the batteries are rechargeable (although, not when the light is running).
If you go with either of those, get the neutral white version, not cool white.
You're a credit to flashlight nerds everywhere! Cheers!
https://www.amazon.com/ThruNite-TH20-Neutral-White/dp/B01FCV32SI/?tag=parametrek-20
I've had my eye on the Thrunite TH20 for a while! If I win, I'll be sure to weight it for you!
https://www.amazon.com/dp/B01FCV32SI/ref=twister_B01FCY03J6?_encoding=UTF8&psc=1
Thanks for the giveaway!
ThruNite TH20 NW
Would like the Thrunite TH20 for car use! Thanks for doing this.
http://www.amazon.com/ThruNite-TH20-Neutral-White/dp/B01FCV32SI/
The ThruNite TH20 (neutral white) is right in your range, but I think something with an optic/frosted lens would be better suited for working on cars. So...
It's a bit over your stated $30, but I think the Skillhunt H15 (neutral white) fits the bill. The TIR optic should spread the beam nicely and work very well for working on cars. There is a group buy thread over on BLF that might knock down the price some as well.
Both of these are AA/14500. If you'd be willing to go with a 18650, you could get something with more output/runtime, but that'd be up to you.
The signal has always seemed a bit gimmicky to me - I think you'd be better off sharpening the knife before you head out, and getting something like a wave or a rebar along with a larger dedicated fire starter. If you need to hammer in a tent peg, find a rock to bang them with instead of a $110 tool.
For the headlamp, the Thrunite TH20 or the Manker E03H are made out of aluminum and I would prefer them over the BD spot, but that's just me.
I highly recommend the Thrunite TH20 headlamp. Durable, fairly lightweight, simple usage, waterproof; perfect for camping. It can get pretty bright if you need it or has very low levels, too. More floody but with a defined hot spot. I recommend the neutral white version. Uses a single regular AA battery or you can use rechargeables if you like. A single battery gives decent run time unless you run it on high all the time. For camp use, I generally don't use it past 15-25% brightness. $29 on Amazon.
ThruNite TH20 Neutral White 520 Lumen CREE XP-L LED Headlamp https://www.amazon.com/dp/B01FCV32SI/ref=cm_sw_r_cp_api_ayOYAb2GT9JK5
Edit: the TH20 isn't bulky on your head like an 18650 based headlamp, but if you need lots of brightness for longer run time, you might consider one of those instead. I use it in pitch black backpacking situations and don't need anything brighter, in fact I've mostly used comparatively very dim headlamps for over 20 years, until getting the TH20.
Awesome!
ThruNite TH20 Neutral White 520 Lumen CREE XP-L LED Headlamp
The Plano 5231 is very popular. Here you can see it in use. Note: I've added 2 Z-95's, 1 Phantom and 1 Defender and it all still fits.
Sorry, that made me laugh. Not piano! P-L-A-N-O :)
Plano is a brand name. Here's an example from Amazon: https://www.amazon.com/Plano-Molding-5231-Organizer-Porsche/dp/B000HJ9514/ref=sr_1_3?ie=UTF8&qid=1466449633&sr=8-3&keywords=plano
Although the way Fantasy Flight is pumping out expansions for Eldritch Horror these days, a piano box might eventually be necessary!
Until your collection grows, one or two of these will serve you well. I use two currently and strap them together using suitcase straps.
https://www.amazon.com/Plano-Molding-5231-Organizer-Porsche/dp/B000HJ9514/ref=sr_1_3?ie=UTF8&qid=1466958793&sr=8-3&keywords=plano
Save for the epic ships, I essentially have a very similar number/distribution of ships as you. I use the Plano 5231. One for the rebels and one for the empire. It does a good job of holding all the small ship, cards, and maneuver dials in the bottom. And the top works well for all the small focus/evades/TLs and such on the top. The only problem I have with it is the storage of the larger ships. I can only seem to fit one YT-1300 in for the rebels, and one firespray plus lambda for the empire. Over all for the price I am happy with them, and there is still room for small ships. I just need to figure out something for larger ships
This case made by Plano is outstanding for holding everything Carcassonne. The compartments on top hold all of the tokens and them some with each being able to have their own separate compartments, and the inside compartments hold all of your tiles plus room for labeling and plenty of room for extra stuff as well. A few pieces of paper like your collections rules can also fit inside as well.
I use these for Lego, would work well for AR parts.
Soak it up really well with a penetrating lubricant. I'm fond of PB Blaster and Knock 'er Loose. Soak it well over several days. Then, gently heat the outer section with a torch, and twist.
Alternatively, you can use a jack to separate them. You'll need a way to attach to both sections, with a grip of some sort, then just use the jack to drive them apart.
Say hello to my little friend.
WD-40 is great for some things, like moisture displacement and cleaning rust. It is not a penetrant, so it won't eat it's way into the corrosion (if there is much) on the threads.
PB Blaster is technically a penetrating catalyst, it's entire purpose is to penetrate into things and allow you to break them loose more easily. It actually pulls itself into the crevices and lubes things that WD-40 would never get to.
You drill into it with a reverse (left handed) drillbit, running your drill in reverse. That will probably bring the bolt out, but if it doesn't you use an Easy Out screw extractor to screw it out. Here is a kit with both left handed bits and extractors. You can get individual tools at a local hardware store. Soak it well wit PB Blaster first.
Also, soak the bolts in PB Blaster. I swear that stuff is straight magic.
http://www.amazon.com/Blaster-16-PB-Penetrating-Catalyst-oz/dp/B000I2079E
A lot of people are saying leverage, which will work. Alternatively, go with a power tool! Find the right sized bit (no idea if any of that set matches) and an impact driver and you should be able to unscrew it without much difficulty (after much soaking in penetrating oil).
Seriously, replace them for your boat kit. There's a lot of overlap with rock climbing, and any safe climber will tell you that exhausted gear like this should be retired from your active kit because someone might inadvertently use it.
I know the situations where you'll need a 23kN carabiner on the river are vanishingly small, but you don't want to risk it. Corrosion is insidious, too, and you might not be able to tell how much strength has been lost by visual inspection. If you've got a biner on the river or crag, it should be able to be used for all original purposes (even if it's marked) so that you don't accidentally use a bad biner in a critical situation.
If you're going for non-survival use, PB Blaster is insanely useful, as any mechanic working on cars in cold-weather climates can tell you.
Conceivably, if you're a dab hand with a blowtorch, heat and vicegrips could get the job done, but you really, really, really can't use them for anything safety related if you do that.
Read up on freeing stuck bolts on cars; I think it's your best bet. Don't use those biners in your gearbag, though.
Try some pb blaster on all the moving metal joints. They could be rusted or otherwise frozen with grime.
What tools do you have?
For longevity target rust. Sand, grind, scrape it down and paint it with hightemp paint. You can replace the grates if you want just search cooking/grill grates on Amazon and you'll probably find something that fits. Personally I'd replace the handles. I hate a grill that feels like it wants to crush my hand when I'm taking a peek or sticking in a temperature probe.
IF I were cleaning it up I'd take this to it, inside and out, and repaint the whole thing. If you don't have an angle grinder a Drill version works (preferably with a cord, batteries don't last that long). I'd remove/replace all wood (handles particularly), hardware, screws, bolts, anything that comes off. Maybe something with the hinges, probably some PB Blaster to break up that rust then some WD40 to coat/lubricate whats left.
To use it, clean off the grates and smoke something, it's usable as is. Get it nice and hot then bring the temperature down and let it go. You may find that it is to big/small for you. People underestimate the charcoal and wood required to keep a smoker this big going. I personally couldn't use one this big, smoking 3 times what you eat sounds good til you throw away good brisket or ribs a week later. If you want to smoke as much as possible get the smoker that makes it easy, not the one that feeds your extended family once a year. For free, just use it and see before you invest time/money.
6.75" according to Amazon
Titanium Spork
I'm got an alcohol stove, GSI Tea Kettle, and a titanium spork. I take a little aluminum cup that I use for instant coffee/tea but I've been thinking about getting a sea to summit xmug because they pack down nice. One of my favorite things is a little table by cascade wild.
Yup! I hadn't either until I stumbled upon it. This guy.
Salt/Pepper: In a small sandwich bag inside Ziploc bag (with other spices) then rubberband it together to prevent opening.
Oil: Small Nalgene bottles. Durable, seal very well, easy to clean.
Spatula: Silicone Spatula good to 500F (or more) similar to this but a bit lighter.
Utensils: Titanium spork and a plain-edge Spyderco knife I carry anyway.
Tongs: Lightweight tongs (metal).
I never carry a ladle. I eat/drink out of pot or pour/scoop with spatula.
*Edit for formatting
A Titanium Spork means never having to eat your icecream with a stick.
Seconding the wine bottle gift bag idea, as my first thought would've been something like a large Crown Royal bag ;) I would suggest this as a good starting stone; he can get a lower or higher grit stone at some point if he wants, but this will serve just fine.
> Let's start with my bread knife, which works quite well.
looks fine
> Then we have this, which I got in a set but have NO IDEA what I'm supposed to use it for. It looks like it's supposed to hurt and not cut.
toss
> Then there are these two.
The second one is a steak knife (raised tip). The first one baffles me. I wouldn't use either for vegetables
> Also, I have this peeling knife, which is the one I'm most frustrated with. Peeling onions or anything that I can't use a peeler for just takes so long.
do you really use a bird beak paring knife for peeling onions? why not just cut off the ends then cut it in half and peel off the top layer? the victorianox one should be a fine replacement but I wouldn't use it for onions.
> Now to my general cutting knifes:
a paring knife, two chefs knives and a santoku. The Ikea santoku is probably the best out of the three, at least with honing and sharpening. i'd toss the other two. The santoku should be able to take care of almost all of your needs as its a general purpose knife
---
Considering your budget, I would probably pick up two knives - https://www.chefknivestogo.com/fufkmgy21.html and https://www.chefknivestogo.com/fufkmpe15.html. If you can only pick up one i'd pick up the first one.
Alternatively you can get the Victorinox fibrox for all the same sizes.
For sharpening I would pick up https://www.amazon.com/Kuromaku-Ceramic-Whetstone-Medium-Grit/dp/B001TPFT0G and watch a few youtube videos on how to sharpen. practice on the Ikea knife before using it on the new knives. The Ikea knife should be sharpened at a steeper angle than the japanese knives.
This?. Would you mind giving me a high level explanation of the grits when it comes to sharpening knives or linking me some resources? I am good with the water vs. oil and natural vs synthetic debate and can find how to videos but would like a deeper understanding of the grit thing and beginner vs advanced. Thanks.
Get a shapton pro 1k, it's a splash stone and that's all you need ATM.
$60 can on Amazon so you still have $20 left for naniwa nagura
Ha No Kuromaku Ceramic Whetstone Medium Grit #1000 by Shapton https://www.amazon.ca/dp/B001TPFT0G/
As for your next knife purchase, head over to /r/chefknives and fill out the recommendation form. Dalstrong is mediocre. For the price, you can do much better.
Also, as an alternative to a cheap sharpening system, there are very good, regular stones (not part of a system) that can be had for as low as $36 (like the Shapton 1000. It takes a little more practice, but it sounds like you have the knives to practice with. Youtube is quite the teacher. Just another option to consider.
I prefer waterstones for kitchen knives, and have a pretty extensive stone setup but a single ~1k grit stone will be just fine for most people. If your knives have any significant chipping you might want something coarser, but otherwise a 1k should be fine (given a little patience if they're in bad shape). No real need to go above 1k for most people, I'd recommend This Shapton 1000 or This king 800 grit. The king is a bit softer and will dish faster than the shapton one will. If you're able to flatten it easily this isn't an issue.
In terms of the actual sharpening technique, This is a good starting point for the basic movements, Jon really knows his stuff and if you watch through all the videos in that playlist you'll be set. I personally switch hands when i flip the knife as I find it's a more natural movement. So long as you hit both sides evenly, raise a burr, then remove this burr correctly you'll have a sharp knife.
Hi,
I got the shapton Kuromaku 1000 (Japanese Shapton pro) and have been very happy with it. It’s also right within your budget.
https://www.amazon.com/Kuromaku-Ceramic-Whetstone-Medium-Grit/dp/B001TPFT0G/ref=mp_s_a_1_1?ie=UTF8&qid=1541257897&sr=8-1&pi=AC_SX236_SY340_QL65&keywords=shapton+kuromaku+1000&dpPl=1&dpID=41uhuBgfaBL&ref=plSrch
I also got a large silicon pet mat for $10 to act as my sharpening pond.
Not sure what you mean by "sharpeners" but from your 13 - 200 range I'm guessing you're looking at pull through devices that range from a cheap piece of plastic crap with some sort of abrasive "V" in it to the electric powered, better built machine with multiple abrasive "V's" in it.
The pull throughs at either end of the price spectrum are not good for sharpening any sort of quality blade. They grind off too much steel, They only work with symmetrical blades. I would not leave any of my knives in the same room with one.
Suggest you consider a sharpening stone or two. Whet stone sharpening is a bit of a skill but it's quick to become proficient with it. Your budget would support a single mid range grit stone, reach a little and you could pick up a finishing stone as well. I like the Sharpton Pro 1K as a first stone https://www.amazon.com/Kuromaku-Ceramic-Whetstone-Medium-Grit/dp/B001TPFT0G
Learning to sharpen can be a skill that will serve a lifetime.
I know you said you wanted a Japanese handle but I think you should consider a Misono Molybdenum. It was my first knife and I’m honestly still happy with it.
Its inexpensive, tough, takes a pretty good edge, and has good fit and finish. It won’t take as keen of an edge as the knives you mentioned.. but its easy to sharpen which is great if you’re learning how to.
I own a Ginga too and its pretty amazing but I wouldn’t want it as my sole knife. It’s a really thin blade so its a bit more fragile than the Misono. I personally would rather have a tougher knife if I only had one.
I also really like the Hi-soft cutting board. It’s easy on knives, has some weight and theres very little maintenance. Just don’t put it in the dishwasher.
Misono Molybdenum 240mm ~ $112.50
(Korin is having a 15% off sale on knives right now)
http://korin.com/HMI-MOGY-240?sc=27&category=280076
Hi-Soft Cutting Board ~ $48.00
(From Korin. Combine the shipping with the Misono)
http://korin.com/HiSoft-Cutting-Board_3?sc=28&category=286082
Bester 1200 ~ $55
(Leaves a good edge alone)
OR
Shapton Pro 1000 ~ $35
(I like the Bester better but this is a really good deal on Amazon Prime)
https://www.amazon.com/Kuromaku-Ceramic-Whetstone-Medium-Grit/dp/B001TPFT0G/ref=sr_1_1?ie=UTF8&qid=1500081962&sr=8-1&keywords=shapton+pro+1000
Suehiro Rika 5000 ~ $50
(Optional.. nice to have tho)
Atoma 400 ~$60
(For stone flattening. You can buy a cheaper plate if you want)
https://www.amazon.com/Generic-Diamond-Sharpener-Medium-400/dp/B0031KNR2O/ref=sr_1_1?ie=UTF8&qid=1500081982&sr=8-1&keywords=atoma+400
I know the link says generic.. but this is an Atoma 400. Just make sure you buy the one that is Amazon Prime
I wouldn’t spend all $500 at once. You can always buy a nicer knife later.. and having two knives is convenient anyway.
Get a shapton kuromaku 1k. Cheapest and best 1k outside of the chosera and less than half the cost.
Here it is - https://www.amazon.com/Kuromaku-Ceramic-Whetstone-Medium-Grit/dp/B001TPFT0G
If you want to stay with just 2 stones, get a Japanese stone or coticule. You will find small ones for under $40 and large ones upwards of $1000+++
If you have any specific questions, send me a pm. I have hundreds of stones.
Checkout /r/chefknives and /r/sharpening, they have a lot of resources on all the stuff youll eventually need and how to get started learning to sharpen. As far as stone recommendations I would say a good starter spot is the King 1000/6000 or a combination of the Shapton stones if it’s in your budget. Personally I think just the Shapton 1k is a good starting spot and build from there. Here’s the link to the Shapton 1k
I'd go for something like this:
That's just $90. Maybe much later when you really need a rough stone, get the 320 Shapton or something in Diamond for ~30
Left to right
Muji Eraser
[Sigg 0.6L water bottle] (http://siggnorthamerica.com/shop/classic-traveller/0-6l-classic-traveller/)
[Muji Gel Pen] (https://www.muji.eu/pages/online.asp?Sec=13&Sub=52)
[Alvin DRAFT-TEC RETRAC 0.3mm] (https://www.amazon.com/Alvin-DR07-Draf-Tec-Retrac-Mechanical/dp/B001DKJ55C)
[Leatherman Style PS] (https://www.amazon.com/Leatherman-Style-PS-Multi-Tool-Black/dp/B0058RX9NU)
Chapfix+
Anker SoundBuds Sport IE 20
[Fisher Space Pen] (https://www.amazon.com/Fisher-400B-Space-Bullet-Pen/dp/B000WGD13U)
[Leatherman Wave Black] (https://www.amazon.com/Leatherman-Multi-Tool-Black-Molle-Sheath/dp/B0009JS2ZW)
[Mee Audio M6 Pro] (https://www.amazon.com/MEE-audio-Universal-Fit-Noise-Isolating-Detachable/dp/B015S2I6A0)
[Random Knife] (http://www.smorgasburg.com/)
[Corsair Voyager Go 32GB] (https://www.amazon.com/Corsair-Voyager-USB3-0-Android-devices/dp/B00HVT27CW)
[Kershaw Cryo 1555Ti] (https://www.amazon.com/Kershaw-1555TI-SpeedSafe-Folding-Knife/dp/B0074FI28Q)
[Alpine Swiss Slim Wallet] (https://www.amazon.com/Alpine-Swiss-Genuine-Leather-Pocket/dp/B00EOYKEEA)
[Anker PowerCore 10000 with Quick Charge 3.0] (https://www.anker.com/products/A1264011)
[Seiko SNDC31] (https://www.amazon.com/Seiko-SNDC31-Classic-Stainless-Chronograph/dp/B004JY0KP8)
[Lenovo T440s (256GB Samsung 840 EVO, 12GB ram, 1080p touchscreen, i5 4300)]
(http://shop.lenovo.com/us/en/laptops/thinkpad/t-series/t440s/)
[Motorola Doid Turbo Ballistic Nylon 32GB] (https://www.verizonwireless.com/smartphones/droid-turbo/)
For Light Carry:
multitool with no blade
style PS
Looks like:
LEATHERMAN https://www.amazon.com/dp/B0058RX9NU/ref=cm_sw_r_cp_apa_i_IjGmDbDPGMT4Q
Leatherman Skeletool is a great item, which you should be able to get in that range. I got the upgraded Skeletool CX for under that from r/knife_swap.
If you want smaller try the Leatherman Style or Gerber Dime . The Style comes with scissor main tool or pliers.
Full size I’d suggest the Leatherman Wingman .
I'd try to build this EDC with the assumption that I could keep it for years (if not indefinitely):
Wallet: allett Ultra Slim Sport Wallet - $15
Knife: Opinel No. 6 Carbon - $12
Multitool: Leatherman Style PS - $25
Light: Olight i3s - $15
Pen: Zebra Sarasa Clip - $3
Watch: Timex Weekender - a variant under $30
I EDC a Style PS right now, and have EDCed the Olight i3s and Zebra Sarasa Clip in the past. I own (but have never EDCed) an Opinel No. 8 stainless, and it's excellent, but I wish it were smaller and could sharpen up even more, so No. 6 carbon it is. I've handled allett wallets in stores and trust their usability and quality. The Timex Weekender is the only one on this list that I haven't had direct experience with, but it's the cheapest watch I could find that I'd feel I could keep for a long time.
I would consider any tailstanding AAA light under $15 with a reasonable high and low. I went with the Olight i3s because I've used it, but I'd also take the Lumintop Worm or Thrunite Ti3 if I could get it under $15.
I couldn't give up my blade, so I settled on one of these.
Leatherman has one without a blade that is TSA approved but very limited in tools. I brought it with me everywhere but Thailand wanted me to check it in so I tossed it.
https://www.amazon.com/gp/aw/d/B0058RX9NU/ref=mp_s_a_1_1?ie=UTF8&qid=1486184629&sr=8-1&pi=AC_SX236_SY340_FMwebp_QL65&keywords=tsa+approved+leatherman&dpPl=1&dpID=41M01p2aAJL&ref=plSrch
Buy one of these bad boys if you want that good glow you’re looking for
Escolite UV Flashlight Black Light, 51 LED 395 nM Ultraviolet Blacklight https://www.amazon.com/dp/B008133KB4/ref=cm_sw_r_cp_api_c2o3AbRPH4TZH
$10
Awesome UV Flashlight
I have this one. https://www.amazon.com/dp/B008133KB4/ref=cm_sw_r_sms_c_api_zWuDzb6ZJRA79
I used this one over the summer and it worked perfectly https://www.amazon.com/dp/B008133KB4/ref=cm_sw_r_cp_apa_3JpOBbA4VQVHF
I actually really like the idea of wearing a florescent vest and using a black light instead. It would make you stand out even more and it would not mess up your night vision.
I have one of these, works great: https://smile.amazon.com/Esco-Lite-Ultraviolet-flashlight-Blacklight-Battery/dp/B008133KB4/
Just keep in mind what /u/NinjaCoder said, you cannot unsee what it reveals. :)
Buy one of these to find them and get something sturdy to smash them with.
This is a young Bark Scorpion (note long, thin pincers) and their sting is pretty harsh.
Source: I have killed a few dozen this year after finding them in our house and being stung.
Bought it on amazon for $10
Here’s the link: https://www.amazon.com/gp/aw/d/B008133KB4/ref=pd_aw_lpo_468_bs_img_1?ie=UTF8&psc=1&refRID=J68HS6WT4KYAK1KCBYD0
My shower tips (mostly include ways to avoid showering)
Canada: https://www.amazon.ca/Brondell-GS-70-GoSpa-Travel-Bidet/dp/B008CSDKSQ/ref=sr_1_5?keywords=portable+bidet&qid=1564670246&s=gateway&sr=8-5
USA: https://www.amazon.com/Brondell-GS-70-Portable-Convenient-Capacity/dp/B008CSDKSQ/ref=sr_1_5?keywords=portable+bidet&qid=1564670345&s=gateway&sr=8-5
I don't live in a dorm, but I use this when traveling
https://www.amazon.ca/Brondell-GS-70-GoSpa-Travel-Bidet/dp/B008CSDKSQ/ref=sr_1_1?ie=UTF8&qid=1466004533&sr=8-1&keywords=portable+bidet
I bought one of these portable bidets for post pregnancy, but now that toilet paper usage is getting ridiculous, maybe I should just keep a little towel by the toilet and use this instead of toilet paper!
Tempted to buy one of these bad boys
I do the bidet too. Grabbed one of these that i keep in my backpack for work poops. No ragrets.
Here's the one I got: http://www.amazon.com/gp/product/B008CSDKSQ/ref=oh_aui_detailpage_o01_s00?ie=UTF8&psc=1
I've been using it for less than a week, so I haven't made a final decision on how I'd rate it. So far it gets the job done, though.
Portable bidet.
This one
And This one
The first one I find has a bit more pressure, but both get the job done. The first one is more portable obviously. All I have to do is get my hands on a 20oz bottle. I've literally cleaned my bum with straight Dasani water (cause we all know it's not worth drinking).
Personally, I'd just assume all is well. Also, I'd highly recommend a good desolder tool (here's a cheap one I bought, haven't tested it yet: https://www.amazon.com/dp/B008DJRYIG). Also, get flux. Lots of flux.
Taking my advice on this is probably not the best advice ever, but man, I don't know how you'd test one component without soldering it to something else, which means you'd need to unsolder it twice, etc.
I've heard tons of good things about this, especially for the price!
The sage switches & Toxic cap set onto the Ducky, then the Cherry Browns from the Ducky into the E-element sounds like a solid plan. Probably what I would do also TBH. Just be careful de-soldering the Ducky since it was originally wave soldered with lead free solder. This means the solder will have a pretty high melting temp & just be an all around pain in the ass to remove.
I strongly suggest getting at least a cheap de-soldering iron like this or this, plus some solder wick for doing it. Also remember that hitting a stubborn joint with a fresh coat of leaded solder will usually let it all come out on the next shot at de-soldering it. You don't want to have to try to de-solder the same joint more than twice, each time increases the chances of damaging the PCB or lifting the pad.
If you don't have a proper vacuum desoldering gun something like this or this is probably worth it just for this mod. It'll save you a decent amount of time and make things easier.
This one?
Sure first here's the LED strips, Power Adapters, and Dimmer. Looks like they've gone up in price a bit since I did it but it's still not too bad. I didn't take any in progress pictures so I'll just have to describe how setup went. The LED strips come with a sticky back side so I just stuck that to the poles on the front side of the Detolf. I used 1 LED strip, 1 dimmer, and 1 power adapter per 2 Detolfs but you could also use 1 strip per Detolf. This will give you more even lighting, and the power adapter should still be able to handle powering 2 fine, you'd just need to also buy a connector for the 2 strips. After you've got the stuff its as simple as just taping on the stip in a |‾| running from the outside poles and across the top of the Detolf, running the power cord outside of it through the gap in the door, and the plugging in the dimmer.
Thanks so much! I highly recommend these LED strips. They're paper thin so they bend easily at the corners of a detolf. You'll need this adapter for the power.
My only complaint about them is that they're a little too bright at first. You get used to them though! You can't beat this nice even white lighting and the ease of installation.
Given that is looks like mine, I'm going to assume they are:
https://www.amazon.com/gp/product/B00HSF66JO/ref=oh_aui_detailpage_o03_s01?ie=UTF8&psc=1
https://www.amazon.com/Adapter-Transformers-Supply-Output-Listed/dp/B00DKSI0S8/ref=pd_bxgy_60_img_2?_encoding=UTF8&pd_rd_i=B00DKSI0S8&pd_rd_r=ET8Y5X5FM7Q06TP33QBH&pd_rd_w=Xw11o&pd_rd_wg=ZQTfN&psc=1&refRID=ET8Y5X5FM7Q06TP33QBH
To install: https://www.reddit.com/r/AnimeFigures/comments/7psgup/dioder_alternatives/dsjy59n/ (Follow the pictures in the chain)
I bought these after a suggestion from another person on this forum. I didn't think they would work, but WOW, it made a huge difference. Brightened my area unbelievably good. First link is the LED lights. Second link is the adapter to be able to plug it in.
I just wrapped mine around the inside of my window.
LE 16.4ft LED Flexible Strip Lights, 300 Units SMD 3528 LEDs, 12V DC Non-waterproof, Light Strips, LED ribbon, DIY Christmas Holiday Home Kitchen Car Bar Indoor Party Decoration (Daylight White) https://www.amazon.com/dp/B00HSF65MC/ref=cm_sw_r_cp_tai_r-dzybVRAW2Y5
LE Power Adapter, Transformers, Power Supply For LED Strip, Output 12V DC, 3A Max, 36 Watt Max, UL Listed https://www.amazon.com/dp/B00DKSI0S8/ref=cm_sw_r_cp_tai_ObezybTYECE37
https://www.amazon.com/Flexible-Non-waterproof-Christmas-Decoration-Daylight/dp/B00HSF65MC/ref=sr_1_3?ie=UTF8&qid=1526496163&sr=8-3&keywords=led+strip+lights
get this!
youre also gonna need this
https://www.amazon.com/Adapter-Transformers-Supply-Output-Listed/dp/B00DKSI0S8/ref=pd_bxgy_60_img_2?_encoding=UTF8&pd_rd_i=B00DKSI0S8&pd_rd_r=G8HHS4XR6MNMHDCCSNZV&pd_rd_w=RgFLj&pd_rd_wg=qhiRw&psc=1&refRID=G8HHS4XR6MNMHDCCSNZV
Based on the specifications of that monitor, it requires a 7-18V DC power adapter. Within that range, you can get at 12V DC adapter for cheap and they're very common and generic. The amperage required by the monitor is less than 1A, so a this power adapter will work fine. Within the specifications of your monitor, and not expensive.
i bought these LED strip lights, which can be cut down to whatever length, and this power supply. i also bought some extra wire and connectors so i could run one long strip of LED lights through all four enclosures. worked around the adhesive issue by hot gluing the fuck out of them. i scratched up a line about two inches away from the front wall, to create some texture for the hot glue to grab, and allowed some extra glue to sort of wrap around the strip and prevent the strip from being peeled away from the glue.
LEDs: https://www.amazon.com/gp/product/B00HSF65MC/ref=oh_aui_detailpage_o05_s00?ie=UTF8&psc=1
Power Brick: https://www.amazon.com/gp/product/B00DKSI0S8/ref=oh_aui_detailpage_o05_s00?ie=UTF8&psc=1
You can cut the LED strip and then re-solder them together. I used these wires for that: https://www.amazon.com/gp/product/B00QTCBZ4I/ref=oh_aui_detailpage_o02_s00?ie=UTF8&psc=1
Thanks! I purchased all the LED parts from Amazon. Here are the links.
LED Strip: http://www.amazon.com/gp/product/B00JQV6NNC
Power Supply: http://www.amazon.com/gp/product/B00DKSI0S8
Dimmer: http://www.amazon.com/gp/product/B00JQ437YM
The LED Strip can be cut every three lights, so you can make it whatever length you want. I have a ton of it left over. For the dimmer I just cut the power cord a few inches after the adaptor and wired it into the terminal block.
Do not get a cheap radioshack soldering iron. Get a cheap Chinese soldering iron off amazon. Something with a digital temp gauge. I’ll edit this comment with a link to the one I have later. Their are a couple different methods to this job. Some people get little angled clippers and clip the 4 legs off of the tact switch and then heat up the solder and pull out the legs this method is easy but you risk cutting into the board. The other method is to properly use a solder sucker / solder wick and desolder the old switches. Do not hold the soldering iron to this board for too long you will pull traces. Believe me I did it my first time. Soldering is not that difficult but with everything the more you practice the better you become. I think some early mistakes are using too much solder, you really don’t need a lot.
My soldering set up: Soldering iron
better solder tip cleaner
better solder sucker
better solder (reccomended)
Also if you’re soldering leaded solder indoors maybe think about your health and what you’re inhaling.
air filter
Last words: everything in that kit will get you by just fine. Personally I think the solder it comes with is garbage. I hate the cheap solder suckers and I use them so often I bought that other one. Keep your iron tips clean. This means basically run some solder on the tip and dunk it in that gold wire mesh often. If your tip is getting dark it’s getting too hot and will have a harder time flowing solder. Keep it nice and shiny.
How much are you going to be making electronics a hobby? If you're just going to be soldering some boards occasionally you could save a bit on the iron and get this Weller. Also a cleaner. If you go with the 888 that will have a wire cleaner built in. I'm getting old so I personally would recommend at least a magnifying glass. I have this helping hand The clips didn't do much for me but the glass did. There are times where the switch pin just gets lost and the glass helped a lot. I also picked up this kit when I started, primarily for the sucker, but I thought the other tools may come in handy. So far they haven't, other than the solder. The first time I tried to use the sucker I could not get it to work correctly, I just wasn't getting enough of a seal around the hot solder, thinking I'd melt the tip, so I ended up buying a different pump that I still have never used, because I eventually DID learn to use the cheaper sucker. I also can't make solder wick work properly, apparently. If this is your first time soldering/desoldering I recommend getting a cheap practice kit that you don't care if you ruin. I can recommend this one as it has you intentionally foul up joins so you can learn to fix them. You won't need strippers. Flush cutters would be helpful if you need to trim the pcb mount legs off your switches (like Zealios, which you will if you have a GH60 Satan pcb) or trimming LEDs. Work mat would be helpful to keep your work area clean but not necessary. You will need a small screwdriver but I can't remember what size. Tweezers or one of these grabber thingies are always helpful when the screw flips sideways when you are trying to seat it. I used this solder on 3 builds so far and have had no issues with joins failing.
Brass all the way. This one is only $10. There are other ones that are cheaper that I have used, but I like the Hakko one best. It only costs as much as a few bags of props. I "dip my tip" before every joint and I have consistent heat and a good tin. A cleaner also helps extend the life of your soldering iron tip and heating element. The problem with using a wet sponge is that it cools the tip down every time and the iron has to heat back up to temp. This probably isn't a huge deal for occasional use, but for frequent use this constant heating/cooling cycle can cause the tip to wear out prematurely. A sponge is also more prone to holding contaminants unless you are regularly swapping it out. For example, if you have some excess solder the blobs will build up in the sponge. With a brass cleaner, they will drop down to the bottom and about once a month you can pull the brass out, and empty the holder in the trash. I started out using a wet sponge, and I also noticed that my tip didn't seem to get as clean as when I switched over to the brass cleaner.
For the majority of people just doing the occasional build I don't think there is anything wrong with a wet sponge. But if you are doing a lot of other electronics work or building / repairing more frequently, it's a good idea to get a cleaner.
https://www.amazon.com/Hakko-599B-02-Solder-Cleaning-Holder/dp/B00FZPGDLA/ref=pd_lpo_vtph_469_bs_t_2?_encoding=UTF8&psc=1&refRID=JQJM1RVZMHS0H0J1QZ2M
This cleans my solder tip amazingly well. I use the sponge to wipe down debris, then run it through the wire and it looks brand new.
Drop what you're doing and order this.
You're the best man, I love the h03, would be great to have a second one to keep in the car at all times. Neutral white, in case the link isn't right.
Skilhunt 1000Lumens 18650 Headlamp EDC Flashlight Waterproof Cree LED Headlight for Outdoor Sports Hands-free Camping Light Brightness Flood Light https://www.amazon.com/dp/B01LEOL3LU/ref=cm_sw_r_cp_apa_-cFhAbJEGFJB0
Thanks for doing these giveaways. Hope I win one sometime! My want:
https://www.amazon.com/dp/B01LEOL3LU/ref=cm_sw_r_cp_apa_i_lE3CCbXZECM8C?th=1&psc=1
More flood or throw?
If flood: Skilhunt H03 Neutral White!
Awesome little light. I just got mine a few days ago and it has replaced my olight S20r already. It's tiny, and puts out a ton of light with 8 brightness modes from 0.3 to 900 lumens. It's a right angle light with a pocket clip, magnetic tail cap and head strap. It's basically a perfect car light.
Edit: if you want more throw, the H03R is only $34. It's not as floody and has more throw.Edit2: oops H03R is out of stock
Edit 3: Apparently Amazon carries the Skilhunts as well. Both the H03 NW and the H03R both cheaper than GearBest's full prices.
I use the GE smart switches with a smart things hub.
https://www.amazon.com/dp/B01M1AHC3R/ref=cm_sw_r_cp_apa_i_ACMvCb57QX7S0
I'd recommend going with a SmartThings hub. The Echo can easily interface with it, and you can control it from both your iPhones and Apple Watch (I find the utility of controlling things from my Mac to be pretty low, and so don't really bother -- but I'll mention one possible solution below).
Here's what I recommend:
HTH!
Hey /u/Mercury357 !
Sorry I can't offer much advice when it comes to Inovelli or Zooz, but I'm sure you'll get a great response from some of the other members here.
I can however, relay that the GE Switches are on sale right now on Amazon for $30.99 and the GE Dimmers are on sale for $32.99
Our Add-On switches work great for 3 and 4-way setups as well, those run $19.50 right now
If you have any questions about GE product, feel free to ask. :)
Raspberry Pi zero w
Relay
Boards
Power Connector
USB Power
Solder kit
Tower Light
Wire diagram
Code in python not the best but that I got on phone.
!/usr/bin/env python2
import RPi.GPIO as GPIO
import json
import base64
import requests
import datetime
import logging
import random
from time import sleep
logging.basicConfig(filename='ci-light.log', filemode='w', format='%(name)s - %(levelname)s - %(message)s')
RED = 17
GREEN = 22
YELLOW = 27
global_state = -2
times = {
"1" : datetime.time(2, 0),
"2" : datetime.time(2, 15),
"5" : datetime.time(2, 30),
"3" : datetime.time(2, 45),
"4" : datetime.time(3, 0),
"5" : datetime.time(3, 15)
}
Pat= “{token}”
bauth = "Basic " + base64.b64encode(':'+pat)
GPIO.setmode(GPIO.BCM)
GPIO.setup(RED, GPIO.OUT)
GPIO.setup(GREEN, GPIO.OUT)
GPIO.setup(YELLOW, GPIO.OUT)
def clearRed():
GPIO.output(RED, 0)
def setRed():
GPIO.output(RED, 1)
def clearGreen():
GPIO.output(GREEN, 0)
def setGreen():
GPIO.output(GREEN, 1)
def clearYellow():
GPIO.output(YELLOW, 0)
def setYellow():
GPIO.output(YELLOW, 1)
def clearLights():
GPIO.output(RED, 0)
GPIO.output(GREEN, 0)
GPIO.output(YELLOW, 0)
tests to make sure lights and relay are functioning as appropriate
def start_up():
clearLights()
setRed()
sleep(1)
clearRed()
setYellow()
sleep(1)
clearYellow()
setGreen()
sleep(1)
clearGreen()
Does little click and light dance to be passive aggressive. don't break builds
def put_on_show(times):
factor = 0.2
while (times > 0):
setRed()
sleep(factor)
clearRed()
setYellow()
sleep(factor)
clearYellow()
setGreen()
sleep(factor)
clearGreen()
setYellow()
sleep(factor)
clearYellow()
times -= 1
factor -= 0.015
blinks light
def blink_light(light_pin):
GPIO.output(light_pin, 1)
sleep(0.1)
GPIO.output(light_pin, 0)
sleep(0.1)
GPIO.output(light_pin, 1)
sleep(0.1)
GPIO.output(light_pin, 0)
sleep(0.1)
GPIO.output(light_pin, 1)
sleep(0.1)
GPIO.output(light_pin, 0)
sleep(0.1)
GPIO.output(light_pin, 1)
sleep(0.1)
GPIO.output(light_pin, 0)
sleep(0.1)
GPIO.output(light_pin, 1)
sleep(0.1)
GPIO.output(light_pin, 0)
sleep(0.1)
GPIO.output(light_pin, 1)
sleep(0.1)
GPIO.output(light_pin, 0)
sleep(0.1)
Checks the builds for D or T then determines if broken
will need to be updated to account for unit tests being broken to change to yellow
def check_builds():
buildDefs = "http://{tfsserver}:8080/tfs/defaultcollection/Development/_apis/build/definitions"
buildsUri = "http://{tfsserver}:8080/tfs/defaultcollection/Development/_apis/build/builds?MaxBuildsPerDefinition=1&deletedFilter=excludeDeleted&queryOrder=finishTimeDescending&resultFilter=failed,succeeded,partiallySucceeded&definitions="
s = requests.Session()
s.headers.update({'Authorization': bauth})
r = s.get(buildDefs)
json1 = json.loads(r.text)
str1 = ''
for x in json1['value']:
if 'D' in x['name']:
str1 += str(x['id']) + ','
elif 'T' in x['name']:
str1 += str(x['id']) + ','
buildsUri += str1
r2 = s.get(buildsUri)
json2 = json.loads(r2.text)
state = 0
print(r2.status_code)
for x in json2['value']:
if x['result'] != 'succeeded':
return 1
return 0
print('starting up')
start_up()
print('started')
main logic loop
while (1):
sleep(3)
logging.info('Checking builds')
print('Checking builds')
new_state = check_builds()
check builds
Also a random human! Good luck!
I bought a cheap soldering kit from Amazon for $17 https://www.amazon.com/dp/B06XZ31W3M/ref=cm_sw_r_cp_apa_oedEzb5K4TWS4
Also a Dremel tool for sanding surfaces and cutting plastic https://www.amazon.com/dp/B003BYRFH8/ref=cm_sw_r_cp_apa_NfdEzbEYCCFER
Pickups almost never fail - they're just a big coil of wire, there's not really anything to go wrong with them.
The first thing to check is obvious - is your volume or tone control rolled off? It sounds silly, but it's easy to overlook if you rarely use the neck pickup.
The next most likely problem is the pickup selector switch. Les Pauls use an open type of selector switch that's prone to corrosion, especially if it's infrequently used. Plug your guitar in, strum the open strings, then click the pickup selector switch up and down and listen to your amp. If you can hear crackling or intermittent sound, it's probably the selector switch.
Most switch problems can be fixed with a squirt of DeoxIT, but the switch may need to be replaced. If you can solder, it's a ten minute job and a six dollar part. If you can't solder, this is a good opportunity to learn - you can buy a basic soldering iron kit for less than $20.
Failing that, take it to a competent luthier. Guitar electronics aren't particularly complicated, so it should be a cheap and quick fix.
Is this it?
https://www.amazon.com/Cooler-Master-Accessory-MasterBox-MasterCase/dp/B071P862G1/ref=sr_1_1?crid=120K5FPJA3MC9&keywords=coolermaster+gpu+mount&qid=1567529625&s=gateway&sprefix=coolermaster+gpu%2Caps%2C149&sr=8-1
https://www.amazon.com/Cooler-Master-Accessory-MasterBox-MasterCase/dp/B071P862G1/ref=sr_1_1?crid=BFEA9DR9OX2U&keywords=cooler+master+vertical+gpu+mount&qid=1573195346&sprefix=cooler+master+ver%2Caps%2C144&sr=8-1
Thank yea, I had a blast actually doing it. the mount is made by Coolermaster.
https://www.amazon.com/gp/product/B071P862G1/ref=oh_aui_detailpage_o00_s00?ie=UTF8&psc=1
To add on to this, I got mines from Amazon for ~54 w/ tax and shipping.
The Cooler Master store, sells just the bracket for 20USD.
This is an amazing thing you do! ThruNite TH20 Neutral White headlamp
> I was wondering what your thoughts on the Tiara C1 Pro were compared to the standard Wizard?
It is bulky for a 16340 light but okay for an 18350 light. You can't lock yourself out of the Tiara Pro (or the regular Wizard), while you can lock yourself out of the Wizard Pro.
The Pro features include a boost driver, flashing modes and a battery voltage check. It also comes with a magnet but Armytek sells the magnetic tailcap as an upgrade for the plain lights.
The biggest downside is the headlamp mount. The 18650 lights have a great plastic clip. The Tiaras are still using the old silicon rubber mount. The new mount is more comfortable and very easy to pop the light in/out of.
Another small 16340 option to consider is the Olight H1 Nova. Though I prefer 1xAA for a small headlamp, like a Thrunite TH20.
ThruNite TH20 NW - https://www.amazon.com/dp/B01FCV32SI
Thanks for the give-away!
Thank you!
https://www.amazon.com/Skilhunt-H03/dp/B01LEOL3LU/?tag=parametrek-20&th=1&psc=1
Skilhunt H03! Thanks for the Giveaway!
A cheaper option to try similar to Wolczyk's suggestion is the skillhunt H03.
Review here.
Thanks!
https://www.amazon.com/dp/B01LEOL3LU/ref=cm_sw_r_cp_apa_i_lE3CCbXZECM8C
You’re the best for doing this, especially so soon after the last one! Here’s my choice:
https://www.amazon.com/1000Lumens-Flashlight-Waterproof-Hands-free-Brightness/dp/B01LEOL3LU
> B-52s, I pretty much need to look at every panel/radome/pod per my inspection criteria.
So, a thrower/big spill light for exterior. During your inspections, do you have to crawl around inside, or does someone else do that? Reason I'm asking, you may be better off with two lights. Maybe a good flood type headlamp for interior inspections. There is also the Thorfire S70S, Beamshot, the Convoy L6, and the Eagle Eye X9, which are similar to the On the road, except with XHP70 emitters. Discount coupon codes available for all except maybe the eagle eye x9
GE Enbrighten Z-Wave Plus Smart Light Switch
https://www.amazon.com/dp/B01M1AHC3R/ref=cm_sw_r_cp_apa_i_AzXtDb8NM8BQF
Like others have said, the issue is more with space in the box behind the unit than it is side to side once you break off the heatsink tabs on the appropriate side. Here are a couple thoughts from my experience installing some a couple days ago:
Assuming you have a neutral in the gangbox that houses the two switches for each fan, I would recommend the following:
Use the pull cords to keep the light switch in the on position, and the fan speed at maximum. After that, you can control the light and fan exclusive using the new switches, the Wink app, or GH/Alexa.
This one does double tap:
https://www.amazon.com/GE-Wireless-Lighting-Control-14291/dp/B01M1AHC3R/ref=sr_1_3?ie=UTF8&qid=1511215435&sr=8-3&keywords=Ge+zwave+switch&dpID=41orYO6Z%252BWL&preST=_SY300_QL70_&dpSrc=srch
You need a switched module (not lamp) and it will handle the fluorescents just fine. GE smart switch with a remote should do the job.
You don't have to rewire anything. One of your light switches is the real switch, and the other is connected to that first switch (not to the main power) Install the GE module at the real switch location, and install the remote at the other, it uses the same wiring.
If you're not sure you can tell the difference, or are concerned about doing a true 3 way, then you can use 1 GE smart module, and velcro an Aeotech Zwave remote near the other location to control it remotely.
Switch
Remote
Aeotech Remote
Do you mean something like this? https://www.amazon.com/GE-Lighting-Required-SmartThings-14291/dp/B01M1AHC3R
SmartThings Version 3 Hub (I have the Version 2 Hub...you will have to look around for this one):
https://www.amazon.com/Samsung-SmartThings-Generation-GP-U999SJVLGDA-Automation/dp/B07FJGGWJL/ref=sr_1_1_sspa?ie=UTF8&qid=1540989501&sr=8-1-spons&keywords=smartthings+hub+2nd+generation&psc=1
GE Z-Wave Plus On/Off Light Switch:
https://www.amazon.com/GE-Repeater-Required-Works-SmartThings-14291/dp/B01M1AHC3R/ref=sr_1_3?ie=UTF8&qid=1540989582&sr=8-3&keywords=z-wave+switch
GE Z-Wave Plus Dimmer Switch:
https://www.amazon.com/GE-Repeater-Required-Works-SmartThings-14291/dp/B07361Y54Z/ref=sr_1_3?ie=UTF8&qid=1540989582&sr=8-3&keywords=z-wave%2Bswitch&th=1
GE Add On Switch (if you have a 3-way or 4-way switch):
https://www.amazon.com/GE-Bluetooth-Wireless-STANDALONE-12723/dp/B00RKJS8MQ/ref=sr_1_3?ie=UTF8&qid=1540989718&sr=8-3&keywords=z-wave+add+on+switch
ZigBee Motion Sensors:
https://www.amazon.com/gp/product/B07F8ZHBLS/ref=oh_aui_detailpage_o01_s00?ie=UTF8&psc=1
ZigBee Door Sensors:
https://www.amazon.com/gp/product/B07F956F3B/ref=oh_aui_detailpage_o01_s00?ie=UTF8&th=1
ZigBee Leak Sensors:
https://www.amazon.com/gp/product/B07F951JDP/ref=oh_aui_detailpage_o01_s00?ie=UTF8&th=1
ZigBee Outlet Plug (you will need to replicate your ZigBee mesh, I use to motion activate lamps, turn lamps on/off at sunset/sunrise, etc.):
https://www.amazon.com/gp/product/B07F96JB63/ref=oh_aui_detailpage_o01_s00?ie=UTF8&th=1
Z-Wave Thermostat:
https://www.amazon.com/gp/product/B005EJ7YO2/ref=oh_aui_search_detailpage?ie=UTF8&psc=1
ZigBee RGB Landscape RGB LED Strips:
https://www.amazon.com/gp/product/B00R1PB2ZY/ref=oh_aui_search_detailpage?ie=UTF8&psc=1
ZigBee RGB Lightbulbs:
https://www.amazon.com/gp/product/B073ZBYXKQ/ref=oh_aui_search_detailpage?ie=UTF8&psc=1
Z-Wave Deadbolt:
https://www.amazon.com/Kwikset-SmartCode-Electronic-SmartThings-featuring/dp/B004F1B24I/ref=sr_1_12?s=hi&ie=UTF8&qid=1540990126&sr=1-12&keywords=z-wave+lock
Z-Wave Garage Door Opener:
https://www.amazon.com/GoControl-Linear-GD00Z-4-Z-Wave-Controller/dp/B00M75TEIU/ref=sr_1_4?s=hi&ie=UTF8&qid=1540990160&sr=1-4&keywords=z-wave+garage+door+opener
Sonos One Speakers (Great music, and talking through SmartThings):
https://www.amazon.com/gp/product/B074XN1LH3/ref=oh_aui_search_detailpage?ie=UTF8&psc=1
Amazon Echo Show (for Voice Control...an Echo Dot will work just fine too):
https://www.amazon.com/All-new-Echo-Show-2nd-Gen/dp/B077SXWSRP/ref=sr_1_1?s=electronics&ie=UTF8&qid=1540990254&sr=1-1&keywords=echo+show
That's about all I can think of at the moment.
If you are going to do this, do it in stages. Z-Wave and ZigBee are mesh networks...meaning that the reliability of the network gets much better the more devices you have. Also, with these mesh networks:
I see so many people complaining about how the Z-Wave or ZigBee devices don't work, when they are relying on too many battery operated devices.
For Z-Wave devices, choose Z-Wave Plus over Z-Wave...it's the newest standard, and has much better range.
In the US, Z-Wave operates in the 900 MHz spectrum and ZigBee in the 2.4 GHz spectrum. Personally, I "prefer" Z-Wave devices as there is a lot of "junk" in the 2.4 GHz spectrum right now. However, the ZigBee devices are operating reliably as I have a strong mesh setup (with non-battery operated devices).
Two great application for the Leak Sensors:
Great applications for door open/close sensors:
Great Application for Motion Sensors
The motion sensors I linked above are the new ones...the magnetically mount. What's cool is that the magnet is in the sensor, and it's strong enough to attach the sensor to a dry wall screw (no need to mount the adapter bracket).
Most people use the Aotech Zwave dongle here: https://www.amazon.com/Aeotec-Z-Stick-Z-Wave-create-gateway/dp/B00X0AWA6E/ref=sr_1_1?ie=UTF8&qid=1537259191&sr=8-1&keywords=aotech+zstick&dpID=41%252BuCNE13iL&preST=_SY300_QL70_&dpSrc=srch
You could also get a combination Zwave/Zigbee dongle for even less: https://www.amazon.com/GoControl-CECOMINOD016164-Linear-HUSBZB-1/dp/B01GJ826F8/ref=sr_1_3?ie=UTF8&qid=1537259245&sr=8-3&keywords=zigbee+dongle&dpID=41GzEBEgWSL&preST=_SY300_QL70_&dpSrc=srch
Alot of people start with Zwave or Zigbee controlled lights, but most people end up with Zwave switches instead, because humans need to also turn those devices on and off. The easiest Zwave switches/dimmers to acquire are the GE Line of Jasco switches, which are sold by https://www.amazon.com/GE-Lighting-Required-SmartThings-14291/dp/B01M1AHC3R/ref=sr_1_2?ie=UTF8&qid=1537259343&sr=8-2&keywords=ge+wave&dpID=51rDfQfpEAL&preST=_SX300_QL70_&dpSrc=srch
Do you think you'll use the features of the Hue bulbs? Like do you need the different colors or are you just looking to remotely control the lights?
I originally went with LIFX but decided that I didn't like the idea of having to replace every light bulb in my house with smart bulbs. Instead I've been opting for the GE Z Wave Plus switches and I've been loving them.
This way it doesn't matter what bulb is used, the whole switch is smart.
Why not just get a zwave dongle for your ha server and then a zwave ge switch?
https://www.amazon.com/GE-Repeater-Extender-SmartThings-14291/dp/B01M1AHC3R
https://www.amazon.com/Aeotec-Z-Stick-Z-Wave-create-gateway/dp/B00X0AWA6E
​
Have had this setup running for about 2 years now. I use the dimmers as well. I run HA in a docker on an unraid server without issues having it pickup the zwave stick.
The Z-Wave system is designed for interoperability, with management by a local hub that reaches out to the cloud as necessary. Hence there are many manufacturers, competitive pricing, interchangeable components, flexible control modalities. Also, a huge range of sensors, modules, controllers, locks, remote controls, and thermostats in addition to switches.
Wi-Fi smart devices are focused on ease of installation. Without standardized interfaces, the only way to offer remote control is through cloud management. Configuration and automation could be provided through a switch-hosted web server, but since the whole point is remote control and Echo/GH integration - and since the manufacturer has an eye on your data and your possible future income stream - the cloud solution wins. Wi-Fi power requirements means that in general these devices must be hardwired.
Non-cloud Kasa support requires an always-on computer running node.js, with manual device installation and static IP addresses everywhere. This is only an issue if TP-Link abandons the product or starts charging, in which case you have to decide whether it's worth the hassle...
I have a bunch of GE/Jasco switches and dimmers and one each of Leviton and Evolve - and also door/window sensors, motion sensors, thermostat, door lock, lamp modules, remotes, wall controllers, and garage door sensor.
The switches are all pretty much indistinguishable. GE/Jasco and HomeSeer 3-ways require a proprietary companion switch but you can dim from the companion and up always=on, down=off. Zooz and Inovelli 3-ways use your existing remote switch but no remote dimming and remote setting is random.
Making cables is easier than it sounds, and soldering isn’t difficult - but you’re right that you want to buy a decent iron at the bare minimum.
That said, a variable wattage soldering iron can be had for like $20 if you know where to look, consumables like solder and flux are super cheap and you don’t need a big soldering station if all you’re doing is making cables. If you’re curious hit YouTube and get an idea of whether or not you think you can handle it.
Soldering Kit
Cable Kit
That’s $50 worth of stuff and you can build six cables at whatever length you want. I think that’s still cheaper than lava cable at that rate and if you need more later you still have the equipment.
ANBES Soldering Iron Kit Electronics, 60W Adjustable Temperature Welding Tool, 5pcs Soldering Tips, Desoldering Pump, Soldering Iron Stand, Tweezers https://www.amazon.com/dp/B06XZ31W3M/ref=cm_sw_r_cp_apa_i_1yxIDb03XRX8S
Seconded, also consider this kind of thing: https://www.amazon.com/Aven-17010-Adjustable-Circuit-Holder/dp/B00Q2TTQEE/ - it's invaluable for PCBs. Just populate from one side, add something to hold stuff in place (like gaffa tape, or bend one lead, or clip on a sheet of paper, etc), turn over the PCB and start soldering away. I wouldn't want to miss mine.
Any soldering iron 40+W where you can regulate the temperature should do, I own a nice station but when I don't feel like breaking it out because it'd take longer to set it up than to do the job I use something like this: https://www.amazon.com/ANBES-Soldering-Iron-Kit-Electronics/dp/B06XZ31W3M/ set to 350°C. Just make sure to clean and tin your tip regularly and it will do the trick just fine Oh, but ditch the solder and get a few spools of good rosin core solder of different gauges, it's not expensive but worth it. In my experience, the solder that comes with kits like that mostly works as a deterrent.
If you're not planning on buying all-included kits also get a few spools of stranded core wire of different colors. You could use solid core wires but those tend to break if they're getting bended from movement without showing it. With stranded core some strands may break but as others don't they'll continue to work. Invisibly broken wires (i.e.) inside the isolation) are a *beeeeep* to debug.
Also, a set of tweezers are great to have, especially the kind that holds stuff together per default, like this one: https://www.amazon.com/Curved-Tweezers-Cross-Jewelers-Soldering/dp/B000OVPG9A/ (only an example, I'd get a tweezers set that contains one like that).
In my experience a tool set like this one is great to have: https://www.amazon.com/Haobase-6Pieces-Double-sided-Soldering-Assist/dp/B01DLX6V3C/ - especially the bending tool is great to have, as it allows eg to bend the leads of a LED without running the risk of breaking the LED itself. It's also great in order to clean up mistakes, helps with desoldering and such
Speaking of desoldering: desoldering braid is a must. A desoldering pump can be useful, too. And yes, practice soldering and desoldering until you can do both without destroying anything.
If you're not going to buy pre-drilled enclosures then you very likely want a) a center punch and b) stepping drill bits. Those let you drill holes in all kinds of sizes without having to buy lots of drills.
Last but not least a wire cutter is a must
https://www.amazon.com/ANBES-Soldering-Iron-Kit-Electronics/dp/B06XZ31W3M?crid=1NQ8NYDFHTHAE&keywords=soldering+iron+kit&qid=1539188799&sprefix=soldering%2Caps%2C1057&sr=8-5&ref=sr_1_5 This would be a great little kit for you.
I bought the cheapest soldering kit on Amazon and it's lasted me through like 9 builds/re-builds so far. Still working fine. Something like this. I don't know exactly how accurate the temperature dial is, but it seems to be about right on mine.
Buying quality's never a bad idea, but you really don't have to if you're not using it a ton.
While it isn't possible to replace the switches without soldering, the solder job is a lot simpler than it seems. Just watch a good tutorial and get a decent 20 dollar solder kit off amazon and you'll be set. It's a good skill to learn. This solder set is amazing and actually comes with a solder sucker which you need to replace a switch anyways. I've used it hundreds of times and it's held up very well.
https://www.amazon.com/dp/B06XZ31W3M/ref=cm_sw_r_cp_api_i_5pV3Bb60EXNJ0
Sorry nobody responded to such a simple question on this subreddit about mice. Apparently most people here don't care or know much about the hardware in their mouse. So I guess I'll be the one to answer your question.
Those are just standard 3 pin micro switches you can find on any ordinary mouse. In my opinion they're all similar, Omron, Kailh, Huano seem to be the more common ones. The ones on the Divina series are all Huano and you can buy them on HERE, yes they're all from China because that's where they are all made.
You'll need basic solder / desolder skills to replace them, it should only take you about 30 min -1 hour or so of watching YouTube videos. But I'd get something to practice with first. Most important is to learn how to desolder using Solder Sucker you can look up a ton of tutorials on Youtube. You can find a full solder kit on amazon for under $20 if you're in the US, it should have everything you need for a quick job. Link here
Once you know how to replace a simple mouse switch you'll save a lot of money by not having to buy another full mouse if a switch ever malfunctions, a lot of people just throw away their old mouse and buy a new one if the "clicks" somehow stop working but really it's most likely just the simple mouse switch they needed to replace.
It's super simple. If you have no interest in learning how to do it I would find someone with a soldering iron and have them do it. I bought this kit and all you would do it use a bit a solder to connect the two holes. A 20 second job.
Headlights (you only need one pair. the cutoff is outstanding)
Map lights, license plate lights, running tail lights, and side marker lights
Reverse lights
Front turn signals (accessible from under the vehicle - pin remover and 10mm socket needed)
Rear turn signals (requires tail light disassembly)
Turn signal resistors (required to prevent hyperflashing; soldering is recommended)
Brake lights (requires tail light disassembly)
Daytime-running lights (pliers needed)
Trunk light and dome light
awesome. thanks so much for all of your help! i think this is the last question i had. going to wait a couple days and then start ordering parts:
Soldering kit has 5 levels and will be used to solder LEDs and to help fit holtites in.
I've had my eye on this one
Would something like this be good or should I avoid it?
Soldering is an extremely valuable skill for this sport, is cheap to get into (this twenty dollar kit is more than sufficient), and will allow you to take advantage of cheap RC packs from HobbyKing and re-solder them yourself. It's definitely worth the mild investment in time, money, and effort.
I've got through about 8 keyboard builds/rebuilds with a generic $20 kit off Amazon and it's still holding up. Like, this'd be fine if you're not willing to drop $100 on something you may rarely use. Or most of the cheap adjustable ones on there.
Check out this guide, watch a couple soldering tutorials, switch soldering is some of the most basic stuff.
I haven't tested this one myself but it seems like this is some good bang for your buck:
https://www.amazon.com/ANBES-Soldering-Iron-Kit-Electronics/dp/B06XZ31W3M
I bought the soldering iron and the replacable tips on ebay, but they're coming from China so it'll be a while before I can vouch for them hope this helps a but.
This is the one I bought and so far it’s been great.
Check it
I don't really wanna post the code for ethical reasons (I started with some basic Adafruit code for bluetooth and turned it into a full OS). But here's a feature list:
I used u8g2's u8x8 mode for the screen drawing, as it requires no ram.
​
Here are my parts:
Voltage regulator (takes 8.4v down to 5v)
22pF capacitors
16MHz Oscillator (required for standalone board)
DIYMall blue OLED
Knockoff Arduino Uno
Adafruit UART-Capable bluetooth module (makes sending data easier)
Spare ATMega 328 processors
Li-Ion" 9V" (8.4v) batteries (rechargeable)
Switches
9V battery clip
Soldering Kit
Elegoo prototyping PCBs
Jumper wires (makes life easier & tidier)
Elegoo Starter Kit (Comes with LEDs, resistors, and buttons)
Get yourself one of these soldering kits. It has everything you need to get started with soldering (though I recommend using solder wick instead of the pump for desoldering.) Just be sure to tin the tips with solder to prolong their life and help with heat transfer, and never blow on a fresh blob of solder to cool it; it give the joint air pockets which can corrode and degrade the joint over time.
Get some Bourns 500k push-pull pots (I recently bought a pair for $16 from an Amazon marketplace seller) for both controls. You could wire them up to coil split each pickup independently (assuming they have 4 conductors) as well as to bypass the controls entirely, have one pickup active all the time, etc. They're incredibly versatile.
Also, some new pickups and a Switchcraft jack will help immensely.
How do I compensate when I'm using a lower end soldering iron? I heard the temperature doesn't stay hot as consistently as better irons- so do I have to just wait longer in between soldering each joint?
I got this one for reference:
https://www.amazon.com/gp/aw/d/B06XZ31W3M/ref=ya_aw_od_pi?ie=UTF8&psc=1
I hear you, I OBSESSED over this for a few days. And I still got the first result on Amazon and wasted two days I could have been tinkering or doing anything else haha.
Here's the one I got.
https://www.amazon.com/gp/product/B06XZ31W3M/ref=oh_aui_search_detailpage?ie=UTF8&psc=1
Looks like the price ticked up or I got a deal or something. Definitely get a helping hands or similar device to hold your projects, so incredibly helpful. Can find those at any hobby store or Amazon for cheap too.
I bought this ages ago, great kit. link here: amazon product page 19$
I had never soldered anything before either, but I got one just to mess with my printers. Being able to snip off and reattach connectors, or extend wires on fans or solder some LED strip lights or whatever is a nice thing to be able to do yourself. This kit is pretty much complete for basic soldering and has been great.
https://www.amazon.com/dp/B071P862G1/ref=cm_sw_r_cp_apa_i_nPJ4AbJ71HA43
https://www.amazon.ca/Cooler-Master-Accessory-MasterBox-MasterCase/dp/B071P862G1/ref=mp_s_a_1_1?keywords=cooler+master+vertical+gpu+bracket&qid=1564761956&s=gateway&sprefix=cooler+master+vertical&sr=8-1. My gpu is a 3 slot. So I had to modify the bracket a bit
Cooler Master Accessory: Fits MasterBox, MasterCase, Maker, H500P Series Vertical Display VGA Holder Kit w/ Riser Cable https://www.amazon.com/dp/B071P862G1/ref=cm_sw_r_cp_api_nmnZAbJ0W51KV
Here you go: https://www.amazon.co.uk/Cooler-Master-MCA-U000R-KFVK00-Vertical-Graphic/dp/B071P862G1
I'd advise not to do that as you'll choke your GPU airflow do not vertically mount your GPU unless you're liquid cooling it or have adequate airflow space with something like this https://www.amazon.com/dp/B071P862G1/ref=cm_sw_r_cp_apa_i_ZKWCDbYX8P1XV
Something like this may also be helpful then. It hasn't been out long and hopefully they will be restocking it. You also have this one which is more specific to Cooler Master cases but you could mod it to fit differently if you cut a side panel. Brackets just might make things easier for you.
https://www.amazon.com/dp/B071P862G1/ref=cm_sw_r_cp_api_d3V6BbJ35MR2E
I was going to use this mount with the case.
https://www.amazon.com/Cooler-Master-Accessory-MasterBox-MasterCase/dp/B071P862G1/ref=sr_1_3?keywords=Vertical+Graphics+Card+Holder+Kit&qid=1558455693&s=gateway&sr=8-3
Thanks. There’s some things you need to know though.
Here’s the bracket I’m using- www.amazon.com/dp/B071P862G1
You’ll have to cut all of the slots out with some side cuts or something.
Here’s a vid to show exactly what to do- https://youtu.be/m2WaKMM0ZvM
No, like this
Used this: https://www.amazon.co.uk/Cooler-Master-Vertical-Graphics-Holder/dp/B071P862G1/ref=pd_rhf_gw_p_img_7?_encoding=UTF8&psc=1&refRID=RKKGSY1N95AR0T2R5CFT
Had to cut 2 or 3 of the horizontal metal bars at the back of the case though.
https://www.amazon.com/Cooler-Master-MCA-U000R-KFVK00-MasterAccessory-Vertical/dp/B071P862G1/ref=sr_1_1?ie=UTF8&qid=1504427153&sr=8-1&keywords=coolermaster+vertical+graphics+card
Cooler Master Accessory: Fits MasterBox, MasterCase, Maker, H500P Series Vertical Display VGA Holder Kit w/ Riser Cable https://www.amazon.com/dp/B071P862G1/ref=cm_sw_r_cp_apa_i_MbgLDbYGXK3F8
Generally it's indicated in the name, for example the wireless version of that motherboard is called "Asus TUF GAMING X570-PLUS (WI-FI)" Other motherboards will have "AC" in their name, lots of higher end boards also just come with it, but you will have to check the product pages on them.
> You mean I can't do mATX + vertical GPU + PCIE WiFi card, or can't do mATX + vertical GPU at all
If there's a built in mount to the case you can do it, but with risers like this one you can't do it with mATX or ATX.
I double checked compatibility and clearance, if you like the look of the Kraken you can get the x52 which is 240mm and top mount it. It will clear the memory with that motheboard. I don't particularly like the performance of top mounted 240mm AIOs as it's no better than the large air coolers I mentioned in my previous comment, but it's an option if you like the look.
You can buy fancy cases, but simple screw/art/tackle boxes are fine too. I've seen people pay hundreds for fancy bags and foam trays, when really, if something broke, it'd be waaay cheaper to just replace it. I have a big multi-section box for all my stuff, and a Star Wars lunchbox I use on the go, but different storage solutions work for different people!
http://www.amazon.com/Plano-Molding-5231-Double-Organizer/dp/B000HJ9514/ref=sr_1_1?s=hi&ie=UTF8&qid=1406088407&sr=1-1
works like a charm!!
Got a plano 5231. It's nice for all of the tokens and whatnot. Can also fit a larger ship or two if you wanted.
It's this thing.
When I was bringing more then a couple lists:
Plano Molding 5231 Double Cover Stow N Go Organizer, Porsche Red https://www.amazon.com/dp/B000HJ9514/ref=cm_sw_r_cp_apa_fBAKBb1S7HQ29
Nowadays I try to bring only one or two (oaky I can cram like 4 or 5 by stacking) and I use a Feldherr MINI PLUS Case for X-Wing Scum and Villainy, Star Ships and Slave 1 https://www.amazon.com/dp/B00VK4ZZD2/ref=cm_sw_r_cp_apa_OCAKBb16YEDT2
They were on sale for $18 a while back, my guess is they'll have new bags and foam out soon for 2e.
I am using this one: http://www.amazon.com/Plano-Molding-5231-Organizer-Porsche/dp/B000HJ9514/ref=sr_1_1?ie=UTF8&qid=1413351375&sr=8-1&keywords=Xwing+case
It holds quite a bit. The top section has all the tokens and the bottom has a millennium falcon and a slave one, plus about 20 models. I could probably organize it to fit more though. I really like the all-in-one aspect. A solid choice I think. :)
The Plano 5231 is where I would start. I have several that I keep mine in (my collection is rather large). The top section will accommodate all the ship tokens, the gameplay tokens and templates & obstacles. The inside will easily fit all that you have along with the dials and damage deck with plenty of room to spare. I am storing complete conversion kit cardboard and a majority of the small ships in the boxes. Adding a bunch of large ships to the collection may present an issue eventually, but you can fit a YT-1300 + another large ship without issues. The Ghost does not fit in the box unfortunately.
Edit: The prices on Amazon for the red plano are not great right now though.
The HDX interlocking series is pretty great, too. The containers lock together making it easy to add to the collection as needed and they are easy to carry. These can accommodate the bigger ships like the Ghost, too. maybe go with this. The price is good, too.
​
Yep, got it from Amazon. It's $10
http://www.amazon.com/Plano-Molding-5231-Organizer-Porsche/dp/B000HJ9514
When you run out of room, upgrade to the Plano 5231. Perfect case for this game.
Edit: Here's a link to a post with the 5231
http://www.reddit.com/r/XWingTMG/comments/1bimbb/wish_i_had_thought_of_this_when_i_got_my_other/
And the case itself
http://www.amazon.com/Plano-Molding-5231-Double-Organizer/dp/B000HJ9514/ref=sr_1_1?ie=UTF8&qid=1368050052&sr=8-1&keywords=plano+5231
The one I'm thinking of was much bigger as he had done away with the box completely. More like THIS. Some of the pics in the product link are gaming related...
Nice one mate. They should have those Plano's on Amazon for $25. Just picked up 2 clearance at Kmart for $7.50 though, so try your local one if you have one.
Also, nice stuff.
Consider this as it's a little smaller and should hold ~10 ships.
http://smile.amazon.com/Plano-Molding-5231-Organizer-Porsche/dp/B000HJ9514/ref=sr_1_17?ie=UTF8&qid=1425944950&sr=8-17&keywords=plano+box
Try the Plano 5231. Amazon just had them on sale for $6.99, but I'm not sure if that's still active.
Edit: Just checked. They're now $9.99 on Prime.
I use single-sided Plano Stow-n-Go Organizers to store all my electronics parts.
Check out this post:
https://www.reddit.com/r/XWingTMG/comments/3qf3ni/storage_solutions_for_the_wiki/?ref=share&ref_source=link
I use a tackle box with Willli's Micro hangers:
http://www.sirwillibald.com/
These Plano boxes are very common (and on clearance): https://amzn.com/B000HJ9514
If you are trying to free up sticky, the best thing I have found is PB Blaster Penetrating Catalyst http://www.amazon.com/Blaster-16-PB-Penetrating-Catalyst-oz/dp/B000I2079E. Be sure to have a pair of rubber gloves and lots of ventilation. Be very careful not to let this get on plastic. I'd spray a little bit down where the typebar goes into the element and work the key until it is smooth up and down. Wipe off the excess and let it air out for a day or so. You should be good to go. A little goes a long way. This has freed every sticky machine I've ever dealt with. Regarding lubrication, I guess I'd say the lighter the machine oil the better - http://www.amazon.com/Liquid-Bearings-EXTRA-LONG-synthetic-movements/dp/B00CD814RA/ref=sr_1_4?ie=UTF8&qid=1396799365&sr=8-4&keywords=clock+oil+kit
My first job as a mechanic was working on mostly pre-'86 cars and trucks. My boss handed me a can of this awesome stuff called PB Blaster and since then, I always give rusty bolts a good soaking in it before making attempt. I have never broken a bolt off since and all I work on are '60's and '70s Mopars and frequent junkyards. I hope this helps
Make sure you are using a screw driver where the head fits nicely into the screw. If you use one that doesn't fit well it will be much more likely to strip it.
Use pb blaster. WD40 is junk.
Another thing you can do is to put the screw driver into the screw and tap it with a hammer. The idea is to break loose rust or other stuff holding the screw in place.
These 2 things are from years of fixing cars. the other thing I do with cars is to apply heat. Usually with a propane torch. This expands the metal and breaks any rust holding it in place. but I have a feeling that it wouldn't work well with nintendo's plastic case. ha
https://www.amazon.com/Blaster-16-PB-Penetrating-Catalyst-11-Ounces/dp/B000I2079E
https://www.amazon.com/Blaster-16-PB-Penetrating-Catalyst-11-Ounces/dp/B000I2079E
https://www.amazon.com/Blaster-16-PB-Penetrating-Catalyst-oz/dp/B000I2079E
This is your friend on vehicles with rust. There's a few variants of this, but this is on the the better more available ones, that isn't stupid expensive
PB B'laster. Cheaper than WD-40. Its got a hell of a warning label on it so you know it's good. Not to be used by pregnant women.
http://www.amazon.com/Blaster-16-PB-Penetrating-Catalyst-oz/dp/B000I2079E
Its a pretty good penetrating lubricant. you can find it pretty much anywhere. its what I have on my shelf at home, but your choice of penetrating lubricant would probably be just fine.
The hood latches tend to seize up over time, especially if you don't lubricate them occasionally. Had the same problem on my Mk5 Jetta. If it's seized and not a broken cable, you can generally fix it pretty easily.
You need three things: a small screwdriver, a can of lightweight break-free lube like Liquid Wrench or PB Blaster penetrating oil, and a can of spray lithium lube.
Pop the safety latch and prop the hood. Locate the hood latch assembly. Using the precision tube on the spray lube, saturate the inside of the latch and latch plate with the penetrating oil (try to keep overspray from rubber parts). Let sit for 30 seconds or so, and then press on the open side of the latch with the screwdriver until the latch plate releases and locks. Pull the hood release in the cabin to reset. Repeat several times until the latch snaps closed freely when you press on it with the screwdriver. Respray with penetrator if necessary.
Use a shop towel to mop up as much penetrating oil as you can and spray the entire inside of the latch assembly with as much spray lithium as it will hold. Work the mechanism a few more times to get it into the pivot and latch plate as much as possible. Re-saturate with lithium grease and button up.
Every time you change your oil, you should relubricate the hood latch with spray lithium to keep this from happening.
EDIT: Linkies.
or PB blaster.
Well, it beats the basin wrench that many articles recommend. Apply some PB Blaster and go out for lunch before returning and applying torque. It really is amazing how suddenly the nut comes loose. Be careful not to spill it, as it's about as aggressive as paint remover.
still just a spork
I have this one.
I use this for lunch every day. It's superb.
Personally, I usually have a titanium spork, chopsticks (you could find similar ones cheaper) and I usually have a knife of some sort on me (like a swiss army knife or something). in case I need to cut up something a little tougher than the spork could handle.
Titanium is nice because it's super light and antibacterial. If you look in an outdoor store you'll find lots of lightweight options that should be easy to carry/store in your car.
Based on my experience with the NeoAir Xtherm, I'd be a bit sketched out about using a NeoAir Xtherm or Xlite for a lengthy thru-hike. Mine started to leak air significantly after only a handful of uses, in such a way that it was impossible for me to repair it (even after getting out of the field). Fortunately, Cascade Designs replaced it for free, but mine is now reserved only for the trips that I really need that added warmth on to keep the wear and tear of the pad to a minimum. Perhaps someone who has carried a NeoAir on a thru-hike (or a lengthy section hike) can chime in, but again, I'd be hesitant to carry one myself on a longer trip.
I agree with /u/AussieEquiv that a 30 degree bag may or may not be sufficient, depending on the timing of your thru especially. Some details on when you plan to depart would be helpful, but I suspect in any case that you might want to consider at least carrying a liner- that way you can send it home once things have warmed up enough that you won't need it. Based on my experiences hiking Georgia in early spring, a 30 degree bag by itself would be a bit cold on at least some nights until some time in April. And even if you start in GA late, you may not finish in ME until late Summer/early Autumn, and accordingly you may still find that the 30 degree bag isn't warm enough in the northeast towards the end of your hike.
Similarly, I also agree with the comment about a thermal top in addition to the leggings. You'll likely be glad to have a full set of long underwear on at least some nights early into your thru-hike. I see you're planning on getting a light puffy which is good, but a light thermal top will be more comfortable for sleeping in.
And again, on another similar note, I would at least consider a hat liner and glove liners for occasional cold weather as well.
And yes, definitely ditch the town clothes (especially since they weigh nearly a pound). A spare t-shirt, underwear, and socks are OK, but you can otherwise just your cleanest hiking clothes (even if that includes your rain gear) while the rest are in the laundry.
I might suggest also carrying a pair of pants in addition to shorts- perhaps look into zipoff/convertible pants to keep weight down. You'll be glad to have pants on colder days, when hiking in grassy areas with ticks, etc.
Was the decision not to carry rain pants a conscious one? If so, what was the rationale behind it? Are you OK with soaking wet pants/shorts at the end of the day (and having to put those same soaking wet pants/shorts on the next morning)? I don't always bother with putting on rain gear myself when the weather is particularly warm (on hot and humid days you sweat just as much under it as you would get wet from the rain without it), but for a longer hike I think it's probably a good idea to have a full rain suit. You will have some cold, rainy days during which I think you'd be glad to have rain pants during in addition to a jacket.
I think if you have a spork with shallow fork tongs it will be OK. Something like the Sea to Summit Titanium Utensil Spork will be fine. Or you might look at the Light My Fire Titanium Spork, which has a fork/knife combo at the opposite end of the spoon (I'm a huge fan of this one, personally).
I hope this is helpful!
Solar chargers are great for a renewable source of energy when you're not certain you'll be near any outlets soon, their drawbacks are their weight and durability, though some new models are decent on both accounts.
​
I do; I have a plastic bag with some money in small to large bills and copies of my birth certificate, license, health insurance, and passport. This is in case I'm not at home, where my actual documents are all in my emergency binder.
​
Plastic sporks? Depending on the brand they may get brittle in the cold. My preferred utensil is the Light My Fire Titanium Spork, it's super light and durable.
​
I recommend nitrile for medical reasons, but I was talking more along the lines of work gloves.
​
Good idea! If I needed glasses I'd be super paranoid about not having a spare pair. One of the things that's impacted me lately are the stories from the Californian wild fires. There are a lot of first hand accounts about dealing with the smoke and how essential protecting your lungs and eyes is.
I have a few in titanium, they're actually very nice to use camping or at home.
I bought one of these http://www.amazon.com/Light-My-Fire-Titanium-Spork/dp/B001E7S5BO I really like it. It's not uncomfortable to use unless you use a death grip to hold it.
I prefer the super spork from Light My Fire. It's actually double ended, instead of the real combo utensil.
Sporks are fun ideas, but then you realize you have a fork with stubby tines, and a spoon with slots in it. The super spork isn't ideal, but it is better. The titanium model also fixes the primary design flaw of the (lighter and cheaper) plastic version, which is the slight fragility of the middle section.
I use this for a utensil http://www.amazon.com/gp/product/B001E7S5BO/ref=oh_aui_detailpage_o04_s00?ie=UTF8&psc=1
I use this for a bowl/plate http://www.amazon.com/dp/B007MJ9TGS/ref=wl_it_dp_o_pd_nS_ttl?_encoding=UTF8&colid=2KO70LRROUK7U&coliid=I245GJ6QHYV8H1
Do you mean, $10 light my fire spork.
https://www.amazon.com/gp/aw/d/B001E7S5BO/ref=mp_s_a_1_1?ie=UTF8&qid=1484317950&sr=8-1&pi=AC_SX236_SY340_FMwebp_QL65&keywords=light+my+fire+titanium+spork&dpPl=1&dpID=31EEJr9H3gL&ref=plSrch
Here you go (on mobile so I can't link well): http://www.amazon.com/gp/aw/d/B001E7S5BO/ref=mp_s_a_1_1?qid=1405896580&sr=8-1
https://www.amazon.com/Kuromaku-Ceramic-Whetstone-Medium-Grit/dp/B001TPFT0G
frequently bought together area brings up a set of 1000,5000, & 8000 grit kuromaku for $167.12!
So there is a thing that hasn't been made clear, making grips for his gun would require carving chisels and if he is already making them then he already has some stuff. You mentioned a Mortising chisel which is for a completely unrelated task. Does he have carving chisels? Since you are looking at Mortising Chisels, does he already have bench chisles? If he is starting and doesn't have bench planes Narex are a good set to start with, if he was looking at Mortising chisels again Narex is a great choice. Unless Lee Valley is running free shipping buy them from highland woodworking if you are not in Canada.
One thing before you do that you should look to see if he has sharpening stones. If he doesn't get him a 8000 and a 1000, that would be about 100 dollars and it will set him up for at least 10 years worth of use. I'm ignoring coursers stones they can be supplemented with course sand paper for the time being.
Cool, thanks! Seems like the stuff labeled Shapton Pro specifically has been discontinued due to some change in logistics with distributors. Is this the current equivalent?
Fibrox 8” chef knife:
https://www.amazon.com/dp/B000638D32
Shapton 1k Sharpening Stone: Ha No Kuromaku Ceramic Whetstone:
https://www.amazon.com/dp/B001TPFT0G
Lapping stone (to flatten your whetstone after it needs leveling from use...you won’t need this right now and can make do without):
Atoma Diamond Sharpener Medium -... https://www.amazon.com/dp/B0031KNR2O
Here’s the utility knife version of the larger knife, one of my personal favorites, same thing but 5” instead of 8” : https://www.amazon.com/dp/B000QCLEFC
The fibrox has relatively soft steel compared to most Japanese styles so it is a more forgiving blade and won’t chip. This also means you can use a honing rod between uses to maintain its edge and not have to sharpen as often.
https://www.amazon.com/Sk11-sided-Diamond-Whetstone-150-600/dp/B003EIE8LC
​
https://www.amazon.com/Kuromaku-Ceramic-Whetstone-Medium-Grit/dp/B001TPFT0G
I don't think a $30 knife would be a significant upgrade once you've sharpened yours. And learning to hone your knives will serve you well no matter what you get in the end. There are lots of devices you can get with less of a learning curve, but for the ultimate flexibility it's worth the time to learn how to use a waterstone as it's inexpensive compared to sharpening systems that can come close in quality and takes off less metal (and thus helps your knives last longer) + does a better job compared to the usual pull-through thingies you see.
​
I'd suggest 1000 grit to start as enough to help you maintain your knife for quite a while. This Shapton is $40 but worth the extra $10 over the commonly recommended King (and other cheaper whetstones) becauase:
https://www.amazon.com/Kuromaku-Ceramic-Whetstone-Medium-Grit/dp/B001TPFT0G
​
It'll let you keep your knife sharp for years. Probably decades. So worth getting a good one 'cause you're stuck with it a long time. Now you can make it sharper with more stones at higher grits, or sharpen faster with some at lower, but ultimately taking it really high isn't worth it unless you have a harder steel---the edge will wear out rapidly and you'll just need to sharpen it again. If you want, you can make a $1 knife just ridiculously sharp, but it won't stay that way:
https://www.youtube.com/watch?v=0P6klz6BTek
King Deluxe 1K comes in at $22, and for a knife like either of the ones I suggested will be all you really need. If you can save more, the Shapton Ha No Kuromaku is a common recommendation.
​
Also notice you asked in another comment about the difference between certain likes of knives. Your wording was a bit odd but I assume you are asking about the difference between the forged and the stamped lines? I can't speak about the Henkels knives, but Wusthof uses fewer steps when heat treating their stamped knives. This leaves them at around 56HRC instead of the 58HRC that their forged knives are hardened to. For a $35-$40 knife this isn't all that bad, but if you were looking at the Wusthof Gourmet line it's kind of silly.
​
Edit: Knife hardness is actually a really complicated subject. There are far to many variables for me to explain here (partly because I'm not the most knowledgeable about all of them) but try not to get to caught up in it just yet. Here are three categories for you: Really hard knives (Japanese mostly), not so hard knives (European mostly), junk that looks like knives/costs more than makes sense (things that put most of the budget into marketing or aesthetics)
It will work but it is very coarse. It will sharpen your knife but it will remove a lot of metal. The knife's edge will also be quite unrefined and so you will probably want to buy a higher grit stone as well. I would recommend this medium grit stone https://www.amazon.com/Kuromaku-Ceramic-Whetstone-Medium-Grit/dp/B001TPFT0G/ref=sr_1_2?ie=UTF8&qid=1536801668&sr=8-2&keywords=shapton+kuromaku. If you only have western knives you don't need anything more. Also ignore the guy telling you to watch Burrfection videos, they're terrible. If you want a video guide on how to sharpen your knife Japanese Knife Imports has a really good series of videos on youtube
All the crappy farm tables and diy projects on r/woodworking a your post gets removed, wtf.
I have a rikon half speed 1850 rpm 8" grinder with a 80 grit CBN cubic boron nitride wheel and a veritas tool rest. Shapton ceramic 320, 1000, 5000, 12000 stones. A 36"x6" 3 cm thick piece of granite and use adhesive backed sandpaper rolls. I wax the granite to allow the paper to come off the granite easily.
grinder
cbn wheel
tool rest
stones
320 g
1000 g
5000 g
12000
sand paper
I actually don't really care of the finer dmt diamond stones or the ez lap stones. I gave my ezlaps to a friend and bought the combo dmts.
I use the course on the duo sharp course/extra course dmt
And a 1000 grit shapton
Finally a strop with the green compound
Blade is razer sharp in < 30s if there's no major nicks in the blade. Major nicks mean going to the extra course and grinding it out for a few minutes first.
Every other system I tried just didn't work as well or as fast. The shapton just seems so much faster than the finer diamond stones.
The one you linked is optimized for harder knives than you probably own. It will work on softer steels, but a 1000 grit shapton is probably the better choice for most knives.
The 1k/6k king stone people are suggesting is pretty mediocre, if you can afford better skip it. You don't need 6k on most knives
B) Leatherman Squirt PS4, motherfucker (or the Leatherman Style PS if you fly often like me)
Slim wallet and keys w/ multitool in left pocket, cellphone in right pocket. Accomplishes the same thing without looking like a NEET.
Leatherman style CS is what I carry. Fairly solid and very light weight. They also make the style ps which has pliers and the style, which is an even smaller tool. Also as others suggest, the squirt ps4 seems like a solid choice.
This Leatherman Keychain. Blister packs will never haunt you or your friends again.
This might be a little small, but I just picked up a Leatherman Style PS for my keychain and I love it so far. It's replaced my much larger Leatherman Charge as part of my EDC since I pretty much only used the pliers and scissors.
So a few days ago I took a shot at trying a few of the 'cheap' $30 shoulder bags on Amazon. I ordered a bunch and this was the one that remained after a few hours of testing all of them. It holds absolutely everything despite being such a small bag (13.9" Height, 10.5" Width, 4.1" Depth). The pockets make the most sense when compared to competitors. Here is my carry list with some updates that show its full versatility (especially as a personal item when flying). Also, bag link here.
Edit: Also the water bottle holder holds either my Oakley or Ray-Ban sunglasses.
I've lurked here for a while and thought I should make my first post.
I'm also looking for a better wallet similar to mine. I've checked out the Hitch and Timber Card Caddy, but can't justify the price. Any recommendations?
Any other feedback is also welcome :)
Small multi-tools (Pick one and goes in wallet front pocket)
Flashlight (Goes in wallet's front pocket)
Pens (Pick one)
Wallet
Watch
Earbuds
Phone (Had to Badly Photoshop it into the pic)
On key-chain
Knives (Just my favorites. I usually just carry whatever knife I'm feeling that day)
Edit: not sure why photo uploaded with potato quality
Leatherman PS
https://www.amazon.com/Leatherman-Style-PS-Multi-Tool-Black/dp/B0058RX9NU/ref=sr_1_1?ie=UTF8&amp;qid=1486276573&amp;sr=8-1&amp;keywords=tsa+leatherman
Gerber Dime Travel Bladeless Knife https://www.amazon.com/dp/B00TOJCDM6/ref=cm_sw_r_cp_apa_33A-BbRVFP3NP
LEATHERMAN - Style PS Multitool, Black https://www.amazon.com/dp/B0058RX9NU/ref=cm_sw_r_cp_apa_k3A-BbGAB4JQ5
Knife - CRKT squid $17.99
Wallet - Recycled firefighter $19.00
Light - ThruNite T01 $9.95
Multitool - Leatherman Style PS $24.95
Pen - Fischer space pen bullet $19.67
Notebook- Rite in the rain $5.98
Lighter - bic mini $1 gas station
Total $98.54
Hard mode just get the knife wallet and light
this is a great version that fits on a keychain. I use it daily.
How about the Leatherman Style PS? Super small compact pliers/multi tool without a knife on board. Check it for yourself.
http://www.amazon.com/dp/B0058RX9NU/ref=cm_sw_r_tw_dp_wzCbsb1YP156Y
> Multi-tool always seem too heavy for what they offer
That's not heavy if you ask me. I think the Style is perfect for every-day on-person EDC, and the Skeletool for either on-person or in an EDC bag. The Skeletool is missing some features compared to a full-up Charge TTi (8 ounces) or similar, but for an EDC, it's better than not carrrying a multitool at all.
https://www.amazon.com/Escolite-Flashlight-Ultraviolet-Blacklight-Detector/dp/B008133KB4/ref=pd_cp_469_3?pd_rd_w=KZIH3&amp;pf_rd_p=ef4dc990-a9ca-4945-ae0b-f8d549198ed6&amp;pf_rd_r=KN64YYMJ1NE18KP2M2CM&amp;pd_rd_r=d53cd7f6-a4de-11e9-910c-738a5becb10e&amp;pd_rd_wg=2dknW&amp;pd_rd_i=B008133KB4&amp;psc=1&amp;refRID=KN64YYMJ1NE18KP2M2CM This is a good UV light for GITD Pops.
There are many skin issues that could cause discoloration. One indication of vitiligo would be that it glows under a black light, like the hands in this image.
I'm not an expert (AKA dermatologist) but I know vitiligo tends to start around joints and the face. It usually spreads from there to the rest of your body.
However, it could start elsewhere but the fact that these spots on your back are the first ones you're noticing makes me think it's less likely that it's vitiligo, though it's still possible.
Best thing you can do (aside from seeing a doctor) is get yourself a black light (Amazon has some small handheld ones) and a mirror.
Turn out the lights, get naked and shine the black light over your body slowly as you look for spots that glow. If it's vitiligo, you'll see it glow and look very different than the surrounding skin. You'll also likely find other areas of your skin that hasn't fully lost pigment due to vitiligo which will also glow. They may even be tiny spots that look like a bunch of freckles. I don't think vitiligo is the only skin issue that glows but if it doesn't glow at least you know it's not vitiligo.
I'm saying to get completely naked because vitiligo can effect genitalia as well. Make sure you look around there.
Of course, if you have healthcare options, it's best to see a dermatologist. Vitiligo can be treated. If you catch it early, such as now with only a few spots, treatment can be very easy and fast. Treatment for a couple of small spots may only require a few months of using a cream and a little light treatment.
If it's something else, you also want to catch it early, so that you can start any possible treatment.
Good luck!
https://www.amazon.com/dp/B008133KB4/ref=cm_sw_r_cp_api_GL2cAbRAKRRB9 works really well and isn’t too expensive.
Do you use a UV flashlight? Those are awesome if not. I bought a badass one on Amazon that really helps compared to the one I had before that I got at Circle K.
I've tried anything from sprays, to a screwdriver duct-taped to a stick. I find just using a regular stick can get in the rocks pretty well and handle it. Having the powerful flashlight helps too because you can see them from across the yard.
Also, having someone spray for scorpions monthly does wonders. When I moved in my house, I could easily get 5-10 per night. I've had my house sprayed ever since then, and I haven't seen one in two years.
Yeah, I always bring a UV flashlight with me for glow rounds. Definitely does depend on the plastic type/color how much it glows, but with the right discs it makes finding your discs at night a non-issue. You can even sometimes find some others that were lost during the day that were well hidden, but glow at night. I use this one, for $10 it works great.
Nice. I have this one and it does nothing for my POP. Works wonders on my other GITD POPs though.
i'd change the myq for the gocontrol linear https://www.amazon.com/GoControl-Linear-GD00Z-4-Z-Wave-Controller/dp/B00M75TEIU/ref=sr_1_1?ie=UTF8&amp;qid=1469114577&amp;sr=8-1&amp;keywords=go+linear
By "GoControl," I think you mean this? GoControl sells several Z-Wave accessories that are actually just rebadges of Linear, not just the garage door openers. :)
I have two of those, those mine are the "Iris" branded ones from Lowes (again, same manufacturer - Linear). They look like this in the app. Tap the green icon, they open and the icon turns yellow. Tap the yellow icon, they close and turn green. They can be controlled by SmartThings monitoring, CoRE, etc. There's actually a "Door Opener" device type that they register as.
Does that answer your question?
If you want something to work with the Wink Hub, you can go with a GoControl Z-Wave Add-on. https://www.amazon.com/GoControl-Linear-GD00Z-4-Z-Wave-Controller/dp/B00M75TEIU You can add it to any garage door you'd like. I installed mine, using a SmartThings hub, and it seems to work pretty well.
GoControl/Linear GD00Z-4 Z-Wave Garage Door Opener Remote Controller, Small, Black https://www.amazon.com/dp/B00M75TEIU/ref=cm_sw_r_cp_api_i_qQH4BbHC7CQTS
I install one of these every week or so. They work really well for modern openers.
Amazon had the garage door sensor but its now unavailable, they are the only seller currently, but we will have it available on Amazon Prime in a couple weeks. We have a few units coming in today so once we get the listing complete, it will be available there in our store.
We will have the other items as well, we ordered yesterday but it may be a week or two for them to get in, Linear is pretty slow shipping.
I have the GoControl for my 2 garage doors. It works great and most importantly integrates with hubs and IFTTT (i prefer Stringify though). The MyQ does not release there API to work with other services from what I here. I use a Wink and story around the block is you can't even make Robots using the MyQ. However, 20 dollars is a steal esp. compared to 80.
Sorry for being so late, but if you have Z-Wave in your automation already, then Z-Wave garage door openers are under $100, like this one: https://www.amazon.com/GoControl-Linear-GD00Z-4-Z-Wave-Controller/dp/B00M75TEIU/ref=sr_1_1?ie=UTF8&amp;qid=1491329589&amp;sr=8-1&amp;keywords=ZWave+garage+door+opener. Is the one I have, it has sensors that tell you if it is open or closed, and then you can use your phone (via z-wave controller) to close/open it. Works well for me. With my z-wave controller (Vera), I have it setup to notify me if I am not home and the door is opened, or left open.
There is also various WiFi options, which also allow you to control it, like this one: https://www.amazon.com/Chamberlain-MYQ-G0201-MyQ-Garage-Controls-Smartphone/dp/B00EAD65UW/ref=sr_1_1?ie=UTF8&amp;qid=1491329677&amp;sr=8-1&amp;keywords=wifi+garage+door+opener. No personal experience with those, but if they support your opener, are probably a good option.
If DIY is more your thing, a Arduino and a simple switch on the track somewhere would work for notifying if it is open.
My cheap/old garage door opener (Genie screw drive) has a bunch of exposed screw terminals for switches. One terminal opens/closes the door, one terminal toggles the light. They will work with any pushbutton switch, so anything that could drive a relay would work.
The door position sensors are just open/closed switches as well, so it would be really easy to wire it to anything that has a few i/o pins.
... so yeah anyway just get something like this and check the compatibility list:
http://www.amazon.com/Linear-GD00Z-4-Z-Wave-Garage-Controller/dp/B00M75TEIU
All good man. There is this also. GoControl/Linear GD00Z-4 Z-Wave Garage Door Opener Remote Controller, Small, Black https://www.amazon.com/dp/B00M75TEIU/ref=cm_sw_r_cp_apa_FxyTzb8594QSS
Good luck either way
Amazon has not allowed Alexa to open/close doors or to unlock doors due to safety and security concerns. There are some workarounds out there.
I use the linear zwave garage door opener:
https://amazon.com/GoControl-Linear-GD00Z-4-Z-Wave-Controller/dp/B00M75TEIU
There is a custom device handler made for it on SmartThings that allows you to open and close it with alexa. However, I have tell alexa to turn it on (open) or off (close). It does not support Alexa telling me the status of the door. I still have to use the Smartthings app for that.
Hi Mike! There used to be a 3rd-party device handler for Chamberlain MyQ openers, but it seems that it has been discontinued: https://community.smartthings.com/t/discontinuation-of-myq-connect-community-smartapp/47183
Another option is to use the GoControl unit that connects to your existing garage door opener: https://smile.amazon.com/GoControl-Linear-GD00Z-4-Z-Wave-Controller/dp/B00M75TEIU. It has native integration with ST as well as options for third party device handlers that extend the functionality. The price on Amazon is a bit high right now, but I've seen it around $65 in the past. If you're not in any hurry, use camelcamelcamel.com to track the Amazon price and notify you when it decreases or hits a target price you configure.
I can't help much with the camera portion of your question, but I'm interested to see what others have to say as well. This is something I'm still deciding on also.
Ahhhh, I see. So to integrate with Wink I would neither either this...
http://www.wink.com/products/chamberlain-myq-garage-door-controller/
Or one of these?
https://smile.amazon.com/GoControl-Linear-GD00Z-4-Z-Wave-Controller/dp/B00M75TEIU/ref=sr_1_3?ie=UTF8&amp;qid=1479394170&amp;sr=8-3&amp;keywords=go+control
I got the Linear Garage Door Opener.
Works well. Plugs in easily to existing garage door opener.
Be very careful with it though. I never include closing it in automations in fear of it closing down on a kid or pet.
It is also an IoT device that if hacked, it will allow bad guys to get in your garage.
I'd think those would both work (haven't used them), but given Wink recognizes them as garage door openers they will limit operations that let you schedule/trigger door openings.
However, since you have a MyQ opener, I wouldn't get the Chamberlain controller you linked; that's to convert non MyQ doors to MyQ. Your current opener already has MyQ, so if you go the Chamberlain/Liftmaster route, just get the Internet gateway others have listed.
... nor the GoControl. Those both have the door sensor that detects if door it open or closed; your MyQ opener already has that intelligence.
If I wasn't clear (or confused you), the Liftmaster/Chamberlain Internet gateway WILL integrate with Wink; Chambrlain/Liftmaster and Wink just place restrictions on what you can do with it security-wise. I think Wink places those restrictions on most, if not all devices it recognizes as a door opener. Alexa does, at least.
The MIMOlite, I've heard, will get you around that, because Wink doesn't know what it's actually controlling.
... but the MIMOlite, alone, doesn't provide a sensor to tell you if the garage is currently open or closed. A ZWAVE sensor designed to detect angular changes, such as this, would work (but I don't know if that one is supported by Wink)
So you're saying if I buy the MyQ Garage Door Opener for my new house, I can return this?
This is the fan I use and this is the timer it runs on also.
You don't need a "night light", you want your snake to have darkness at night. Light and heat should be from two separate sources, and make sure your heat source is always controlled by a thermostat. If your room does not receive ambient lighting from a window, etc. you can use something as simple as a clamp lamp with an led light bulb screwed into it, plugged into an outlet timer. As long as the light is not overly bright (grow lights or aquarium fixtures can be too bright) and your snake has a place(s) to seek shelter this will work fine.
There grow lights I purchased on Amazon. I have a timer set up to give them more light during the winter months.
Yeah, so most cannabis plants , except for autoflowers, are what’s called “photo-period” where their growth is determined by the light schedule, so we basically have to recreate natural patterns of sunlight.
During the first stage , Vegetative stage, you want to run your lights on 18 hours, off 6. During this phase, you train your plant to grow the way you want it to. See: Low-Stress Training, Supercropping, Mainlining, etc. the plant does not create flowers during this stage. I always flip my plants into flower mode whenever my plants are a little under half the size I want them to grow to, as they can double in size or more during flower.
To put your plants into flower mode, you just switch the light schedule to 12 hours on, 12 hours off. Flowering times vary based on strain, but average is about 8-9 weeks of flower before harvest.
You can get a digital timer for your lights on amazon for cheap. This is what I use in all of my tents.
So I don’t know exactly how much I’ve spent on my beardie since he was given to me with almost everything I needed to care for him, but I can give you the basics.
First off, for the flooring you can use paper towels to start, or contact cabinet paper that can be found at a dollar tree. I don’t think tile is that expensive, but if you’re unable to get some at the moment those work just fine. I also suggest covering the back and sides of the tank so the beardie doesn’t see its reflection and get stressed
You’ll need at least one hide on the cooler side, which can be made from something as simple as a small cardboard box with a hole cut in it or some bricks that are arranged into a cave-like hide
A basking area can be made from bricks purchased at Lowe’s or Home Depot, or if you choose to use any driftwood/rocks you find just make sure you clean them properly
Calcium powder is also extremely important to help your beardie not develop MBD. I’m part of a Facebook bearded dragon group that suggests this brand sprinkled over greens/bugs three times a week: https://www.chewy.com/repashy-superfoods-calcium-plus/dp/166276 I poke some holes in the paper lid with a toothpick to create a shaker-type deal so I’m not wasting any calcium
I think one of the most expensive parts is the UVB light since they can get pretty pricey, and since they need to be changed every six months. Here’s an 18”, along with a fixture that could be used, but obviously with a longer tank you’ll need a longer size: https://www.chewy.com/zoo-med-t8-reptisun-100-uvb/dp/126590 https://www.amazon.com/GE-Fluorescent-Included-Workbench-16466/dp/B000HJ75PW again, I usually stay away from reptile brands for things such as fixtures because the cheaper version works better and lasts longer. The T8 bulb needs to be hooked into the tank, which I use zip ties to the lid but Velcro to the side also works, as long as it’s 12” away from the basking area
Heat lamp with dimmer: https://www.chewy.com/flukers-clamp-lamp-dimmer-85-in/dp/129140
Pack of 90w flood lights (make sure they’re halogen, not LED): https://www.homedepot.com/p/Philips-90-Watt-PAR38-Halogen-Indoor-Outdoor-Flood-Light-Bulb-2-Pack-466268/205541724
Digital temp gun: https://www.amazon.com/Etekcity-Lasergrip-774-Non-contact-Thermometer/dp/B00837ZGRY
Light timer for both lights: https://www.amazon.com/Century-Heavy-Digital-Programmable-Timer/dp/B00MVF16JG
Vet bills and fecal tests can be pricey as well, depending on where you live. My last vet appointment with mine, which did include a test for parasites, cost around $300
While I don’t know how much I’ve spent on my beardie, I can safely estimate it’s $700+, give or take a bit. One of the most expensive is buying the greens and bugs for him. I’m growing a garden to feed him but since it’s not ready yet, I have to constantly buy him collards, turnip and mustard greens, along with various fruits and veggies which can go bad very quickly. I’m in the process of looking into buying his superworms online where you can get a better deal, but at the moment I’m paying 100 for $10 at my local exotic pet shop, which he goes through quickly.
I don’t know how old you are, but if you say you’re not old enough to properly take care of a reptile I would wait a few years or so until you get another. Bearded dragons, while more of a beginner reptile than others, still require a lot of time and effort to make sure they stay healthy. I would recommend doing a lot research throughout the next few months (look at multiple sources, don’t just listen to people at a pet store because often they don’t know what they’re talking about), and if possible, perhaps slowly start gathering the needed supplies in order to properly care for one
I hope I covered everything since reddit refreshed and deleted my first response before I finished, but if you have any more questions you can always message me (:
I use these programmable timers for my iguana and turtle lamps. Each timer can control 2 devices and support 8 daily on/off cycles. Great for fish tanks, too FYI.
You don't need to spend a lot of money to accomplish what you want. Just get as many of these cheap basic timers as you need, one per schedule. Say you want your lights on at certain times but everything else on at a different time, all you need is 2 of these, and plug in a cheap power strip to the timer so you can hook up as many appliances as you need to the timer. Not sure why you would even consider spending so much on just a timer...
https://amazon.com/gp/product/B00MVF16JG
Your previous post mentioned that this started after day light savings time. Have you considered just putting her to bed at her regular (before the time change) time? Then maybe adjusting bed time by 5 or 10 minutes every night to make it an easier adjustment for her?
Also, I let my kids stay up as late as they want but only if they are in their bed reading. This goes for all three of them (11, 7, and 2.5) and has always worked wonders for keeping them in the bed. They usually fall asleep on their own within 30 minutes or so. We have these lights strung up in the toddlers room on a switch timer so they automatically turn on at bedtime and off 30 min later. Gives him enough light to look through his book (his current favorite is "Too Many Carrots") and we don't have to risk waking him up to turn them off later. The 7 year old has a cute cat shaped silicone light, which she adores, and the 11 year old uses a head lamp from our camping gear.
i use those basic ass dial timers , i think you can get one for like 10 $ mine has tabs you push in / pull out and can be set for either on/off every 15 mins. .
https://www.amazon.com/dp/B00MVFF59S?psc=1
awesome, thank you! would a timer like this work? https://www.amazon.com/dp/B00MVFF59S/ref=sspa_dk_detail_0?psc=1&amp;pd_rd_i=B00MVFF59S&amp;pd_rd_wg=KBcJh&amp;pd_rd_r=0JGTM74FGMQ0YW91K08Q&amp;pd_rd_w=5pAEd
I've been taking ice baths for a bit now using plastic water bottles as reuseable ice cubes while filling the tub daily. I have a nice jacuzzi tub available most of the time that is great, but lugging the ice bottles around (my tub is on the 2nd floor, and my freezer is on the 1st floor) and having to re-freeze them every day can be a PITA - as well as having to use new water each day instead of the ability to recycle. My next solution is a chest freezer, which I intend to set up as soon as I am able.
A few tips from my research:
Couldn't you use a normal time-dependent timer between the inkbird and your kegerator? That way your kegerator will only kick on during the times you tell it to.
Edit: Not that easy. Power needs to be supplied 24/7.
Double Edit: They make ones with a battery back up.
I would so it on low for 6 hours. If your crockpot doesn't have a timer and you want to start it before work, I suggest getting one that the plug goes into. 8 hours is a long time for veg.
They make digital ones, but you have to reprogram them Everytime you plug it in. Here is a link to a mechanical one. https://www.amazon.com/Century-Plug-Mechanical-Timer-Grounded/dp/B00MVFF59S/ref=mp_s_a_1_4?ie=UTF8&amp;qid=1536151828&amp;sr=8-4&amp;pi=AC_SX236_SY340_FMwebp_QL65&amp;keywords=plug+timer&amp;dpPl=1&amp;dpID=41hWDwaWyhL&amp;ref=plSrch
Oh, that's nice! You can load the washer in the morning, set it to start running at an hour before you usually get home, and then move it to the dryer right away.
&#x200B;
I wonder if one of those[ outlet timers](https://www.amazon.com/Century-Plug-Mechanical-Timer-Grounded/dp/B00MVFF59S) would work for that? You'd need a grounded one that accommodates the three prongs (the one I linked does).
&#x200B;
Setup (in case you want this extra guide):
&#x200B;
It ain't cheap and won't likely solve all your algae issues (i have all manner of thread algae currently but it comes and goes) but it makes all the difference in overall plant health and growth, you will be trimming weekly if all goes well.
Success, now just wait until the plants get wildly healthy in a week.
I like the mechanical timers for their simplicity, they seem to last fairly long. I have owned a few of the digital timers and they can be a pain to program correctly. Even though the mechanical timers can't have multiple schedules it is nice to know they'll function just as intended.
Here's one I'm talking about - https://www.amazon.com/Century-Plug-Mechanical-Timer-Grounded/dp/B00MVFF59S/
Erm... maybe attach a simple motor to a Wall timer?
If you don't know electronics, then you should accomplish this with as little electronics and as many off-the-shelf parts as possible.
Well, I'm skeptical of the smart home stuff for two main reasons. The biggest is because most of it seems like either more fragile and less reliable than the good ol' mechanical stuff. I know a light switch is going to turn on and off my lights. If it doesn't, odds are it's a problem with the light, not the switch. If I say "Hey, Lady in a Tube, turn off the lights," there's a much bigger chance of it not working in a way that I can't do anything about. A lot of other home automation stuff seems like it could be just as easily, and a lot more reliably, done with a simple, mechanical outlet timer. I want hot water in the morning, why buy a smart kettle or a smart plug that needs Wifi, when one of those timers will do the same thing, more reliably, even if my internet is down? Then there's the issue of so many of these smart home gadget companies getting bought out and bricking their devices. No fun.
The second concern I have is, of course, privacy. These things are collecting a lot of data, and I don't know how a lot of it is being used. I'd prefer to not have a hot microphone picking up what I say and sending it to a data center to be picked through for ads. Yes, I know the Echo doesn't send any audio unless it's been triggered first, but I don't know what all these other devices are sending out. Wasn't there a smart vacuum that was uploading maps of its users floorplans? Then there's the Vizio smart TVs that literally uploaded a framegrab of everything it displayed to Vizio every 30 seconds. I might be paranoid, but until the privacy stuff shakes out, I ain't gonna bother, even if I can find a use for it.
Giantex Indoor Grow Tent Room Reflective Mylar Hydroponic Non Toxic Clone Hut 6 Size (32''X32''X63'') https://www.amazon.com/dp/B00PXK7ICK/ref=cm_sw_r_cp_api_UhVuybY2C4CHS
Roleadro 2nd Generation 600W LED Plant Grow Light Upgraded Full Spectrum Indoor Growing Light with 120pcs 5W Chips https://www.amazon.com/dp/B01IVQ96MW/ref=cm_sw_r_cp_api_diVuybHJCV7XV
VIVOSUN 4 Inch 203 CFM Duct Inline Fan with Variable Speed Controller https://www.amazon.com/dp/B01CTM0H6I/ref=cm_sw_r_cp_api_BiVuybSGHVZTE
Century 24 Hour Heavy Duty Plug-in Mechanical Timer Grounded https://www.amazon.com/dp/B00MVFF59S/ref=cm_sw_r_cp_api_nkVuybNGBW6PS
MacDoDo PH-02 Digital PH Meter Tester Best For Water Aquarium Pool Hot Tub Hydroponics Wine - Push Button Calibration Resolution 0.01 / High Accuracy +/- 0.05 - Large LCD Display - 100% Guaranteed https://www.amazon.com/dp/B01JOHTMEO/ref=cm_sw_r_cp_api_MkVuybZ08V91M
VIVOSUN Pair of 1/8" Adjustable Grow Light Reflector Clip Hanger Rope Ratchet with Zinc Alloy Internal Gears 75lb Each https://www.amazon.com/dp/B00P7TZNPQ/ref=cm_sw_r_cp_api_nlVuyb1Q8670K
This is my setup, my fan is coming in today and my seedlings sprouted this morning. I did quite a bit of research and The light is a little underpowered but I was on a pretty tight budget and can always add more light later.
I spent $40 on seeds and super soil mix from Mephisto genetics, going a more organic route and won't require nutes.
I also spent about $30 on peat moss, perlite, and compost. I already had some ducting and pots.
I have the same ones, they get really hot so be sure to keep the heads far from the seedlings
Might even consider getting a mechanical timer. I got one recently and now I dont have to worry about turning them on in the morning and off at night.
As an example for a smallish grow:
2 x 2 x 4 Tent: https://www.amazon.ca/gp/product/B074H5DKPY/ref=ppx_yo_dt_b_asin_title_o01_s00
Lights: https://www.amazon.ca/gp/product/B0752CL6KJ/ref=ppx_yo_dt_b_asin_title_o01_s00
Exhaust fan: https://www.amazon.ca/gp/product/B01C82SYZ0/ref=ppx_yo_dt_b_asin_title_o05_s00
Ducting: https://www.amazon.ca/gp/product/B00EPE3XHY/ref=ppx_yo_dt_b_asin_title_o05_s00
Timer: https://www.amazon.ca/gp/product/B00MVFF59S/ref=ppx_yo_dt_b_asin_title_o00_s00
Total cost: ~270 CAD
Ah okay gotcha. Also I realized I can get tons of discarded circuit boards from work so those should be enough practice material for me. I was looking at an iron like this https://www.amazon.com/Vastar-Full-110V-Soldering-Iron/dp/B01712N5C4/ref=sr_1_4?ie=UTF8&amp;qid=1483622458&amp;sr=8-4&amp;keywords=soldering+iron . Looks like it would be okay and is 60W
I really like this one:
https://www.amazon.com/Vastar-Soldering-Iron-Full-Welding/dp/B01712N5C4/ref=sr_1_4_acs_twc_5bddfe5a-5f_3?s=hi&amp;ie=UTF8&amp;qid=1519276481&amp;sr=1-4-acs&amp;keywords=soldering+iron&amp;content_id=5bddfe5a-5f09-4448-804c-13db1e65e880&amp;ingress=search&amp;content_type=story&amp;ascsubtag=5bddfe5a-5f09-4448-804c-13db1e65e880&amp;tag=ospsearch-20&amp;widget_name=expert_recommendation&amp;content_provider=osp
I use a little better stand then the one they give you but this Iron does have a temp adjustment which makes it pretty nice.
i would get this set
http://www.amazon.com/Full-Vastar-110V-Soldering-Iron/dp/B01712N5C4/ref=lp_11498399011_1_3?srs=11498399011&amp;ie=UTF8&amp;qid=1463149918&amp;sr=8-3
comes with a solder sucker, stand, and tweezers for only a couple bucks more than the other recommendation. What I am currently using to make my SuperGameGirl
Saw a suggestion for this a few days ago from /u/jaiakt:
Amazon.com: Vastar Full Set 60W 110V Soldering Iron Kit
Weller does seem to be a good brand from reviews I've read before, though. The WLC100 that Krelbit suggested would be a step up in class from this.
I bought [this kit](Vastar Full Set 60W 110V Soldering Iron Kit - Adjustable Temperature, 5pcs Different Tips, Desoldering Pump, Stand, anti-static Tweezers and Additional Solder Tube for Variously Repaired Usage https://www.amazon.com/dp/B01712N5C4/ref=cm_sw_r_cp_api_AGFfzbEE1V8HC) off Amazon for $16. Not super high quality, but I've used it for several builds with no problem.
Check Craigslist for guitars that have electronic issues or are completely dead. For example I got an rg321mh that has a perfect neck and frets for $60. All I had to do was rewire a new input jack. Get a cheap solder pen and some 63/37 rosin core solder.
Wiring guitars is WAY easier then most people think. You can find diagrams for almost any production guitar/pickups.
Just make sure your frets, neck, and nut are good, that stuff is a pain to fix. The rest you're replacing anyways.
I just do a full rewire. Buy the following for a dead guitar: 1. CTS pots. 2. Switchcraft input jack and switch. 3. 22awg cloth sleeved wire. Use a multimeter to check pickups resistance. Or just get some guitar fetish pickups of your choice for a cheap option of new pickups. Then just do the full rewire following a diagram. Make sure to pre-tin your solder pen, the solder point, and your wire. Also sand the back of your cts pots for easier adhesion. Pickup a $5 helping hands from harbor freight to hold stuff to solder.
All this stuff will cost you around $50-60 with a cheap solder pen kit ($12 Amazon) and you will have enough wire and solder to do a bunch of guitars.
You will have a completely rewired guitar in less than 2 hours of work.
Here is links to solder pen, solder, and wire. The rest just lookup for your guitar you're gonna rewire.
https://www.amazon.com/Vastar-Soldering-Iron-Full-Welding/dp/B01712N5C4?ref_=fsclp_pl_dp_6
https://www.amazon.com/Gavitt-Cloth-covered-Pre-tinned-Pushback-Vintage-style/dp/B00JYJFE72/ref=mp_s_a_1_4?keywords=22+awg+wire+cloth&amp;qid=1556147584&amp;s=gateway&amp;sr=8-4
https://www.amazon.com/Kester-Rosin-Core-Solder-Dispense-Pak/dp/B00AVLM4SO/ref=mp_s_a_1_4?crid=IRV7SJBS91YR&amp;keywords=63+37+solder+kester&amp;qid=1556147625&amp;s=gateway&amp;sprefix=63+37&amp;sr=8-4
This one for $17 has served me well so far.
I got this kit. [Vastar Full Set 60W 110V Soldering Iron Kit] (https://www.amazon.com/dp/B01712N5C4/ref=CM_SW_R_CP_APA_ZV6IZBDB771M1)
I ended up getting a few other things and a better solder sucker after a few jobs.
[Hakko 599B-02 Solder Tip Cleaning Wire and Holder] (https://www.amazon.com/dp/B00FZPGDLA/ref=cm_sw_r_cp_apa_9Y6IzbHX1H6MD)
[Engineer SS-02 Solder Sucker] (https://www.amazon.com/dp/B002MJMXD4/ref=CM_SW_R_CP_APA_W06IZBVBPKVMP)
The sucker was totally worth the extra cost.
I'm going to pick up either this for $11 or this for $21 when I do the soldering on my pair.
2x TH20 Headlamps
https://www.amazon.com/ThruNite-TH20-Lumen-CREE-Headlamp/dp/B01FCV32SI
From Jeff
Amazon: https://www.amazon.com/Escolite-Flashlight-Ultraviolet-Blacklight-Detector/dp/B008133KB4/ref=sr_1_3?ie=UTF8&amp;qid=1498698634&amp;sr=8-3&amp;keywords=uv+flashlight
I use this Blacklight UV Flashlight from Amazon! Just have to charge for minute to see the glow!
A UV light is handy for a little instant charge. If you're looking for a really glowy disc, try Kastaplast. It outshines the rest.
I use an LED UV flashlight like this
Scorpions glow under blacklight, so it's pretty easy to find them with something like this
https://smile.amazon.com/Escolite-Flashlight-Ultraviolet-Blacklight-Detector/dp/B008133KB4/ref=sr_1_3?ie=UTF8&amp;qid=1522520306&amp;sr=8-3&amp;keywords=blacklight&amp;dpID=51veSdpP7EL&amp;preST=_SY300_QL70_&amp;dpSrc=srch
https://www.amazon.com/Escolite-Flashlight-Ultraviolet-Blacklight-Detector/dp/B008133KB4/ref=sr_1_1?ie=UTF8&amp;qid=1526687158&amp;sr=8-1&amp;keywords=escolite
We got this and it's worked great.
https://www.amazon.com/gp/product/B008133KB4/ref=oh_aui_detailpage_o00_s00?ie=UTF8&amp;psc=1
I always thought this one garnered more use off what the sub says often
Amazon is a great place to check! I picked up this one and I've been using it for years now. It goes on all my travels. It's not necessarily compact but for the sake of feeling happy, healthy and clean, I'll take it!
I replied to another poster as well.
It's this one.
https://www.amazon.com/Brondell-GS-70-Portable-Convenient-Capacity/dp/B008CSDKSQ/ref=sr_1_3?crid=4SMYEIMTXCTN&keywords=travel+bidet&qid=1564154096&s=gateway&sprefix=travel+bidet%2Caps%2C129&sr=8-3
It's tough to clean. I have a really skinny bottle brush that I double over. Otherwise I love it, especially when I'm travelling.
This one
Get this
Bought this and no longer travel without it Brondell GS-70 GoSpa Travel Bidet https://www.amazon.ca/dp/B008CSDKSQ/ref=cm_sw_r_cp_api_i_BMIZCbFAD49KC
True. A non-ultralight luxury is the Brondell Travel Bidet
http://www.amazon.com/Brondell-GS-70-GoSpa-Travel-Bidet/dp/B008CSDKSQ/
I use this bidet at home and love it.
For public bathrooms, you can get a travel bidet, like this one.
I usually just use some toilet paper that I've dipped into the toilet (after flushing of course!), and alternate between wet and dry wipes until it's clean.
I bought this from Amazon:
Brondell GS-70 GoSpa Travel Bidet https://www.amazon.com/dp/B008CSDKSQ/ref=cm_sw_r_cp_apa_rccnybCJ7CAEJ
Now I never have to worry about bidet-less bathrooms anymore. I've used it in airplanes, malls and even hotels that don't have bidets. Capacity is a little lacking (only 500 ml) but you can always bring with you a 1L bottle of mineral water for stall refilling or just walk over to the sink with your pants down for refilling (not recommended).
Also, bring tissue. Wet wipes clog toilets if you decide to flush them down.
You're welcome.
you're welcome!
I use the specific 'feminine' wipes that you find in the drugstore.
If you are going to use a water bottle - just buy a peri-bottle or a personal bidet...so that you can have a little more control of the water.
If you're ever in the need of a bidet, go on amazon and search up a portable bidet. I got one when i moved to North America!
edit: https://www.amazon.ca/Brondell-GS-70-GoSpa-Travel-Bidet/dp/B008CSDKSQ/ref=sr_1_1?ie=UTF8&amp;qid=1504155231&amp;sr=8-1&amp;keywords=portable+bidet
Use a travel bidet like this
Sure! So this is a bidet:
https://www.amazon.com/gp/aw/d/B008CSDKSQ/ref=mp_s_a_1_1?ie=UTF8&amp;amp;qid=1499647593&amp;amp;sr=8-1&amp;amp;pi=SL75_QL70&amp;amp;keywords=travel+bidet
What you do is instead of using toilet paper, you squirt your butt with water by squeezing the bidet bottle. This eliminates the need for TP as it'll clean just as effectively.
This!
https://www.amazon.com/Tenma-21-8240-Vacuum-Desoldering-Iron/dp/B008DJRYIG/ref=sr_1_9/140-2662085-0132061?ie=UTF8&amp;qid=1519399470&amp;sr=8-9&amp;keywords=desoldering
Also, when you are re-soldering... The key is to heat the part you are soldering, then add solder to the hot joint. You let the hot joint melt the solder, not the iron. If the parts being soldered don't get hot enough, they will not form a good bond. You've now learned the hard way.
It takes practice to learn how to solder, as it does to desolder. I would suggest practicing on an old printer or some other scrap device first.
You could probably find a used or new, cheap PCB on /r/mechmarket to practice. I just built my own, new 60%. It was harder than I thought but also not terribly difficult. Learning how to desolder (because I'm an idiot and messed up a lot of things) was a more difficult process. Again, not terribly difficult. You could always buy a soldering practice kit on Amazon.
I would suggest you buy a good solder sucker to make your life easier. I recommend this one. I also tried this thing per suggestions on /r/mk but found it disappointing. It doesn't suck out all the solder cleanly when I tried it.
I don't know about the quality or differences between the new and old QFRs or LED process. Some LEDs are separate and are independent of the switches, so you don't have to worry about that. Some are in the PCB themselves, so you don't have to worry about that again. Then there are cherry MX RGB switches which I know absolutely nothing about.
It's just called a desoldering iron, I was sleepy when I wrote the previous comment haha. I use this one and it's great. It just combines the iron and solder sucker into one much more effective tool.
Some will recommend the Engineer SS-02. I prefer the Soldapullt.
There's also this, but I haven't tried it myself. It's apparently good too.
I would buy some decent soldering wick just in case, for those stubborn pads. 99% of the time you won't need it in my experience though, given how big switch holes are.
Those are fine but honestly you don't need all those extra bit and bobs.
Just get the same basic soldering iron off Amazon, a desoldering iron like this one or a desoldering pump.
Here's every desoldering tool I've used so far, from worst to best:
If you don't have a desoldering iron already, this one has worked wonders for me. I got it when it was around $10 and it's desoldered like 3 boards w/o any problems.
Desoldering is very easy with a tool like this. Since you already have access to a soldering iron, it should be feasible.
If you've not soldered before, couple things to keep in mind. For one, don't leave the soldering iron in contact for too long. If it takes more than a second to melt the solder, increase the temp or change tips (if you can). You want to avoid damage, which happens as a property of thermal transfer. You might assume that hotter is worse, but less heat is transferred over time if the soldering happens in less time. Never touch the iron to the board, if possible. Always touch it to the pin of the switch, and apply the solder to the heated switch pin, and not the iron directly.
For the desoldering iron, it maintains a fairly low temperature, so you shouldn't have to worry too much about damaging the board. However, because of its lower temp, you might also need a fine-tip in the soldering iron to assist. If it takes more than a second or two for the desoldering vacuum to melt the solder, back off, let the joint cool, and try again with the iron applied in tandem.
Also, never push the thumb trigger while it's pointed at something. Sometimes hot slag will come out. Treat it like a loaded gun.
Its never too late to learn how to solder, if its only a few switches that are like this you can buy some Gateron switches individually or in a 10 pack and replace the bad ones.
A decent soldering kit that comes with everything you need can be bought at amazon for less than 20 bucks, with a solder sucker included and if you want even easier solder removal you can get one of these desoldering iron pumps - https://www.amazon.com/dp/B008DJRYIG/ref=cm_sw_r_sms_apap_4HuPH8htp6ZEX
There's plenty of switch desoldering tutorials over at /r/mechanicalkeyboards, and if you need help just make a post and I'm sure plenty of people will be glad to help you out.
That looks like a lot of solder from the picture. Maybe try ordering one of these, I found it to work better than a solder sucker...
Tenma 21-8240 Vacuum Desoldering Iron
https://www.amazon.com/dp/B008DJRYIG/ref=cm_sw_r_cp_api_aegZzb1ZWPPJQ
Sweet. DOETT!
For desoldering the old switches (and diodes), I'd recommend this: http://amzn.to/2EWtuLJ it has worked well for me.
I'd recommend that when you install diodes on the new PCBs (if you do new PCBs) that you install them on the opposite side of the PCB as the switches.
Highly recommend upgrading. I was like you, then I got this (link below), and my whole quality of life improved. Girls even like me now!
https://www.amazon.com/gp/product/B008DJRYIG/ref=oh_aui_detailpage_o00_s00?ie=UTF8&amp;psc=1
Hey! https://www.amazon.com/gp/aw/d/B008DJRYIG/ref=mp_s_a_1_1?ie=UTF8&amp;qid=1521608293&amp;sr=1-1&amp;pi=AC_SX236_SY340_QL65&amp;keywords=desolder&amp;dpPl=1&amp;dpID=41SYOSe4FRL&amp;ref=plSrch such things exist!
The best way to remove a switch when you don't have a desoldering iron like this (you can get cheap ones too, like this one or this one) is to basically use a mix of a solder sucker and wick to suck up as much as you can. Then stick a screwdriver under the switch, and alternate heating and pulling out the two contacts until the switch pops free
They provide enough light but aren't super bright, I do have the option of putting another strip across (I only used half) to make it brighter but 1 should be enough. You can't beat the price: LEDs and Power Source . I originally was going to hold them up by zip ties, but the backing is sticky enough to stay on the wire shelf. I'm not sure how well it will stand up in the future but for now it's great.
Ok, so I'm about to embark on this project. I want to put the Hue strips behind my TV, but I need 2 strips, which is expensive and cumbersome. Here's what I've been able to find...
I purchased some item from Amazon. Here's what I got:
16 foot roll of RGB LED's: http://www.amazon.com/dp/B008YRT9IK/
12v RGB LED Power Amplifier: http://www.amazon.com/dp/B0081CZJGO/
12v Power Supply for LED Strip: http://www.amazon.com/dp/B00DKSI0S8/
Here's what I plan on doing. I cut off the LED strips AFTER the Philips controller. That should leave 4 wires, the R, G, B and V+ wires. I connect that to the RGB Amplifier. I them connect the amplifier to the RGB strip and voila, everything should work, in theory. I haven't completed this project yet, I just got the items today. I plan on recording a video assembling everything together. There's a few videos on YouTube showing this as well, but they're vague. Hope this post helps!
here
I made sure to get the 3000k as they're a warmer softer light, as well as waterproof. I got myself one power adapter per box (each box was a single piece, so I ordered to strands of lights).
The lights are adhesive backed, but adhesives in the enclosure are a big no no, so I just used the adhesive to hold em in place while I placed them, and then siliconed them into place for good.
The lights are cool cause you can wire multiples together with available adapters and connectors. The strands come with a couple adapters too. But no power supply, so make sure you get one, or something equivalent.
Also, I wrapped the lights around the upper perimeter of my boxes, but they're definitely bright enough that I'm considering taking about 1/4 out. They're not overly bright, but it's more of a personal opinion, but my snakes don't seem to mind them. So you may not need more than one strand, depending on how much light you want in the enclosure.
OP could also use the Viltrox with an AC adapter to run on a power bank with an AC outlet like this one. The 24,000 mAh one would probably run a Viltrox for 10 hours, and the 40,200 mAh version would almost certainly well exceed that.
EDIT: Based on reviews, this one would probably be better.
12V DC, 3A Max, 36 Watt Max, UL Listed https://www.amazon.com/dp/B00DKSI0S8/ref=cm_sw_r_cp_api_3owhybBPVHBRM
You don’t need to match the 2A input. You just need it to take in AC power and and put out 12V 3A. This is what I got and no issues with it: https://www.amazon.com/dp/B00DKSI0S8/
The cord on that is almost 4ft. I don’t quite need a 6 ft cord because my EO is mounted right above an outlet that’s hidden by furniture.
Yes, standard 12v 3A with proper polarity from a reputable brand should work just fine.
/u/MattAces posted this one in a previous thread, I haven't confirmed this one would work or not, though.
https://www.amazon.com/dp/B00DKSI0S8/ref=cm_sw_r_cp_api_3owhybBPVHBRM
AC Adapter
https://www.amazon.com/SoulBay-Universal-Switching-Selectable-Electronics/dp/B01N7RS0NG/ref=sr_1_fkmr0_2?ie=UTF8&amp;qid=1506451136&amp;sr=8-2-fkmr0&amp;keywords=ac%2Fdc+power+adapter+12v+27w
This would get you very close, it's slightly under powered. Do you have the specs on what the adapter is powering?
This one would also work, but it could supply too much amperage if the device is shorting or having other electrical issues.
https://www.amazon.com/Adapter-Transformers-Supply-Output-Listed/dp/B00DKSI0S8/ref=sr_1_1?s=electronics&amp;ie=UTF8&amp;qid=1506451264&amp;sr=1-1&amp;keywords=ac%2Fdc+power+adapter+12v+3a
Edit: Either way, you could replace the end with the one from your adapter if they do not fit, assuming you know how to crimp or preferably solder and shrink tube.
I ordered 2 of these to fill my 10' x 10' playspace https://www.amazon.com/gp/aw/d/B017HQVOP4/ref=yo_ii_img?ie=UTF8&amp;psc=1
I ordered 5 boxes of these to attach them. 1 in each corner, and 1 in the middle of each tile. https://www.amazon.com/gp/aw/d/B001PLOM8Y/ref=yo_ii_img?ie=UTF8&amp;psc=1
I angled the pins so that they went all the way in and are sturdier.
For the lights it took 2.5 spools of this https://www.amazon.com/gp/aw/d/B00HSF64E6/ref=ya_aw_od_pi?ie=UTF8&amp;psc=1
Also an adapter https://www.amazon.com/gp/aw/d/B00DKSI0S8/ref=ya_aw_od_pi?ie=UTF8&amp;psc=1
And a remote to power it all on/off without having to plug it in over and over. https://www.amazon.com/gp/aw/d/B00MHKCTLE/ref=ya_st_dp_summary
This is the one they sell for it, I don't think I'd have anything appropriate on hand. But thanks :)
This: https://www.amazon.ca/gp/product/B00HSF65MC/ref=oh_aui_detailpage_o00_s00?ie=UTF8&amp;psc=1
With this: https://www.amazon.ca/gp/product/B00DKSI0S8/ref=oh_aui_detailpage_o00_s00?ie=UTF8&amp;psc=1
Canadian links, but they have them in other countries.
Very simple to setup - I just put it right next to the rods in the Detolf and went up and around.
Are you talking about the power supply for the Charsoon charger in the UAVFutures video? If so I also had the issue you have (as well as another issue where it killed one of my batteries by not balancing properly) I bought this power supply to replace the cheapo one it came with : https://www.amazon.com/gp/product/B00DKSI0S8/
I pretty much immediately upgraded to an iCharger 106b+ though and only use the Charsoon as a battery tester. It's much nicer having something that can parallel charge and discharge as well as be more reliable to not kill my batteries.
I think yours has the double doors? I had a 16-18 gun cabinet with a single door. The door was the perfect width for this Molle seat back panel. I had to cut a corner for the lock mechanism and had it sewed by a local custom leather shop. Then I drilled and used rivets to attach it to the door. I have another cabinet that I added plywood shelves to. I just used double stick tape to stick plywood to the sides, then put a shelf on top, then stick on 2 more sides, then another shelf and repeat.
It sounds like you're going overboard on lighting. I just outfitted my new
saferesidential security cabinet with LED strips. The safe is 40" wide, 72" tall and 25" deep. I bought this two-pack of LED strips and this power adapter and a this 5-way power splitter. I installed one full strip minus 6 inches around the perimeter of the door, and I didn't need any more. I added a loop around the sides and top at the back of the safe only because I had a second strip of LEDs, not because it was necessary.Edit: I know it's impossible to judge brightness in a photo, but here's two I took of my safe. The single strip of LEDs facing away from the door provide sufficient light. The LEDs around the back edge add a ton of light, but the glare from looking at the LEDs cancels out a lot of the added brightness.
So basically I used a 16" wire wreath frame and wrapped tin foil around it to reflect the light better, and stuck on the LED Lights! They don't come with a power adapter so I bought this one.
i'm gonna go with what everyone else says: get a decent temp adjusting iron. it makes a world of a difference...add to that a small chisel tip (usually not provided on a cheap pen iron)...such much easier and enjoyable soldering. though, its not worth spending 80-300 dollars on a soldering iron for one project..
i use/recommend:
also another good affordable iron:
everyone says weller...and its because they dropped the money on one and want other people to do the same haha...if you have the money, sure go for it. if not, many stations in the 80-100 range are excellent quality to begin on.
also get a helping hand, tweezers, needle nose pliers, snips, and maybe a wire stripper.
For frame of reference, I am also BRAND NEW to this hobby. Been poking around for maybe 2 weeks tops. Before this, I had never even seen a soldering iron in person.
How much of an investment is a huge investment for you? If you can stomach around 100 bucks, this package has ALMOST everything you need. The only addition I would make is this 10 dollar cleaning station.
As far as learning technique, check out this series of videos, particularly the soldering and de-soldering ones.
Kester 44 Rosin Core Solder 63/37 .020" 3/4oz Dispense-Pak http://www.amazon.com/Kester-Rosin-Core-Solder-Dispense-Pak/dp/B00AYJ0B7Y/ref=sr_1_7?s=hi&amp;ie=UTF8&amp;qid=1395671772&amp;sr=1-7&amp;keywords=kester+44
Desoldering Wick - 2mm http://www.amazon.com/Aven-17541-Desoldering-Wick-Width/dp/B003E48ERK/ref=sr_1_3?ie=UTF8&amp;qid=1395672458&amp;sr=8-3&amp;keywords=desoldering+braid
No Clean Flux Paste http://www.amazon.com/MG-Chemicals-Clean-Paste-Syringe/dp/B00425FUW2/ref=sr_1_2?ie=UTF8&amp;qid=1395672365&amp;sr=8-2&amp;keywords=flux
Solder Tip Cleaner
http://www.amazon.com/Hakko-599B-02-Solder-Cleaning-Holder/dp/B00FZPGDLA/ref=sr_1_1?ie=UTF8&amp;qid=1395673163&amp;sr=8-1&amp;keywords=solder+tip+cleaner
velcro strap for battery! 300mm if you're wrapping around the entire quad
clear double-stick Gorilla Tape
also [this](https://www.amazon.com/Hakko-599B-02-Solder-Cleaning-Holder/dp/B00FZPGDLA/ref=sr_1_6?
s=hi&ie=UTF8&qid=1464845046&sr=1-6&keywords=hakko) soldering iron tip cleaner is freaking awesome
poster putty for soldering stuff, way better than helping hands
Ok, so there are a lot of things I'd probably change :)
&#x200B;
Motors - SabotageRC Booty 2306-2300kV, they're cheaper and significantly higher quality than the DYS you're looking at (they are made by DYS, as well, but with much higher quality components and build quality)
&#x200B;
ESC - beware Racerstar. Some things they OEM and you get a good product for a good price, but others you get significant drops in quality. I would pay a few cents more apiece and get Spedix ES-20 Lite ESCs.
&#x200B;
VTX - the one you selected is decent, but your soldering skills need to be up to par, the wires come undone from the VTX extremely easily and are incredibly difficult to reattach. I would recommend a few dollars more to get an AKK VTX with either larger pads or a connector.
&#x200B;
VTX antennas - There are better ones out there. Lumenier Axii is one of the best and most durable (and significantly lighter), pagoda antennas being slightly better in some regards but more fragile.
&#x200B;
Radio - The Turnigy Evolution is about the same price now and is a better choice than the FS-i6. Still uses the Flysky AFHDS2A protocol, so it will work with the receiver you selected (and there are now others that are good, as well). If the phonebook style radio appeals to you, then the i6 is the only cheap choice, but keep in mind it is a CHEAP radio, not an inexpensive one.
&#x200B;
Wire - I would suggest ordering some 14, 16, 18, 20, 22, 24, 26, 28 gauge wire from Hobbyking (as much as they suck, they're the only place that sells lengths of wire inexpensively). Getting 1m of each wire in both black and red should only be 10-15 bucks IIRC.
&#x200B;
Power supply for charger - get a supply that is at least 19v and 200 watts, like this: https://www.amazon.com/MEAN-WELL-LRS-200-24-211-2W-Switchable/dp/B00YMA7I7C/ it is a few dollars more, but you can also run your charger at its full output, which will come in handy for charging your batteries in a timely fashion.
&#x200B;
Soldering iron - get a quality one, you're going to need it. https://www.amazon.com/Weller-WLC100-40-Watt-Soldering-Station/dp/B000AS28UC/
&#x200B;
You should also get some no-clean flux: https://www.amazon.com/MG-Chemicals-milliliters-Pneumatic-Dispensing/dp/B00425FUW2/
&#x200B;
Decent solder: https://www.amazon.com/MAIYUM-63-37-solder-electrical-soldering/dp/B076QF1Y85/
&#x200B;
And a tip cleaner: https://www.amazon.com/Hakko-599B-02-Wire-type-soldering-cleaner/dp/B00FZPGDLA/
&#x200B;
That should get you well on your way - still on a budget, but you'll hate yourself WAY less when you go to build it and have decent equipment. :)
If you can avoid the sponge and go for a coated metal Brillo pad type scrubber. Temperature shock can lower the life span of tips.
Here is an example:
https://www.amazon.ca/Hakko-599B-02-Solder-Cleaning-Holder/dp/B00FZPGDLA/ref=asc_df_B00FZPGDLA/?tag=googlemobshop-20&amp;linkCode=df0&amp;hvadid=293027932547&amp;hvpos=1o2&amp;hvnetw=g&amp;hvrand=9051192495741392112&amp;hvpone=&amp;hvptwo=&amp;hvqmt=&amp;hvdev=m&amp;hvdvcmdl=&amp;hvlocint=&amp;hvlocphy=9000801&amp;hvtargid=pla-432940967999&amp;psc=1
It doesn't necessarily need to be that brand, just the general idea
soldering iron $40
solder (I think this might be a little too thick, but I can't find any 0.022" solder)
I recommend this if you can squeeze it into your budget because it makes cleaning the soldering iron tip sooo much easier
desoldering pump
if you want ergo clears, you'll need some springs too.
it will get you started, for sure. this is a very comprehensive kit for an absolute beginner, but it lacks in quality of components.
i bought what seems to be another version of the exact same kit, my soldering iron looks the same, the solder sucker, multimeter, tweezers, wire cutter and multitool.
my issues with this kit: the soldering iron tips seem like they're extremely low quality; i've soldered 3 or 4 pedals and i've had to change the tip (thankfully there are a few different/replacement tips in there). the solder is nothing to write home about; my dad has since gifted me some proper, thin, good quality 63-37 solder. he also gave me a brass tip-cleaner (like this: https://www.amazon.com/Hakko-599B-02-Wire-type-soldering-cleaner/dp/B00FZPGDLA/ )
whenever i move out of this tiny apartment i'll certainly spring the extra cash for a soldering station setup from a reputable brand (weller, hakko)
Sure, though I can't vouch for the quality of any of those items. A cheap soldering iron can make the job more difficult.
I would also suggest one of these for cleaning solder off the tip between soldering items, and good solder like this. Again, cheap solder will make any job ten times harder.
Of course, that kit is dirt cheap at 20$, maybe just give it a shot and see what happens.
Looks like you got an even cheaper iron that looks very similar, but wanted to mention I just got this soldering iron and I'm very happy with it.
Also, I got some soldering wick, which I much prefer to the solder-sucker. My mind was blown by how much easier my life got with solder wick.
I also got one of these, which is nice.
Make sure to tin your tip and keep it clean. You can wipe it off on a wet sponge, or get a tip cleaner. I use that tip cleaner, and for $9 it's awesome.
There will be more. These are everywhere. I've never been stung by them.
One of these may be helpful.
it's a UV flashlight and it is purple but my iphones camera makes it look white in the video link to UV flashlight you can see it also makes my keyboards purple under glow look kinda white as well
https://www.amazon.com/dp/B008133KB4?ref=yo_pop_ma_swf
The one I use
Definitely, I grabbed this one
https://www.amazon.ca/gp/aw/d/B01A5KLUG2/ref=mp_s_a_1_5?ie=UTF8&amp;qid=1519657664&amp;sr=8-5&amp;pi=AC_SX236_SY340_FMwebp_QL65&amp;keywords=uv+flashlights&amp;dpPl=1&amp;dpID=51Cg0uY-DnL&amp;ref=plSrch
If you're in the US this most likely is a good equivalent
https://www.amazon.com/gp/aw/d/B008133KB4/ref=mp_s_a_1_3?ie=UTF8&amp;qid=1519657748&amp;sr=8-3&amp;pi=AC_SX236_SY340_FMwebp_QL65&amp;keywords=uv+flashlight&amp;dpPl=1&amp;dpID=51veSdpP7EL&amp;ref=plSrch
https://www.amazon.com/gp/product/B008133KB4/ref=ppx_yo_dt_b_search_asin_title?ie=UTF8&amp;psc=1
395.
Another person said it only worked after it dries so I’ll try that.
https://www.amazon.com/gp/aw/d/B008133KB4/ref=mp_s_a_1_1?ie=UTF8&amp;qid=1519706928&amp;sr=8-1-spons&amp;pi=AC_SX236_SY340_QL65&amp;keywords=escolite+uv+flashlight+black+light%2C+51+led+395+nm+ultraviolet&amp;psc=1
That is the one I have. It might not be the best but it works incredibly well at lighting my glow discs and it fits in my pocket. I have 4 glow discs in my bedroom that I nuke right before bed and it’s been an hour and my 2 USDGC Firebirds are still glowing from around a 5 second charge and my new glow Vibram disc is quite visible as well.
Play night golf in backyard course few times/week and tried almost everything.
-Glow discs vs lights vs tape, generally the lights will be the best option, and generally by a large margin. Discs are ok if open field, tape is meh, but lights work in any environment, and even when buried in long grass. It's actually easier to find a disc with a light in 2 foot grass at night than during the day.
-Glow discs themselves, if it isn't Kastaplast, it doesn't actually glow worth a shit, don't bother.
Using these for baskets thanks to another redditor (just order some cheap carabiners), and don't look directly at them when not expecting it, frigging bright
https://www.amazon.com/gp/product/B07N13435P/ref=ppx_yo_dt_b_asin_title_o05_s00?ie=UTF8&amp;psc=1
Bought this as charging light, it's ok but a bright ass tactical style light with pocket clip charges them just as well honestly and serves the dual purpose of avoiding snakes etc and navigating around, personally I'd skip it and buy a $20-30 fenix
https://www.amazon.com/gp/product/B008133KB4/ref=ppx_yo_dt_b_asin_title_o04_s00?ie=UTF8&amp;psc=1
Batteries
https://www.amazon.com/gp/product/B00N24LU7I/ref=ppx_yo_dt_b_asin_title_o00_s00?ie=UTF8&amp;psc=1
LEDs
https://www.amazon.com/gp/product/B07QXR5MZB/ref=ppx_yo_dt_b_asin_title_o00_s00?ie=UTF8&amp;psc=1
Tape, it's ok but expected better, maybe try gorilla brand etc
https://www.amazon.com/gp/product/B0000DH8I8/ref=ppx_yo_dt_b_asin_title_o00_s00?ie=UTF8&amp;psc=1
Each basket gets a lantern, each kastaplast gets a battery and 2 led's both top and bottom, tactical light with spare battery in pocket, and we're off.
Personally doing Grym X, Gote, and Berg if want a bag or hands full, or just a Kaxe Z if 1 disc'ing it.
I bought this blacklight flashlight to charge my glow discs for the Night of the Living Disc event this weekend. I've never played at night so I'm pretty pumped!
Hornworms stand out against the foliage in blacklight/UV light. I bought a UV flashlight on amazon for hunting scorpions & it works wonders for catching those bastard hornworms too.
http://www.amazon.com/gp/product/B008133KB4/
Don't have a pic of a hornworm in the light but it's bright as hell for $13: http://i.imgur.com/fCXoEs2.jpg
$10.19
https://www.amazon.com/gp/product/B008133KB4/ref=oh_aui_detailpage_o00_s00?ie=UTF8&amp;psc=1
I'm not a raver either (have nothing against them though). I'm sticking with glow sticks (they're cheap) tied to my night costumes. Oh and I bought a blacklight flashlight to play around with this year, but not sure if I'll walk around with it or just play with it back at camp.
maybe next year i'll get off my ass and build some arduino based LED clothing that rocks.
I obviously recommend them both. The stool is nice for changing your experience with pooping.
Adding the bidet on top of that will cause you to wonder why you have put up with paper all your life.
I highly recommend the Squatty Potty.
There are bottles like this that let you try the bidet out first. I, personally, recommend filling it up with cold water, If you can take cold tap water, you can deal with the bidet at any time of the year. After two seconds, it's not like you'll notice the cold.
A bidet and a Squatty Potty can change your life. Obviously, you have to be ready to accept these changes, but from my experience, they are totally worth the effort to get used to.
Or better yet, a packable bidet
Or you could bring a baby bidet!
Here you go: https://www.amazon.com/Brondell-GS-70-Portable-Convenient-Capacity/dp/B008CSDKSQ
It's a very nice thing to have! The Europeans know what they are doing.
Even better are bidet attachments for your toilet that attach to the water line, which are perhaps $30-$40, but I have not gotten one.
Why not try a travel bidet?
Well actually...
I use a portable bidet! Theyre available on amazon for pretty cheap (they last a really long time): Brondell GS-70 GoSpa Travel Bidet https://www.amazon.ca/dp/B008CSDKSQ/ref=cm_sw_r_cp_api_2VBqzbAG7BYEC
Oh hey if you, your friend, or anyone else here is interested in learning more about staying fresh below the belt while minimizing waste, consider a travel bidet, such as this one. Works great! It's a solid replacement for your bidet at home (if you have one). I don't have the exact wait, but I think it's only a few ounces.
I got you...
https://www.amazon.com/dp/B008CSDKSQ/ref=cm_sw_r_cp_apa_i_oa4BCbWVB8D0W
They make travel bidets, they're basically squeeze bottles with specialized nozzles:
http://www.amazon.com/Brondell-GS-70-GoSpa-Travel-Bidet/dp/B008CSDKSQ
I have made it my life's mission to go forth and spread the gospel of the holy church of the bidet.
I used this thought all of WA. It was great. You can just use the top part on a smart water bottle if you like - I preferred the dedicated reservoir.
I have to desolder a bunch of switches, and it sucks. I was looking for a specific desoldering tool; would something like this fit the bill?
That's an investment I'm not sure I'm ready to make.
Have you had any experience with the cheaper versions? ie: https://www.amazon.com/Tenma-21-8240-Vacuum-Desoldering-Iron/dp/B008DJRYIG
As others have said, ADD solder. Also, big parts suck. You are going to have to get out your big iron, with a big tip. I am usually replacing parts on 30+ year old boards, not just salvaging. This means that pad damage is a No-Go. I will often clip the legs of ICs in order to remove them without damaging traces. Learning to test the ICs is something I'm getting better at so that I don't needlessly destroy or replace ICs.
I don't have a soldering pump, because I do fine for my purposes with a few other tools. My new favorite is this desoldering iron that resembles a solderpault. After that, I like this one with a good tip on it. For big stuff, I break out the big, 45W Fat tipped soldering iron and use a solder sucker to remove the solder.
Hakko.
Cheapie iron that I bought.
It wasn't one of the easiest things to desolder. I lifted a pad for the first time and had to hand wire one switch. I used one of these and soldering wick to do the whole thing.
I love the build quality and layout of the board, but I need MX clears, so it was worth desoldering the thing IMO even though there were a few headaches.
Okay, just making sure people know that cheap, manual pump desoldering irons already exist.
It's not exactly hard, but it's a pain in the ass. You need a solder sucker of some kind, then you heat the solder with your soldering iron and suck it away with the sucker.
But I'd really get at least a cheap soldering iron with integrated sucker.
Something like this:
https://www.amazon.com/Tenma-21-8240-Vacuum-Desoldering-Iron/dp/B008DJRYIG/
Makes it at least easier.
And always be careful and make sure to remove as much solder as possible, and make sure not to let things get too hot.
I got one of these a while back and it makes desoldering really easy. I'd recommend you get one and do it yourself - it would likely be both quicker and cheaper :)
I use this. Works great.
If you are looking for a cheap solution you could get something like this: https://www.amazon.com/dp/B008DJRYIG/_encoding=UTF8?coliid=I3JMX1FFJ074SX&amp;colid=ZKZN0HUJO21P
I used a crappy hand pump I got from Amazon for $8. I'd give this one a try though.
You could try one of these, it worked good for me. I removed a promicro using it.
https://www.amazon.com/gp/product/B008DJRYIG/ref=oh_aui_detailpage_o09_s00?ie=UTF8&amp;psc=1
I use this for desoldering switches and it works really well and is cheap
Looks the same as the Tenma 21-8240 and a couple others who use the same design:
https://www.google.com/url?sa=t&amp;source=web&amp;rct=j&amp;url=https://www.amazon.com/d/Soldering-Irons/Tenma-21-8240-Vacuum-Desoldering-Iron/B008DJRYIG&amp;ved=2ahUKEwjXtYrZ78DgAhWniVQKHbesCiwQFjAAegQIBRAB&amp;usg=AOvVaw3rpTjysYOUgLzYnlY1eulr
I think 30w and 40w versions exist so something to keep in mind.
I agree with you. One thing to also mention is that OP would most likely have to de-soldering LED's which is a pain.
One great easy de-soldering pump/iron here is a decent option. But it is atill quite time consuming.
Maybe look into a new PCB, plate and stabs?
>he hako is like $200 or something isnt it? I really dont desolder enough to justify that price tag.
Last week someone posted this as a good cheap option: https://www.amazon.com/gp/product/B008DJRYIG
If you really want different switches on a BW X TE, and still have some money left to spend then MAYBE you can buy a desoldering iron, switch holtites, and switches of your own choice. I said maybe because there's no guarantee that the switch holtites could fit just right into the BW X TE's PCB. Just to give a brief run down, holtites makes it so that you don't have to solder if you want to replace a switch. If you're willing to go through this route, I can help you, but I can't be held responsible if the holtites doesn't fit and you've already bought the holtites and desoldering iron, maybe even the switches.
Are you doing it with an iron or an actual desoldering tool? I bought one of these off Amazon and it's not perfect but it works quite well. It just takes some time to heat up and eventually you have to eject a mass of molten solder since it's all stored in the suction tube.
Just a heads up, supposedly this is a really good desoldering iron for the price.
https://www.amazon.com/gp/aw/d/B008DJRYIG/ref=mp_s_a_1_4?ie=UTF8&amp;qid=1502984637&amp;sr=8-4&amp;pi=AC_SX236_SY340_FMwebp_QL65&amp;keywords=Desoldering+gun&amp;dpPl=1&amp;dpID=41SYOSe4FRL&amp;ref=plSrch
For desoldering, I just ordered one of these. Typically I'll use solder wick and some flux but this seemed well reviewed, maybe it's worth it for you to order one and give it a shot?
I used one very similar to this and it worked fine.
https://www.amazon.com/Adapter-Transformers-Supply-Output-Listed/dp/B00DKSI0S8/ref=sr_1_3?ie=UTF8&amp;qid=1519684388&amp;sr=8-3&amp;keywords=12v+3a+power+supply&amp;dpID=41kaSAMcYWL&amp;preST=_SY300_QL70_&amp;dpSrc=srch
I've used a 12V power supply for a motorized curtain project. Something like this should suffice depending on your motor (though if you're using a motor that draws too much current for that power supply it's probably way overpowered). You can run the arduino off of it too, just run the 12V to Vin and ground to ground. You could also use something like this to control the motor, might be easier than making a circuit out of transistors.
LE 16.4ft LED Flexible Light Strip, 300 Units SMD 2835 LEDs, 12V DC Non-waterproof, Light Strips, LED ribbon, DIY Christmas Holiday Home Kitchen Car Bar Indoor Party Decoration (Daylight White) https://www.amazon.com/dp/B00HSF65MC/ref=cm_sw_r_cp_api_RZ4dAbA6SN1AR
And
LE Power Adapter, Transformers, Power Supply For LED Strip, Output 12V DC, 3A Max, 36 Watt Max, UL Listed https://www.amazon.com/dp/B00DKSI0S8/ref=cm_sw_r_cp_api_f04dAbKTW24T6
http://www.amazon.com/Power-Adapter-Transformers-Supply-Strip/dp/B00DKSI0S8?ie=UTF8&amp;psc=1&amp;redirect=true&amp;ref_=oh_aui_detailpage_o00_s00
I mounted these above my workbench, they're super brightL
http://www.amazon.com/Flexible-Lights-Daylight-Lumens-Non-waterproof/dp/B00JQV6Q4I
and then you just need a power adapter:
http://www.amazon.com/Power-Adapter-Transformers-Supply-Strip/dp/B00DKSI0S8
I mounted them facing down, behind a piece of wood so i see the lights directly.
LED light strips come in 16ft portions and you can cut them to whatever size you want. They are also very cheap!
LED STRIP HERE
110VAC to 12VDC ADAPTER HERE
they plug right in and are super cheap to replace.
Yes you'll need a power supply. If you were to buy this LED tape it comes with one, just cut the barrel connector off, strip the two leads, and connect them to the DMX decoder inputs. Then toss the remote and IR sensor in the garbage.
Or you could buy them on their own. Try not to go too cheap with them. The build you linked to uses a switch mode driver/transformer. They have surge protection and can switch between input voltage but I've found they can make a squealing sound when running.
If it's AC adapter, I think it uses a pretty generic one, you should be able to find it.
https://www.amazon.com/dp/B00DKSI0S8/ref=cm_sw_r_cp_api_3owhybBPVHBRM
The product page says a 24w power consumption, so aiming for a 36w or larger power supply would be a good idea, something like this would work just fine.
I went to amazon and ordered these lights and this adaptor. I haven't gotten them in yet, but I'll let you know what I think of them when they do. They seem pretty straight forward but you never know with these kind of things haha.
As for preference of white vs warm (yellow), I used christmas lights and a white fluorescent lamp as different backlighting to see which I liked more. I picked the white because I felt it had a more mysterious/ night time feel (just my opinion haha), but all the Hari and Deepti ones use yellow light so it's all up to personal preference. Post pictures of yours when you finish! I'd love to see how it turns out! :)
This is the one I already bought. Can I just get an adapter for this? LE Power Adapter, Transformers, Power Supply For LED Strip, Output 12V DC, 3A Max, 36 Watt Max, UL Listed https://www.amazon.com/dp/B00DKSI0S8/ref=cm_sw_r_cp_api_n-iVAb127J24S
phone chargers are typically 5v, not 12v. Anything with a 12v >250mA output would work, so it just depends what you have laying around. Or you can get something off amazon for maybe 10 bucks at most. such as http://www.amazon.com/Power-Adaptor-Transformers-Supply-Strip/dp/B00DKSI0S8/ref=sr_1_3?ie=UTF8&amp;qid=1453144942&amp;sr=8-3&amp;keywords=led+power+supply
http://www.amazon.com/Power-Adaptor-Transformers-Supply-Strip/dp/B00DKSI0S8
https://www.amazon.com/Adapter-Transformers-Supply-Output-Listed/dp/B00DKSI0S8/ref=pd_lpo_sbs_23_t_0?_encoding=UTF8&psc=1&refRID=T60MPKWVX3N790BZGRP6 Would this work?
No problem. My particular ones are just green, but the same company sells RGB ones. Got them on Amazon.
The LEDs themselves are here and the power supply is here. Cheers!
I would get this one.
https://www.amazon.com/gp/aw/d/B00DKSI0S8/ref=mp_s_a_1_3?ie=UTF8&amp;qid=1519091480&amp;sr=8-3&amp;pi=AC_SX236_SY340_FMwebp_QL65&amp;keywords=12v+3a&amp;dpPl=1&amp;dpID=41kaSAMcYWL&amp;ref=plSrch
The connector on the one you listed is different.
A lot of the $30 - $50 mirrors that are readily available at Walmart, Target etc. are really not that great. They're better than nothing, but that's about it. If she's as into makeup as you say she is, she's going to want something properly bright. If you're looking for a makeup mirror with lights built in already, you're going to have to invest around $80 - $100. Instead, if she already has a mirror, you can just add LED lights around the perimeter, and it works better than most makeup mirrors. Definitely better than the $30-$50 ones.
Here's what I use: this LED strip + this power adaptor. It's super easy to install if she already has a mirror, and it is BRIGHT. It's cheap (around $40CAD), and SUPER functional. I can't recommend it enough. You can probably even get a different adaptor with a switch/dimmer.
Thanks! I got one from Amazon but it doesn't look like it's the right size as my Gledopto controller. Can you help?
This is the one I got: https://www.amazon.com/gp/product/B00DKSI0S8/ref=oh_aui_detailpage_o01_s00?ie=UTF8&psc=1
I recommend adding [these] (https://www.amazon.com/gp/product/B00HSF65MC/ref=ppx_yo_dt_b_asin_title_o05__o00_s00?ie=UTF8&amp;psc=1) (along with this as a power source) for light. I have two curio cases lit up with these and it works great.
Sorry, was asleeping. LED strip here
Power supply: here
Shoutout to /u/squadz , got the idea from his thread a while ago.
I have the Weller WES51 and I really love it. I can definitely recommenced it.
Also, I recommend getting some solder tip wire cleaner, such as this one. If you plan on doing a fair amount of soldering.
This, this and this should get you started.
I would recommend getting a fume remover:
https://www.amazon.com/Absorber-Remover-Extrator-Prevention-Soldering/dp/B07VWDN29F/ref=sr_1_39?keywords=soldering+fume+remover
As well as a tip cleaner:
https://www.amazon.com/Hakko-599B-02-Wire-type-soldering-cleaner/dp/B00FZPGDLA/
I've used both the WESD51 and a few Hakko stations, they're both great. Personally I have the WESD51 because its easier for me to get tips, but either way hakko and weller and both pretty good, definitely go for the digital if you can afford it. Also I'd get a few spare tips and a tip cleaner along with some no clean flux. But I wouldn't get just a reflow, unless all you do is SMD, which you can totally do with a slightly steadier hand and an iron.
I really like my Hakko FX888D, as I like having the digital control of temperature, and it comes with a copper cleaning sponge, but that's minor -- they're similarly priced. If you're going with the Weller, you'll want to add some flux-impregnanted copper cleaning sponge and holder like this one from Hakko for 10 bucks. Nothing cleans tips better in use. Blob on a bit of solder, mash it in there for a second, tin a bit more fresh solder on, good to go.
I also have that Kester reel, and I love the stuff.
EDIT: Also, no helping hands? No ESD mat? Sure, it might put you over 150, but man are those things useful... They should be on the list for an "I want to get serious about soldering" kit.
Wet sponge drops the heat to quickly, better off using this
Soldering is a good skill to have, in general.
And if you're careful, there's not much you can screw up.
Watch a YT tutorial or two and you'll be good to go.
For tools you'll eventually want what is in this kit, but probably not that kit itself.
I bought a Weller WLC100 40 watt kit (definitely get a norrower ST2 or ST3 tip as well), a solder sucker tool (you can use desoldering wick, but the solder sucker is worth the money), a Helping Hands and 60/40 rosin-core solder.
In addition, I like using tip tinner, a wire tip cleaner like this because I found that using a wet sponge reduced the tip temperature too much.
Also, solder fumes are not great so only do this is in a well-ventilated area. I like to use a small fan to blow the fumes away from my face.
The only thing you'll need to do is desolder/clip the existing swtich and wire up the replacement. You don't have to mess with the pots or caps unless you want to.
Phostenix Tele diagram page.
edit: fixed solder type
I worked as a gaming console repair tech for a couple years and have modded probably over 100 xboxes at this point. Here's some tips I've learned.
> How can I avoid causing permanent damage to the machine?
Get a decent iron. Something $60 or more. The cheap ones from walmart and such are a waste of time and money. Spend a little bit more and you'll save time and aggravation. Get something with enough power to stay hot while you're using it. Get one that has a usable temperature control (not just a 20-watt or 40-watt switch but something that gives the temp reading in degrees). Get something that lets you change tips and get something that has small/precise tip options. A good cheaper option is the Auoye int 2900. I used that one for years before upgrading to a better one. Try to keep it hot enough to melt the solder, but not much higher. More heat = higher risk of damaging something. Use flux and use it often. I use MG Chemicals 8341 No Clean Flux Paste just about every time I solder something. Keep the tip clean. Clean it often while you're working. A lot of folks will use a wet sponge but that's not ideal (temp change can reduce lifespan of the tip). Use a brass-wire one instead like this one. Try to not over-do it with the solder. Use enough to form a secure connection, but don't use so much that there's a big blob leftover on the wire when you're done. I usually dab a small amount of solder on my iron, then add more once the tip is on/next to the spot I'm working on.
> Can this be done indoors, if a window is open?
Sure. I usually open a window and run a box fan in the window blowing air outside, plus a ceiling fan. I also wear a facemask. It helps to be conscious of your breathing. I'll take a breath in, then get over my work and tap where I need to while exhaling, and I'll to try to turn my head away from my working area when inhaling just to limit fume inhalation. Ideally, you'd have a fume extractor, but those are often expensive.
> What protective equipment do I need?
I usually wear a mask/respirator and eye shields and that's about it. I'll sometimes wear an anti-static wristband but static hasn't been a big issue in my working area.
> What's the best way to setup a hard drive?
This doesn't require soldering but I'll comment anyways. My preferred workflow is to softmod the Xbox, then do a TSOP flash, then drop in a new hard drive and use a disc like HeXen to format the drive. Your 1.6 xbox cannot be tsop-flashed, so you'll you can either install a modchip (more difficult) or just setup your new hard drive with the softmod files on it (easier). You can use the app Chimp to clone a small hard drive to a bigger one and it doesn't require a modchip to be installed. If you don't have a modchip/tsop-flash, then make sure you lock the new hard drive after you're done.
> Where would you suggest looking for a 'soldering mentor' of sorts, if need be?
Soldering isn't all that hard. I never had a mentor. I just screwed around in my room until I got the hang of it. It seems harder than it is before you actually start doing it. You just need to take your time, use tools that are good enough, use the proper temperature (not crazy high), clean your tools as you go, use flux, and try to keep a steady hand. You can look up YouTube tutorials and stuff, but I didn't. I used to teach console repair when I did it professionally a few years back and I used to teach people who had no prior experience. Once you've done it a couple times, you'll see that it's not that hard. Feel free to practice connecting wires to broken electronics you have just to get the muscle memory down.
Yep. All good stuff here. On the note of equipment I'd add that the hakko tip cleaners are way better than a sponge imo. You just jab the tip in a few times and it looks good as new. Also it would be a good idea to pick up a narrow chisel point tip and some ceramic tweezers for doing the surface mount diodes. Of course if op is on a tight budget and doesn't solder often then all that is excessive.
My business partner and I just started making our own cables in December. We use Switchcraft connectors (personal preference) and Canare Star Quad cable. It hasn't been too hard to learn on star quad. We use a Weller WES51 which is around $85.
Also recommend a brass sponge and this helping hands tool if you have the budget for it.
EDIT: Neither one of us had really soldered much before, but we did have someone showing us how to do it. So Quad-Core might be tough if you're totally trying to teach yourself.
Will do. for some reason that [item] (https://www.amazon.co.uk/Hakko-599B-02-Solder-Cleaning-Holder/dp/B00FZPGDLA/ref=sr_1_6?ie=UTF8&amp;qid=1494242378&amp;sr=8-6&amp;keywords=hakko+tip+cleaning) is £46 in the UK. Does the hakko wire sponge have much over just some random sponge?
Loose the wet sponge and get a brass sponge/wire to clean your tips.
Hakko 599B-02 Solder Tip Cleaning Wire and Holder Hakko http://www.amazon.com/dp/B00FZPGDLA/ref=cm_sw_r_udp_awd_1MHPub0NEFXNF
I bought this one a while ago and I built a couple of boards and unsoldered over 10 boards and I’m satisfied by it. Probably are better options out there but it works and you can set your temperature with a knob which is ok.
Don’t forget to buy some tip tinner and maybe a tip cleaner like this.
Do you have a de-solder wick? Or a suction tube/bulb?
It's lit-tree-lee as easy as heating the solder and letting the wick do its job or sucking it up into the bulb.
Buy it:
https://www.amazon.com/Aven-17542-Desoldering-2-5mm-Length/dp/B017ODKIPC
https://www.amazon.com/Apex-Weller-Desoldering-Bulb-Solder-Off/dp/B00011TUZY
I like this cleaner to clean the tip of your iron:
https://www.amazon.com/Hakko-599B-02-Solder-Cleaning-Holder/dp/B00FZPGDLA/ref=pd_lpo_469_bs_img_2?_encoding=UTF8&amp;psc=1&amp;refRID=5T5GCF0MQZC3DGJ93YQ8
Learn how to do it:
https://www.youtube.com/watch?v=htrcZuK_ZsY
Do you have solder flux paste? You'll need that too.
If you don't own a soldering iron, but foresee yourself continuing down this road in the future, I implore you to buy a decent soldering iron. Getting a cheap $10 iron will just result in horrible joints and a lot of frustration.
Start off with something like the [Weller WLC100](https://www.amazon.com/Weller-WLC100-40-Watt-Soldering-Station/dp/B000AS28UC]. It's a no-frills iron, but it's quality and will serve you well. One of these little metal sponges is great addition, too. Better than using a wet sponge to clean your tip.
As for kits...I don't know off hand. Listen to the others for that advice. Just try to do something that's through-hole and not SMD for your first project.
then something like this?
http://www.amazon.com/LyonsBlue-Desoldering-Vacuum-Solder-Removal/dp/B003FHYL7I/ref=sr_1_1?ie=UTF8&amp;qid=1449426345&amp;sr=8-1&amp;keywords=soldering+vacuum
and this?
http://www.amazon.com/0-8mm-Rosin-Core-Soldering-Solder/dp/B00JR3ROV4/ref=sr_1_4?ie=UTF8&amp;qid=1449426415&amp;sr=8-4&amp;keywords=60+40+solder+tin
and this to practice on?
http://www.amazon.com/Solderable-BreadBoard-matches-tie-point-breadboards/dp/B0040Z3012/ref=sr_1_8?ie=UTF8&amp;qid=1449426442&amp;sr=8-8&amp;keywords=prototype+pcb
and this (which i saw WFD use)
http://www.amazon.com/Hakko-599B-02-Solder-Cleaning-Holder/dp/B00FZPGDLA/ref=sr_1_9?s=hi&amp;ie=UTF8&amp;qid=1449426488&amp;sr=1-9&amp;keywords=soldering
Did you know Amazon will donate a portion of every purchase if you shop by going to smile.amazon.com instead? Over $50,000,000 has been raised for charity - all you need to do is change the URL!
Here are your smile-ified links:
https://smile.amazon.com/dp/B01712N5C4/ref=CM_SW_R_CP_APA_ZV6IZBDB771M1
https://smile.amazon.com/dp/B00FZPGDLA/ref=cm_sw_r_cp_apa_9Y6IzbHX1H6MD
https://smile.amazon.com/dp/B002MJMXD4/ref=CM_SW_R_CP_APA_W06IZBVBPKVMP
---
^^i'm ^^a ^^friendly&nbsp;bot
Those desoldering irons are straight up dangerous. I'd avoid at all costs. Grab a threaded solder sucker, it's much safer and works about as well.
The general consensus is that a small, conical tip works best for switches. I personally like an elbow tip for SMD soldering, but you can use the same one you're using for switches.
Your soldering station looks like a piece of shit. Buy this one instead. Set it to 4 and solder away.
You've got solder paste in your order. That won't work properly without a hot air setup. Kester 0.031" is the solder of choice for building. You can also find similar, lead-free solder on amazon, but lead free is harder to work with.
If you don't have flush cutters and ESD-safe tweezers, I recommend grabbing some. Ifixit has some for pretty cheap.
Your cleaners are bad. Get this instead. It is, again, safer than your selection.
You don't need flux, the kester solder has it in the solder already.
That kit looks pretty good, though I haven't used it. From my own experience, I would recommend a couple of optional upgrades to be thrown in. First, a brass wire type soldering iron cleaner. The sponge on stations like these is fine, but it's much easier to clean with the brass type mid-project. There are cheaper versions available, but my experience is all with the Hakko. Second, I've never had luck with those wire cutters. I've had much more luck with strippers that give separate holes for each gauge. Here's a cheap one and here's the Hakko pair I have.
Like I said, these are optional as the kit comes with basic solutions for both of these tools, but maybe something to think about for the future.
Some tips I learned the hard way:
I do not know if he got you the links but here they are all on Amazon. The funniest thing is that I have it all ready for when I get enough money for this and the Hakko FX-888D.
Solder is the Kester 44
Solder sucker
Desoldering wick
Hakko cleaning tip wire station
You definitely want to get a soldering station. So something that can control the temperature of the of the iron. The reason being is the ones that just plug into the wall usually fluctuate between extremely hot and very hot which can become if you’re trying to solder next to very delicate transistors on the pcb.
I know people say you can get away with the cheapest everything but that’s usually not the case at all and sometimes dangerous to your health.
Getting good solder, tip tinner, brass sponge, flux pen, and a fan with a carbon filter will do you great things.
The fan is extremely important when your desoldering as that will give off a tonne of chemicals.
This is what I personally have
https://www.amazon.com/gp/aw/d/B00BSW69LI/ref=ya_aw_oh_bia_dp?ie=UTF8&amp;psc=1
https://www.amazon.com/gp/aw/d/B074J6R1KQ/ref=ya_aw_oh_bia_dp?ie=UTF8&amp;psc=1
https://www.amazon.com/gp/aw/d/B001W2XZOS/ref=ya_aw_oh_bia_dp?ie=UTF8&amp;psc=1
https://www.amazon.com/gp/aw/d/B00FZPGDLA/ref=ya_aw_oh_bia_dp?ie=UTF8&amp;psc=1
https://www.amazon.com/gp/aw/d/B00NS4J6BY/ref=ya_aw_oh_bia_dp?ie=UTF8&amp;psc=1
The soldering iron is overkill if you’re just using it for trains
https://www.amazon.com/gp/aw/d/B00FZPGDLA/ref=mp_s_a_1_1?ie=UTF8&amp;qid=1480774918&amp;sr=8-1&amp;pi=SY200_QL40&amp;keywords=solder+clean&amp;dpPl=1&amp;dpID=51B7RqNpe1L&amp;ref=plSrch
I want to know how this is fair:
same product, Amazon.ca
http://www.amazon.ca/Plano-Molding-5231-Double-Organizer/dp/B000HJ9514/ref=sr_1_1?ie=UTF8&amp;qid=1404186251&amp;sr=8-1&amp;keywords=Plano+Molding+5231
$43 vs $10
edit: Just did a test, purchasing it through the US Amazon.com and shipping to Canada would be a final cost of $17.77. Not bad really.
I use a Plano for all my stuff, I think it's this model:
https://www.amazon.com/Plano-Molding-5231-Organizer-Porsche/dp/B000HJ9514/ref=sr_1_1?ie=UTF8&amp;qid=1469025237&amp;sr=8-1&amp;keywords=plano+5231
In the top compartment I keep all my tokens, dice, pegs, and templates - stuff like that. You can put some small ships in here too, I just don't yet. There are a couple of slightly bigger compartments in the top section that hold my asteroids and damage deck.
In the bottom compartment is all my ships and I put my rulebook in there too. I've still got a good amount of empty space but once it starts filling up I'll migrate a few of the smaller ships into empty spaces on top. Overall it should hold quite a lot of small based ships. The one place it's weak is that there isn't much storage for big ships/bases unless you start cutting the dividers. And the cards share the divider space too. Eventually I'm thinking of migrating them to a thin binder with pocket pages but it's not necessary yet.
There are bigger stow n go models too.
General tips: http://boardgamegeek.com/thread/1161158/plano-box
http://www.amazon.com/Plano-23600-01-Stowaway-Adjustable-Dividers/dp/B000E39T50/ref=sr_1_1?ie=UTF8&amp;qid=1398397905&amp;sr=8-1&amp;keywords=plano+box
That 3.99 box I bought won't fit the cards without modification and there will be some dice mismatch in compartments. I have a deckbox for the cards, anyway.
http://www.amazon.com/Plano-Molding-5231-Double-Organizer/dp/B000HJ9514/ref=sr_1_8?ie=UTF8&amp;qid=1398397905&amp;sr=8-8&amp;keywords=plano+box
But certainly the red Plano box would fit a large collection. It's overkill in my opinion.
I've been looking at these tackle boxes http://www.amazon.com/Plano-Molding-1354-StowAways-Sandstone/dp/B000OES590/ref=sr_1_1?s=hi&amp;ie=UTF8&amp;qid=1398399845&amp;sr=1-1&amp;keywords=Plano+Molding+1354 and http://www.amazon.com/Plano-Molding-5231-Double-Organizer/dp/B000HJ9514/ref=sr_1_1?s=hi&amp;ie=UTF8&amp;qid=1398399879&amp;sr=1-1&amp;keywords=Plano+Molding+5231
Neither are quite as travel friendly as I would like. They're fine if you're driving, but a bit annoying to lug around on a bus or subway.
It's not for everyone but I use these guys to organize screws. I have a few boxes worth of common screws in the lower portion and a bunch of small screws, nuts and bolts in the top compartment. The biggest thing is to sort through the inevitable bin of parts and fasteners when you're done with your project and try to keep the catch all containers to a minimum.
I only have about 30 or so ships, but I use two Plano 5231 cases. One for IMPs one for Rebels, and scum intermittently. I also have a plastic keter toolbox for the large ships.
Lots of people like Plano's stuff. Without getting something custom (read: expensive) you could try one of Plano's bigger chests, like the 732 tackle box.
As others have mentioned the Plano makes several great cases that work great for X-wing
Here's what it looks like with ships/dials/bases/tokens inside of it. I caulked the bottom of the trays since they didn't sit flush I can fit almost all of my Rebel fleet inside of it. The only thing I can't fit is a YT-2400, though I took out the Ghost I could fit several more easily. I picked mine up at Harbor Freight on sale for $9
You can tell this is the correct one because under the "also purchased" is x-wing stuff.
https://www.amazon.com/Plano-Molding-5231-Organizer-Porsche/dp/B000HJ9514/ref=sr_1_6?s=hi&amp;ie=UTF8&amp;qid=1537967313&amp;sr=1-6&amp;keywords=plano
I'm mostly a one of each ship person (minus the swarm ships, like i have 8 tie's and 8 Z-95's) and have one of these for each faction. They hold plenty of small based ships and can handle some of the smaller large based ships. Other than not having enough storage for the large ships I have no issues with it.
It's a little large to bring everything to game days, but it was cheap and customizable and works great.
The good 'ol trusty Plano 5231 is $10 at Lowe's/Menard's/Amazon/K-Mart. I also have 3 of the double version (basically two of them plastered together) for each faction and it fits a good majority of my ships and I've been playing since Wave 1.
Plano Molding 5231 Double Cover Stow N Go Organizer, Porsche Red https://www.amazon.com/dp/B000HJ9514/ref=cm_sw_r_cp_apip_Xcx2qRQAepfi4
This is the case you want.
You should be good with Jumpmaster and Starfighters for now. Check out this video for an idea:
https://youtu.be/ZKs1m80Qnas
Pick up most wanted for slave 1 pilots and upgrade cards
Pick up starviper for upgrade cards (also a fun ship!)
Do you mean this plano? https://www.amazon.com/Plano-Molding-5231-Organizer-Porsche/dp/B000HJ9514/ref=pd_rhf_schuc_p_img_6?_encoding=UTF8&amp;psc=1&amp;refRID=DJD54KJNEYTR97QFSJS9
Well i just got into this game just have one starter and just placed an order for a gravity feed. I'm just planning to use this plano lockjaw organizer. It worked great for when ran a Junior High D&D club, so planning on storing my dice, rule books and dice bags. And for the cards I'll use Deck box for my teams and then store any extras in BCW boxes from my baseball collecting days. It's a bit much for what i have know but it's what i have on hand don't want to spend money on storage rather save that money for when the DC Worlds Finest set is released.
I use Plano Molding 5231 Double Cover Stow N Go Organizer, Porsche Red https://www.amazon.com/dp/B000HJ9514/ref=cm_sw_r_cp_awd_hR5NwbJVH6QRV
http://imgur.com/OGR2PPD
http://imgur.com/3jQxDcX
http://imgur.com/FYPKNXc
I found this bag on sale and it ROCKS. Drops to @ 30USD or less if you watch it. https://www.walmart.com/ip/Okeechobee-Fats-Okeechobee-Fats-Large-Tackle-Bag-Green/51272020
I have 4 Plano boxes (https://www.amazon.com/Plano-Connectable-Satchel-Stowaway-Handle/dp/B0007RF4DE), a box with all small cards, tokens, and a Ghost (https://www.amazon.com/gp/product/B000HJ9514/ref=oh_aui_detailpage_o01_s00?ie=UTF8&amp;psc=1), and a small chit box ALL in the inner pocket, all my lists/papers/HoTAC stuff in the big outer pocket, all my pilot cards in ziplocs on the end pockets, and more. It's a battle beast. Pics later if you want...
I use this
https://www.amazon.com/Plano-Molding-5231-Organizer-Porsche/dp/B000HJ9514
And multiple of these
https://www.homedepot.ca/en/home/p.2-pack-interlocking-organizer.1000817742.html
Works really well and very cheap. Just got the plano and its perfect for holding all tokens in the top.
Any specific Plano model work well? I used Plano 5231 for X-Wing and that has been fantastic.
I've seen people use all sorts of things for playmats. From black felt with white paint splashed lightly to represent stars to vinyl banners with Hubble images printed on them to elaborate Death Star terrain. Anything you think looks good in your budget will work. I think the size for tournament play is 3x3.
As for storage I love this plano box.
http://www.amazon.com/gp/aw/d/B000HJ9514/ref=mp_s_a_1_1?qid=1404185450&amp;sr=8-1&amp;pi=SX200_QL40
It fits my two cores (with cards and templates) plus all the wave one ships. There is also room to grow.
It's a 5231 Double Cover Stow N Go Organizer, Porche Red -- Amazon link: http://www.amazon.com/gp/product/B000HJ9514
I notched the dividers with a hole saw to allow quick access to tile sets, otherwise they were about as tall as the tiles and made it difficult to get them out. I also ended up buying an extra case as I was one divider short to properly organize the expansions I've got.
http://www.amazon.com/gp/product/B000HJ9514/ref=oh_aui_detailpage_o04_s00?ie=UTF8&amp;psc=1
This is working pretty well for me right now.
Lol, yah I'm on my third box also.
Let me guess, was this box #2?
http://www.amazon.com/gp/product/B000HJ9514/ref=oh_details_o00_s00_i00?ie=UTF8&amp;psc=1
I like this one for portable needs not storage.
http://www.amazon.com/gp/product/B000HJ9514/ref=oh_aui_detailpage_o00_s00?ie=UTF8&amp;psc=1
it has two separate cases you can fit all your dice and tokens in the upper level. The second level has enough room for the large ships and lots of small slots for many small ships. I have not tried the Decimator in it yet so not sure about that.
We have been using this. Characters fit on top, vehicles fit in bottom.
Not sure how much will fit once the wave of xmas gifts come in, but it's working for the couple things we have now with plenty of room to spare.
Know what I don't keep in my car? Candles. Know what I do? PB Blaster. Instead of using pinterest inspired gimmicks I do what actual adults do. Buy PB Blaster (or any other version of penetrating oil) and use it like it is intended.
It is not expensive and works wonders on everything. If you aren't in a hurry you can get it for $3.64 on Amazon Prime Shipped.
If you need it today then hit up your local Autozone or Wal-Mart or whatever place you have around you that deals with automotive stuffs. They will have it. It's everywhere. Know what they don't have in that aisle? Candles.
http://www.amazon.com/Blaster-16-PB-Penetrating-Catalyst-oz/dp/B000I2079E/ref=sr_1_1?s=automotive&amp;ie=UTF8&amp;qid=1394596607&amp;sr=1-1&amp;keywords=p+blaster
I use a stripped screw extractor kit. Very handy for under $20; I've had good luck with them.
Don't forget to spracy the screw with a penetrating oil first!
I have some of this. I'll give it a try. I feel like I was hitting it pretty hard but I was definitely afraid of damaging something. I could definitely hit harder. Thanks for the response.
locksmith here. I dont see any lock on the door. No dial at least. Is it key operated? It could just be a hatch of some kind thats rusted shut. Try lubricating the crap out of it and using something like pb blaster or a similar penetrating oil. let that sit for a while than try opening it.
Oh, and in the future try PB Blaster instead when you're trying to free something that is seized up. It is far superior to WD-40 for that task.
This stuff is your friend when it comes to rust. One can has lasted me awhile.
Spray that on the rusted area and let it sit for a day or two for best results. Get a wrench that fits on the bolt, and take a hammer to the end of the wrench. There are better and safer ways to break free a rusted bolt (impact hammer/wrench) but this is the cheap way.
As for your stripped screw problem, i had the same problem on my Acura. I have a fatty flathead screwdriver, probably 5 time normal. I dremeled a notch into the head of the screw, sprayed it with blaster, let it sit for a bit and cursed and put a fair amount of weight into it and it broke free.
I had to replace the front passenger hub assembly on my wife's minivan. The bearing nut came off with no problems and I thought that was going to be the bear. Nope. One of the brake caliper support bolts would NOT budge even with my impact and a half a can of PB Blaster. Eventually got it off after heating up the housing around the bolt with some
MAPPpropylene gas. That thing was ON there.Great job! You might try PBlaster next time you have seized screws, it does a much better job than WD40. I used it this weekend cleaning up a Disston D-15 Victory saw. Same store had a few stanley planes but they were too far gone for saving.
https://imgur.com/a/ZCANI -- Saw ended up good enough for me to use. Might watch that Paul Sellers video on sharpening them, I think it's sharp but who knows.
Apologies for the odd angles - uploaded from Imgur mobile and didn't see where to flip the image. Guessing saw dates somewhere between 1928 and 1945. The victory symbol changed to a "V" around then by the eagle.
Try using PB Blaster to penetrate the gunk. I had this issue with a old VW and PB Blaster helped. Also tried using the blow torch/impact wrench. that failed but PB Blaster and this methods combined worked. HTH
You've never heard of PB Blaster? This stuff is magic
https://www.amazon.com/Blaster-16-PB-Penetrating-Catalyst-11-Ounces/dp/B000I2079E/ref=pd_all_spx_5/146-4021135-0122059?_encoding=UTF8&amp;pd_rd_i=B000I2079E&amp;pd_rd_r=69018b96-57a5-11e9-8bb5-4d66d06308ae&amp;pd_rd_w=Z79rJ&amp;pd_rd_wg=BI4pX&amp;pf_rd_p=181658a1-8c8b-49ea-9a7c-d3e4ca5d6a8c&amp;pf_rd_r=1V3R7SNX7NNC1CXHCBE8&amp;psc=1&amp;refRID=1V3R7SNX7NNC1CXHCBE8
Try a different lube, like PB blaster
Try to intentionally apply pressure in the "ON" direction. Sometimes it will break free enough while tightening to come loose.
Try hitting the crank arm while trying to loosen/tighten. A rubber mallet or deadblow would be best.
If the above still does not work only then would I start methods that may cause damage... like more force or heat.
You need to use a screw extractor.
If you've lead a good clean life (and it looks like you haven't) it will come right out.
If you don't want to buy the tool or don't have the drill to use it with just go to your LBS. Any competent one should be able to do this for you for a rather small charge.
If you have reason to suspect the screw is in there real good start applying PB Blaster or other penetrating oil now. Do whoever will be removing it a favor and get penetrating early. WD-40 is not a good penetrating oil.
http://www.amazon.com/Light-My-Fire-Titanium-Spork/dp/B001E7S5BO
http://www.thinkgeek.com/product/8ace/
I use it all the time. Next time out is the 25th-27th.
edit: ya, if you're referring to the mess kit it's new this season. I still have two more things on the way as well. A Lite My Fire titanium spork and a folding grill.
Buy a Spork everybody should own a spork !
Just finished my holiday shopping: Titanium Spork
http://www.amazon.com/Light-My-Fire-Titanium-Spork/dp/B001E7S5BO/ref=cm_lmf_tit_9
I introduce you the mighty spork.
Steam ID http://steamcommunity.com/id/1nf4m0uz
These are the items I currently have in my pack:
Collapsible plate, bowl, and cup
single burner - there are probably better/smaller/lighter weight ones but this is just what I'm using at the moment
Titanium spork knife
camping pot
I toss a sponge and a travel bottle of dish soap in the pot.
It'd be nice to see if other people have similar travel packs and what they use.
I got a titanium spork! I'm very excited about my spork. :)
I'd worry about the rubber edges. Rubber tends to wear out/flake after time and exposure to the elements, and it's definitely less durable than metal. Not really sure rubber is needed to scoop out every last bit of a meal either. The shape of the spoon end also seems less than optimal for eating. Is this product better than, say, this spork?
this?
I've got both of these. Both are great.
http://www.amazon.com/Light-My-Fire-Titanium-Spork/dp/B001E7S5BO/ref=sr_1_1?ie=UTF8&amp;qid=1381935479&amp;sr=8-1&amp;keywords=titanium+spork
http://www.amazon.com/Snow-Peak-cutlery-Spork-titanium/dp/B000AR2N76/ref=sr_1_4?ie=UTF8&amp;qid=1381935479&amp;sr=8-4&amp;keywords=titanium+spork
there are titanium sporks
Titanium spoons - they are the future.
http://www.amazon.co.uk/Light-My-Fire-Spork-Titanium/dp/B001E7S5BO
I also have the titanium version and it is great. Never once worried about breaking it. I typically am only using the spoon on dehydrated foodstuffs, but every so often I do "luxury" hikes where we bring steaks and whatnot and so a discrete fork is a boon. It's because of the fork that I think it's superior to the frequently recommended long spoon option. "Spork" is a total misnomer for the utensil since it is a fork and spoon on opposite ends, not a mutant amalgamation of the two.
Creator of /r/Whatsinthebag and still in dire need of a new EDC backpack.
I haven't made any final decisions on it, but I've got dozens of great options so far.
Othar than that....Oh....
...just to name a few things...ya know...off the top of my head.
Don't get the Light my fire Titanium Spork. While it's sturdy and has a good "hand feel", they made the stupid thin about a quarter inch too large to fit in the typical steel mess kit, even removing everything but the pot and outer bowl. You have to buy their stupid spork cover if you don't want crud all over your spork.
Are you talking about this stone?
https://www.amazon.com/dp/B001TPFT0G
Now that I think about it, you probably won't want a laser for your first good knife. They are great, but not at everything. They are so thin that they aren't great for breaking down bigger /harder things like squash. The uraku will be a solid all-rounder. And with your left over $50 you can get this to keep it sharp.
Is it this stone? Is it a good idea to get a thin stone when I've never sharpened before and I'll probably ruin the stone. That way I have smaller margin for errors?
From all the recommendations im getting im deciding between the king post above or the shapton 1000
&#x200B;
Ha No Kuromaku by shapton
KING KW65 1000/6000 Grit
&#x200B;
家庭用の包丁を研ぎたいんだけどおすすめの砥石って無いかな?
とりあえずこれ買おうと思ってるんだけど
Thank you for the detailed response. The tutorial video was detailed and simple to understand!
For the Shapton, you said 320 and 1500 or 2k - I am assuming you meant for me to buy two. Do I have those two or should I buy this instead - https://www.amazon.com/Kuromaku-Ceramic-Whetstone-Medium-Grit/dp/B001TPFT0G ?
https://www.amazon.com/Norton-614636855653-8-Inch-Combination-Oilstone/dp/B000XK5ZDY/ref=mp_s_a_1_3?ie=UTF8&amp;qid=1539581754&amp;sr=8-3&amp;pi=AC_SX236_SY340_QL65&amp;keywords=norton+india&amp;dpPl=1&amp;dpID=41epHsuXYbL&amp;ref=plSrch
https://www.amazon.com/Ceramic-Whetstone-Sharpening-Workstone-QA-0124/dp/B001NI5JUY/ref=mp_s_a_1_4?ie=UTF8&amp;qid=1539581796&amp;sr=8-4&amp;pi=AC_SX236_SY340_QL65&amp;keywords=naniwa&amp;dpPl=1&amp;dpID=31wXmlIa8-L&amp;ref=plSrch
https://www.amazon.com/Suehiro-Japanese-Whetstone-Sharpening-Sharpener/dp/B00SPBWNMO/ref=mp_s_a_1_6?ie=UTF8&amp;qid=1539581832&amp;sr=8-6&amp;pi=AC_SX236_SY340_QL65&amp;keywords=suehiro&amp;dpPl=1&amp;dpID=31tOs0shD%2BL&amp;ref=plSrch
https://www.amazon.com/Kuromaku-Ceramic-Whetstone-Medium-Grit/dp/B001TPFT0G/ref=mp_s_a_1_2?ie=UTF8&amp;qid=1539581898&amp;sr=8-2&amp;pi=AC_SX236_SY340_QL65&amp;keywords=shapton+pro&amp;dpPl=1&amp;dpID=41uhuBgfaBL&amp;ref=plSrch
just wat i could find in 5 min on mobile
Are you talking about this?
Ha No Kuromaku Ceramic Whetstone Medium Grit #1000 https://www.amazon.com/dp/B001TPFT0G/
I can't find one by that name.
Will this shapton do it? https://www.amazon.co.uk/Kuromaku-Ceramic-Whetstone-Medium-Shapton/dp/B001TPFT0G/ref=sr_1_1?ie=UTF8&amp;qid=1520458718&amp;sr=8-1&amp;keywords=Shapton+whetstone
Thanks for the response. I know I can get by with just my chef's knife, but looking to branch out a bit... I don't want just 1 knife in my apartment.
I get that a chef's knife and gyuto are essentially the same thing. Just like a chef’s knife, a gyuto here is the "starting" knife type to invest in, which is why I was asking whether it makes sense for me, given I have a western chef's knife. I'll skip the gyuto and focus on getting a good Nakiri, a good Petty, a functional (budget) Bread, and investing in whetstones.
Here's what I'm looking at:
Nakiri: Budget $100-200
Petty Budget $100-200
Bread Budget: sub $100
Whetstones Budget: sub $100
Thoughts? Recommendations? Anything I’ve missed?
https://www.amazon.com/Kuromaku-Ceramic-Whetstone-Medium-Grit/dp/B001TPFT0G/ref=sr_1_3?ie=UTF8&amp;qid=1478794648&amp;sr=8-3&amp;keywords=shapton+5000
Amazon reviews seem to say this is exactly the same as the more expensive Shapton stones. Made by the same company, same materials, everything, just half the price for the japanese market. WW video on youtube suggested something in the 1000 range and the 5000 range. Thinking of asking for those two as christmas gifts. Anyone have experience with these specific ceramic stones?
I’m not sure. Pardon my ignorance.
Ha No Kuromaku Ceramic Whetstone Medium Grit #1000 https://www.amazon.com/dp/B001TPFT0G/ref=cm_sw_r_cp_api_i_I-sRCbJSP4HF8
Under 100 bucks
1k Shapton stone
8 in wusthof
this
And this
Are the only two stones you need.
I also recommend you get this
To use with this
Is this the Shapton Pro you are talking about? https://www.amazon.com/gp/product/B001TPFT0G/ref=ox_sc_act_title_1?smid=A3S19P3OS2LK90&amp;psc=1
Also is this the shapton you mention?
&#x200B;
https://www.amazon.com/gp/product/B001TPFT0G/ref=ox_sc_act_title_1?smid=A1BCBTURM0NCR9&psc=1
I do leathercrafting, and I'd like to buy myself some sharpening stones as a sort of birthday present to myself. I've asked in the leatherworking sub, and gotten varied suggestions, so I'm broadening my search.
TL;DR I've never sharpened a blade before, I want something to start with, but don't want to spend big money upgrading if I get really into it. I prefer ease of use and convenience, and while I want to sharpen leather knives, I'd like to be able to sharpen other tools like woodworking blades/chisels and kitchen knives as well.
EDIT: I don't know why some of my links aren't working, it happens sometimes and I have no idea what I'm doing wrong.
Try checking these out
Gerber Dime Travel
https://www.amazon.com/dp/B00TBF5JC4/ref=cm_sw_r_cp_awdb_vfxHybHFGC82A
The Leatherman Style PS
https://www.amazon.com/dp/B0058RX9NU/ref=cm_sw_r_cp_awdb_inxHybJQCT5Q8
I thought that was a pocket for your multi-tool.
I carry this as a (1.4 oz) pot gripper. It's also, obviously, multifunction.
I use this as my pot. It's 1.3L pot that's 3.5 oz with the screenlid and a piece of aluminum foil. I don't bring the regular lid. 1.3L is large for a solo pot, but I eat out of it, and it's pretty much as light as an of the smaller, and much more expensive titanium pots I see. It's also wide enough to use a sideburing stove like a supercat stove. this means the stove doubles as the pot stand.
A good pen is a must. Something solid and comfortable that fits you, and you like the way it writes. A flashlight is always useful-I would recommend something like a Thrunite Ti4 or Ti5. After that, I would suggest some kind of pocket knife/multitool if you can-in my area I could carry multiple and noone would bat an eye, but if you are in an area where knives are a not allowed, try something along the lines of a SOG Powerlock or Leatherman Style
Those are what I would consider the basics, after that its really up to you. A nice watch would not be remiss, or a decent wallet. When I was in highschool, I carried a dry-erase marker that got used a lot. Another thing would be a nice high capacity USB drive, to store files on, or programs. Make sure you back it up though if you are going to use it for any school projects.
If you have training(or even if you dont) it would be a good idea to get a first aid kit, and maybe pocket mask to through in your backpack, along with a roll of duct tape.
Lastly, The one thing that I would suggest would be a good book. You never know when you might be waiting awhile, done work, in a boring assembly, etc. where a good book is nice to have. I always had one in a cargo pocket all through school.
Leatherman Style PS keychain multitool
You can get TSA-Compliant multi-tools. The rule is just that they can't have a knife. I have this one and have had it inspected and passed just fine:
Amazon Link
When you go through, pull all the tools out a little before sending through the X-Ray to save time or else they might make you wait to send through again and waste time.
It's TSA friendly, it has pliers, scissors, a file, a flathead on the file, tweesers, a carabiner clip, and a hook on the carabiner that can be used as a bottle opener. Great little tool- http://www.amazon.com/Leatherman-831488-Style-PS-Multi-Tool/dp/B0058RX9NU/ref=sr_1_1?ie=UTF8&amp;qid=1335244483&amp;sr=8-1
Links for the stuff:
EarPods.
Phone Case.
Watch.
Sunglasses.
Knife.
iPod.
Flash Drive.
Leatherman.
I honestly have no idea what specific wallet that is, I just know it's a fossil.
Who doesn't either 1. Have pocket knife? or 2. Leatherman type tool on the belt? When I fly I even have the PS Leatherman, https://www.amazon.com/gp/product/B0058RX9NU/ref=oh_aui_detailpage_o07_s00?ie=UTF8&amp;psc=1
I literally feel naked if I don't have something like that.
I'm a professor, so I'm always carrying more than I can fit in my pockets (laptop, notepads, sometimes piles of student papers, etc.). I have a messenger bag that's very simple with not much organization. The main compartment is divided into two parts, one of which has a couple of loops for pens and a small pocket. There's a open pocket on the back of the bag for things that you might want to access quickly. And there are small pouches on the sides of the bag for sunglasses or other small things.
My laptop goes in the part of the main compartment without pen loops. A couple of notepads go in the other part of the main compartment, along with a small case which fits in the small pocket and holds earbuds and a USB drive. Student papers go in that compartment when I need to carry them. My sunglasses go in one of the side pouches (the one I can easily reach while wearing the bag), and a pocket knife goes in the other side pouch (or in my pocket if I'm expecting to use it a lot). The back pocket holds a carrying case with several pens, a small power bank and cables, and a small multi-tool. I also have a small flashlight that can fit in various places depending on how accessible I want it to be, but usually is stored in the carrying case. (I like this carrying case specifically because it lies flatter than most others I've seen, so it's not uncomfortable against my back while in the back pocket of my messenger bag.)
I think you're thinking about Leatherman Style which is $50 cheaper. The Skeletool is only $20 cheaper. I've never had the style because it doesn't have a knife but it's TSA compliant so that's a perk.
https://www.amazon.com/dp/B008133KB4/ref=cm_sw_r_cp_api_uBDGAbWQY9KHF
Here’s the link to the UV flashlight I bought, it works great!
Something like this?
this one works well for me.
In for a TH20 please! Thank you!
Headlamp.
Thrunite TH20 in neutral white tint is my favorite work headlamp. It’s tiny and incredibly durable for $29. You’ll need a few rechargeable AA batteries and a charger. Nice thing is the headlamp only takes a single AA so the other batteries can be ready to go for backup.
ThruNite TH20 Neutral White 520 Lumen
EBL AA Rechargeable Batteries - haven’t used before but this one comes with USB input with the charger so you could hook it up in your car or house
ThruNite TH20 Neutral White 520 Lumen CREE XP-L LED Headlamp Flashlight (NW) https://www.amazon.com/dp/B01FCV32SI/ref=cm_sw_r_cp_api_i_DDF1DbMM6G86S
Would love the get my collection started with a TH20 NW!
https://www.amazon.com/dp/B01FCV32SI/ref=cm_sw_r_cp_apa_i_Lo50Db2K5YD1P
Thanks for doing this.
ThruNite TH20 Neutral White 520 Lumen CREE XP-L LED Headlamp Flashlight (NW) https://www.amazon.com/dp/B01FCV32SI/ref=cm_sw_r_cp_api_i_KI80DbGRJ8J49
Thanks! TH20 for me
https://www.amazon.com/dp/B01FCV32SI/ref=cm_sw_r_cp_apa_L2wXzbFYHB3VP
Ty, awesome idea!
TH20 on amazon
Could use a better headlight, so ThruNite TH20 it is. Hell, even if I'm not chosen, I might just order one myself.
ThruNite TH20 520 Lumen CREE XP-L LED Headlamp (TH20 Neutral White)
https://www.amazon.com/ThruNite-TH20-Neutral-White/dp/B01FCV32SI/?tag=parametrek-20
I need a light that can take a AA that isn't junk.
ThruNite TH20 Neutral White headlamp
thanks for another giveaway!
Thank you for the giveaway!!!
https://www.amazon.com/dp/B01FCV32SI/ref=twister_B01FCY03J6?_encoding=UTF8&amp;psc=1
ThruNite TH20 NW - https://www.amazon.com/dp/B01FCV32SI
Thanks for the give-away!
Thanks! th20 nw
https://www.amazon.com/dp/B01FCV32SI
https://www.amazon.com/ThruNite-TH20-Neutral-White/dp/B01FCV32SI/
Thanks for doing this!
https://www.amazon.com/ThruNite-TH20-Neutral-White/dp/B01FCV32SI/
Awesome, thanks!
https://www.amazon.com/dp/B01FCV32SI
https://www.amazon.com/gp/aw/d/B01FCV32SI/ref=mp_s_a_1_2?ie=UTF8&amp;qid=1525726366&amp;sr=8-2&amp;pi=AC_SX236_SY340_FMwebp_QL65&amp;keywords=Manker+E03H&amp;dpPl=1&amp;dpID=41GW8Gj4l2L&amp;ref=plSrch
I hope I did this correctly, first time.
Thank you for the opportunity!!!
Skilhunt ftw!
Skilhunt H03.
Thank you for the giveaway and good luck to everyone!
Glad I was able to find a community like this. Thanks for the giveaway!
Skillhunt H03
Thanks for doing these! I've heard a lot of good things about the Skilhunt H03 NW.
I've waited a long time to get to be able to enter for the Skillhunt H03 Neutral White :). Good luck everyone!
New here as well. Seems I have a lot to learn from you folks. This one looks like a good place to start with my re-education.
https://www.amazon.com/dp/B01LEOL3LU/ref=cm_sw_r_cp_apa_i_lE3CCbXZECM8C
Thanks
Thank you for the fun and generous giveaways!
Skilhunt H03 NW
Thanks for the giveaway, if chosen is like this one
I would like this please! And thanks!
https://www.amazon.com/1000Lumens-Flashlight-Waterproof-Hands-free-Brightness/dp/B01LEOL3LU
Thanks again!
The Skilhunt H03 NW would greatly improve an upcoming camping trip.
Skilhunt H03
https://www.amazon.com/dp/B01LEOL3LU/ref=cm_sw_r_cp_apa_i_lE3CCbXZECM8C?th=1&amp;psc=1
I'd love to add yo my collections. Thank You for what your doing
&#x200B;
My entry a Skilhunt H03: https://www.amazon.com/Skilhunt-H03-NW/dp/B01LEOL3LU/?tag=parametrek-20 at $44.50
&#x200B;
I also choose the Skullhunt H03
https://www.amazon.com/Skilhunt-H03/dp/B01LEOL3LU/?tag=parametrek-20&amp;th=1
I'll throw my name in here with this one:
https://www.amazon.com/1000Lumens-Flashlight-Waterproof-Hands-free-Brightness/dp/B01LEOL3LU/ref=sr_1_2?s=sporting-goods&amp;ie=UTF8&amp;qid=1551072054&amp;sr=1-2&amp;keywords=skilhunt+h03
Skilhunt H03 NW
Thanks!
This'll do. A magnetic light would be nice.
Thanks as always for being an awesome flashlight community. Thanks in advance if I win this light:
https://www.amazon.com/1000Lumens-Flashlight-Waterproof-Hands-free-Brightness/dp/B01LEOL3LU
Skilhunt H03
https://www.amazon.com/Skilhunt-H03/dp/B01LEOL3LU/?tag=parametrek-20&amp;th=1
This skillhunt h03 would be great for my YMCA camp coming up!
please
Yessss! I'd love a Skilhunt H03 ! :)
Skilhunt H03 would be awesome.
Thank you for everything!
https://www.amazon.com/dp/B01LEOL3LU/ref=cm_sw_r_cp_api_i_yMtuCb6J8PDKW?th=1
If the $0.50 extra disqualifies that option (I will definitely pay any extra over the $44), then my second choice is...
https://www.amazon.com/dp/B07HBNSXLY/ref=cm_sw_r_cp_awdb_t1_8puuCbFQW0SJW
Sure could use an H03 NW while camping this year!
Skilhunt H03-NL I’ve only ever had cheap headlamps and would love the upgrade! Thanks for doing this!
https://www.amazon.com/dp/B01LEOL3LU/
Hopefully I win the Skillhunt H03 in neutral white. Thanks for doing this!
https://www.amazon.com/Skilhunt-H03/dp/B01LEOL3LU/?tag=parametrek-20&amp;th=1
Been eyeing one of these for work for a little while now... https://www.amazon.com/dp/B01LEOL3LU/ref=twister_B01KZRD49Q?_encoding=UTF8&amp;th=1
Thanks for the Giveaway.
https://www.amazon.com/dp/B01LEOL3LU/ref=cm_sw_r_cp_apa_i_lE3CCbXZECM8C
Hello from r/gaming. My wish
What great timing to find this sub!
I like the looks of this Skilhunt H03.
Skilhunt H03 Neutral White.
&#x200B;
Thank you for the giveaway!
Thanks for the opportunity! Recently got my first “real” light because of this sub and looking to grab this next.
Entering with the Skillhunt NW
Skilhunt H03 would be awesome! Still need a headlamp. Thanks for the giveaway!
Awesome, thanks for doing this parametrek!
I'd love one of these: https://www.amazon.com/dp/B01LEOL3LU/ref=cm_sw_r_cp_apa_i_lE3CCbXZECM8C
Astrolux S1 / BLF A6
H03 is about $20 more on Amazon but prime shipping
ThruNite TN12
ATACTICAL A1 550 lm Pocket-Sized LED Torch Super Bright LED Flashlight, Black
I'd order a battery from mtnelectronics.com or illumn.com
The H03 is really small compared to most 18650 lights. Way easier to carry.
I'm assuming this is the one correct? Do you know if they make a dual light switch or if it would fit in one? I haven't replaced a switch yet... Does it need a gateway?
https://www.amazon.com/GE-Wireless-Lighting-Control-14291/dp/B01M1AHC3R/ref=sr_1_2?s=hi&amp;ie=UTF8&amp;qid=1519682770&amp;sr=1-2&amp;keywords=ge+paddle+switch
I had undercabinet florescent with power coming directly into them, and I replaced them with a combination of led strip lighting, diffusers and individual power supplies. Then I changed the switch to a GE z-wave. Here's a list of the products I used:
Power Supply: ($14 x 3)
https://www.amazon.com/gp/product/B017R17YQC/ref=oh_aui_search_detailpage?ie=UTF8&amp;psc=1
LED Lights: ($8) https://www.amazon.com/gp/product/B00HSF64JG/ref=oh_aui_search_detailpage?ie=UTF8&amp;psc=1
Diffusers: ($26)
https://www.amazon.com/gp/product/B00PJSUZSK/ref=oh_aui_search_detailpage?ie=UTF8&amp;psc=1
Zwave Switch (now they are $38, but I got some on clearance for $21)
https://www.amazon.com/GE-Wireless-Lighting-Required-14291/dp/B01M1AHC3R/ref=sr_1_2_sspa?ie=UTF8&amp;qid=1519156674&amp;sr=8-2-spons&amp;keywords=ge+zwave&amp;psc=1
All in all I replaced lighting under the three main cabinets and the total cost was under $100. I'm not sure it was the best way to do it, but it works! For my application dimming wasn't what I was looking for, but I think you could swap out some parts for the dimmable versions.
GE Enbrighten Z-Wave Plus Smart Light Switch, On/Off Control, In-Wall, Incl. White and Lt. Almond Paddles, Repeater/Range Extender, Zwave Hub Required, Works with SmartThings, Wink, Alexa, 14291 https://www.amazon.com/dp/B01M1AHC3R/ref=cm_sw_r_cp_api_i_.HWsDb3VAEJTQ
Comes with an almond paddle
It couldn't hurt. If it goes unused put the switch somewhere else. And considering the $30 GE switches on Amazon right now ( https://www.amazon.com/dp/B01M1AHC3R/ref=cm_sw_r_cp_apa_nZpcAbV7DQWYZ ) it's a good time to pick up an extra switch (or fifteen)
The newer version that supports z-wave plus. Just the on/off model, not the dimmer. Model #14291.
GE Z-Wave Plus Wireless Smart Lighting Control Smart Switch, On/Off, In-Wall, Includes White & Light Almond Paddles, Works with Amazon Alexa, 14291 https://www.amazon.com/dp/B01M1AHC3R/ref=cm_sw_r_cp_api_QiyeAb380Q4QY
This is $40
https://www.amazon.com/GE-Repeater-Extender-SmartThings-14291/dp/B01M1AHC3R/ref=sr_1_3?keywords=ge+zwave+light+switch&amp;qid=1566325106&amp;s=gateway&amp;sr=8-3
Also what $10 wifi switch are you even talking about?
Z-wave switches will do what you want and are compatible with Smartthings. I have a few GE dimmers but they also make non-dimming switches. You can get them for about $35, sometimes less.
GE Z-Wave Plus Wireless Smart Lighting Control Smart Switch, On/Off, In-Wall, Includes White & Light Almond Paddles and Zwave Repeater Range Extender, Works with Amazon Alexa (Hub Required), 14291 https://www.amazon.com/dp/B01M1AHC3R/ref=cm_sw_r_cp_api_shK0AbC9YFRW8
Can’t speak to how well they control fans or how they work in the same setup as the Lutron Casetta.
I use Ge z-wave plus switches and dimmers with abode today and they work great. https://www.amazon.com/dp/B01M1AHC3R?ref=yo_pop_ma_swf
The GE or HomeSeer dimmers will work just fine. I personally use the GE ones. Make sure you get the Z-Wave Plus ones though... they can be enabled through a device handler in ST to enable double tap (so can the HomeSeer switches).
https://www.amazon.com/GE-Wireless-Lighting-Required-14291/dp/B01M1AHC3R/ref=sr_1_4?ie=UTF8&amp;qid=1517504684&amp;sr=8-4&amp;keywords=ge+z-wave+plus+switch
or
https://www.amazon.com/New-Model-Wireless-Lighting-Wall/dp/B01MUCZA1C/ref=sr_1_5?ie=UTF8&amp;qid=1517504684&amp;sr=8-5&amp;keywords=ge+z-wave+plus+switch
Again make sure it's the Z-Wave PLUS model. Even within those links, picking a specific switch might get you the non-plus.
As far as wattage, you should be fine. Standard switches will do up to 600w, that's 10x60w bulbs on a single circuit (or 6x100w) assuming incandescent bulbs, power usage goes WAY down with LED bulbs.
Your biggest problem is going to be getting all of your switches to fit into the wall... they're quite big. I'd recommend jumping neutrals and line if you can from switch to switch, instead of trying to add to the bundles (i.e. neutral into switch 1, then out of switch 1 to switch 2, etc...). If you're not comfortable with wiring you should have an electrician install them.
You'll want to look at Smart things by Samsung or even a hubitat with z wave motion sensors, door sensors and z wave light switches.
Smart things
https://www.amazon.com/Samsung-SmartThings-Generation-GP-U999SJVLGDA-Automation/dp/B07FJGGWJL/ref=sr_1_4?keywords=smartthings&qid=1568218834&s=hi&sr=1-4
Hubitat
https://www.amazon.com/Hubitat-Elevation-Home-Automation-Hub/dp/B07D19VVTX/ref=sr_1_4?crid=11LGAJMZT4XTM&keywords=hubitat&qid=1568218857&s=hi&sprefix=Hubitat%2Ctools%2C181&sr=1-4
If you go the z wave /z wave plus route things tend to be much more stable and you can build a interference free IOT network. Zigbee runs on 2.4ghz so its generally less preferred to z wave that operates at a interferance-FREE 800-900 MHz.
Things like the GE Z wave light switches are great for a good reliable IOT network.
GE Z wave light switch & Extender
https://www.amazon.com/GE-Repeater-Extender-SmartThings-14291/dp/B01M1AHC3R/ref=sr_1_2?keywords=zwave+ge+light+switch&qid=1568218742&s=gateway&sr=8-2
For locks I highly recommend the Keyless Yale locks. $98 a piece, very reliable and they work great with a z wave network. They also use a hardened steel strike plate, a solid steel body, a tamper alarm, a anti saw dead bolt core and cant be picked.
&#x200B;
You'll want a good quality door sensor, good reliable ones are few and far between so make sure you get something that has great amazon reviews. Dont cheap out here as flaky contact sensors are everywhere and its not worth the $5 when it doesn work half the time.
Z Wave Door Sensor
https://www.amazon.com/Z-Wave-Magnets-Window-Sensor-DWZWAVE2-5-ECO/dp/B01N5HB4U5/ref=sr_1_4?crid=29QS4YGELWFZR&keywords=zwave+door+sensor&qid=1568220339&s=hi&sprefix=Z+wave+door%2Ctools%2C170&sr=1-4
Yale Z wave YRD110ZW619 Dead bolt
https://www.amazon.com/gp/product/B00PM6V1XW/ref=ppx_yo_dt_b_asin_title_o06_s00?ie=UTF8&psc=1
&#x200B;
I also use an Abode Security System thats z wave based with my z wave locks feeding in to it. Abode is great as its got all the fancy features other alarm systems offer but has no monthly charge!!
Abode Security System
https://goabode.com/?rfsn=2685339.3291b5
&#x200B;
For Smart outlets I dont have any z wave ones yet, just a couple of TP-Link kasa ones. I would probably go for GE in wall outlets though. DONT SKIMP on your outlets, lesser known brands have been know to catch on fire!
I have 19 kasa light bulbs and they work pretty darn good, but I would recommend GE outlets for much better home automation. Smart light bulbs are good for basic stuff but once someone turns off the light switch you cant turn them back on until you flip the switch.
Kasa Light Bulbs LB110
https://www.amazon.com/TP-Link-LB110-Smart-Wi-Fi-Dimmable/dp/B01HXM8XE2/ref=sr_1_5?keywords=Kasa+bulbs&qid=1568220252&s=hi&sr=1-5
Please note that Smart things and Hubitat are booth good in there own respects, Smart things is good for people who know how to use a computer but are not power users. Hubitat is great for people who own a github account and really want the full automation experience. Hubitat runs most/all IOT commands locally and doesn't rely on the cloud for processing.
I skipped hubitat and went for HASSIO, I really, REALLY, dont recommend this rout unless your a computer tech as the learning curb can be really steep!!! It runs on your own server, I use the VB version
HASSIO
https://www.home-assistant.io/hassio/
Replacing the light switch with a smart home switch (e.g. GE Enbrighten ). Even if you don’t own the home, certainly you can “replace” a switch?
Thanks! The switch is a long ways from my hub. However, I have a kwikset deadbolt there and it seems to work just fine. I am hoping it will work.
Is this the switch?
GE Z-Wave Plus Wireless Smart Lighting Control Smart Switch, On/Off, In-Wall, Includes White & Light Almond Paddles, Works with Amazon Alexa / Google Home, 14291 https://www.amazon.com/dp/B01M1AHC3R/ref=cm_sw_r_cp_api_pPg5ybFJ9EEK7
I have several of those set ups in my home. I use ZWave switches and plugs.
I have a SmartThings hub controlling it with the built in Smart Lighting app. If I turn on my switch it will automatically turn on a plug that has a light plugged into it.
I have over cabinet lighting connected to my dining room lights, and a curio cabinet connected to living room lights. It's not instant, usually about a 5 second delay between tuning on the switch and the plug turning on.
A scene controller should do the same thing without controlling a circuit directly, and should be faster. Usually they have a few buttons on them. But they cost more than a standard switch.
Ok, I'm sorry, I don't understand how any of this works but I'm trying to learn!
So these light bulbs would work: https://www.amazon.com/Hyperikon-Dimmable-Equivalent-Qualified-UL-Listed/dp/B075MVMRCM/ref=sr_1_6?ie=UTF8&amp;qid=1539489965&amp;sr=8-6&amp;keywords=dimming+light+bulbs
and these switches:https://www.amazon.com/GE-Lighting-Required-SmartThings-14291/dp/B01M1AHC3R/ref=lp_13575748011_1_4?srs=13575748011&amp;ie=UTF8&amp;qid=1539490103&amp;sr=8-4
and I was thinking about getting a lamp in one room, I could use this plug: https://www.amazon.com/Smart-Enabled-Google-Assistant-HomeKit/dp/B01NBI0A6R/ref=sr_1_15?ie=UTF8&amp;qid=1539490403&amp;sr=8-15&amp;keywords=dimmer+outlet
and a wink hub.
And I would be able to dim and lighten a room from my phone (or the switch on the wall for those plugs). This comes out to be ~$300 for the whole set.
The Phillips Hue would be $665 for the same set up.
Do I have this right? I plan to do more research, but just so I am at the same baseline.
I think you are looking for a paddle switch so the light switch doesn't have to be on the "on" position all the time. I see a lot of people use this https://www.amazon.com/GE-Wireless-Lighting-Control-14291/dp/B01M1AHC3R/ref=sr_1_4?s=hi&amp;ie=UTF8&amp;qid=1482999401&amp;sr=1-4&amp;keywords=Ge+paddle or this https://www.amazon.com/GE-Dimmer-Z-Wave-12724-Amazon/dp/B006LQFHN2 I can't speak for Hue or LIFX and Nest because I think they use their own standard (not z-wave so it doesn't play well with smartthings) other than if you would like to change light colors. If I had a clean slate, I would stick with one standard, z-wave products.
GE makes good z wave plus smart switches capable of 3 way switching. You would buy one of these
GE Z-Wave Plus Wireless Smart Lighting Control Smart Switch, On/Off, In-Wall, Includes White & Light Almond Paddles, Works with Amazon Alexa, 14291 https://www.amazon.com/dp/B01M1AHC3R/ref=cm_sw_r_cp_apa_K4LZzbMEWM70Q
And one of more of these
GE Add-On Switch for GE Z-Wave, GE ZigBee and GE Bluetooth Wireless Smart Lighting Controls, NOT A STANDALONE SWITCH, Includes White & Light Almond Paddles, 12723 https://www.amazon.com/dp/B00RKJS8MQ/ref=cm_sw_r_cp_apa_y5LZzb3VB99ZF
The newer ones are Z-Wave+, the older ones are just Z-Wave. I run the Leviton Decoras (Z-Wave+) for switches & dimmers. I've added a few of the new GE Fan Controllers, but those have had a rough time being detected correctly by OZCP / HASS.
> I'm okay buying a hub
IF that's the case, then I'd get a hub. It gives you a lot more flexibility in smart options, more options for home automation, and you're not stuck just doing hue or through Wifi. I like SmartThings; plenty of people around here want something more sophisticated, and that's fine, but if you're just getting started it's a perfectly viable solution. The SmartThings hubs will allow you to get any Zwave or Zigbee switches. I'm a big fan of the GE switches; there's also a dimmer version. I haven't done much cross comparison, I've just never had a problem with any of the GE switches I own (~20). That said, the price keeps creeping up, so I've picked up some of the old Jasco ones, which is the switch that eventually became the GE Switch. The old ones are only Z wave, not Z-wave+, but I haven't had issue with those either.
Anything Hue is still limited to requiring that the Hue bridge be up and running, and you're also limited to 7 dimmer switches per hub which is really easy to run through with three ways.
You're probably better off getting something like https://www.amazon.com/gp/aw/d/B01M1AHC3R/ref=mp_s_a_1_4?ie=UTF8&amp;qid=1511631187&amp;sr=8-4&amp;pi=AC_SX236_SY340_FMwebp_QL65&amp;keywords=zwave+switch&amp;dpPl=1&amp;dpID=41orYO6Z%2BWL&amp;ref=plSrch and a SmartThings hub. In the absence of the hub it just works like a perfectly normal light switch, but the hub also allows it to be turned on/off remotely, including via Alexa. SmartThings integrates with Hue so you still get a fully integrated experience.
Only catch is no colour changing, but it sounds like a lot of your lights are white only. They also have a dimmer model which when combined with Philips Warm Glow LED bulbs gives you some colour temperature control without getting into Hue bulbs.
I have this lock. never have had a problem with it.
and a bunch of these light switches...also never had a problem
I had a similar set up. I replaced it, unsuccessfully, with a high/low rocker and a standard GE Z-wave plus .
I tried installing it myself and then had an electrician come out and work on it for a few hours too and no luck.
Apparently there's an upfront burst load (sure this is the wrong terminology) on the whole house fan that that switch must handle and it cannot. When you switch it on, it just starts clicking and the house fan is having a spaz. It can't handle enough current the get the fan started.
I haven't been able to find a Zwave switch that can handle that upfront load needed by this house fan.
Shame. It's been a couple years now and I'm still heading upstairs to turn that thing on and off and the rest of the house is completely automated!
Any opinions on this ANBES soldering kit?
Looking to jump into the world of self-built mechanical keyboards but don't want to purchase a higher end kit that I may or may not use.
Follow on, they're cheap: https://www.amazon.com/ANBES-Soldering-Iron-Kit-Electronics/dp/B06XZ31W3M/ref=sr_1_3?ie=UTF8&amp;qid=1549820394&amp;sr=8-3&amp;keywords=soldering+iron
Both of those options seem overly complex considering my skill level and the size of this PCB which is about 1/2” wide. I bought duplicates of everything though because I anticipated messing up somewhere.
The tip is the smallest of this set:
https://www.amazon.com/dp/B07CTLZBHQ/ref=cm_sw_r_cp_api_i_Juq1Cb4ZV5CJP
The iron is this one:
https://www.amazon.com/dp/B06XZ31W3M/ref=cm_sw_r_cp_api_i_SMq1CbW3YJ15W
The solder is this:
https://www.mouser.com/ProductDetail/590-4885-227G
Is this soldering kit any good?
https://www.amazon.com/ANBES-Soldering-Iron-Kit-Electronics/dp/B06XZ31W3M/ref=sr_1_1?ie=UTF8&amp;qid=1538618726&amp;sr=8-1&amp;keywords=solder+kit&amp;dpID=51cIDrNtObL&amp;preST=_SY300_QL70_&amp;dpSrc=srch
I want to get a cheap kit and practice de/resolding my old CM board and eventually buy a higher end kit. Will this kit be enough or do I have to go with something more expensive?
What about these? Which one do I pick?
ANBES Soldering Iron Kit Electronics, 60W Adjustable Temperature Welding Tool, 5pcs Soldering Tips, Desoldering Pump, Soldering Iron Stand, Tweezers https://www.amazon.com/dp/B06XZ31W3M/ref=cm_sw_r_other_apa_i_6D-BCbR2BG953
Anbes Soldering Iron Kit, [Upgraded] 60W Adjustable Temperature Welding Tool with ON-OFF Switch, 8-in-1 Screwdrivers, 2pcs Soldering Iron Tips, Solder Sucker, Wire Cutter,Tweezers,Soldering Iron Stand https://www.amazon.com/dp/B07GJNKQ8W/ref=cm_sw_r_other_apa_i_hF-BCb4RY4RZZ
Or do you pick something else entirely?
I own this one, it's alright, especially if you're not planning on doing a ton of soldering
you'll pretty much have to get a soldering kit but they are pretty cheap on amazon.
There have been a few posts in /r/DIY recently about making them (this or this for example) reading the comments there will probably help. /r/RetroPie/ will also be a good resource, people are always posting their latest builds. I haven't done one like this personally but reading those makes me think I could if I wanted to.
As for 3D printing, check your local library. I know a few locally are starting programs for making stuff with a 3D printer and there are lots of plans for a case online (here for example)
I know I really didn't answer your question but hopefully I was helpful. Look forward to seeing what you end up making!
It's too much fancy junk stuck into a non-ergonomic handle with a way too long working distance. It also isn't grounded, unless you connect that ground terminal to something, and if it's powered from a laptop supply could have RF transients of 100-300V at the tip, which could destroy ESD-sensitive components. If you do ground it, you could still have problems if your ground lead has high RF impedance.
You can do everything you need to do with a cheap plug-in iron like this one, recommended a couple days ago by another redditor:
https://www.amazon.com/ANBES-Soldering-Iron-Kit-Electronics/dp/B06XZ31W3M/ref=pd_ybh_a_2?_encoding=UTF8&psc=1&refRID=RKKZHK5HD74K1HXDXG04
I wouldn't even buy one of those for field work, because I have a butane-powered iron that works just as well and isn't ever going to have a CPU crash.
That said.. people do use them and find their performance acceptable so they can't be completely garbage.
Wow, thanks for taking the time to explain this to me in detail, I really appreciate it. I fixed the link for the power supply, but it's basically just a 12V 5A (60W) power supply, so I think it should be sufficient.
I'm planning on picking up a soldering iron since I don't have one, I was looking at this set.
Just so I'm clear, when I want the panel on, I send 5V to the MOSFET to open it, and to control the "brightness" of the panel, I use PWM?
If you're just going to be soldering switches, most any basic soldering kit will do fine. You should also get some Super Lube and Band-Aids to lube your stabilizers. Zealios are going to be the closest switch to Holy Pandas that you can find on kbdfans, though the different spring weights do change the feel a lot. You should order a switch tester pack with the different weights to get a feel for what you like.
I bought this one: https://www.amazon.com/ANBES-Soldering-Iron-Kit-Electronics/dp/B06XZ31W3M
It's cheap. It's chintzy. But it works just fine, and for occasional DIY stuff, it's perfect.
oh lol the ebay link wasn't there for some reason when I originally replied, now I see it clearly says °C on the dial
Anyway, I've heard the one you linked is fine for quick soldering work. It would probably work for you, but that stand is kinda iffy in my opinion. I would prefer a wire stand that encloses the entire iron so that it's a lot harder for it to fall off and burn something. For a cheap-o set, this one seems pretty okay and is cheaper and probably better than the eBay one: https://www.amazon.com/ANBES-Electronics-Adjustable-Temperature-Desoldering/dp/B06XZ31W3M/ref=pd_lpo_vtph_469_bs_t_1?_encoding=UTF8&amp;psc=1&amp;refRID=MP976EM3NYM02Y0YG0FM
I got a Tenma 21-10120 soldering station from my local MicroCenter for around $60. It has a digital readout and shows not only the temperature you set but also the actual current temperature of the iron. It didn't come with anything else, though, so I had to also get solder core, desolder pump, solder wick, wire cutters, and for the heck of it a brass tip cleaner. Altogether, my set probably came to just under $100.
Semi-related, always wear eye protection when soldering. I also use nitrile gloves to reduce the risk of lead poisoning. I still wash my hands after solder work, but that's mostly to clean the sweaty feeling off my hands from being in gloves.
Not sure if you still need help, but from what you describe, I think that this is a great kit for you. It's cheap and provides enough power to do what you need to do.
This is the iron i ordered. Comes with 5 tips. Looks like a couple are pretty small. https://www.amazon.com/gp/product/B06XZ31W3M/ref=ask_ql_qh_dp_hza
Assuming something like this should work?
https://www.amazon.com/Cooler-Master-Accessory-MasterBox-MasterCase/dp/B071P862G1/ref=sr_1_1?gclid=CjwKCAjw67XpBRBqEiwA5RCocZ94A6pW6rV8Ly7stsb3FXXvlfvwtapN3LkLhYmG7iz6edx6U31BnxoCeF0QAvD_BwE&hvadid=267947957228&hvdev=c&hvlocphy=9015392&hvnetw=g&hvpos=1t1&hvqmt=e&hvrand=14275909158139353769&hvtargid=kwd-443390106938&hydadcr=18064_9813303&keywords=cooler+master+vertical+gpu+mount&qid=1563321795&s=gateway&sr=8-1
;)
Cooler Master Vertical Graphic Card Holder ( With riser card ) PC Gehäuse Zubehörteil 'FreeForm Modular System, hochwertiger Stahl, Riser Card enthalten' MCA-U000R-KFVK00 https://www.amazon.de/dp/B071P862G1/ref=cm_sw_r_cp_api_i_VdaADbVGAKC7Y
/u/timxhorton posted a build with this bracket yesterday. Looked pretty good and wasn’t forced up against the glass.
https://www.amazon.com/Cooler-Master-Accessory-MasterBox-MasterCase/dp/B071P862G1/ref=pd_lpo_sbs_147_t_0?_encoding=UTF8&amp;psc=1&amp;refRID=2KGDG9F85ZTPJW3AWMXA&amp;th=1
https://reddit.com/r/Amd/comments/civyvs/my_white_and_black_ryzen_7_3700x_build/
sorry cooler master >< https://www.amazon.com/Cooler-Master-Accessory-MasterBox-MasterCase/dp/B071P862G1/ref=pd_lpo_sbs_147_t_0?_encoding=UTF8&amp;psc=1&amp;refRID=2KGDG9F85ZTPJW3AWMXA
Grab it quick they sell out
Cooler Master Accessory: Fits MasterBox, MasterCase, Maker, H500P Series Vertical Display VGA Holder Kit w/ Riser Cable https://www.amazon.com/dp/B071P862G1/ref=cm_sw_r_cp_apa_i_K1znDbT2Y60DM
I put this in my s340....no more sagging. Same size card as yours too 1060 strix
https://imgur.com/a/XFCbVMt
Vertical Display VGA Holder Kit w/ Riser Cable https://www.amazon.com/dp/B071P862G1/ref=cm_sw_r_cp_apa_i_OWc4AbBH1JG53
this right?
> The whole point was to prevent GPU sag but I guess I could run some bends to keep the card propped up.
I'd get creative with some form of pillar or even do something with suspension like in Pi.
I'd do something novel with suspension from above.....but I've got a horizontal motherboard in the HAF XB case.
I've looked into such vertical GPU mounts before for the sake of something novel(gpu laying fan-side up in my case) and I keep coming to the same issue, awkward cabling / plugs.
The only way around it that I see would be to cut into the case to allow for this from Cooler Master or something like it for full access to the back of the card and to use normal cables.
Not sure if your case would need cutting, but most have bars or slats between/under the PCIE covers.
My coolermaster did come with a PCI-e Riser cable https://www.amazon.com/Cooler-Master-Accessory-MasterBox-MasterCase/dp/B071P862G1/ref=sr_1_1?ie=UTF8&amp;qid=1549305159&amp;sr=8-1&amp;keywords=cooler+master+vertical+gpu+mount
Unrelated, but im looking to vertical mount my Video card too, how did you do it? Did you get the coolermaster kit? Or did you just dremel through the grill and stick it in? Btw i have the MSI gaming x trio rtx 2080
&#x200B;
Edit: Typo