(Part 2) Best automotive according to redditors
We found 43,458 Reddit comments discussing the best automotive. We ranked the 19,913 resulting products by number of redditors who mentioned them. Here are the products ranked 21-40. You can also go back to the previous section.


![AUTOSCRUB Fine Grade Sponge [AS-019]](https://m.media-amazon.com/images/I/41TkFk-DodL.jpg)
Yeah, I was going to buy one of these, until I saw the reviews and customer supplied photos.
IF YOU FIND YOURSELF IN THIS SITUATION< TAKE A DEEP BREATHE AND WIND DOWN A WINDOW.
The water pressure on the car will prevent you from opening the door. This is how you are trapped. Wind the window down.
My friend died in exactly this way. I wish he knew this. Now you do.
Edit: If you can't roll it down; How to smash a car window (from zolco1 below)....or you could keep one of these handy for emergencies.
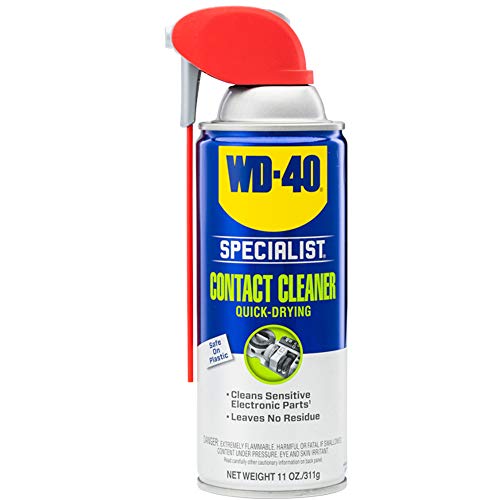
I too had this issue, and completely fixed it with some electrical contact cleaner. Compressed air didn't work, I had to use this stuff. You lift up the rubber base of the sticks and spray this stuff in there on all the sides, wiggle around your sticks a bit to get it all around in there, let it dry for a an hour and then they'll be back to normal. I have to repeat this process every few months depending on how often depending on how much I'm using my switch, but it's super easy and takes very little time. I still have the same can of cleaner, and it seems like it has plenty left in it.
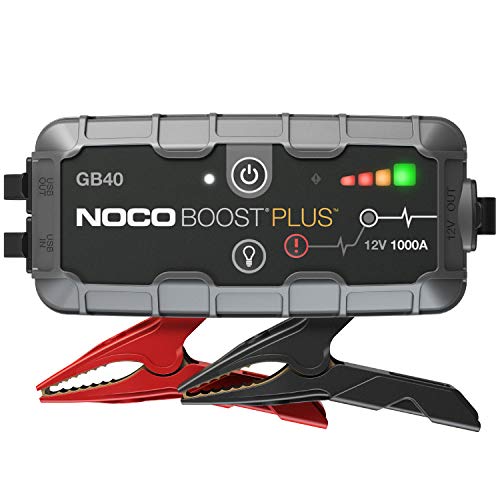
Lithium jumper packs. Everyone should keep one in their car.
Some cost more, some cost less.
https://www.amazon.com/gp/aw/d/B015TKUPIC/ref=mp_s_a_1_4?ie=UTF8&amp;qid=1510625545&amp;sr=8-4&amp;pi=AC_SX236_SY340_QL65&amp;keywords=lithium+car+jump+starter&amp;dpPl=1&amp;dpID=510sDmMz-0L&amp;ref=plSrch
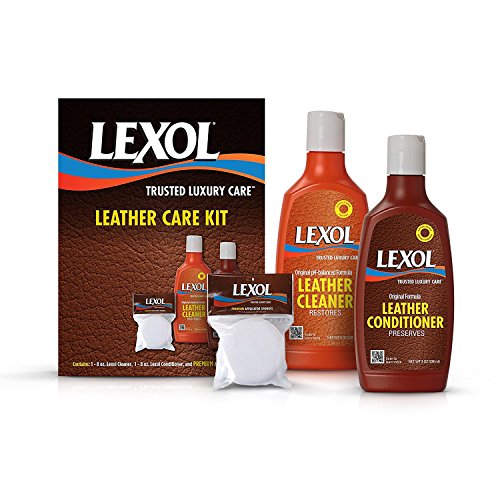
This is an awesome boot/leather shoe care kit. Good price and has everything you need.
http://www.amazon.com/AutoExec-Wheelmate-Steering-Attachable-Surface/dp/B00E1D1GY6
http://www.amazon.com/Manso-Useful-Computer-Wordpad-Laptop/dp/B00H4WN1MQ/
http://www.amazon.com/zolink-Retractable-Holder-Iphone-Samsung/dp/B00LM1M0HM/
The Onion was beaten to it by actual products...
Oh man, I love when people ask stuff like this on Reddit. I bootblack, and have worked on countless leather boots! Frye boots are lovely.
First off, what kind finish do your Melissa Buttons have, or did they have when you got them? For instance, looking at the current line, Antiqued/Polished can take polish, Rugged should not be polished, and Suede will have an entirely different cleaning/care routine from the other two. I'll assume it's closer to the first two for the following.
For any leather that's not suede or nubuck, the first step is cleaning. You can pick up some saddle soap (Kiwi exists in your local drug store or grocery store and is totally fine) or use just about any mild soap - I regularly use diluted Dr. Bronners. You want to create a lather and scrub that into the leather, and then wipe the boot down with a damp, not wet, rag. Be sure to get all the suds off the boot, but don't soak it either. If it's really dirty, feel free to repeat this step!
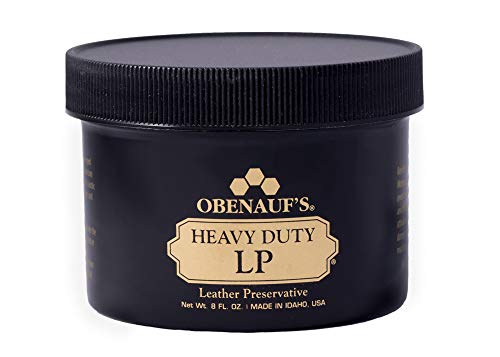
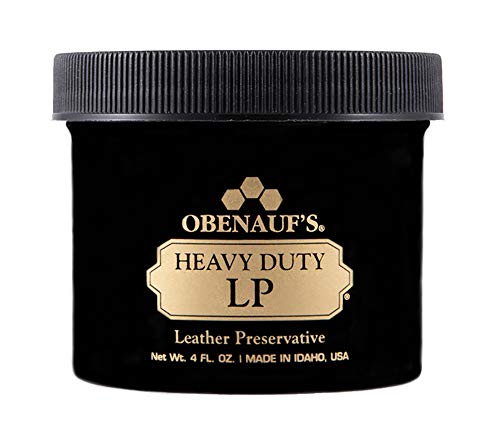
Then, I would choose a conditioner. I'd actually stay away from an animal-based oil like neatsfoot oil or mink oil, as well as less-stable oils like olive oil, since those could go rancid with too much humidity. I'm a big fan of Obenauf's, which gives good deep conditioning with just a bit of product (seriously, a little goes a long way) and has a pretty neutral scent. Frye actually sells a conditioning cream of their own, which I imagine would also be fine. Pretty much anything with a beeswax base is also good. Apply with your fingers so you can really rub it into the leather - the heat from your hands will help work it in.
Finally, if your boot is the sort that would look better with some shine, I would wait a day or two to let the conditioner soak in and then apply a bit of cream polish - this will give your boots some shine, but it won't be like, patent-leather mirror shiny, which I feel would be the wrong style for Frye boots. Kiwi also sells these, but Meltonian is my go-to. With cream polish, you apply a light coat and then buff the boot with a shoe brush in light, fast strokes. You can use your fingers to apply the polish, but it'll dye your fingertips, so either wear gloves or use a rag or a polish brush. Buff the boot until it's shiny to your liking!
Don't worry too much, it's pretty hard to ruin a good pair of boots while taking care of them. They'll definitely be happier with a bit of TLC!
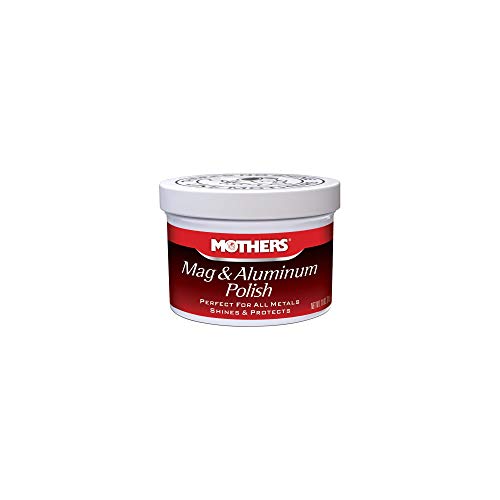
http://www.amazon.com/Mothers-05101-Mag-Aluminum-Polish/dp/B0009H519Y
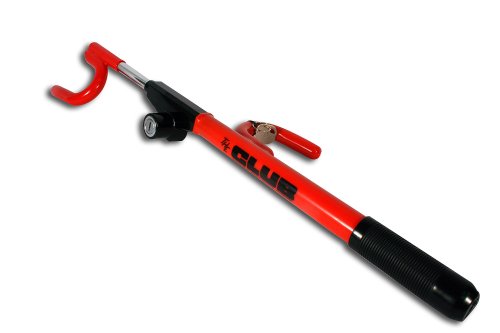
They're probably talking about these anti theft devices, guy.
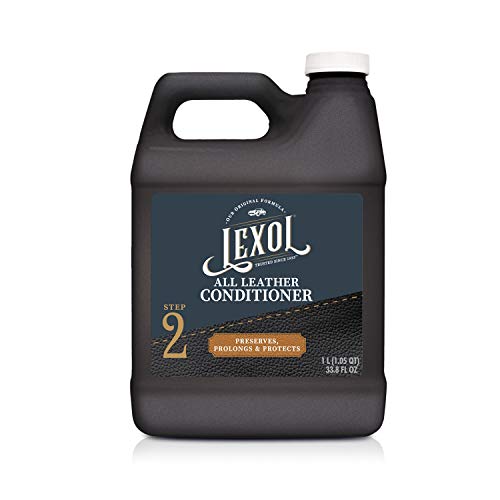
For all circlejerk needs use Lexol leather conditioner. 1LTR of lubricating goodness.
He should have used this:
http://www.amazon.com/AutoExec-Wheelmate-Steering-Attachable-Surface/dp/B00E1D1GY6
http://www.amazon.com/ROF-Inc-Ring-Fire-Enterprises/dp/B000ER47ZS/ref=sr_1_1?ie=UTF8&amp;s=automotive&amp;qid=1268264954&amp;sr=1-1 ! Hands down, the best thing on amazon :)
Not hard. Do you want the super easy and lazy way?
Get a battery tender quick disconnect and then get the usb port that plugs directly into it.
Quick disconnect: https://www.amazon.com/Battery-Tender-081-0069-6-Terminal-Disconnect/dp/B000NCOKZQ
USB port: https://www.amazon.com/Battery-Tender-081-0158-Disconnect-Smartphone/dp/B00DJ5KEF4/ref=pd_sim_263_3?_encoding=UTF8&amp;pd_rd_i=B00DJ5KEF4&amp;pd_rd_r=YJ39F7M010D2BW6GZEY0&amp;pd_rd_w=ANaFZ&amp;pd_rd_wg=QpvAv&amp;psc=1&amp;refRID=YJ39F7M010D2BW6GZEY0
I am so old...
Edit: http://www.amazon.com/Club-1000-Original-Steering-Wheel/dp/B0000CBILL
I was a wildland firefighter for a few seasons, and we had to use full leather boots (any flammable/metal materials were too much of a liability when running through fire) and to take care of my stupidly expensive boots i used Obenauf's LP and it worked wonders. Made from beeswax and absorbed quite quickly it kept my leathers supple and durable. I still keep a tin of it around to massage into wear areas on my leather jackets and riding pants. Knees and elbows love this shit.
In regards to general care I wish I had more advice for you but this stuff makes leather happy, that I do know.
You're making the assumption that there is only one copy of the key.
Get a this: http://www.amazon.com/Club-1000-Original-Steering-Wheel/dp/B0000CBILL
Definitely check out /r/AutoDetailing where I learned my method.
The way I do it:
Equipment:
Washing:
Rinseless washing is great when your car is mildly to semi-dirty. This means if it's mostly just dust on your car this is great. Otherwise if it's caked with mud this won't work. You'll have to go somewhere to hose your car off with water first so it's not as dirty.
Clay Bar/Nanoskin:
Note: This is only necessary if there are actually micro-contaminants. I would do it on a new car regardless since it has been sitting on a lot. On a normal basis you only need to do when your car doesn't feel glass smooth after a wash. Usually no more than 1-2 times a year.
Sealant/wax:
After you're done with claying your paint is clean so you'll want to put wax/sealant on it to protect it. It'll make your car nice and shiny too.
Start with an isopropyl alcohol wipe. What I do is dunk a towel in the alcohol solution and wipe down every panel and drying after it. You can also just fill another spray bottle with it and spray. This will get rid of oil/wax/sealant so the sealant goes directly on the paint. Then just apply the sealant/wax on following the instructions. With opti-seal you just spray and wipe. With some other items you'll need to apply and wait to cure and buff out any remaining wax/sealant.
For wheels and tires I suggest you just check out the wiki on autodetailing. I just simply wipe off the tires with ONR but ONR isn't the best at getting oil. I'm too lazy though to worry about it too much as long as the wheels look clean it's fine with me.
I'm lazy and do a rinseless wash 1-2 times (usually 1) a month. Some do it weekly. I put sealant on every 3-4 months or so. I've only clayed my current car once so far.
At the suggestion of multiple reddit users, I use this cleaner/conditioner and this brush, which have worked well enough for me.
Block out time on your schedule to do follow-ups.
Block out time to study and learn about selling. If you think you're a natural sales person then you're not. The most knowledgeable sales person is the one that understands they know nothing. Many people have an aptitude for sales but not the ability or willingness to learn and grow. The difference between a good sales person and an extraordinary one is someone who is willing to learn and grow. ABL. Always be learning.
Have dedicated office time. Some sales people become very distant from the office because they start and end their day from home. Stay connected with your office staff. Show your face and make sure you don't become that person outside who they never see.
Keep yourself mobile. Always have a laptop and hotspot and some type of mobile office kit. My colleague has a sweet little setup that fits on the passenger seat. I've used a cheap little table that hooks to the steering wheel (for when you're not actually driving).
Your business should have goals and quotas. Track your closing rate. I've had many people that think they're doing well only to discover they're only closing 30% of their leads and it should be 50 to 60% (that will depend on your industry of course). Take some of the office time to figure that out.
Number one mistake people make is they confuse what is urgent with what is important. Dedicate time on your schedule to what is important. Make it part of your office time.
Sorry if I answered more than what you asked but I got on a roll.
EDIT: Added links to the mobile office stuff.
I would very strongly suggest you get her (and yourself, and anyone else that drives) on of these Car Escape Tools that will allow her to cut her seatbelt and break out her window. A car door is extremely difficult to open underwater, as proved by Mythbusters. A window, on the other hand, is easier to break and will shatter into (mostly) not dangerous pieces.
I don't think a knife could break that glass that easily. I'd guess it was one of those emergency tools that is designed to break glass.
Probably just paranoid but this is in that pocket of my FRS. fits perfectly. http://www.amazon.com/gp/product/B002AMAXNA/ref=oh_details_o07_s00_i01?ie=UTF8&amp;psc=1
Just get a can of obenaufs.
Application is easy. The only heat you need is in your hands, no weekend project. I use it on a lot of leather goods to protect and extend life. This is also made of beeswax.
More line than you think you need. Double the line. You can never have enough line.
Waterproof, powerful flashlight my recommendation
Plastic bag with a lanyard for valuables/wallets/phones/licenses. Alternatively, a pelican case.
A pair of vice grip pliers ("The wrong tool to get every job done right")
A knife, as others said. I work professionally on the water as well as boating recreationally. The Myerchin Rigging Knife is the best all purpose knife to have on board. It might be a little overkill, but when you need a line cut fifteen seconds ago, you'll be glad you have it.
A VHF handheld radio and a knowledge of what channels are monitored by the USCG (13, 16, 22A), Commercial traffic (13/16) and local police/fire departments
Spare fuses, bulbs, plugs
A Towboat US membership
A bigger, heavier anchor if you're anywhere with a decent amount of current (rivers, oceans). I'm very much a proponent of overkill when it comes to anchoring. I use an anchor way bigger than my 20' pontoon needs, and it's a tad pricey, but once I drop it and pay out the scope, I rarely worry about dragging.
Bag of cleaning supplies. Rags, paper towels, and the holy trinity of vinyl care: melamine pads, CLR Mold & Mildew, and 303 protectant
Most important item of all: A bleach bottle with the bottom cut off
2008 BMW Z4M Coupe
I can't believe I haven't posted in so long. This job is back from February.
I performed my Maintenance Package on this 2008 BMW Z4M for a client. This client emailed me about wanting a maintenance Detail on their vehicle. I informed them that this package is usually reserved for previous clients because of the cleanliness requirements (clayed vehicle). I figured worse case scenario I'd bring everything if it's too dirty and needs more stuff.
Products Used:
Wash
Wheels
Decontamination
Interior
Engine Bay
Notes
This was an eye opening experience for me about cleaning a clean car. I learned that it's difficult to make a clean car even cleaner and really focuses you as a detailer to focus on details more than the big picture.
Price: $155
Time: 3.5 Hours
Thank you for your business!
head over to /r/goodyearwelt for the skinny on shoecare regimen and products. I wouldn't use Kiwi stuff myself, but that's mostly for other reasons. Lexol is a great neutral conditioner (not that you'd need this much).
Brightmoor is not a great area, no. I would assume that whatever company you're interviewing with will have a parking lot with a gate, unless they're run out of a house or something. Stick close by and you'll be fine. If there's no parking then you'll want a club on your steering wheel and to take anything valuable out of your car.
You'll be fine, you won't get shot or shanked or robbed in the three seconds you'll be outside, but you should keep your wits about you. Also, don't judge too hard—Brightmoor is full of people, some good and some bad, and no one likes feeling as though they're being perceived as horrible. It might also be a good idea to check out the area on Google Street View just so you know where all your turns will be, what the building you're headed to looks like, and in general what to expect from the neighborhood.
Bead Jack changed my life, bro. You can't afford not to buy it.
It depends. If the car is full of water, the door is really easy to open. However, if the car is full of air, it is really hard to open the door. It is recommended to break a window with a tool like this then open the door. There was a Mythbusters episode about this here.
Careful magic erasers basically sand off a thin layer leaving leather and vinyl raw and it will get dirty again quick. After you use magic erasers to get everything off use some leather conditioner like Lexol to make it look like it just came out of the box. Then its protected and will look new for longer.
It looks beautiful, obviously stored in good conditions. I'm not sure how it works, but my bet is it will take very little to get it going. The tubes are likely OK because these amplifiers are used very few hours compared to commercial equipment. The main thing to check is the filter capacitors. The other capacitors and resistors are likely OK if it's been stored in an air conditioned area. Also, changes in values of these will not cause damage when the unit is powered up. It will likely be necessary to clean all the controls and switches, too.
Having restored a lot of older equipment, here's what I would do before turning it on:
I recently refurbished a 14-tube receiver from 1964 and all it required was a good cleaning. Absolutely no tubes or capacitors were bad.
Good luck with the project!!
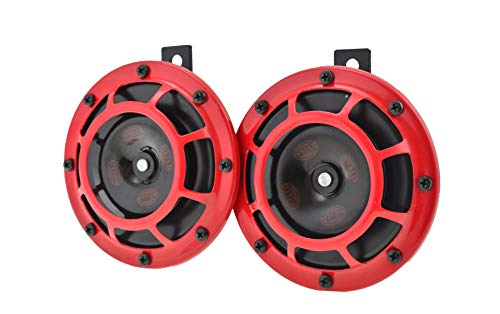
Have you heard of our dear lord and savior Hella?
https://www.amazon.com/HELLA-003399801-Supertone-High-Bracket/dp/B000CRZXPI
Link
Clay bar http://www.amazon.com/gp/aw/d/B0002U2V1Y?pc_redir=1407450846&amp;robot_redir=1
And don't forget the Obenauf's! Available here.
Thanks, useful to know specifically where the failure happened.
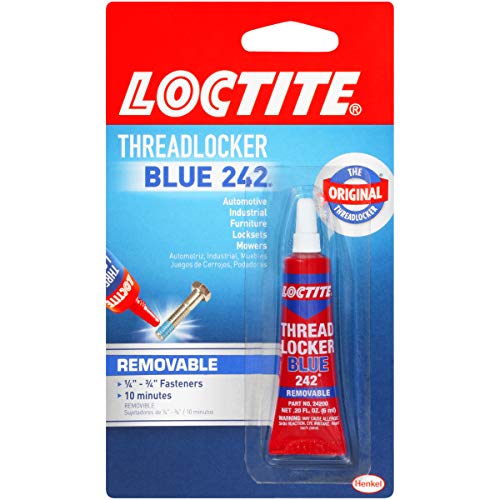
Anyone using gear like this: Use LockTite Threadlocker or something similar on all threaded parts meant to stay put!
They sell these things for cheap on Amazon, too. Hammer+recessed razor blade to cut seat belts.
I feel you friend. I also went camping but did take one of those car jump all in one batteries along with a 12 volt power adapter for my machine. it had worked the previous camping trip for about three to four days just fine. But this time, it died at 1 a.m. the first night and I was awake the rest of the night. I simply cannot sleep without my cpap at this point. The rest of the trip was a misery, next night slept in the passenger seat of my Prius with the CPAP plugged and car on (on but not running). trying to sleep in a seat sucks, but the car turned itself off every hour so it was hardly any better than that first night. I believe the next night I slept in the bed of a truck with a CPAP plugged in in the truck (again, on but not running) through the little back window and it worked much better. Until it rained.
So the NEXT camping trip I got my shit together.
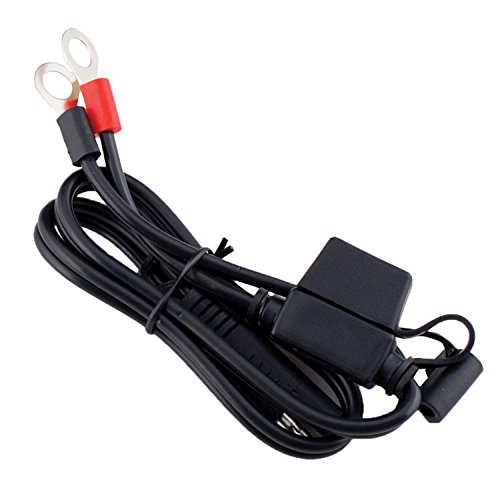
Get a deep marine battery. These are designed to power small things on a boat and are used to the small dribble of electricity over a long period of time. Get a battery box to place it in for safety, and a battery tender to charge it before the trip. You'll want a ring terminal harness to attach to the battery posts, and a female 12 volt adapter to plug your machine into.
The box contains everything safely with just the plugs you want sticking out the slots in the lid, but if there's small children in the camp you may want to ratchet strap it closed to be on the safe side.
I got battery and box at my local walmart. The rest from Amazon.
Female cigarette adapter:
Battery Tender Black 081-0069-8 Female Cigarette Adaptor for Quick Disconnect https://www.amazon.com/dp/B0041CDPQO/ref=cm_sw_r_cp_apa_i_173UCbVCXJH0M
Ring terminal harness:
Battery Tender 081-0069-6 Ring Terminal Harness with Black Fused 2-Pin Quick Disconnect Plug https://www.amazon.com/dp/B000NCOKZQ/ref=cm_sw_r_cp_apa_i_7-3UCbPET1K8N
Battery tender to charge your battery:
Battery Tender 12 Volt Junior Automatic Battery Charger https://www.amazon.com/dp/B000CITK8S/ref=cm_sw_r_cp_apa_i_Ak4UCbQYJBZCA
And of course you'll need to get the 12 volt power adapter. Look up the model maker of your CPAP machine and Google away to see where you can find one. I looked for my manual and then I found the one that was recommended in the manual along with recommendations. Mine recommends I do not use the water chamber when using the 12 volt power adapter due to power consumption and no way am I risking the battery running out of power before the trip is over. I got the adapter from a generic CPAP supplies website.
Good luck! I'm going camping this summer I hope my setup still works!
I usually camp out of state with family and have a few nights in a house before heading home. I always bring a new face mask new filter and even a new hose if I have one as after camping the machine reeks of woodsmoke and it drives me absolutely batty.
Edited to fix oh so many typos.
PS: I will edit the links more pretty when I'm on a desktop sorry about the non pretty formatting
I'd say 95% of cars on the road have electrical windows also powered by a 12V battery, so Teslas are really no different. For this they make emergency window breakers
Its not really a slimjim or hotwire that makes first/second gen legacies and first gen impreza's easy to steal, its whats called 'jiggler keys'. If you've ever seen a police video of how a slimjim works, its a fairly delicate procedure, and you have to walk around with the slimjim itself which can be long and obvious looking. Hotwiring involves ripping the lower and/or upper steering wheel shroud off to access the ignition wiring. On these model subaru's that plastic is very thick and even with the steering wheel completely off, its difficult. Easier on older model american cars but 90's era american and foreign cars took some precautions in this regard to prevent it.
The jiggler key, as the cops call it, involves just a random car key of varying length which the thieves then shave down to make it fit in other makes and models of cars, specifically older 80's and 90's cars. The ignition and drivers side lock tumblers of these cars are usually somewhat worn down with use over the years and can be made to 'click' into the lock cylinder. Thats what this guy looks like he's doing, because all it involves is walking up to the car, and inserting a seemingly normal looking key and just playing with it for a min, just like how a normal person would unlock the car.
The only way to mitigate this would be to get one of those steering wheel lock bar thingys, like this one. Alternatively you could wire up some hidden fuel delivery cut off switch underneath the front drivers seat that you have to switch on before starting the car. You could have that wired to your fuel pump. My friend did this to his gen-1 legacy after his previous gen-2 was stolen in a similar fashion by a crackhead.
Just in case OP isn't sure what to use, this stuff keeps my Iron Rangers kickin'.
got it off amazon, it even had prime so free 2 day shipping for me :D http://www.amazon.com/Ring-of-Fire-Enterprises-Emblem/dp/B000ER47ZS/ref=sr_1_1?ie=UTF8&amp;qid=1332177849&amp;sr=8-1
Those are after market horns.
http://www.amazon.com/Hella-SuperTone-Horn-Kit-118/dp/B000CRZXPI
Howdy, new /r/HappyBuckmarkOwners member!
Some Buckmark pointers:
If you're feeling adventurous:
Sounds like the tender harness that I've got with the in line fuse https://www.amazon.com/Battery-Tender-081-0069-6-Terminal-Disconnect/dp/B000NCOKZQ for a tender.
Something like this?
First, get a pair of cedar shoe trees to keep in the boot (you don't have to insert it all the way if you don't want)
Next, buy a horse hair shoe brush. After you wear your shoes, brush them down. If there is some stubborn dirt/grime, you can wipe them down with a damp rag, let them dry, then brush them.
Every few months, depending on how often you wear them, give them a good cleaning with Lexol cleaner, then condition them with Lexol conditioner. Let the conditioner dry, then brush vigorously.
That is literally all you need to do. No Obenaufs, no oils, nothing fancy.
Shopping list:
http://www.josbank.com/menswear/shop/Product_11001_10050_101593 (these go on sale pretty frequently for $8-$12)
http://www.amazon.com/Kiwi-100%25-Horsehair-Shine-Brush/dp/B0010TR6NE/ref=sr_1_5?ie=UTF8&amp;qid=1408110167&amp;sr=8-5&amp;keywords=shoe+brush
http://www.amazon.com/Lexol-907-Leather-Care-Kit/dp/B005H7DRQA/ref=sr_1_1?ie=UTF8&amp;qid=1408110196&amp;sr=8-1&amp;keywords=lexol
Screw is probably close to stripped. Throw some Loctite on the threads and tighten it back up. The blue loctite is semi-permanent, meaning you can remove it in the future if you choose.
I took my first bike (2001 ninja 250) from NC to seattle, coast to coast, 2 months after I got it. Long trips are great as long as you prepare for them.
1 - Maintenance. If there are any intervals that will happen during or soon after your trip, do them before you leave.
2 - Get roadside assistance or something similar. At least have the number for a tow truck.
3 - Make sure you can charge your phone/other stuff. Basic hookup involves something like this, or a battery tender cable with an adapter. I did the second one, with the quick disconnect between my seat (where the cable comes out from the battery) and my tank bag, where all the wires are.
Getting to the actual riding part...
1 - Wind isn't as much of a problem as you might think. It can suck, but if you stay relaxed it'll be just fine. Remember, the bike will always want to stay up, so just let it do its thing. (your bike weighs ~650lbs, it's not going to be too badly affected anyway)
2 - Take breaks! At least once an hour, pull over for 30 seconds or so and get off the bike. Walk around it, drink some water. Fatigue has a nasty habit of creeping up on you without you realizing it.
3 - Stay hydrated and fed, and keep a bottle of water with you.
That's all I have for right now, I'll edit later if I think of something else
edit: get some earbuds or a big old speaker if you're against headphones while riding. Hours upon hours of road without a radio or anything gets boring insanely fast.
Spray this stuff under the flap and it fixed the drift: WD40 Company 300554 Specialist Contact Cleaner Spray - 11 oz. with Smart Straw https://www.amazon.com/dp/B00AF0OFVU/ref=cm_sw_r_cp_api_i_g27JDbR7VP0TY
https://www.amazon.com/WD-40-Specialist-Electrical-Contact-Cleaner/dp/B00AF0OFVU
Not even close:
https://www.amazon.com/Haribo-SUGAR-Classic-Gummi-Bears/product-reviews/B006J1FBLM
and
https://www.amazon.com/AutoExec-Wheelmate-Steering-Attachable-Surface/dp/B00E1D1GY6
(look at the customer images)
I've posted my list before:
Car Wash Shampoo: Chemical Guys Maxi Suds II Amazon link
Quick Detailer: Chemical Guys High Gloss Spray Sealant & Quick Detailer Amazon Link
Wax/Sealant (every 6 months): Blackfire Pro Paint Protection (previously Blackfire Wet Diamond All Paint Protection) Amazon Link
Clay Bar (every 12 months): Simoniz S57 Perfect Finish Detailing Clay Amazon Link
Clear Plastics (head/tail lights): Plexus Plastic Cleaner & Protectant Amazon Link
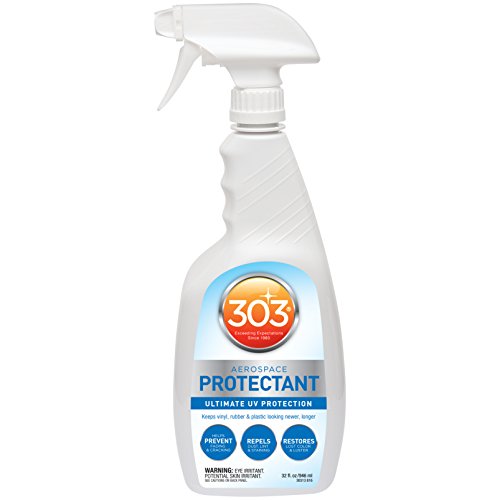
Plastic/Vinyl/Rubber/Leather: 303 Aerospace Protectant Amazon Link
Door/Trunk/Frunk Seals: 303 (above) or Nextzett Gummi Pflege Rubber Conditioner Amazon Link
Glass: Stoner Invisible Glass Amazon Link
Wheels: Griot's Garage Wheel Cleaner Amazon Link
Tires: Aero Low Shine Rubber Care Amazon Link
Aerospace 303 32-oz bottle only $8.18 on Amazon
Cheaper per oz than buying the gallon jug.
EDIT: as of 7:13pm ET 5/2/2018, it seems like the price has gone back up to $14.17
It is all about determination. If she doesn't have the title she would have to try to get a new one. That takes time.
Also take her copy of the key away.
A low tech solution would be for him to get a club and always place it on the wheel when he is not driving it. http://www.amazon.com/Original-Club-Steering-Wheel-Lock/dp/B0000CBILL
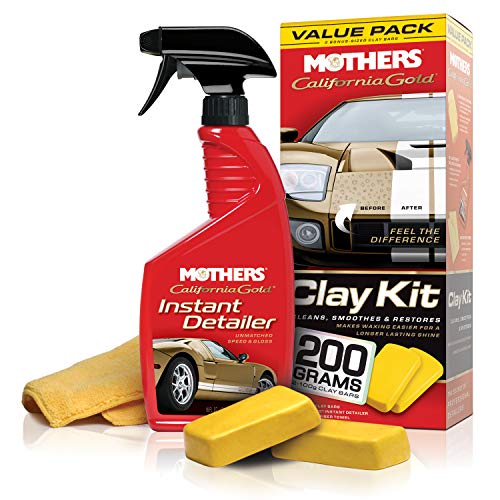
What do you guys think of Mother's Gold? Specifically this package.
https://www.amazon.com/Mothers-07240-California-Gold-System/dp/B0002U2V1Y
I like automatic watches. I've also got a wife, child, and house to pay for. I also love to beat the shit out of my stuff because it just sort of happens.
Enter the SNK803. Automatic. Tough. Most importantly, easily replaced if I destroy it. But, I don't like the matte finish of the case. I DID have a dremel tool. Do I have an autozone? Yes I do. Do they carry mother's mag & aluminum polish? Every day. So I polished it up. Not mirror, a shiny satin finish. But now I need a quality strap. So I ordered a John Allen Woodward Alligator for $1,100...NO! What goes best with a satin finish and a beige face? Simple leather! This is a Ritche Genuine Leather NATO strap for a timex weekender. Happens to come in 18mm. And you know it's high quality leather. How? Says so. Genuine is right in the name. Only the best straps come WITH a tool to remove the pins.
Now I've got a watch that looks great, keeps great time, is a tiny mechanical wonder, and looks just as good at work as it does hiking. With a grand total of maybe $60 and an hour of work in it.
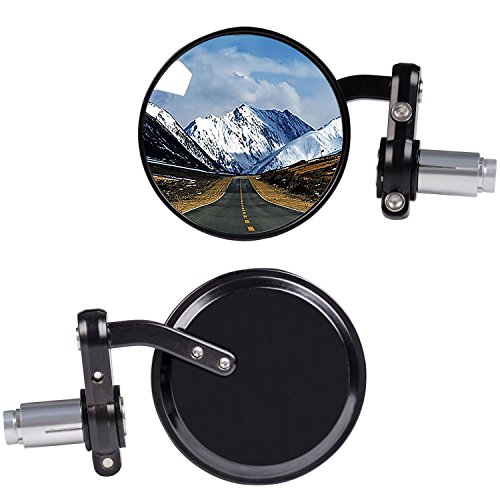
I have a drz with a mirror in the same spot. What you do is buy THESE. Take the bar end piece out and you have a mirror that can be mounted on the skinny part of your bars. Honestly the view from them is pretty shit and you cant really adjust em much, but I did it mainly for the look and its still good enough to see if there is something behind you
http://www.amazon.com/Ring-Of-Fire-T-REX-EMBLEM-Emblem/dp/B000ER47ZS
That's the one I got. It's probably cheaper elsewhere now.
[Prime eligible](http://www.amazon.com/gp/product/B000ER47ZS/ref=as_li_ss_tl?ie=UTF8&amp;tag=try002-20&amp;linkCode=as2&amp;camp=1789&amp;creative=390957&amp;creativeASIN=B000ER47ZS"&gt;T-Rex Car Emblem)
https://www.amazon.com/Kool-Stop-Tire-Bead-Jack/dp/B001AYML7K
https://www.amazon.com/Kool-Stop-Tire-Bead-Jack/dp/B001AYML7K
There are readily available tools you can purchase that allow you to easily cut your seatbelt and break a window.
http://www.amazon.com/Seatbelt-Breaker-Emergency-Escape-Tool/dp/B002AMAXNA
Take knobs off fader
Get WD-40 electrical contact cleaner, spray it on a qtip and scrape the gunk out. You can use a bunch of this stuff and even directly blast it in the fader channel. It evaporates very quickly.
Then, get silicone grease on another qtip and use the tiniest amount to lube the fader. A little of this goes a long way. Too much and you’ll end up with more debris.
https://www.amazon.com/WD-40-Specialist-Electrical-Contact-Cleaner/dp/B00AF0OFVU/
https://www.amazon.com/Super-Lube-92003-Lubricating-Translucent/dp/B0081JE0OO/
I'm reposting some suggestions I made from a previous similar thread, hope it works out for you (the last person's budget was $100; not sure what yours is, but you can pick and choose!)
&nbsp;
Optimum No Rinse: Concentrated and capable of being diluted as a wash, quick detailer, clay lubricant, window cleaner, light interior cleaner, and more.
Optimum Opti-Seal: Incredibly easy to use sealant (wipe on and walk away!), can be used in place of RainX on windows, good drying aid, and useful as an interior dressing as well. Opti-seal ALL the things!
Detailing brushes: Because every detailer can use more brushes!
Nanoskin Autoscrub Sponge: Makes the process of decontaminating your paint much faster. Much longer life than clay and can be used even after dropped on the ground! Use the ONR as lubricant and you save tons of money.
The Rag Company Eagle Edgeless Towels, 4 pack: These will be the best towels he's ever used.
The total for all of this should be $97.96, just under your budget :)
&nbsp;
A couple other suggestions if you want to mix and match:
Smaller Opti-Seal: Since it's the biggest budget item here and a little goes a long way, you can go with the small one to include more items in your bundle.
Adam's Wheel Cleaner: The least terrible smelling wheel cleaner, but extremely effective as well. Good if that truck throws a lot of brake dust.
CarPro PERL: For protecting exterior plastics as well as dressing them, and for use as a satin look tire dresing.
Wheel Woolies: Makes cleaning wheels a much nicer experience, and won't fling brake dust into your face like the brushes do.
Hope this helps! If you want any more specific recommendations for any category, feel free to ask! As for things to avoid, Armorall, Turtlewax and Chemical Guys in my opinion.
You need this bad boy.
AutoExec Wheelmate Steering Wheel Attachable Work Surface Tray https://www.amazon.com/dp/B00E1D1GY6/ref=cm_sw_r_cp_apa_VrMDzbD8PW8E8
You need to get yourself a steering wheel table.
https://www.amazon.com/AutoExec-Wheelmate-Steering-Attachable-Surface/dp/B00E1D1GY6
Hilarious customer reviews.
303 aerospace, and a microfiber towel.
https://www.amazon.com/303-30313-CSR-Protectant-Plastic-Fiberglass/dp/B00KN0UOEE/ref=sr_1_1_sspa?ie=UTF8&amp;qid=1510258186&amp;sr=8-1-spons&amp;keywords=303+aerospace&amp;psc=1
Great job! Hope you used something other than Armor All otherwise he’s going to have a nice haze on the inside of his windshield.
Aerospace 303 is a really great product that is similar to armor all but doesn’t leave the super greasy feel or oily haze.
303 (30313-CSR) UV Protectant Spray for Vinyl, Plastic, Rubber, Fiberglass, Leather & More – Dust and Dirt Repellant - Non-Toxic, Matte Finish, 32 Fl. oz.
https://www.amazon.com/dp/B00KN0UOEE
Buy some 303 (see link) and spray on a paper towel and wipe all the rubber that looks narly. Wait a few days and do it again. I’ve made some seriously messed up rubber and plastic look new again with this stuff.
303 (30313-CSR) UV Protectant Spray for Vinyl, Plastic, Rubber, Fiberglass, Leather & More - Dust and Dirt Repellant - Non-Toxic, Matte Finish, 32 Fl. oz. https://www.amazon.com/dp/B00KN0UOEE/ref=cm_sw_r_cp_api_i_EJkSDbK4MC09Y
My $100ish must have use everyday options include: cordless 3/8 ratchet https://www.amazon.com/dp/B07CZWBYBK/ref=cm_sw_r_cp_api_i_Tw.2DbXFTMF30, lighting! a good rechargeable headlamp https://www.amazon.com/dp/B07CV3VTYB/ref=cm_sw_r_cp_api_i_aI.2DbYZ76FY7, flashlight or decent under hood light https://www.amazon.com/dp/B01MTXC016/ref=cm_sw_r_cp_api_i_sK.2Db40MCX8D, a portable jump box https://www.amazon.com/dp/B015TKUPIC/ref=cm_sw_r_cp_api_i_mL.2DbX8E94SN or 24 cans of brake cleaner https://www.amazon.com/dp/B00JRPDW7M/ref=cm_sw_r_cp_api_i_Du.2DbZ2WMZDE
Fuck- that sucks. And I know how shitty it feels from experience.
I was moving across country back in the 90s and stopped for dinner- parked in the semi-parking because I was pulling a large ass U haul trailer. When I came out 30 minutes later, the van and U-Haul full of all of my shit was gone- I mean everything- socks to books to a huge collection of personal/family photographs to a few vintage guitars to my massive record/cd collection to my bed to my blender- every fucking possession I owned in the world down to my pillows except what I was physically wearing was stolen and never recovered. LE found the van and trailer burned slap flat to the ground the next morning. Once thieving cocksuckers cross a state line, shit gets even more difficult to untangle. They never caught the fucks. I doubt they even tried much past calling in a tow truck.
Ever since that, any time I pull a trailer now I park it where I can watch it while I eat- and IF I'm going to be at a hotel I put thick chains through each the tires, each locked by a decent lock, and use [the Club] (https://www.amazon.com/Club-1000-Original-Steering-Wheel/dp/B0000CBILL). Hindsight is 20/20.
I wish you luck.
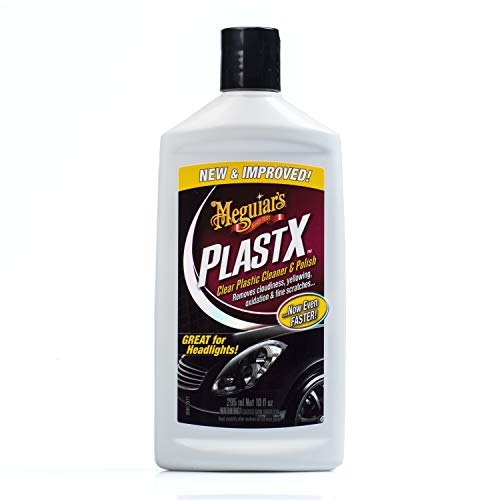
If you want to try and treat it, there's a billion different kinds of plastic cleaner/de-clouder. It's the same stuff you use on car headlights.
Meguiar's G12310 PlastX Clear Plastic Cleaner & Polish
Meguiars PlastX works like a charm. It's easier than toothpaste or any of these 5 step sandpaper-polishing compound kits, you just wipe it on, wipe it off and your headlights look great.
Dear Portland:
https://www.amazon.com/Club-1000-Original-Steering-Wheel/dp/B0000CBILL
I have no idea why the company isn't advertising the fuck out of Portland.
And before anyone says it, most car thieves are opportunist, not professionals. Of course, the club problem wold be solved with a metal steering wheel with a leather wrap.
Hella horns. Really popular among the Subaru community.
$27.64 https://www.amazon.com/gp/product/B000CRZXPI/ref=oh_aui_detailpage_o07_s01?ie=UTF8&amp;psc=1
I also bought a 12V horn wiring harness relay kit (basically extension cords for the horn) for $12.99 just in case https://www.amazon.com/gp/product/B00XM107FC/ref=oh_aui_detailpage_o07_s00?ie=UTF8&amp;psc=1
https://www.amazon.com/Ring-Of-Fire-T-REX-EMBLEM-Emblem/dp/B000ER47ZS
I think this is an atheist thing, not a lesbian thing. Not that you can't be both, of course.
Use this
Install one of these as well as one of these and you're good to go. That is the setup I have running to my handlebars for my phone while riding. I also installed a switch so I can stop it from pulling power when parked or raining or whatever, you can see the switch glowing red under my seat.
My bead jack. Ever struggle to get a tire on or off? This is magic.
https://www.amazon.ca/Kool-Stop-Tire-Bead-Jack/dp/B001AYML7K
http://www.amazon.com/Kool-Stop-Tire-Bead-Jack/dp/B001AYML7K
I had a Conti/CR-18 pairing that was truly awful. It ate tire levers for breakfast, lunch, and dinner. Thankfully it rarely flatted. Sometimes I'd take it to a shop to get flats fixed just so I didn't have to deal with it. I'd service the bearings but somebody else can fix the flat at their usual rate thankyouverymuch. Mechanics complained. We got into discussions about rim sizes. It was all labeled 622. Anyway, that jack makes it easy. You'll have the tire back on in under a minute.
Some bike shops will have them for sale.
Just don't let the velominati see it.
This tire bead jack has saved me so much effort.
Or have one of these.
Ok. So to summarize what you want:
Will be used for
Some things you also mention
>when I want to use it, I want it to do the job properly
You listed off a large range of tasks, an I personally feel that for all those things, some of the knives you are looking at might not be necessarily the best.
My Thoughts
Firstly, I would advise against using any knife as a go-to seatbelt cutter. For safety reasons you don't want to accidentally stab the person whose seatbelt you want to cut. Especially since tanto blade shapes are designed to maximize tip strength for stabbing/penetration. For your emergency needs I feel this or this would be better.
As for camping, a tanto blade is not "ideal" but for the tasks you I assume you'll be doing I think you'll be ok. A blade with a nice belly (the curved part of a blade, like a drop point) has more utility as it will be easier to slice food, and offer you a bit better control. But I mean if you like the tanto shape than by all means =).
If you feel like you're not going to have it on your person everyday, then that Kershaw RJI should be more than sufficient for your needs. Just because Kershaw's price are lower, they definitely do not feel like "cheapies"! Kershaw has great build quality, 8cr13MoV is an OK steel, and will be easy to touch up.
I haven't had any experience with SOG so I can't say much about them, other than that /r/knives is a fan of the SOG Flash. As for ZT, they are wonderful knives. they are a little big to have in the pocket, but the quality and craftmanship is definitely there. For how lightly you will use it, If I were in your shoes, I am not sure if I can justify this as a first buy, unless you have a real appreciation for knives.
Other Options
They are all around the same blade size, and same "look" as your suggested 3. The first 3 are around the same price range as the Kershaw RJI and are community proven knives. The last is around the price range of the ZT 0700, but in my opinion is a better buy. Griptilians are a joy to use.
That's my $0.02, hopefully I didn't overwhelm you too much!
There was a post about this a couple of weeks back. People recommended this cleaner because it is safe for the plastic. Also if you look at the joycon carefully you will see a little plastic flap that can be lifted, you need to lift that flap and spray the cleaner under it. So far since using the spray linked above I haven't had an issue, however I really haven't been playing my switch enough since to properly test (sekiro is taking all my time).
Wash: https://smile.amazon.com/Meguiars-Hyper-Wash-Foaming-Leaves-D11001/dp/B0006SH4IM
Clay: https://smile.amazon.com/Nanoskin-AS-019-AutoScrub-Grade-Sponge/dp/B00CUAWJ6G
Decontamination: https://www.autogeek.net/carpro-iron-x-cleaner.html
DA: https://www.harborfreight.com/6-in-57-amp-heavy-duty-dual-action-variable-speed-polisher-69924.html
Polish: https://smile.amazon.com/Meguiars-Mirror-Glaze-Ultra-Cut-Compound/dp/B003LMGDHI
Compound: https://smile.amazon.com/Meguiars-Mirror-Glaze-Ultra-Cut-Compound/dp/B003LMGDHI
Pads: https://smile.amazon.com/dp/B004104678/ref=twister_B00NN89SGI?_encoding=UTF8&amp;psc=1
Coating and Sealant: https://www.autogeek.net/cquartz-uk-edition.html
You might enjoy the pictures and user reviews for this little gem on Amazon.
I undestand that this would come with a warning and the majority of people that would get one wouldn't use it while driving, but it's always the minority that spoils things, right?
Here's the page
The comments are pretty funny though, worth a read:
>My husband Brad always warns me not to try and update my Facebook page while I'm driving. "You'll hit another pedestrian," he says. "This isn't the Enterprise, there isn't a deflector array." Then along comes a miracle product like this! I can now happily fly at warp speed down the streets of Los Angeles, laptop or mobile device perched right in front of me, so I can keep both eyes right on it AND on the road. It's so much easier to ignore all the frightened screams and annoying honking when you've got Facebook to look at while driving. Thank you, Wheelmate!
I think he was using a Wheelmate.
Read the reviews.
[With this of course!] (http://www.amazon.com/AutoExec-Wheelmate-Steering-Attachable-Surface/dp/B00E1D1GY6)
Don’t spray canned air into it. Make sure it’s contact cleaner for electronics. This is the one I used and it has fixed 2 of my joycons: https://www.amazon.com/WD-40-Specialist-Electrical-Contact-Cleaner/dp/B00AF0OFVU/ref=mp_s_a_1_2?keywords=wd40+electrical+contact+cleaner&amp;qid=1557692939&amp;s=gateway&amp;sprefix=wd40+&amp;sr=8-2
The rubber flap can be propped up with a little object like a toothpick or safety pin (just be careful), and spray the contact cleaner into it, rotate the stick a few times, and let it dry.
Get Electrical Contact Cleaner. It's meant for this and plastic safe.
Something like this: https://www.amazon.com/WD-40-Specialist-Electrical-Contact-Cleaner/dp/B00AF0OFVU/ref=pd_sim_263_3?_encoding=UTF8&amp;psc=1&amp;refRID=B1NEN2YVCYPJ0RPVXTDP
How To: Decontaminate your paint & wheels
Note: When using a clay bar and/or sponge, you will feel the contaminants being picked up. When running over the paint or wheels, you’ll feel little bumps. Keep the clay/sponge motion going and the bumps should go away. It’ll start to feel smooth. To be 100% sure you’ve gotten everything up, place your hand in a plastic sandwich baggy and run your hand over the paint. Because of the ‘finer’ surface area of the bag, you’ll feel what you missed. https://www.youtube.com/watch?v=Ml434m7ILNA Here is a video of Mike Phillips explaining it.
Congrats! Your car should be contaminant free and ready to be polished!
Dodo Juice Ferrous Dueller
The Mother's & Meguiar's Clay Bar Kits can be found over the counter for about $15-20.
NanoSkin Fine Grade Sponge
Optimum No Rinse
CG Citrus Wash & Gloss
i use Amazon.com: Nanoskin (AS-019) AutoScrub Fine Grade Sponge and as lube some shampoo diluted in water. does an amazing job and quite quick!
Use a cleaner that works for multiple fabrics, and not specifically for leather. Example: Car Guys has a multi-purpose cleaner that is highly rated. At $17 I feel it's a little expensive, but might be worth picking up when it goes on sale: https://www.amazon.com/CarGuys-Super-Cleaner-Effective-Upholstery/dp/B071XB18BF/
Same with the "conditioner", I use a multipurpose spray which gives the seats an additional layer, but also makes the seats sound squeaky: https://www.amazon.com/gp/product/B00KN0UOEE/
I keep one of these charged up in my trunk. It saved me a couple times with my previous ICE car, including one time over a year since I had last charged it.
&#x200B;
https://www.amazon.com/NOCO-GB40-UltraSafe-Lithium-Starter/dp/B015TKUPIC/
&#x200B;
I figure it might still come in handy with the Tesla in the case where there's a 12V failure, but it could also help someone else who needs a jump. It also has a light and a USB charging port.
Had a post like this awhile ago with more insight for those who care...
I guess I can repost my own post:
I do this kind of thing as a part time job for CDOT (Colorado Dept of Transportation) when I want extra money to buy something stupid, so I have some good insight as to what gets people stuck.
--------------------------------------------------------------------------------
>An extra belt and a breaker bar big enough to move the tensioner.
I mean, I don't carry an extra belt, but I'm pretty good about checking wear on it every few weeks or so. However, a breaker bar is definitely definite definitely recommended. It's most useful for wheel lugs, but it'll work on a belt tensioner too.
>Spare hose clamp for if you blow a radiator hose off/ intake hose/ turbo hose/ whatever. They cost like nothing (literal cents), but when you need it you need it. You ain't going anywhere with no air intake/ turbo intake/ coolant hose.
>Bottle jack? instead of the stock scissor jack?
No you don't need a full size floor jack.
If you have a regular passenger car (like a 4 door car) the scissor jack will work fine. They are kind of tedious to jack up and down but it's for an emergency, not everyday use. The bottle jack is a good idea for large SUV, Trucks, and RVs. Make sure you have a base or something on it if you have any sort of lift. Also remember that you will have to jack up much further to install the inflated tire than you had to for the flat one.
Only other advice I have here is actually pull that jack out and figure out how to use it. They all gotta be different and some are like oragami in how this click into that, which slides onto that... Reading the user manual and deciphering the IKEA-esque pictures on the side of the road just adds frustration and stress to the already crappy situation.
>Fix-a-flat kit
Meh. A spare tire is the better option. Make sure you check it's inflated at least every couple months. It's very very common that people have a spare, but that its flat. It does you no good as a spare if it's flat. A tire plug kit a definitely a good thing though. If you do HAVE to use the fix a flat, prepare to have a tire shop guy charge you twice when they find it all over the wheel. It's a nightmare to clean off, and as others have said will ruin you TPMS sensor. Depending on the make/model of your car this could be another $35 to $100 you have to spend, in addition to a new tire.
>Lights! and flares
(Ignore the guy in the comments that said lights are only emergency vehicles. He has no idea what he's talking about)
For an emergency kit, flares are better since they don't require batteries (that you will forget to change/ charge). However, lots of road flares last 30 - 60 minutes. It should take you 20 to change a flat. Be careful with the flares as many types drip as they burn. Don't light yourself or the side of the road on fire. I know you're thinking "well duh" but it happens every year in CO where I live. Someone lights the brush on fire near the highway cause they put flares out and got to fixing their car and not paying attention.
That said, you can get LED road flares that are bright and really good at attracting attention. Look up the laws in your area. Some places restrict the color you can use. Amber (orange) is usually a pretty safe color to choose. If you can get on that has more than one color, it's better. Monochromatic light doesn't give people good depth perception. Avoid as much as possible bright white strobes facing rearward. All you're going to do is blind the people you are trying not to get hit by.
> Screwdriver set with misc bits
Like others have said, this won't be super useful for your car, but for various other tasks it can be a huge time/ money/ aggravation saver to just have basic tools for random things. Ever tried to get a hose clamp off with just your fingers? You just have to remember to put those tools back in the kit. You don't need Snap Off for this as they likely won't get used that much. Don't get the cheapest ones at Harbor Freight either. Get the " pittburgh professional" ones.
> Socket set?
You can get the set if you want to, but at a minimum get the socket that fits your lugs. Get the drive size that fits the breaker bar you got from above (likely 1/2"). When I do this for work I had a cordless impact driver which was awesome, but a breaker bar doesn't require you to remember to charge batteries, and I haven't found anyone that just wasn't strong enough to use one. A breaker bar is like $15. Cordless impact driver powerful enough is like $250+.
>Glass Breaker/ Hammer
Honestly, you'd be better off with a spring loaded center punch. You have to have room to swing the hammer, and some people (elderly, children) just don't have the strength to hit the window hard enough. With the center punch, you just touch it to the glass and push until it clicks. Many cops and firefighters use these as a means to get you out. If you go this route, have a seat belt cutter, pocket knife, something...
>Fire Extinguisher
It's better if you mount this somewhere where it wont get buried. My favorite place is honestly the trunk lid or right in front of the taillight area in a car, under one of the seats for a SUV or truck (if you can easily flip it up). Imagine yourself suddenly panicking and thinking holy goddamn s**t my car is on fire, and scrambling to get to your extinguisher. Put it somewhere you can scramble to easy. If it takes longer than 10 seconds, its not accessible enough.
> A little portable air compressor
can really help if you get a flat and have a flat spare. Not necessary but sure is nice. You can use it for other things too (blowing up sports balls air mattresses etc...). They usually take FOREVER to fill a tire, but if you're stuck anyway...
>Roll of duct tape (because obviously).
I've used it to tape up bumpers after an accident so they can at least get off the road, to secure wiring, to a whole number of other things.
>Spare fluids.
Maybe. Gallon of coolant or distilled water at least. quart of oil, etc... This also depends on where you normally drive. If you never leave the city and a parts store is usually a couple blocks away then you don't have to bother. If you live outside the city and it would take you the entire afternoon to walk the next 15 miles to the store...well, plan accordingly.
> Tire pressure gauge.
To check main and spare tires. Don't trust the ones on the gas station pump (they get slammed around and scraped on the ground). I've seen them as inaccurate as 15 - 20 p.s.i. off.
> Jumper cables.
Better yet, your own jump pack.. Jumper cables are only useful if someone else is there to rescue you.
> A tow strap
is kinda nice, but if you're stuck and there's nobody else around it won't help you (unless you have a winch/ come-along). Nothing wrong with having one handy in case someone comes along though.
> Tire chains.
Don't know where you live but in CO there is actually a new (ish) chain law for passenger vehicles. When it's in effect you are supposed to have chains (or alternative traction device) in place. It's not just for truckers anymore. I take them out in the summer.
> A shaker siphon
Makes transferring fuel way way way way way less infuriating than dealing with the stupid friggin gas cans you have to buy nowadays. All the silly safeties and valves, it's like playing goddamn BopIt. They also work for coolant and washer fluid too, not that you would be dumping gallons of washer fluid... How to use it I don't carry a fuel container in my truck with me, but FYI it's illegal (in the US at least) to transport fuel in anything other than an approved fuel container. I doubt you'll get in trouble, just something to consider.
I've got one of these and it works great https://www.amazon.com/NOCO-GB40-UltraSafe-Lithium-Starter/dp/B015TKUPIC/ref=sr_1_3?ie=UTF8&amp;qid=1542410718&amp;sr=8-3&amp;keywords=car+jump+pack
I just carry one of these and I'm not worried about it beyond that. This has also been useful when other people ask for a jump and has saved my friends who have been parked in a manner where jumper cables wouldn't reach their battery from another car.
... It's also a huge usb battery bank and can be charged from usb, so I could start my car using a small goal zero solar panel if I really needed to.
Other than that, I have one of these in my dash DC port, which lets me keep an eye on the 12v when I'm running an inverter as well as monitor interior temp.
Go to Amazon and order this (I like Meg's products),
This should run you about $345 for everything and have you setup to take care of your car for a long time. You can find a 20% discount code online for harbor freight to bring the price down $55 for the DA. Go to home depot and buy a couple buckets and you will be good to go.
Edit: To add, I went to Lowes and bought a cheap inline sprayer for my hose and it works fine for foaming up the vehicle, plus it only costs $5.
Edit2: If you are going to downvote me please post why you don't like my recommendation.
Clay bar also works without damaging paint: https://www.amazon.com/Mothers-07240-California-Gold-System/dp/B0002U2V1Y/ref=sr_1_4?s=automotive&amp;ie=UTF8&amp;qid=1487455346&amp;sr=1-4&amp;keywords=clay+bar
To understand what shoe care needs: Shoe Care Guide
To clean leather products: Saddle Soap
To condition leather products: Venetian Shoe cream (VSC) or Saphir Renovateur or [Allen Edmonds Leather Lotion] (http://www.allenedmonds.com/aeonline/cati2_ShoeCareProductss_1_40000000001_-1________subcategory#facet=&amp;sId=216&amp;sort=5&amp;ps=1000&amp;bi=0)
To "protect" leather you have 2 options:
If you're walking around in snow / rain with dress shoes: Galoshes/ Overshoes
And being more specific helps. If you live in warmer climates, Mink oil and Obenauf's are most likely unnecessary, and products like VSC and Saphir would be great.
Avoid products from DSW and most B&M stores (unless well reviewed and recommended!) and the likes as they aren't great in quality (personal experience) - and if you're spending hundreds on shoes, consider spending a few dollars more to taking care of them goes far.
http://www.amazon.com/HELLA-003399801-Supertone-High-Bracket/dp/B000CRZXPI?ie=UTF8&amp;*Version*=1&amp;*entries*=0
those fuckers BARK at you.
you need these. http://www.amazon.com/HELLA-760688000000-003399801-Supertone-Bracket/dp/B000CRZXPI
they work exceptionally well at tell someone to get the fuck out of the way.
I once watched a serious case of road rage happen in front of me on 85S. One guy kept swerving into the lane of the other guy, nearly hitting him multiple times. I got up as close as I was comfortable doing (my car had excellent brakes just in case) and just laid on the horn with the hellas. They got the hint and both chilled out and went about their business.
Hella Supertones.
https://www.amazon.com/HELLA-003399801-Supertone-High-Bracket/dp/B000CRZXPI
118 DB. Sounds awesome. People GTFO of your way.
Hella SuperTones in blue
Hella Supertones are pretty popular in the Subaru scene. They’re fairly easy to mount behind the grille in most cars. Personally, I like the sound of the new Sharptones a little bit more. But there’s endless options out there. Just find some tone that you like. Most electronic horns are gonna wire up the same
Amazon has them for $5.40
http://www.amazon.com/Ring-of-Fire-Enterprises-Emblem/dp/B000ER47ZS/ref=sr_1_4?s=automotive&amp;ie=UTF8&amp;qid=1310246476&amp;sr=1-4&amp;tag=dealswoot-20
Yo.
http://www.amazon.com/Ring-of-Fire-Enterprises-Emblem/dp/B000ER47ZS/ref=sr_1_2?ie=UTF8&amp;qid=1334416210&amp;sr=8-2
The 0801 was discontinued as of June 1, so they should be starting to hit clearance prices. Kershawguy has it for $139 w/ free shipping and no sales tax. It is a great design. I've actually ended up with multiple of the different variants of this, but haven't had one of the "plain" ones. Maybe now is an opportune time to pick one up. ;)
As for the pivot coming loose, a bottle of threadlocker runs about $5 online or at your local hardware store. If you plan to be tinkering with your knives at some point, it's definitely worth picking one of these up. A single bottle will last you quite a long time.
https://www.amazon.com/Battery-Tender-081-0069-6-Terminal-Disconnect/dp/B000NCOKZQ/ref=sr_1_7?s=automotive&amp;ie=UTF8&amp;qid=1502911662&amp;sr=1-7&amp;keywords=battery+tender
> I can't get the bolts on the battery leads loose
Try a 10mm socket rather than a screwdriver.
Like /u/greenslither says, once you get your battery cables loose, fit this harness and use a Battery Tender or equivalent.
I love this tire bead jack. It only gets used about 3-5 times a year for changing flats and switching from snow tires to summer tires, but with super tight beads on my Schwalbes, it is a necessity.
https://www.amazon.ca/Kool-Stop-Tire-Bead-Jack/dp/B001AYML7K
I'd recommend getting a multitool or something that looks like you got it at a hardware store. Or if you're serious about having something to break your windows in an emergency, maybe something designed for that purpose like this or this.
Get home bag, normal road hazard stuff (jumper cables, flashlight, poncho).
However, you really should have a window breaking/seat belt cutting tool for emergency use. Not only can it save your life if you're in an accident and end up in the water but it can also help you assist others in an accident when they are trapped and you need to cut someone out of a car quickly.
http://www.amazon.com/Seatbelt-Breaker-Emergency-Escape-Tool/dp/B002AMAXNA/
https://www.amazon.com/Towallmark-Seatbelt-Cutter-Breaker-Emergency/dp/B002AMAXNA
People keep these in their cars for a reason.
Picked up these universal motorcycle mirrors from Amazon for $10. With a longer bolt or modification of the mirror bracket they bolt right on. Just thought I'd share in case anyone is looking for some affordable mirrors.
https://www.amazon.com/gp/aw/d/B002GTKAHQ/ref=mp_s_a_1_3?ie=UTF8&amp;qid=1526871235&amp;sr=8-3&amp;pi=AC_SX236_SY340_QL65&amp;keywords=bar+end+mirrors&amp;dpPl=1&amp;dpID=41E%2BMoq7dvL&amp;ref=plSrch
gone are the days of payless.
If you're walking that much, on a budget, I'd enjoy seeing how much wear and tear you'd put on a some Chippewa Boots or Chippewa Apache The vibram sole lugged or sans lugged should do wonders in regards to comfort and durability.
with the 20% off $100+ Amazon Coupon and it's a solid frugal purchase. Code SPSHOEI4 at checkout may work as well for 20% off.
Throw some sno-seal or Obenauf's and you're set for most all terrains.
Most new tents do come with a waterproof coating. But over the years they can lose the coating, allowing the water to "wet" through the material. There are various ways you can reapply a coating, but Camp Dry is generally the cheapest and easiest... but from reports I've seen Atsko Silicone Guard works much better and I'll give that a try once my current can of Camp Dry runs out.
For shoes... it depends on the material. Camp Dry is silicone based and uses petroleum product as a thinner; it's OK for materials like tents, but it's not great for natural materials like leather, nubuck or suede. For good leather boots, I use Obenauf's Leather Protector. For nubuck or suede, they have water-based sprays, Nikwax has one and Uggs has their own which is what my wife uses on hers. Have to be careful with leather and suede since products can damage them and/or cause discoloration.
I use Camp Dry on tents, tarps and umbrellas, but don't bother with backpacks or any other camping gear.
That seems to be the 4oz version. It's a better deal to get this one
This is all you'll ever need for them:
http://www.amazon.com/Lexol-907-Leather-Care-8-oz/dp/B005H7DRQA/ref=sr_1_1?ie=UTF8&amp;qid=1453281124&amp;sr=8-1&amp;keywords=lexol
The cost of cleaning and conditioning isn't really dependent on the specific shoe. Given how cheap the products used are in bulk, you're basically paying for his time.
25 bucks will get you this which should be enough to last you basically forever, and 10 bucks will get you this which is the same thing in smaller quantities.
I have this on my vehicle. Does that count?
oh my! Thank you for the detailed info and for providing technical information. For the lags, i'm still coming familiar with the vocabulary here- would that be a product like the SDW EWP-Ply Screw?
Some of that is higher level than im potentially capable of this summer I think, so I'll start with the spirals.
&#x200B;
For the locktite, I presume we'd want to use a product like this
&#x200B;
Thank you again for the suggestions!
I choose to keep the battery part separate. If that's what you want, here's what I got.
Battery Tender 081-0069-8... https://www.amazon.com/dp/B0041CDPQO?ref=yo_pop_ma_swf
Battery Tender 081-0069-6... https://www.amazon.com/dp/B000NCOKZQ?ref=yo_pop_ma_swf
I use one of these
http://www.amazon.com/Battery-Tender-081-0069-8-Cigarette-Disconnect/dp/B0041CDPQO/ref=pd_bxgy_auto_img_b
Conncted to one of these
http://www.amazon.com/Battery-Tender-081-0069-6-Terminal-Disconnect/dp/B000NCOKZQ/ref=pd_bxgy_auto_img_b
Get a small 12v-usb adapter and you can charge most small electronics.
http://www.amazon.com/Belkin-F8Z445ttP-F8Z445ea-USB-Charger/dp/B0047T79TA/ref=sr_1_3?s=automotive&amp;ie=UTF8&amp;qid=1343024563&amp;sr=1-3&amp;keywords=12v+usb+adapter
The whole set up cost me under 25$ to make and I can charge most small electronics, my GPS, and the SAE cable lets me run my battery tender during the winter without removing any fairings. The only thing I wish I had done differently was put them all to a relay for fuse block, but they all have inline fuses so I'm not terribly concerned about it.
Obligatory get a bead jack post.
(I use nylon levers on my alloy rims.)
Steel Tire Lever or the Kool Stop Tire Jack.
Kool Stop Tire Bead Jack by Kool Stop http://www.amazon.com/dp/B001AYML7K/ref=cm_sw_r_udp_awd_L9Cvtb1WF831V
The tire jack will less likely scratch your wheel.
Are you sure the wheels are larger? Some tire manufacturers tend to make their beads a little tighter. Those tend to loosen a little bit with lots of riding.
I once got a set of new Vittorias that left blisters on both thumbs from my trying to get them on to my Mavics. The mechanic showed me a variation of one of these: http://www.amazon.com/Kool-Stop-Tire-Bead-Jack/dp/B001AYML7K that he swore by.
Everyone should own at least one glass breaker/seatbelt cutter combo and keep it stored in the glove box (NOT in the trunk). That, or some sort of "EMT knife" with a glass-breaker if it's legal in your area.
They're dirt-cheap, they will break glass more efficiently than a huge ass item such as a bat and you never know whenever they might come in handy.
You won't be able to break the window - underwater they become almost impossible to break unless you have a window shatter tool with a sharp edge. You can buy them and keep them in the car - since you have thought this out so much go do it! They often are comboed with a seat belt cutter thats safe so it doesn't cut YOU and sometimes a LED flashlight and other small features - really cool handy tool you will probably NEVER NEED.
But if you do need it you will be god damn praising god it's there.
I've had the same thoughts and 'fantasies' about how I would get out of a car underwater....I bought one its in my glove compartment and no regrets. I would link it but it was years ago in a random auto parts store for like $30
edit: I don't know if this means it's a cheap piece of trash (probably - mine was like 20 or 30 when I got it) but here is one on Amazon for less than $7 lol. I am not advocating for this particular model just to show you what I'm talking about and give an example they are inexpensive.
https://www.amazon.com/Towallmark-Seatbelt-Cutter-Breaker-Emergency/dp/B002AMAXNA
Well, one thing, it can be hard to open a door when partially submerged if the windows are closed. You have to wait until the car is submerged. Most cars nowadays have electric windows and locks which can go out. They sell a tool you can use to break windows, though. Something like this
I recently got these boots two weeks ago. I have to say after a brief break-in period of a few days after treating them with Obenauf's and leather lotion they are comfy and the leather has softened well. I've compared the build and leather to my brother's Wolverine 1000 Mile Boots and they are similar enough that you should have one or the other, not both (unless you need another color boot of course). I was deciding between the lighter brown and the cordovan, the reddish brown of the latter looks great and didn't darken or alter after leather treatment.
The sole is by Vibram and I haven't had any slipping issues where I live in NorCal. Replacement of the sole after wear shouldn't be too hard for a cobbler and I plan on caring for these boots for a lifetime.
Sizing wise, I sized a whole size down. I usually wear a 9.5D with my Nike Free Run 2, so I went down to 8.5D. Perfect fit.
I say go for it and pull the trigger, the 30% discount makes the boots worth to try out and return if not satisfied.
If I'm able to ill post pics of them.
EDIT: Had work, took pics before leaving.
Here you go.
Though I don't use leather boots at the brewery, I'm a huge boot nerd.
One of the biggest rules of leather boot care is letting your boots rest for at least 24 hours before wearing again. This gives time for all the moisture to be wicked away, especially from accumulated sweat while working. Cedar shoe trees are also your best friend, and will help even more with taking away moisture (plus they smell awesome). Put them in immediately after use!
As for leather care itself, coconut oil or Obenauf's oil are both excellent. Brush your boots with shoe brush, or wipe them down with a damp warm cotton cloth. Let dry, then apply the oil to the leather with your fingers, working the it in naturally with the warmth from your body (you'll feel sexy). Let the boots dry overnight, and then they'll be good to go! Coconut oil or Obenauf's will darken the leather a bit, so be aware of that.
I would shoot for twice a month for conditioning - really depends on how hard you work your boots.
Hope that helps!
Don't make it too complicated.
Some of the deeper scuffs may not go away completely, but they add character to the boot.
I like Obenauf's, personally.
Very Important:
Optional:
Be sure to review the Leather Care section in the wiki to get a good overview of products and care techniques.
First, you should check /r/autodetailing
There's lots of options and everyone will have their favorites based on experience. One thing's for sure though, stop wiping down with ONLY water as that is probably making things worse other than getting some dirt and grime off. It makes the leather dry and prone to even more cracks. You need some sort of leather-specific PH-balanced cleaner and a conditioner to follow it.
My favorite value option that's easily sourced from your local Advance Auto/AutoZone is Lexol. Amazon has a kit that's pretty cheap for you to see if you like the results:
http://www.amazon.com/Lexol-907-Leather-Care-Kit/dp/B005H7DRQA
Gliptone is also another well-liked value option:
http://www.amazon.com/Gliptone-Leather-Care-Combination-Kit/dp/B003VV423G
There are other higher end brands like Leatherique and Leather Master, but the results just didn't feel it was worth the price difference.
As for the dashboard, avoid junk like Armor All. Go with something like Einszett Cockpit Premium: http://www.amazon.com/einszett-Cockpit-Premium-16-9-fl/dp/B0002Z2MZ4
I did not take care of mine for over a year so the whole boot was scuffed. Here is what I did. First, Lexol Cleaner, then Lexol Conditioner 4 times in 2 days. Once nice and softer again, I just did a quick polish with Kiwi Tan, that one doesn't darken and matches the rest of the boot. They look brand new again and you can't see where the scuffs were located.
I rather spend around $12 for a real leather conditioner + cleaner than risk my shoes/boots with uncertainty.
But to answer yours; yes, it will be a poor decision.
I never had the drift but I do use my pro controller more. I heard spraying this stuff into the joystick part fixes a lot of drift problems.
For people who have problems with their JoyCons drifting, I highly recommend trying this. This is not a permanent fix by any stretch of the imagination; however, after attempting numerous different fixes this has easily shown the best and longest lasting fix for JoyCon drift.
Best move here is to use special electrical contacts oil.
I'm living in Europe, so I'm using a European brand (actually French...)
: http://www.kfsolution.fr/kf/KFproductdetail.csp?division=&product=F%202%20SPECIAL%20CONTACTS&ilang=fr&plang=fr
You have different brands in USA, like this one :
https://www.amazon.com/gp/offer-listing/B00AF0OFVU/ref=olp_twister_child?ie=UTF8&mv_size_name=0
Most of the time, it will cost you 15 USD / EUR (without transport).
You could find those special electrical contacts oils in a good electronic component shop, if you live a big city.
I have one bottle for now 8 years so you can use a bottle for many years !!
Believe me : it changed a lot of things for me :
N64 cartridge working again, unrecognised joypad on PSX... recognized, boring USB key.. working again, etc.
On your picture, your cartridge isn't clean !
Take a q tip, put some special oil on it and.... clean. do this with 2 Q tips for a good measure.
Spray some oil on your 62Pins Slot, inside the SNES , and you are good to go.
Except for the battery, cartridges can last practically forever....
Nanoskin Fine Grade Sponge https://www.amazon.com/dp/B00CUAWJ6G/ref=cm_sw_r_awd_6.eWub0G5AWXB Sorry for long link on mobile. I only use these now. I do think you need to use more lube with these then normal clay but it last longer. If you drop it just rinse it thoroughly and ready to go again.
If he has time to do yoga, he has time to code. Just needs to put the laptop on one of these bad boys
...and get yourself one of these Has room for a dozen donuts and coffee!
Reminds me of Amazon reviews for a certain car/productivity product.
https://www.amazon.com/303-30313-CSR-Protectant-Plastic-Fiberglass/dp/B00KN0UOEE/ref=sr_1_1?ie=UTF8&amp;qid=1499573952&amp;sr=8-1&amp;keywords=aerospace+303
Can you do the vehicle jump start ones too?
I bought this one because it can also charge a phone and it was able to start my completely dead F350 work truck, but I’m sure I over paid haha.
https://www.amazon.com/dp/B015TKUPIC
I swear by the one I have but I always tell people make sure the one you buy has enough juice for your vehicle. I had this one and it was OK for a 4cyl and "struggled" a little on bigger batteries, it never once didnt get me going though. I really want this one as its got more amps to kick over bigger cars faster.
So, first I have to say, that's the proper color for a guitar in that finish.
That said, it's your guitar, you can do with it as you see fit. It's yellowed because the outermost layer of the polyurethane finish it's coated with is yellowed. Your best best would be something like this to polish up and remove the yellowing from that outmost layer.
Definitely check in an inconspicuous area first though, it's not exactly a standardized process.
I use Meguiars Plastx to polish the scratches off slabbed coins. It's actually marketed for plastic headlights. Take a towel, but a nice dab on it, and work it in pretty hard. Doing it hard might actually leave VERY tiny hairline scratches as you get the bigger stuff out - But this only really happens with NGC plastic. Then, to get any other little scratches out from using hard pressure, put more on, a generous amount, and do a circular motion very softly then wipe the stuff off. Some deep scratches might take some time, lighter scratches take 20 seconds.
https://www.amazon.com/Meguiars-PlastX-Plastic-Cleaner-Polish/dp/B0000AY3SR/ref=pd_lpo_vtph_263_bs_t_1?_encoding=UTF8&amp;psc=1&amp;refRID=486722KKZ1WXQGSHBB8F
Here's the stuff.
I've made crazy scratched slabs look virtually brand new.
there's also slab-renew. Never tried it but its much more expensive.
http://www.slabrenew.com/home.html
Mothers 07240 California Gold Clay Bar System https://www.amazon.com/dp/B0002U2V1Y/ref=cm_sw_r_cp_api_i_AY3oDb2RBHAN3
Mothers 07251 NuLens Headlight Renewal Kit https://www.amazon.com/dp/B00GZLMEPM/ref=cm_sw_r_cp_api_i_2Y3oDbMHSKTCV
>I hear mink oil is of dubious quality and in general organic products cause the leather to more quickly deteroriate.
Mink oil and Obenauf's etc. are made for very harsh conditions - unless you're wading through the countryside, it's like putting on a scuba suit when there's a light drizzle outside. If you live in a city, you're fine. Said products will not cause a 'quick' deterioration - it's over a long period of time. They will also cause the leather to darken and lose some of its depth of color.
>What's the deal with cleaning? I'm leaning toward Saddle Soap to clean my boots. How effective is, say, using just a boot brush, regular soap, and wet paper towels to clean dirt from your boots? Can you use a clean t-shirt rag to clean?
Saddle soap dries out leather - it's soap, after all. It's overkill for regular boot care. A damp cloth or rag works fine for cleaning regular messes.
>I'm leaning toward using regular polish and no waterproofers or sealant. Do boots need polish or just shoes? Does polish protect at all? Does the polish process clean at all? I'm assumming you match the polish color to your leather. How important is this match--do you have multiple brown polishes or just one?
Waterproofers and sealant are unnecessary - leather is naturally water resistant and needs to breathe. If they get wet, dry them with a cloth then put in your cedar shoe trees (or crumpled newspaper) to absorb excess moisture. Polish isn't really essential on workboots like those Apaches (since the aesthetic is based around getting them scuffed and beaten up), but it can be used to hide scuffmarks if you want to keep them pristine (IMO missing the point). Polishing doesn't clean by itself, and will probably trap stuff underneath. The importance of the match depends on how specific you are about the boot's color. I don't remember if the Apaches are a pull-up leather, but on boots made of pull-up leather you can get rid of scuffs simply by rubbing them until they disappear.
>I am planning to buy unvarnished cedar trees and a boot brush for cleaning, as they appear to be necessary for the life of the boots. Do you have any suggestions? It seems like most are the same in quality.
Just buy split-toe shoe trees made of actual cedar (instead of plastic etc.). As long as they're in the right size, you're fine.
It appears that you're really overthinking this. Leather is naturally very strong and water-resistant, and doesn't need to be babied with a massive variety of products - at least for a workboot like the Chippewa Apache (high-end dress shoes may require more finesse).
Here's what I do:
Lexol leather cleaner (orange bottle) is available at auto parts stores, walmart, amazon-Lexol Cleaner
Once its clean, it wouldn't hurt to have some conditioner around. There are many but lexol's a good product. Lexol Conditioner brown bottle.
Not op but I’d guess mothers mag and aluminum polish. Stuff is awesome
Mothers 05101 Mag & Aluminum Polish - 10 oz https://www.amazon.com/dp/B0009H519Y/ref=cm_sw_r_cp_api_i_KQ7rDb8SDD7MD
FWIW: I bought one of these and I love it. You could establish a new edge on the most coarse stone, and refine it with the other two. As an alternative to finer stones, use automotive-grade sandpapers to get it up to 2500-3000 grit. For putting the final edge on it, I have a strop made from an old leather belt that I cover with a small amount of Mother's Mag. Honestly, though, you could stop at the fine stone on that tri-hone and be all set.
Hope this helps!
Followed this tutorial.
Got everything from amazon. Went with this dremel since it came with the polish wheels. This add-on item polish.
And these for safety. (And to meet the minimum for the add-on item.)
With 0 dremel experience, it was still easy. Didn't even mess up the glass, but I'd already upgraded mine to sapphire so I can only speak for that.
http://www.amazon.com/Hella-SuperTone-Horn-Kit-118/dp/B000CRZXPI
Horn + Battery + Switch = Horn on Bike
Hell, you could fit all that into cargo pants and be a pedestrian honking at cars.
Or on kickstarter.
You can also look into Hella supertones.
No reference to the club?
Ya'll are slipping.
Buy one of these: http://www.amazon.com/Original-Club-Steering-Wheel-Lock/dp/B0000CBILL
Not trying to come down, but I may recommend grabbing a club. Won't stop a real criminal, but for $40 it keeps honest folks honest. Plus may convince someone to steal your neighbors car instead of yours, better to give sympathy than to need it. There are cheaper one's too, I know this claims a $1800 payback if broken or something.
http://www.amazon.com/Original-Club-Steering-Wheel-Lock/dp/B0000CBILL
Probably this.
That... shouldn't happen?
Maybe buy one of those old school steering wheel locks.
Thanks! I started off with Mother's California Gold clay bar and waxed with Meguiers Ultimate Liquid Wax.
Honestly I'm not sure when the scratches came out. I didn't notice them after I used the clay bar, but I didn't think to actually look for them. Definitely not visible after the wax, though!
Chemical Guys Microfiber Applicators
Griots Garage Microfiber Speed Shine Cloth
Royal Auto Shop & Car wash towels 36 pack
Gummi Pflege Stift
Shurhold Buff Magic Compounding Pad 2 pack
Yacoto Microfiber Chenille Wash Mitt 2 pack
303 Fabric Guard
Invisible Glass 32 Oz - 6 pack
Griots Garage Microfiber and Foam Pad Cleaner
Chemical Guys Foam Cannon and Honeydew cleaner
Optimum No Rinse Wash & Shine 32 oz
Mothers Clay Bar Kit
Sonax Wheel Cleaner Full Effect 169 oz
Griots Garage Microfiber Drying Towel
303 Stain Guard
303 Speed Detailer
Detailer's Choice Leather Chamois
Natural Boar Hair Detail Brush Pack
303 Spray Wax
MATCC 5Pcs White Flannelette Polishing Wheel Cone-Shaped Wheel Grinding Head
Chemical Guys Premium Microfiber Applicators
Is this what you're referring to by clay bar?
I'll give the Windex/409 a shot first, since I have that lying around.
Thanks for the advice!
There are lots of ways to clean the boots, using saddle soap is probably your best bet. Obenauf's is your best bet for protecting them.
I would recommend this; https://www.amazon.com/Obenaufs-LP-Boot-Preservative-Preserves/dp/B0002X520S over mink oil. I use this in my leather restoration kit.
You could darken them using Obenauf LP. Maybe see if anybody else has tried it on the brick colour.
http://www.amazon.com/Obenaufs-LP-Boot-Preservative-Preserves/dp/B0002X520S
This is where I received all of my info: http://www.redwingshoes.com/shoe-care
I use this to condition and this to waterproof. Both work great.
Obenaufs is what I use on both pair of my leather boots (Red Wing Iron Rangers and my upland field boots [that see way more beating]). Does a great job for both. I put it on the Iron Rangers right when I got them and apply it semi-regularly.
edit: This stuff. No experience with the Dr. Marten branded stuff, but Obenaufs has been great.
If you sweat a lot with your watch on, something like Obenauf's LP will help condition and protect.
I used it on my Moto Cognac band, and it is much more supple now.
From the Obenauf's product description:
No! The conditioner and Mink Oil included in the Basic Care are not made for the smooth leather of Beckmans. Here's what you need:
Yeah that’s it. I’ve only ever bought it from Amazon.
Lexol also works just fine
I rub my leather goods with leather conditioner (specifically Lexol) every once in a while so that they stay supple and don't crack/dull
I used a dremel and this stuff:
Mothers 05101 Mag & Aluminum... https://www.amazon.com/dp/B0009H519Y?ref=ppx_pop_mob_ap_share
Mother’s. All I did was use the soft polish attachment and go to town on the SS. It worked great on my skx that o had gouged trying to remove the bezel with the wrong tool. It took awhile, but t worked great.
You can wash with soap and water, APC, or even aluminum-safe wheel cleaner if its really funky. When you clean it, use a pressure washer/compressed air to blow out the fins. If there is anything built up it will reduce the performance of the intercooler.
This video is a pretty good guide on polishing bare aluminum to a mirror finish. It is time consuming and messy, but you will get good results. If there aren't any deep scratches, I usually wetsand with 400, 800, 1000; sometimes finishing with #0000 steel wool before moving to the rouges. Instead of a compound at the end, I typically use something like mothers mag and aluminum polish, and finish with a coat of wax.
0000 steel wool and mothers polish. I just cleaned my 749 Termignoni's and the 0000 steel wool didn't harm them a bit. Give it a nice soap and water clean afterward. Mothers has a residue but man does it shine nice!
Pads
Polish
Wipes
https://www.amazon.com/HELLA-003399801-Supertone-High-Bracket/dp/B000CRZXPI
Also i dont know how i forgot hella supertones. they look good, and make you safer because they are loud
for your headlights make sure to find a guide specifically for the hawkeye (60-07 models)
Similar thing happened to me today, but going from right to left approaching a stoplight. I think they were trying to make their way to the open "first vehicle" spot at the light in my lane that i was coming up to. Thank god i had these horns
I would assume that you could get a set of Hella Supertones in Europe. They are loud and dissonant.
I highly recommend the Hella Super Tones
Just gonna leave this here for OP
The Scion FR-S has the same issue, sounds like a clown car. It's like, "I'M SO MAD," meep. So I bought some Hella Supertones and everything was right with the world again, I could be angry and actually HONK at people.
I had the front bumper off to install an oil cooler anyway so install was relatively simple and I believe you can do it by just removing the undertray and not the whole bumper, I have no idea what you would have to do for your Matrix though. The horns came with a relay but the FR-S already has one so I didn't use it, not sure about the Matrix, you'll have to Google that. For the low tone I just spliced in to the 2 cables going to the stock horn and the high tone had a single cable which I spliced in to for a live source and ran a cable from the mounting bolt for ground.
Google's your friend, you might even be able to buy a wiring harness to ease things along. I'm a dumbass and managed this pretty easily, good luck :).
http://www.amazon.com/Ring-of-Fire-Enterprises-Emblem/dp/B000ER47ZS
I'm active duty enlisted in the Air Force and I've had this on the back of my car for a year and a half and no one has said anything to me on any base. My supervisor, a lapsed Catholic, and a coworker, a biblical literalist, have actually said they thought it was funny.
What about this?
https://www.amazon.co.uk/T-REX-EMBLEM-T-Rex-Car-Emblem/dp/B000ER47ZS/ref=sr_1_20?keywords=dinosaur+eats+fish&amp;qid=1564220101&amp;s=gateway&amp;sr=8-20
This is the link to it on Amazon if you want to buy it. There's only 12 left, but there's meant to be more coming soon!
Dinosaurs love fish.
I transitioned into working on my bikes almost entirely by myself (Wheel building/suspension service/bearings excluded) and this is the exact path I went down as well. Here is everything I bought from Amazon:
The same $50 tool kit
Torque wrench
Cable/housing/wire cutter
Chain/quick link pliers
Wet/Dry Chain lubes
Park Tool grease
Degreaser
Blue Loctite
Carbon grip paste
And some additional small things like cables, cable end caps, ferrules, zip ties, etc. A set of needle nose pliers can be handy to help push/pull stubborn cables/housings as well.
Also, to make working on the bike 10x easier, I recommend getting a stand. I use this one because I am space constrained and it folds up nice and small, but there are probably better ones out there.
It seems like a lot of $$ to lay out at first, but it pays for itself pretty quickly compared to taking the bike to a shop every time you need to do something to it. Basically everything you need to do can be found on YouTube as well.
Not sure why it's happening but just a touch of Loctite Blue should fix that
Probably. could be wrong though. Regardless it's pretty cheap.
Here is a relatively cheap supply list:
Loctite Blue 242:
https://www.amazon.com/dp/B000I1RSNS/ref=cm_sw_r_cp_api_9tS9yb9QJHK9R
Nano-Oil 10 weight:
https://www.amazon.com/dp/B002C9RGA4/ref=cm_sw_r_cp_api_EwS9yb10KF8P2
Torques:
https://www.amazon.com/dp/B000LQEUJ0/ref=cm_sw_r_cp_api_yvS9ybNJ3JZ9A
There are probably better torques but l think these will work. I have a $45 set so I didn't think that is really cheap lol
I use Loctite blue threadlocker. It will hold it in place, but will still allow you to remove the bat when you actually want to remove it.
Any auto parts store has it or here is the amazon link.
https://www.amazon.com/Loctite-Heavy-Duty-Threadlocker-Single/dp/B000I1RSNS
I'd use more than just a drop with that stuff. Personally, I'd put enough to make sure two to three threads of the fitting are covered. Your stuff isn't as strong needs more.
When people say they used loctite, they're usually talking about the blue stuff which is different. link: https://www.amazon.com/dp/B000I1RSNS
This: https://www.amazon.com/Battery-Tender-081-0069-6-Terminal-Disconnect/dp/B000NCOKZQ/ref=pd_lpo_vtph_263_bs_t_1?_encoding=UTF8&amp;psc=1&amp;refRID=QM94FQD1ZYPEYY78R4KZ
plus this: https://www.amazon.com/Battery-Tender-081-0158-Disconnect-Smartphone/dp/B00DJ5KEF4
The first one has a number of accessories you can connect from a battery charger to heated clothing. The second is a usb adapter.
I've been very happy with the Battery Tender brand. I have a friend who uses this on his boat (it's designed not to overchage).
http://www.amazon.com/Battery-Tender-021-1163-Solar-Maintainer/dp/B004Q83TGO/ref=sr_1_1?ie=UTF8&amp;qid=1416250584&amp;sr=8-1&amp;keywords=battery+tender+solar
We use a traditional (plug in) tender on my wife's car. A fairly common setup is to permanently connect the terminals to the battery and then run the leads somewhere more convenient, like out the grill or fender. It makes connecting/disconnecting a lot more convenient.
http://www.amazon.com/Battery-Tender-081-0069-6-Terminal-Disconnect/dp/B000NCOKZQ/ref=pd_bxgy_auto_text_z
Most people can manage to install the battery tender pigtails on their own.
https://www.amazon.com/Battery-Tender-081-0069-6-Terminal-Disconnect/dp/B000NCOKZQ
https://www.amazon.com/Battery-Tender-081-0158-Disconnect-Charger/dp/B00DJ5KEF4/ref=sr_1_1?s=automotive&amp;ie=UTF8&amp;qid=1487631371&amp;sr=1-1&amp;keywords=battery+tender+usb
Yes you can. To make it easier by negating the need to pull off the seat or panels to get to the battery, get yourself one of these:
http://www.amazon.com/Battery-Tender-081-0069-6-Terminal-Disconnect/dp/B000NCOKZQ/ref=sr_1_1/185-9216454-3055567?ie=UTF8&amp;qid=1449857423&amp;sr=8-1&amp;keywords=battery+tender+pigtail
Battery tender junior.
Tuck a quick connector harness under the seat and you'll be golden.
I've had this for over a year and it works great
If you buy a battery tender it comes with one of these that the usb thingy hooks right up to. I just have it hanging out the side of my bike and I can easily tuck it up under the fairings.
when you buy a battery tender it will come with a lead for connecting to the battery, as well as a lead that has battery clamps/clips on it for temporary charging.
this "lead" has two wires on one end and a fitting like the USB adapter in /u/afeagle1021's post (except it is the MIRROR IMAGE of that fitting). The two wires will go on your battery terminals (aka posts) via loops installed on their ends that go around the battery terminal screws, where you bike's electrical system makes it's contact with the battery.
there is an indicator for polarity on at least one of the wires, make sure it is attached to the corresponding battery terminal. then you plug your bike into the tender overnight and plug the usb adapter in when you need to power your phone when you are riding.
you might need to get creative about how you run your usb cable if you want it secured and out of the way.
Link to lead sold without tender
Link to Battery Tender Jr.
Battery Tender makes a quick disconnect plug. I have one on my bike that I use to connect the tender. You screw it onto the battery terminals. I also have a USB plug that I can connect to it and charge phones, cameras, whatever.
This video helped me with my technique: http://youtu.be/-XUFVrl0UT4 .
Also, the bead jack is supposed to help. Haven't tried it myself: http://www.amazon.com/Kool-Stop-Tire-Bead-Jack/dp/B001AYML7K
Specialized tires do run small. They are the right size, just really tight. Kool stop makes a nice tool to help get these stubborn tires on.
http://www.amazon.com/Kool-Stop-Tire-Bead-Jack-Handle/dp/B001AYML7K
This video is a good one.
https://www.youtube.com/watch?v=-XUFVrl0UT4
BTW, you need the levers. Just go out and buy. It's not an expensive thing and very useful thing you can carry.
I suggest you to try without metal things to mount tires. If not careful, you end up cutting the tube. I've done pinch flatting the tubes a few times so this is from my experience.
If you must, try the bead jack.
https://www.amazon.com/Kool-Stop-Tire-Bead-Jack/dp/B001AYML7K/ref=sr_1_31?ie=UTF8&amp;qid=1483489515&amp;sr=8-31&amp;keywords=tire+lever+bicycle
When I use the tire lever while mounting, I do double check the lever is not pinching the tube.
Oh man I know that frustration so well. You SHOULD be able to install a tire without levers, but I’ve gotten to the point where I’m covered in sweat and feeling like existence is hopeless trying to get that last little bit on. No need to get to that point if you don’t have to. this tool has been a lifesaver for me on those really tough ones
Do yourself a favor:
https://www.amazon.com/Kool-Stop-Tire-Bead-Jack/dp/B001AYML7K
This right here was the answer to all of my prayers. You can mount anything on earth with this. Once you get used to it, it is even effortless.
Or if at home or touring (where it make sense to carry extra tools), use a tool like the Kool Stop Tire Bead Jack. Works very well. https://www.amazon.ca/dp/B001AYML7K/ref=cm_sw_r_other_apa_i_E8RXDbM907Q8X
These guys: http://www.sjscycles.co.uk/var-tyre-levers-prod27539/?currency=usd&amp;geoc=us&amp;changecurrency=usd
They are basically a portable version of the Kool Stop Tire Jack which allows you to get tight fitting tires such as the Schwalbe Marathon Plus or anything tubeless on without frustrations.
He probably meant to post something like this thing
I always keep a glass break and seat belt cutter in every car i own.. to hell with manual or electronic windows.. if i gotta go i gotta go Exact One
I've never been in the situation my self, but after recently having had this happen to a close friend of mine not long ago I asked my parents and this is what I've been told.
First and for most, DO NOT PANIC. There is a chance that you won't be open the door at first because the pressure of the water our side and your air filled cabin will be an issue. Your car will fill with water, so what you want to do is make sure you can get your seatbelt off. You can buy one of these which you can cut your seat belt with if its stuck.
As I said your car will be filling with water. Now here's the issue, the myth busters said to wait until your car was fill submerged and your car is full of water to open the door, but if your in a very deep lake. That could lead to fatality. So what's recommended is that you actually try to open your window electronically as soon a soon get your seat belt of. If you can't that tool I showed above has a part to break open your window . Again don't panic, as water will then fill your car quickly, you can try to swim out of it then and to safety. There will be a current but you should be able to get out any way. If not, just wait a little and you can make it out.
If you have passengers in your car like children. I would advise getting them out with you as they won't be able to get themselves out.
Some of them use a little handheld device like this to break windows. No one would even know they're carrying it.
Keep a 'life hammer' next to your seat. Allows you to cut the belt if necessary & smash the window.
Seems ridiculous not to wear just because you think the concept of the law is oppressive. You're an idiot if you don't wear a belt. Effectively psychological child abuse if you do it around minors (akin to the chap that told his kid up was down, black was white etc).
If you're doing anything like this you should have a seatbelt knife attached to your chest somewhere. We were issued them in Iraq and now I try to keep one in the car. Such a simple (in hindsight, obvious.) yet uncommon thing.
EDIT: Something like this would be ideal.
I use these. They work pretty well, and look pretty good for the price, but what you need to do is take some thin rubber tubing and rap it around the core before you put them on the bike. This gets rid of most of the handlebar vibration making them very usable. You get anti-vibration mirrors for ~20 bucks when you will spend well over 50 if you buy "good" one out the packaging.
It is an '82 XS400 special. It ran from 77 to 82. I have drag bars, but left all the cables the original length. The horn bracket got flipped upside down so I could access it/install a new one. I made a bracket that attaches to the bar running down in front of the engine to hold to LED fog lights, run by an auxiliary switch. Painted and wrapped the headers and have emgo shorty mufflers. Emgo pod filters, and a puck-style filter for the breather tube nipple. Led tails, led indicator lights, Upgraded headlight. Point of note on the headlight, mine was a sealed beam halogen. So to add a new bulb you have to buy an aftermarket reflector housing from candlepower.
EDIT: Also forgot Oury grips, cafe mirrors, new fuel lines, fuel filter and vacuum tube.
http://www.amazon.com/gp/product/B007CA6E56/ref=oh_aui_detailpage_o04_s00?ie=UTF8&amp;psc=1
http://www.amazon.com/gp/product/B002GTKAHQ/ref=oh_aui_detailpage_o05_s00?ie=UTF8&amp;psc=1
http://www.amazon.com/gp/product/B003T0ITF6/ref=oh_aui_detailpage_o07_s00?ie=UTF8&amp;psc=1
http://www.amazon.com/gp/product/B00HAQGO20/ref=oh_aui_detailpage_o06_s00?ie=UTF8&amp;psc=1
http://www.amazon.com/gp/product/B00230QCIY/ref=oh_aui_detailpage_o08_s00?ie=UTF8&amp;psc=1
http://www.amazon.com/gp/product/B006VFL0SO/ref=oh_aui_detailpage_o02_s00?ie=UTF8&amp;psc=1
http://www.amazon.com/gp/product/B00HDYB3P2/ref=oh_aui_detailpage_o01_s00?ie=UTF8&amp;psc=1
http://www.amazon.com/gp/product/B000N5UVME/ref=oh_aui_detailpage_o00_s00?ie=UTF8&amp;psc=1
http://www.amazon.com/gp/product/B0022ZUJGG/ref=oh_aui_detailpage_o09_s00?ie=UTF8&amp;psc=1
http://www.amazon.com/gp/product/B000UKKSTI/ref=oh_aui_detailpage_o05_s00?ie=UTF8&amp;psc=1
http://www.amazon.com/gp/product/B00HJEGQQ2/ref=oh_aui_detailpage_o04_s00?ie=UTF8&amp;psc=1
http://www.amazon.com/gp/product/B007ZGKKMA/ref=oh_aui_detailpage_o03_s00?ie=UTF8&amp;psc=1
http://www.amazon.com/gp/product/B009SK7N8K/ref=oh_aui_detailpage_o03_s00?ie=UTF8&amp;psc=1
http://www.amazon.com/gp/product/B005ETCIO8/ref=oh_aui_detailpage_o02_s00?ie=UTF8&amp;psc=1
I think about where a car might lurk if it were stalking me. Then I point the mirrors there. I put on these cheap bar end convex mirrors, the field of view is ridiculous.
Best bang for the buck? Cheap Amazon bar ends for $10. Here. Same exact ones that they sell at my local bike shop for $90. I mount them under my bars like this.
This particular pair takes a little while to ship, so I usually order two because I break/lose them a lot. Cheapo is the way to go.
http://amzn.com/B002GTKAHQ
They'll mount below the bars, just take out the bar end adapters.
Not OP but I bought this for my Apaches based on recommendations here, works great:
https://www.amazon.com/Obenaufs-LP-Boot-Preservative-Preserves/dp/B003SKCARK/ref=sr_1_3?ie=UTF8&amp;qid=1509973628&amp;sr=8-3&amp;keywords=obenaufs%2Bheavy%2Bduty%2Blp&amp;th=1
Ya gotta be a TOUGH MANLY MAN to make it through NorthEast winters.....
Just kidding, man. It's a great question, actually. This is my experience...
You're going to need wool socks to keep your feet warm. I personally like Darn Tough socks and some from a label called Mountain View I got at Ocean State Job Lot for $4.00 (70% merino). You don't have to spend a ton of money to get wool socks. TJ Maxx and Marshalls have slightly irregulars on sale quite often around here. Not sure about California, tho. Avoid cotton socks. Run far, far away from acrylic socks. Look for socks that are mostly (>50%) wool. Nylon will give them some durability.
You're also going to need to learn how to take care of your boots! Maybe you do this already, but if not...
The simplest thing to do is wipe them off with a clean towel after you get back indoors.
You're also going to have to treat your leather boots with some kind of dressing. Frequency varies, but at least once a year. Once a month is probably overkill. So find something in-between that works for you.
This is strictly in my opinion and experience, but the two best products I've found for this are Obenauf's Leather Protector and Huberd's Shoe Grease. WARNING: Obenauf's WILL darken the leather. That's no big deal to me but for some people it's a non-starter. Huberd's doesn't seem to darken leather, but YMMV.
Lastly, Bick #4 does a real nice job of conditioning and cleaning leather shoes/boots. I only use this when I think my shoes/boots are looking a little grubby. Bick #4 does NOT darken leather at all.
I hope you get a chance to "enjoy" a "real winter" sometime soon. One of the most fun experiences I've ever had was hanging out with a buddy from India who had never experienced snow before. He thought it was glorious. It made me take a new look at it, and winter CAN be glorious if you want it to be.
This stuff works better than snoseal. It's breathable, body heat melts it into the gloves, smells good, and darkens the leather a few shades. Highly recommend it for kincos.
Use this occasionally
http://www.amazon.com/gp/aw/d/B003SKCARK
Definitely a little darker right after use- but they lighten back up
This is the exact set I bought. It doesn't squirt or spray, it has a screw on top with a small nozzle, like on a shampoo bottle.
http://www.amazon.com/Lexol-907-Leather-Care-Kit/dp/B005H7DRQA/ref=sr_1_3?ie=UTF8&amp;qid=1395619579&amp;sr=8-3&amp;keywords=lexol+cleaner
My first GYW pair as well, also black cherry. I picked up a Lexol Leather Care Kit that comes with leather cleaner and conditioner. I wore them a few times and then cleaned and conditioned them according to the kit instructions. After each wear I brush them down with a horse hair brush and when I'm not wearing them I put in shoe trees.
I clean/condition them after about 5-6 weeks, unless I get them really muddy or something. There are surely others on this sub with better knowledge of leather care, but this routine has been working fine for me so far. Most will recommend giving them 24 hours to rest after wearing, but, y'know, they're boots.
Check this out.
I'm pretty new to boots as well, but I'd suggest picking up a few things if you don't have them already. This will apply to most leather shoes/boots (doesn't really apply to suede or roughout leathers... for that you'll need a suede brush)
FYI below is basically a tl;dr of this post that got me started on all of this. I recommend you read through it all and check out /r/goodyearwelt and maybe just use this post as more as a quick reference or for ideas.
Once everything is acquired you'll be ready to give your boots an initial tune-up and have some daily-care tools.
Daily Care
It really depends on how much work you want to do. A quick brush shine with some polish will do a lot to make them look better but if you want to rejuvenate them it will take more work.
Step 1. Clean the boot. Saddle soap works but there are good leather cleaners out there. I will link to the one I use. A damp cloth and some elbow grease will work as well, although to a lesser extent.
Step 2. Condition the leather. There are a lot of options. I use lexol with comes with a cleaner. https://www.amazon.ca/Lexol-907-Leather-Care-8-Ounce/dp/B005H7DRQA
Step 3. There are leather repair products that would help fix that tear on the left boot but since these are work boots I wouldn't bother.
Step 4. Brush shine with black shoe polish. Put a little polish on the boot with an applicator brush then brush off the excess with a horse hair brush.
I work in a technical environment in the military and this works wonders.
Next time use contact cleaner; not wd40. I use this. Good stuff.
https://www.amazon.com/gp/aw/d/B00AF0OFVU?aaxitk=uPOduJFJ9VJWctk9.GsbGw&amp;pd_rd_i=B00AF0OFVU&amp;pf_rd_p=30dbdc00-03a0-42f0-976a-08a7c08bd014&amp;hsa_cr_id=7484699300401&amp;sb-ci-n=productDescription&amp;sb-ci-v=WD40%20Company%20300554%20Specialist%20Contact%20Cleaner%20Spray%20-%2011%20oz.%20with%20Smart%20Straw&amp;sb-ci-a=B00AF0OFVU
https://www.amazon.com/gp/product/B00AF0OFVU/ref=as_li_qf_asin_il_tl this is the perfect fix for drift more people need to know about it
This isn't horrible. $25 gift card, but more importantly, it should be the version2 switch with better battery life - https://slickdeals.net/f/13642192-nintendo-switch-v2-25-amazon-promo-credit-298-99?src=frontpage
if you buy it and actually use it enough you'll probably want this - https://www.amazon.com/gp/product/B00AF0OFVU/ref=ppx_yo_dt_b_asin_title_o02_s00?ie=UTF8&amp;psc=1
then follow this.
https://nintygamer.com/switch-controller-drift-fix/
My parents' neighbor has been watching as I borrow Mom and Dad's hose and he recently asked if I could take on his car and I was happy to oblige! Overall, the exterior was in okay shape - couple bugs, a few spots of tree sap and bird poo, as well as just a good amount of dirt and mud tucked in some spaces. I gave the car a two bucket wash,
clay, Iron X treatment,Iron X, clay and topped it off with a sealant. Thanks for pointing out that I listed my procedure out of order, /u/Deadfable! Here's the deets:Products Used:
0000 Steel Wool from Home Depot (used with QD for the exhaust tips)
Overall a fun job! Got rewarded with a hearty lunch of sausage and peppers on Italian bread. Happy detailer!!
I love Larry's videos from AMMO NYC & DRIVE Clean and have always followed his recommendations for detailing/washing.
Great, thank you!
Sorry if I'm being stupid, but do I apply the sealant with a microfiber towel or with this?
If not, what is that sponge used for?
Reminds me of this
Nothing beats the reviews for this:
http://www.amazon.com/AutoExec-Wheelmate-Steering-Attachable-Surface/dp/B00E1D1GY6#customerReviews
https://www.amazon.com/gp/aw/reviews/B00E1D1GY6/ref=cm_cr_getr_mb_paging_btm_3?ie=UTF8&amp;s=sd&amp;sortBy=helpful&amp;pageNumber=3
Grab some 303 Aerospace Protectant to go with it, doesn't leave grease and grim behind like most cleaners and protects from UV damage.
Try this out: 303 (30313-CSR) UV Protectant Spray for Vinyl, Plastic, Rubber, Fiberglass, Leather & More – Dust and Dirt Repellant - Non-Toxic, Matte Finish, 32 Fl. oz. https://www.amazon.com/dp/B00KN0UOEE/ref=cm_sw_r_cp_api_2wT8BbGKZ8J2W
Buy three buckets, one for wheels, the others for a two bucket system.
Buy something to clean the wheels as well. I have the wheel woolies but I'm going to ask for the woolly wormit for my birthday from my wife.
Get a Waterless Wash and/or Quick Detailer for the times when you don't need a wash but you want to clean stuff up.
Take a look into this new Meguiar's Hybrid Ceramic Wax for a sealant. I have used the Fast Finish and it's great so this should be even better.
I also use Meguiar's Ultimate Quik Wax (D156 is the same but in a gallon jug) as a drying aid and it makes the car POP!
As a final suggestion, buy some 303 for the interior. You're going to love it. Not greasy, smells okay (not fruity), and leaves things looking great.
If you store them outside ir somewhere the sun can damage them then invest a little money into some 303 protectant spray. 303 (30313-CSR) UV Protectant Spray for Vinyl, Plastic, Rubber, Fiberglass, Leather & More - Dust and Dirt Repellant - Non-Toxic, Matte Finish, 32 Fl. https://www.amazon.com/dp/B00KN0UOEE/ref=cm_sw_r_cp_apip_Z1LTpJE4AnyGG
Also avoid oyster beds and dragging them across rough gravel. Have fun!
Ive been using 303 Aerospace Protectant with no issues.
https://www.amazon.com/gp/product/B00KN0UOEE/ref=oh_aui_search_detailpage?ie=UTF8&amp;psc=1
I would not recommend a full size battery, I work in an autoparts store and see brand new ones off the shelf dead. They will also loose charge overtime. Instead I would recommend a portable jump pack. I have one and used it twice to jump start a car and it still had full battery. The one I have also has dual lights on it with various functions and a usb power port. Its a little cheaper than a fullsized car battery and won’t go bad after a few years sitting.
NOCO Genius Boost Plus GB40 1000 Amp 12V UltraSafe Lithium Jump Starter https://www.amazon.com/dp/B015TKUPIC/ref=cm_sw_r_cp_api_7UfIAb057BART
Jumper cables as well, because its a good idea to have extra options in case you need to jump or be jumped
Tow strap, only get this if you have an idea as to what you are doing/experience
Tow hook/tow hitch
Mini cheap chinese tire inflator (got it for free, but it does work)
For long trips you can consider bring some oil and a few qts of trans fluid, just make sure you can easily add the trans fluid, may need a funnel or may be a sealed pan.
Water, deerpark makes these fantastic durable 1 gallon bottles I see go on sale for 10 for $10
Gurantee no one will tell you this, but it got me unstuck in the middle of west virginia on a freezing night and has worked getting friends out. That would be 2x4s and a handsaw, or just some precut 2x4’s. I’ve used these to give a 05 F250 traction in mud, I also used a bunch of wood to get myself unstuck from a ditch I backed into. Was able to build the bottom up with wood and gas it quickly
in reverse. Thank god for that one.
Flashlights, even just some cheap junk will work.
If its cold enough toss a cold weather sleeping back in the trunk.
If you can carry a gun inside I suggest looking into that.
People will mention the typical clothes/food
That plugs into a portable battery jump box. They're really handy to keep in your vehicle.
Like this
https://www.amazon.com/NOCO-GB40-UltraSafe-Lithium-Starter/dp/B015TKUPIC/ref=mp_s_a_1_3?keywords=Lithium+jump+starter&amp;qid=1565214716&amp;s=gateway&amp;sr=8-3
> Now I need to find one that can handle jump starting my ls3.
I have this one. Was able to jumpstart a 4.6l V8 with a completely dead battery several times and a SC'd 5.4L v8
I wish I could help you but I'm in a different state at the moment. :/
I recommend on top of jumper cables you purchase a battery jump starter. Amazon
Check last week's thread on this. In short, read the reviews on Amazon. They are not good. I would stay away.
Second, do not waste your money on a lithium jump starter. Again, check the reviews - don't just look at the star rating, but read them. They fail quickly and often dangerously. NOCOs are especially notorious for the charging circuitry blowing itself up and not working anymore only a few months after purchase. And that's the leading brand for the market... you want to carry a Chinese Taobao special lithium battery in your trunk all the time?
Finally, to answer your question, if the car's battery is totally dead, no, probably not reliably. The CVPI's starter draws around 200 amps. This battery will not be able to supply that reliably. The 600 peak amp rating is total marketing wank and means basically nothing. The 300 starting amp rating is only for 32° F or above for 5 seconds when the battery is brand new and fully charged. Your typical car battery is rated in cold cranking amps, which is measured at 0° F for 30 seconds. A CVPI's starter may only draw 200 amps, but most car batteries you find for the CVPI will be 500-1000 cold cranking amps.
I would look at one of these. Even the higher-spec Stanley units have bad reviews across the board.
I bought the NOCO GB40 from Princess Auto last winter, was around $180 I think but cheaper online. You can choose the volts/amps too and that changes the price, tbh I can't remember the recommended minimum. Used it 3 or 4 times last winter when we had that brutal -30/-40 week at the beginning of Feb and it was so much easier than 2 car boosting.
https://www.amazon.com/NOCO-GB40-UltraSafe-Lithium-Starter/dp/B015TKUPIC
The clips are very short (since it only plugs into one car) and detachable for easier storage, and the battery itself is USB rechargeable. Also, if you put the wrong clips on the wrong nodes of your car battery, it won't fuck it up. You'll get an error light on the NOCO and it won't charge until you switch them around. For someone like me who is not mechanically inclined and can never remember which cable goes where, it's a god send.
e: I have the 12V, 1000 AMP version
Hit it with this stuff it works wonders and will show you right where any hidden corrosion is on solder points.
Electrical Contact Cleaner Amazon Example
Don't use regular WD40. The electrical contact cleaner is a separate product sold by them. I am not sure what would happen if you sprayed the regular stuff on it but I'm sure nothing good. I've edited my comment to include the link, but here it is again
WD40 Company 300554 Specialist Contact Cleaner Spray - 11 oz. with Smart Straw https://www.amazon.com/dp/B00AF0OFVU/ref=cm_sw_r_cp_apa_i_FTnJDbM1B9S8V
Hey, that’s progress!
Try resoldering the connectors on the back of those. They might have come loose from the mechanical pressure over time.
As for cleaning the buttons themselves, I have some stuff that I use for dodgy buttons and scratchy pots. Not exactly this, but it’s from from RadioShack which doesn’t exist anymore. Probably this is similar and would do the job:
https://www.amazon.com/WD-40-Specialist-Electrical-Contact-Cleaner/dp/B00AF0OFVU/ref=mp_s_a_1_2?ie=UTF8&amp;qid=1541714656&amp;sr=8-2&amp;pi=AC_SX236_SY340_QL65&amp;keywords=electrical+contact+cleaner&amp;dpPl=1&amp;dpID=41yj73g%2B%2BlL&amp;ref=plSrch
I’d resolder the connections, then spray this stuff in there and click the buttons like a hundred times.
Worst case scenario, those little black buttons are a standard part you can replace.
Not all joycons who wander are lost.
Seriously though, try some electrical contact cleaner, use a toothpick or tiny flathead screwdriver to pry up the dust cap under the analog stick (it's a very thin rubber material), stick the nozzle inside, and spray a few times, then move the analog stick all around for a minute. Let it dry, and then that should, at least for a while, fix the problem.
There's a rubber covering at the base of the analog stick, just lift it up, poke the plastic straw on the nozzle of the WD-40 electrical contact cleaner can under it, and spray it. Don't go crazy, just make sure to get a little bit on all sides. Also, make sure to use the WD-40 electrical contact cleaner, not regular WD-40. Here's a link to the correct product on Amazon. If your drift is caused by dust or dirt getting into the analog stick, this should fix it. However, if it comes back, then the stick itself is worn out and you'll need to send it in to Nintendo for repair.
Electronics cleaner worked for me. No issues in 3-4 months of moderate use.
https://www.amazon.com/gp/aw/d/B00AF0OFVU?psc=1&amp;ref=ppx_pop_mob_b_asin_title
Just shoot it under the rubber dust covers and let it dry for 20-30 min
Look for a bad bias resistor on the driver card, bad/broken solder joint on the wires leading to the diode mounted on the heat sink, or (most likely) a bad output transistor.
Check and spray for corrosion at every connection you can get at as well.
Here's a link to the spray I use
&#x200B;
I spray it under the little flap thing of the joycon(no disassembly) and let it dry for an hour and it's back working!
For the joycon's drifting, I found a little spray from WD-40 specifically their ELECTRICAL CONTACT CLEANER (not their other stuff which would melt plastic), really helped eliminate the drift. This is what i used, its $6.75 on amazon right now, which is much cheaper than $70 for new joycons
https://www.amazon.com/gp/product/B00AF0OFVU/ref=oh_aui_search_asin_title?ie=UTF8&amp;psc=1
Non-mobile link
Most of the clay out there is very similar, but there are different grades of clay (read: aggressiveness). Nanoskin is great for the "average Joe" who has a reasonably clean car but needs to decontaminate it, and clay is great for a 100% decontamination job like a very dirty or neglected car.
If you're new to claying... I'd suggest getting this kit, or something similar. It has everything you need as a beginner. I used these all the time when I first started detailing. I finally needed more so I bought in bulk and gallons of lube at a time.
The second thing I'd recommend is getting a small, fine nanoskin sponge. You can try it without dropping $45 for a mitt or pad and see if you like it and the results you get when working with it.
Unless you specially needclay, go with Nanoskin (AS-019) AutoScrub Fine Grade Sponge https://www.amazon.com/dp/B00CUAWJ6G/ref=cm_sw_r_cp_api_i_SEotDbSTMY8MQ
Don't use just water.
You can pickup blue ONR https://www.amazon.com/Optimum-NR2010Q-Rinse-Wash-Shine/dp/B00D8DR0AO/ref=sr_1_1?ie=UTF8&amp;qid=1510851008&amp;sr=8-1&amp;keywords=optimum+no+rinse which you can use as clay lube, detailer, rinseless wash depending on the dilution with your distilled water.
Clay lube: ratio 1:64 or 2 oz/1 gallon
Those types of clay do the job and some people perfer it to traditional clay. I haven't heard of that brand, but i'm sure its the same stuff. I personally have little sponge from Nanoskin. https://www.amazon.com/Nanoskin-AS-019-AutoScrub-Grade-Sponge/dp/B00CUAWJ6G/ref=sr_1_3?ie=UTF8&amp;qid=1510851254&amp;sr=8-3&amp;keywords=nanoskin
I like this better than that "towel" since this has a nice grip.
Get a Megs105 or Ultimate Polish (since its a beater I expect the paint is in need of compounding) $10
If you don't want to compound maybe a wax cleaner, its milder, cheaper and you could probably 1-step your car with it but don't put your expectations high because it only removes mild oxidation and some swirls. $7
If you need a backing plate, go get a 5 inch one $10, you need it
Get an CCS Orange Pad from lake (8-10)
Meguires Gold Class Wax on Target/walmart/amazon $10
I almost forgot but you need to clay before you start the magic and the cheapest one and most awarding one I know is this that's like $11.
Invest a few more dollars and if you want your money back you could always clean your friends car for a few bucks.
I agree with everyone that it's rail dust, or just iron particulates that get embedded in to your clear coat. initial removal will take care of most of it, but know that with a white vehicle, it'll show up occasionally, even with waxing.
Instead of plain clay bar, I'd recommend getting a nano-skin. works like clay bar, but much easier to use (you can drop it and simply rinse it off). I just use any quick detail spray as a lube.
nanoskin
https://www.amazon.com/Nanoskin-AS-019-AutoScrub-Grade-Sponge/dp/B00CUAWJ6G/ref=sr_1_1?ie=UTF8&amp;qid=1503197119&amp;sr=8-1&amp;keywords=nanoskin
That's what I use. Works great.
I was thinking of those ones where suddenly everyone thought the product was hilarious, and wrote wacky stuff. Like this: https://www.amazon.com/AutoExec-Wheelmate-Steering-Attachable-Surface/dp/B00E1D1GY6
"Unnatural reviews likely*". Nailed it.
Because it's smaller then this Steering wheel table
Whenever I feel like life is getting me down, I read this review (or watch the Aww Joby video) and whatever I was thinking about before that point is pretty much chased away by laughter. I think it was on some post (can't remember where) that had a bunch of funny Amazon reviews.
This was another product they listed, almost all of the reviews are priceless... https://www.amazon.com/AutoExec-Wheelmate-Steering-Attachable-Surface/dp/B00E1D1GY6#customerReviews
Enjoy!
Thank God I have one of these!
I picked up my bottle of it on amazon. Presently it's about $17 a bottle. I'm sure the pricezombie will chime in on price history...
http://www.amazon.com/303-30313-Aerospace-Protectant-fl/dp/B00KN0UOEE/
EDIT: Just curious, where did you find it locally?
Absolutely you want to start taking care of it properly it right away, start with a with a high quality, non greasy UV protectant spray.
I don’t own a GTI yet. But I have been using this stuff on my cars for a while now and it’s amazing 303 (30313-CSR) UV Protectant Spray for Vinyl, Plastic, Rubber, Fiberglass, Leather & More - Dust and Dirt Repellant - Non-Toxic, Matte Finish, 32 Fl. oz. https://www.amazon.com/dp/B00KN0UOEE/ref=cm_sw_r_cp_api_i_KCWFDb1P9VS7Y.
No problems here. I open mine almost every day as long as weather permits. We've had a bit of rain here in Salt Lake, but not much and I haven't noticed any leaks, but I also haven't gone looking to see if any water is pooling.
I've read that treating the seals with 303 will keep them from drying out which can be part of the reason they start to squeak.
I drive a 15' BRZ and live in FL
https://www.amazon.com/303-30313-CSR-Protectant-Plastic-Fiberglass/dp/B00KN0UOEE/ref=sr_1_7?ie=UTF8&amp;qid=1499474713&amp;sr=8-7&amp;keywords=interior+cleaner
I see 303 get a lot of good reviews on how nice their interiors look after applying. Is 303 a cleaner or just a UV protectant? Am I better off buying something like Chemical Guy's Interior Detailer and Protectant? or Meguiar's
https://www.amazon.com/Chemical-Guys-SPI-663-InnerClean-Protectant/dp/B008LPKV28/ref=sr_1_1?ie=UTF8&amp;qid=1499476506&amp;sr=8-1-spons&amp;keywords=interior+detailer&amp;psc=1
I keep my interior pretty clean. I do a quick dust wipe with a microfiber every few days so the dust doesn't build up. And every few weeks I'm looking to wipe it down and touch it up with an interior detailer and was wondering which one is preferred.
Kaboom with Oxiclean + tooth brush, then wipe clean with a microfiber towel has worked well for me. Be sure to give the cleaner a good minute or more of contact time to work its magic on the mildew before wiping clean.
The magic eraser suggested by others will work quicker, but it will also scour off the top layer of your vinyl which will likely weaken it and remove UV protection. If you must go the magic eraser route be as gentle as possible, and be sure to generously re-coat the vinyl with 303 protectant to protect against UV damage.
And if all else fails, vinyl can be repainted to look like new. I had great results a few years ago with this white dye followed by a few coats of this clear coat on my seats. They are still holding up great after a few years of heavy use and many cleanings.
There are a ton of products out there, but THIS for the leather and for pretty much everything else THIS.
EDIT: You can find this stuff in most auto parts stores.
Vinyl decals? 303 Aerospace Protectant apply and rub till dry. This will help prevent fade and wear on the decals. It needs to be applied regularly. Be careful what you wash and clean your trailer with, anything that will destroy the plasticizers will cause the decals to crack and fade quickly.
http://www.autogeek.net/convertible-top-dye.html
http://www.amazon.com/303-30313-Aerospace-Protectant-Trigger/dp/B00KN0UOEE/ref=sr_1_1?ie=UTF8&amp;qid=1427689475&amp;sr=8-1&amp;keywords=303
I've been testing out 303 Aerospace Protectant. I've heard good things and so far it seems to be working great.
Might be worth checking out /r/AutoDetailing .
I'm new to the Mazda club as well ('16 CX-5 GT), and I've read on other forums that 303 is very popular for cleaning and protecting vinyl and leather on car interiors.
I just bought some, and plan to test it on the wife's car first to make sure everything checks out :) I'll be interested to hear what others recommend.
Buy a jump box is a better option. Then you don't have to rely on someone else. https://www.amazon.com/dp/B015TKUPIC/ref=cm_sw_r_cp_apa_tg-IybQ8KYRH5
Won't help you now, but maybe throw this on your Christmas list.
https://www.amazon.com/NOCO-GB40-UltraSafe-Lithium-Starter/dp/B015TKUPIC/ref=sr_1_3?ie=UTF8&amp;qid=1510858529&amp;sr=8-3&amp;keywords=gb40+jump+starter
Can personally vouch for this. Get one that you can still use even if it blows out the fuse for your cig lighter. Also, get an additional dedicated jump starter.
I second everything @cynicoblivion said above. If you'll be doing HH in a rural area, make sure your car is in good shape; check fluid levels, tire pressure (including the spare tire), light bulbs, etc, every week. Verify that your car insurance covers towing, or join AAA. And I highly recommend you get something like this, to jump start your car without the need for a 2nd vehicle: https://www.amazon.com/NOCO-GB40-UltraSafe-Lithium-Starter/dp/B015TKUPIC/ I used to do HH in a very rural area and would drive 800-1,000 mi per week. My worst fear was to have my car break down in the middle of nowhere... I have since moved to a much more urban area, still doing HH.
I like wheel well covers. Finishes the truck appearance wise and gives good protection to the underside. Not a flashy investment but definitely one I'd make before many others.
Get something like this:
https://www.amazon.com/NOCO-GB40-UltraSafe-Lithium-Starter/dp/B015TKUPIC/ref=sr_1_3?ie=UTF8&amp;qid=1539442816&amp;sr=8-3&amp;keywords=genius+boost
Or get a combo air compressor / battery jumper combo. When you need it, and you will, you'll be thankful.
https://www.amazon.com/NOCO-GB40-UltraSafe-Lithium-Starter/dp/B015TKUPIC/
https://www.amazon.com/gp/aw/d/B015TKUPIC
https://www.amazon.com/gp/aw/d/B0037V0EW8
Here is the mobile version of your link
Had good luck with this
I know from detailing to remove dust from something you don't want to scratch, use a Microfiber towel, and a bottle of spray detailer for Cars.
And if you tried other methods and got scratches in the glossy part of the One you can use this to get it out: http://www.amazon.com/Meguiars-PlastX-Plastic-Cleaner-Polish/dp/B0000AY3SR/ref=sr_1_1?ie=UTF8&amp;qid=1395621216&amp;sr=8-1&amp;keywords=mcguires+plastx
Yea. I bought something like this at a local autoparts store to polish my some older headlights and even my glossy PS3.
I used this Meguiar's G12310 PlastX Clear Plastic Cleaner & Polish, 10 Fluid Ounces https://www.amazon.com/dp/B0000AY3SR/ref=cm_sw_r_cp_api_i_N-wiDbWEBJW7F
I think the reason this worked on the 3DS though is because the plastic on the 3DS is a glossy material but if it’s more of a hard plastic I don’t think it’ll work.
https://www.amazon.com/Meguiars-PlastX-Plastic-Cleaner-Polish/dp/B0000AY3SR/ref=mp_s_a_1_2?keywords=plastx+meguiars&amp;qid=1569598527&amp;sprefix=plast+x&amp;sr=8-2
By polish, I mean using polishing compound preferably designed for plastics/headlights. Something like this: https://www.amazon.com/Meguiars-G12310-PlastX-Plastic-Cleaner/dp/B0000AY3SR
One more thing, the UV sealant usually says to keep it out of the rain after it's been applied, so if there's any rain forecasted and and you don't have a garage, don't do it until the rain is gone.
You can fix this long-term (but not completely permanently) with two steps: First, thoroughly clean the headlights using Meguiar's PlastX, which will restore them to brand new shine. Next, apply a layer of Meguiar's Keep Clear Coating, which will keep the headlights from fogging again for up to one year. You can probably use a different brand of coating, but I haven't found anything else that works as well as PlastX.
This would be worth a try. Works on lots of plastic surfaces.
Meguiar's G12310 PlastX Clear Plastic Cleaner & Polish, 10 Fluid Ounces https://www.amazon.com/dp/B0000AY3SR/ref=cm_sw_r_cp_apa_i_VoSPDb5X6XV5T
I just toothpasted my car over the weekend. It does indeed work. Just buy some simple Crest toothpaste with whitener in it. I doubt the chemical compounds of the toothpaste do anything, but what you are getting is a very mild abrasive compound.
Take a spray bottle of water, slather up some toothpaste on a rag and cover the head light and buff and buff and buff. When you think you've ground down the surface layer enough, spray more water on and rinse and wipe clean.
If this doesnt do it, you can step up to something like Bar Keeper's Friend mixed with water for more abrasion. You can also try 1000 & 2000 grit wet sanding, however you have to be careful sanding them as you could make the surface even more rough and cause it to cloud up again more quickly.
Follow it up with some Meguiars Plastic X polish and you should be good to go. http://www.amazon.com/Meguiars-PlastX-Plastic-Cleaner-Polish/dp/B0000AY3SR
Is it permanently fogged (plastic damaged) or is this just condensation a.k.a. does it get better with time? If it's the first one you might be able to remove the instrument cluster window and use plastic polish on both sides of the plastic. If it's condensation check to see if gaskets, o-rings, etc that create a seal are in good condition. That's where I'd start at least...
PlastX and a foam applicator
Yes in general.
If you headlights are oxidized very lightly, you can apply plastx and with a terry cloth polish the lights back to clarity. You can also use a foam pad if you own one.
Snap a pic and I can give you more advice if you need any.
Just remember you will need to seal your headlights or they will just oxidize again in a couple months. Apply a wax or sealant to your headlights regularly, typically when you apply it to your car.
I use this stuff and it works amazingly: http://www.amazon.com/gp/aw/d/B0000AY3SR?pc_redir=1396539178&amp;robot_redir=1
I have a bottle in my trunk, and use it to clean friends and family cars. It takes a very small amount to make the headlight look brand new. I've had the same bottle for a couple years.
If you're really worried about car theft, what about one of these: Steering Wheel Lock ?
This totally doesn't help now, and I realize this, but consider getting a club (http://www.amazon.com/Original-Club-Steering-Wheel-Lock/dp/B0000CBILL) for your own car, and a spare one to keep around your apartment for when guests visit.
I've been living in Queens for 25 year now (born and raised), and my family has had a car stolen back in the day, and that has made my parents on high-alert ever since. It was a crappy old toyota, and we didn't have anything valuable in the car, but still somebody thought to steal it.
My boyfriend who was born and raised in a super-safe suburb in MA gets paranoid when he drives his car into unfamiliar areas and I've always teased him about the uber-paranoia (doesn't even leave spare change in sight, and the thought of leaving his laptop in his car out of sight still makes him nervous). My mom bought him a club and I think it really gives him better peace of mind. In your case, even if thieves could break into the car, and had the car keys to start the car, they wouldn't be able to drive far with a club locked on its steering wheel.
Sorry this happened to you. It's unfortunate but you have to be cautious in NYC and exercise common sense at all times. I worked in a pretty safe area of Queens, and once last year one of our clients left our building to discover that her car had its windows smashed, which she believed to be because she had a GPS HOLDER (not even a gps itself, which she kept in her purse on her person) visible on her dashboard.
Good luck with everything. :)
Yes, that is 100% normal. It is the risk we all take as car owners. Do look up book value for your car though; generally the insurance company gives you book value, which tends to be more than the car is actually worth. If you show them that the market value is higher than book value then you can even argue for more money.
One insurance company advertises "better car replacement" which should help. You might go with that company.
If you're truly paranoid, some options to help prevent theft of the entire car are:
To be honest, a 2009 Fiesta really isn't worth all that effort, time, and money. Just park it somewhere visible or secure and lock it. Save the money that would be wasted on all those irritating accessories to help buy a replacement if an insurance is insufficient, if it gets stolen at all.
My tenant's older hondas and toyotas used to get stolen all the time- PD basically told me that they are being stolen by daylaborers who don't have licenses and can't register a car, so they steal cars and use them to commute back and forth from places like Tracy and Salinas for work in city. Two of them were found a few months after they were stolen in the East Bay and San Jose with toolboxes and painting supplies in them- in perfect condition, gas in the tank.
I had all my tenants with older cars start using The Club (that 80's car theft tool that locks your steering wheel), and we haven't had a car theft since. But yeah, they love those older cars without alarm systems and without chip-keys.
Hope it turns up for you.
I don't worry, I have this
Shouldn't this be the responsibility of the insurance company to clean up? Just because the owner found a piece of paper with a name on it doesn't mean they were the thief. Mail and ID's get stolen just as often if not more than cars. I get that these people are frustrated but it seems like there anger is pointed in the wrong direction. Given that this is the second time the car was stolen I'm going to venture a guess and say the owner needs to get a club for his old ass honda.
I just use a steering wheel club.
Looks like this:
https://www.amazon.com/Club-1000-Original-Steering-Wheel/dp/B0000CBILL
This is The Club.
It's a patented steering wheel lock. People had been using chains and whatnot for ages for this purpose, but this thing was like, specifically designed to lock your steering wheel.
It was super popular when I was growing up and I guess it's still around:
http://www.amazon.com/Club-1000-Original-Steering-Wheel/dp/B0000CBILL
So during the time you were married, this was your primary (only) vehicle? And she drives a second vehicle? With the way the separation agreement is worded, I have a hard time imagining a judge taking the car away from you when you have it in your possession.
> After we got the divorce, I told her that I would pay her for the car. I paid her $1000 and then decided that I didn't need to make any more payments to her
How much did you (originally) agree to pay her? Does she have this in writing (email/text)?
You need a tag and insurance to drive it legally. You need to get those up to date to stay out of trouble with the law, but I can't imagine this has much bearing on the dispute over ownership.
If you think she might have a key and you're worried about her coming over and taking it, you might consider a steering-wheel lock.
Do you mean "The Club?"
People realized that it's very easy to steal your car even with "the club" in place. Videos like this started circulating on evening newscasts showing how "The Club" was at best a way to slow them down a minute or two.
More importantly, cars began using smart keys that would prevent the engine from starting without a code from a microchip. You could tow it to a chop-shop, but you can do that with "The Club" anyway.
EDIT: A bit more on The Club from Freakonomics.
> What we found out was that a pro thief would carry a short piece of a hacksaw blade to cut through the plastic steering wheel in a couple seconds. They were then able to release The Club and use it to apply a huge amount of torque to the steering wheel and break the lock on the steering column (which most cars were already equipped with). The pro thieves actually sought out cars with The Club on them because they didn’t want to carry a long pry bar that was too hard to conceal.
/r/detailing will tell you to use a clay bar. I've had good results using this one from Mother's. There are tons of videos out there that will tell you how to properly use it.
Ever tried a clay bar? Takes a little elbow grease but works like a charm and won't damage your paint. I usually spot wax over any spot I clay bar though, just for the extra protection.
Mothers 07240 California Gold Clay Bar System https://www.amazon.com/dp/B0002U2V1Y/ref=cm_sw_r_cp_apa_i_uQxKDbQHE12KR
Noob detailer. Please help to check my rinseless wash process for mistakes and/or advise on existing paint damage.
Started following this sub when I got a nice enough car to care for. It's a Mazda with soul red paint though and seems like every little thing is super visible and the clear coat scuffs when you look at it wrong. I street park in Brooklyn, dust, leaves, pollen, bird bombs and all, every day. Was recommended to adopt ONR rinseless 2 bucket method, researched and tried to follow to the best of my ability.
First, the list of equipment I obtained thus far:
Below is the workflow I had going today, so much new stuff to use and new methods, I did not feel in the least bit confident that I did it right. Asking for folks here to review it and point out any mistakes I have made along the way as well as tips to optimize the process for the future:
I went out to the car with two buckets, each with grit guards, one with 256:1 ONR solution, the other just warm water for rinsing. I started applying ONR solution in straight line motions with BRS one panel at a time starting with the roof>rear window/trunk gate>windshield>hood>front fenders>rear fenders>rear doors>front doors. I do not aim to detail interior or wheels much tbh, but i did dedicate about 6 costco towels to wheel duty by cleaning up the nooks and crannies of the wheels and wheel wells, rinsing them in rinse bucket and never dipping them back into the ONR bucket after first use. Following that, I cleaned and refilled rinse bucket and went back to repeat the panels. Why? Well, the car was very dirty with BRS quickly becoming black with dirt and me switching to costco MF towels to make another two passes over each panel, discarding towels that get visibly dirty on all quarters into laundry pile. I tried folding dirty halves/quarters away and using the Ammo NYC sweep and rotate style to minimize contaminants dragging across paint. Eventually, I felt ready to move onto claying because costco towels and BRS were no longer looking dirty as I passed them across.
Here is where my confidence and excitement of a new auto detailing convert took a big hit. First of all, I had a superficial but long scratch across the right side which I expected to be possible to mask down with claying>using opti seal, since I could not actually feel it with my fingers. That didn't work at all, although I could tell by doing the ziploc bag drag test that the clayed areas were much smoother than the untreated ones. I used Mother's detailer spray bottle to lubricate, half panel at a time, then slide the pancake shaped clay sideways with no inward pressure until i stopped feeling drag resistance. I added lubricant if I felt clay stop on dry areas.
I wanted to change pace after failing with masking the scratch, so I started on the inside of the windshield. I made a 10:1 ONR solution in a spray bottle, sprayed it direct onto a high gsm fluffy mf towel from aliexpress and started wiping away at the inside. I then used the flat looking towel (also from aliexpress) to wipe down streaking. I was pretty happy with the results, but unsure if I did something wrong or missed a step. Still, I moved on.
I then wiped the entire exterior with a clean towel and soaked up the Opti seal applicator, proceeding to apply the stuff one panel at a time and following up with another clean mf towel to wipe off the excess wherever i saw streaking (which was almost everywhere as it was my first time and I wanted to lay a generous protective coating). I got rid of streaking easily, but....
The result was clean, silky smooth paint, but upon closer inspection, it was covered in etchings from leaves, bird bombs and whatnot. The ONR>instant detailer>clay>opti-seal did not remove it. I did not apply pressure onto paint in affected areas during any of the above procedures, as I was afraid of damaging clear coat even further. Did I need to apply more inward force and scrub down the etched areas once it was cleaned from contaminants? Or the only solution to these spots now is to polish? Here is a picture of one of many etchings. some others are bigger in size, some area smaller, one is shaped like an outline of a small leaf -( . The hood also has some tiny black dots that seem to have a white halo of discolored paint around them ~1mm wide.
What would be recommendations for me at this point, and what ballpark cost to fix if I am not skilled/dedicated enough to get into polishing myself if that's the route I have to take? I did look over the field guide link for paint damage in the sub wiki section, says etching removal can require up to polishing depending on severity, but I couldn't tell what severity etching I got going tbh.
Finally, are there any parts of this process that were done wrong or could be done better? Are the instant detailer spray and 10:1 ONR spray different in what they can do, or do they more or less perform same function to lubricate and suspend contaminants on the clear coat? Do I need to somehow strip opti-seal layer every few months to re-clay and re-seal, or just ONR on top and instant detailer spray>spot clay>reapply opti-seal in trouble spots from here on out?
The actual tool I used was Porter Cable's DA Polisher
With that I did:
If you go this route, you'll also need a [hook&loop attachment]
(https://smile.amazon.com/gp/product/B00BQVF8J0/ref=oh_aui_detailpage_o07_s00?ie=UTF8&amp;psc=1) for the polisher. I did a lot of research before landing on what would get me good results with very minimal time. I did the whole thing in about 4 hours, after not having done anything but a normal wash for 3.5 years. about 9 months later, I'm ready for (need) another detailing.
I wax about every three months. You'll be able to feel when you need a new coat. I also claybar every spring
Are you talking about getting a DA polisher or just washing, cleaning, and sealing? If you're not getting a DA machine and polishing, you can get everything you need to detail your car for about $100 imo.
Get two $5 five gallons n buckets at Home Depot.
Here's a good car wash kit for $60:
TriNova Car Care Kit
If you want to decontaminate the paint ($15):
Mother's Clay Bar Kit
Here's a super-easy to apply sealant that should last 4-6 months, depending on weather and driving habits ($18 with coupon):
Meguiar's Ultimate Fast Finish
And get a bunch of good quality MF towels ($18 for 12):
12 Pack Microfiber Towels
That's plenty to get started and should be enough product to get you through 10 washes/details.
If you get addicted, be sure to check out The Rag Company for some great drying towels, and look into Optimum No Rinse wash to make maintenance washes a lot easier.
Hey guys i'm new to this detailing scene..but I do hope to learn a lot from everyone! I have an 05' white civic and the exterior isn't terrible, but there's definitely parts where there's medium oxidation and swirl marks. Just overall the paint doesn't feel glossy and smooth, just weathered and feels like metal.
Please let me know if I got the steps correct...any inputs is greatly appreciated!
Thanks so much for all your suggestions and inputs. I hope to learn a lot from all of you.
PS. Extra question, I'm doing a roadtrip after the detail...(stupid i know) but what's a good product to get rid of the bug stains while I'm out on the road?
THANKS!!
Interesting, I'll have to give the Mother's QD and clay bar a shot then. This seems like it?.
Thanks! I love it so far, definitely want to keep it looking as good as I can.
You'd be surprised, I really didn't use a wide variety, and what I used didn't cost too much. This was a while ago, and I buy so many random cleaning products I don't even remember what all of it was exactly, but:
Wax;
Claybar.
Really nothing particularly fancy you couldn't pick up at target. That said, I did spend a long time claybarring and waxing. Pretty much went over the entire car twice.
SECTION | CONTENT
:--|:--
Title | How to Remove Paint Scuffs On Your Car (Paint Transfer)
Description | How to remove paint scuffs from your car. Learn how to safely remove paint transfer from your car's paintwork without causing any damage to the paint underneath. Foam Abrasive: http://amzn.to/1r4wgDj Dash Camera I use: http://amzn.to/22BezJu WD40: http://amzn.to/1X1Expk Clay Bar: http://amzn.to/1XUcwiN Wax I recommend: http://amzn.to/1XUdviU Compound: http://amzn.to/1TYJpIw Remove Scratches from Wheels: https://youtu.be/9WQiqYlpxoY?list=PLDD611CFB36FC65F2 Top 10 Car Cleaning Mistakes: https:/...
Length | 0:06:05
****
^(I am a bot, this is an auto-generated reply | )^Info ^| ^Feedback ^| ^(Reply STOP to opt out permanently)
Clay bar is so much work but definitely worth the trouble, I try to do it once a year. 2-3 times a year I'll give it a really good wash, use klasse all in one followed by klasse sealant. Dirt/spots buff off with a microfiber, and I can wash the car very quickly once this is done. It does such a great job of creating that protective layer. It's on the expensive side but you use so little of each product that they will last you quite awhile.
Edit: doh, forgot my claybar brand...mother's
Yeah, you'll be fine. It looks like the suede cleaner just stripped all the natural oils out of the leather. Get this or this.
Wear them with some thick wool socks and they should be plenty warm. I wouldn't wear them to go hiking in snow or anything, but I think they'd be fine for walking through a slush/snow/icy mix. Treat them with leather conditioner before winter.
I recommend the Red Wing Beckman. Good semi-lugged sole that works indoors and out, and can definitely handle the elements once you add some Obenauf's. Also, email Revolve once that this is your first order with them and they'll give you 30% off, which gives these a damn good price/quality ratio.
I would start with the military boots. Make sure they fit well enough, and go on some smaller hikes to break them in. If there are no problems, go for it. You can always try more expensive boots later.
I would look into some waterproof treatment, though it will cut down on breathability and you can get wet from the inside out, from sweat. e.g.
My bushacres are nubuck, I wouldn't oil them.
In general you don't want to over saturate the leather with mink oil. Give it as much as it wants and no more. Too much oil and it can go rancid. A good alternative is beeswax based waterproofing like Obenauf's.
I'd be cautious of the boot dryer because dryness ruins leather. Constant moisture does as well, and I doubt consistent wetting and drying is good for leather. You could use Obenauf's LP to waterproof them as well.
That would probably work, but I use this stuff. It's kind of a hard wax, you rub your fingers around a bit and it melts, then you rub it into your leather.
I can't remember if this is per the directions, but I go back the next day and wipe it down with a cotton rag to remove any excess.
https://www.amazon.com/Obenaufs-LP-Boot-Preservative-Preserves/dp/B0002X520S/ref=sr_1_1?ie=UTF8&amp;qid=1480387762&amp;sr=8-1&amp;keywords=obenauf+s+heavy+duty+lp
one jar lasts approximately forever.
Wow sorry, I could've sworn I replied to this comment. I used Obenauf's Heavy Duty LP. I bought it mainly just to darken my boots, but it doesn't hurt that it also has protective qualities.
Eu folosesc Kiwi 100% Horsehair Shine Brush.
Nu știu dacă e cea mai bună, dar asta folosesc eu și sunt mulțumit. A, da, și mă interesează foarte mult încălțămintea de calitate și am grijă de ea deci nu-s doar un noob care nu știe ce recomandă. Peria asta își face treaba și e ieftină.
Și dacă tot veni vorba, pentru bocanci recomand Fiebing's Yellow Saddle Soap și pentru bocanci negri recomand Obenauf's LP Boot Preservative și/sau Obenauf's Leather Oil.
Săpun doar pentru bocanci, nu pantofi, și Obenauf's stuff doar pentru piele neagră, o să schimbe culoarea altfel. Pentru pantofi sau bocanci la care nu vrei să se schimbe culoarea recomand refined coconut oil.
De evitat orice fel de cremă colorată. Aia e moartea pielii.
Amazon has it.
Wow, wonderful find. Seriously envious. Honestly, I would not worry about the damage much, its hardly noticeable. If they were my boots, I'd clean them with warm water, let dry, and condition/protect with Obenauf's. In fact, this is what I do with my boots in northern Vermont.
Was this what you used?
http://www.amazon.com/gp/aw/d/B0002X520S?pc_redir=1404739595&amp;robot_redir=1
I really love the way they turned out in your photos and I think I want to get them and apply the same wax. Great review btw.
The crew at styleforum is constantly recommending Obenauf's:
Amazon
However, on the Wolverine 100 site, they show a video of a guy using Montana Pitch Blend.
I'll end up going with the Obenauf's since it doesn't have mink oil which supposedly can rot the leather over time.
This stuff will do the trick
I'm actually not sure if that's a conditioner or just a leather protector of some sorts, but usually, conditioners are labeled as such. Lexol is what I use, and what is often recommended around here as a general purpose conditioner.
I decided to just go with lexol leather conditioner and it's working perfectly. It came highly recommmend in /r/goodyearwelt. Don't use Obernauf's LP unless you want to ruin your boots. Don't use waxes. Oil works well but can be a little harder to work with because of how easily it saturates the leather. If you look around this subreddit you'll see a lot of boots that are drenched when they are oiled. You don't want that. You want a healthy leather.
Be careful when using oil on shoes and boots. Most of them will darken the leather. If you plan on repeatedly using the boots in heavy snow or rain oil will help weather proof them. Otherwise there isn't any real reason to. Every couple months give the boots a good rub down with a leather conditioner. It'll help keep the leather from drying out and restore some luster.
I like Lexol; it's cheap, it works and it doesn't darken the leather. A jug this size will last you years. Of course there are plenty of options out there, feel free to do the research. There's a lot to learn. Just keep in mind that products containing oil (especially mink) or wax will darken the leather.
Equally important is to get a shoe brush if you haven't already. With five minutes, a brush and a little elbow grease you can get your boots looking great without having to use any product. You don't want to over condition leather as it can weaken it over time.
Someone help me understand why this is even a deal? It's more expensive than if you were to purchase these separately.
1 liter Leather Conditioner
1 liter Leather Cleaner
Total is $18.45... and that isn't even a sale price. It could be even cheaper if you do subscribe and save and just cancel the subscription right after it ships.
I have always used either Chelsea Leather Food or Lexol Leather Conditioner for my leather goods.
The Chelsea is really popular among soccer players for use on their cleats so it can be found in a reasonable number of sports stores that sell them for around 10 bucks. Make sure you get the clear stuff though.
The Lexol looks like a car care product but it was recommended to me for use on my riding boots and is extensively to keep horse tack from drying out and wearing down. Amazon is selling a liter of the stuff for 12 bucks. Because it is meant to soak in to the leather a bit, it may darken the JCP boots up some, so go with a few even, light coats first rather than just pouring the stuff on.
The Kiwi polish that you can find in drugstores everywhere is plenty good and is pretty cheap at around 3 bucks a tin. I am currently using some Brooks Brothers Shoe Cream which I got as a gift a bit ago and i love the stuff. It is a bit on the 'pricey' side at 9 bucks a jar so it is up to you.
As a last note, I would recommend getting some Saddle Soap for use after youve gone slogging through some less than clean streets and perhaps forgotten to clean your shoes for a bit. It is a great 'once and a while' product to get your shoes clean again and helps to make sure you arent polishing any dirt or grime into the shoe the next time you give them a shine.
http://amzn.com/B000637TNM
as a classic car owner, Mothers Mag and Aluminium polish
http://www.amazon.com/MOTHERS-05101-Mag-Aluminum-Polish/dp/B0009H519Y
nothing comes even close to it.
It's seriously under priced. If you're looking for another hero that's under-appreciated it's mothers mag and alumanum polsih. Combine that with 0000 steel wool and they will make your tail pipes glow!
I bought 00 and 0000. Only used the 0000 because I wanted to take the least metal off. You have to cut into the metal though you will see small lines that don't look good until polished. You will see the tarnish disappear.
Chrome though, I didn't even need to polish. Brushed it with the steel wool rust came off and it was shiny and perfect looking.
Wool Grades
Steel Wool first. Then i used a aluminium/mag polish called Mothers.
Idk about the bottom of the forks at least on my bike that finish is different. But all the cross members on the forks shined up right
Man... that raw aluminum makes me want to take some Mothers to it... could probably achieve a mirror finish.
Mothers 05101 Mag & Aluminum Polish - 10 oz. https://www.amazon.com/dp/B0009H519Y/ref=cm_sw_r_cp_api_OWsoxb449WA9N
This works perfectly for me!
You can polish the blade with mothers mag polish or somthing simular, and you can patch the handle with sugru
I use Mother's Mag and Aluminum Polish
https://www.amazon.com/Mothers-05101-Mag-Aluminum-Polish/dp/B0009H519Y/ref=sr_1_2?ie=UTF8&amp;qid=1523456718&amp;sr=8-2&amp;keywords=mothers+mag+and+aluminum+polish&amp;dpID=51jppSER5ZL&amp;preST=_SY300_QL70_&amp;dpSrc=srch
It works like a charm! I polish it all the time.
Use Mothers mag polish.
[Mother's Polish w/ microfiber cloth] (http://www.amazon.com/MOTHERS-05101-Mag-Aluminum-Polish/dp/B0009H519Y/ref=sr_1_1?ie=UTF8&amp;qid=1419893973&amp;sr=8-1&amp;keywords=mothers+polish) for heavy duty stuff and a Jewelry Cloth for everyday use.
Use something like this.
> For batteries, I'm using some efest IMR 18650s, do you think a different battery would make a noticeable difference?
eFests and mechs do not go well together, that being said hopefully you have one of the 20 amp rated ones, but it's still likely a poor choice for a mechanical device. Before buying the mod or at the same time you should have bought at least two of these, which currently is the cheapest price out of the three known trustworthy vendors for authentic cells.
You should read more into mechanical mods if questions like this are ones you need to ask, not meaning to be rude. Using an ohms law calculator at 4.2v you're going over 1a of what hopefully is the rating of your battery (if you have the 12a then this is actually not safe) but your mod will be pulling less with voltage drop. You should be calculating for 4.2 though to give yourself some headroom for safety. Especially if you threw an efest into a mech. I apologize if I come off condescending, it's not my goal at all, it's just with mechanical mods the battery is possibly one of the most important things to know how many amps you have to work with and you should never use rewraps in a mech. There's other batteries with lower ratings people use but honestly, I don't see any reason to when the VTC5a exists, is available, and possibly the all around best battery for vaporizers in general. In regulated devices you can sacrifice that extra cdr for some more battery life but in this situation the CDR is going to be a major determining factor in building safely and knowing what is safe and isn't as you need this for ohms law calculation.
Use the 510 pin cap for now because the more safety involved currently the better. Also if you didn't already know make sure to religiously check your battery wraps for any nicks or tears. With your mod you do have the delrin insulation I believe, but honestly if there's a tear or any damage to the wrap just rewrap it to be safe, you really don't want a short to happen and I don't want to see you on the news.
If there's any other questions that you're hesitant to ask, you may as well, because I'd rather help clear some things up or show you areas in which to read more so you know how to use what you have as safe as possible, and with efest batteries it worries me that there may be some things you may have missed.
Tldr: order these and don't use the efests. 2 of them should be fine unless you plan on using it as a main device in which 4 may be a safer bet, but 2 should be fine. Plus you're still learning some things it seems to there's no reason to use a potentially risky rewrap with false ratings when something like that is so cheap, and performs so well.
edit: I use Mothers Mag & Aluminum Polish for my mech mods, they're copper but I want to say that works well for brass too. Theres videos on how to properly polish if you are unsure. You want to wash it off after you use that though so you prevent potential damage to your device by leaving some of it behind. Pick up battery wraps and insulators as well, you're going to need these if you vape regardless and with mechanical mods you should have some ready to go as soon as any damage to the wrap happens. They're dirt cheap and it's easy to do, again there's youtube videos that show how to rewrap 18650s. Don't get them mixed up with other batteries though afterwards, as you don't want to throw a 15a battery into that thinking it's 25a and pulling too much power from it than the cell can handle.
Hybrid mode is more conductive but at this stage in the game I would use the topcap with the 510 pin instead. You likely won't notice a dramatic difference and it's safer for now.
Also you will probably have better luck with simple round wire builds than things like claptons simply due to ramp up time. Especially since at the moment if you continue to use that without the batteries I linked, you want to pulse it as little as possible. I am erring on the side of caution but if I am aiming for what's safest for you right now and until you learn all you should have known before buying a mech, you probably should too. Either way though, I find simple round wire builds are better in the builds I have tried compared to the fused claptons I gave a shot once. I don't like ramp up time though and even if you look at a lot of way people who are "sponsored" build you will see half the time they are still using basic round wire builds too. They just work and are simple.
Hi All!
My family owns a heating oil delivery business and we pride ourselves on having the cleanest and best looking trucks around.
To polish the tanks, we use Mother's Aluminum polish (https://www.amazon.com/Mothers-05101-Mag-Aluminum-Polish/dp/B0009H519Y) applied by hand (to avoid swirls, I'm told)
I was wondering if you guys could shed some light on a best approach to keep these looking like a mirror finish? Could a DA polisher be used? Is there a better product than the aluminum polish? Should we be waxing the tanks as well?
Here are a couple of pictures: http://imgur.com/a/IfTnb
Thanks for any tips! I know this is a little unique since it's metal instead of paint!
Depends on how bad. I've used Autosol products for aluminum oxidation with pretty good results. It's not super cheap, though. Also, some Mothers Mag Aluminum Polish works well if the surface is pretty clean.
It's hard to say without seeing the pipes, but heavy rust is usually really difficult to remove as the metal has physically changed. Feel free to send a picture of your pipes, though!
Sure, awesome find by the way.
After removing all the tubes I wiped it down a few times with just a damp cloth to get the heavy dust off. The real pain is getting rid of the sticky yellowed smoke film that most old tube gear has. The best thing I've found to get rid of it is Zep All Purpose Cleaner. It's green and can be found at Home Depot. The nice thing about it is that you apply it, wait five to ten minutes and gently wipe it off. It takes the grime with it and leaves lettering. Keep it up until the surface is clean and your rag isn't lifting up any nasty yellow anymore. You still have to be careful, if you rub too much or apply too much or leave it on too long it will lift lettering, but it's the most forgiving product I've come across in that respect. I was pretty lucky with this one as it hadn't been smoked around that much.
For the aluminum tube covers I used Mothers metal polish. They transform from dull grey to almost a mirror finish without too much effort. I went a little nuts with the Mothers and polished as much of the steel as I could, like the tuning pot cover (while trying to keep the stickers), the sides of the chassis, and the aluminum capacitor cans. This album shows a before and after.
I removed the face panel, soaked it in Zep first and then used Blue Magic Quick Shine metal polish. I also used Zep on the back but didn't do much else since there's so much lettering around all of the connections that I didn't want to remove it. I soaked the knobs in Zep, used Brasso to shine up the caps, and then used a paper towels and a small stiff brush to get all of the Brasso out of the plastic grooves. I was lucky with the dial glass, it wasn't dirty enough that it need to be removed, I just used Zep and then Windex on the front. If you do remove it, be very careful with the lettering, it comes off easily... I'd only use a damp cloth.
After I fired it up I found I had some dirty switch pots, so I squirted them with a little Deoxit and worked them back and forth. I also used a little clock oil on the pots.
I bought a kit from this guy to replace components. There are plenty of forums (I prefer audiokarma.org) with information and willing members to assist if you want to do it yourself, but the kit takes a bit of the guess work out of it. My album shows everything that was replaced. Basically, it's every capacitor that could go bad and affect the sound, modifying the de-emphasis to modern standard, lowering the voltage (These fishers run crazy hot and eat output tubes at their original voltage), and making it a little safer to operate.
I had to replace the plastic antenna straps which had crumbled from age, one of the brass knob caps that was missing, 3 out of the 4 lightbulbs, and 9 tubes.
I then put the tubes back in and brought it slowly up on a variac for about 3 or 4 hours to reform the can caps. I still have some polishing work on it, but it's pretty much done and sounds great.
Have you powered up your 500B? Is it complete? Pictures?
I have the same complaint. Might get these. Hella Supertone
Hella SuperTones. German made. 118dB. You WILL be heard with these.
http://www.amazon.com/HELLA-003399801-Supertone-High-Bracket/dp/B000CRZXPI
Bought the horns off of Amazon then I used some extra wire and fixtures that were laying around the garage! I'll put a link to the horn set I bought.
But this is my 2016 crosstrek that's I've owned for about two months and I love it!
HELLA (3AG 003 399-801) Supertone 12V High Tone/Low Tone Twin Horn Kit with Bracket https://www.amazon.com/dp/B000CRZXPI/ref=cm_sw_r_cp_api_Hp6WAbFFJ7W96
I've got a set of Hella super tones. Please do this the right way and use the included relay instead of just using the old stock horn wire and "splitting it."
I didn't like the air horn option because of tight mounting space in my NA. My supers are pretty loud, it'll make you jump if you're standing in front of them when I hit it. Super tone kit is also louder than air horn kit from Hella.
Hella Horns my guy, way better.
Those are "Hella Supertones." A horn upgrade. They're really loud!
http://www.amazon.com/Hella-SuperTone-Horn-Kit-118/dp/B000CRZXPI
Comparison video
Has anyone used this:
Hella SuperTone Horn Kit, 118 db
https://www.amazon.com/HELLA-003399801-Supertone-High-Bracket/dp/B000CRZXPI/ref=sr_1_1?ie=UTF8&amp;qid=1504655208&amp;sr=8-1&amp;keywords=hella+supertone+horn
you didn't specify you wanted OP ones, you should be more specific... here is an amazon link for Hella Supertones.
https://www.amazon.com/HELLA-003399801-Supertone-High-Bracket/dp/B000CRZXPI/
Unless I’ve been duped. When I was looking at them for my Subaru they were more expensive.
HELLA (3AG 003 399-801) Supertone 12V High Tone/Low Tone Twin Horn Kit with Bracket
Thats why you use open face horns.
I picked up this amazing piece of amazing a while back. Just need to get a car now.
We've created a fish-themed theism vs atheism arms race of epic proportions. Soon we'll need to make bigger cars to contain the progressively larger fish eating each other on our bumpers.
What have we done?
Edit: Who can top this one? http://www.amazon.com/Ring-of-Fire-Enterprises-Emblem/dp/B000ER47ZS/
Here you go! http://www.amazon.com/Ring-of-Fire-Enterprises-Emblem/dp/B000ER47ZS/ref=sr_1_3?ie=UTF8&amp;qid=1302730521&amp;sr=8-3
I've had mine for 2+ years with no problems.
Seriously, compared to a Darwin fish with feet, FSM, dinosaur eating a fish, etc. I feel like a rocket promoting science is pretty non-controversial. I mean, who doesn't love science and rockets?
Its also on amazon.com
It might have been just my car/plate combination, but I didn't really care for it as much as I thought I would. I tried getting a steering wheel cover for my car, but the Prius has a smaller wheel than most, apparently.
So, seat covers, floor mats, and interior LED lighting are left on my list. I'd also like to get this, but I don't want my brand new car destroyed over it.
http://www.amazon.com/ROF-Inc-Ring-Fire-Enterprises/dp/B000ER47ZS
I would say either this car stick on or this guitar wall mount
http://www.amazon.com/Ring-of-Fire-Enterprises-Emblem/dp/B000ER47ZS/ref=sr_1_1?s=automotive&amp;ie=UTF8&amp;qid=1347043752&amp;sr=1-1&amp;keywords=T-Rex+Car+Emblem
I got one of those too but it was about 1/2 the price via Amazon
Quick Google search resulted in this http://www.amazon.com/gp/aw/d/B000ER47ZS?pc_redir=1411016587&amp;robot_redir=1 (sorry, mobile)
It is made of plastic and there are 4 adhesive pieces on the back of it. I just got it on amazon.
http://www.amazon.com/gp/product/B000ER47ZS
http://www.amazon.com/gp/product/B000ER47ZS cheaper on Amazon, Prime eligible fyi.
Gotcha! Well as long as it’s the ‘blue’ threadlock one your all set👍 heres an example
No problem grasshopper. Those stems are actually hard to remove, so congratulations. This makes it easier for the knob issue, now you can soak it in kero laced with PB and it will come, you can also mount the stem in a vice (use scrap wood or leather to protect the threads. As to the stem, clean it well, then when you reinsert it use some Loctite and it will be fine. Vintage tool restoration is not for the faint of heart. Again, patience, and you will overcome.....
https://www.amazon.com/Loctite-Heavy-Duty-Threadlocker-Single/dp/B000I1RSNS
Also for the screw on your towel hanger, try getting some Loctite.
Loctite*
....to lock down your bolts. tight. :P
Not a dumb question exactly, you're just not putting in the effort!
Loctite Heavy Duty Threadlocker, 0.2 oz, Blue 242, Single https://www.amazon.com/dp/B000I1RSNS/ref=cm_sw_r_cp_api_v9ugzb8P1PS7R
Google is your friend :)
everyone in the forums is using blue loctite for their bearings because they would like to remove them at some point again to clean or replace the bearing. I would recommend using that to seat the bearing.
I also recommend this. Optionally, a five gallon bucket and an ice scraper for scraping small parts off your magnet also come in handy. Most importantly, have fun!
That's the same slate we used on our film. It's a fine piece of kit that Does The Job. The 'color bars' are just ink printed and wear off over a month's use (see pic). It's the same kit you get on Amazon, they're just shipping directly from China.
Pro Tip: Put Loctite on the screws at the hinge of the sticks. They don't have washers and they fall off during production.
Go buy some thread locker or something like it. Take the screws out, put a little on and you shouldn't have this problem anymore. This stuff: https://www.amazon.com/Loctite-Blue-Threadlocker-6-Milliliter-209728/dp/B000I1RSNS/ref=sr_1_1?s=industrial&amp;ie=UTF8&amp;qid=1486099527&amp;sr=1-1&amp;keywords=blue+loctite
I don't think that is the right loctite. That stuff is super glue not threadlocker. Threadlocker isn't permanent like super glue.
I personally use the blue.
I have those stands too. They're nice!
If they're wobbly for you, I would recommend unscrewing it and dabbing a little Loctite on the screws. Worked wonders for me. Handy stuff to have around in general, saves my butt a few times per year.
https://www.amazon.com/Loctite-Threadlocker-Red-0-20-209741/dp/B000I1RSNS/
You need to use Threadlocker when you put any screw, nut or bolt into a machine that will experience vibration.
Loctite Heavy Duty Threadlocker, 0.2 oz, Blue 242, Single https://www.amazon.com/dp/B000I1RSNS/ref=cm_sw_r_cp_api_i_jVNKDb3XDSN8F
I don't have any balisongs with screws but I've seen around this subreddit people recommending blue loctite and roughly following the procedure outlined this video. I've used this product on many types of small screws like knives and it seems to work well (even though the tube is red, it is the blue specification).
I upvoted you so hopefully someone with experience could either disprove me or back me up.
Try some BLUE loctite on the set screw. It will hold it in place but can be removed still. If you use red loctite it usually requires heat to remove the screw.
https://www.amazon.com/Loctite-Heavy-Duty-Threadlocker-Single/dp/B000I1RSNS/ref=asc_df_B000I1RSNS/?tag=hyprod-20&amp;linkCode=df0&amp;hvadid=198054161189&amp;hvpos=1o1&amp;hvnetw=g&amp;hvrand=15853359351861568847&amp;hvpone=&amp;hvptwo=&amp;hvqmt=&amp;hvdev=c&amp;hvdvcmdl=&amp;hvlocint=&amp;hvlocphy=9025389&amp;hvtargid=pla-350863460111&amp;psc=1
How often do you change the blade on the squeegee? You can put loctite on the threads of the screws, but it might take a bit of effort to get them back off if you have to change the rubber piece very often.
I had the same problem. I put a little loctite on mine and left off the lock washer.
a little bit of thread lock like https://www.amazon.com/Loctite-Heavy-Duty-Threadlocker-Single/dp/B000I1RSNS/ref=br_lf_m_7j4nsxzjbsum5b8_img?_encoding=UTF8&amp;s=hi works great
Yep, no new gear or anything needed.
Keep in mind you have to swap out the AT gear and and retension belts when swapping to the street gear.
By the way, buy this before your board arrives.
https://www.amazon.com/gp/product/B000I1RSNS/ref=oh_aui_detailpage_o03_s01?ie=UTF8&amp;psc=1
I swapped from AT to Street and unlocked some of the screws too far so I lost the loctite and my tension would come loose in 30 seconds of riding and I'd be like UGH and then I had to uber home. Today after 12 hours of sealing it, 11 miles and tension is still great
I got this, this, this, and this. If you're doing it only once then it may be worth it, but if you're gonna do it for multiple sights then you might wanna get the tools.
Be sure to clean the screw threads first with acetone. This will remove any old Loctite or dirt so that the new Loctite will adhere. Use Blue Loctite: http://amzn.to/2xpsbl6 but only a small amount, don't over do it.
https://amzn.com/B000I1RSNS
Thanks to this thread, just put this on my bike:
USB Connector
Tender receiver
Have my phone in a case on my bars to run as a speedo/map/GPS tracker. No more limited distance.
First:
Battery Tender 081-0069-6 Ring Terminal Harness with Black Fused 2-Pin Quick Disconnect Plug https://www.amazon.com/dp/B000NCOKZQ/ref=cm_sw_r_cp_apa_CO2myb008ZQVE
Then connect:
Battery Tender 081-0158 Black Quick Disconnect Plug with USB Charger https://www.amazon.com/dp/B00DJ5KEF4/ref=cm_sw_r_cp_apa_RP2mybAQ3ZYY3
Then you just connect and route a standard USB to mini USB.
I recommend this if you're gonna leave it plugged in, easier than taking off the seat!
That one is kind of weird. It looks like you need to install that whole thing and then pull the power cord out of the car and plug it into a wall? That is weird.
I would use this instead. https://www.amazon.com/Battery-Tender-021-0123-Junior-Charger/dp/B000CITK8S/ref=sr_1_4?s=automotive&amp;ie=UTF8&amp;qid=1481806706&amp;sr=1-4&amp;keywords=battery+tender
It's a smart charger, from a USA company made in USA, and when you don't need it you put it away. I have three of them. One for my classic car, and one for each of my motorcycles.
Add in this https://www.amazon.com/Battery-Tender-081-0069-6-Terminal-Disconnect/dp/B000NCOKZQ/ref=pd_bxgy_263_img_2?_encoding=UTF8&amp;psc=1&amp;refRID=S7TZQJ2BZZ3NWG4KS2KV
You connect this part to the battery terminals and leave them there. When you want to plug it in, you just connect the cords from the tender to this. Plug and play. I also use this on my motorcycles. My car I just use the standard connection clamps that come with the tender.
Cheap, USA made, and works. Read the reviews.
http://www.amazon.com/Battery-Tender-081-0069-6-Terminal-Disconnect/dp/B000NCOKZQ
Here's a pic OP if you want to compare. Yeah, I doubt that's killing the juice to your bike.
A battery tender will lengthen the life of your battery as well. Install some permanent leads so its easy to hook up and leave it on the tender whenever its parked at home.
get this and connect it to this. that way have your battery tender plug for when the bike is sitting and use the same connection for the charger and nothing is draining anything
This thing helps some: https://www.amazon.com/Kool-Stop-Tire-Bead-Jack/dp/B001AYML7K
This. Kool Stop Tire Bead Jack.
Or this. CrankBrothers Speedier tire lever.
If you come across a tire that you can't put on with your hands, use one of these: https://www.amazon.com/Kool-Stop-Tire-Bead-Jack/dp/B001AYML7K (check your LBS first though)
Best $15 I ever spent
I've got Marathons on two bikes - work great, no punctures, roll fast, easy to mount, and the casing is relatively compliant (vs Specialized Armadillos - yikes!)
With regard to mounting issues, I've often found that mounting up high quality (read $$$) tires to low quality (inexpensive) rims usually yields sore thumbs. For instance, running Schwalbe DH tires on my Mavic 521s is a snap. OP's bike is on the lower end of the dollar spectrum, so I might suggest a tire mounting tool like this. I have had one for years - it's never failed to help with stubborn tires!
EDIT: try using one of these, before you use heat. I'm surprised your LBS didn't have one, though.
I didn't realize they were carbon. I was going to suggest hitting it with a heat gun and then attempting to just press tire down and out of the bead like you would on a car or motorcycle, before trying to get up under it with the lever. But heat gun is likely too aggressive for the carbon, i would hit it with a blowdryer though for sure.
A tire bead jack will do the job. It uses leverage to stretch the tire and a plastic lip to protect the rim.
Some tires go on some rims easily, its much more difficult on others.
There are tire bead jack tools like this one: https://www.amazon.com/Kool-Stop-Tire-Bead-Jack/dp/B001AYML7K. They work pretty well, but I do not usually find them necessary.
One thing that can help is to go around the tire and push the already mounted parts into the rim as far as they will go. This can create just a little more slack to get the remaining portion on.
This is the "nuclear option" for really difficult tires: https://www.amazon.com/Kool-Stop-Tire-Bead-Jack/dp/B001AYML7K/ref=pd_sim_468_1?_encoding=UTF8&amp;psc=1&amp;refRID=BZE8P13X5X94NM8JY176
I've never found soapy water to be much help, but talcum powder is sometimes effective.
Consider buying a tire jack instead of a tire lever:
https://www.amazon.com/Kool-Stop-Tire-Bead-Jack/dp/B001AYML7K/ref=sr_1_25?s=sporting-goods&amp;ie=UTF8&amp;qid=1483033192&amp;sr=1-25&amp;keywords=tire+lever
Otherwise, I do second the support for Pedros levers, they're way better than most others.
This is good advice, if you still have issues, deflate the tube a bit. If that still doesn't work, one of these are totally a lifesaver for the extremely stubborn combinations: Kool Stop Tire Bead Jack
Kool Stop Tire Bead Jack https://www.amazon.com/dp/B001AYML7K?ref=ppx_pop_mob_ap_share
I have those same marathons and I’ve had that same problem. I just bought one of those cool stop tools- I Highly recommend it.
You need a kool-stop bead jack. It will make any tire installation a breeze.
Kool Stop Tire Bead Jack https://www.amazon.com/dp/B001AYML7K/
On mobile, sorry for the formatting.
Kool stop tire jack lever
I run wire bead gatorskins.. nuff said
I recently bought that tire in a 28 and a 32. No problem on size going from a 28 to a 32 you should be able to use the same tubes as well.
Just a heads up though - they are HELL to get on the rim. Have a shop do it or invest in a dedicated INSTALL tool like this - not just a set of levers
Watch some youtube videos so you get the basic gist if this is not your first rodeo but I suggest the tool I linked to - or else you better buy a couple of patch kits or extra tubes for when you pinch the tube while trying to lever the tire bead over the rim.
PRO TIPS Throw the tire outside in the hot sun for a couple hours to expand/soften the compound and use liquid soap to lube the contact areas. Hope this helps.
I've got a set of Pedro's tire levers, plus a tire jack to help get the tire back on. It's still an incredibly daunting task. I'm sure I'll get faster with practice, but I still hate doing it.
Or one of these guys: http://www.amazon.com/Seatbelt-Breaker-Emergency-Escape-Tool/dp/B002AMAXNA
People's lack of preparedness astonishes me.
At all times, you need these in your car:
Jumper cables
Tow rope
Gas can
Something to break your window and something to cut your seatbelt, like this: https://www.amazon.com/Towallmark-Seatbelt-Cutter-Breaker-Emergency/dp/B002AMAXNA
Flashlight
Tire gauge
In cold weather areas, you also need:
Very warm jacket, gloves, hat
Snow shovel
There's more, for sure. That's off the top of my head. I drive an electric car and still have jumper cables for all the idiots that don't. I even have a car battery charger for other people: https://www.amazon.com/gp/product/B004EIAADG/ref=s9_acsd_zgift_hd_bw_bLXhjn_c_x_w?pf_rd_m=ATVPDKIKX0DER&amp;pf_rd_s=merchandised-search-8&amp;pf_rd_r=HBMZ3ASAYDSAZ2X5FEQ9&amp;pf_rd_t=101&amp;pf_rd_p=a6b3dd3a-5e3d-5661-9134-0d3384e34ec6&amp;pf_rd_i=318336011
EDIT: and a spare tire. Ugh. I have run flats.
EDIT #2: and an ice scraper, obviously.
If step 3 fails, at least you have steps 1 and 2 working in your favor.
This
You'll probably never use it, but if you need to it will save your life.
This is sad : / I imagine the driver was unconscious after hitting the pole? Always, always keep a window breaker/seatbelt cutter in your car just in case and make sure its easily accessible from the drivers seat.
You can get one of those seatbelt cutters for emergencies to put in your car.
http://www.amazon.com/Seatbelt-Breaker-Emergency-Escape-Tool/dp/B002AMAXNA/ref=sr_1_1?ie=UTF8&amp;qid=1376531312&amp;sr=8-1&amp;keywords=seatbelt+cutter
Might give you some peace of mind.
Yep. I'm fully aware that there are situations in which wearing a seatbelt might backfire and result in my death. I'll play the odds and keep it on, thanks very much.
I also keep one of these close at hand, because why not?
Not sure if this post is dead but I just installed these bar end mirrors and they are working out beautifully:
Amazon Link
Youtube video I watched to install them
i have a cheaper version that works just fine
http://www.amazon.com/Universal-Inceased-Davidsons-Kawasaki-motorcycle/dp/B002GTKAHQ
these things are allll over ebay and amazon for 5-15$
https://www.amazon.com/dp/B002GTKAHQ/ref=cm_sw_r_other_apa_eMVpxbHGXRJ9T they are bar end mirrors but all you do is take that part out and you can clamp them around your bars.
http://www.amazon.com/Universal-Inceased-Davidsons-Kawasaki-Cruisers/dp/B002GTKAHQ?ie=UTF8&amp;psc=1&amp;redirect=true&amp;ref_=oh_aui_search_detailpage
If you remove the bar end inserts you can clamp them on the bars like OP.
$12 on Amazon. They work great, you're not looking at your shoulder or elbow all day long, they don't vibrate much, they're easy to install, and cheap as heck.
Be warned, they look good, they work great, but the quality control may be lacking. My bike came with just one of the mirrors on it. I ordered another pair. One of the mirrors I ordered rattled loose because 2 fasteners were not torqued correctly from the factory. I'd fix it, but it's the fasteners inside the mirror.
For $12, these mirrors are amazing. I'd say they're worth $20. They also function as bar end sliders I discovered, now I need to order a new pair.
Kawell Rear View Side Mirror... https://www.amazon.com/dp/B002GTKAHQ?ref=yo_pop_ma_swf
KAWELL Rear View Side Mirror... https://www.amazon.ca/dp/B002GTKAHQ?ref=ppx_pop_mob_ap_share
I'm using some $12 amazon specials and they work OK, but I'm probably upgrading to CRG Lane Splitters.
I went cheap once ($12) and they immediately broke while adjusting them.
I have bought these 3 times for 3 different bikes.
Never buy these. It looks like the arm attaches to mirror with bolts, but it's actually just glued on. If you tighten them up properly it's very easy to break them while adjusting them.
http://www.amazon.com/Universal-Inceased-Davidsons-Kawasaki-motorcycle/dp/B002GTKAHQ/ref=sr_1_1?ie=UTF8&amp;qid=1427322825&amp;sr=8-1&amp;keywords=bar+end+mirror
Just unscrew the bar end insert from it, and then you can mount it to the bar instead. It's cheap, but I haven't had any issues so far.
http://www.amazon.com/gp/product/B002GTKAHQ/ref=oh_aui_detailpage_o00_s00?ie=UTF8&amp;psc=1
You have to make a few tweaks to them but it sure beats paying $80 for some.
Nothing special
https://www.amazon.com/gp/aw/d/B002GTKAHQ/ref=ya_aw_od_pi?ie=UTF8&amp;psc=1
Had them for a year with no problems
> What rearview mirrors are those? How do you like them?
Honestly, just these. They get the job done and I can more or less see everything going on behind me: http://amzn.com/B002GTKAHQ
> Do you notice a big difference after installing the aTRE?
I can't say, I haven't ridden it yet : (
> What happened? Sorry to hear :S
Some idiot kid pulled his bike out in front of me at the absolute very last possible second and gave me nowhere to go. I went over the bars and straight into the ground and it seems my fibula broke my fall. Needless to say I've invested some good money in race-spec boots this time around.
Just curious, but why did you go with Otter Wax over something like Sno Seal or Obenauf's?
LL Bean Boots - (signature version, if you like canvas). Go down a full size for medium-weight socks, size and a half for wool socks, which you should have at least three pairs of. Darn Tough has a no bullshit lifetime warranty, so feel comfortable buying their stuff. Weatherproof a pair of Thorogoods if bean boots aren't your bag. Here's a plain toe version.
A vintage navy peacoat is always a safe and timeless option.
Keep an eye out for merino wool beanies, softer than a baby's ass.
When all else fails, an insulated thermos and tea's a good thing to have.
You may want to consider Obenauf's LP in that case
My bad on the low quality image. Loving my new J. Crew Knit Sweater in dark blue
Waiting for:
Tan Wolverine 1000 miles
Obenauf's Heavy Duty LP
Saddleback ID wallet
I recommend either not treating them or maybe giving it a quick layer of Obenauf's Heavy Duty LP.
I really don't have a preference. I use Black rock leather, but a lot of fashion leather shoe guys like Obenauf's LP or venetian shoe cream
It appears that you have Amazon...
http://www.amazon.com/Lexol-907-Leather-Care-8-oz/dp/B005H7DRQA
If not, check this guide https://www.reddit.com/r/goodyearwelt/comments/1ubpyl/introductory_leather_care_guide/cegfreo
Idiot proof shoe care. Don't use this on shell, don't put it on the outside of suede shoes. I've been told you can condition the inside of suede others have suggested no care is necessary.
For cleaning and conditioning, check the lexol kit for $10 on Amazon: http://www.amazon.com/Lexol-907-Leather-Care-Kit/dp/B005H7DRQA/ref=sr_1_1?ie=UTF8&amp;qid=1414503723&amp;sr=8-1&amp;keywords=lexol+care+kit
I'm fairly new, myself. I've driven clunkers most of my life. Spent about five years downtown where I didn't have a car. Now I'm back in suburbia, so I've got a brand new GTI, and it's the first one I've ever cared to take good care of. Here's what I started with:
I should have picked up some of Chemical Guys' citrus wash and clear, too, to help deal with a winter's worth of grime left by terrible touchless car washes. I've also got a tire brush, hand vacuum, and some assorted cheap microfiber towels around already.
Your kit looks a lot more cost-effective, though. Throw in some cheap buckets, grit guards, wash mitts, and drying towel, and an extra stack of cheap microfibers and you're still under $100 for practically everything you would need for a proper two-bucket wash and wax.
Try a leather cleaner and conditioner combo.
https://www.amazon.com/gp/aw/d/B005H7DRQA?pc_redir=T1
I use this stuff it's cheap and works great.
FWIW, I'm planning on using Lexol as well. I too recently got the 8119's and after reading hours of guides and opinions on leather conditioning, it seems that Lexol is the best for what I want, which sounds like what you want too - moisturize the leather without fucking up the color too much.
Amazon's got a good kit for $12 Prime.
The chair looks to be in pretty good condition as it is. I would just give it a once over with some lexol cleaner then conditioner. Depends on your usage, but it shouldn't need more than one application a year.
I bought my first car with my own money about 5 years ago. I did not want any stickers or anything of that nature on it. It was my "mature and classy" ride. Then about 6 months ago someone on reddit put a link to this up. I now have ONE thing stuck on the back of my car. I've seen people in my rearview mirror at stoplights take pictures of it before.
Here's an Amazon link for anyone brave enough:
http://www.amazon.com/Ring-of-Fire-Enterprises-Emblem/dp/B000ER47ZS
http://www.amazon.com/Ring-of-Fire-Enterprises-Emblem/dp/B000ER47ZS/ref=sr_1_1?ie=UTF8&amp;qid=1347042037&amp;sr=8-1&amp;keywords=atheist+fish
I got mine from Amazon.
Edit: Made link visually appealing.
Sorry for the long link: http://www.amazon.com/gp/aw/d/B000ER47ZS?pc_redir=1398379833&amp;robot_redir=1
They're available for purchase here: http://www.amazon.com/o/ASIN/B000ER47ZS/unreasonablefaith-20/ref=nosim/
If the buzzing is your only problem get some loctite and apply a little bit to all the screws after setting it up. Fixed the buzzing on my Jazzmaster in 10 seconds. Just make sure you get the non permanent type so you can readjust it if needed. I almost guarantee the problem is just the screws not the whole bridge.
Most hardware stores will have it on the shelf, just be careful not to buy the permanent red variety.
Otherwise, Amazon to the rescue.
Thats relatively flush which means you need to thread it more.
You’re installing this with a front sight tool, correct? Regular home depot tools will not suffice (trust me I tried and ruined...)
If not, this is a decent budget one that hasn’t let me down in 6 months—my Ameriglo tool has tho
Also get some Loctite
I'd recommend this too.
screws fell out after i disassembled to install a ssd
i heard that blue loctite is what they use to make sure they stay, might get some soon if it happens again
You are getting horrible advice and this thread is complete shit. Here is exactly what you need:
Vice.
Upper Vice Block.
Torque Wrench 1/2”.
Anti-Seize Grease.
Blue Loctite.
Punch Set.
Torx & Allen Set.
The reason people are recommending an armorers wrench is for the muzzle break install. Every armorers wrench has a slot designed for installing one. This isn’t mandatory because you can use a regular wrench but you might as well get one because you will need one to build a lower when installing the castle nut.
http://www.amazon.com/Loctite-Blue-Threadlocker-6-Milliliter-209728/dp/B000I1RSNS/ref=sr_1_1?ie=UTF8&amp;qid=1462848673&amp;sr=8-1&amp;keywords=loctite+blue
Try to apply this product on the screw which tight the motor mount to the truck. based on what the boosted customer service said, those screws were designed to hold motor mount to the truck, temporarily while the epoxy completely dry. But, thread locker and screw hold motor mount really well. It has been almost 4months after I apply thread locker. and it still holds with any problem. but send them back to boosted before ur warranty ends just for check up, which i ll do pretty soon:)
Make sure to leave ur board for 24hours after u apply thread locker. make sure do not touch or ride for 24hours!!
This stuff will work and is removable (with a little effort) if you need to remove the joystick in the future. I use it to secure the nuts to the bolts on my car's brakes.
Loctite Heavy Duty Threadlocker, 0.2 oz, Blue 242, Single https://www.amazon.com/dp/B000I1RSNS/ref=cm_sw_r_em_apa_i_i6T0Bb9RE5YJ3
Loctite
lubricant for Bali
You could grab some light-weight loctite like loctite blue: https://www.amazon.com/Loctite-Heavy-Duty-Threadlocker-Single/dp/B000I1RSNS/
Then put a very very small amount on the threads, screw them as tight as you can, and let them sit. They'll be secure. And since you're using something like loctite instead of super glue, you can still unscrew them (though it'll take a lot more effort)
I believe some DW screws are set permanently with Loctite. I may be wrong about your situation.
Thanks!
This: Loctite Heavy Duty Threadlocker, 0.2 oz, Blue 242, Single https://www.amazon.com/dp/B000I1RSNS/ref=cm_sw_r_cp_api_KNelzbNETSX7V
Versus this: Permatex 24200 Medium Strength Threadlocker Blue, 6 ml https://www.amazon.com/dp/B0002UEMZ2/ref=cm_sw_r_cp_api_YMelzb052MTNF
Which do you recommend?
Yeah, it's just a thread sealant; keeps the threads from banging loose over time (which they do). UK might have a different version, but loctite is pretty prolific, I'd be surprised if you don't have it. Link below off the US market for reference; this is the blue stuff, which will keep the threads from coming loose, but will still let you remove it if you actively try. Another nut could work, but thread sealer is better for the purpose; it's also cheap, and the tiniest bottle will last a very long time. It only takes a drop or two on the threads.
https://www.amazon.com/Loctite-Heavy-Duty-Threadlocker-Single/dp/B000I1RSNS/ref=sr_1_3?keywords=loctite+blue&qid=1555605929&s=gateway&sr=8-3
Ah, now that I'm looking I even see .2oz: https://www.amazon.com/Loctite-Heavy-Duty-Threadlocker-Single/dp/B000I1RSNS
Right, this is exactly the issue that's happening.
There are three solutions:
This is what mine looks like. You can buy them from pretty much any hardware store. Just ask for M5 nylocks. They have a plastic bit inside (color doesn't matter). You can bring in one of your prop nuts just to double-check and confirm they're M5.
I use an 8mm ratchet wrench, the ratcheting capability is VERY important, it'll cut down your swap time by 90%.
Cool!
Thanks for the update!
Did you use threadlock to secure the bolts? Bolts wiggle free under normal use, but they don't with threadlock! :D
Also, carry a few spare bolts with you, because even the very best will wait till the worst possible moment before breaking! :(
There is potential for the screws to release.
Go ahead and get some, it's cheap and will keep your quad from coming apart mid-flight.
Sorry bro, on the other coast... WA state.
I added a [pigtail] (https://www.amazon.com/Battery-Tender-081-0069-6-Terminal-Disconnect/dp/B000NCOKZQ/ref=sr_1_5?s=automotive&amp;ie=UTF8&amp;qid=1465948574&amp;sr=1-5&amp;keywords=pigtail+sae) and got one of [these] (https://www.amazon.com/Battery-Tender-081-0158-Disconnect-Charger/dp/B00DJ5KEF4/ref=sr_1_4?s=automotive&amp;ie=UTF8&amp;qid=1465947776&amp;sr=1-4&amp;keywords=sae+adaptor) to get USB charging capability.
Longsleeve was essential, since I'm usually out during the day when it's hot as hell, crazy how cold even 50mph winds can get at night.
As for sunblock, started to realize 30-60 minutes with the sun beaming on me probably wasn't the best to go unprotected. Also an extra pair of ear plugs
My bike already came with this installed, which apparently can be used if you have gear that has electric warming features
Then I got this which is basically a USB adapter, use it to charge my phone or GPS etc
Ask your dealer if they installed one (they're not factory equipped); if they didn't , you can get one from Amazon for less than $6
I have something like this up front: https://www.amazon.com/Goodway-Universal-Motorcycle-Waterproof-Rotation/dp/B07BRR9RPM/ref=sr_1_13?ie=UTF8&amp;qid=1550853589&amp;sr=8-13&amp;keywords=motorcycle+phone+mount
The cable runs under the tank all the way back under the rear seat. I cut off the ring terminals and attached this: https://www.ebay.com/itm/Battery-Tender-SAE-DC-Power-Automotive-DIY-Connector-Cables-2x0-75mm-30cm-300mm/142428764913?epid=1238902560&amp;hash=item21296a7af1:g:j6sAAOSwWxNYyOzV:rk:1:pf:1&amp;frcectupt=true
I also have the standard battery ring terminal that comes with the battery tender running from the battery all the way back under the rear seat as well. Basically this from the battery:
https://www.amazon.com/Battery-Tender-081-0069-6-Terminal-Disconnect/dp/B000NCOKZQ/ref=sr_1_6?ie=UTF8&amp;qid=1550854062&amp;sr=8-6&amp;keywords=sae+connector
The end result is you have 2 SAE connectors under the seat. One that runs to the battery and one that runs to the USB charger.
If you want to use the the charger you linked and if you already have a cable that is long enough, you can run the cable from the battery to the rear, then loop it around and run it to the front. Under the seat simply cut the red cable and just put any switch of your liking in-line: https://www.ebay.com/sch/i.html?_from=R40&amp;_trksid=p2334524.m570.l1311.R1.TR12.TRC2.A0.H0.Xtoggle+.TRS0&amp;_nkw=toggle+switch&amp;_sacat=0&amp;LH_TitleDesc=0&amp;_osacat=293&amp;_odkw=switch&amp;LH_TitleDesc=0
Let me know if you want more pictures of my setup. I can snap some up (currently the bike has fairings/seat off since I am getting it re-padded).
Get these Battery Tender 081-0069-6 Ring Terminal Harness with Black Fused 2-Pin Quick Disconnect Plug https://www.amazon.com/dp/B000NCOKZQ/ref=cm_sw_r_cp_api_kZ.tzb78XRSC3
Battery Tender 021-0123 Battery Tender Junior 12V, 0.75A Battery Charger will charge and maintain your battery so that it is ready to go when you are! It's lightweight, fully automatic and easy to use https://www.amazon.com/dp/B000CITK8S/ref=cm_sw_r_cp_api_y4.tzbARX0FQZ
They also sell them as a package at most battery stores. I can't tell by the description if the tender includes the adapter as well.
Every time you get home plug it in and leave it plugged in.
In terms of having something to charge a battery without taking the seat/unscrew everything, you could get him something like what you've linked but I would opt for a SAE connection cable. SAE connections are much more common for accessories (like chargers or USB connectors) than the BMW cigarette style.
This is what I have on my bike for battery tenders and separate USB plugs
https://www.amazon.com/Battery-Tender-081-0069-6-Terminal-Disconnect/dp/B000NCOKZQ/ref=sr_1_1?ie=UTF8&amp;qid=1498076141&amp;sr=8-1&amp;keywords=battery+tender+cable - $6
You could easily get him this in addition to whatever else.
edit - fixed link
This so what I have: https://www.amazon.com/Battery-Tender-021-0128-Maintain-Damaging/dp/B00068XCQU/ref=mp_s_a_1_4?ie=UTF8&amp;qid=1539529909&amp;sr=8-4&amp;pi=AC_SX236_SY340_QL65&amp;keywords=battery+tender&amp;dpPl=1&amp;dpID=41GJoSjcVrL&amp;ref=plSrch
Paired with this pigtail lead which sits in my glovebox: https://www.amazon.com/Battery-Tender-081-0069-6-Terminal-Disconnect/dp/B000NCOKZQ
Do not cut into or splice off of your wire harness. Get a battery tender pigtail that connects directly to your battery (https://www.amazon.com/dp/B000NCOKZQ/ref=cm_sw_r_sms_apa_-1cAzb8YDMYBC). Then use a 'Battery Tender SAE to USB adapter to plug a USB cable into (https://www.amazon.com/dp/B00DJ5KEF4/ref=cm_sw_r_sms_apa_r3cAzbN5DASR2). This was you can charge you bike when parked for a while and have the freedom to run the USB cable to your bars for your ram mount or into your bags to charge extra gear.
I added one of these to my bike.
I then plug in one of these to charge my phone.
I much prefer the modular setup as I can plug in other accessories to the same port, such as my tire inflator. However one of the direct to battery usb chargers may be cheaper.
Other people mentioned the Battery Tender adapter, which is great.
This guy did a great review on some Bonneville upgrades, and the charger set up he did is excellent.
https://ericwais.wordpress.com/2015/06/20/day-21/
I am pretty sure this would mount on a ST just the same. I use this on a 60 mile round trip commute and its great. Good visibility and it keeps everything charged.
Basically get these:
Arkon Case
Tender Adapter
Battery Tender Harness
And a small piece of velco with glue on it to hold the adapter/cord to your bike when not in use.
Do you really commute 200 miles a day? Or is that just a fun trip you have planned?
I use one on my bikes. I've seen my battery get low if I'm running a lot of lights or use my E-start a few times on a short trip. It definitely extends the life of a battery.
If you get one buy one of these too:
https://www.amazon.com/dp/B000NCOKZQ/ref=cm_sw_r_cp_api_45gNzb60665XK
It's a harness that you attach to your battery, and you can put the quick connector somewhere so you don't always have to remove your seat. On my dirt bikes, I put them behind my air box door next to the air box, so I can access it within seconds.
Oh wow thanks for the detailed explanation!! I have one of those basic ones like this: https://www.amazon.com/Battery-Tender-081-0069-6-Terminal-Disconnect/dp/B000NCOKZQ/ref=pd_bxgy_263_img_2?_encoding=UTF8&amp;pd_rd_i=B000NCOKZQ&amp;pd_rd_r=FEPFCNGTVQGZ1AS6BW9E&amp;pd_rd_w=eRr1U&amp;pd_rd_wg=vLNJB&amp;psc=1&amp;refRID=FEPFCNGTVQGZ1AS6BW9E
Have you ever tried them?
for the future. This works really great to get on the tight ones. https://www.amazon.com/Kool-Stop-Tire-Bead-Jack/dp/B001AYML7K/ref=asc_df_B001AYML7K/?tag=hyprod-20&linkCode=df0&hvadid=241975700326&hvpos=1o2&hvnetw=g&hvrand=9865483448796285076&hvpone=&hvptwo=&hvqmt=&hvdev=c&hvdvcmdl=&hvlocint=&hvlocphy=9031245&hvtargid=pla-448754439296&psc=1
You’re going to need this.
Changed my life
You can cut part of the handle off so it fits in a saddle bag, works amazingly well.
Kool stop Bead Jack
This tool makes mounting tires much easier:
http://www.amazon.com/Kool-Stop-Tire-Bead-Jack/dp/B001AYML7K
Obtain this item:
http://www.amazon.com/Kool-Stop-Tire-Bead-Jack/dp/B001AYML7K
Made mounting a Gatorskin and a GP4000s on Velocity Deep-V rims humanly possible. Before, I was doing it with some Park Tool levers until my fingers couldn't move anymore. Some tire/rim combinations are just impossible to install/remove any other way!
Edit: My bad! The Kool Stop one is just for installation, try the Crank Bros one for enhanced leverage during both removal and installation:
http://www.amazon.com/Crank-Brothers-Speed-Bicycle-Lever/dp/B001BIZARI
My friend got the same wheelset and tire combo as I did, but he used the Crank Bros lever instead of the Kool-Stop to install his Continentals. I believe he's removed a tight tire with it too, so it's been working for him.
Kool Stop Tire Bead Jack
If not for that awesome device, there'd be no more skin on my thumbs. Many tire/rim combos just aren't go to cooperate without it.
https://www.amazon.com/Kool-Stop-Tire-Bead-Jack/dp/B001AYML7K
Just order it now. I don't have a lot of hand strength. I literally carry one in my bike bag with the rest of my flat repair tools.
The thing is, if you're going to start buying extremely puncture-resistant tires from Schwalbe . . . well, those are about the bitchiest tires to get on, period. Like Greenguards (Marathons), Marathon Plus, Mondials, and most of the really puncture resistant Schwalbe tires can be a nightmare to get on.
This is a dumb question, but you've checked to make sure these aren't pinch flats, right?
I've always used really wide MTB tires, so I've never had much of a problem. But when I tried to put 28c tires on my Cross Check, I had so much trouble that I broke several things in my house in rage at not being able to get it on. [Then I bought this] (http://www.amazon.com/Kool-Stop-Tire-Bead-Jack/dp/B001AYML7K). It is just as amazing as it looks.
I've had these tires before, and they are quite a pain due to geting that tight wire bead over the lip of the rim. I have had at least minor success with either leaving stubborn tires in the sunlight or using a blow-dryer to heat up the rubber to get it to slightly expand and make it easier to convince.
I've also used the Kool-Stop tire jack to great success.
I wouldn't use the levers as a way to continue getting the tire on by this point, because it'll likely pinch-flat the tube.
My hobby whenever someone is about to mention the Marathon Plus is always to warn the what a nightmare they are to put on, especially the 25 mm version:)
That being said, I run Marathon Plus on both my commuter bikes (currently testing out Gator Skins on my racer). I usually go around 3.500-4.000 km before the first flat at which point I often just replace it.
It's a very rough ride on those tyres, but I really appreciate the no flats aspect.
I have this tool in my arsenal to help me put the tyres back on.
I had a similar issue recently, I rage quit, went online and ordered one of these, a tire bead jack.
Of course 5 minutes after I ordered it, I went out and managed to finally get the tire on, so still haven't needed to use it yet....
In case they get trapped in the car because the seatbelt is stuck or the door can't open.
https://www.amazon.com/Towallmark-Seatbelt-Cutter-Breaker-Emergency/dp/B002AMAXNA
but wait, there's more!
emergency escape tool
They make a tool for that.
Barring that, there's a bit of time to try whacking at it with my Leatherman.
Or you could always try ceramic off a spark plug, aka ninja rocks.
Here's an annoying guy on Youtube doing it.
Here's the Mythbusters doing it.
'course, no one has tested it from the inside...
This emergency escape tool sure would make a good Milkshake.
This device is an excellent investment-- it's $5, and hopefully you'll never need to use it, but it can cut seat belts and break car windows. Just put it in the center console and forget about it!
Haha, it's really not that exciting. That part that I am involved in is being one of many people positioned around the circuit, and getting to a crashed car quickly, if it's in my sector. Whilst we do deal with any fires, if there are medical needs, we summon a fully qualified doctor (there are usually several at a race meeting), and the doctor and rescue crew deal with extricating the driver (I can be asked to help in some way, if they need an extra pair of hands). I haven't been involved in many major incidents, they are pretty rare.
As for your actual question, you probably could use the metal part of the headrest to break the window (LPT: try to hit the window in a corner, as it will be more likely to break), but best to have something like this handy, if you need to get into/out of a car window, quickly.
http://www.amazon.com/Seatbelt-Breaker-Emergency-Escape-Tool/dp/B002AMAXNA
Seatbelt cutter/glass breaker tool. Because you never know.
All car owners should have one of these.
I have something like this in my car.
https://www.amazon.com/Seatbelt-Cutter-Window-Breaker-Emergency/dp/B002AMAXNA
It's to cut a seat belt in case of an accident, or break a window. The seatbelt cutter has worked great for opening packages and cutting zip ties. I'm happy I've never had to use it for it's intended purpose.
Every one needs ones of these and teach your kids how to use to too then leave it .... Of all the times to forget the name of the box thing on the passengers side. but any way - leave it in there. Unless you lock yours, then tie it to the passengers/drivers side door.
Or something like that.
As for the phobia of driving into water and not being able to get the seat belt off you should buy one of these. They are very easy to use, cheap, and simply place it in your glove compartment. They even come with one that comes on a key chain. Solve your phobia, save money from tickets, and give you the responsibility to help break your habit.
Edit: Here's the key chain one
$7 on Amazon.
I really don't have anything must-have on my wishlists. But I think that a Seatbelt Cutter Window Breaker Emergency Escape Tool would come in handy if I get in a car wreck.
These ones: https://www.amazon.com/Universal-increased-Davidsons-Kawasaki-Cruisers/dp/B002GTKAHQ
Simple to install. You just screw it in and the 2 metal sleeves will expand and press against the inside of the hand grips. That's what should keep them in.
My friend gave me a pair as a gift and I bought another pair after I lost the right one he gave to me during one of my rides.
https://www.amazon.com/Hawk-eye-Motorcycle-Davidsons-Kawasaki-Cruisers/dp/B002GTKAHQ
I used these on my duke and on my Supermoto. Easy to modify by just using a larger screw. On the supermoto i have it upside down so i can look under my arm.
https://www.amazon.com/Hawk-eye-Motorcycle-Davidsons-Kawasaki-Cruisers/dp/B002GTKAHQ
I hated these because... ugly. But worse is they are too convex, almost fisheye. Very difficult to gauge distance.
These however are perfect and look waaaay better Fantastic visibility and angle of view. The only complaint, as listed in the reviews, is that they may be loose in the actual mirrors ball joint and move in the wind. I cleaned mine up with alcohol and a swab and then hit the back of the mirror with some hot glue and it's perfect. It's still moveable but not locked in place.
Not sure how I feel about the shape of those. I currently have some bar end mirrors that are round. The only complaint I have about them is that one of the mirrors frame is loose from the neck piece that holds it. It sounds like similar issues to what people have with these.
Maybe I'll try some glue or something. I just would like some solid bar end mirrors. I don't care if I have to pay more for them as long as they work well.
Here you go! https://www.amazon.com/dp/B002GTKAHQ/ref=cm_sw_r_other_awd_7io5wbDTJAB6M
I bought those exact ones and I hated them honestly. The mirrors were not convex enough and were hard to adjust perfectly. I traded them back in and got these .
Cheap and they work great
I've bought the below ones for the other motorcycle. They worked great but for the fz07 I bumped up to the arrow.
KAWELL Rear View Side Mirror Round Bar End Convex
My bar ends spin very easily but loosening the screw was impossible.
I got these: https://www.amazon.com/Krator-Universal-Inceased-Davidsons-Kawasaki/dp/B002GTKAHQ#productDescription_secondary_view_div_1490672053210
Love the look and functionality of the new. Previously the mirrors were the highest point on the bike so the bar ends make it look more streetfighter. Also I would have to lean to look around my shoulder but that's not a problem with these.
I plan on finding the size of the bolt to fit in the old holes and adding accessories like a phone mount or cup holder.
When I did it I unscrewed the caps at the end of the stock handle bard and put these on with screw of the same treading and some washers. Really easy to install and inexpensive. $16 Bar End Mirror
Plus a photo of them on my bike for reference. Had them for about a year.
https://i.imgur.com/hE9Y6PA.jpg
Oh cool, if i'd had known we could have done some duo v7 riding :) Maybe if the weather clears up again.
I used the stocks for about 2 rides before i replaced them, i didn't like them much. I'm more for a clear view. The bar ends are convex, so i see a lot in them, practically no dead corners. I bought them cheap in some motoshop in Aalst when i saw them on display. I just wanted to try if it would work. They are very cheap and are found all over the internet. Just search for bar end mirrors There are more expensive options, but i imagine these things are the first to break off... You have to take in account that the bars for the V7 are threaded at the ends (god, why?). So you either have to use the screw of the bar end weight, or use another M6 bolt to fit them on.
About the veering to the right, do you have it at all speeds and how hard? For me it's quite hard, i let go and immediately it veers to the right and within 3 seconds i have to take hold again, otherwise i'll just ride of the road.
Didn't know about the plate rule; will follow it next time, thanks for the heads up.
https://www.amazon.com/dp/B002GTKAHQ/ref=cm_sw_r_cp_api_1slmyb9HF87KJ
This is what I got. Requires a spacer to use with stock bars.
Its these bar ends:
https://www.amazon.com/gp/product/B002GTKAHQ/ref=ppx_yo_dt_b_asin_title_o03_s00?ie=UTF8&amp;psc=1
You can take the clamp off of the bar end portion and clamp them directly to your handle bars.
Amazon. I had some trouble getting them in the right spot. Half of the mirror is blocked by my stomach, I can't find a good angle but it works. One on each side. These are the ones I got from Amazon https://www.amazon.com/gp/product/B002GTKAHQ/ref=oh_aui_detailpage_o04_s00?ie=UTF8&amp;psc=1
http://www.amazon.com/gp/product/B002GTKAHQ?psc=1&amp;redirect=true&amp;ref_=oh_aui_detailpage_o00_s00
10 bucks, look great. i bought 2 pairs in case one of the breaks haha.
These are the ones I'm using, they come with the right sized screw that goes right into the end of the bar without any adapters or weird stuff.
Bar End Mirrors
EvoTech Tail Tidy
So you might not remember but you gave me a bunch of info and stuff on SV's when I was choosing what kind of bike to get and ended up napping a dope deal on an 07 SV650. The first thing I did was order those exact same bar ends from OP's post. They are pretty fuckin fantastic. Cheap enough that even if they break I don't really care but well made enough that they don't move when I ride. The installation should be really easy but without any instructions it has the potential to be a pain in the ass, youtube fixes that problem.
the bar ends are like a solid 8/10. So worth the ten bucks you can nab them for here.
I bought these. I used some rubber at the end to stabilize/fit better. Cheap but works well http://www.amazon.com/gp/product/B002GTKAHQ?psc=1&amp;redirect=true&amp;ref_=oh_aui_detailpage_o00_s00
edit: buddies duke with something close to the style: http://imgur.com/sCOAivT
https://www.amazon.com/gp/aw/d/B002GTKAHQ/ref=sxts_sxwds-bia_1?ie=UTF8&amp;qid=1526155012&amp;sr=1&amp;pf_rd_m=ATVPDKIKX0DER&amp;pf_rd_p=6840225482829252734&amp;pd_rd_wg=hw42a&amp;pf_rd_r=MZ9VA0P9QEP6FJEAS9MW&amp;pf_rd_s=mobile-sx-top-slot&amp;pf_rd_t=9701&amp;pd_rd_i=B002GTKAHQ&amp;pd_rd_w=12evy&amp;pf_rd_i=bar+end+mirrors+for+motorcycles&amp;pd_rd_r=deef310b-5a83-40cc-bf29-c3bc6252c5d7&amp;pi=AC_SX236_SY340_FMwebp_QL65
I just bought my very first pair of Timberland Original Yellow boots. I want to protect them while keeping the same soft and matte texture/look of the boots. My plan is to put mink oil or Obenauf's Heavy Duty Beeswax on the boots and brush them with a soft brush to make it soft and matte.
The guy in this video used mink oil and brushed them off using a soft brush to restore the original look and feel of the boots.
I know mink oil and beeswax will darken the leather. I don't mind that at all. How to protect my first pair of Timberland?
Basic mineral oil or beeswax or a combo.
You can gently melt down some beeswax IN mineral oil and then rub it all in, let it dry, and then wipe off excess.
Even simpler is to get some Howard's Butcher Block Conditioner at Lowes or Home Depot. It is just beeswax and mineral oil pre-mixed. It works best if gently heated or if you apply it to your handle and then use a hair dryer to gently heat the handle. That way the wax and oil get deep down in the leather.
You could also use Obenauf's to condition and protect.
Winter Clothing/Underwear
In the fall I would wear whatever sweater was on sale at Goodwill.
For the colder winter months I wore a heavy Carhartt jacket and layered as necessary, normally using old/retired ARMY-issued polypropylene underwear.
I bought this around 7 years ago and it's awesome to have in cold weather.
Long Sleeve
For a long sleeve I would always wear these Hanes Cool Dri T-Shirt's in the summer. They claim 50+ UPF (Ultraviolet Protection Factor) though I'm sure that high of a rating only applies to the black ones and it will slowly go down as you put it through the wash. I bought the safety green ones over a year ago and haven't noticed any change in sun protection so far. They were holding up too witch was impressive with my line of work at the time (railroad labor).
Pants
I started wearing whatever blue jeans I found at Goodwill but they would always end up having holes after a month or so. I used that saved money and waited to for a 25% off sale to buy a few pairs of Duluth Firehouse pants (the originals, not those quick-dry things). I've returned 1 pair so far after 2 years even though I staggered them every day. I suspect I may have over-washed them (weekly)?
Hats
I was required to wear a hard hat so I bought this sun shade that wrapped around the brim, it worked out very nicely because 50% of the work involved bending over, exposing the back of your neck to the sun.
Socks
I bought Darn Tough socks and haven't looked back since.
Boots
I went through a few brands of boots before I found the perfect pair of Chippewa's. All other boots I tried were uncomfortable in the toe area. I was restricted to certain boot requirements from the railroad: 8", defined heel, safety toe, laced. I also put on some KG's Boot Guard before I wore out the leather on the toe area, use masking tape to make it look good! As for boot care, I opted for Obenauf's Heavy Duty LP because of the water and chemical resistance. Any time I needed to clean my boots I used Dawn (yes, the dish soap). For a thorough (bi-yearly) cleaning I used Murphy Oil Soap (yes, the wood cleaner).
Lunch Box
As for a lunch box, a basic small cooler/ice chest will do the job just fine for storing hot or cold items (not both at once!). They're well insulated, cheap, and beat broken zippers, ripped cloth, or dented metal any day.
Canteen
COLD: I bought this Coleman 1 Gallon Jug about 5 years ago at Goodwill for $2 and it still looks brand new today.
HOT: This Stanley One Hand Vacuum Mug was the best money I ever spent. It's awesome for driving without spillage and relatively easy to use while wearing insulated gloves. Sadly my first one was ran over by a coworker but I quickly bought another.
Sunscreen
Find whatever works for you, but keep in mind that high SPF ratings are pretty much marketing. SPF 15 = 94% UVB protection and SPF 45 = 98% UVB protection. As far as I'm aware you cannot obtain 100% UVB protection from sunscreen.
Sunglasses
Again, find whatever feels most comfortable to you, everybody is different. I was required to wear safety glasses which means polycarbonate lenses, they are known to scratch easily. Because of that, I found a pair that could be cheap enough to replace when necessary. Yes, my company did provide them, but they were incredibly uncomfortable to wear for 8+ hours a day.
Other
Having a few bandanas will always come in handy.
If you need gloves, your leather choices are between grain and patched. Grain is much more expensive, takes some breaking into, is water resistant and very durable. Patched is pretty much the exact opposite of grain. My goto brand was Kinco.
I may add more if I can think of anything else.
EDIT 1 - Forgot a link..
To waterproof your boots you can use:
SNO-SEAL
Obenauf HD/LP
They will both darken your both considerably
Totally, as long as its boot specific oil it should work fine. The most highly regarded brand (and what I personally use) is Obenaufs, it is a little more expensive but that tub should last about a year or so.
It's important to get the dirt off before oiling, some folks use Saddle Soap or similar to strip all the dirt/chemicals off first. Dirt and especially harsh chemicals can dry out and damage the leather if left on for extended periods. Personally, my boots are usually just dirty (no chemicals) so I give mine a good scrub with water, let em dry overnight, then use the oil on em. It's important to spend some time rubbing the oil in so that it really soaks in instead of just sitting on the surface. Some folks leave their boots in the sun for awhile to warm them up to aid absorption.
Anyway, I usually once every 2-3 weeks or whenever the leather seems dry (depends on the environment). You can over-oil boots, however, so I wouldn't do it more often than that myself.
Yes. The BLO should be good enough for a working tool. I replace the finish on all my hammers and axes with BLO and they hold up well. The BLO/beeswax can feel nicer in the hand but I'm not sure that it is tougher. Though the leather will do a better job of absorbing the melted wax then wood does.
For leather I prefer obenauf over generic mink oil. I think it does a better job but I haven't run a side by side test. I put that on all leather products so I would put that on first out of habit.
Obenauf's Heavy Duty LP is 20% off at Amazon
if I can't use it everyday without wearing it out, then I don't consider it BIFL... sure, they'll need to be resoled eventually, but that's any pair of boots. If you're worried about the leather drying out, then this is the stuff to use: http://www.amazon.com/Obenaufs-Heavy-Duty-4oz-Preserves/dp/B003SKCARK
Smoke jumpers use it to protect their boots from heat and caustic ash... they still have to buy a $400 pair of boots every season, but for me it has kept my Danners with 100s of miles on them feeling soft and looking like new
Ok I was really debating between Obenauf's or sno seal, but I think you convinced me about Obernauf. But which Obenauf's should I use the heavy duty lp http://www.amazon.com/Obenaufs-Heavy-Duty-4oz-Preserves/dp/B003SKCARK/ref=sr_1_1?ie=UTF8&amp;qid=1382402091&amp;sr=8-1&amp;keywords=Obenauf%27s
The boot preservative
http://www.amazon.com/Obenaufs-LP-Boot-Preservative-Preserves/dp/B0002X520S/ref=sr_1_2?ie=UTF8&amp;qid=1382402091&amp;sr=8-2&amp;keywords=Obenauf%27s
Or the silicone water shield
http://www.amazon.com/Obenaufs-Silicone-Water-Shield-Environmentally/dp/B002UBLSO4/ref=sr_1_6?ie=UTF8&amp;qid=1382402091&amp;sr=8-6&amp;keywords=Obenauf%27s
Or maybe a combination of the heavy duty lp and the silicone water shield? I don't want to spend more money then necessary but before I take my boots out into the world I want to make sure they're properly prepared for the elements. Oh and thanks for the help guys! All of this is very informative and helpful.
You can treat anything but suede, nubuck, and rough out leathers with Obenauf's LP Boot Preservative after its been cleaned. It should help preserve your boots.
*formatting
Well these don't take to snow/rain too well. I recommend to get some obenauf's LP to somewhat waterproof it. It won't make it a rain boot but it will make it water resistant.
Clean off salt stains on the thing and you should be fine for light snow and small amounts of rain. Of course, let it dry if you were soaking in some rain/snow. Applying the obenauf's also darkens the leather to make it look more like a darker version beeswax on the desert boot (which is the crepe sole with a slightly darker leather , see here for comparison).
The leather will lighten up over time after applying obenauf and I actually have pictures here of only the after shots with about 3 months of wear after obenaufs LP (I also applied obenauf's oil though so it is actually darker than it should be).
If its leather then any sort of leather conditioner should age it nicely. One of the best ones to use is Obenauf's Leather Preserve. It darkens up the leather and seals it real well.
Shoes:
You'll have to keep re-treating, and watch out for issues like gumboot (clogged leather pores). I've also read that treating with liquid oil like mink instead of wax can weaken the leather by hydrating it and making it, yes, more supple -- but also softer.
Pants:
Ditch jeans. KUHL makes the best field pants I've tried. They're more durable, lighter, and are generally very good. Go to an REI to see how different versions fit. KUHL makes jeans and similar pants, too, but their lighter field pants are much better in most conditions.
Socks...too many options, none of them stood out for me. As long as you have enough pairs of thick hiking socks and can cycle through clean pairs every day or so, you should be fine. Synthetic socks typically dry faster than wool. That's about the only major / consistent difference in my experience.
Thanks! Couple questions:
When you say you wipe off salt stains with vinegar you mean applying standard cooking vinegar to a shoe rag and rubbing around to try to get the salt stain out?
And are these the products you use: Obenauf's Leather Oil during normal times and then apply their heavy duty leather protector for the rough weather?
Same here, I got some Timberland lightweight boots and the toe separated after two months of wearing them to work. On the other hand, my Pros are holding up great after three years of winter abuse. Just don't forget to give them a rub down, I recommend this stuff.
I just got a pair of Johnston & Murphy dark brown oxfords and they are made out of sheepskin leather. Can I use my usual boot leather conditioner/protector (listed here) on these, combined with a damp rag wipe when necessary?
I was reading around and the only info I could find was on this site stating "To protect your sheepskin from cracking or drying out, a leather conditioner specifically for sheepskin is essential." Is this true? I would rather not have to go back to the store and buy their shoe cream if I don't have to. Or if anyone knows of an alternative on Amazon that would be cool.
Thanks!!!
I'm not sure about lightening the color, as most conditioners that you apply to boots will slightly darken the leather, at least temporarily.
If you'd like to give them a bit of protection, you may want to try something like this after cleaning off any dirt with a brush, rag, or whatever. That should help the suppleness of the leather and offer a slight bit of weather protection.
When people say they used Obenauf's is THIS what you mean? How many pairs of boots can I handle with 4 oz?
Not sure just how broke you are, but I bought this 8 oz lexol kit for ~$11 like 2 years ago and I'm not even halfway through it. Comes with applicators, cleaner and conditioner.
Bought my kit on Amazon... free shipping after 35$..
https://www.amazon.ca/Lexol-907-Leather-Care-8-Ounce/dp/B005H7DRQA/ref=sr_1_1?ie=UTF8&amp;qid=1484105863&amp;sr=8-1&amp;keywords=Lexol+907+Leather+Care+Kit%2C+8-Ounce
Thanks for the video! It was very helpful. He kept referencing an "interior cleaner." What brand of cleaner do you recommend? Lexol 907?
I would not recommend either product:
Magic Eraser: The magic erasers are basically a mild sandpaper made to scratch away the dirt. While great in kitchens, not so good on your dyed leather as if you were to use it regularly it would eat right through the dye and hide.
Armor all: You'll get a lot of hate for most of the Armor All products from the pros. They are just poor products and there are way better manufacturers and specific products out there.
If you want to do a basic leather clean up I would recommend Lexol cleaner and conditioner. It's cheap, and readily available at hardware and auto parts stores as well as a light brush. Someone below recommended a brush for leather shoes. Provided it is soft I see no issues with it.
Start with a wipedown on a microfiber cloth with the cleaner, and move up to light use with the brush if its needed. Another wipe down with a dry cloth, then you can condition.
The standard for leather care (the only cleaner & conditioner I've ever seen stocked at leather supply stores) is Lexol.
Amazon Link
Thanks for the feedback on sizing. It feels good enough considering my oddly shaped feet. I'll look into the brands that you mentioned!
When people say to use Lexol, is this what they're referring to?
Roughly these, though I bought them a year and a half ago before I knew about proper care.
I'm currently thinking this leather care kit, a horsehair brush, and mink oil
Get yourself some Lexol leather cleaner and condition. Link
This stuff is absolute magic and used for car interiors, shoes, bags, or anything leather. I use it on my Plycraft replica (real leather) as well as my Red Wing shoes. A lot of the leather cleaners/conditioners or Internet Knowledge is extremely overboard for leather care. The users at /r/goodyearwelt and /r/malefashionadvice swear by this stuff for leather care.
You will not harm or discolor the leather on the chair at all. There's some kind of magic sauce in it. From the Amazon link
This Lexol pack look any good? Or should I just stick to the conditioner? What is "leather cleaner"? Just like a more mild saddle soap or like Saphir Renomat?
I finally got my Iron Rangers in Copper Rough & Tough in. What leather conditioner should I use? Should I get this Lexol kit or Red Wing's leather conditioner?
Also, what kinds of suede brushes do you guys recommend?
Are these your only boots or do you have another pair to rotate out? If you let the leather rest every few days they will maintain their shape and you'll be less prone to wrinkles and deterioration. Either way you should be wiping off any excess water, salt, or slush and using a leather cleaner when needed and a conditioner every 3-6 months. Here's the stuff I use personally.
If you are literally walking through heavy snow then I would look into weather dressing the beckmans. But be forewarned that it IS going to darken the leather and will diminish the depth of the leather color. Here are three examples of the darkening of the leather. Please read the comments too as there are helpful bits of info in there. Obenaufs carries a Heavy Duty Leather Protector and a leather oil.
I don't have a perfect yes/no answer for you. I live in the Midwest US and have a pair of Iron Rangers that I don't intend to treat other than with conditioner. We can get some bad winters here but I'll just take my chances. I also plan on picking up a pair of waterproof boots so that I have something to switch out with the IRs.
Is this what I need? https://www.amazon.ca/Lexol-907-Leather-Care-8-Ounce/dp/B005H7DRQA
http://www.amazon.com/dp/B005H7DRQA/
Would you suggest me getting the lexol leather care kit or just the lexol conditioners? Is the cleaner necessary?
Just got the Red Wing Iron Ranger 8083 the other day. Would something like this work for leather care? What kind of brush should I get? What else do I need to know?
Thanks!
Saddle soap or this Lexol cleaner/conditioner kit.
Is this the same conditioner?
https://www.amazon.com/Lexol-E301123100-Leather-Care-Kit/dp/B005H7DRQA/ref=sr_1_3?ie=UTF8&amp;qid=1521461753&amp;sr=8-3&amp;keywords=lexol&amp;dpID=51K9XWibG7L&amp;preST=_SX300_QL70_&amp;dpSrc=srch
The link you provided says "Equine" in the logo.
This sub recommended me to use Lexol for my new Iron Rangers. Is this the package I should be going with? Or a Lexol spray? Thanks!
SQ: Is there anything I else I should be doing to care for my 1ks?
Sorry the pictures might not be the best to judge. Got these as 2nds from STP a while back.
Shortly after purchase, had a local cobbler add half soles.. for some reason he dressed the edges using black polish or something, which eventually wore away.
I'm wondering if he also tried to buff and polish the uppers or something, because I feel like the wear around the toe showed up shortly thereafter and I don't really beat things things up as much as they look like I do.
Half soles started coming off not too long after, definitely not using that cobbler again, haha. Not too worried about the soles though, at some point I'll probably hit up B.Nelson or something for a proper fix.
I'm much more worried about the uppers, so far I've given them the occasional cleaning and conditioning with this basic lexol kit which I mainly got for my Beckmans (which are holding up much better, haha). Should I grab VSC or Pure Neatsfoot or something instead?
I'm thinking I might like something to darken the leather, right now they're a little chalky looking.
Any advice? I've been doing a lot of lurking and searching over the past year but I still feel pretty clueless.
Lexol Leather Cleaner and Conditioner and Sponge Kit, For Use on Leather Apparel, Furniture, Auto Interiors, Shoes, Handbags and Accessories https://www.amazon.com/dp/B005H7DRQA/ref=cm_sw_r_cp_apa_i_t78OCbRYWN9HC
A good place to start is with some conditioner. Every 2 or 3 months or so it is good to condition your boots, lexol works well: http://www.amazon.com/Lexol-907-Leather-Care-Kit/dp/B005H7DRQA/ref=sr_1_1?ie=UTF8&amp;qid=1422498360&amp;sr=8-1&amp;keywords=lexol+leather
Visit /r/goodyearwelt for more care info
Leather just takes a bit of work (and extra maintenance), to be honest. The best brief leather harness guidelines I've found: "Leather can be cleaned with soap and water, with leather cleaner or saddle soap. Allow to air dry for at least 24 hours. Use leather conditioner to keep the leather soft and supple. Never soak leather."
You might check out a leather-specific cleaner plus conditioner pack. Works best with a microfiber cloth. The conditioner is only necessary occasionally.
I assume I should be using this for the cleaner and conditioner?
I bought this exact listing from Amazon. It comes with a pad and the Lexol has instructions on the package as far as application, but it isn't too tough. Just make sure the leather is clean, and try pouring like a quarter-sized amount onto the cleaning pad. You can work up from there if you want to use more at one time. The good thing about Lexol is you can wipe off excess with a clean cloth (I use a spare washcloth) and no harm done.
Personally, I wipe down first with an old rag, then use the cleaner if needed (usually isn't). Then I brush, use the conditioner, and let it sit a while. Then I wipe clean and let it sit for a while again. It's kind of a superstitious process to be honest. If you're conditioning your leather on a schedule and using shoe trees, you're already doing way more than the average person.
Remember that the Lexol WILL darken your leather a little. I tried to show some comparisons in my original post. But the coconut oil will be more in my experience.
Edit: I actually bought the "Like New" version via an Amazon Warehouse deal to save a couple bucks. it was basically just an open box item. Neither bottle had been opened.
Lexol makes some really good stuff. I like their cleaner and conditioner.
I used Lexol for my brand new glove last year and then, play catch a lot. I saw a video on YouTube about it and give it a chance.
http://www.amazon.com/gp/product/B005H7DRQA/ref=pd_lpo_sbs_dp_ss_1?pf_rd_p=1944687662&amp;pf_rd_s=lpo-top-stripe-1&amp;pf_rd_t=201&amp;pf_rd_i=B000637TNM&amp;pf_rd_m=ATVPDKIKX0DER&amp;pf_rd_r=00WTQ71RB2S53X1ZGBDE
This product is great, you can even use it regularly to clean the glove.
I highly recommend it.
I've been lurking for a while but finally made an account to ask this:
I decided to go with Red Wing Beckmans (9023) as my first high-quality footwear purchase. I also purchased a Kiwi 100% Horsehair Shine Brush, a Lexol 907 Leather Care Kit, and Woodlore Adjustable Men's Shoe Tree (Cedar).
My first question is: how should the shoe trees fit into my Beckmans? I went to a Red Wing store and got sized. They said I have wide feet and recommended I get 8.5 (I usually wear 8.5s in regular footwear like Van's and Nike). I purchased the 8.5 Beckmans and I've worn them about 8 times now. Out of paranoia, I double checked with the Red Wing store to see if the boots were creasing properly (as I have a lot of toe space and was worried that it might be too big). They assured me that It was fine. I ordered size medium (8-9.5 size) and They arrived yesterday. I inserted them into the boots but noticed that it was pretty difficult to get them in there and the heel of the shoe tree scratches against the heel of the boot when inserting. I notice if I wiggle the front of the shoe trees in a bit more before inserting the heel, it doesn't scratch the heel of the boot. I apologize if the picture quality is poor , I only have my phone at this time. Is this okay for my Beckmans? Or should I return these for a different shoe trees? I'm worried about them being stretched improperly. If I should get different ones, can someone direct me to a specific shoe tree? Here are some pictures of my 9023s with the shoe trees.
My second question is, do I need any other care products than the ones I listed above? My care regime currently will be to brush after each use, shoe trees for a minimum of 1 day before next wear, Lexol clean and condition once a month and/or after they get really dirty.
> pots are crackly
https://www.amazon.com/WD-40-Specialist-Electrical-Contact-Cleaner/dp/B00AF0OFVU
We had the drift issue as well. After reading about the fix using an electrical contact cleaner, I figured I'll give it a try. It worked. Just use a knife to lift up the rubber flap under the joystick, spray the cleaner inside, rotate stick a few times, let it dry. No more drifting. Not sure how long the fix will stay in place, but I'll keep doing this to avoid buying a new controller.
https://www.amazon.com/WD-40-Specialist-Electrical-Contact-Cleaner/dp/B00AF0OFVU/
I used WD-40 Electrical Contact Cleaner spray you can get it at homedepot for like $5. Make sure NOT to use regular WD-40. A quick 1 second spray under the flap of the analog and it will be as good as new. Heres a link to the right one if you want to get it from amazon.
https://www.amazon.com/WD-40-Specialist-Electrical-Contact-Cleaner/dp/B00AF0OFVU/ref=pd_lpo_sbs_328_t_0?_encoding=UTF8&amp;psc=1&amp;refRID=1HRH2926M4M7210XZ89H
Use this:
https://www.amazon.com/dp/B00AF0OFVU/ref=cm_sw_r_cp_awdb_t1_OcuIDbVK9CH95
I’ve had two drifting joycons and using this sprayer under the rubber cap and waiting for 5 minutes worked both times. Much easier than dealing with Nintendo support each time.
Something like this: https://www.amazon.com/WD-40-Specialist-Electrical-Contact-Cleaner/dp/B00AF0OFVU
Probably available at your local hardware store.
Not sure about not spending anything but I’ve read some people with other controllers, when they have problems with analog sticks, swear by this spray, it’s like WD-40 electrical contact cleaner and they say it works wonders. Maybe vita stick is different and doesn’t get fixed as well, I don’t really know. But it’s worth a try for 6-7$ I guess.
WD-40 Specialist Electrical Contact Cleaner Spray - Electronic & Electrical Equipment Cleaner. 11 oz. (Pack of 1) - 300554-E https://www.amazon.com/dp/B00AF0OFVU/ref=cm_sw_r_cp_api_i_B5PCCb7P9Y03Y
If it starts to happen again try using Electrical Contact Cleaner, I used this one. I was having major drift issues and this has resolved it (for now at least).
I cleaned my pc with compressed air, but it doesnt look like everything went away, I still got this [Contact cleaner]( https://www.amazon.com/WD-40-Specialist-Electrical-Contact-Cleaner/dp/B00AF0OFVU/ref=sr_1_1?keywords=contact+cleaner&qid=1558717635&s=music&sr=1-1-catcorr) from WD-40 which has more power and is kind of a "liquid that evaporate" you probably know what I mean. Is it safe to use this on the top side of my GPU to clean it?
here
I'm assuming you're trying to clean the PCB. That shiny coating is an electrical varnish; a sealant to protect the board, mainly the circuit traces. Any type of Isopropanol (Isopropyl Alcohol, Acetone, etc.) will strip that varnish. What you'll want to use is Contact Cleaner (here). It's as simple as spraying down the PCB lightly with the cleaner, and then taking a non-abrasive brush to work it around and remove the dirt/oil/dust. Once you're satisfied, wipe down the PCB with a clean microfiber cloth. Good luck!
Price dropped on Amazon. https://www.amazon.com/GIDDS-302932-Specialist-Electrical-Contact-Cleaner/dp/B00AF0OFVU/ref=mp_s_a_1_1?crid=3PN9JM3ZL8H0J&amp;keywords=wd40+electrical+contact+cleaner&amp;qid=1554541248&amp;s=gateway&amp;sprefix=wd4&amp;sr=8-1
I recently had a similar problem, due to smash. I used compressed air and that only helped for a short while. I recently bought this electronic contact cleaner, gave it a couple sprays under the flap, rotated the stick a couple times and let it dry. And it's been working like new again. Hasn't given me problems anymore.
Get this: https://www.amazon.com/dp/B00AF0OFVU/ref=cm_sw_r_cp_api_i_OBGPCbF0J6K7T
And look on YT. There are tutorials to fix this with that spray. Worked for me
wd40 makes a line of contact cleaner. http://www.amazon.com/WD-40-Specialist-Electrical-Contact-Cleaner/dp/B00AF0OFVU
Hello,
I've read the wiki and its a huge resource. Thank you to all who put it together!
Some of the product reccommedations are unavailble on Amazon so I just wanted to ask a few questions with regards a brand new car I bought and see if these products are whats needed:
So firstly, washing the exterior of the car:
I have Meguiars Gold class wash, I have two buckets, and grit guards, I will do the two buckets method. Now do I dry the car with:
this: https://www.amazon.com/gp/product/B01ERU0F3A/ref=ox_sc_act_title_5?smid=A1RKELVBY446LD&amp;psc=1 or
this: https://www.amazon.com/gp/product/B00GXRFLY4/ref=ox_sc_act_title_3?smid=A1RKELVBY446LD&amp;psc=1
Once I have washed the outside and dried it with the towels, I then apply the wax, I will be using #845 - can I use these to apply it:
https://www.amazon.com/Viking-Car-Care-Microfiber-Applicator/dp/B0051MYL8E/ref=pd_bxgy_263_2?_encoding=UTF8&amp;pd_rd_i=B0051MYL8E&amp;pd_rd_r=BG4S92NE1D9CH9E2J67C&amp;pd_rd_w=HVEIG&amp;pd_rd_wg=6EheM&amp;psc=1&amp;refRID=BG4S92NE1D9CH9E2J67C
I know I needs to get a clay bar or a micro sponge I'm just not sure where/how this fits into the process, what items do I need to buy
These?
https://www.amazon.com/Mothers-07240-California-Gold-System/dp/B0002U2V1Y/ref=pd_bxgy_263_3?_encoding=UTF8&amp;pd_rd_i=B0002U2V1Y&amp;pd_rd_r=BG4S92NE1D9CH9E2J67C&amp;pd_rd_w=HVEIG&amp;pd_rd_wg=6EheM&amp;psc=1&amp;refRID=BG4S92NE1D9CH9E2J67C
https://www.amazon.com/gp/product/B00CUAWJ6G/ref=ox_sc_act_title_1?smid=ATVPDKIKX0DER&amp;psc=1
Lastly, I am buying this window cleaner -
https://www.amazon.com/gp/product/B0006SH4KU/ref=ox_sc_act_title_8?smid=ATVPDKIKX0DER&amp;psc=1
Is it safe to use inside and out? I would imagine spray directly on outside windows and just use some microfiber towels like this - https://www.amazon.com/gp/product/B00WC5KQGE/ref=ox_sc_act_title_4?smid=A1RKELVBY446LD&amp;psc=1 to clean it off? On the inside I would imagine spraying directly onto the cloth would be better.
Do I clean the outside windows after the car has been cleaned and waxed?
I understand the basic process and with this being a new car I want to be 100% I'm doing the right thing, I fully intend on washing it every other week and taking great care of it!
Thanks
Tim
id drop the creme glaze and get a wax instead (if budget is a problem?). meguiars gold class wax is a cheap but very effective wax.
youll need about 3 cutting pads, 3 polishing pads, and 2 wax/sealant pads.
32 oz of compound and polish is a lot. if budget is a problem, you can do a lot of cars with the 8 oz bottles.
you might want to consider getting just the nanoskin sponge instead of the mitt and a regular microfiber wash mitt. it will be cheaper and you dont need to clay every wash.
ONR is good, but since you can use soapy water as a lube with the nanoskin, you might want to just get a good quick detailer instead. it helps with drying the car too.
Sounds like you need a clay bar. Or my favorite, a Nanoskin sponge.
How sticky/tacky should my nanoskin sponge be? After doing the recommended break-in, I never got the white or foam/bubbles they described and it is definitely not tacky. At the edges of the rubber, it sticks a little, but the overall face of it never changed.
Can you feel anything when you move your fingers over it? It may be worth asking r/AutoDetailing. Another option is to use a nanoskin which works like a clay bar.
Just get something from a reputable brand. Meguiar's is good and readily available. Another option you have is using a Nanoskin sponge, which does the same thing as clay, but can be re-used and can be rinsed off if you drop it on the ground, where with clay, if you drop it that piece of clay is done.
I’ve heard bad things about the clay mitts. Supposedly they fall apart instantly. Try this guy : Nanoskin (AS-019) AutoScrub Fine Grade Sponge https://www.amazon.com/dp/B00CUAWJ6G. I spray the car heavily with ONR (two cap fulls into a 32 ounce spray bottle, fill the rest with water). Then I brush every section both horizontally an MF vertically with this sponge. If you drop the sponge just dip it in a bucket of water to get everything off. Smooth as glass afterwards. Top it off with some Collinite 845 and your whip will be looking tippy top!!
I personally have only used the Nanoskin sponge to decontaminate my car. It's a highly recommended clay alternative.
As for a sealant/wax, I'm not sure if my recommendations will be of any use since I just started detailing my own car over the last ~6 months. I have only tried one wax (Meguiar's Ultimate Liquid Wax) and one sealant (Opti-Seal). Longevity of the Ultimate Liquid Wax wasn't great IMO. I'd look into Collinite 845 since it's highly regarded and there are plenty of tips/tricks on how to use it.
Honestly, easiest solution may be go to with CarPro Essence or HD Speed. I don't think there are any special tips/tricks on how to use Essence or HD Speed, and both will allow you to polish and seal your paint in one step. Admittedly, I haven't looked into either much, but they are next in line for me to research.
Yes you can use that one, I actually have this one. I bought a two pack in case something happens with one so I'll have one on hand.
The interior was easy. Vacuum, wiped down with Nextzett Cockpit Premium, and dressed some parts with 303. The only bad thing was I was vacuuming in the sun, so it was hot af. The paint had oxidation, but the owner didn't have much time so I only washed it and sealed it with Sonax Polymer Net Shield.
It is an 05. Paint is in decent condition but a lot of contamination. It was sitting under a sap tree for 2 years. I spent about an hour claying the hood and it removed maybe 70% but there was a lot of stuff. I was using chemical guys clay.
Thank you..glad you said something :)
Like this
When using a clay bar alternative like this, do you apply it the same as you would a clay bar? Wet the surface with an auto detailing spray, then gently pass back and forth with the bar until it slides smoothly?
Hello!
So I've been lurking here for several weeks trying to soak up what I can. I've checked out the wiki page on starter kits and I guess I'm just wondering a couple things based on the list to get myself going.
Gonna get the buckets and the grit guards. I've got a ton of microfibers I use for my car already.
I was thinking of getting the Griot's DA polisher recommended (here)[https://www.amazon.com/Griots-Garage-10813STDCRD-Orbital-Polisher/dp/B009UKUUWE/ref=as_li_ss_tl?s=automotive&amp;ie=UTF8&amp;qid=1462198536&amp;sr=1-1&amp;keywords=griots+da+polisher&amp;linkCode=ll1&amp;linkId=3a68733089f6c8d0f136c31b5c3bb8d1]
I guess I'm wondering what chemicals I should be using on my vehicle?
I do live in an apartment complex though so I DO NOT have access to a hose because our landlord has got it under lock and key. I read a few days ago about a product that someone used outside and it was still ok (though I do have access to a garage!).
I guess I'm just more lost as to where to start besides the DA polisher.
edit: Oh! I've used a clay bar before and while it was nice, I was wondering about this nanoskin sponge that's also recommended.
https://www.amazon.com/Nanoskin-AS-019-AutoScrub-Grade-Sponge/dp/B00CUAWJ6G/ref=as_li_ss_tl?s=automotive&amp;ie=UTF8&amp;qid=1462198361&amp;sr=1-1&amp;keywords=nanoskin&amp;linkCode=ll1&amp;linkId=4c532041fcdbfa6b35f768083c70423e
Is that like a 1:1 sub for clay bars? Same thing just not wasted if dropped?
I believe clay bar qualities are different. Just like with most stuff, generally the higher the quality, the more expensive it is. The cheaper ones I've worked with have streaked heavily and more often. Depending on the vehicles condition, and how often you detail, a clay bar can last a long time. This CLAYBAR is pretty cheap & plenty of people like it. For a clay sponge it does the job.
Did you not decontaminate the paint with clay or alternative??!
Oh boy. Your paint is supposed to feel VERY smooth after a wash, clay, and wax. Here's a review of a nanoskin sponge which is 100% worth it I wrote. My car feels so smooth it's ridiculous.
http://www.amazon.com/gp/aw/d/B00CUAWJ6G/
http://www.reddit.com/r/AutoDetailing/comments/2bjc99/the_best_10_ive_spent_detailing_nanoskin/
Not decontaminating your paint also results in you rubbing abrasive particles into your clear coat and swirling it.
Here's my advice-
So my first ever detail is planned out like is this
My understanding is polish basically scrapes a layer off in order to go deep, is there anything i need to "refill" that digging?
Does my order of detailing sound good, in other words do i need to add anything else?
wax for the interior? I was thinking of the 3m style spray on plastic stuff that I assumed was used on the seats and other surfaces to prevent dust buildup.
The brush is the Nanoskin (AS-019) AutoScrub Fine Grade Sponge http://amzn.com/B00CUAWJ6G
obviously should have called it a sponge!
Check this out. It sounds like you could really use this now, and the reviewers love it!
It was all because of the AutoExec cover-up.
This is one of my favourite WTF - I mean who needs 55 gallons!
Also I love the shear ridiculousness of this steering wheel table
And one of the other stupid thing is pens specifically for her read the comments for all of these - they are funny!
As far a gift - surprise me if I win :)
They sell some pretty amazing ones with some great reviews if you're interested.
Pshh...a true gamer would bring his desktop in the car with him. That's why they have power inverters and this.
People who bought this item also bought: https://www.amazon.com/AutoExec-Wheelmate-Steering-Attachable-Surface/dp/B00E1D1GY6
Get yourself a stand for your laptop while you’re at it
I know it’s not meant to be used while driving, but you know someone has done it.
The reviews are actually pretty funny.
Reminds me of the reviews for AutoExec Wheelmate Steering Wheel Attachable Work Surface Tray. I wish they still allowed pictures.
Just a phone? Pfft, amateur...
You need you one of these fancy things
Drivers are, however, doing all of the following - and I have a hard time believing any of them are accidental:
The list goes on. Don't do these things and, magically, you're a lot more careful.
Check out the reviews on this badboy
This should be a purchasable item that allows you to use your notepad while on autopilot.
> That's just dumb. If it wasn't useful, there wouldn't be a market.
Pet rocks. Goldfish. This laptop shelf that affixes to your steeringwheel:
https://www.amazon.com/AutoExec-Wheelmate-Steering-Attachable-Surface/dp/B00E1D1GY6
This Steering Wheel Work Table is the greatest series of reviews I have ever seen.
DIRTY THIRTY
Lots of good reviews on the Wheelmate http://www.amazon.com/AutoExec-Wheelmate-Steering-Attachable-Surface/product-reviews/B00E1D1GY6
If you liked that, you'll love the Steering Wheel Desk Reviews:
> 4 out of 5 stars Not so good as baby changing table
> I read some 4 and 5 star reviews by those who used this device successfully to change a baby while driving. On that basis, I bought one. I put my baby on it and drove for over an hour. It did not change. Same baby. I am glad it worked for some people but I will be returning mine. (The steering wheel desk.)
I'll give you an upvote for paying the dog tax. You'll have another when you get some 303 Aerospace Protectant on those fenders and get em back to black
There are dozens of sprays you can buy actually designed for protecting fabrics and vinyls from the sun. 303 Spray comes to mind. I've used it on convertible tops for many years with great results.
I use 303 Aerospace Protectant and it works great.
https://www.amazon.com/303-30313-CSR-Protectant-Plastic-Fiberglass/dp/B00KN0UOEE/
I'd try something like that. Apply to the fabrics and plastics periodically. Paint as well, or use a UV film (also protects against scratches).
303 makes a great product for both.
https://www.amazon.com/dp/B00KN0UOEE/ref=cm_sw_r_cp_apa_i_fkNIDbFJ17NC1
I use Adam's and chemical guys stuff for most everything else. There's better stuff out there, but I find these to be easy to use and get ahold of.
> I kind of agree but honestly ours is looking pretty faded considering it's only been a year.
We have a black plastic mailbox (something purchased off-the-shelf from Home Depot). I've discovered that regular applications of 303 Aerospace Protectant work wonders to keep my mailbox from fading from the sun.
bahaha whoops had the wrong link on my clipboard. https://www.amazon.com/dp/B00KN0UOEE/?coliid=ICF1ZUK8SEQI6&amp;colid=21PX3HJTDBEM6&amp;psc=0&amp;ref_=lv_ov_lig_dp_it
Thanks! This is the general vinyl cleaner -- not specific to cars? (As in this product: https://www.amazon.com/303-30313-CSR-Protectant-Plastic-Fiberglass/dp/B00KN0UOEE/) ?
Please don’t use armor all. Here’s what most of the pros use: 303 (30313-CSR) UV Protectant Spray for Vinyl, Plastic, Rubber, Fiberglass, Leather & More – Dust and Dirt Repellant - Non-Toxic, Matte Finish, 32 Fl. oz. https://www.amazon.com/dp/B00KN0UOEE/ref=cm_sw_r_cp_api_OoQXBbW2J4TG9
Def skip the mothers recommendation.
I like this stuff and use it on other things like the dash as well:
https://www.amazon.com/303-30313-CSR-Protectant-Plastic-Fiberglass/dp/B00KN0UOEE/ref=sr_1_3?ie=UTF8&amp;qid=1543273220&amp;sr=8-3&amp;keywords=303
you can try 303 Aerospace protectant
https://www.amazon.com/303-30313-CSR-Protectant-Plastic-Fiberglass/dp/B00KN0UOEE/ref=sr_1_1?ie=UTF8&amp;qid=1492447381&amp;sr=8-1-spons&amp;keywords=303+protectant&amp;psc=1
has UV resistant properties.
Here you go. It's 32oz so it lasts quite a while. I bought a gallon about 10 years ago, severely overestimating how much I needed.
Did you know Amazon will donate a portion of every purchase if you shop by going to smile.amazon.com instead? Over $50,000,000 has been raised for charity - all you need to do is change the URL!
Here are your smile-ified links:
https://smile.amazon.com/303-30313-CSR-Protectant-Plastic-Fiberglass/dp/B00KN0UOEE/ref=sr_1_1
---
^^i'm ^^a ^^friendly&nbsp;bot
> wheel cleaner plus would be an infrequent use, not every time. D143 would be your every-time use.
So, should I get both or just Meguiar's D143?
> griots fast correcting cream and a microfiber cutting pad from meguiars for the cutting portion of the polishing. replaces 105 and maybe the heaviest foam pad, but i'd just get a microfiber cutting pad in addition to the others.
Would you happen to have a link to both? I am a little confused on what those are.
> Meguiar's D120 glass cleaner concentrate instead of rainx glass cleaner. a gallon will last you the rest of your life. (dilute 1:10)
Seems like a lot, but I guess it is more worth it in the long run.
> a more neutral soap like Adam's or Optimum's. Gold Class has wax additives.
These are a little more expensive (unless I am looking at the wrong one). Is Optimum Car Wash CW2006G the correct one?
> as for concerns: do not use D143 on plastics. don't spray it on the wheel wells either. wheels only. yes you can use optibond on all plastics
Should I stick with Meguiar's D101 in for the plastics, wheel wells, and wheels?
> 303 Aerospace will protect your dashboard. Leatherique has a good conditioner but really you're not going to be able to stop creases from forming.
What would be a recommended cleaner for either/both? Should I use 303 Aerospace Protectant on with the leather conditioner as well? Should I get both the Leatherique Leather Rejuvenator/Prestine Clean or just the Leatherique Prestine Clean?
Would definitely stay away from ArmorAll stuff as it seems to be lower quality and greasy -- maybe Aerospace Protectant 303 or Meguiars if you're going that route.
This is how I've restored my already fading plastic on my 2013 Civic Si, and made my parents 02 Taurus UV beat to hell plastics look great. I can take before/after photos and tape off a section if you'd like me too.
http://www.amazon.com/gp/aw/d/B00KN0UOEE?cache=29d7dd861b2be32d9a9c2e80a296ba56&amp;pi=SY200_QL40&amp;qid=1408276749&amp;sr=8-1#ref=mp_s_a_1_1
https://www.amazon.com/gp/product/B00KN0UOEE/ref=oh_aui_search_detailpage?ie=UTF8&amp;psc=1
That is the one I use. Works great on dashes and seats too!
I use this on my dashboard. Matt finish.
https://www.amazon.com/gp/product/B00KN0UOEE/ref=oh_aui_search_detailpage?ie=UTF8&amp;psc=1
Not a prob. I think they're all pretty much the same formula but this is the popular one. Great stuff
Personally I use 303 aerospace protectant. Used to work in a boat shop and we used this a lot on upholstery due to direct UV ray exposure. Have used this in all of my cars and have never had warping or fading of the dash/trim.
http://www.amazon.com/gp/product/B00KN0UOEE/ref=oh_aui_detailpage_o07_s00?ie=UTF8&amp;psc=1
Hope you get started, not near you unfortunately. However, I'd really recommend you pick up a booster pack like this one: https://www.amazon.com/NOCO-GB40-UltraSafe-Lithium-Starter/dp/B015TKUPIC
I have one and, since I drive old... er classic cars, it's been a lifesaver.
You can get lithium battery ones now, like this. They last for months without needing charging, and more conveniently, fit neatly in the glovebox. Naturally doesn't help if you need the air compressor component.
my friends have this guy and apparently it works well enough - https://www.amazon.com/NOCO-GB40-UltraSafe-Lithium-Starter/dp/B015TKUPIC/
I also have this one for tires and it works remarkably well for being so cheap - way easier to deal with than going to gas stations - https://www.amazon.com/gp/product/B01L9WSTEG/ref=ppx_yo_dt_b_asin_title_o07_s00?ie=UTF8&amp;psc=1
I have a small tote bag w/ a change of clothes + contact lenses and spare meds just in case as well, my lexus came w/ a first aid kid so im trusting that'd cover anything else
Sorry to necropost, but I found this thread from google seeking a totally different goal, but my needs and yours might align.
Consider a car battery jump-starter, a unit which is a battery pack big enough and strong enough to produce enough amps to jump start a dead car. These big batteries can be wall-recharged (or slowly solar recharged), and can be used directly as a battery for your cellphone and lights (skipping the engine battery all together). Like https://www.amazon.com/NOCO-GB40-UltraSafe-Lithium-Starter/dp/B015TKUPIC
For your case, you should never touch the engine battery and buy yourself a superior battery to run your life off of, right? And buying a jump-start battery gives you the freedom of even using your main life battery to fix your engine battery in times of distress.
I got a Noco GB40 from Canadian Tire. Ive used it to jump two cars for a total of 7 jumps. Ive only recharged it once now. It cost more, $125, and only has one USB port, but its been great https://www.amazon.ca/NOCO-GB40-UltraSafe-Lithium-Starter/dp/B015TKUPIC
I wouldn't trust it to hold a charge more than 6 months without being plugged into either 12V or the house.
As far as how the marketing nonsense goes, something like this is probably the minimum size I would look for: https://www.amazon.com/NOCO-GB40-UltraSafe-Lithium-Starter/dp/B015TKUPIC
It says 1000A but I would put the figure at about 200 amps. If you watched AvE's or Motoyam's reviews it looks like the '7000J/3S' is probably the true figure. The 1000A is completely bogus. Simply doing the math:
Current Voltage = Power
Power Time = Energy
So:
Current Voltage Time = Energy
Current 12V 3s = 7000J, solving gives 194 amps.
$96. At Amazon: NOCO Genius Boost Plus GB40 1000 Amp 12V UltraSafe Lithium Jump Starter https://www.amazon.com/dp/B015TKUPIC/ref=cm_sw_r_cp_tai_koGlzbJ63TFVE
Yeah looks good and I'd like one or the bigger ones as my cheapo charger stopped working but it was a plug in and the ones for the road are batteries included like this which before lithium were much bigger and wore out quicker.
That one is not a jump starter. That is a trickle battery charger designed to slowly charge a battery over night. Jump starters contain internal lithium ion batteries (in most cases) and can start the engine without an external power source. A trickle charger will require you to plug into a wall and charge the battery to capacity over a set amount of time. (MFR specific).
This is the one I have.
I thought it was a typo.... it's not: https://www.amazon.com/NOCO-GB40-UltraSafe-Lithium-Starter/dp/B015TKUPIC
Another reason I'm probably stressed over nothing - this was the battery jumper I used, and it states that there's no worry for incorrect connections.
Use this for jump starter. Works great: NOCO Boost Plus GB40 1000 Amp 12V UltraSafe Lithium Jump Starter
Air compressor: Kensun Tire Inflator AC/DC Portable Air Compressor
Noco is undefeated
www.amazon.de/gp/aw/d/B015TKUPIC
If your goal is emergency starting of a vehicle do yourself a favor and buy a ready made unit... something like this...
https://smile.amazon.com/gp/product/B015TKUPIC/
Supercaps are not meant for that... they are meant as an alternative to a NiMH battery in a power fail setup.. i.e. as an array controller backup battery... but unlike the battery they charge from empty in a couple of minutes... verse 7~8 hours for the battery... they typically are just holding memory on so drain very slowly...
&#x200B;
If you stack them up you must use a balanced charge circuit that does each cell separately and monitors as it does it... get it wrong and you either cause a whole lot of heat or you can make the battery rupture and catch fire...
I used a 5,000 grit sandpaper from the auto parts and headlamp polishing. You need to be patient and do a few applications. I feel like I am not done but it sure looks a lot better than when I picked it up :)
https://www.amazon.com/Meguiars-G12310-PlastX-Plastic-Cleaner/dp/B0000AY3SR
Ouch....You could try out [Meguiars M17] (https://www.amazon.com/dp/B0000AXMD6/ref=sr_ph_1?ie=UTF8&amp;qid=1466456170&amp;sr=sr-1&amp;keywords=plastic+cleaner) and or [Megs PlastX] (https://www.amazon.com/Meguiars-G12310-PlastX-Plastic-Cleaner/dp/B0000AY3SR/ref=pd_sim_263_4?ie=UTF8&amp;dpID=41KHjV%2BR9bL&amp;dpSrc=sims&amp;preST=_AC_UL160_SR160%2C160_&amp;refRID=FWYTEAE959PHVWTSJDX9)
If you have a cordless drill purchase the 3M lens cleaner: http://www.amazon.com/3M-39008-Headlight-Restoration-System/dp/B001AIZ5HY/ref=sr_1_2?ie=UTF8&amp;qid=1396048236&amp;sr=8-2&amp;keywords=3m+lens+cleaner
There are more than enough pads in there for 2 headlights. Take off your front bumper and put up your hood, this will make the task so much easier. Triple painters tape the paint around top and sides. Get a squirt bottle from Autozone, Homedepot, etc and fill it with water. Take your time, it should take around 45 minutes to do both.
Also do them at the same time, each step. Don't complete one and move to the other.
Afterwords protect and clean with: http://www.amazon.com/Meguiars-PlastX-Plastic-Cleaner-Polish/dp/B0000AY3SR/ref=sr_1_5?ie=UTF8&amp;qid=1396048450&amp;sr=8-5&amp;keywords=3m+lens+cleaner
You can clean them up with Meguiar's PlastX. I use them to polish up my headlights a bit, but it works for all kinds of plastic. $6 on Amazon
The idea is to use a chemical meant to reverse oxidation in plastics like headlight lenses, but on the laser lens. I've heard of people using this product to buff the lens: https://www.amazon.com/Meguiars-PlastX-Plastic-Cleaner-Polish/dp/B0000AY3SR
Re: pots, I think it can work if you have an oscilloscope and the repair manual to get the values, but otherwise it's kind of a fool's errand IMO
The Meguiar's PlastX costs $6.47 on Amazon. Instead go to Dollar Tree and get some toothpaste that works just as well.
Meguiar's G12310 PlastX Clear Plastic Cleaner & Polish - 10 oz. by Meguiar's http://www.amazon.com/dp/B0000AY3SR/ref=cm_sw_r_udp_awd_PiNyub18GBBVM
This stuff works wonders, but it takes a few coats though.
Sure. https://www.amazon.com/Meguiars-PlastX-Plastic-Cleaner-Polish/dp/B0000AY3SR
Hope this helps! This isn't an exhaustive list of the best professional products but some of the best top rated affordable and highly rated by forums and high subscriber YouTubers. I'll try to answer questions as they come. Thanks for all tye comments and positive/critical feedback. Promise is all helps in the end!
Wash/Decontamination
Wheels/Tires
Compounding/Polishing
Finshing Wax/Protectant/Plastic & Trim Restorer
Interior/Glass Cleaners
Convertible Fabric Top Cleaner/Protectant/Sealer
Microfiber Cloths/Car Drying Microfiber Cloths/Buffing Microfibers/Brushes/Etc.
Perhaps some plastic polish? Im not sure if it will quite give it a glossy finish so much though, but a lot of people favor this it seems, haven't tried it myself.
Yeah, it was hardware issue - plastic was making scratchy noise, i added some plastic cleaner/polish and that annoying noise is gone so far.
Looks like you can clean it. Copper should be pretty easy. Plenty of info on that. Acrylic can be a biatch though. I use Meguiar's PlasticX and a microfiber cloth (and in your case a toothbrush). Just be sure to rinse it really well with DW. The question really is "is at block worth the time to clean?" as it will take quite a bit of elbow grease.
I think you're probably out of luck on the buttons (unless you want to disassemble the fob and figure out a way to machine polish them), but for the plastic back, maybe Meguiar's PlastX would make a difference?
Temporary fixes are fairly simple.
Just about any rubbing compound will knock off the layer of oxidation.
For example, wheel-polish. For a very good fix, either buy a full headlight restore kit. Or put together your own.
I've had very good luck with Meguiars's PlastX followed by Klasse Sealant Glaze
Meguiar's PlastX Clear Plastic Cleaner and Polish - The plastic exterior on my Jeep Liberty looks terrible and it makes me sad!
My wishlist! Thanks!
Meguiar's Plastx is my go to for dustcover (and headlight) cleaning.
Clean as much of the dust off as you can by spraying it down with the kitchen sink sprayer, as if you just drag a rag over it, the dirt will cause a bunch of tiny scratches in the cover. After that, hit it with the Plastx (basically, you use it like you would a car wax - use a pad to work it in, and then buff it out).
PlastX is $7 on Amazon.
Or, you could buy a bottle of this and make it look new again. I've tried it and it works on fine scratches. http://www.amazon.com/gp/aw/d/B0000AY3SR?pc_redir=1409971466&amp;robot_redir=1
http://www.amazon.com/gp/aw/d/B0000AY3SR
Here's something simple and relatively cheap you can try. You can find it at any auto parts store or even Walmart. It's good for light scratches and scuffs on a variety of plastics, just make sure to use a microfiber cloth (probably stocked within a 5 ft radius of the Plastx), and test a small spot first. If nothing else, it's good for cleaning plastics so while the scuffs might be there still, the rest of the body should be nice and shiny.
Most of the time I'm living in a flat so what I do it use a quick detailer (US link / UK link) and microfibre (US link / UK link) to keep things clean between proper washes. In fact I keep a bottle of quick detailer and a one of glass cleaner in the car at all times (I wrap a microfibre cloth around the spray head and put the combo in the driver/passenger door pocket).
Basically if you can catch any big, obvious dirt e.g. bird crap, early then it makes things easy.
If you manage to get some time, putting on a good coat of really hard wearing wax (US link / UK link) or sealant (US link / UK link) will be really helpful. It should last a year and make cleaning with quick detailer much easier.
As for the headlights, the yellow colour comes from the plastic oxidising. You need to scrub away that layer and then protect it. Toothpaste works quite well but there are dedicated products like (US link / UK link). Afterwards I'd apply some 303 Aerospace protectant (US link / UK link) which is also great for the interior plastic.
http://www.amazon.com/gp/product/B0000AY3SR/ref=oh_aui_detailpage_o00_s00?ie=UTF8&amp;psc=1
This worked amazing : https://www.amazon.com/gp/product/B0000AY3SR/ref=oh_aui_detailpage_o00_s00?ie=UTF8&amp;psc=1
Remember, Honda Civics are one of the most stolen vehicles. this is always a good deterrent if you do not have an alarm system.
Congrats on your new car
These cars were and still are so easy to steal that this is why in the 90's all the cars had The Club or other similarly ridiculous devices (like transmission shift lockouts). They weren't really all that effective since you just had to saw the steering wheel but it was annoying enough that thieves would consider looking for a different car to go steal.
I can't believe I'm saying this but OP, have you considered finding a vintage club-style steering wheel locking device? There must be someone you know who still has one lying around. Again, a thief that really gives a crap about stealing your car can saw through the steering wheel but honestly most of the time people just steal these old Hondas for joyrides. It looks like you can buy a new one for like $35 on Amazon.com as well, but I'm almost 100% sure someone you know must still have one of these in their garage somewhere, they sold like a bajillion of these in the 90s.
It won't make your car thief proof but it makes it annoying enough that people will just go find another old Honda or GM SUV to steal.
They had all sorts of crazy devices back then too, there was one that stopped them from hitting the gas pedal by locking up underneath the gas pedal, one that locked up the shifter (this one required bolting it into the car), other more crazy looking steering wheel models that made it harder to saw out by having a shield for the steering wheel itself, etc. You can go crazy but honestly most thieves will recognize the club since it's bright red and it's only real purpose is to make them realize that stealing your car will be annoying.
I don't think there's any question your father in law is out of line and has some messed up ideas about entitlement. Since you're planning on leaving anyway, seems like buying one of these might solve the problem with the least amount of drama. The Club is old school by now. Probably lots of other stuff now with the same purpose.
It was a safety device that was popular in the 90's, before many cars had electronic alarm systems. https://www.amazon.com/Club-1000-Original-Steering-Wheel/dp/B0000CBILL
the club.
i know they can just cut the wheel..still another barrier..
A friend of mine used to have a really shitty Geo Metro with all kinds of anarchy symbols and generic punk ramblings spray painted all over it. There was never anything of value in the car, so he always figured "fuck it" and left the vehicle unlocked all the time.
One day, he returned to his car to find that someone had rummaged through his stuff, and after deciding it was all worthless, they had placed a club on his steering wheel and left.
>...I should consider getting one (but my laziness suggests that it won't happen).
http://www.amazon.com/Club-1000-Original-Steering-Wheel/dp/B0000CBILL
You need a Club. At the very least, it's a deterrent.
http://www.amazon.com/Club-1000-Original-Steering-Wheel/dp/B0000CBILL
I used to hide my blunts in the car club. Do u guys remember those?
http://www.amazon.com/gp/aw/d/B0000CBILL/ref=redir_mdp_mobile
Yup! They still make it. https://www.amazon.com/gp/product/B0000CBILL/ref=ox_sc_act_title_1?smid=ATVPDKIKX0DER&psc=1
How do I get the paint on the right side of this picture looking like the left?
https://imgur.com/tL3kCaW
I bought the car used, neglected and abused. I've patched up the mechanical bits and I want to get my paint looking nicer, and hopefully uniform. My issue is that on certain parts of the vehicle the paint doesn't have much depth to it, but if I look on the inside of the doors, the paint is a deep beautiful color.
Would this be a good kit for it?
Mother's Clay Bar + Meguiar's Compound, Polish, and Wax
I'm not expert in the physics of paint and materials, but the Mothers bars wouldn't have moved very much without much force, and shearing against the dry paint.
I'd suggest the mothers kit:
http://www.amazon.com/Mothers-07240-California-Gold-System/dp/B0002U2V1Y/ref=sr_1_1?ie=UTF8&amp;qid=1397154469&amp;sr=8-1&amp;keywords=mothers+clay+bar
I just followed the instructions and took my time. It went well. I've done 3 cars since purchasing. Still have 3/4 life left in the 2nd bar. No more spray way left, but I had another brand's spray wax on hand. Seems to work just as well as the spray contained in the kit. I assume most spray waxes are lubricating enough to let the bar slide over the paint and remove dirt etc...
https://smile.amazon.com/Mothers-07240-California-Gold-System/dp/B0002U2V1Y
That or a different brand.
If you have a free weekend and really feel like getting your car clean, get a claybar kit like this, and after that's done, give it a nice wax. You will be pretty amazed at how smooth and slick the paint is after this.
You can try either bug and tar remover by turtle wax (the only product ID ever buy from them), 90% isopropyl alcohol will work too, as it works great for tree sap and it's safe for clear coats, or if all else fails, you can try a clay bar with some quick detailer as lube. Mothers has a quick detailer and clay bar kit you can buy at any auto parts store like AutoZone/Advanced Auto.
I used Meguiar's cleaner wax about a month ago, after washing and clay baring. Today I just used the quick detailer that came with the clay bar kit, after washing of course!
Meguiar's A1214 Cleaner Wax - Paste - 11 oz. https://www.amazon.com/dp/B0009IQX0E/ref=cm_sw_r_cp_api_6SmnzbV4JRVER
Mothers 07240 California Gold Clay Bar System https://www.amazon.com/dp/B0002U2V1Y/ref=cm_sw_r_cp_api_WTmnzb8AET2XB
Here's a long thing I wrote for a friend just getting started. It was an email and i don't feel like fixing links.
https://smile.amazon.com/gp/product/B0050IQH9K/ref=oh_aui_detailpage_o01_s00?ie=UTF8&amp;psc=1
https://smile.amazon.com/gp/product/B00GG9FI8I/ref=oh_aui_detailpage_o00_s00?ie=UTF8&amp;psc=1
https://smile.amazon.com/gp/product/B0009IQZFM/ref=oh_aui_detailpage_o00_s00?ie=UTF8&amp;psc=1
https://smile.amazon.com/Mothers-07240-California-Gold-System/dp/B0002U2V1Y/ref=sr_1_3?ie=UTF8&amp;qid=1476666101&amp;sr=8-3&amp;keywords=mother%27s+detail+kit
https://smile.amazon.com/Viking-862400-Blue-Microfiber-Applicator/dp/B0051MYL8E/ref=sr_1_3?ie=UTF8&amp;qid=1476666178&amp;sr=8-3&amp;keywords=wax+applicator
https://smile.amazon.com/Detailing-Multi-Use-Microfiber-Professional-Dual-Pile/dp/B01L4L4L26/ref=sr_1_17?ie=UTF8&amp;qid=1476666651&amp;sr=8-17&amp;keywords=microfiber+buffing+towel
https://smile.amazon.com/Meguiars-X3002-Microfiber-Wash-Mitt/dp/B000RXKR6M/ref=sr_1_1?ie=UTF8&amp;qid=1476667551&amp;sr=8-1&amp;keywords=meguiars+wash+mitt
https://www.amazon.com/Mothers-05664-California-Gold-Wash/dp/B0009H51B2/ref=sr_1_9?rps=1&amp;ie=UTF8&amp;qid=1476668207&amp;sr=8-9&amp;keywords=car+wash&amp;refinements=p_85%3A2470955011
Do you have 2 buckets to use? Always set one bucket up with the soap water, and the other with just water. Soak up your mitt, wash the car, rinse the mitt, then soak again in the soap water. This helps reduce contaminants. If you want to go the extra mile, get these for the buckets to prevent dirt from swashing around the bucket:
https://smile.amazon.com/Grit-Guard-Insert-Red-Diameter/dp/B000N3W8J0/ref=sr_1_2?ie=UTF8&amp;qid=1476667750&amp;sr=8-2&amp;keywords=grit+guard
It fits in a home depot bucket.
If you have particularly pesky tar or bugs on the car, you'll need this that you can get from any autozone type store:
https://smile.amazon.com/Stoner-Car-Care-Tarminator-Remover/dp/B0002LBGWI/ref=sr_1_1?ie=UTF8&amp;qid=1476667917&amp;sr=8-1&amp;keywords=tarminator
WARNING **
When using the power lock (or any sealant / non-liquid wax), DO NOT let it touch any black plastic or rubber parts of the car!!!!! If it does, just wipe it off with a wet micro fiber cloth. Failure to follow this will result in a white hue on the black piece. You could always painter's tape off those areas that are hard to avoid.
Steps for this process:
1b) Bring the car to an area with as little sun light as possible for the next steps!
Something like this? If so that would be able to remove the other paint around the car from two other dings the car got well before my ownership. I was planning to polish the whole thing eventually as well
Never clayed car before. Is this ok?
Mothers 07240 California Gold Clay Bar System https://www.amazon.com/dp/B0002U2V1Y/ref=cm_sw_r_cp_apa_i_bQmUDbVM3CXDP
Wash, then clay, then wax?
You need to clay bar the paint and then wax/seal it. If you park your car outside, this will need to be done regularly.
https://www.amazon.com/Mothers-07240-California-Gold-System/dp/B0002U2V1Y
https://www.reddit.com/r/AutoDetailing/
What do you mean by air blower/sheeting? I have tried an air compressor and the pressure is just too high and breaks up the beads of water bit doesn't really blow them off. But yeah I need to get the buckets and grit guards and the sheepskin wash mitt.I have been using a microfiber sponge thing kind of like this. What kind of cloth do you recommend for applying wax and what brand wax? I have been using some wax that came with the vehicle but I'm just about out and I've been applying it with some microfiber wax applicator towels from O'Reill. Also how often should I wash the wax applicators and how?I was just at Walmart and picket up some of this, not sure if it's recommended or not. I also got one of these but I'm not really sure of the purpose of it, I just keep hearing people talking about using "clay bar"¿?.
Sorry for the wall of questions, but like I said I'm really new to this and would greatly appreciate of you could answer most of them (if not all)
Because of the Prime Day deals I decided to pick up a few different products without knowing too much. I bought: Optimum No Rinse, Mothers Clay Bar System, Microfiber Clothes, Liquid Wax Paint Sealant, and Hybrid Wax.
My quick understanding is that the recommended process is: wash > clay > wash > wax. In terms of these products, does that mean:
ONR wash > Mothers Clay (should I use their lube or just the ONR water?) > ONR wash > Liquid Wax > Hybrid Wax
Just want to make sure I follow the right order so I can start to keep my car in good shape. How often should I clay? What about the sealant and the wax?
Thanks!
Obenauf's Leather Preserver. I've used it for a while now on all my leather boots. It will darken but damn does it work well. Beeswax for waterproofing and oils to hydrate and protect the leather. Great stuff.
maybe i wasnt taking care of my redwings. Does this help the life of them? They ALWAYS crack right behind the steel toe
Spot this guide. I've learned that /u/a_robot_with_dreams is a god with GYW.
Interesting enough, only a few hours ago was I reading about shoe care today. So basically, unless you are trudging through the depths of hell, stick with just leather conditioner. That can be [Venetian shoe cream] (http://www.foresupplyco.com/productDetail.asp_Q_catID_E_48_A_subCatID_E_55_A_productID_E_703_A_strSession_E_11CDE680EB31BEC5B749AC768C51E5CDB07E9B03), Obernauf's leather oil cleaner, or whatever. You will not need all those waxes and such, as mixed in with Obernauf's Heavy Duty LP. Do your best to not use too much conditioner.
Seems like the steps are, when you do your monthly or biannual or whatever schedule conditioning you choose...:
5a. Optional: Polish or wax if you're a clean mofo or likes to get down and dirty like mentioned above. Re: Polishing (and wax?)...seems like it's mostly on dress shoes and formal footwear. Since we're talking about boots, skip
Repeat every blue moon or something.
Obenauf's LP Boot Preservative 8 oz - Preserves and Protects Leather - Made in the US https://www.amazon.com/dp/B0002X520S/ref=cm_sw_r_cp_api_waqJAbQCSP786
The best: https://www.amazon.com/Obenaufs-LP-Boot-Preservative-Preserves/dp/B0002X520S
Rub some Obenauf's Leather Protecter onto your Sperrys, best decision I've made when it comes to leather products.
http://www.amazon.com/Obenaufs-LP-Boot-Preservative-Preserves/dp/B0002X520S
I got those boots from this image in one of the sidebar guides, where they are in the "cool, mostly dry" weather category.
I don't know exactly what that means, but it doesn't really sound like enough for what I'm hoping my next pair of shoes can endure -- I live in Michigan, and park outside during the winter. I don't need to be able to do shoveling in these or anything, but I do have to sometimes walk through foot-deep snow.
I suppose that this is what you guys are referring to? It looks good to me.
Obenhauf's leather preservative is fairly popular on /r/leathercraft. I use it on all of my straps, and as mentioned, it does darken the color for awhile, but it works wonders for keeping the sweat out. Sno Seal is another popular product, but I haven't personally used that.
Heavy Duty LP I'd guess; so something like Obenaufs. Basically stuff that will help make the boots waterproof/water resistant, but it can/will also darken the color of the leather.
Leather is skin and should be thought of in the same way. Skin remains supple due to the presence of oils, and leather jackets are no exception. When you're taking a shower, the water washes away some of the oils from your hair and skin, and the same thing happens to the oils in your jacket in rain. This can result in the leather becoming dry, and dry skin cracks and can peel and become damaged. But leather is also dead, and cannot heal like our living skin can.
Much like skin, with proper care this effect can be mitigated and repaired to an extent. With our skin, we exfoliate and moisturize to remove dead skin and protect the rest from drying out. The same things are done to leather. If your jacket gets wet, wipe as much of the water as you can and let it dry fully. Then use a horsehair brush to gently exfoliate the area. If it's dry and brittle, use a leather oil.
There are leather oils to specifically protect against rain, though they can also darken the leather, and leave it a bit greasy. My favorite is Obenhauf's LP. It is highly effective but be sure to apply properly!
http://www.amazon.com/Obenaufs-LP-Boot-Preservative-Preserves/dp/B0002X520S
I love love love leather dye it really is so easy. I have dyed coats, purses, boots, and a pair of pants so far. I use Fiebings Leather Dye amazon link. There are lots of tutorials out there but I'll tell you what works for me. This is for boots because I wanted them to last, purses coats etc were a lot less steps but anyway!
0-I didn't do this step because the chemical is illegal to buy in California but if you have a coated leather piece, something that's really shiny is usually how you would tell I gather, you would use a leather stripper here. But again I never did this.
1-Wash with Fiebings Saddle Soap
2-After it dries paint on your leather dye. I always did two coats although a lot of times it didn't need it.
3-After that dries buff the item to remove excess dye. If you forget to do that (like I do sometimes) dye will rub off on stuff.
4-Coat the item with something to perseve leather. I use either Obenauf's LP Boot Preservative or Obenauf's Leather Oil
That's it! And I definitely find the item looks a lot better after dye. The Obenaufs makes leather look amazing. And it's not animal oil so I like it a lot more than mink oil say.
Obenhauf's: http://www.amazon.com/Obenaufs-LP-Boot-Preservative-Preserves/dp/B0002X520S
I use a leather conditioner and some sort of light waterproofing. Kiwi Leather Lotion is pretty basic and cheap and is a nice entry-level leather conditioner. As for waterproofing, you can use a silicone waterproofing spray, or something like Obenauf's or Sno-Seal, or for very light protection, you can use a wax polish.
I wipe my boots down with a apple cider vinegar/water mix and a couple times a year coat them with some Obenaufs
It should work fine, but I'd further protect/waterproof it with Obeneuf's LP.
Choose half a size down from your Brannock size
use this first to clean the leather, following instructions on box, and then condition the seats using this stuff
Lexol is quite recommended and very cheap. This 1 litre can lasts you very long and is cheaper. There are smaller bottles too, if you don't need so much.
And yes Kiwi works well.
Dumb question but this lexol is the one everyone refers to right and not the "non darkening one" or the neadsfoot one?
Hi! I'm a super newbie to detailing and want to start with the interior of my car. I have a 2001 Lexus LS 430 that is in mostly good shape, but the interior black leather has never(!) been cleaned or conditioned (yikes!). It has only normal wear though, no weird staining, for the most part has only been used by adults (no kids) and no food/drink in the car, so just body oils and dirt from time.
I want to use Mothers Leather Wash Foaming Cleaner, based on a few posts I've seen in this forum and am wondering where to buy one of those soft bristle brushes I see used in this video and this post? Do you think a specific leather-cleaning product is necessary or should I just use a Meguiar's APC diluted (as mentioned here)?
I'm also still confused about whether or not to condition the leather after--I've seen conflicting information about coating on the leather that makes conditioning pointless.
Right now, I am leaning towards coating since my leather is so old and definitely does look a little dry/creased (no cracking yet, thank god!), I'll probably get the Lexol conditioner if so.
Also, for the dash and door panels, which are covered in leather, can I use the general 303 or Meguiar protective treatments on them or is there a leather-specific product?
The full list of what I intend to get to clean the interior of my car:
Just wondering what you all think and if you have any tips!
I just use lexol. I'm sure MFA will have a million different things they recommend but it works for me.
Some Lexol leather conditioner will do wonders for the general dryness. Nothing lasts forever, but keep high-quality leather properly conditioned (for skates, I'd say condition every 3-6 months or so) and it'll last a long long time.
Any cobbler should be able to fix little things like a broken strap. I live in a northern city so it's easy to find shops that specialize in hockey boots, but anyone who works on boots regularly would be a good choice. You could also contact the manufacturer (if they still are in business) to see if they offer a recrafting service - they usually love to see their well-worn boots come in for a little TLC.
I would want No More Trouble Zones because I love Jillian's workouts and I use them to keep the "trouble zones" managed. plus, my sister is being a meanie and taking her copy of it to college with her this fall...brat lol
I would really enjoy either this or this!
Thanks for the contest!
Edit: Twinsies
I've had good luck with Lexol and there is a lot of info about it all over the web.
http://www.amazon.com/Lexol-1013-Leather-Conditioner-Liter/dp/B000637TNM
1 liter.
From AE;
2x creams = $15.30
2x brushes = $17
2x dauber = $8.50
1x heel and edge dressing = $4.68
Lexol conditioner = $8.50 http://www.amazon.com/Lexol-1013-Leather-Conditioner-Liter/dp/B000637TNM/ref=sr_1_1?ie=UTF8&amp;qid=1416599681&amp;sr=8-1&amp;keywords=lexol
Lexol cleaner = $7 http://www.amazon.com/Lexol-430033-Leather-Cleaner/dp/B0002F9YIC/ref=sr_1_3?ie=UTF8&amp;qid=1416599766&amp;sr=8-3&amp;keywords=lexol
$61, and arguably better.
http://www.amazon.com/Lexol-1013-Leather-Conditioner-1-Liter/dp/B000637TNM
This one says preservatives under the title, but it should still be okay right? When applying do you coat the entire shoe with a thin layer?
ok Thanks, is this the same product as you listed before?
One more! Lexol conditioner, 1 liter. Half hour left on this one
https://www.amazon.com/Lexol-1013-Leather-Conditioner-1-Liter/dp/B000637TNM/ref=gbps_img_m-6_f45d_0b3df79f?smid=ATVPDKIKX0DER&amp;pf_rd_p=c624455a-ed52-4f78-9f81-675ed6faf45d&amp;pf_rd_s=merchandised-search-6&amp;pf_rd_t=101&amp;pf_rd_i=13887280011&amp;pf_rd_m=ATVPDKIKX0DER&amp;pf_rd_r=P05NPJBV4Z16AESBVF0K
And another foam cannon
https://www.amazon.com/DUSICHIN-SFL-001-Pressure-Release-Adjustable/dp/B00WPKHFA6/ref=gbps_img_m-6_f45d_90581759?smid=A3V0XY0I1N8OZ5&amp;pf_rd_p=c624455a-ed52-4f78-9f81-675ed6faf45d&amp;pf_rd_s=merchandised-search-6&amp;pf_rd_t=101&amp;pf_rd_i=13887280011&amp;pf_rd_m=ATVPDKIKX0DER&amp;pf_rd_r=P05NPJBV4Z16AESBVF0K
hey sorry, one more question.
this lexol page on amazon has two 8oz versions of Lexol conditioner. Do you know if one is better than the other?
I can't comment on SofSole as I never heard of it before. Most people here will recommend Lexol Conditioner. It is a light conditioner that won't change the color of your shoes
http://www.amazon.com/Lexol-1013-Leather-Conditioner-Liter/dp/B000637TNM
You can also use coconut oil to condition your shoes. It is a deep conditioner, so you should only apply small fingertips of it in order to avoid over conditioning your shoes. I have experience with both and both work well.
http://www.amazon.com/Lexol-1013-Leather-Conditioner-Liter/dp/B000637TNM/ref=sr_1_1?ie=UTF8&amp;qid=1377032574&amp;sr=8-1&amp;keywords=lexol
I would recommend Lexol Leather Conditioner
Would some like this be good to condition natural OSB trenches? I don't want anything to darken them up. I just want to prevent any water damage/ take care of the leather. Should I even bother conditioning them?
I'd recommend spending the money on a set of Grace USA punches. Bought mine from Amazon and I absolutely love them. I bought these. I also bought this set of Grace roll spring holders. Very useful for starting roll pins. A decent hammer (I have a dedicated brass mallet and a dedicated nylon mallet), and a [bench block]https://www.amazon.com/Wheeler-60981-Universal-Bench-Block/dp/B0047WKF84) if you like things to be easy.
I also have a needle file set (don't remember the brand, but they were like $20 for 6-8 of them). For sanding on the internals I generally just use wet/dry sandpaper. Usually start with around 200-grit, and end with 800-grit. For polishing, Mothers Mag and Aluminum Polish and a white t-shirt. With enough time, it will give a nice mirror finish and be as smooth as ice.
Yup that’s exactly what i used.
https://www.amazon.com/dp/B0009H519Y/ref=cm_sw_r_cp_api_i_gb4kDbS54XQ5W
This stuff is amazing!
If this is aluminum go with this one. One of my favorite products!
They also have mag/aluminum wheel polish for almost half off. I really recommend this stuff. I have cheap aluminum american racing wheels on my jeep and this stuff makes them look real good.
http://www.amazon.com/MOTHERS-05101-Mag-Aluminum-Polish/dp/B0009H519Y/ref=lp_2596858011_1_16?srs=2596858011&amp;ie=UTF8&amp;qid=1393773460&amp;sr=8-16
On my personal vehicle i clean them with soap and water. Then i use either a powerball or a Cotton buffing pad with Mothers mag polish. Take your time and it will look amazing.
I would give this a try
Mothers Mag & Aluminum Polish works well too. I use it all the time for my mods and other assorted things.
Your mother usually does a good job cleaning my blow holes
https://www.amazon.com/Mothers-05101-Mag-Aluminum-Polish/dp/B0009H519Y
They are called finger pump oil cans. Thanks for making me look that up!
First thing I did was scrub it down with some 000 steel wool and Goo Gone. I've never honestly seen anyone else use this combination but it works amazing on aluminum, steel, plated metals and tons of other stuff.
After I got all of the grim off I wiped it down with some all purpose cleaner.
Next I put a buffing ball on my drill and used some Mothers Aluminum polish. After a few pases with the mothers I cleaned off the ball, and finished out with some Blue Magic 400. The Mothers polish has a small amount of abrasive which helped smooth out what the steel wool did and the Blue Magic 400 has no abrasive and leaves a longer lasting protective coat then the Mothers. I have found you can make just about anything look new with this quick and easy method. Check out how nice it cleaned up the shocks on my bike Album.
http://www.amazon.com/MOTHERS-05101-Mag-Aluminum-Polish/dp/B0009H519Y/ref=sr_1_1?ie=UTF8&amp;qid=1382723868&amp;sr=8-1&amp;keywords=mags+aluminum+polish they sell it at walmart, it won't make it like it was out of the box but it can get it shiny again but be prepared to be at it for awhile. Imo just leave it be
When it's time to polish the metal, head to your local version of Walmart or Amazon and pick up some aluminum polish. I use Mother's. It's strong enough to work on the metals harmonicas use, but also pretty gentle. Just rub that on and if your cloth starts going black it's working. Get that elbow grease going and every few minutes wipe it off so you can see your progress. Repeat until fine scratches are gone and it's shiny new.
If you have deeper scratches, then you'll need to use sandpaper in increasingly finer grades first. 120 -> 220 -> 400 -> 1000 -> aluminum polish will take a seriously messed up cover plate to shiny new in about 15 minutes total. It's pretty easy to do.
This pack of sandpaperwill do hundreds of harps
Mother's polish
Mothers 05101 Mag & Aluminum Polish - https://www.amazon.com/dp/B0009H519Y/ref=cm_sw_r_cp_tai_T.uHzbMVDV4PZ plus a lil’ elbow grease
Ok, I was having a TON of problems with adhesion with PLA, and a fair deal of issues with PETG on the textured sheet. I tried it all: Lower Z, 99% alcohol, dish soap, increased bed temp. Everything was coming loose after a few layers, or warping (or warping worse with the higher bed temp). It would still warp with a 2cm brim.
I was seriously considering tossing the textured sheet because it was completely useless for me, so I tried a more drastic approach. I figured that acetone was risking chemically changing the surface (which is why they warn against it), so I decided instead to physically change the surface.
I got some "Mothers Mag & Aluminum Polish" and softly polished one side of the textured sheet. This stuff has an extremely fine grit in it (aluminum oxide), and it scuffed/polished the top layer of the powder coat. I didn't polish too hard, I didn't want to change the look or texture of the sheet. After that, I washed the surface thoroughly with dish soap, dried it with towels, did a pass with the 99% alcohol, then heated the bet to 80c for a few min.
The difference was night and day. PLA sticks incredibly well (nozzle 200c, bed 50c), but still easily pops off with a light bend of the sheet. It didn't change the surface texture of the sheet at all, you still get that nice textured finish. I haven't tested PETG on it yet, but considering how well the PLA sticks, I'll only want to only do small test parts first until I have confidence that the bigger parts will actually pop off (I still have the reverse side of the sheet for PETG in case this polished side works too well). I've accumulated about 50h of printing on the polished textured sheet now without issue.
WARNING: Mothers contains petroleum distillates. I'm not a chemist, but I may have in the end actually chemically changed my textured sheet anyways (similar to what using acetone would have done). I don't know if there will be long term issues with this method, but in my case, I at least turned a useless textured sheet into something I can actually use for a bit.
This is the stuff I used: https://www.amazon.com/Mothers-05100-Mag-Aluminum-Polish/dp/B0009H519Y
Mothers Metal Polish - Warning: It's a microabrasive.
Simichrome
Thank you. Is this the one?
Mother's 05101 Mag and Aluminum Polished Metal, 283 g https://www.amazon.co.uk/dp/B0009H519Y/ref=cm_sw_r_cp_apa_i_CPZQCb0V7JHCW
I use mother's aluminum polish on my exhaust tips. It works great!
Mothers 05101 Mag & Aluminum Polish - 10 oz
https://www.amazon.com/dp/B0009H519Y/ref=cm_sw_r_cp_apa_i_e84-AbXQ7GWW2
Hella Supertones, like the other guy said. I have them on my NA, they're awesome. A ton louder and attention getting than the stock "meep meep" horn they came with, even though mine are in the stock horn location behind the bumper.
Subaru drivers seem to like these
Found those horns much cheaper: http://www.amazon.com/HELLA-003399801-Supertone-High-Bracket/dp/B000CRZXPI
I know they've got the Subaru stigma attached to them, but Hella's SuperTone horns are an amazing upgrade for not a ton of money.
2014 S+ here, One of the first things I did was upgrade the horn. I didn't find it too difficult to do myself.
Hella Supertone
&#x200B;
If I remember right, connected the power straight to the battery positive and grounded out to the body. When mounting them I used two existing threaded holes with only having to add a second bolt.
Makes a big difference with other cars being able to hear me. I've even seen a couple in cars jump a little when I use it.
I use these and they seem to get the job done very efficiently.
Get some Hella, Super Tones. Everyone will hear the damn train horn from hell.
Actually they're aftermarket horns haha https://www.amazon.com/HELLA-003399801-Supertone-High-Bracket/dp/B000CRZXPI
2014 here also. I rarely use my horn, so it isn't a huge deal to me, but I agree it's very weak. I've considered going with these: Hella horn.
Not too expensive, and would be a fun little project. I think these are one of the most common that people upgrade to.
GOOD SHIT MAN. here you go.
https://smile.amazon.com/HELLA-Protective-3AG-003-399-801/dp/B000CRZXPI/ref=sr_1_3?ie=UTF8&amp;qid=1543267212&amp;sr=8-3&amp;keywords=hella+horns
If you're not as tech savvy like me, I also got the subimod harness as well! it's expensive as fuck but made the install 10000000% easier. I didn't have any of the tools either. its a literal plug and play. lets just put it this way. it took longer to take the front bumper off TBH. LOL
https://subimods.com/subimods-v2-hella-horn-harness-kit-most-subaru-models-sm-h-hv2.html
Put them on BLAST!
Looks like Hella Supertones (aftermarket horns).
Sounds like it's time to upgrade your friend's horns to these.
My supertones are used almost exclusively for cabs. That, or idiots doing insane things around the Tim Horton's at Marion and Archibald (which should be deemed a public safety hazard and closed).
https://www.amazon.com/HELLA-003399801-Supertone-High-Bracket/dp/B000CRZXPI
HELLA 003399801 Supertone 12V High Tone/Low Tone Twin Horn Kit with Bracket https://www.amazon.com/dp/B000CRZXPI/ref=cm_sw_r_cp_api_ibSYzbX5ZVQYM
Got two. Duel tones, one does a high pitch and one does a lower pitch.
I'm pretty sure this is the one I bought: HELLA 003399801 Supertone 12V High Tone/Low Tone Twin Horn Kit with Bracket https://www.amazon.com/dp/B000CRZXPI/ref=cm_sw_r_cp_apa_CIBWzbM36B7E0
That's actually a really good price for them too.
I was wondering too and googled a few of the mods he listed below, looks like they're Hella Supertones
549
Bought mine here. I'm sure there are other places that sell it as well.
I got an FSM from them and it's pretty nice for the price, http://www.amazon.com/Ring-of-Fire-Enterprises-Emblem/dp/B000ER47ZS/ref=sr_1_4?ie=UTF8&amp;qid=1310411520&amp;sr=8-4
this one? T-rex I have that on my camaro in the buckle of the bible belt. All I've ever got from this has been socker moms taking pics of my bumper whilst scoffing.
The plastic on that cluster makes me uncomfortable. Must... Plastix
http://www.amazon.com/Chippewa-Mens-Rugged-Handcrafted-Lace-Up/dp/B0036VN9WG
paired with:
http://www.amazon.com/Superfeet-Green-Premium-Insoles-Womens/dp/B002T0072U/ref=sr_1_1?s=apparel&amp;ie=UTF8&amp;qid=1417477581&amp;sr=1-1&amp;keywords=superfeet+green
and
http://www.amazon.com/Kirkland-Signature-Outdoor-Trail-Merino/dp/B00LFLOUI6
and
http://www.amazon.com/Lexol-1013-Leather-Conditioner-Liter/dp/B000637TNM/ref=sr_1_1?ie=UTF8&amp;qid=1417477693&amp;sr=8-1&amp;keywords=lexol+conditioner
Your feet will be in heaven. Superfeet will make a MASSIVE difference standing on concrete. I have the exact same above setup for working as a Realtor. On my feet all day long (showing homes and open houses) and my feet are always cozy and comfy!
http://www.amazon.com/Mothers-05101-Mag-Aluminum-Polish/dp/B0009H519Y?ie=UTF8&amp;psc=1&amp;redirect=true&amp;ref_=oh_aui_detailpage_o02_s00
Thank me later.
Step one: Buy these: http://www.amazon.com/Hella-SuperTone-Horn-Kit-118/dp/B000CRZXPI
Step two: Install in front bumper, facing forward
Step three: Honk/flash high beams to get people to move. 118 deb of fury is like the parting of the red seas. It's amazing. :D
https://www.amazon.com/dp/B000I1RSNS/ref=cm_sw_r_tw_dp_U_x_ff63AbCGMR60V
This and the clamps come with the Battery Tender I bought. I have the connector on at all time and tucked under the pillion seat. You can also get cig and usb connector for it too.
If that doesn't work would you could always try bar end mirrors.
These look decent
Cleaner
Rejuvenator
Conditioner
I use these on my handmade boots to keep them in good condition.
Also, watch some youtube videos.
I always keep a spray can of Contact Cleaner in case of keyboard accidents. This will solve (and dissolve) your problem.
I recently spilled a cup of coffee (with sugar) into my brand new Magic Keyboard. Oops. I sprayed contact cleaner into it immediately and forced all the coffee out. I sprayed the solution under all the keys, then tapped it keys-down onto paper towels until the solution came out clear instead of brown. My keyboard came out perfectly fine (I'm typing on it now). Accidents like this, with sugar in the coffee, usually cause permanent damage. But not if you're well prepared.
Warning: I suggest you do not buy this brand, which will only cause further confusion.
This stuff worked for me. Just spray it in there and let it dry
WD-40 Specialist Electrical Contact Cleaner Spray - Electronic & Electrical Equipment Cleaner. 11 oz. (Pack of 1) - 300554-E https://www.amazon.com/dp/B00AF0OFVU/ref=cm_sw_r_cp_api_i_OBGPCbF0J6K7T
Get this and spray it under the caps of your joysticks, they will work like they're brand new again.
https://www.amazon.com/gp/product/B00AF0OFVU/ref=oh_aui_detailpage_o00_s00?ie=UTF8&amp;psc=1
I was actually looking into getting the Nanoskin version of this and I am so scared of it instilling swirls into my paint. Somebody please help me make a decision, I need some pros / cons.
I would use a spray electronic cleaner like this or this.
I have found the WD-40 brand stuff at local hardware stores like Home Depot or Lowe's and it works great. Have cleaned off old motherboards and a GPU that had sticky soda all over the back of it.
Otherwise, as others have suggest, alcohol with wipes or q-tips. I just think the can and spraying the fuck out of it is the best first step to get the majority of it cleans and then using qtips for detail work if you find residue.
Also, as other have suggested, take all the components apart and clean them all separately, making sure the contacts and sockets are as clean as you can get.
How does somebody sit on a computer and piss in it? I've been blackout drunk before, but I can never understand how people can't find a toilet or bathtub/shower to piss in. Otherwise, wouldn't you just piss your clothes wherever you happen to pass out?
> https://www.amazon.com/Kool-Stop-Tire-Bead-Jack/dp/B001AYML7K
How about you fix your horrible horrible horrible links in the future so that the spam filters don't nail you? I've taken this post out of the spam bin but won't again.
Get the club instead. Possibly the cheapest option out side of a homemade kill switch.
The Club 1000 Original Club Steering Wheel Lock, Red https://www.amazon.com/dp/B0000CBILL/ref=cm_sw_r_cp_api_i_tnxZDb9DGW30H
really? I don't need to have it repainted or anything? You're 100% sure clay bar will work? I need to find out what that is. And are you talking about something like this?
https://www.amazon.com/Mothers-07240-California-Gold-System/dp/B0002U2V1Y/ref=sr_1_1?ie=UTF8&amp;qid=1478497153&amp;sr=8-1&amp;keywords=clay+bar+car
Carry one of these: https://www.amazon.com/Towallmark-Seatbelt-Cutter-Breaker-Emergency/dp/B002AMAXNA
http://www.amazon.com/Seatbelt-Breaker-Emergency-Escape-Tool/dp/B002AMAXNA They work.